

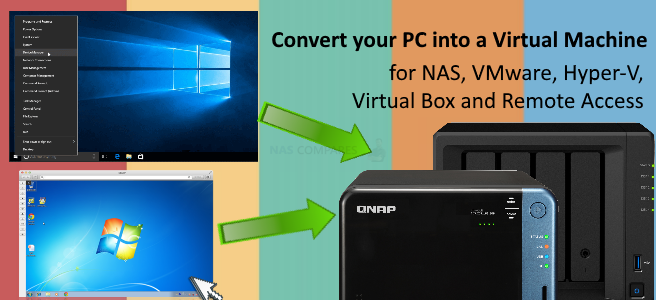
How to Turn your Physical Computer into a Virtual Machine for Remote Access over the Internet
Remote working and ‘online desktop’ access is something that has grown massively relevant in 2020 and only promises to get even bigger. The technology and logic behind the creation of a virtual machine (VM) is not new and in fact, things like ‘Remote Desktop’ in the Windows Programs list of Windows 10, 8, 7 and even XP has always been present. This kind of remote deployment and access of a desktop computer experience has moved into other tools tool ranging from consumer end with VirtualBox and VNC, to much higher end with Windows VM Deployment in Hyper-V and VMware/Vsphere. A virtual machine should be almost identical to that of its physical counterpart when it comes to day to day use. The idea of using a NAS drive as a means of creating a virtual computer that can be accessed via the network or the internet is not a new thing, however, it is only now in 2020 with the growth of companies letting their employees work from home, serviced hired offices or simply over WiFi in a coffee shop, that the idea of a NAS that is designed for an ideal virtual machine environment has become more desirable. In order to fully take advantage of virtual machines on a NAS, one should remember that you can choose between using a NAS brands own first-party application (such as virtualisation station from QNAP or Synology Virtual Machine Manager), 3rd party supported NAS tools such as VirtualBox and JAVA VM Manager for Asustor and Terramaster, or it can support third-party applications (such as Citrix, Windows Server and VMware) with add-ons. The choice is yours and in fact, there are LOADS of ways to create VMs, which each either being FREE or so heavily featured and user-friendly, that they are still cheap at their price point. Below are the best ways for you to create a virtual version of your Desktop Computer, or at least create a remote means to access your PC as easily as possible
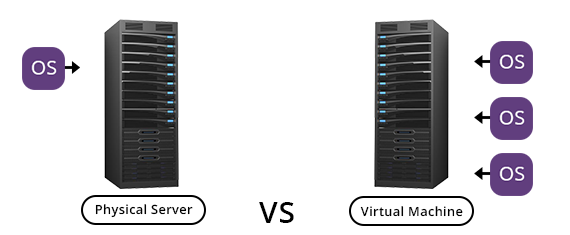
What is a Virtual Machine? What Are the Advantages of a VM?
A virtual machine app creates a virtualised environment (or clones your existing machine into a virtually built equivalent) that behaves like a separate computer system, complete with virtual hardware devices (CD/DVD Drive, Hard Drive, etc). The VM runs as a process in a window on your current operating system or NAS platform and allows you to access it either on your physical PC or remotely over the internet/network on a physical device. You can boot an operating system as a virtual disc image (an ISO for example) inside the virtual machine, and the operating system will handle it as it would a regular computer. Whenever you want to use the operating system, you can open the virtual machine program on your PC/NAS/client application and use it in a window on your current desktop. In the VM industry, the operating system actually running/supporting the virtual environment is called the host (so this is the NAS, server or PC that is launching the VM. The device you are using to see/interact with the VM is called the client (and the VM itself can often be called the ‘guest’). It helps keep things from getting too confusing as you go through this list of ways to create and access a virtual machine.
In the majority of cases in a VM, the guest OS is stored on a virtual hard drive a big, multi-gigabyte file that is created as a container/quota of space that in reality is stored on your real hard drive(s) on yoru NAS/Server/Physical PC. The VM host app presents this file the guest OS as a real hard drive for the client app to interact with. This means you won’t have to mess around with partitioning or doing anything else complicated with your real hard drive, as the entire VM exchange is going to be contained in this one area of the overall system storage.
Virtualization does add some overhead, so don’t expect them to be as fast as if you had installed the operating system on real hardware. Demanding games or other apps that require serious graphics and CPU power don’t really do so well unless you use a NAS or Host Server system that supports PCIe GPU cards and then dedicate that hardware to the VM Host app and the guest VM in question (currently only available on QNAP NAS Drives). Overall though, virtual machines aren’t the ideal way to play Windows PC games on Linux or Mac OS X (and often used reason for Mac users to use a Windows VM) at least, not unless those games are much older or aren’t graphically demanding. However with the evolution of NAS hardware and 10Gbe too, using a QNAP NAS drive to edit large RAW Photo and Video on a Virtual Machine remotely (using GPU enabled VM Hosts and the VM guests being accessed via a client tool, have been very successful. You just need enough horsepower, as you would on a local machine!
Generally, as a rule of thumb, your local host NAS/Server/Computer should still keep at least 25% of the hardware resources available for it to run smoothly enough not to hamper the VM being hosted, as once a VM is deployed and active, the system resources (CPU Cores, Memory, USBs, PCIe slot, etc) that you dedicate to it will be permanently reserved, even when not in active access.
IMPORTANT I – If you’re converting a Windows PC to a virtual machine, remember that you may encounter licensing issues. Windows Activation may detect that it’s running on a different machine, and you may have to contact Microsoft to get it properly activated. Windows licenses are only supposed to be in use on one computer at a time.
IMPORTANT II – When creating a virtual machine of an existing physical computer, remember that in almost all cases, you cannot SAVE the VM image you are creating to your physical machine, as it would technically be impossible (taking INFINITE TIME), so you will need to ensure you have an external drive that is big enough to store the Virtual Machine image you are creating (so it will need to have a bigger capacity than the physical PC hard disk/SSD. Alternatively, you can connect a NAS server and then map a network drive and then select it as a save destination for the VM image you create. However remember that most NAS drives are connected at 1Gbe by default (with SATA at 6Gb/s, USB at 5Gb/s, etc) so this will increase the creation time somewhat, as well as result in the image creation potentially becoming corrupt if the network connectionis inturrpted during creation. So I strongly recommend you use a local connected external drive.
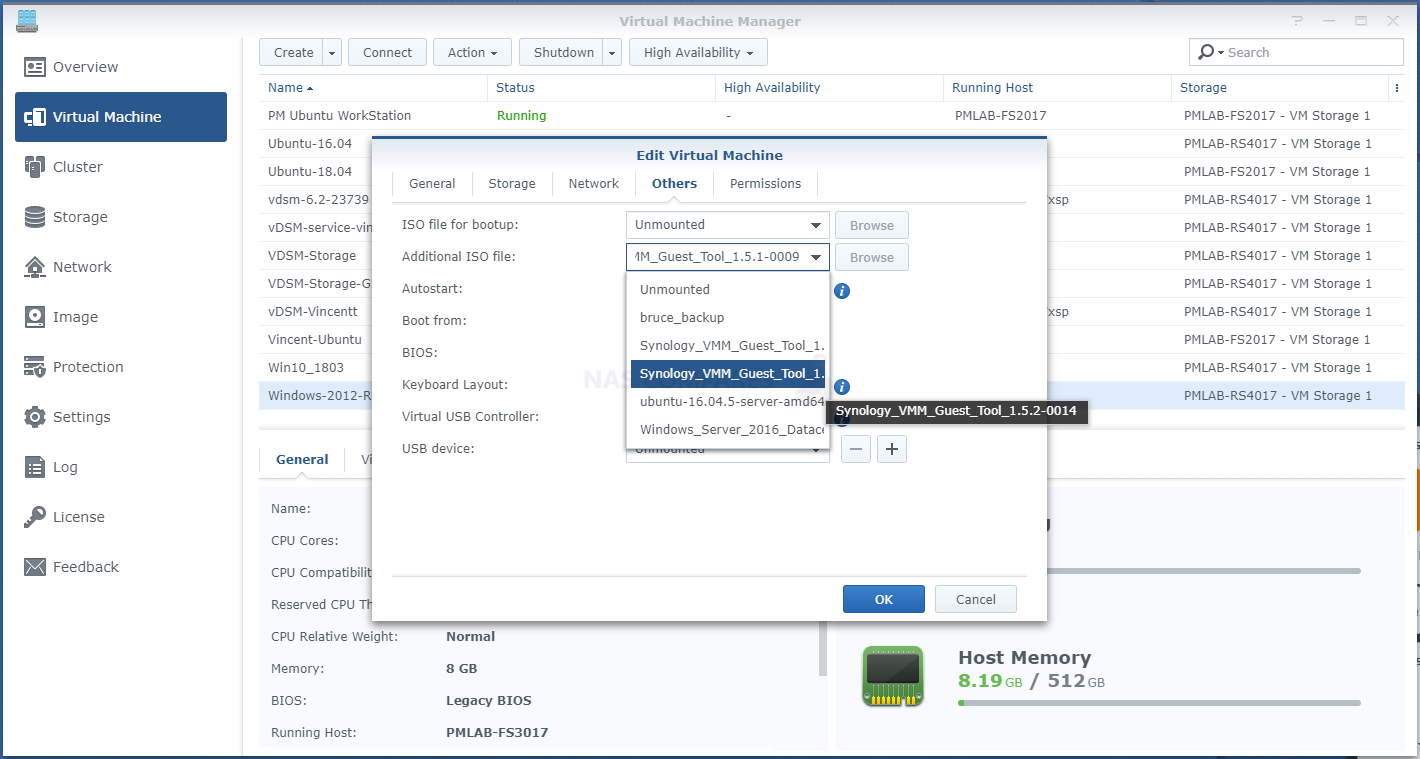
IMPORTANT III – If you are using a QNAP NAS to host your Virtual Machine, remember that it has a built-in Image Converter in Virtualization Station – very useful for configuring some unsupported images. With Synology, you have a ‘Guest OS Tool’ ISO available for free download within the application which helps with Windows 7/8/10 VM installation that includes drivers.
Method #1 – Creating a VMware Virtual Machine
NAS Compatibility – Synology, QNAP
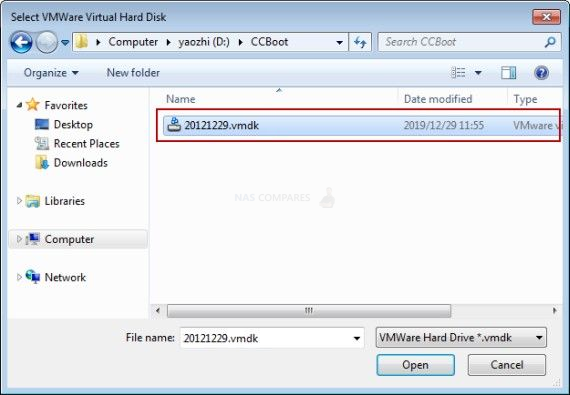
VMware offers a free tool known as VMware vCenter Converter that can be run on your local PC system and extract a VM clone of your machine onto an external drive or locally. It can convert both Windows and Linux physical machines into VMware virtual machines. You can then boot these virtual machines in a supported NAS host tool, or alternatively with VMware’s free VMware Player application, so this can be a completely free solution – though obviously requires an existing PC/Linux system to clone in the first place. With this method, you are not restricted to using the official VMWare host tools either, with modern NAS providers like QNAP and Synology supporting VMware deployment on their Virtualization Station and Virtual Machine Manager applications respectively.
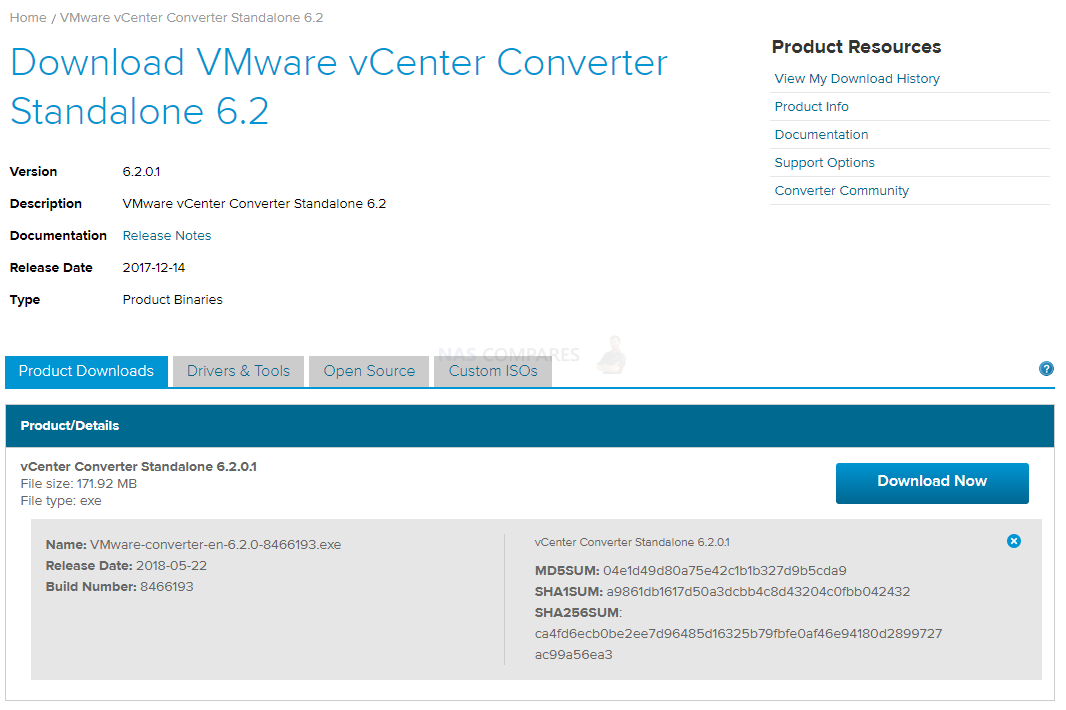
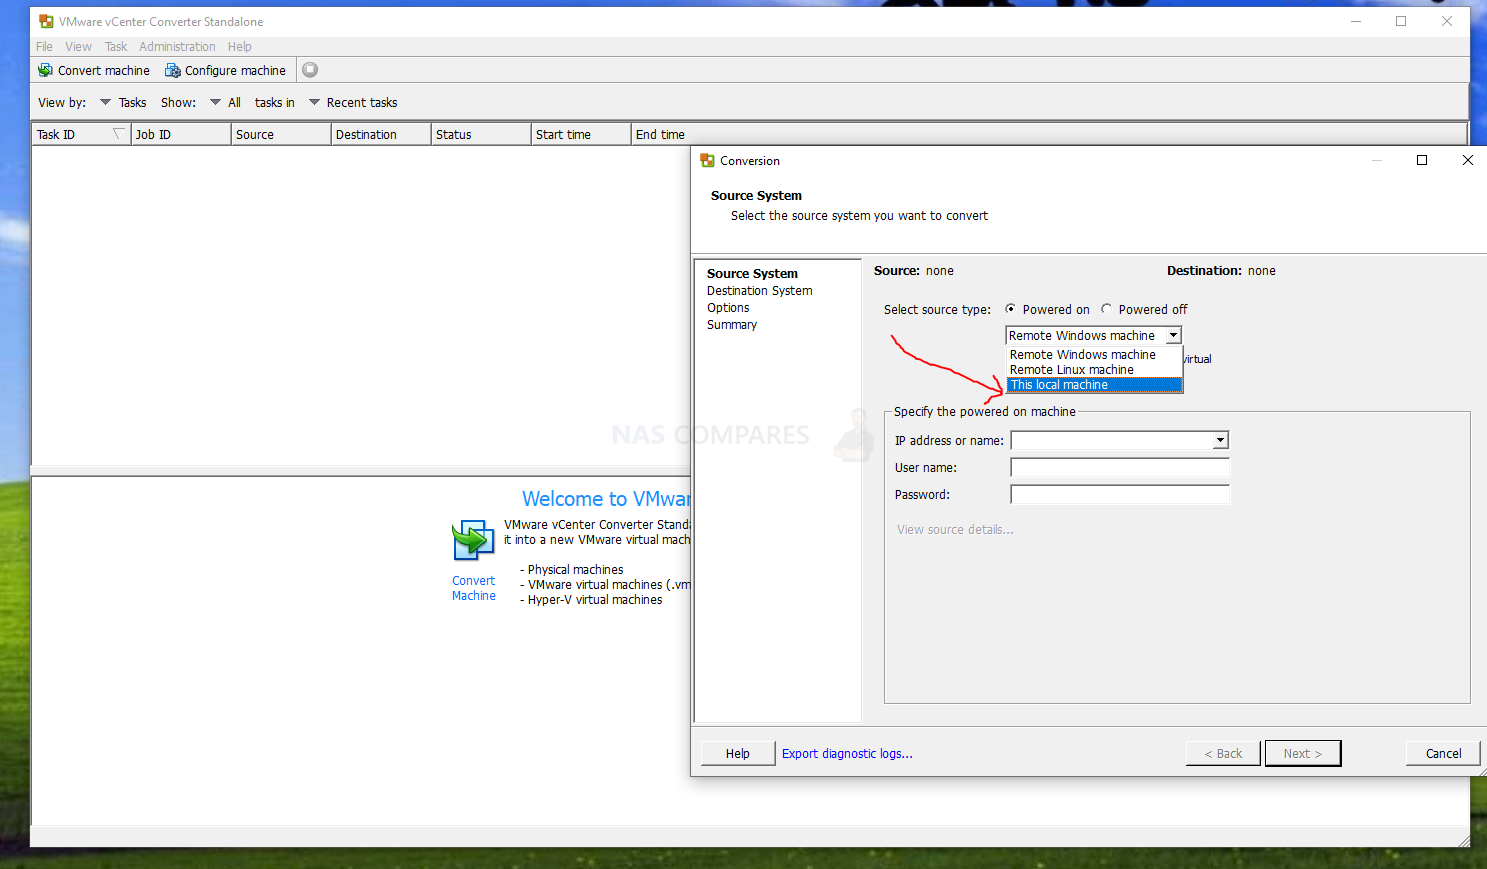
Download vCenter Converter from VMware and launch it on the computer you want to turn into a virtual machine. Click the “Convert Machine” button on the toolbar and select the current, powered-on computer as the source. If you want to mount your virtual machine on your local PC/Mac system, you need to choose a VMware Workstation, VMware Player, or VMware Fusion virtual machine as the destination and configure the options for the virtual machine. I recommend a VMware WorkStation if you intend to export this VM onto a NAS system for remote access.
The utility will then create a virtual machine from the current Windows system, modifying it so it will boot properly in a virtual machine program into a virtual image. Save that virtual machine to an external hard drive and boot it up on a different computer using the official VMware client tools, or upload it to a NAS drive (or just connect over an available USB on your QNAP or Synology NAS) and then unpack and mount the guest VM in the NAS host tool.
Method #2 – Creating a Microsoft Hyper-V Virtual Machine
NAS Compatibility – Synology, QNAP
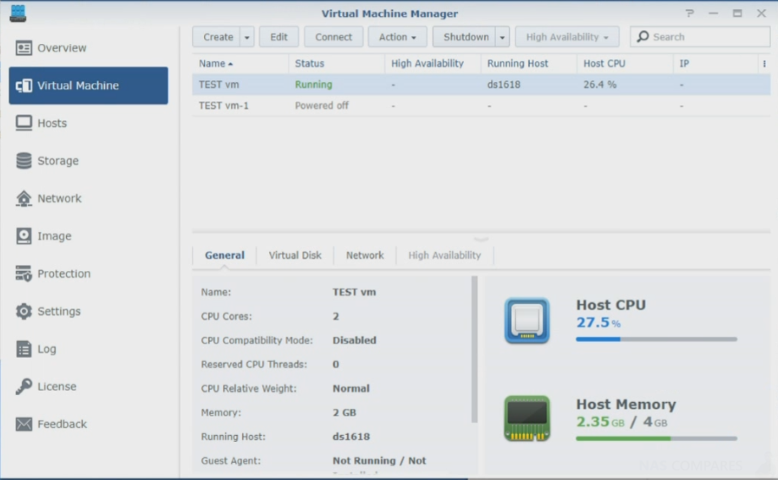
If you want to use familiar Windows tools (or just have more experience of dealing with Windows 10,8,8.1,7, etc and want to use something alot more familiar), then I recommend the HYPER-V. In order to convert your physical system into a virtual image format for Hyper-V deployment, Microsoft offers a Disk2vhd tool, which is one of their many useful SysInternals utilities that are still supported in even recent versions of Windows Operating System. This utility will convert a running Windows system to a VHD (virtual hard drive) file for use in Microsoft’s virtual machine products, such as the Hyper-V virtual machine tool included with professional versions of Windows 10 – alongside the use of deploying Hyper-V images (as well as duplicating, snapshotting and backups of them) in the Synology Virtual Machine Manager and QNAP Virtualization Station.
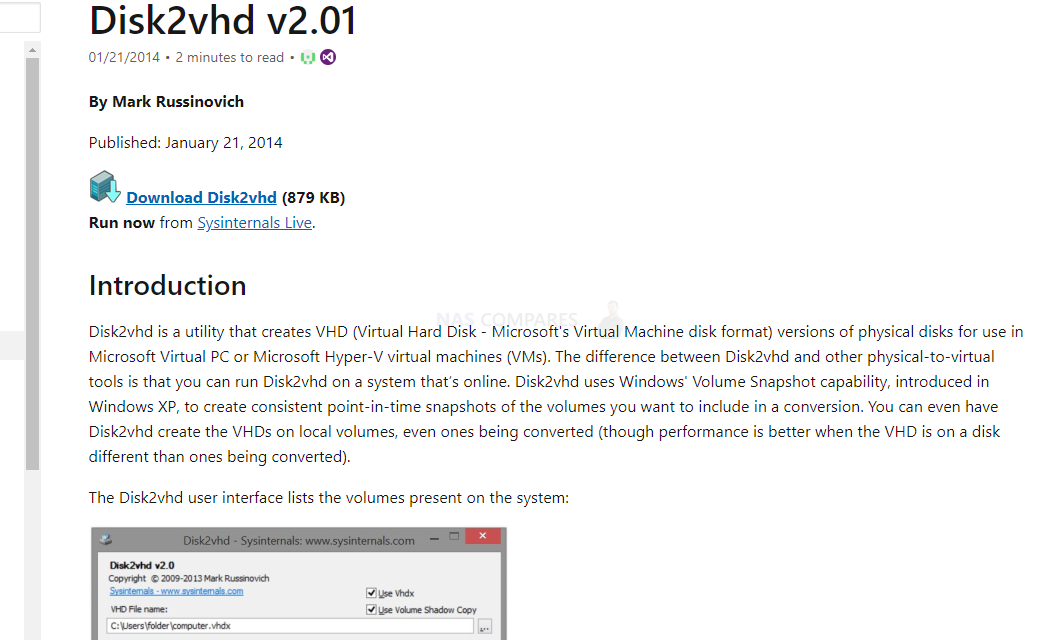
Run this tool on a Windows desktop system that you want to convert. You’ll be able to select which partitions and drives you want to include in the VHD file. It’ll create a copy of the running Windows system as a VHD file, and you can take that VHD file to another computer, NAS or Hyper-V supported server and run it in Hyper-V associated import modes. This should then extract and create the converted physical system into a VM and should boot up just fine. However, remember that this tool is very ‘all or nothing’ as far as extraction goes and if there is the slightest issue/error, then it will fail to extract. So as long as you launch it in Microsoft’s own Hyper-V virtual machine software or use a NAS that supports Hyper-V extraction in its own VM application, you should be ok.
Using the Disk2vhd tool is also not something you can do casually. Even on a system that has a modest amount of hardware and storage will take upto a DAY to create an image, as requiring a storage media destination (USB drive/Mapped NAS drive) to export the image onto whilst it is being created – because you cannot save it to the system you are backing up (for obvious reasons). This also means that you can not switch your system into hibernate or standby mode during the Disk2VHD creation.
Once it has been, it is a simple case of transferring the image file you created to the NAS Drive and it’s VM software for deployment, or on to another PC system to action with the Hyper-V host machine to run the guest VM.
Method #3 – Creating a VirtualBox Virtual Machine
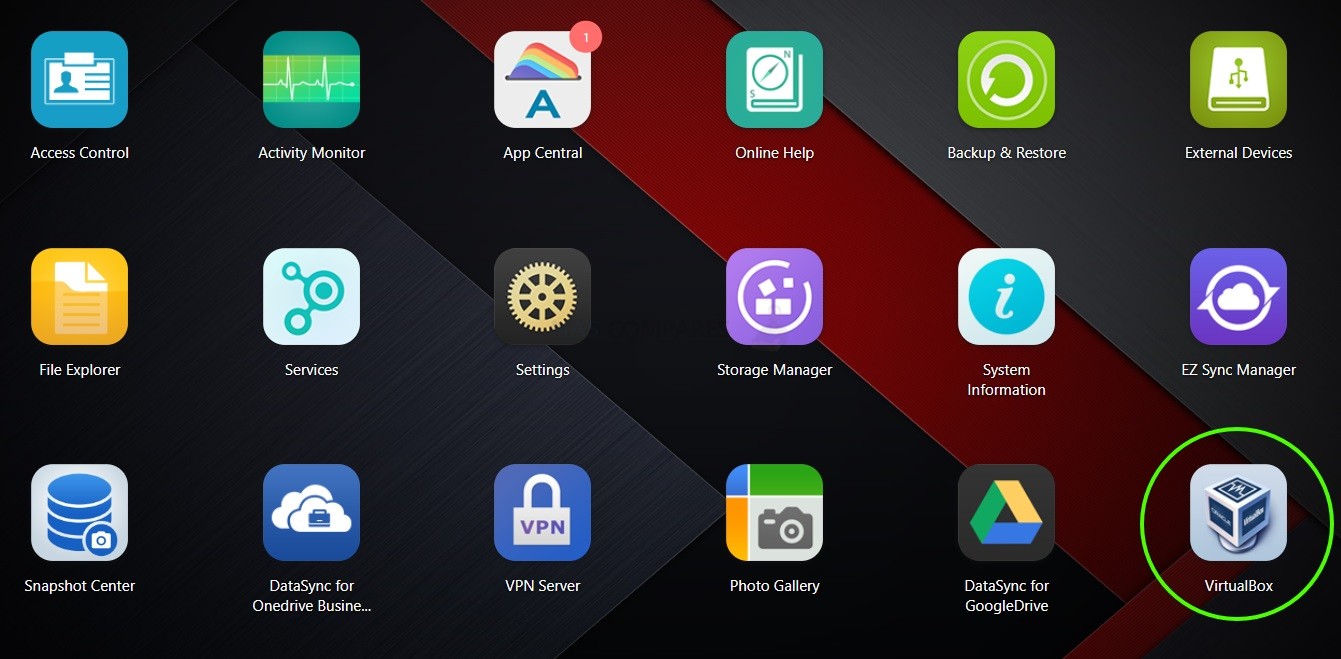
NAS Compatibility – Asustor, Synology, QNAP
VirtualBox doesn’t offer an easy graphical utility for converting a physical machine to a virtual machine. If you’re feeling particularly adventurous, they do offer some unsupported instructions for converting a physical Windows computer to a VirtualBox virtual machine. This requires some registry tweaking and shutting down the computer. You’ll then have to manually create a copy of the disk and convert it to a VirtualBox VDI file.
The process for converting a Linux virtual machine should be about the same, but without all the extra tweaks required to make Windows behave. It’s much easier to move Linux installations between different machines with different hardware configurations. Alternatively, VirtualBox can be used to open numerous other kinds of virtual machine image, so you can still use the tools listed in the previous methods to create a virtual machine and open the image within VirtualBox on your Asustor NAS Drive.
This process isn’t for the faint of heart, and it is included with the rest because some NAS drive vendors use 3rd party virtual machine software to deploy them, such as Asustor using VirtualBox and Terramaster using a JAVA-based VM tool in its app center. Even if you use VirtualBox already, you may want to just use VMware or Microsoft’s utility and give VMware or Hyper-V a try, as it is by far the easiest to use to create a virtual image of your machine at the early stages.
Method #4 – Installing Windows Server on a NAS and Deploying a VM inside
NAS Compatibility – Synology, QNAP
For those that are not aware, there is in fact a server software available from Microsoft that is incredibly similar to that of Windows 10 and allows you to control a NAS using the familiar desktop controls of a standard PC, as well as having access to the remote desktop and connection tools in it includes. If you purchase a NAS drive that is Windows Storage Server featured (WSS), you can then upload the image of your physical PC that you have created, upload it to the Windows Storage server storage, then you can use the Windows tools (including VMware, Hyper-V and VirtualBox mentioned above) to deploy the VM as you would in a desktop environment, as well as establish remote access over the network or internet using the straight forward windows server .tools
Currently, Windows Server arrives in version 2008, 2012, 2016 and 2019. Check to see if your company is using this platform for their overall data storage systems, or if you have the resources on your NAS system to deploy a Windows Server VM and deploy guest VMs within. This is not the most efficient system of remote access and virtual machine conversion of your physical PC (typically requiring more memory overall, as well as adding an extra unnecessary layer in the setup), but it does allow you to use Windows tools that you may well be more familiar with than band new 3rd party ones.
Method #5 – Using TeamViewer instead of a VM
NAS Compatibility – Synology
This one is more of a cheat than actually using a Virtual Machine of your PC. For a number of years, the easiest and cheapest way to create a remote desktop to your PC is using TeamViewer. I say this because although it is NOT free if you are going to use it for business, it has by FAR the most user-friendly graphical user interface (GUI) or any remote desktop tool out there. Available to use for free, if the idea of creating a virtual version of your physical PC is a little too difficult/take too long, You can install TeamViewer inside a few minutes and once it is set up, you can establish remote access to your PC desktop over the network or internet VERY easily.
I included the idea of using Teamviewer to access your PC remotely in this list of VM options because, although you are NOT using a virtual machine (in fact you NEED to leave your physical PC running at all times), it is DEFINITELY the best and fastest way you can create a remote desktop that can be accessed worldwide and also has the benefits of costing very little/free. That said, it is NOT perfect. Leaving yoru PC on all the time is not really a great idea and if you have a power-saving/hibernation/standby mode in place, it will likely not be able to wake your PC up – alternatively, you leave the PC on indefinitely and that is not great on the hardware.
Overall, this method is for those that want a FAST solution to working remotely from their work PC and have almost ZERO technical knowledge.
Method #6 – Create a Ubuntu Linux VM on your QNAP NAS and Access Remotely
NAS Compatibility – Asustor, Synology, QNAP
If you have QNAP NAS drive already, need a virtual PC to on/share, but have either no technical knowledge to make a VM of your machine, have no storage space available or have lower NAS hardware resources available (CPU/Memory) then the final option is to create a virtual Linux/Ubuntu virtual machine to deploy on the NAS and access anywhere in the world. Ubuntu and the Linux based virtual machines that you create use much, MUCH less in terms of hardware resources, are freeware and using the VM/Linux Station tools on your NAS allow you to create snapshots and/or duplicate virtual environments easily.
Although it is not possible to convert a WindowsVM into a Linux Ubuntu VM (completely different OS’) there are LOADS of familiar applications available on the app center of the VM once it is deployed taht can be used for pretty much ANYTHING a Windows PC can be used for, as well as doing it will lesser resources. So it would allow you to connect your low-end PC/Mac/Tablet/Phone/etc to the Linux Ubuntu VM via a URL and from there have as much access and functionality as if you were in the room with the PC itself!
As mentioned previously though, this is not an ideal situation for those that want to use a windows VM and despite the Operating system, desktop and GUI serving init’s most recent v18 release as something incredibly similar to that of Windows and OSX, it still might serve as a little frictional and cannot really be served to you as a perfect alternative to a VM of your windows PC. That said, it’s a great extra that’s included with your QNAP NAS and quite fun to play around with anyway. If you are looking for advice on the right virtual machine solution or need help with trying to set up remote desktop access to your PC for work/personal use, use the free advice section below for some advice.
 |
 |
 |
|
| Synology DS918+
££££
|
Synology DS1819+
££££
|
Synology RS1619XS+
££££
|
Synology DS3617xs
££££
|


🔒 Join Inner Circle
Get an alert every time something gets added to this specific article!
This description contains links to Amazon. These links will take you to some of the products mentioned in today's content. As an Amazon Associate, I earn from qualifying purchases. Visit the NASCompares Deal Finder to find the best place to buy this device in your region, based on Service, Support and Reputation - Just Search for your NAS Drive in the Box Below
Need Advice on Data Storage from an Expert?
Finally, for free advice about your setup, just leave a message in the comments below here at NASCompares.com and we will get back to you. Need Help?
Where possible (and where appropriate) please provide as much information about your requirements, as then I can arrange the best answer and solution to your needs. Do not worry about your e-mail address being required, it will NOT be used in a mailing list and will NOT be used in any way other than to respond to your enquiry.
Need Help?
Where possible (and where appropriate) please provide as much information about your requirements, as then I can arrange the best answer and solution to your needs. Do not worry about your e-mail address being required, it will NOT be used in a mailing list and will NOT be used in any way other than to respond to your enquiry.


|
 |


p2v server migration exists ?
REPLY ON YOUTUBE
i have default network vm but i have no connection..
REPLY ON YOUTUBE
I installed it. HDMI and keyboard plugged in. I get the qnap startup screen then it goes blank. No connection to any of the two networks either from my laptop. I assume the virtual network messed up but wasnt expecting HDMI issues. So at the moment I have a qnap that will need resetting again. Now and again I get a mouse pointer on screen for a few seconds. Thats it. Should have bought a NUC
REPLY ON YOUTUBE
Thank You!
REPLY ON YOUTUBE
I’m curious to know if you would be able to run WDS (Windows Deployment Services) on it to make a PXE boot device for imaging company machines?
REPLY ON YOUTUBE
I had the Teamviewer app installed on my DS1819+ prior to my upgrade to DSM 7 final release on 29 Jun 2021. After the upgrade finished installing Teamviewer was gone and was no longer in the package center. Did Synology decide not to include Teamviewer under DSM 7? I really liked being able to choose to log in through the HTML interface or the Remote Control interface directly to a command line. It would have made it very easy for me to remotely access my NAS from outside of my local network.
REPLY ON YOUTUBE
I’m surprised how big impact your screen recording software makes. If it was ten years ago, then maybe, but in present it seems unacceptable. Or maybe there’s just something wrong.
Have these tests been applied to the newer shingled models WD and Seagate have started secretly plying onto people who would reasonably expect better?