

I am very new to the world of NAS so i’m sorry if this is a silly question but I am trying to set up a NAS so my family have a centralized place for phone back ups. I have looked all over for a few days now and it seems that I tunes needs the hard drives it sends its back ups to, to be local. I have followed a few tutorials but they all seem to be different from what I am looking for. Do you have any idea on how I could work around this while still being able to back my phone up remotely? Thank you.
There is no way to backup to your itunes while on the move and not connected to your local WiFi with an iTunes server in the same network. But one you are at home can backup your phone.
You can choose to backup via USB or WiFi. You can find how to install itunes server on a NAS later in this post.
Back up iPhone via cable
https://support.apple.com/en-gb/guide/iphone/iph3ecf67d29/ios
Turn on Wi-Fi syncing
- Connect iPhone and your computer using USB.
- Do one of the following:
- In the Finder sidebar on your Mac: Select your iPhone, click General at the top of the window, then select “Show this [device] when on Wi-Fi.”
Note: To use the Finder to turn on Wi-Fi synching, macOS Catalina is required. With earlier versions of macOS, use iTunes to turn on Wi-Fi syncing.
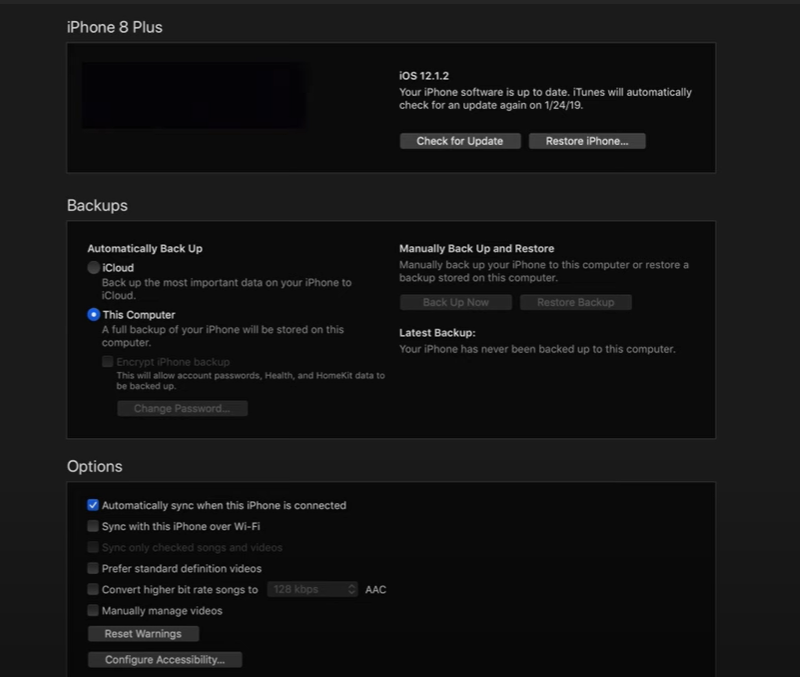
- In the iTunes app on a Windows PC: Click the iPhone button near the top left of the iTunes window, click Summary, then select “Sync with this [device] over Wi-Fi” (in Options).
- In the Finder sidebar on your Mac: Select your iPhone, click General at the top of the window, then select “Show this [device] when on Wi-Fi.”
- Click Apply.
By default, whenever iPhone is plugged into power and is connected over Wi-Fi to your Mac or to iTunes on your Windows PC, the computer syncs your selected content to iPhone.
See Sync content between your Mac and iPhone or iPad over Wi-Fi in the macOS User Guide or Sync iTunes content on PC with devices on Wi-Fi in the iTunes User Guide for Windows.
You can find instruction on how to set it up below:
How to enjoy my Synology NAS music on iTunes (Mac)
Overview
Synology NAS can be your iTunes Server to stream music and videos stored on your DiskStation to an iTunes client within the local network. It also provides the Smart Playlist feature, letting you create playlists containing songs particularly specified. This article will guide you through the steps to stream music and videos with Synology iTunes Server to an iTunes client on a Mac, and use the smart playlist.
Contents
- Before you start
- Manage iTunes server
- Enjoy music and videos on Mac iTunes clients
- Use Smart Playlist
1. Before you start
This article assumes that you have done the following tasks for your DiskStation:
- Create a volume on your DiskStation. (See here)
- Create a shared folder on your DiskStation. (See here)
- Install and run iTunes Server in Package Center.
Refer to Quick Installation Guide for more information about hardware and software installation. You can also see Synology DiskStation User’s Guide (available at Synology’s Download Center) for a general idea about related topics.
2. Manage iTunes server
After iTunes Server is installed on your DiskStation, you can store your music collection in music shared folder and run your iTunes on your Mac computer. In addition, you can change settings of iTunes Server.
To manage iTunes Server:
-
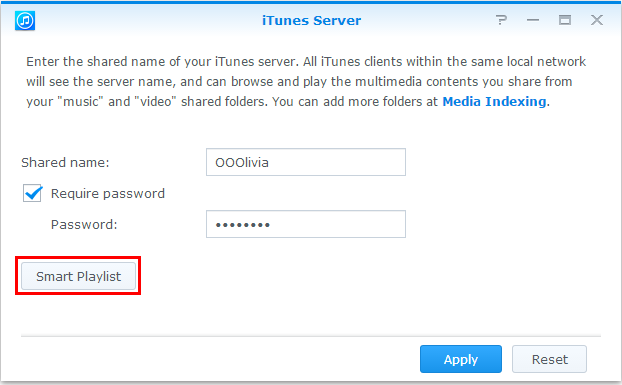
- Log in to your DiskStation as admin or user belonging to the administrators group, and go to iTunes Server.
- Enter your Shared name.
- Tick Require password and enter a password if you want iTunes users to enter a password before accessing your shared folders (optional).
- Click Apply.

Note:The music and video shared folders will be accessed by iTunes clients. iTunes Server supports the following formats.
- Audio: MP3, M4A, M4P, WAV, AIF.
- Video: MOV, MP4, M4V.
- Playlist: WPL, M3U.
3. Enjoy music and videos on Mac iTunes clients
This section explains how to enjoy music and videos on a Mac iTunes client.
Please note that you cannot use the following devices. The media devices access your DiskStation contents through Home Sharing.
- iPad, iPhone
- Apple TV
To access music and videos on a Mac iTunes client:
-
- Launch iTunes on your Mac. Under SHARED LIBRARIES, browse to the iTunes server with the shared name you entered.

-
- If you had set a password, enter the Password, and click OK.

- You can access all the music and videos stored on your DiskStation.
4. Use Smart Playlist
This section explains how to create a smart playlist, which can automatically include certain types of songs that match specific criterion. iTunes clients will be able to play the smart playlist you created.
To create a smart playlist:
-
- Go to iTunes Server.
- Click Smart Playlist to create smart playlists.
-
- Click Create, enter a name for the playlist, and click OK.

-
- In the window that appears, set rules for the playlist.

- Click OK when finished.
To edit a smart playlist:
-
- Do either of the following to start editing:
- Select the item you want to edit and click Edit.
- Double-click the item.
- Do either of the following to start editing:

-
- Do any of the following to modify the rules:
- Modify the rules by choosing items from the drop-down menus.
- Click + if you want to add a rule.
- Select a rule and click – if you want to delete the rule.

- Click OK when finished.
To delete a smart playlist:
-
- Select the smart playlist you want to delete.
- Click Delete and then click Yes.

To view the newly-created smart playlist on iTunes:
Go to SHARED LIBRARIES, and browse to the iTunes server of the selected shared name. You will see the songs matching the rules of the smart playlist in the main area of iTunes.

| Where to Buy a Product | |||
 |
    
|

|
VISIT RETAILER ➤ |
 |
|
|
VISIT RETAILER ➤ |
 |
|
|
VISIT RETAILER ➤ |
 |
|
|
VISIT RETAILER ➤ |
We use affiliate links on the blog allowing NAScompares information and advice service to be free of charge to you. Anything you purchase on the day you click on our links will generate a small commission which is used to run the website. Here is a link for Amazon and B&H. You can also get me a ☕ Ko-fi or old school Paypal. Thanks! To find out more about how to support this advice service check HERE If you need to fix or configure a NAS, check Fiver Have you thought about helping others with your knowledge? Find Instructions Here


DISCUSS with others your opinion about this subject.
ASK questions to NAS community
SHARE more details what you have found on this subject
CONTRIBUTE with your own article or review. Click HERE
IMPROVE this niche ecosystem, let us know what to change/fix on this site
EARN KO-FI Share your knowledge with others and get paid for it! Click HERE