


How to Setup a Virtual Machine on your QNAP NAS Drive
Regardless of wherever you are in the world right now, the virtues of conducting your business operations remotely, as well as ensuring the security and dependency of your assets (physical or digital) have never been more relevant. Perhaps you are considering shifting a % of your workforce into remote access roles so they can do their jobs from home, or you are an employee or self-employed individual that is weighing up their options need a robust virtual machine solution? Into this arena, we have QNAP NAS and their QNAP Virtual Machine software, Virtualization Station 3 that has developed over the last 5 years into quite an impressively featured, yet user-friendly VM platform. Supporting numerous VM image types (ranging from Windows to Linux Ubuntu, Android and even virtual QNAP QTS – vQTS) it is quite a powerful tool that allows you to create a virtual desktop computer experience that will reside on your NAS drive for access over the network or internet. Despite the technical nature of virtual machines, it is actually surprisingly simple to set up a Windows 10 virtual machine on a QNAP NAS, with free tools online to convert your physical Windows PC into a virtual image (with VMware- VMware VCenter Converter and Hyper-V/Microsoft Disk2vhd), as well as the option to download a free trial copy of Windows 10 from the Windows store (if you click that link with a Windows PC, it won’t show the ISO file, so visit it with an Android/iOS/OSX based device to see the link properly), which you can then validate with your own product key, or start with a new one, there are lots of options to set up your QNAP NAS based Windows 10 virtual machine. So, let’s go through how to do it.

What you need to Setup a Windows Virtual Machine on your QNAP NAS Drive
Setting up a virtual machine is easy, but does require some specific hardware and software available from the beginning. So, go through this checklist to ensure you have the following to hand/ready:
- A virtual image (ISO, VHD, OVA, etc) of Windows that is downloaded from the Windows Image Store, or a virtual image of your own PC that you created with VMware VCenter Converter and Hyper-V/Microsoft Disk2vhd tools as discussed. Be sure to be using a 64bit version of the VM guest
- Sufficient storage space on the Volume you are storing this VM onto within the NAS to save the VM
- An internet connection – not strictly necessary, but you may well need updates to the tools that are used in this QNAP VM installation guide, as well as use the Virtualization Station 3 VM Converter tool – so if your VM image is not showing when looking in the folder it is located in, it might be an incompatible version and you should be cable to convert it using the tools included.
- A laptop or tablet that is on the same network as your QNAP NAS that can be used to input/setup the NAS for the first time. After this, you can arrange for the VM to be internet accessible, but the first time should ideally be conducted locally (not strictly necessary, but really, REALLY makes it easier)
- A QNAP NAS that has at least a 4-Core Intel x86 64bit Processor (Intel Celeron, Pentium, Core, Xeon, etc) and 4GB of Memory (ideally 8GB, as you need spare memory to run the QNAP in the background). Below are the best options ranging from between £500-2000+.
A virtual machine (VM) is much like a regular physical PC, however, it is a virtual equivalent that, in the case of NAS, lives on your network storage device and can be accessed by one or more users over the local network or via the internet. A virtual machine allows you to create a duplicate of (or replacement for) your physical PC and converts it into a digital format. This version can then be used for software testing, duplication for multiple staff users or as a virtual copy of your existing setup for use when working from home, in coffee shops, the commute or more. Below are three solutions that scale depending on budget and power.
 |
 |
 |
 |
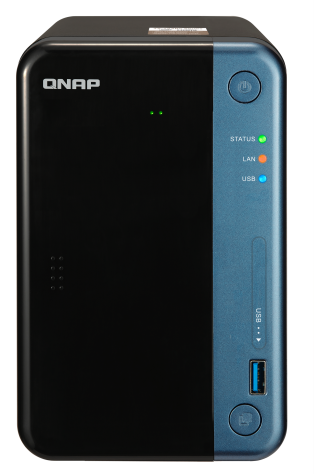
| QNAP TS-253Be
££££
|
QNAP TVS-473e
££££
|
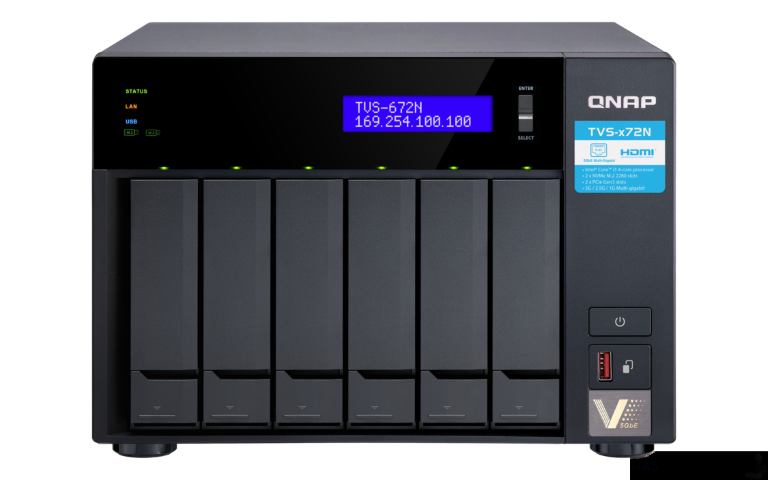
QNAP TVS-672N
££££
|
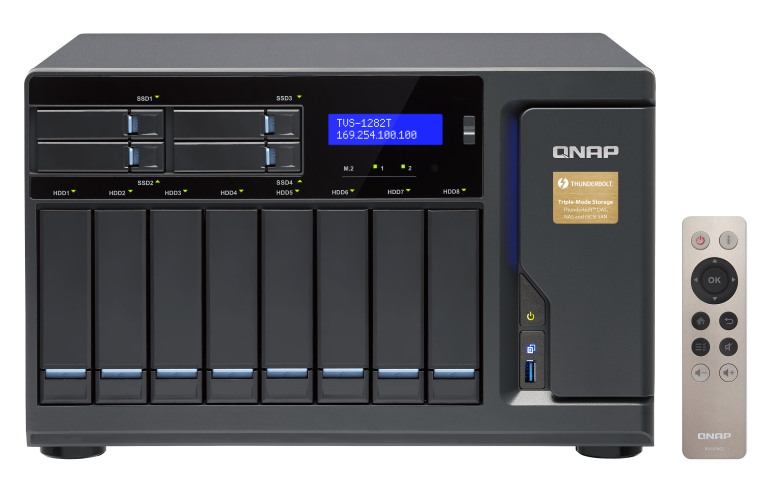
QNAP TVS-1282
££££
|


Install and configure the Virtual Machine Manager package
This guide to install a Windows 10 VM on your QNAP NAS is based on the idea that you have your QNAP NAS already setup, updated to the latest QTS firmware, have your storage pool and volume arranged and have access to the internet or the QNAP Virtualization Station app already installed, in the latest version (to ensure that the virtual environment dropdown list has every option). Additionally, the Windows 10 Virtual Machine image you are going to use is already stored on the NAS storage or is on a USB drive connected to the NAS device.
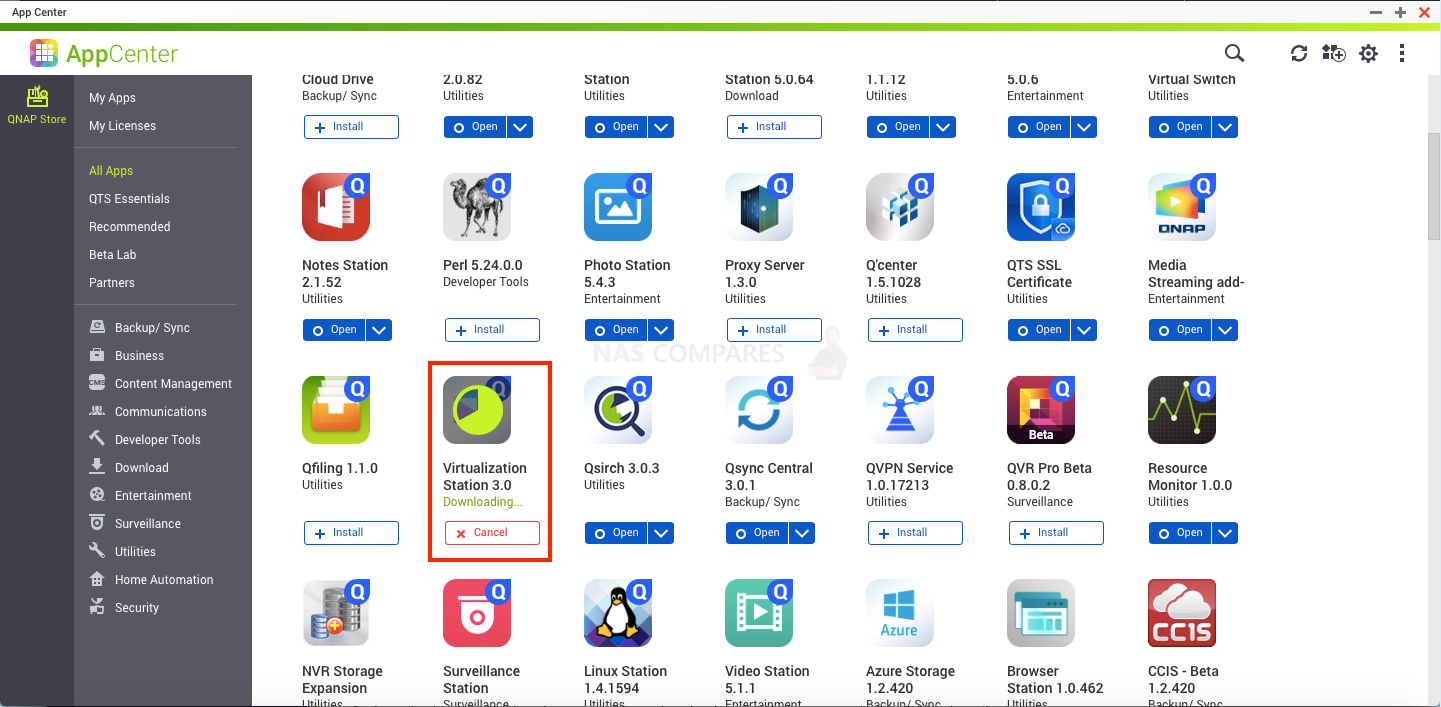
Installing Virtualization Station
Virtualization Station can be installed from the QTS App Center. Search for “Virtualization Station” and click “+ Install”. After the installation is complete, you can launch Virtualization Station.

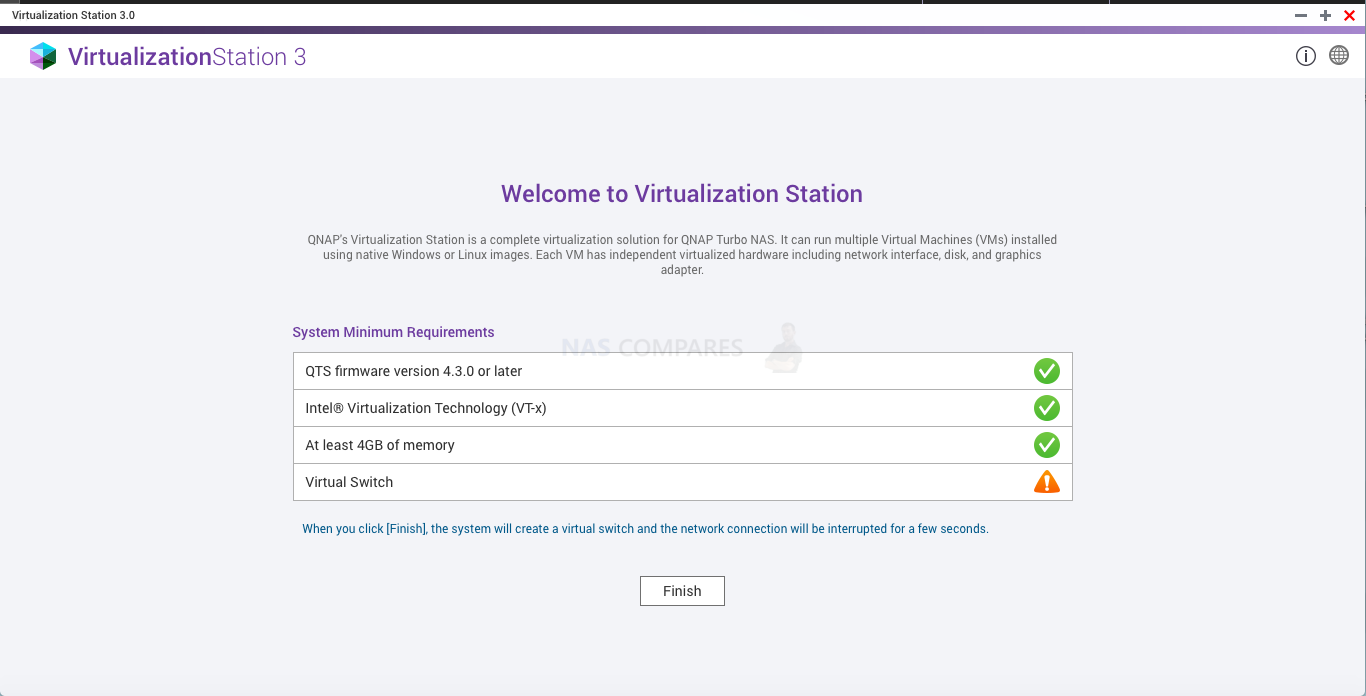
Virtualization Station will check your NAS system resources to ensure it can run Virtualization Station.

Setting up a VM
Creating a VM from an ISO image
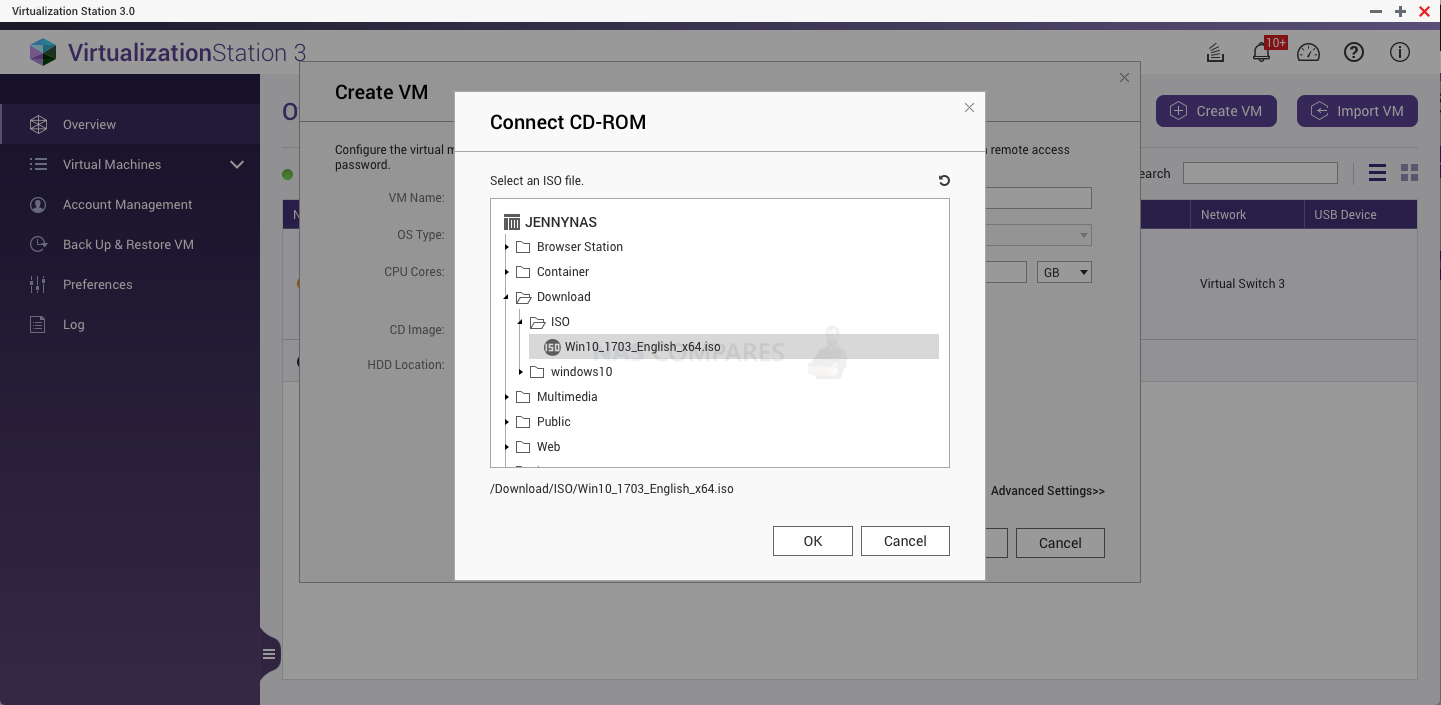
The ISO image must be stored in your QNAP NAS before using it to create a VM, or transferred over from a USB drive from your local machine
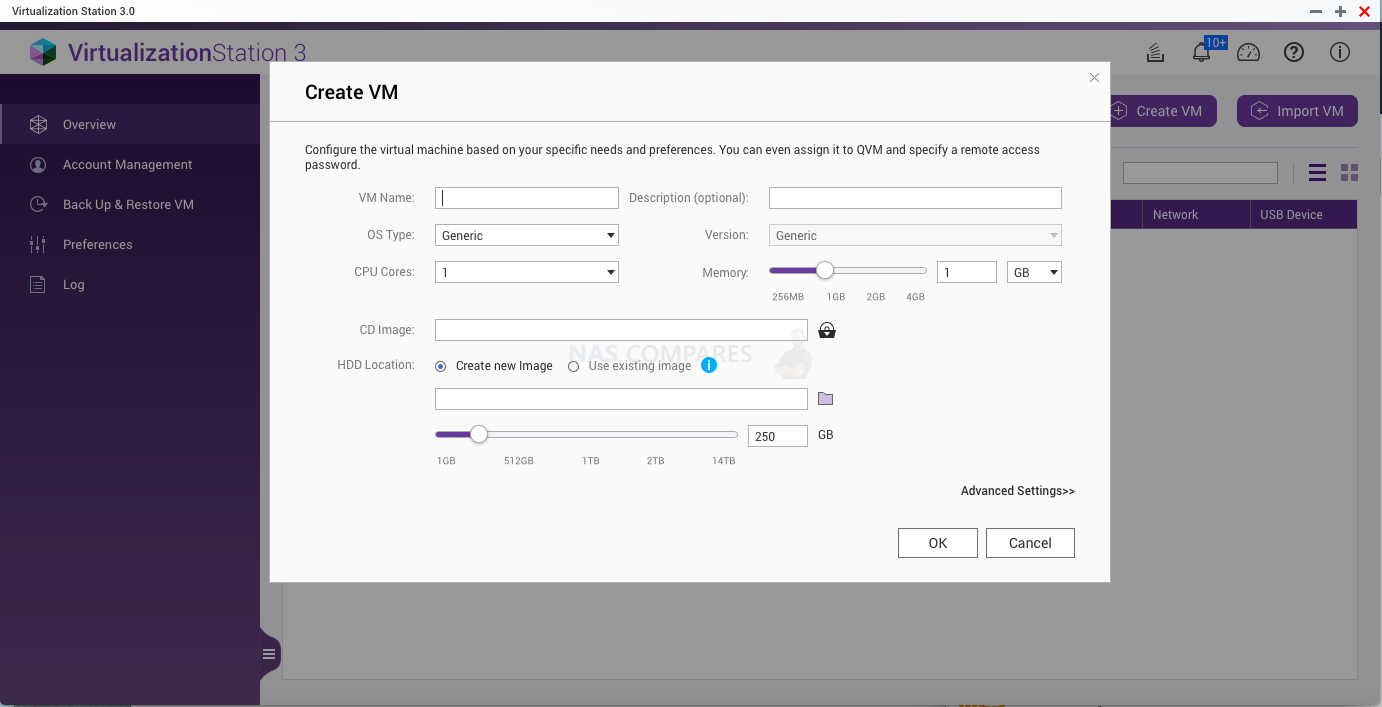
Open Virtualization Station, go to the “Overview”, and click “Create VM”.


In the “Create VM” menu, you will be asked to specify the details of the VM.

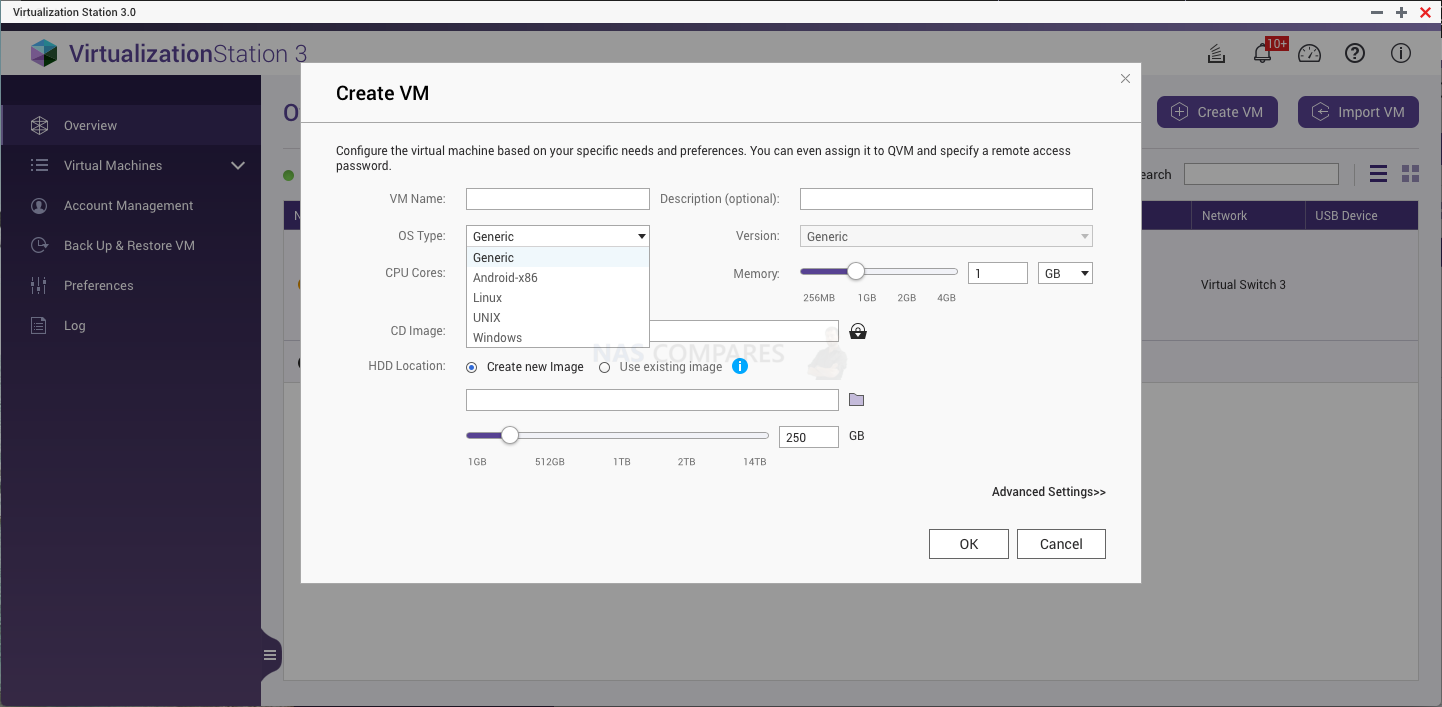
Select an OS type for your VM.

Select the ISO image of the operating system to use.

Click “Start” to power on the VM.
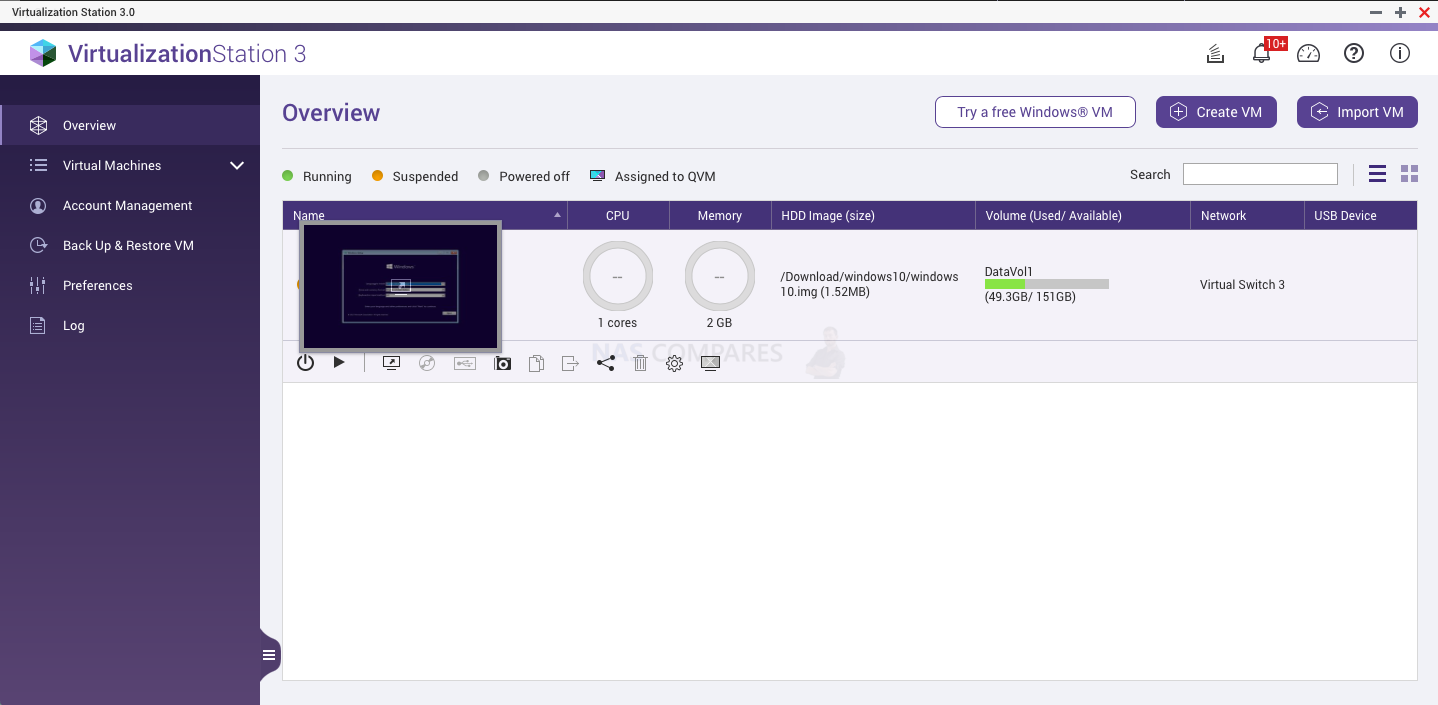

Clicking the VM thumbnail will open a new tab for you to operate the VM.

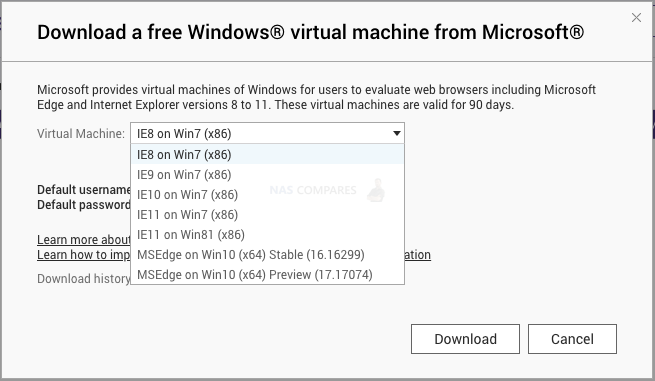
Setting up a free Windows VM
In “Overview”, click “Try a free Windows VM”.
There are VM for Windows 7, Windows 8.1 and Windows 10. After selecting a VM, click “Download”. This VM is currently provided free by Microsoft® for evaluating web browsers such as Internet Explorer. The VM is valid for 90 days and you have to log in the VM with below default username and password:
Default username: IEUser
Default password: Passw0rd!

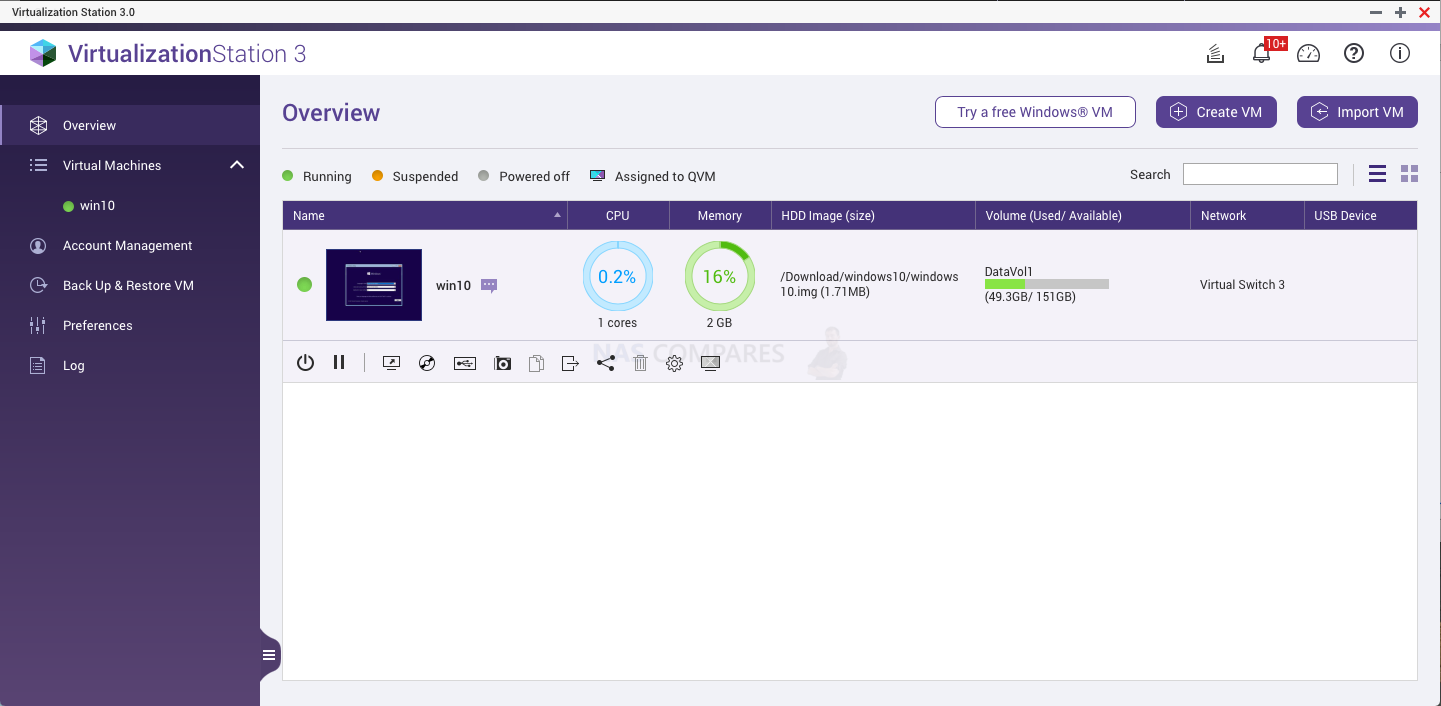
Operating Virtualization Station
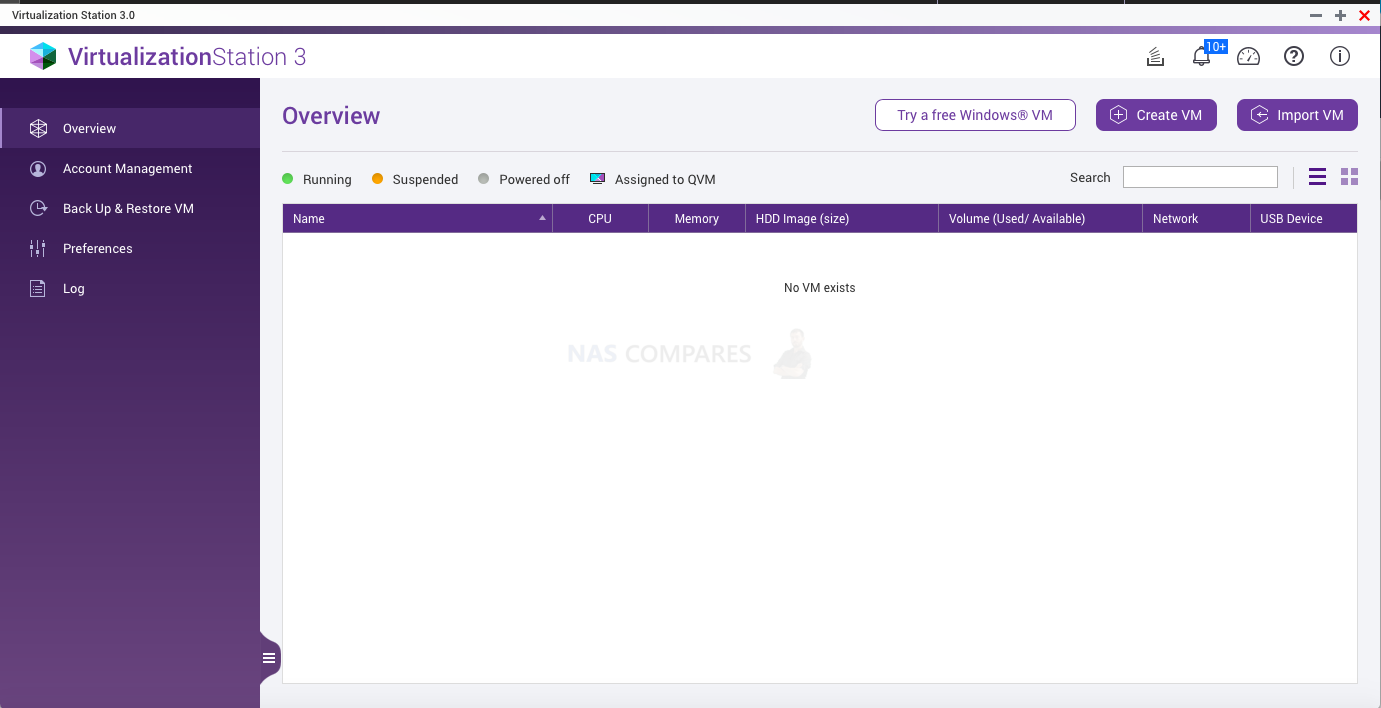
1. Overview
All of the VM that have been created are listed on the Overview page.

Import VM
To import a VM, click “Import VM” and then you can import the VM file from the QNAP NAS or your host PC.
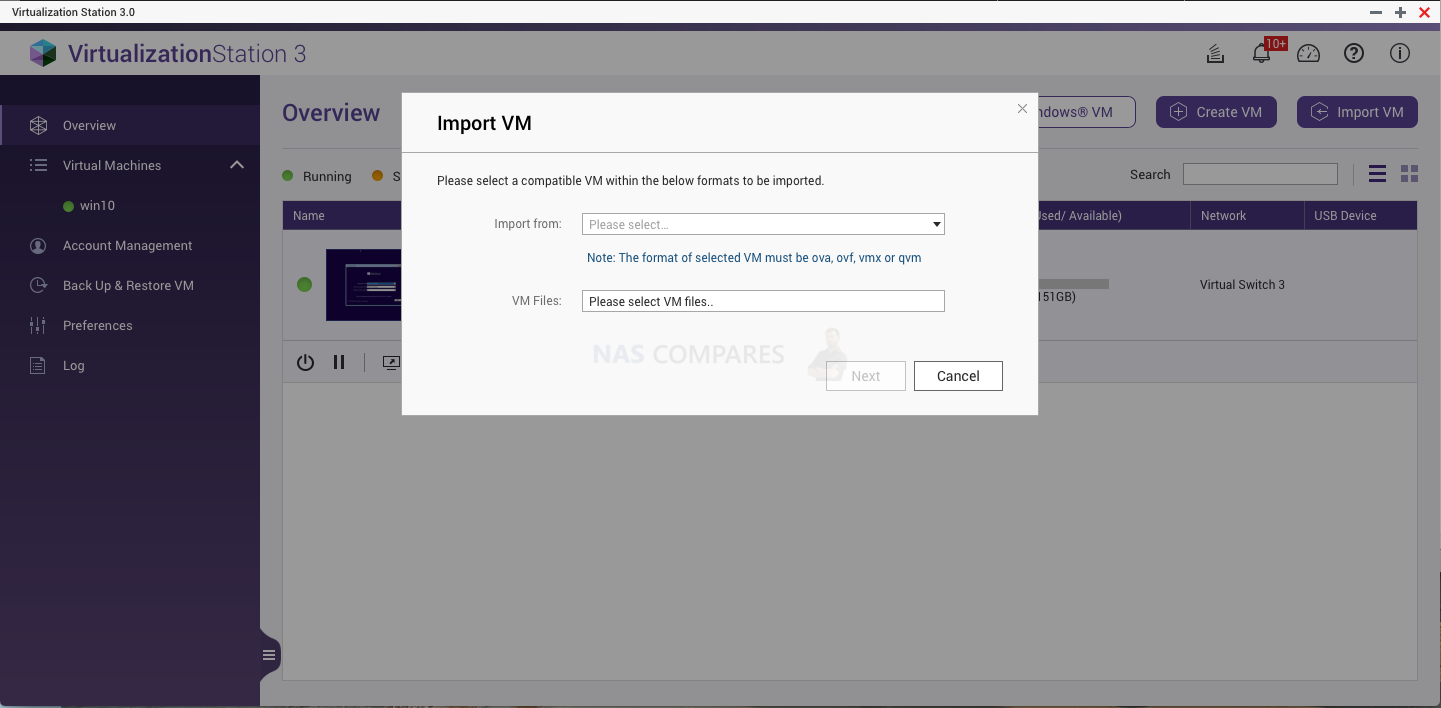

Note: *.ova, *.ovf files are only compatible with VM exported by VirtualBox v4 and VMWare 5.0 only. *.vmx files are only compatible with VM created by VMware Workstation 8/9/10. *.qvm is for VM created by Virtualization Station.
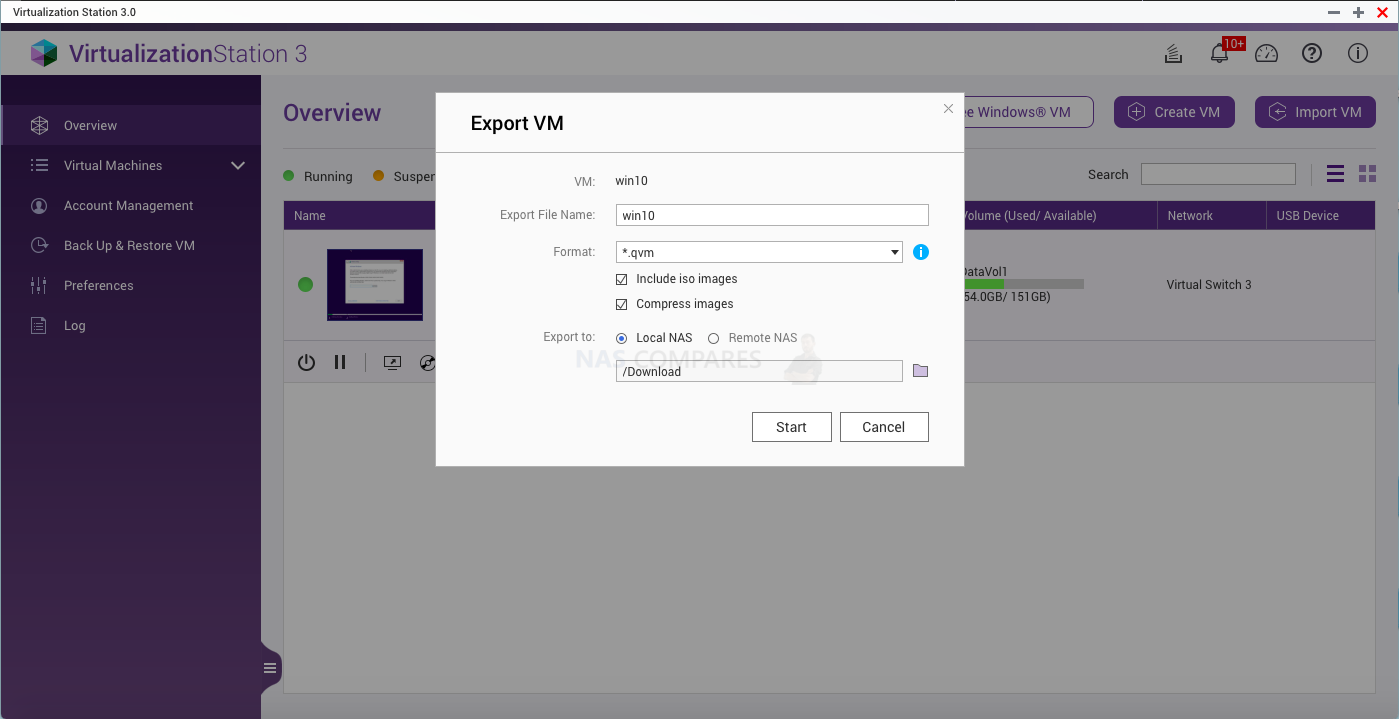
Export VM
Click ![]()


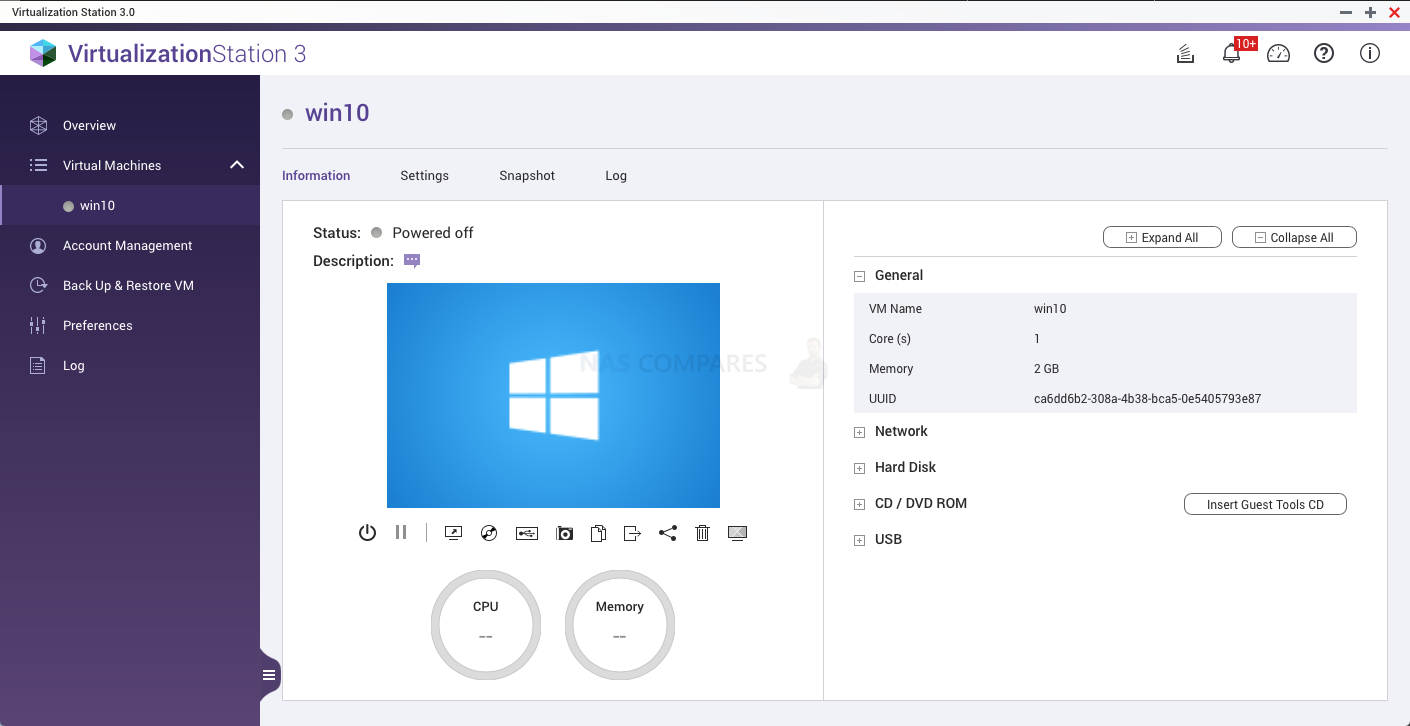
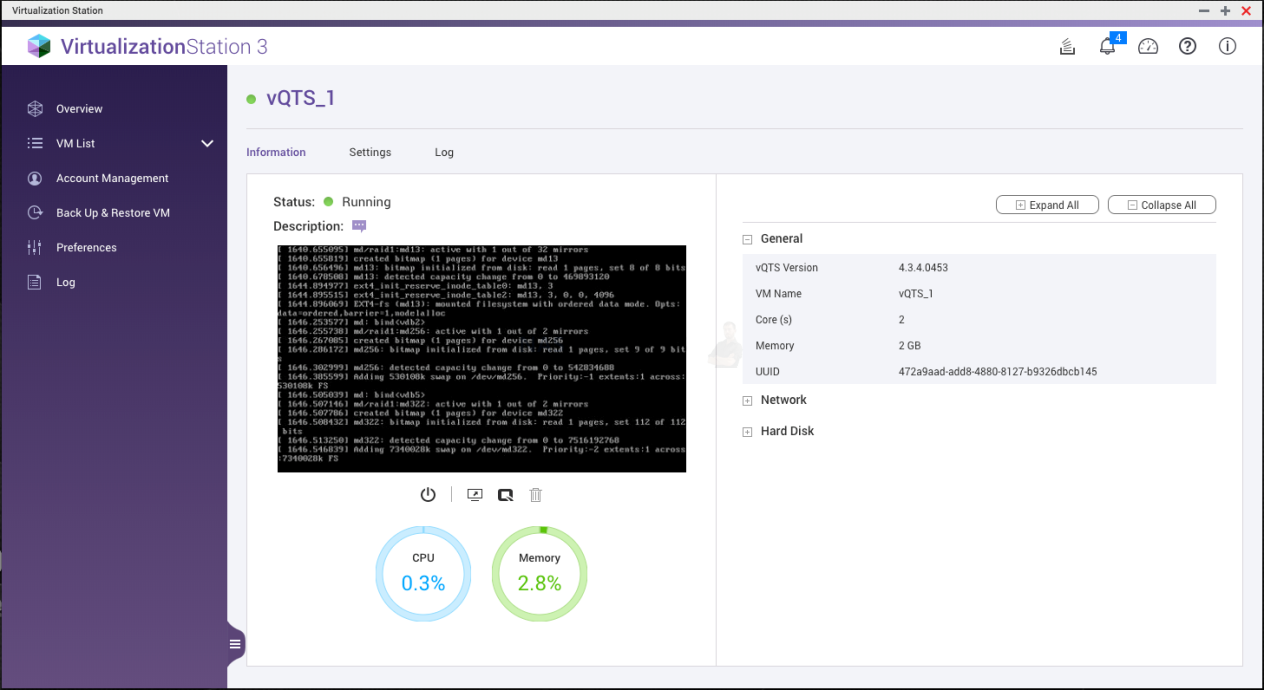
2. Virtual Machines
Information
You can view all of your VM on the left side menu. Clicking the VM name on the list or clicking ![]()


- Click

- Click


- Click

- Click

- Click

- Click

- Click

- Click

- Click

- Click

- Click

- Click


To use Virtio interface for Windows VM, you must install the Virtio drivers in the VM. The drivers are available in the Guest Tools CD. Click “Insert Guest Tools CD” in the CD/DVD ROM column to use it in your VM.
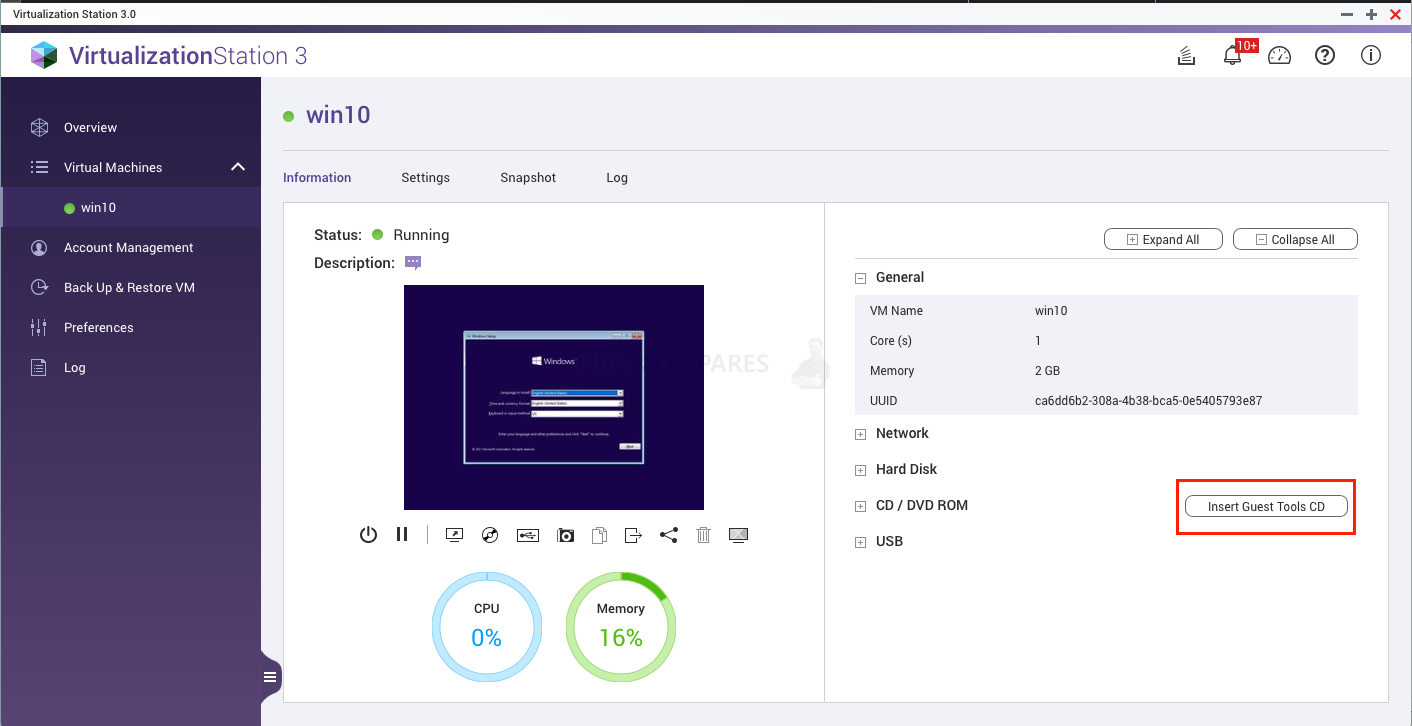
Tip: In Kernel-based Virtual Machine (KVM) infrastructure, “Virtio” is the primary platform for I/O virtualization and seen as an abstraction driver. It provides a higher I/O performance for virtual hard drives and network adaptors.

Settings
VM settings include “General”, “Boot Options”, “Network”, “Storage”, “CD /DVD”, “Video”, “Audio”, “Keyboard Layout”, “Remote Console”, “USB”, “Auto Start” and “Virtio-serial”. Some settings cannot be modified when the VM is online.
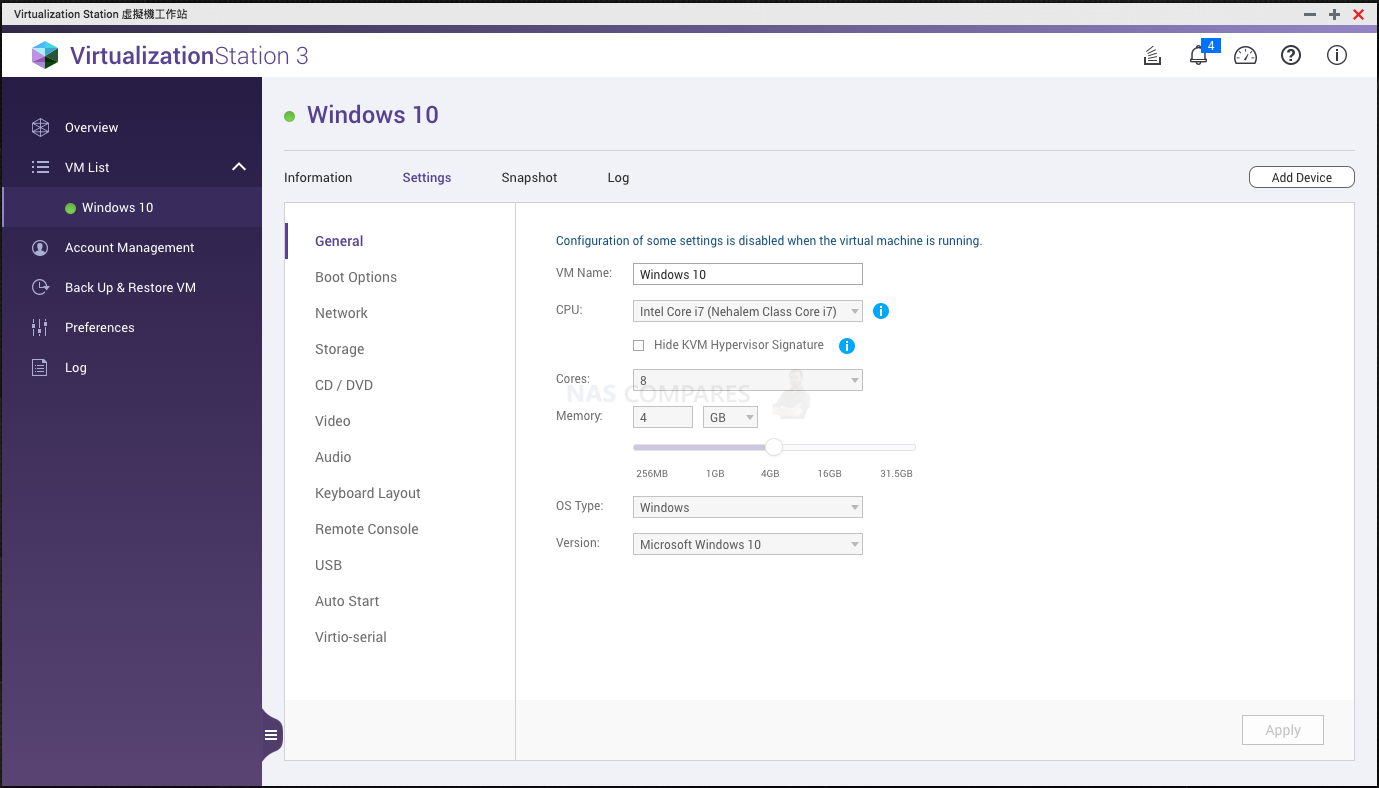

- General
Basic VM configuration such as the VM name, CPU cores, memory and OS type. You can specify different CPU commands set to run the VM. To ensure compatibility when importing/exporting VM, ensure the VM has the same CPU command set. - Boot Options
Specify the boot order of devices including HDD and CD/DVD drives. - Network
Specify virtual adapters to connect to Virtual Switches. - Storage
Each HDD has a correspondent image file stored in the specified location. There are three cache modes: “Writeback”, “Writethrough” and “None”.”Writeback” is using the NAS page cache. When the capacity of NAS cache is full, it will write back all the cache data on the disk. Compared with “Writethrough”, “Writeback” has a better transfer rate. However, “Writethrough” is more secure as it directly writes data to the disks by using write cache and avoids data loss if unexpected events occur. “None” will bypass the NAS cache so that the transfer rate performance will be between “Writeback” and “Writethrough”. - CD / DVD
Specify an “Image Path” to locate a ISO image - Video
Specify a video type. “VGA” can be used in most legacy OS, while “Cirrus” has a higher compatibility with legacy OS. For “VMVGA”, if the VM has the related driver installed, this type can provide more resolution options. - Audio
Specify an audio type for the VM. The related drivers installed - Keyboard Layout
The default setting is “English (US)”. For the keyboard mapping, you can select different keyboards to insert key signals. - Remote Console
The default port range for “Auto Port” is 5900-5930. This can be manually set if required. - USB
To connect USB devices, check either “Enable USB 2.0” or “Enable USB 3.2 Gen 1” to see the USB Connection panel on the VM information page. A USB device can only be assigned to one VM at a time, and other NAS apps will be unable to see this device when it is assigned to a VM
A VM can be set to automatically start within 0-600 seconds of the NAS starting up. - Virtio-serial
Enable Virtio-serial to communicate with the VM in which the guest tool is installed so that you can retrieve the IP address of VM and synchronize the NAS time after the VM resumes or has reverted to a snapshot’s content.
Snapshots of VMs
Virtualization Station provides a snapshot feature to record the VM system status at a point of time. In the event of a VM failure, users can quickly roll back to the snapshot to ensure continual system operation. Click ![]()

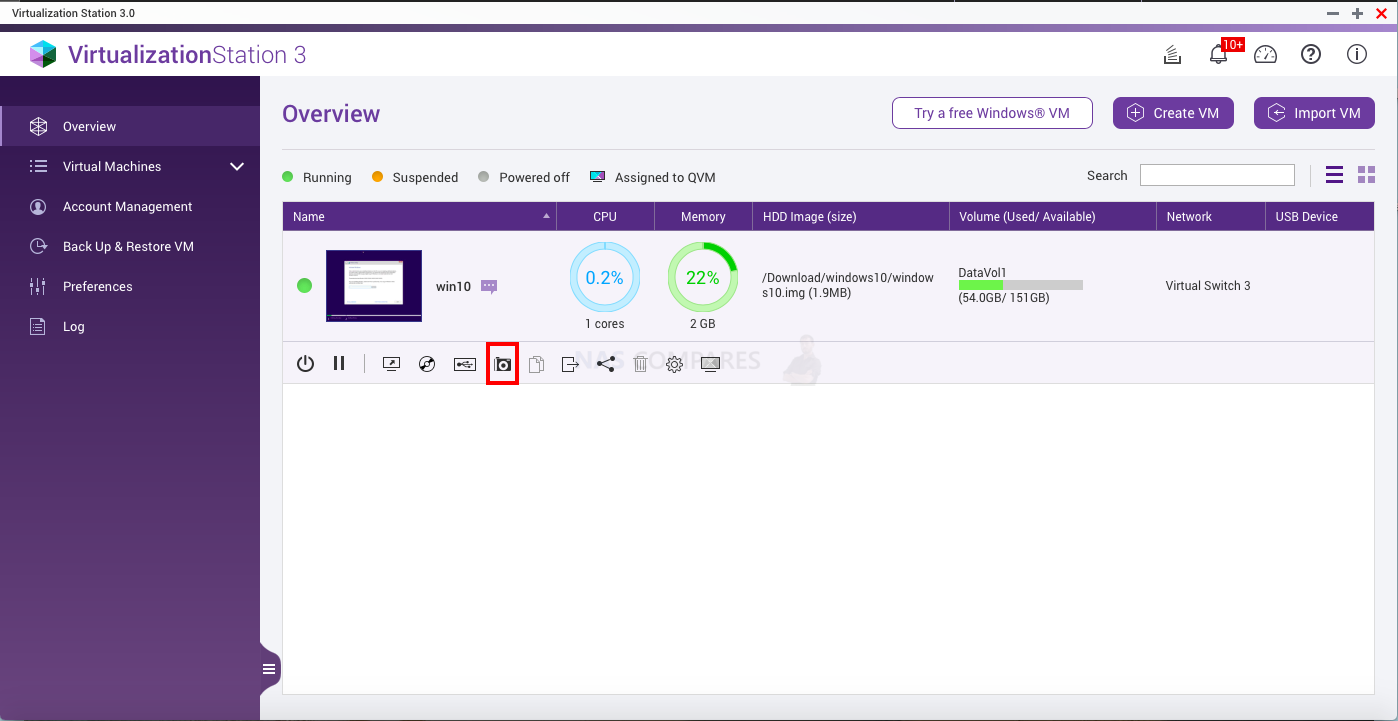

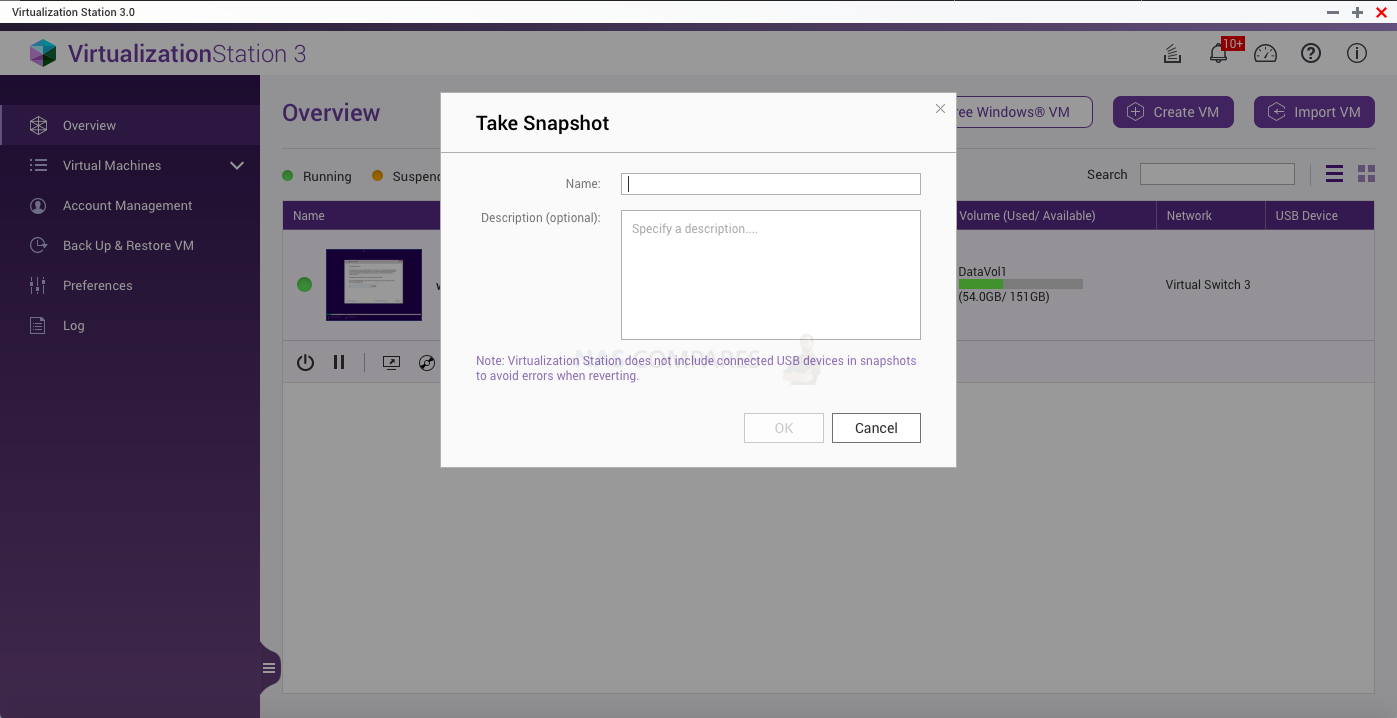
Click “Take snapshot” to start the process of taking a snapshot. Name the snapshot and click “OK” to create the snapshot.
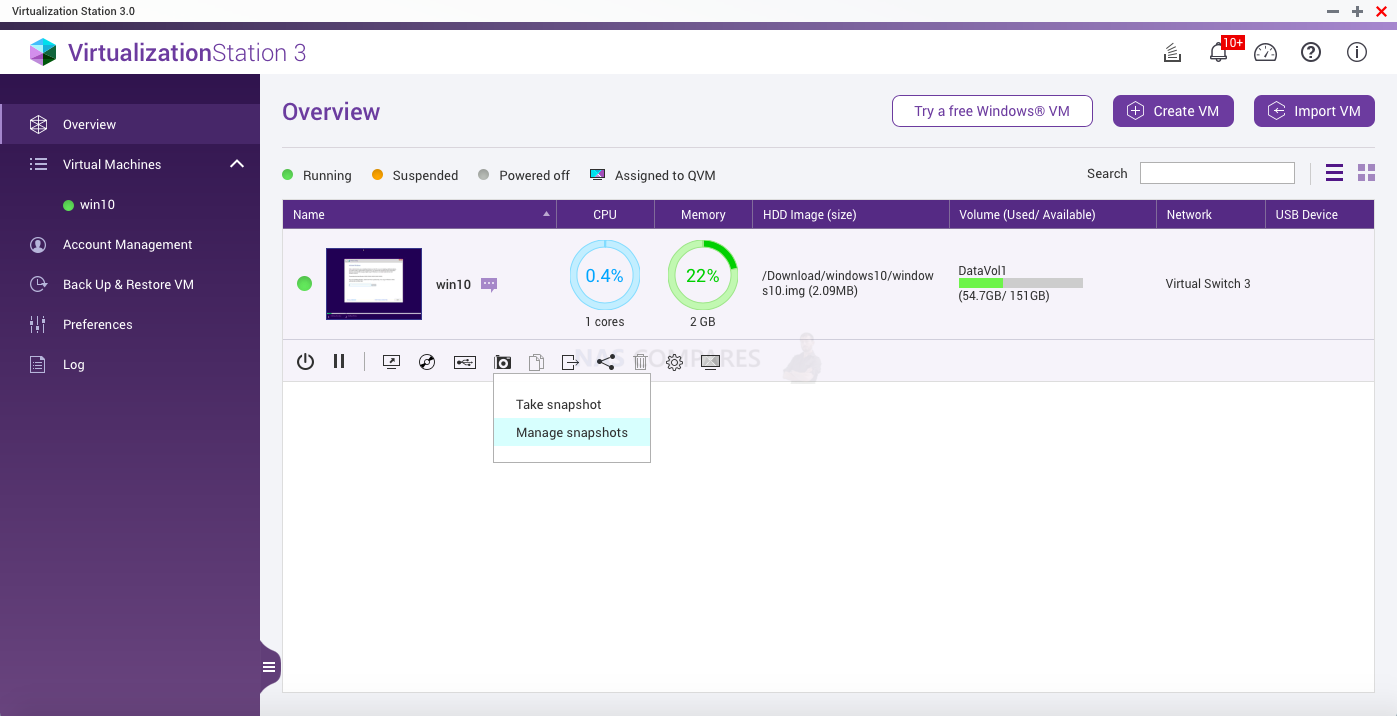
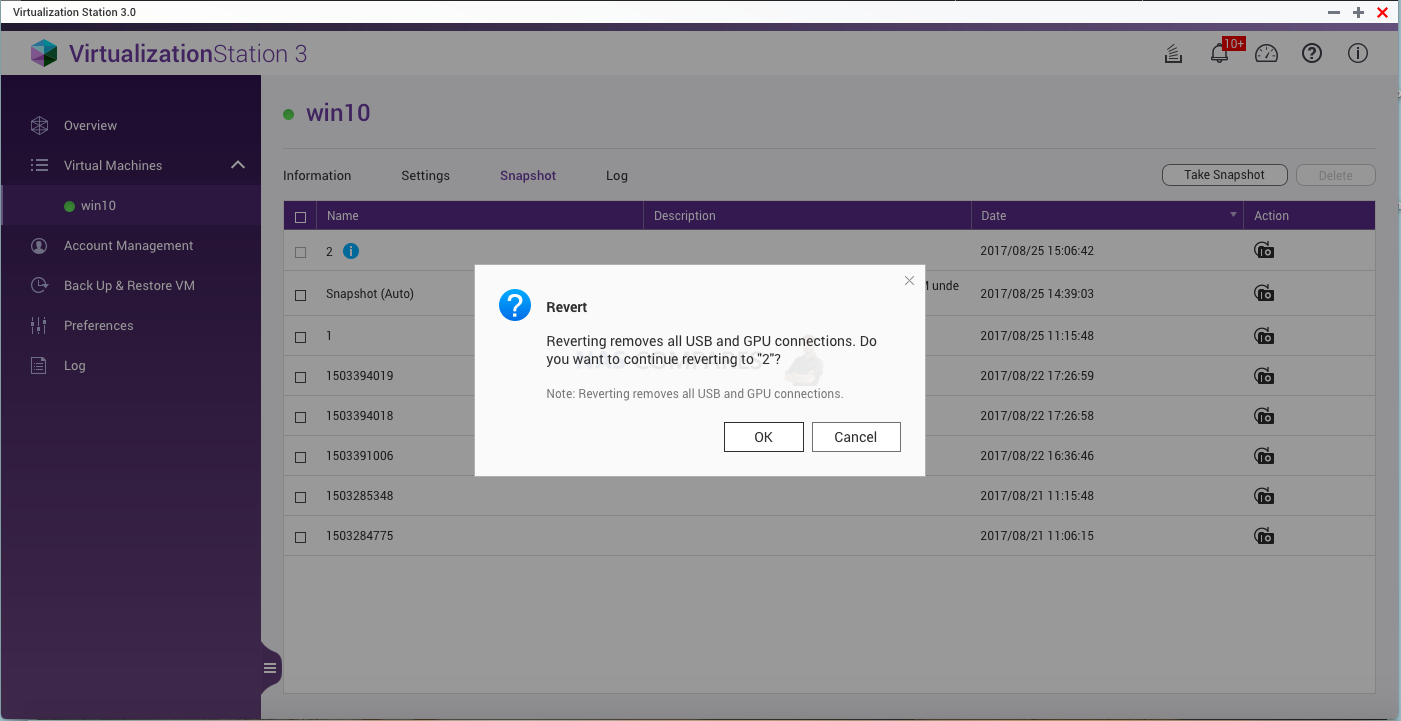
Click “Manage snapshots” to check all the snapshot tasks.

After a snapshot is taken, click ![]()

Click ![]()

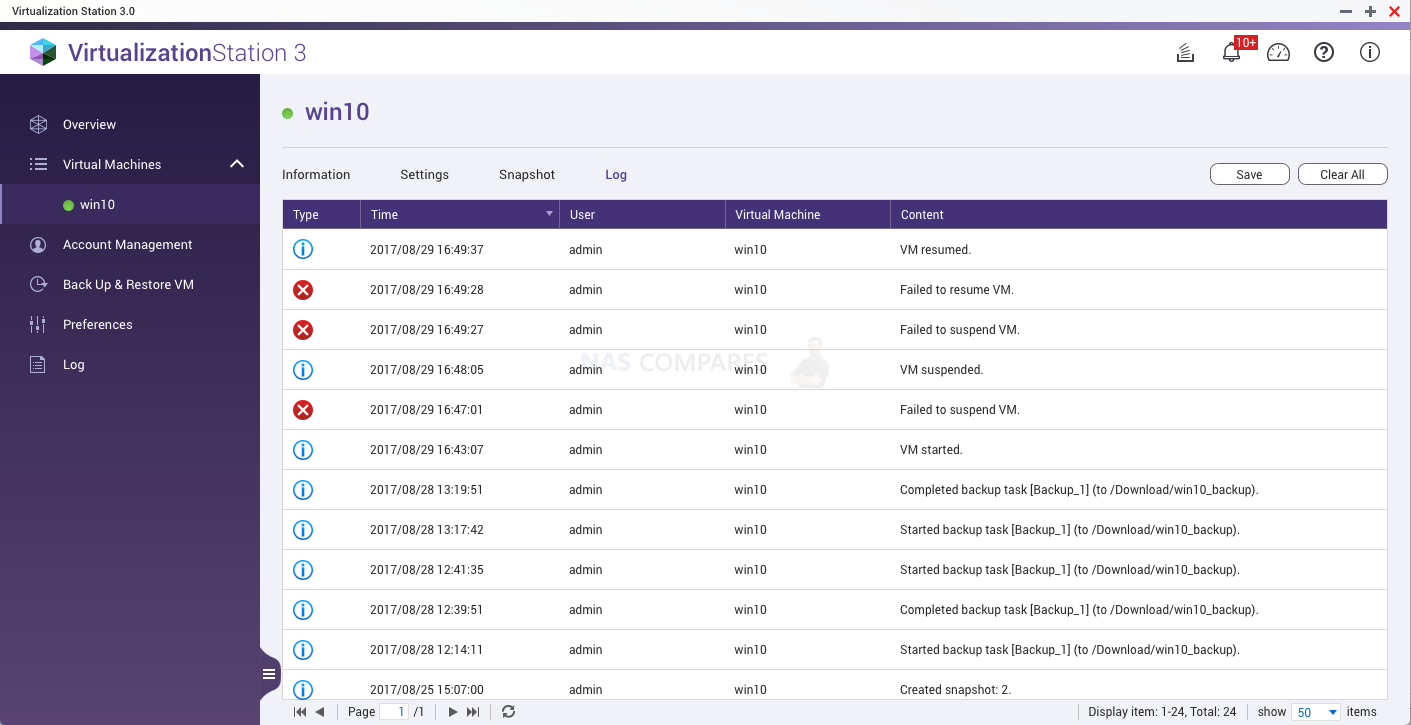
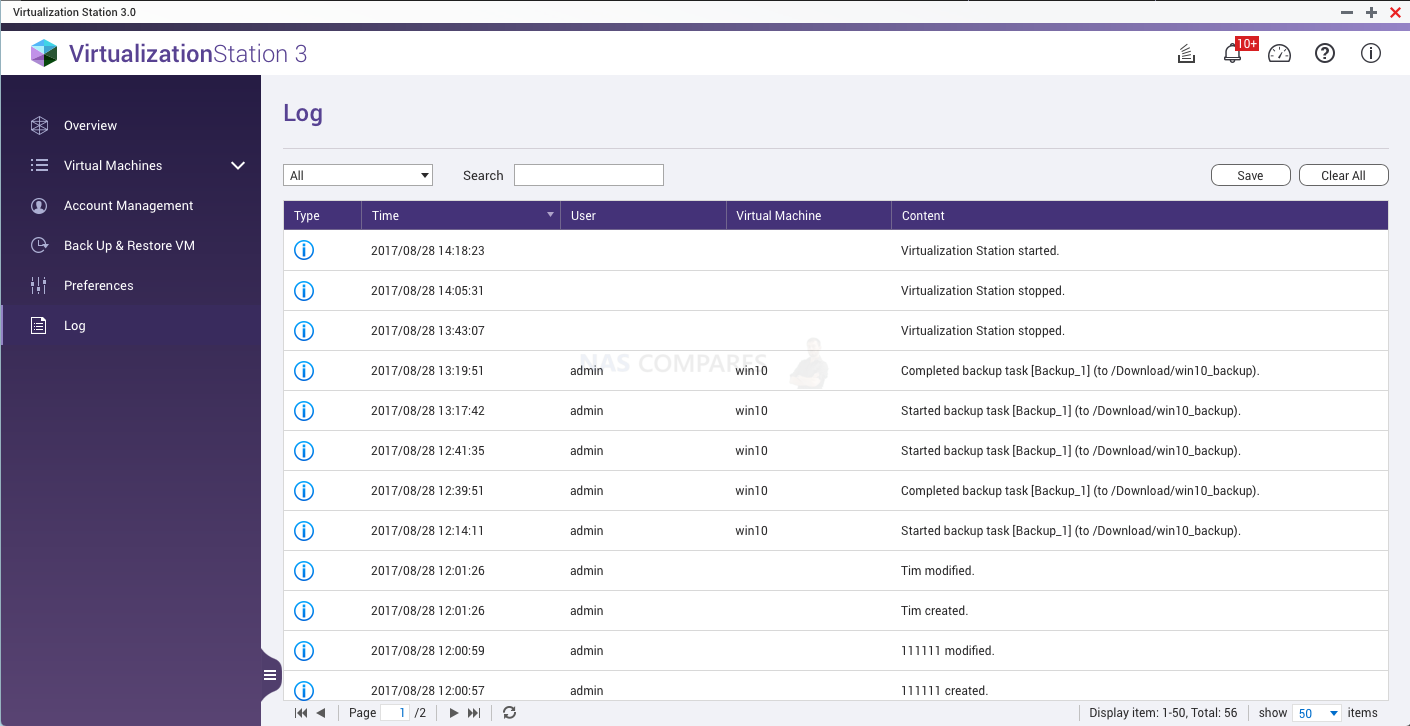
Log
Click “Log” to check VM information, warnings or errors.

3. Account Management
Click ![]()

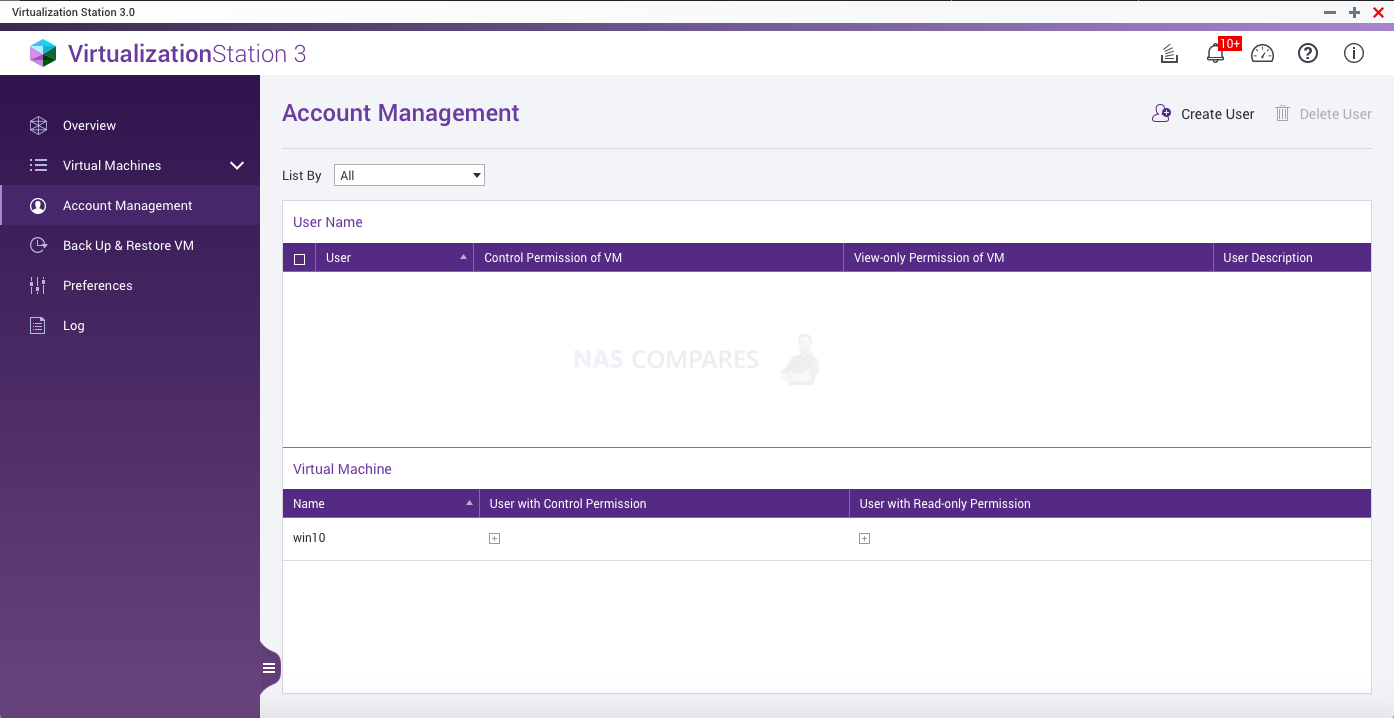

Click ![]()

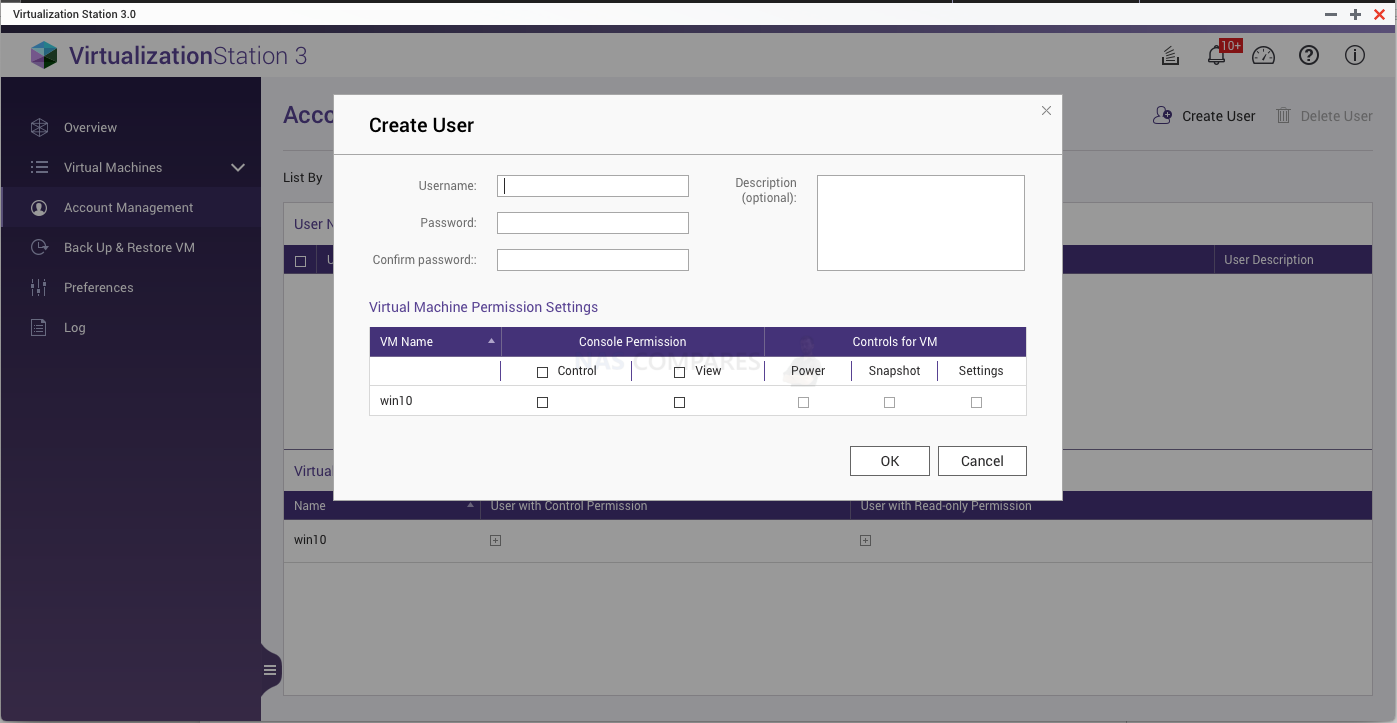

Click ![]()
![]()


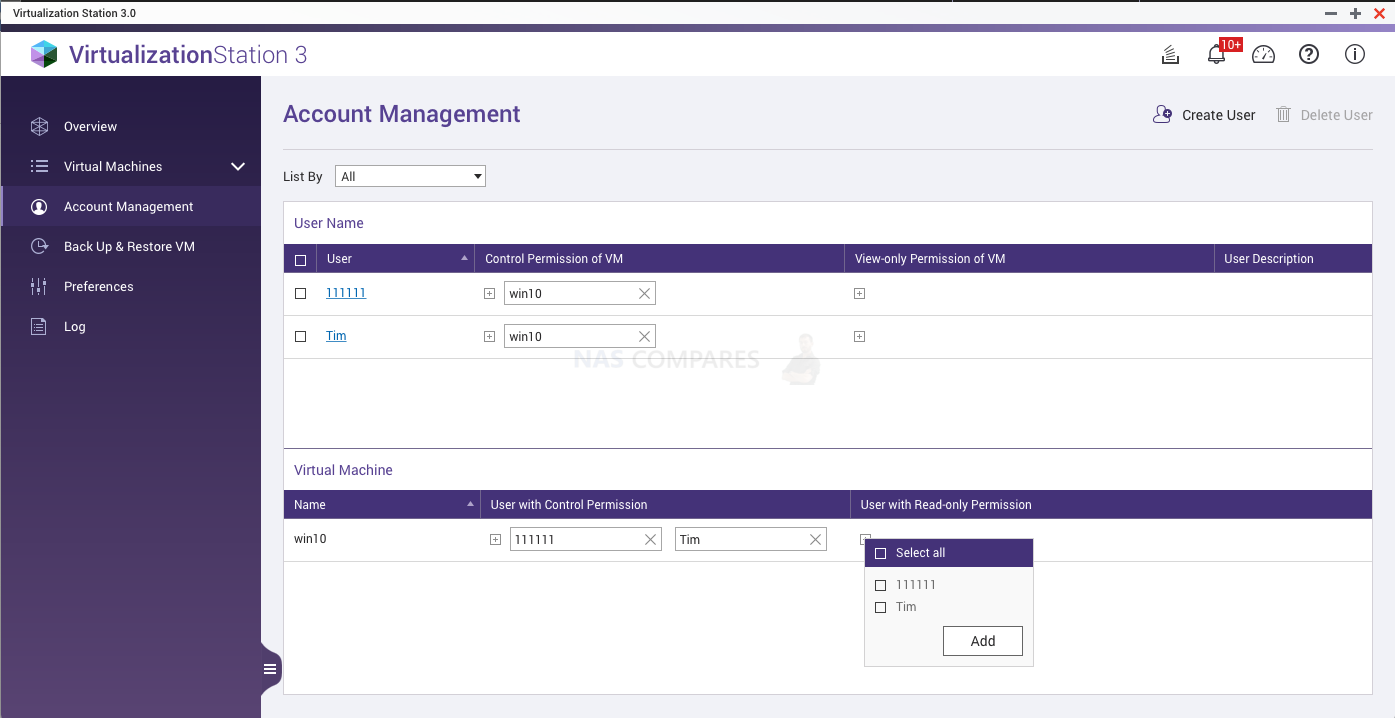

To delete users, check the users to delete and click ![]()

4. Back Up & Restore VM
VM can be backed-up/restored to/from remote or local NAS. Every task can be manually activated, restore, edited and deleted.
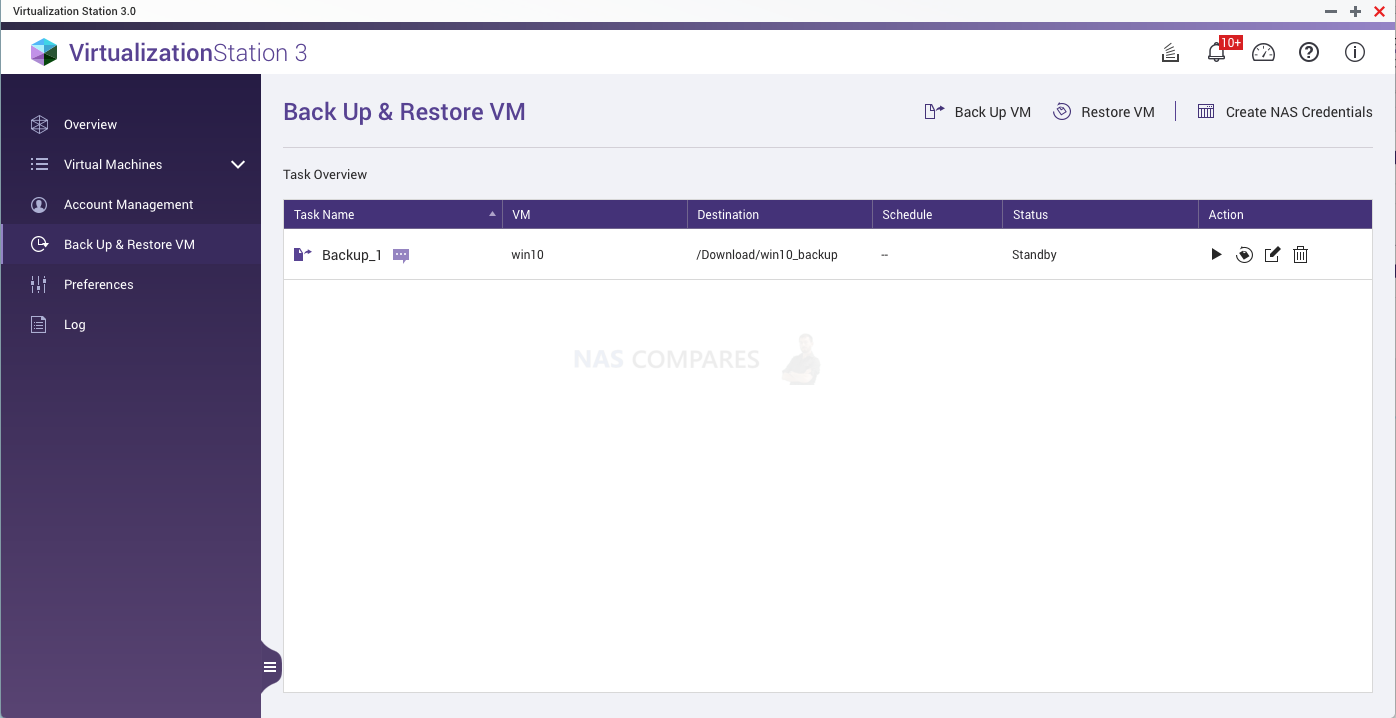

- Click “Back Up VM” to back up a VM. The VMs can be backed up at remote or local NAS. You can select the maximum number of backup versions.
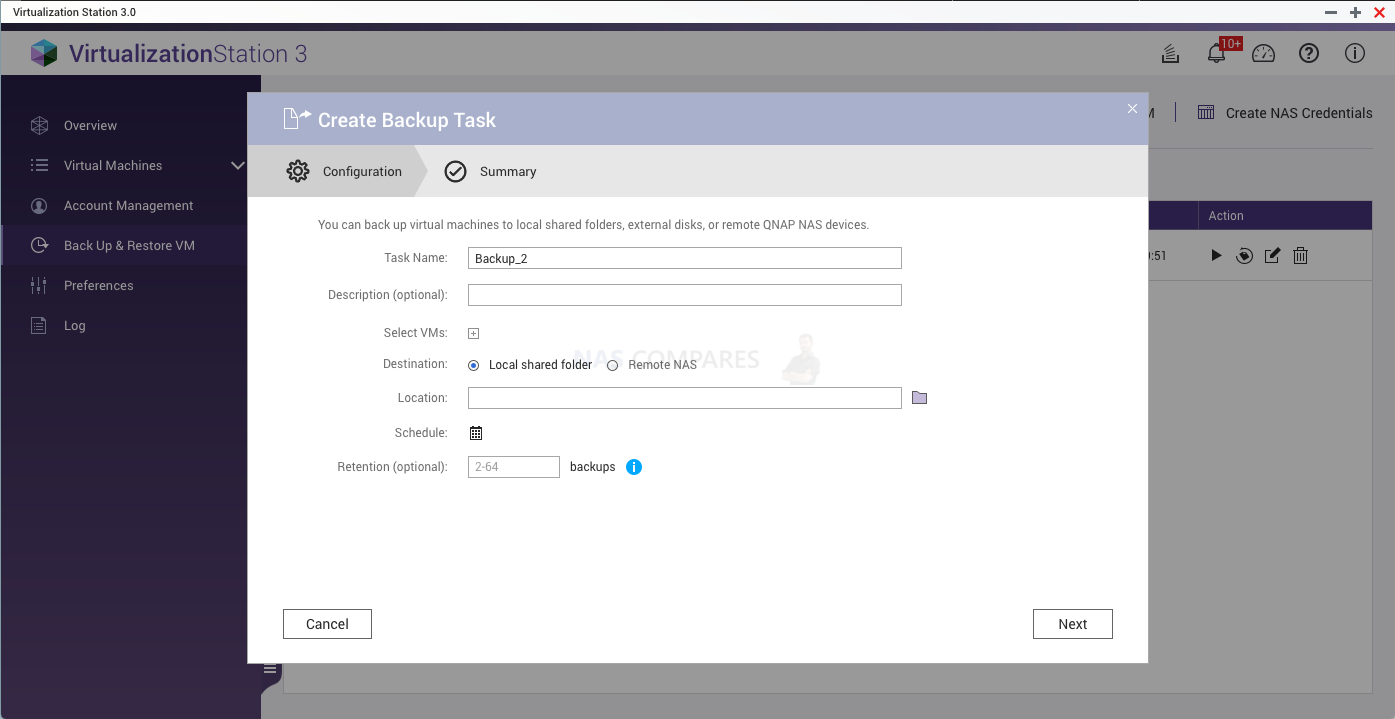
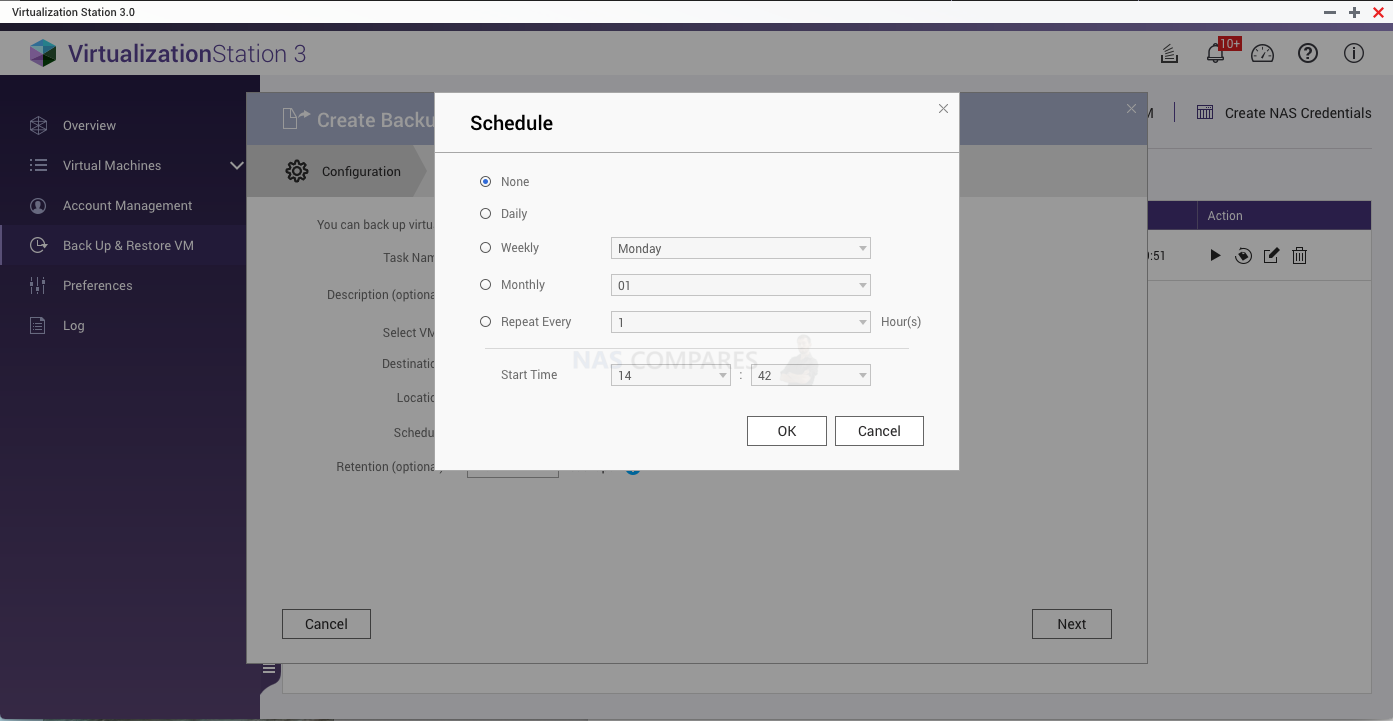
Select the schedule to arrange automatic backup times.
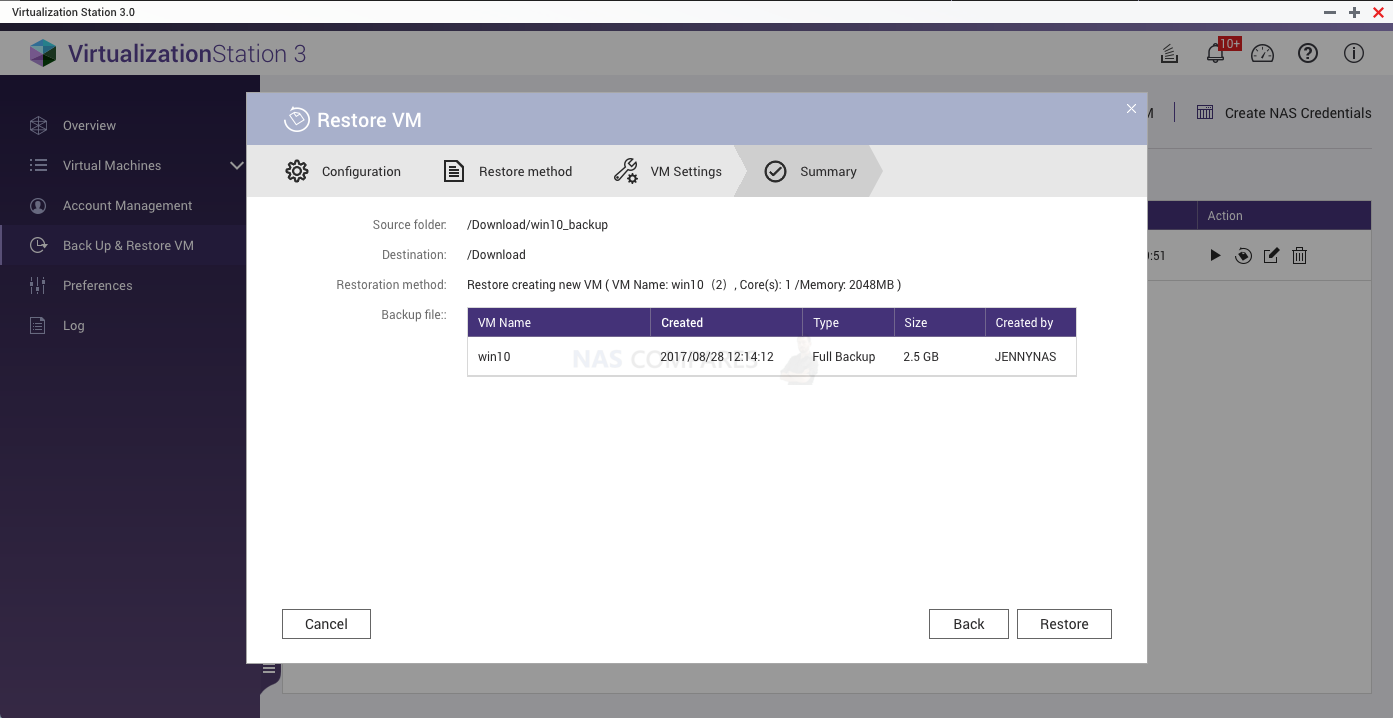
- If the VM cannot be started or it disappears, click “Restore VM” to restore a backed-up VM.
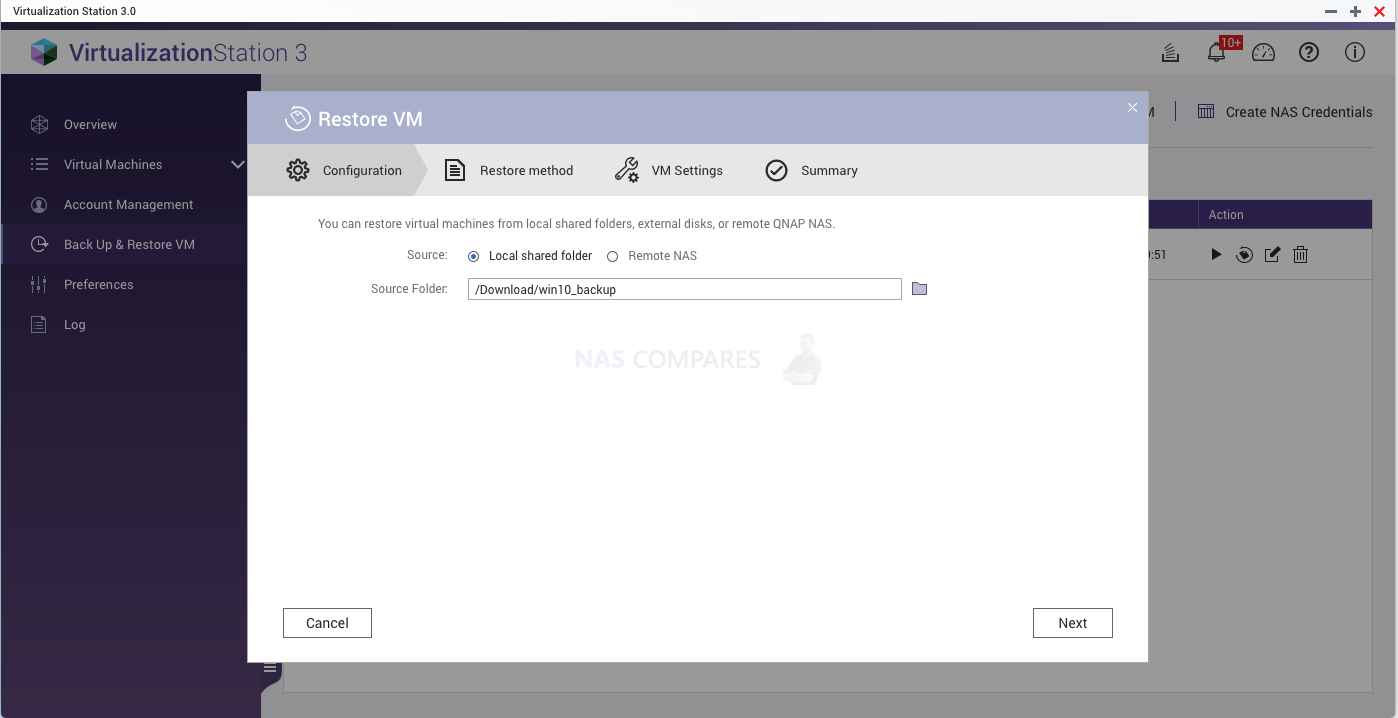
You can overwrite the existing VM or create a new VM.
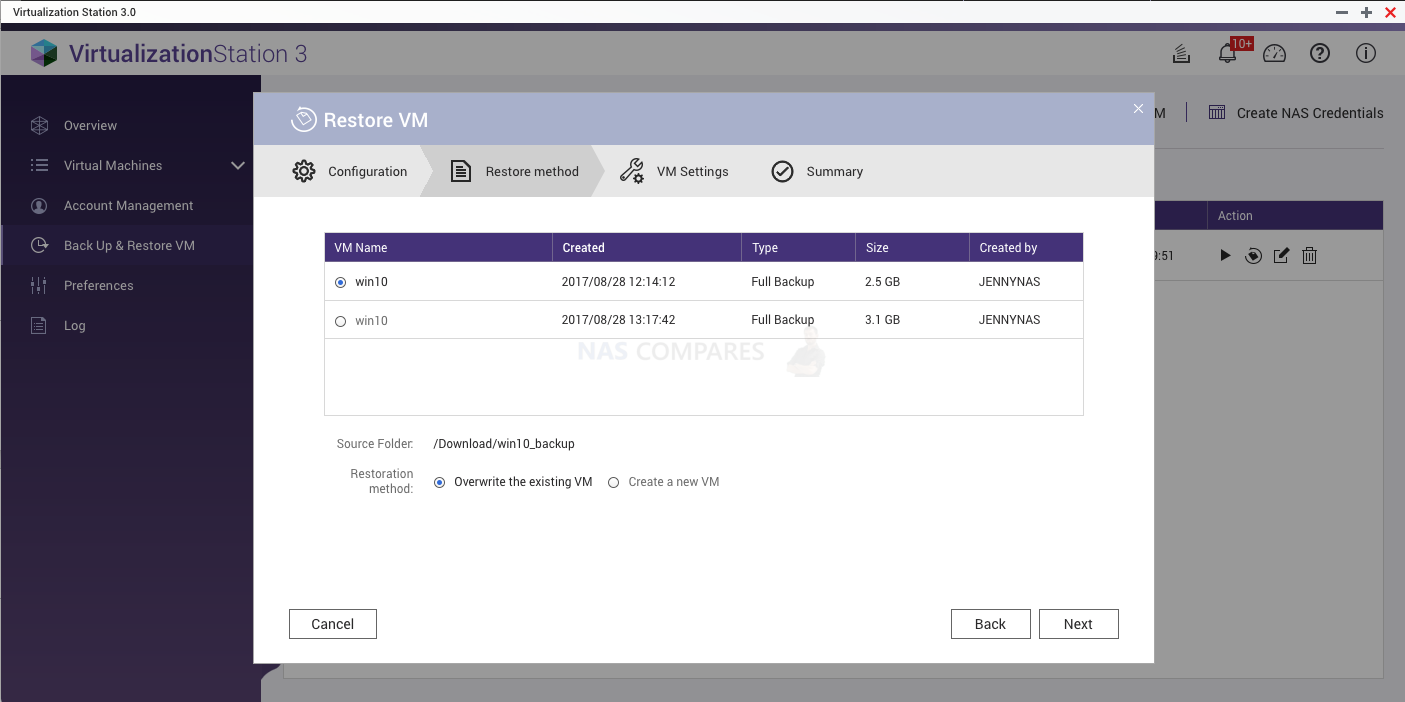
The VM will be restored to the state recorded by the backup file. Users can also create a VM from a backup file directly. This method shortens the VM creation process but deletes the backup after completion.


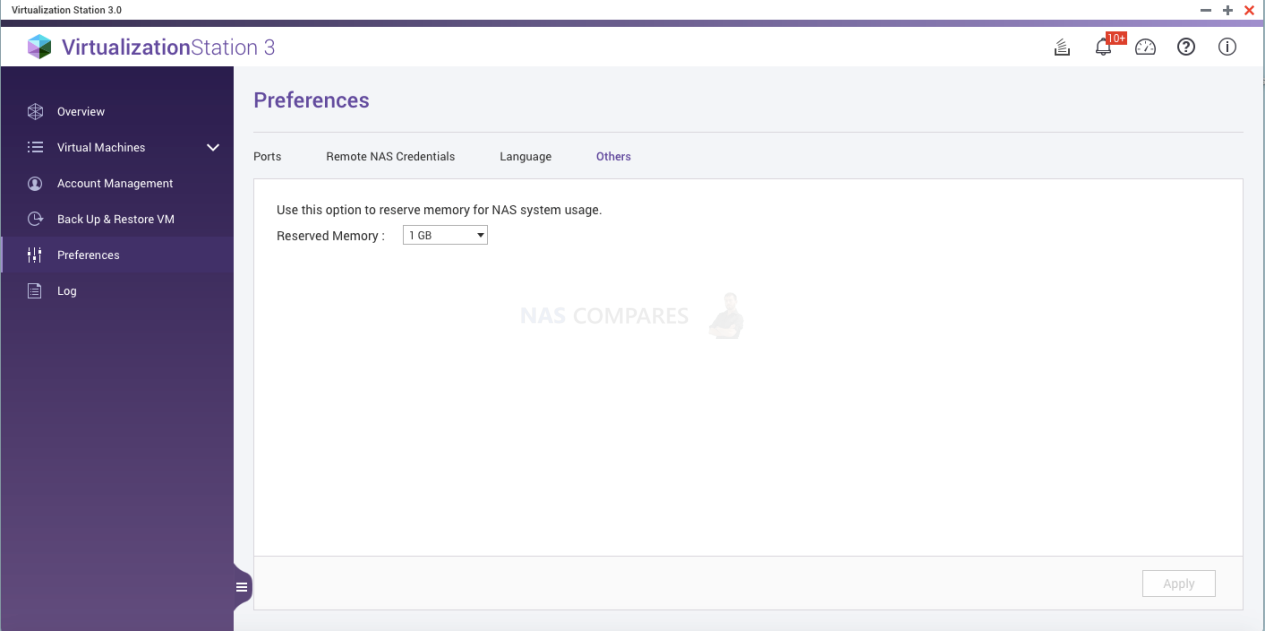
5. Preferences
There are four tabs in “Preferences”:
- Ports Settings
The default ports of “Web Server” and “Web Server (SSL)” are 8088, 8089 respectively. You can specify the ports used by Virtualization Station.

- Remote NAS Credentials
You can view or add NAS network information including the display name, IP address, and more.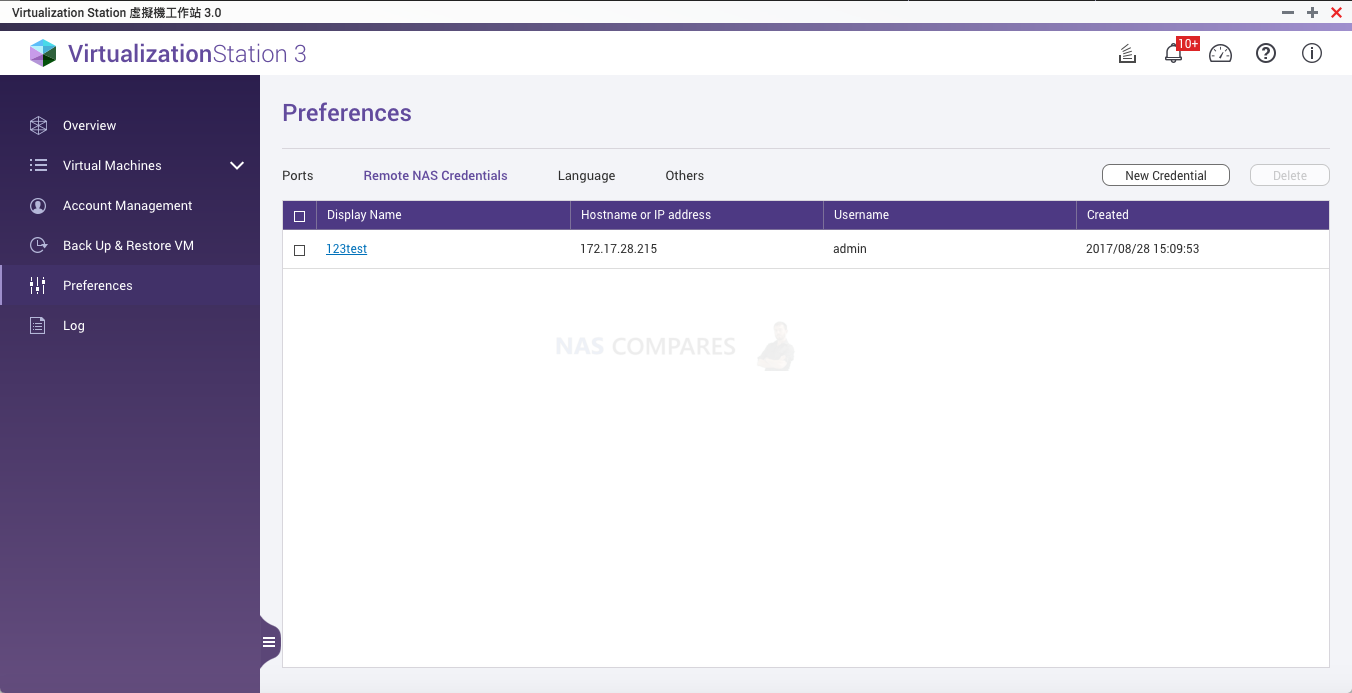
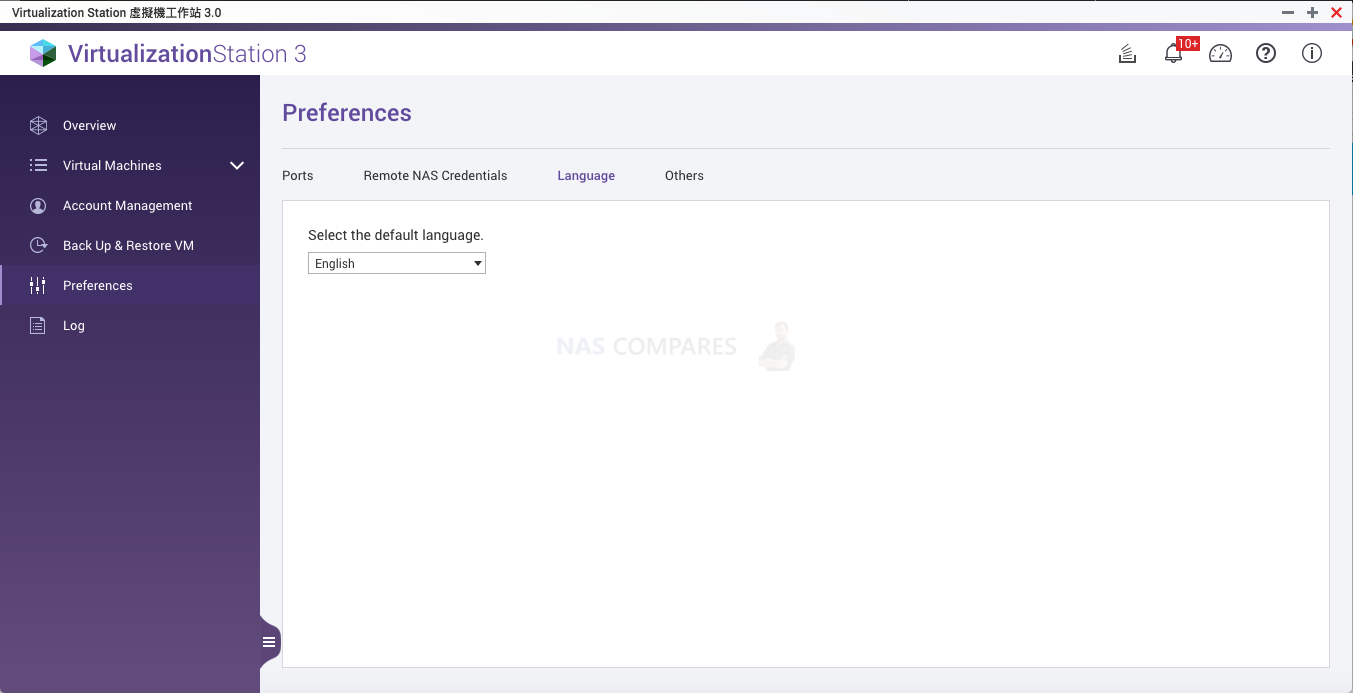
- Language
You can change the displayed language.
- Others
Users can set the reserved memory. This ensures that the NAS will have sufficient resources for system services.


6. Log
To check the system logs of the Virtualization Station, click ![]()

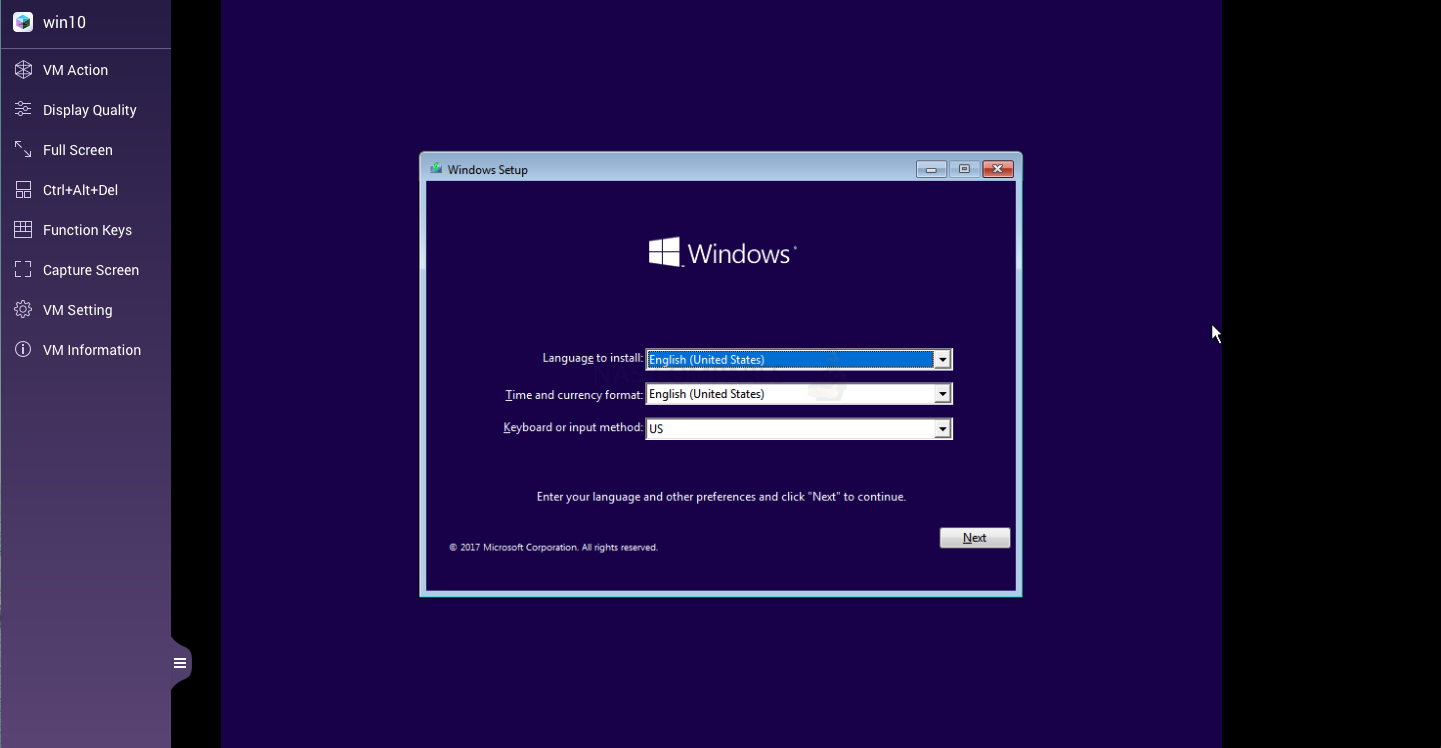
7. Console (HTML5)
The console is viewed after opening the VM.


- VM action: Suspend, reset, shutdown, force shutdown or take a snapshot.
- Display quality: Select the connection quality – High, Medium, Low and Very Low.
- Full screen: View the VM in full screen.
- Ctrl + Alt + Del
- Function keys: Users can open the keyboard here.
- Capture screen: Click and it will open the screenshot in the new browser.
- VM setting: Change VM settings.
- VM information: View the VM information.
That’s it, now you can access the virtual machine using Windows Remote Desktop Tool, Installing Teamviewer or any other remote access tool you’d like to try (or have pre-installed on your system). Or you can simply use the VM through the browser tab if you’d like instead, but the refresh rate and response time will not be as fast, due to the fractionally higher latency.
A Quick Question to You – Yes, you reading this!
If you plan on buying your NAS Drive the links below will take you to some Synology NAS Options


🔒 Join Inner Circle
Get an alert every time something gets added to this specific article!
This description contains links to Amazon. These links will take you to some of the products mentioned in today's content. As an Amazon Associate, I earn from qualifying purchases. Visit the NASCompares Deal Finder to find the best place to buy this device in your region, based on Service, Support and Reputation - Just Search for your NAS Drive in the Box Below
Need Advice on Data Storage from an Expert?
Finally, for free advice about your setup, just leave a message in the comments below here at NASCompares.com and we will get back to you.


 |
 |


