Jonsbo N5 NAS Case Review
Ever since we first found out that Jonsbo were launching a new 12-bay storage desktop chassis for NAS use, we’ve been eagerly awaiting the chance to get our hands on the final product and find out whether it can really live up to the prototype unit we saw at Computex 2024 in the summer. Jonsbo already has an established range of NAS-focused enclosures with the N1, N2, N3, and N4—but none of these solutions seemingly ticked all the boxes for most users. The Jonsbo N5 is designed to be the most adaptable and scalable DIY NAS case in desktop that the brand has ever developed, and it’s easy to see why. Supporting up to 12 hard drives, four SSDs, practically any motherboard on the market, massive PCIe card support, and massive CPU cooler support—the N5 is an absolute behemoth. But is there such a thing as going too overkill when it comes to your own DIY server? Today? I want to review the N5 and help you decide whether this do-it-yourself server enclosure deserves your money and your data!
You can watch the full YouTube Review of the Jonsbo N5 NAS Case HERE on NASCompares

Note – You can see the comparison of the Jonsbo N2, N3, N4 and N5 in this article HERE
|
Where to Buy? #1 Jonsbo N5 (Aliexpress $195) – HERE #2 Jonsbo N5 (Aliexpress $300) – HERE #3 Jonsbo N5 (Aliexpress $192) – HERE Jonsbo N5 Coming to Amazon Soon – HERE |
Jonsbo N5 Review – Quick Conclusion

I’m really impressed with the Jonsbo N5! Having experimented with DIY NAS cases for years, I’m reluctant to label any one case as the “ultimate NAS case,” but the N5 comes remarkably close. While it may not be the smallest or the most discreet option, and those hard drive handles can be frustrating, in almost every other way, it’s the ideal NAS case for DIY server builds. If you’ve got the space, you won’t find a more scalable and upgradable NAS solution on the market in 2024. Though it’s not for the faint of heart, if you’re serious about setting up a long-term server solution that you can scale in any direction over time, the N5 will have you covered for years to come. Jonsbo has clearly put thought into refining this product based on past feedback, and while I expect someone to eventually create a hard drive tray mod to fix the handle issue, the case is otherwise unbeatable. Plus, considering the N5 is only about $80-100 more expensive than the N2, N3, and N4, yet far more versatile and scalable, it’s undoubtedly a fantastic choice!
 These Offers are Checked Daily
|

Jonsbo N5 Review – Packaging
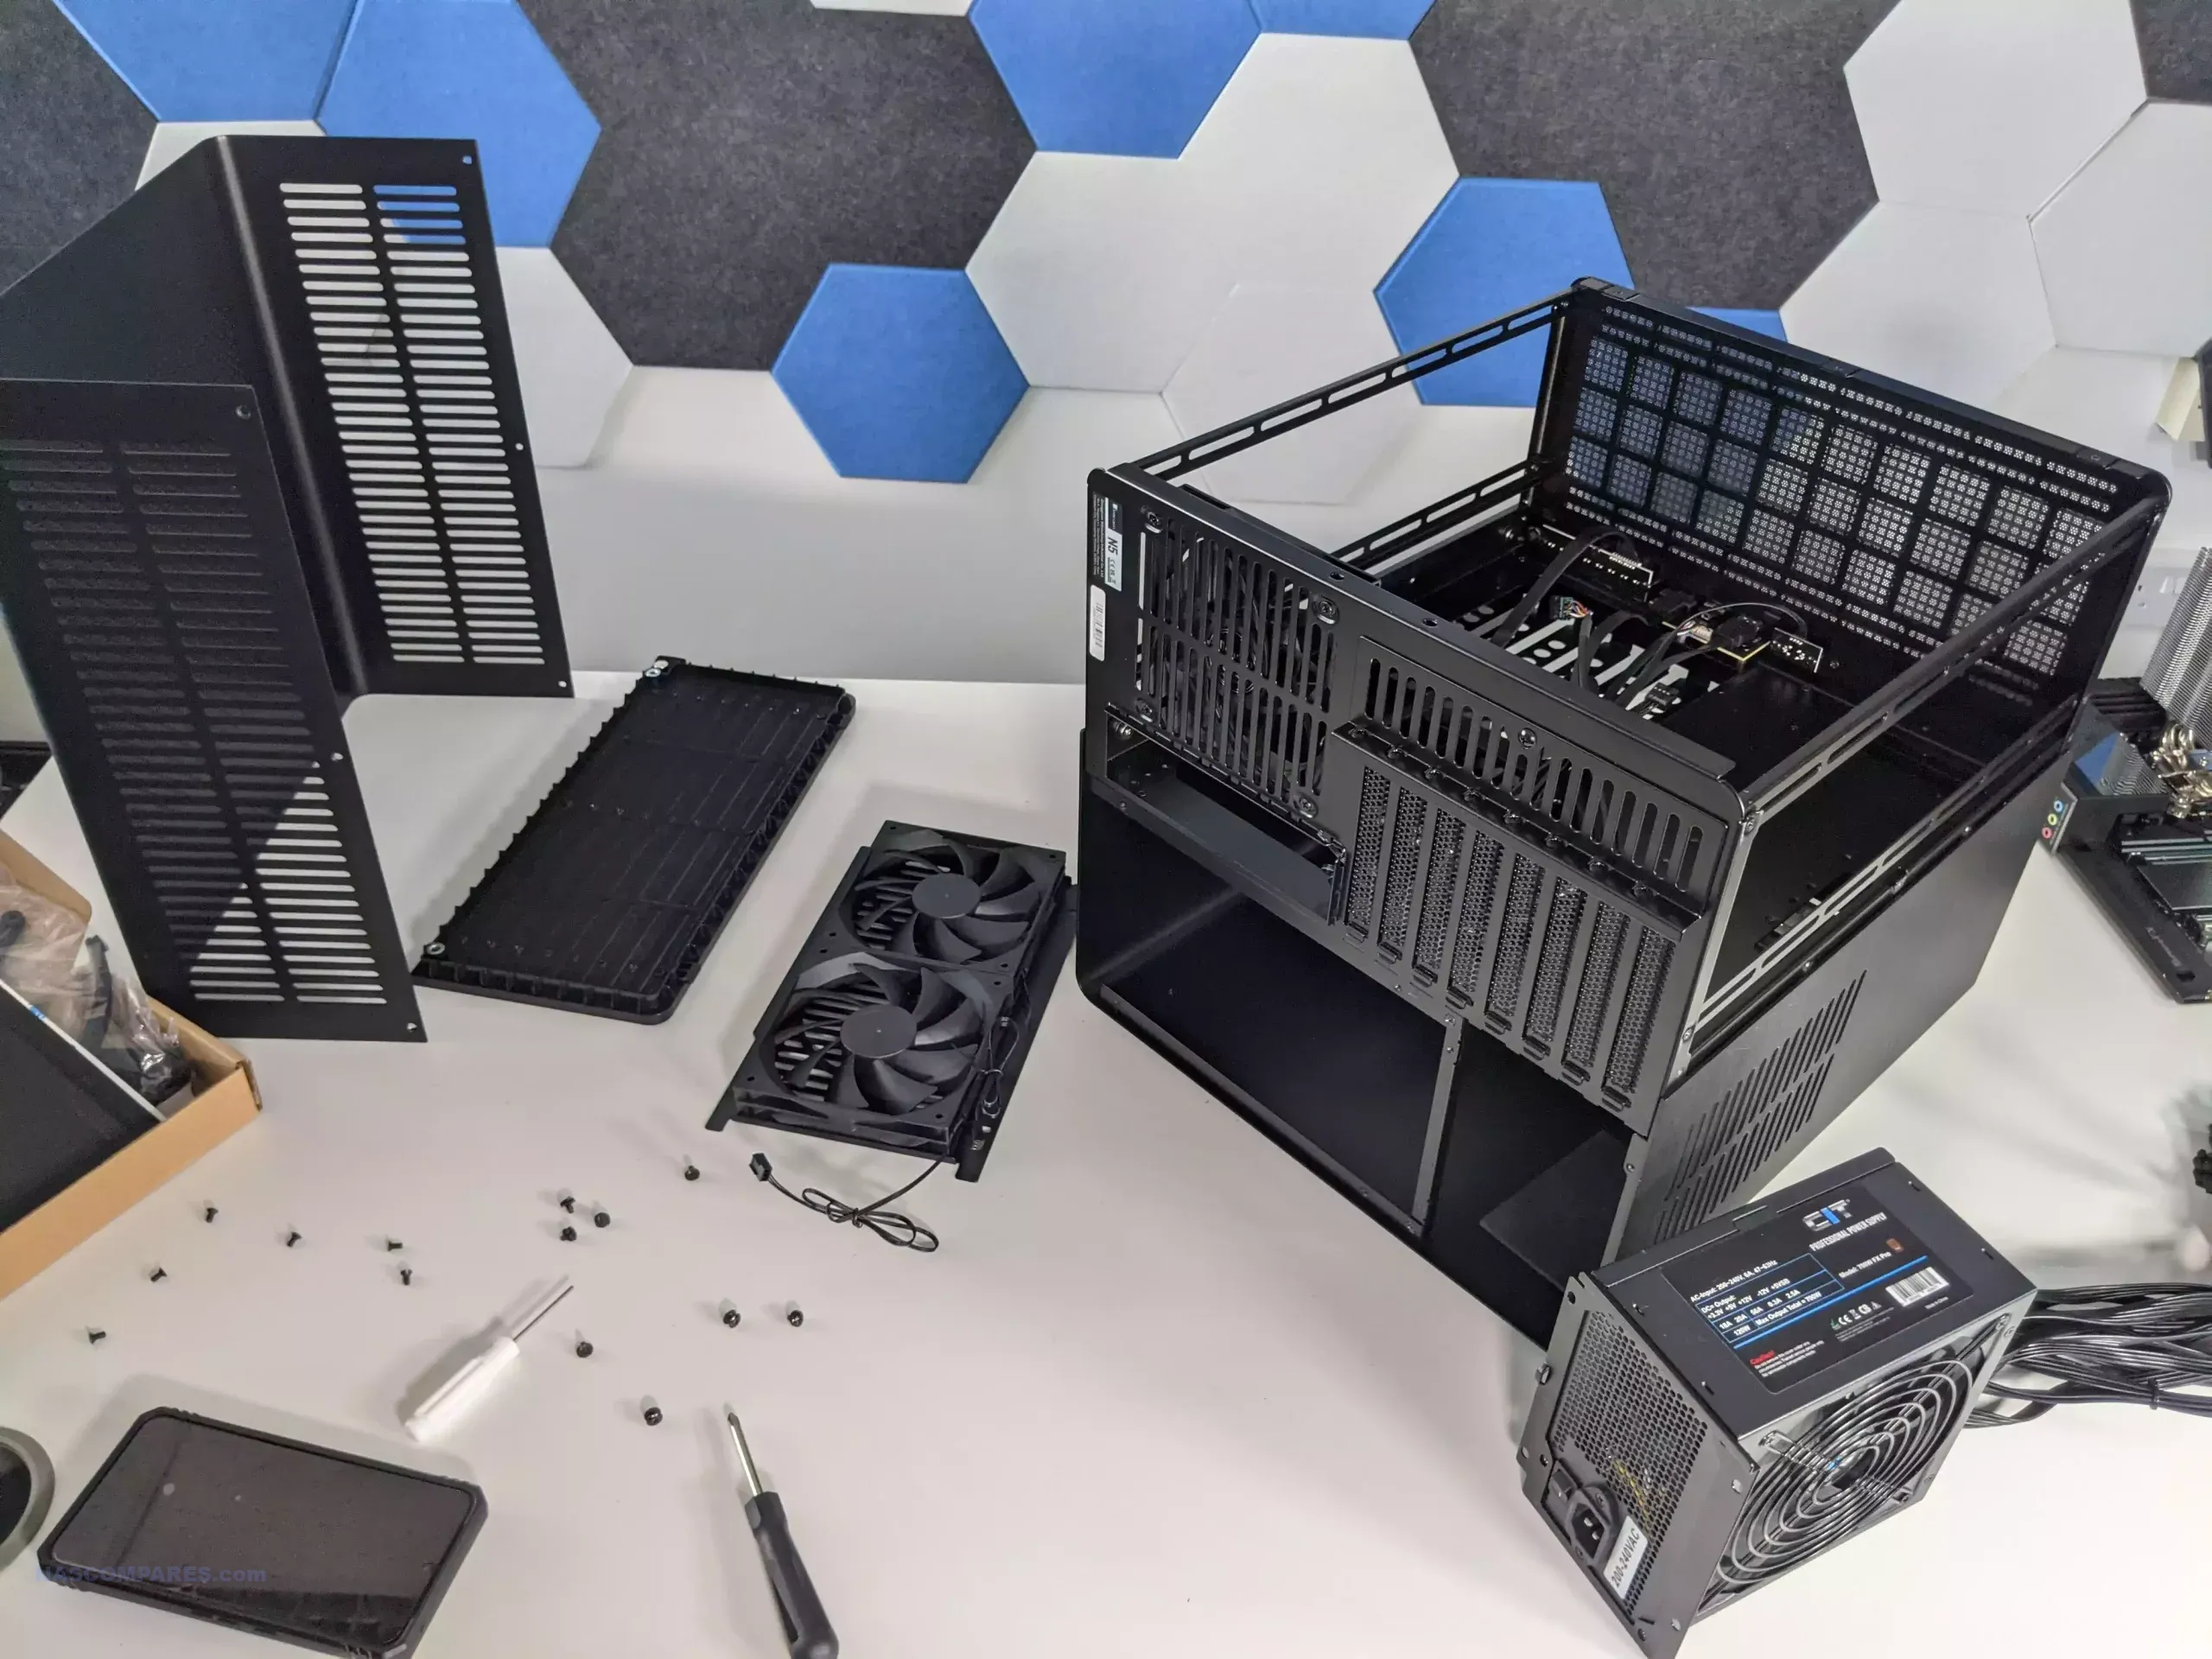
Unsurprisingly, the packaging that the N5 arrives in is absolutely enormous. The enclosure itself is already pretty darn large; this case manages to be taller than most gamer PC cases but also wider too. The external casing, however, is not your typical brown faceless box and actually is adorned with system-specific details on all sides.
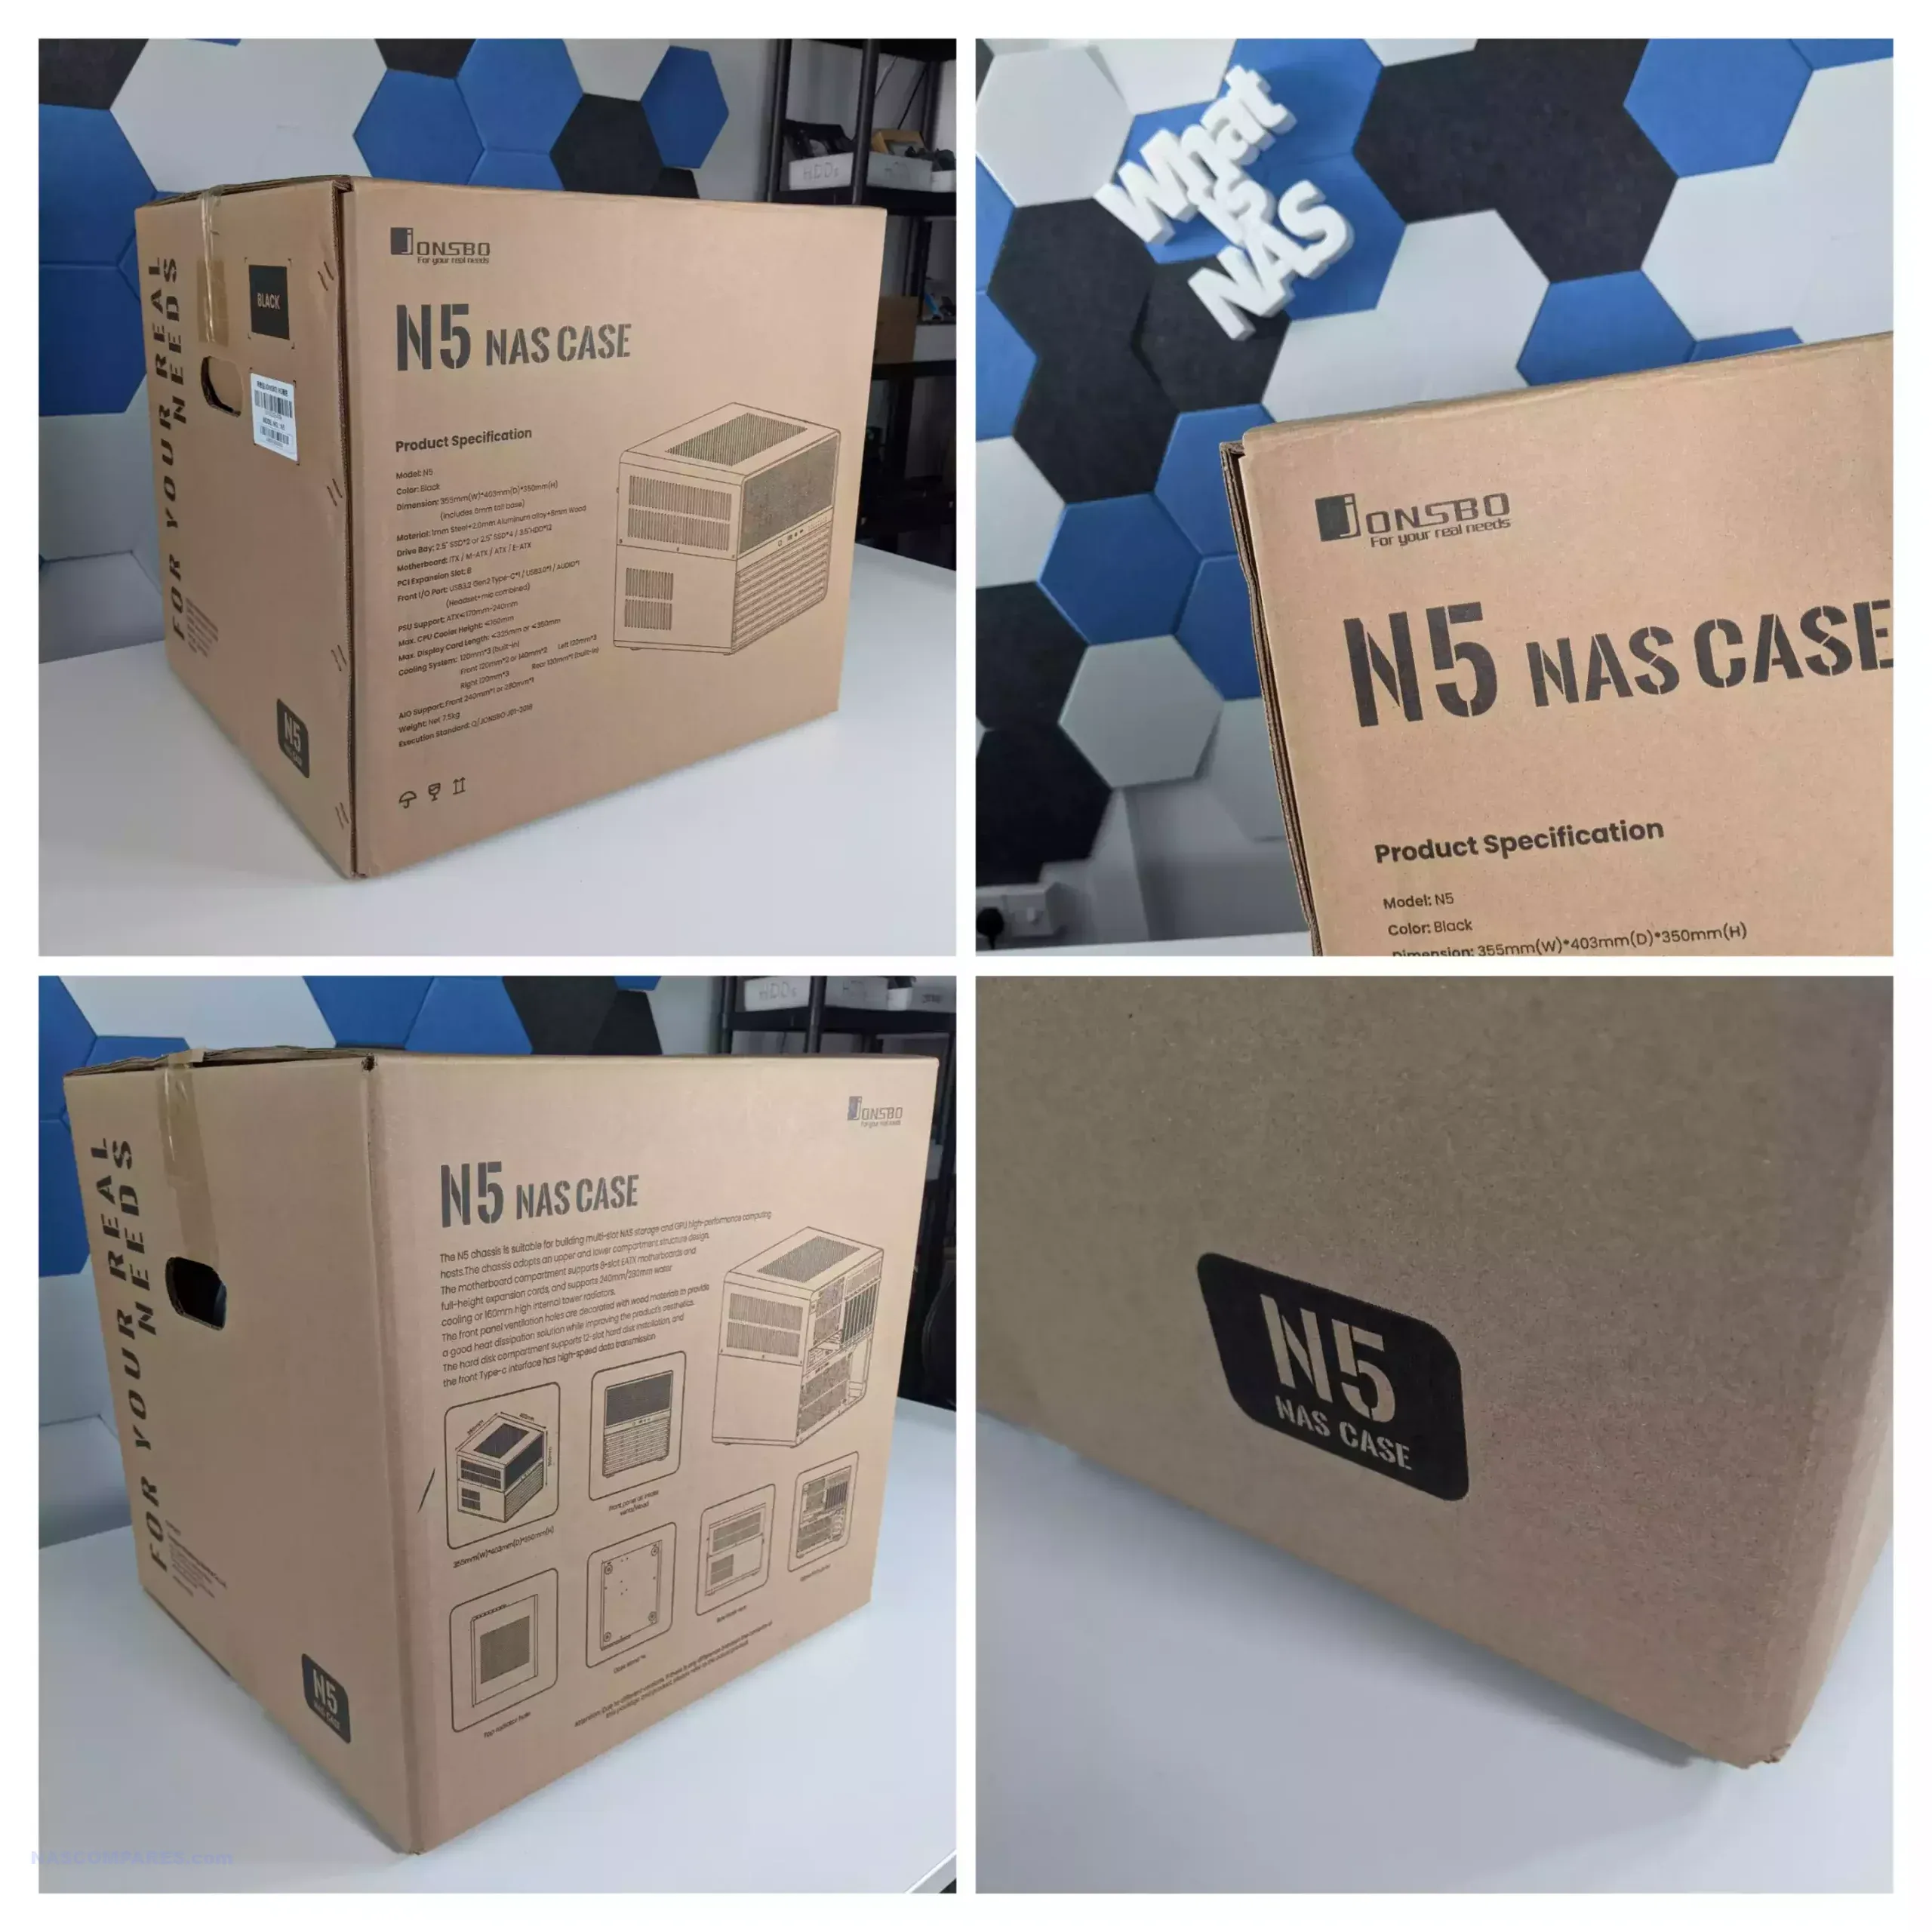

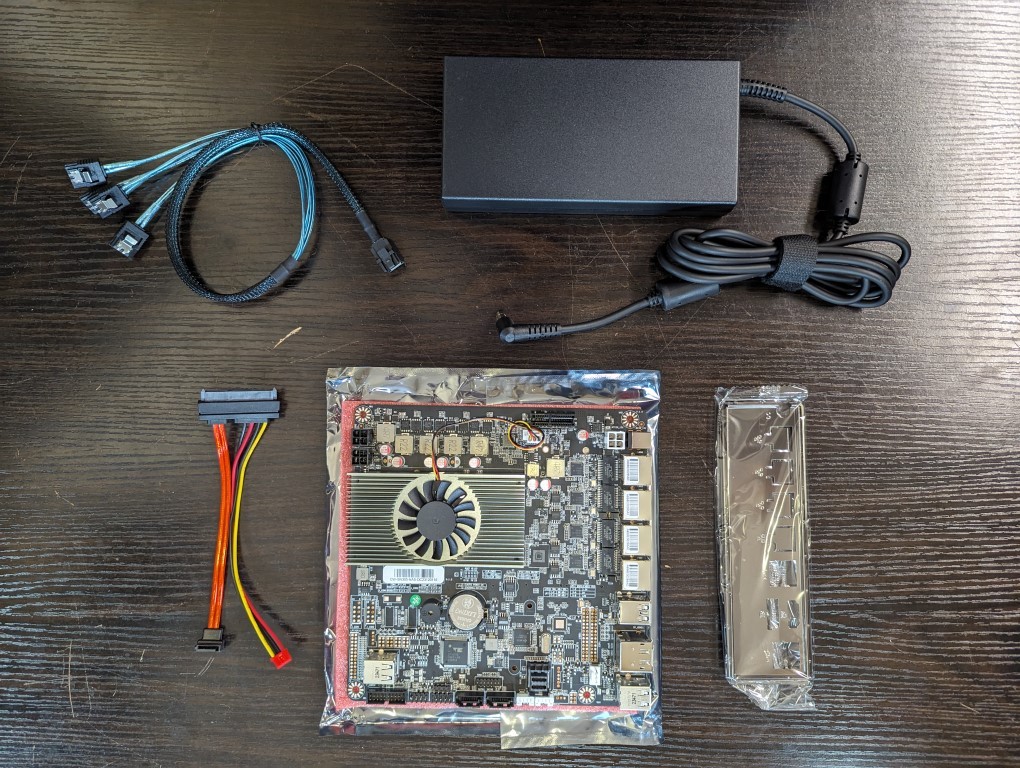
The contents of the system arrive via the main enclosure itself encased in thick foam on all sides to protect the device from damage by shock or motion in transit. The accessory kit that the system arrives with is in its own dedicated box, and although I question the sustainability and recyclability of some of these materials, there’s no arguing that the system is pretty well protected in transit.
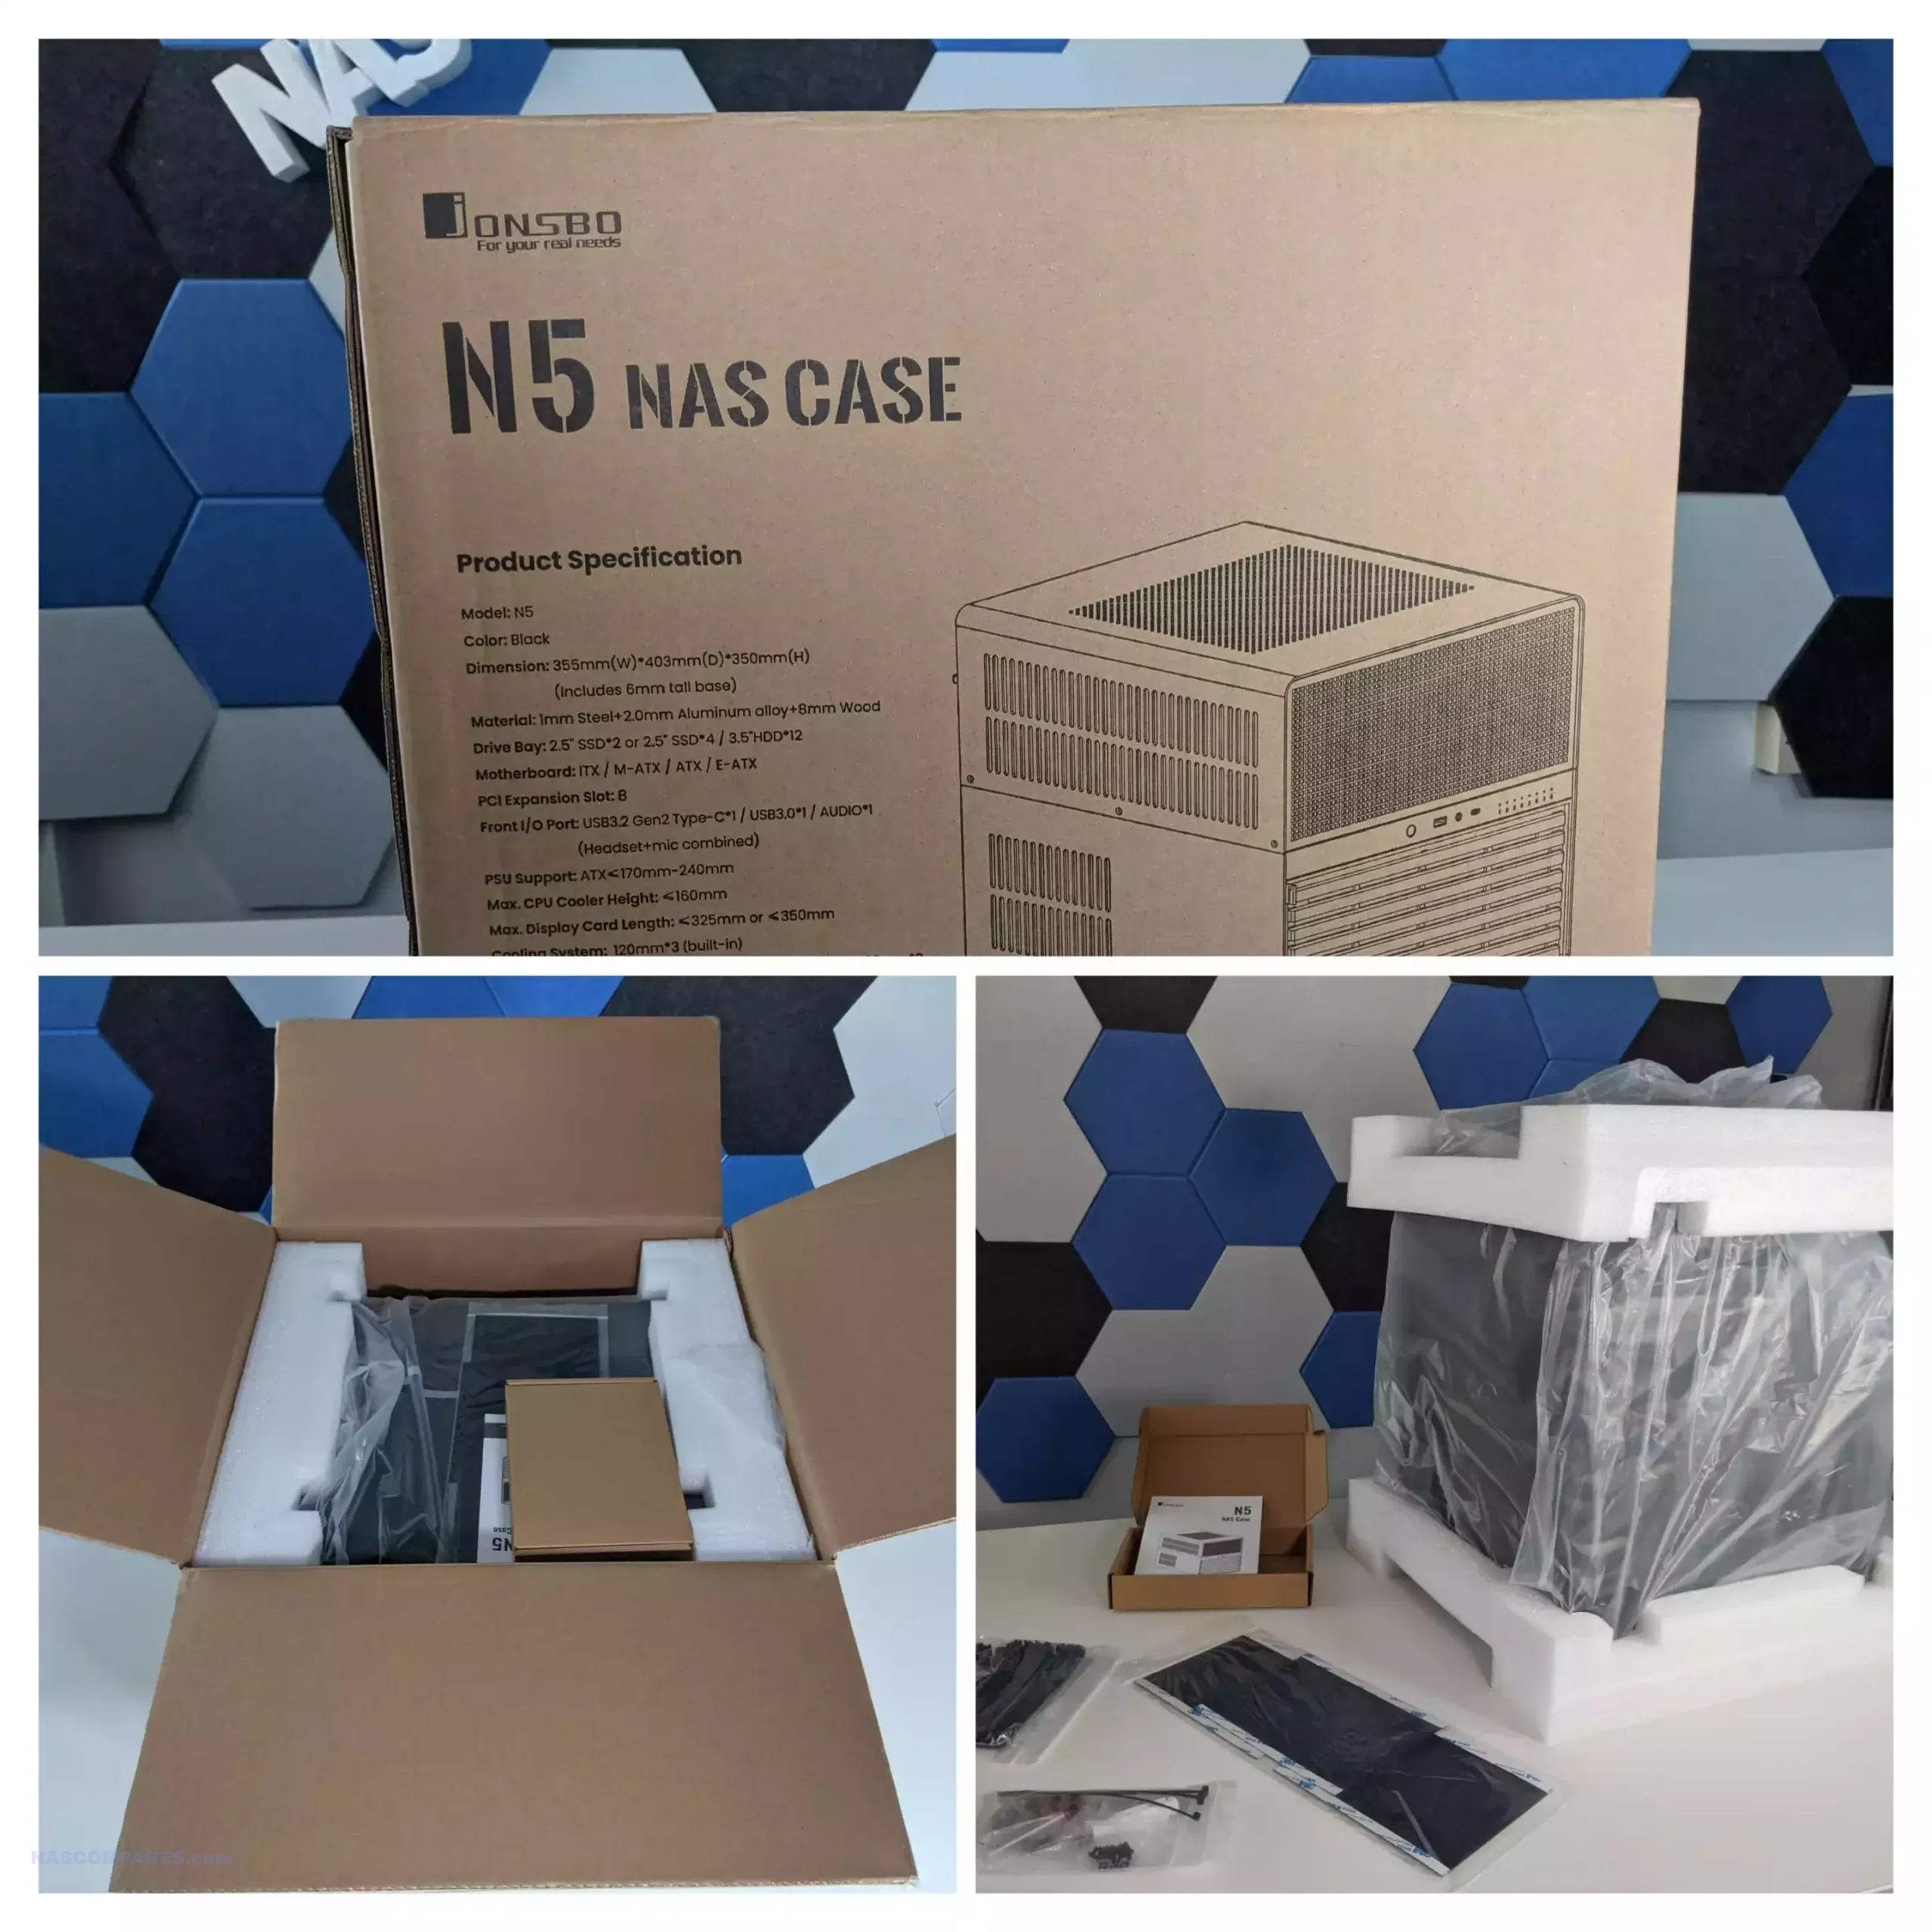
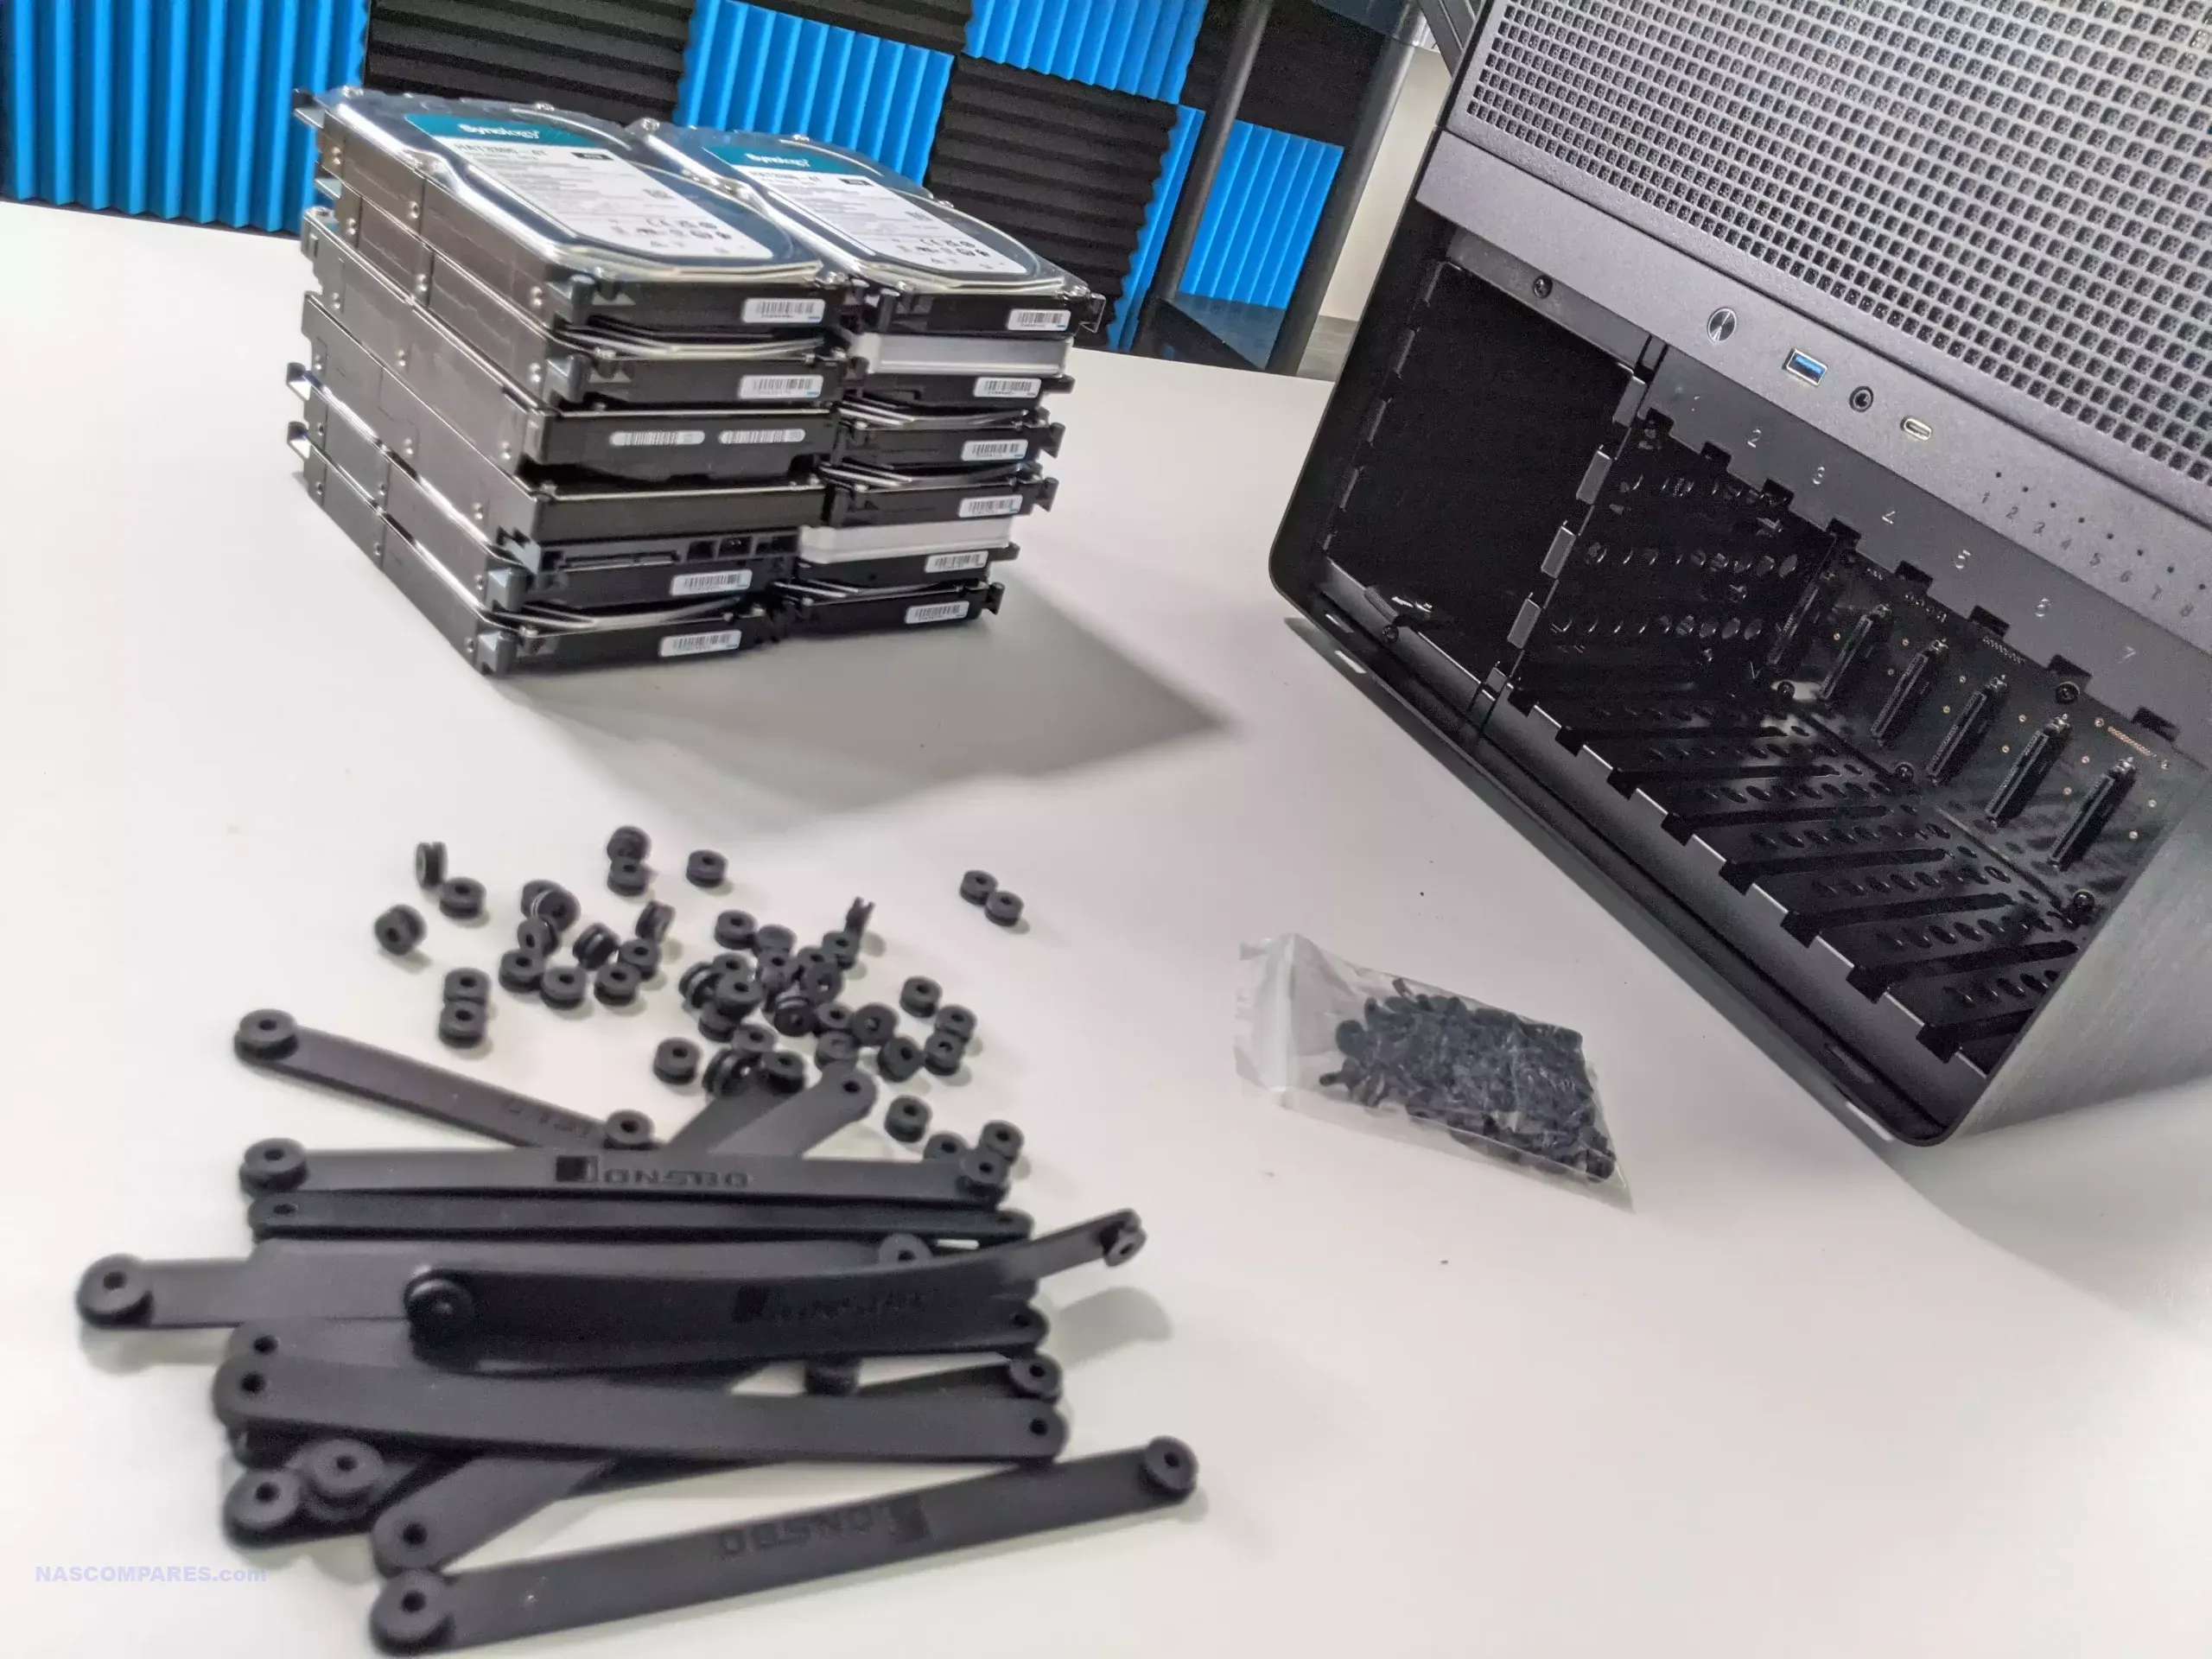
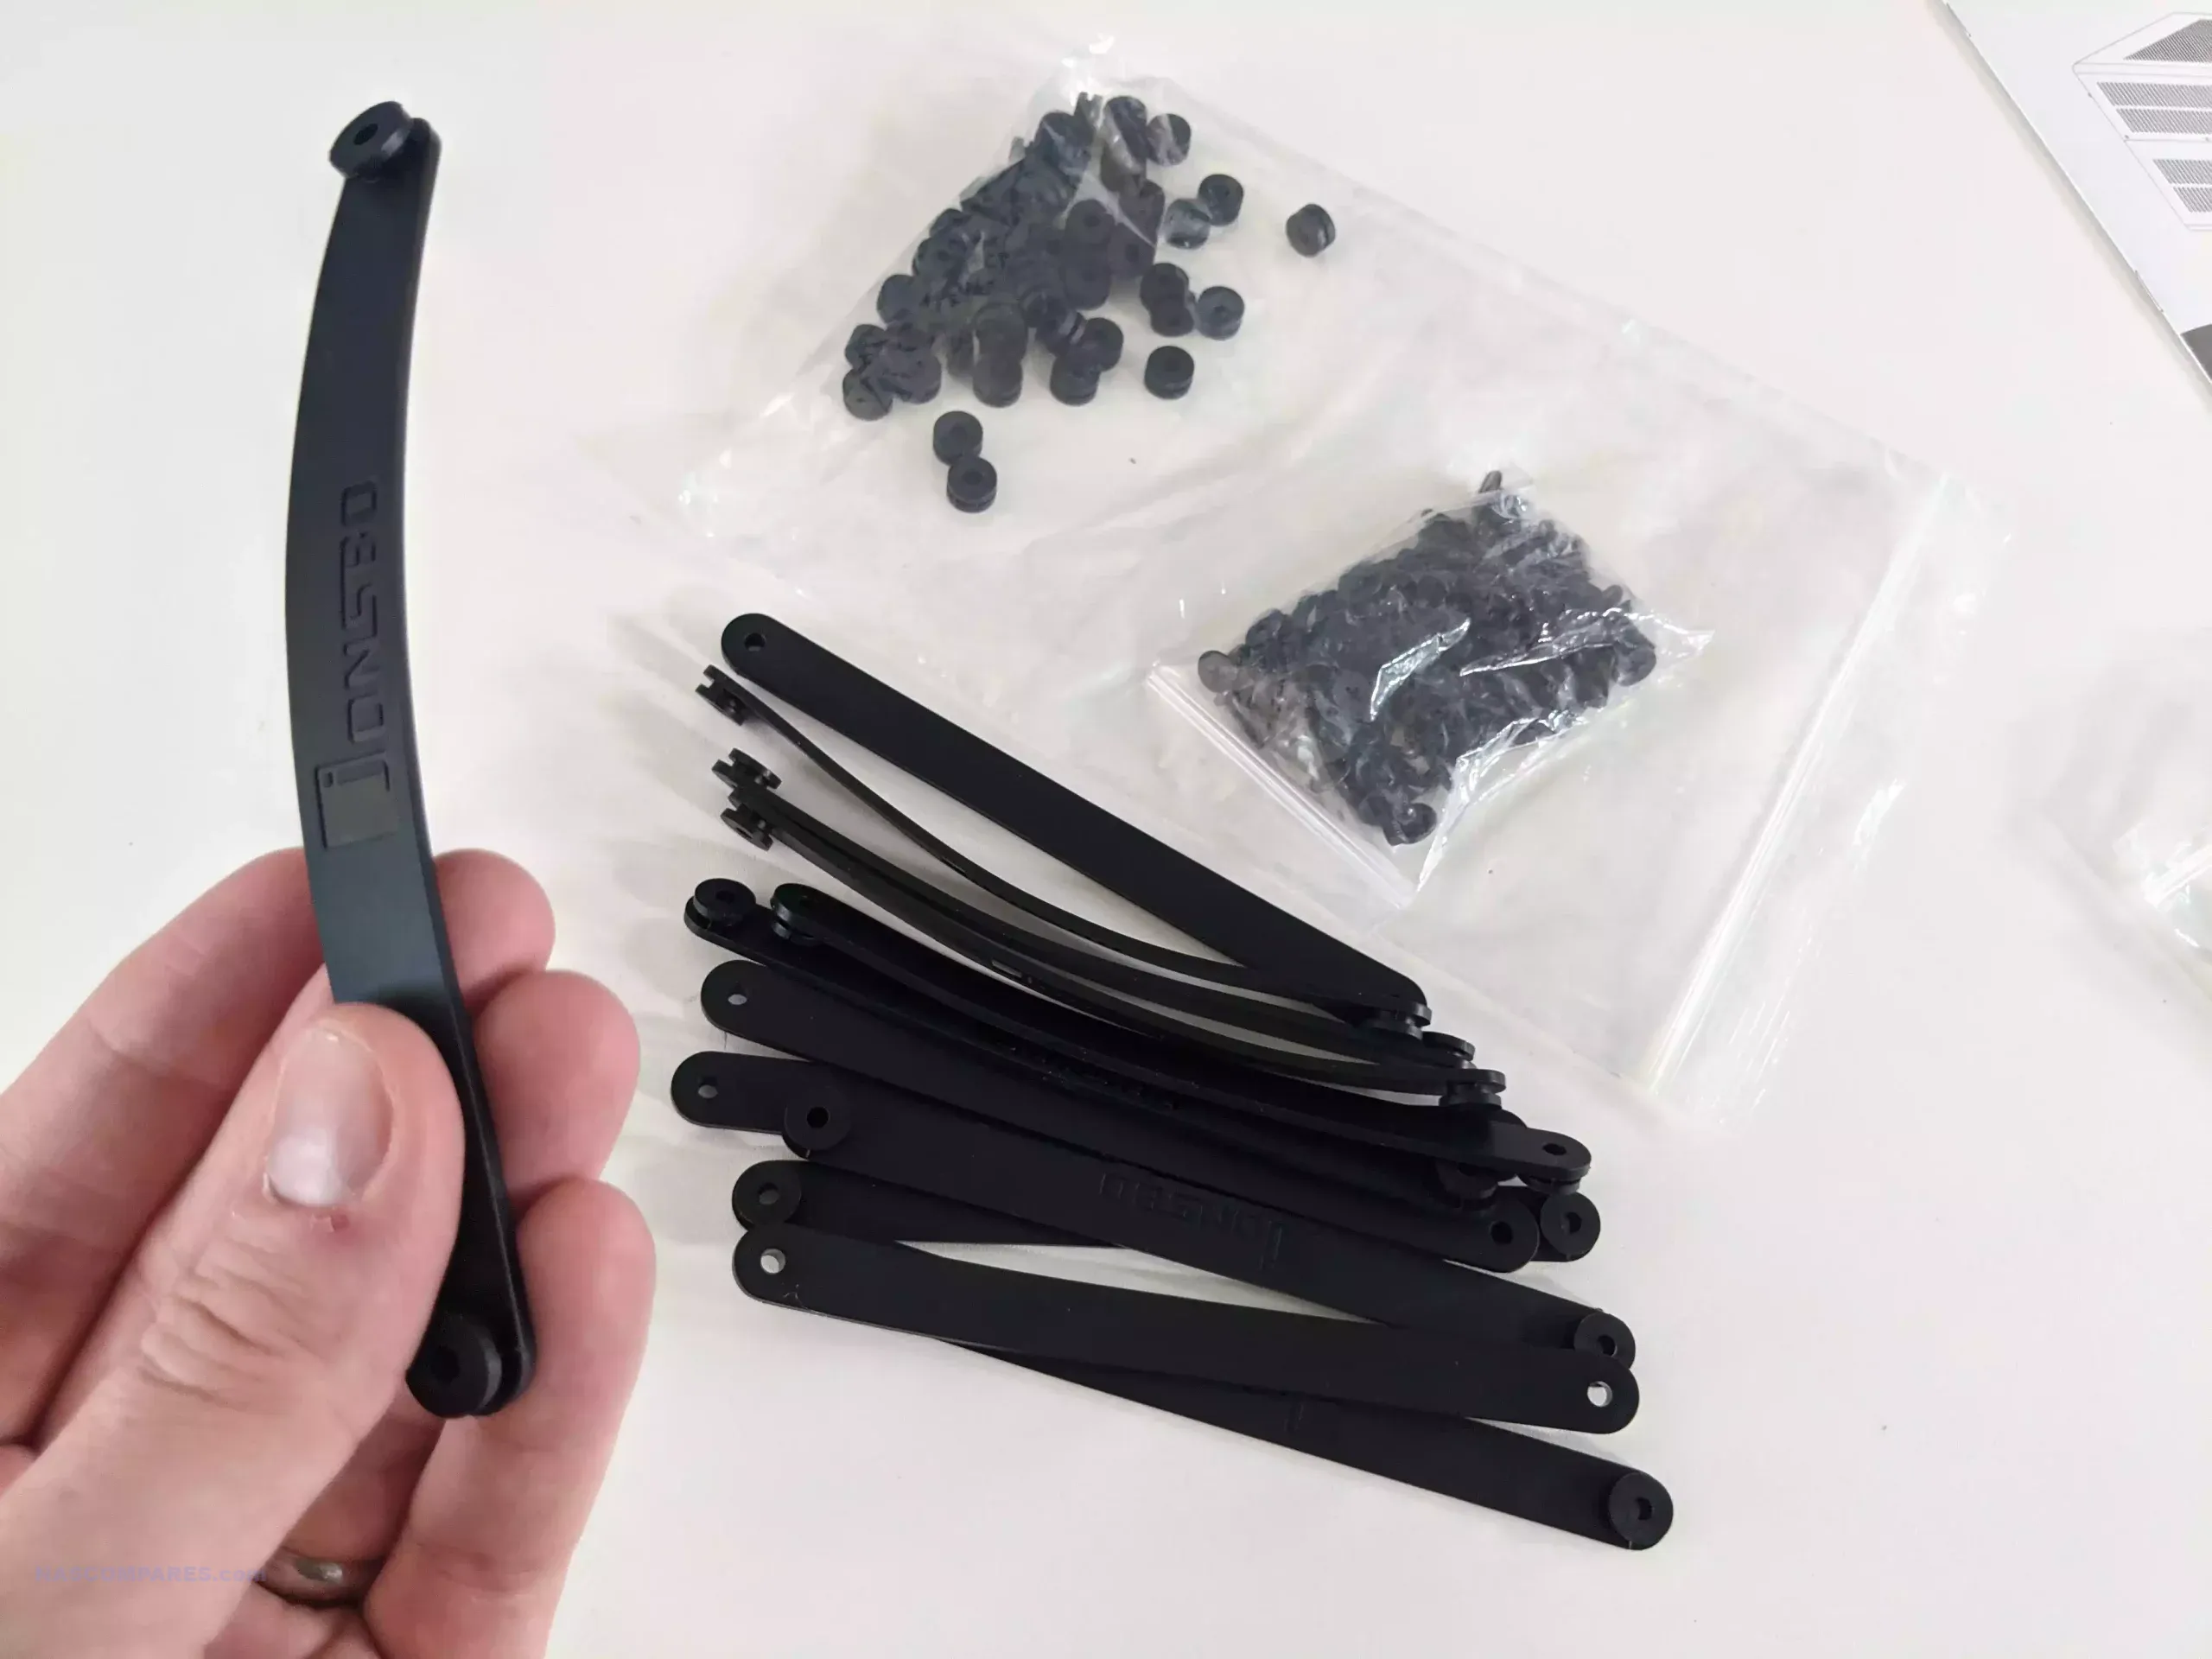
It’s also worth highlighting that, despite the fact that the N5 arrives as a case only, it arrives with a pretty extensive accessory kit included. Indeed, although you obviously have to get your own CPU+Mobo+RAM+storage+PSU+media, everything else you’re going to need is included when constructing the system. The kit includes extra tray accessories, extra screws, extra cable ties, and a couple of screwdrivers for dismantling and constructing the entire system enclosure.
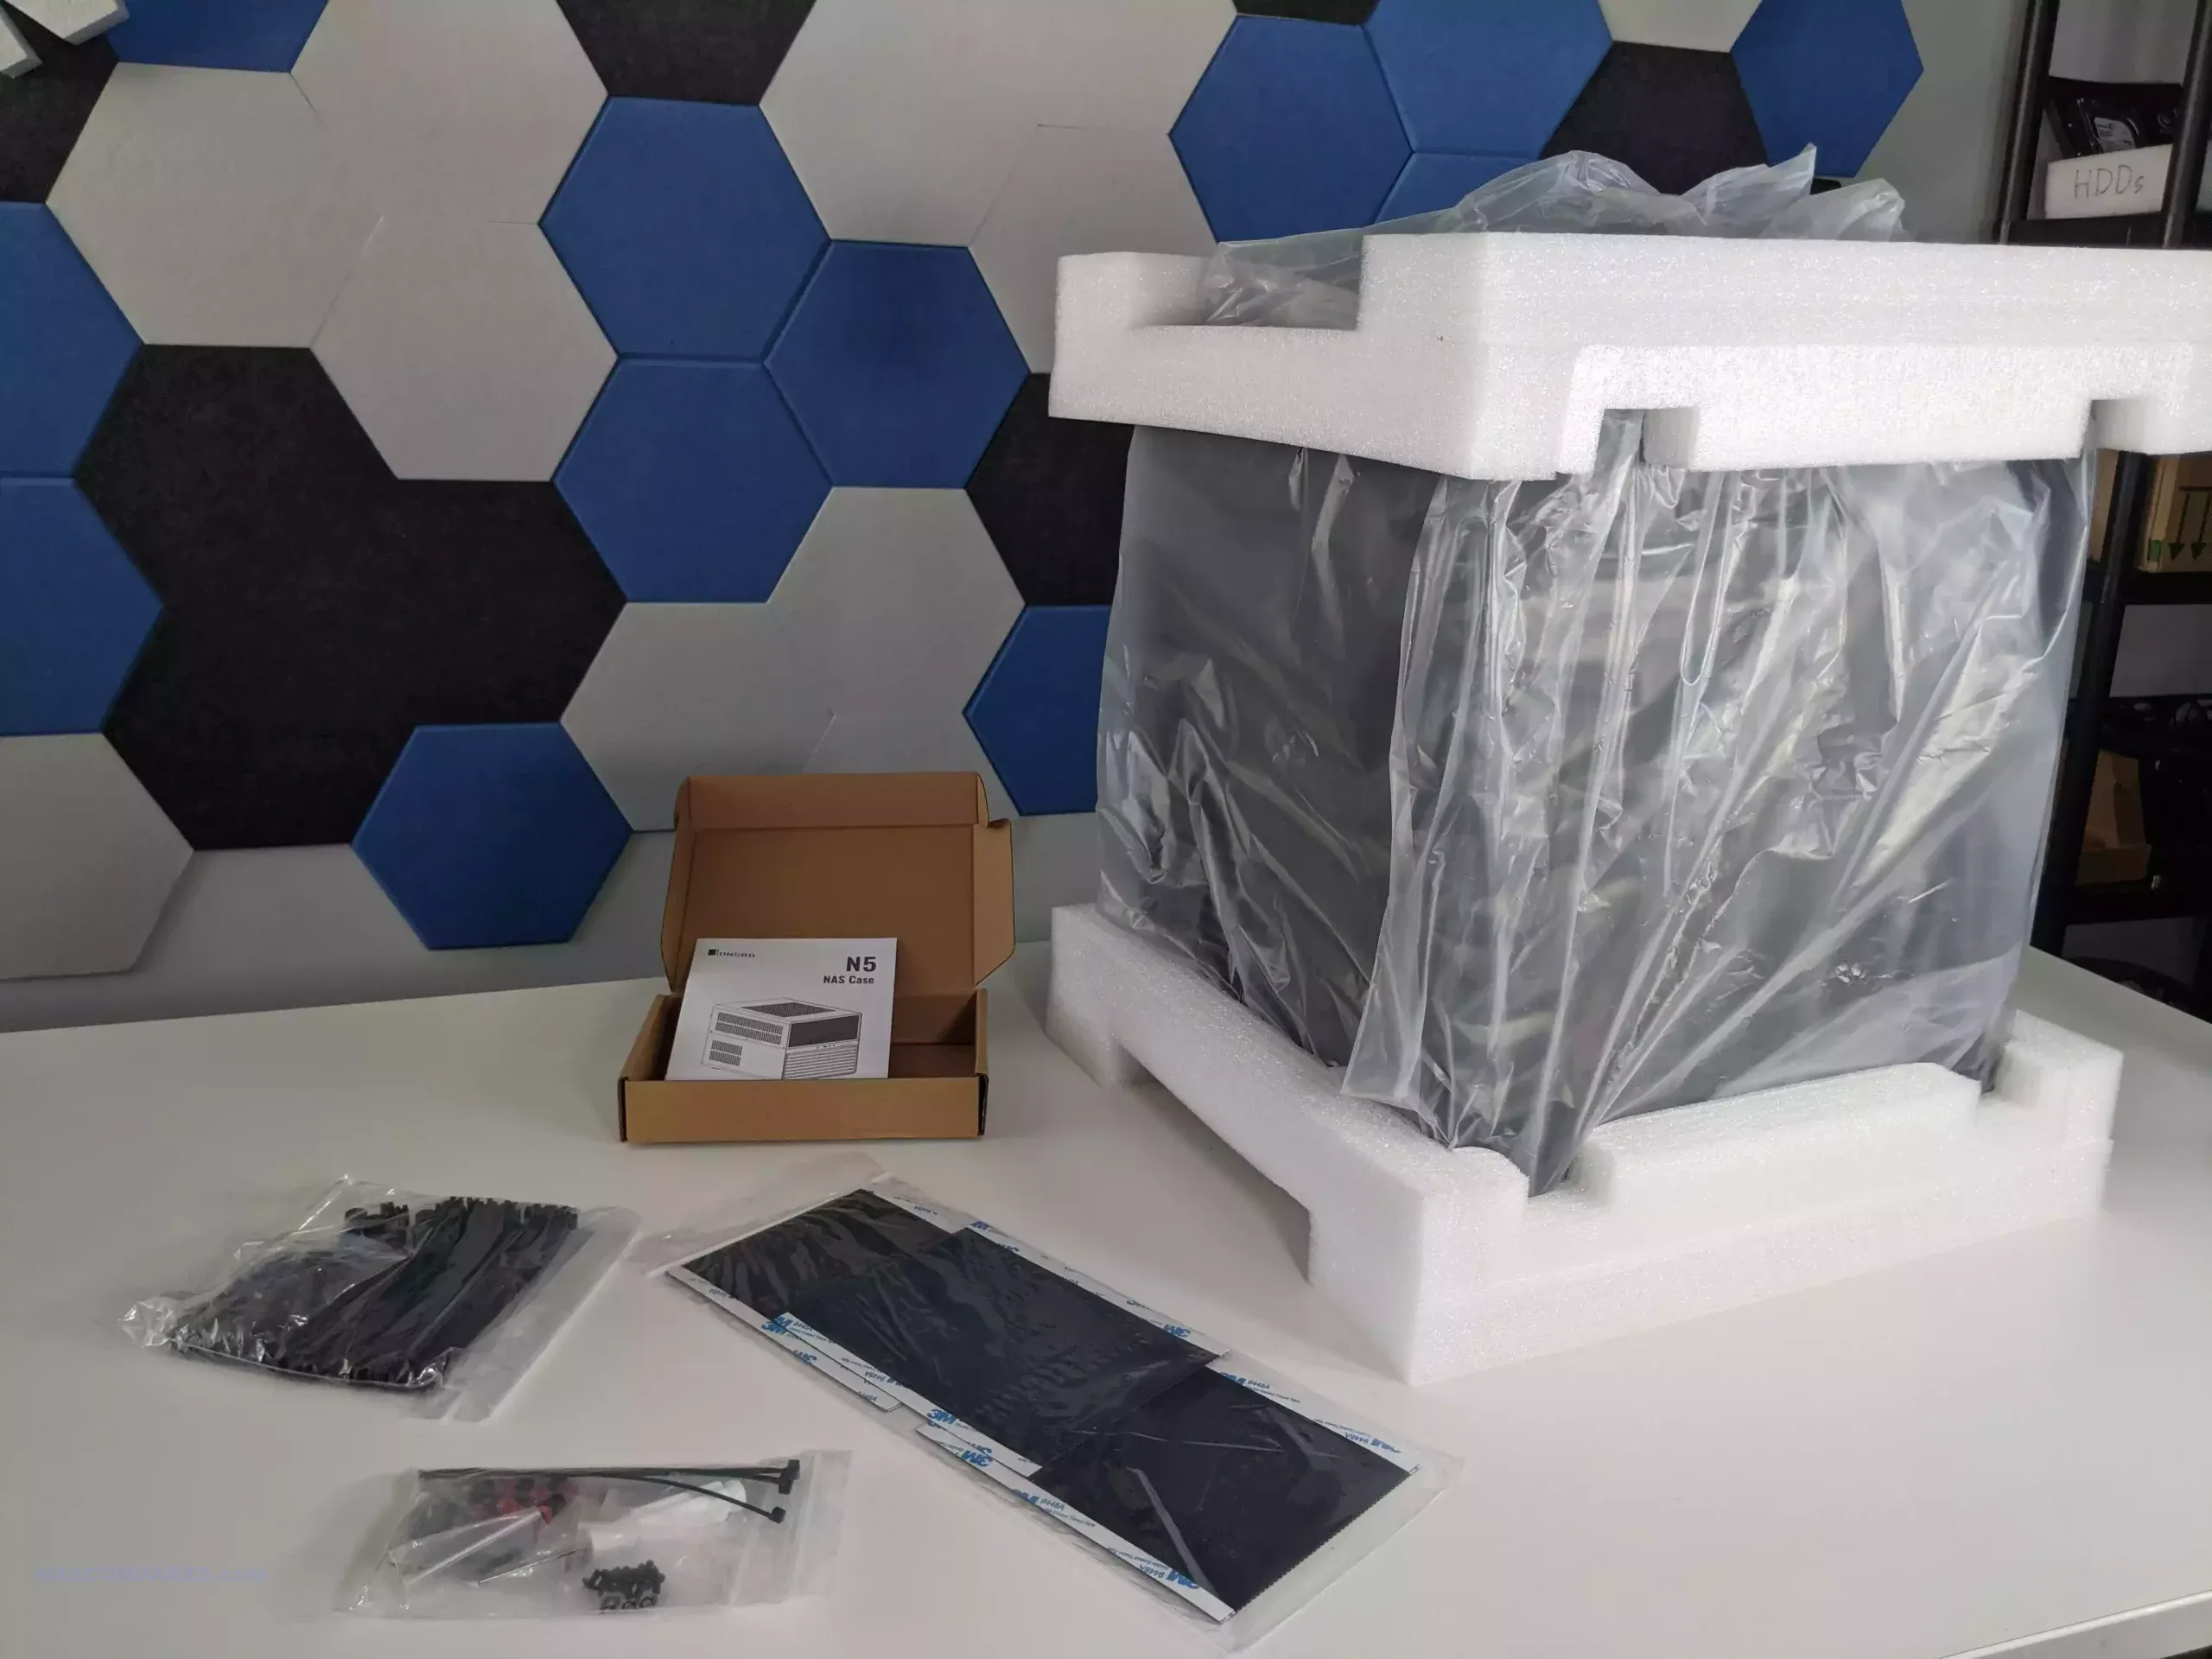
In terms of screws, the kit includes 2.5-inch screws for installing 2.5-inch media into the external framework, screws and grommets for the individual 3.5-inch drive media, screws and mounts for the motherboard and extra cooling systems, and additional washers for each screw kit.

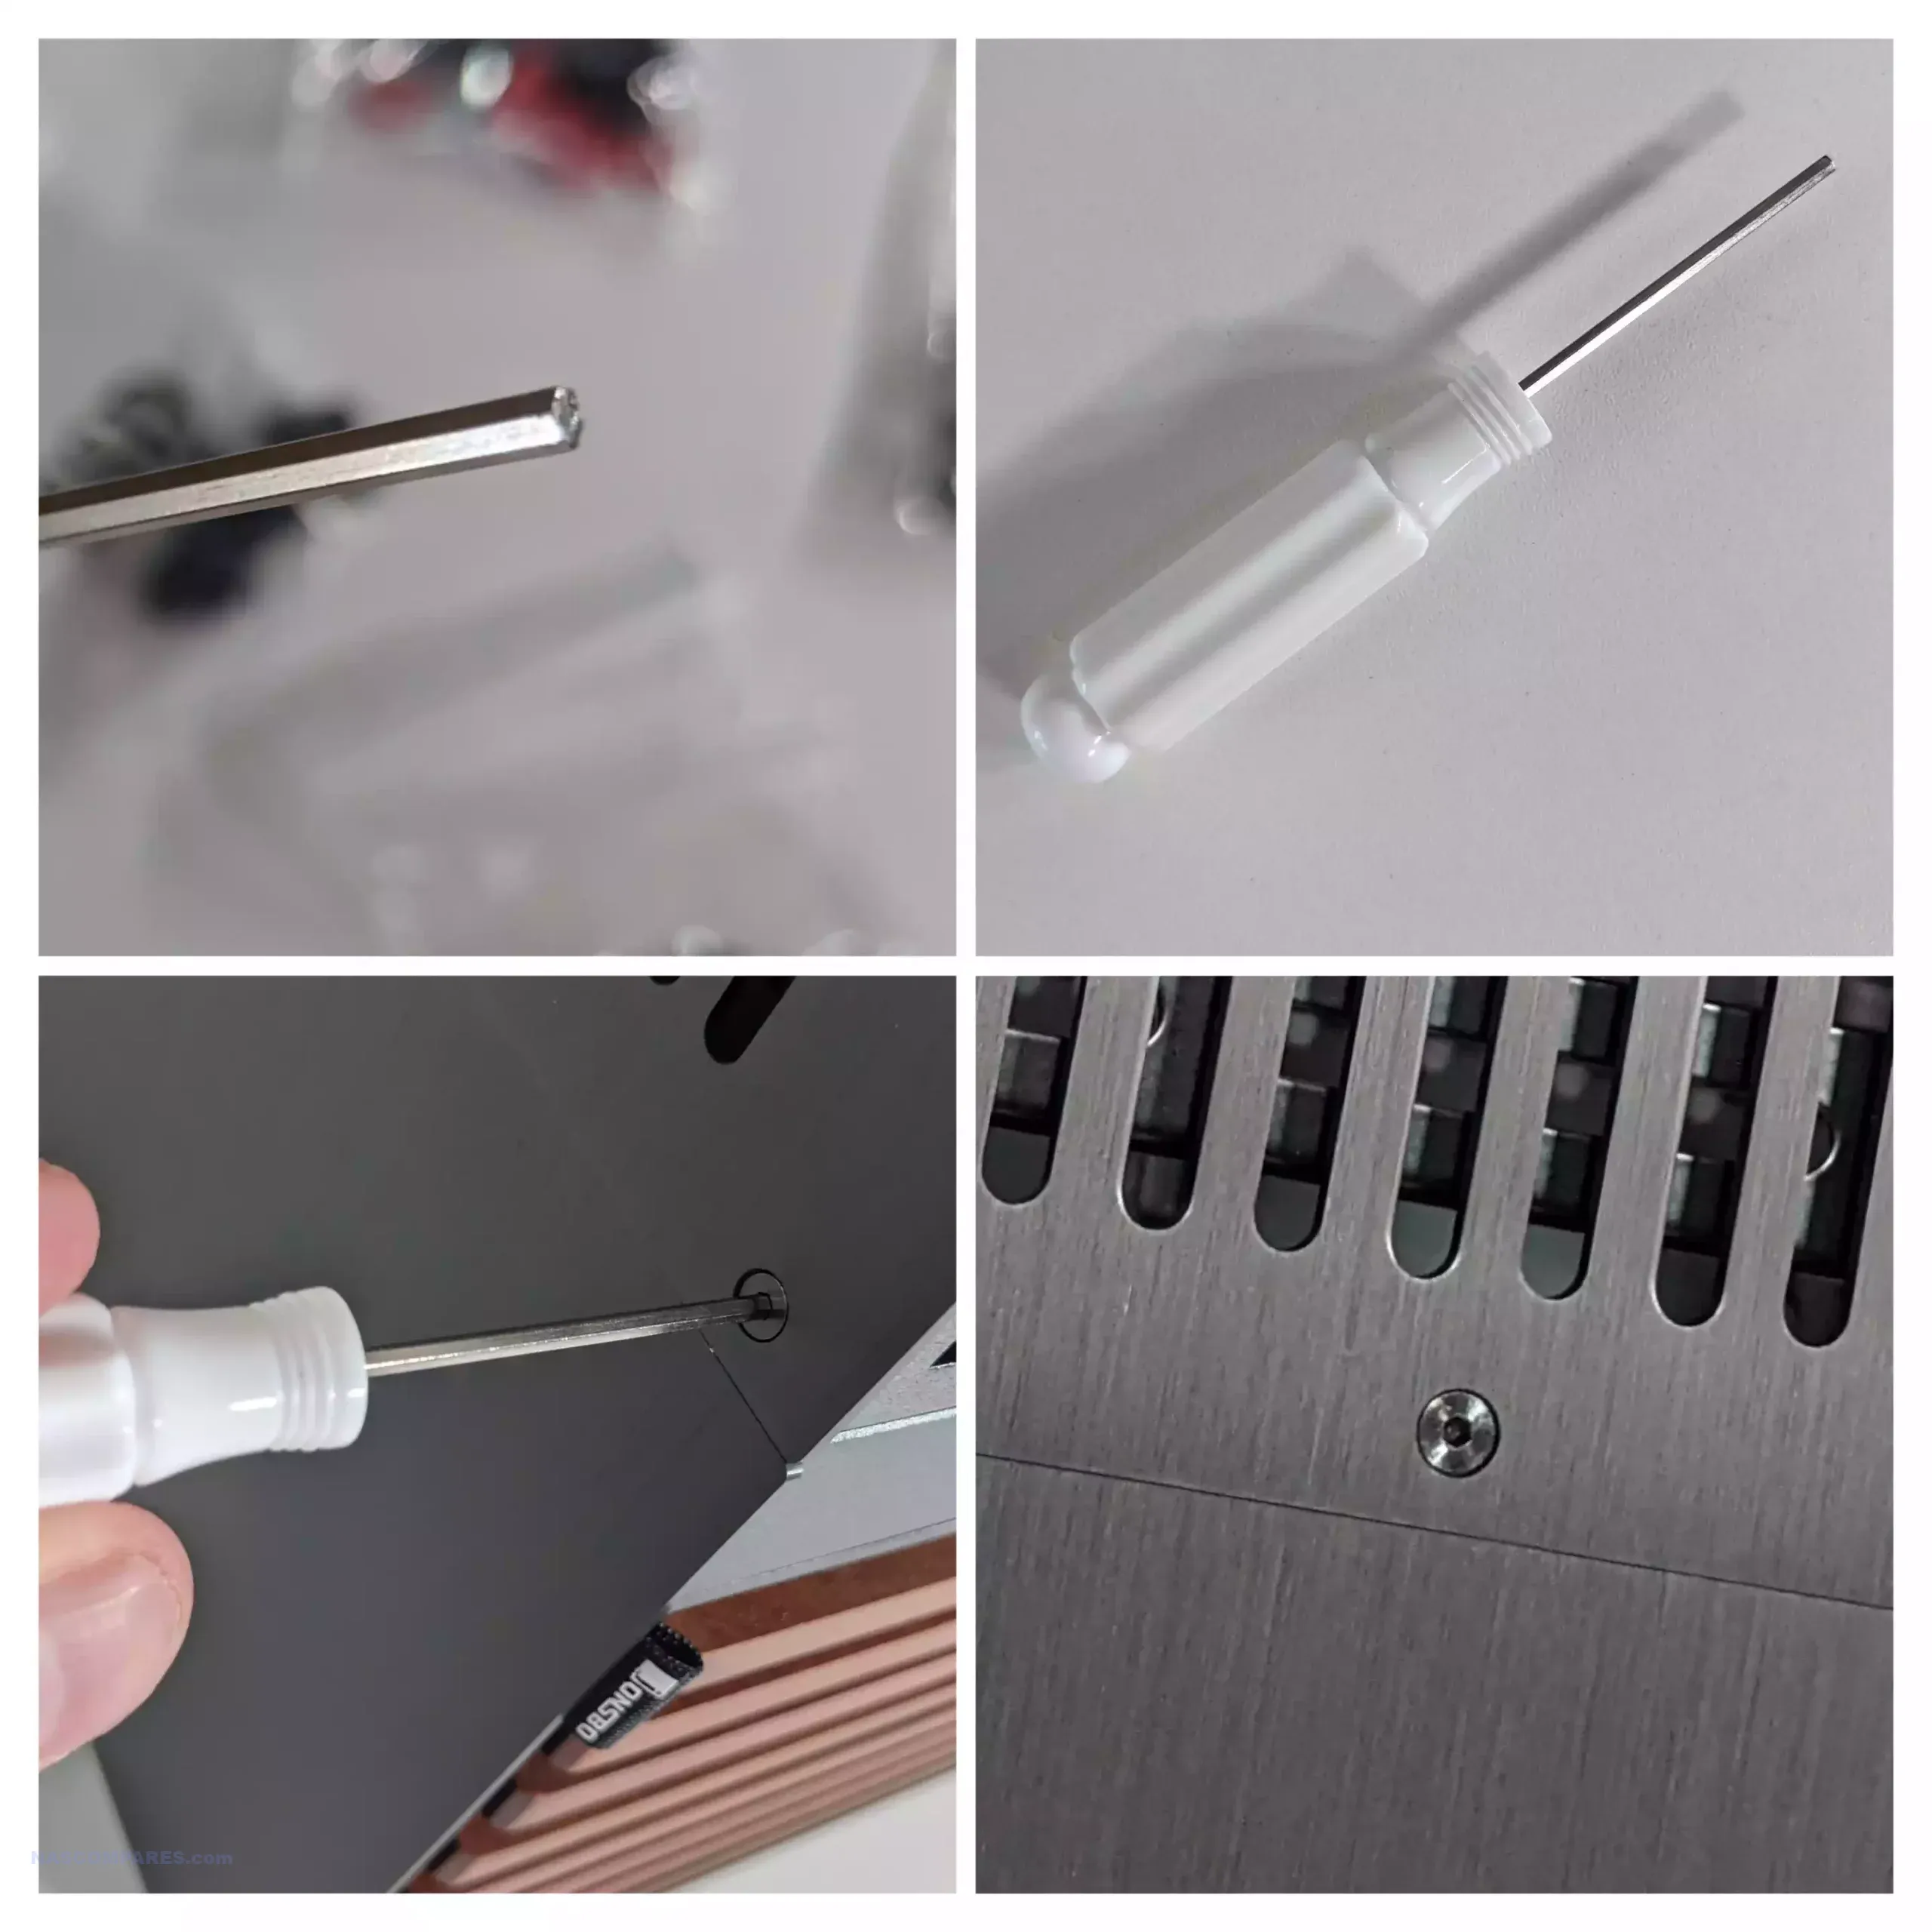
One complaint I’ve had when previously reviewing the Jonsbo NAS enclosure series that continues to annoy me here is that the brand still chooses to use hex/Allen key screws for the lid of the system. I understand why they choose to use these, as they can often be produced to be much more flush with the external enclosure and add to the sleek and discreet external casing that this chassis arrives with. However, these screws are pretty small, and even if you use the included hex/Allen key screwdriver that the kit arrives with, these are very easy to tear up, and once that happens, accessing the inside of your Jonsbo N5 NAS enclosure will become a right nightmare!
One enormous compliment I have to pay to the presentation of the Jonsbo N5, however, is the included instruction manual. I have reviewed and unboxed absolutely loads of NAS enclosures and complete NAS systems, and none of them I’ve ever had are more useful build instruction manuals than the N5! It details the correct order of building the system, outlines the appropriate outlets that you need to use for installing different components, as well as differentiating and recommending build methods for ITX or ATX deployments, right the way down to cable funneling. Previous Jonsbo NAS enclosures have always arrived with a folded A4 leaflet included, whereas this latest generation device arrives with a much more detailed instruction manual for first-time setup.

Overall, this is the most impressive DIY NAS presentation and accessory kit that the brand has ever released, arguably better than most other DIY NAS enclosures I’ve played around with in the last few years. However, we need to focus a lot more now on the design of the N5 itself.
Jonsbo N5 Review – Design (External)
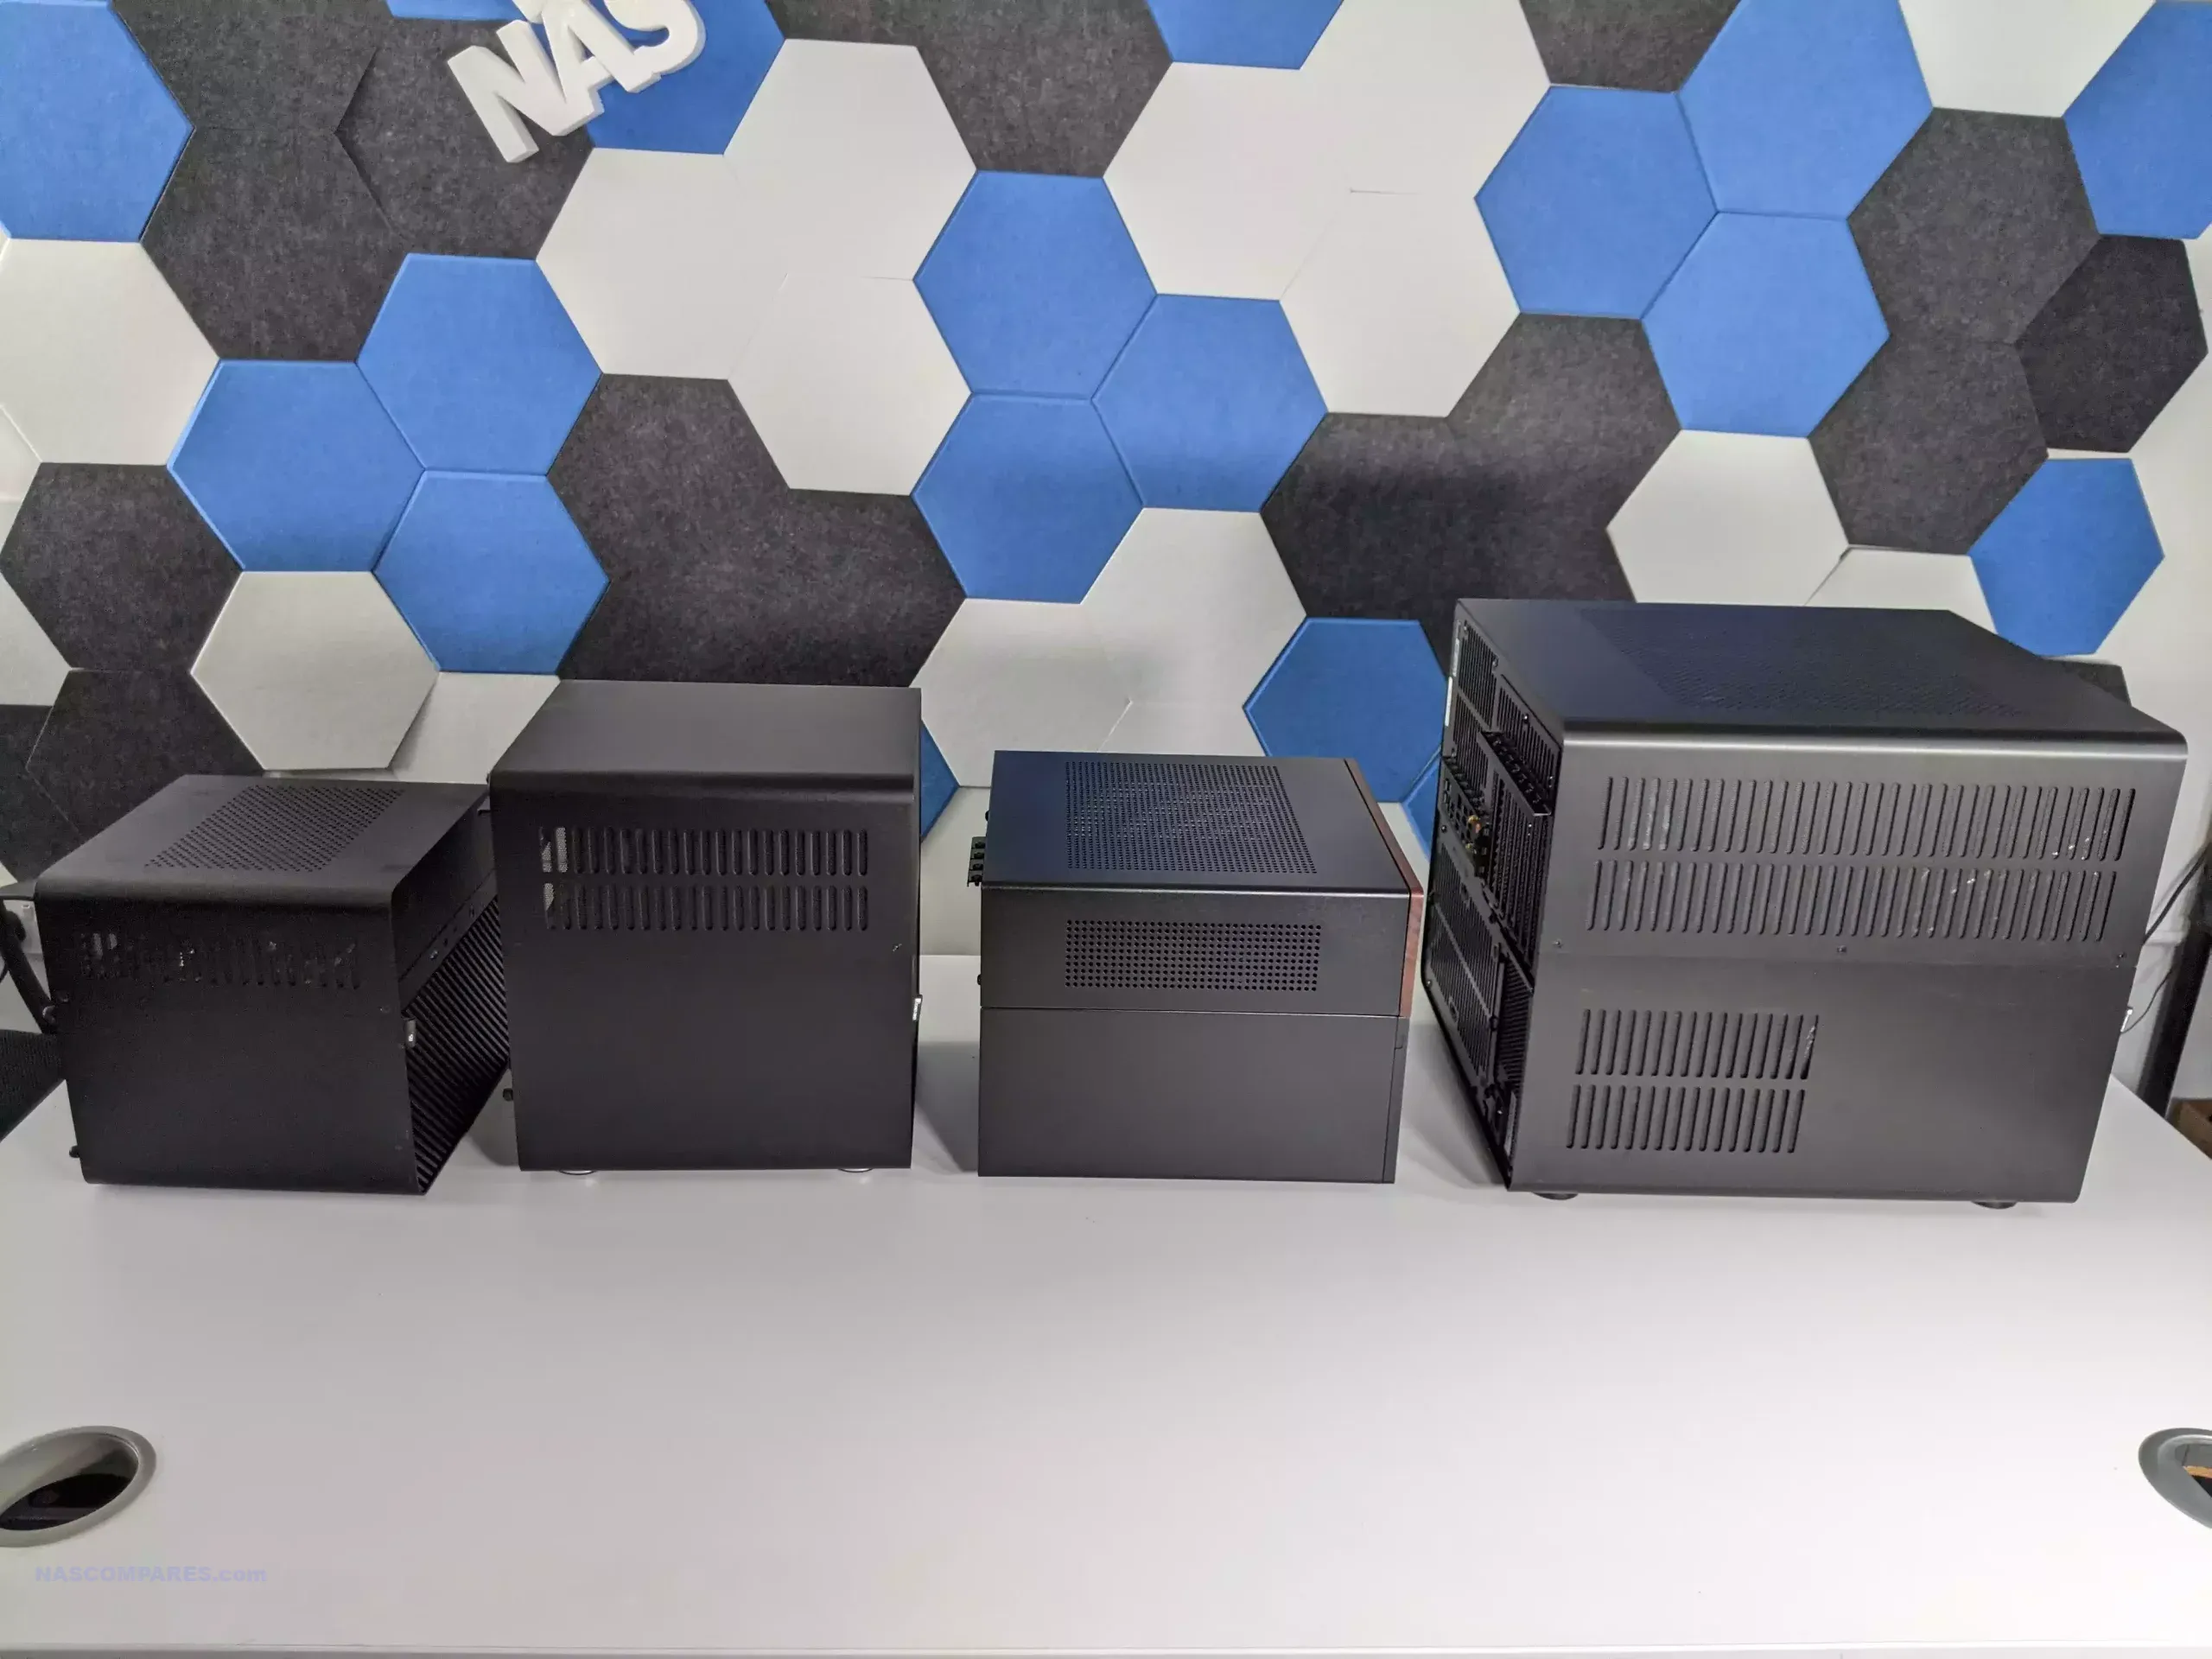
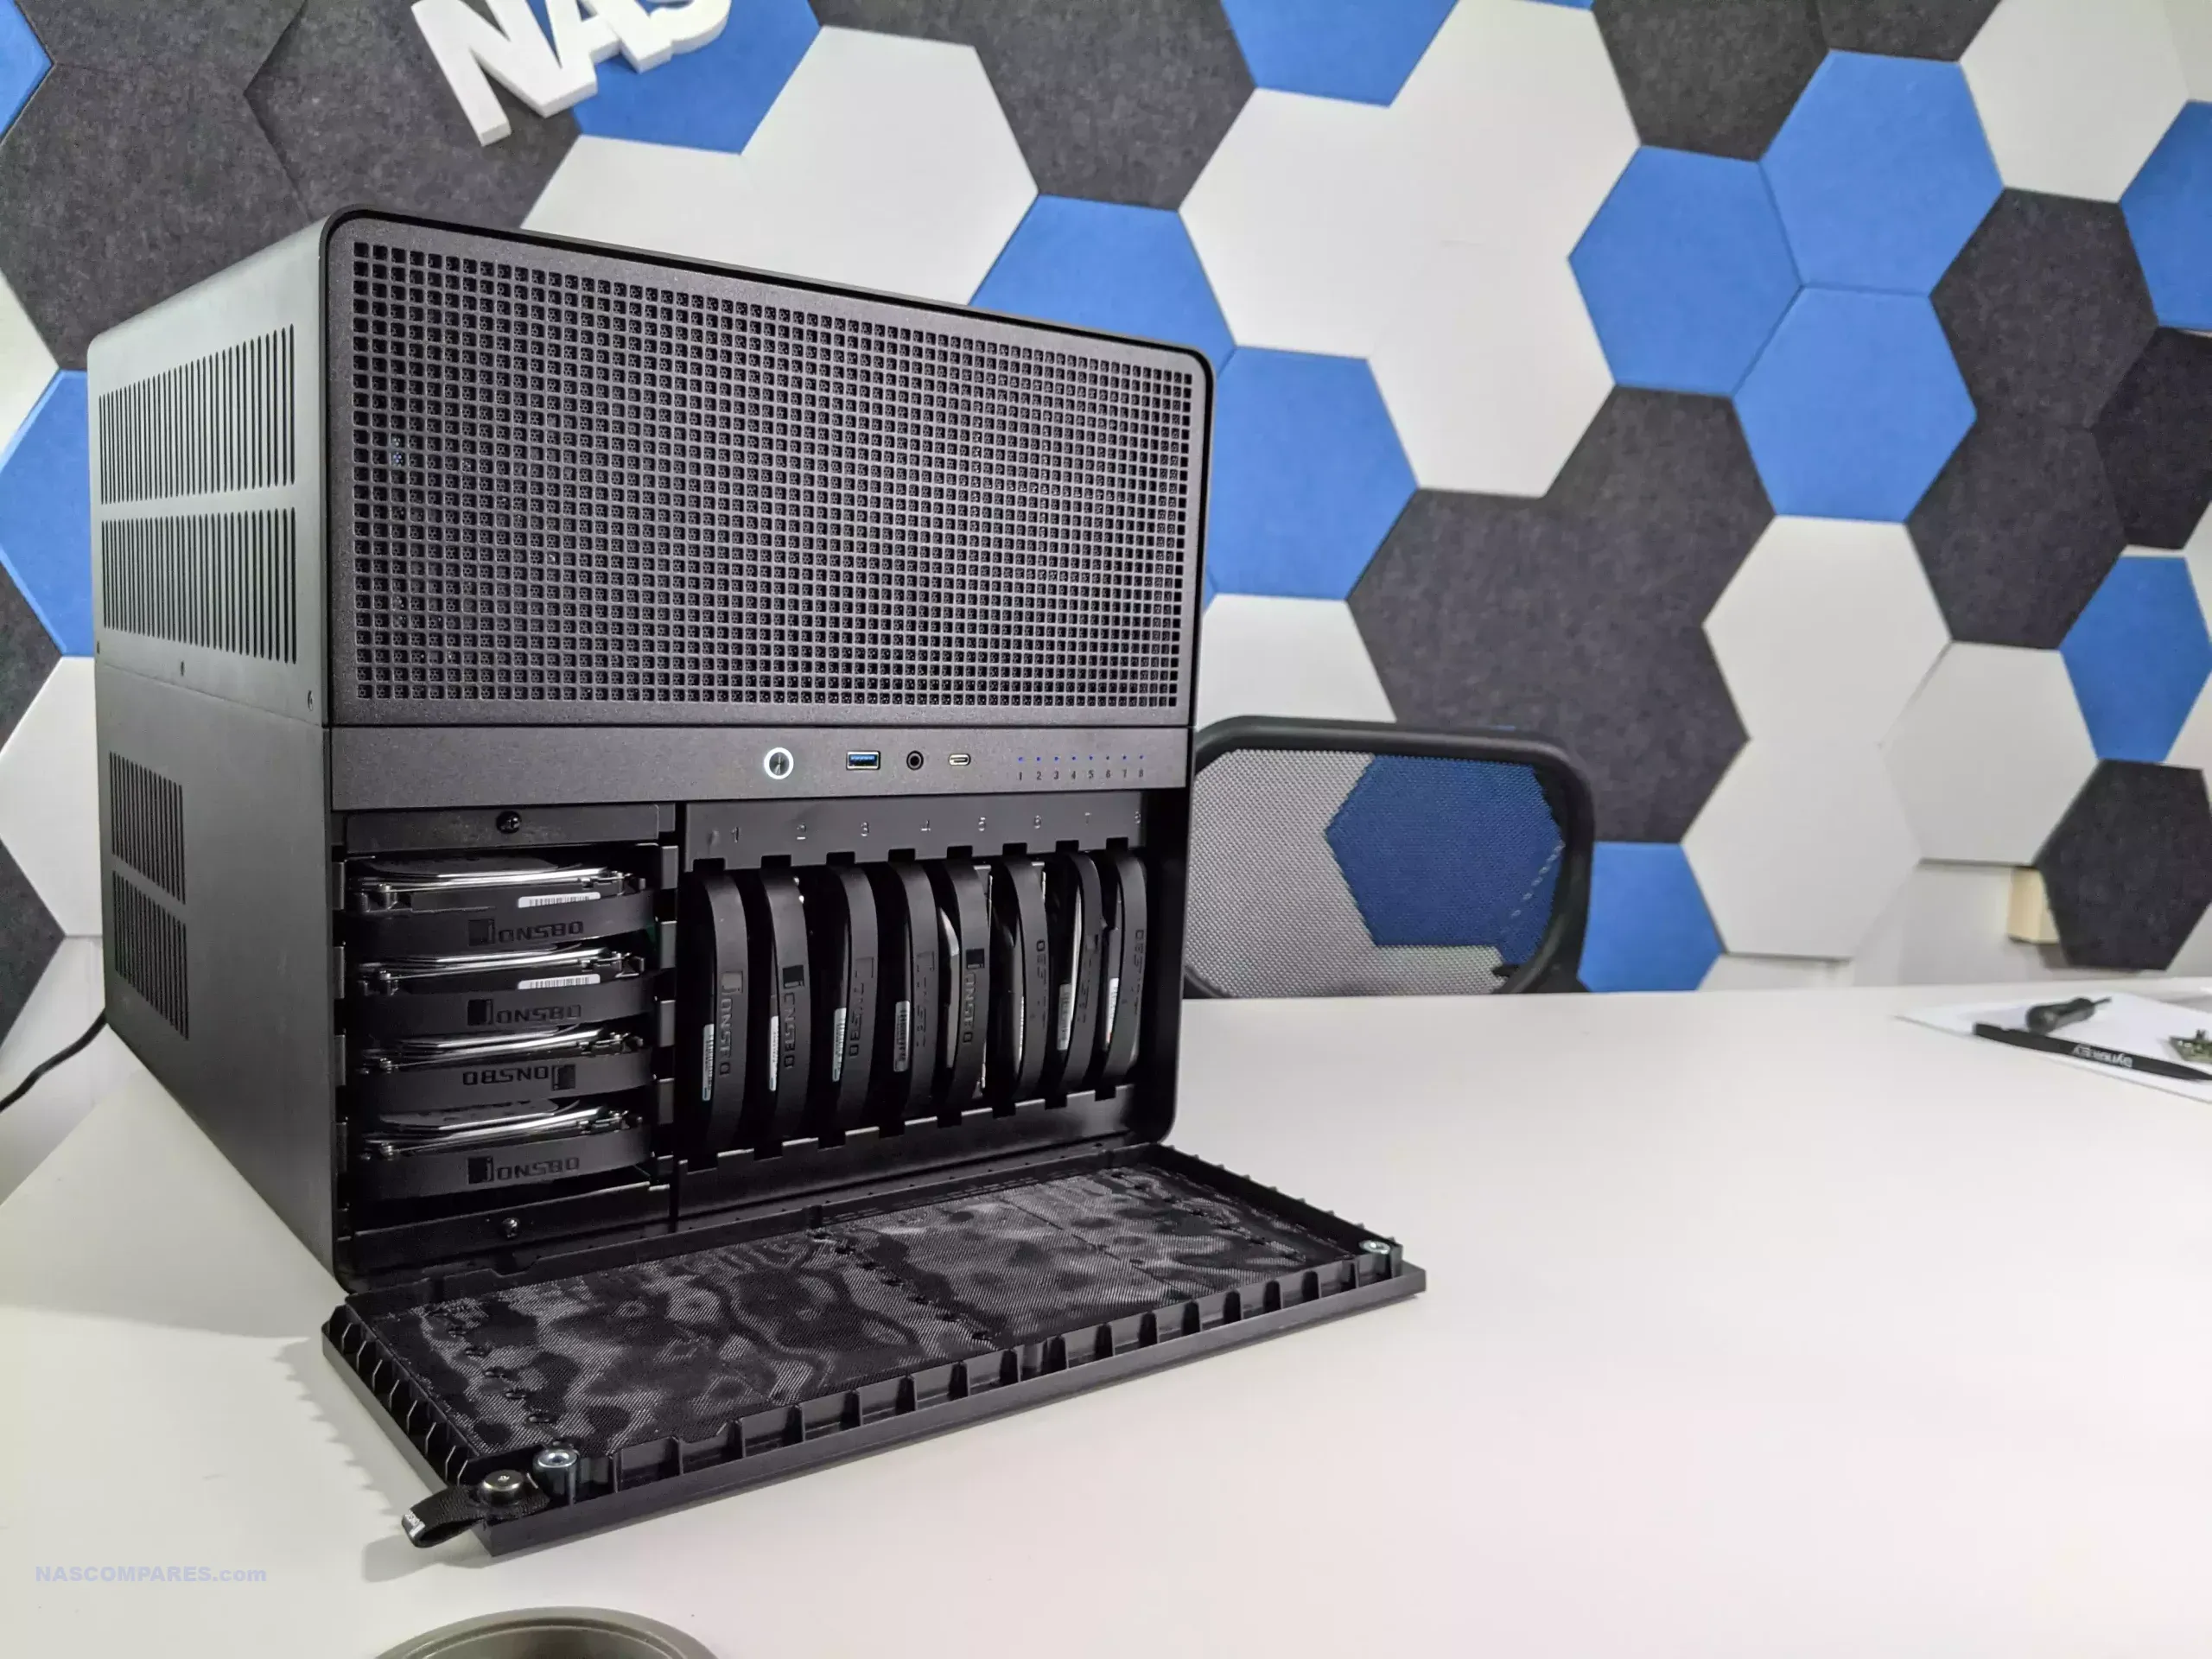
To say that the N5 is a bit big would be a wild understatement. The Jonsbo N5 isn’t just big; it is almost the size of all three Jonsbo N1, N2, and N3 combined! You are looking at the volumetric equivalent of a 12-bay rackmount system boiled down into a desktop enclosure—all the while supporting full-height and full-length PCIe cards, coolers, and accessories. Measuring 35 cm by 40 cm by 35 cm (and over 7.5 kg in weight), this is one seriously large case in every dimension. You do not need to necessarily fill this system on day one, but it’s definitely clear that the N5 is designed for long-term upgrades and scalability.
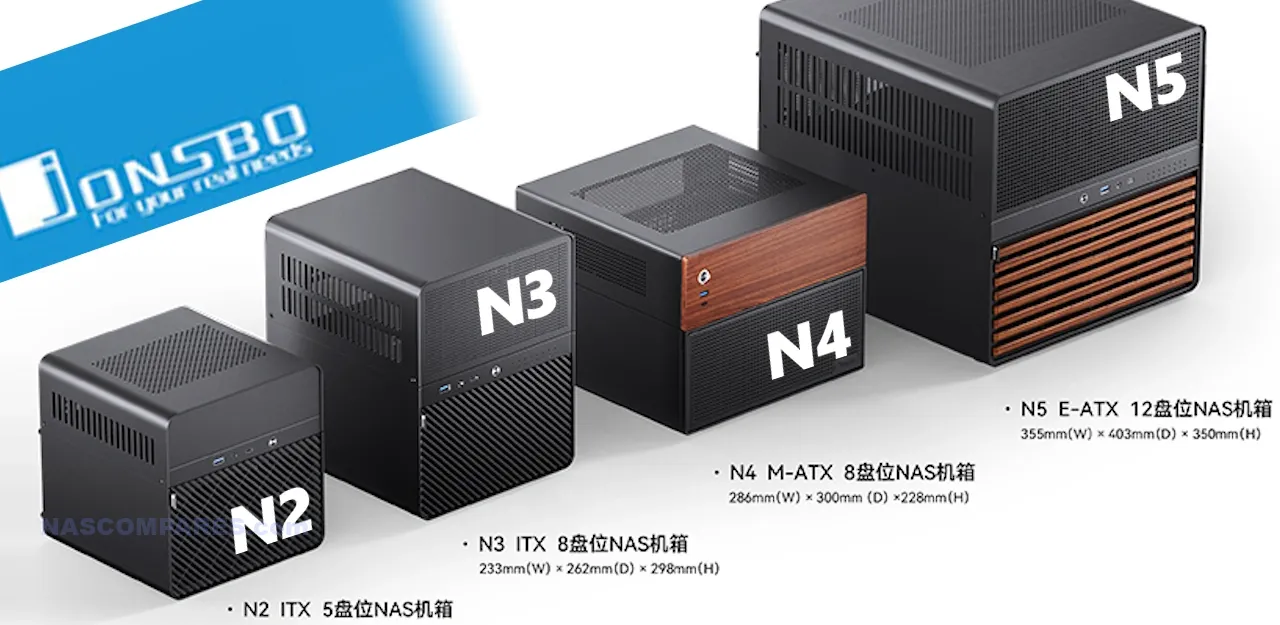
Just to give you a little bit of perspective, below you can see the front-facing size comparison of the Jonsbo N2 versus N3 versus N4 versus N5. There is no gradual growth here, and in fact, it’s a huge scale-up between the N4 and N5.
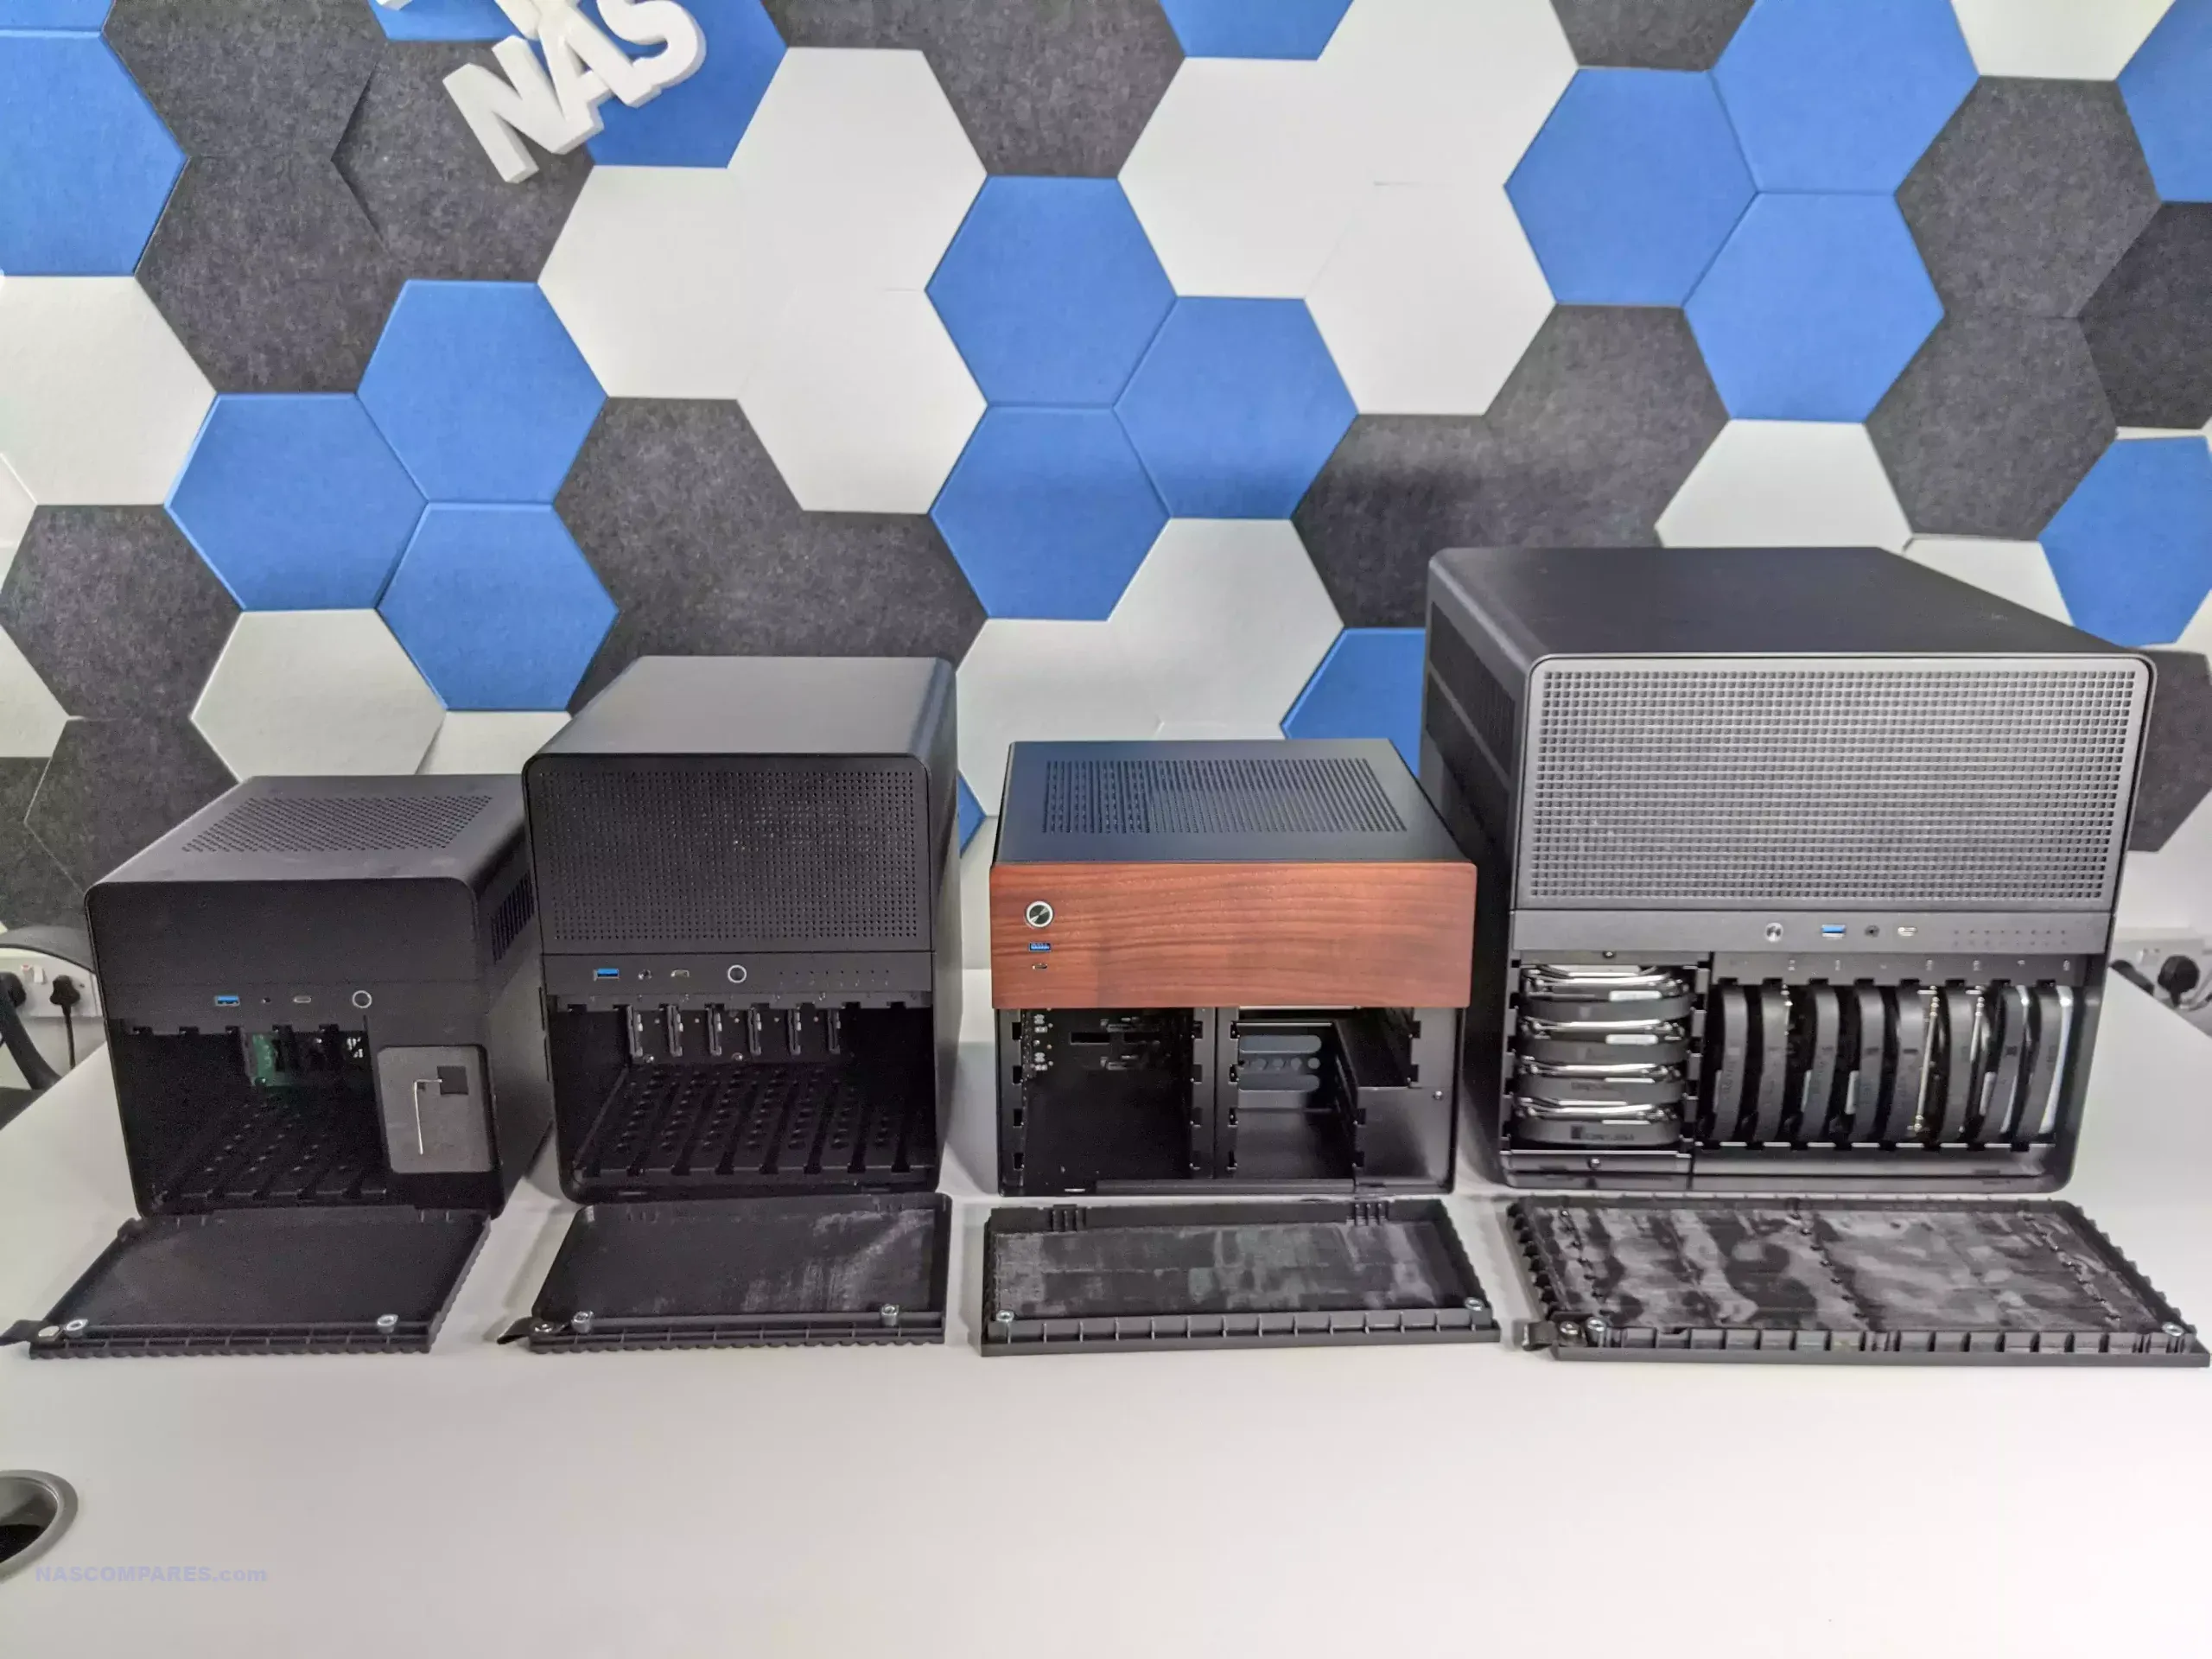
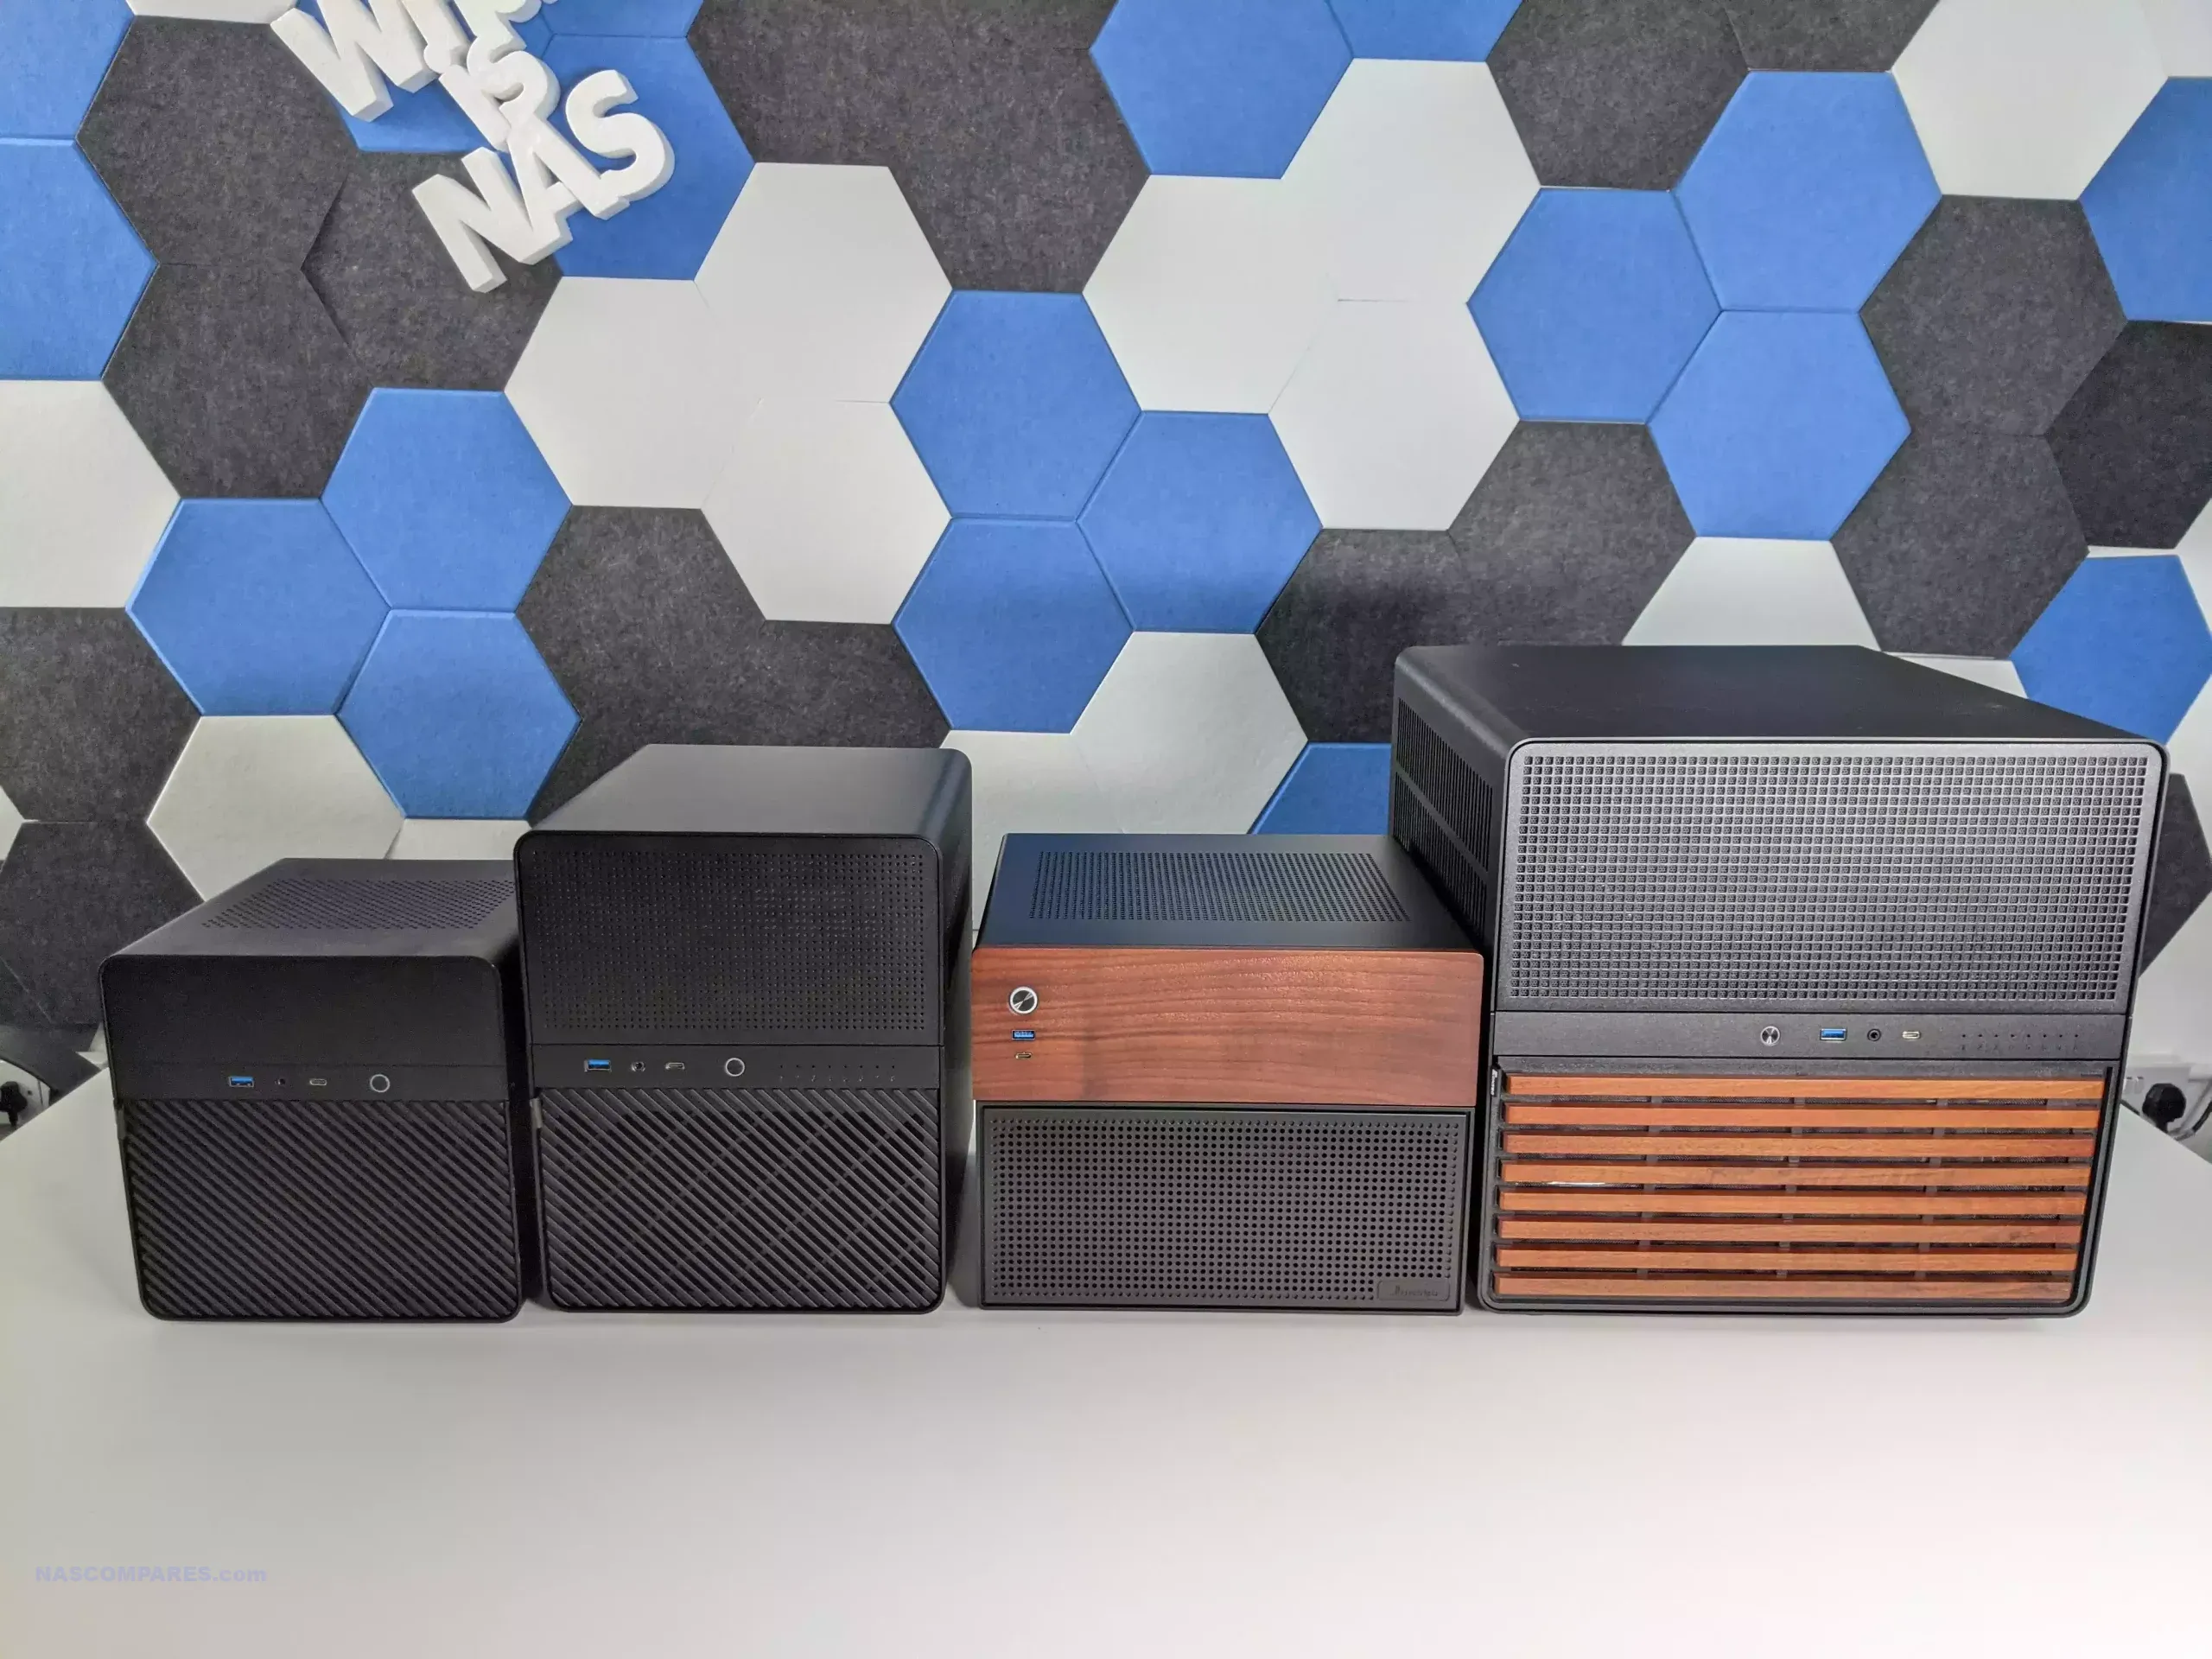
Indeed, this is factored into the depth of the three cases too. When you have the N2, N3, N4, and N5 facing sideways, you can see the full depths of the N5 realized to a great deal better.
For a better understanding of how these four cases differ in their full specifications, use the chart below:
| Specification | Jonsbo N1 | Jonsbo N2 | Jonsbo N3 | Jonsbo N4 | Jonsbo N5 |
|---|---|---|---|---|---|
| Dimensions (W x D x H) | 170mm x 354mm x 217mm | 222.5mm x 222.5mm x 224mm | 233mm x 262mm x 298mm | 286mm x 300mm x 228mm | 355mm x 403mm x 350mm |
| Material | 3mm Aluminum alloy (External), 1mm Steel | 2mm Aluminum alloy (External), 1mm Steel | 2mm Aluminum alloy (External), 1mm Steel | 0.7mm Steel + Wood | 1mm Steel + 2mm Aluminum alloy + 8mm Wood |
| Drive Bay | 2.5″ SSD1 / 3.5″ HDD5 | 2.5″ SSD1 / 3.5″ HDD5 | 2.5″ SSD1 / 3.5″ HDD8 | 2.5″ SSD2 / 3.5″ HDD6 | 2.5″ SSD4 / 3.5″ HDD12 |
| Motherboard Support | ITX | ITX | ITX | ITX / M-ATX | ITX / M-ATX / ATX / E-ATX |
| PCI Expansion Slots | 1 (Low profile) | 1 (Low profile) | 2 | 4 | 8 |
| Max CPU Cooler Height | 70mm | 65mm | 130mm | 70mm | 160mm |
| Max GPU Length | 185mm (Low profile) | 197mm (Low profile) | 250mm | 230mm | 350mm |
| Cooling System | 1 x 140mm (built-in) | 1 x 120mm (built-in) | 2 optional 100mm (HDD), 2 optional 80mm (MB) | 1 x 120mm (built-in) | 11 total fan slots (120mm and 140mm) |
| Weight | 3.8kg | 2.9kg | 3.9kg | 3.75kg | 7.5kg |
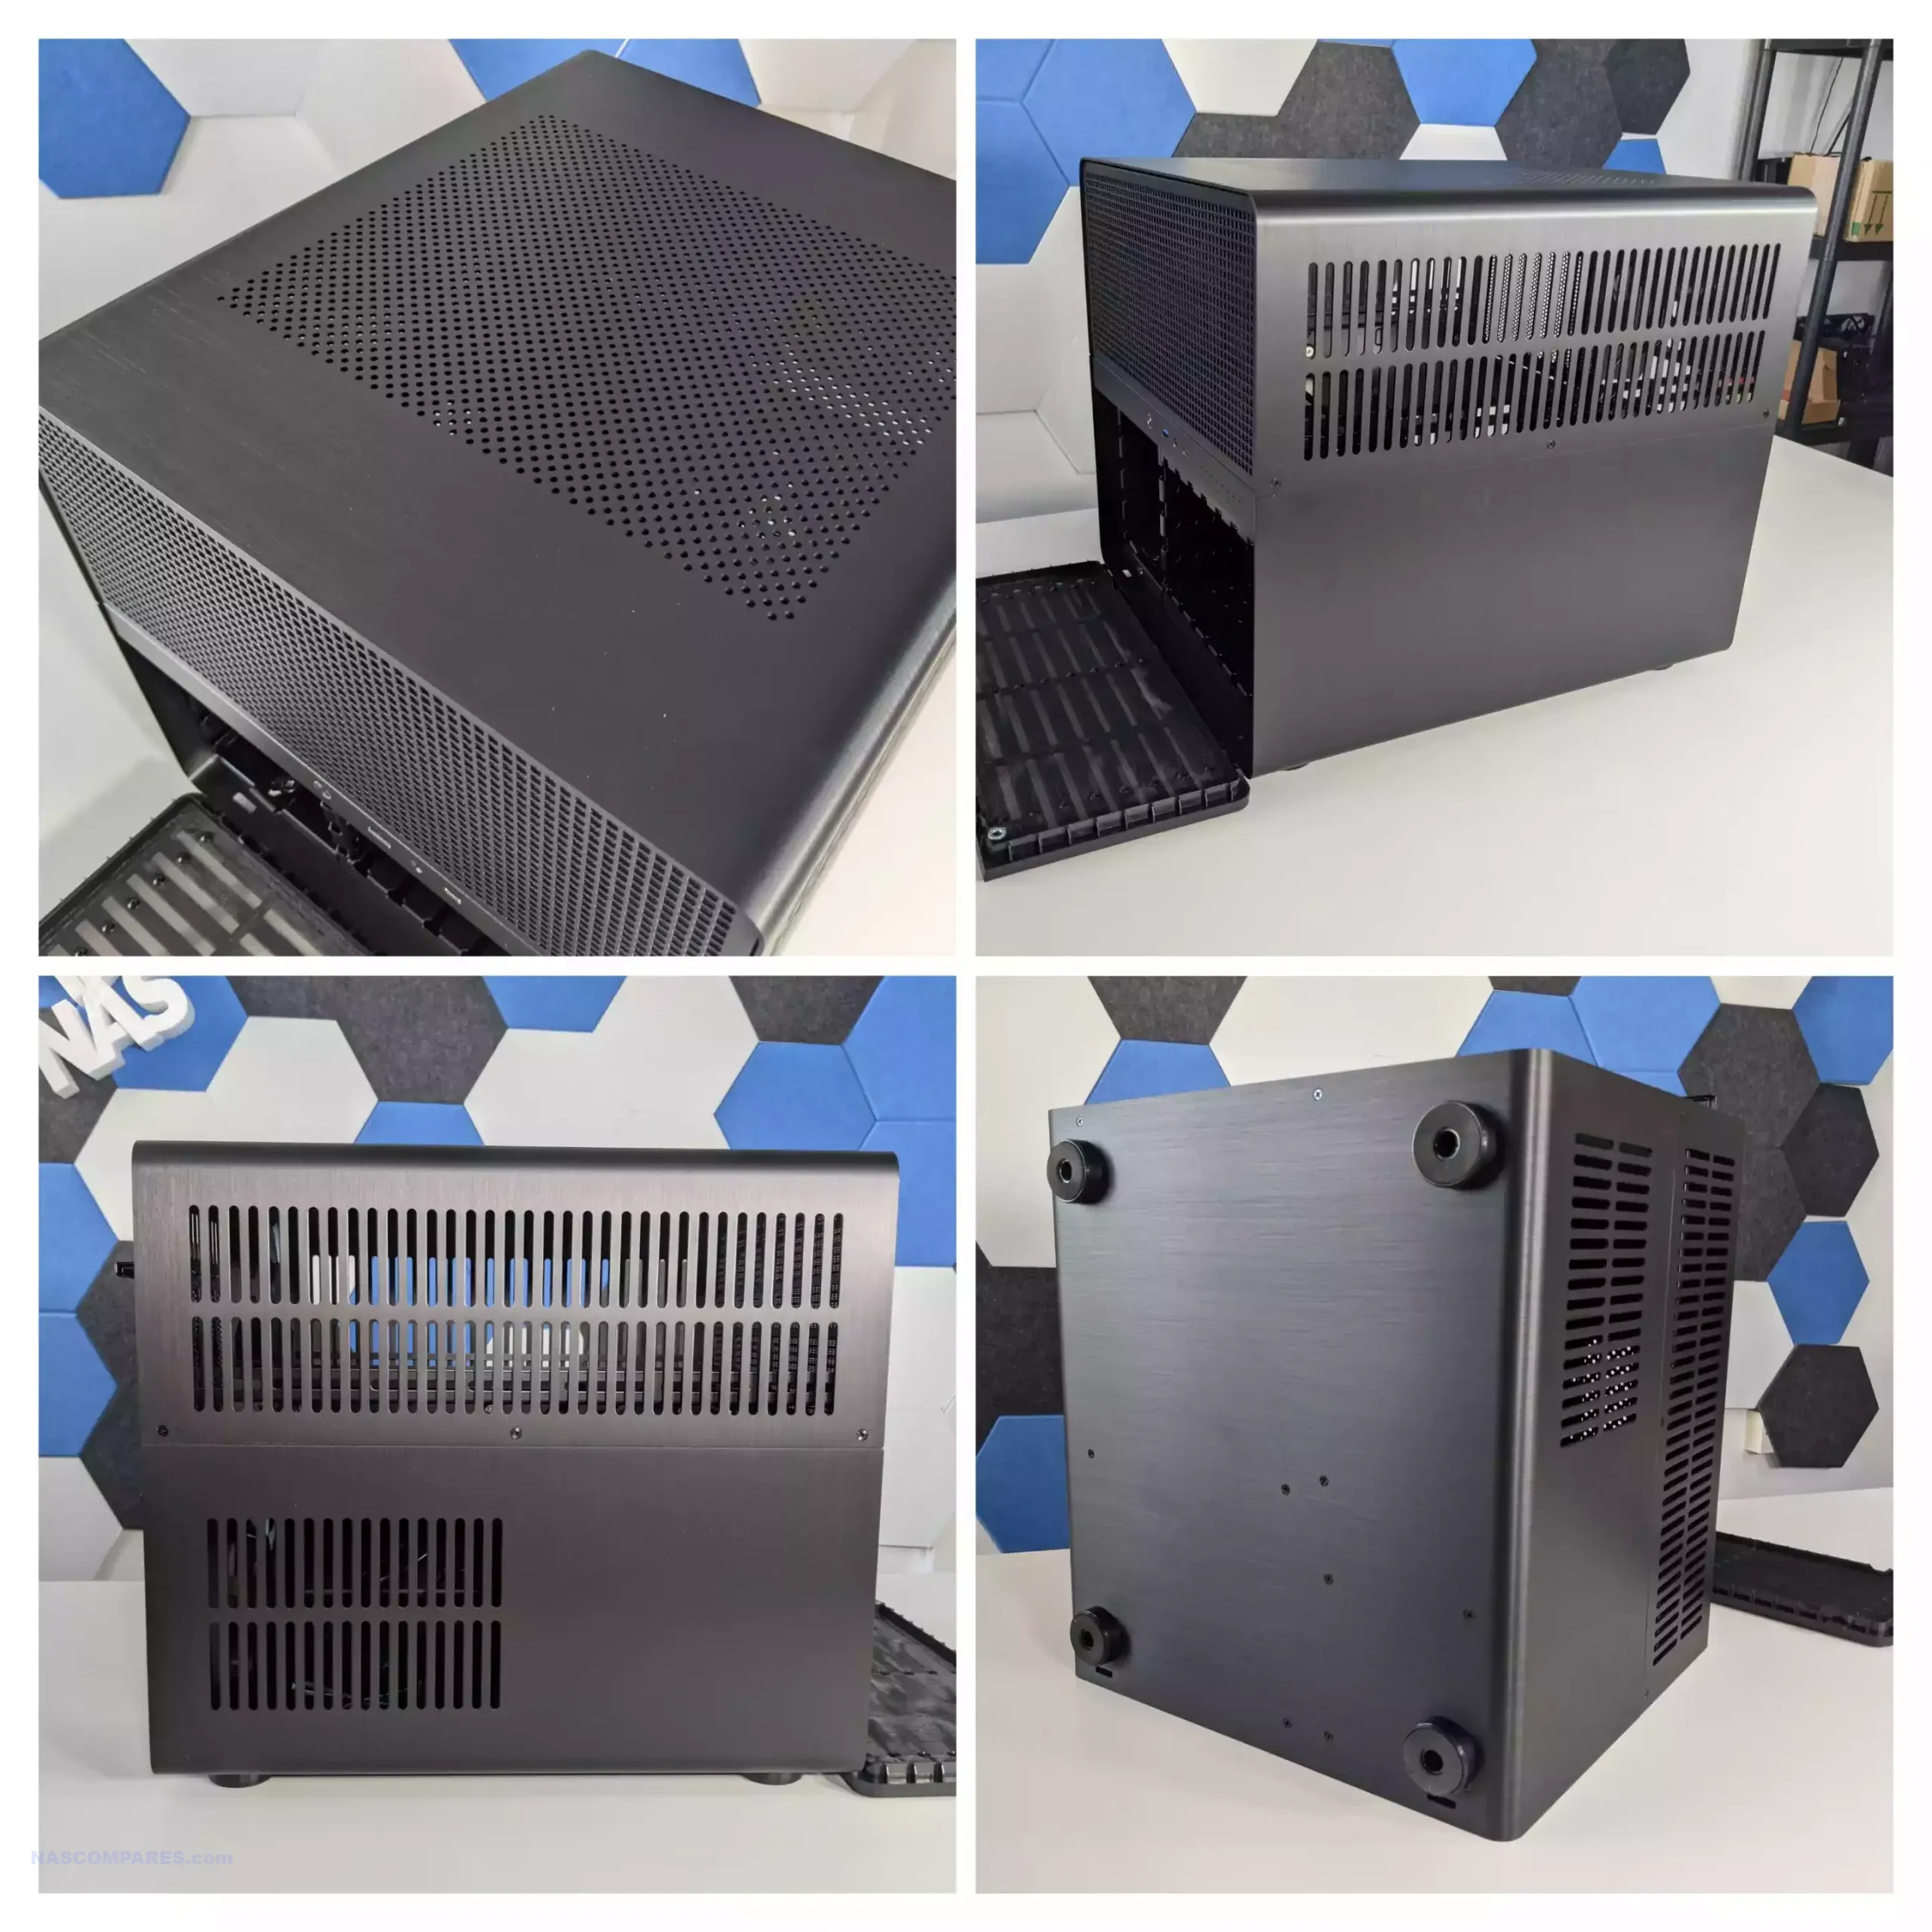
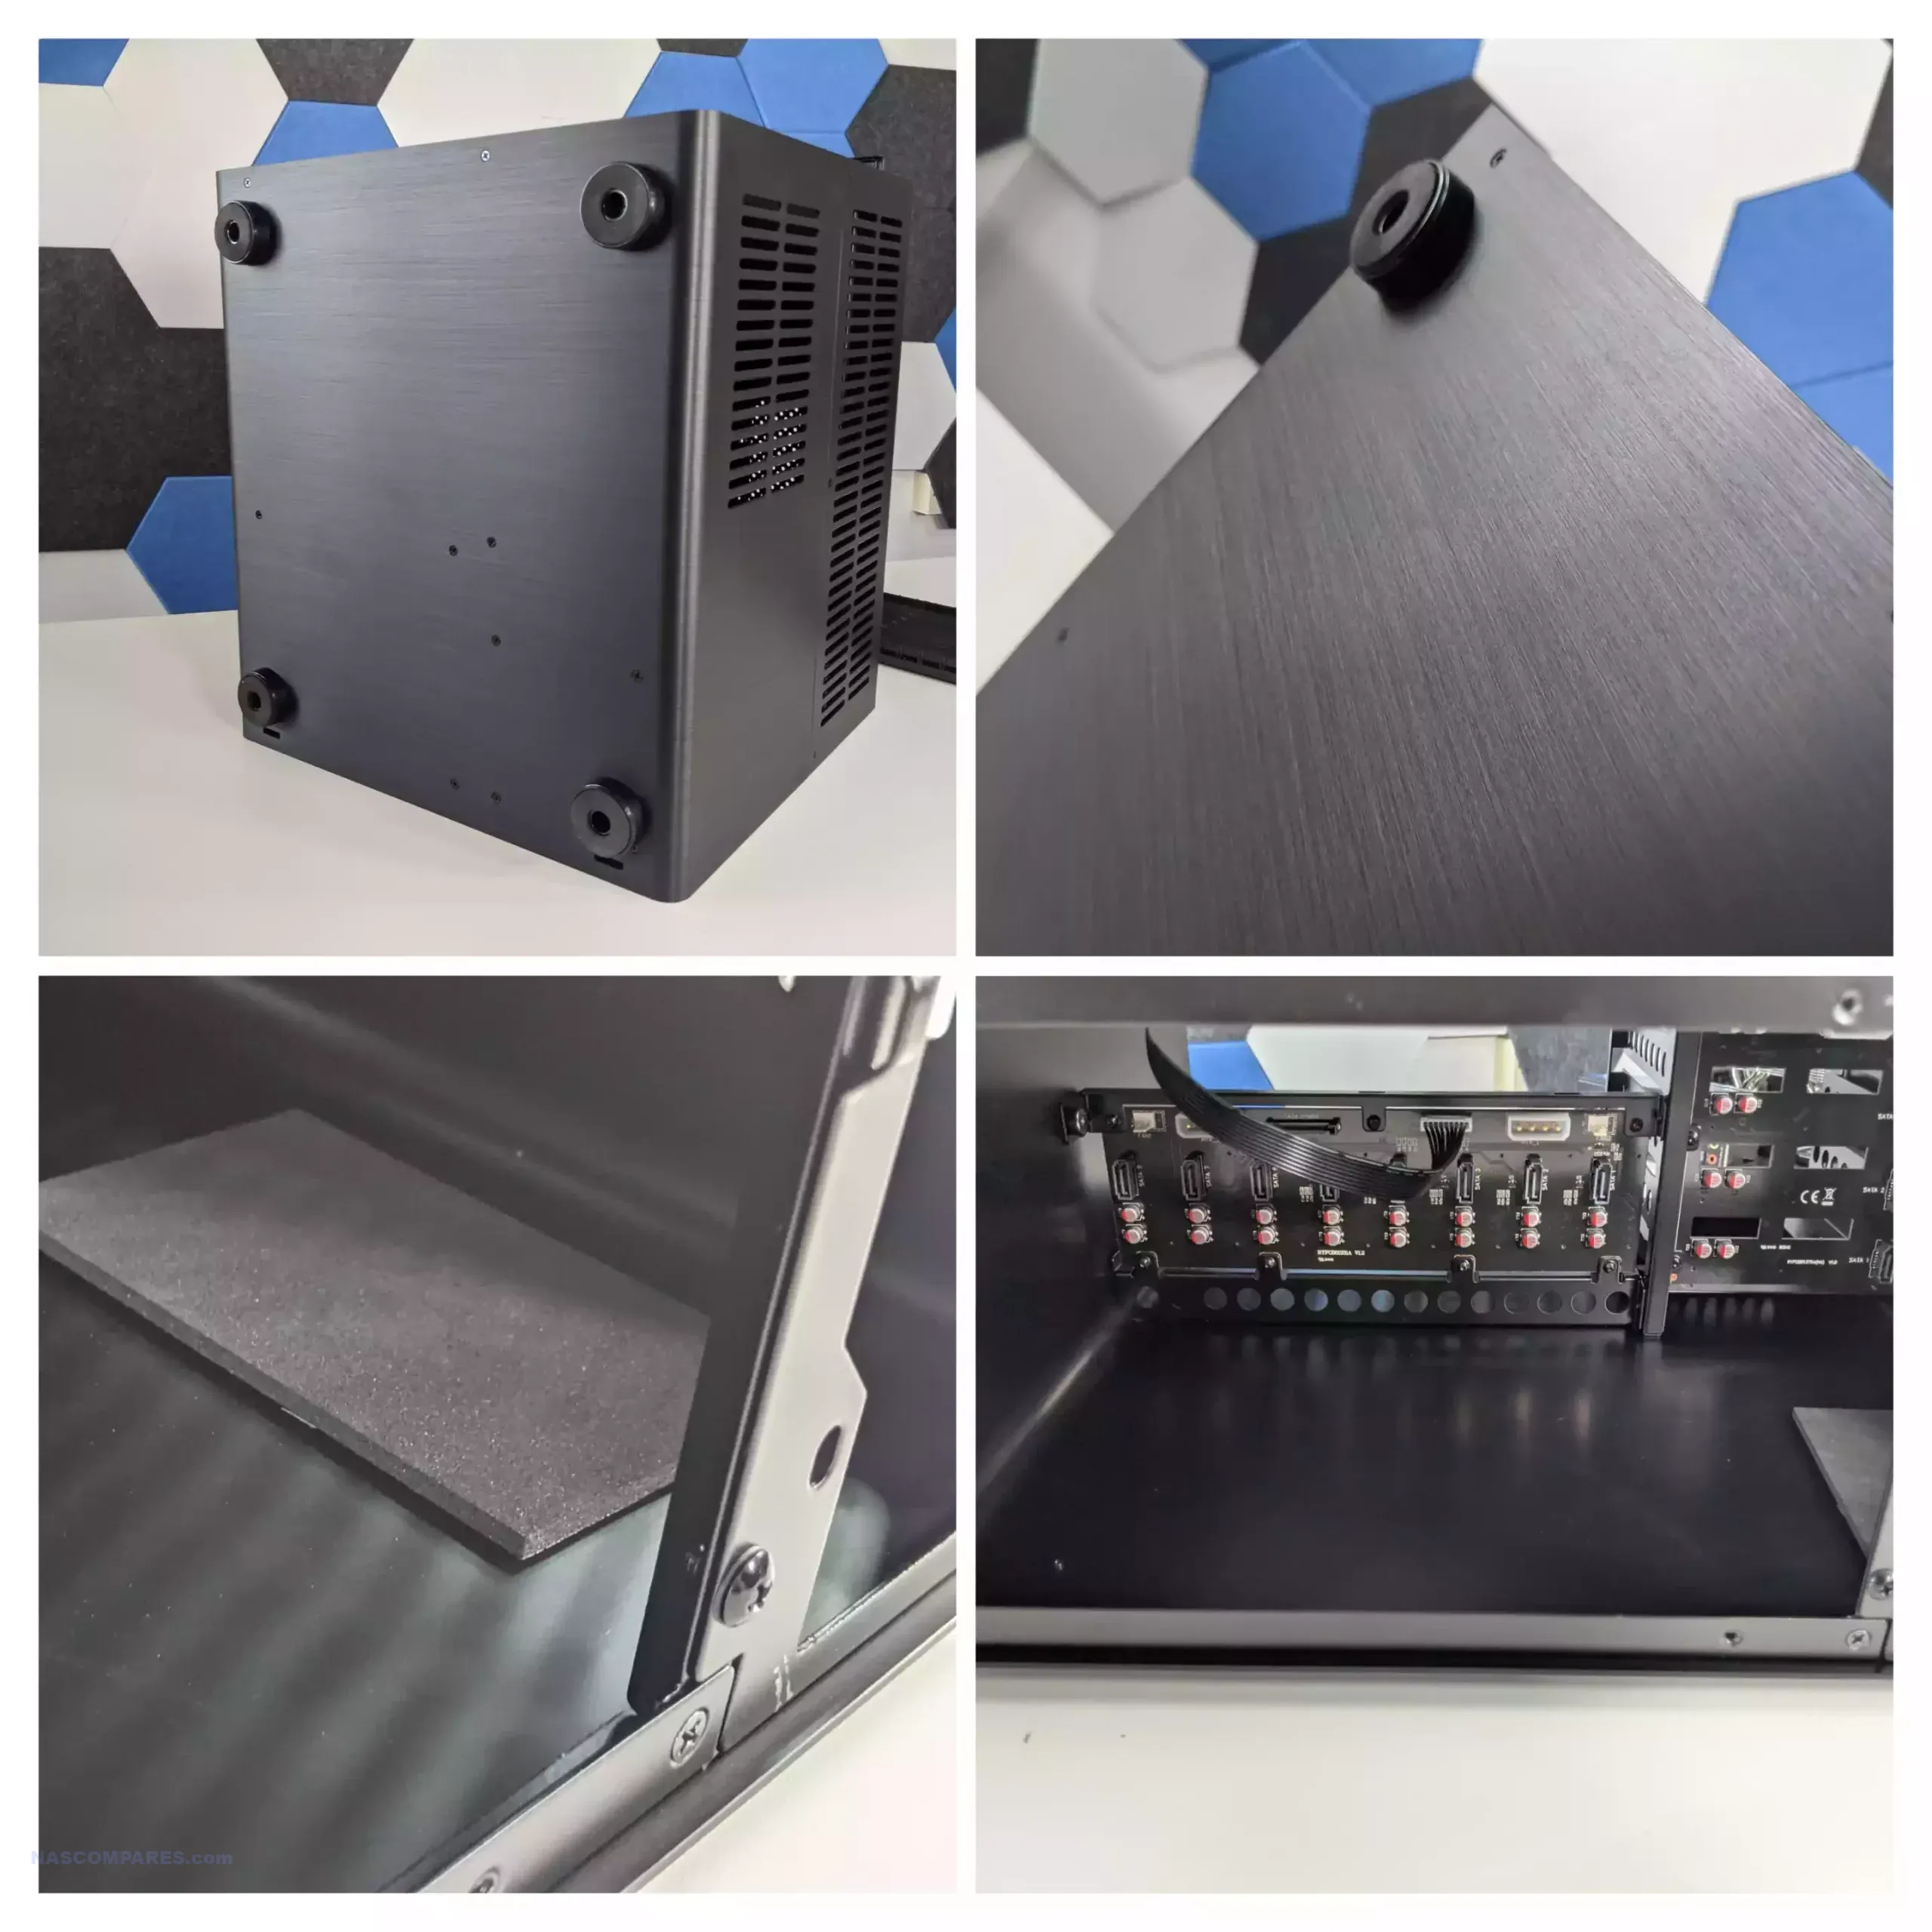
One thing that is worth highlighting is that although the case looks tremendously imposing in its largely metallic chassis that is going to dominate your desktop, the black matte steel is only 1 mm thick. This doesn’t mean that heat dissipation won’t be pretty effective on the casing, but it also means that it is going to amplify ambient noise when the system is in operation. This is especially true if you start adding even more internal fans to the system for cooling or use larger than 10TB drives, which have a tendency to be more industrially built.
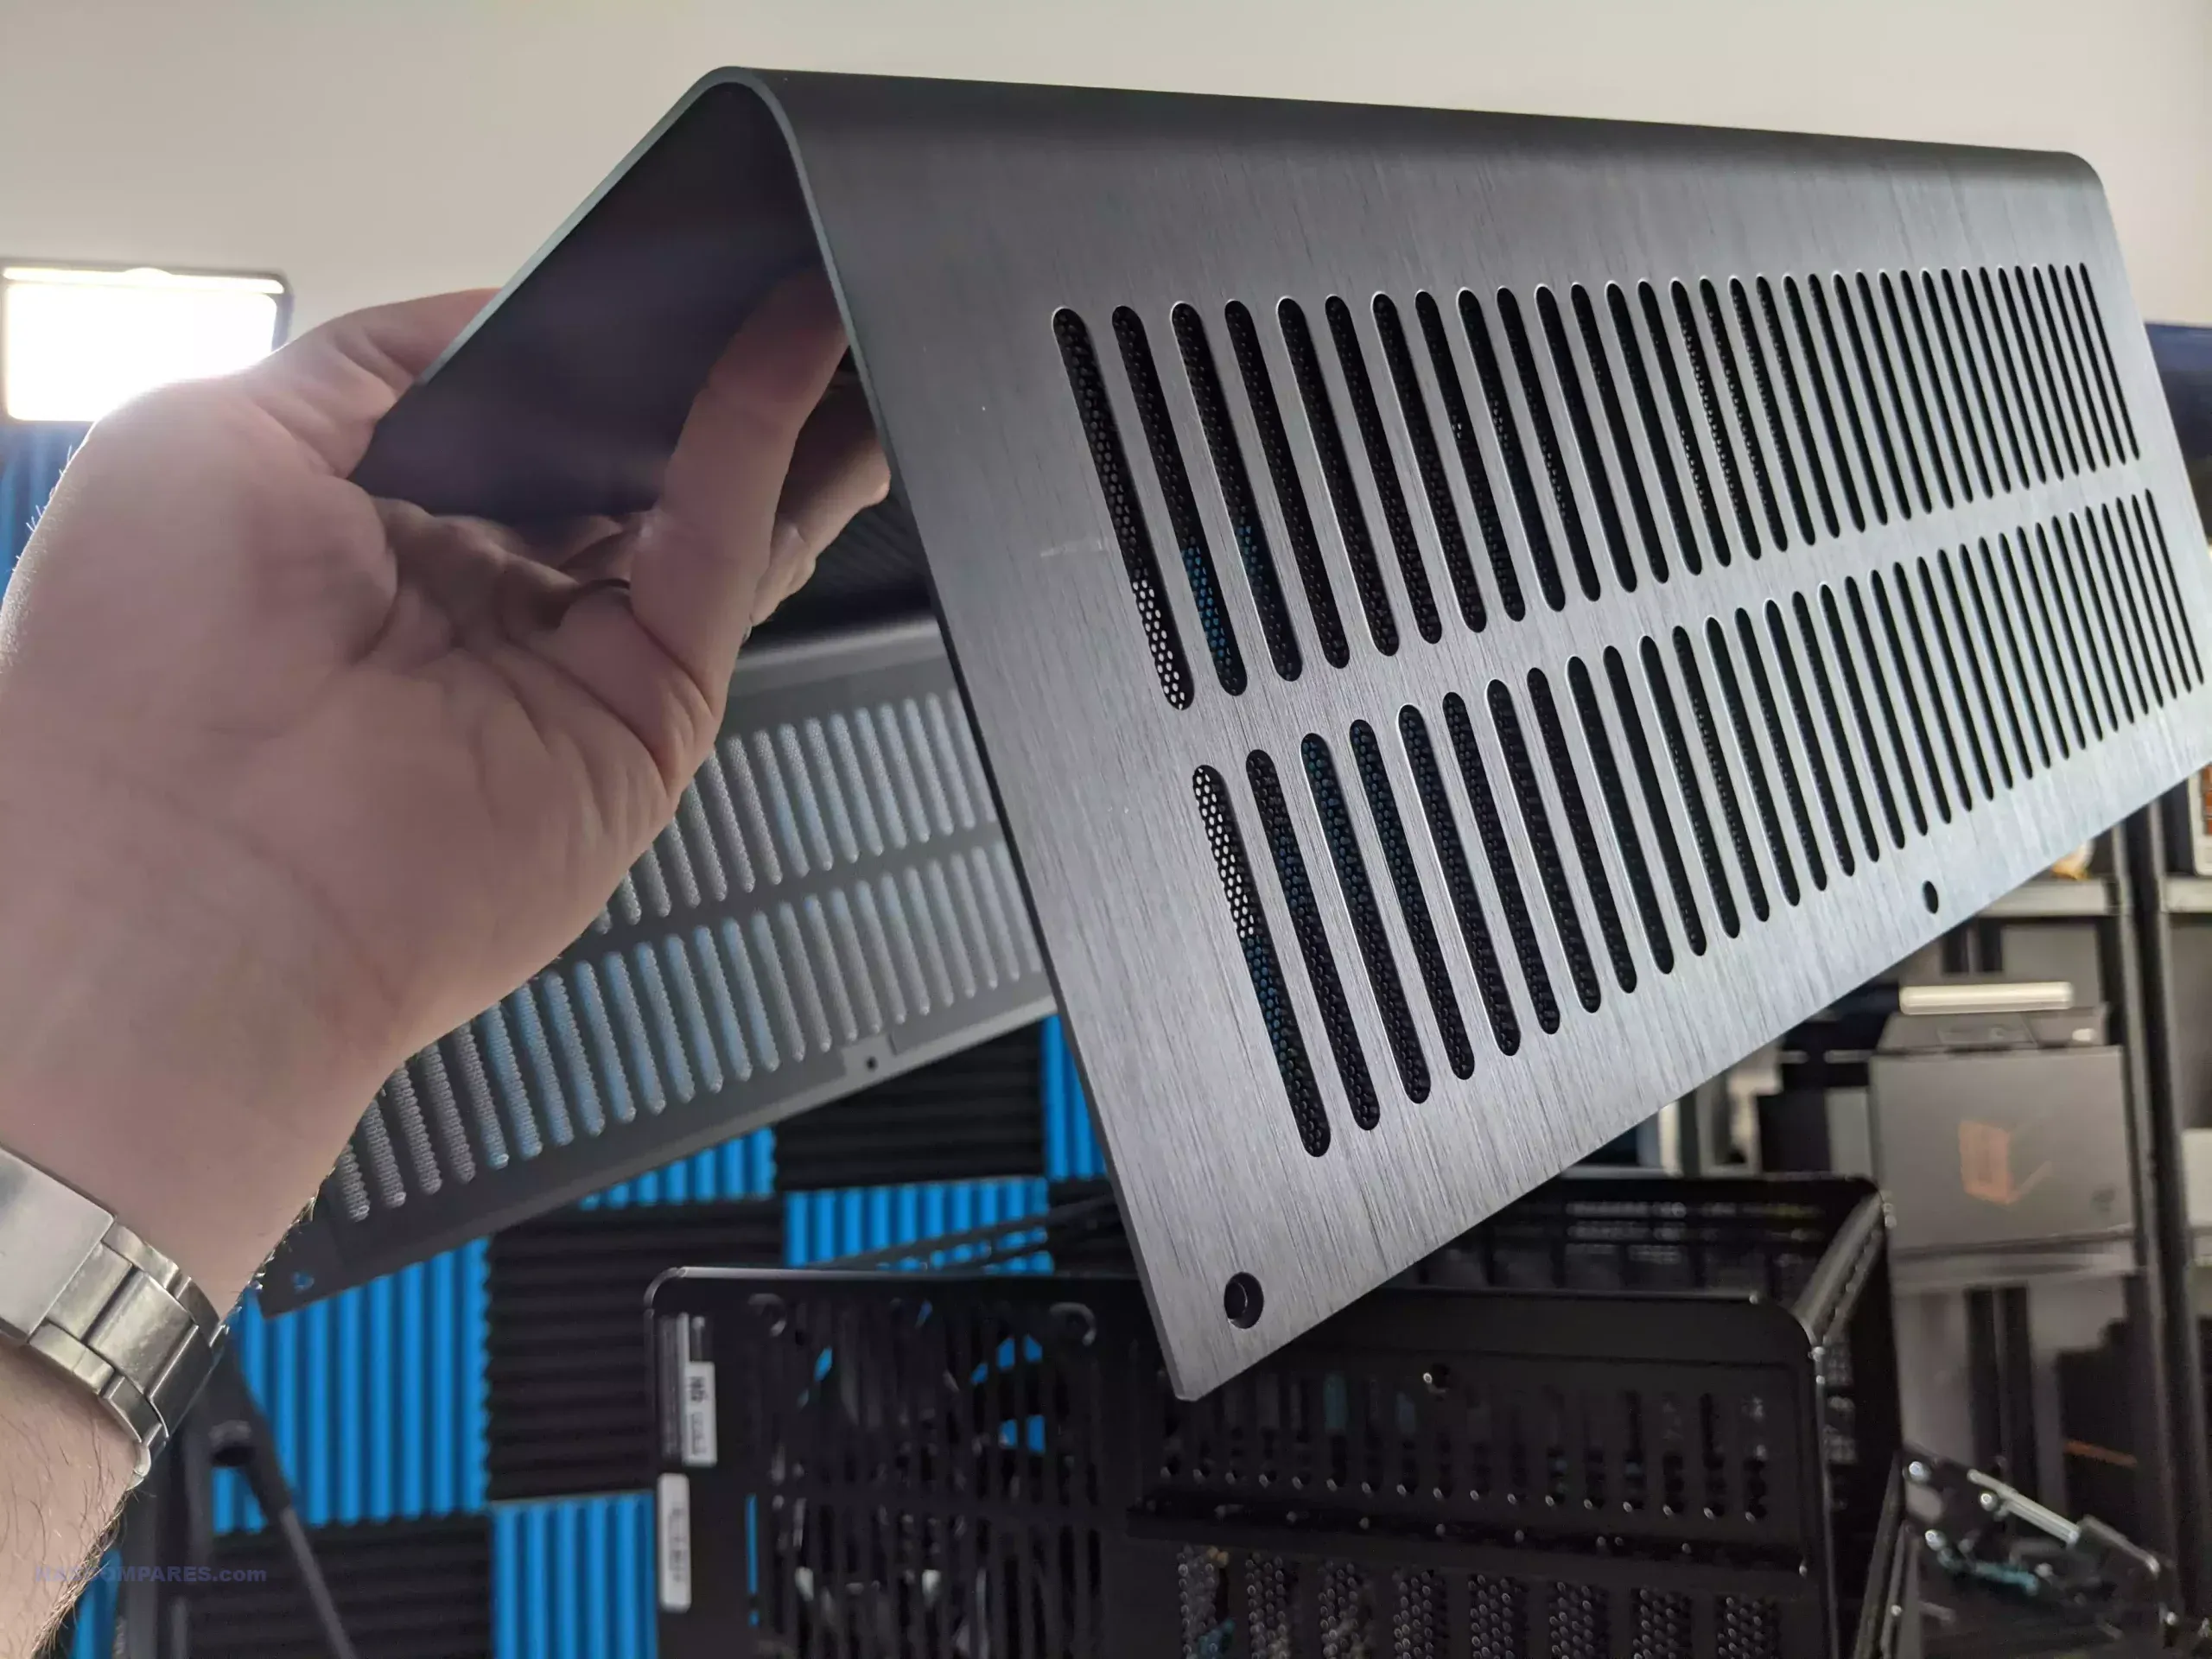
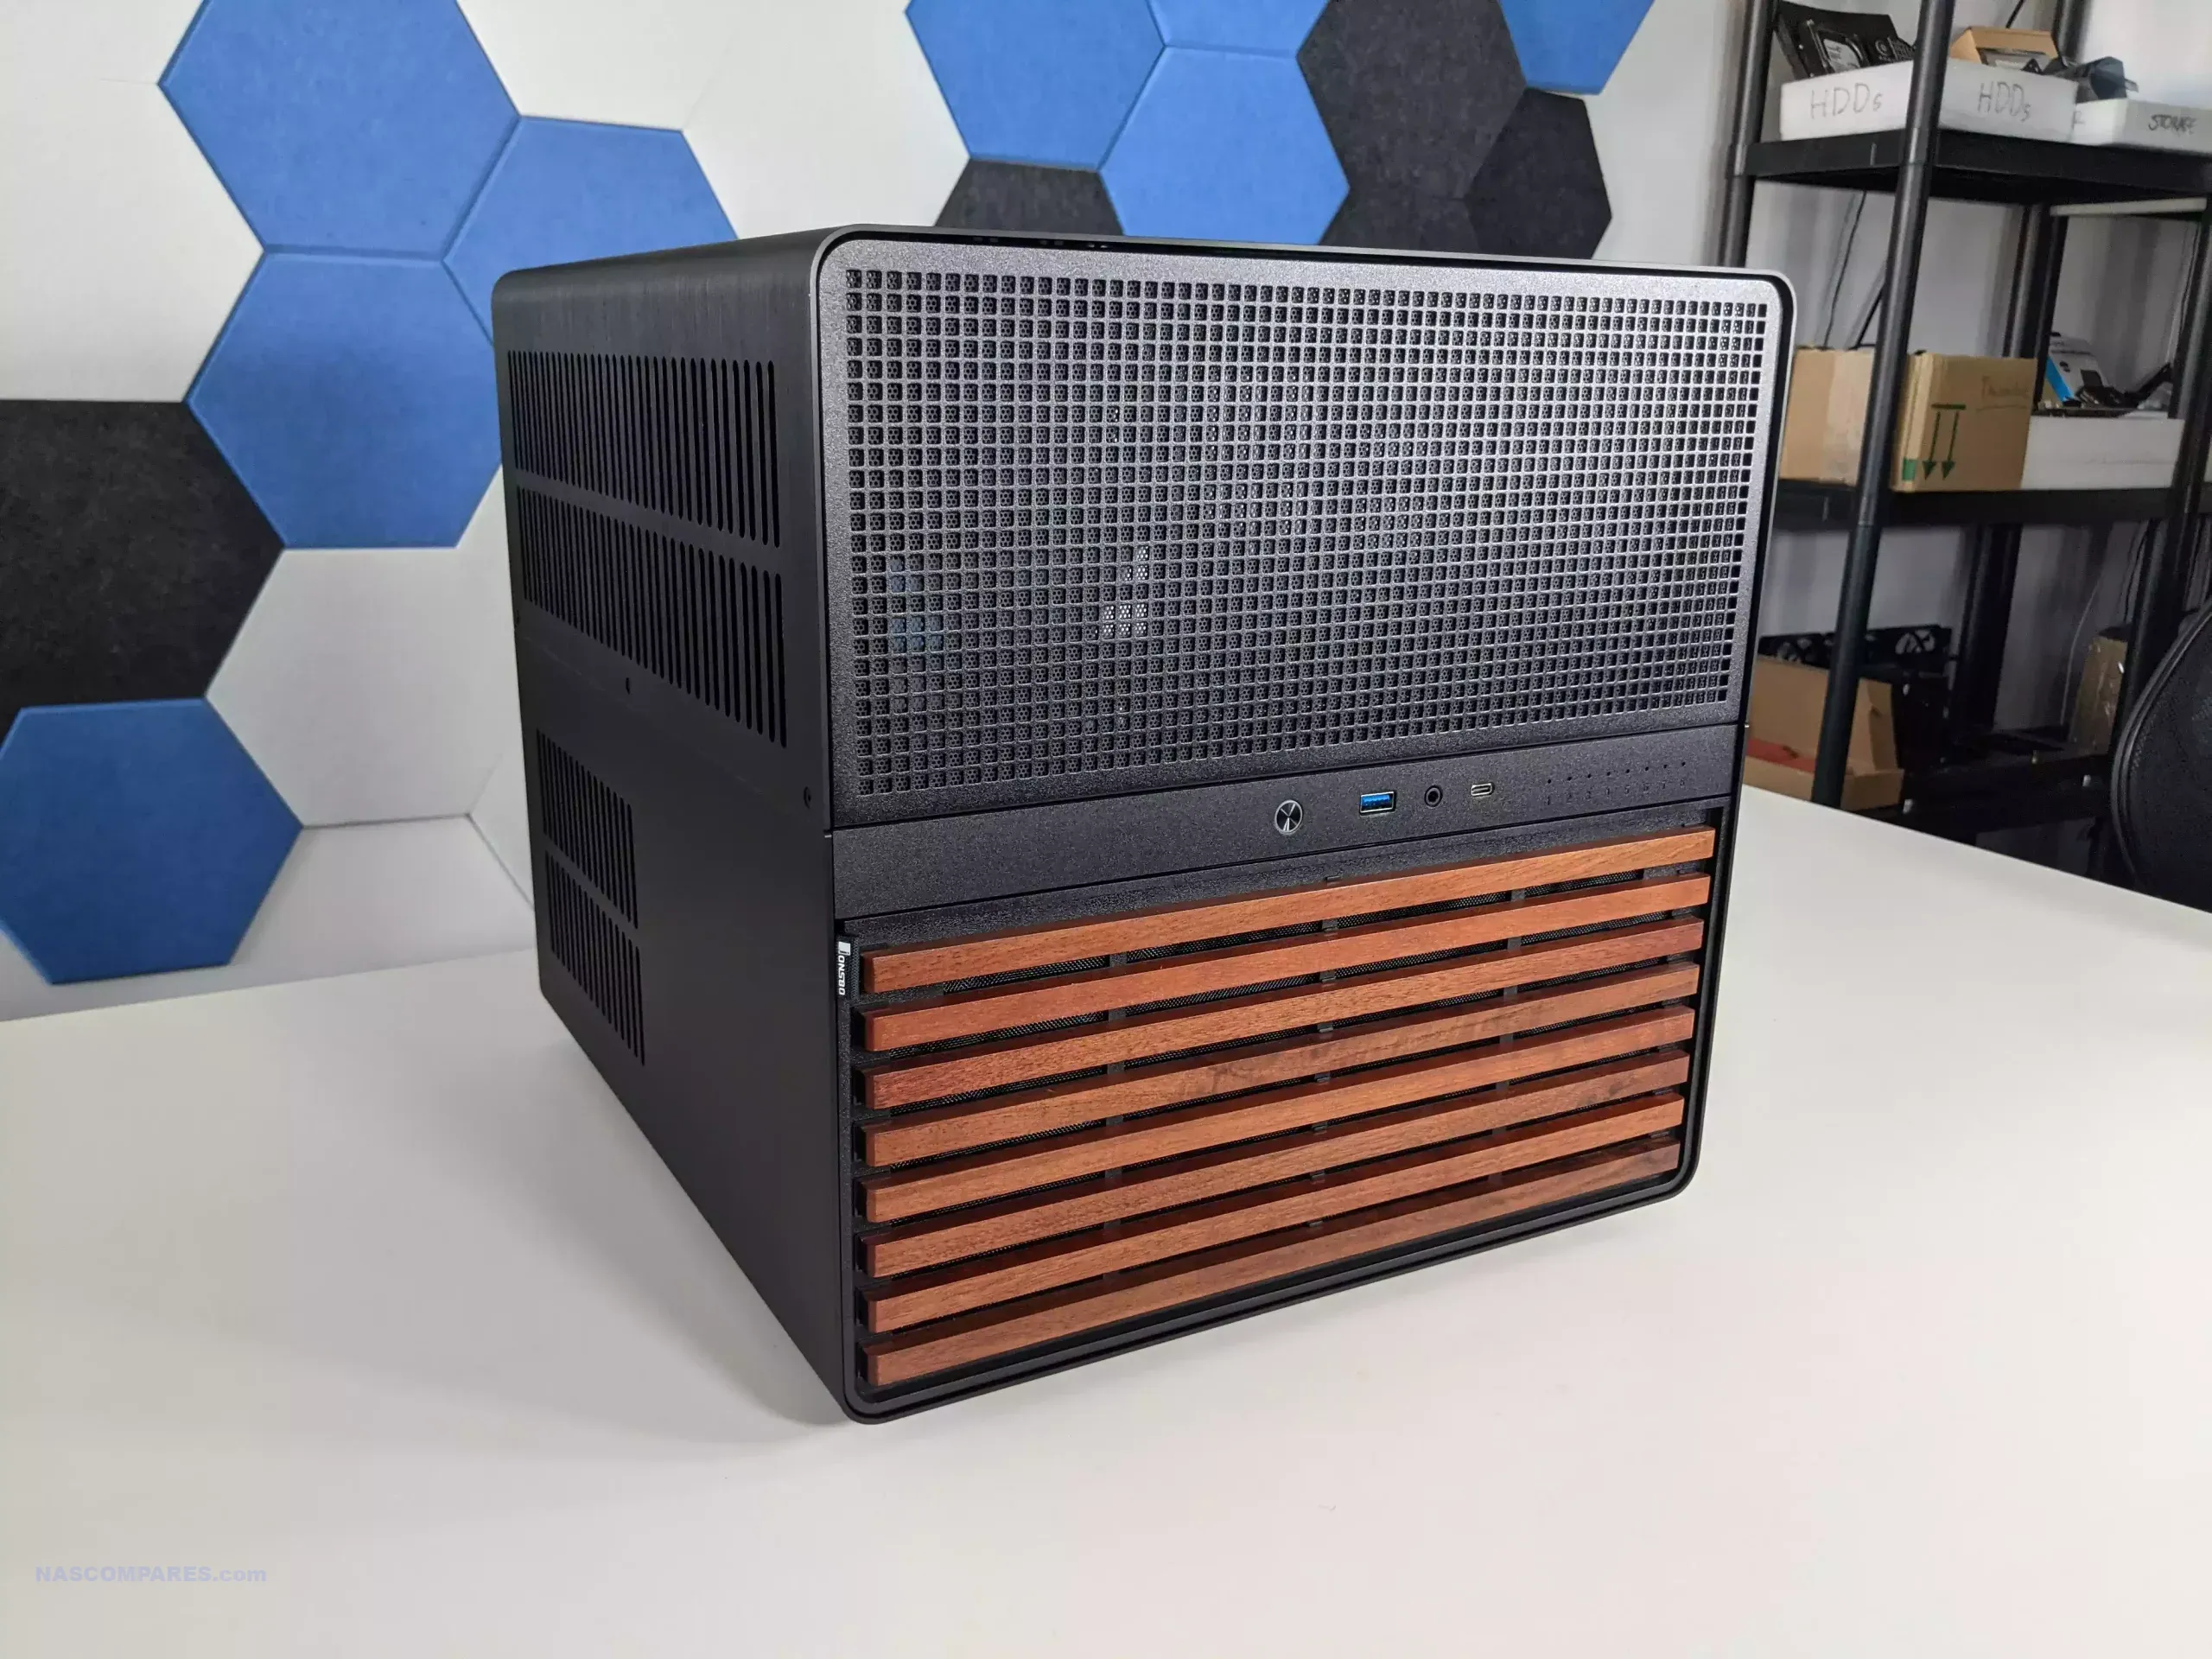
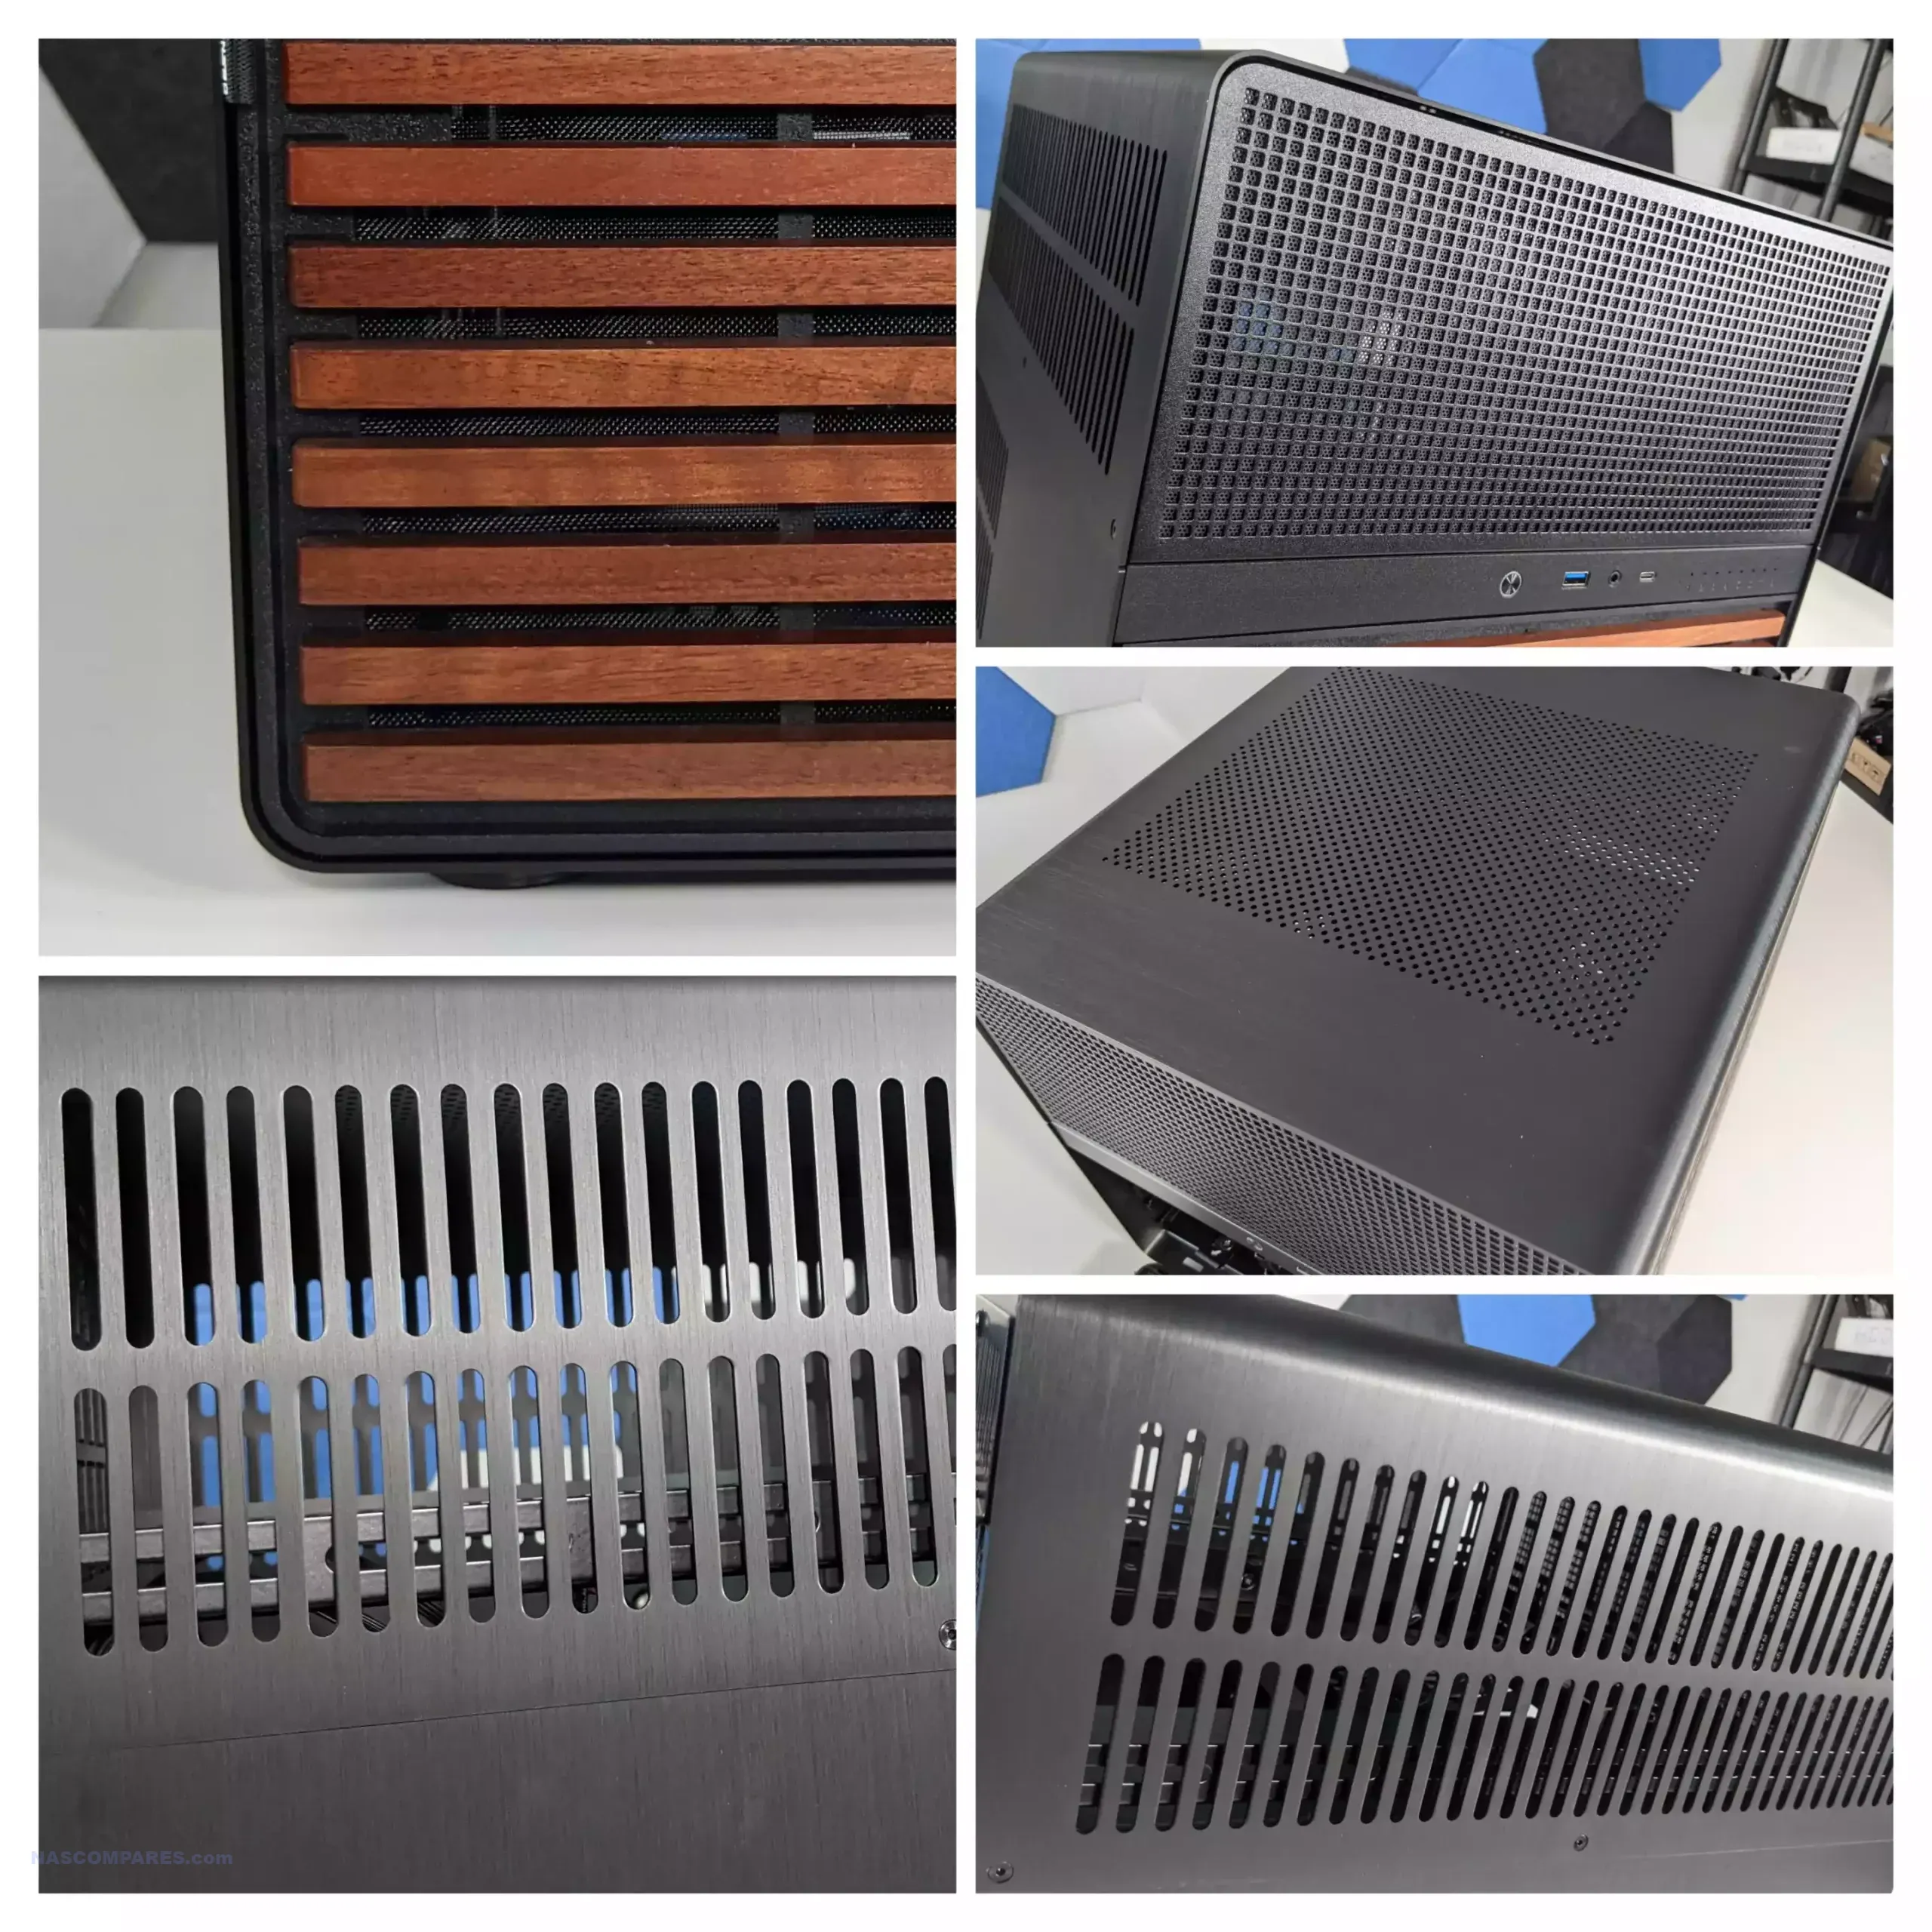
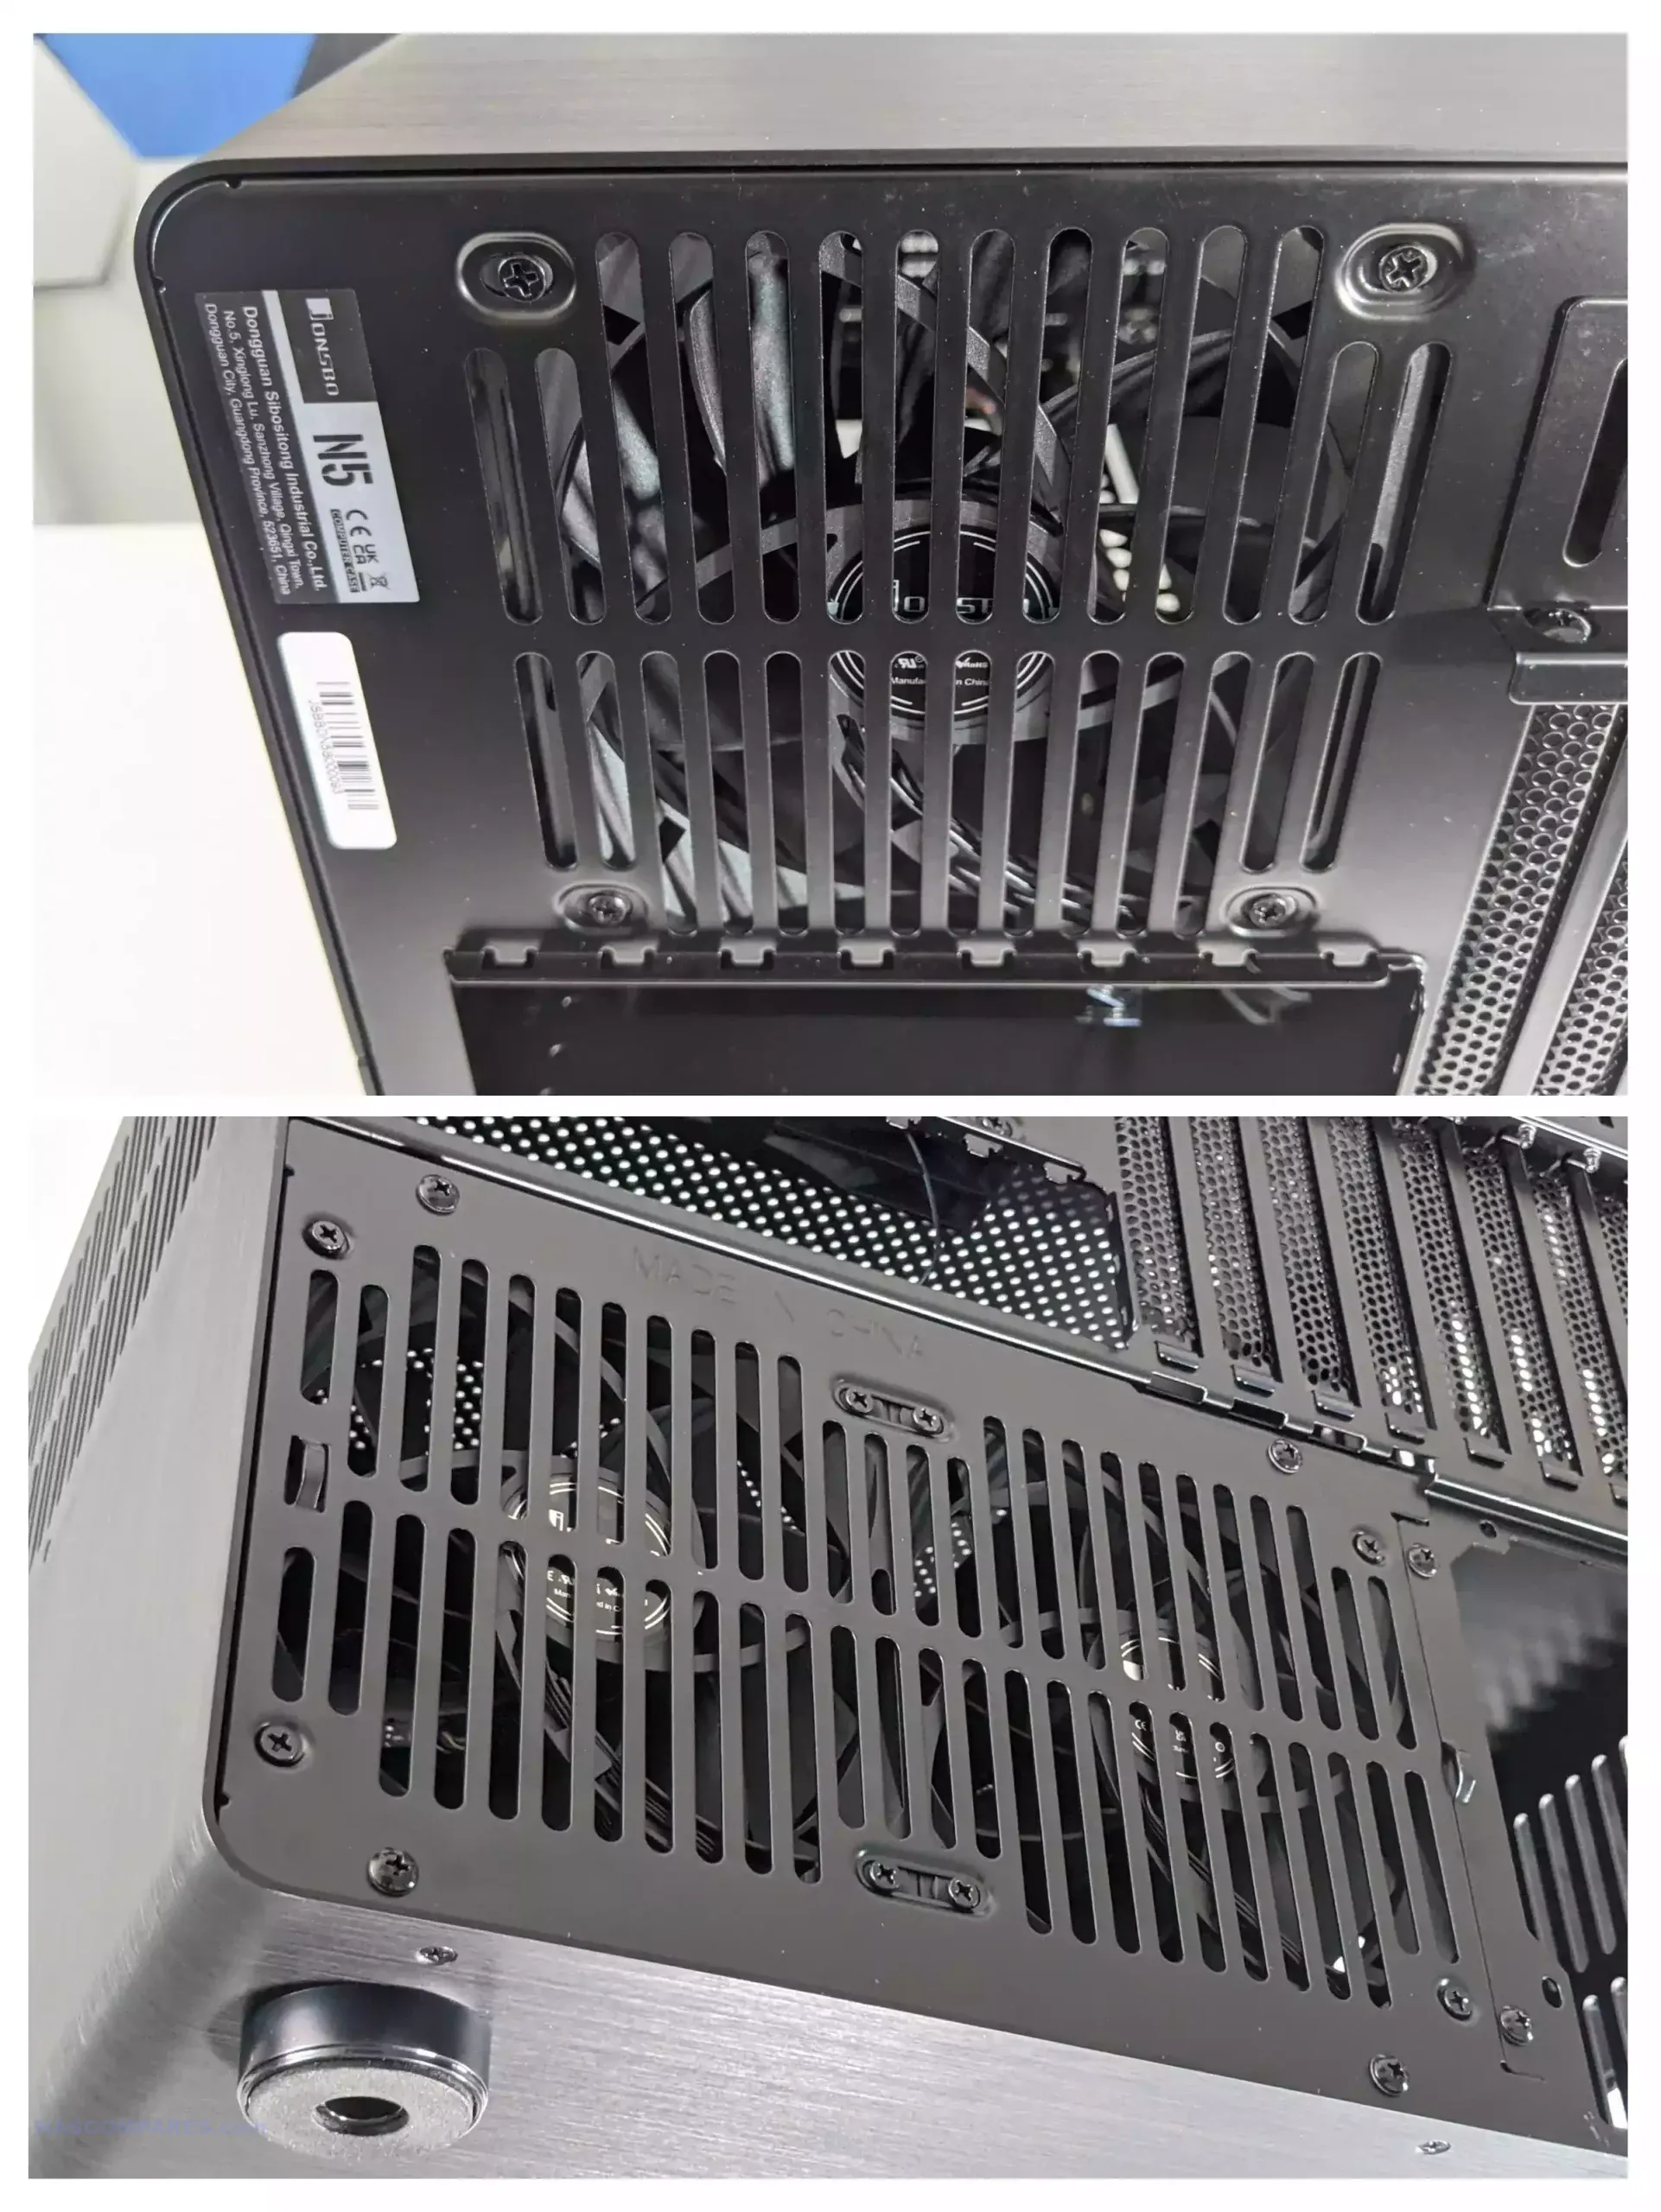
The N5 has passive ventilation coming out of the wazoo in practically every direction. From ventilation on the top of the case, vented slots on either side, the entirety of the front panel featuring two-stage ventilation at the top and bottom, and the rear of the casing being filled with more holes than a particularly unlucky gangster, Jonsbo is clearly aware of the fact that this system is going to be massively reliant on airflow to keep the large quantity of internal components cool.
Additionally, the kit includes three adhesive mesh dust panels that can be fitted to the three vents on the side compartments of the N5 enclosure. These are completely optional, but I would still recommend utilizing them to limit any kind of external detritus when using this big old case!
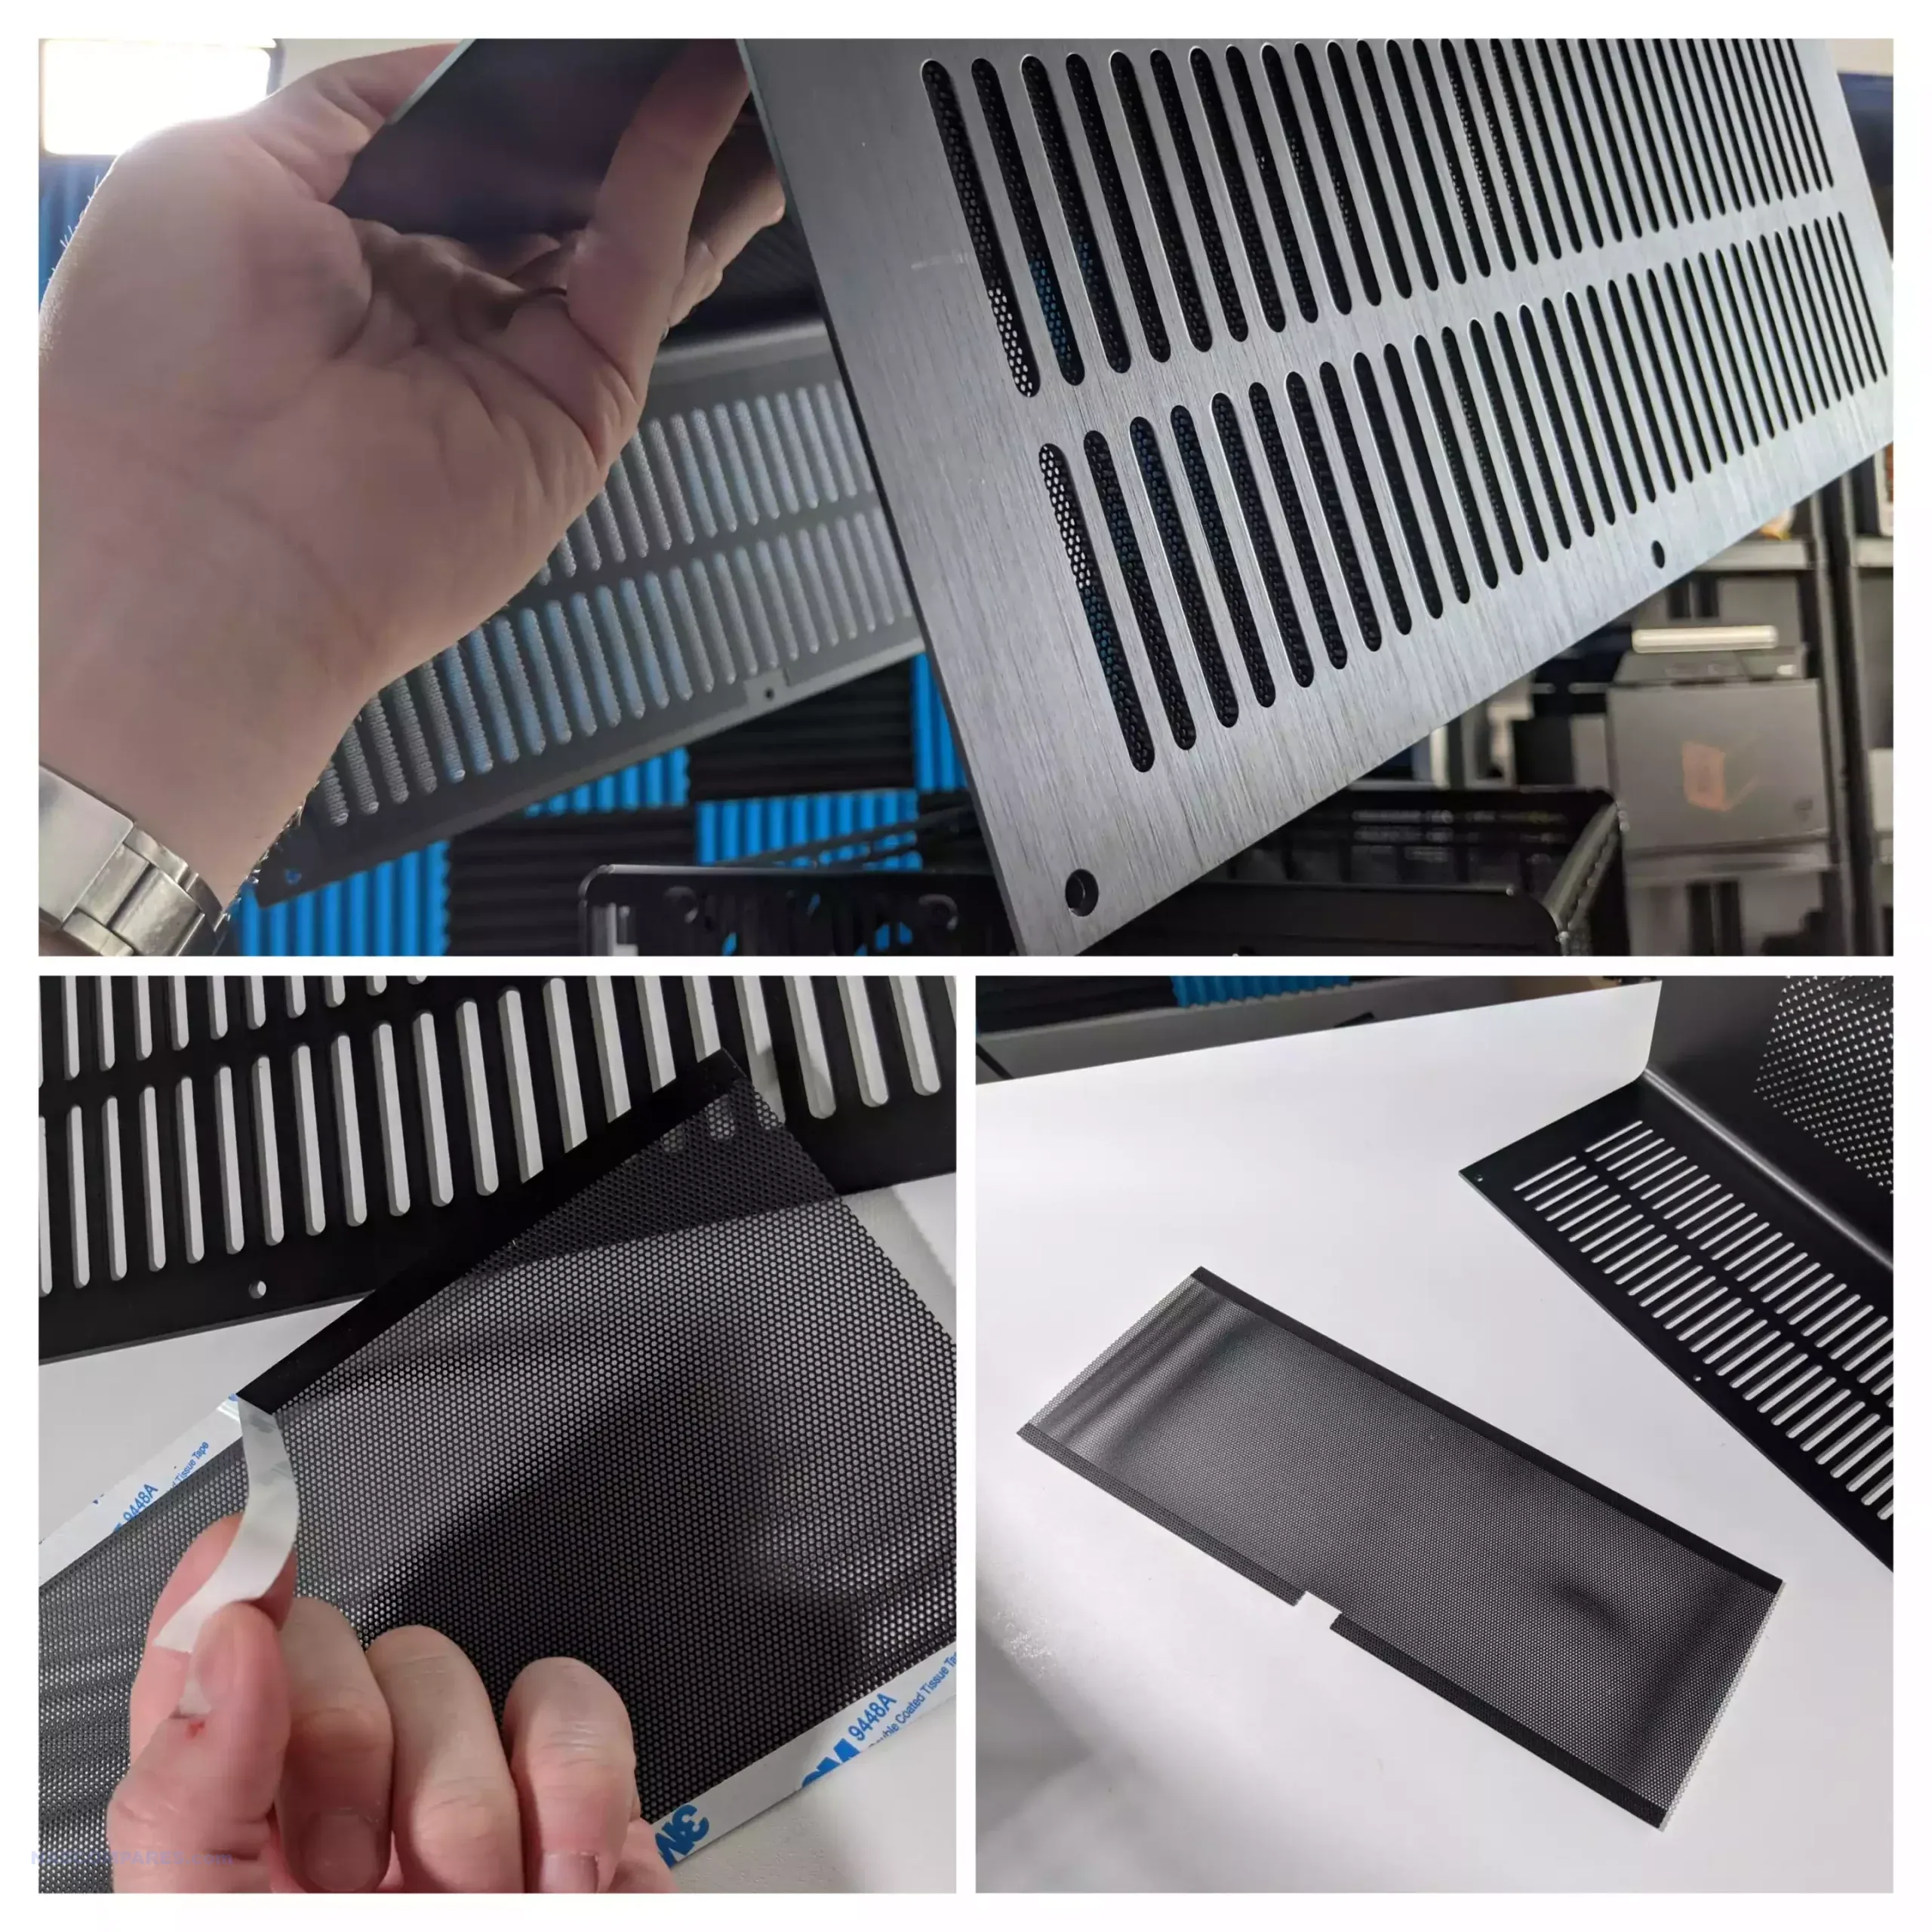
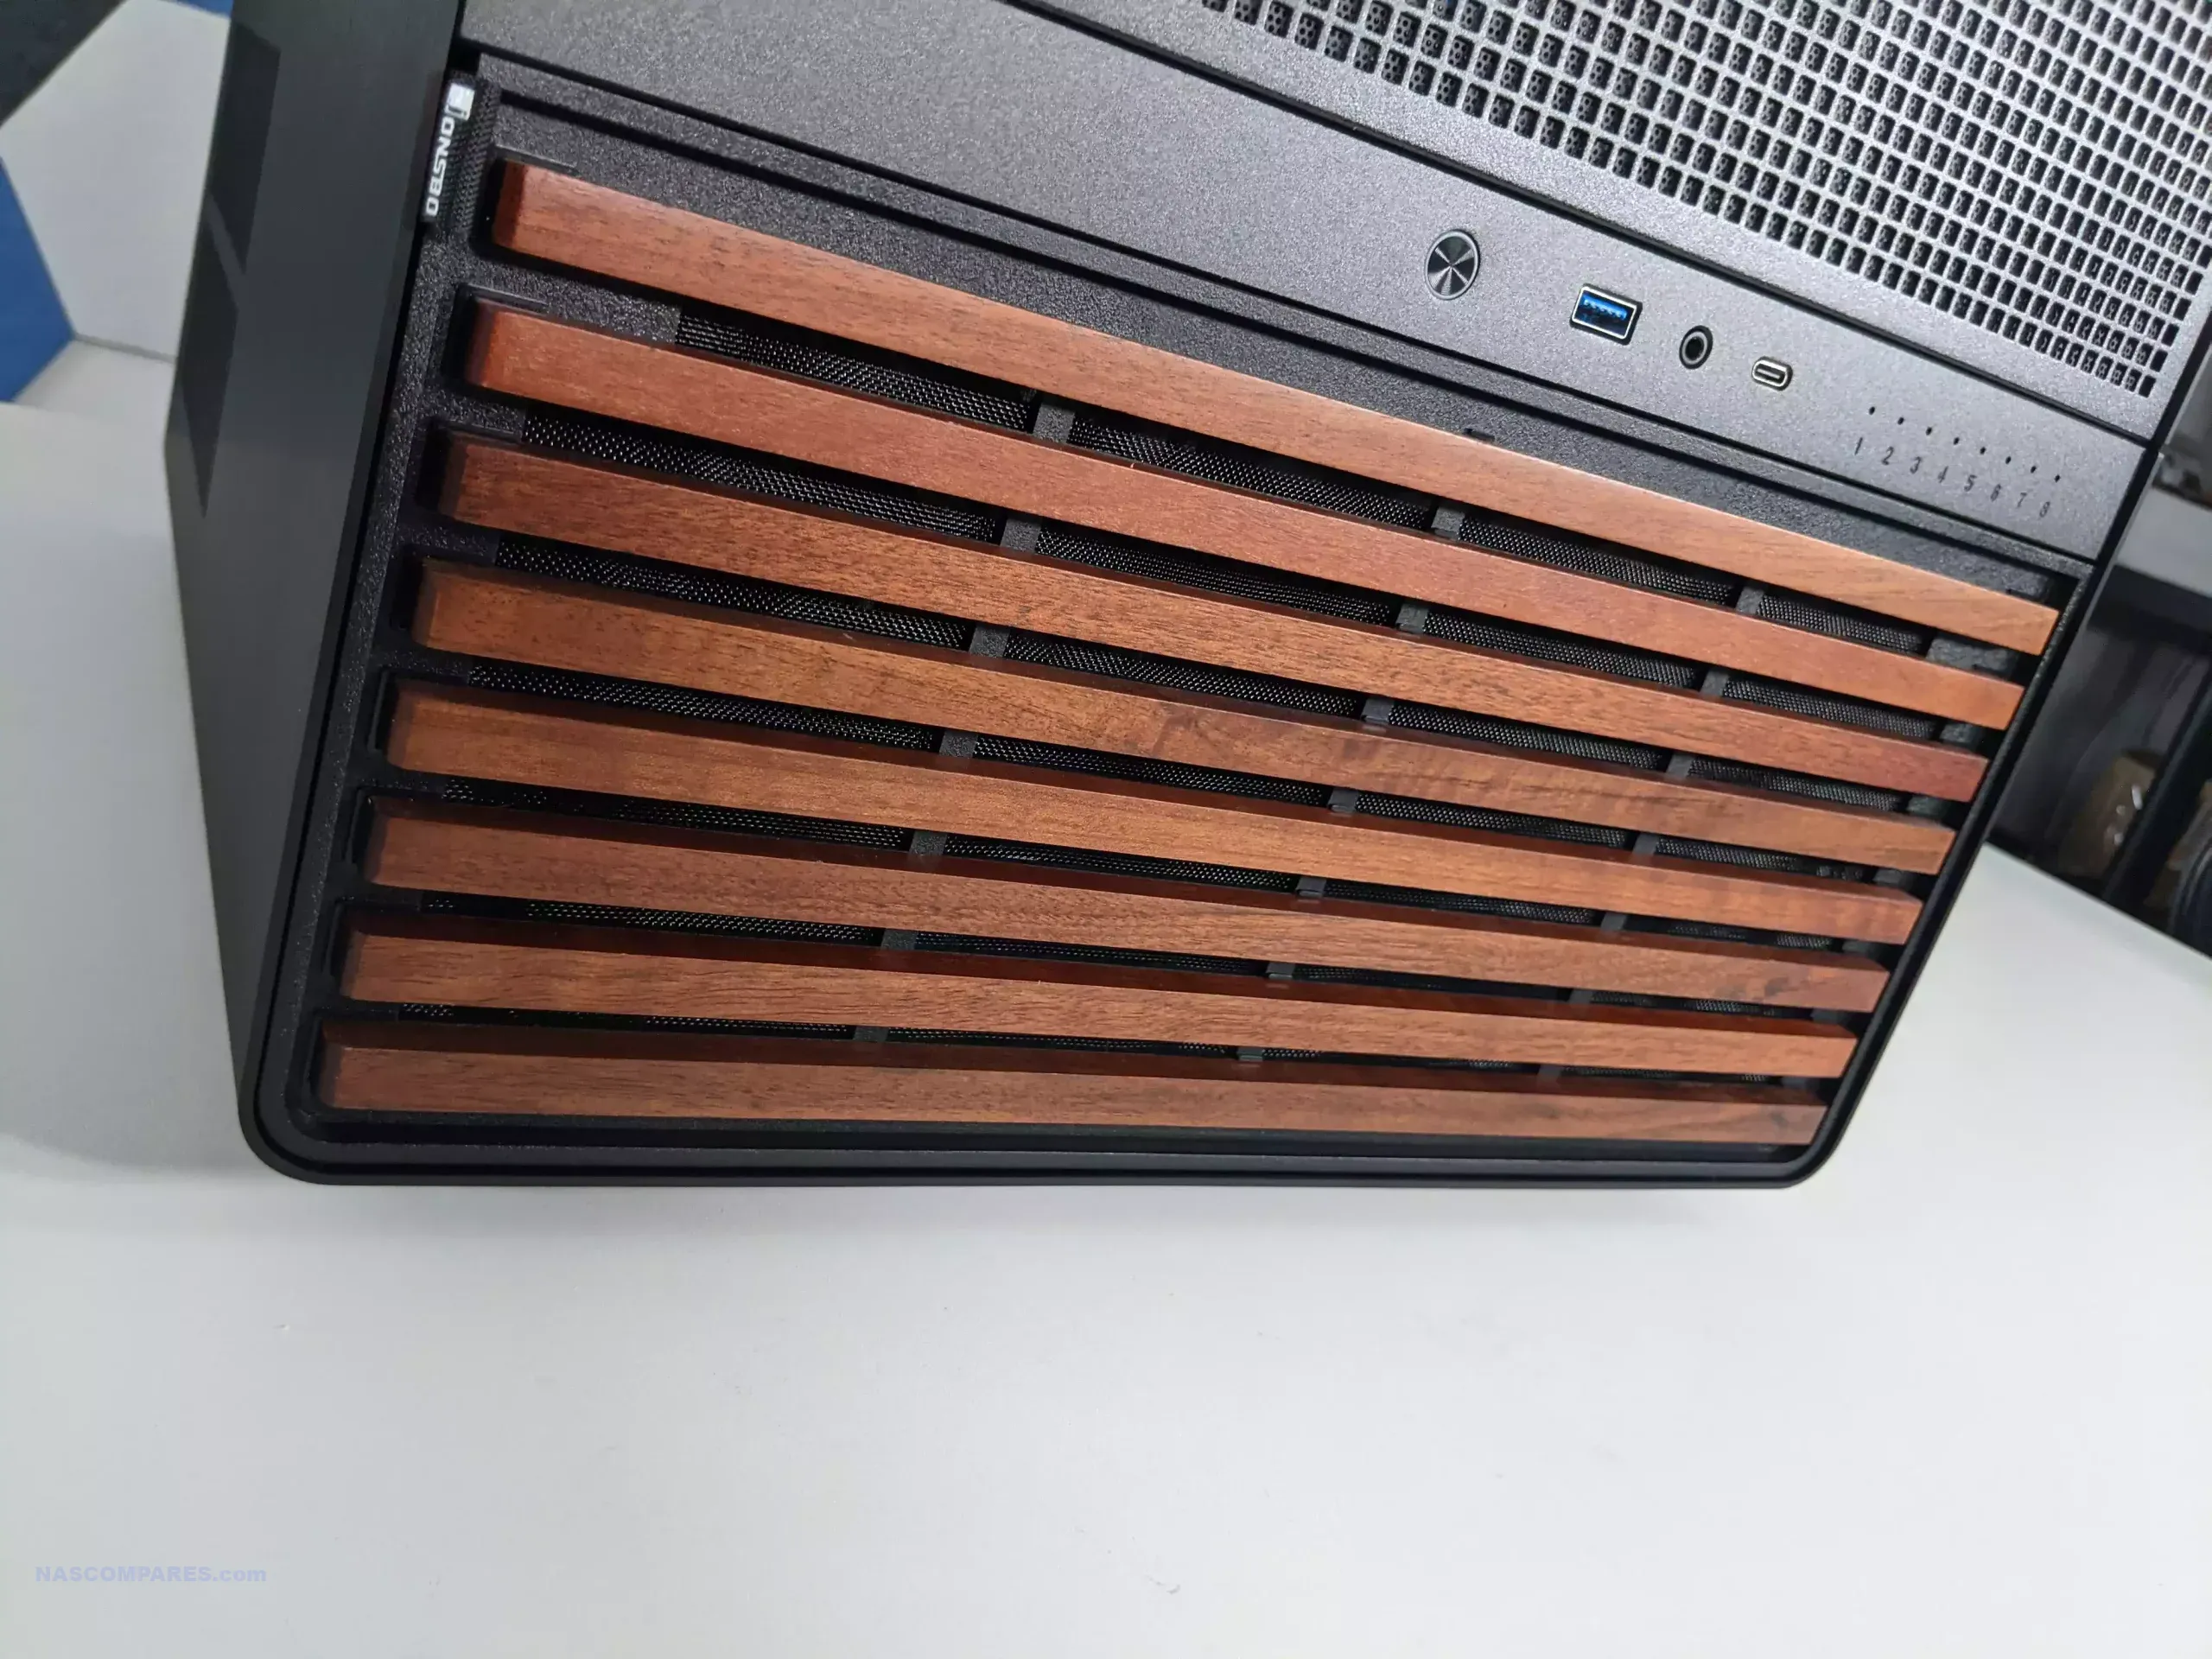
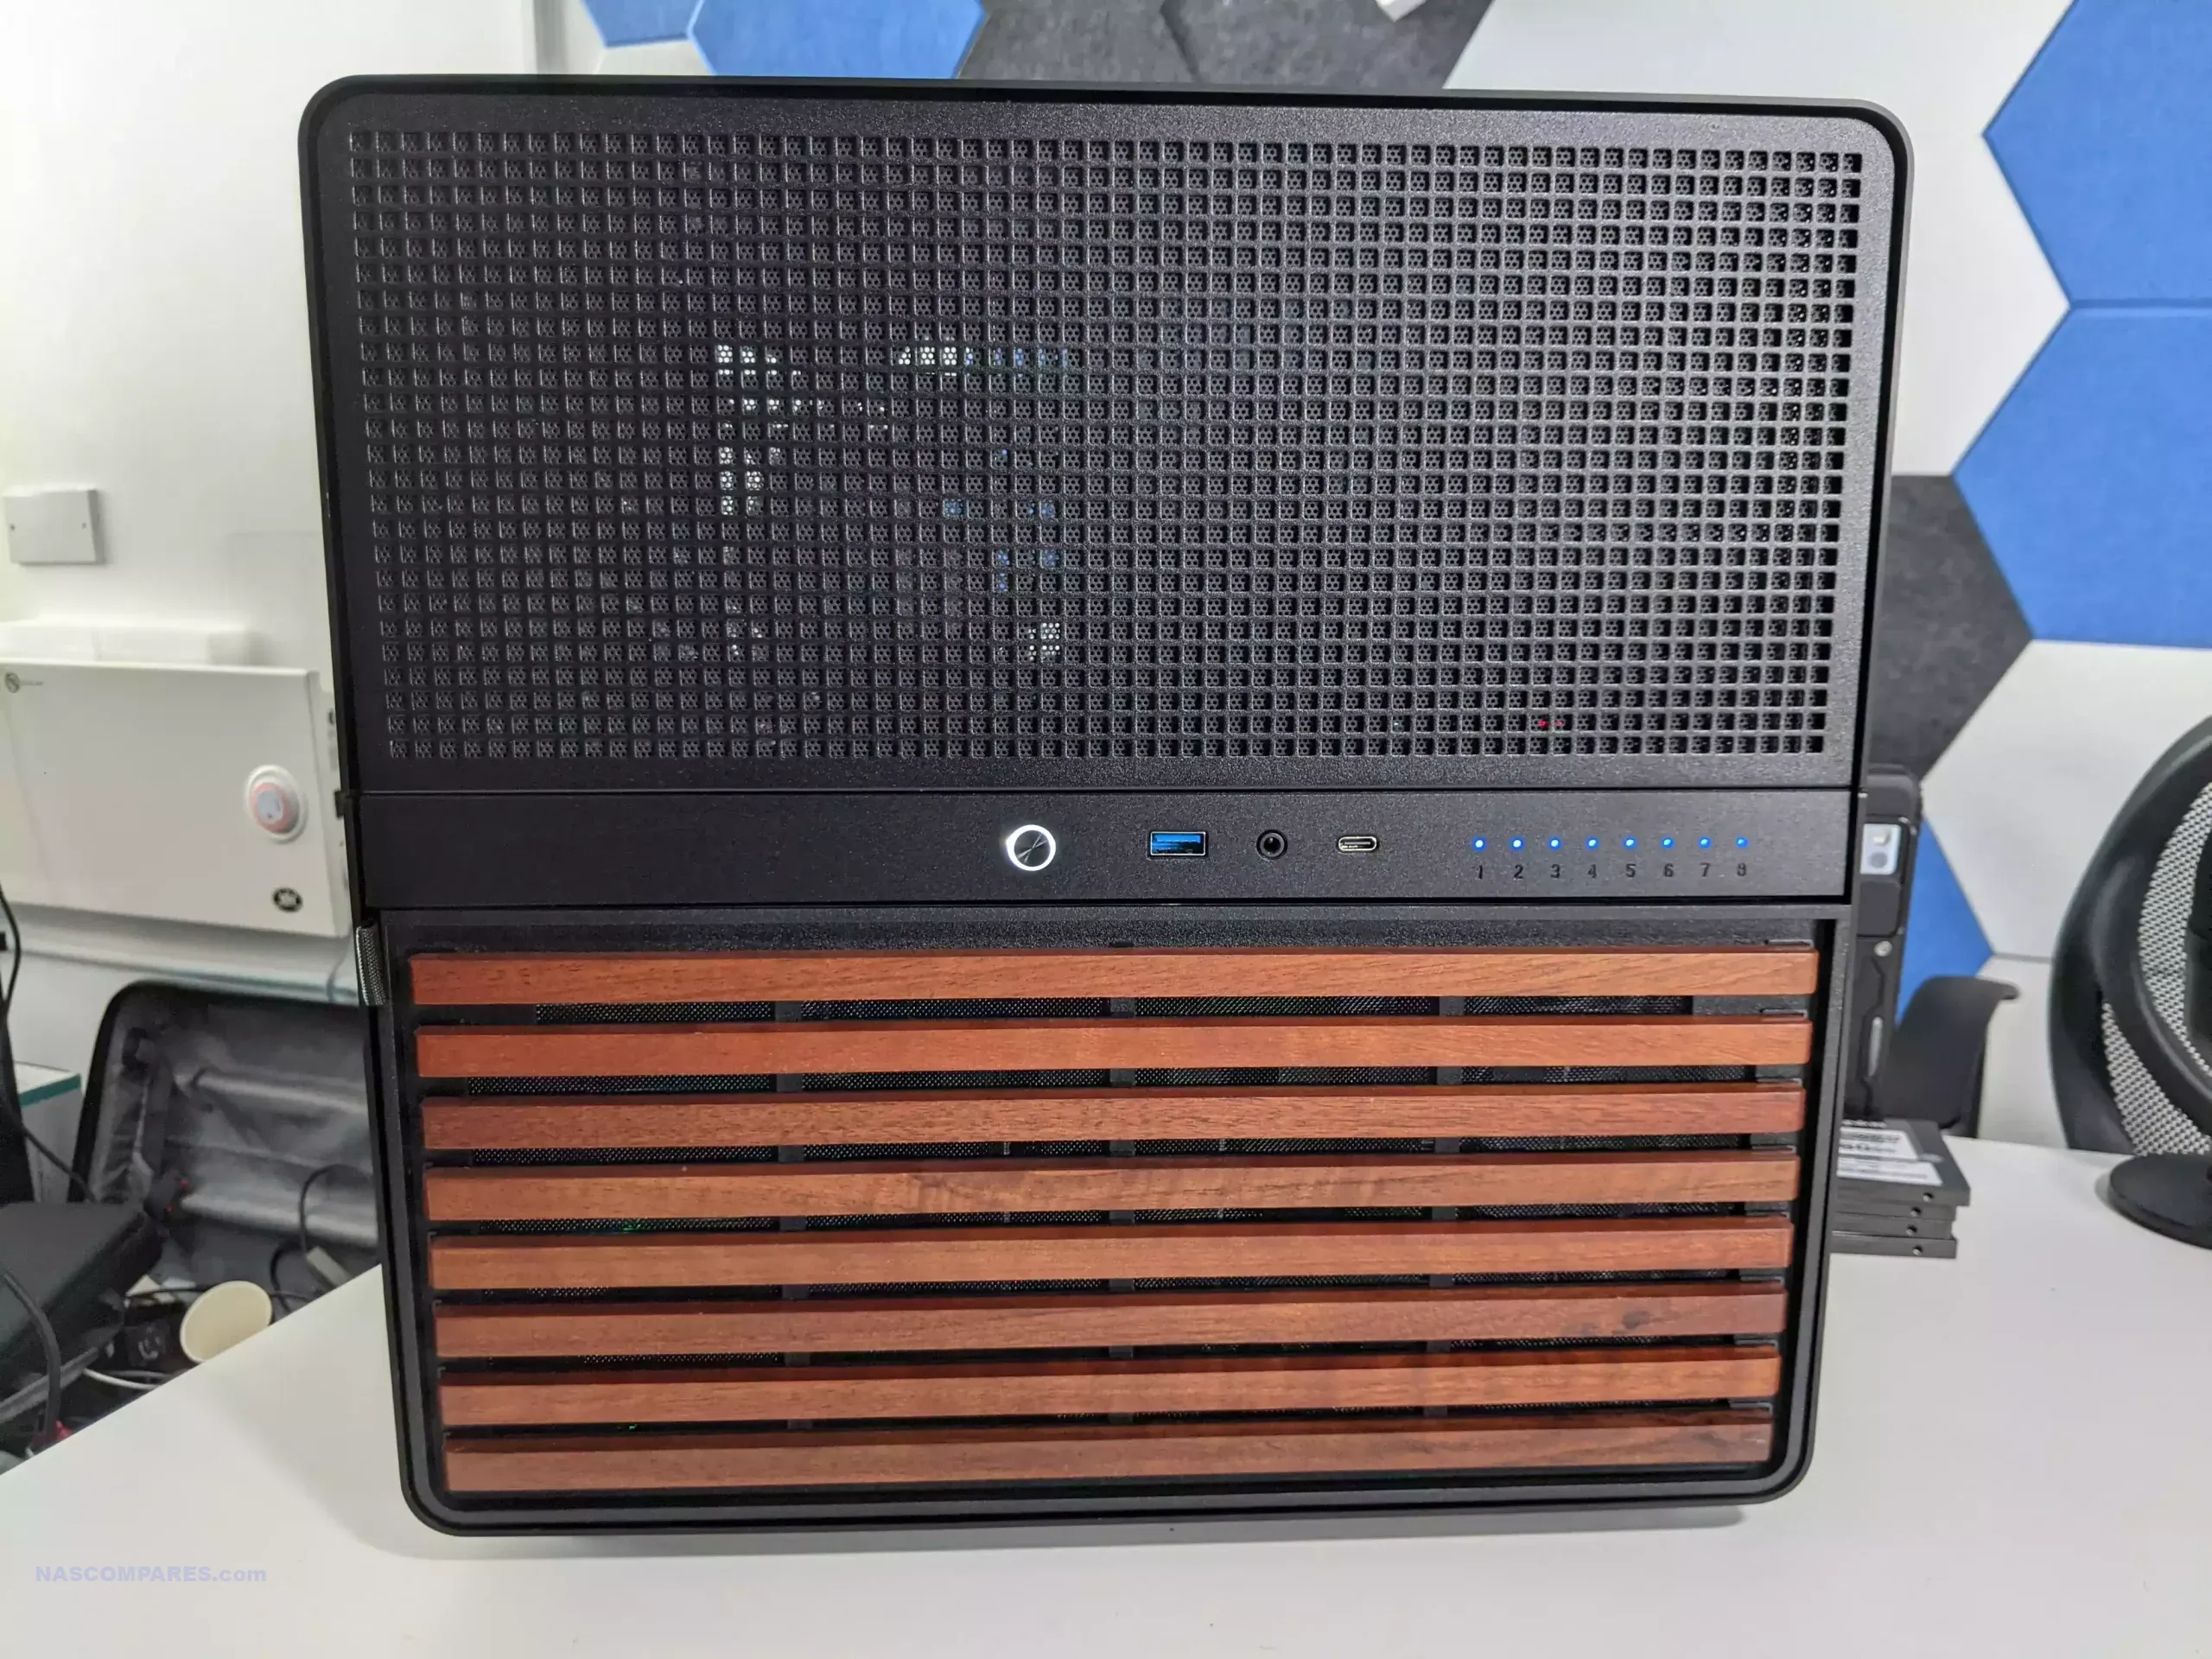
The front panel also features a pre-fitted mesh dust panel behind its large ventilation slits throughout. The front panel comes off easily thanks to a fabric pull handle and is real wood, at 8 mm thick.
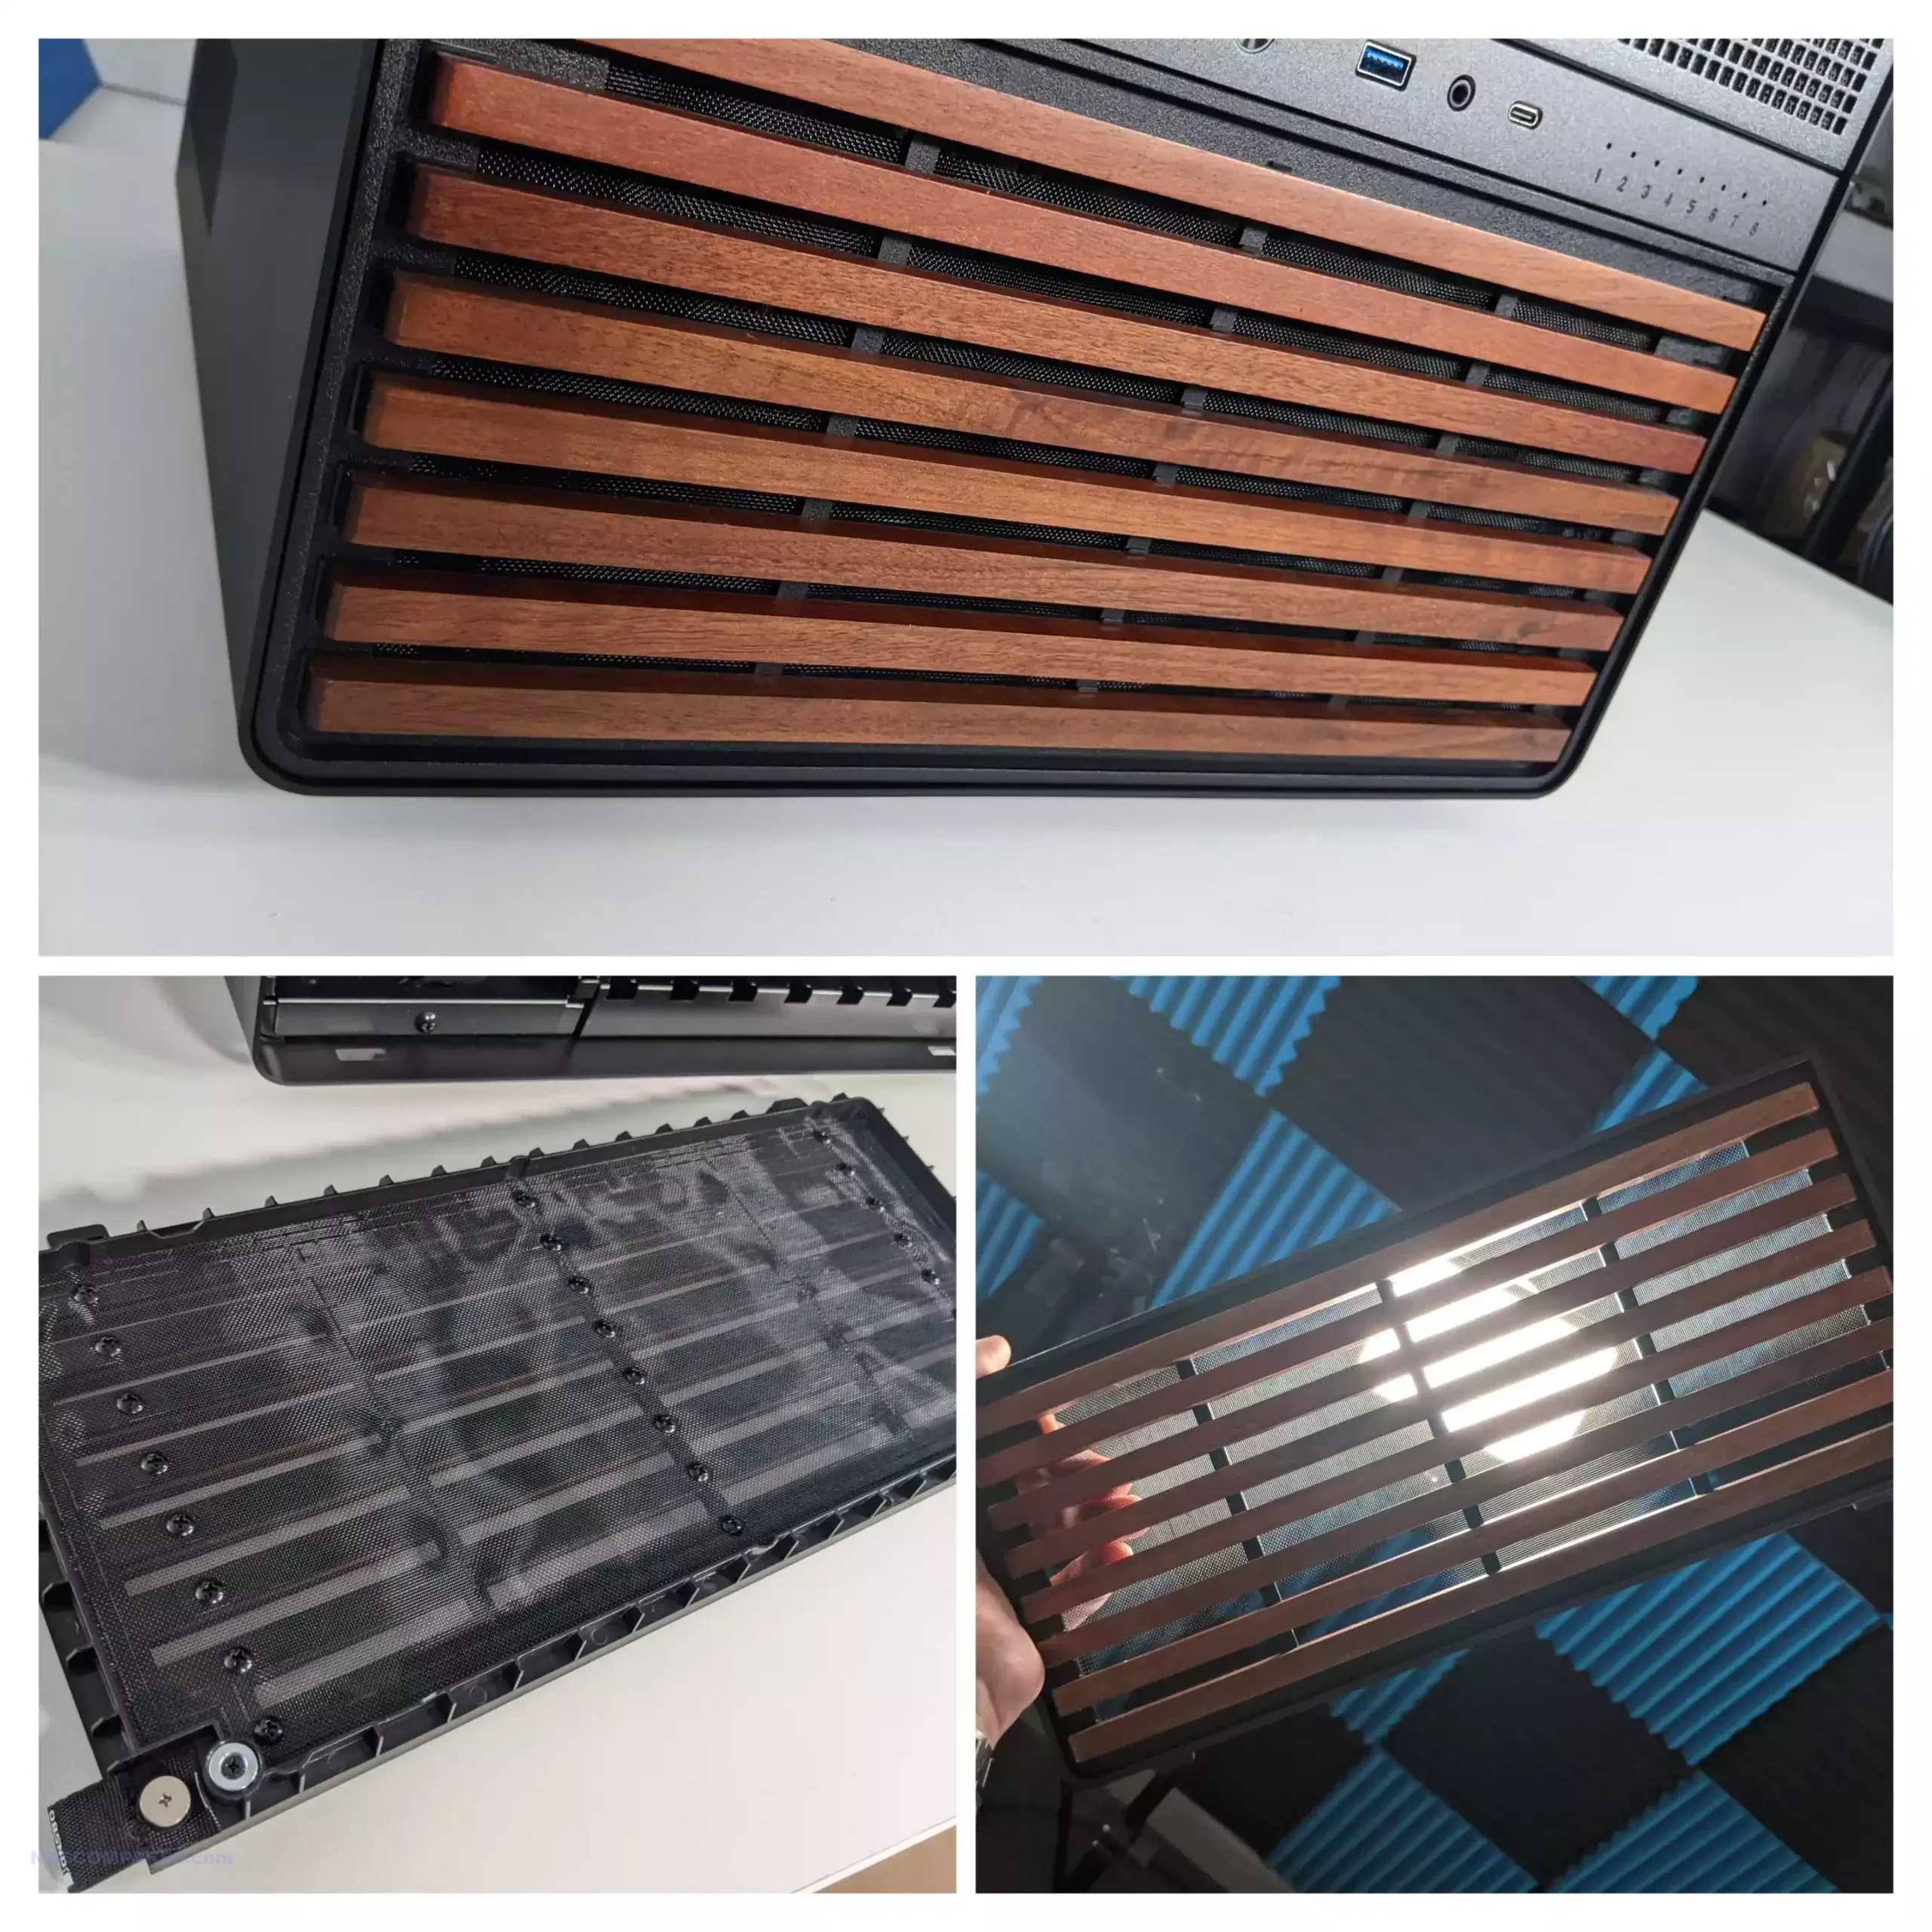
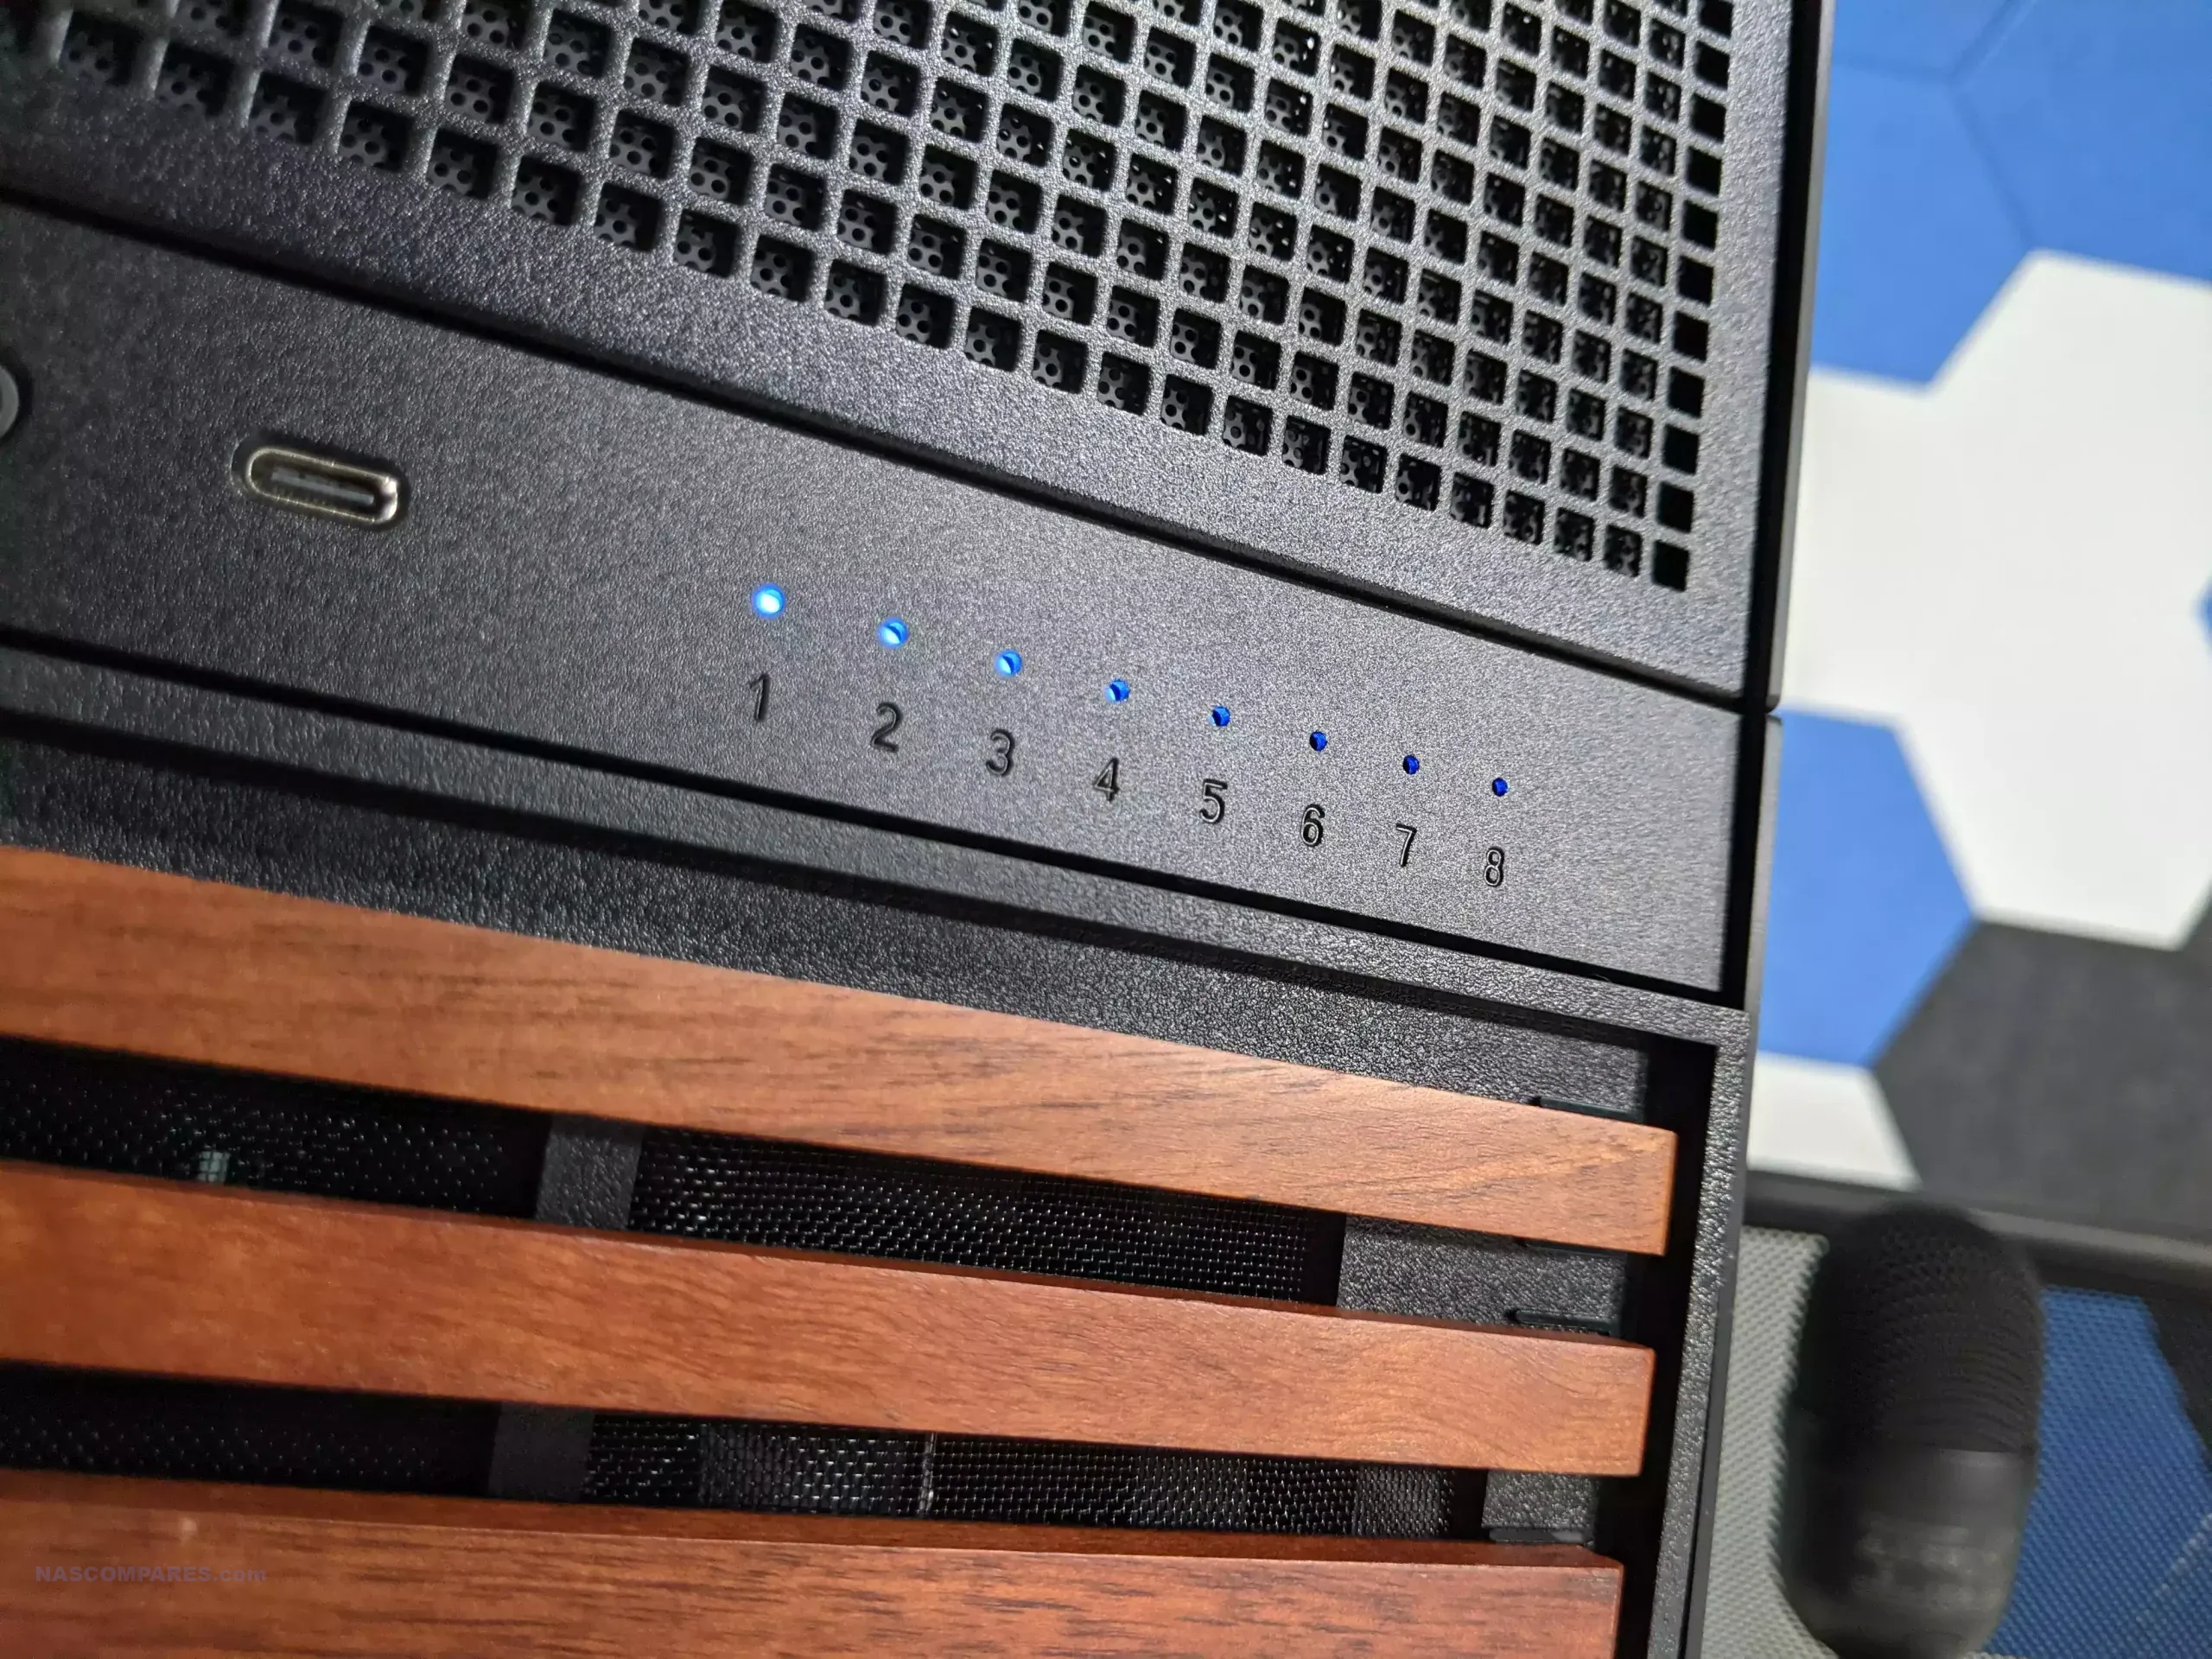
LED indicators that show drive health and activity are oddly displaced on the system. However, the eight vertical bays have their own eight dedicated LEDs shown clearly on the front panel of the N5 and are as clear as you would expect. However, the four horizontally mounted drives have their own LEDs tucked somewhat hidden to the left of the casing internally and are by no means as clear as the initial eight LEDs. This is an odd choice and one that I can only assume is down to utilizing the original N3 design a little too much, or the difficulty of porting in the four additional LEDs from the sub HDD cage into that front panel smoothly.
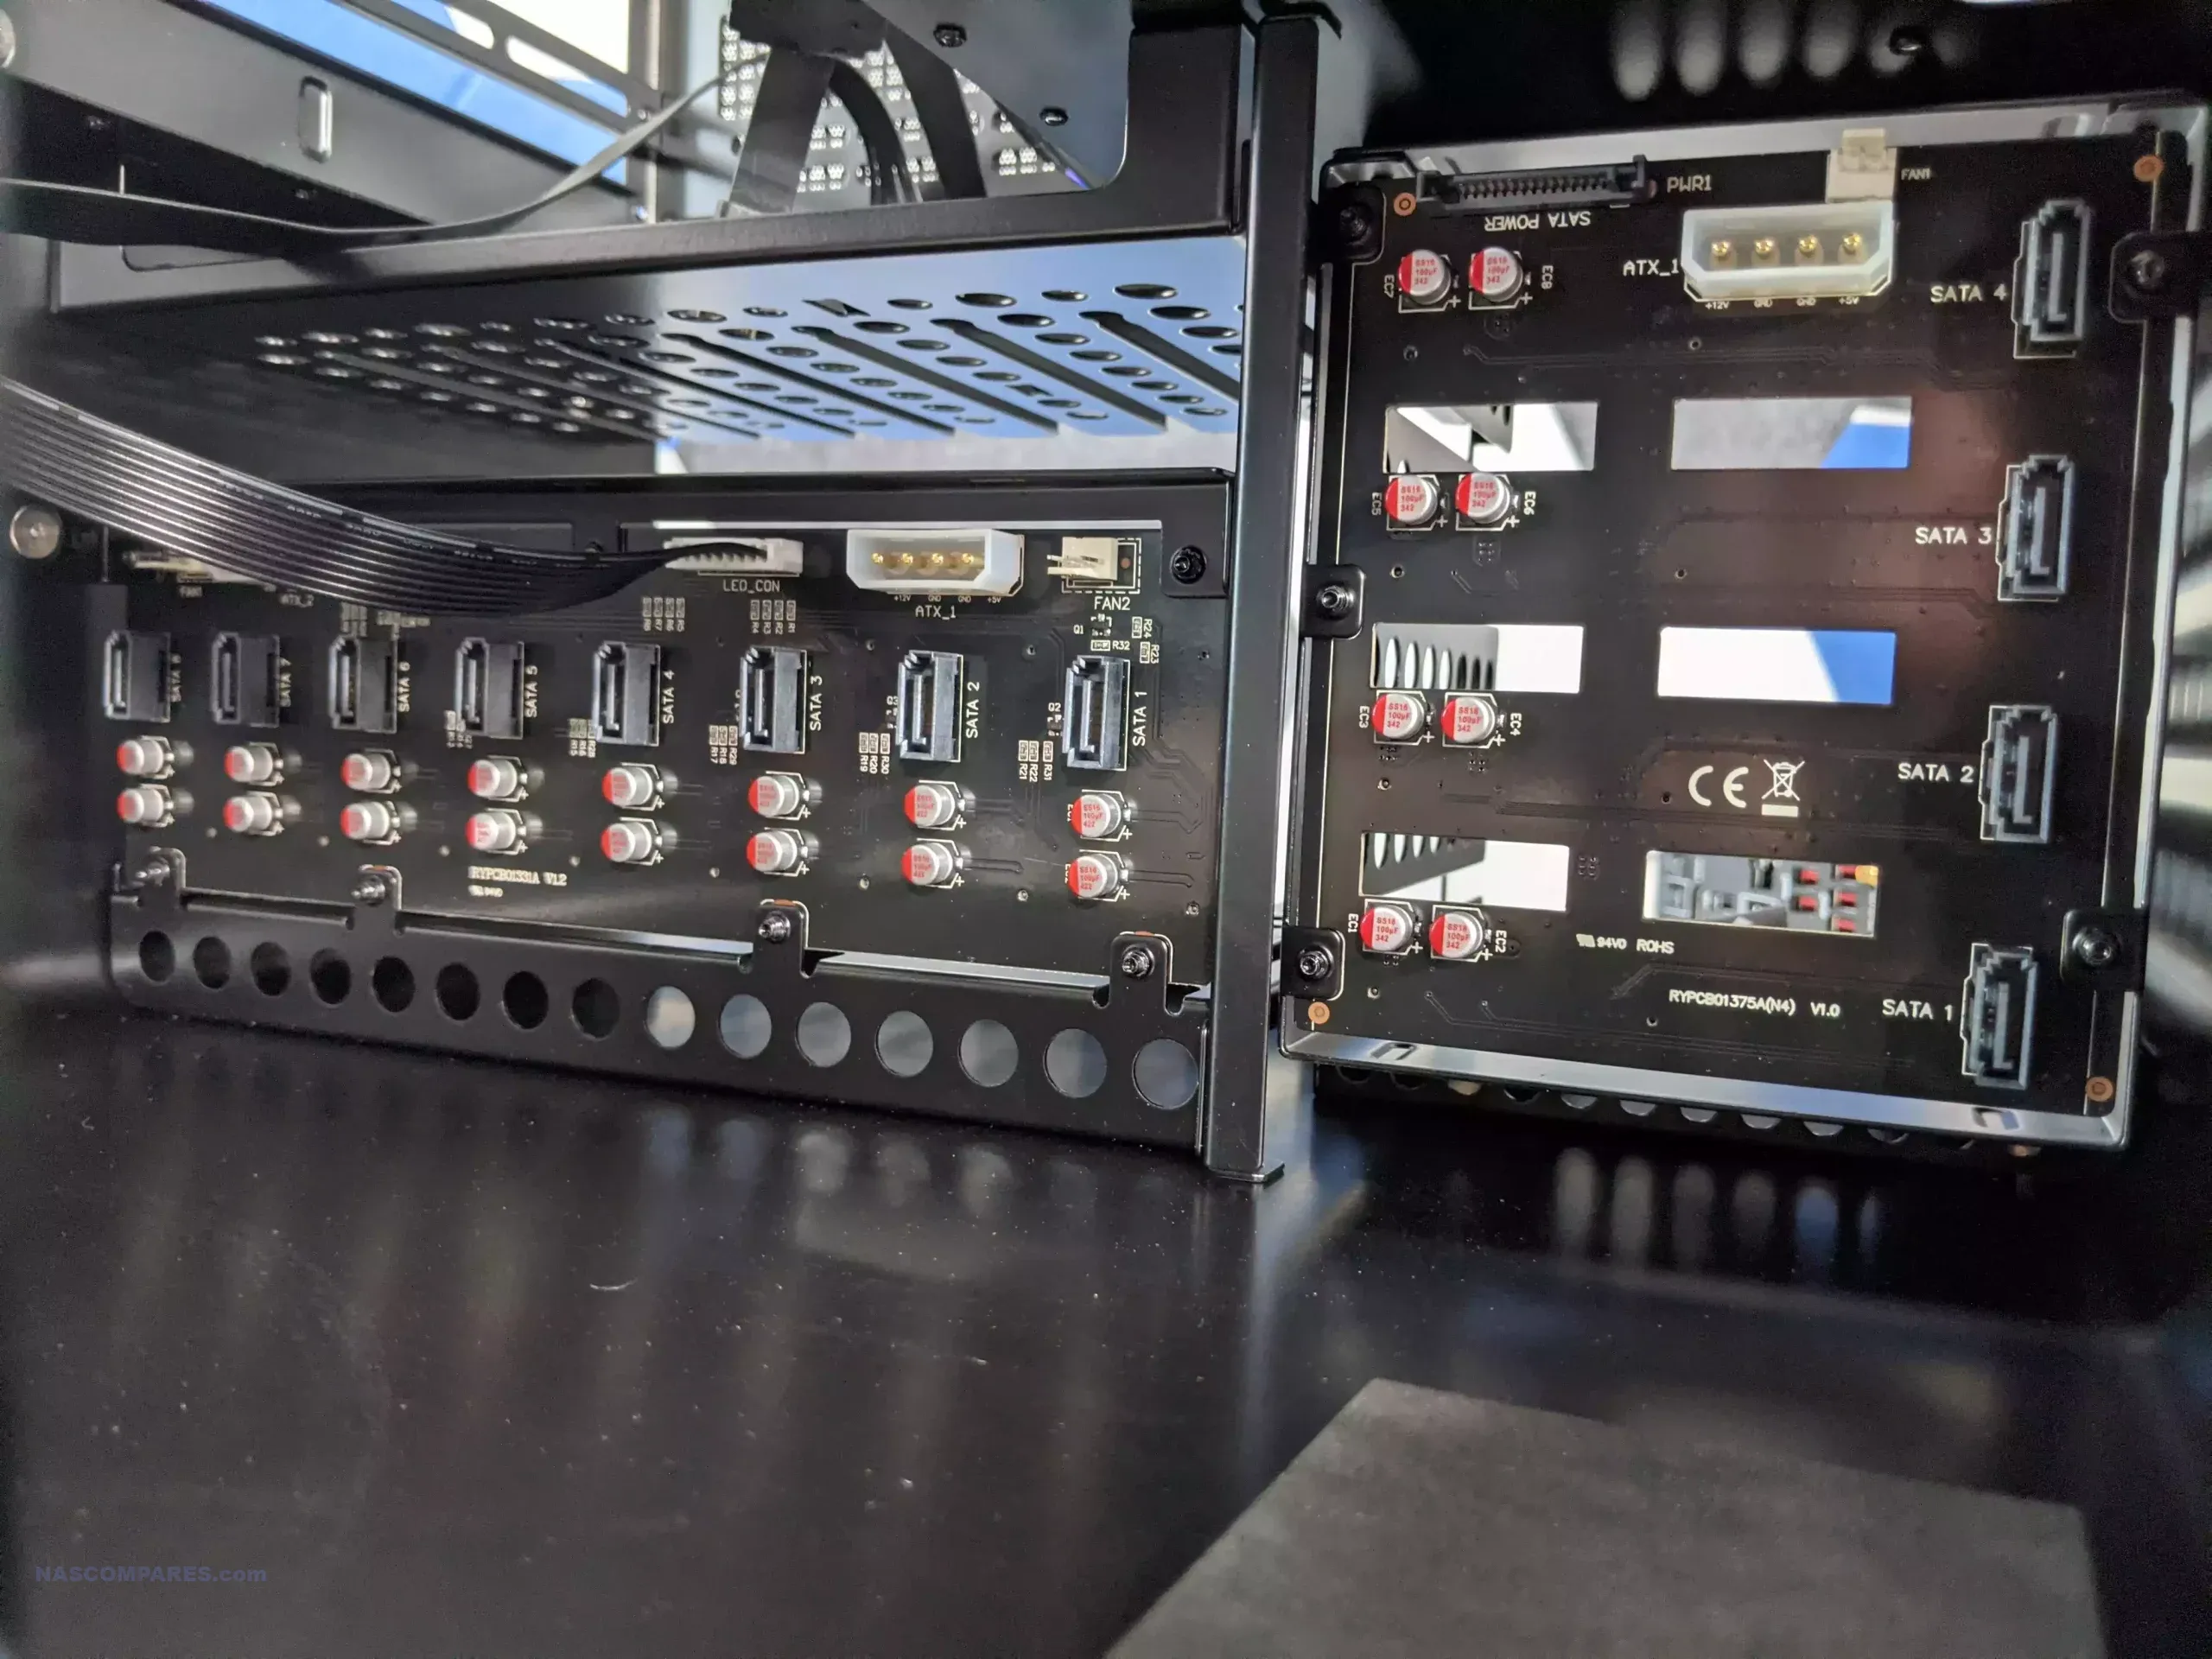
I populated the system with 12 3.5-inch hard drives, and each drive feeds directly into its own dedicated combined SATA power and data interface—no loose wires and all interfaces are mounted on their own PCB backplane. Internally, it is actually two separate PCBs, with eight on one and four on the other.
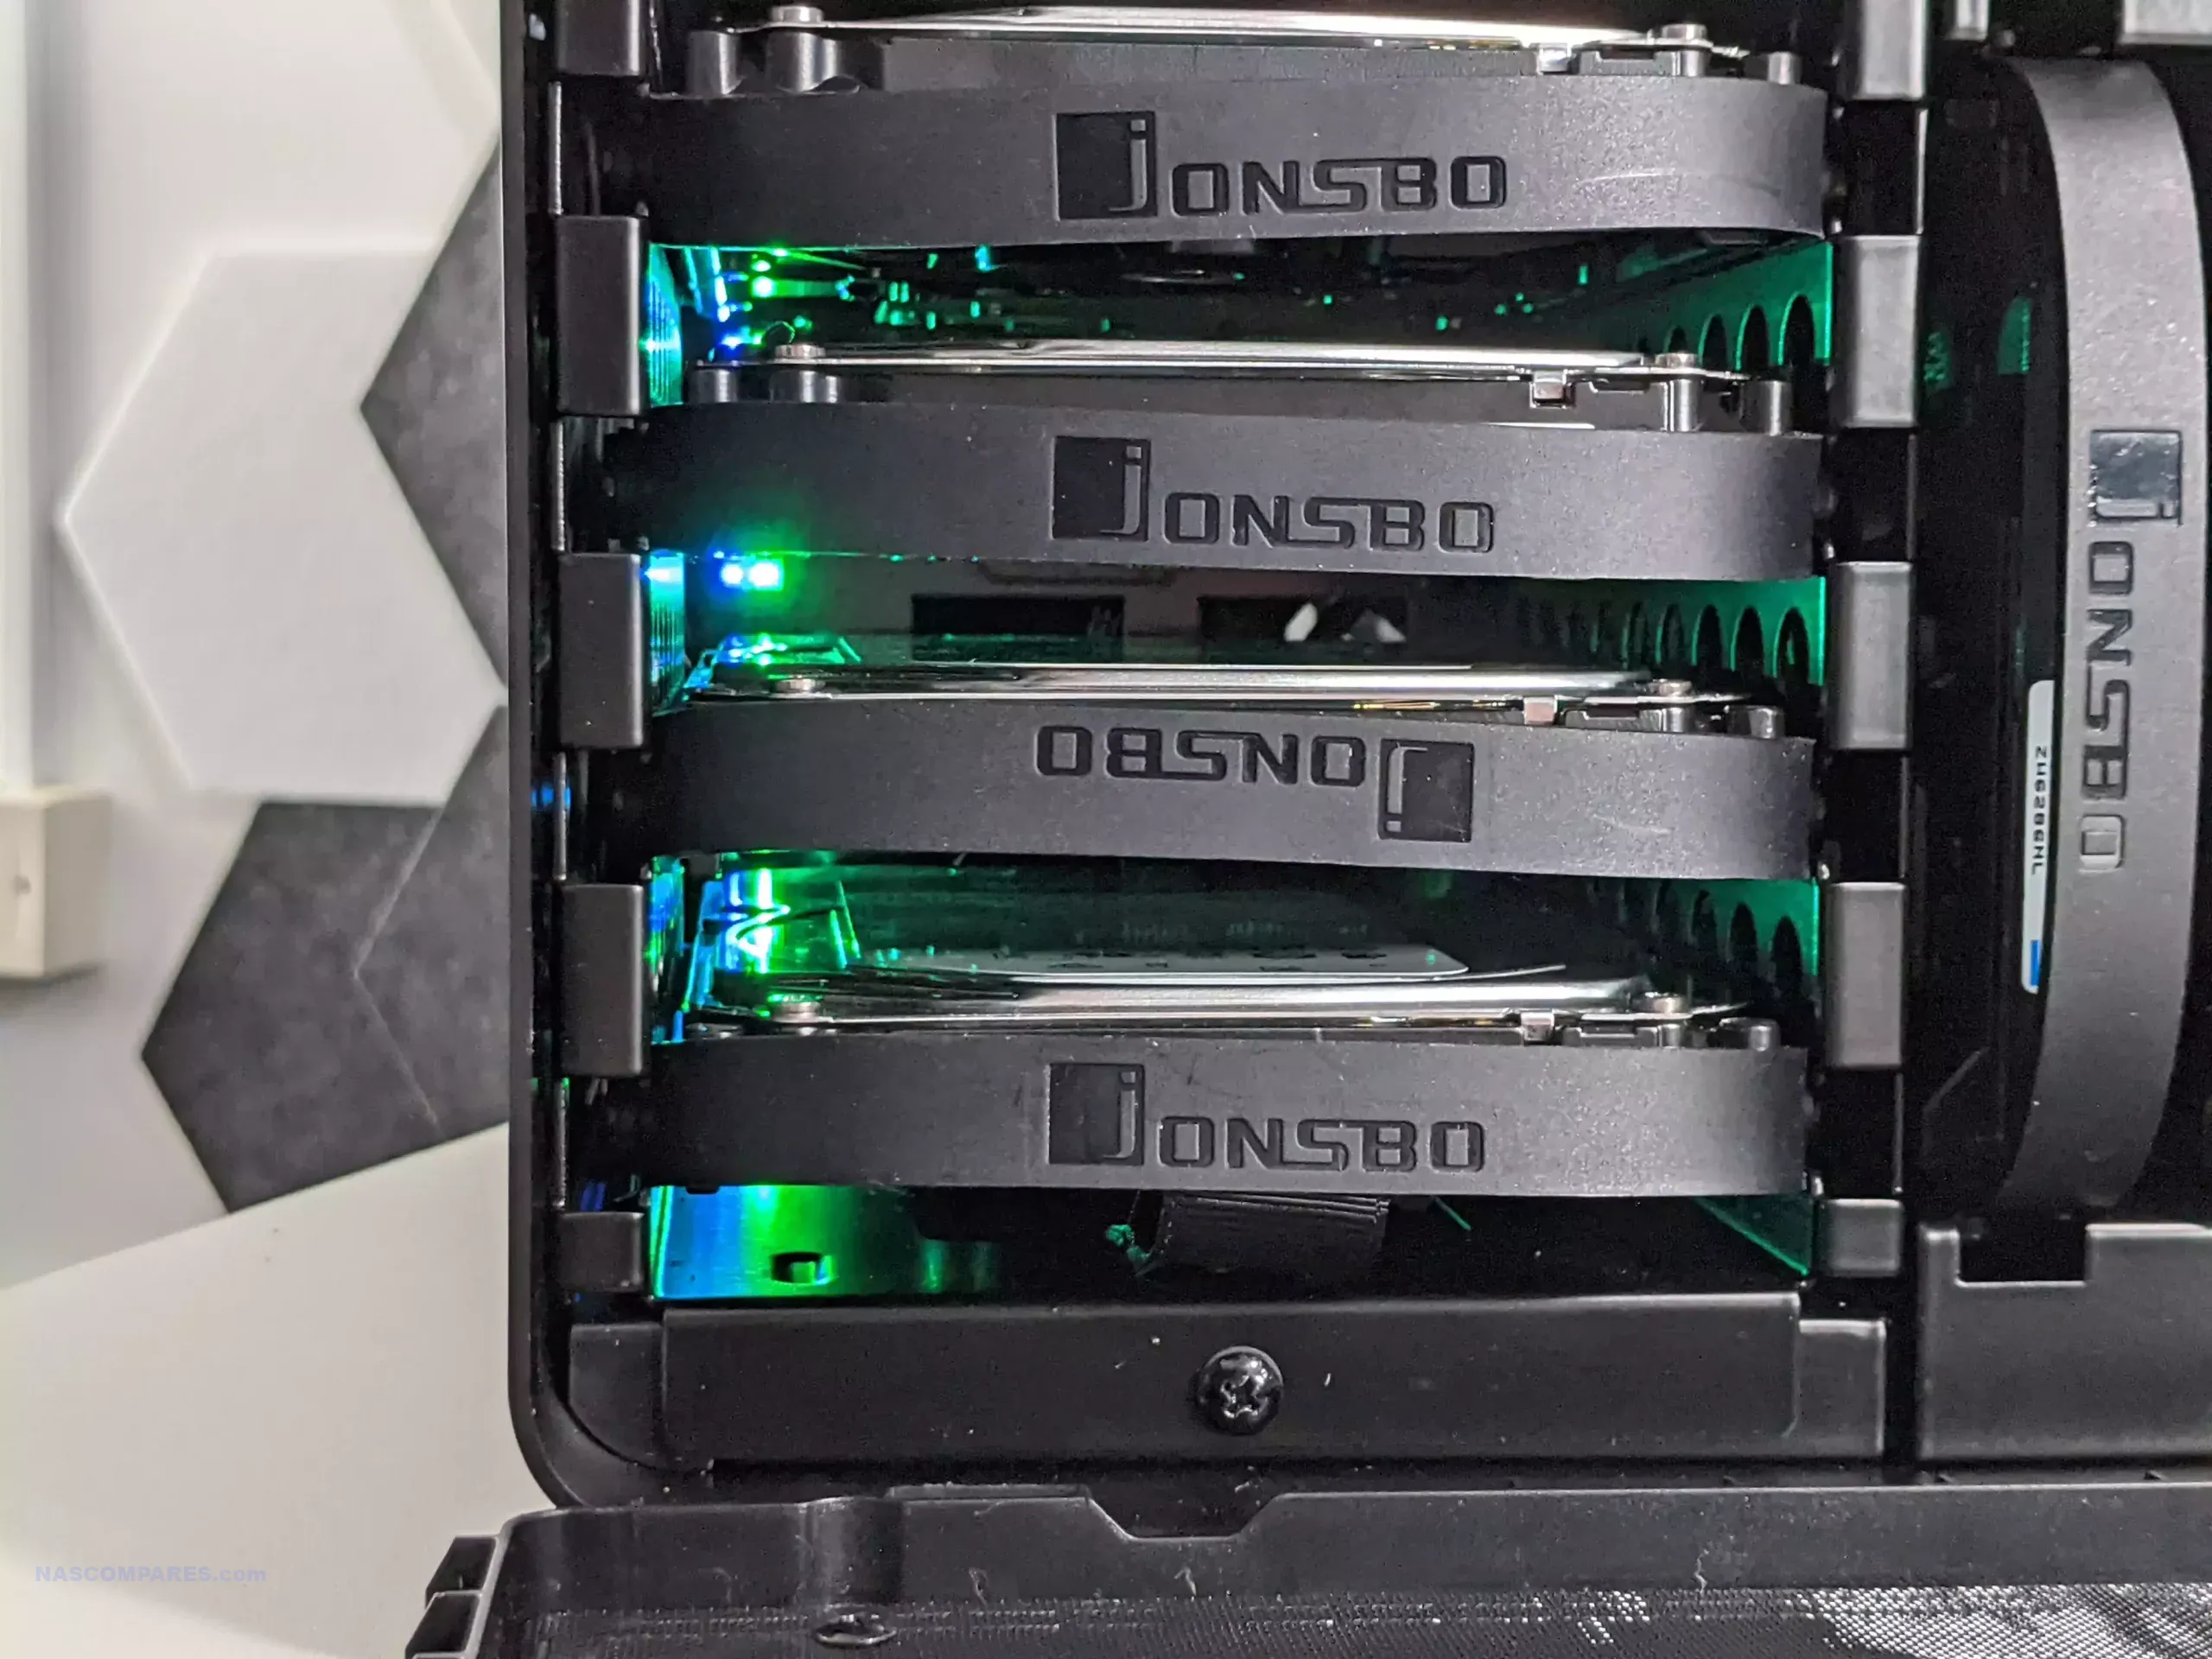
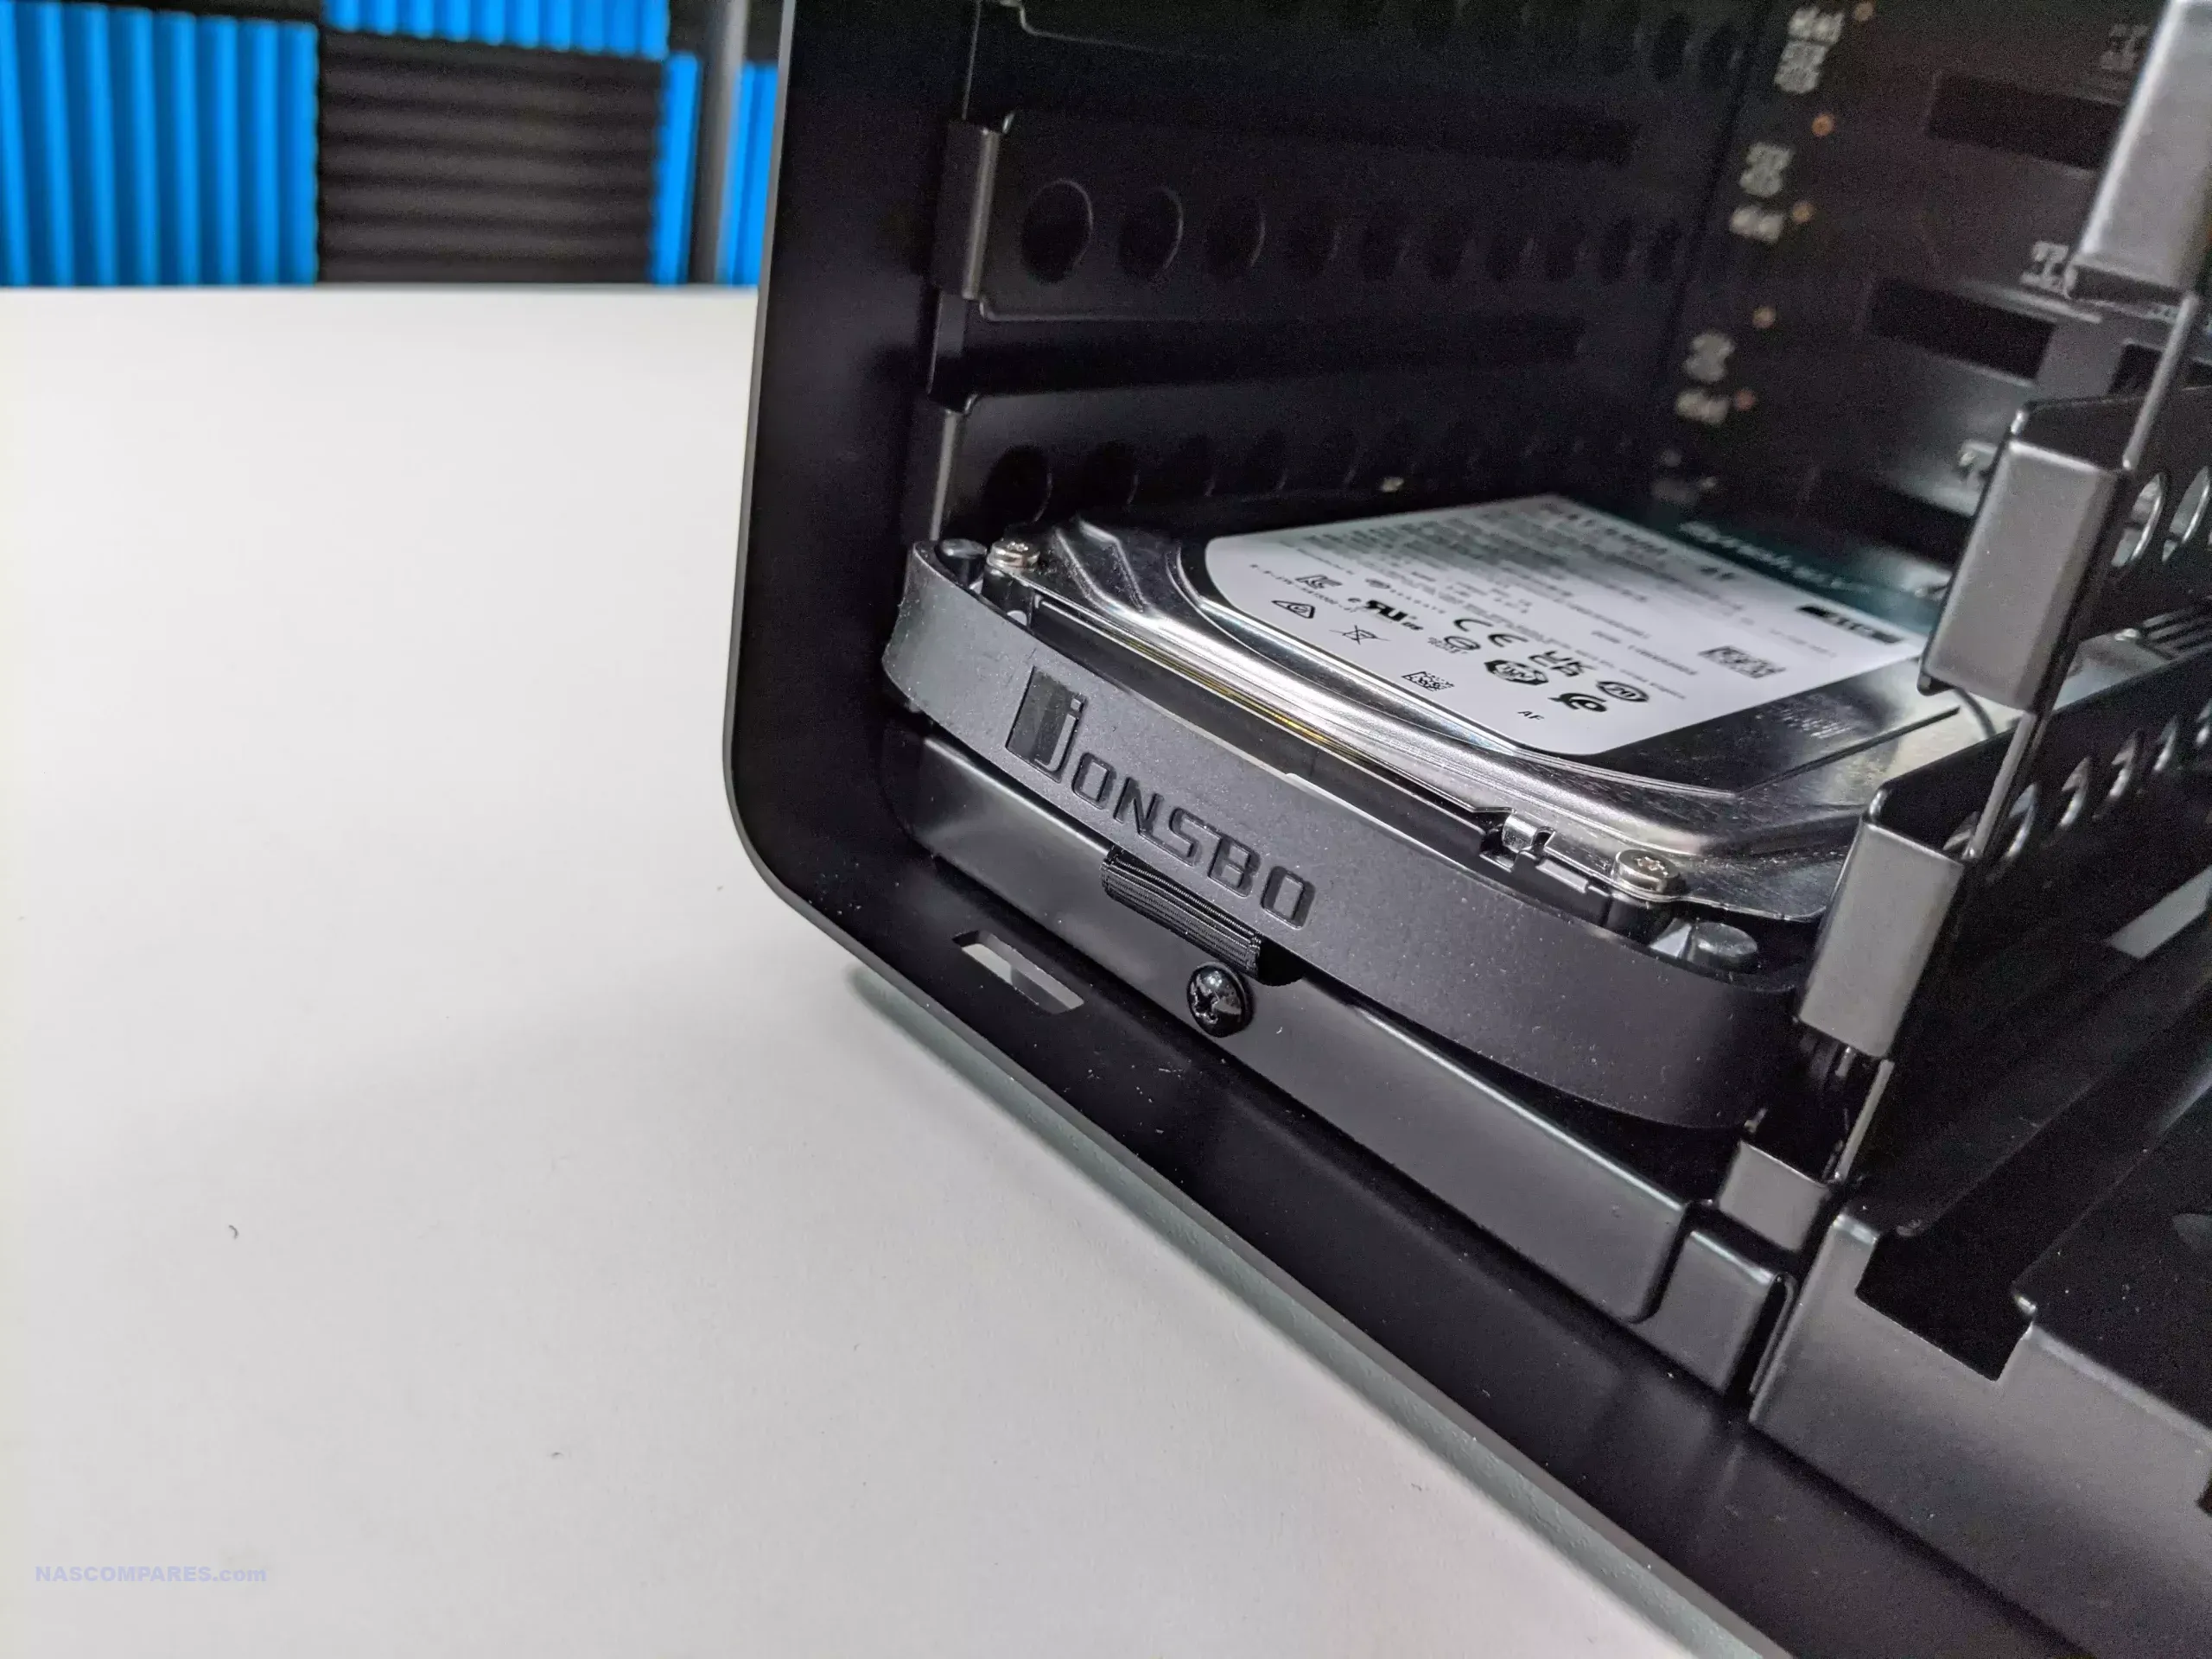
However, I’m sad to say that Jonsbo still persists in using their odd rubber handle and grommet design on hard drive installation instead of traditional trays like everyone else in the market! I have commented on this numerous times in the past through my other reviews of the N2, N3, and N4 systems, and have never really liked these trays.
Standard 3.5-inch hard drive trays would be considerably smoother for installation, and the fact that the system feeds directly into static PCB and SATA interfaces internally means that there is no reason for using such a flexible choice of media injection when a static tray would serve just as well—and about 10 times better.
Worse still, I’m not entirely convinced that these rubber handles are safer than trays when it comes to removing drives in the event of a RAID failure and drive swap out. The rubber handles have too much give when pulling and could lead to a potential spring of the drive into your knuckles as you remove it, or worse, that you have to pull it extra hard to remove the drive and the drive ejects, hitting the table. I still don’t understand why Jonsbo persists with these trays.
Though, ever so slightly in Jonsbo’s defense, as each drive is being held by six individual rubber grommets that tightly fit inside the internal chassis, there is an argument to be made that these do reduce ambient vibration throughout the rest of the chassis in a way that a loose tray perhaps might not.
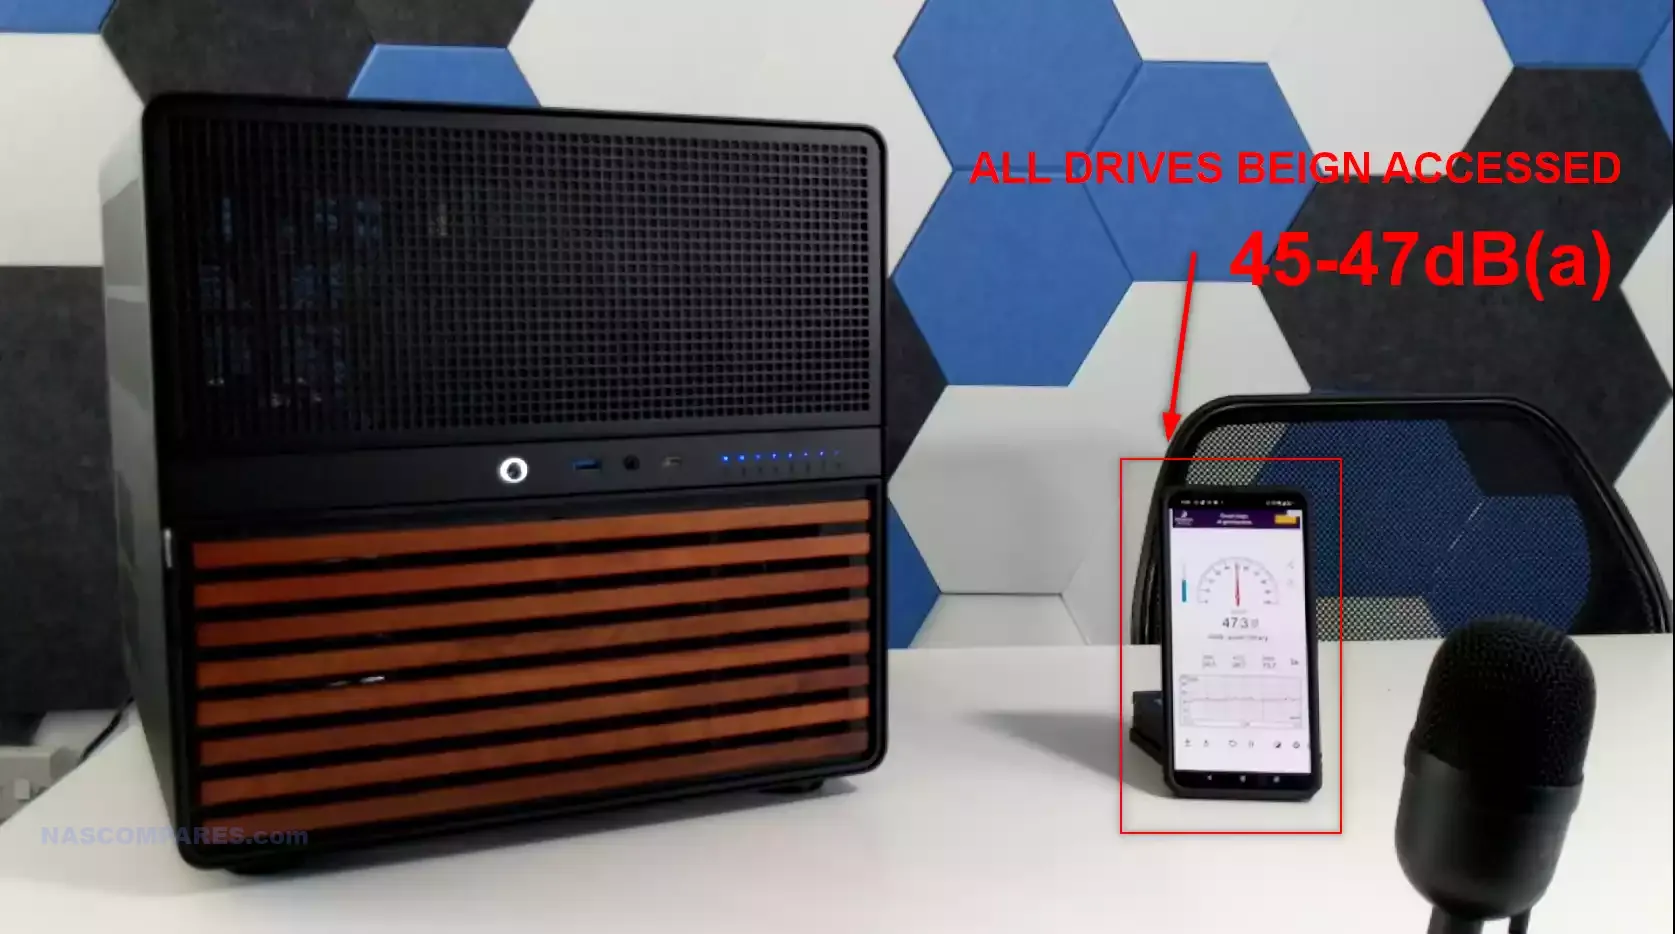
With the system fully populated with 12 hard drives, utilizing the three default fans that the system has on full, as well as a silent CPU cooler, I made two individual noise tests of the system when in operation. The front of the system, which has all of the storage media but lacks any direct active cooling, achieved an average noise level of between 45 and 47 decibels. Now I’m sure these numbers could be lessened by users who plan to use smaller-capacity and less industrially constructed hard drives; nevertheless, I can’t imagine it would be that much quieter given you have 12 drives spinning inside this comparatively packed desktop chassis.

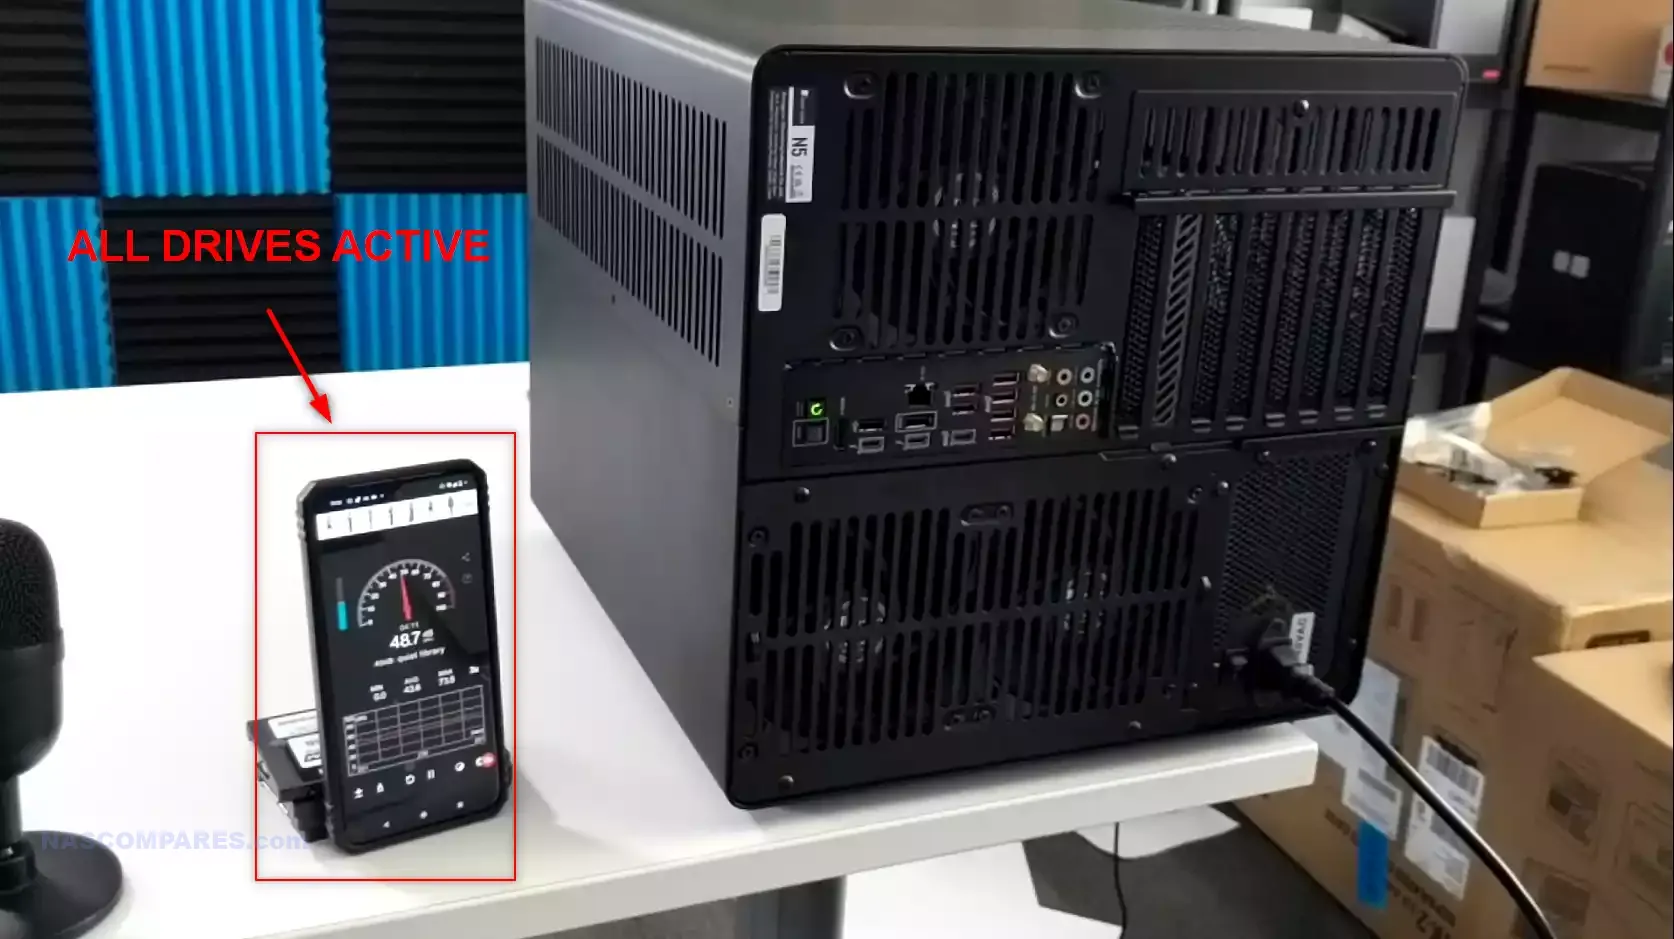
Turning the device around to the fans and ports end, noise was actually fractionally subdued, hitting an average of between 37 and 39 DBA. It is still not exactly a quiet system, but I was actually kind of surprised that these three active cooling fans built into the rear of the chassis did not cause more noise than this.

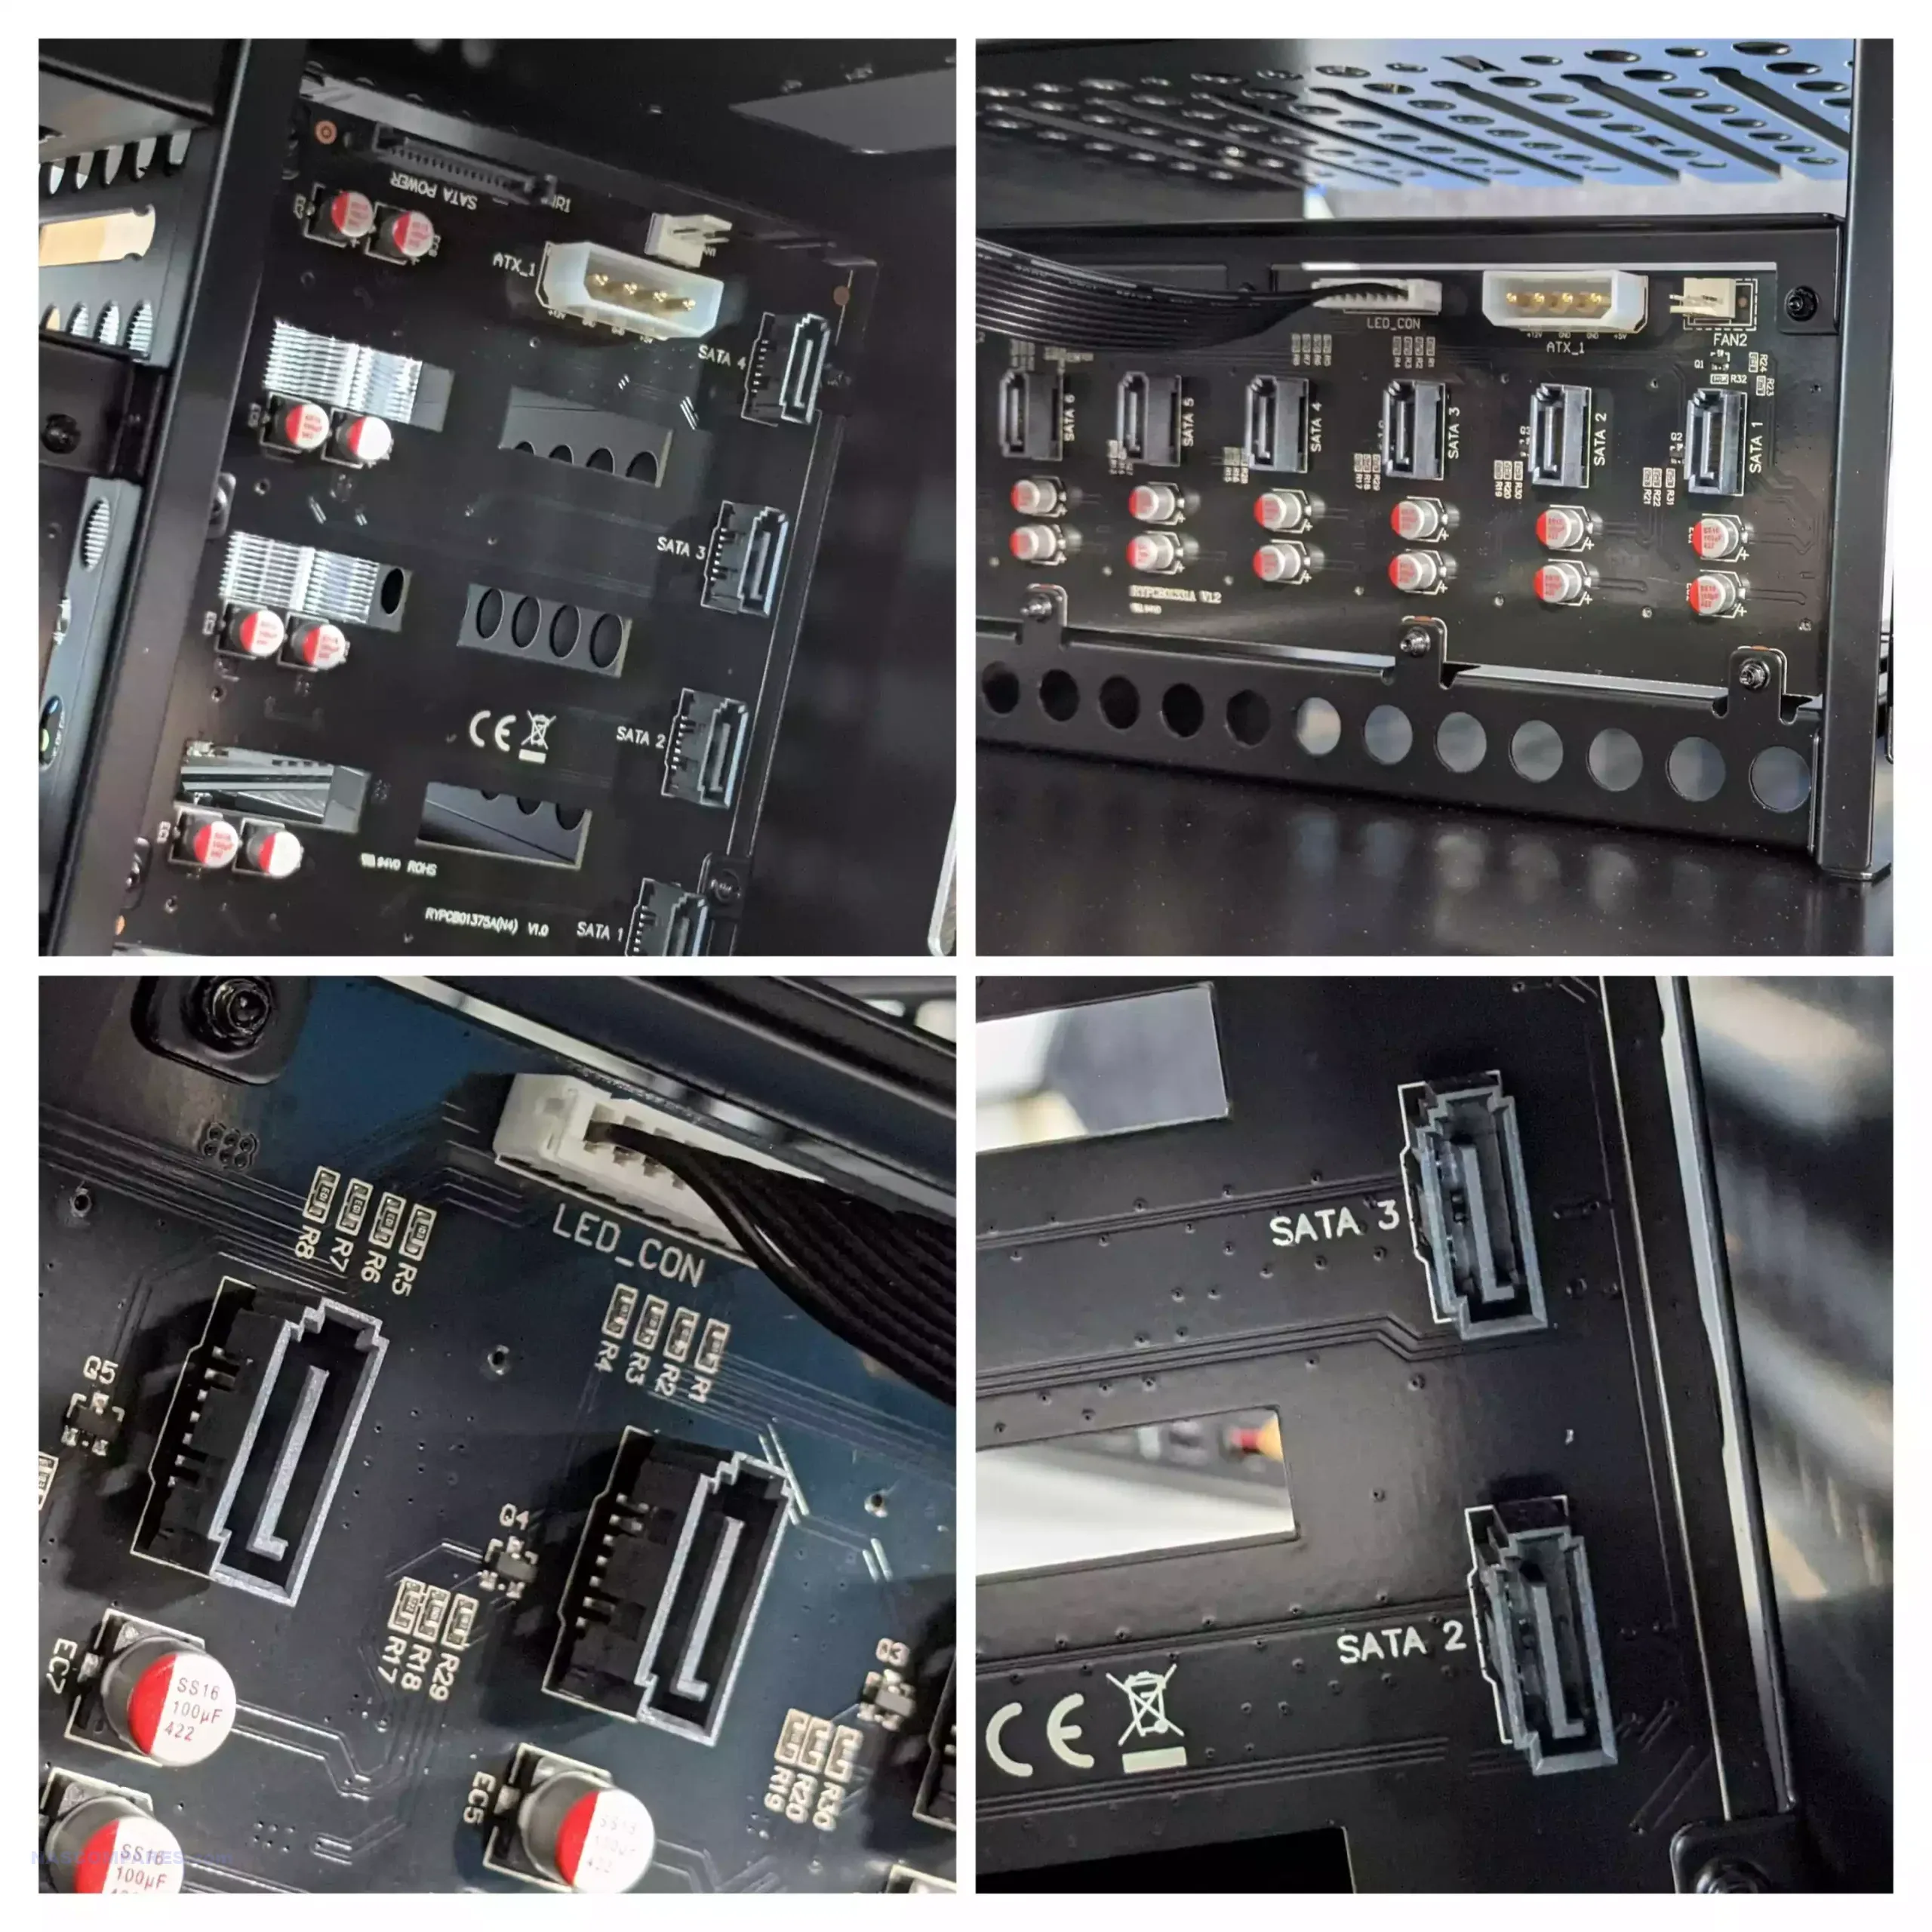
As mentioned earlier, the eight vertically stacked hard drives all back onto an internal PCB that features individual interfaces for each drive, numbered 1 through 8. It also features individual SATA outputs, a SATA power input, and two Molex power inputs.
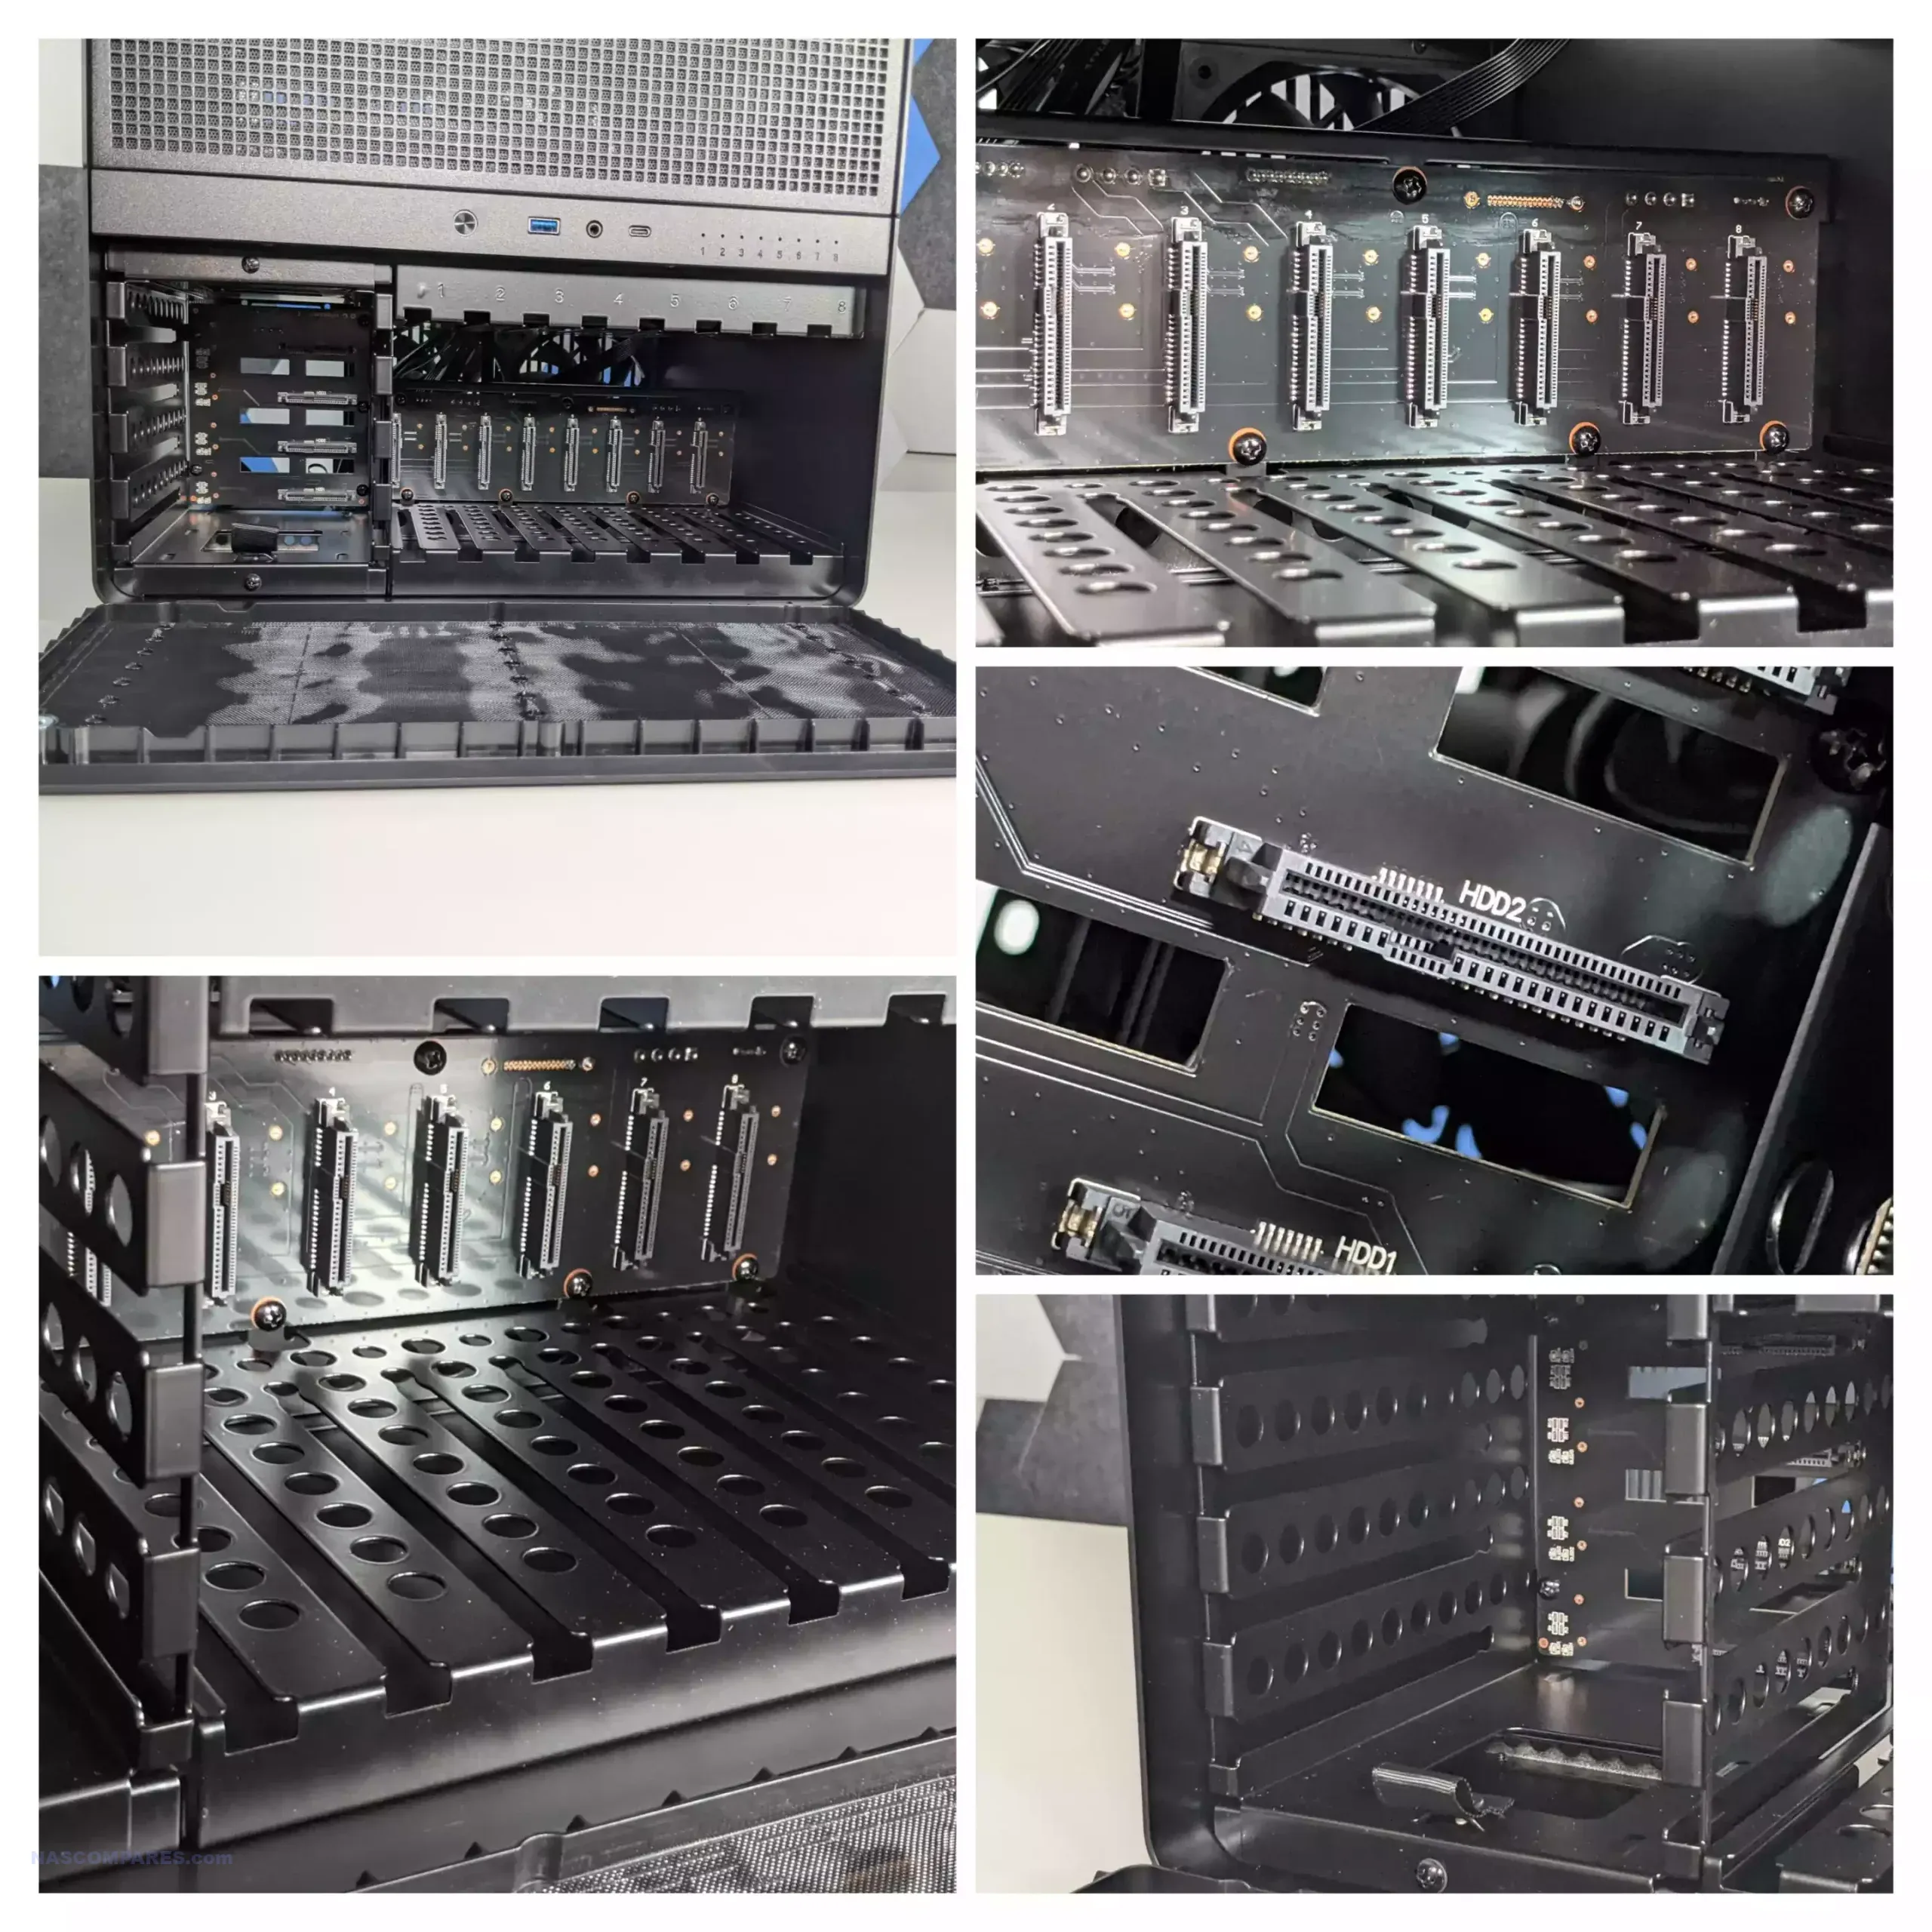
This PCB features an additional SATA power, Molex power, and individual SATA outputs for the drives on the other side of that board. I did start to wonder why exactly Jonsbo had decided on mounting two individual media PCB boards into this system rather than one large dedicated board that funneled all 12 SATA inputs.
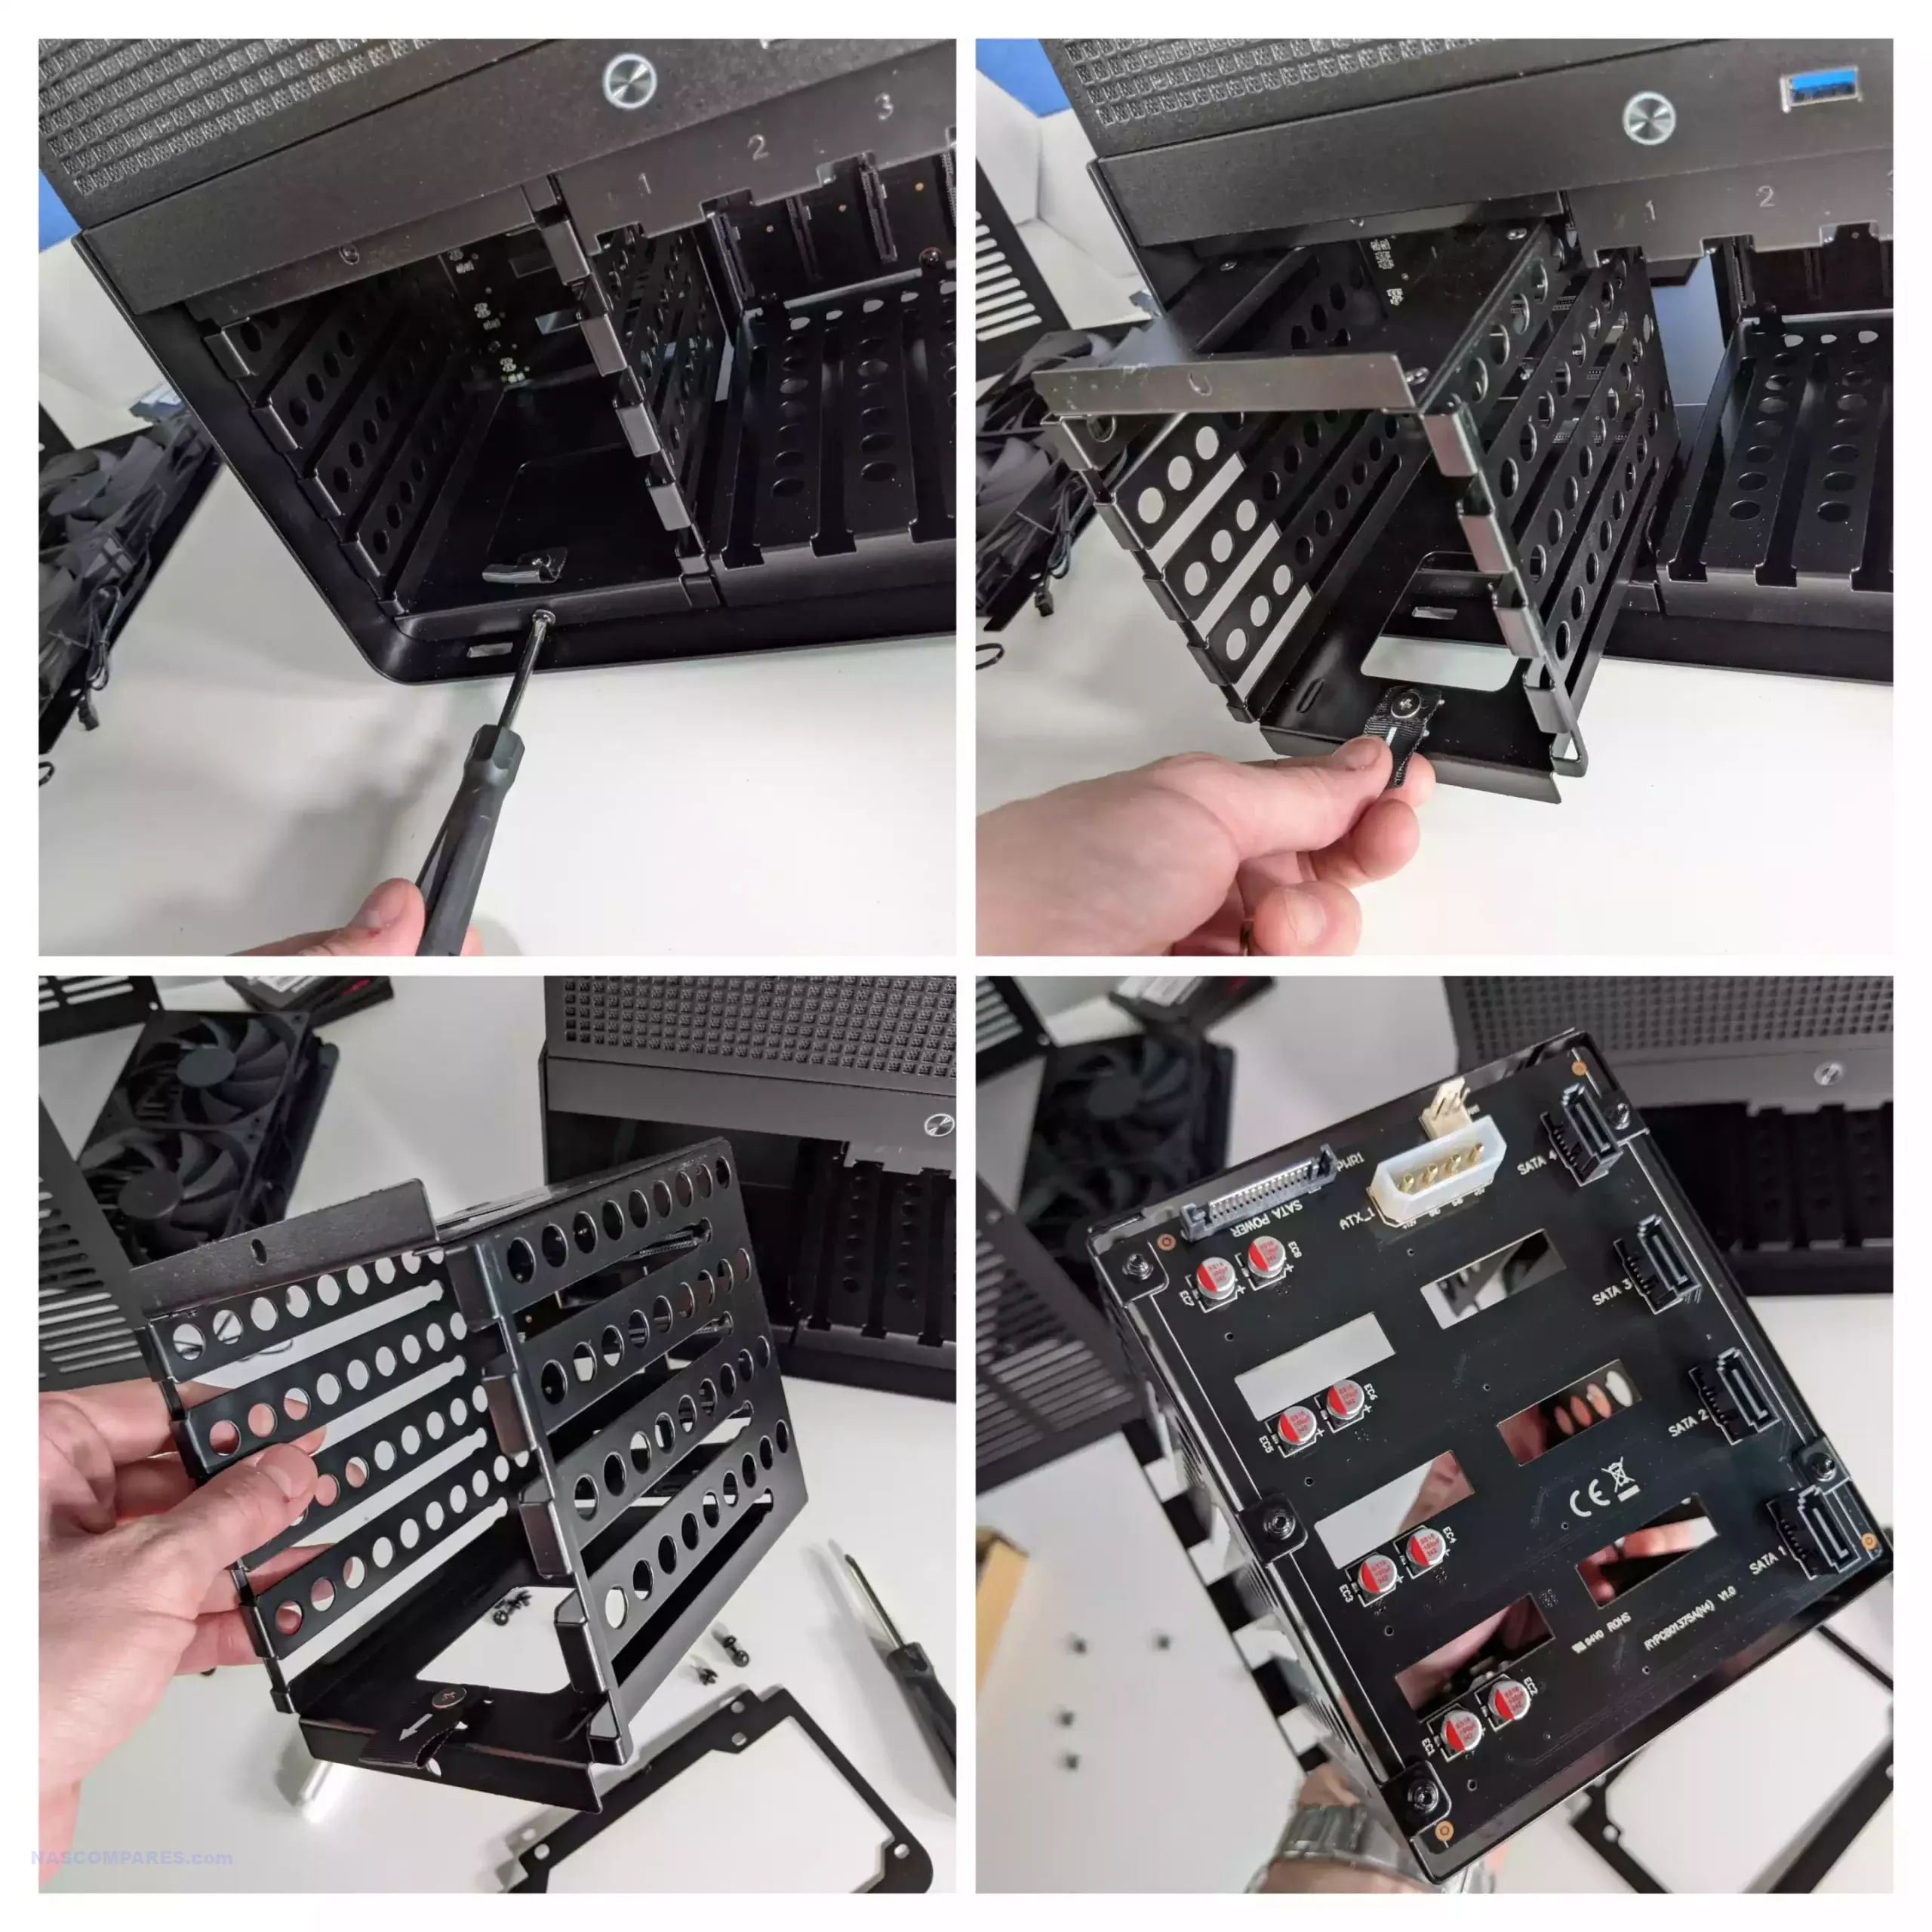
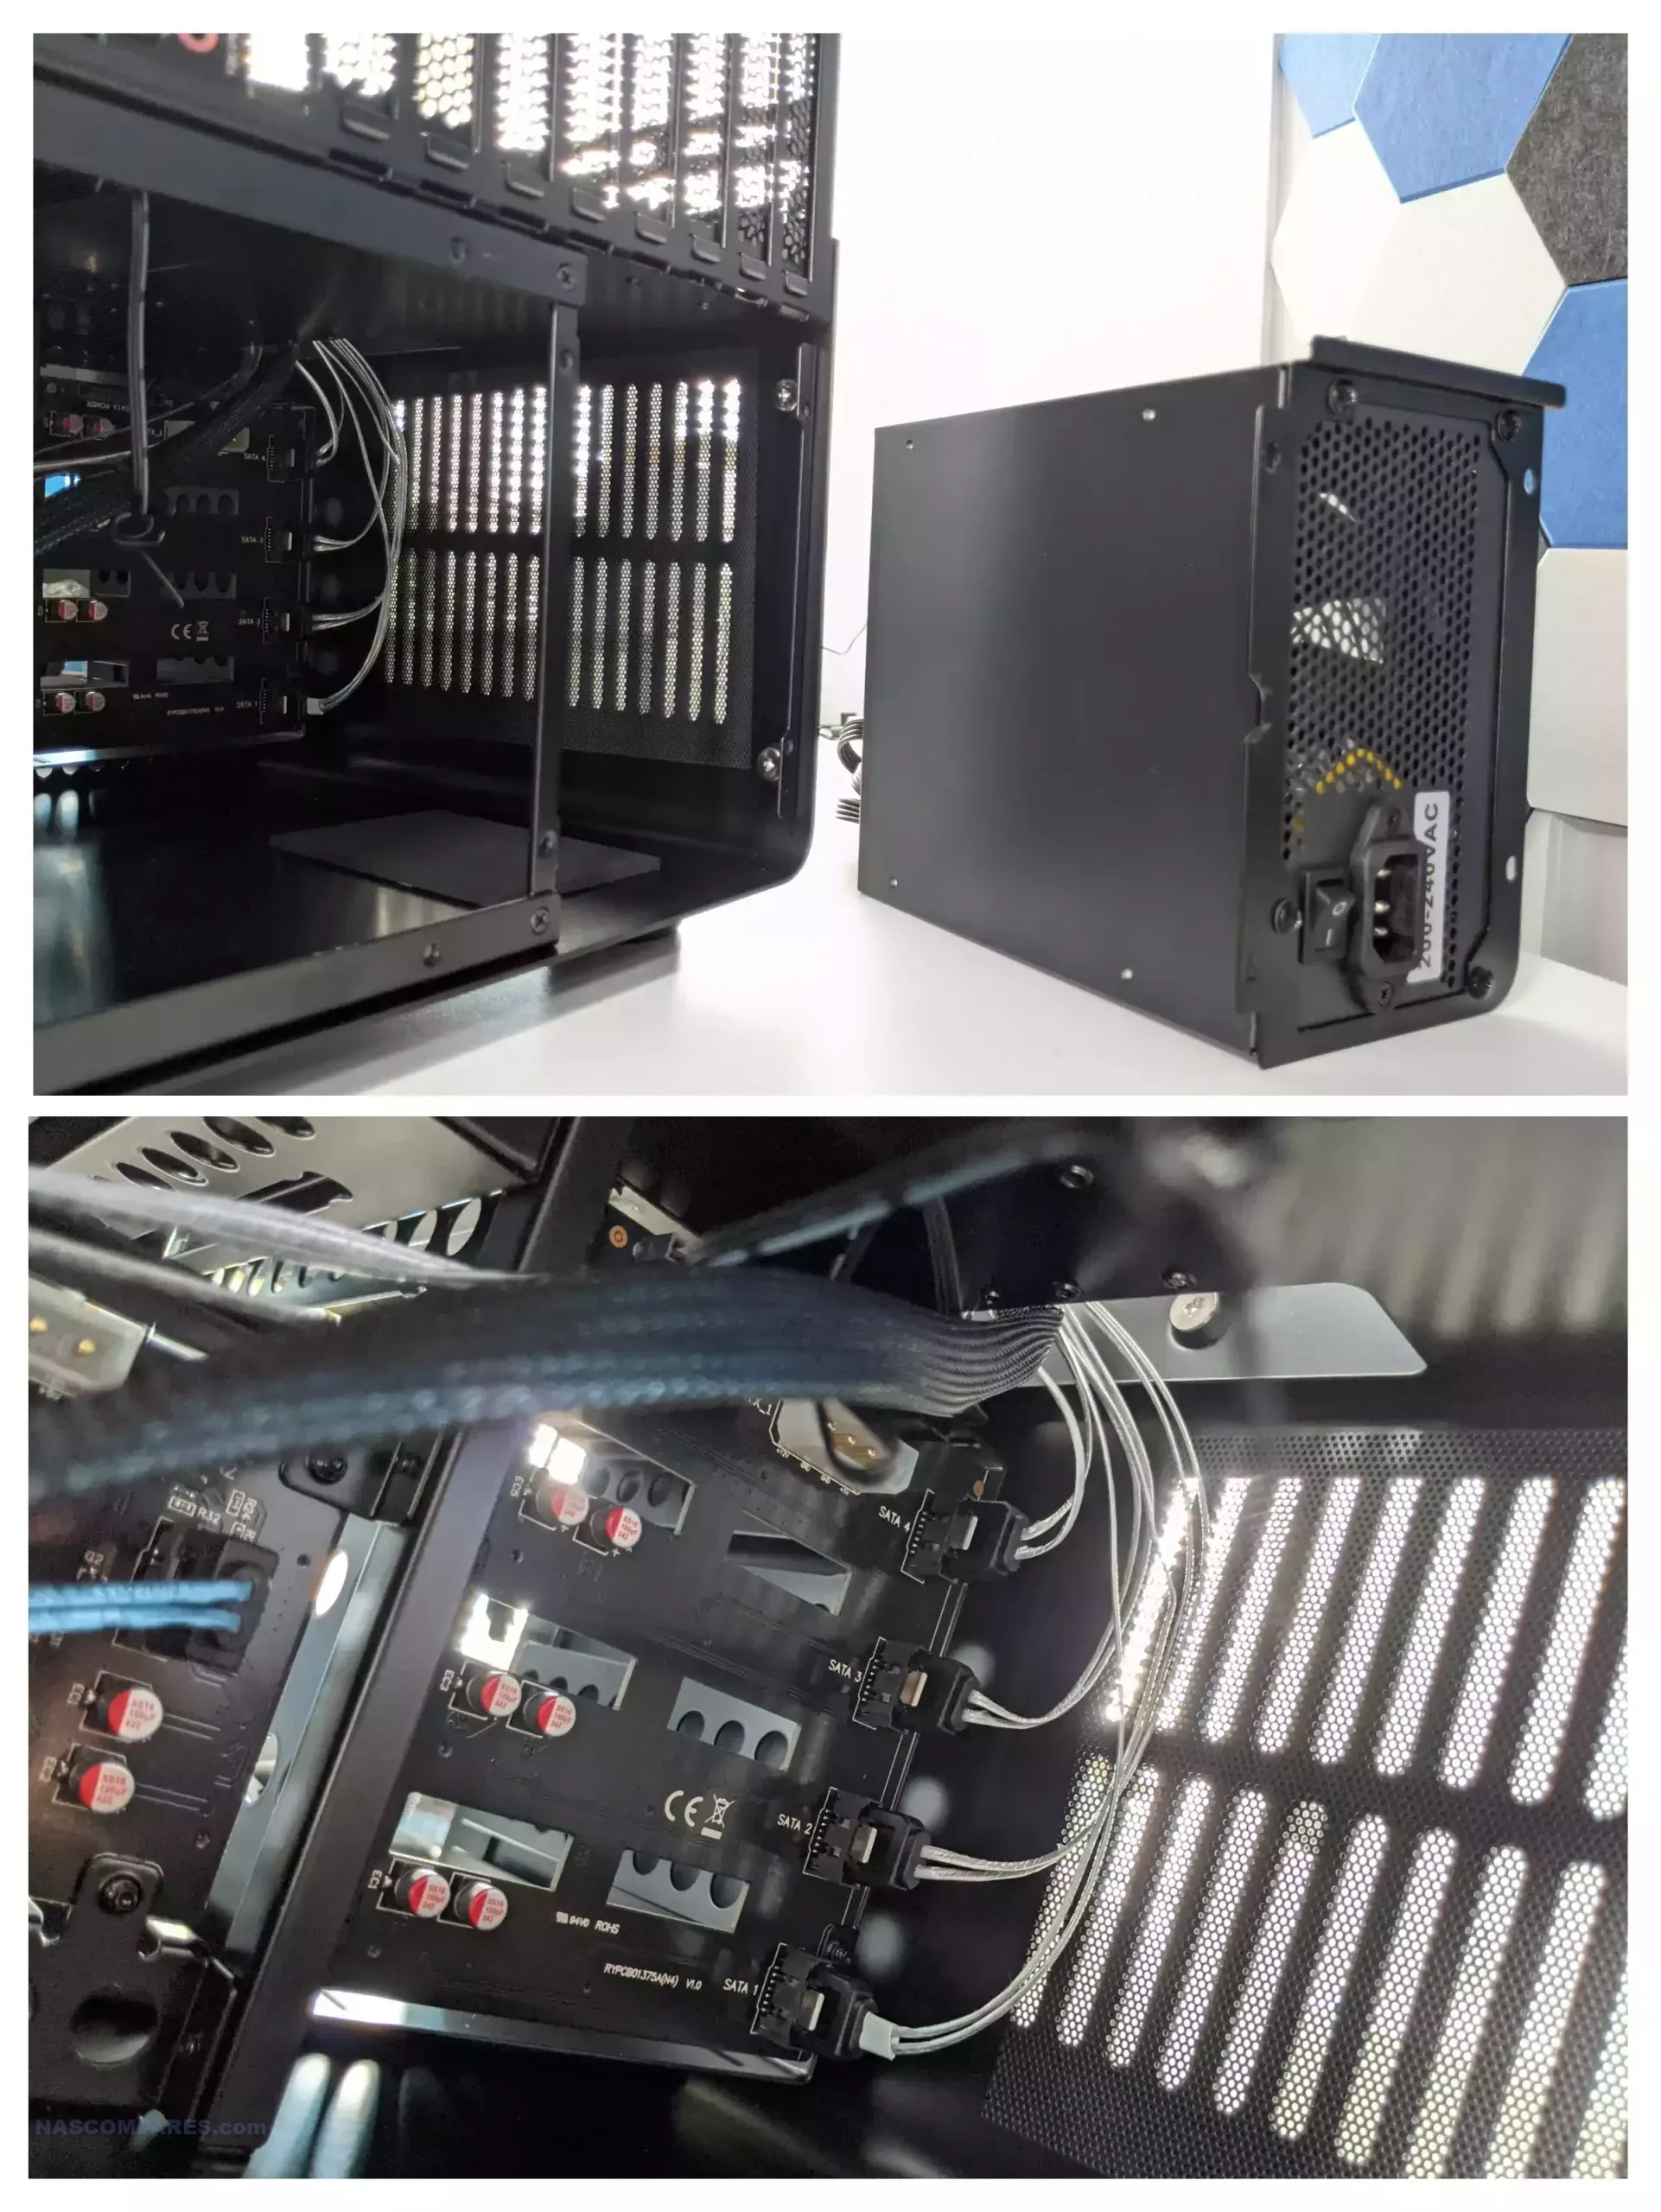
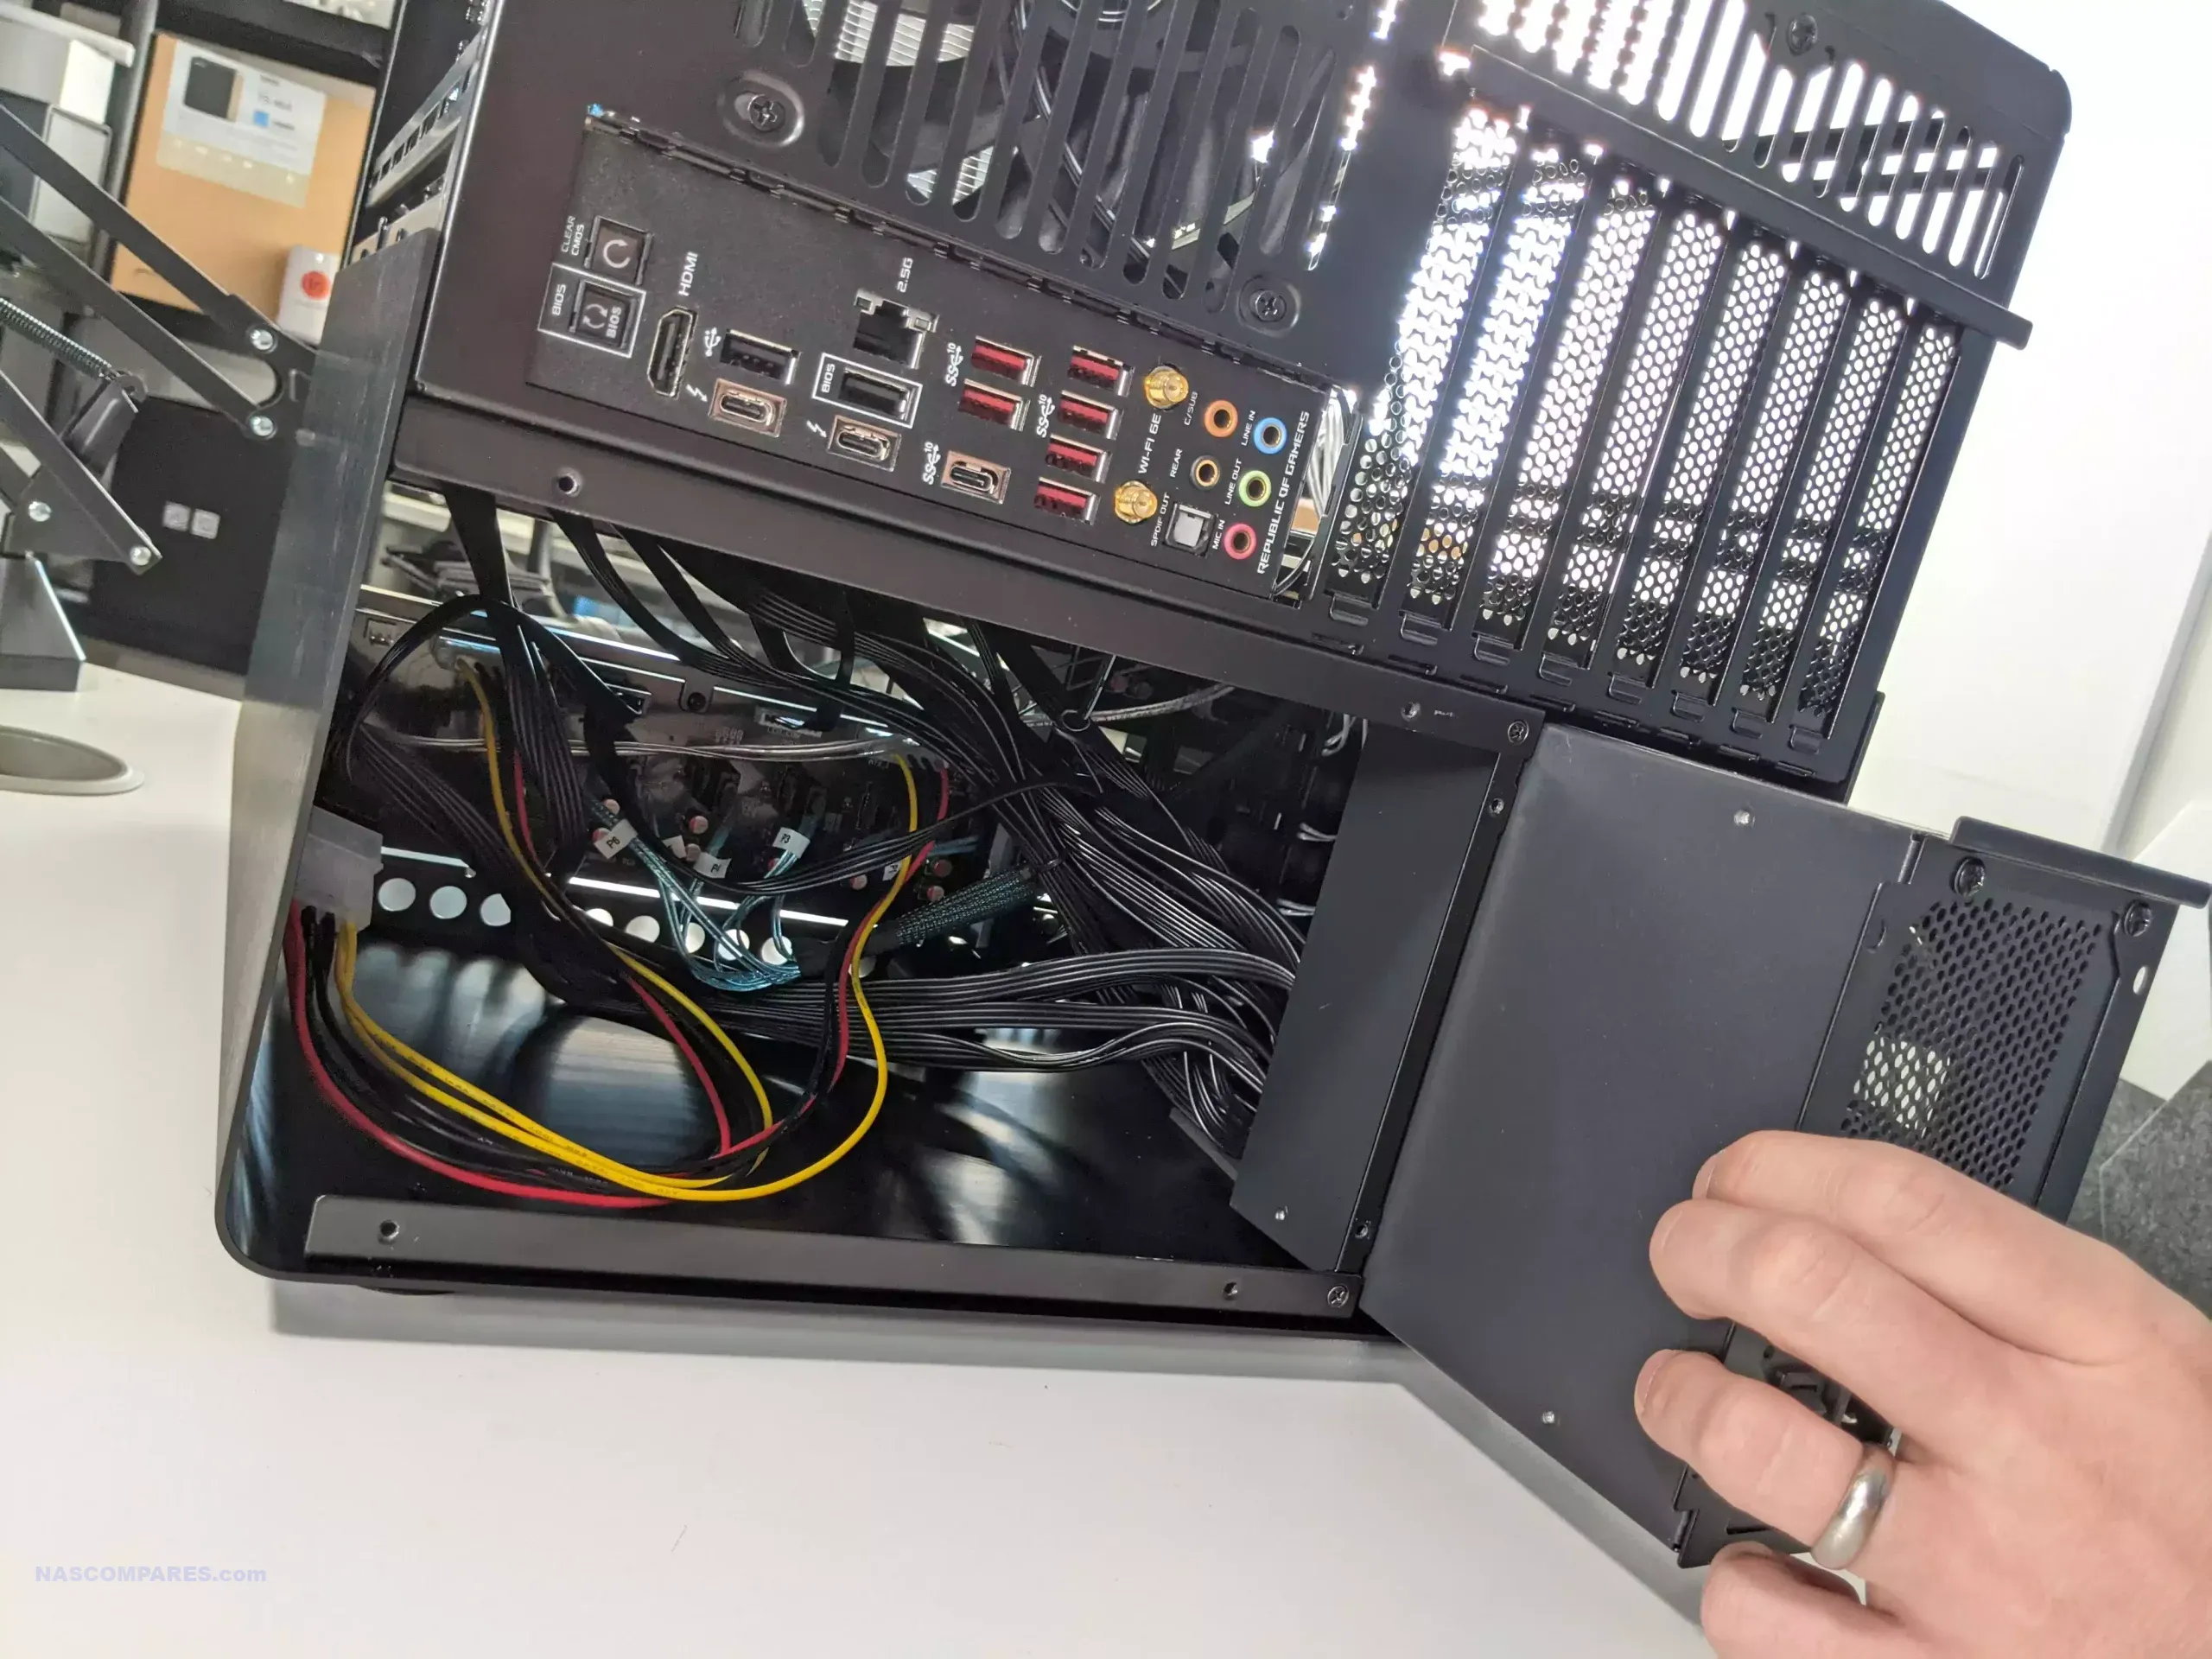
The answer ended up being surprisingly interesting. The four horizontally stacked storage drives are mounted in their very own cage. This cage can be removed from the front of the system via just two screws holding it in place, and this allows you to slide out this main cage and install the drives and the SATA cables considerably more easily after the installation of the PSU and its accompanying cables. The space between the PSU and this four-drive bay area is actually really tight, and there are definitely benefits in having the ability to slide out this storage area for easier access to this cabling, as well as funneling the SATA cables more effectively or applying maintenance to an existing storage setup inside the system.
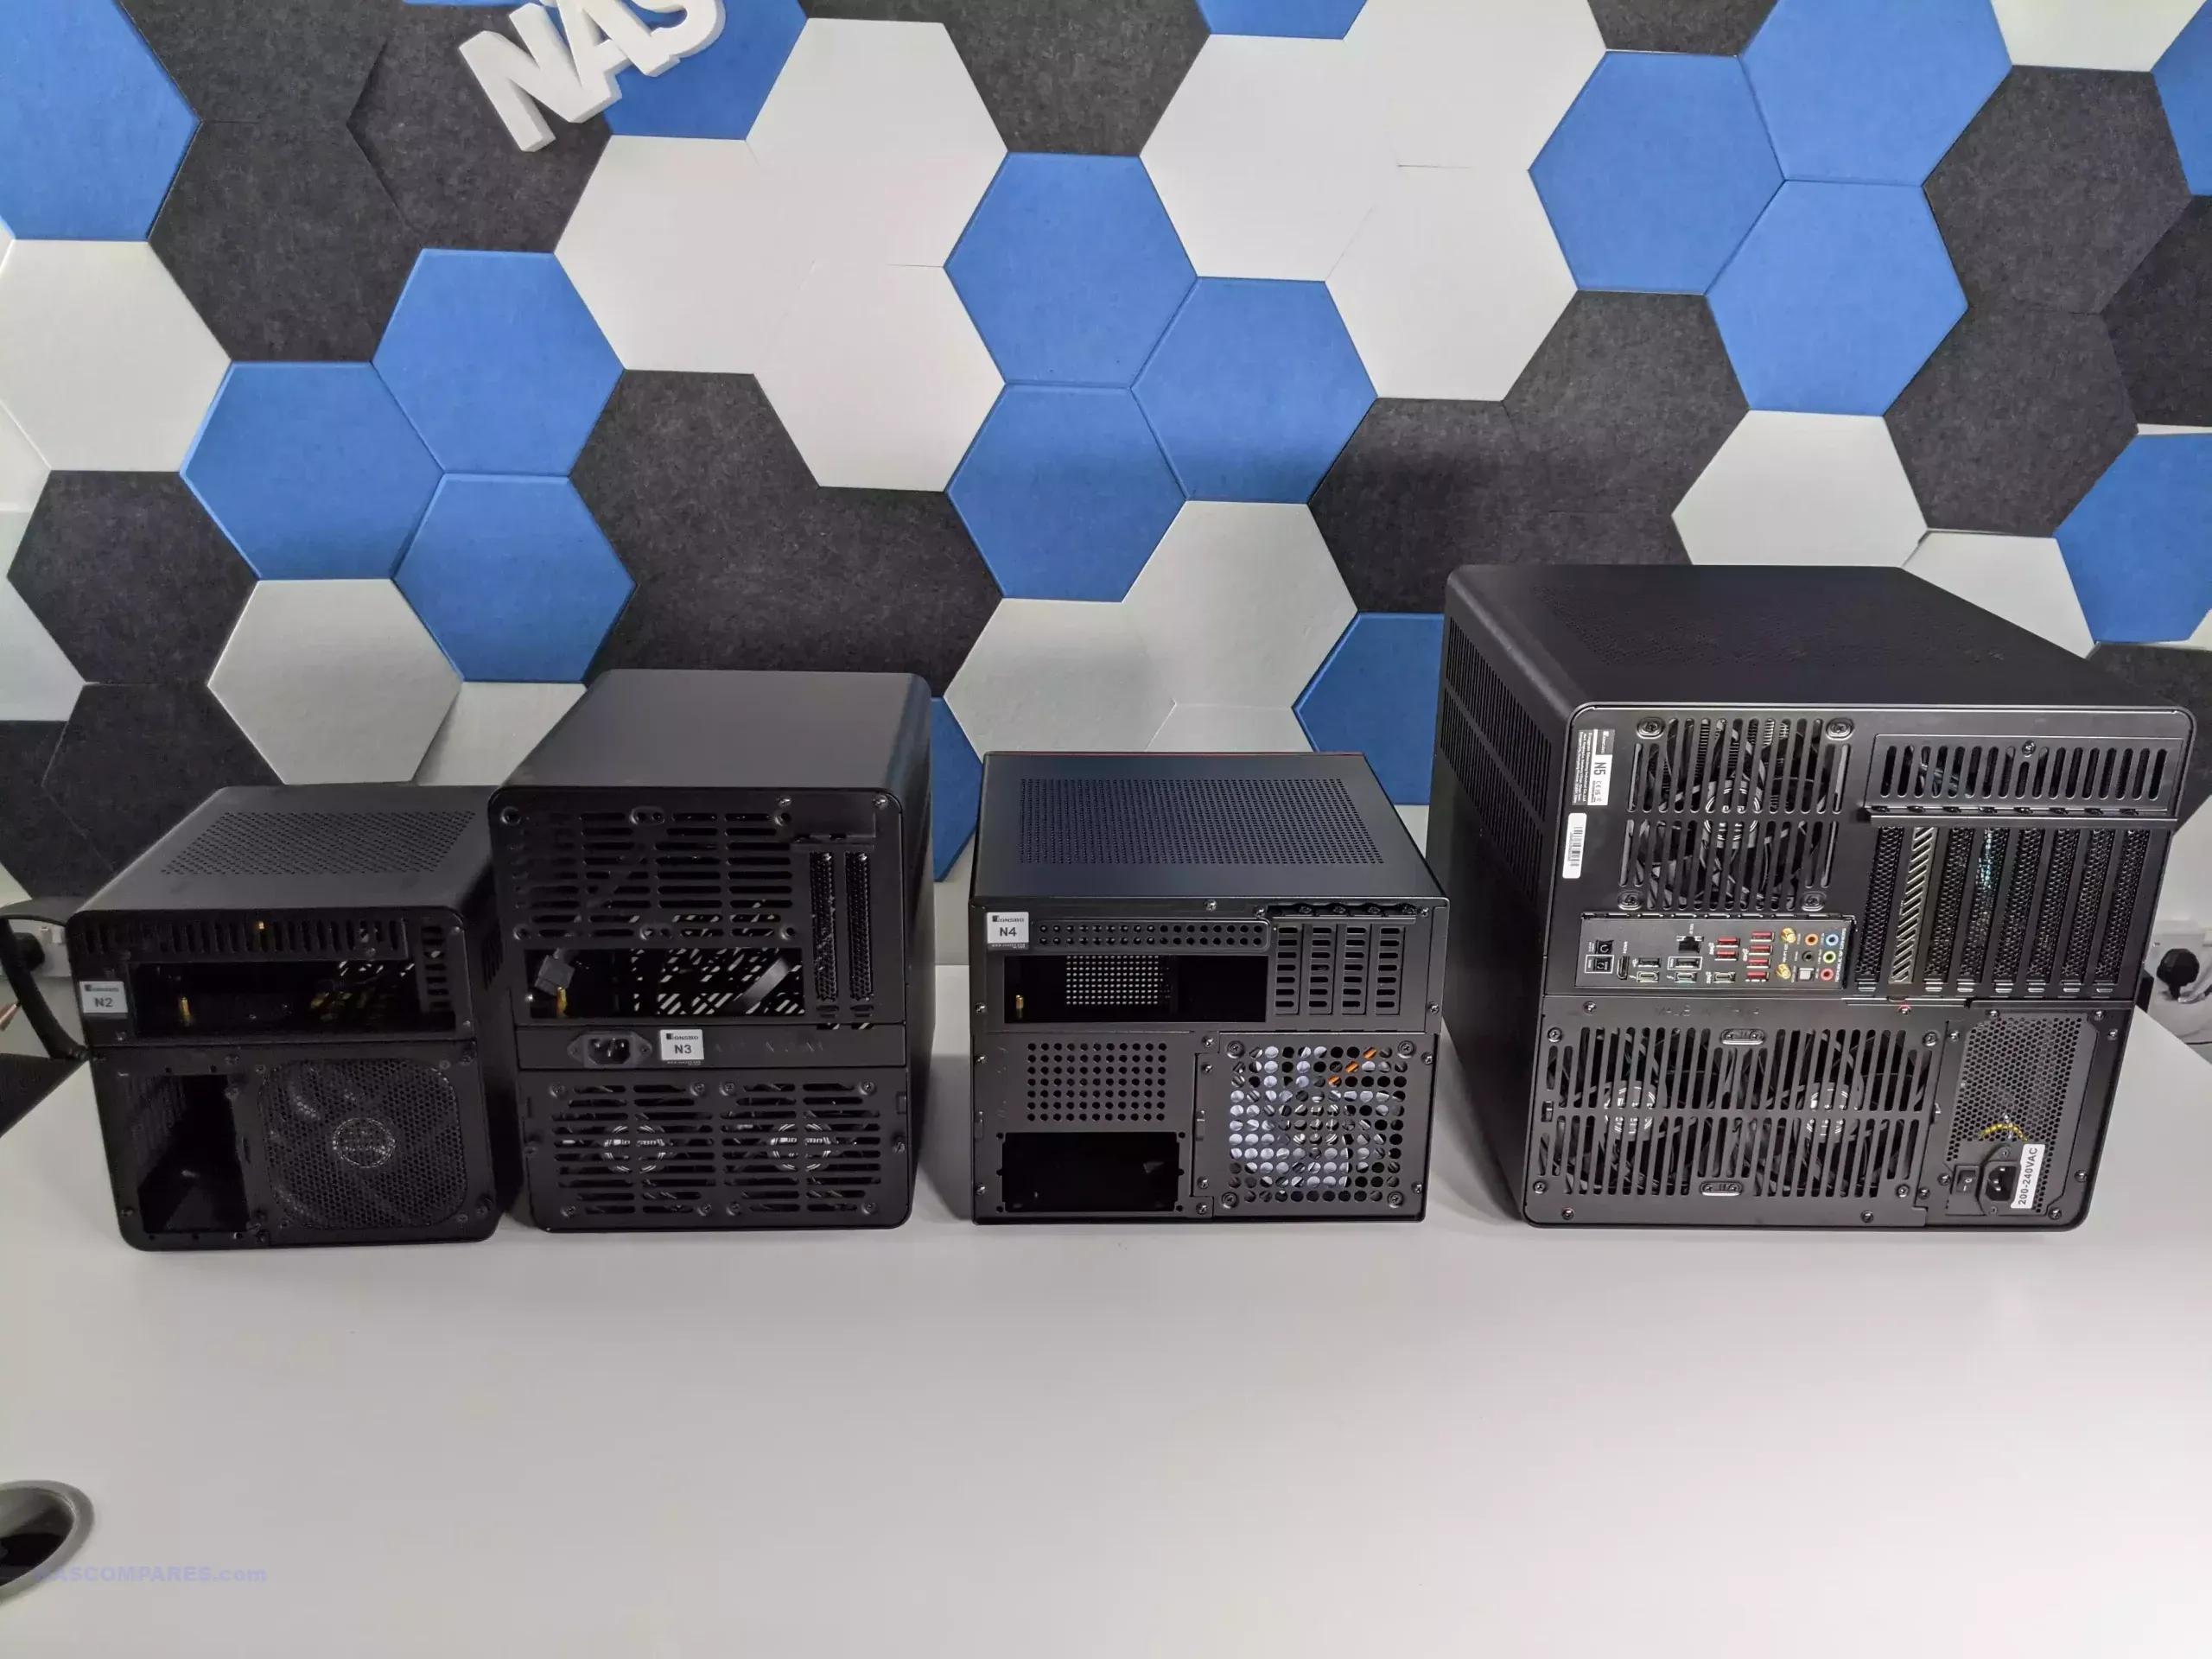
The front of this system features similar ports to previous Jonsbo NAS cases, which include a USB Type-A, a USB Type-C, and audio in and out ports. These USB ports are USB 10G, but that is definitely going to depend on your motherboard installation of choice and whether it is compatible fully with the F-panel cabling inside the N5.
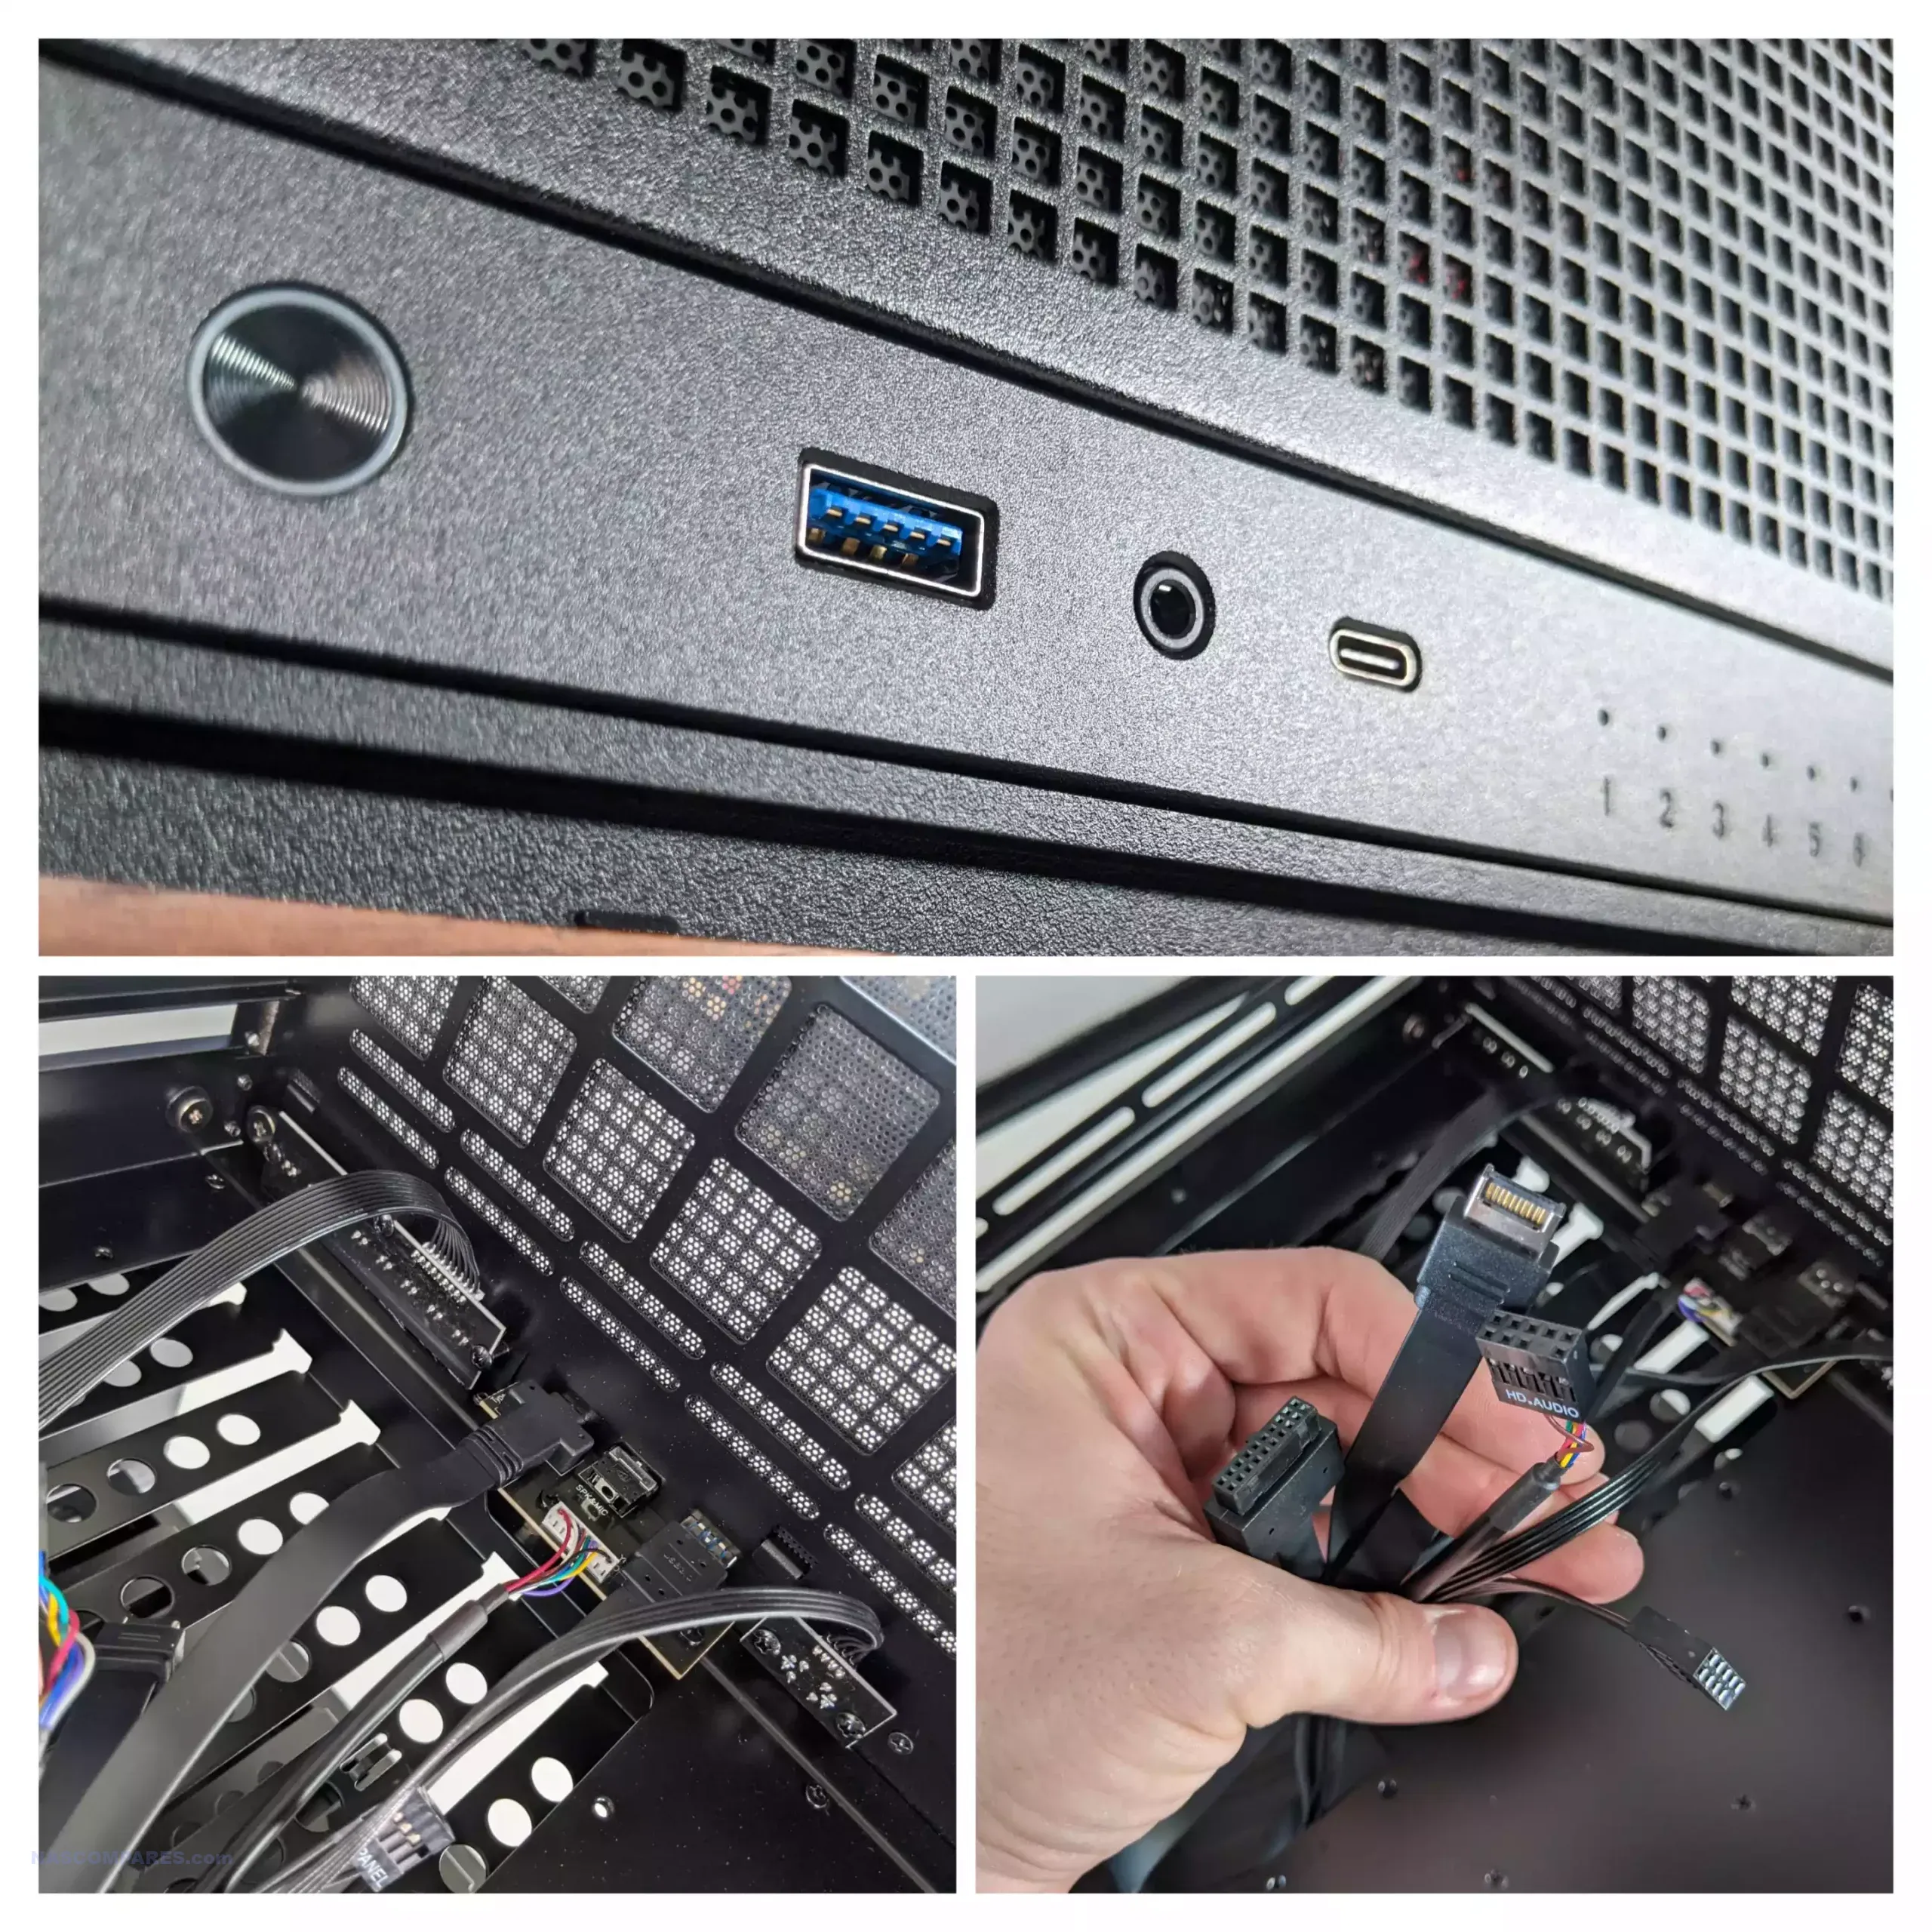
The rear of the case doesn’t feature any further ports, and will be solely reliant on the motherboard that you choose to install inside the case. Pre-populated in any way. You get the case, you get the accessory kit to install your components, and that is it.
The three fans built into the rear of the N5 are Jonsbo-branded 120 mm fans. There is an argument that replacing these fans with a quieter alternative, such as the Noctua options in the market, but really you would be putting a plaster on a shotgun wound in the case of the N5. This case is going to make a great deal of ambient noise, whether you like it or not, and reducing the fan noise by a few decibels really is not going to make a great deal of difference here.

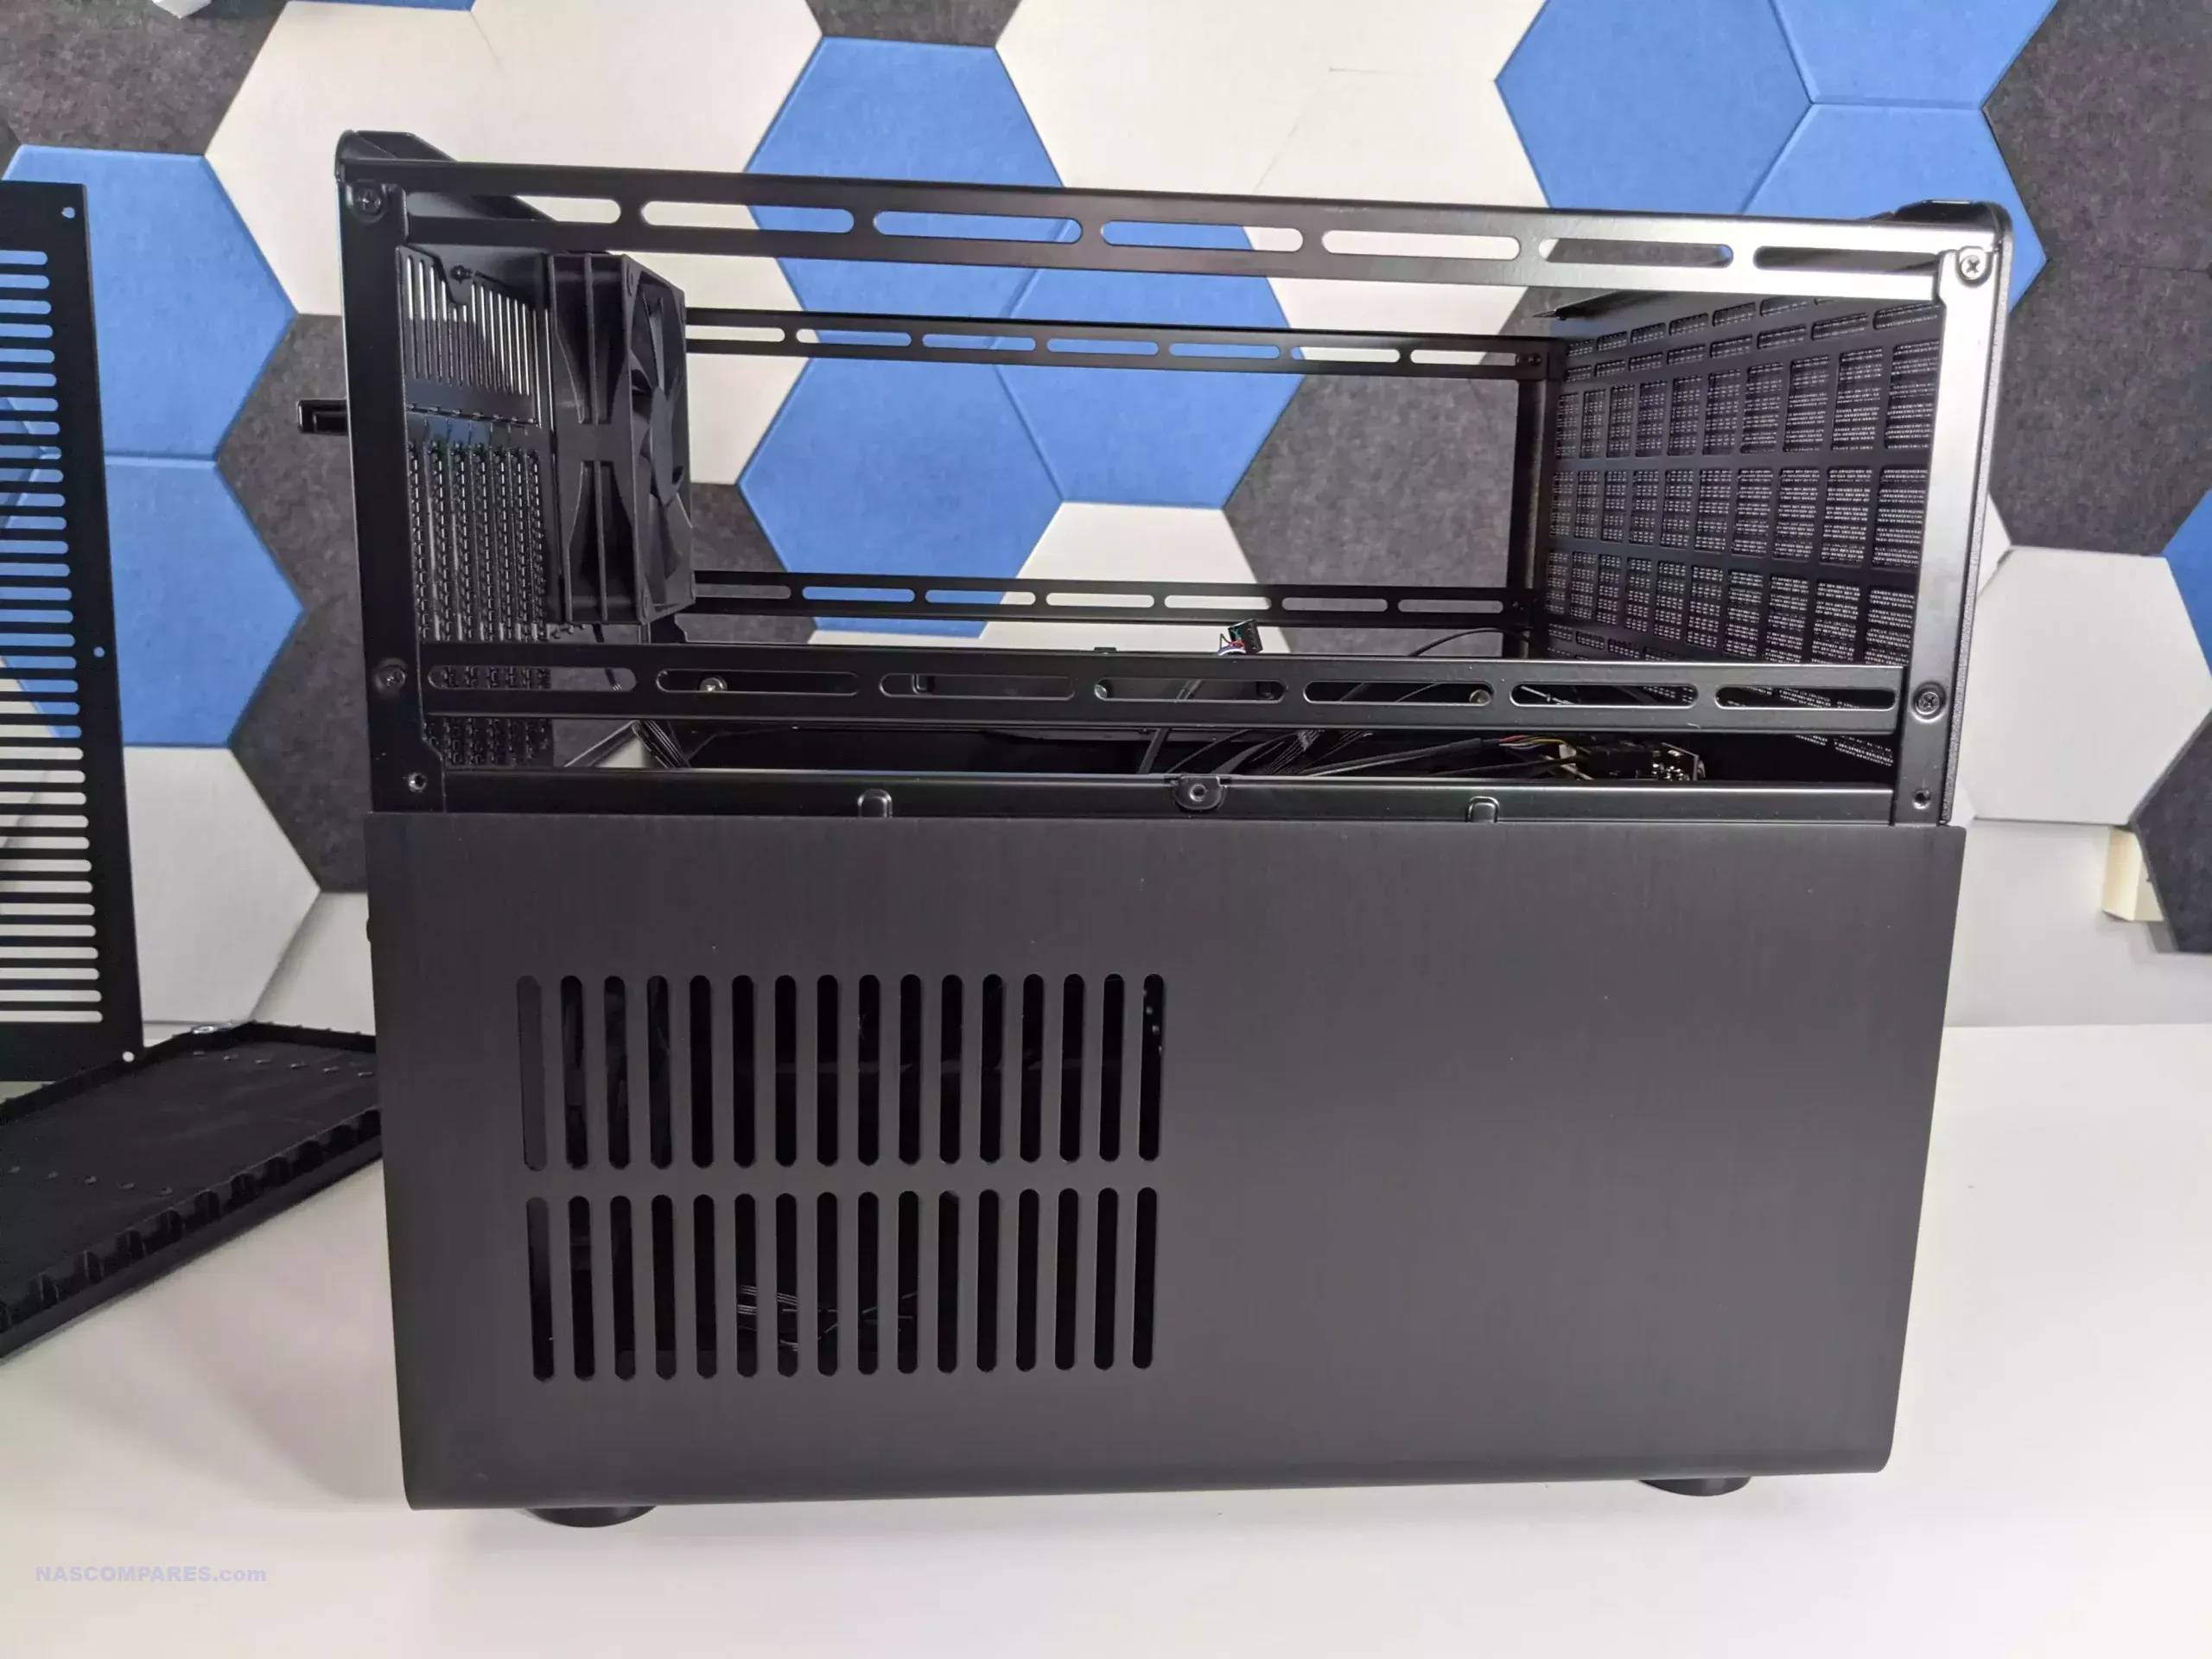
On the inner walls of the sides internally, the N5 features mounting rails, as well as screws to install each of these components included with the accessory kit. These do seem metal basic, but at the same time, hardly any different from the other popular large-scale NAS cases like the Fractal Node 804. I would have, of course, preferred to see direct 2.5-inch SATA injection rather than loose cables and a light framework, but at least you have these two side-mounted frames to add small system mods conveniently to hand.
Unlike previous Jonsbo cases, which used SFX power supplies, the Jonsbo N5 supports larger-scale ATX internal PSUs. This is clearly reflective of the larger motherboard support that this system features, and although there is sufficient room to mount the PSU and use a similar PSU plate as previous Jonsbo cases, it does lead to a tight cluster space between the PSU and the horizontal 4-bay hard drive cage.
Why Jonsbo persists in utilizing the hexagonal Allen key screws to mount the top of the case, when every other screw inside the system uses a standard cross-head screw, kind of blows my mind. By six individual small screws, which, although easy to remove, still kind of beg the question—why you can’t have had normal flat-head cross screws instead for convenience.

Overall, the external design of the N5, keeping in mind the massive scale of this system, largely repeats the design elements from my previous Jonsbo NAS case reviews (the horrible rubber band trays and the odd choice of screws). And although I’m a little confused by the LED and SATA PCB arrangement, overall, I’m really happy with the construction of the N5 externally. Let’s take a look at the inside and discuss what we find.
Jonsbo N5 Review – Internal Design
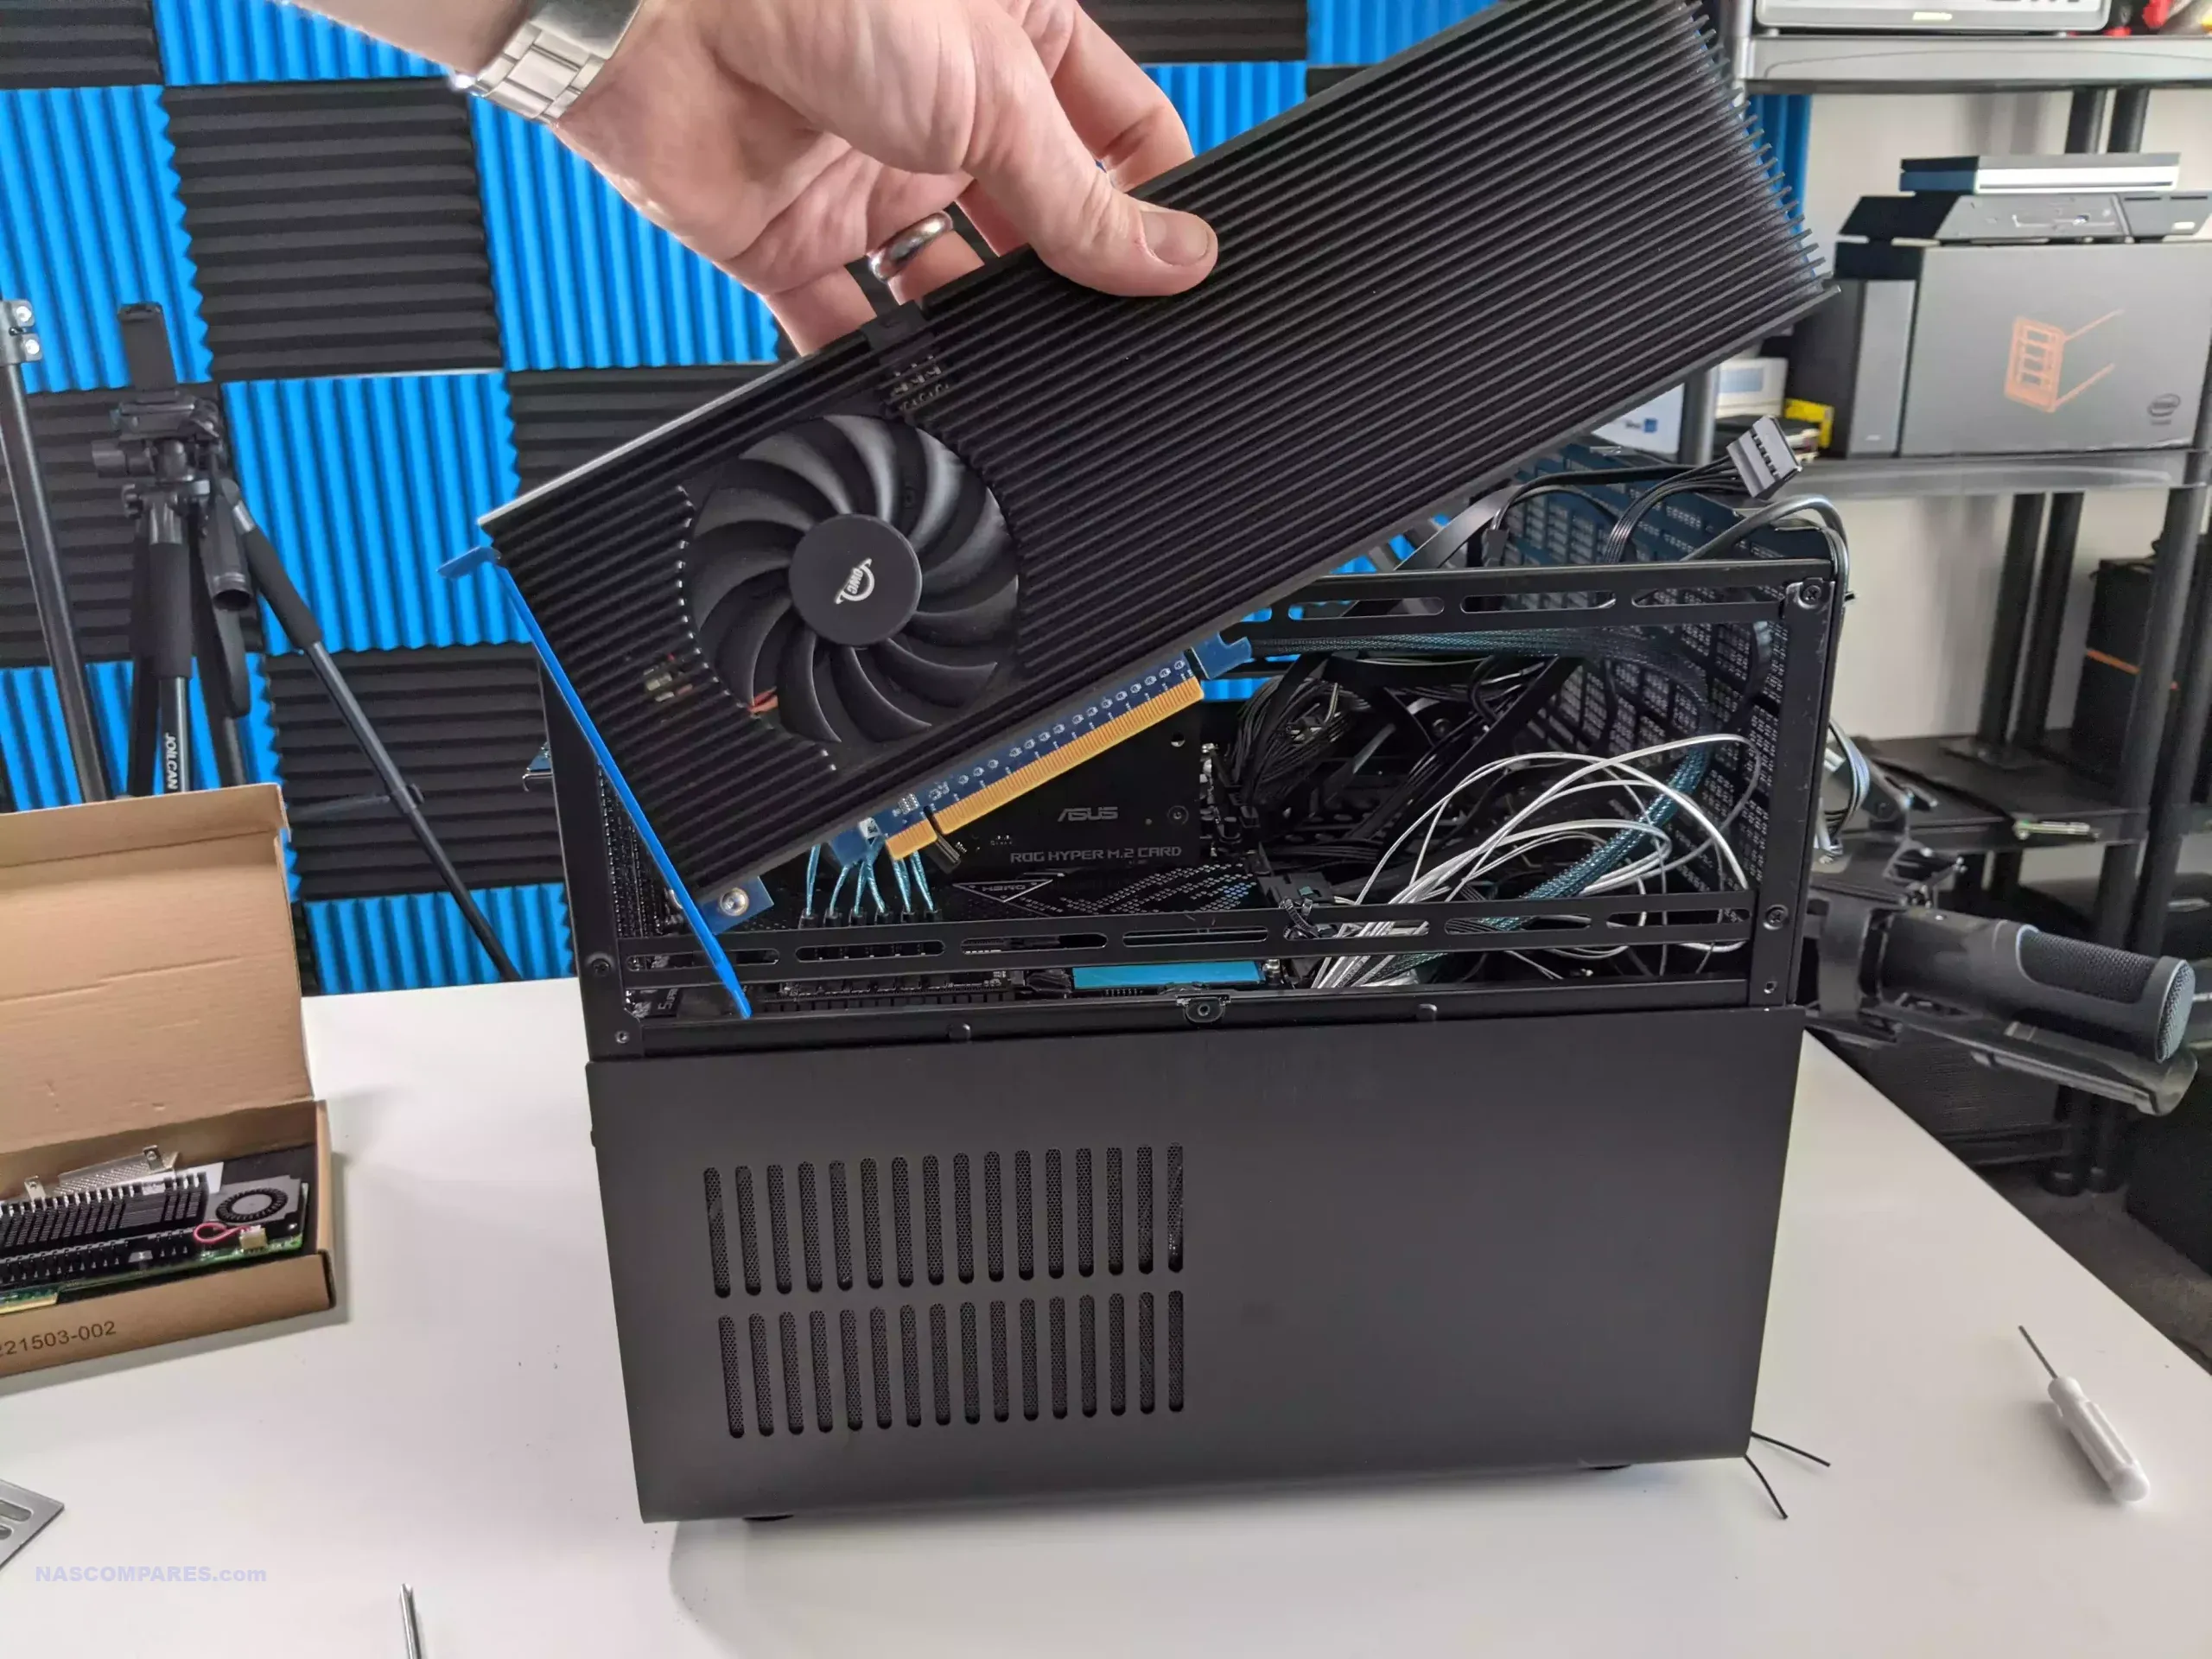
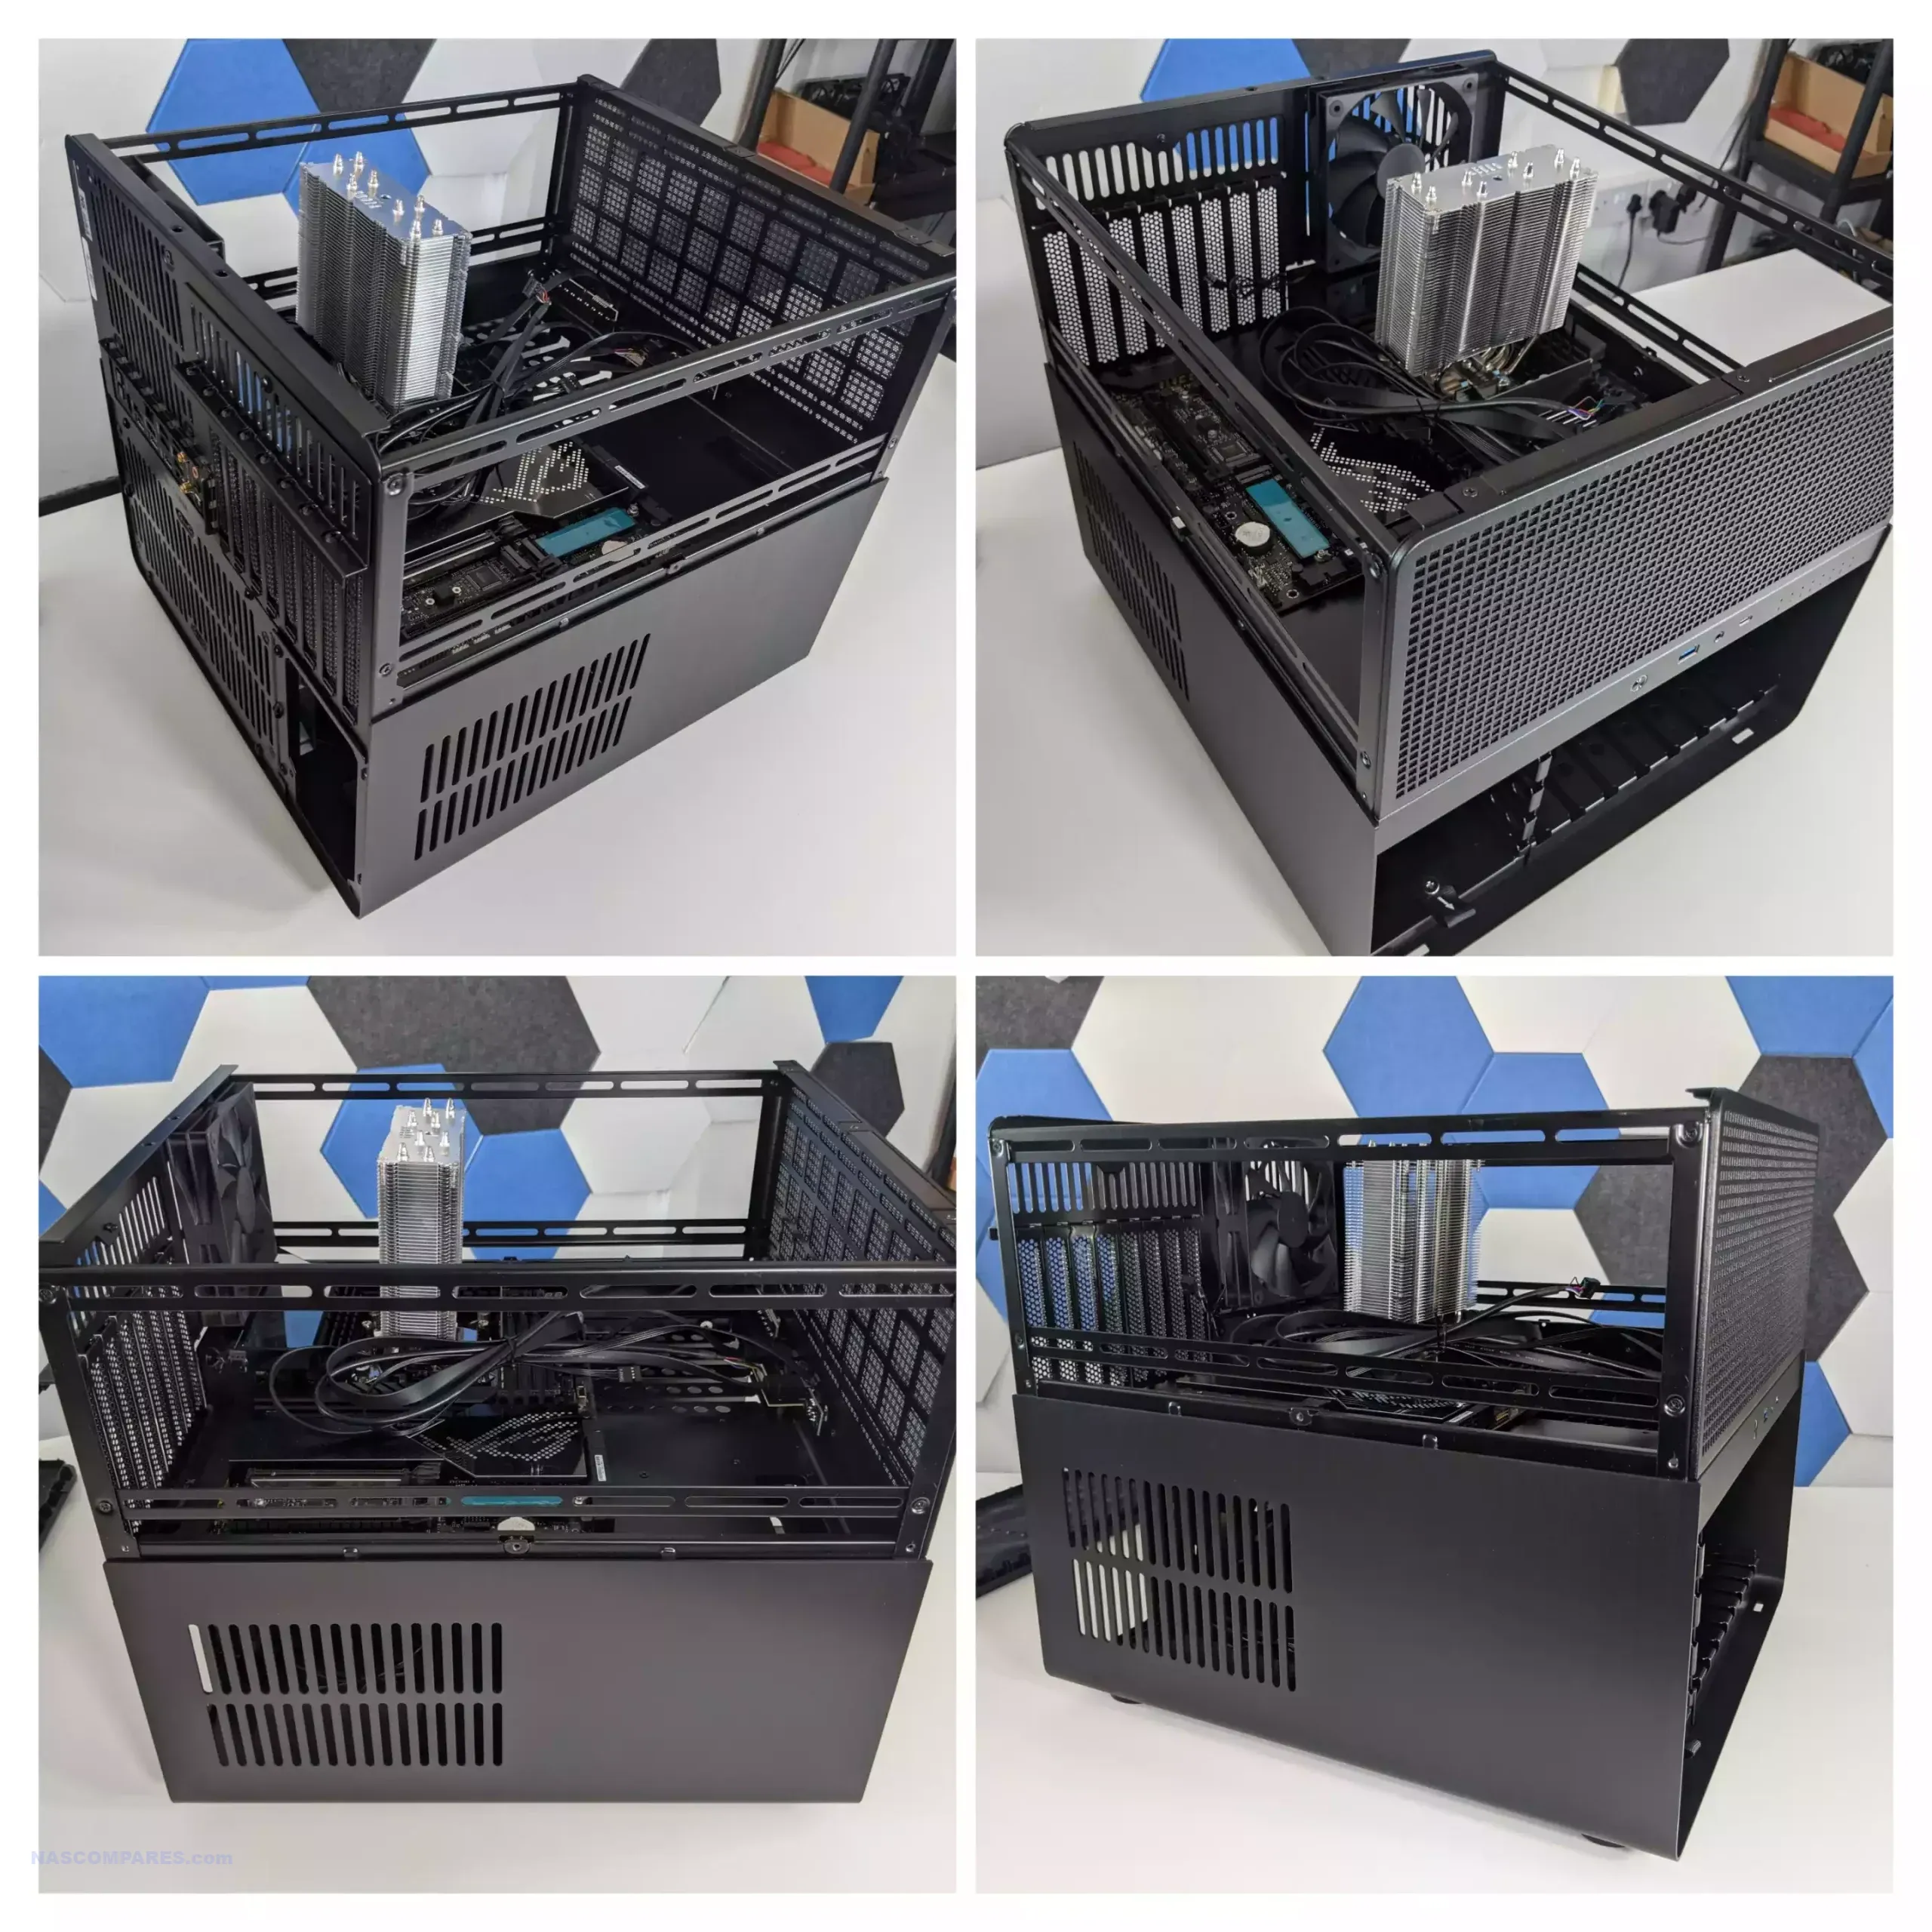
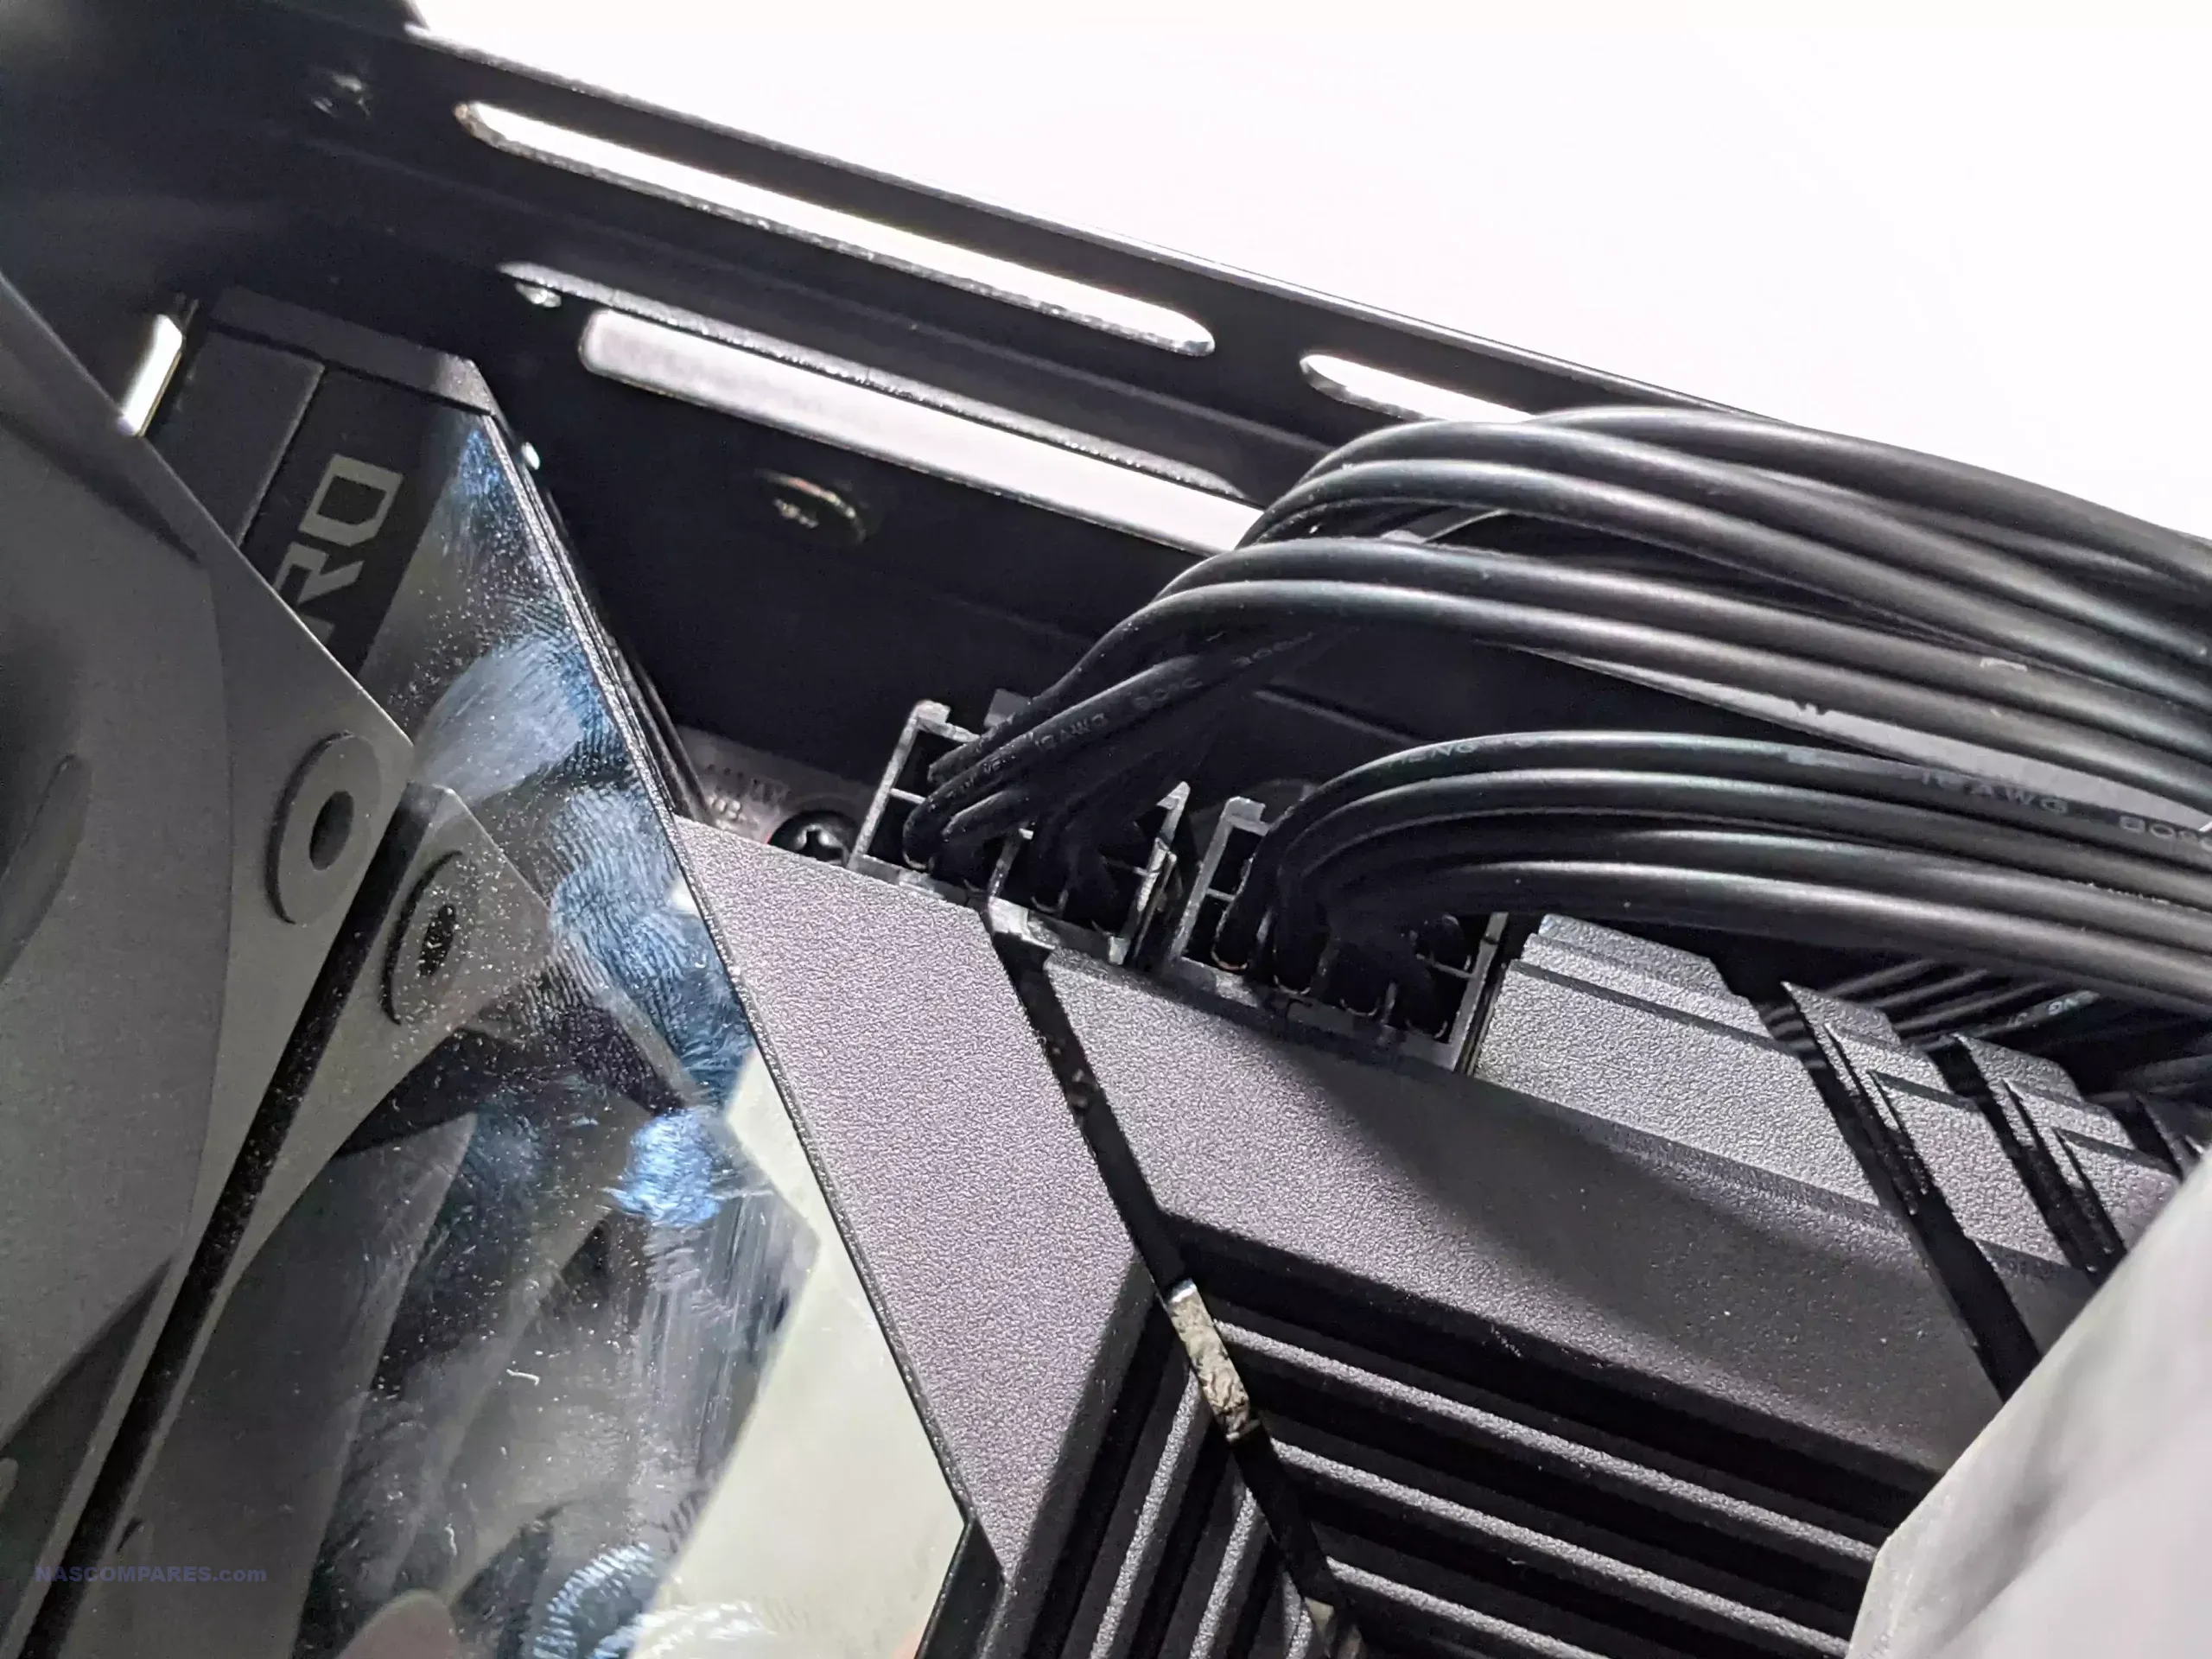
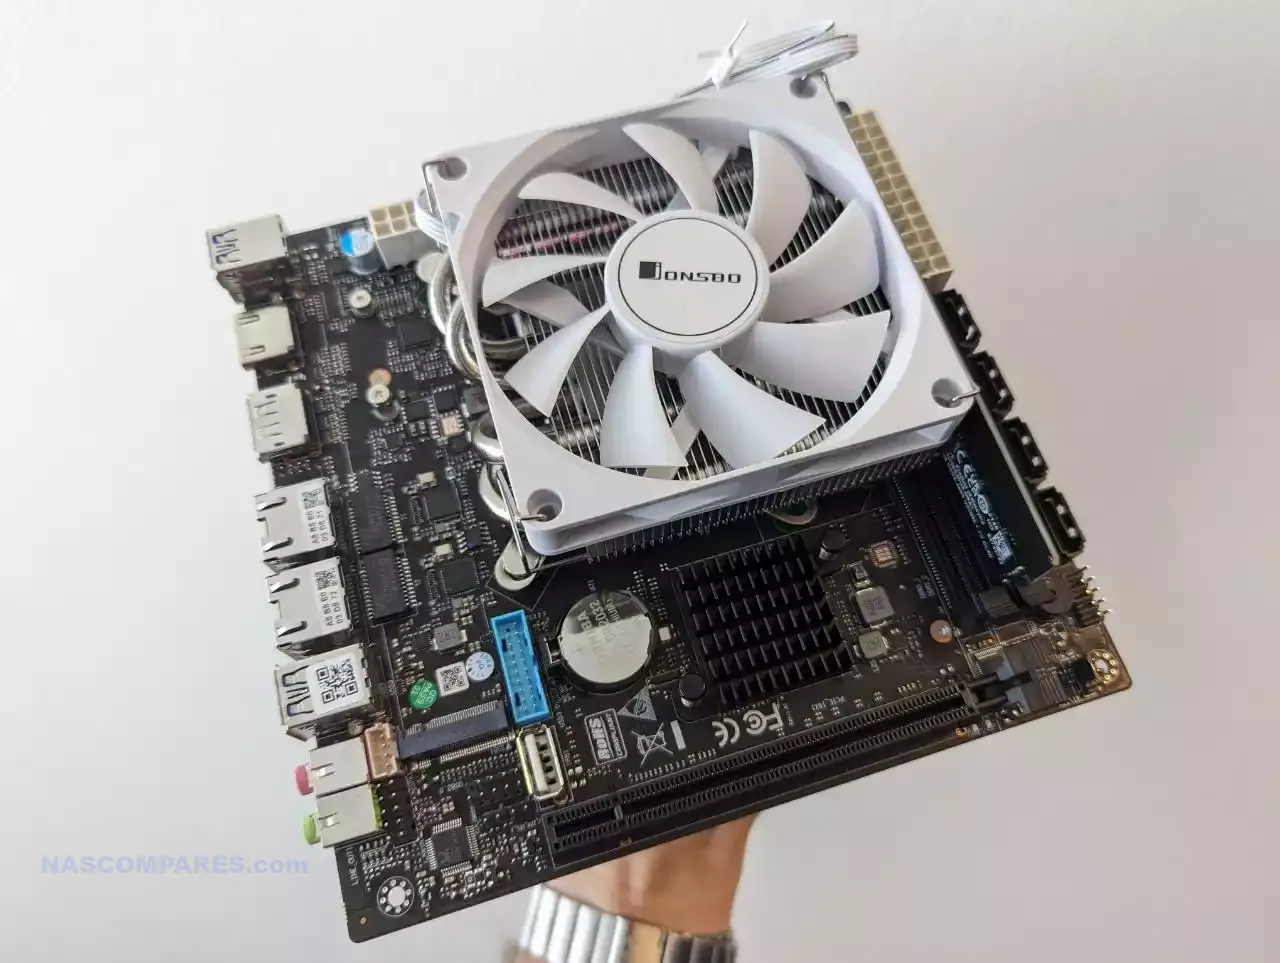
When Jonsbo launched the N4 NAS enclosure earlier this year, it seemed to be a NAS case that fell behind a lot of the scale-ups and improvements of the N3 before it. Jonsbo has clearly decided to rectify these things by maxing out practically every direction possible on the scalability of the N5. For a start, you can support up to eight whopping 160 mm CPU coolers inside the system. Given the 12 SATA storage media support and up to 8 PCIe cards, it makes sense that you’re going to use much more powerful CPUs, and therefore need a cooler best suited to capture all of that active airflow! I tested several large-scale CPU coolers, and even my 160 mm height CPU fan still had around 5-7mm clearance space.
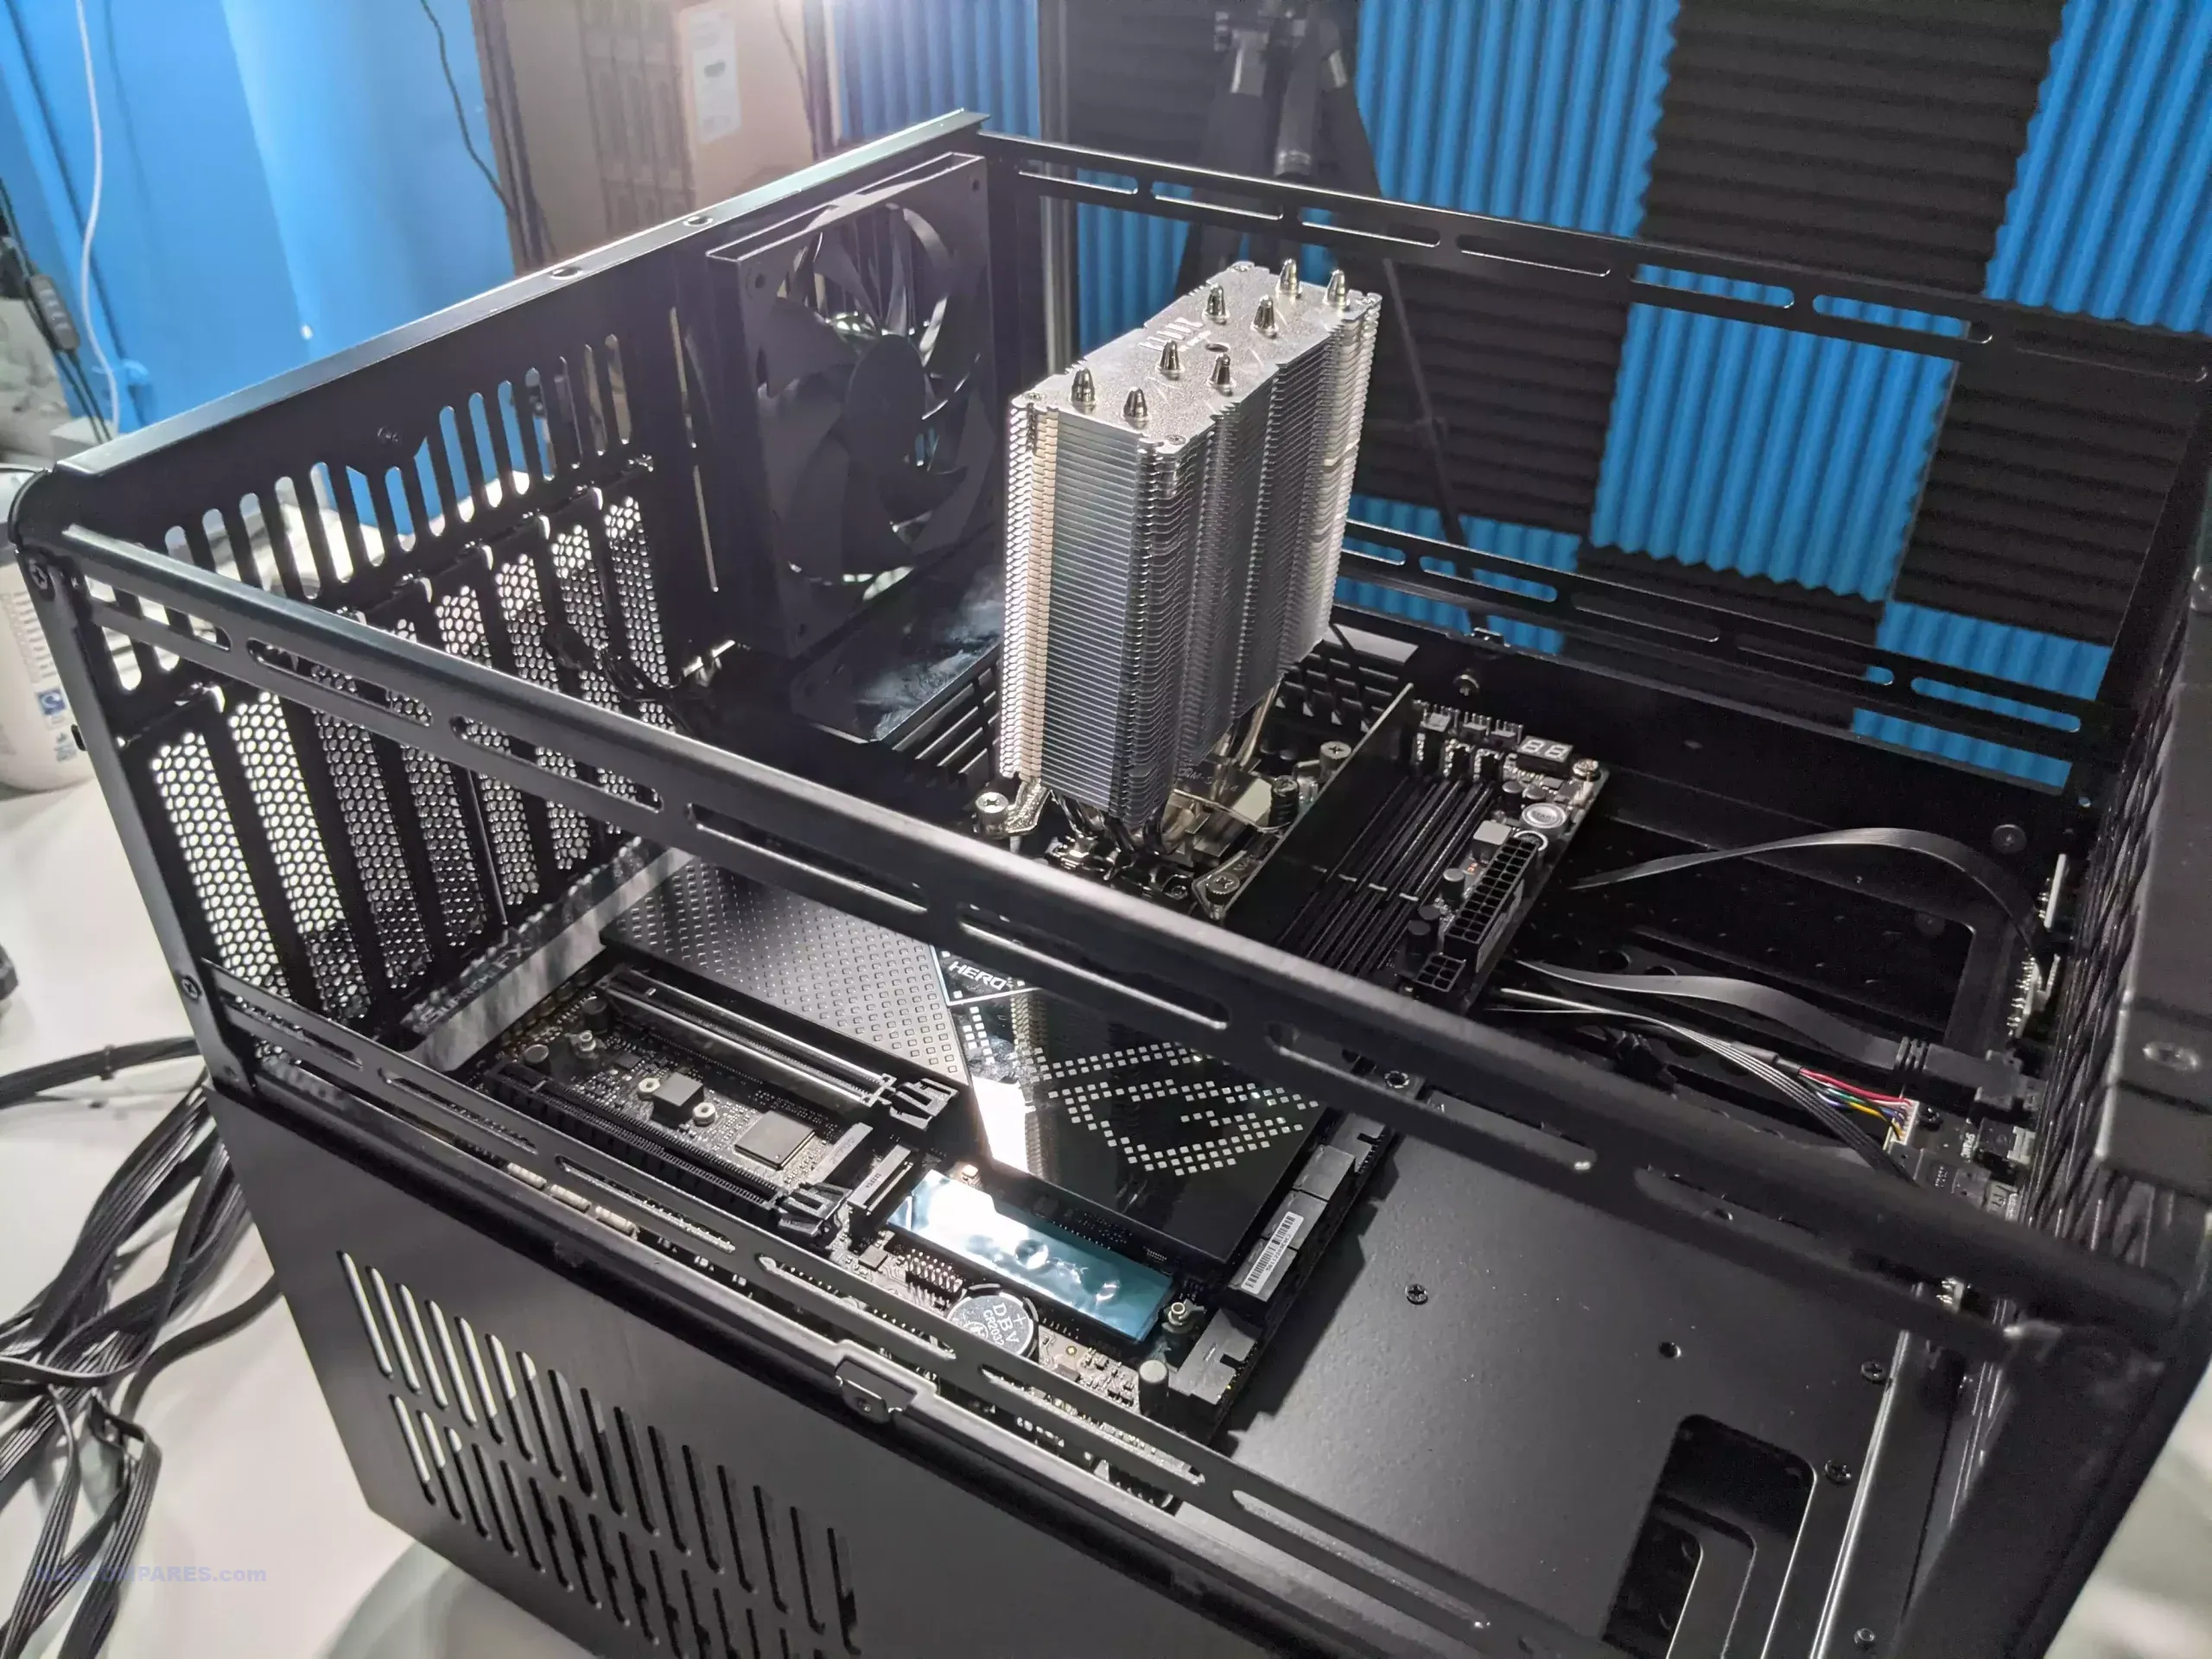
The space afforded to the motherboard installation on the Jonsbo N5 is absolutely huge. A few users online have already told me that they have opted to install an ITX motherboard inside this case, and although I am a massive ITX mobo fan (as there’ve been some fantastic NAS-optimized compact boards of late from Topton, CWWK, and Minisforum), when I did pop an ITX board in, it was kind of comical how little space it actually took up.
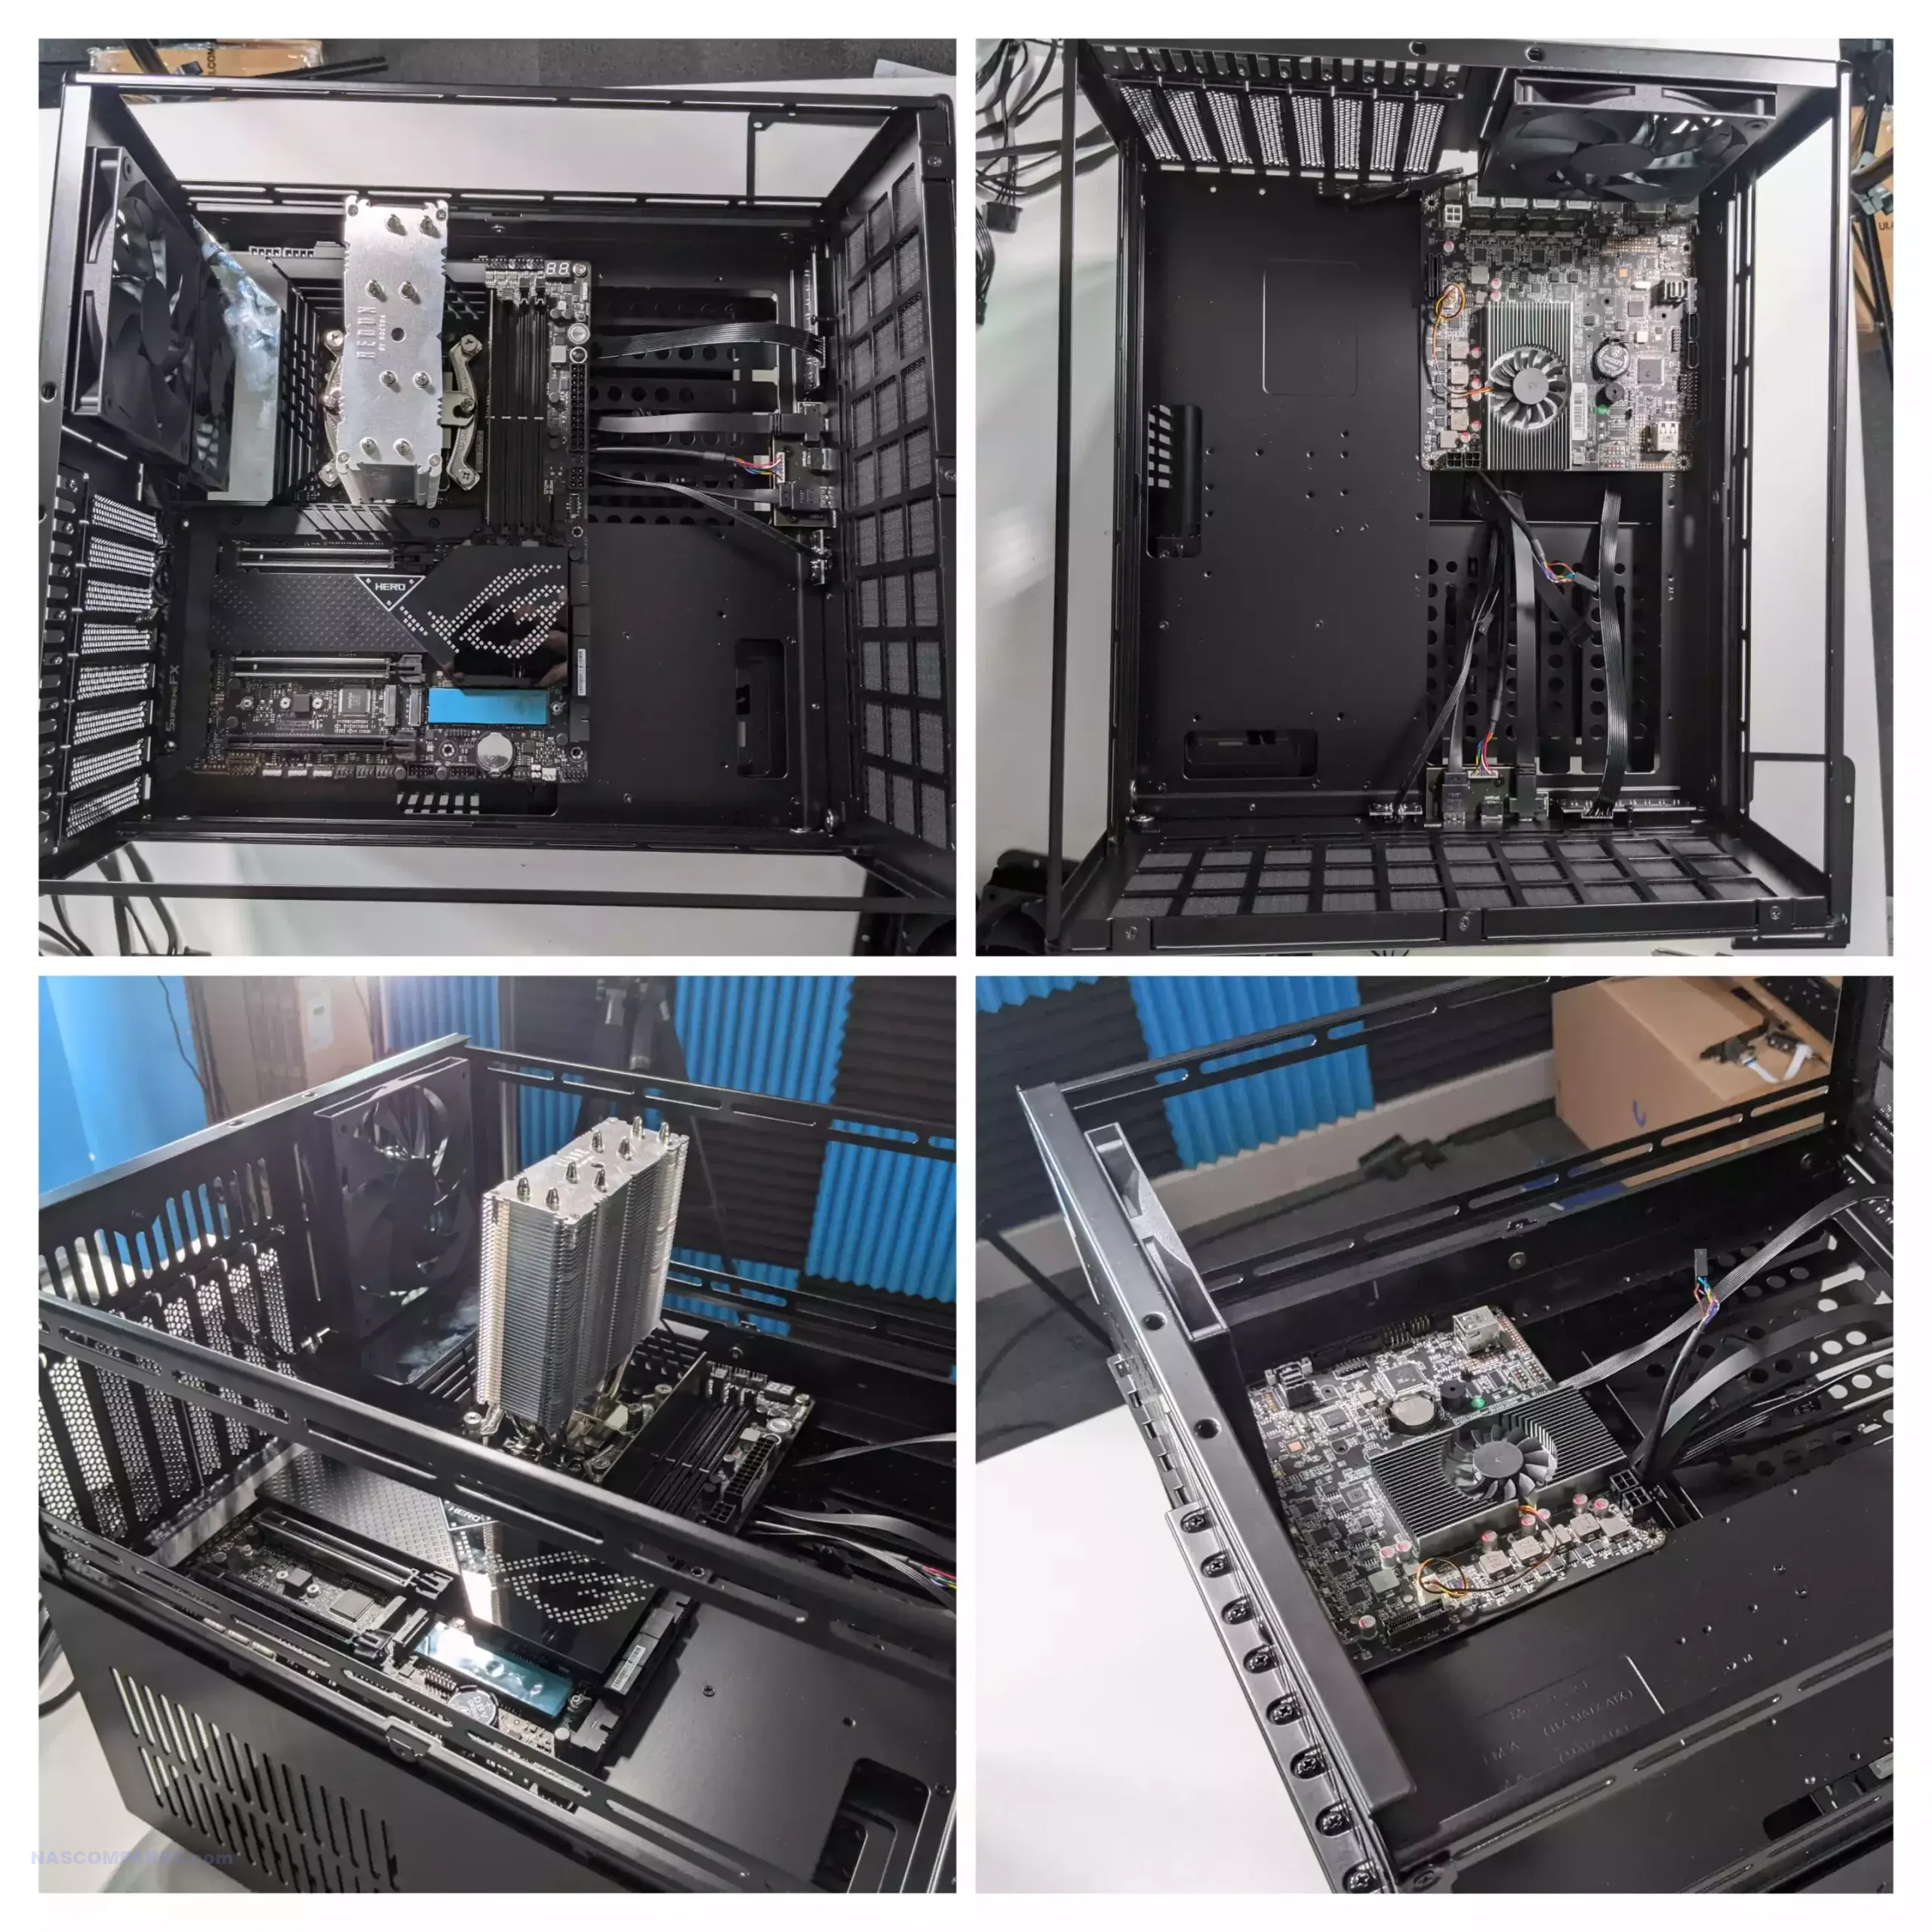
So for the build video I’m working on, I decided to cannibalize an existing ATX test machine that I’ve been using for about a year on Gen 5 SSDs. This board fit in snug as a bug in a rug, and there was still a ton of space where the main eight SATA storage space protrudes beyond the motherboard cavity. Unlike previous generation Jonsbo cases that nest the motherboard directly on top of the storage media bays, the N5 has got sufficient room that there is only a small amount of overlap and therefore restrictive airflow and potential heat generation to be concerned about.
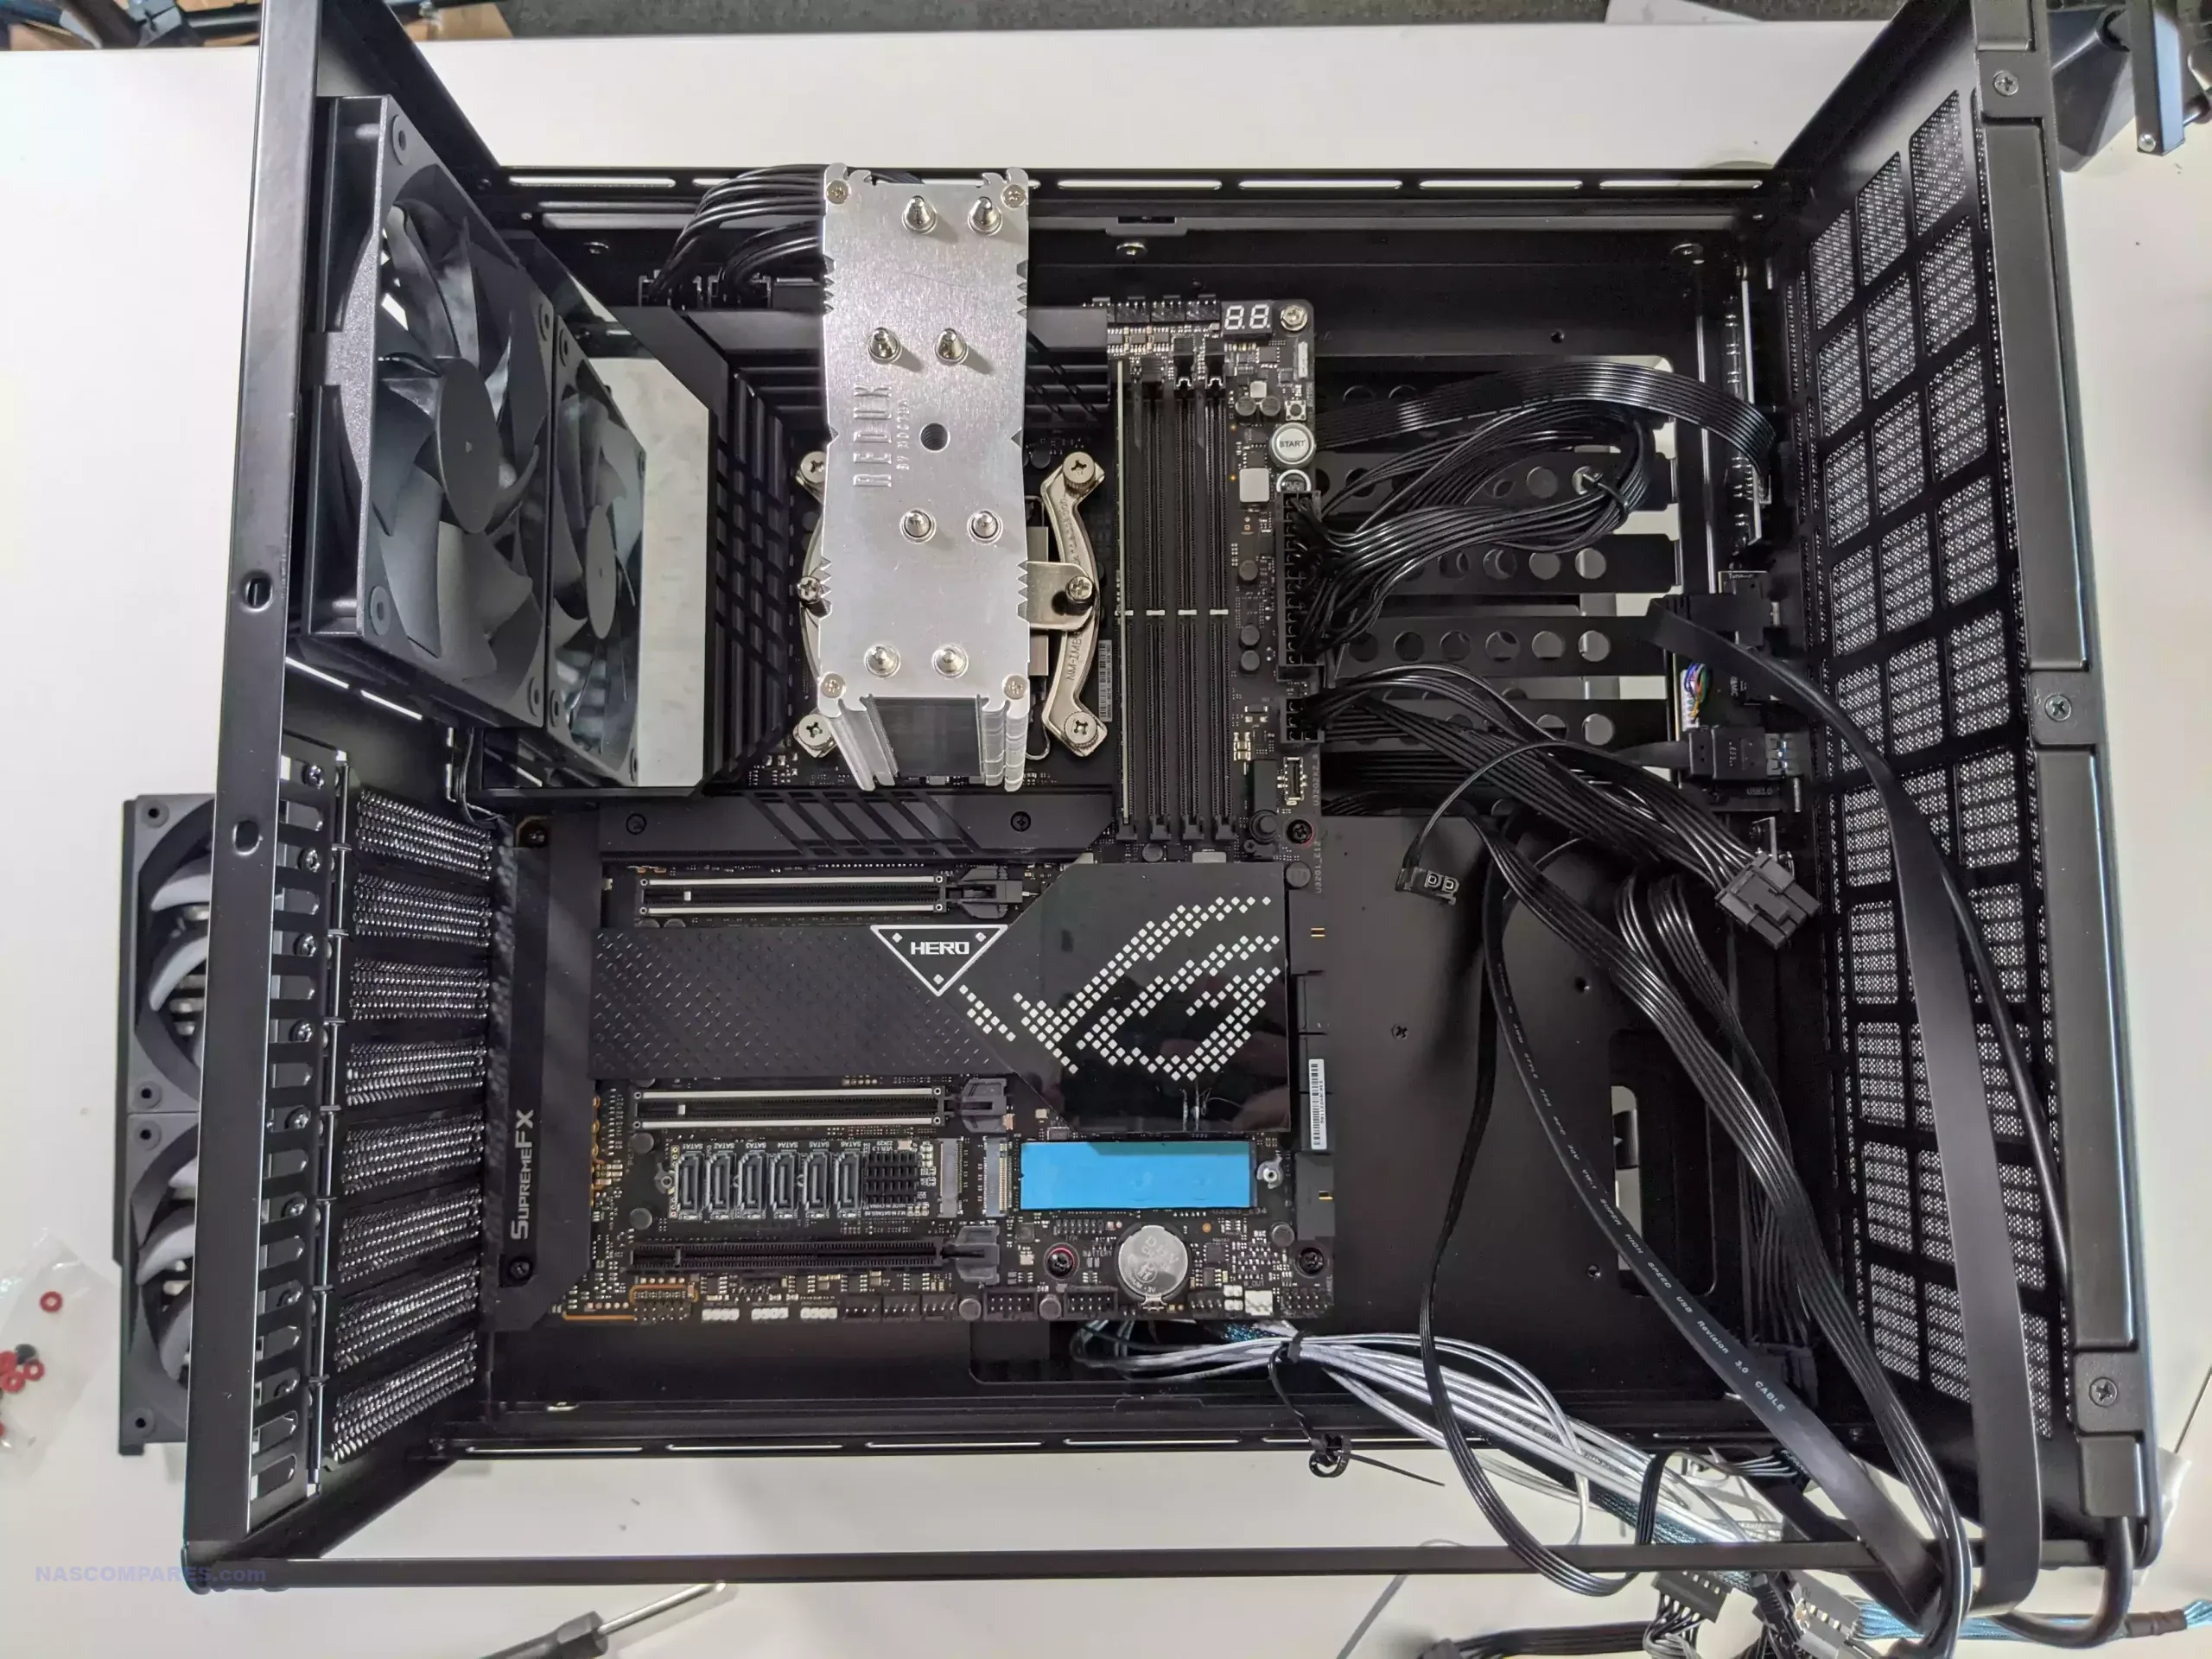
With eight individual PCIe slots on the rear, even if you use double-height cards on your motherboard, that still allows for four individual fat graphics cards if you want! On top of that, the system supports up to 350 mm length cards as well, at full height, so the scope for PCIe upgradability here is absolutely massive. Add to that the fact that even more modest motherboards with 1-2 PCIe slots will still be able to capitalize on the scope of this case, thanks to modern M.2 to PCIe adapters in the market.
If you do mount 2.5-inch SATA SSDs inside the case via the mounting rails mentioned earlier, just be aware that this does overlap ever so slightly over the last PCIe slot. And although most likely this won’t pose an issue, as a double-height card will occupy the two last slots comfortably, just be aware that this may also block active airflow slightly.
It’s an exceptionally spacious and clear cavity to install your motherboard here, with the same space that you would regularly see afforded to a professional gaming rig, but this time geared much more towards 24/7 storage. But what about if you’re building this NAS case? Are there any hurdles or hiccups you should be aware of?
Jonsbo N5 Review – Building a NAS?
I’m currently working on a step-by-step build guide for the Jonsbo N5; however, in the meantime, until that is finished, here are a few early observations that I had when building a server using the N5.

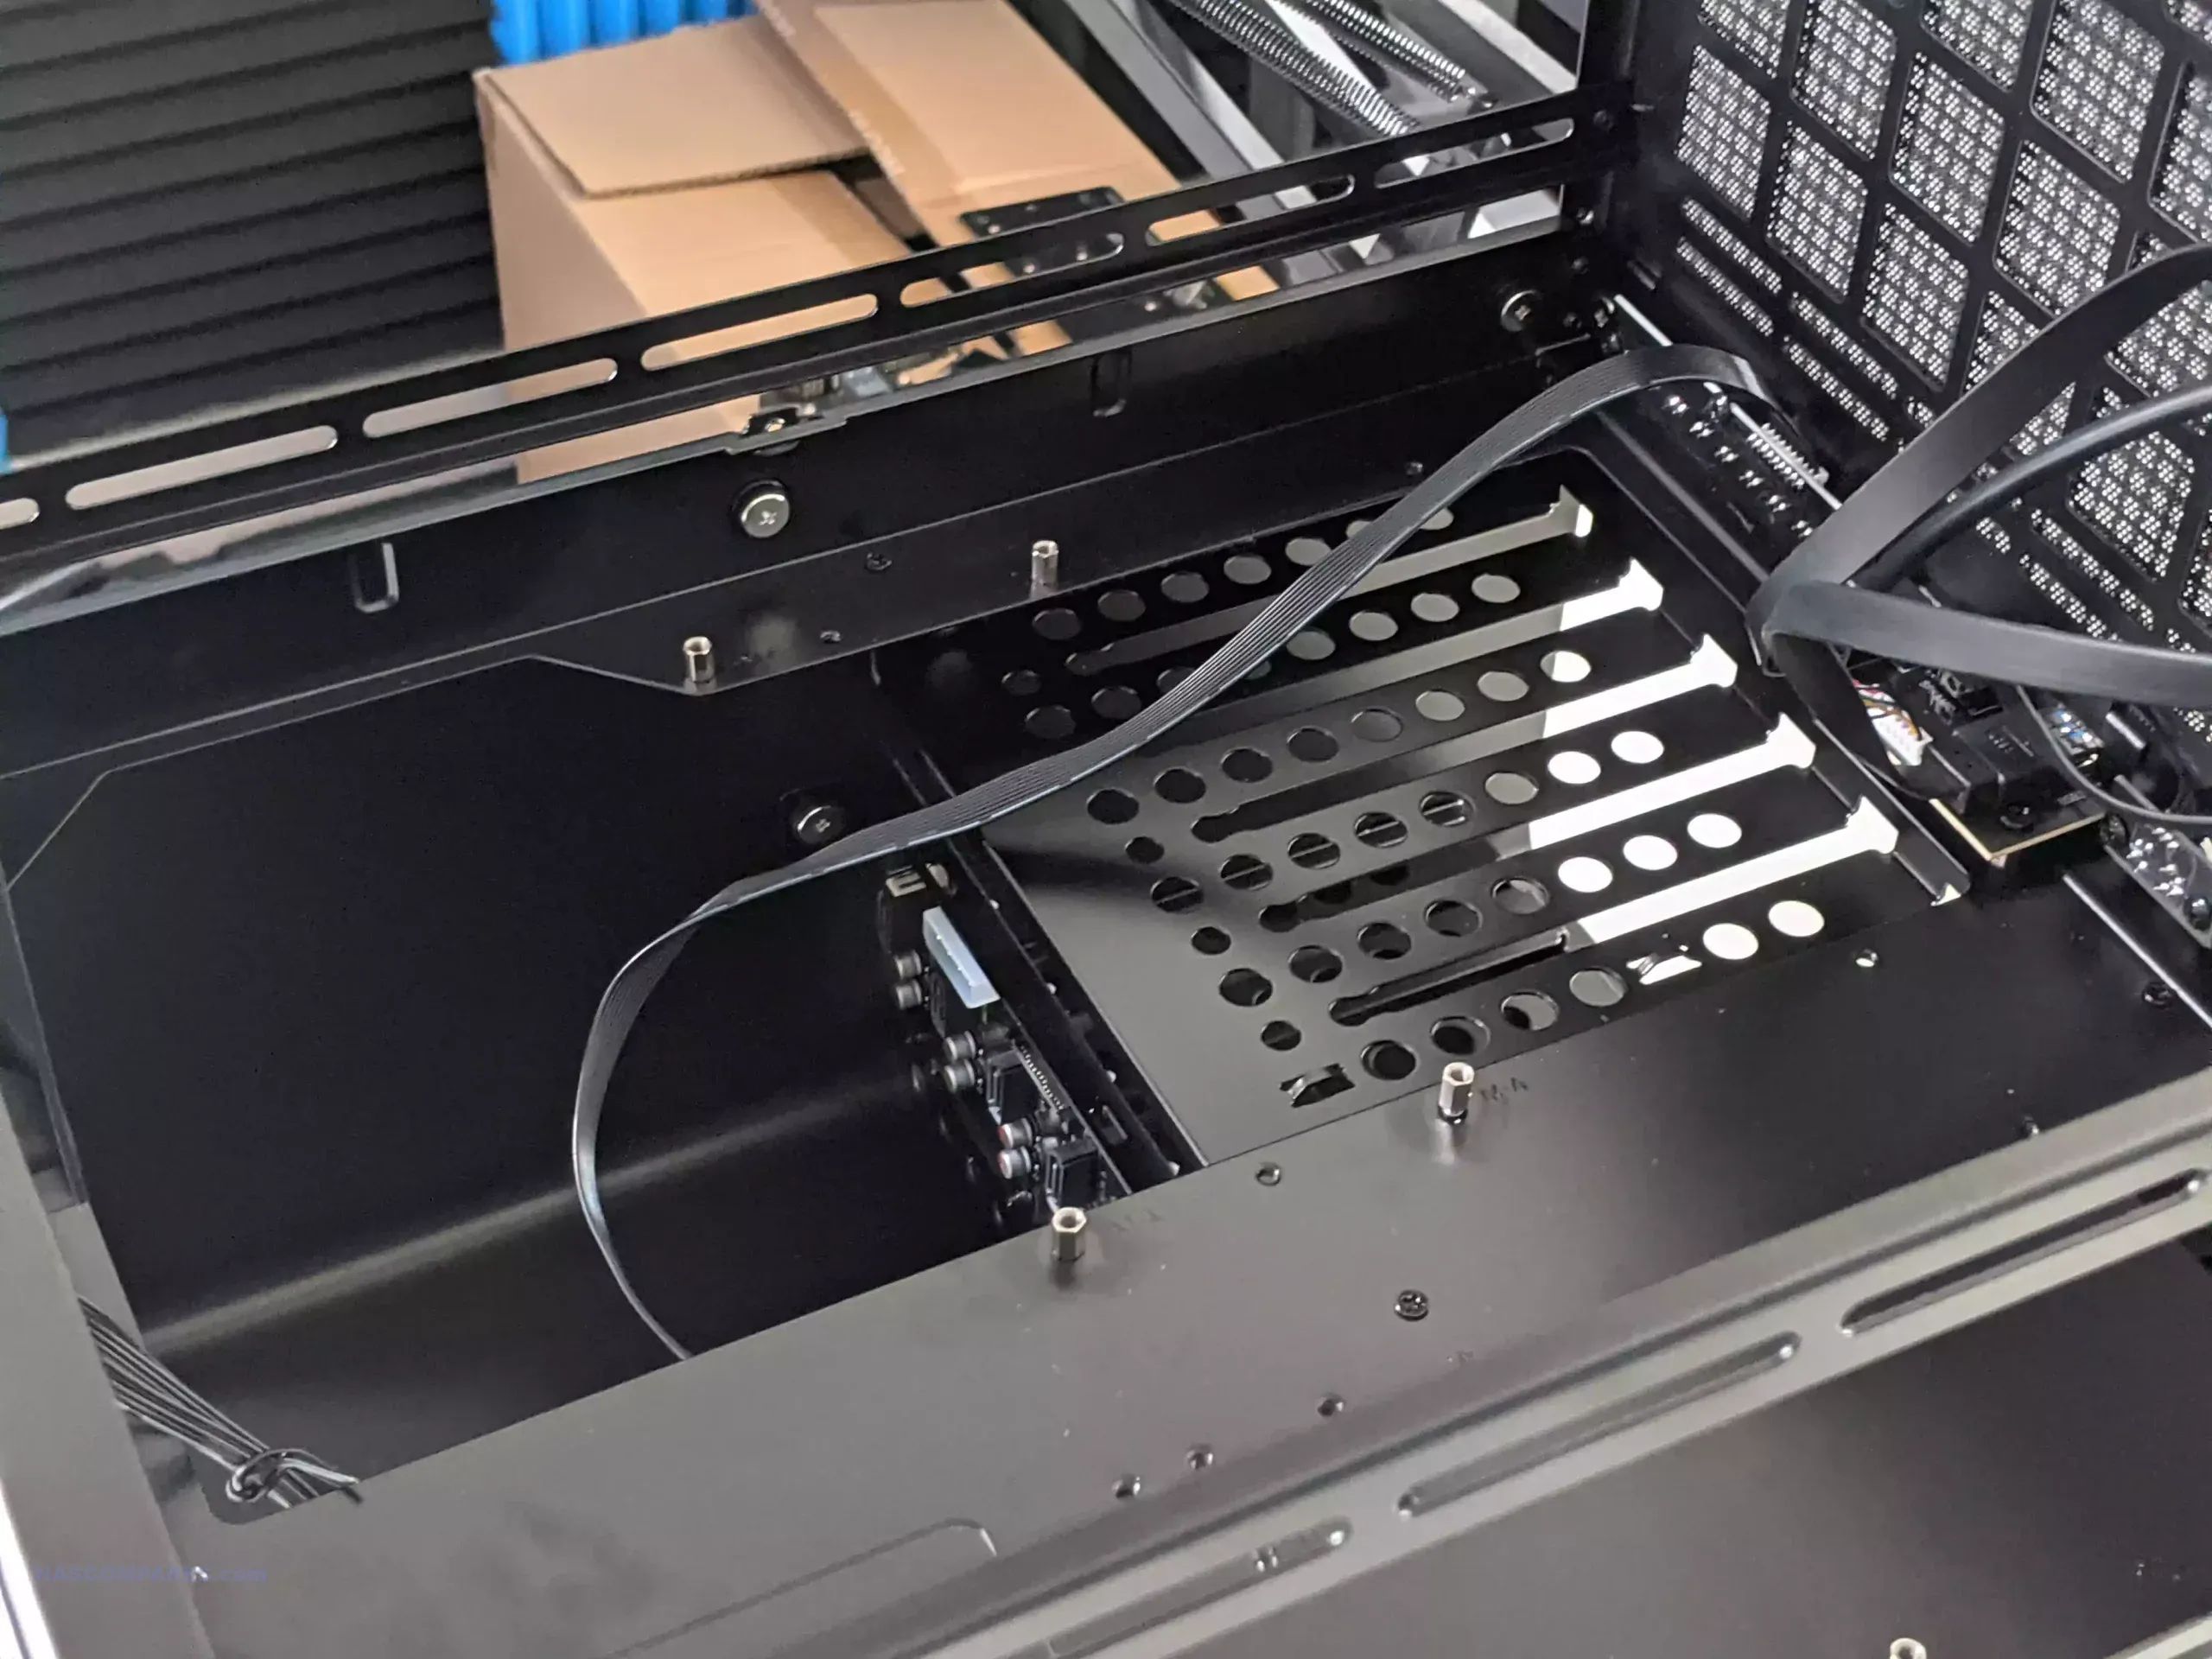
The area behind the hinged fan panel is surprisingly spacious, and in contrast to the tight-knit area behind the PSU, there is absolutely loads of space here to funnel your PSU SATA cables freely without fear of blocking the air inlet.

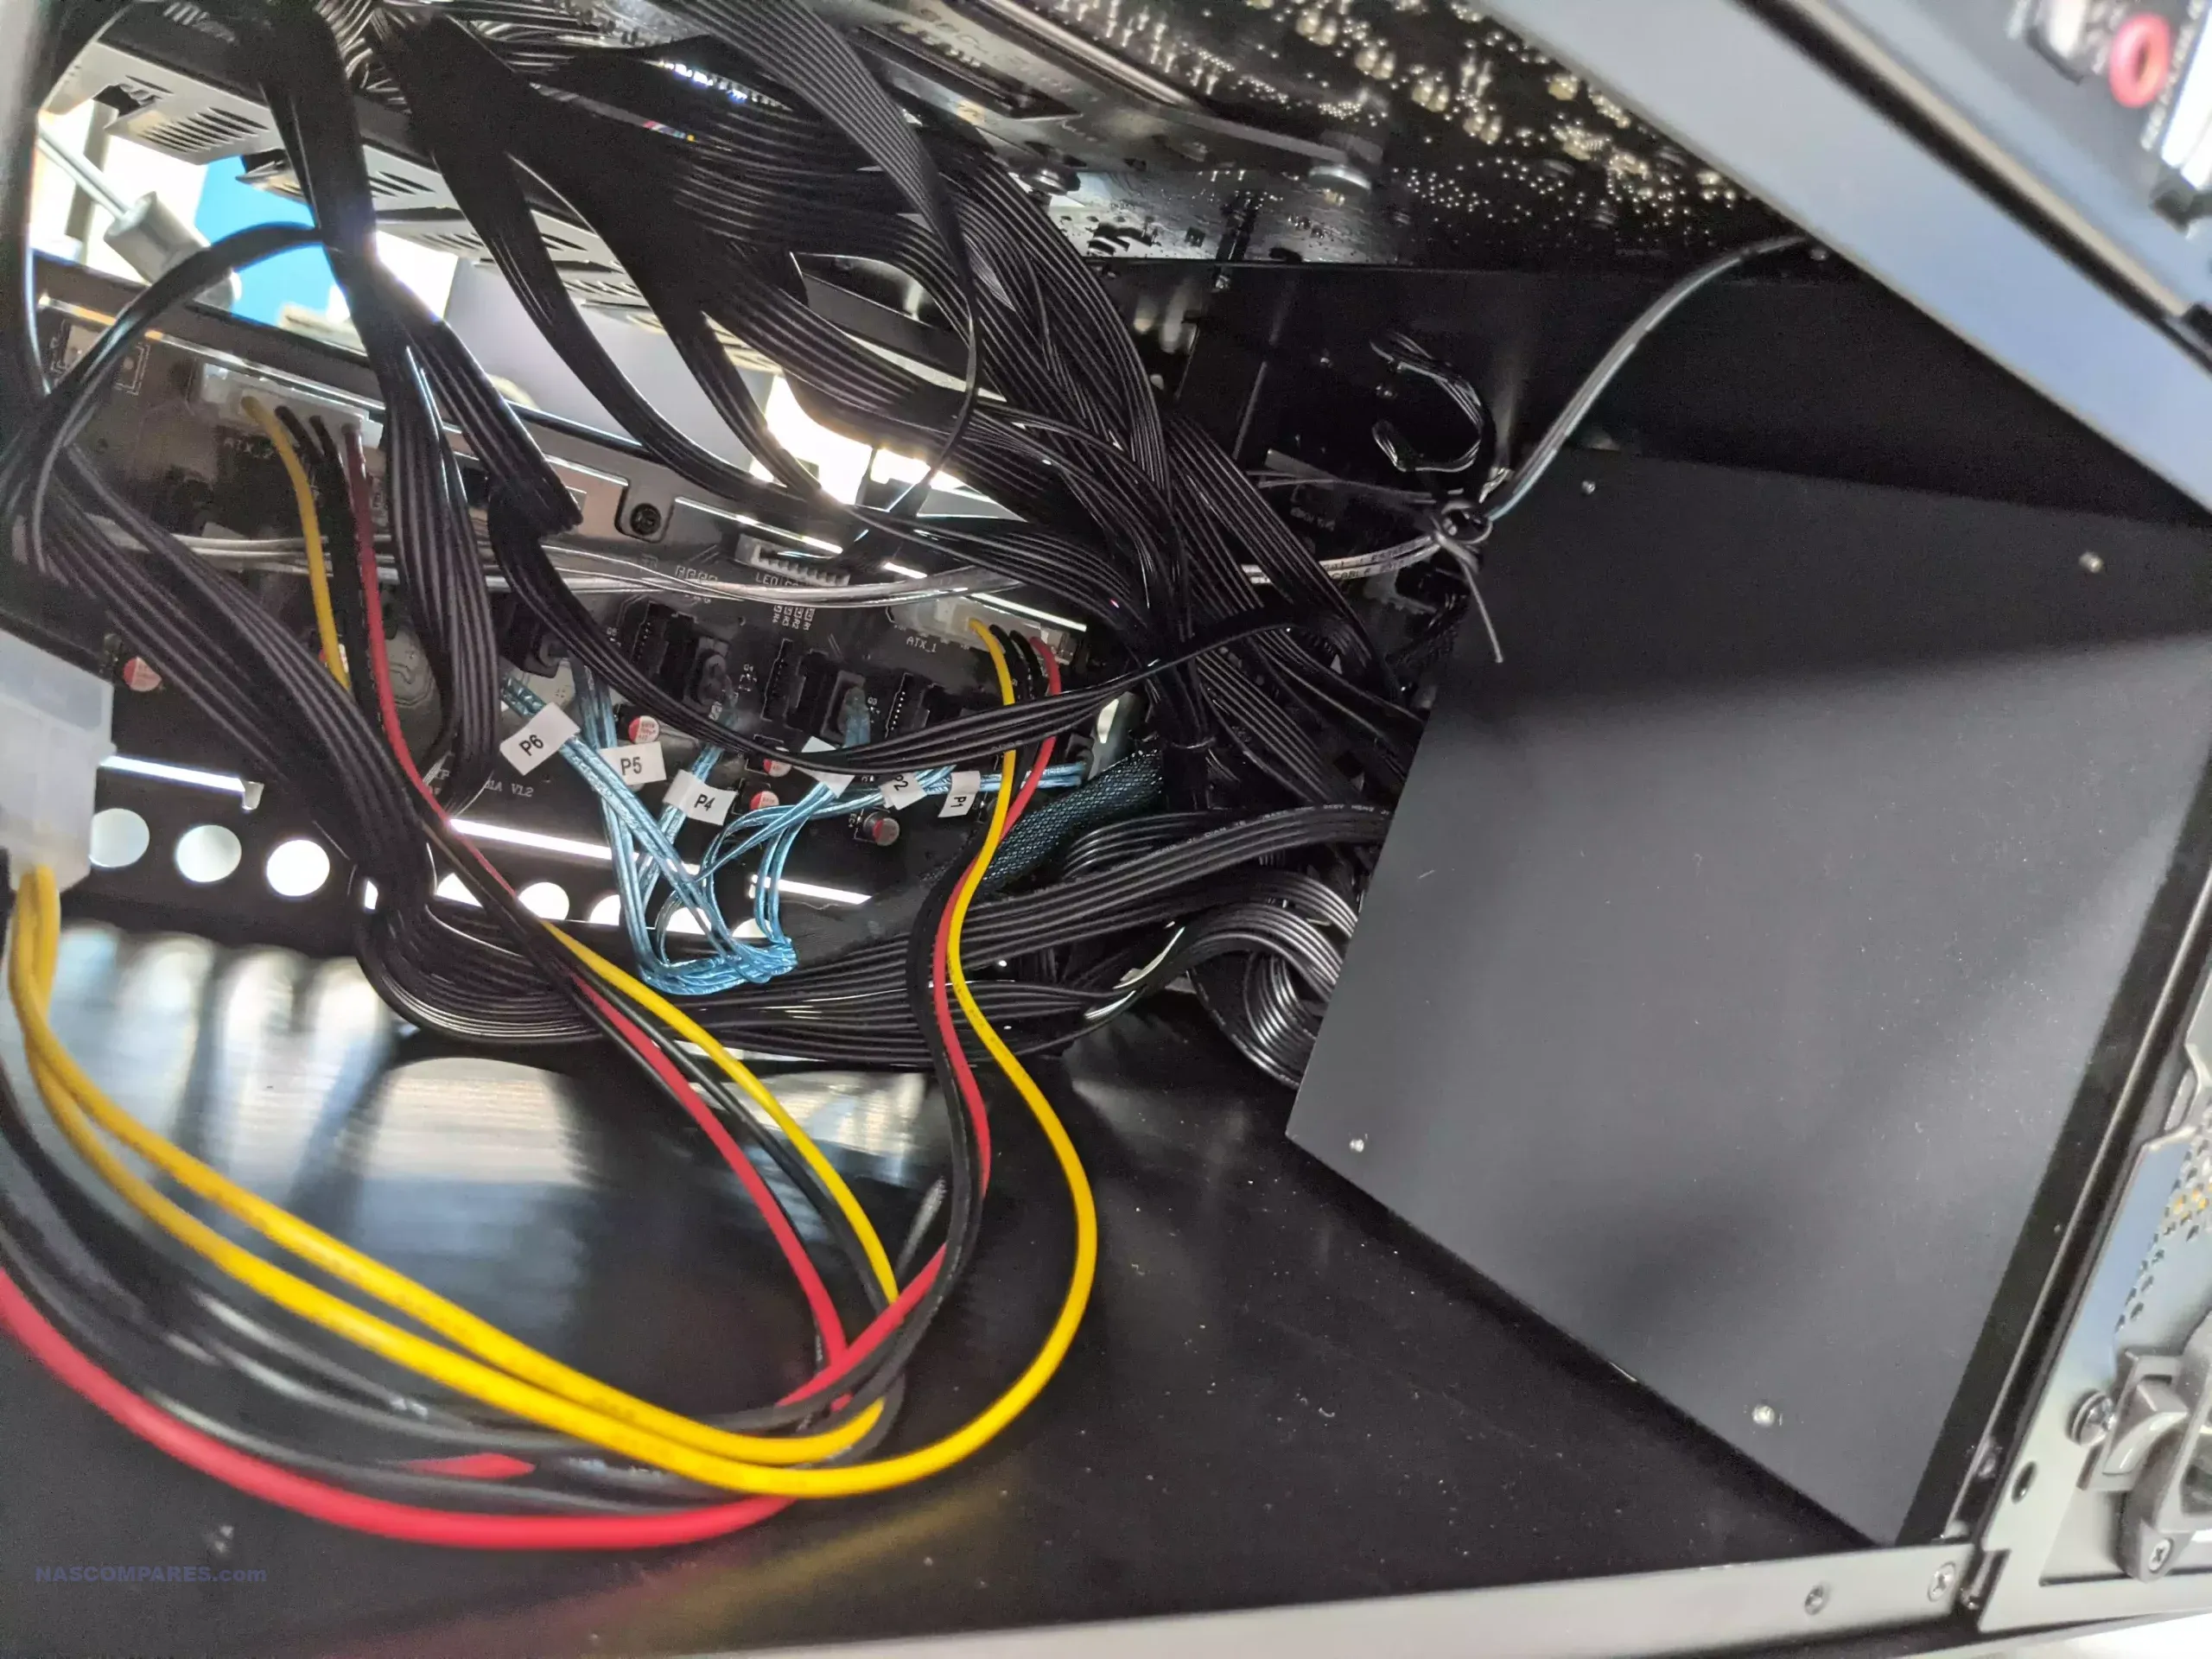
The area behind the 4-bay cage that is sandwiched behind the PSU is a different story, however, and I strongly recommend that you funnel all of your SATA cables long, long before you even consider playing with the PSU installation.
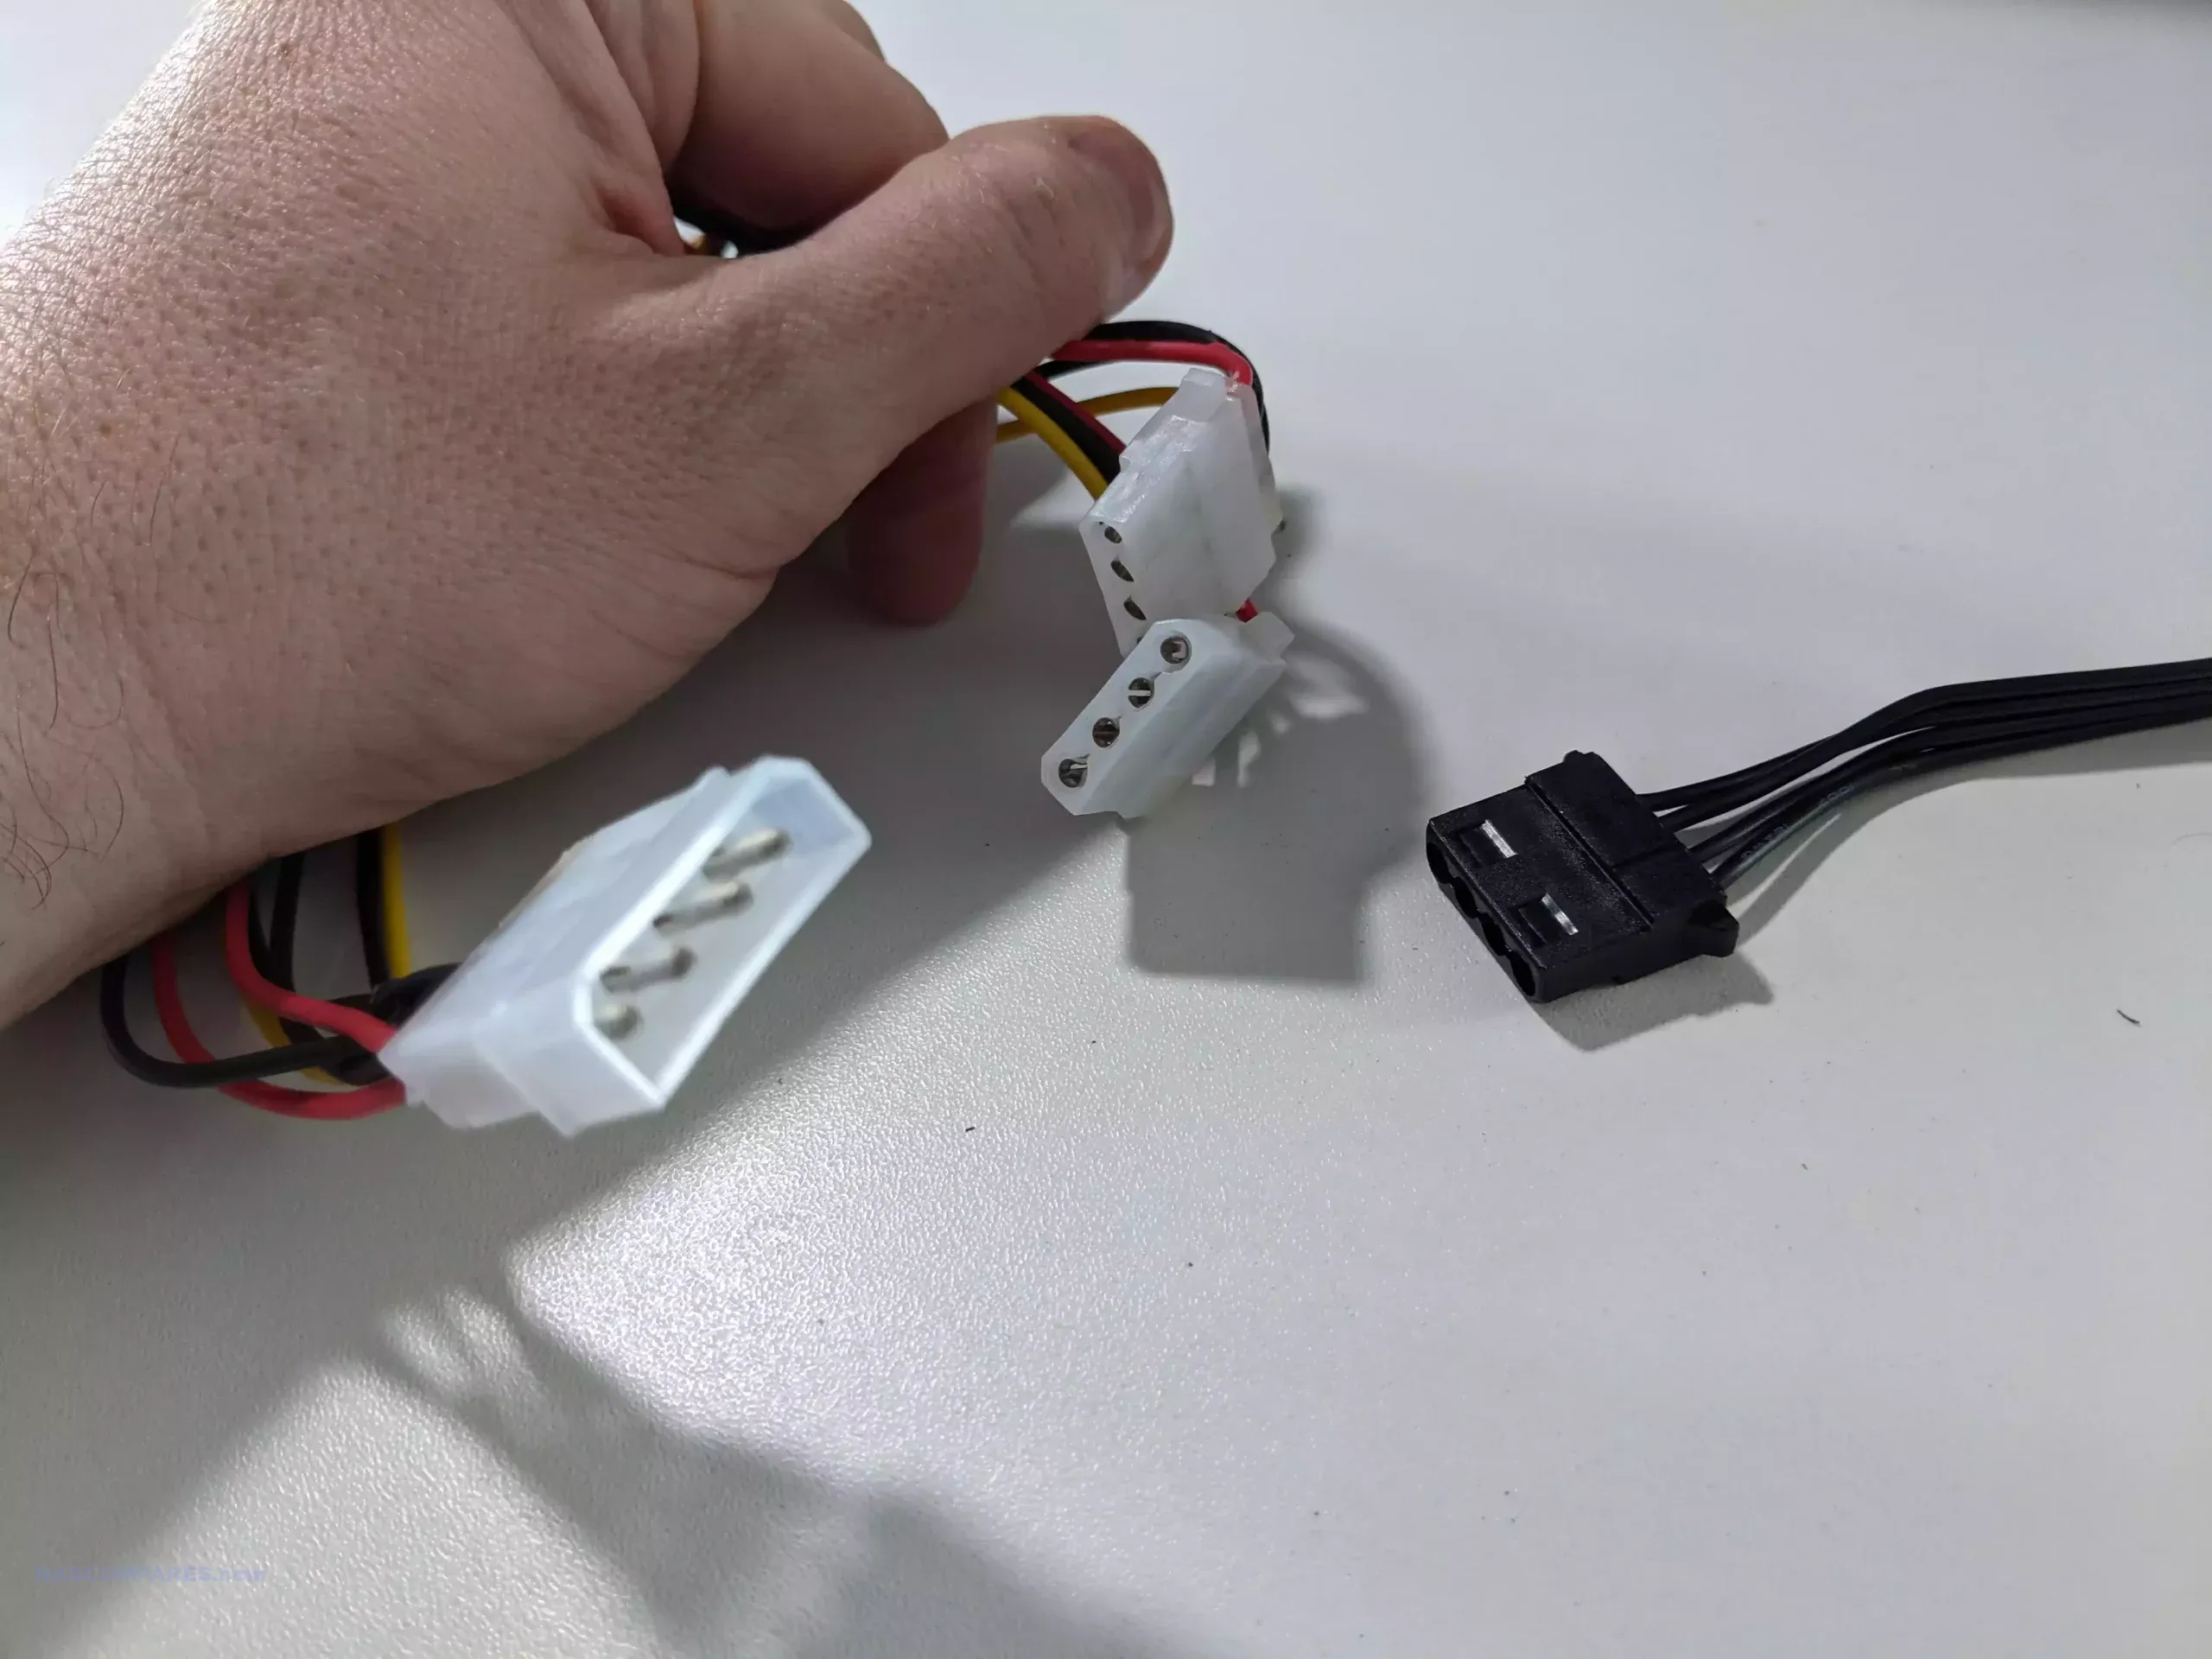
The PCBs inside the Jonsbo N5, as it separates the media across two PCB boards, require you to separate the power a little. The rear board features three individual Molex power female ports and two SATA power female ports. More than likely, you are going to need to use a Molex splitter on the majority of domestic PSUs in order to accommodate these connections.
It is recommended that you use 60 cm SATA cables minimum when connecting all 12 bays of storage to the N5-installed motherboard. The four horizontal drives will easily cable in well to the small cavity hole for these cables in the case, but the eight individual SATA bays will need to effectively double up to reach the small SATA inlet hole featured in the N5, so perhaps even consider swapping slots 1234 with 90 cm SATA cables.

The main SATA 20-pin connector and a couple of 6/8-pin power connectors can be funneled via the cavity above the 8x hard drive storage bay. These can be tracked via the small envelope space above the eight-slot SATA PCB.
However, there is an additional small cable inlet located next to the motherboard backplane area that you can use to funnel additional 4/6/8-pin power inputs for your motherboard at that corner if needed.
Everything else about building this case was pretty straightforward, just be aware that you really need to focus on funneling the SATA cables first, then routing each of the PSU cables into their relevant internal case cavity before sliding the PSU and its plate into place. As it is near impossible to do this afterwards and will result in having to dismantle almost the entire arrangement after. Let’s discuss some recommended upgrades and build options.

Recommended Upgrades and Adapters for your Jonsbo N5 Build
Here are a bunch of upgrades that will allow you to scale up just what you can do with your Jonsbo N5 NAS case build. Many of these are soft mods or adapters that allow you to scale up even smaller class systems into something more aggressive.
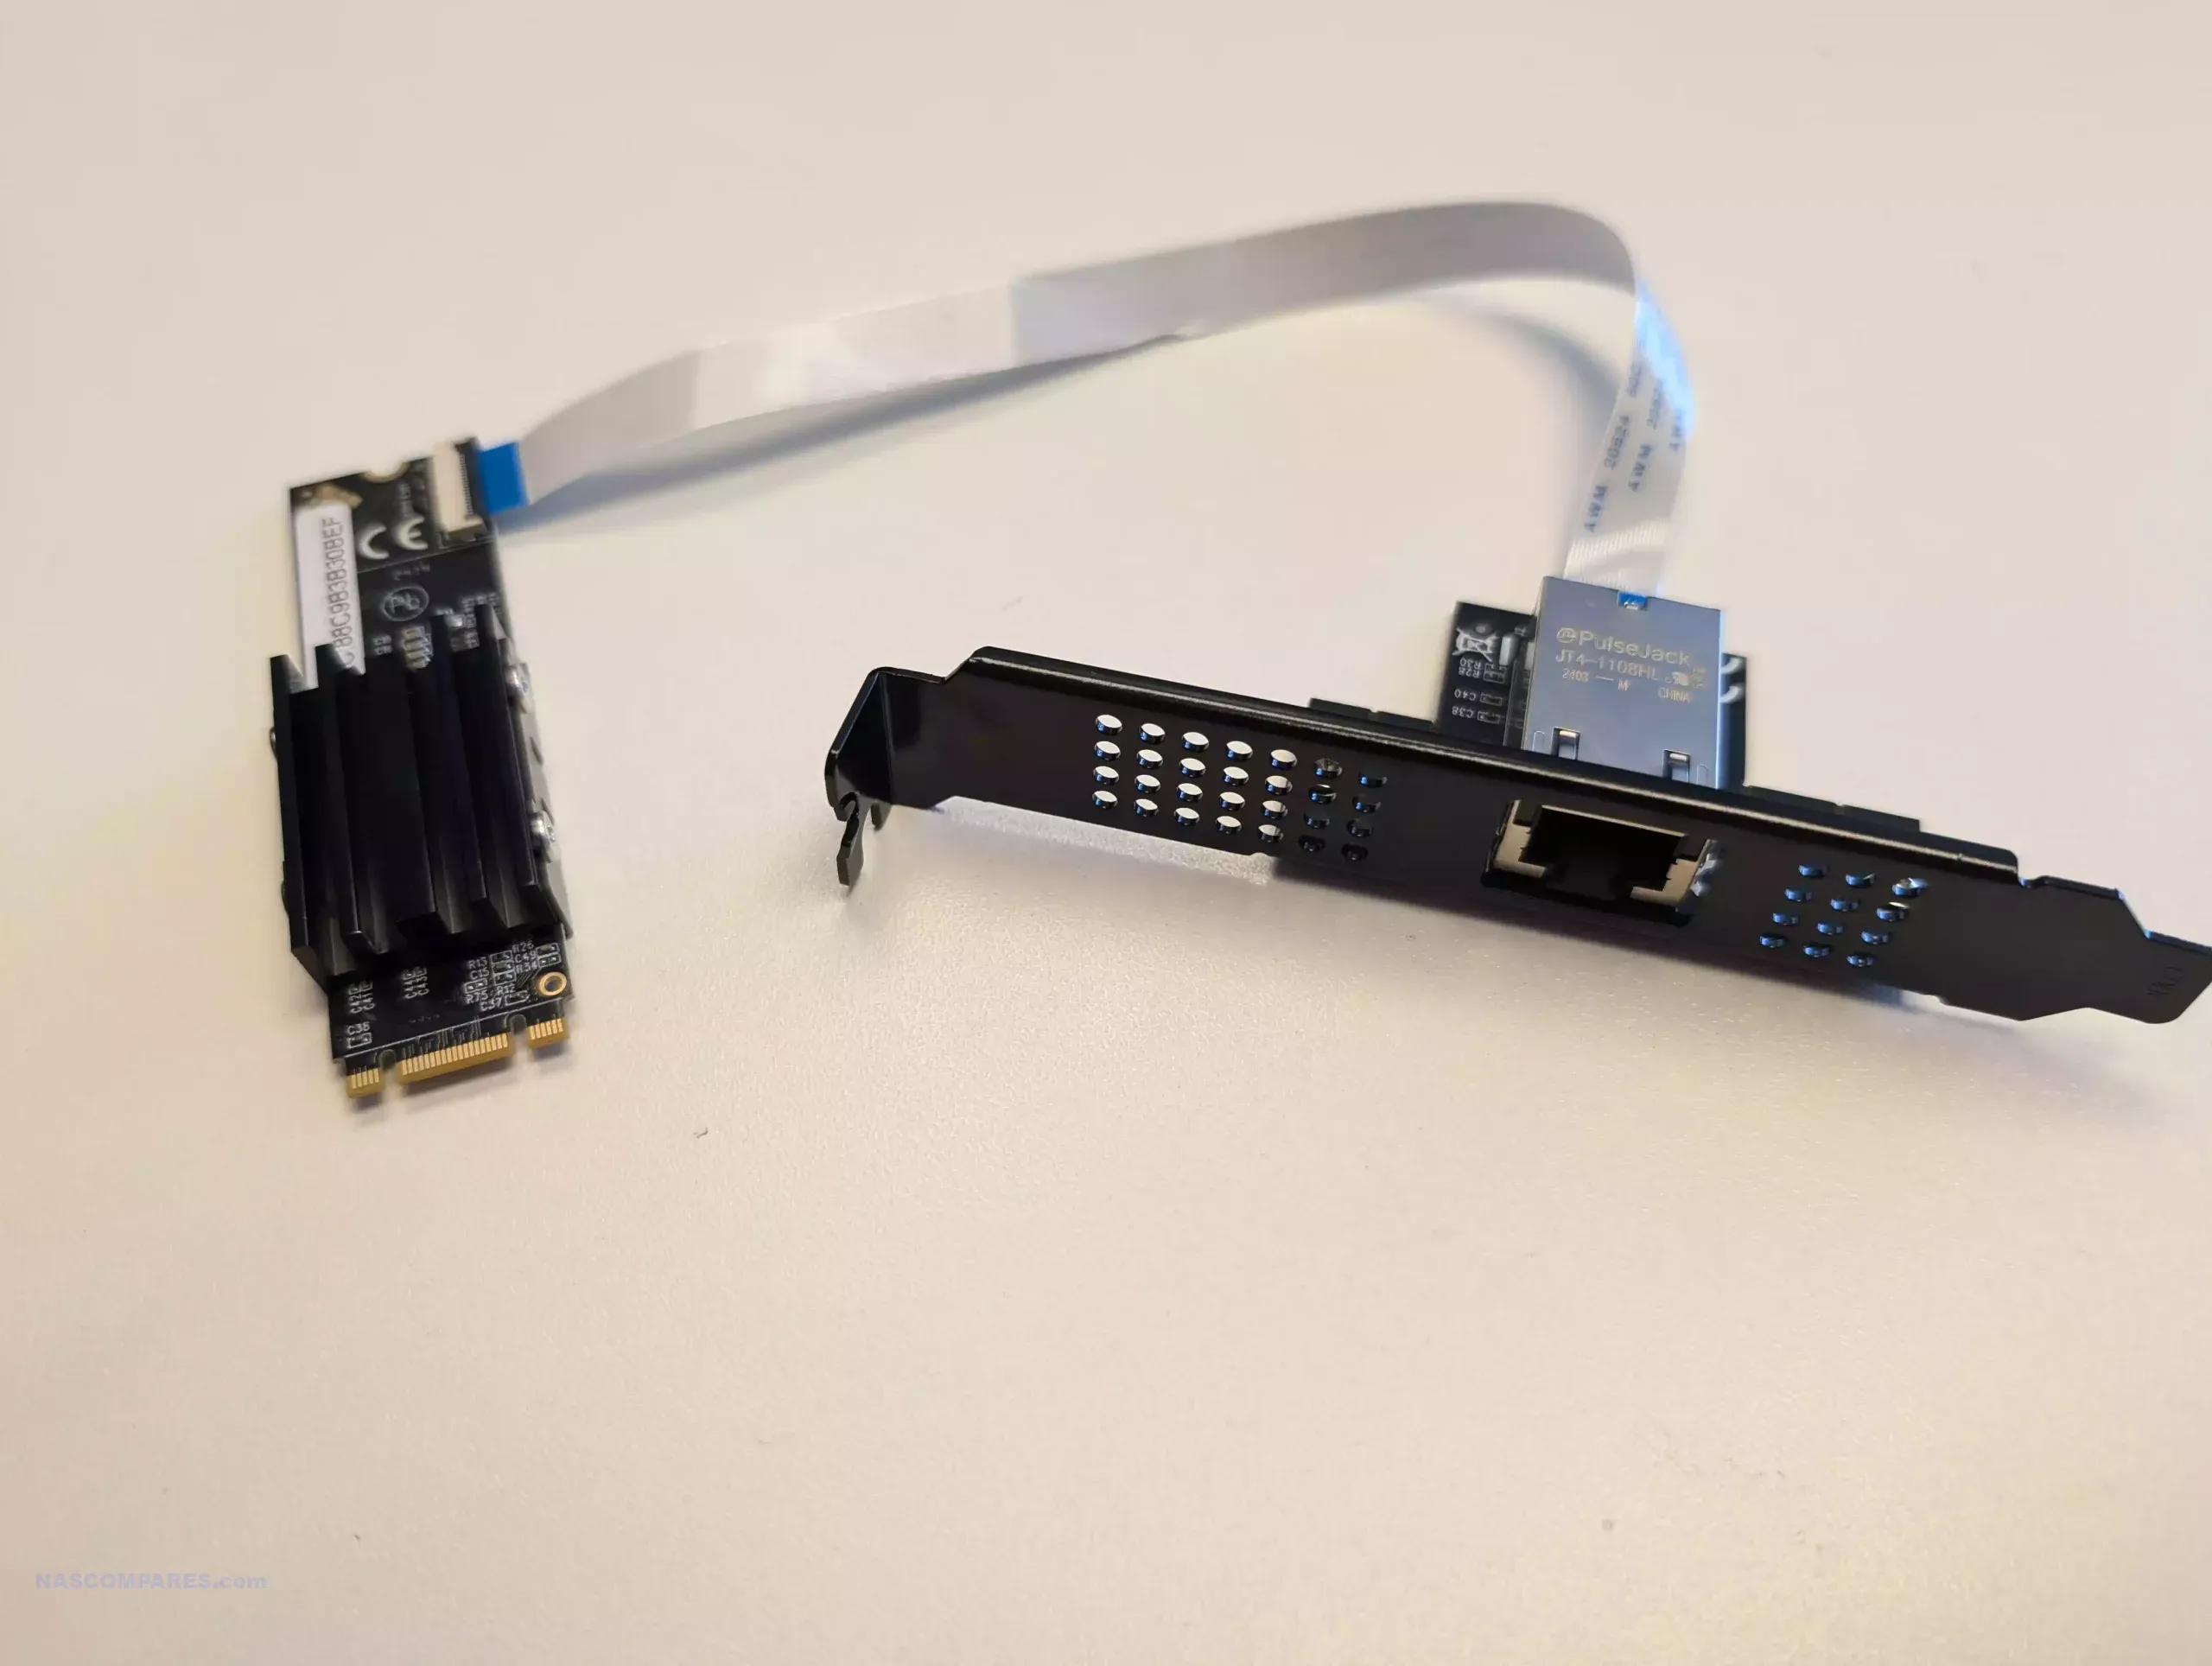
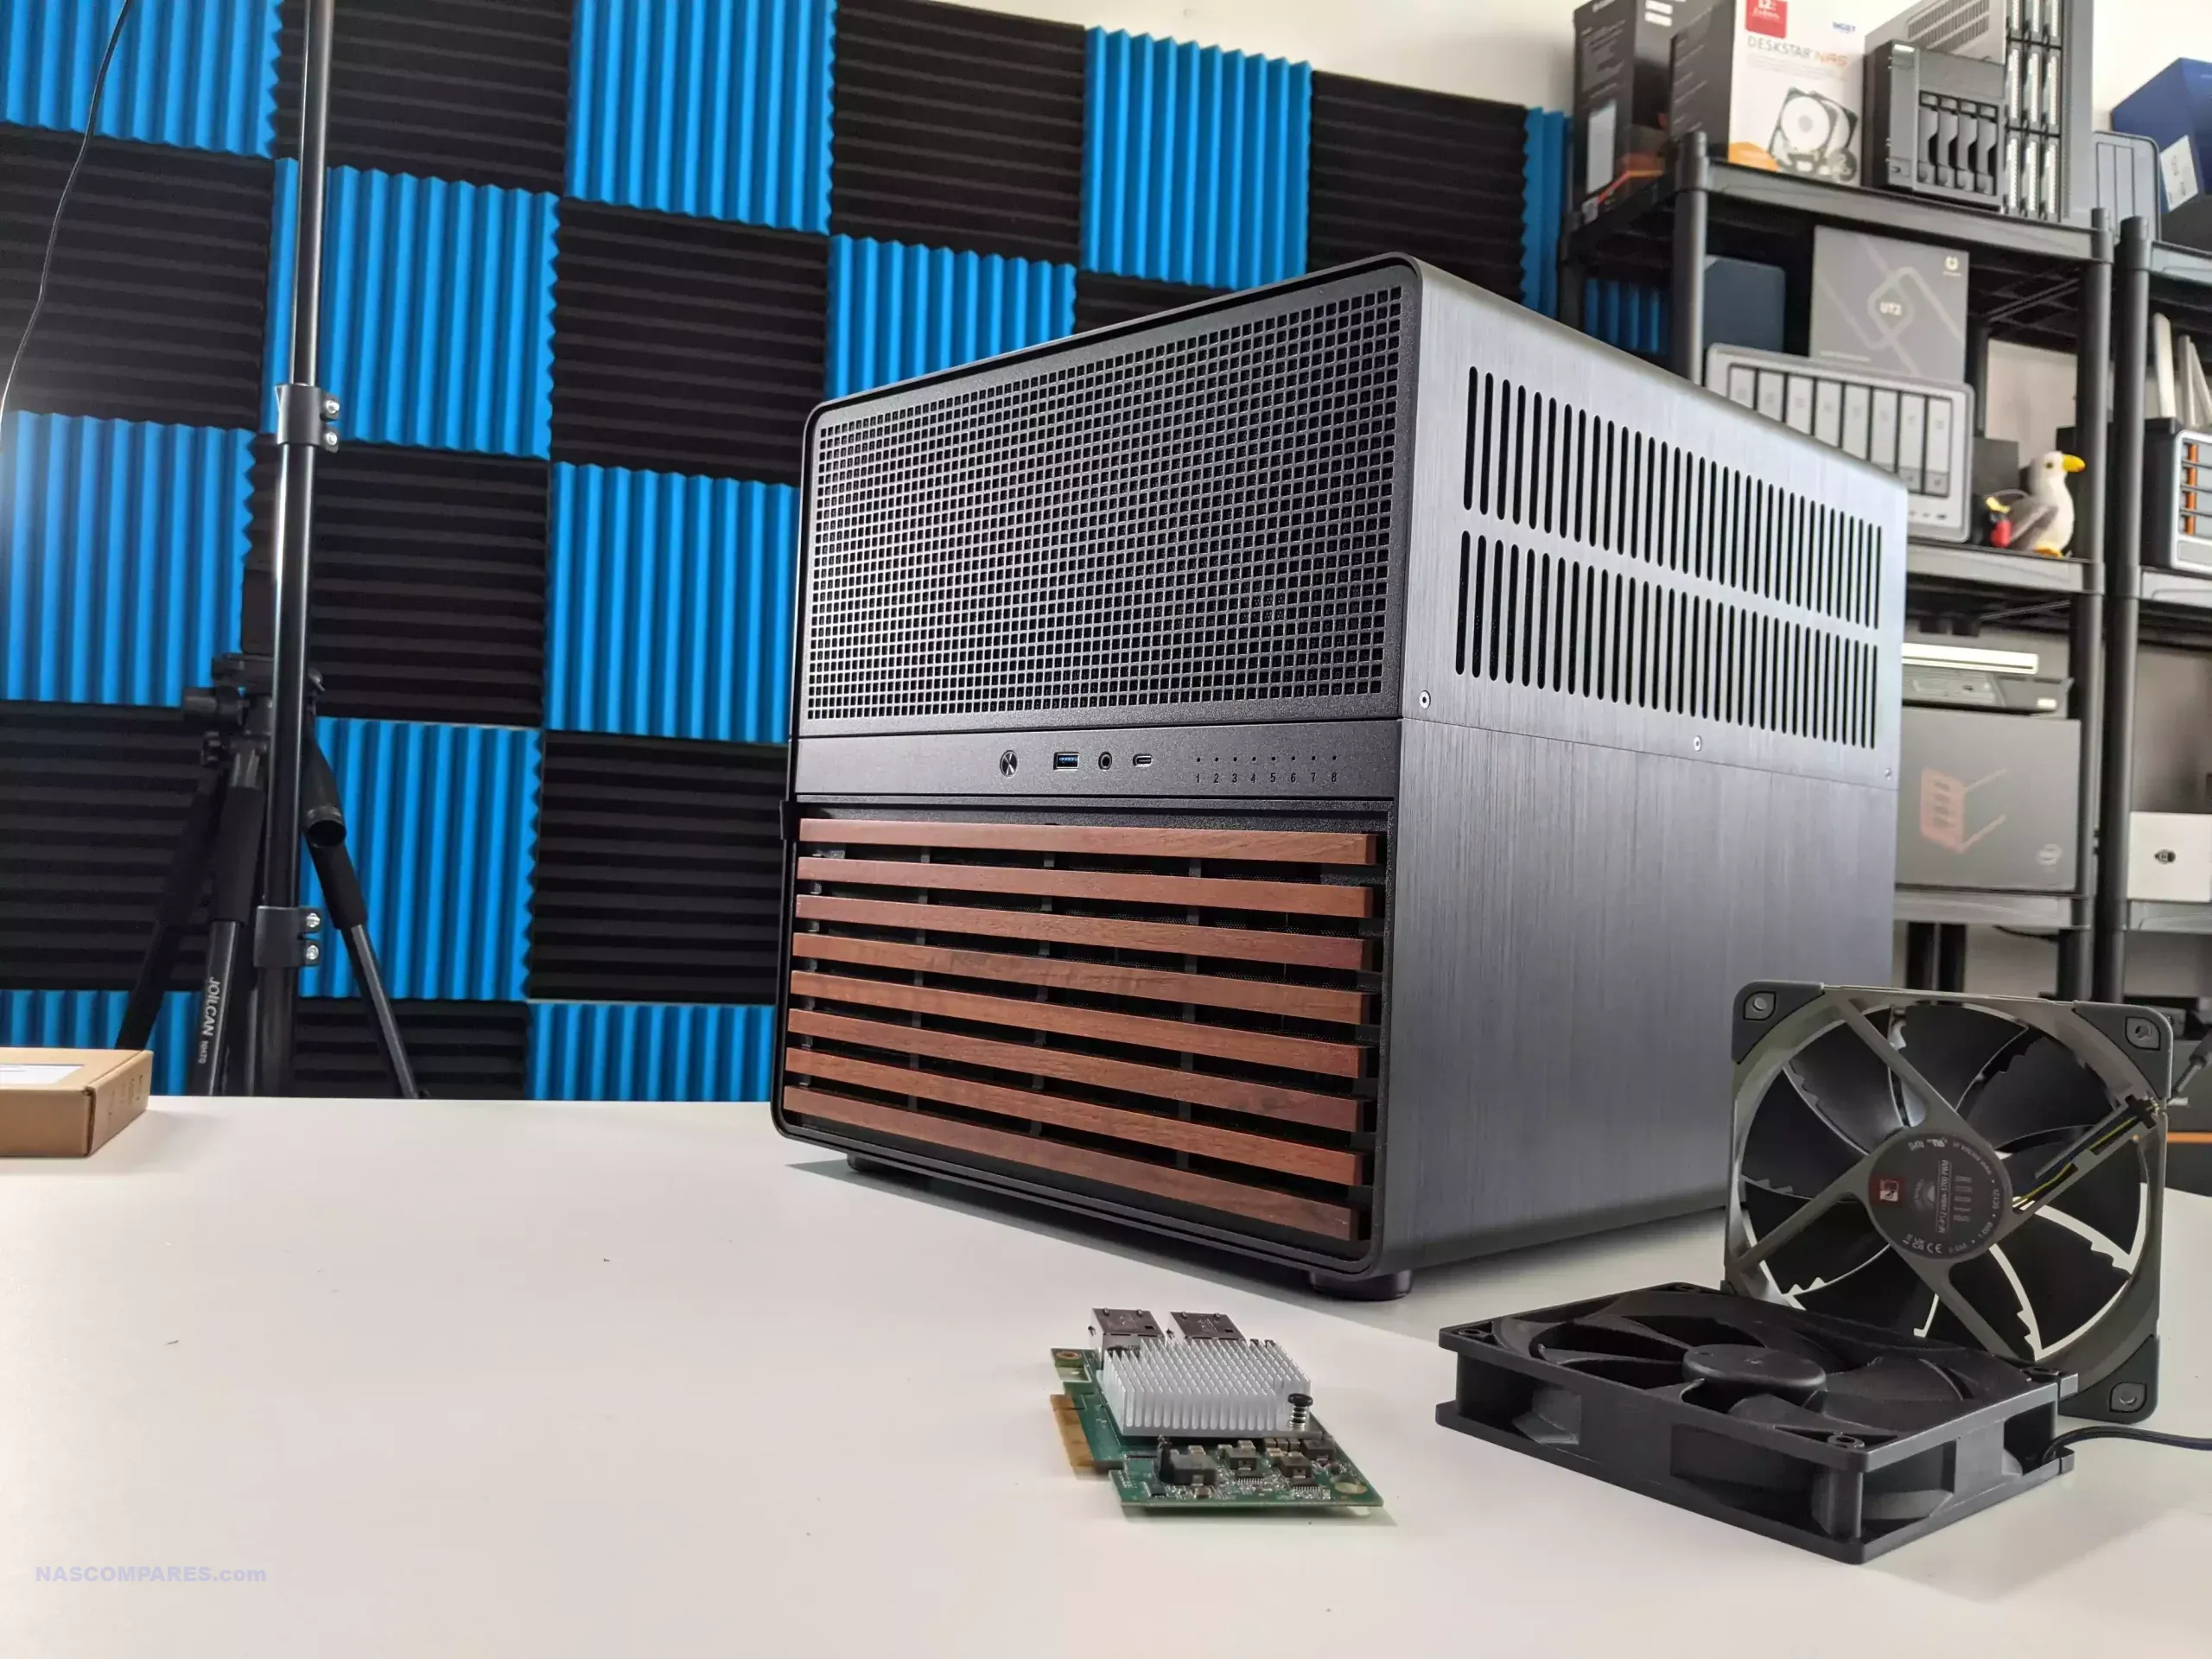
If you have run out of PCIe slots on your motherboard but still want to add 10 GB Ethernet, don’t fear, as you can get hold of the IO Crest M.2 to 10GBE network adapter that even arrives with its own PCIe backplate that you can slot into one of the available cavities of the N5, and is attached with a loose ribbon to an M.2-mounted controller.
Buy the IOCREST M.2 to 10GbE Adapter HERE for $79 at Aliexpress

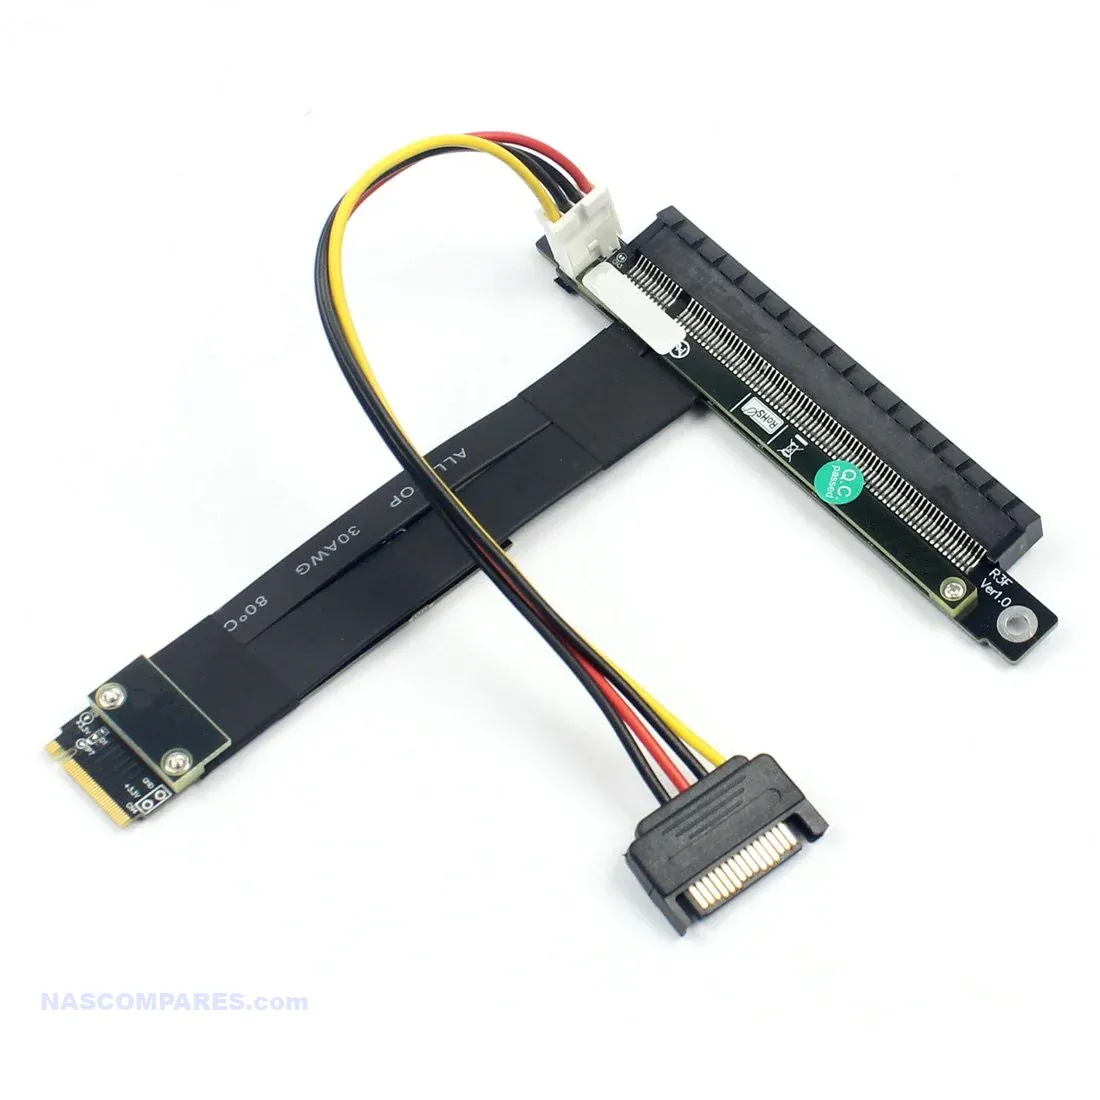
If you are thinking of being a little bit more broad in what you want to do with your PCIe slots beyond 10GB network upgrades, then you can get an M.2 to PCIe upgrade riser. You can even get hold of a Gen 4 x 4 M.2-supported model pretty affordably now that will allow you to attach up to a full x16 length PCIe card, but keep in mind that the M.2 adapter is limited to x4 speed (Gen 4 x 4 is approx 8 GB per second bandwidth).
Buy the ADT-LINK Gen 4×4 M.2 to PCIe Slot Adapter HERE for $26 at Aliexpress

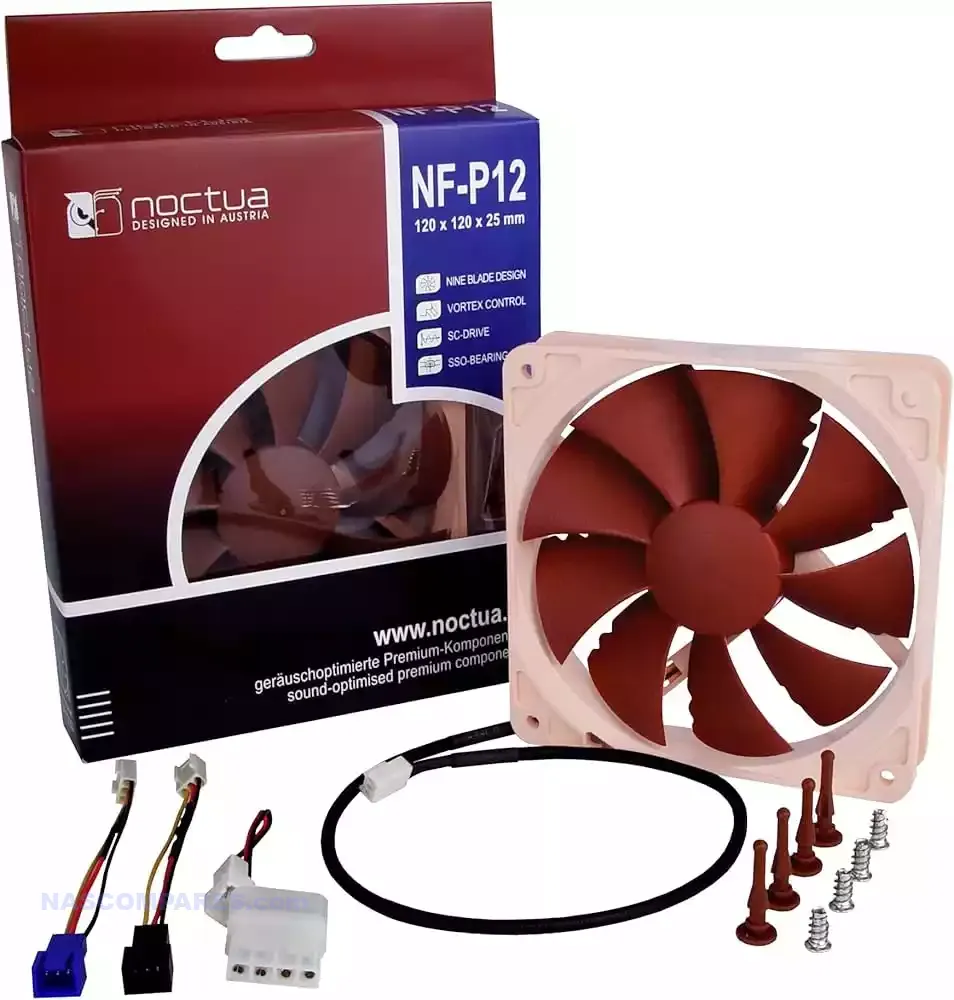
If you want to add further fans to the Jonsbo NAS via those hanging rails, or modify the existing 120 mm Jonsbo fans, low-noise fans from Noctua can be used on the Jonsbo N5 as replacements or upgrades.
Buy the Noctua NF-P12 Silent 120mm Fan HERE for $25.98 at Aliexpress or $21.95 on Amazon HERE

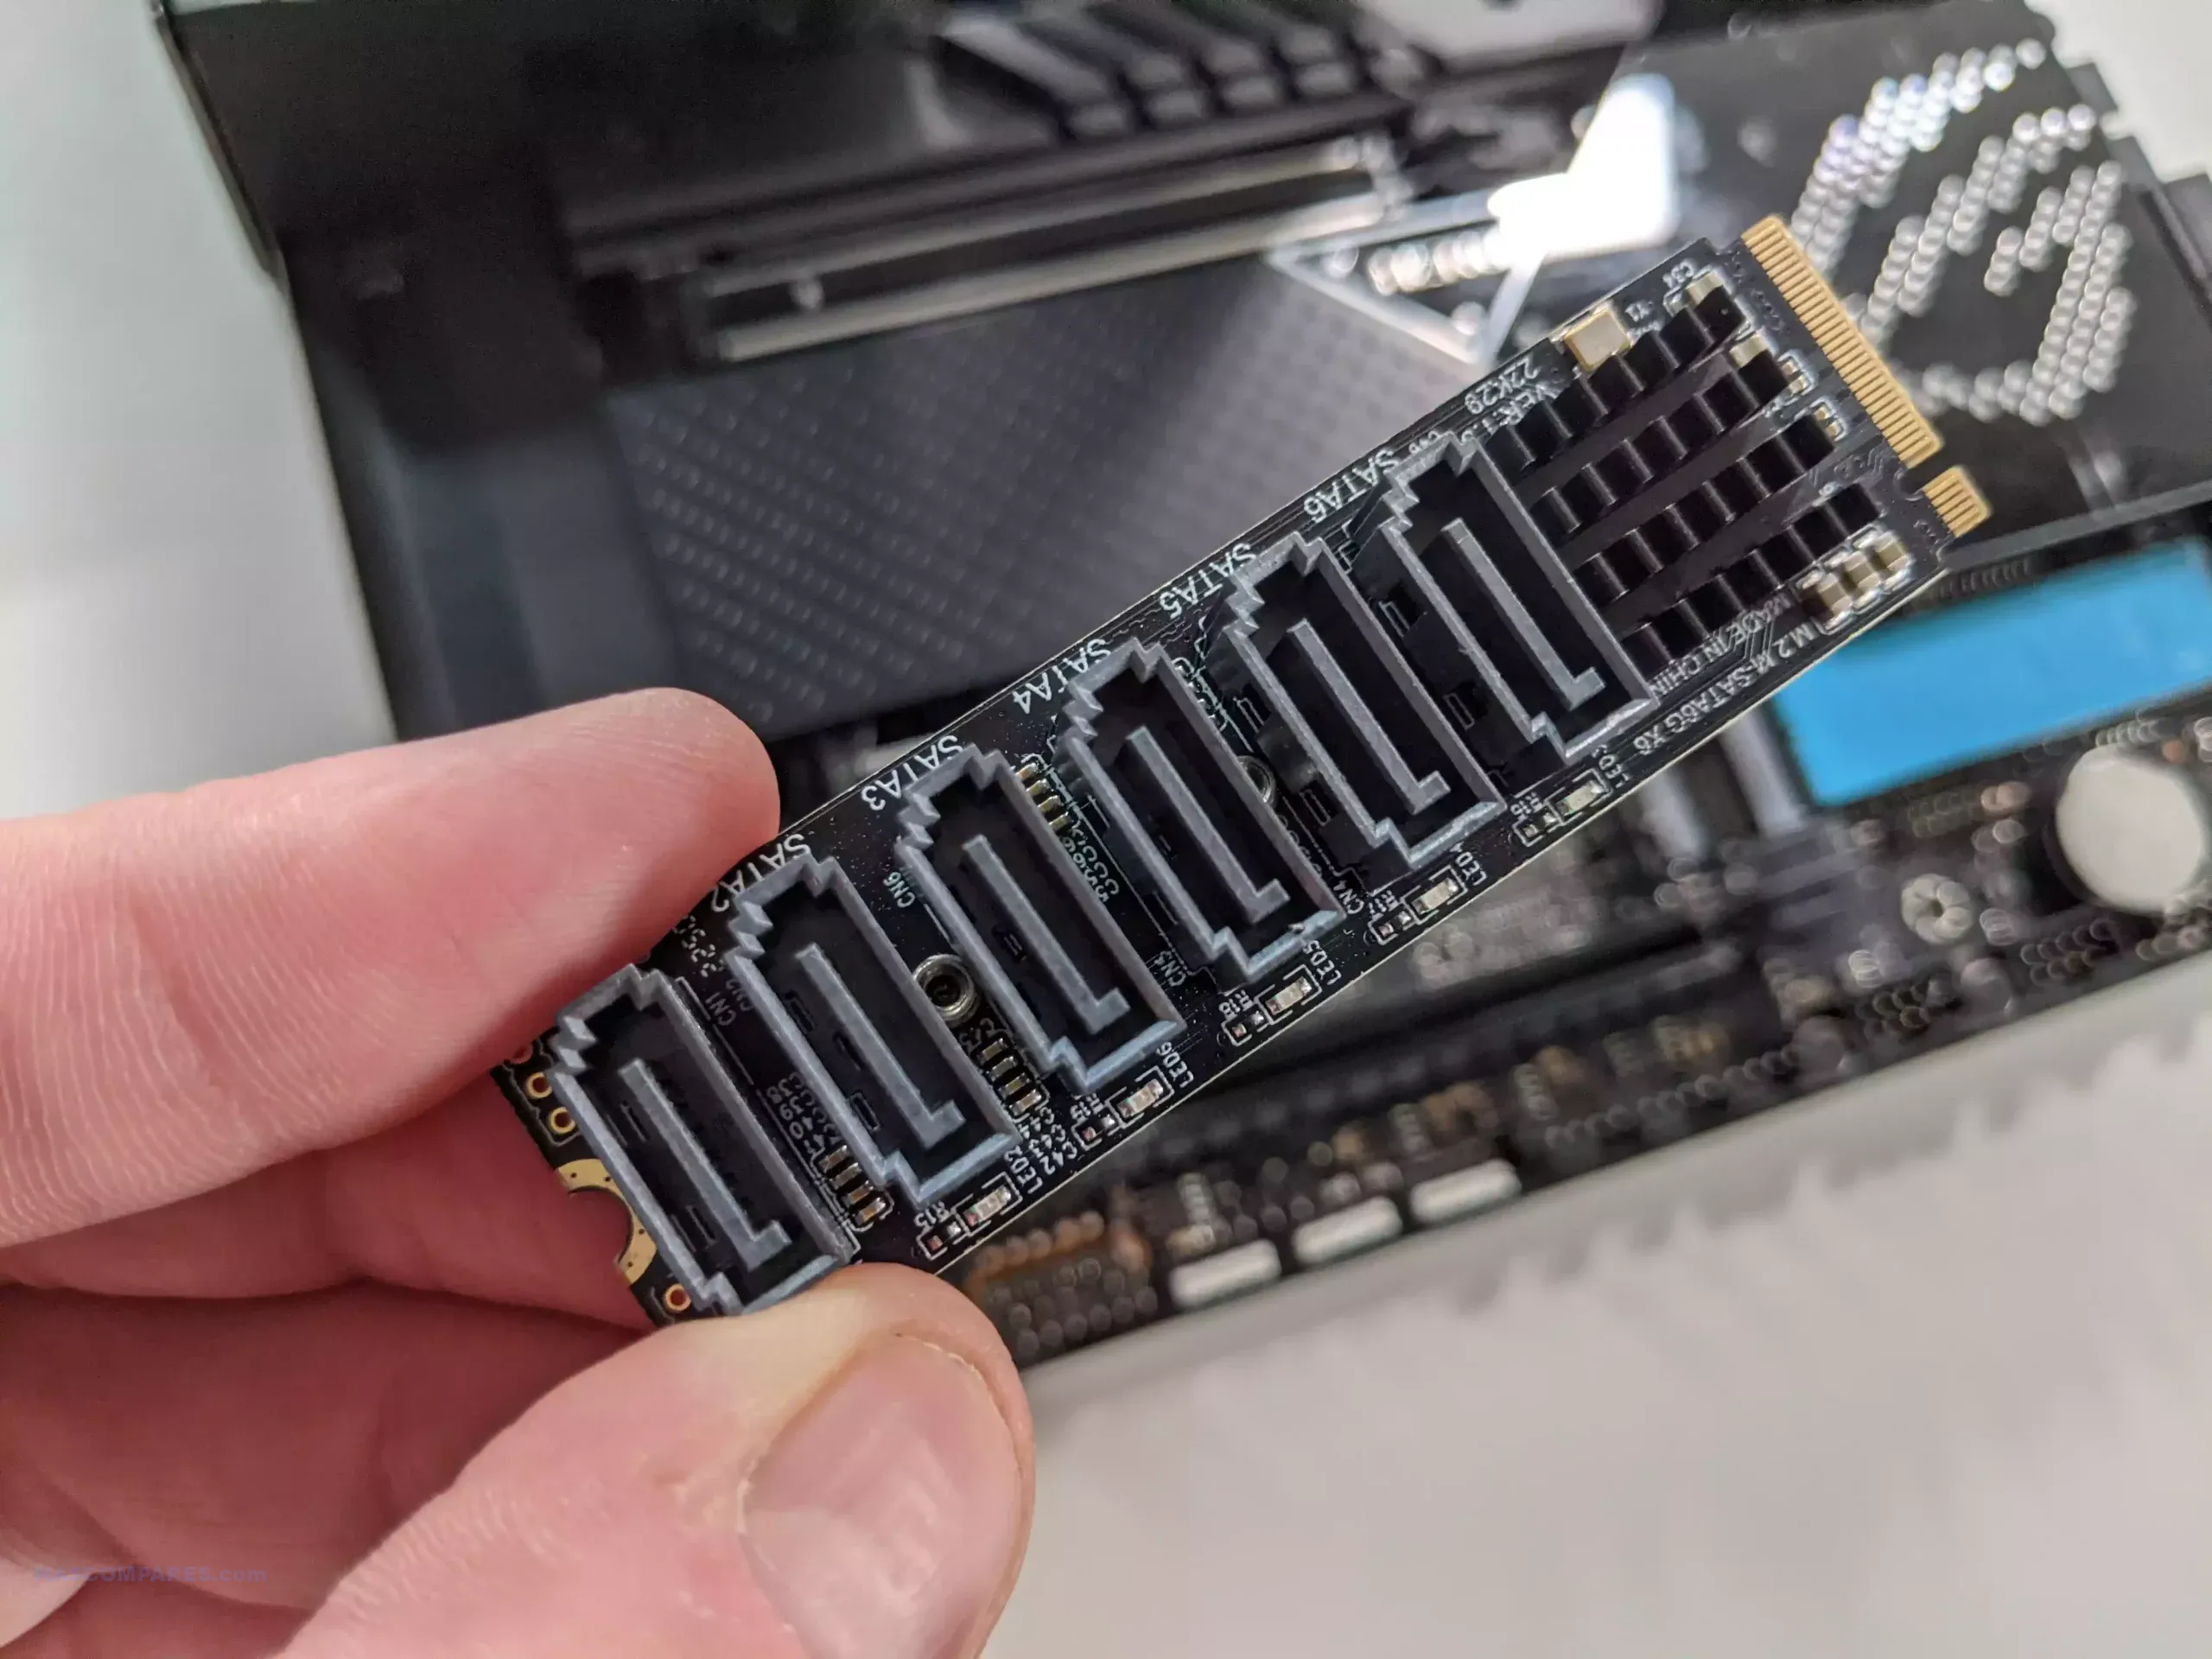
Even if you opt for an ATX motherboard, you’d be surprised how many motherboards do not arrive with 12 individual SATA inputs for your storage media. Of course, there are workarounds on some motherboards, such as PCIe SATA upgrade cards, or some more modern motherboards featuring HD Mini-SAS fan-out ports that allow for multi-SATA interfaces to be connected on a smaller surface area. However, one of the cleanest and easiest upgrades I found to attach six additional SATA drives is utilizing an M.2 to SATA upgrade card. These are dirt cheap and have the added benefit that they can be tidily installed on the M.2 PCB in advance before installing onto the motherboard. You are potentially sacrificing a useful M.2 in favor of SATA connections, but we are starting to see more and more multi-M.2 slot motherboards in the market, so this is less of a concerning sacrifice as time goes on.
Buy the M.2 to 6x SATA Adapter HERE for $17.19 at Aliexpress or $32 on Amazon HERE
As mentioned previously in the article, motherboards available in the world of NAS. Even though the Jonsbo N5 supports a much larger ATX motherboard, the small scale and lower power consumption afforded to a number of NAS-optimized MITX motherboards can’t really be ignored. ITX boards are great for NAS.
Topton 8 Core Intel i3 N305 Motherboard, 6x SATA, 2x NVMe, 4x 2.5GbE – $279 HERE
Review HERE on YouTube and HERE on NASCompares

CWWK Demon Gen5 Board Intel 12/13/14 generation CPU |3x M.2 NVMe|8x SATA3.0|2x Intel 2.5G network ports – $279 HERE
Review HERE on YouTube and HERE on NASCompares

To make the funneling of the SATA cabling easier, I strongly recommend that you use pre-bound SATA cable lengths like these. These $10-12 6x SATA 50-100 cm Pre-Netted cables allowed me to attach (with 2 of them) all 12 bays of storage easily and neatly without too much loose cabling in between. Additionally, each SATA connector is numbered at either end to ensure you can connect drives appropriately and not have any confusion down the road in the event of a drive failure.
Buy the SATA x8 Cable HERE for $9.29 on Aliexpress


and x6 HERE on Amazon for $13.98

As mentioned earlier on, you may be using a PSU that does not quite have enough power input to support the rather complex storage configuration. It is recommended that you check that you have enough SATA and Molex available. If not, I recommend getting hold of Molex and/or SATA splitter cables like the ones below.
Buy the Molex Splitter HERE for $1.20 on Aliexpress
And that’s really it. The only last thing I would add is that if you are going to fully populate this NAS with hard drives, be aware that hard drives above 8/10 TB have a tendency to make more ambient operational noise and vibration, which will be multiplied significantly via this case. So just be aware that larger storage may well lead to a louder system in general.
Jonsbo N5 Review – Conclusion

I think I’m in love! I have been playing around with DIY NAS cases for years now. I’m hard-pressed to call any single case “the ultimate NAS case,” but the Jonsbo N5 is as close as it gets. It might not be the smallest, or the most discreet, and those hard drive handles are a nightmare, but in every other regard, this is the perfect NAS case for your DIY server solution. If you have the surface area available, you simply will not find a more scalable and upgradable NAS solution in the DIY server market in 2024. It is not a solution for the timid, but if you are looking to start your server journey off right on day one and not have to be concerned in any way that you perhaps cannot scale the system in any direction down the road, the N5 will have you covered for decades to come!
Jonsbo has clearly spent a great deal of time learning from their previous releases and tweaking the things that needed to be tweaked. I’m sure it won’t be long before someone creates a hard drive tray mod that eliminates the issue of those rubber handles, and in every other regard, this thing is unbeatable. Also, if you factor in that the N5 is only around $80-100$ more in price than the N2, N3 and N4, but several times more broadly compatibility and scalable – it’s surely a no brainer!
| PROS | CONs |
|
|
 |
 |


Read the Jonsbo NAS Series Comparison Article on NASCompares Below (click below):