How to Use No-Idle Zone on the Synology Surveillance DVA3219 NAS
Once your cameras are mounted successfully (Guide for that can be found here), software configurations must be set up for DVA to suit your needs fittingly. This chapter covers the crucial settings to achieve high detection precision.
Step 1 – Select a Stream Profile
For optimal detection accuracy, select a resolution of at least 1280×720@20FPS.
Step 2 – How to Define the Detection Zone
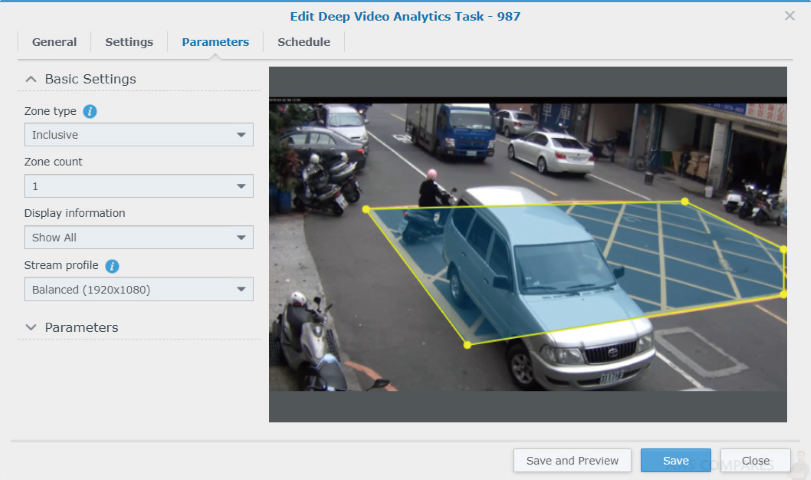
Simply drag the nodes to adjust the position of the detection zone. You can left-click on the yellow border to add nodes or right-click to delete them. DVA provides two zone types, inclusive and exclusive, which are highly compatible with various scenarios, allowing you to cover the areas that truly matter. You can easily customize the zones to remove areas where accidental triggers often occur.
Step 3 – How to Select Target Detection Objects
Based on the actual surroundings, you can choose what types of objects to detect in the zones. Only designated objects lingering in the restricted area will trigger events.
Step 4 – How to Set the Minimum Duration
Once an object enters the detection zone, DVA will continue to track its movement. If the object stays in the zone longer than the specified time duration, the no-idle zone rule will be triggered.
Step 5 – How to Triggering Mechanism
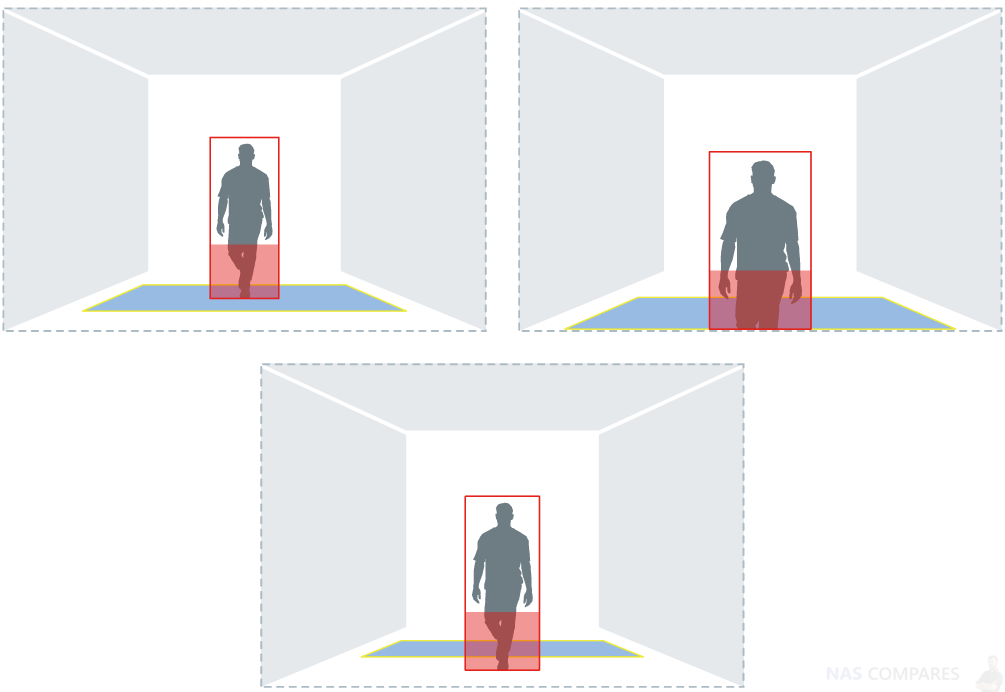
Since No-Idle Zone detection is mainly applied to wall-mount cameras with recordings taken from high angles, the analysis traces the lower half of objects. As shown in the figure below, once the red bottom area of an object enters the blue detection zone, the lingering time will start to be counted and trigger events if the object stays for too long.
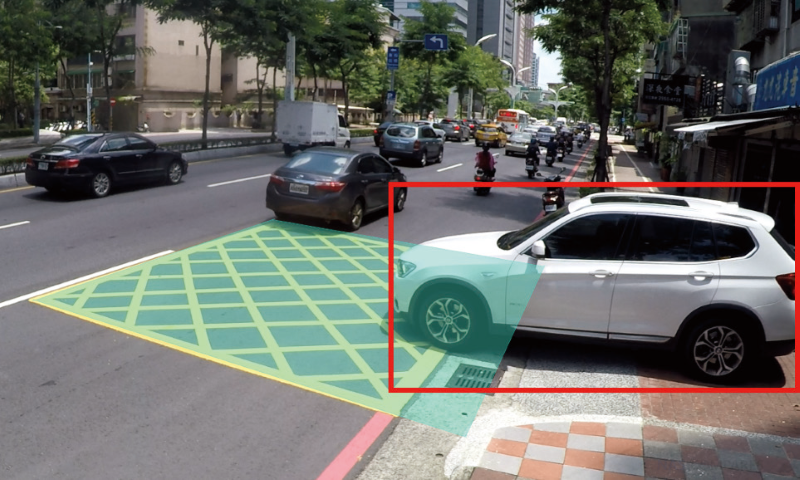
If vehicles are your target detection objects, due to their large sizes, the analysis will check how much of their areas overlap with the detection zone. If the overlapping areas exceed the threshold, they will start being counted as lingering, and eventually trigger events when the set duration is reached.
Synology Surveillance DVA3219 – How to Improve Detection Accuracy
After adjusting software parameter settings, there are still some factors that may affect detection accuracy. This chapter lists some possible causes and solutions.
Step 1 – Make sure to Clear Surroundings
The simpler the surroundings are, the more easily can object features be analyzed and provide accurate reports. The following are some general guidelines:
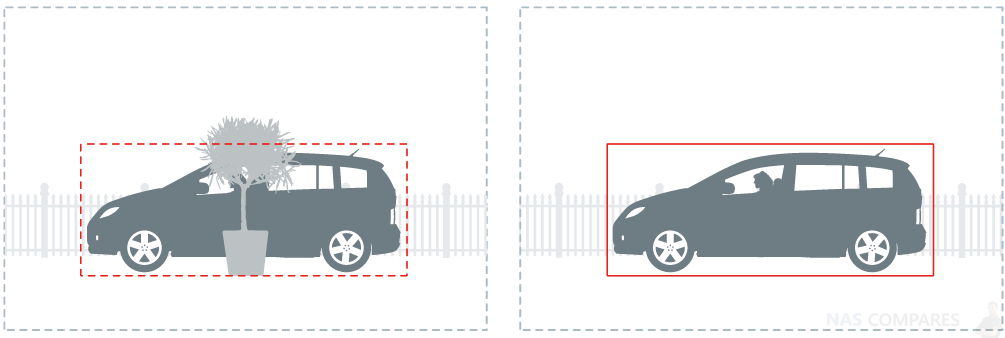
- Remove obstructions like potted plants or columns from the detection zone so that objects will not be blocked and miss detection
When the areas your camera footages cover are rather wide, small objects in the distance may not be detected correctly. We recommend adjusting the camera positions or adding new cameras to accommodate the farther corners

Try using cameras with higher FPS. The higher the frame rates are, the more stable the analysis will be
Step 2 – Note Possible Interference
Even with thorough planning of the camera mounting environment, it is still possible that movements are wrongly identified. Please be advised that the points listed below may affect detection, but be assured that the analysis can still function normally:
- Weather sometimes affects the accuracy of outdoor cameras. Rain and snow, changes of shadows, or differences between day and night are all possible influences
- Objects with similar appearances to the real objects, such as cardboard cut-outs or mirror reflections, might be mistaken
Synology Surveillance DVA3219 – How to Utilize Advanced Features
Besides detailed parameters that allow you to track occurring movements precisely, DVA also offers tagging features which boost the efficiency of file management.
Step 1 – How to Integrate with Motion Detection
Intrusion Detection can be integrated with Surveillance Station’s motion detection so that cameras’ recording, notifications, action rules, and other settings can also be triggered when an intrusion event is detected.
Step 2 – How to Make Use of Smart Tags
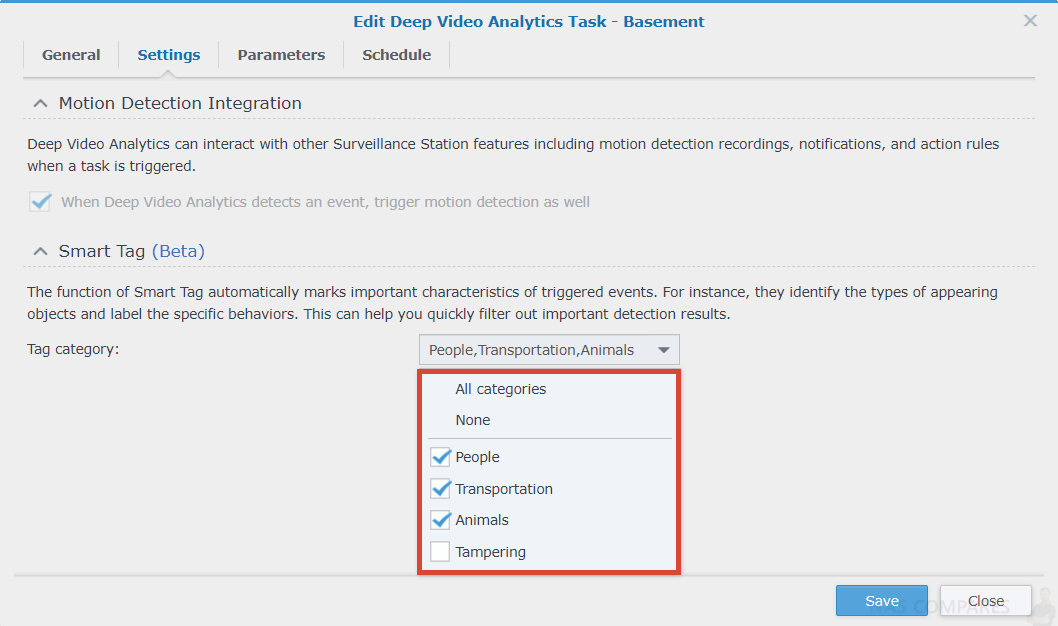
Intrusion Detection is capable of automatically tagging events according to the objects that appear in the images, such as people, animals, and vehicles. This gives administrators overall knowledge of the video content even without manual processing.
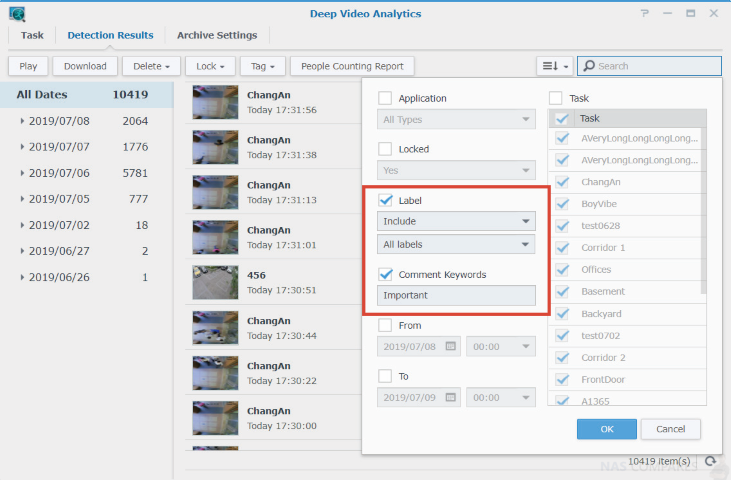
Videos can also be searched for by tags to quickly locate major events.
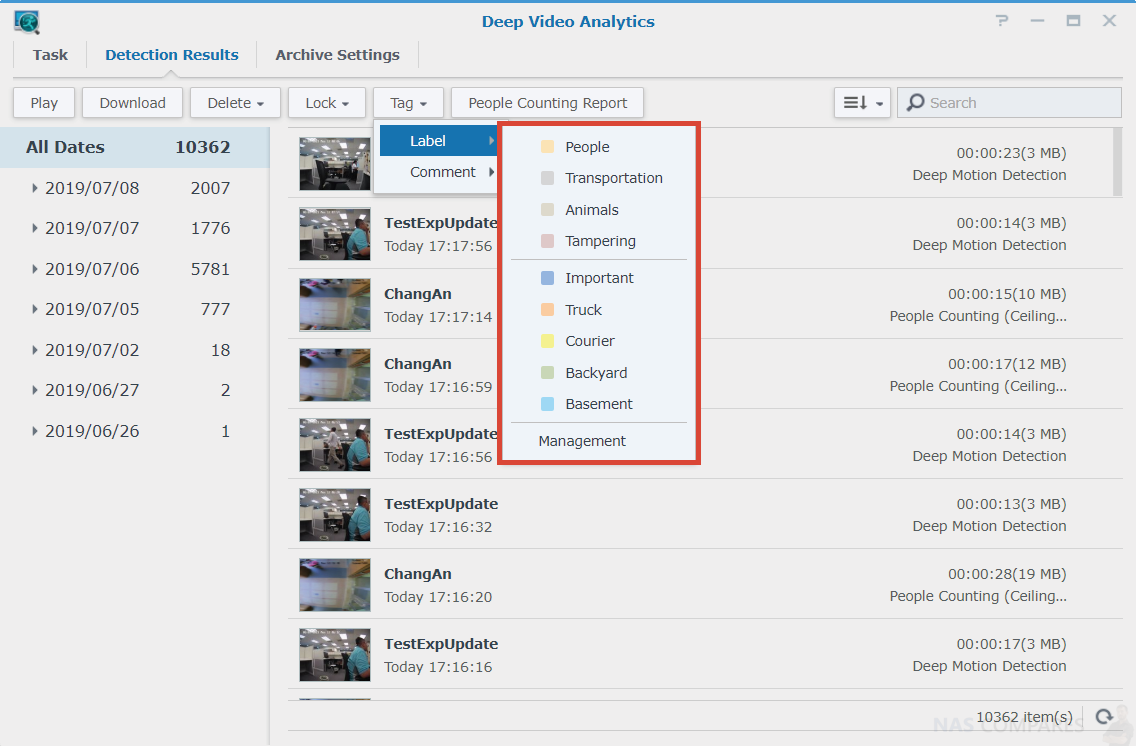
Step 3 – How to Label and Comment
Detection results can be labelled, sorted, and commented on. For example, you can create a “Courier” label to mark related events or easy access to the video file afterwards
Still Need Help with your DVA3219 Surveillance Station NAS? Click the Guide that best suits your needs the most, that can help you use your Synology DVA3219 NAS and Surveillance Station:
Synology Surveillance DVA3219 First Time Camera Setup User Guide
Synology Surveillance DVA3219 Deep Motion Detection User Guide
Synology Surveillance DVA3219 People Counting User Guide
Synology Surveillance DVA3219 Intrusion Detection User Guide
📧 SUBSCRIBE TO OUR NEWSLETTER 🔔🔒 Join Inner Circle
Get an alert every time something gets added to this specific article!
This description contains links to Amazon. These links will take you to some of the products mentioned in today's content. As an Amazon Associate, I earn from qualifying purchases. Visit the NASCompares Deal Finder to find the best place to buy this device in your region, based on Service, Support and Reputation - Just Search for your NAS Drive in the Box Below
Need Advice on Data Storage from an Expert?
Finally, for free advice about your setup, just leave a message in the comments below here at NASCompares.com and we will get back to you. Need Help?
Where possible (and where appropriate) please provide as much information about your requirements, as then I can arrange the best answer and solution to your needs. Do not worry about your e-mail address being required, it will NOT be used in a mailing list and will NOT be used in any way other than to respond to your enquiry.

|
 |


