


Jellyfin on a Synology NAS – An EASY Installation Guide
The benefits of using a Synology NAS to enjoy your decades of collected multimedia on all of your network client devices (Smart TV, Phones, Tablets, Console, etc) are all pretty well established. Alongside not having to pay the monthly/annual media subscription services of the likes of Netflix, Hulu, Disney+ and more to effectively ‘rent’ media, thanks to services like Jellyfin, you can scrape online databases for all of your box art, trailers, cast information etc and have your own media collected presented to you in anot dissimilar way to those paid subscription services – with media YOU OWN! Although a number of popular multimedia streaming platforms have grown in popularity, such as Plex and Emby, what sets Jellyfin apart from those is that it is 100% FREE. Plex locks a few services (such as hardware transcoding) behind a paid plex Pass subscription, Emby make some of the client applications paid-purchases (such as the mobile client), but Jellyfin continues to be championed as the perfect open-source and free-to-access/use multimedia private media server platform. HOWEVER, unlike Plex and Emby, Jellyfin is nowhere near as established in the App centers of the NAS brands – requiring a container creation and much more manually crafted installation, resigning its installation as a little trickier than those 2-click install apps. LUCKILY for Synology users, installation of Jellyfin on Synology NAS is now SO MUCH EASIER, thanks to supportive users on homebrew/community sites. So, today I want to guide you though the much easier way to setup Jellyfin on your Synology NAS.

Jellyfin on a Synology NAS – How to Find and Install the Jellyfin App for Synology NAS
Before we go any further, it is worth highlighting that the Jellyfin installer for Synology is not an official app or one that has been added by the brand themselves as a certified app. So, as with installing any 3rd party application, make sure you have your system secure and your backups in place. You should ALWAYS have this be the case, but nonetheless its always key to ensure this when using non-officially provided applications. In the case of installing Jellyfin, the first thing you need to do is connect your Synology NAS with the unofficial Community App center – SynologyCommunity. Although there are ALOT of applications available to try out there, the ones that will be automatically installed later are the Jellyfin app and the streaming add on ‘ffmpeg’.

Note – IF you do not want to connect your Synology NAS with the unofficial App center, You can download these tools individually if you want, by heading to the Synologycommunity website and downloading each
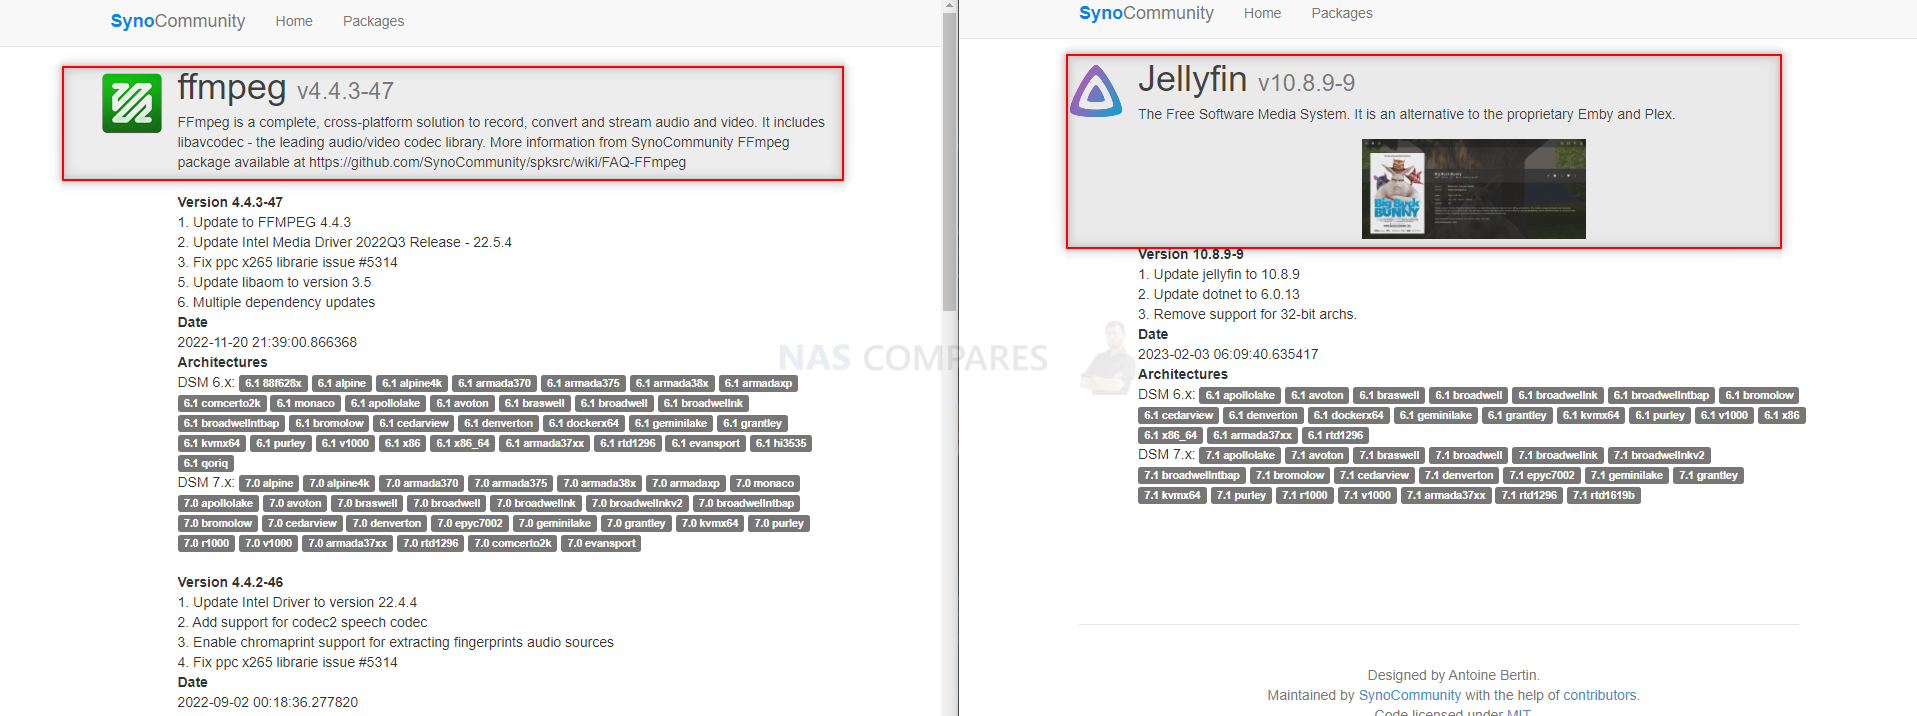
FFMPEG – https://synocommunity.com/package/ffmpeg/
Jellyfin – https://synocommunity.com/package/jellyfin
Otherwise, the MUCH EASIER way is to add the Synologycommunity app center to your Synology NAS. You can find the app center address by visiting THIS page, or alternatively, you can just copy the URL below:
Copy This –-> https://packages.synocommunity.com/


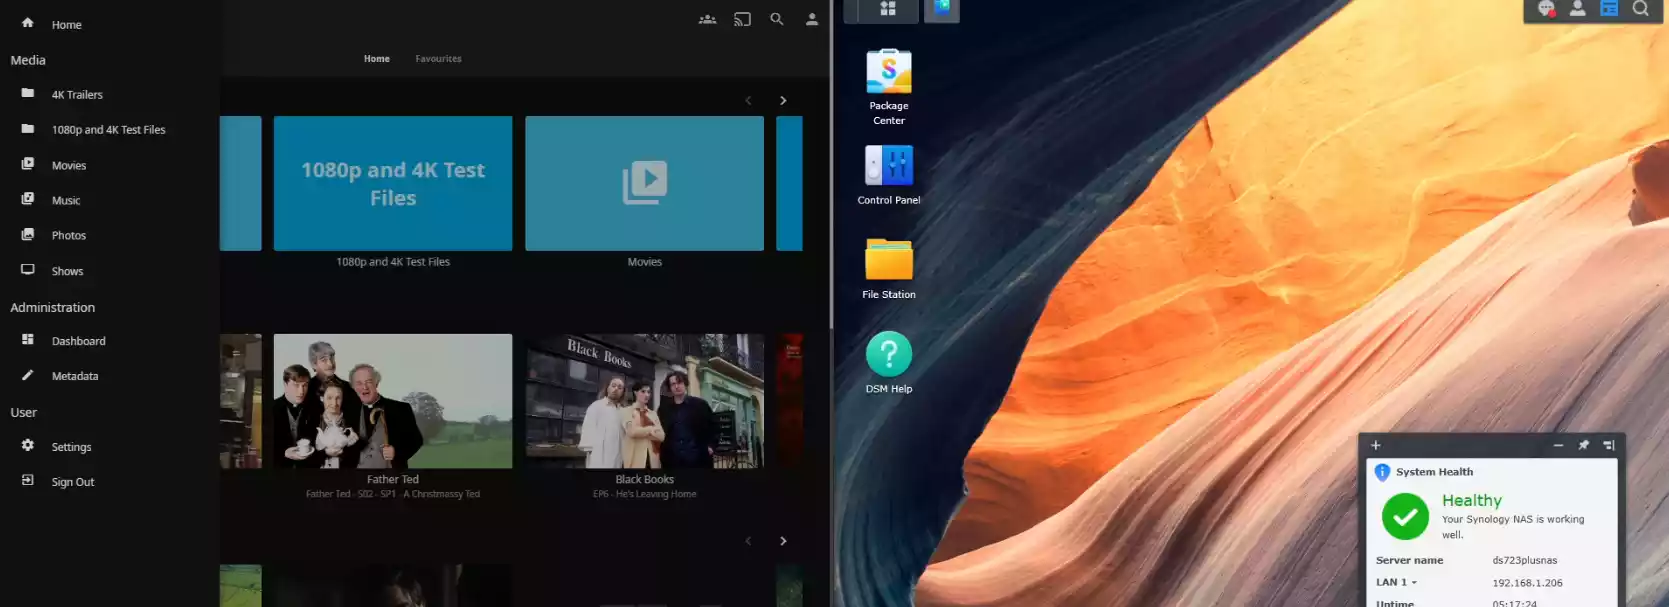
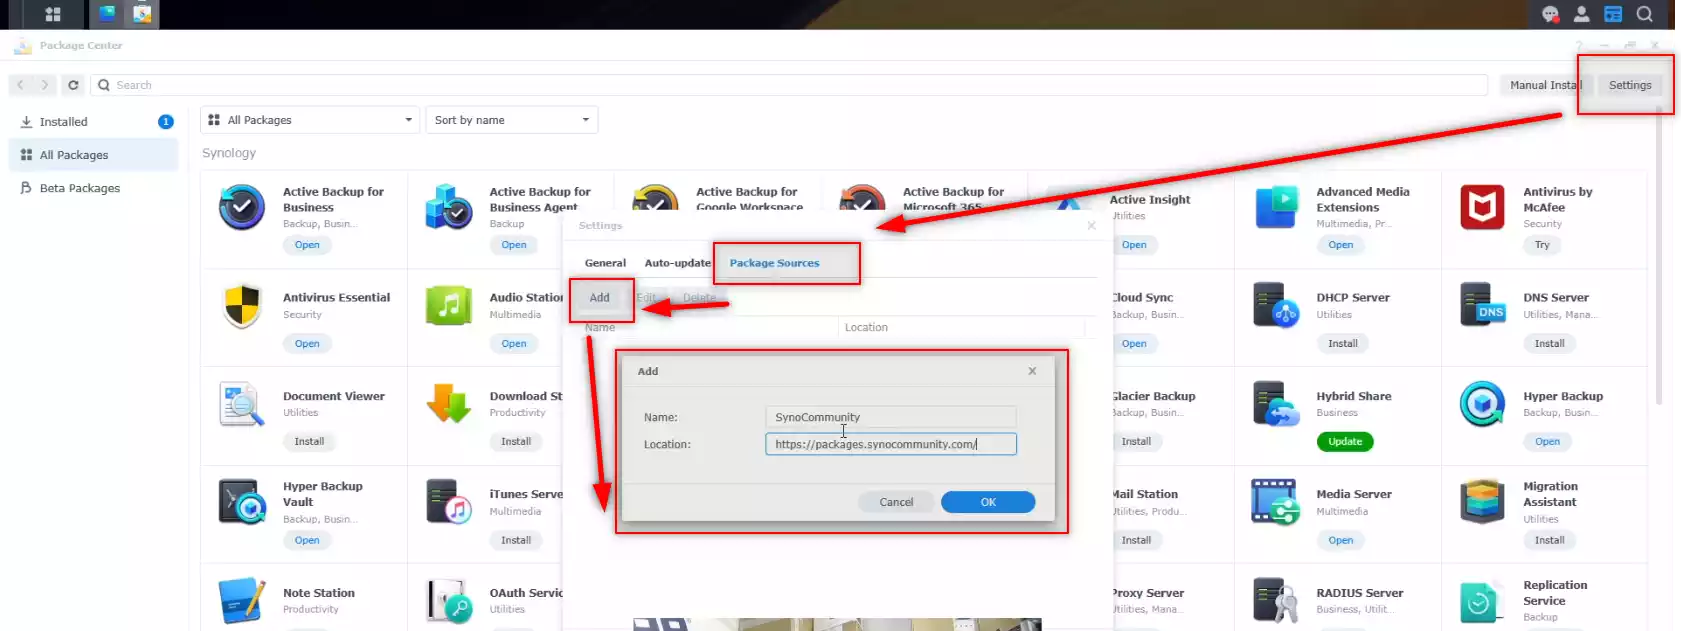
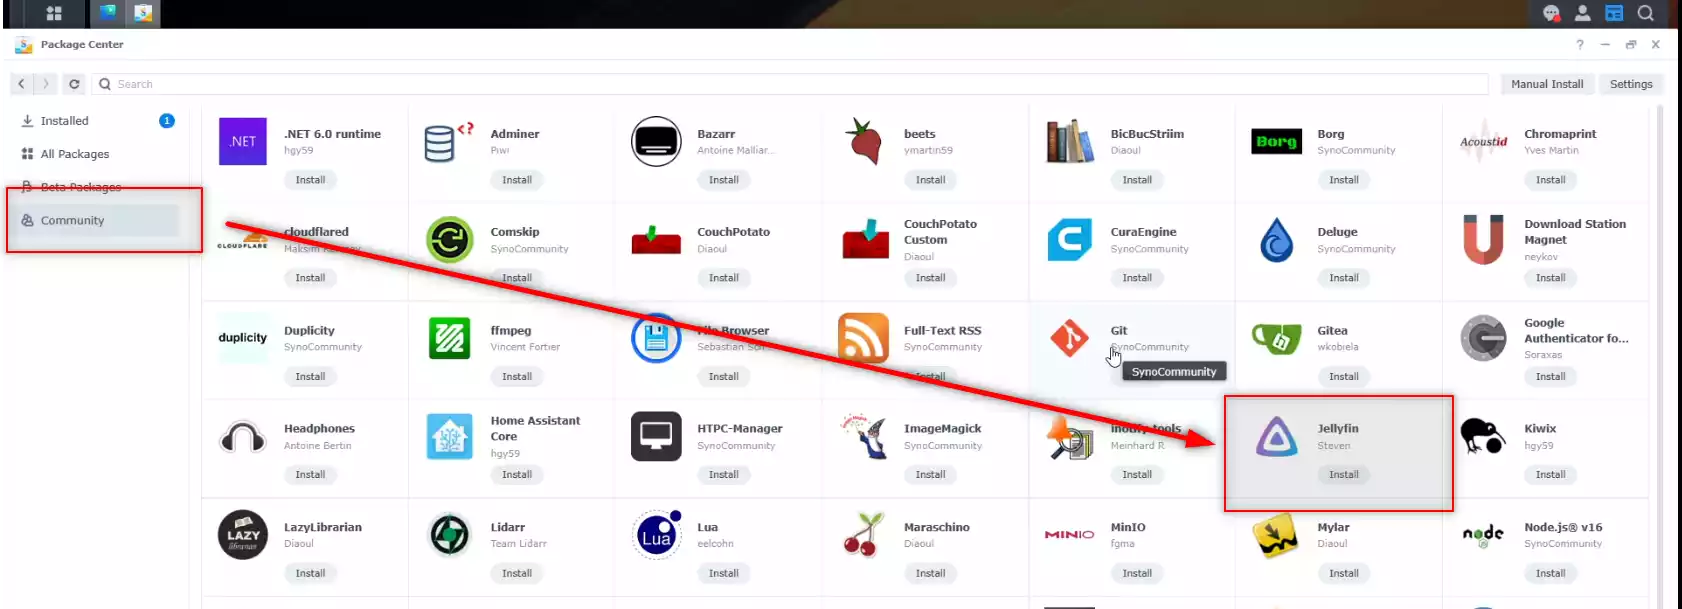
Next, log into your Synology NAS and then head into the App center. Log into your NAS as administrator and go to Main Menu → Package Center → Settings and set Trust Level to Synology Inc. and trusted publishers. In the Package Sources tab, click Add, type SynoCommunity as Name and https://packages.synocommunity.com/ as Location and then press OK to validate. Go back to the Package Center and the next SynoCommunity’s package center should be available on the left had side in the Community tab (listed by whatever name you gave it).

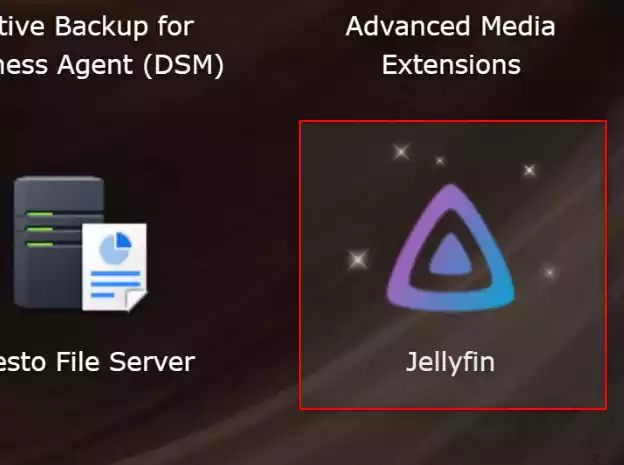
As mentioned, there are ALOT of applications in the Synologycommunity app center, with varying degrees of polish or usability. Depending on the hardware of your NAS (i.e. the CPU it is built on), different applications will be displayed (as some apps need integrated graphics or run or arrive with support of specific ARM/x86 processors). They should list alphabetically and the Jellyfin app should be easy to spot!

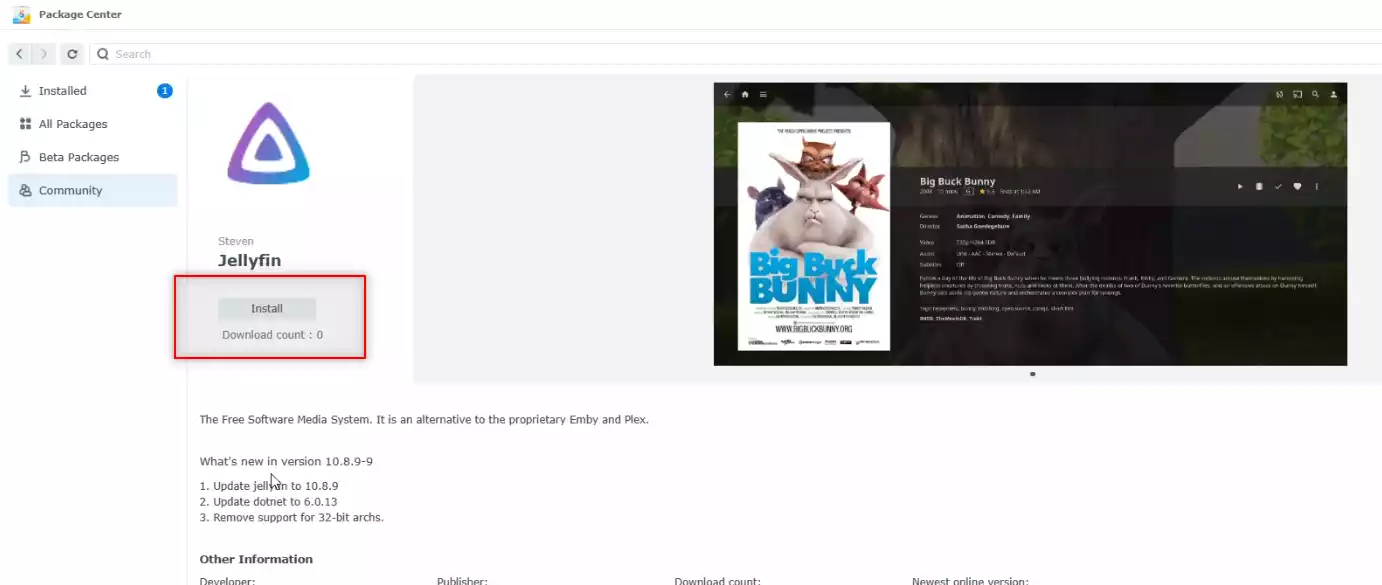
Installing the Jellyfin app on your Synology is as straightforward as most other applications. That said, in order for it to run at its best (features and services etc), it will also need to install the FFMPEG add-on. This is a hugely well know and established package know and used in some small/big way across thousands of applications. You will not need to download anything separately, as it will add it’s download and installation to the main Jellyfin installation.

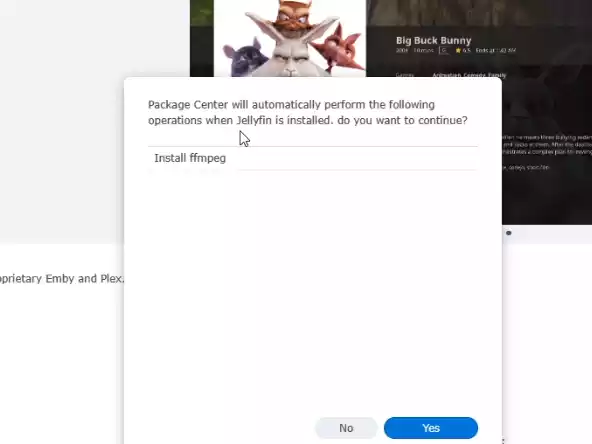
Unless you have already downloaded ffmpeg in advance, you will just need to click confirm during the installation window and it will download it automatically.

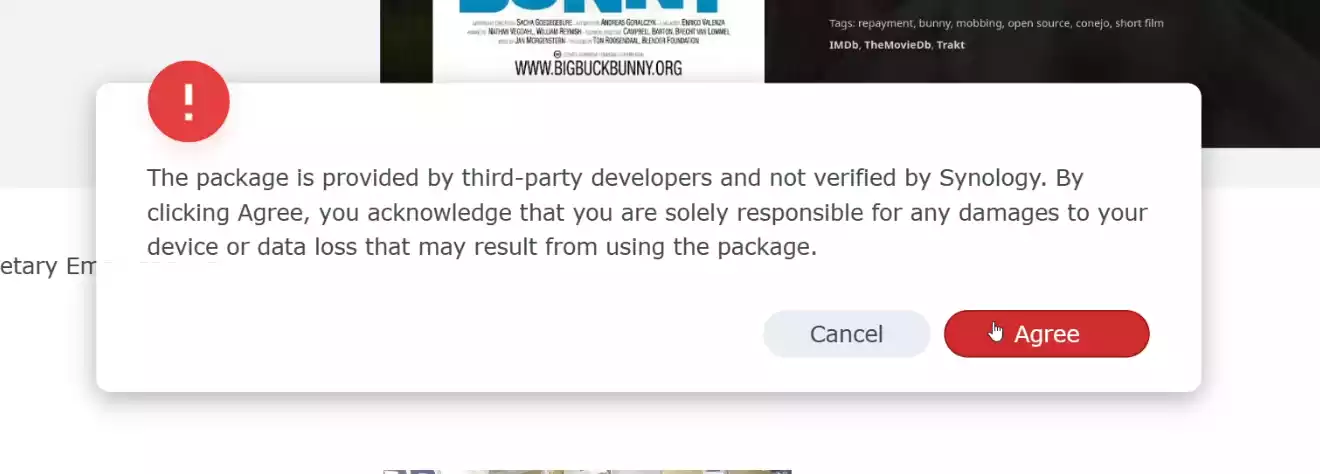
It is once again worth reminding you that both the Jellyfin and ffmpeg applications are not supported in the official 3rd party app selection by Synology, and the NAS will warn you of this twice during the installation.

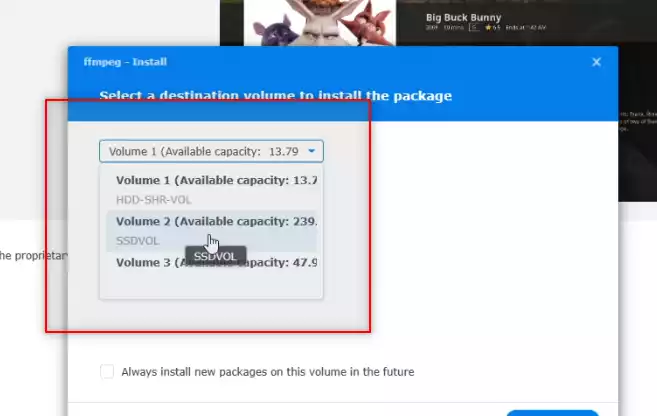
It is not hugely important which volume you install these two apps into on your Synology NAS. Just do NOT install the tools in the same folder directory as your media, as well as add media to the Jellyfin installation directory.

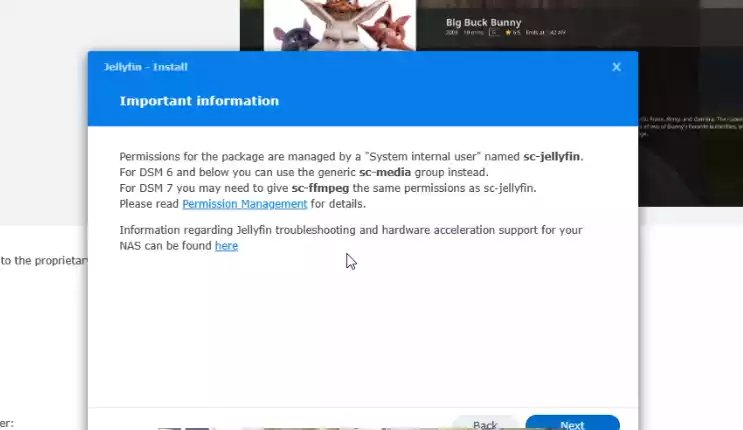
Towards the end of the installation, the Synology installer will highlight that applications that are installed in your Synology NAS will need you to manually grant them access to where your media lives in your system (i.e. installing Jellyfin does not automatically give the app access to your Movies, TV Shows, Music, etc). Just continue with the installation until it has been completed. Once that is done, I can guide you through granting Jellyfin access to your multimedia collection on your Synology NAS.

Jellyfin on a Synology NAS – How to Give Jellyfin Access to the Media on Your NAS
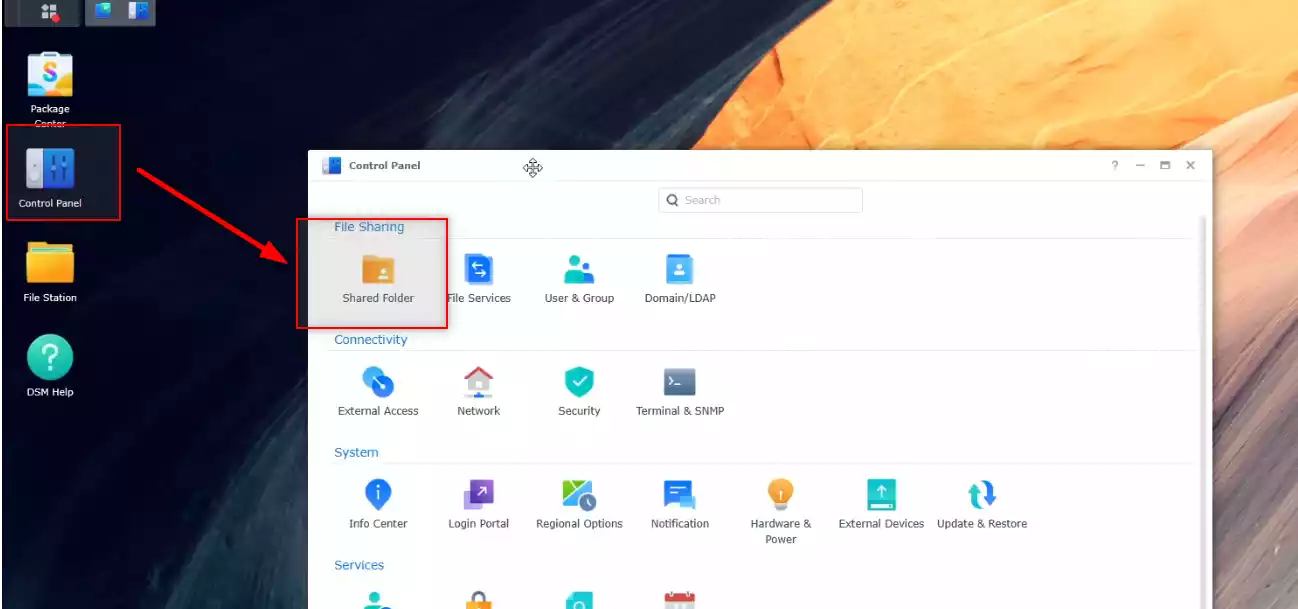
So, Jellyfin/mmpeg is installed on your Synology NAS. Let’s give this great multimedia streaming application access to your shows! Head back to the Synology DSM desktop and select ‘Control Panel‘. Then in the window that opens, select ‘Shared Folders‘, as shown:

The next window that opens will show you all of the folders on your Synology NAS. Now, if you have already uploaded your multimedia to the Synology NAS, you will have added it to one of these folders (as these are the primary folders your creat during your Synology NAS setup and installing other applications. Select the folder that you know your multimedia is in (n my case, that is ‘Multimedia and Virtual Images’, but yours will be different. When you select it, you can double-click it OR just click the ‘Edit‘ button at the top.


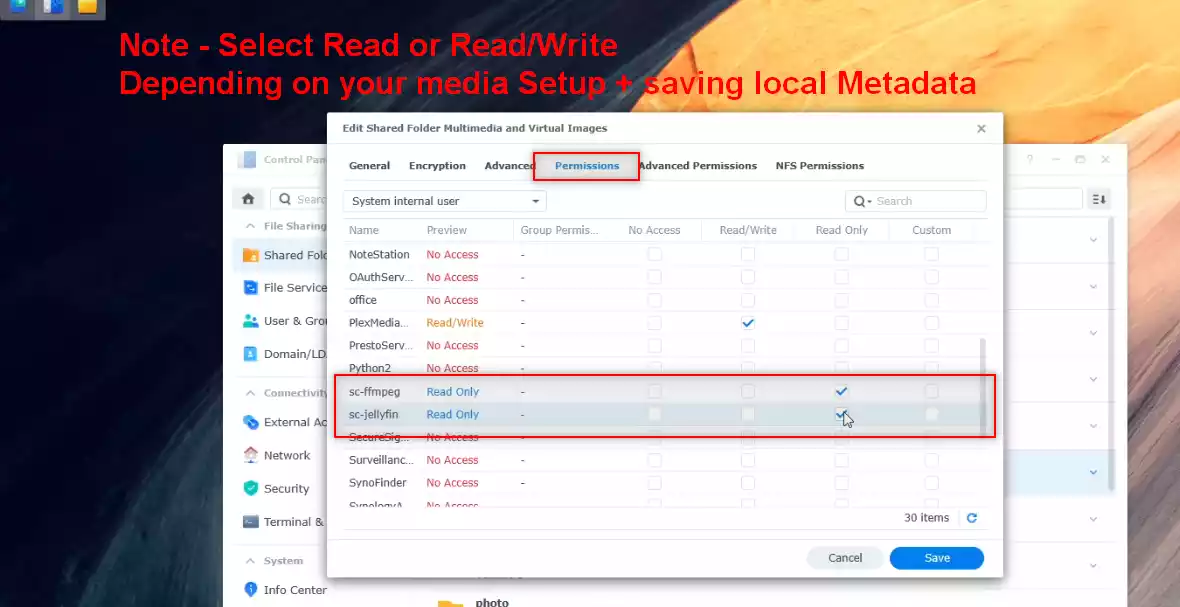
From here, you will need to move over to the ‘Permissions’ tab, as this shows the users, groups and applications (referred to as ‘System Internal User’s) that have any form of access to a shared folder. Use the drop-down tab at the top left and in the selection, select ‘System Internal User’.
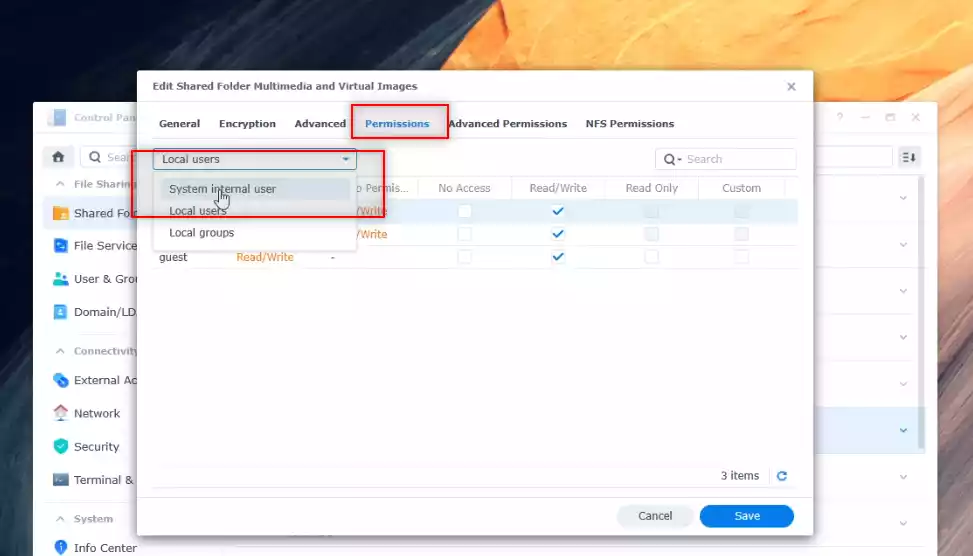

This will display a list of all the applications and services that you have installed on your Synology NAS. Scroll down till you find SC-JELLYFIN and SC-FFMPEG. Then you need to tick a box to provide the appropriate amount of access you want o give these apps to your multimedia. Now, you CAN select Ready-Only, as this means the apps can see and index your media. However, if you plan on saving local metadata and save media/data (nfo’s) that has been scraped from online boxart databases (such as MovieDatabase etc), you will need to grant these tool Read/Write access (so they can write/save the newly gathered data appropriately – again, not a dealbreaker, but useful). You CAN create custom levels of access that can be quite granular, but this will take more time and attention. It’s your call! When you are done, simply click ‘save’ and close the Shared Folder and Control Panel windows.

Now you have installed Jellyfin on your Synology NAS and given the application enough access to your multimedia folders to allow it to start building and managing your media for streaming your stuff! The last thing we need to do is start creating our multimedia folders and connecting them with your collections! You will find the Jellyfin application on the selection of apps on your Synology NAS and DSM 7 apps menu like any other.

Jellyfin on a Synology NAS – How to Add Your Media Libraries and Find Metadata
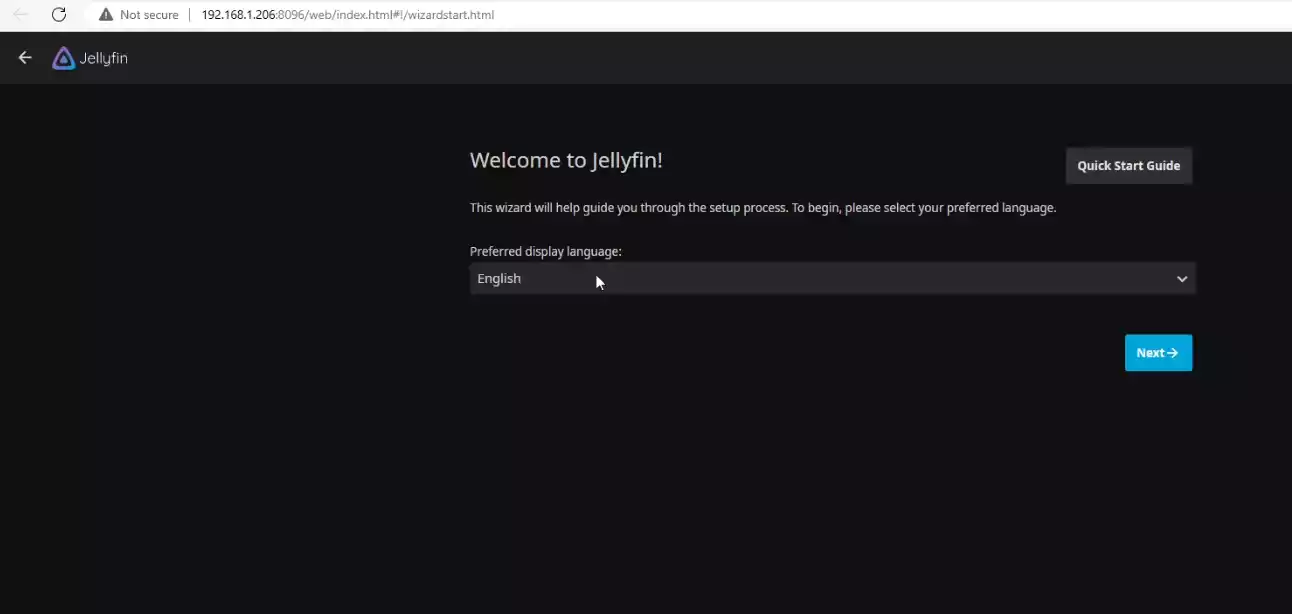
Installing Jellyfin on your Synology NAS in DSM 7 and granting it sufficient access means you can now start creating your media libraries. You want to make sure all your Movies are in a Movie older, TV Shows and Boxsets in a TV folder, Albums in your Music folder, etc. You do this so you can find stuff quicker, sure. But MAINLY because you want to be able to let Jellyfin crawl these folders appropriately and add the multimedia box art, cast lists, episode synopsis’, bonus online resources and more – Turning your decades of multimedia into a slick ‘Netflix’ style GUI to enjoy from your sofa! The walkthrough wizard is very straight forward and begins with asking you to select your language etc:

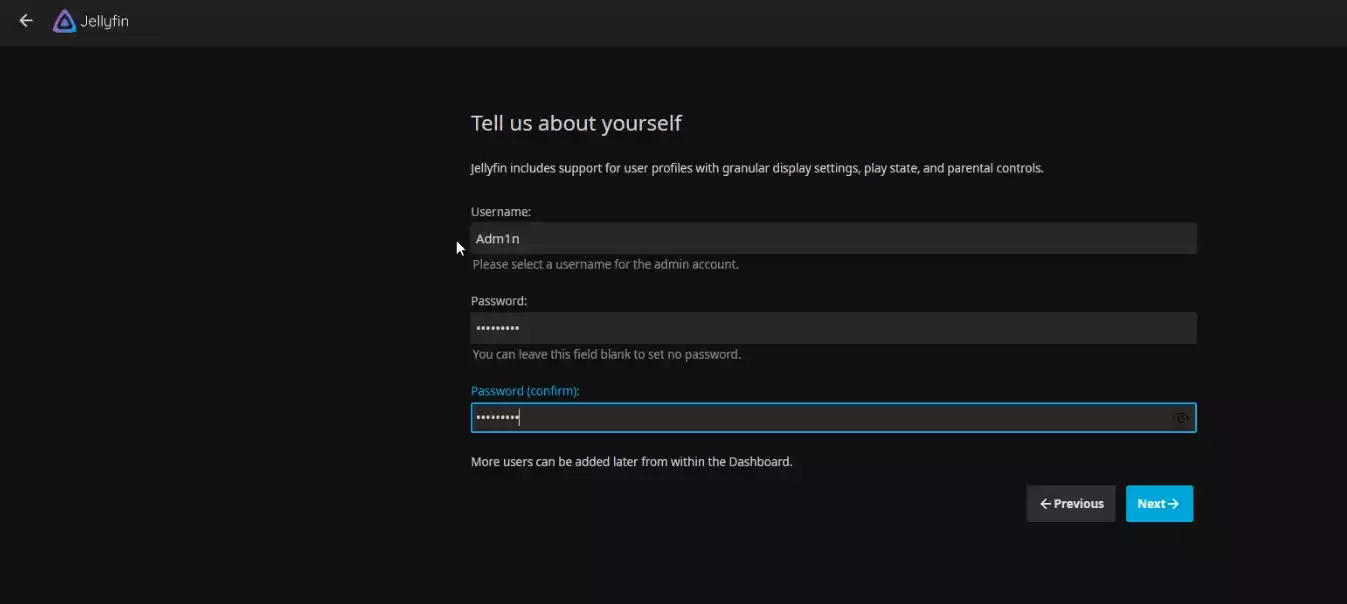
Next, you will need to create an additional Jellyfin login account. This will ensure that your media is only accessed by those with permission. You can create many more users and groups in Jellyfin later on, but for now you just need to create a new set of login credentials (these will be needed when adding Jellyfin access to your client streaming devices later). Try not to replicate the same login credentials as you use for the Synology NAS and DSM, as this can present a security risk if a user gains more access than they should!

Next, you need to start creating those Media Libraries. It is worth noting that you can add and amend libraries at ANY TIME when using your Jellyfin Media server, but it is advised to add them at the start as shortly afterwards the system will begin indexing them and scraping metadata appropriately. This means that it will start sorting your media out into listings and then crawling the data bases you selected to check and add all the presentation media/art to your library. Select the PLUS symbol to start adding a new library.


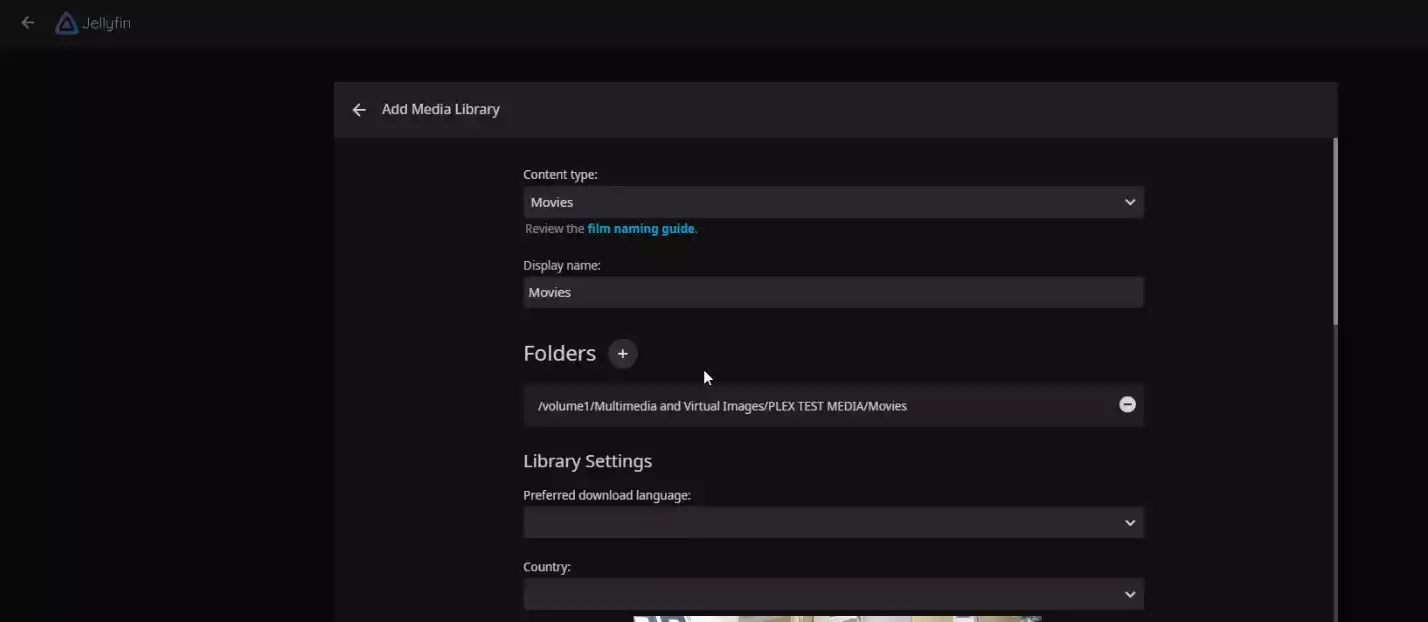
First things first, select the content type (as this will change the way that Jellyfin will check databases, class the media and the online resources it will crawl for appropriate content). In the ‘Folders’ box, click the plus symbol and it will display the folders in your Synology NAS that Jellyfin has been granted access to. You should be able to find your media quickly.

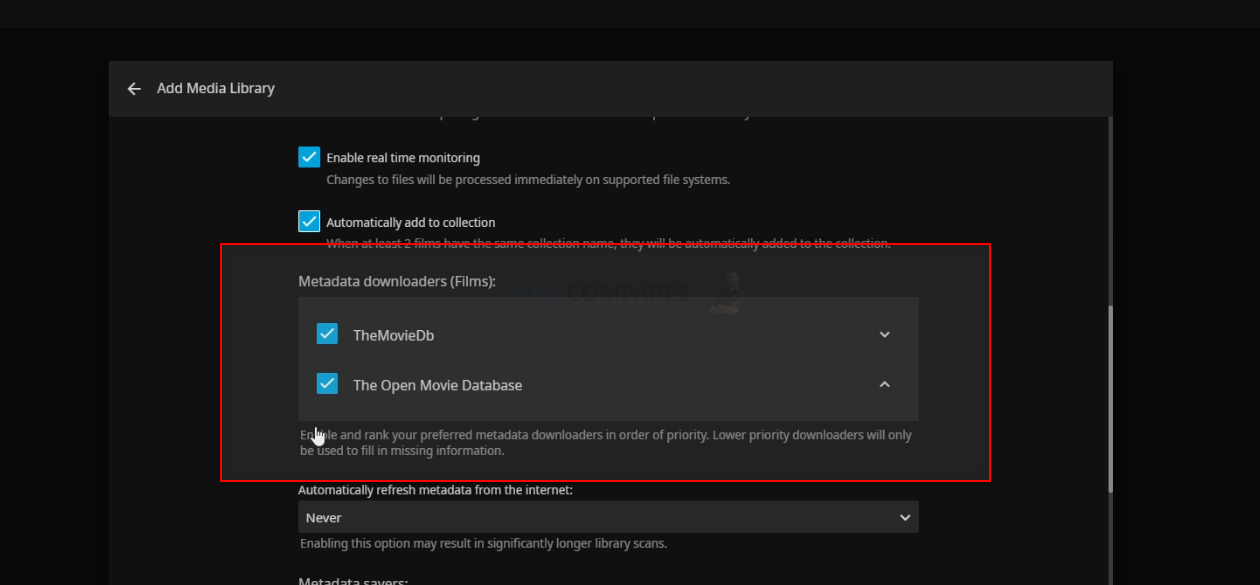
There will be several options that allow you to configure your new media folder, the key ones you need to make sure are ticked are to do with the metadata downloaders. These are where Jellyfin will pull the graphical presentation, facts and just glossy wonderfulness to your new multimedia server. There are additional options to download ‘fan art’ if your media does not have metadata for your media, as well as the option to save locally as/when they are found, perform period rescans online to update your media and more. This is also the reason why your media needs to be appropriately catalogued in type, i.e if you class a folder full of TV Shows as ‘movies’, Jellyfin will not crawl the appropriate online resources to get media.

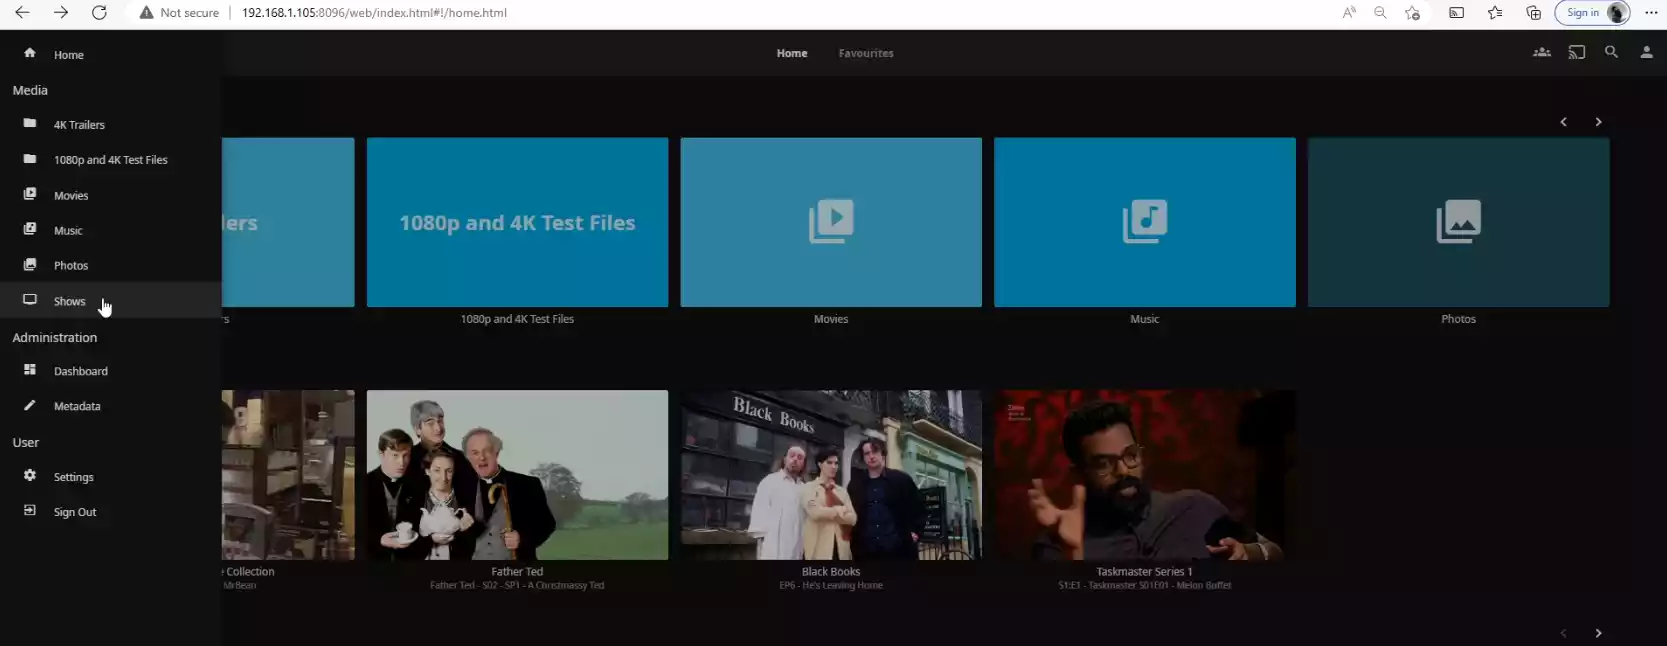
And THAT IS IT! As soon as you have added a few folders, complete the installation and then you will be presented with the primary server-side GUI for Jellyfin. The system will spend some time indexing your multimedia and scraping the appropriate metadata and the amount of time this will take will depend on the power of your NAS, size of your multimedia collection and your internet connection.

After this, there are a whole host of other settings and features you can start enabling/disabling (eg transcoding/conversion support, user/group access, UpNp/DLNA, remote access, client support and more) in the setting tab on the left-hand side. However, I won’t be covering those here, as these are quite specific to different kinds of users. I will be making an advanced video on Synology NAS Jellyfin NAS setups soon, but in the meantime you can watch my video below that will walk you through the synology DSM 7 Jellyfin installation from above. Thanks for reading and I really hope this guide helped you!


Need More Help Choosing the right NAS?
Choosing the right data storage solution for your needs can be very intimidating and it’s never too late to ask for help. With options ranging from NAS to DAS, Thunderbolt to SAS and connecting everything up so you can access all your lovely data at the touch of a button can be a lot simpler than you think. If you want some tips, guidance or help with everything from compatibility to suitability of a solution for you, why not drop me a message below and I will get back to you as soon as possible with what you should go for, its suitability and the best place to get it. This service is designed without profit in mind and in order to help you with your data storage needs, so I will try to answer your questions as soon as possible.
📧 SUBSCRIBE TO OUR NEWSLETTER 🔔
🔒 Join Inner Circle
Get an alert every time something gets added to this specific article!
This description contains links to Amazon. These links will take you to some of the products mentioned in today's content. As an Amazon Associate, I earn from qualifying purchases. Visit the NASCompares Deal Finder to find the best place to buy this device in your region, based on Service, Support and Reputation - Just Search for your NAS Drive in the Box Below
Need Advice on Data Storage from an Expert?
Finally, for free advice about your setup, just leave a message in the comments below here at NASCompares.com and we will get back to you.


 |
 |


