


Installing Plex Media Server on a Synology NAS in DSM 7.1/7.2: A Step-by-Step Guide
Plex Media Server is an excellent tool for managing and streaming your media collections. It can run on numerous platforms, including Synology’s DiskStation Manager (DSM), the operating system for their Network Attached Storage (NAS) devices. In this guide, we’ll explore the process of installing Plex Media Server on a Synology NAS using Docker, a platform that simplifies application deployment. Note: This guide assumes you have DSM already installed on your Synology NAS, your multimedia already in folders on the NAS storage and you’ve set up Container Manager/Docker. (Docker is the DSM 7.1 and older release name, whereas Container Manager is the new DSM 7.2 branding. Both are largely the same but with tweaked changes in the GUI and setup pathways, and both are powerful tools for running applications inside isolated containers, simplifying installation and configuration. Additional note, for the sake of ease, I have opted for the Docker installation path/methodology, but many of the parts of Step 6 have been consolidated in Container Manager – so do factor that in. The results are largely the same but there are differences between them in a page-by-page installation in the setup wizards, and a single ‘all config options in a single window’ presentation in the GUI. Do factor that in, depending on whether you are using DSM 7.1 Docker or DSM 7.2 Container Manager.
Plex Install Step 1: Log in to DSM
Log in to your Synology DSM through your web browser by typing your NAS’s IP address. The DSM interface should appear.

Step 2: Open the Container Manager/DockerPackage
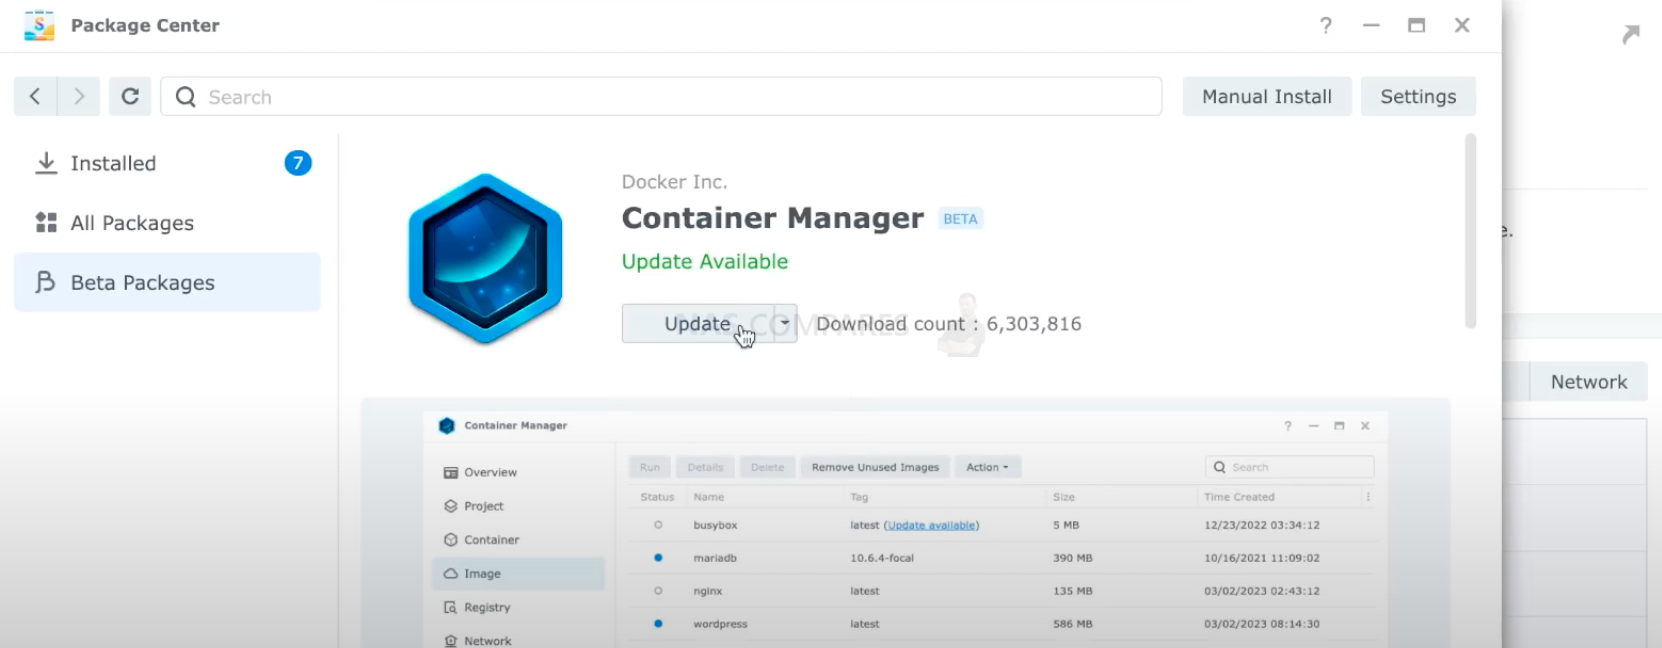
Navigate to the main menu and open the Container Manager/Docker package. If Container Manager/Docker is not installed yet, you can find it in the Package Center. Search for “Container Manager” or “Docker”, download, and install it.
Step 3: Search for Plex Image
In the Container Manager/Docker package interface, navigate to the “Registry” tab. Here you’ll find a search bar. Type “Plex” and press Enter. A list of available Docker images for Plex should appear.
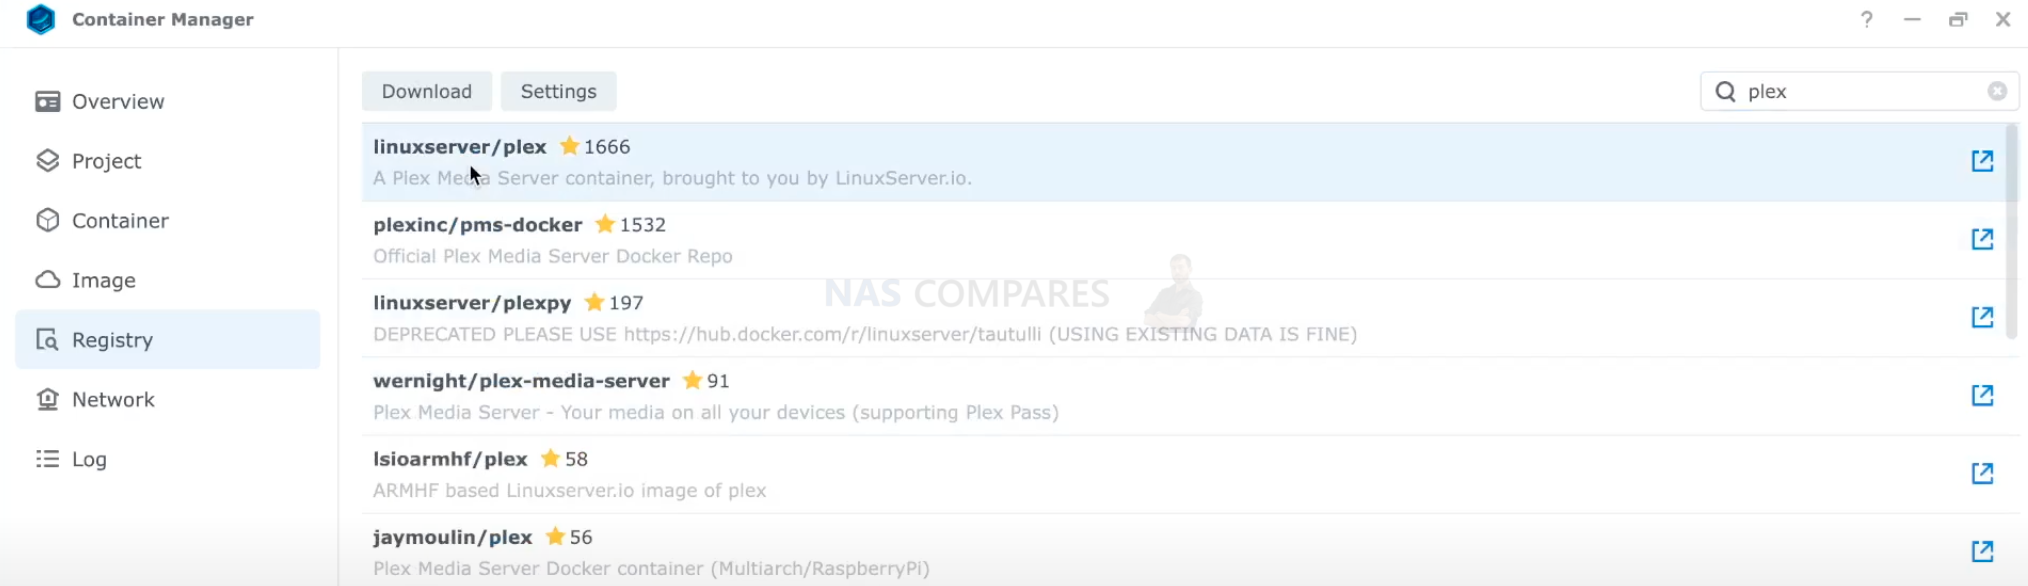

Step 4: Download the Official Plex Image
Look for the official Plex image in the search results. It’s usually named “plexinc/pms-docker”. Click on it, then click “Download”. A new window will open asking you to choose a version. It’s generally safe to choose the “latest” tag. Click “Select” to start the download.
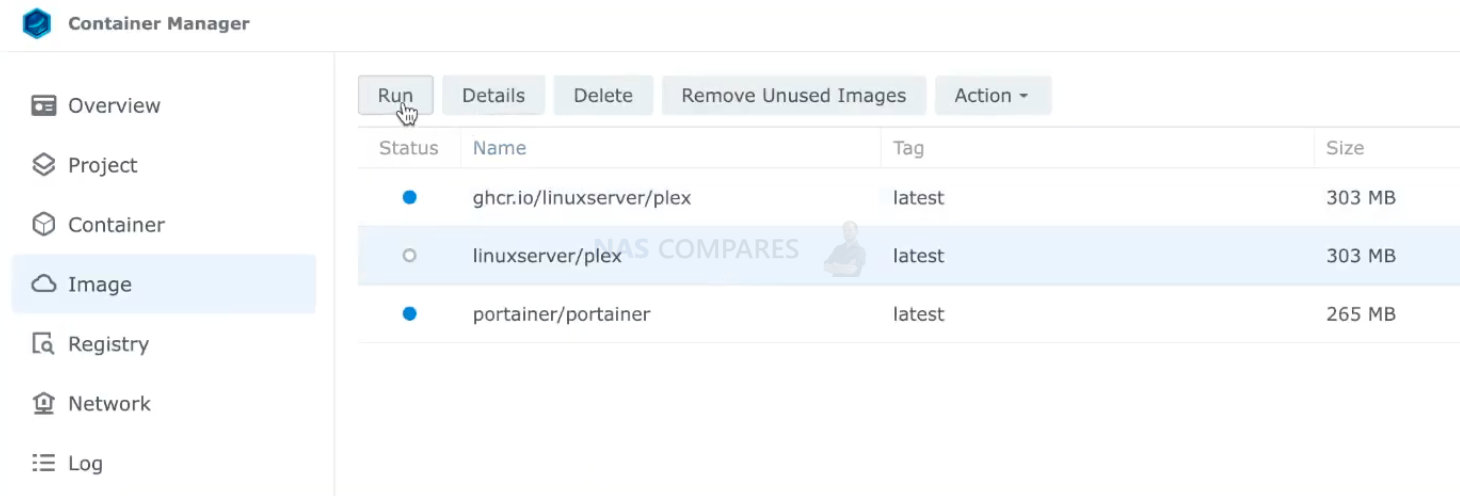

Step 5: Prepare the Container
Once the download completes, go to the “Image” tab. You should see the downloaded Plex image. Click on it, then click “Launch”/”Run”. This will open the “Create Container” window.
Step 5.5 – PAUSE! Learning how to set up a Container Correctly
In the “Create Container” window, you’ll need to set up your Plex container. Here’s a brief overview (each is broken down underneath):
- Container Name: Choose a name for your Plex container.
- Advanced Settings: Click on this and check “Enable auto-restart”. This means the container will automatically restart if it crashes.
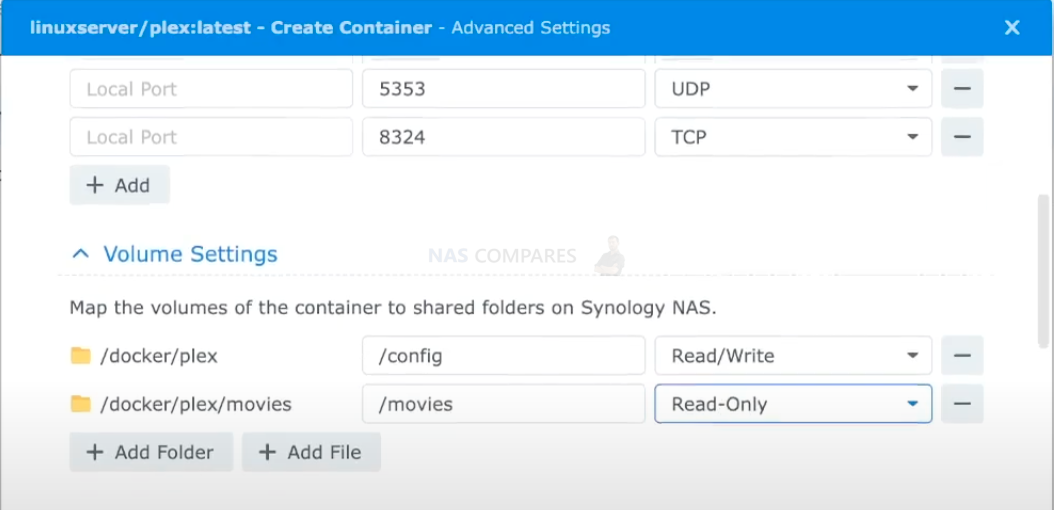
- Volume: Here you’ll map the folders on your NAS to the directories in the Plex container. At a minimum, you’ll need to map your media directories and the directory where Plex will store its configuration data.
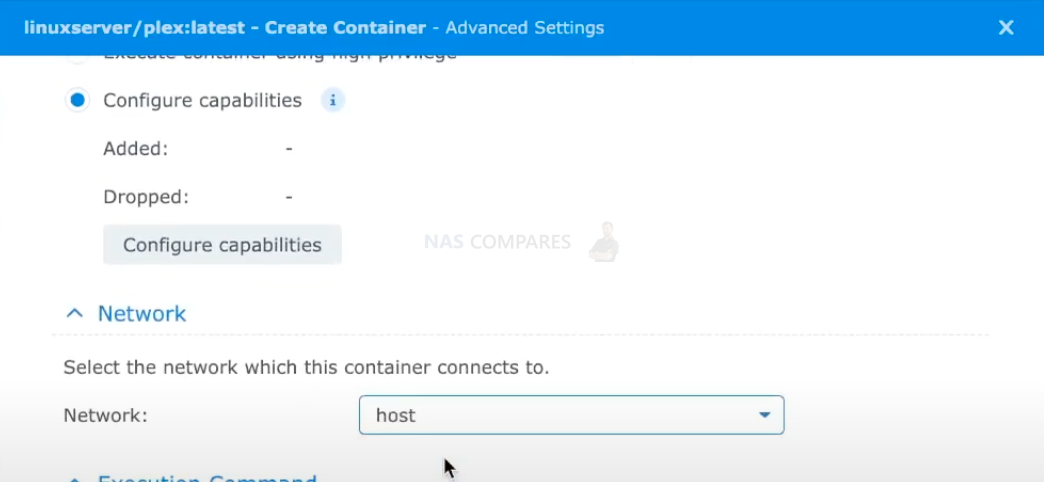
- Network: Leave this at the default settings.
- Port Settings: Plex requires certain ports to be accessible. Container Manager/Docker will automatically map these ports for Plex.
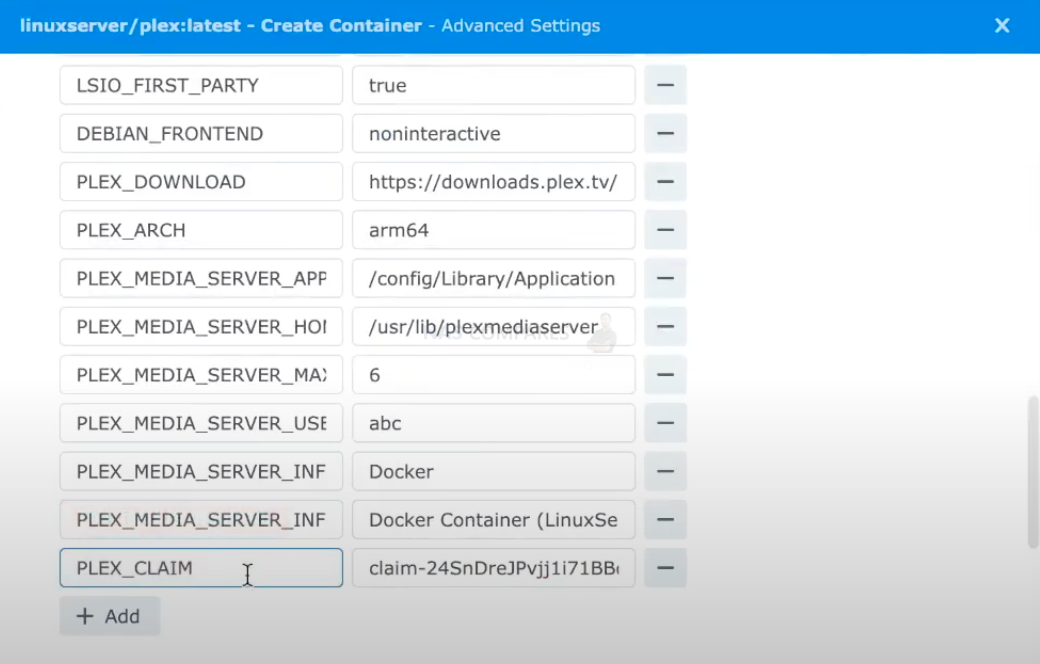
- Environment: Plex uses environment variables for certain settings. Most users won’t need to change anything here.
However, this is arguably THE MOST important step and there are plenty of small mistakes that can be made that can (at best) result in the plex container just not booting or (at worst) result in your plex container going into a boot-loop that is near impossible to suspend and force you to re-install Container Manager/Docker from scratch! So, let’s go through these sub-steps in a wee bit more detail!
Step 6 – Creating Container for Plex in Synology Container Manager
Link you plex folder and media folder to your docker/container. Use aliases /config and /movie or similar.

Add Plex claim code variable. PLEX_CLAIM from earlier.

Select Network type as HOST

Go to PLEX web address: YOUR NAS IP :32400


If your videos are buffering, you may want to change the preferences file.
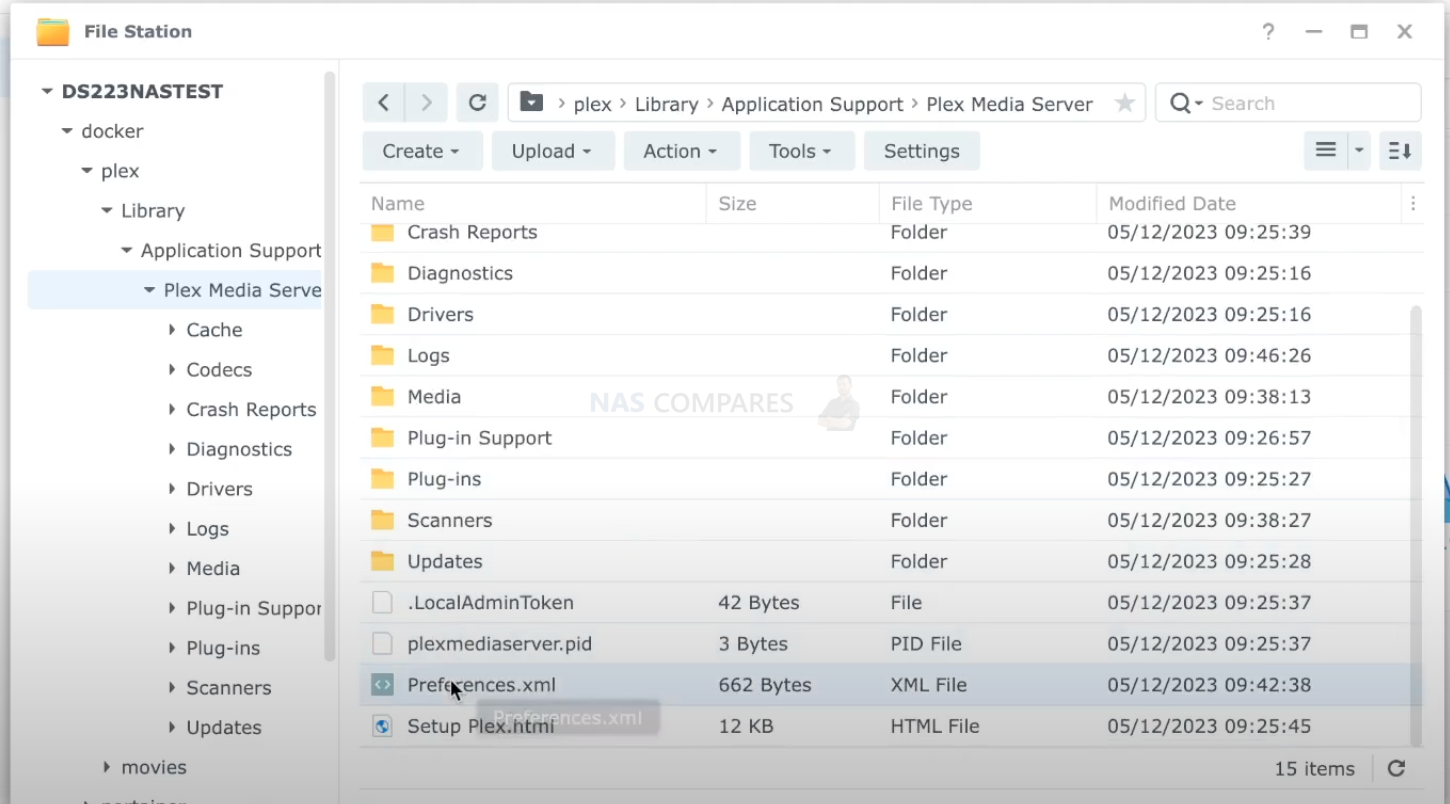

Extra – Use SSH (if you have a NAS that have integrated graphics or you want to adapt the Plex chosen graphic driver), you can follow this guide HERE. Add VaapiDriver=”i965″ at the end of the XML. Save and upload it to the NAS.


Step 7: Launch Plex Media Server
Once the container is created, you can start Plex by selecting the container and clicking “Action > Start”.
That’s it! You’ve installed Plex Media Server on your Synology NAS using Container Manager/Docker. To access your Plex server, you should be able to navigate to http://<your-nas-ip>:32400/web in your web browser, replacing <your-nas-ip> with the actual IP address of your NAS.
Remember, Plex’s performance can depend on your NAS’s hardware capabilities, so you may need to adjust your settings accordingly. If you encounter any problems, the Plex and Synology communities are great resources for troubleshooting. Enjoy your new media server!

Docker vs Container Manager vs Portainer – What is the Difference and Which is Best for a Synology Plex Installation?
Synology Container Manager is simply a newly designed version of Docker for Synology DSM 7.2. It has tweaked the GUI of Docker, as well as the arrangement of the configuration options available when creating a container. Docker and Portainer however are two different but related tools in the world of containerization. Docker is an open-source platform that automates the deployment, scaling, and management of applications. It does this by using containerization, a lightweight form of virtualization. A Docker container packages an application with everything it needs to run, including the application code, runtime, system tools, system libraries, and settings, into a standalone unit that can run consistently on any platform that supports Docker. This ensures the same environment from development to production, thereby eliminating the “it works on my machine” problem. Whereas Portainer on the other hand, is a management tool for Docker. It provides a web-based user interface that allows you to easily manage your Docker containers, images, networks, and volumes. It can be used to simplify and visualize tasks that would otherwise require complex Docker CLI commands. It’s essentially a user interface for Docker, allowing you to manage your Docker environments (local or remote) visually.
To sum it up, Docker is the technology that allows you to create and run containers, and Portainer is a tool that makes it easier to manage those containers. You would use Docker to create and run your containers, and you could use Portainer to simplify the management of those containers, especially in more complex setups. Both Docker and Portainer can be used to install Plex Media Server on a Synology NAS. The best choice between them largely depends on your familiarity with Docker and your comfort level with command-line interfaces. If you’re comfortable with command-line interfaces and you like to have granular control over your configurations, Docker would be a good choice. Docker offers you more direct control over your container configuration, which can be beneficial for troubleshooting or making advanced tweaks. On the other hand, if you prefer a graphical user interface and want an easier way to manage Docker containers, Portainer is a great choice. Portainer simplifies the management of Docker containers by providing a user-friendly interface. It’s also especially useful if you’re managing multiple Docker environments, as it can manage them all from one place.
For most Synology NAS users, Docker might be the more straightforward choice, simply because Synology’s DSM already includes a Docker package that integrates well with the DSM interface. Using Docker directly on the DSM might be a bit simpler than installing an additional tool like Portainer. However, if you have a complex Docker setup or if you’re managing multiple Docker environments, Portainer might be worth considering. Ultimately, both Docker and Portainer are tools that can help you achieve the same end result: running Plex Media Server on your Synology NAS. The choice between them depends on your specific needs, your technical skill level, and your personal preferences.
Which is Better, Plex Installation via Docker or via an App in the Synology Package Center?
Both methods of installing Plex Media Server on a Synology NAS—through Docker or through the Synology package center—have their own advantages and disadvantages. The best method for you depends on your specific needs and technical comfort level.
Installing Plex via Synology’s Package Center:
Pros:
- Ease of Installation: Installing Plex via the Package Center is straightforward. Just a few clicks and you’re good to go.
- Integration: Plex installed from the Package Center integrates well with Synology’s DiskStation Manager (DSM) interface.
Cons:
- Update Delays: The Plex package in the Package Center may not be updated as quickly as the official Plex releases. This can mean missing out on new features or bug fixes in the short term.
- Less Control: You have less control over the Plex environment when it’s installed as a standard package.
Installing Plex via Docker:
Pros:
- Up-to-Date: Docker images for Plex are typically updated quickly after a new release, so you’ll have access to the latest features and bug fixes more promptly.
- More Control: Docker gives you more control over the Plex environment, which can be advantageous for troubleshooting or making advanced tweaks.
Cons:
- More Complex Setup: Docker has a steeper learning curve and the setup process can be more complex, especially if you’re new to Docker or containerization.
In summary, if you’re looking for a simple, easy-to-set-up solution and don’t mind potentially waiting a bit longer for updates, the Synology Package Center could be the way to go. If you want the most control over your Plex setup and you’d like to get updates as soon as they’re available, Docker might be a better choice, as long as you’re willing to deal with a slightly more complex setup process.
📧 SUBSCRIBE TO OUR NEWSLETTER 🔔 This description contains links to Amazon. These links will take you to some of the products mentioned in today's content. As an Amazon Associate, I earn from qualifying purchases. Visit the NASCompares Deal Finder to find the best place to buy this device in your region, based on Service, Support and Reputation - Just Search for your NAS Drive in the Box Below
🔒 Join Inner Circle
Get an alert every time something gets added to this specific article!
Need Advice on Data Storage from an Expert?
Finally, for free advice about your setup, just leave a message in the comments below here at NASCompares.com and we will get back to you.

![]()

![]()
![]()
![]()
![]()
![]()
![]()
![]()
![]()


