DS1821+ RAM upgrade
Add a Memory Module to Synology NAS Optional Synology memory modules are designed to expand the memory of your Synology NAS. Follow the steps below to install, check, or remove a memory module on your Synology NAS. The following table shows the memory configuration for best practice:

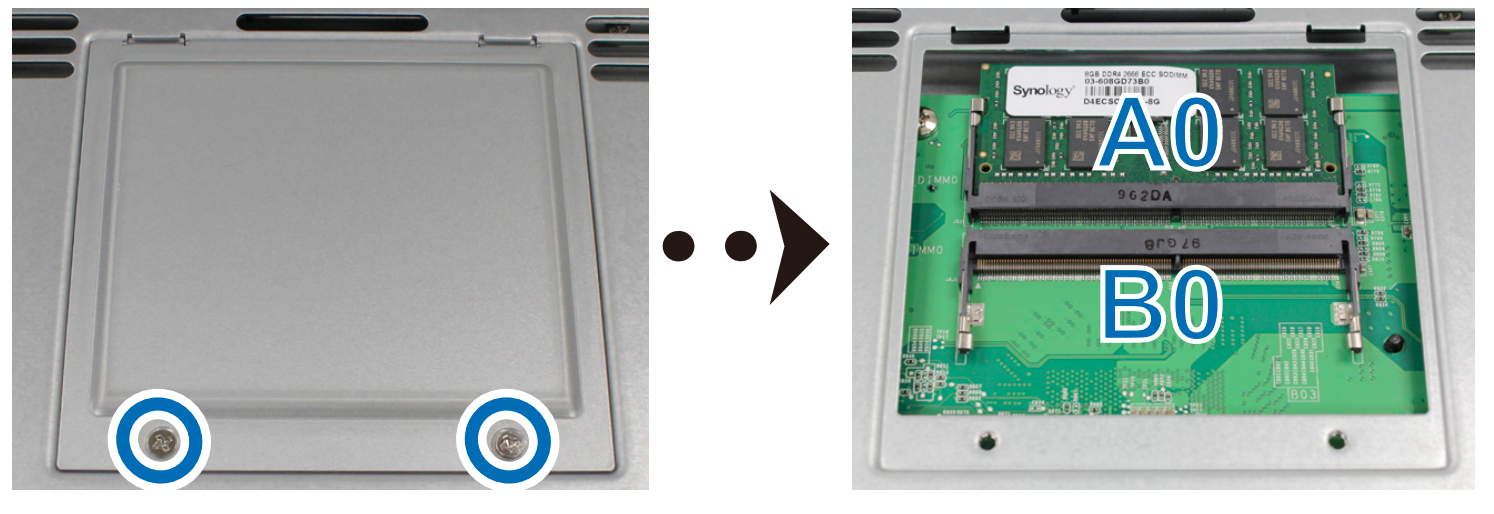
Follow the steps below to install, check, or remove a memory module on your DS1821+. To install the memory module
1 Shut down your Synology NAS. Disconnect all cables from your Synology NAS to prevent possible damage.
2 The memory modules are located at the bottom of your Synology NAS.
3 Remove the two screws on the cover that protecting the modules. Lift up the cover and put it aside. You will see one pre-installed 4 GB memory module.

4 Insert the new memory module into the empty slot:
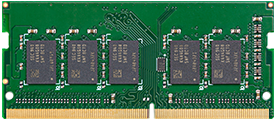
a Align the small gap between the gold connectors of the memory module with the notch on the empty slot. Insert the memory module into the slot. Make sure that the module is properly inserted.
b Gently push down the memory module until you hear a click.

5 Replace the cover and tighten the two screws that removed.
6 Reconnect the cables that removed, then press the power button to turn on your Synology NAS.
To make sure your Synology NAS recognizes the new memory capacity
1 Install DiskStation Manager (DSM). Please see “Install DSM on Synology NAS” for more information.
2 Sign in to DSM as admin or a user belonging to the administrators group.
3 Go to Control Panel > Info Center and check Total Physical Memory.
If your Synology NAS does not recognize the memory or does not start up successfully, please make sure that
the memory module is installed correctly.
To remove the memory module
1 Follow step 1 to 3 of the “To install the memory module” section to shut down your Synology NAS,
disconnect the cables and remove the cover.
2 Push the levers on both sides of the memory module outward. The memory module will be released from its
slot.

3 Hold the memory module by its edges and remove it from the slot.
4 Replace the cover and tighten the two screws that removed.
5 Reconnect the cables that removed, then press the power button to turn on your Synology NAS.
COMPATIBLE RAM

D4ES01-4G UK USA
DDR4 ECC Unbuffered SODIMM
EAN: 4711174724031
D4ES01-8G UK USA
DDR4 ECC Unbuffered SODIMM
EAN: 4711174724055
D4ECSO-2666-16G UK USA
DDR4 ECC Unbuffered SODIMM
EAN: 4711174723676
Do You NEED 5GbE NAS? (Or Should You Skip Ahead to 10GbE)
UGREEN DXP4800 PRO NAS Review
Minisforum G7 Pro Review
CAN YOU TRUST UNIFI REVIEWS? Let's Discuss Reviewing UniFi...
WHERE IS SYNOLOGY DSM 8? and DO YOU CARE? (RAID Room)
UniFi Routers vs OpenWRT DIY Routers - Which Should You Choose?
Access content via Patreon or KO-FI
Discover more from NAS Compares
Subscribe to get the latest posts sent to your email.


DISCUSS with others your opinion about this subject.
ASK questions to NAS community
SHARE more details what you have found on this subject
IMPROVE this niche ecosystem, let us know what to change/fix on this site