DS3612XS RAM upgrade
I looking for RAM to upgrade a DS3612XS.
I tried : DIMM 1333Mhz DDr3 PC3 10600 ECC 8GO without success.
Could you propose me a solution ?
Hardware
• CPU: Intel Core i3TM Dual Core 3.1GHz, with floating point (Intel® Core™ i3-2100 Processor)
• RAM Size: ECC RAM 2GB DDR3 SDRAM – 4X SLOTS 240PIN
• Internal HDD3
: 12X 3.5” SATA(II) or 12X 2.5” SATA/SSD
• External HDD Interface: 4X USB ports
• Expansion Interface: 2X Expansion port
• Size (H X W X D): 310 mm X 300 mm X 340mm
• Weight: 10.53 kg
• LAN: 4X Gigabit (10 GbE X2 add-on card is supported)
• Link Aggregation
Memory Specifications
Max Memory Size (dependent on memory type) 32 GB
Memory Types DDR3 1066/1333
Max # of Memory Channels 2
Max Memory Bandwidth 21 GB/s
Kingston 2pcs 4GB DDR3, 1600MHz, ECC, CL11, 2R, X8, 1.5V, Unbuffered, DIMM This module can be run in Dual Channel mode. BRAND Computer Memory Solutions Lifetime exchange or repair warranty against manufacturing defects. Compatible with: Synology DiskStation DS3612xs Max memory 32GB sockets 4
USA links – https://amzn.to/2LbMlDV
8GB (2x4GB) RAM Memory for Synology DiskStation DS3612xs By CMS B82
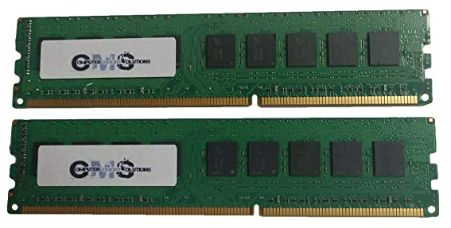
UK link https://amzn.to/3bfp3rl
32GB (4x8GB) RAM Memory for Synology DiskStation DS3612xs BY CMS B90
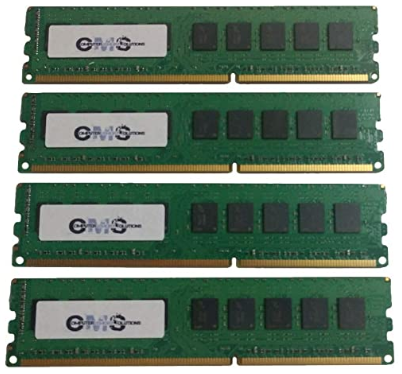
UK Link – https://amzn.to/35Jtc5X
Add a RAM Module on DiskStation
Synology RAM module 1GB/2GB is designed for DiskStation memory expansion, and is optional for your choice.
Follow the steps below to install, check, or remove your RAM module.
Install the RAM Module
1 Press and hold the power button until you hear a beep sound to shut down your DiskStation. Disconnect all
cables connected to your DiskStation to prevent any possible damages.
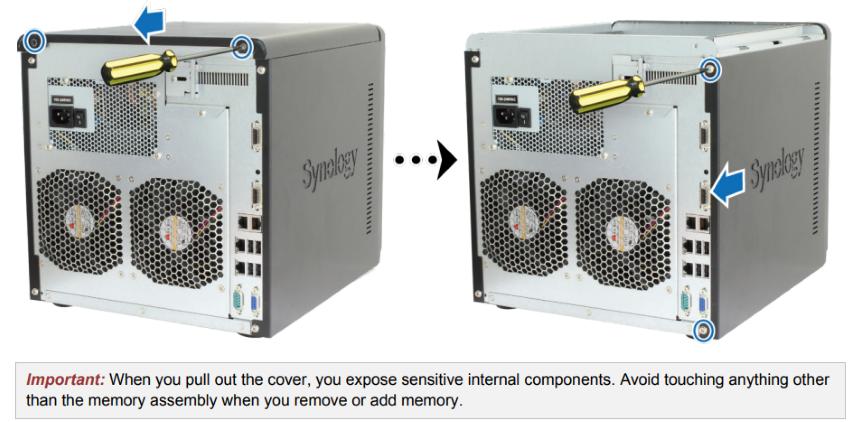
2 Remove the screws on the back of DiskStation, and then pull the top and side cover.
3 Remove the 6 screws on the inner panel, and pull it a little to see the cables connected to the motherboard on
the inner side of the inner panel. Disconnect the 5 cables carefully and remove the inner panel from your
DiskStation
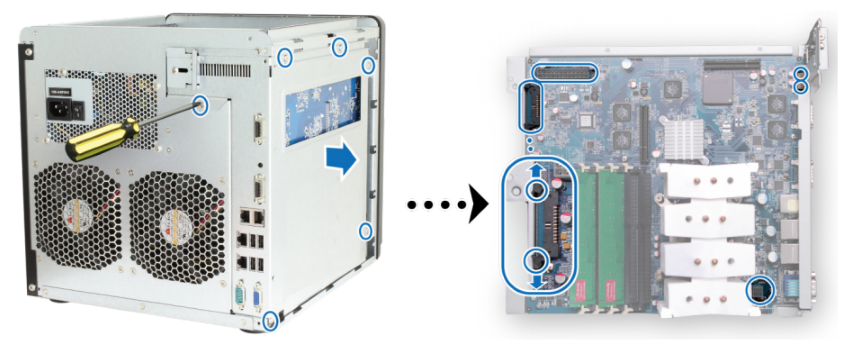
4 Insert the new memory module in the memory slot on the motherboard:
a Open the ejectors on the memory slot and push them out to the sides.
b Align the notch on the gold edge of the module with the notch in the memory slot.
c Use two fingers with firm, even pressure to push down on the memory module.
d When the memory is inserted correctly, the ejectors will snap into place
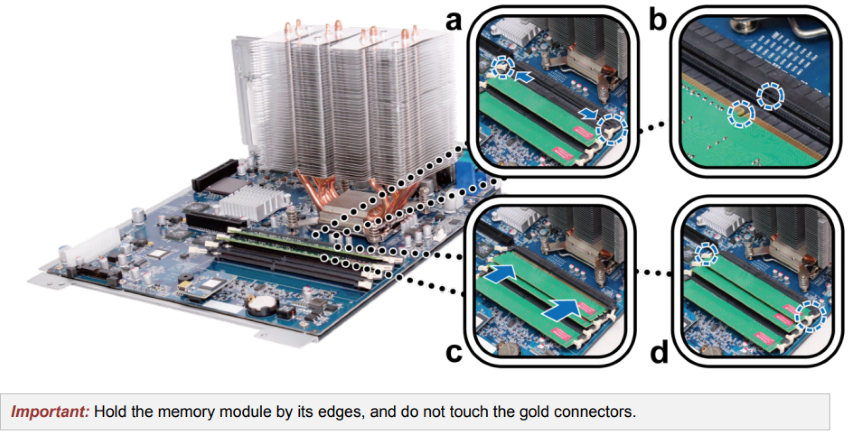
5 Connect the 5 cables you disconnected in step 3, replace the inner panel, and tighten the 6 screws to secure it.
6 Replace the top and side cover, and tighten the screws you removed in step 2.
A Buyer's Guide to Travel Routers - GET IT RIGHT, FIRST TIME
Jonsbo N6 DIY NAS Case Review
The Best Bits (and Worst Bits) of NAS of 2025!
Minisforum MS-02 Ultra Review
Minisforum N5 NAS, 6 Months Later - Better, Worse, the Same?
Beelink ME Pro NAS Revealed
Access content via Patreon or KO-FI
Discover more from NAS Compares
Subscribe to get the latest posts sent to your email.


DISCUSS with others your opinion about this subject.
ASK questions to NAS community
SHARE more details what you have found on this subject
IMPROVE this niche ecosystem, let us know what to change/fix on this site