Synology DS423+ compatible RAM upgrade
The Synology DS423+ is a powerful and reliable NAS device that is designed for small and medium-sized businesses. It comes with 2 GB of DDR4 non-ECC memory, with 2 GB of it soldered to the board, and one memory slot available for upgrades. The maximum memory capacity is 6 GB, which means that you can add an additional 4 GB to the pre-installed 2 GB.
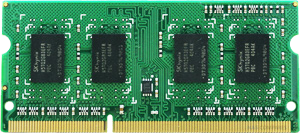
If you’re looking to upgrade your Synology DS423+ memory, there are official and unofficial options available. Synology offers their own memory upgrades that are compatible with the device, which are non-ECC unbuffered SODIMMs. The model number for their 4 GB memory upgrade is D4NESO-2666-4G, and it is compatible with various Synology NAS devices, including the DS423+.
However, if you’re looking for other options, there are community-tested RAM upgrades that are also compatible with the DS423+. These upgrades are unofficial, but they have been tested by the NAS community and have shown to work on the device. Here are some of the RAM upgrades that have been tested:
- Crucial 4GB, 8GB, 16GB, and 32GB*
- TimeTec 4GB, 8GB, and 16GB
- Kingston 4GB, 8GB, and 16GB
*Please note that the 32GB option is untested and to be confirmed (TBC).
The community-tested RAM upgrades come from various manufacturers and have different memory capacities and speeds. Some of the upgrades listed above have been tested on DSM 7.1.1-42962 Update 1, DSM 7.1, and DSM 7.1.1-42962 Update 3.
Here is how ds423+ looks like by default:
| System Memory | 2 GB DDR4 non-ECC | |
| Memory Module Pre-installed | 2 GB (soldered) | |
| Total Memory Slots | 1 | |
| Maximum Memory Capacity | 6 GB (2+ 4 GB) |
Official Synology memory upgrades
SODIMM
D4NESO-2666-4G
- DDR4 non-ECC Unbuffered SODIMM
- EAN: 4711174723669
- Capacity: 4GB
Applied Models:
- 23 series:DS423+
- 20 series:RS820RP+, RS820+, DS920+, DS720+, DS420+, DS220+
- 19 series:DS2419+, DS2419+II, DS1819+, DVA3219
- 18 series:DS1618+
Unnoficial RAM
Tested in our Studion on DS920+ and it should work on ds423+
| DS423+ | DDR4-2666 non-ECC unbuffered SO-DIMM 260pin 1.2V | D4NESO-2666-4G |
Crucial 4GB – Buy HereTimeTec 4GB – Buy Here
Kingston 4GB- Buy Here Crucial 8GB – Buy Here TimeTec 8GB – Buy Here Kingston 8GB- Buy Here Crucial 16GB – Buy Here TimeTec 16GB – Buy Here Kingston 16GB- Buy Here Crucial 32GB* – Buy Here * = UNTESTED, TBC |
Here are NAS community tests :
How to Add a Memory Module to Synology NAS
Optional Synology memory module is designed to expand the memory of your Synology NAS. Follow the steps below to install, check, or remove a memory module on your Synology NAS.
To install the memory module
- Shut down your Synology NAS. Disconnect all cables from your Synology NAS to prevent possible damage.
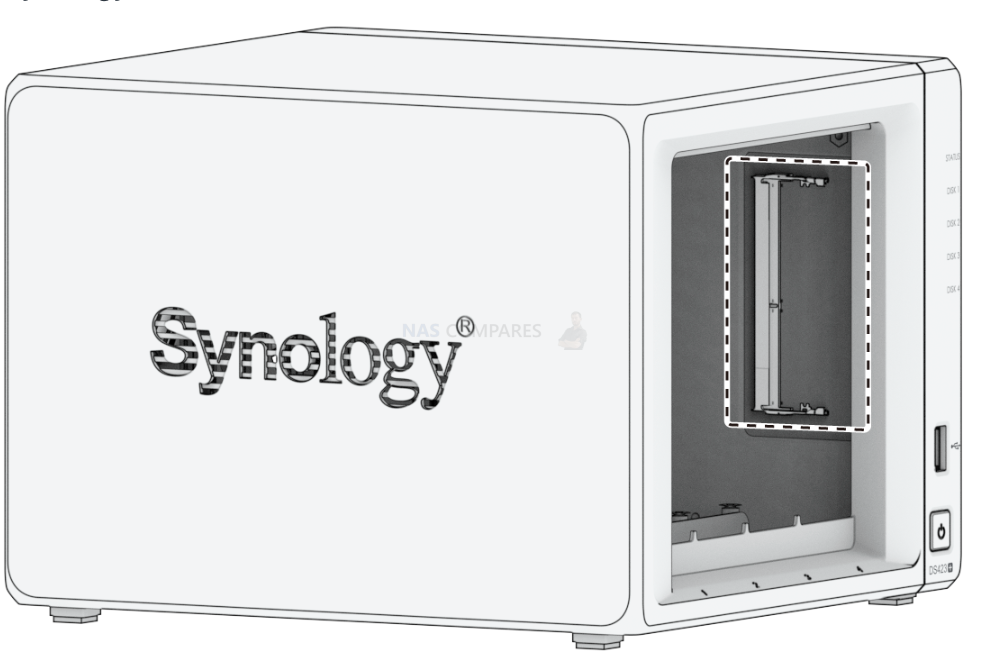
- Remove the drive trays from the drive bays. An empty memory slot is located on the inner-right side of your Synology NAS.

Notes:
- When you remove the drive trays, sensitive internal components are exposed. Avoid touching anything other than the memory assembly when removing or adding memory.
- Insert the new memory module into the empty slot:
- Align the small gap between the gold connectors of the memory module with the notch on the empty slot. Insert the memory module into the slot. Make sure that the module is properly inserted.
- Gently push down the memory module until you hear a click.

Notes:
- Hold the memory module by its edges and avoid touching the gold connectors.
- Synology will not provide full product warranty or technical support if a non-Synology memory module is used for memory upgrade.
- Insert the drive trays back into the drive bays.
- Reconnect the cables removed in step 1, then press the power button to turn on your Synology NAS.
To make sure your Synology NAS recognizes the new memory capacity
- Install DiskStation Manager (DSM). Please see “Install DSM on Synology NAS” for more information.
- Sign in to DSM as admin or a user belonging to the administrators group.
- Go to Control Panel > Info Center and check Total Physical Memory.
If your Synology NAS does not recognize the memory or does not start up successfully, please make sure that the memory module is installed correctly.
To remove the memory module
- Follow step 1 to 2 of the “To install the memory module” section to shut down your Synology NAS, disconnect the cables and remove the drive trays.
- Push the levers on both sides of the memory module outward. The memory module will be released from its slot.
- Hold the memory module by its edges and remove it from the slot.

- Insert the drive trays back into the drive bays.
- Reconnect the cables removed in step 1, then press the power button to turn on your Synology NAS.
There are several ways to check the memory is working on your Synology DS423+ correctly. One easy method that can be done very quickly is using the Synology Memory Test tool.
To run a memory test:
-
- Download and install the Synology Assistant, where you can find the memory test function. The application is available at Download Center.
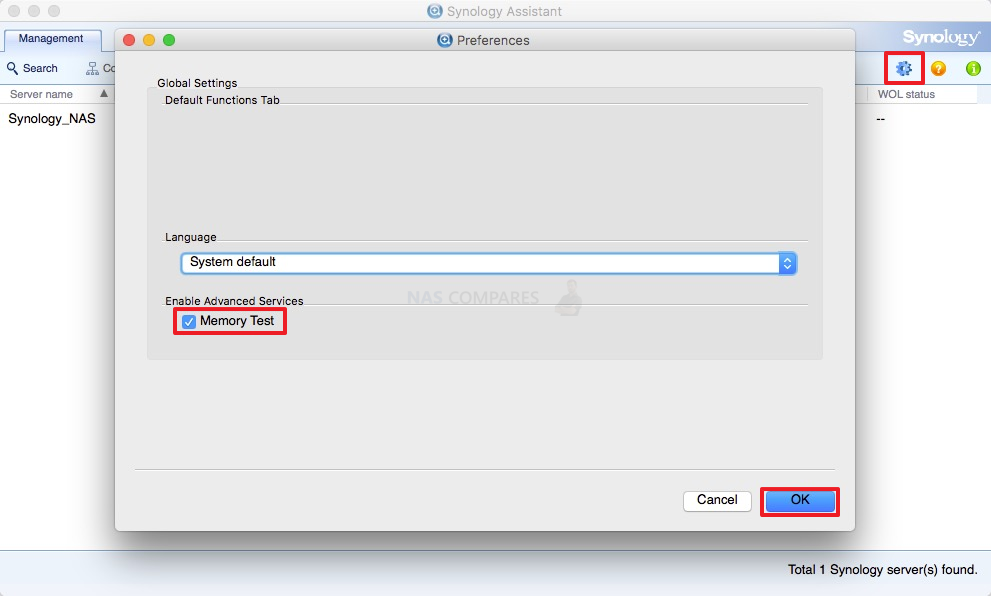
- Open Synology Assistant, click and enable the memory test service.

-
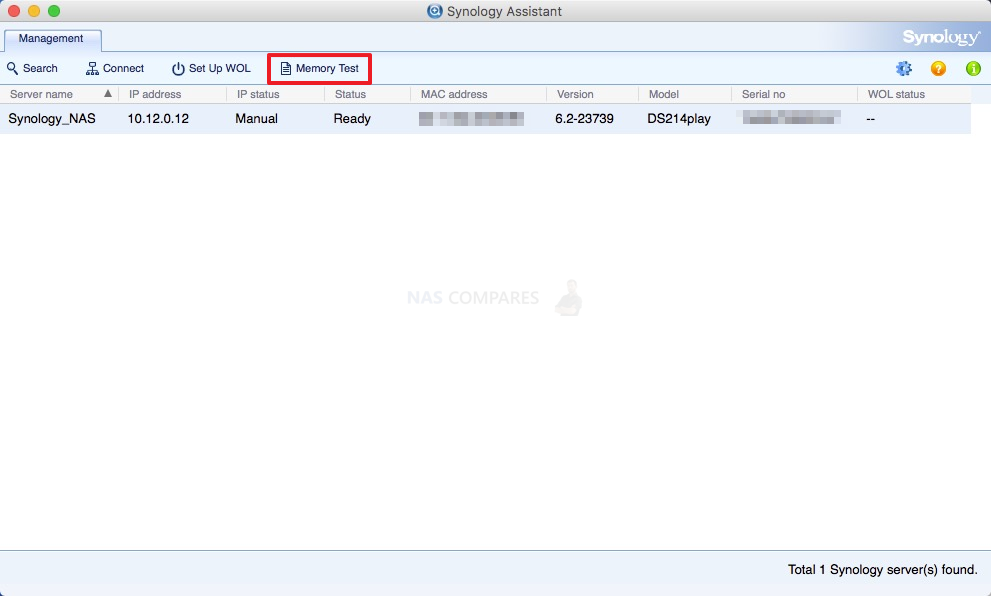
- Select the device where you wish to run the test and click Memory Test.

- Select the device where you wish to run the test and click Memory Test.
During the memory test, your Synology NAS will be rebooted. It will recover after another reboot if its memory is normal and passes the test. However, if the memory test fails to finish or shows that there is an error, the memory may be faulty. In this case, you are strongly recommended to return your Synology NAS for repair. Just in case you have installed a non-Synology memory module, please remove it and rerun the memory test. Though once again you should remember that Synology do not recommend using memory modules that are not from Synology themselves, so this test may not be indicative of the health of unofficial memory in your Synology NAS. Alternatively,you can perform as many actions and processes as possible (scans, copy/pastes, thumbnail generation, transcode a 4K file, RAID changes, synchronisation, etc) at once to see how the task manager and resource monitor behaves in the Synology DS423+. It should spike each time and at a greater height as you do more and more and once it exceeds the memory you had previously installed, this is a good confirmation that the installation is working fine.
How Much RAM Do You Need in Your NAS?
A Buyer's Guide to Travel Routers - GET IT RIGHT, FIRST TIME
Jonsbo N6 DIY NAS Case Review
The Best Bits (and Worst Bits) of NAS of 2025!
Minisforum MS-02 Ultra Review
Minisforum N5 NAS, 6 Months Later - Better, Worse, the Same?
Access content via Patreon or KO-FI
Discover more from NAS Compares
Subscribe to get the latest posts sent to your email.


DS224+ with Kingston KCP426SD8/16 (1 x 16GB, 2666 MHz, DDR4-RAM, SO-DIMM) works perfect. Ensure the RAM is sitting tight and correct in module holder by 2x clicks!
Hi! I have tested two models of RAM on my new DS423+:
Crucial RAM CT8G4SFRA266 8Go DDR4 2666MHz CL19 (https://www.amazon.fr/gp/product/B08C56KXQJ/ref=ppx_yo_dt_b_asin_title_o02_s00?ie=UTF8&psc=1) => KO, blue led always blinking…
SABRENT RAM 8Go DDR4 3200MHz So-dimm (https://www.amazon.fr/gp/product/B09XJGCM3T/ref=ppx_yo_dt_b_asin_title_o00_s00?ie=UTF8&psc=1): OK no issue and RAM test form Synology Assistant OK
=> so 2GB + 8GB 🙂
Thank you for your article
Samsung M471A5244CB0-CWE 4GB works in DS423+