


A Guide to Installing Plex Media Server on your Synology NAS with the DSM 7
If you have been looking at buying a NAS drive for Plex to use as your own private Netflix, then there is a very good chance that you have heard the name ‘Synology’. They are the brand that produces some of the most user-friendly, yet powerfully efficient (yes, that is a thing!) servers in the market in 2022 and are often a highly recommended choice for setting up a slick, polished media streaming solution that uses YOUR movies/boxsets. Last year, Synology updated its system software and services platform, Diskstation Manager, from version 6.2 to 7.0 and improved a number of the system’s abilities and processes. However, the process for installing Plex media server on your Synology NAS changed, with DSM changing access privileges and defaults for 3rd party programs in order to ensure their solutions were as secure as possible. If you are running a Synology NAS drive with DSM 6.2 and are wondering how to install Plex Media Server, it is still remarkably straight forward and a full video walkthrough guide on this can be found HERE. However, those of you who have the most recent DSM7 upgrade (with DSM 7.01 and 7.1 already rolling out over 2022 gradually) will have found that the process for installing Plex has changed noticeably. So, today I wanted to walk you through, step by step, how to install Plex on a DSM 7 Synology NAS from beginning to end and ensure you get it right, first time. Alternatively, there is a video at the bottom of the page that will walk you through even quicker. Thanks for reading and I hope you enjoy this guide.
Plex Installation Guide on the DSM 7.0
Installing Plex on a NAS with DSM 7.0 is actually VERY similar to that of installing it on a DSM 6.2 Synology NAS, however, there are a few small changes in the process which allow Plex Media Server to access the correct directories. Previously these steps might be needed by most people but were not directed by the application especially clearly, so having these steps integrated into the formal setup is actually quite a smart idea by Synology. Let’s begin:
Step 1 – Head To The App Center
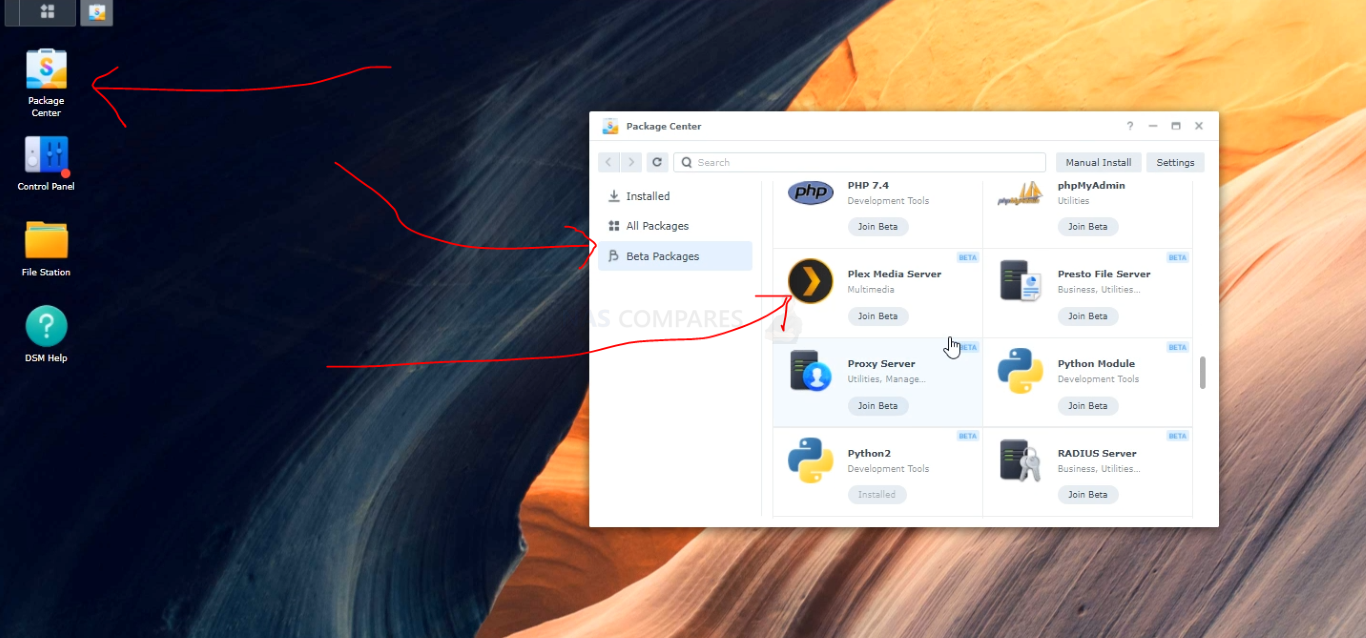

Step 2 – Go to the Beta Section
Step 3 – Find Plex Media Server and select Join Beta
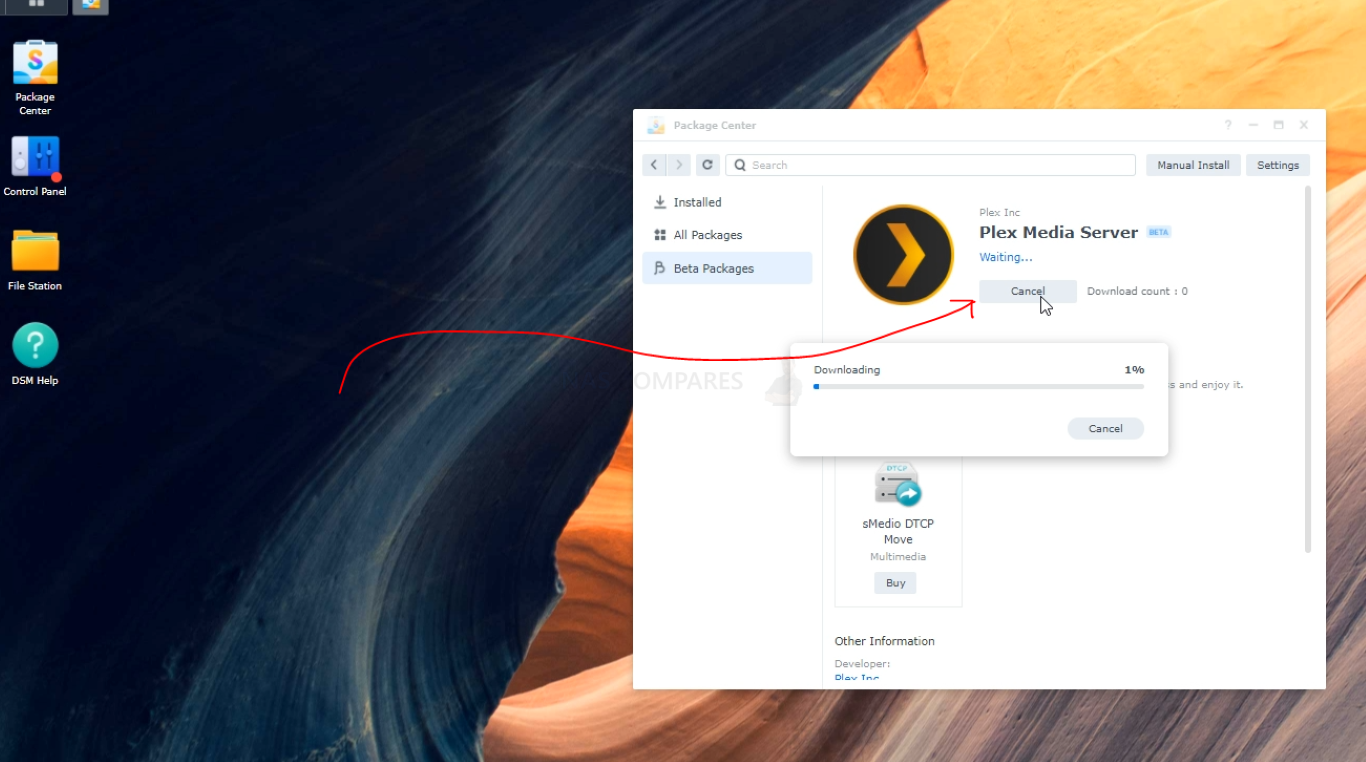
Step 4 – Install Beta Application (speed depends on Internet Connection)

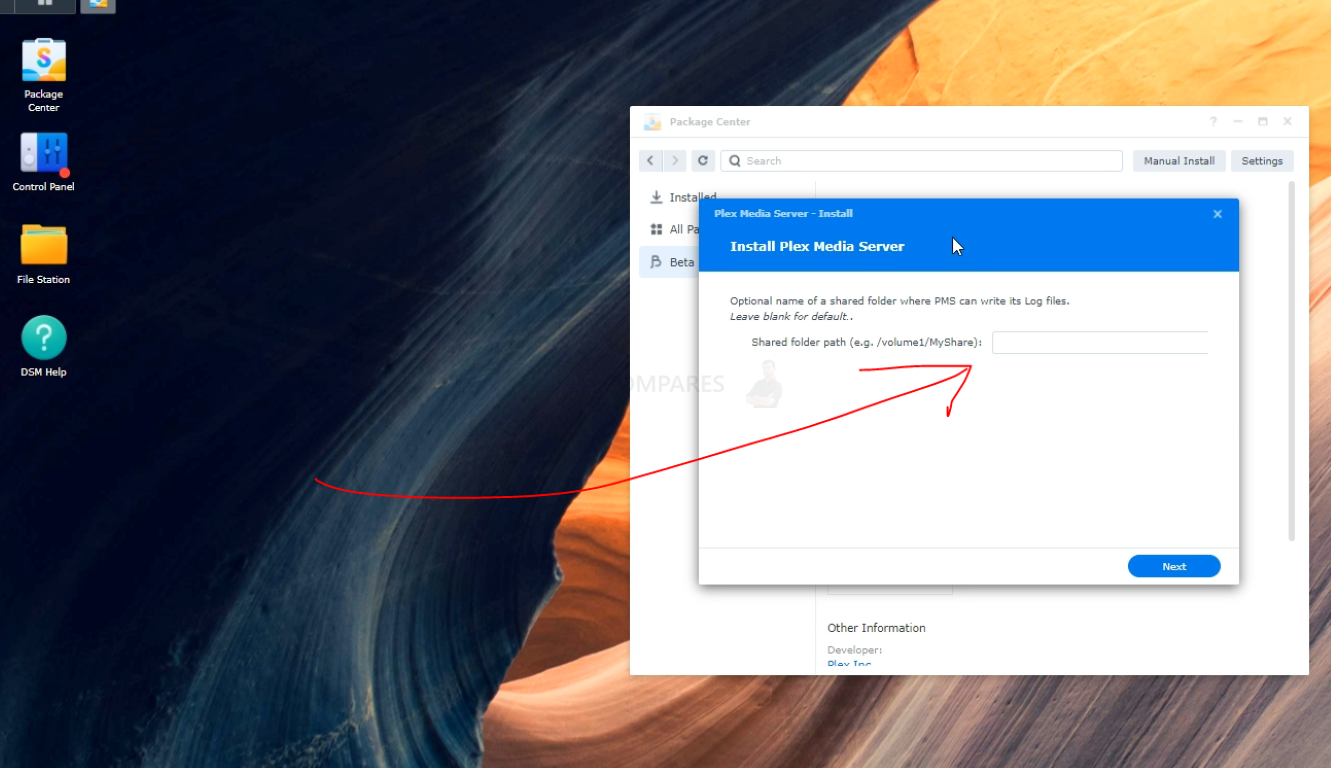
Step 5 – Select the location of where the Log Files will be installed – Can be left blank and it will save to the default directory

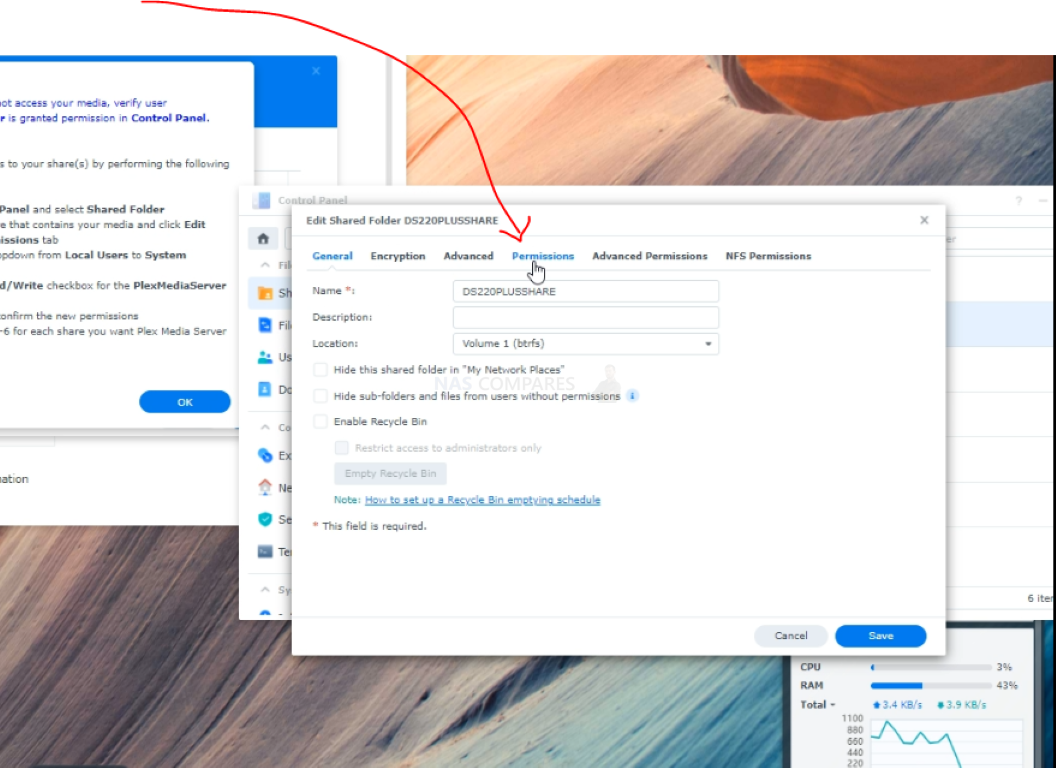
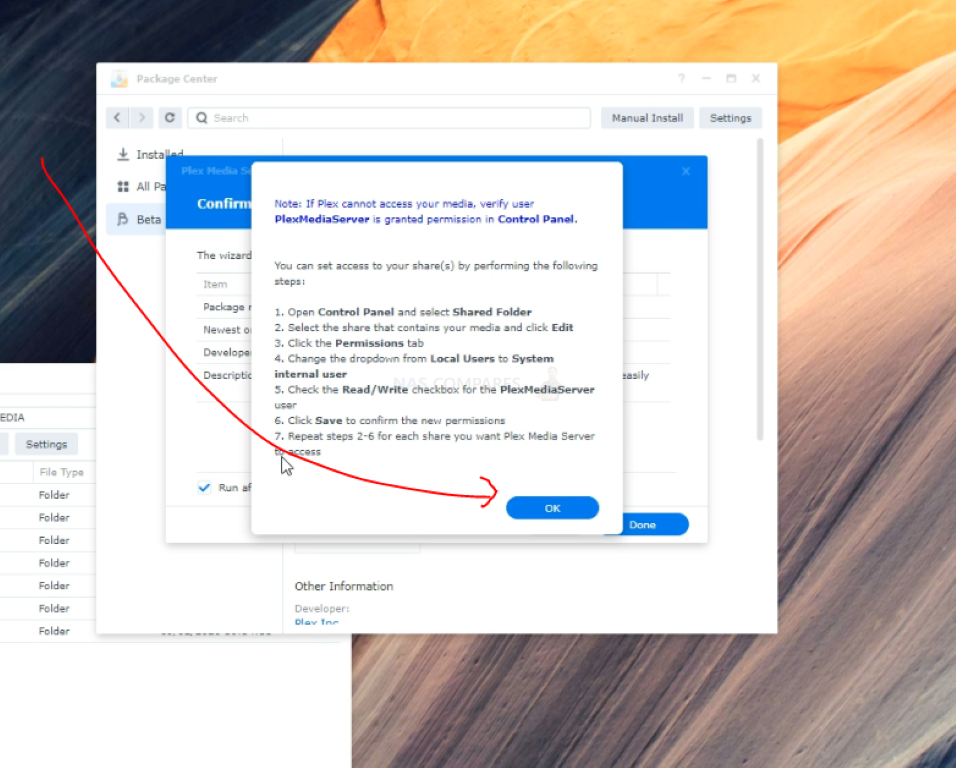
Step 6 – (This is the NEW bit) Give the Plex Media Server Application Permission to access the media directories. Head to the Control Panel
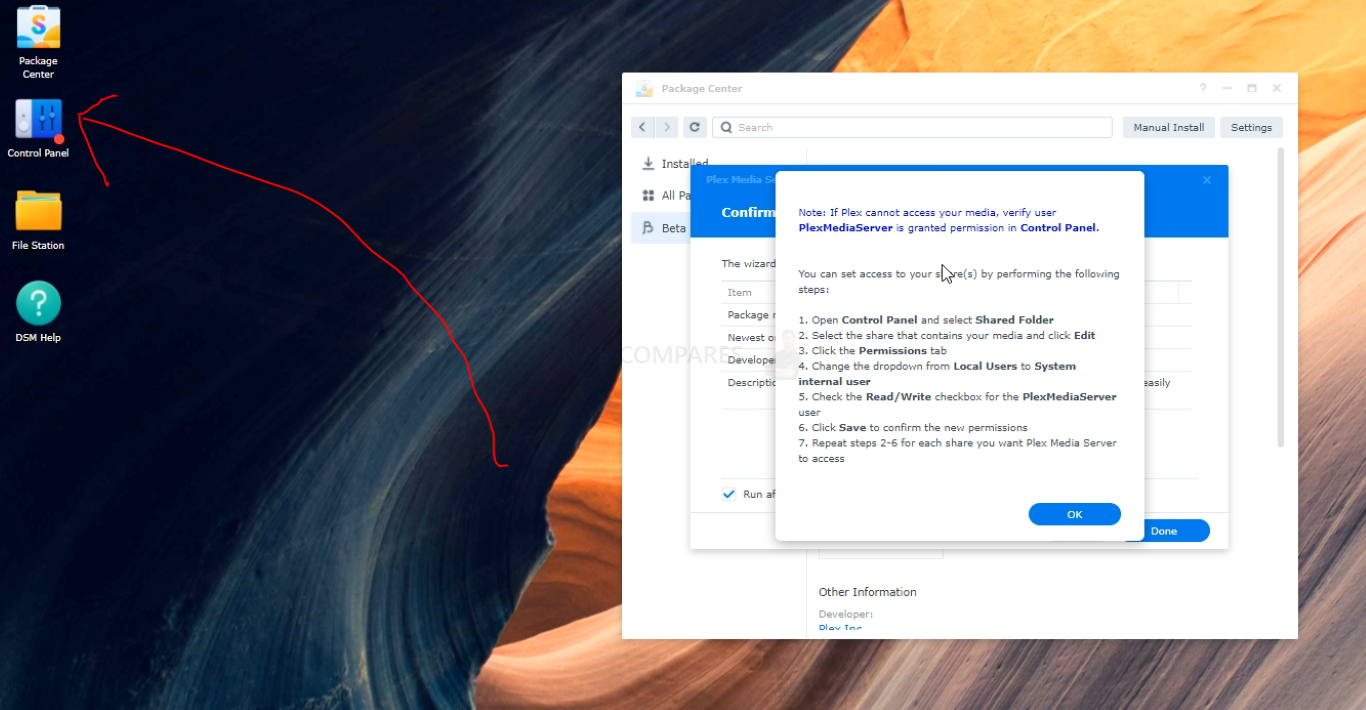

Step 7 – Then ‘Shared Folders’
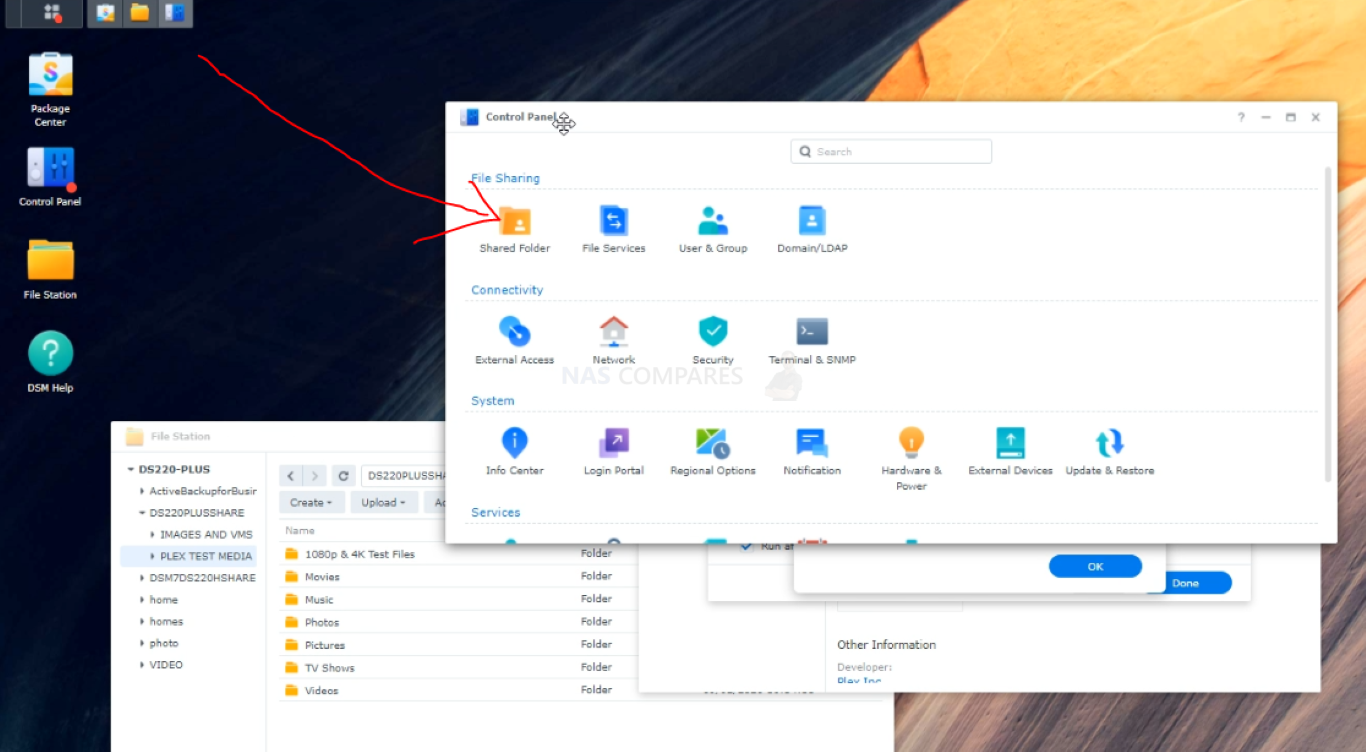

Step 8 – Select the Folder where your Media is located in. In my case it is DS220PLUSSHARE – But it will be different on your own NAS device and based on your own storage setup
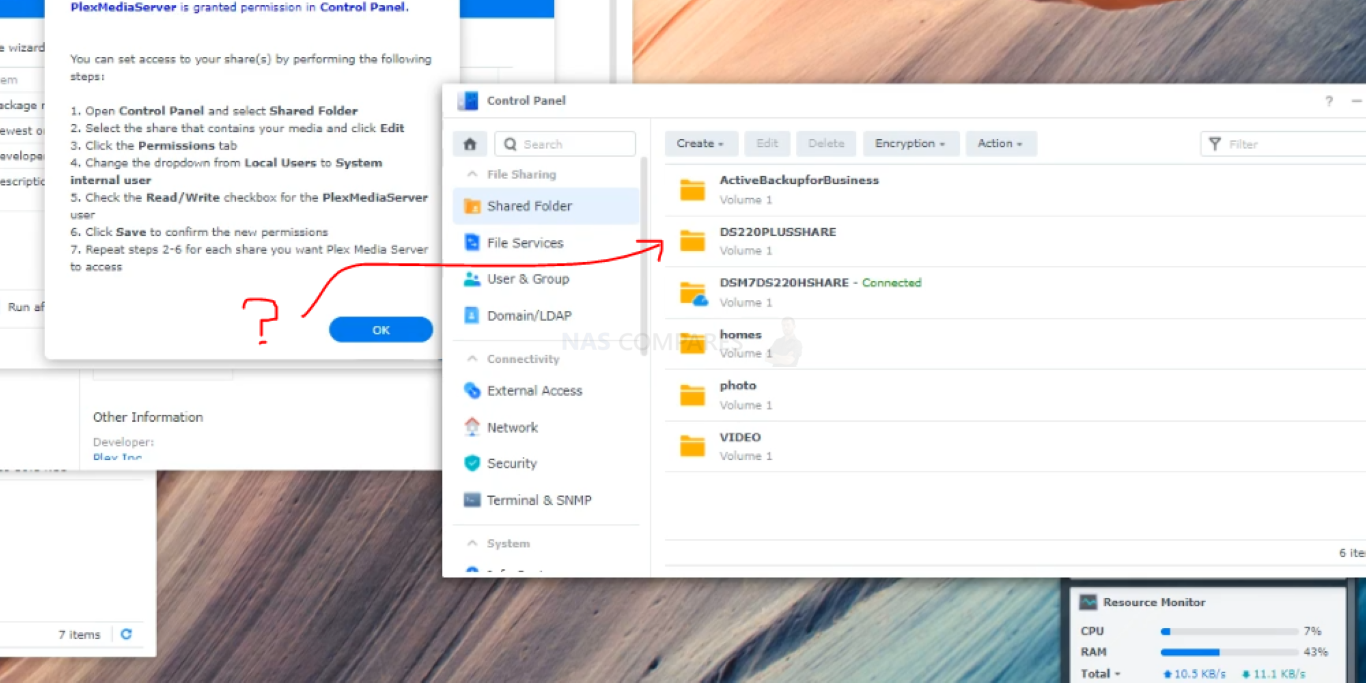

Step 9 – Select EDIT (at the top)
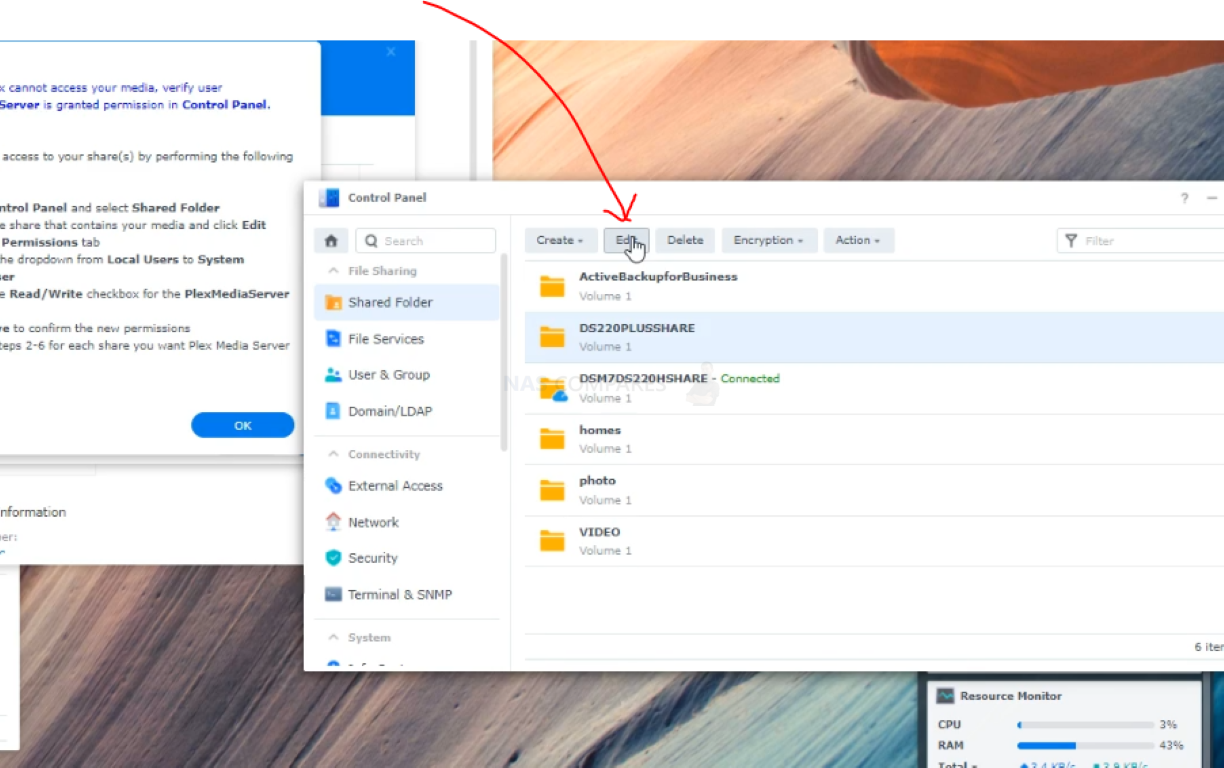

Step 10 – Then select the Permissions Tab

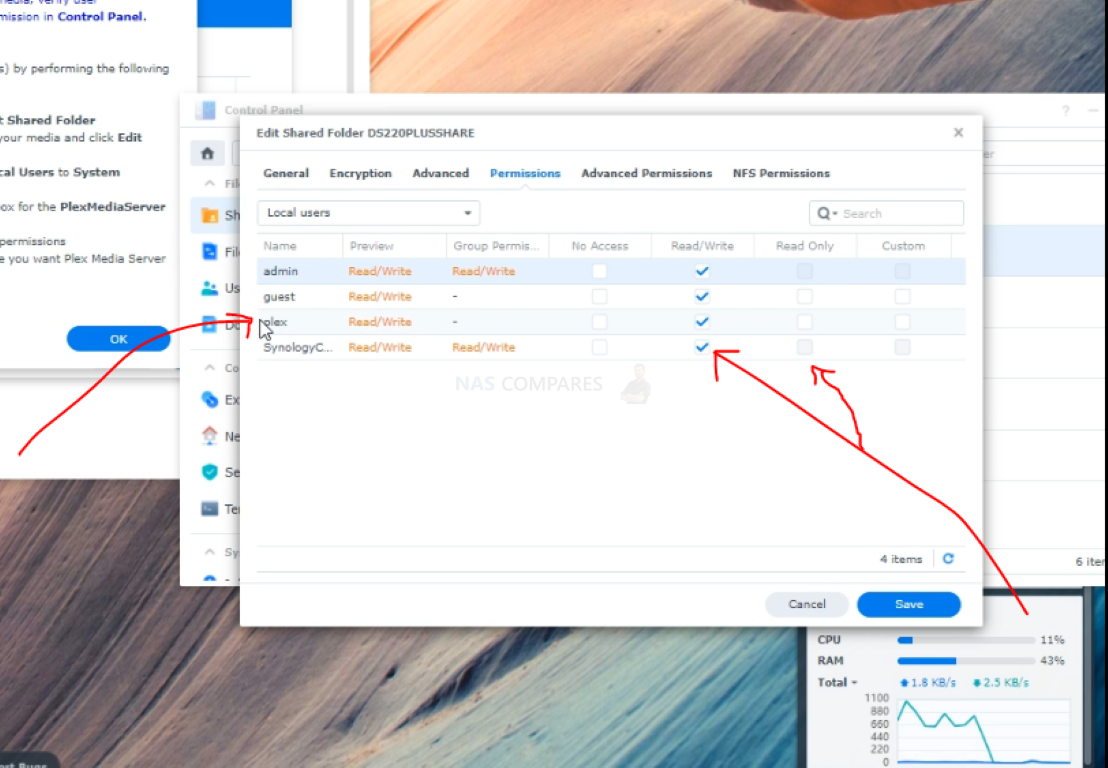
Step 11 – If Plex has created a local User (likely in DSM 6.2 . DSM 6 7.0 migration setups), make sure that the PLEX user account still has Read and/or Read/Write Access in the tick box list

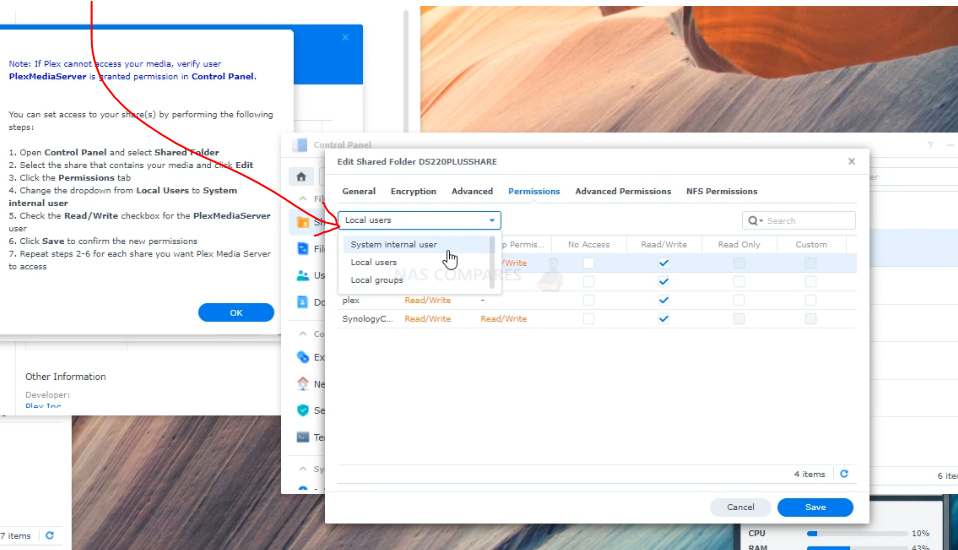
Step 12 – Then (IMPORTANT) Select the drop-down menu at the top and switch to ‘System Internal’

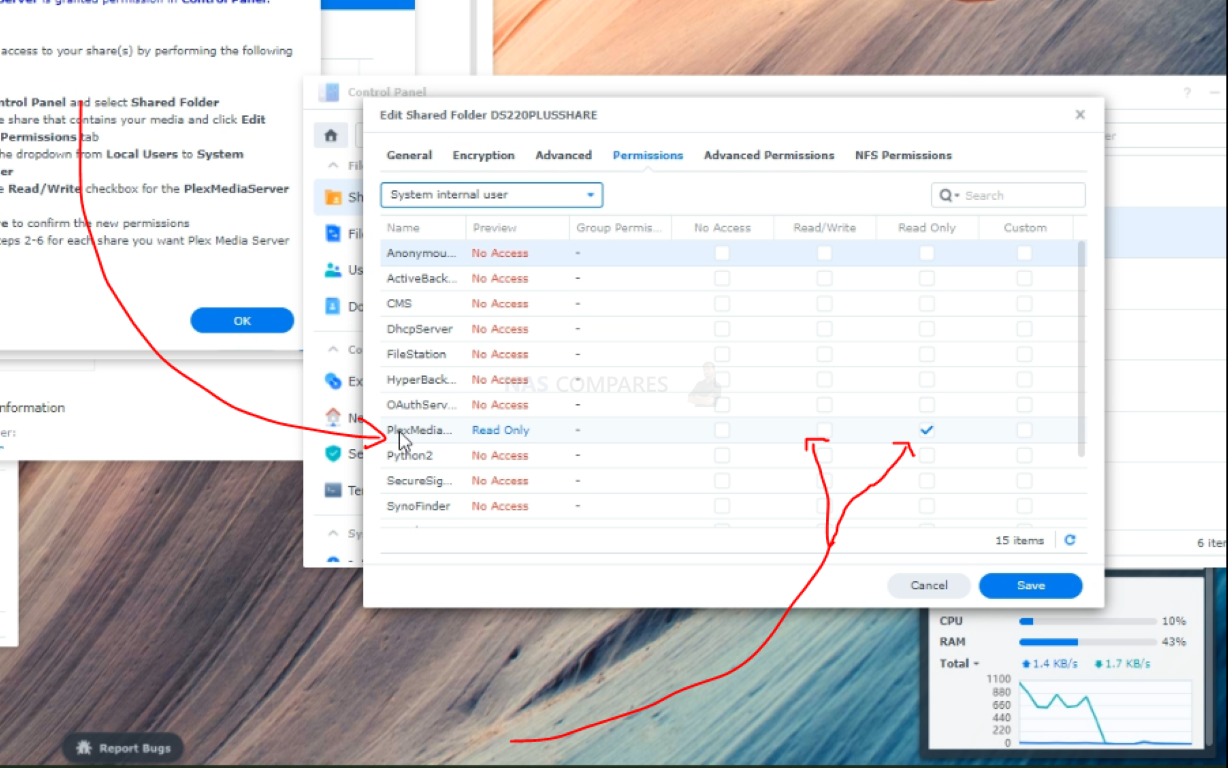
Step 13 – Scroll down to the ‘Plex’ entry and give it Read and Write Access, then save the changes

Step 14 – Head back into the App Center window and click OK on the Plex Media App install setup window

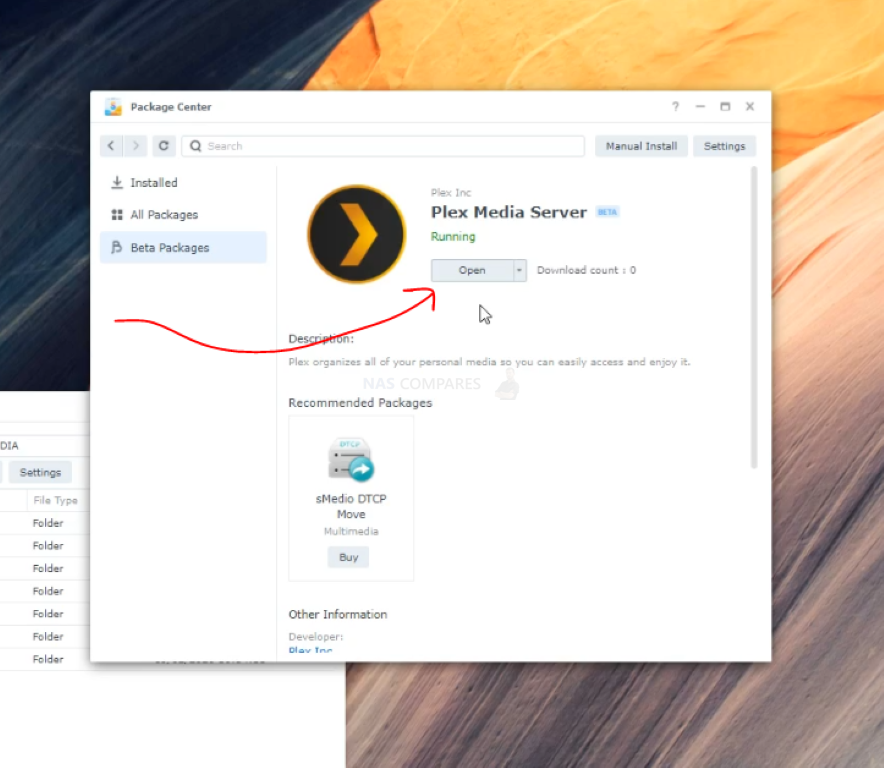
Step 15 – The Plex Media APP should be installed and you can go ahead and click OPEN in the App Center window OR open it from the main Synology App dashboard

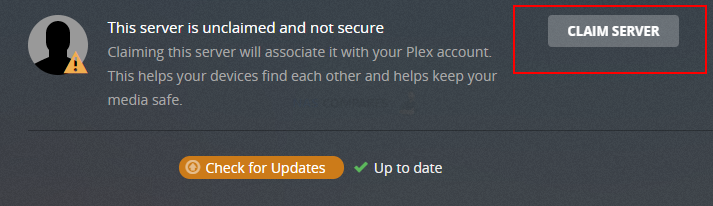
Step 16 – As this is a reinstallation of Plex Media Server on a NAS system as far as the Plex NAS app is concerned, the system may require PLEX to ‘claim’ the NAS once again, just head into the individual Server Settings and an option to CLAIM the server will appear in orange

Step 17 – Whether this is your first Plex Installation OR a DSM migration, you will likely need to establish the pathways for each multimedia file type.
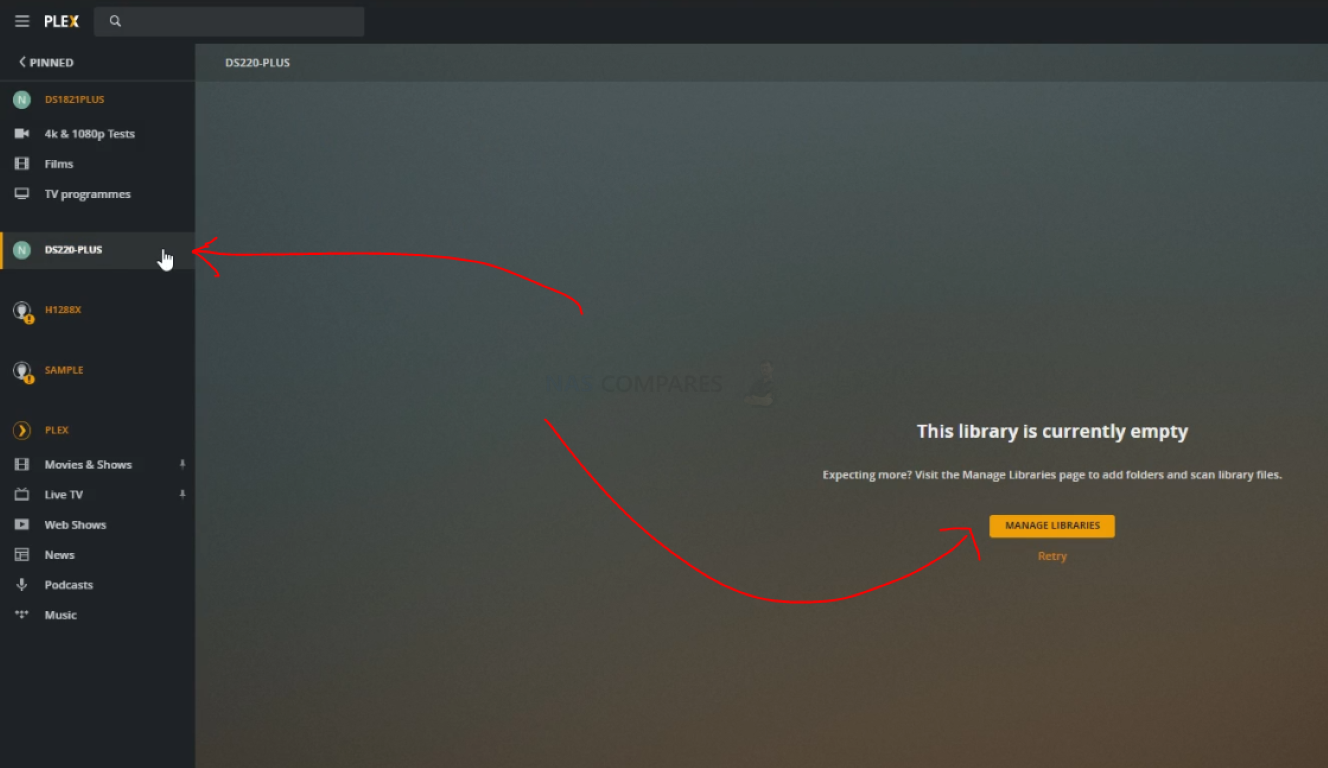

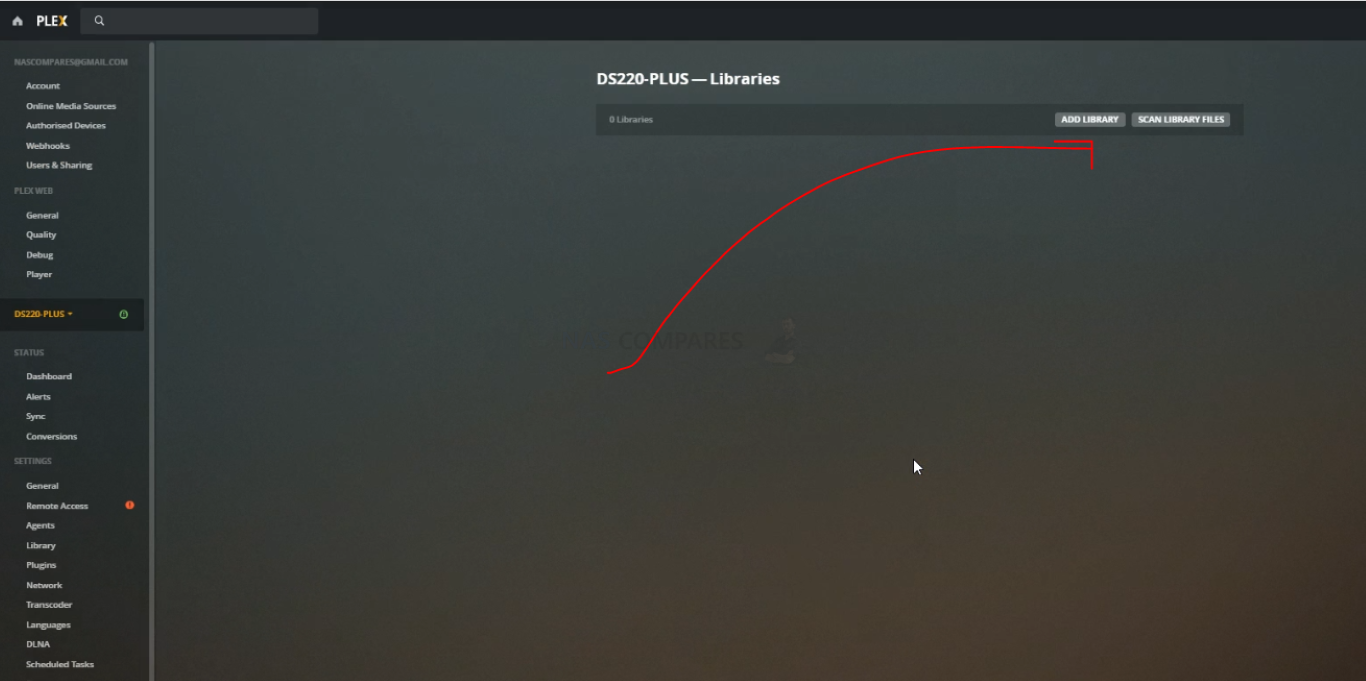
Step 18 – Just head upto the ADD LIBRARY option and a popup will appear that allows you to select each Media Type

Step 19 – Then browse the directories (that you gave the Plex Media Application permission to access) and add the media that is appropriate


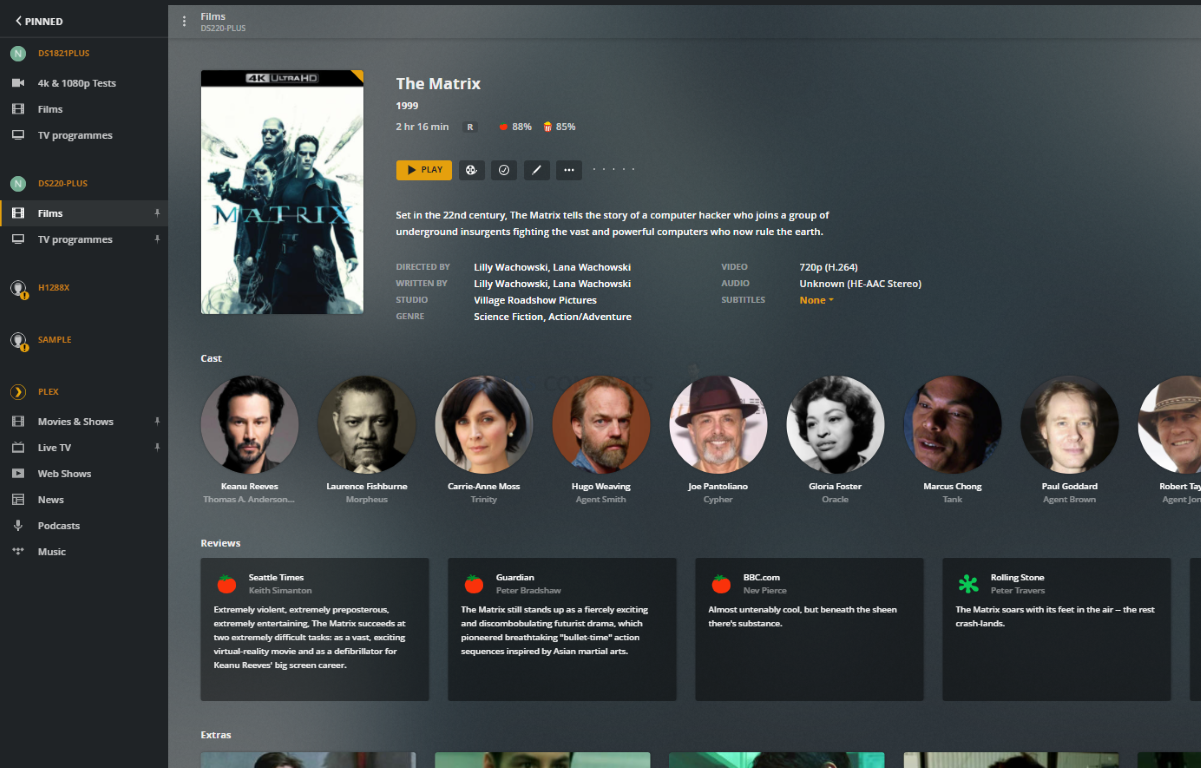
Step 20 – Now the Plex Media Server Application will scrape all the metadata from the site librarys (rotten tomatoes, IMDB, etc) and fill out all the slick PLEX GUI for your connected clients to enjoy.

And there you have it. Plex is now installed on your DSM 7 equipped NAS System. Here is a video that will guide you through the process if you prefer visuals over text!

Want to learn more about DSM 7.1 and what Synology plan for 2022? Watch my article below that covers the highlights:

If you are looking for the driver fix for the Synology NAS and Plex installation with J4025 and J4125 processors, you can find the video walkthrough and step by step guide below:
 |


📧 SUBSCRIBE TO OUR NEWSLETTER 🔔
🔒 Join Inner Circle
Get an alert every time something gets added to this specific article!
This description contains links to Amazon. These links will take you to some of the products mentioned in today's content. As an Amazon Associate, I earn from qualifying purchases. Visit the NASCompares Deal Finder to find the best place to buy this device in your region, based on Service, Support and Reputation - Just Search for your NAS Drive in the Box Below
Need Advice on Data Storage from an Expert?
Finally, for free advice about your setup, just leave a message in the comments below here at NASCompares.com and we will get back to you.


 |
 |


