


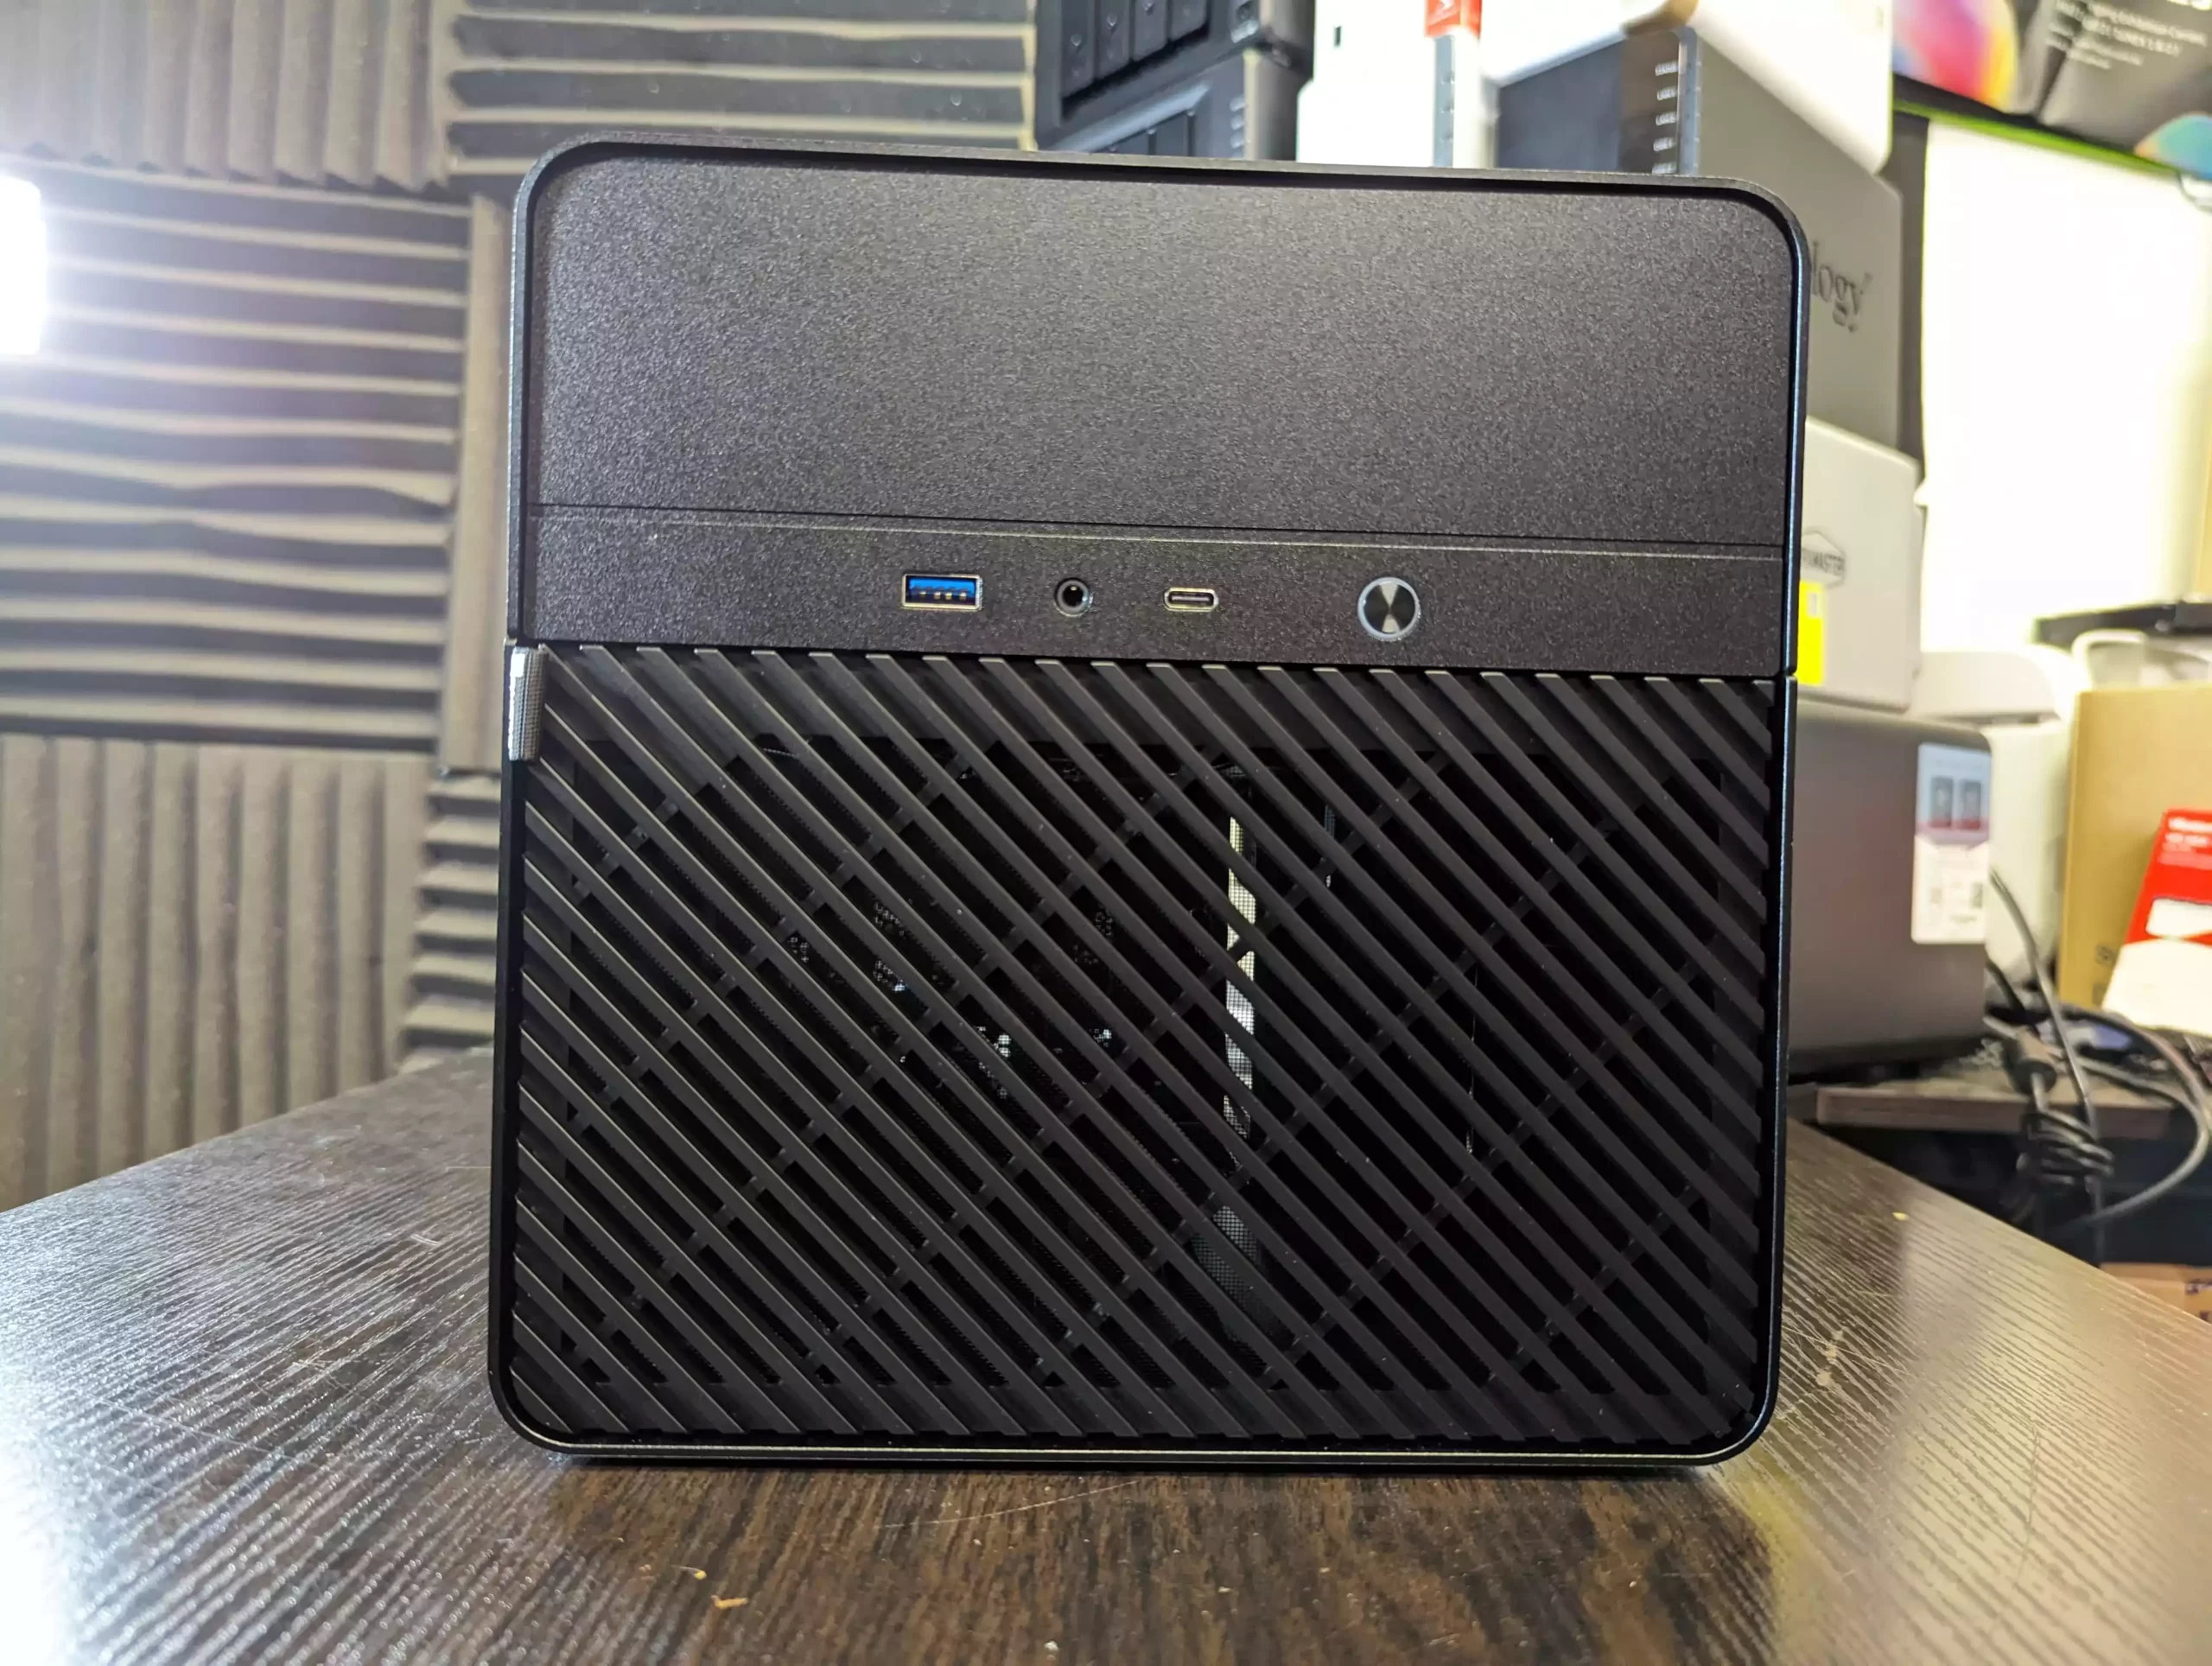
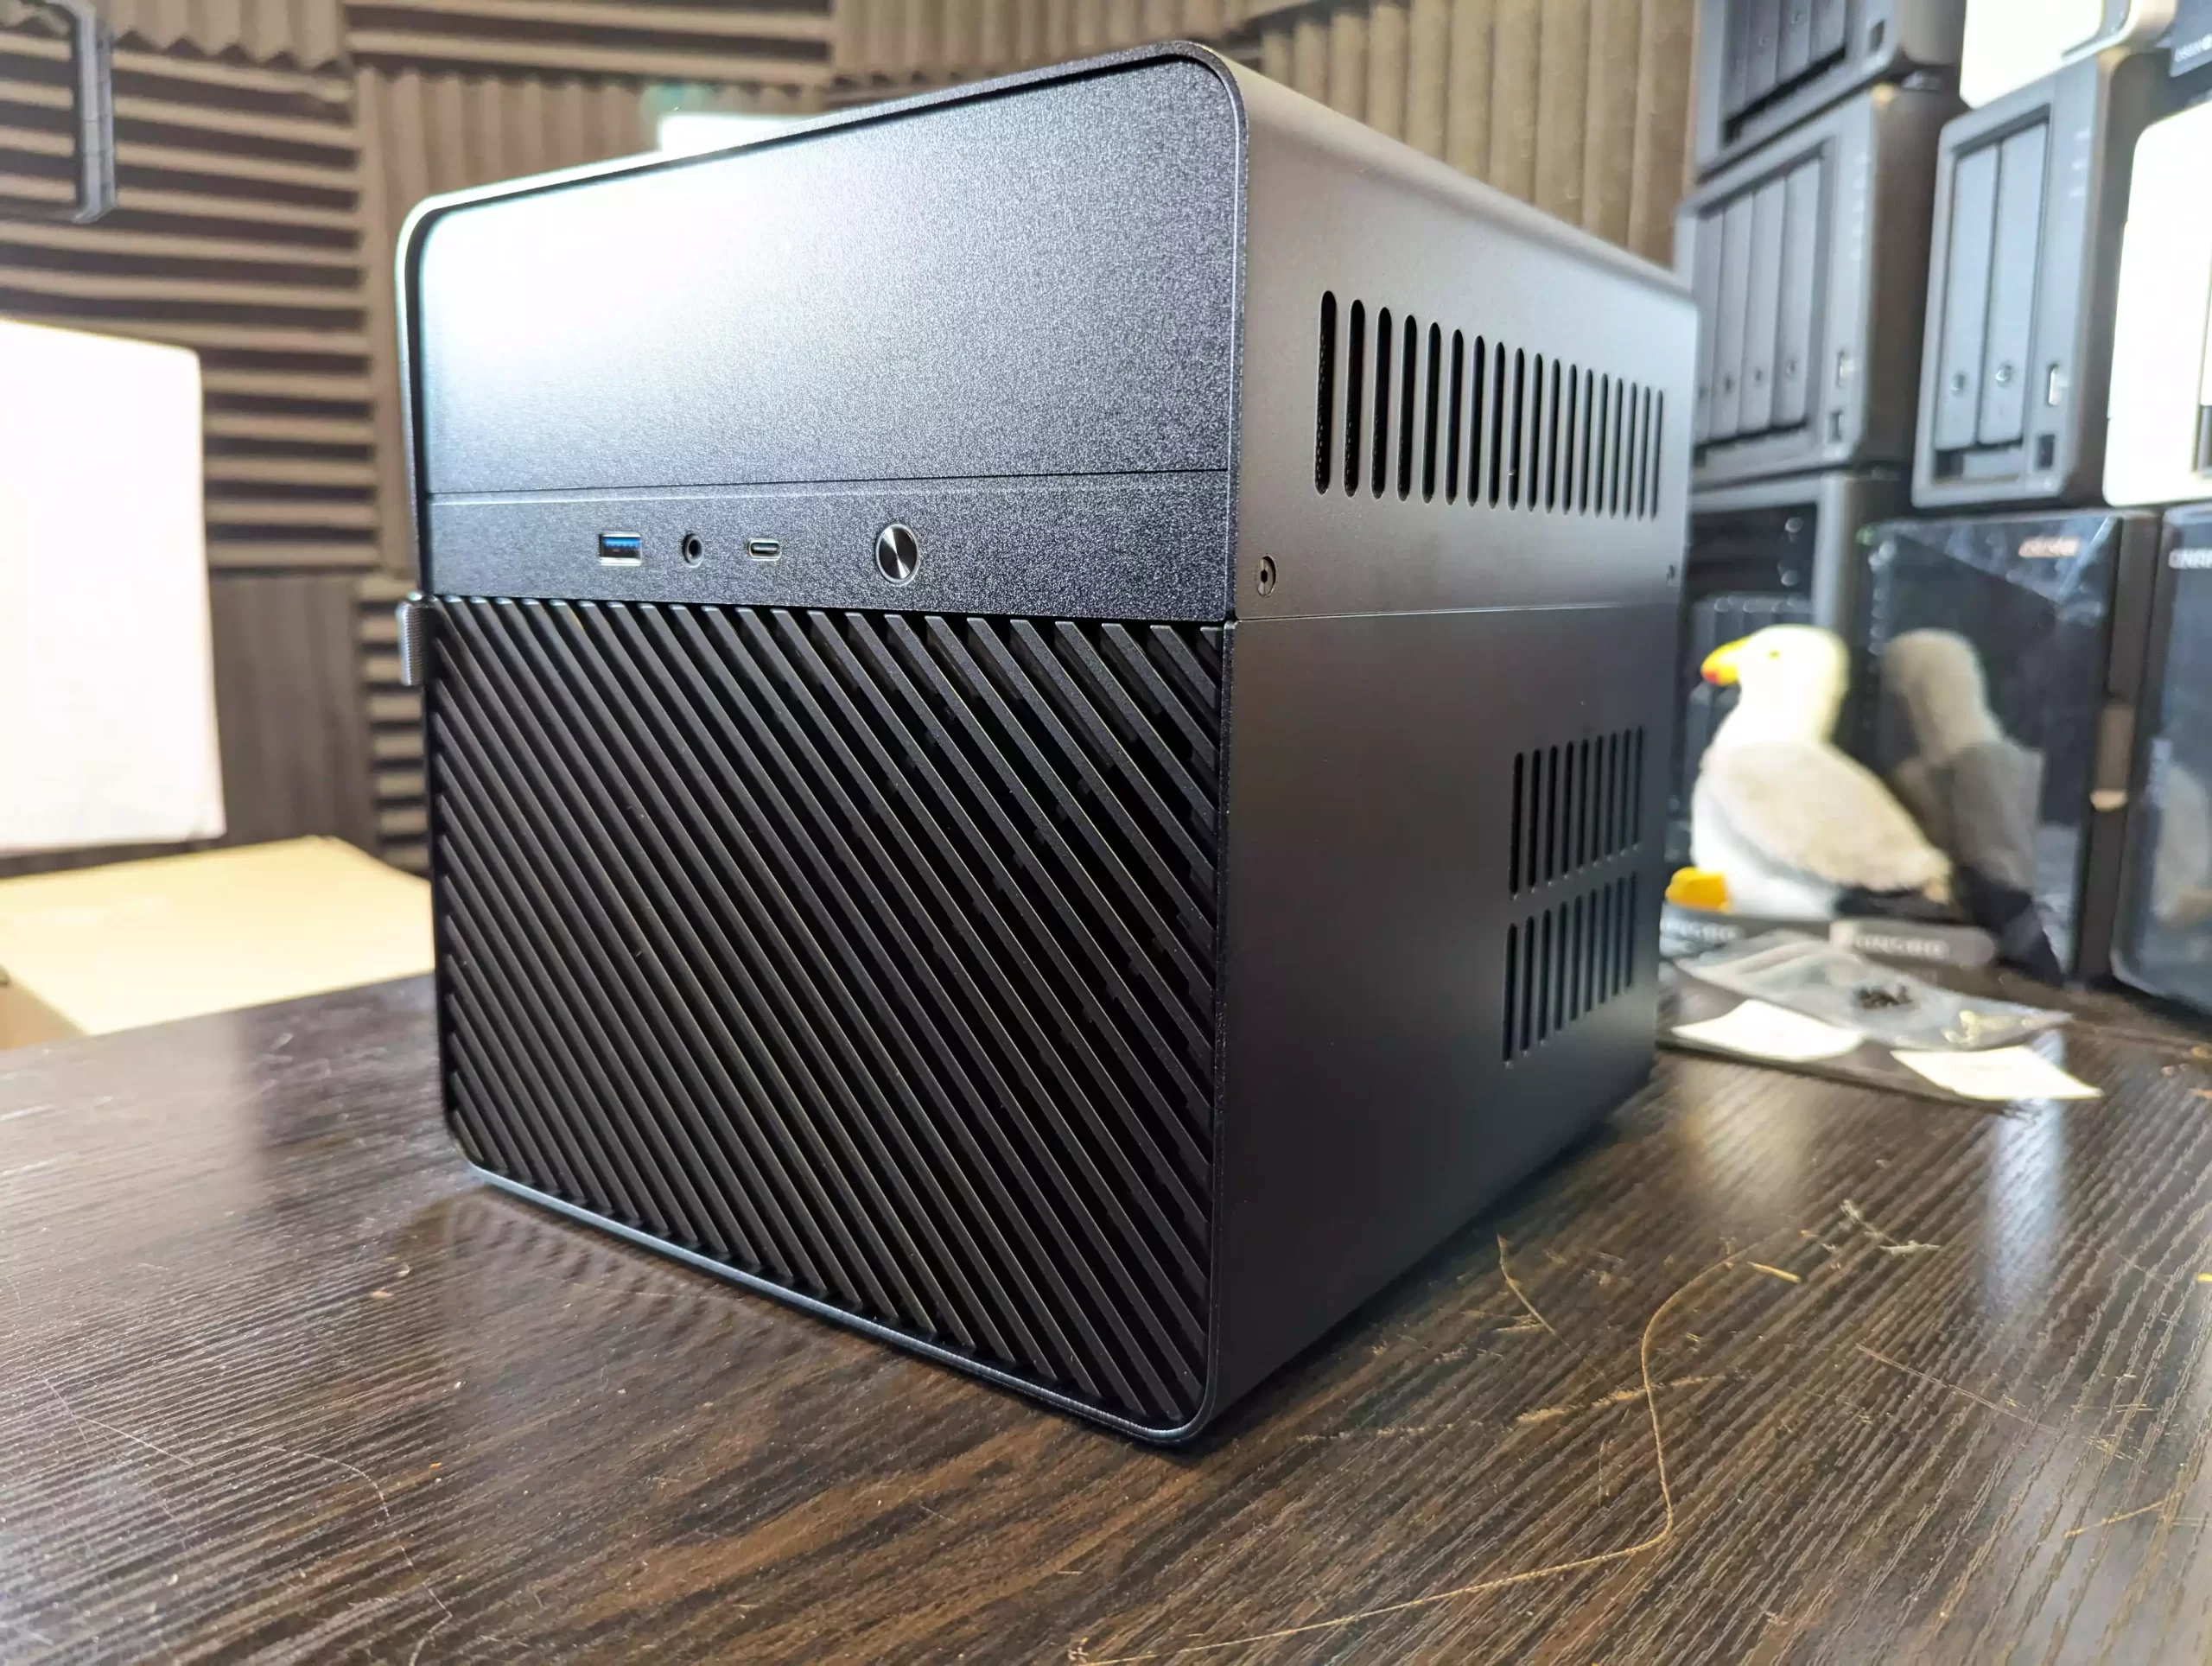
Jonsbo N2 Build with TopTon NAS Board Walkthrough
It’s almost comical now how easy it is to build your very own NAS server from scratch. Building your own server expands the boundaries of your tech understanding. A lot of this ease is attributed to the modular approach to PC and server building that has emerged in recent years. This is especially true for network-attached storage (NAS) devices. The increased availability of pre-configured server motherboards from brands like TopTon and the wider availability of server-ready cases make building your own low-cost, open-source alternative to big brands like Synology and QNAP increasingly easy. Today, I want to guide you through building the Jonsbo N2 NAS build using a cost-effective pre-built TopTon NAS board. This guide will help you finish in just over an hour and will enable you to use popular NAS software such as UnRAID and TrueNAS. Let’s begin.
Note – FULL Video Tutorial HERE on the YouTube Channel
In a Rush? Here are the full details on the Recommended Jonsbo N2 NAS Builds for $250, $500, $750 and $1000 – HERE on the blog (with parts) and HERE on YouTube:
| Jonsbo N2 + TopTon Intel n5105 Celeron / Pentium n6005 Build (+$35)
£264.64 (128GB M.2 NVMe + 4GB RAM + 400W PSU) (Optional/Swap) If you want to save some money:
£247.47 (no M.2 NVMe and Cheap PSU) Note, you need an SSD for TrueNAS OS (USB for UnRAID) |

| Jonsbo N2 + Intel Core i5 12th Gen + 16GB RAM + 10GbE Build
Total 390.44 (i5 CPU + 16GB RAM + 2x10GbE + 400W PSU + Case + Cables) |
| Jonsbo N2 + Gen4/5 MoBo + Intel Core i5 12th Gen with Int Gfx + 32GB RAM + 10GbE Build
Total £586.63 (Amazon) + £123.51 (Aliexpress) |

What You Need for the Jonsbo N2 NAS Build
Although this guide is designed for the Jonsbo N2 NAS, the range of TopTon NAS motherboard combos is diverse. Some elements of this guide might differ based on the TopTon motherboard you choose. Generally, you’ll need the following items:
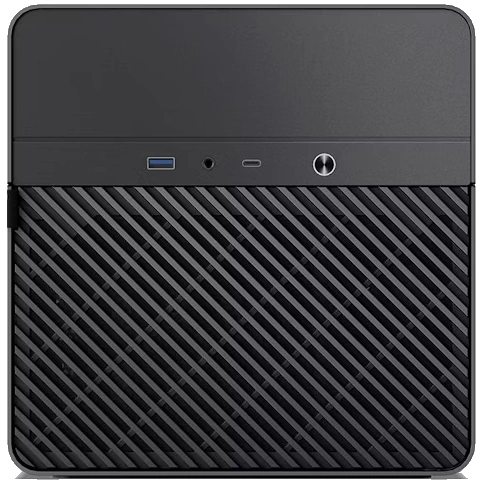
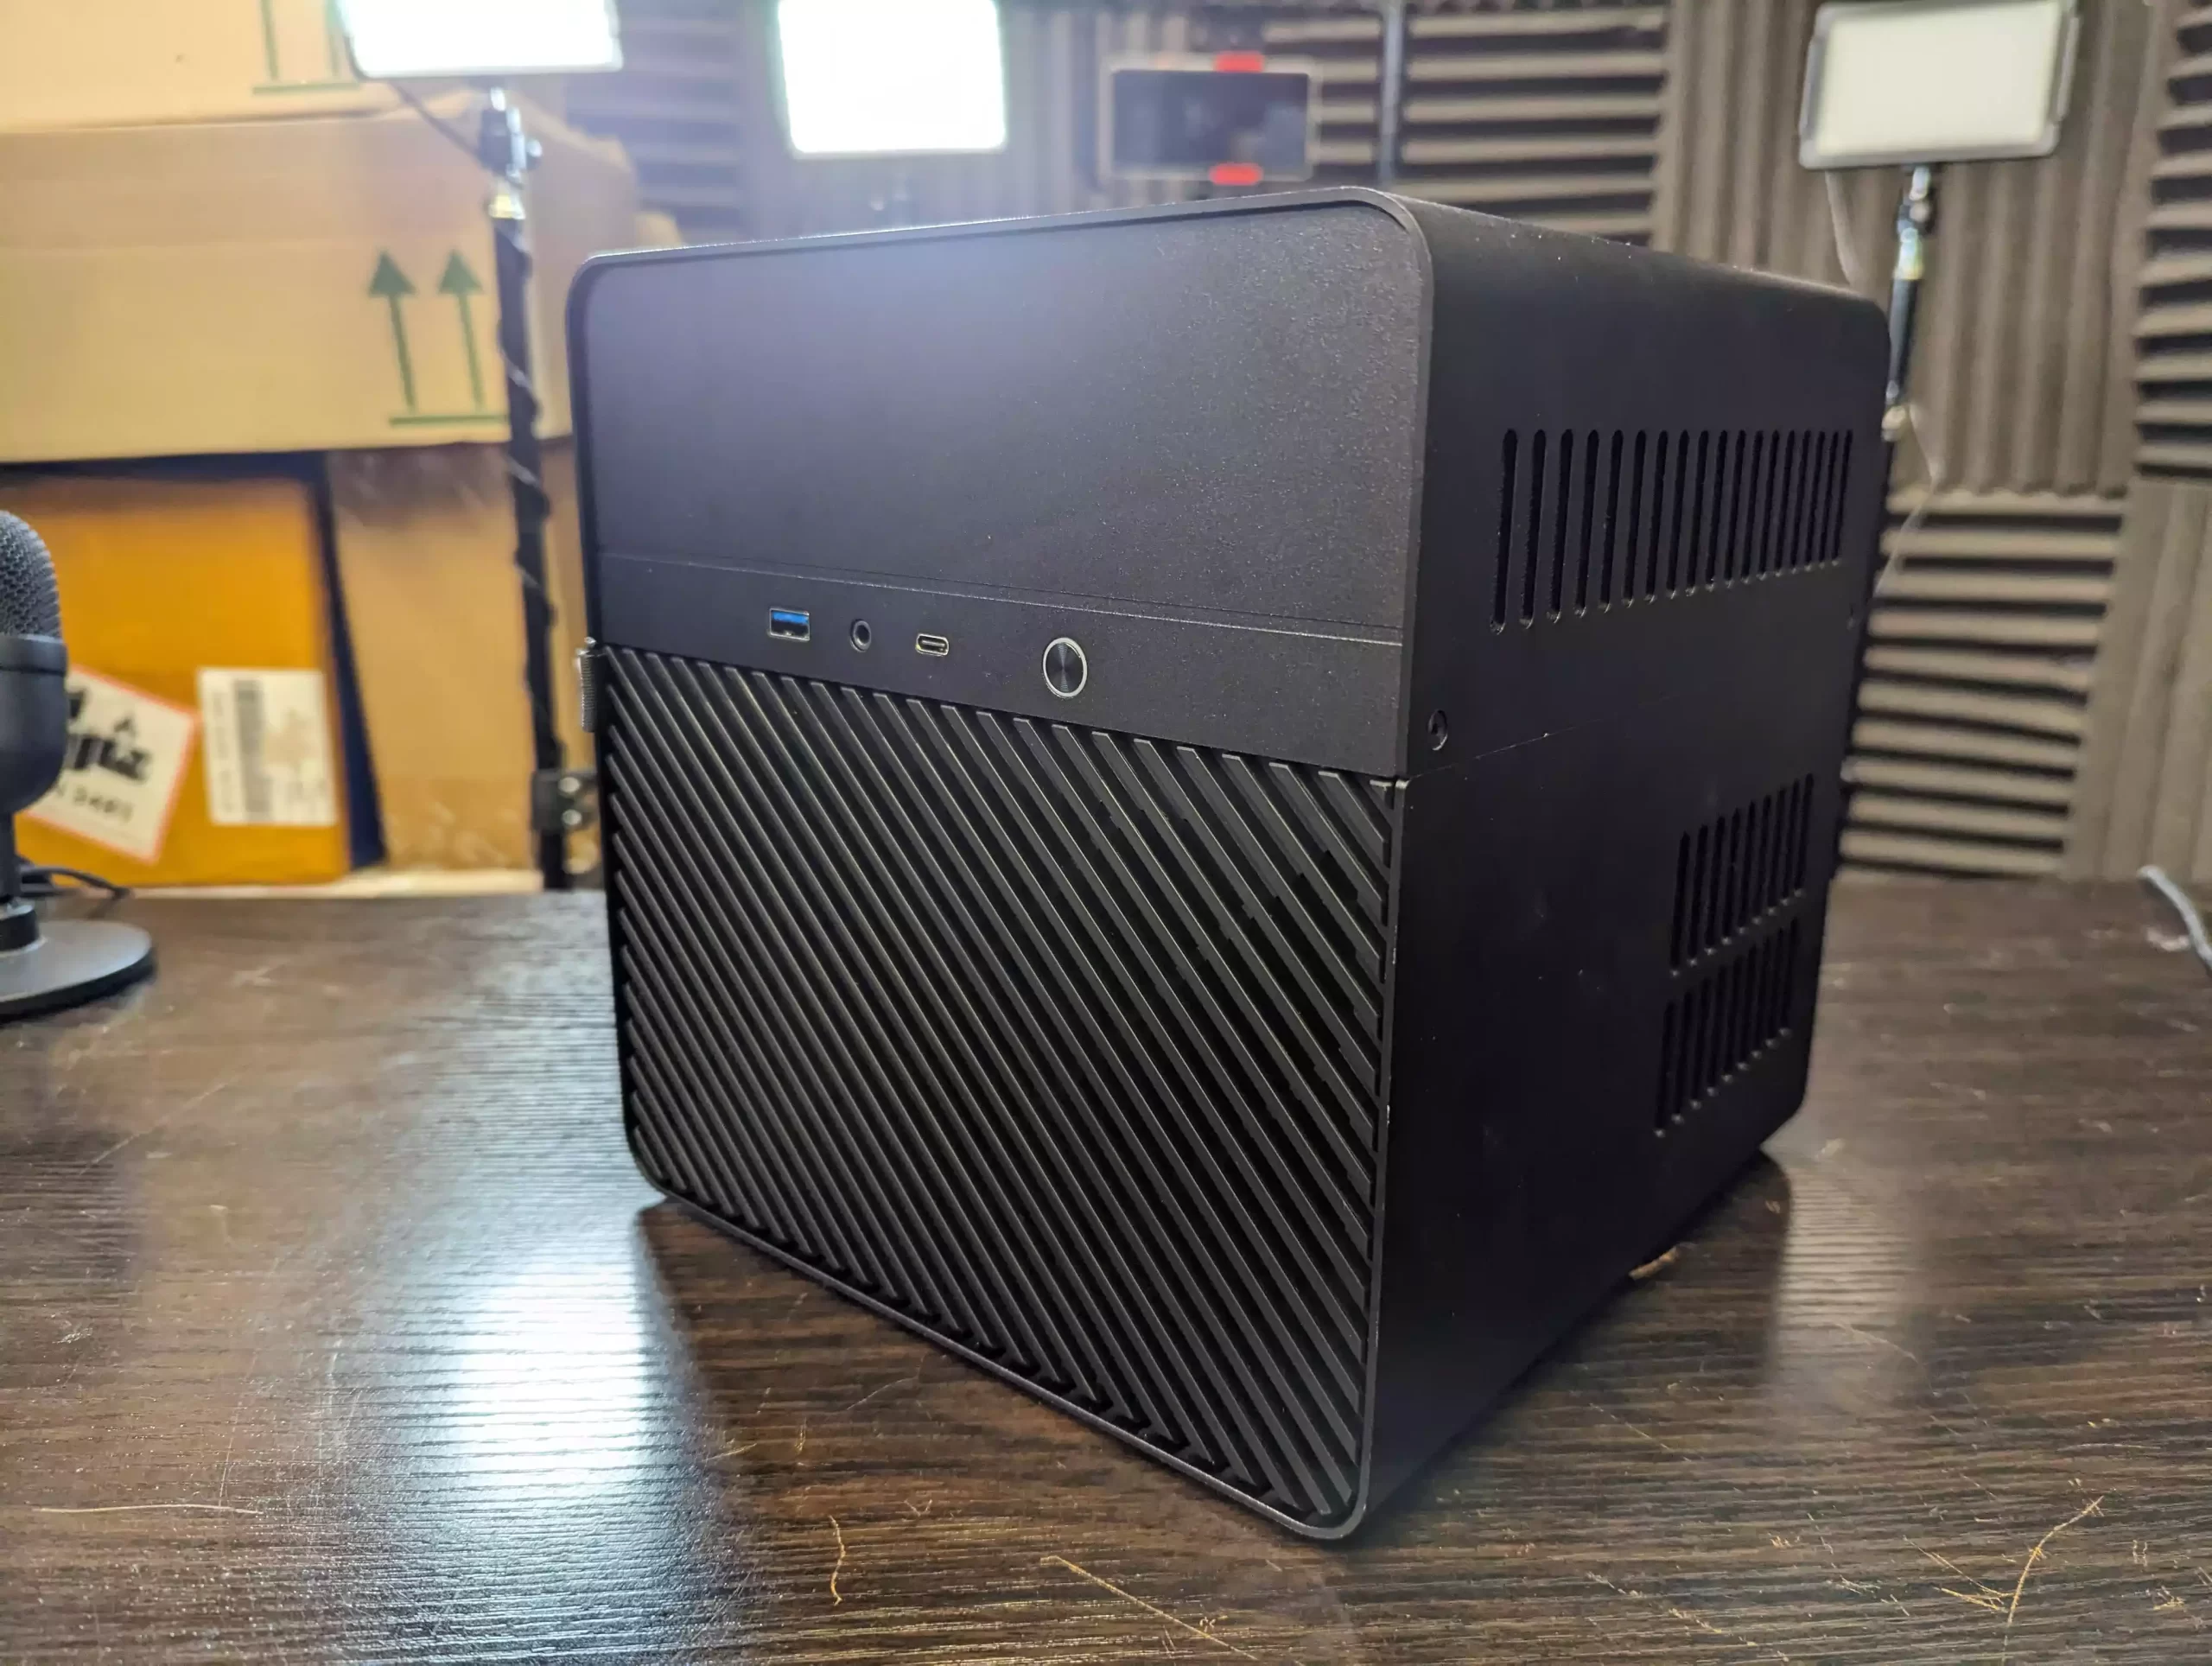
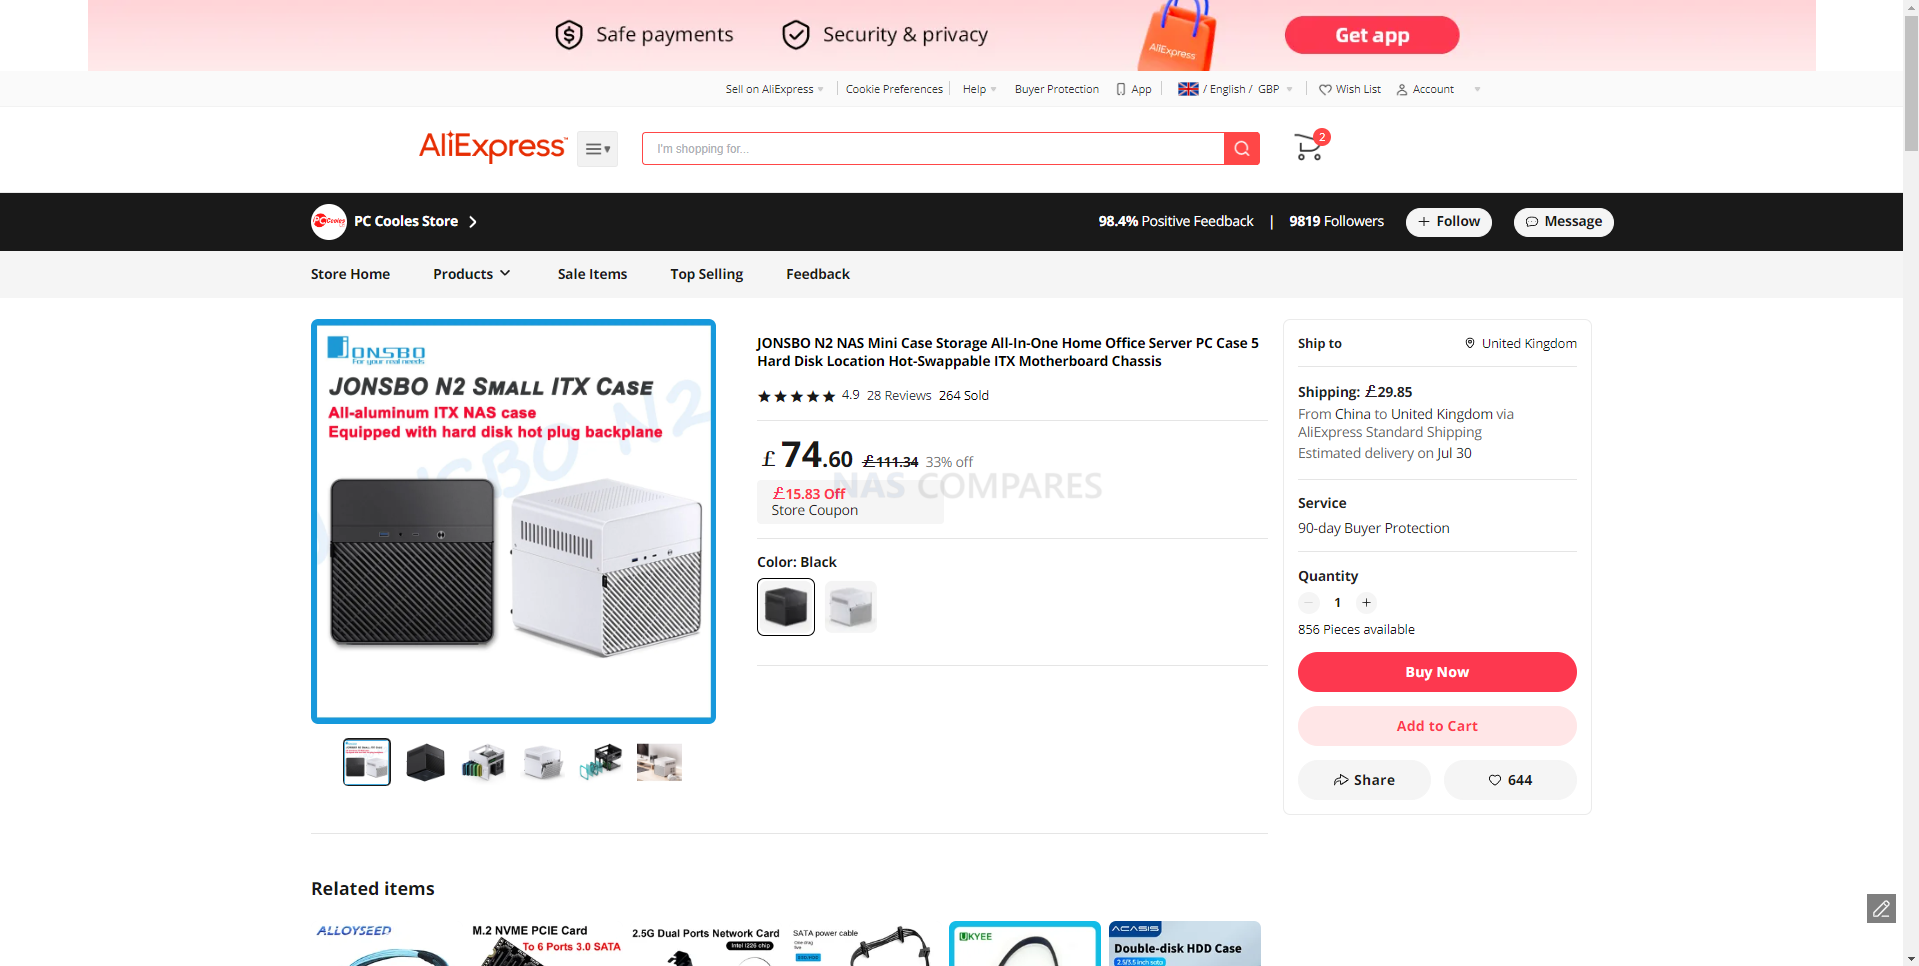
- Jonsbo N2 NAS case – HERE

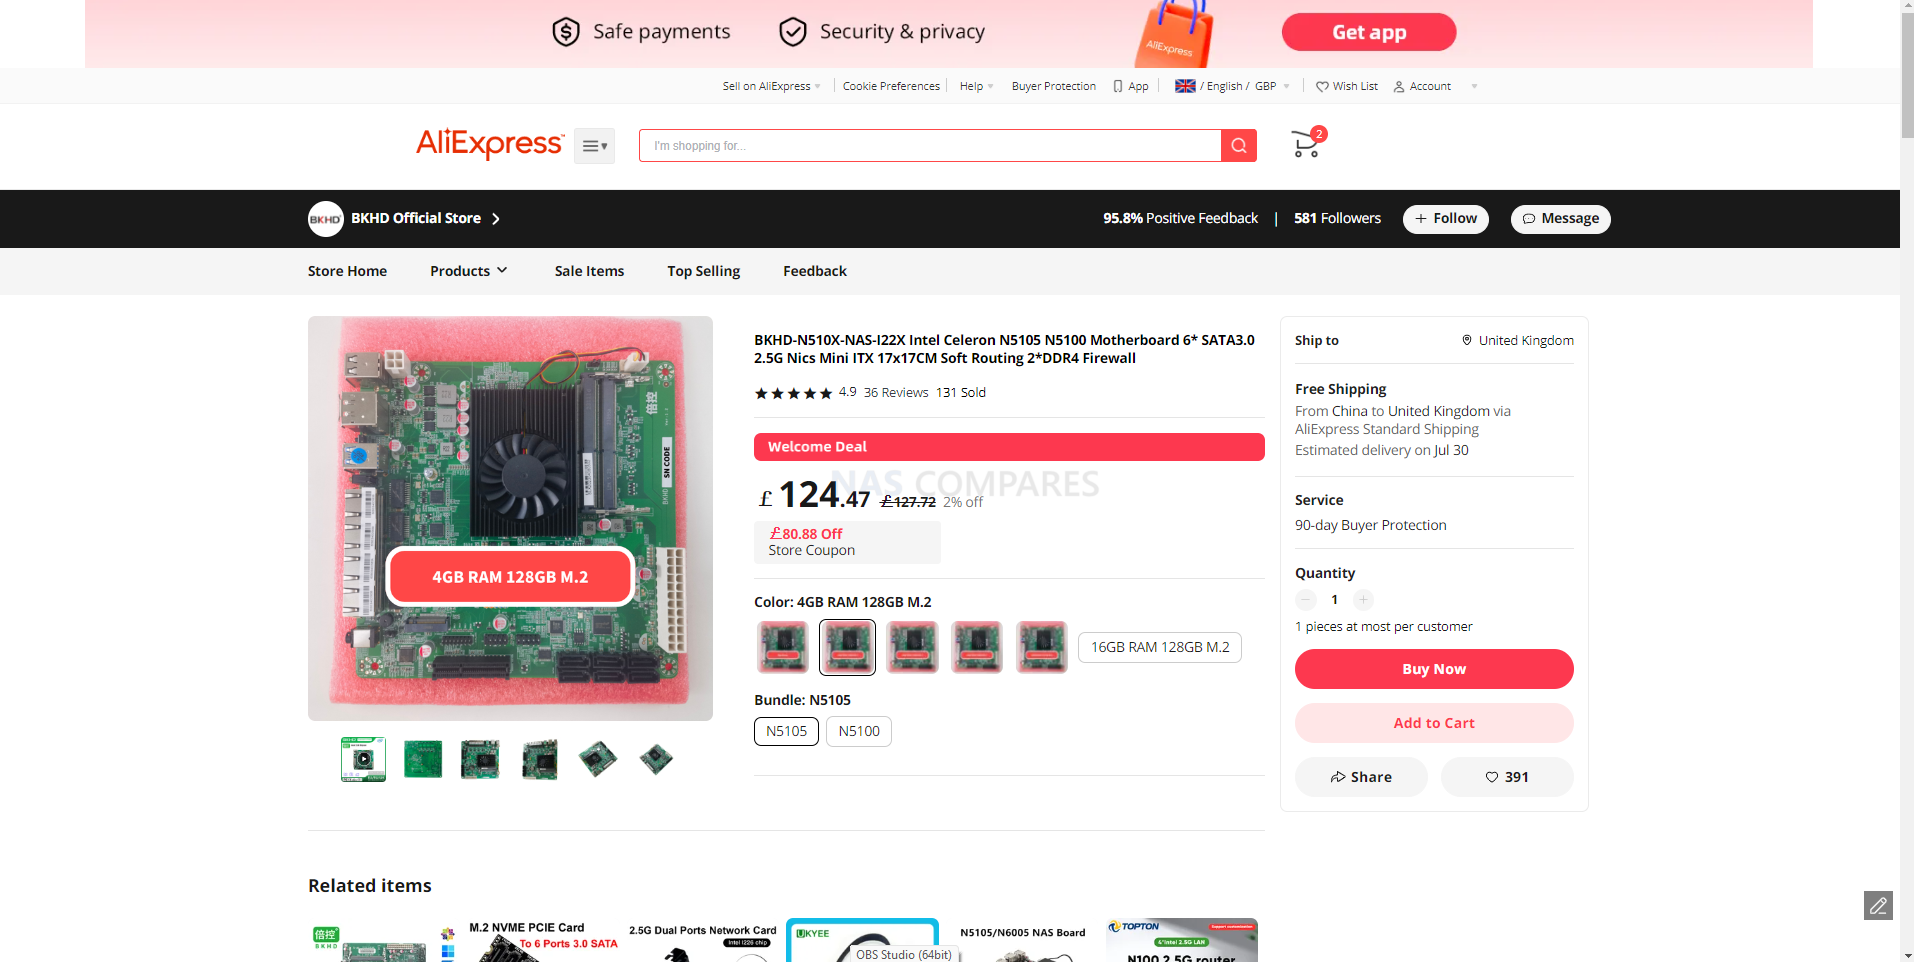
- TopTon NAS motherboard (either with memory and SSD included or purchased separately)- Amazon HERE

- Storage media (HDDs and SSDs)
- A USB drive (if you’re using UnRAID to run from or TrueNAS to install from) – HERE
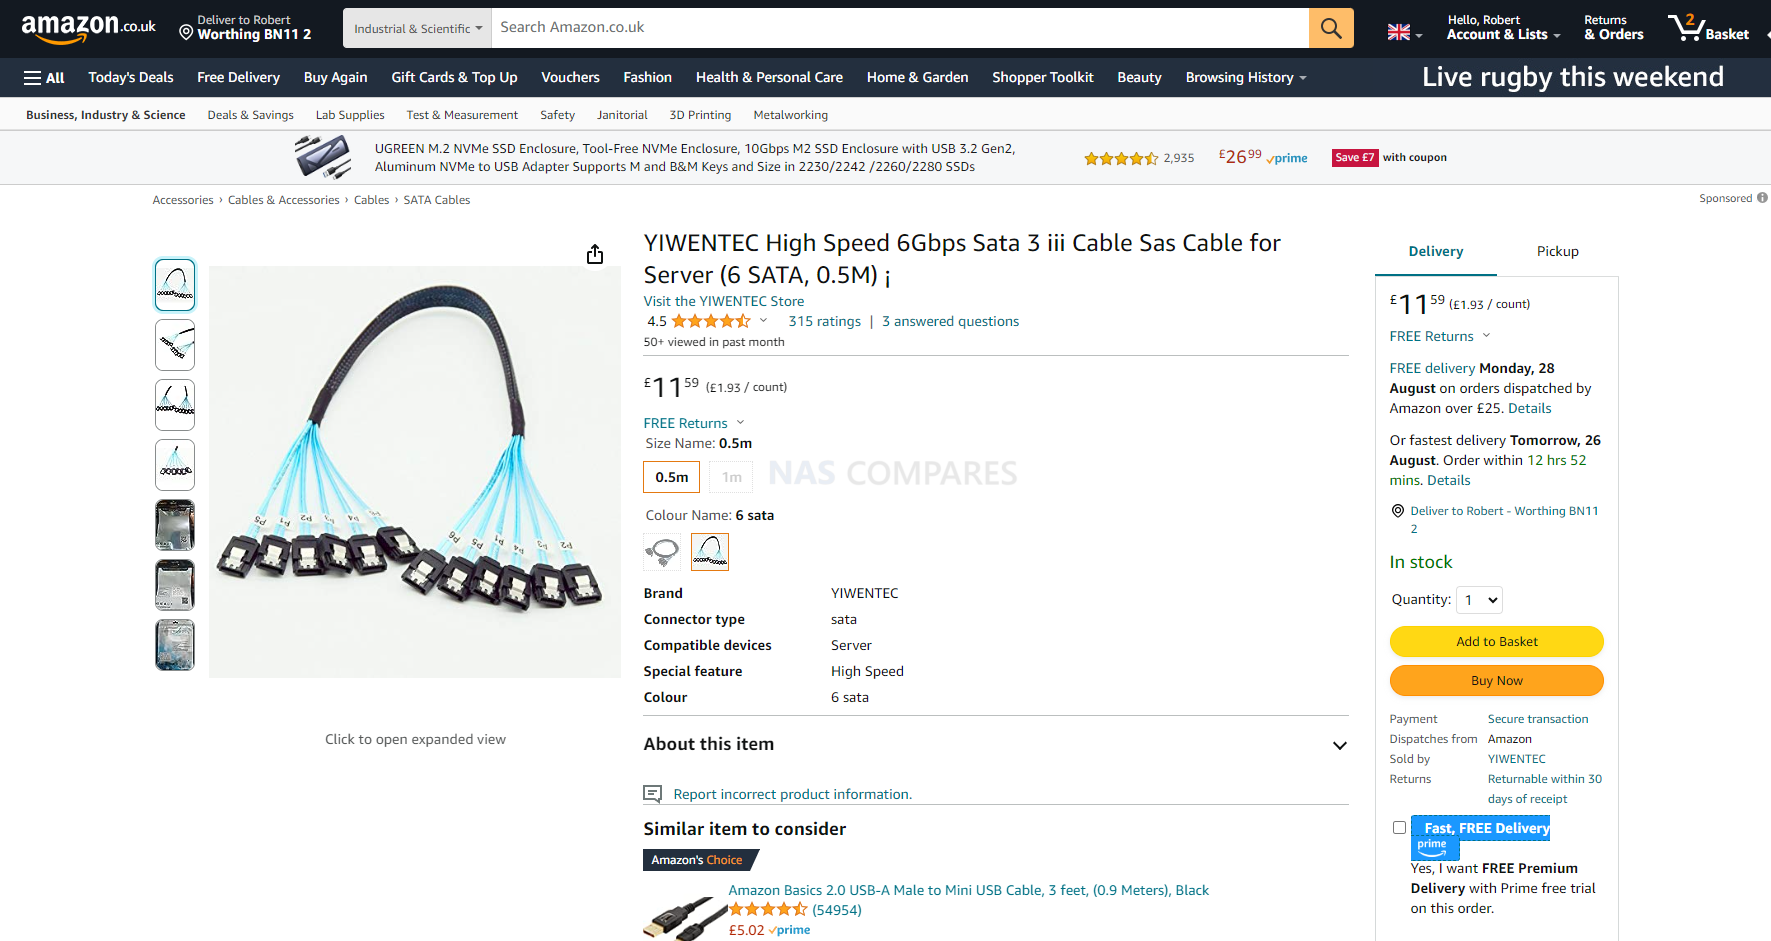
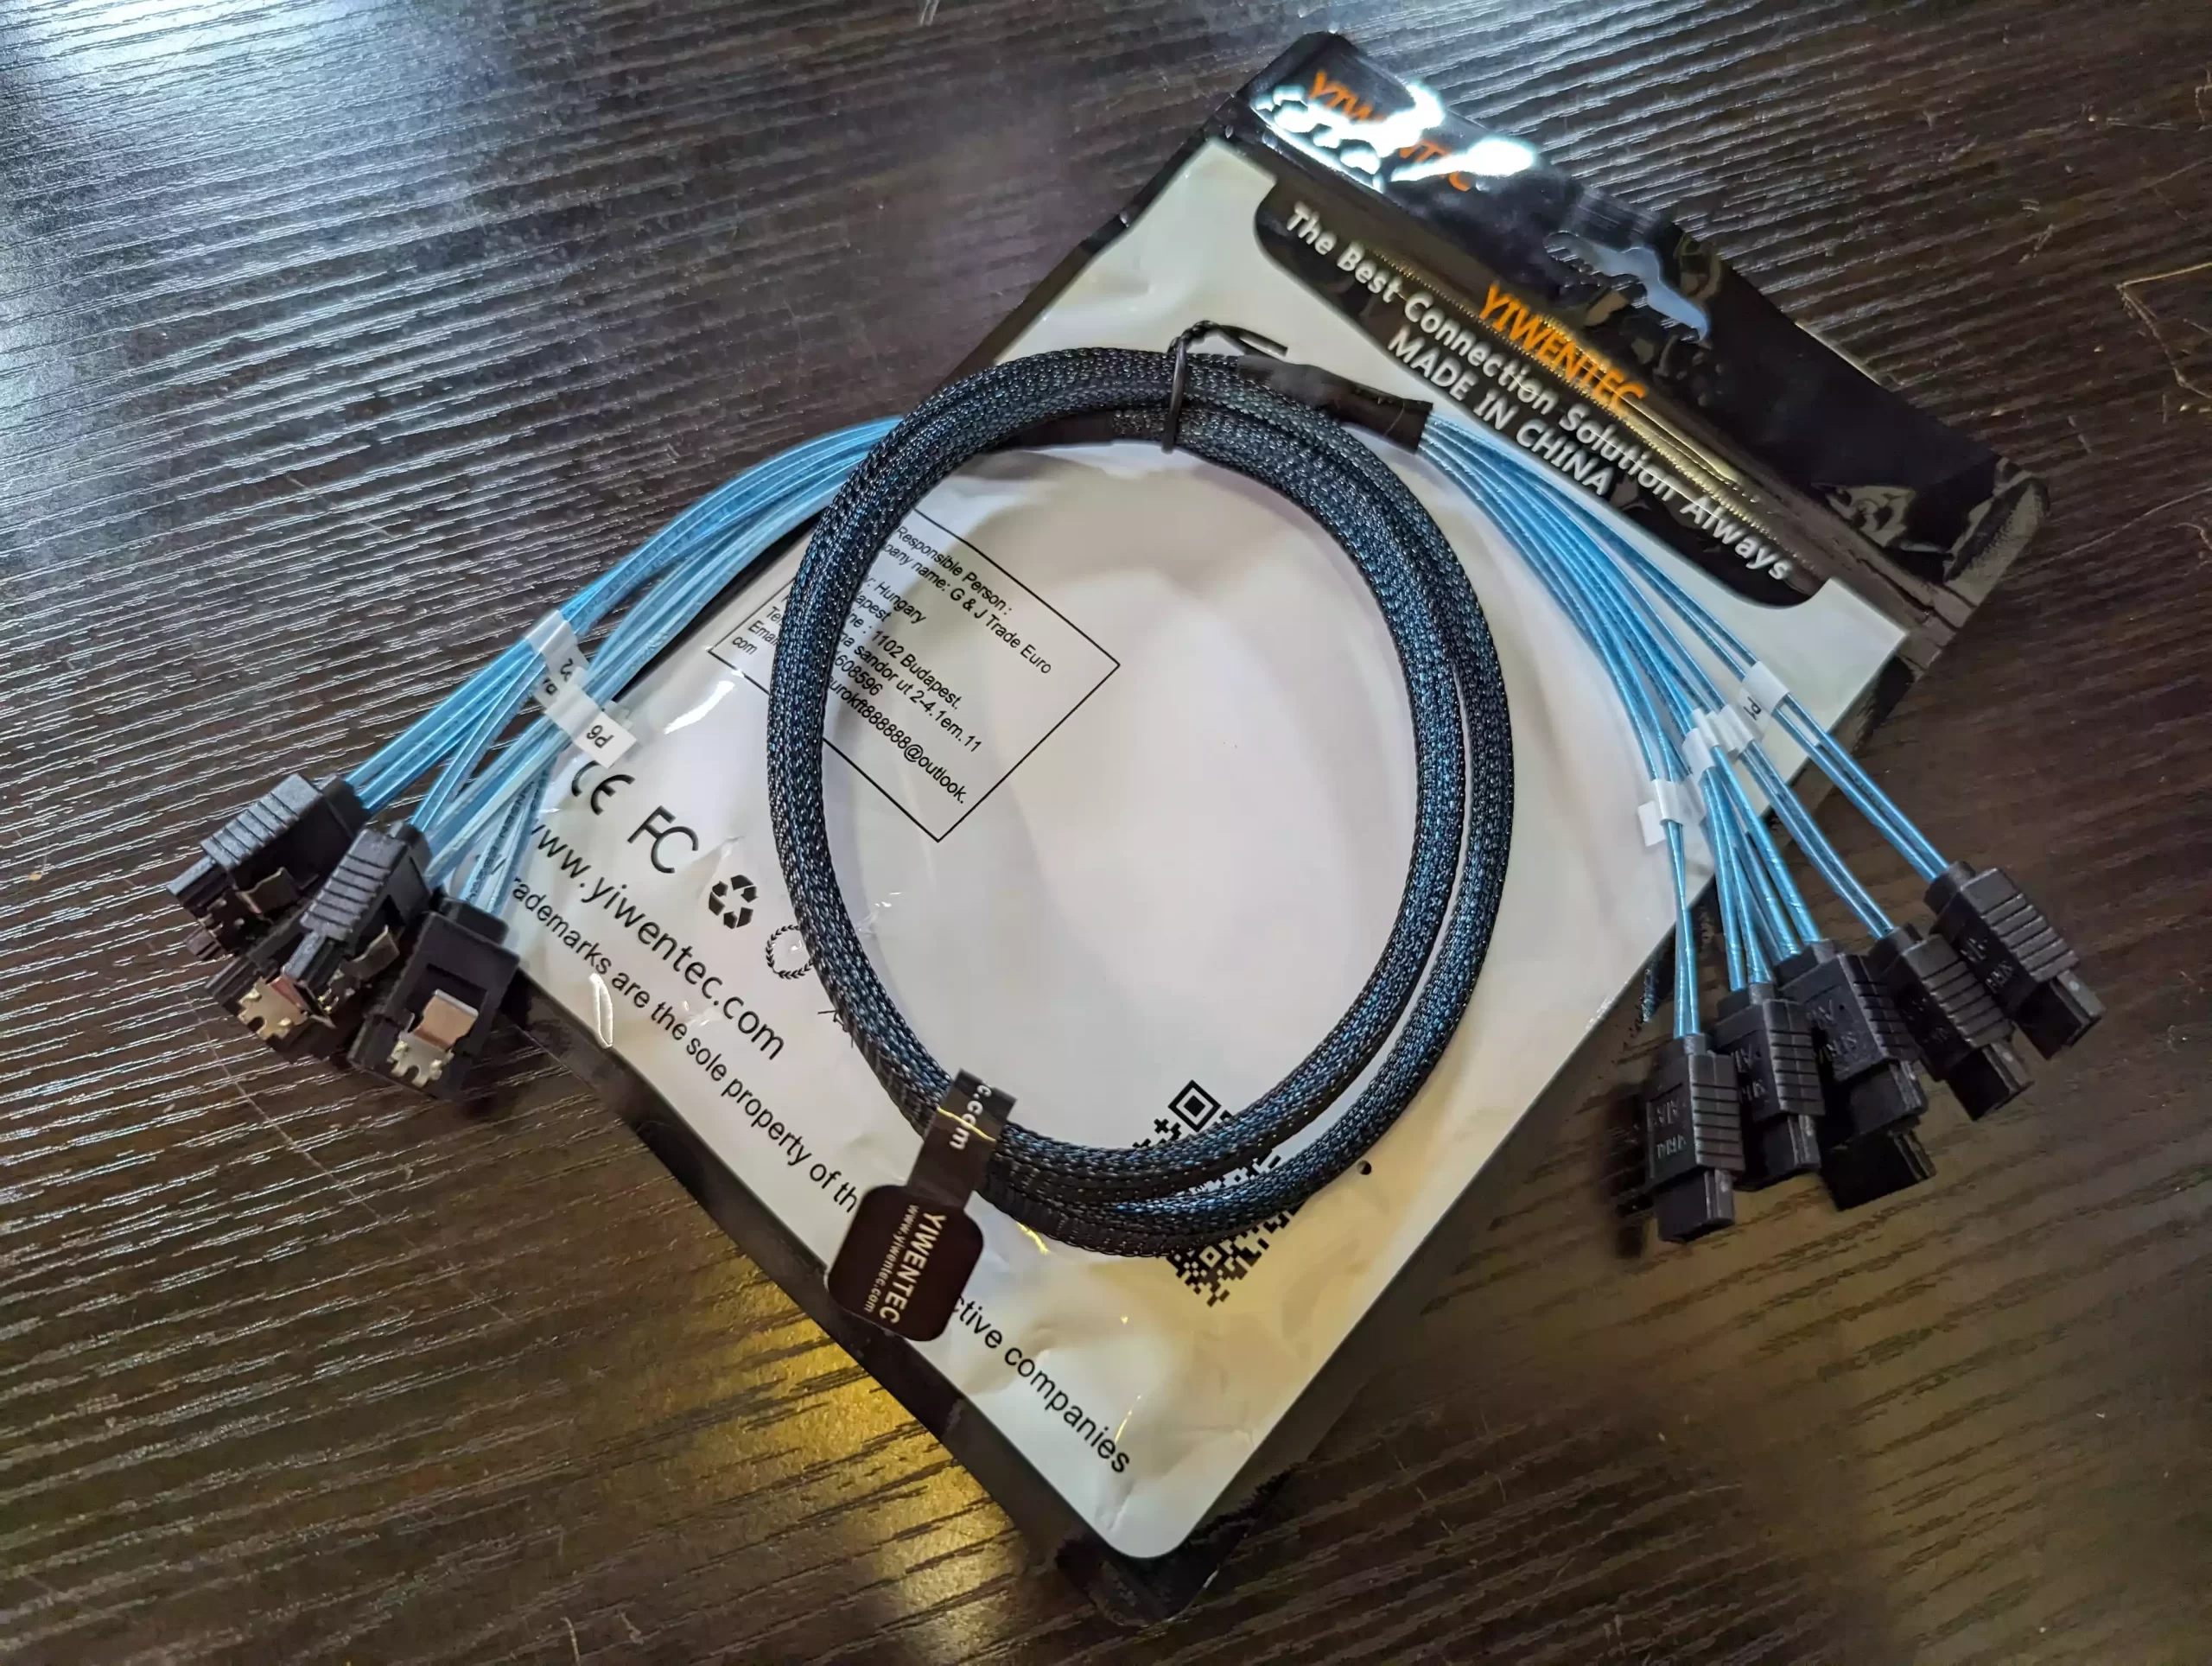
- A 6x SATA multi-lane cable – HERE

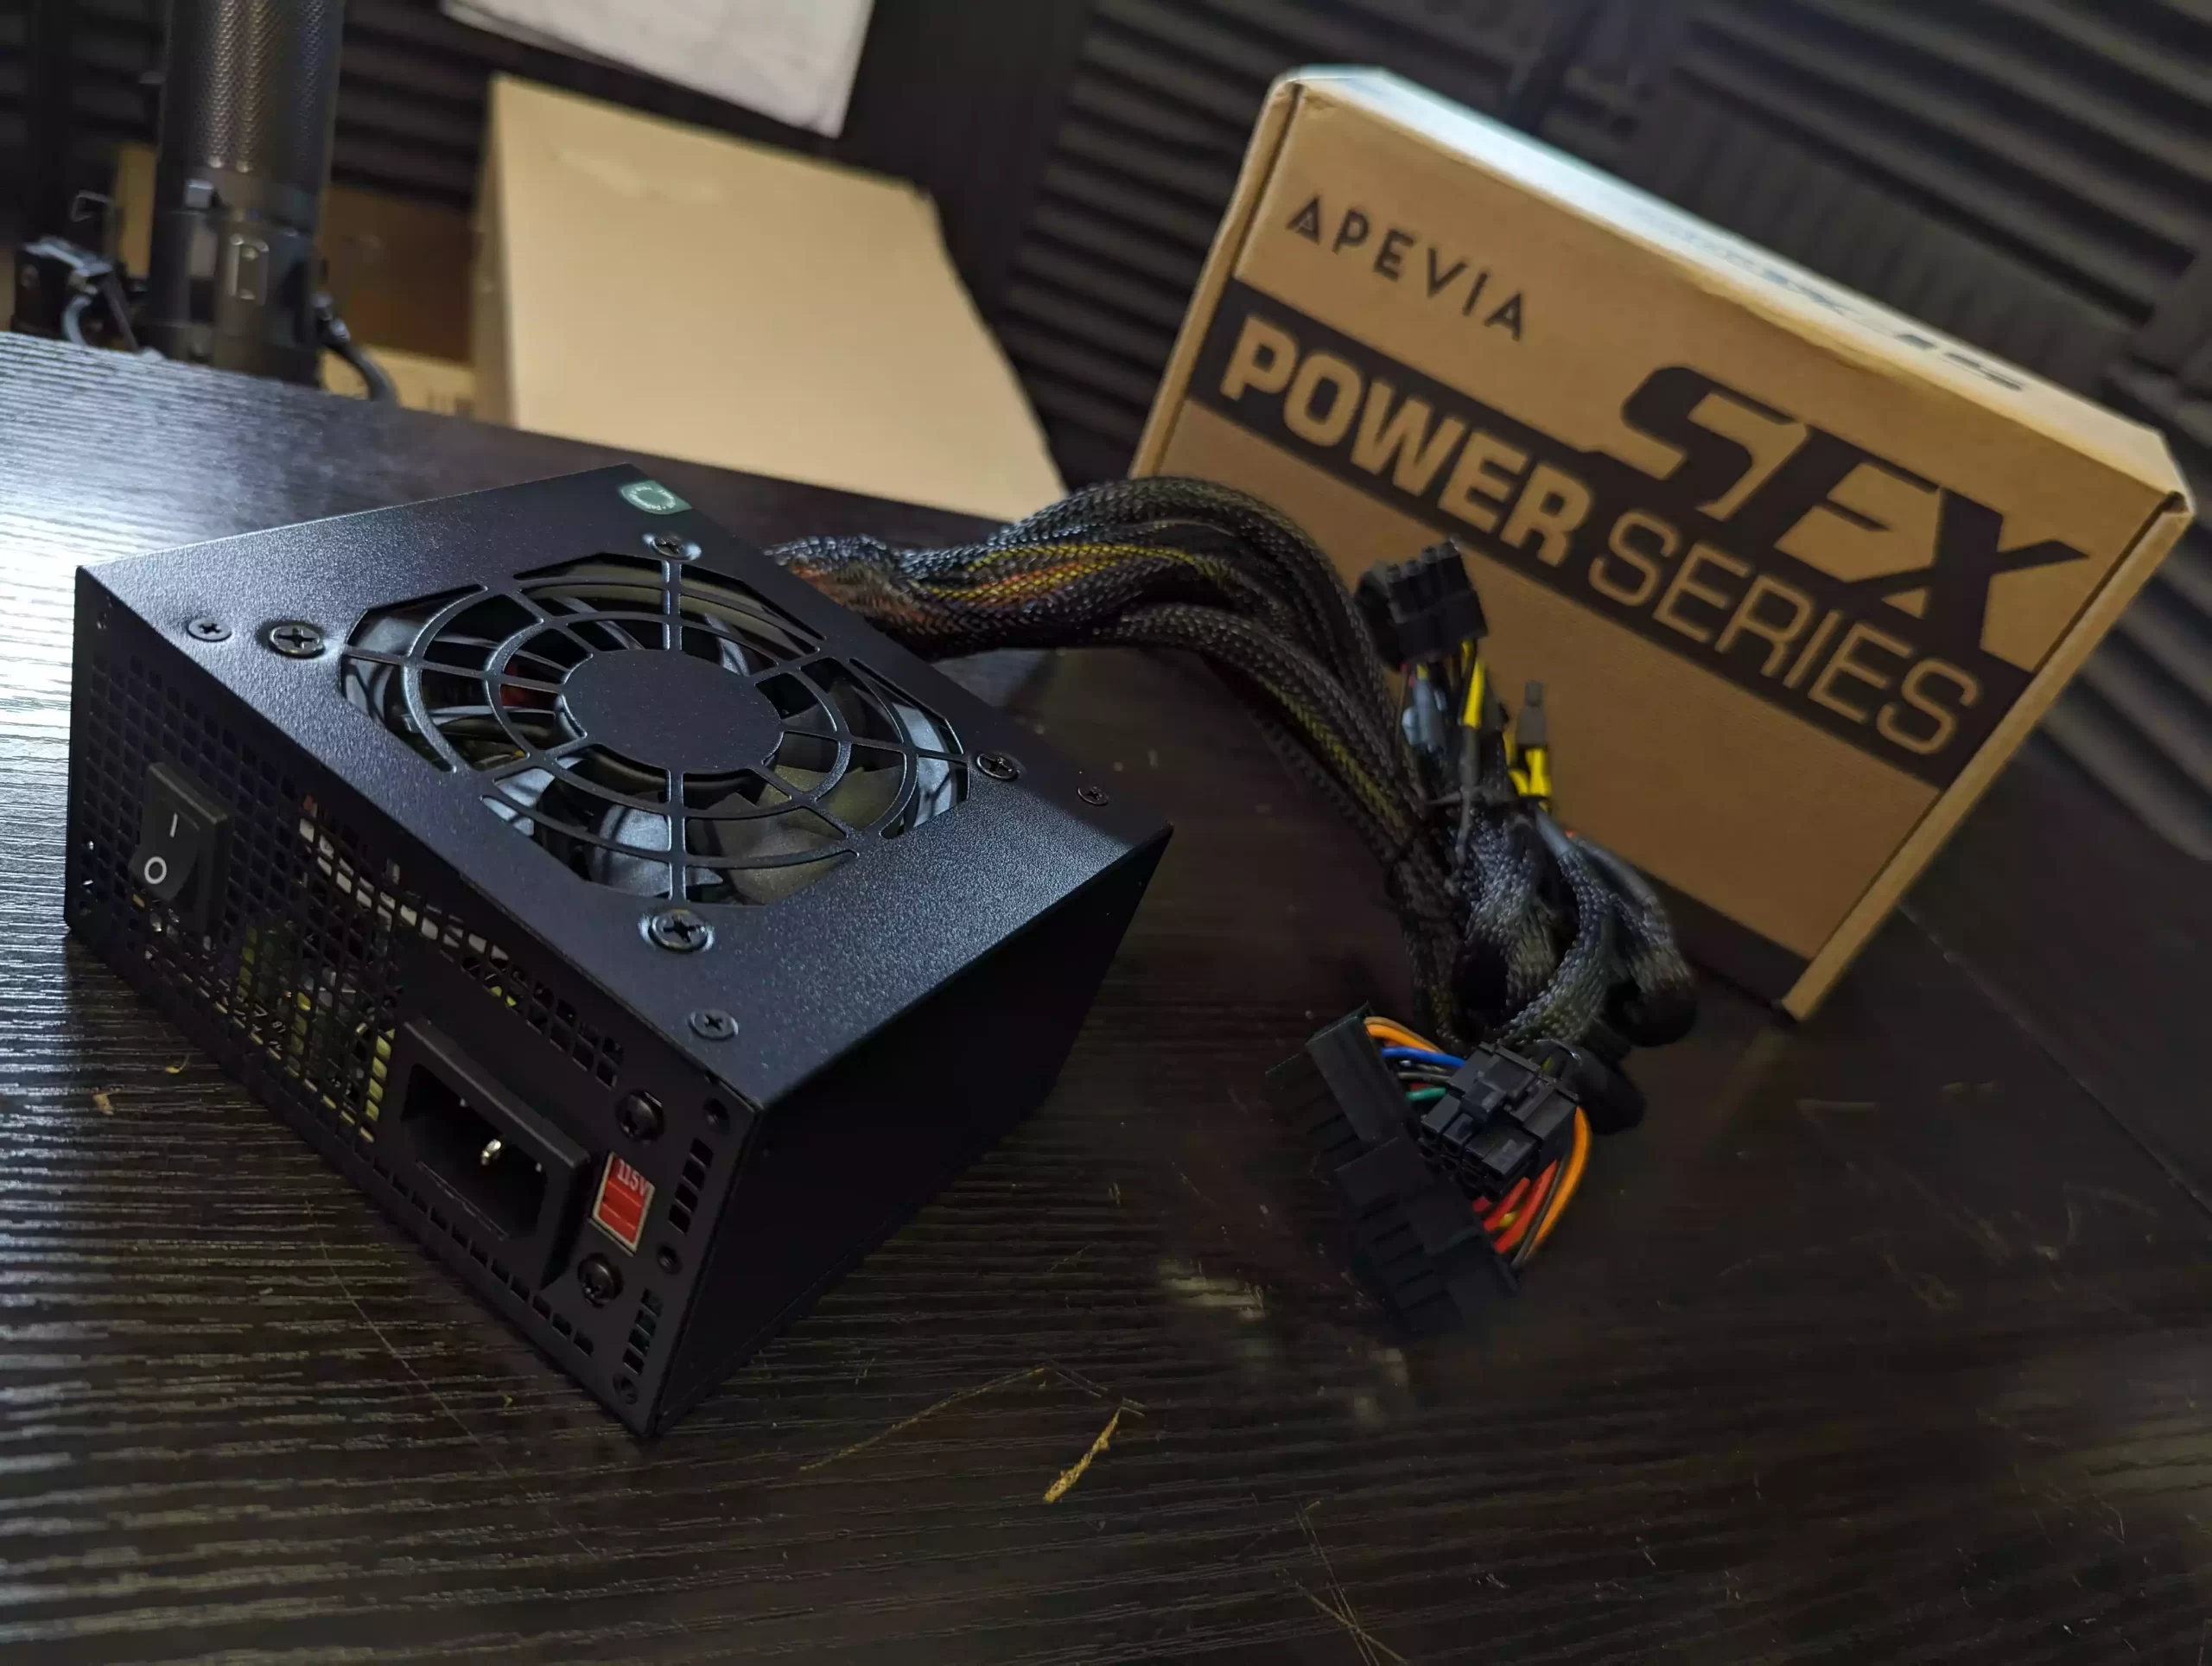
- A minimum of 250-watt SFX PSU – HERE


- Philips cross-head screwdriver
- USB keyboard, mouse, and HDMI monitor/capture card
- Optional – Download Advanced IP Scanner HERE, as it is a really useful tool for analyzing your network and finding your new TrueNAS Core NAS for remote access
- Optional – A Disk Image to USB conversion too. I recommend ‘Rufus’, currently in ver 3.19 and can be run in a portable .exe form that doesn’t require installation – DOWNLOAD
- Optional – Download the latest stable release of TrueNAS Core here as a system image (you will be converting this to USB later on) – DOWNLOAD
- Optional – Download the latest stable release of UnRAID here as a system image (you will be converting this to USB later on) – DOWNLOAD
That’s about it! The only other things you’ll need are time and patience. Avoid rushing the build as you’re working with internal components in a relatively confined space.
Start of the Jonsbo N2 NAS Build Guide
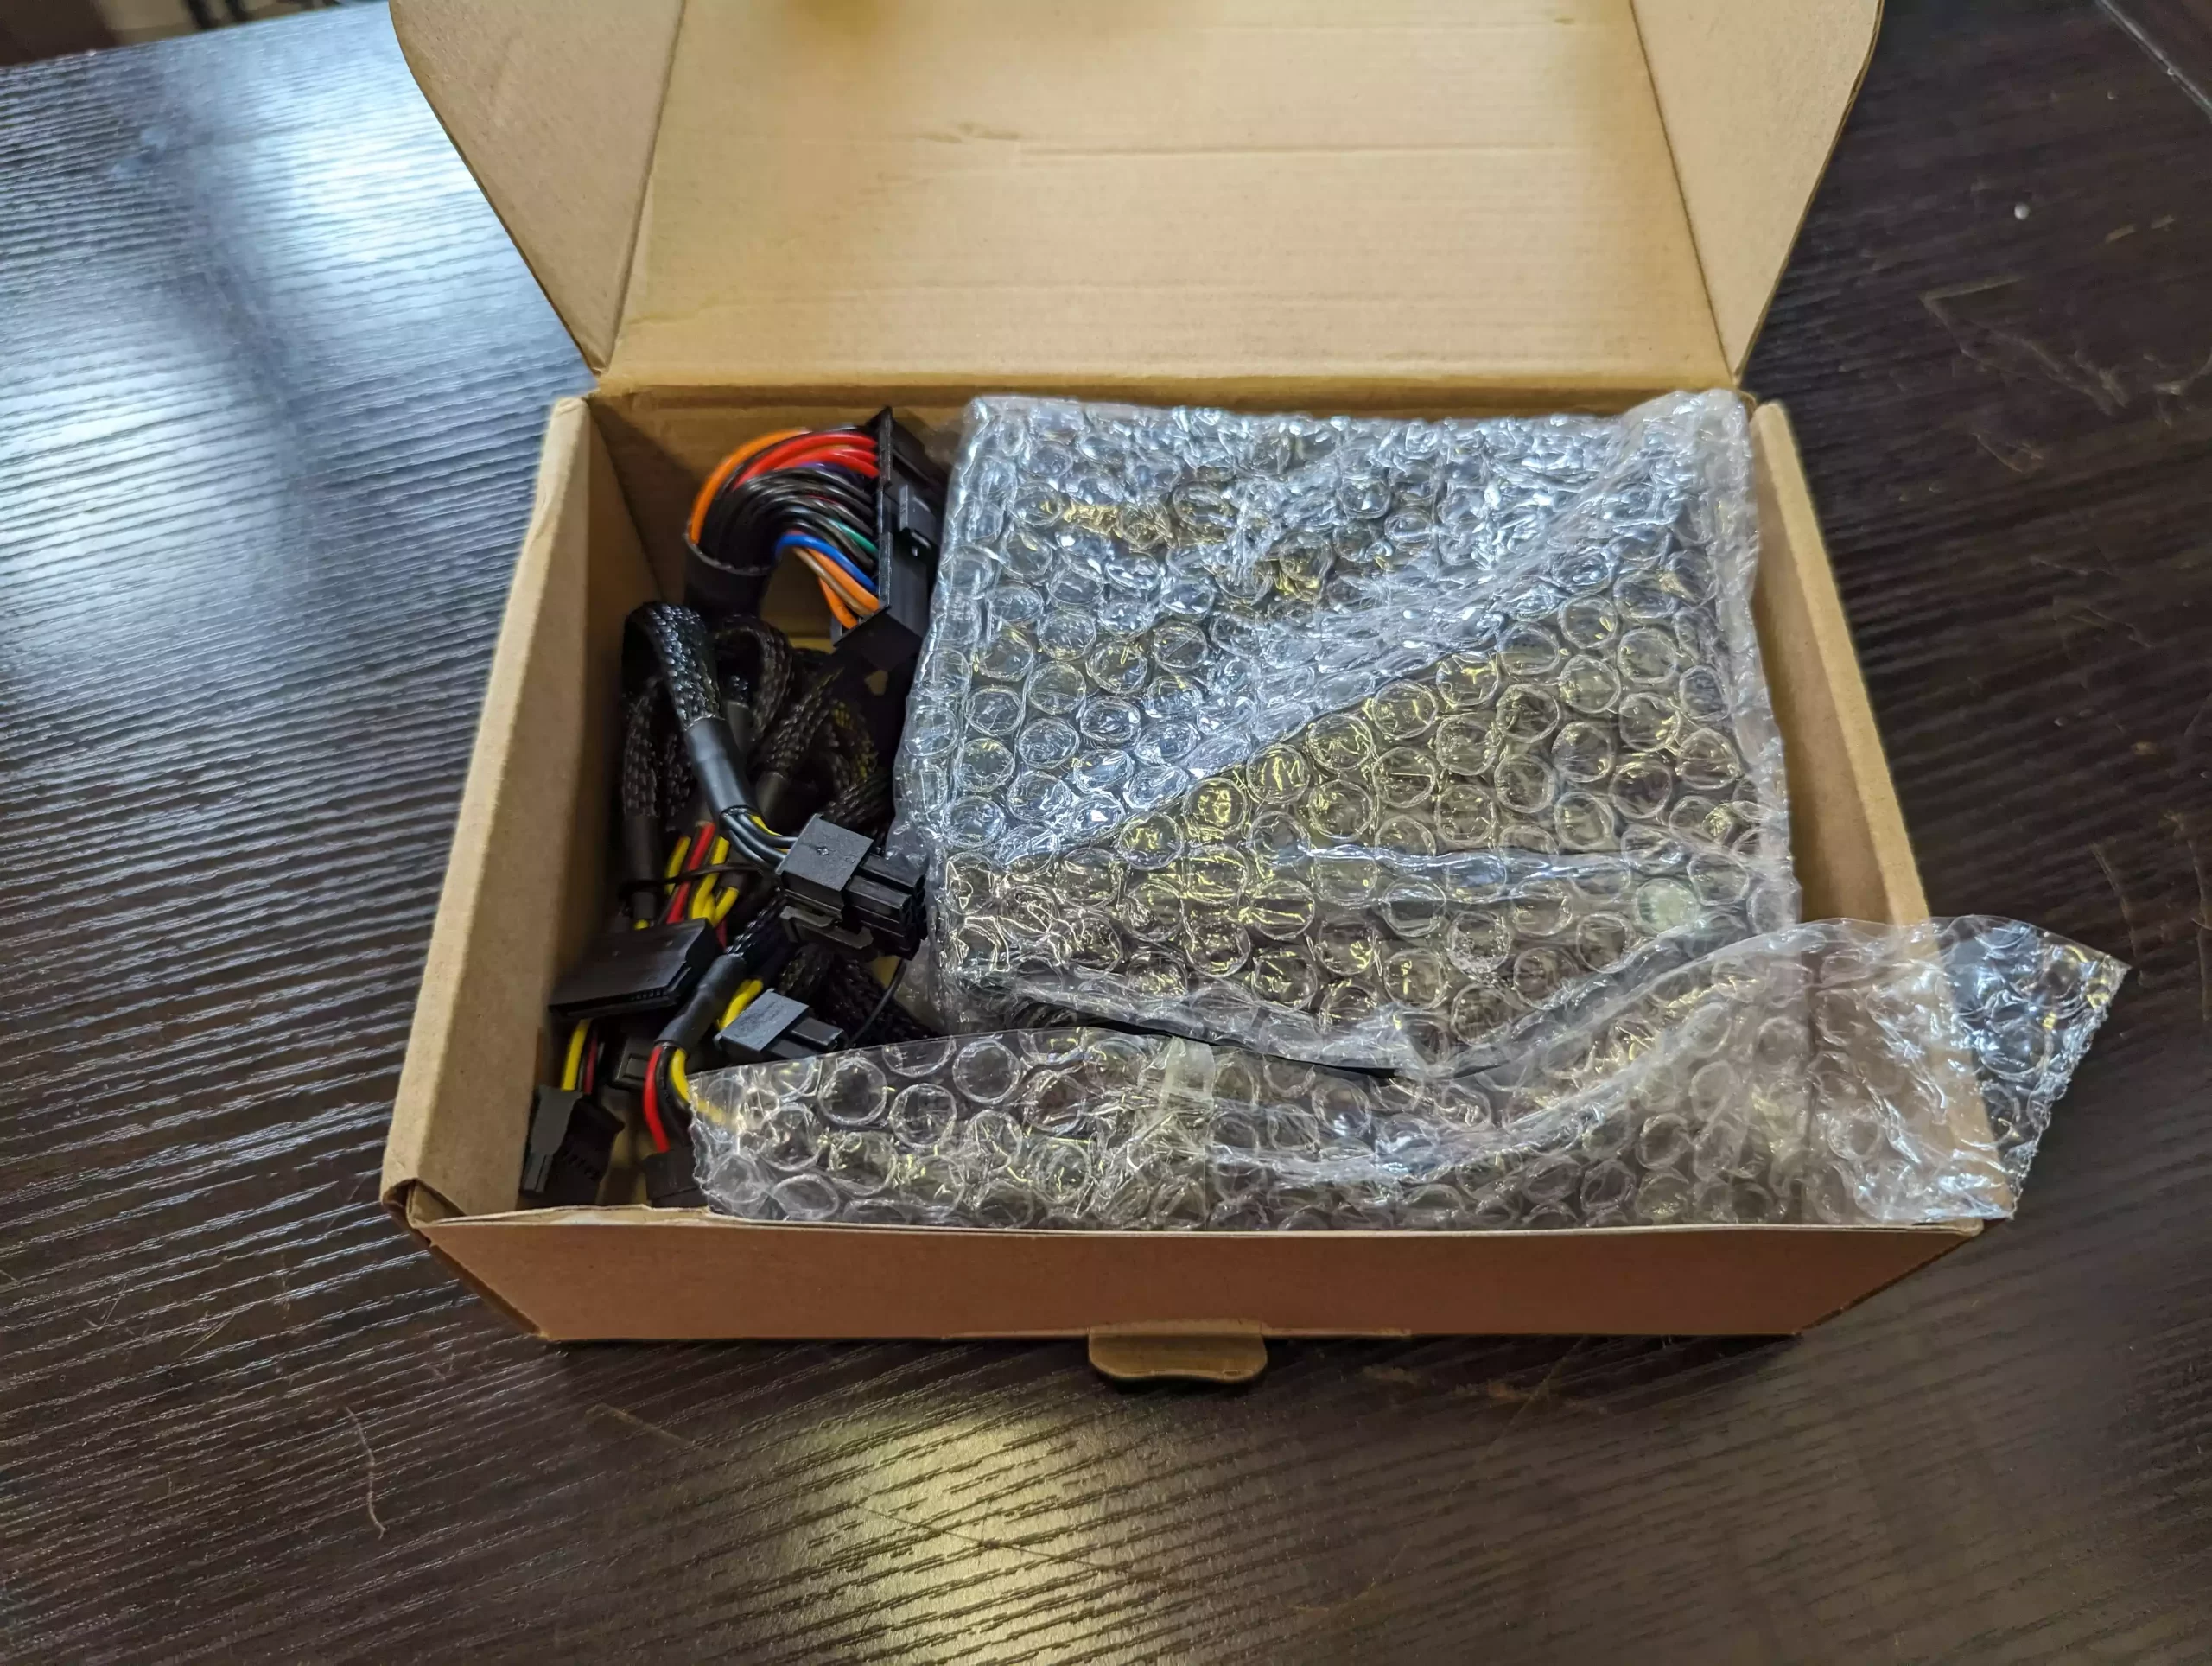
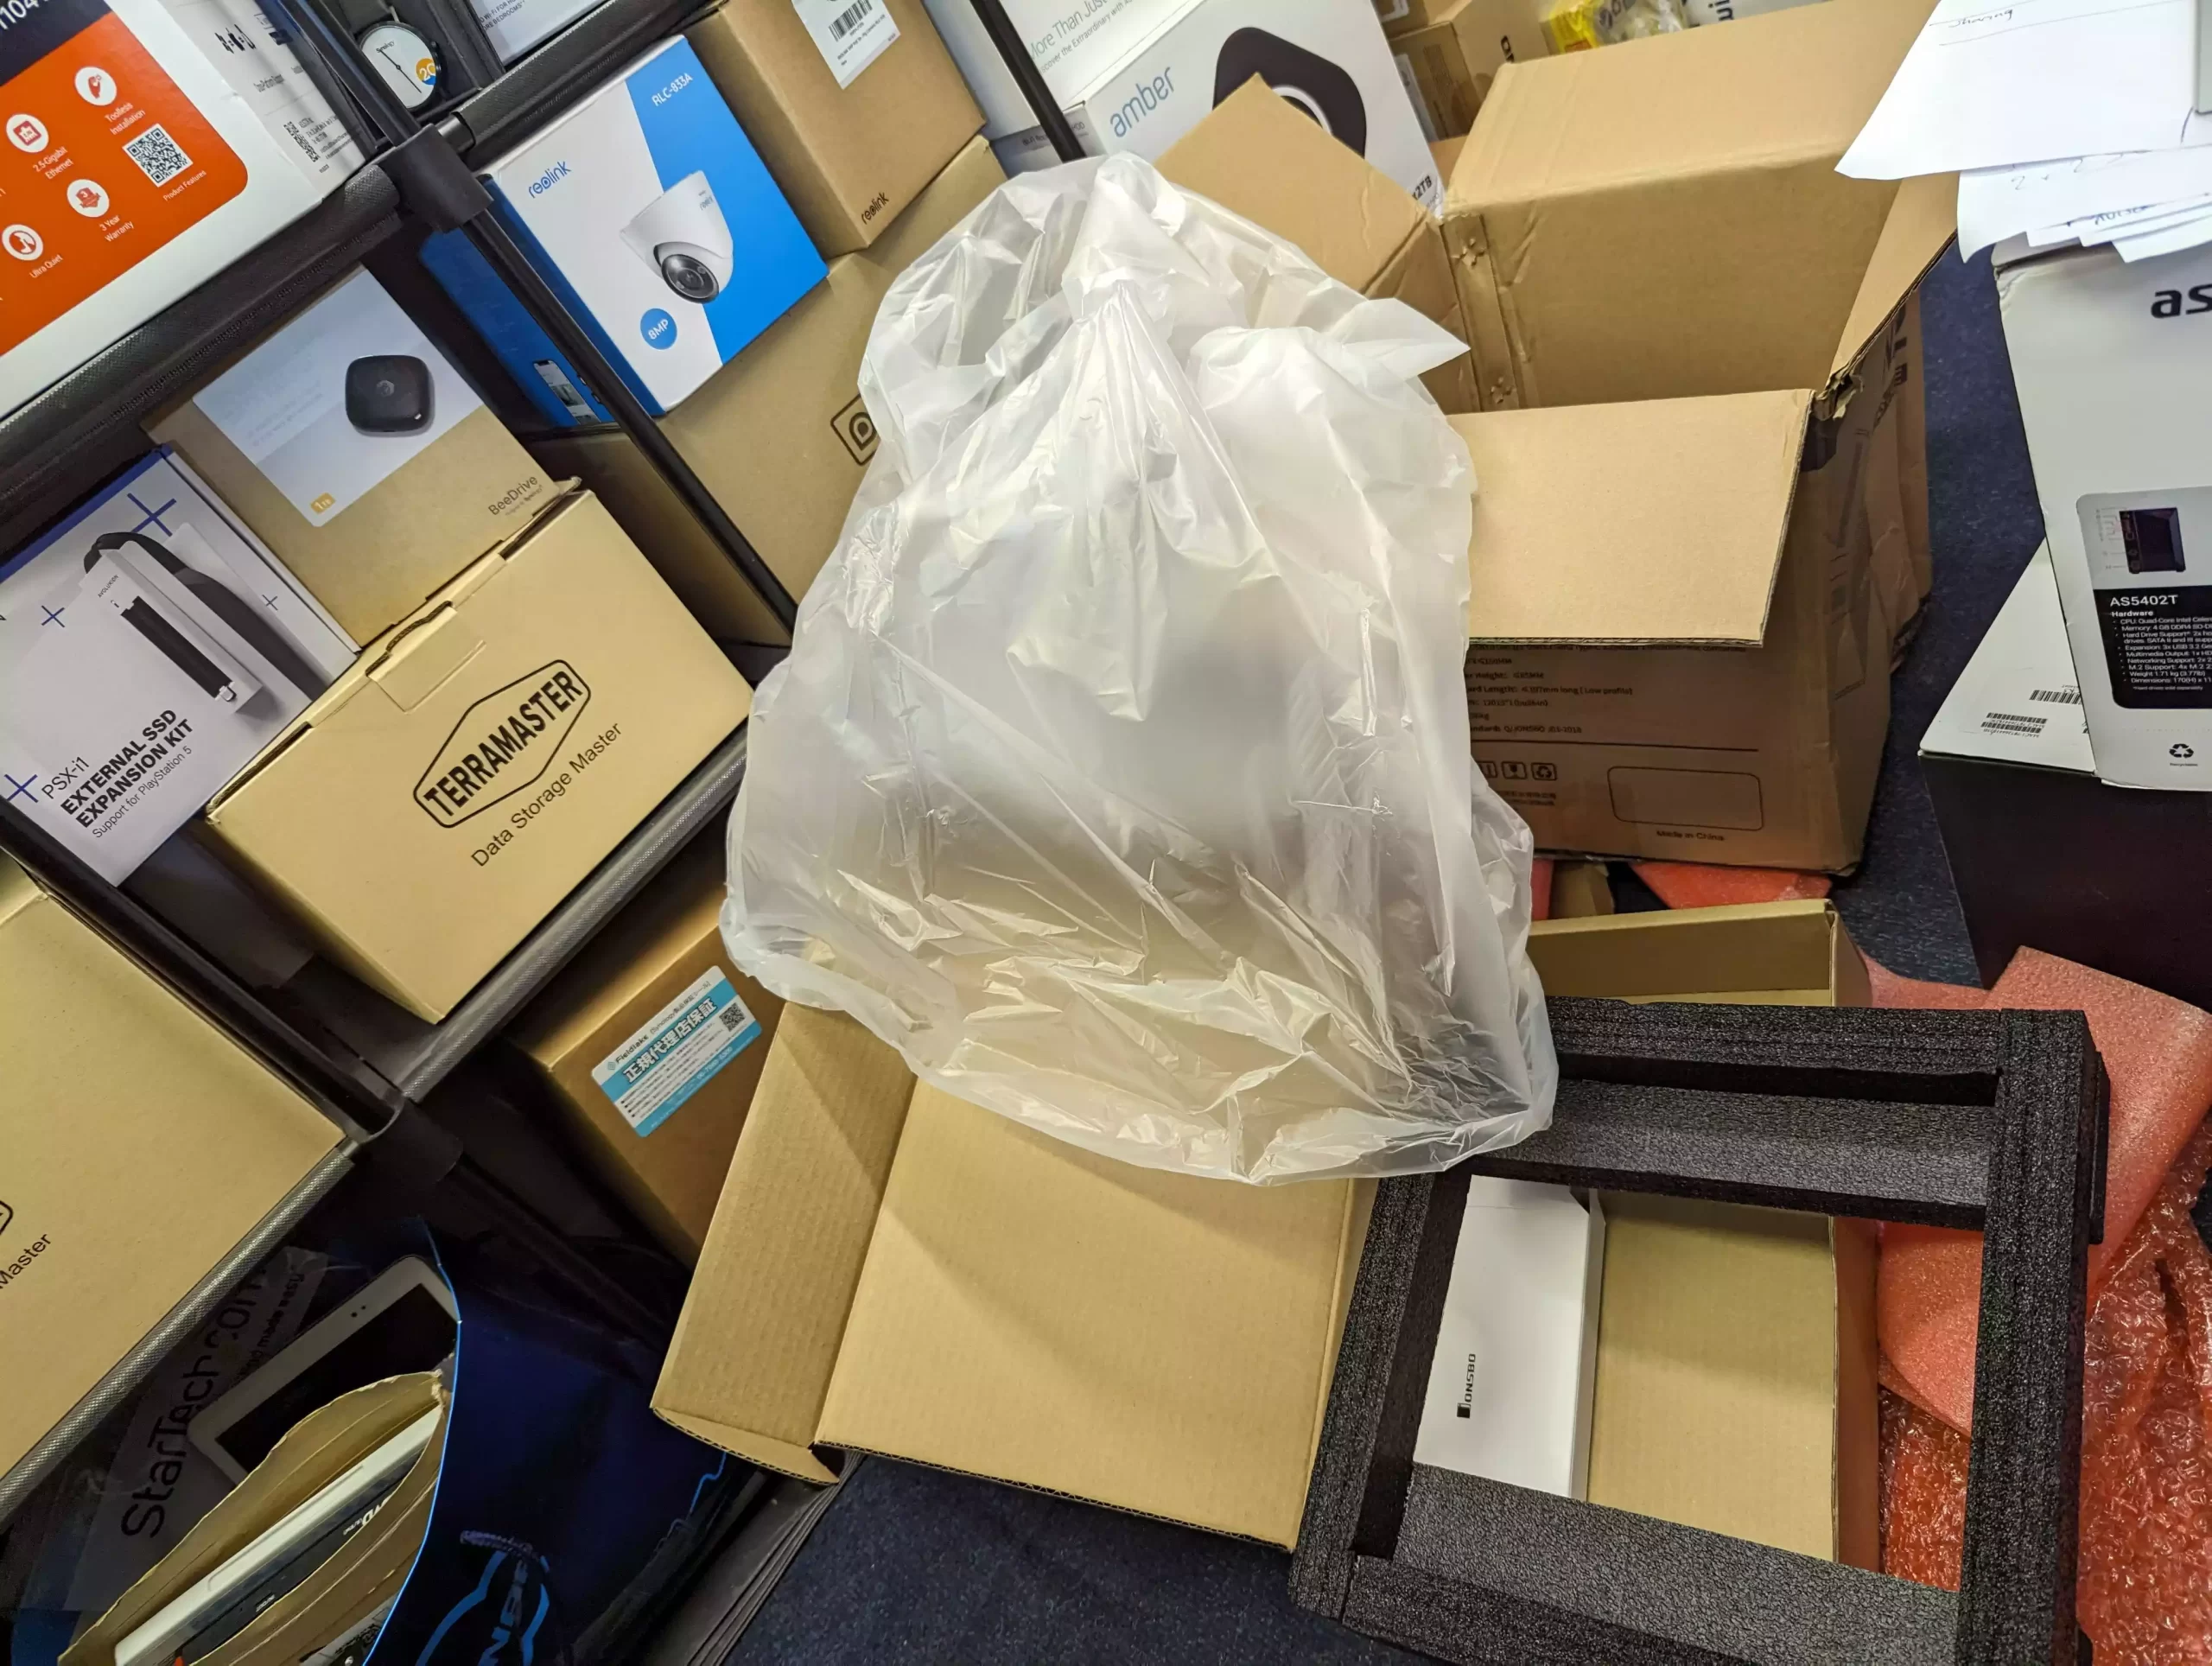
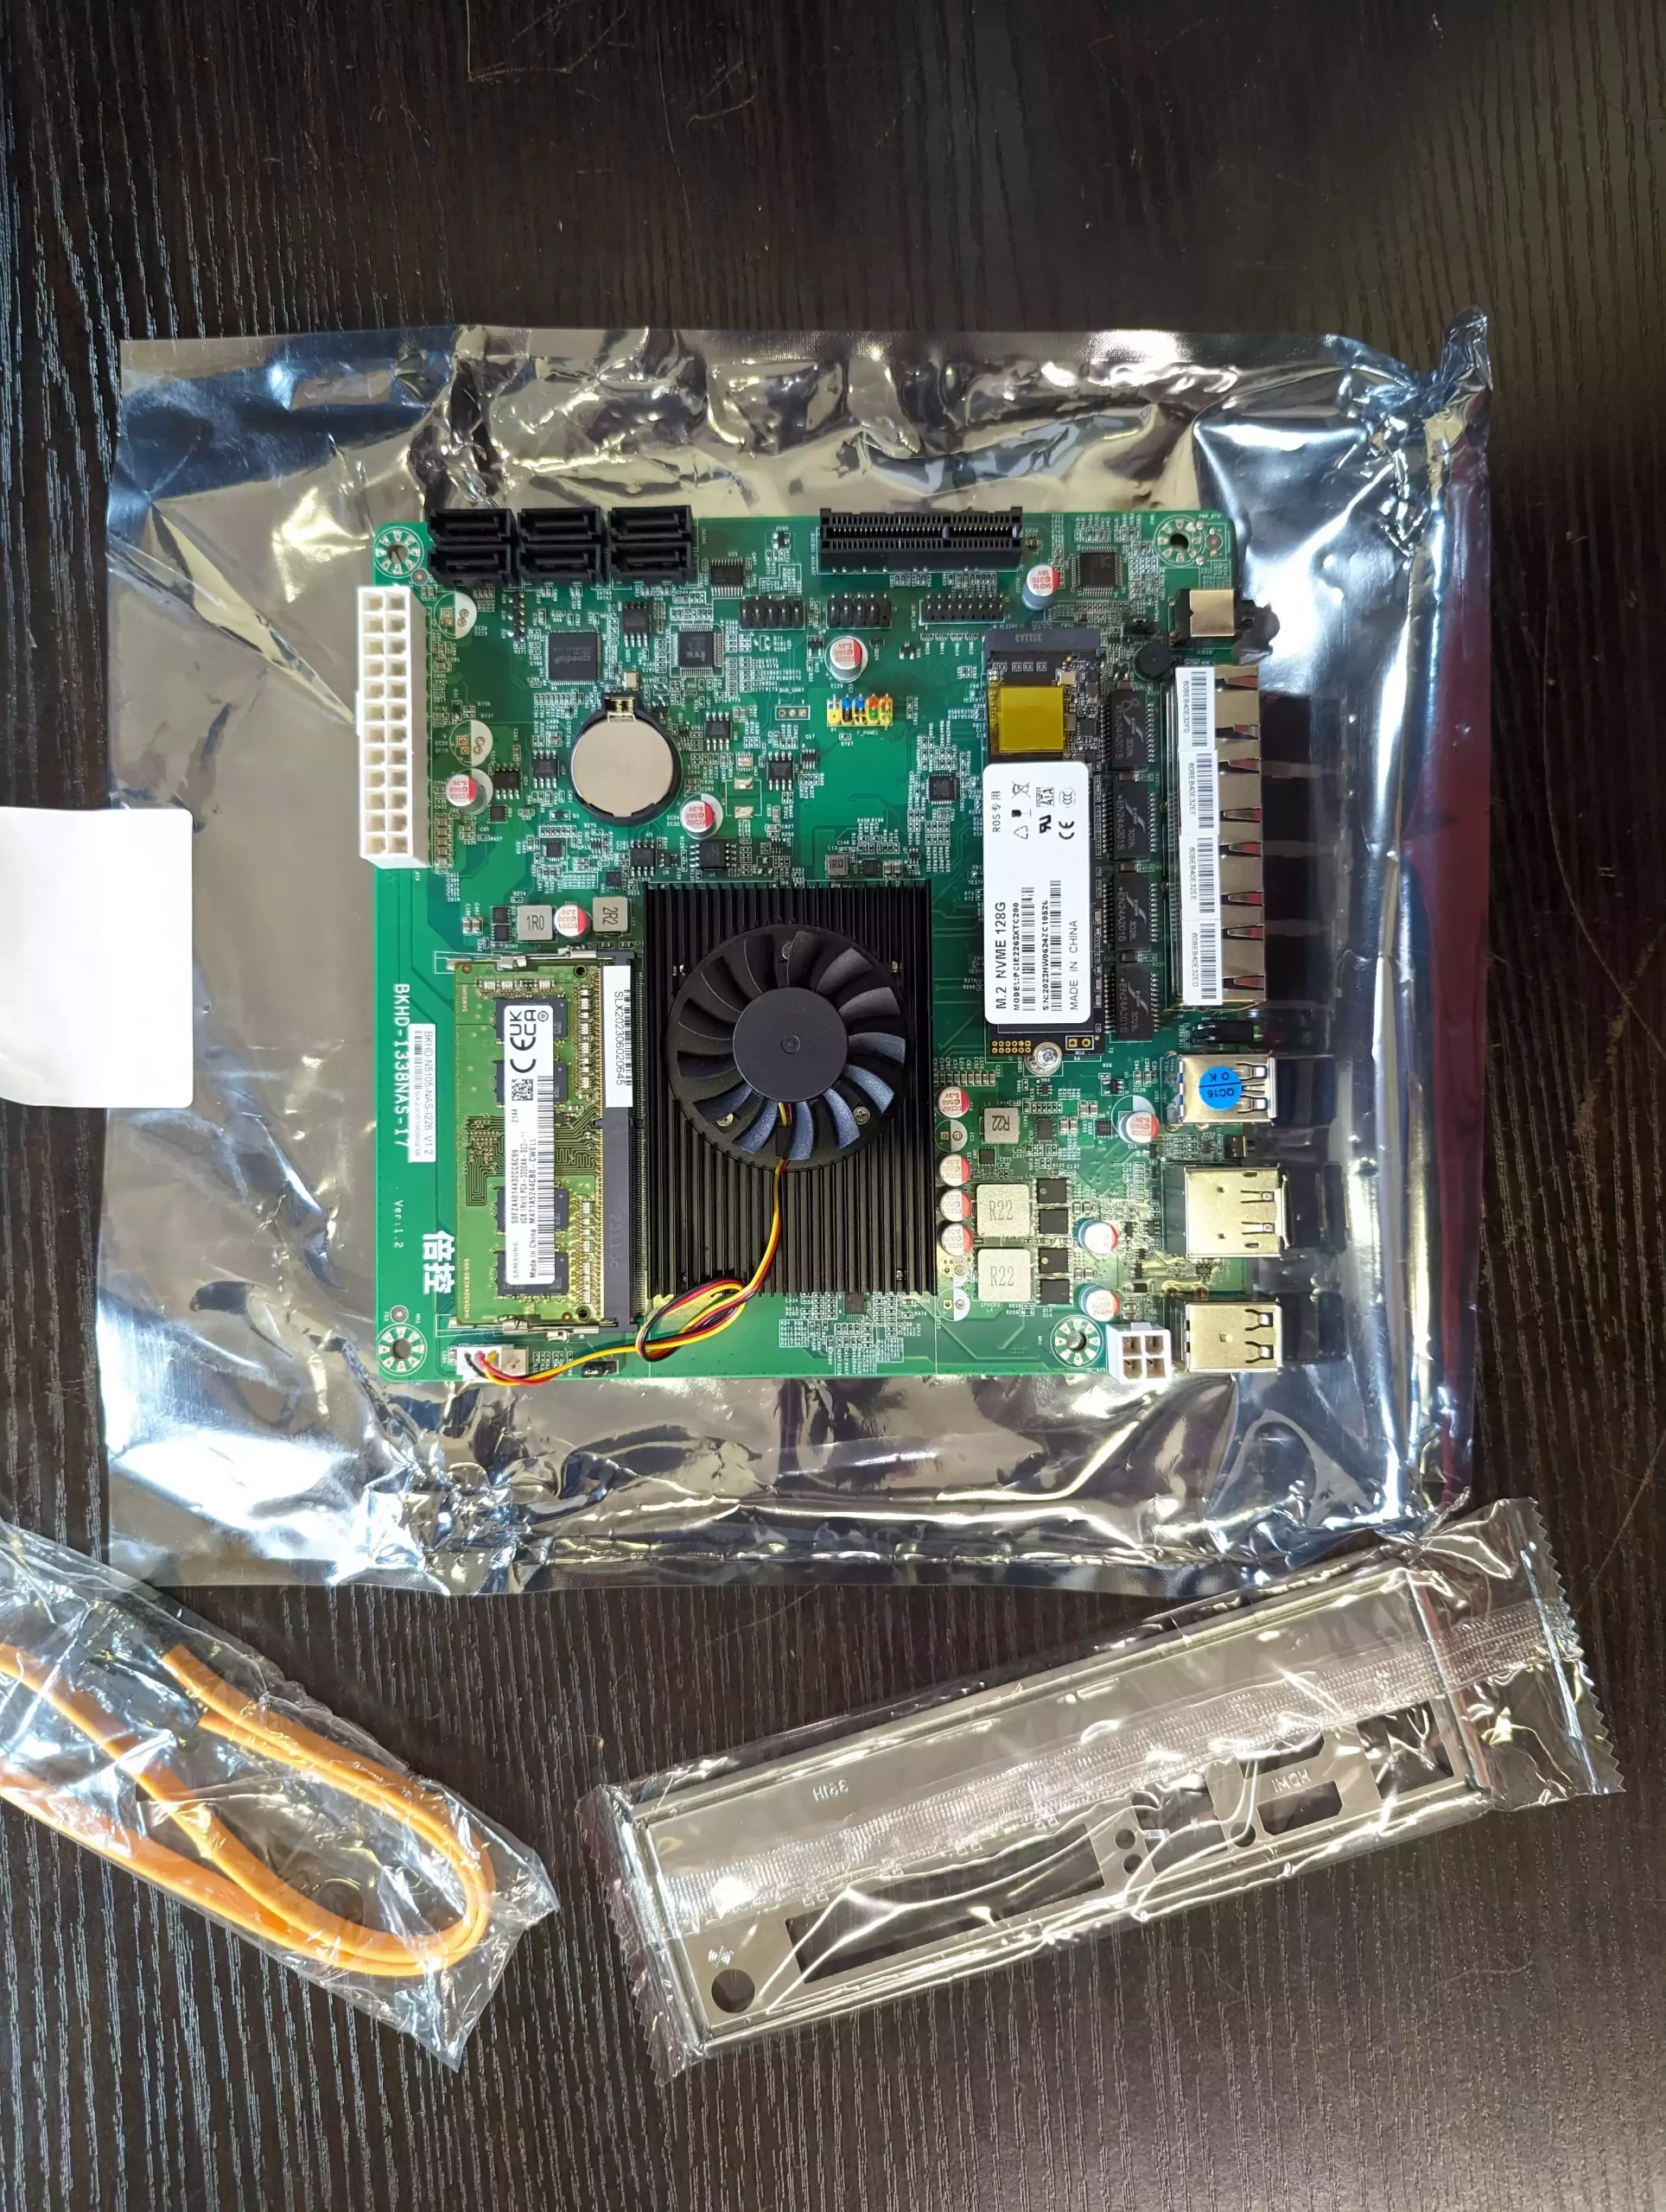
Unpack all components for this build and clear away any unnecessary materials.

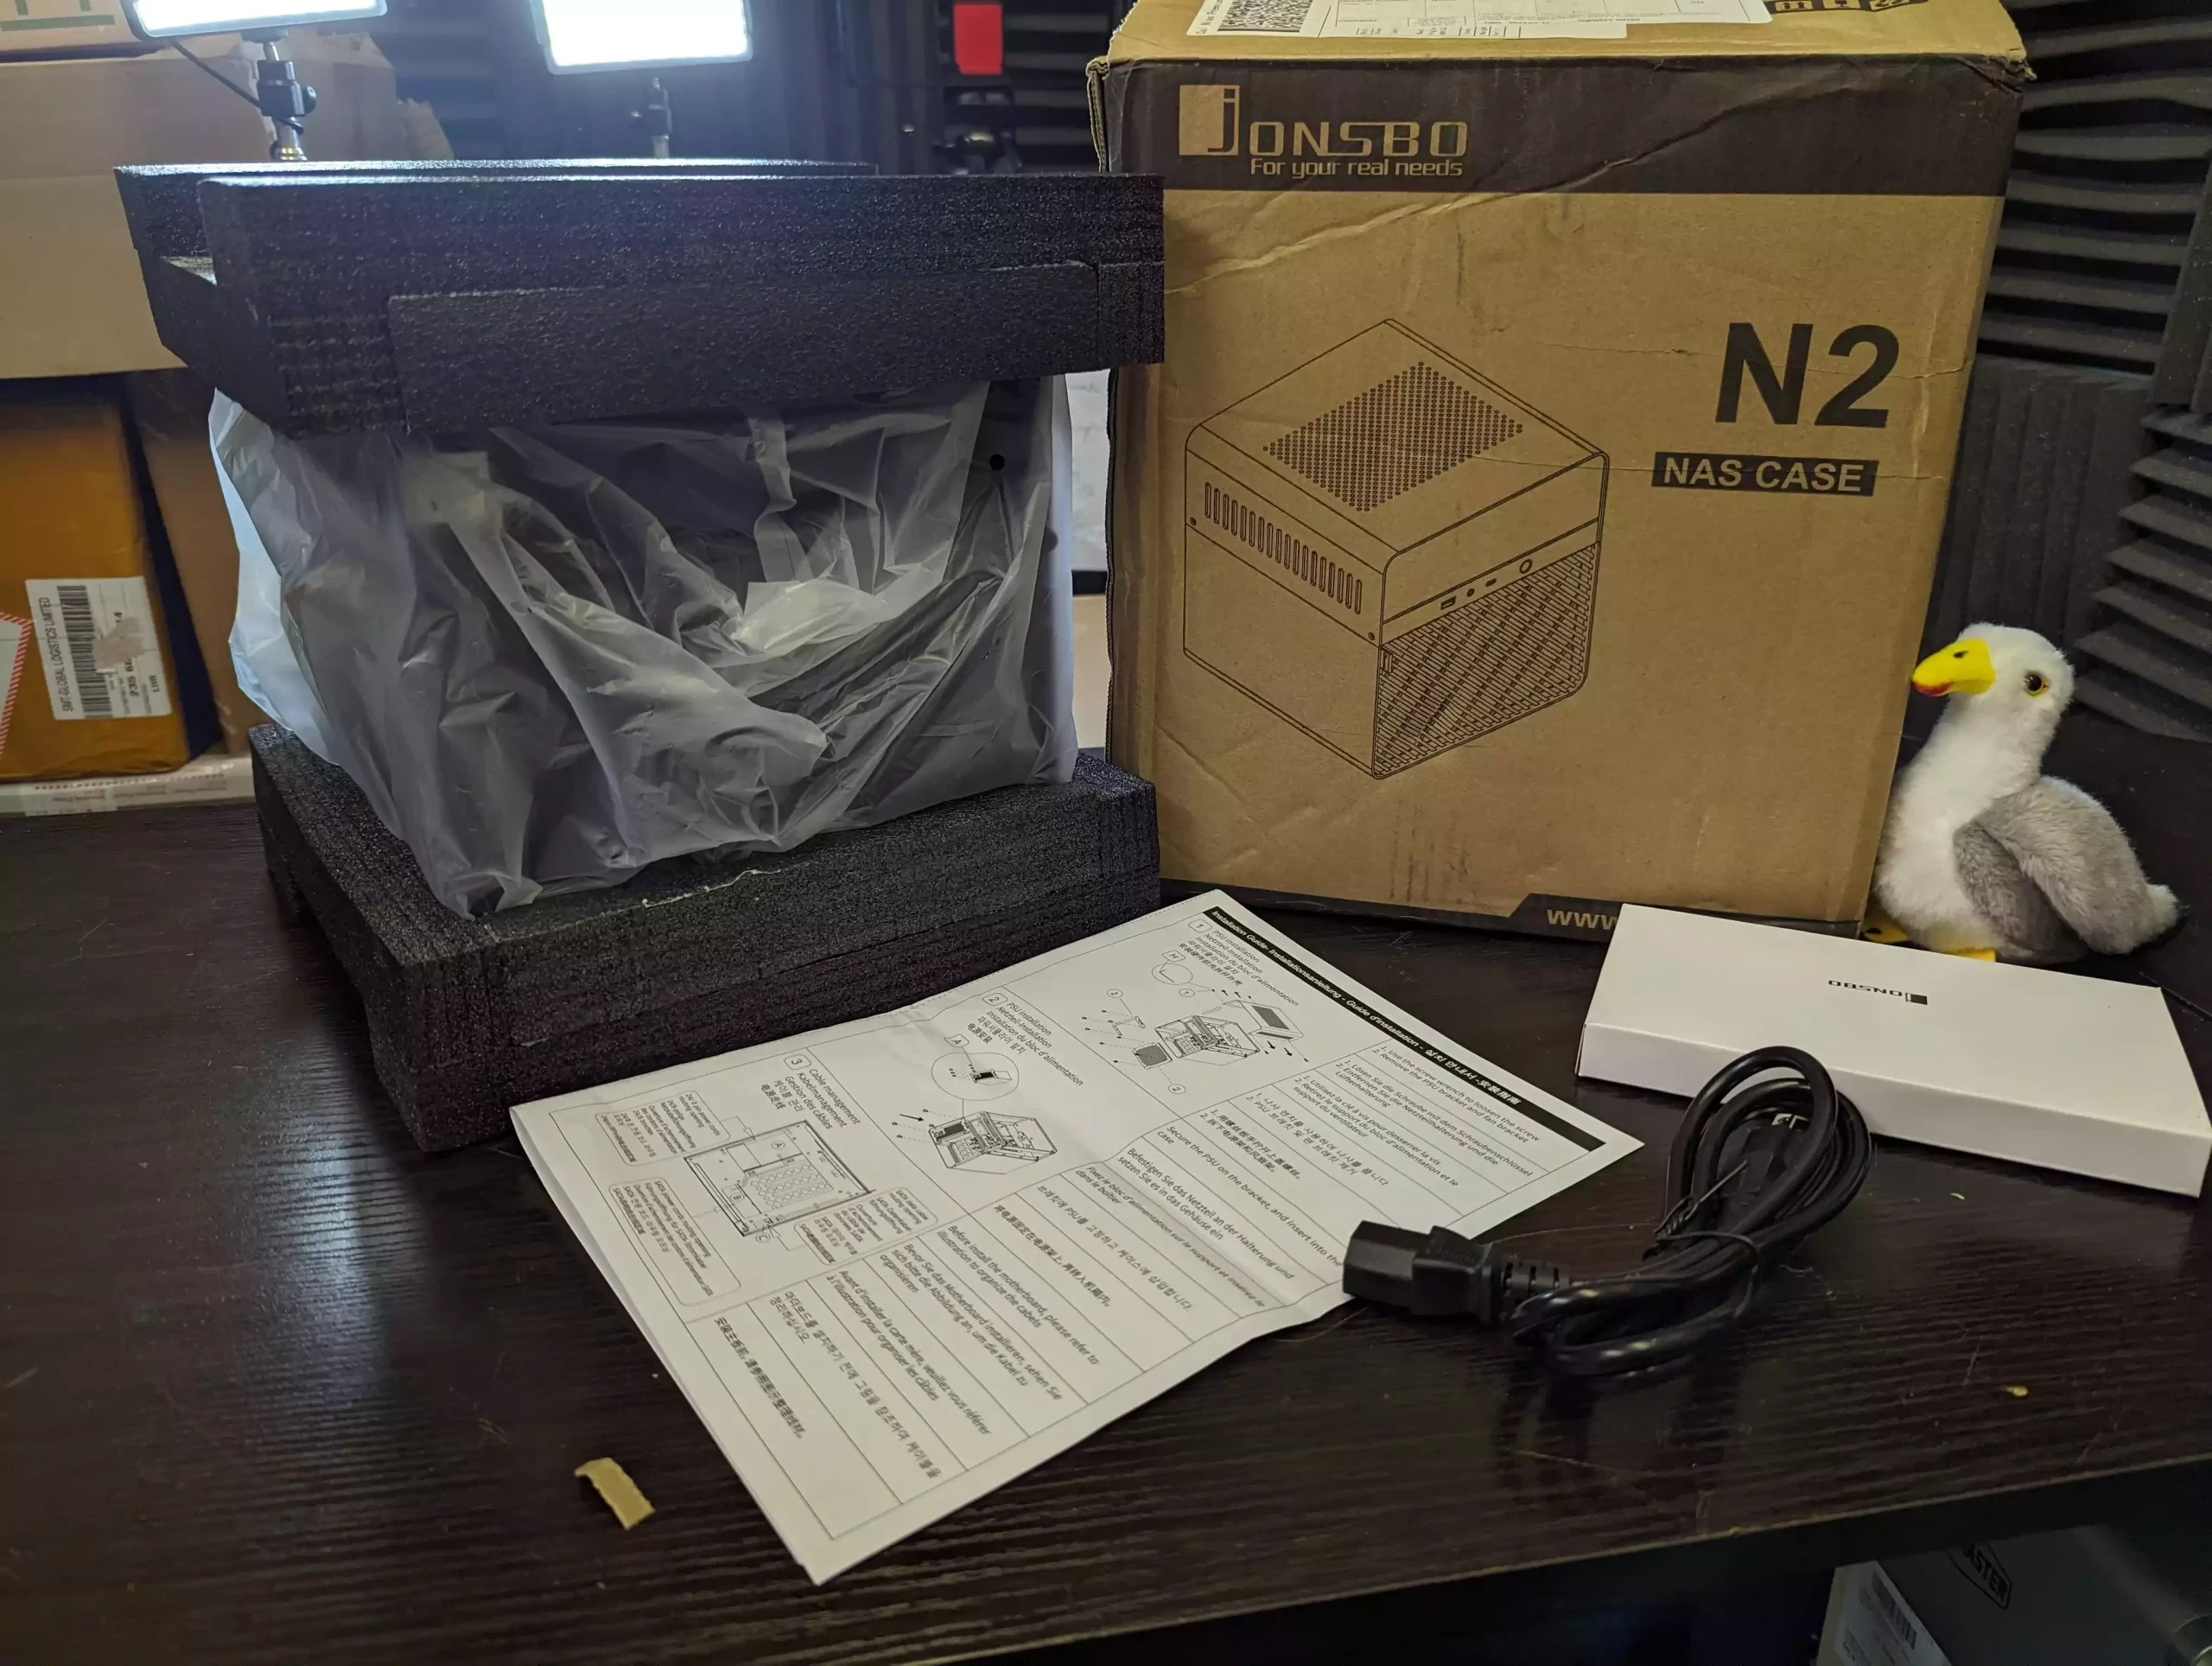
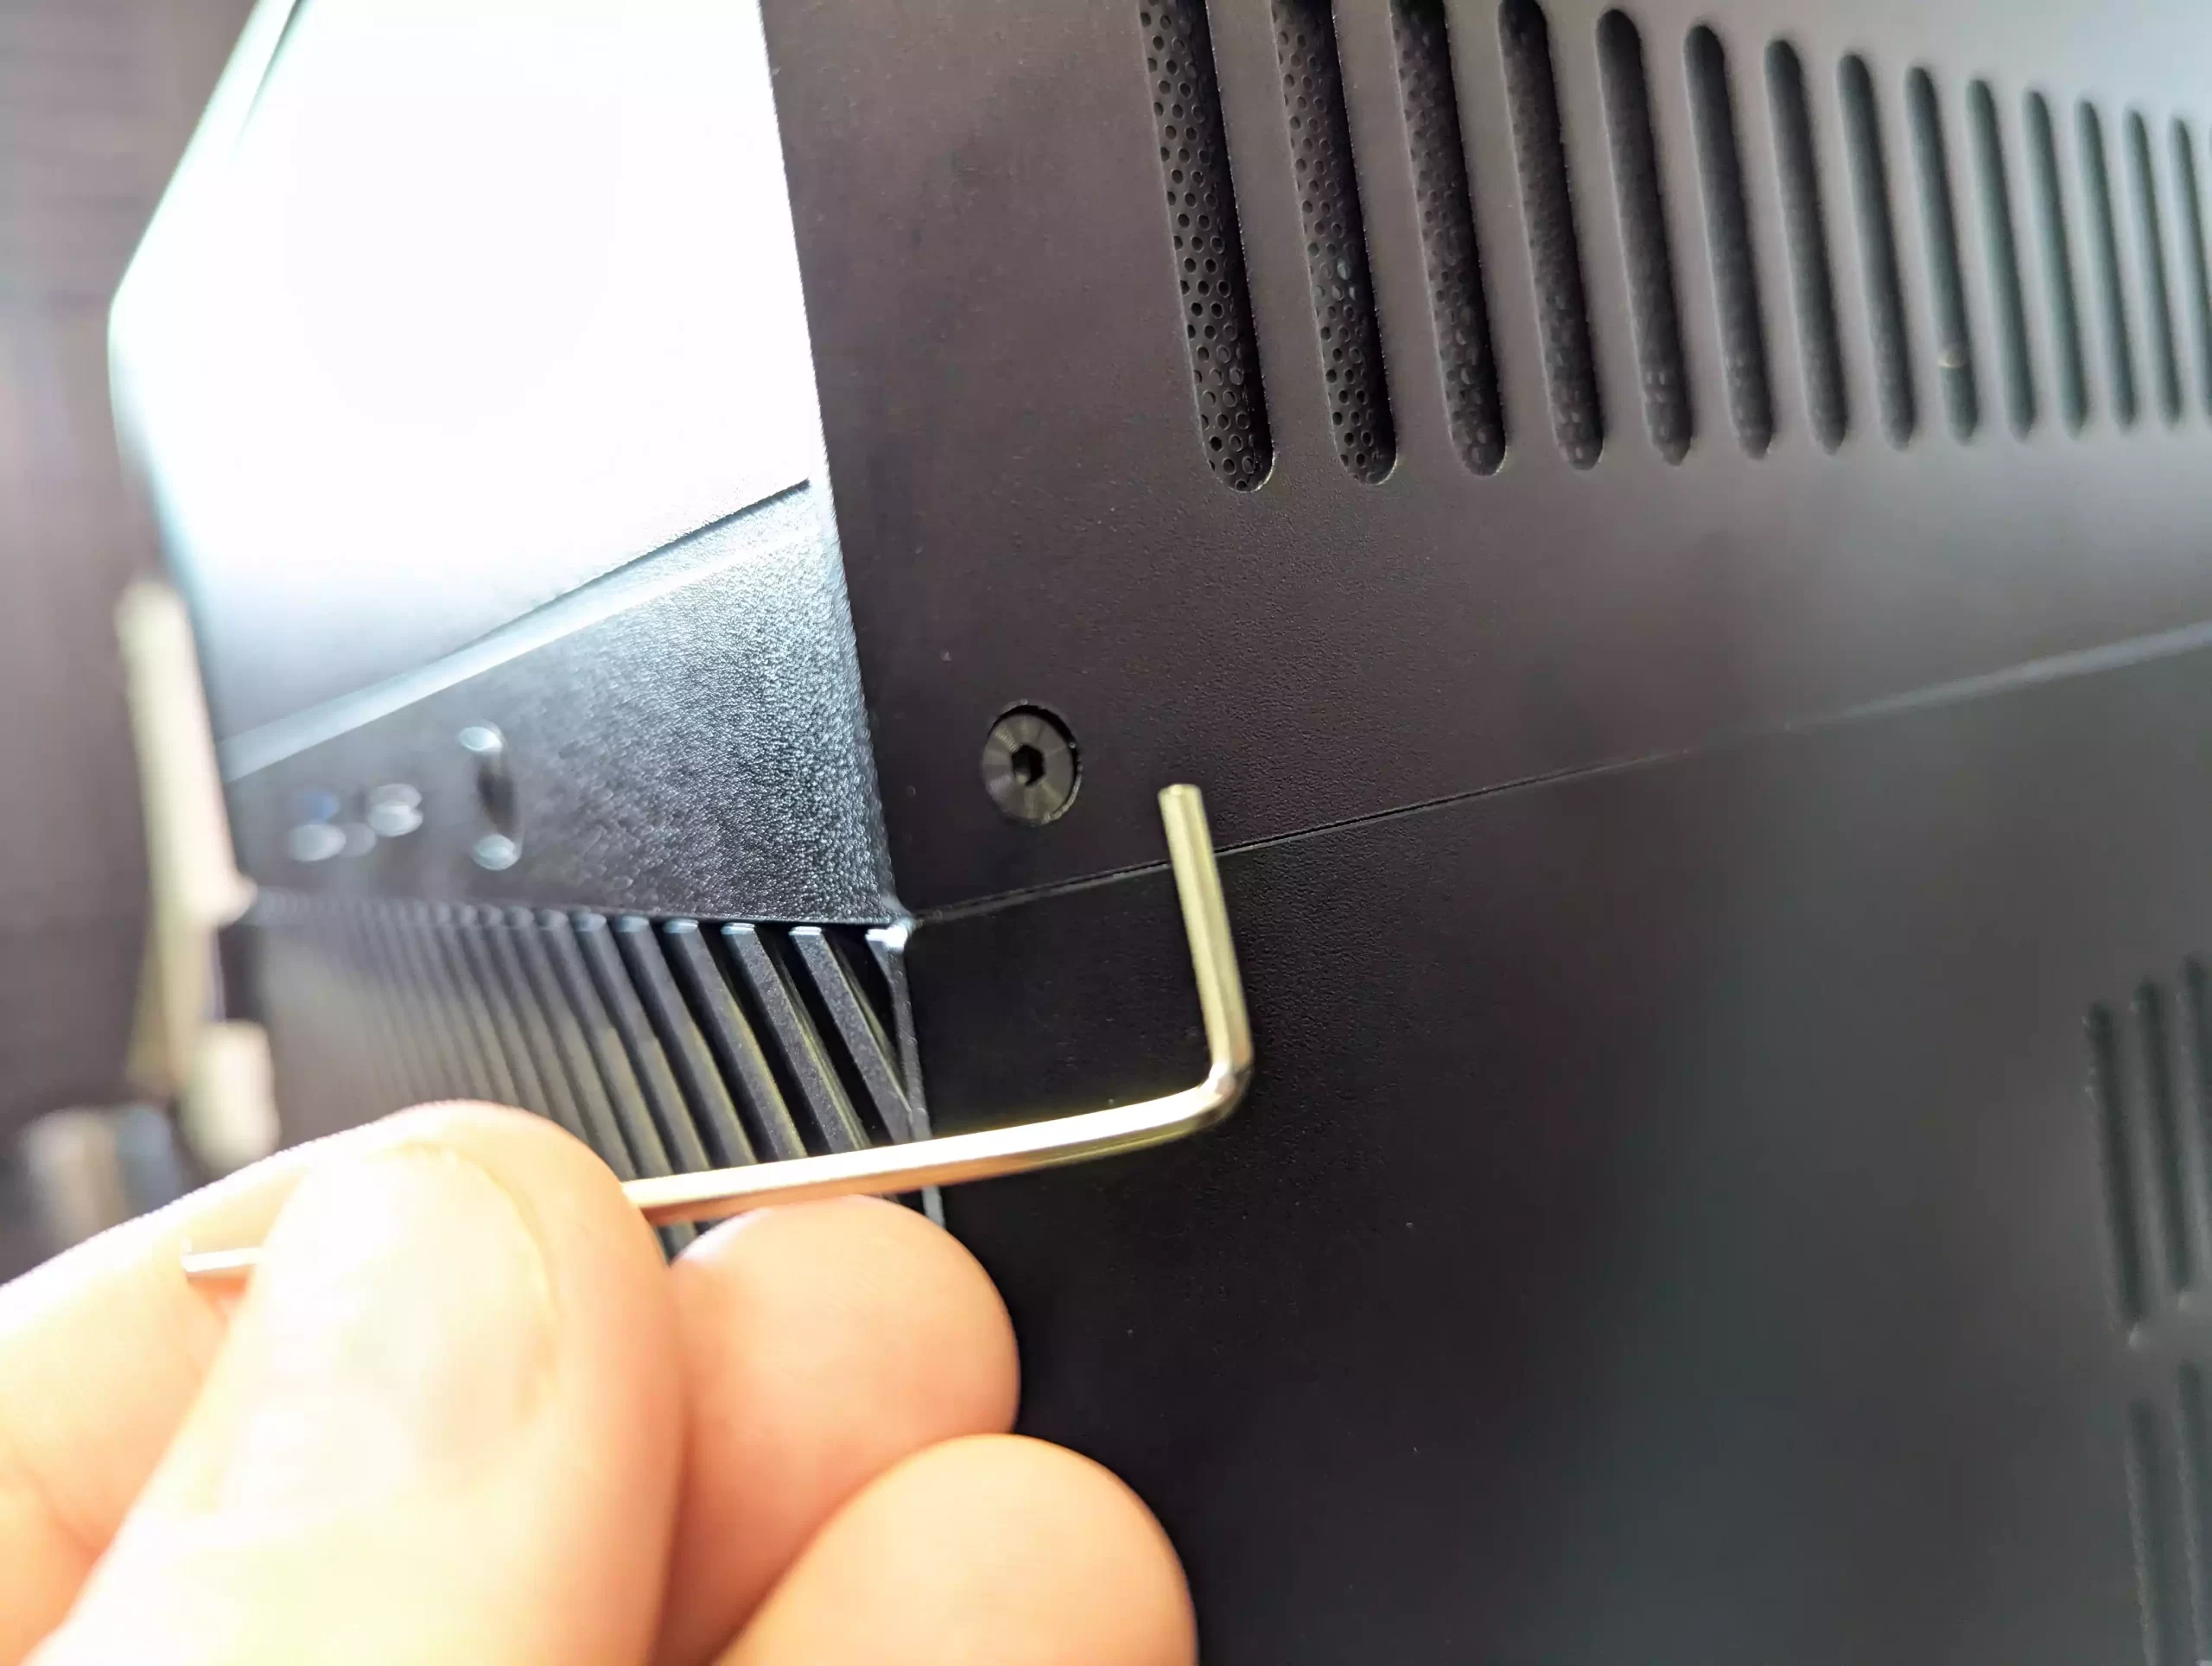
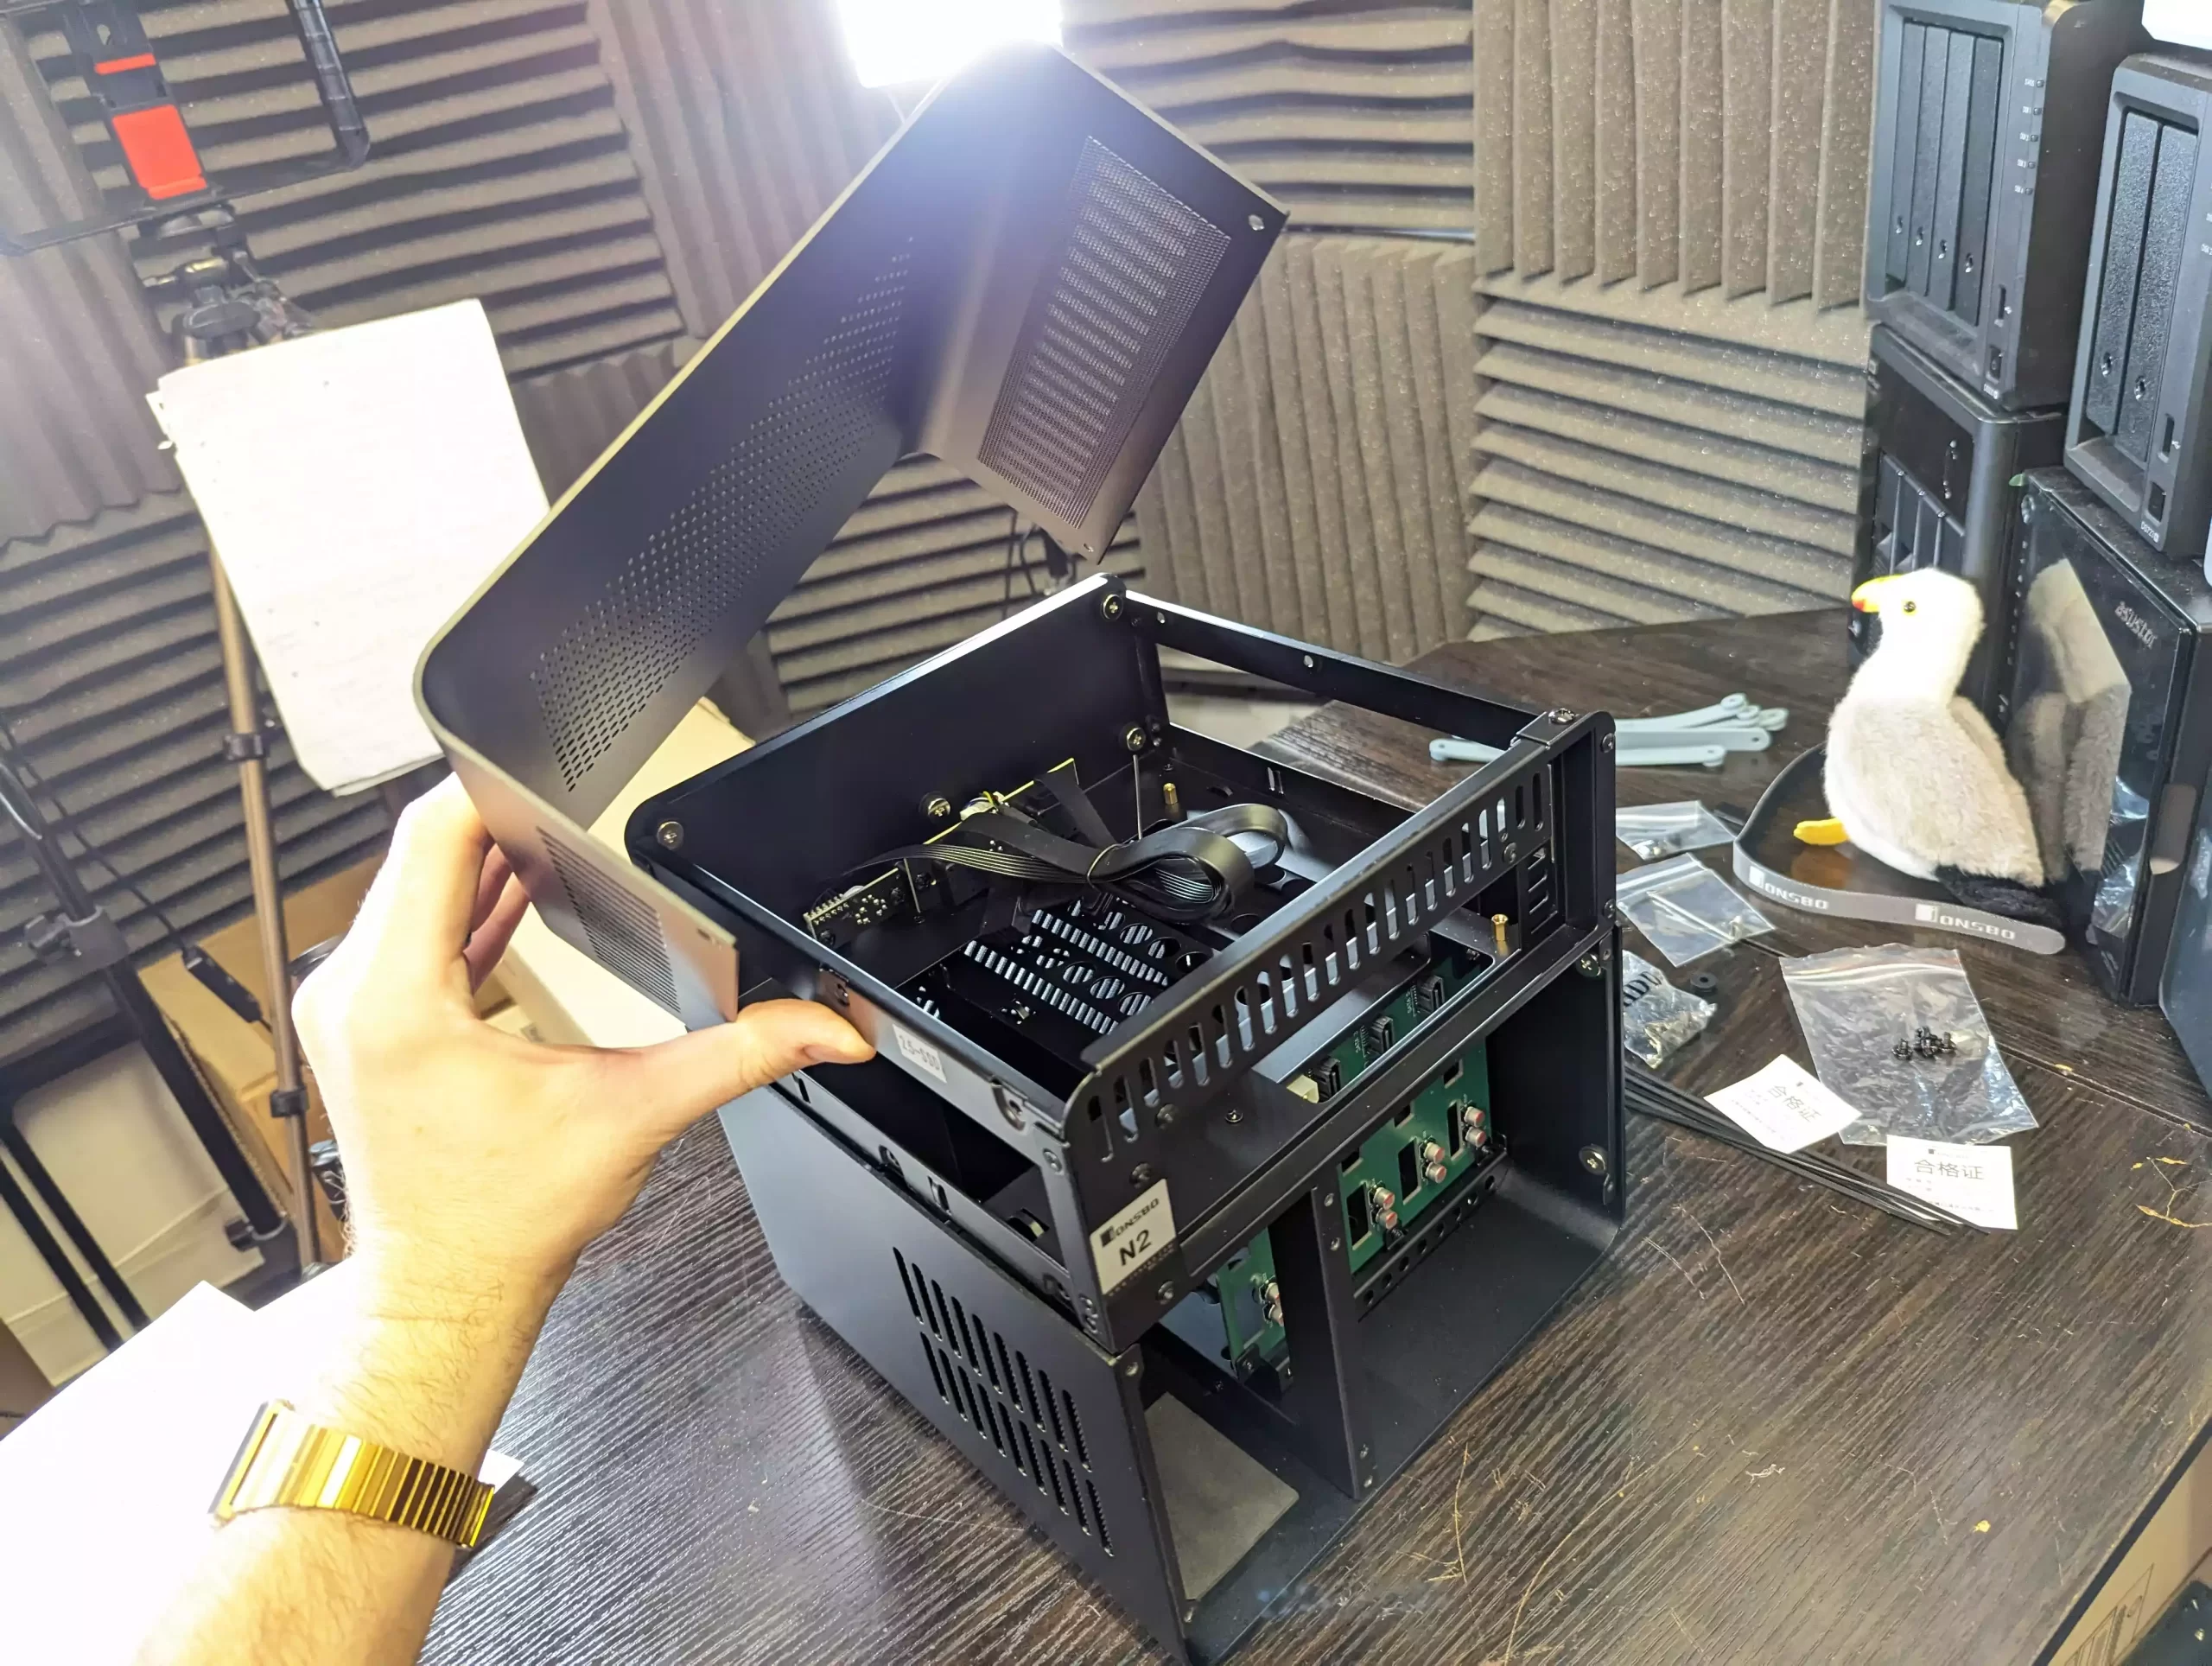
Place the Jonsbo N2 NAS case on a table. Use the included small Allen key to remove the top lid from all four corners.
Go to the back of the Jonsbo N2 case and take out the four thumb screws around the fan.

Detach the fan using the small fan connector linked to the internal starter board.
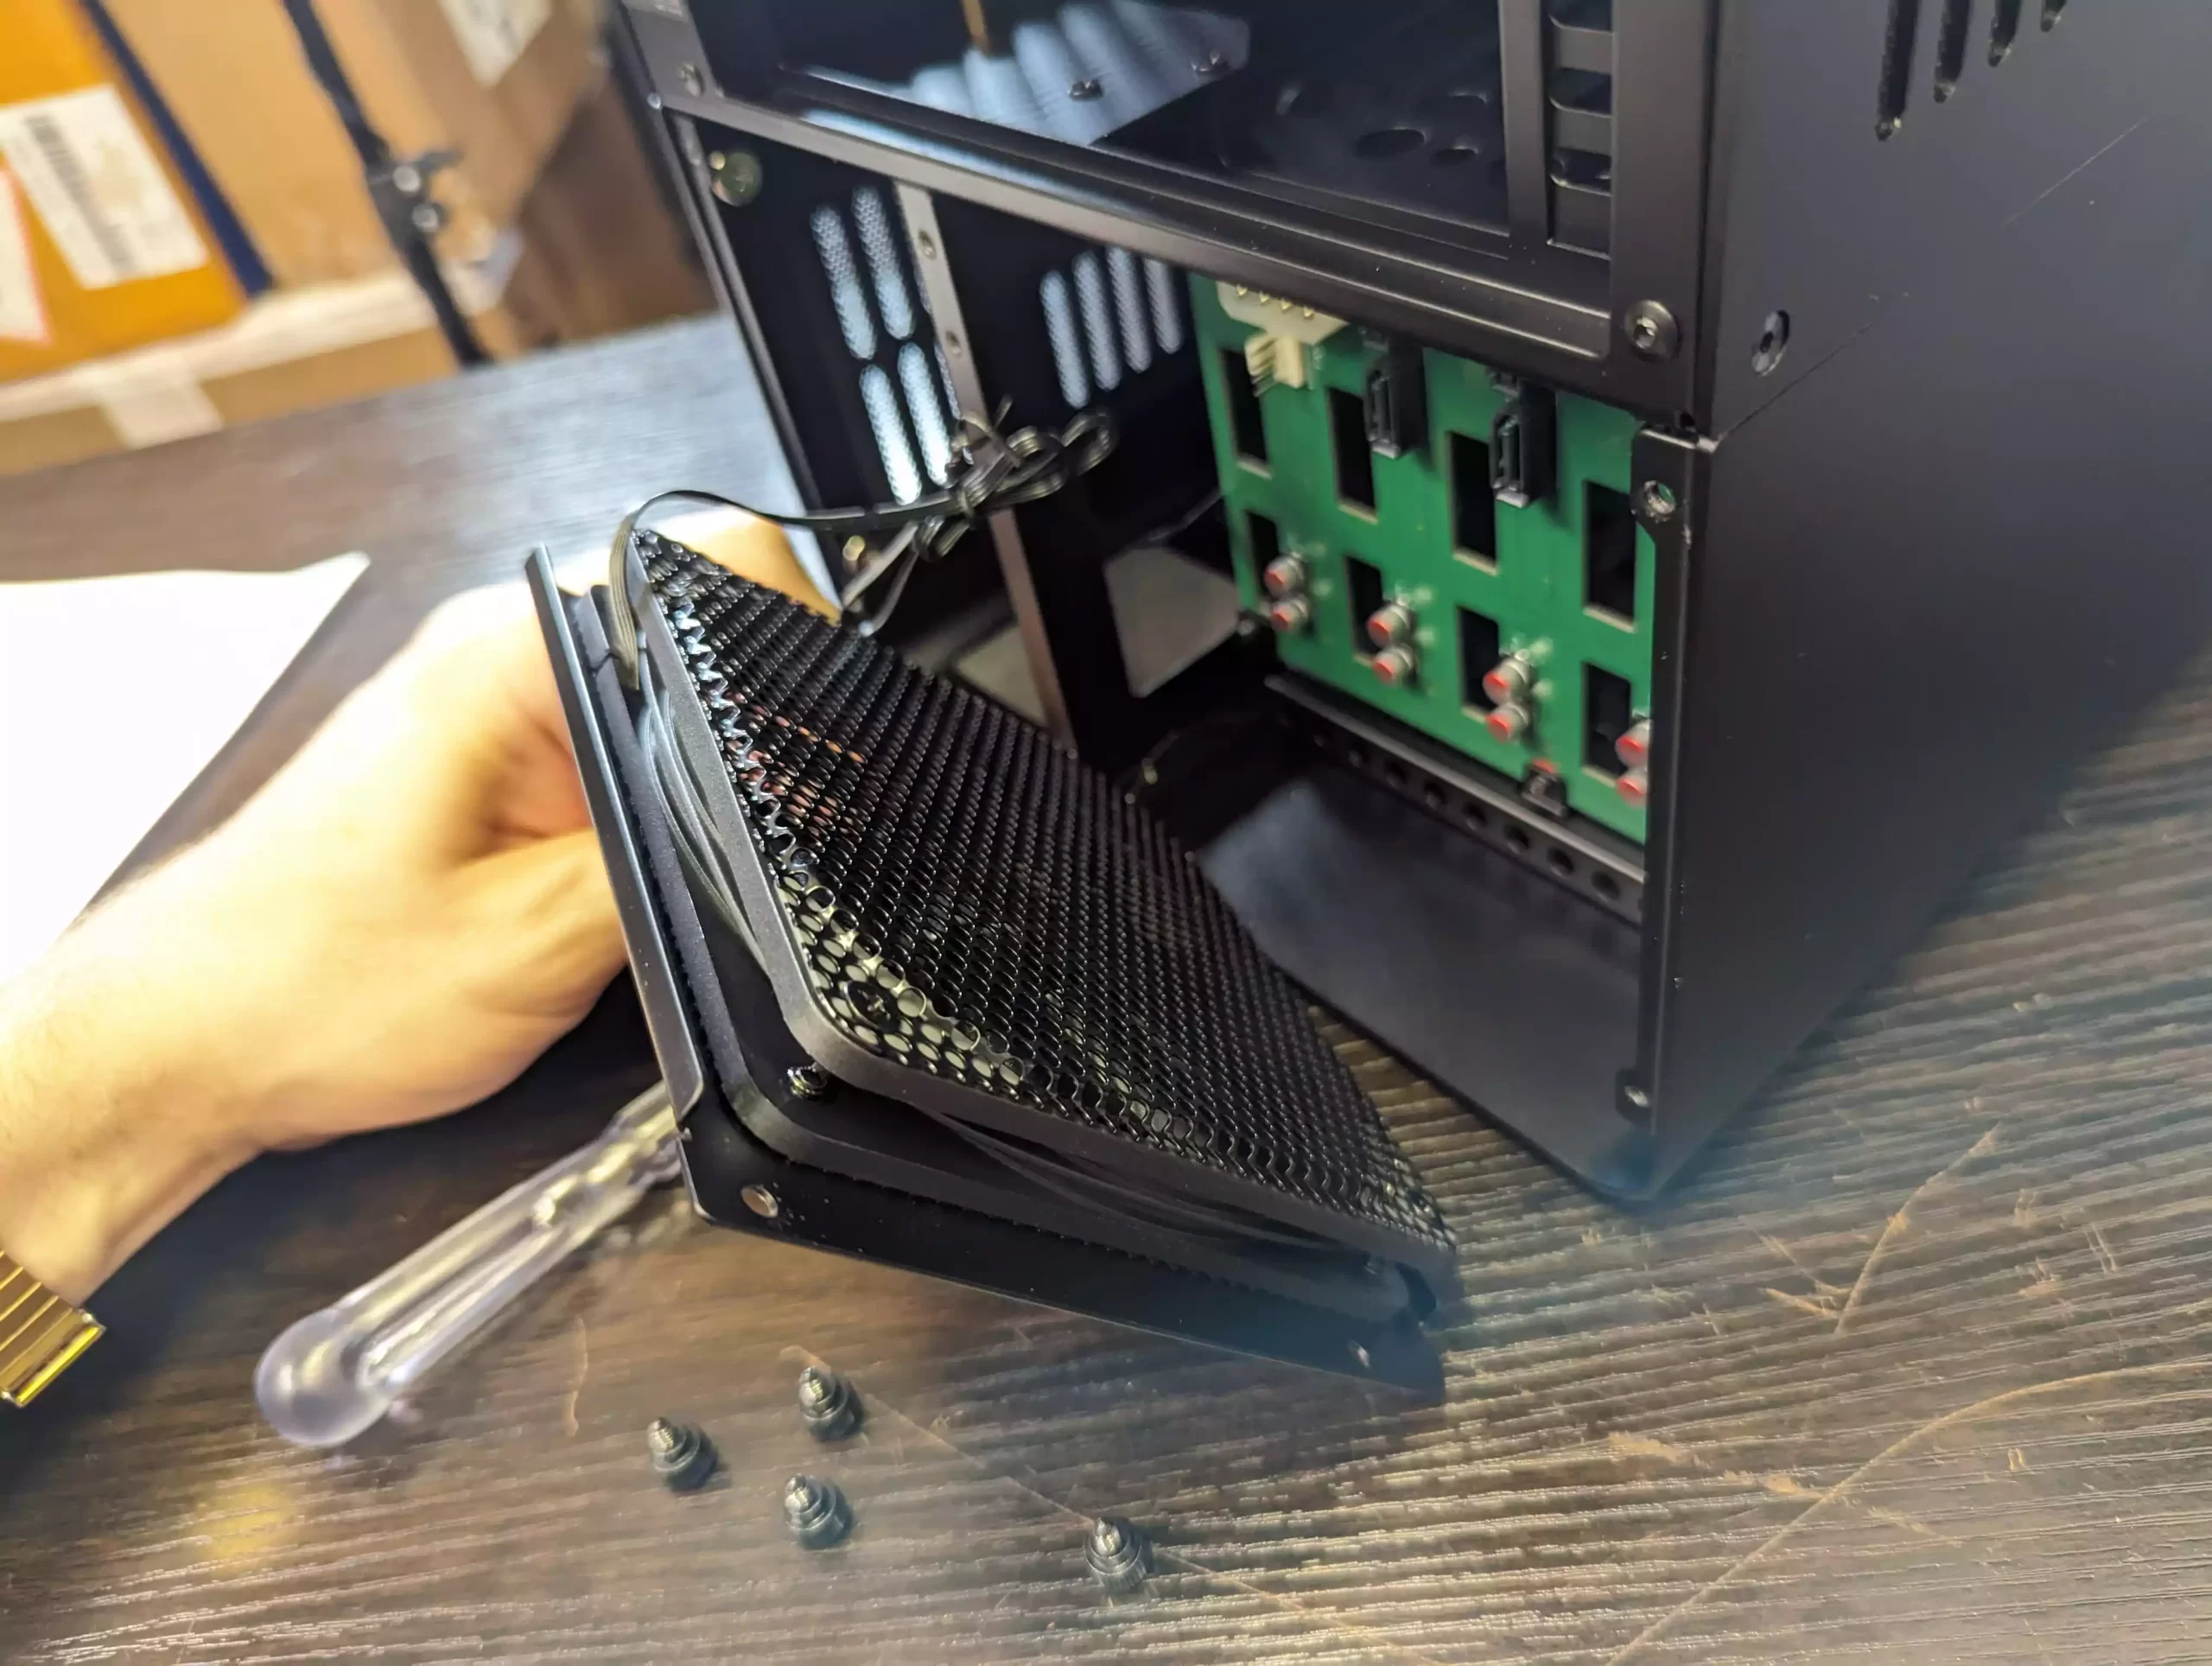
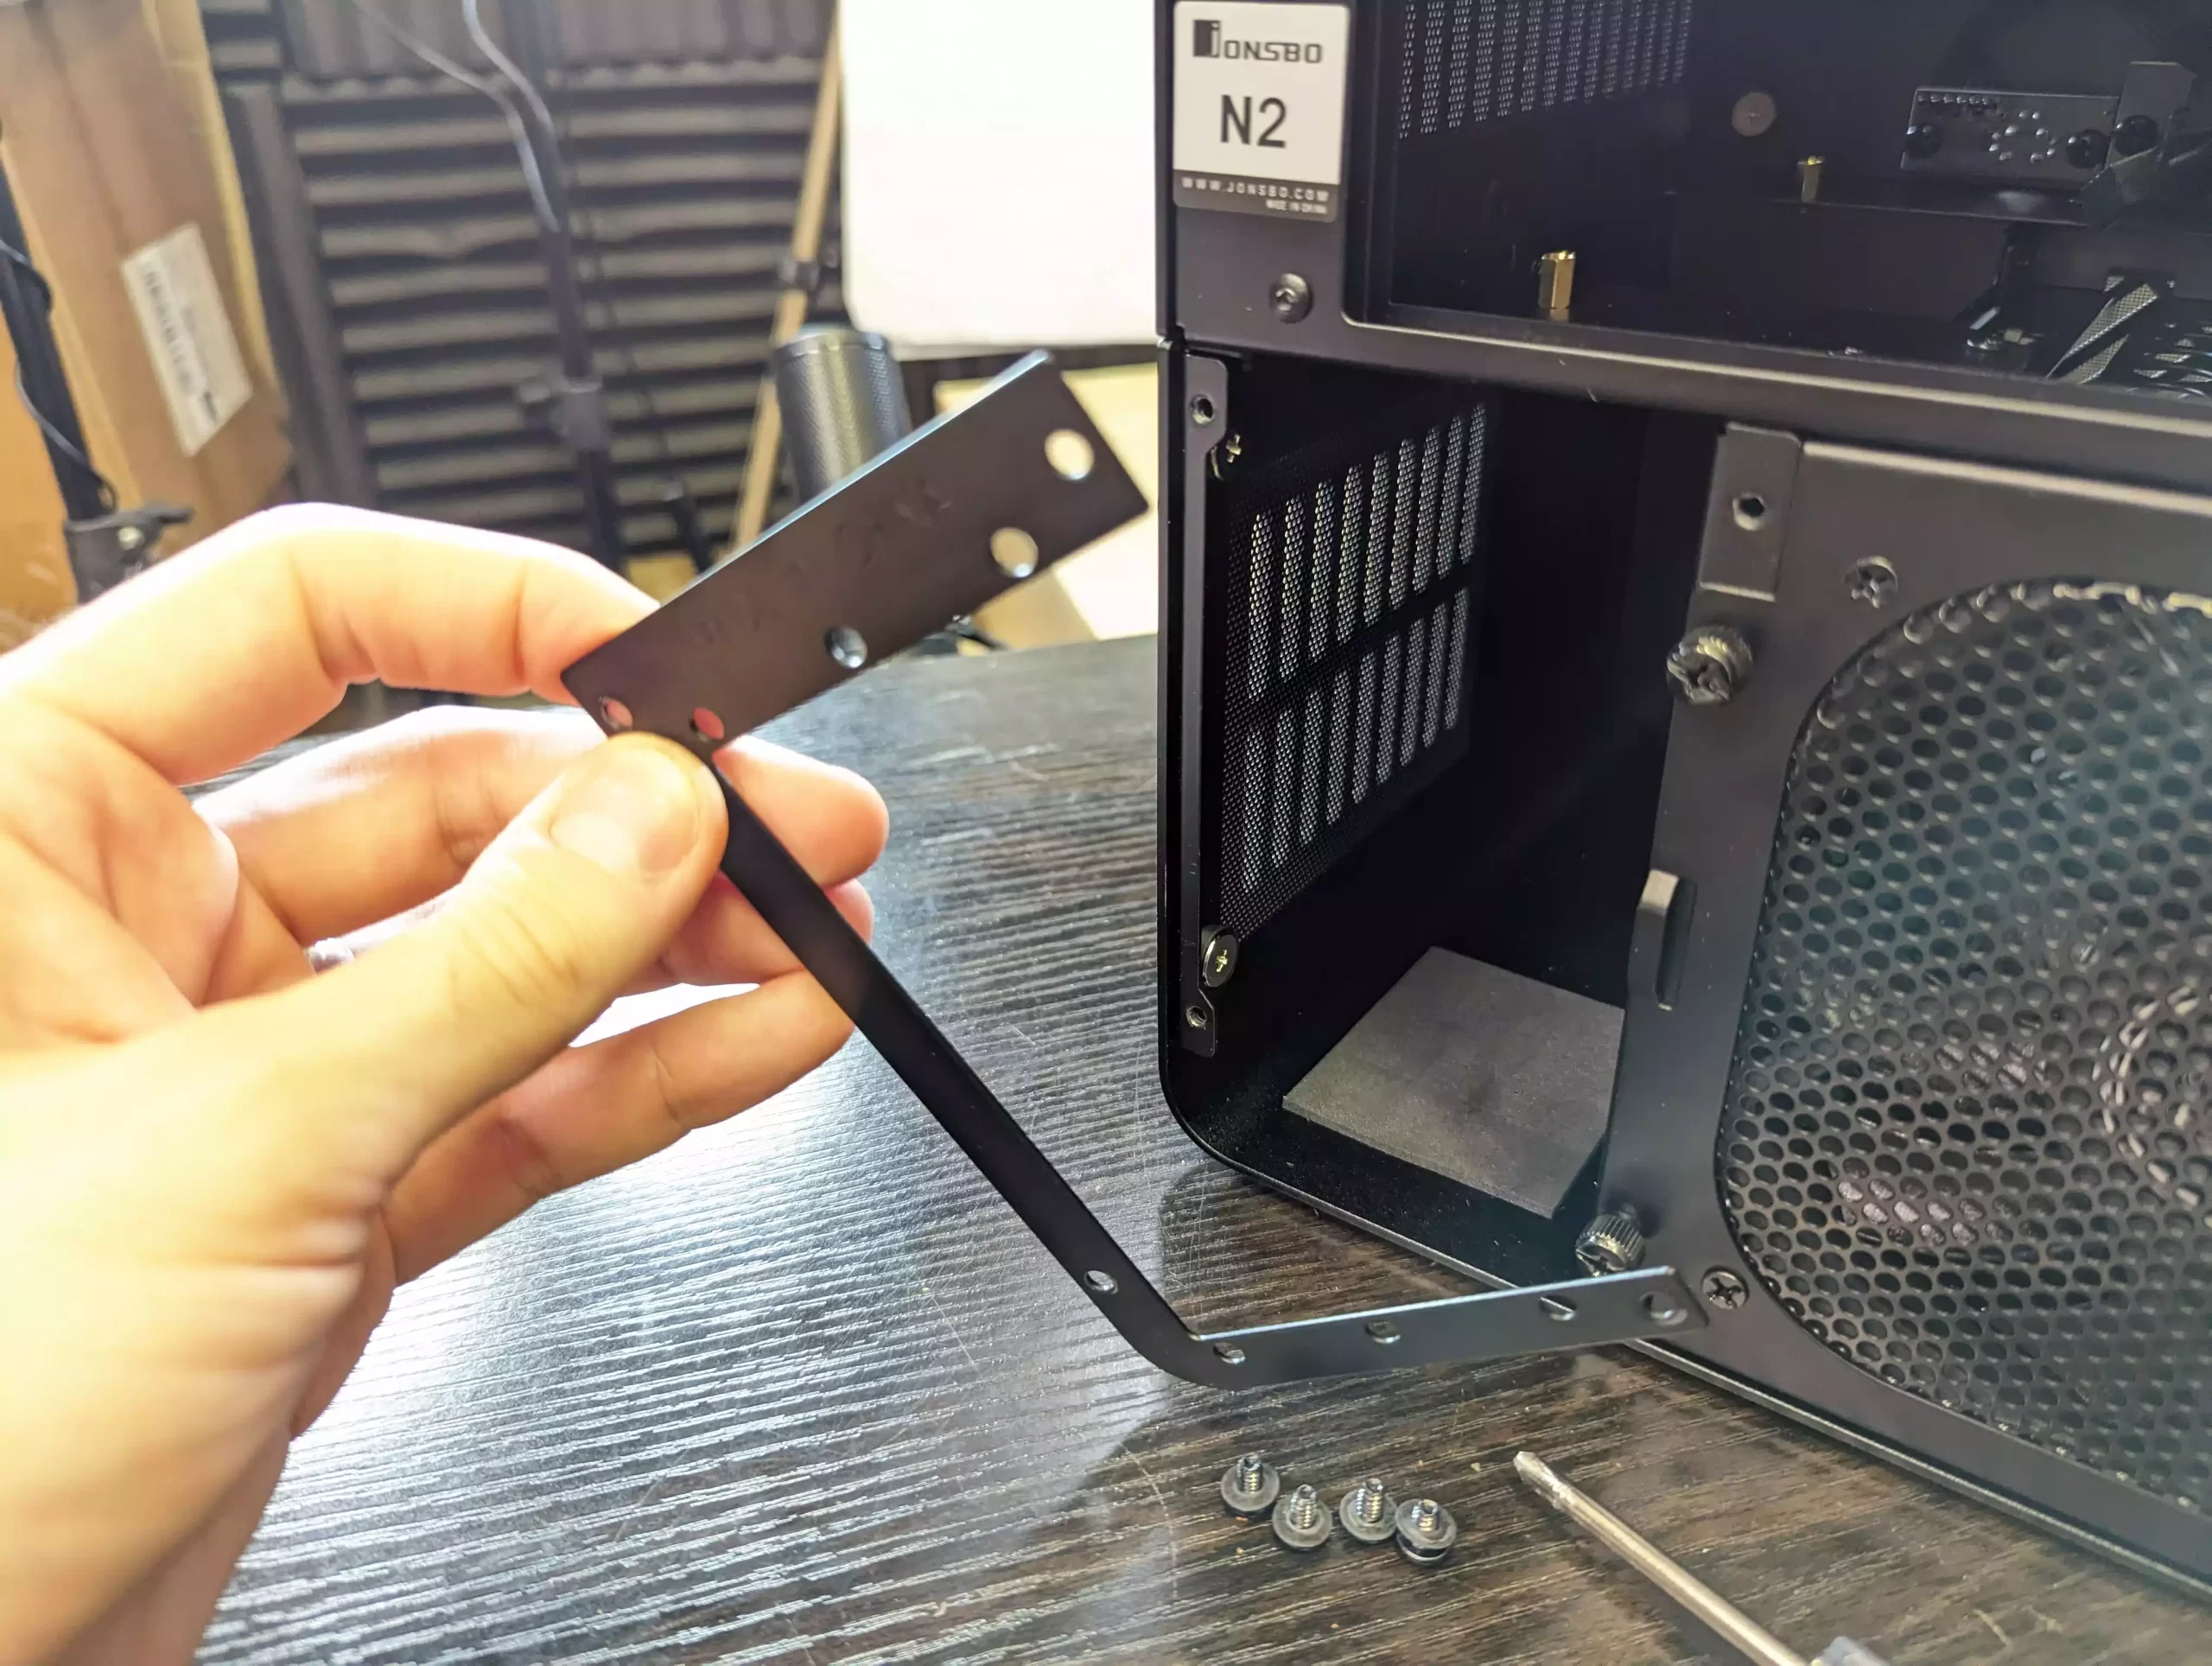
Next, remove the screws securing the plate around the PSU compartment.
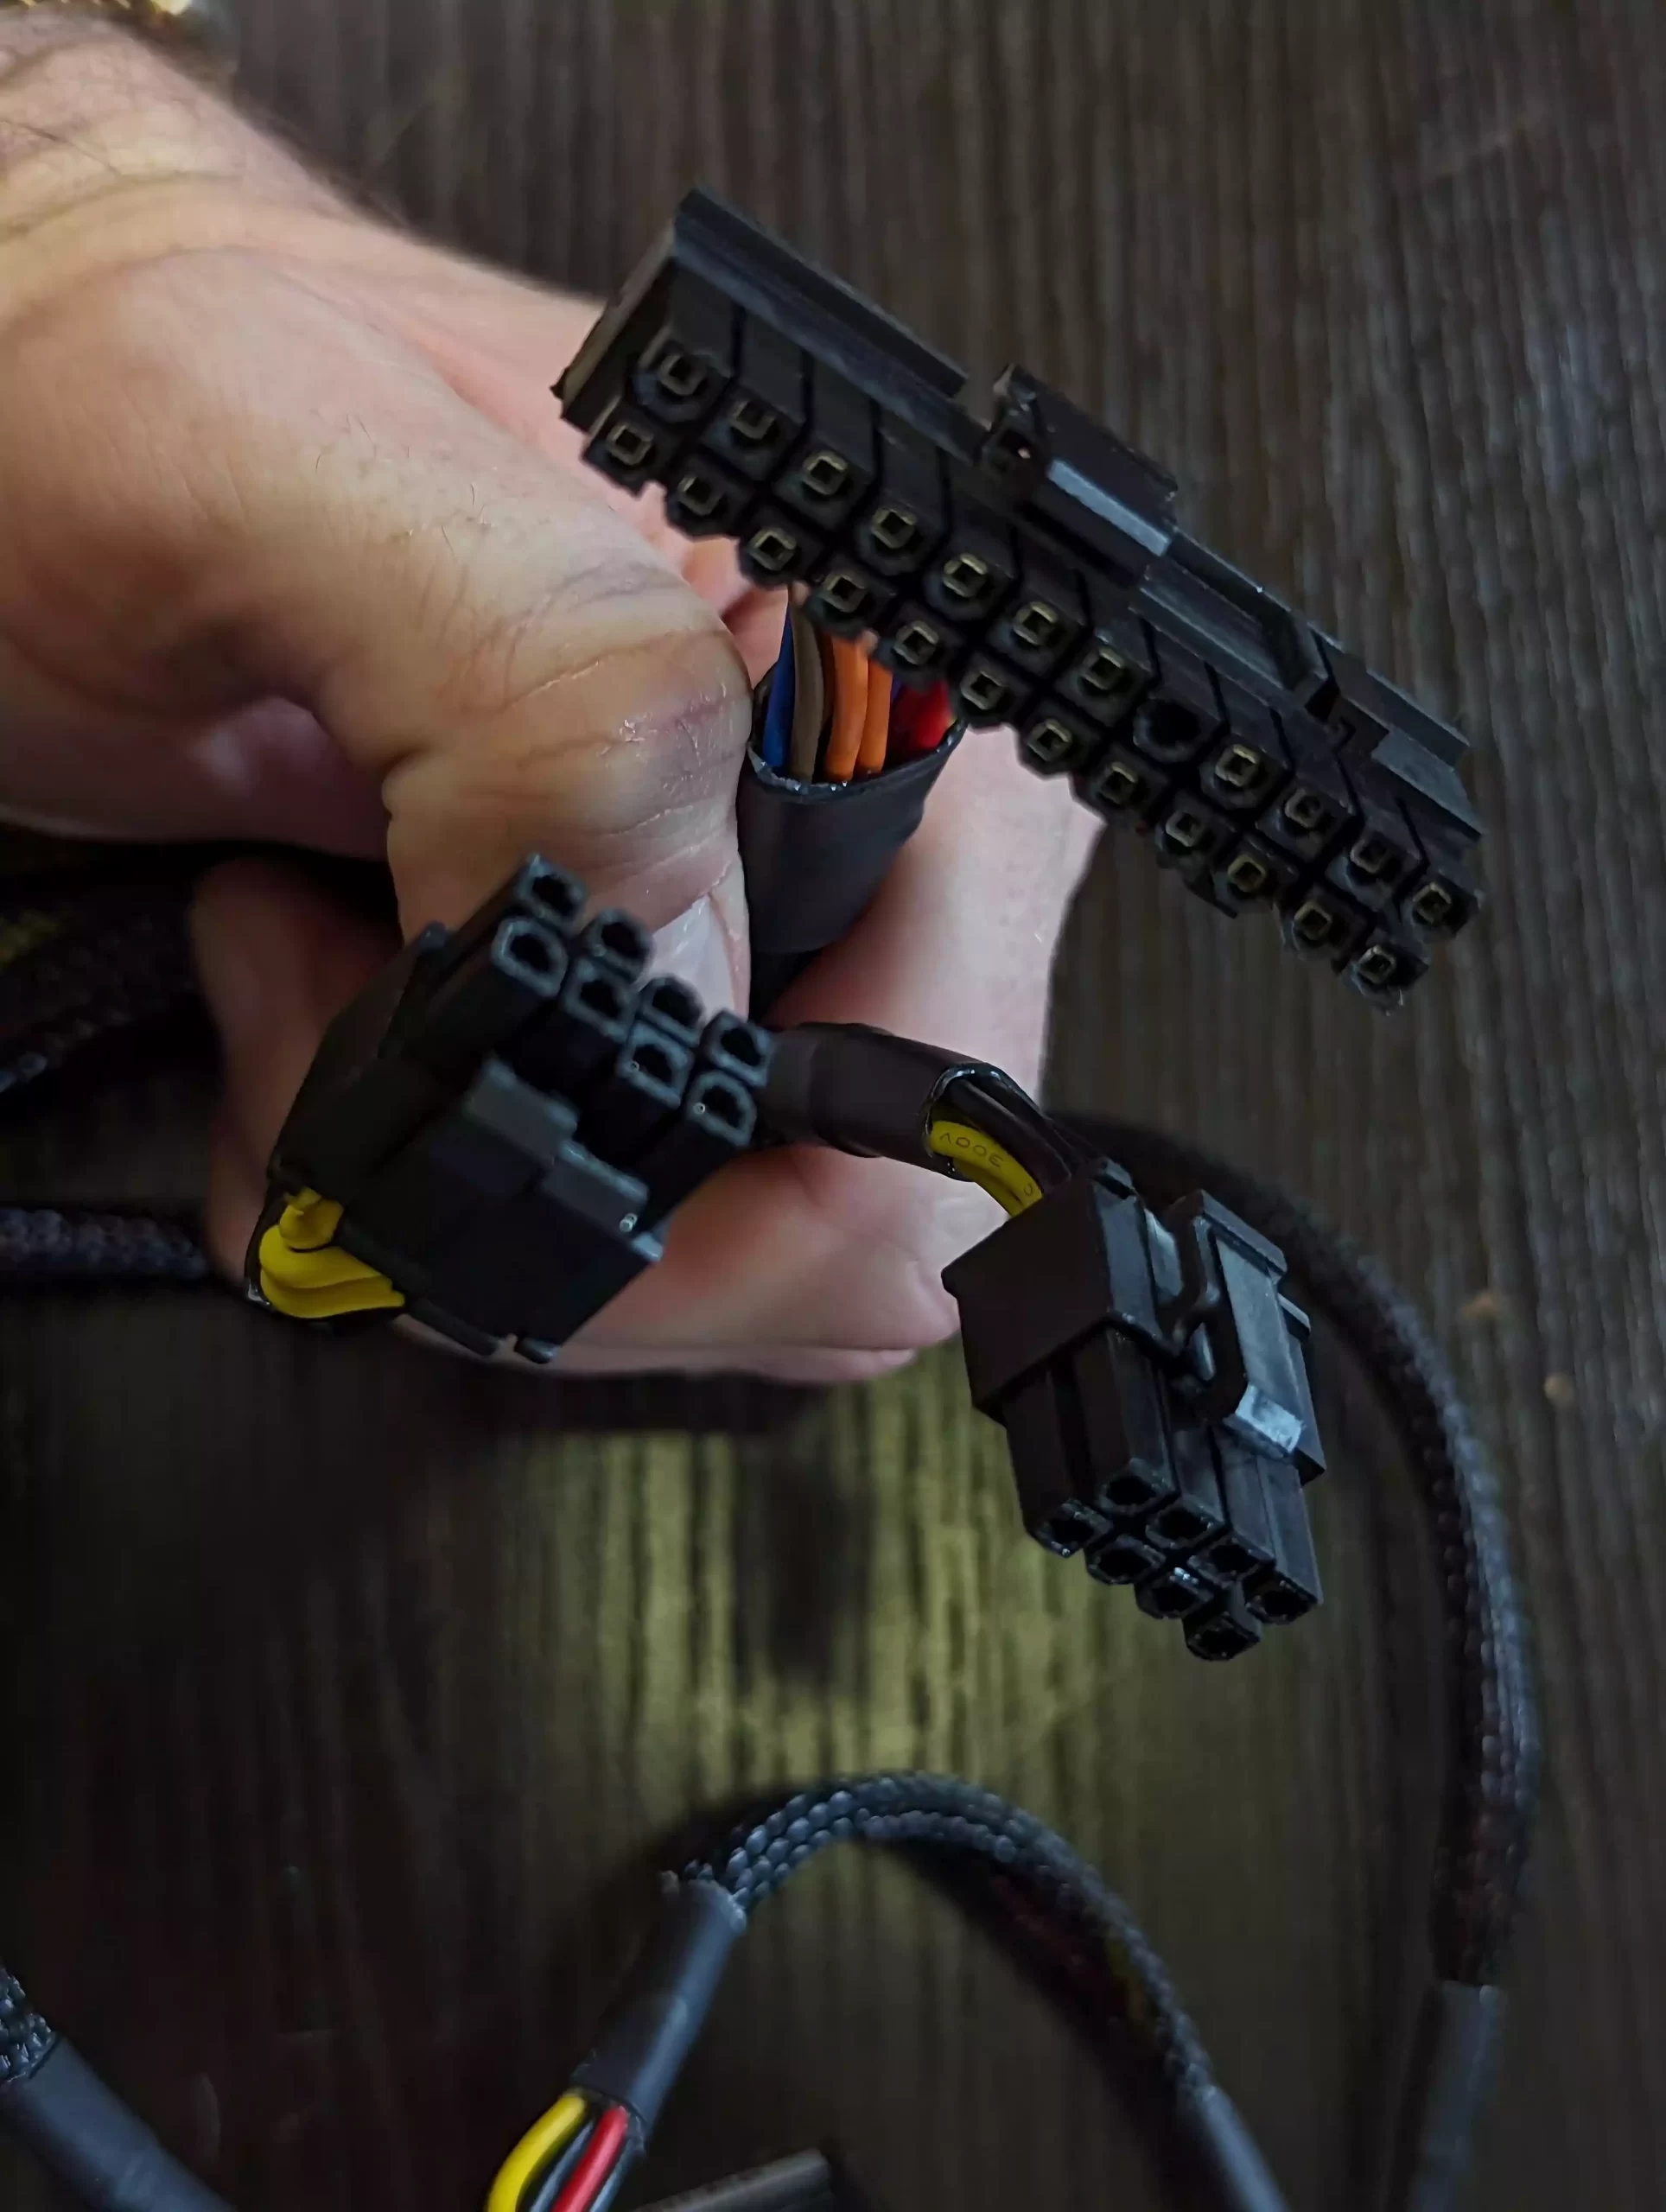
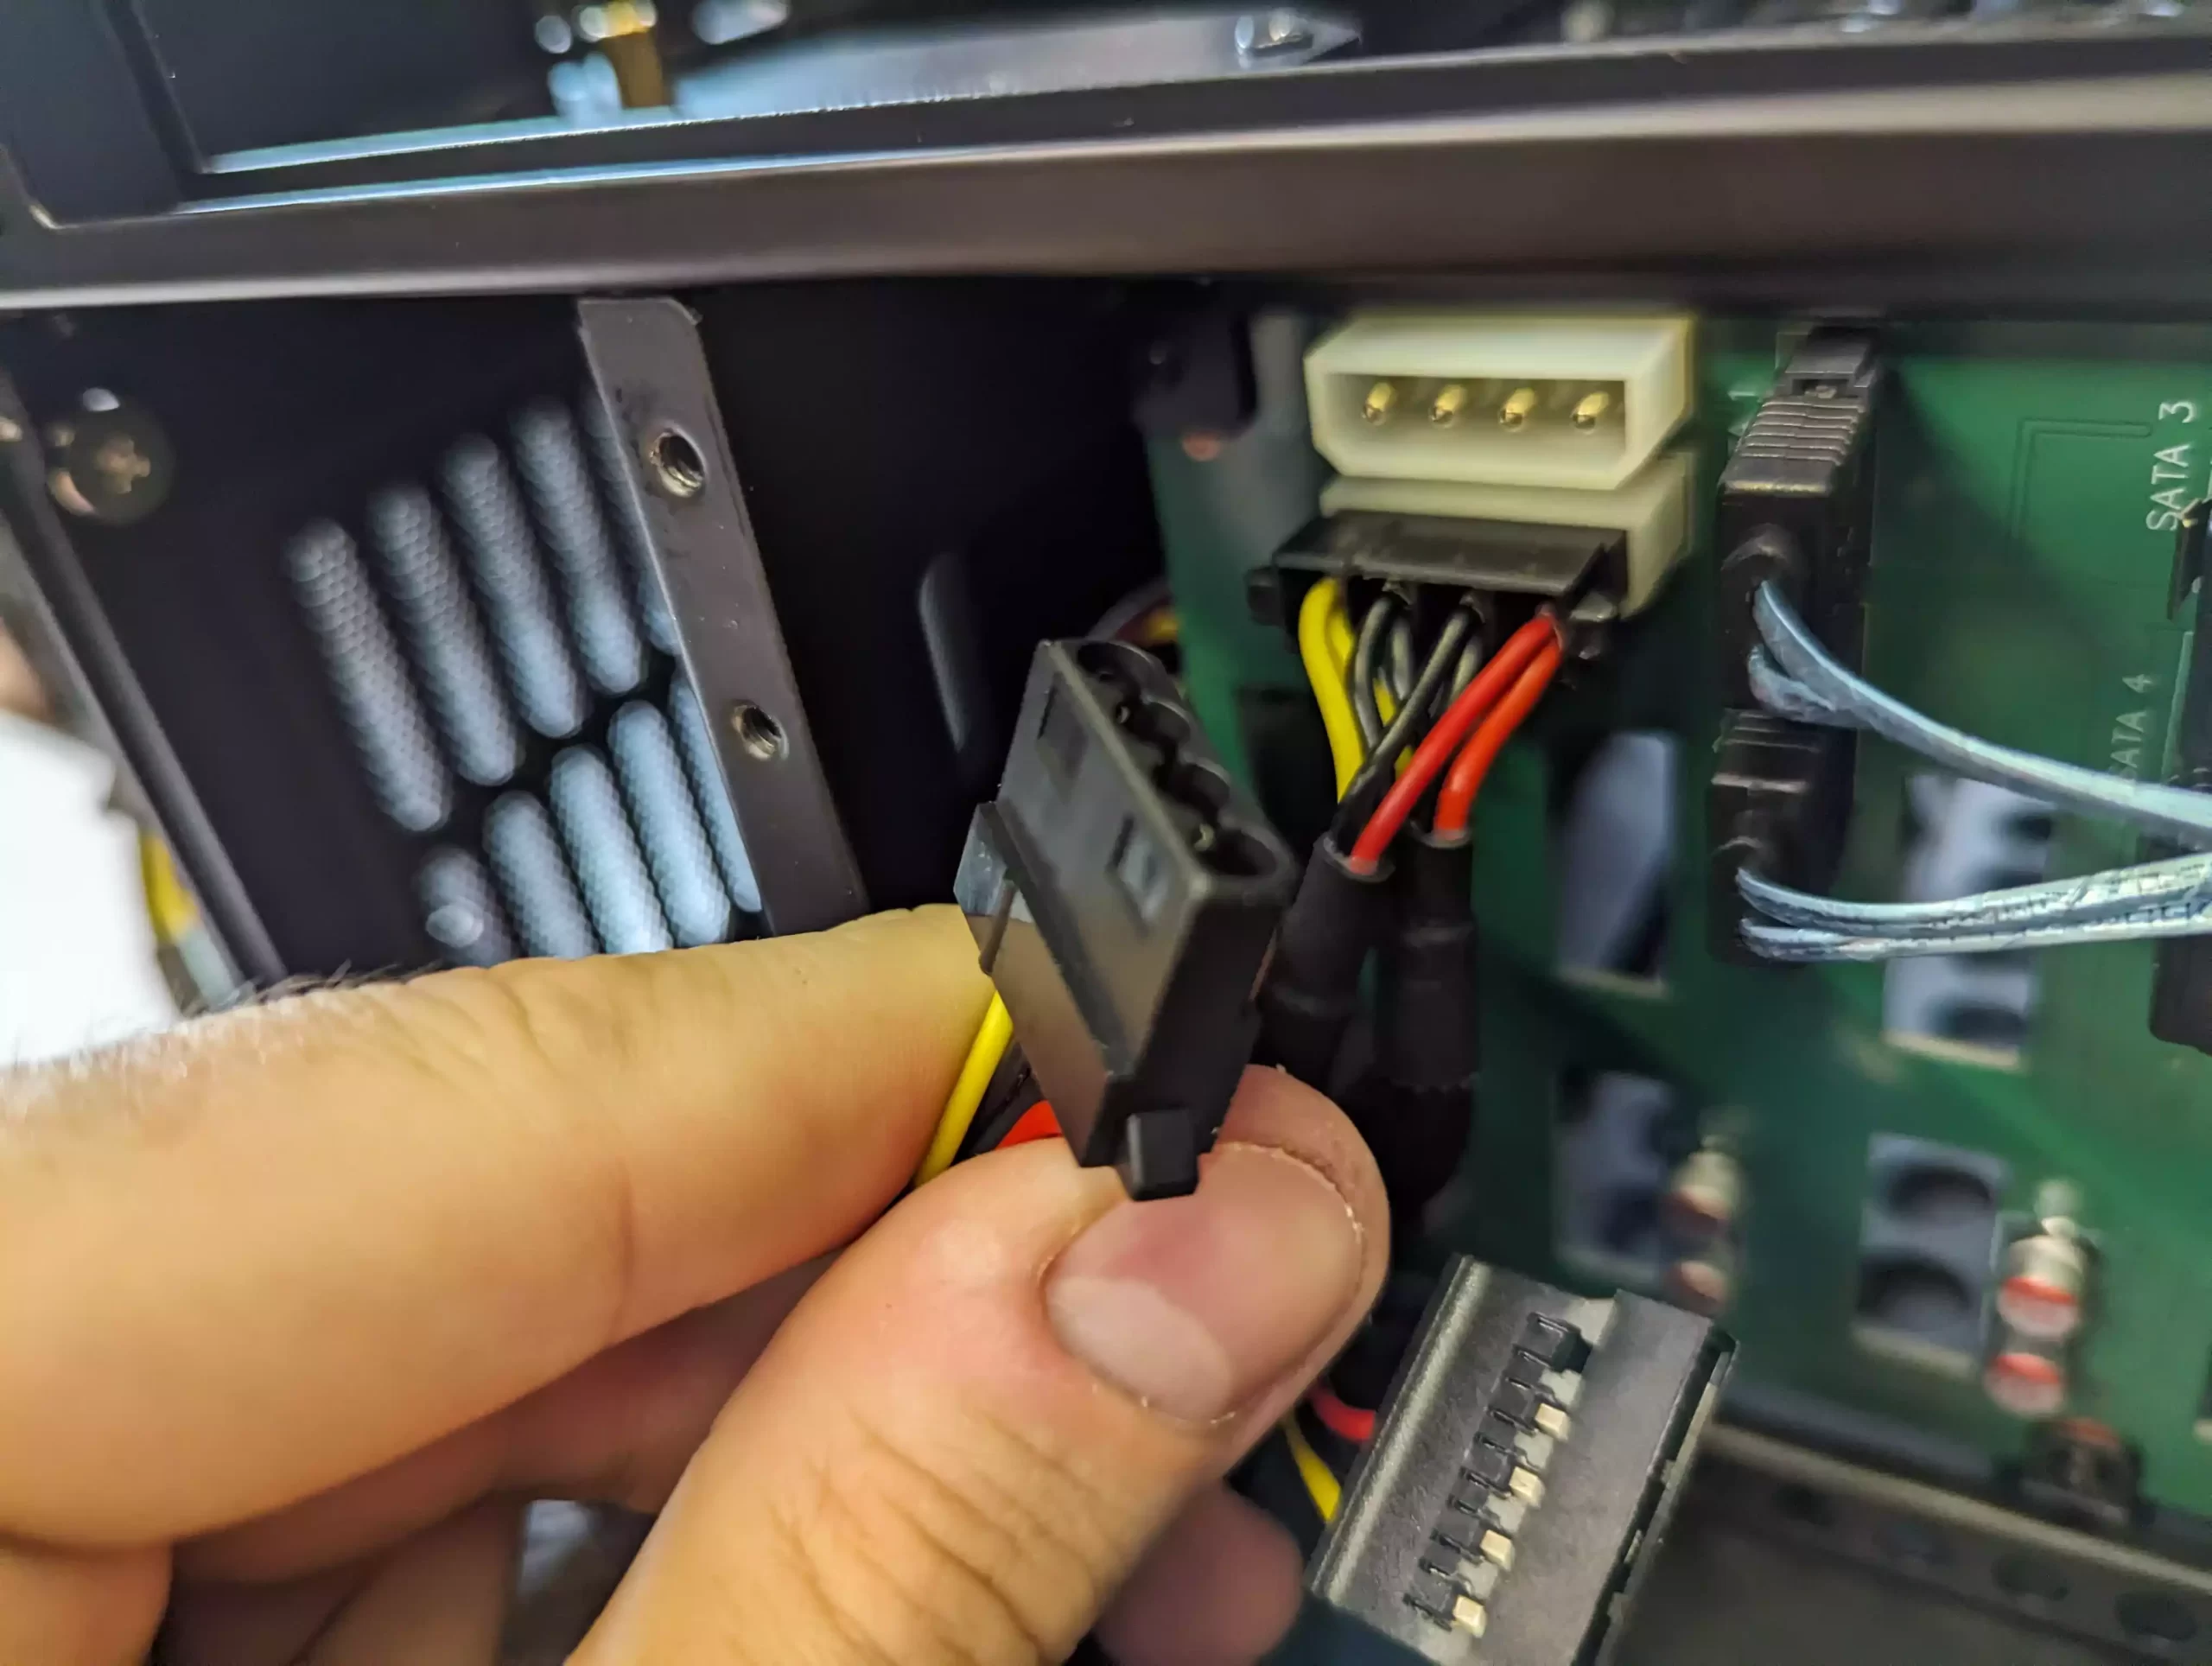
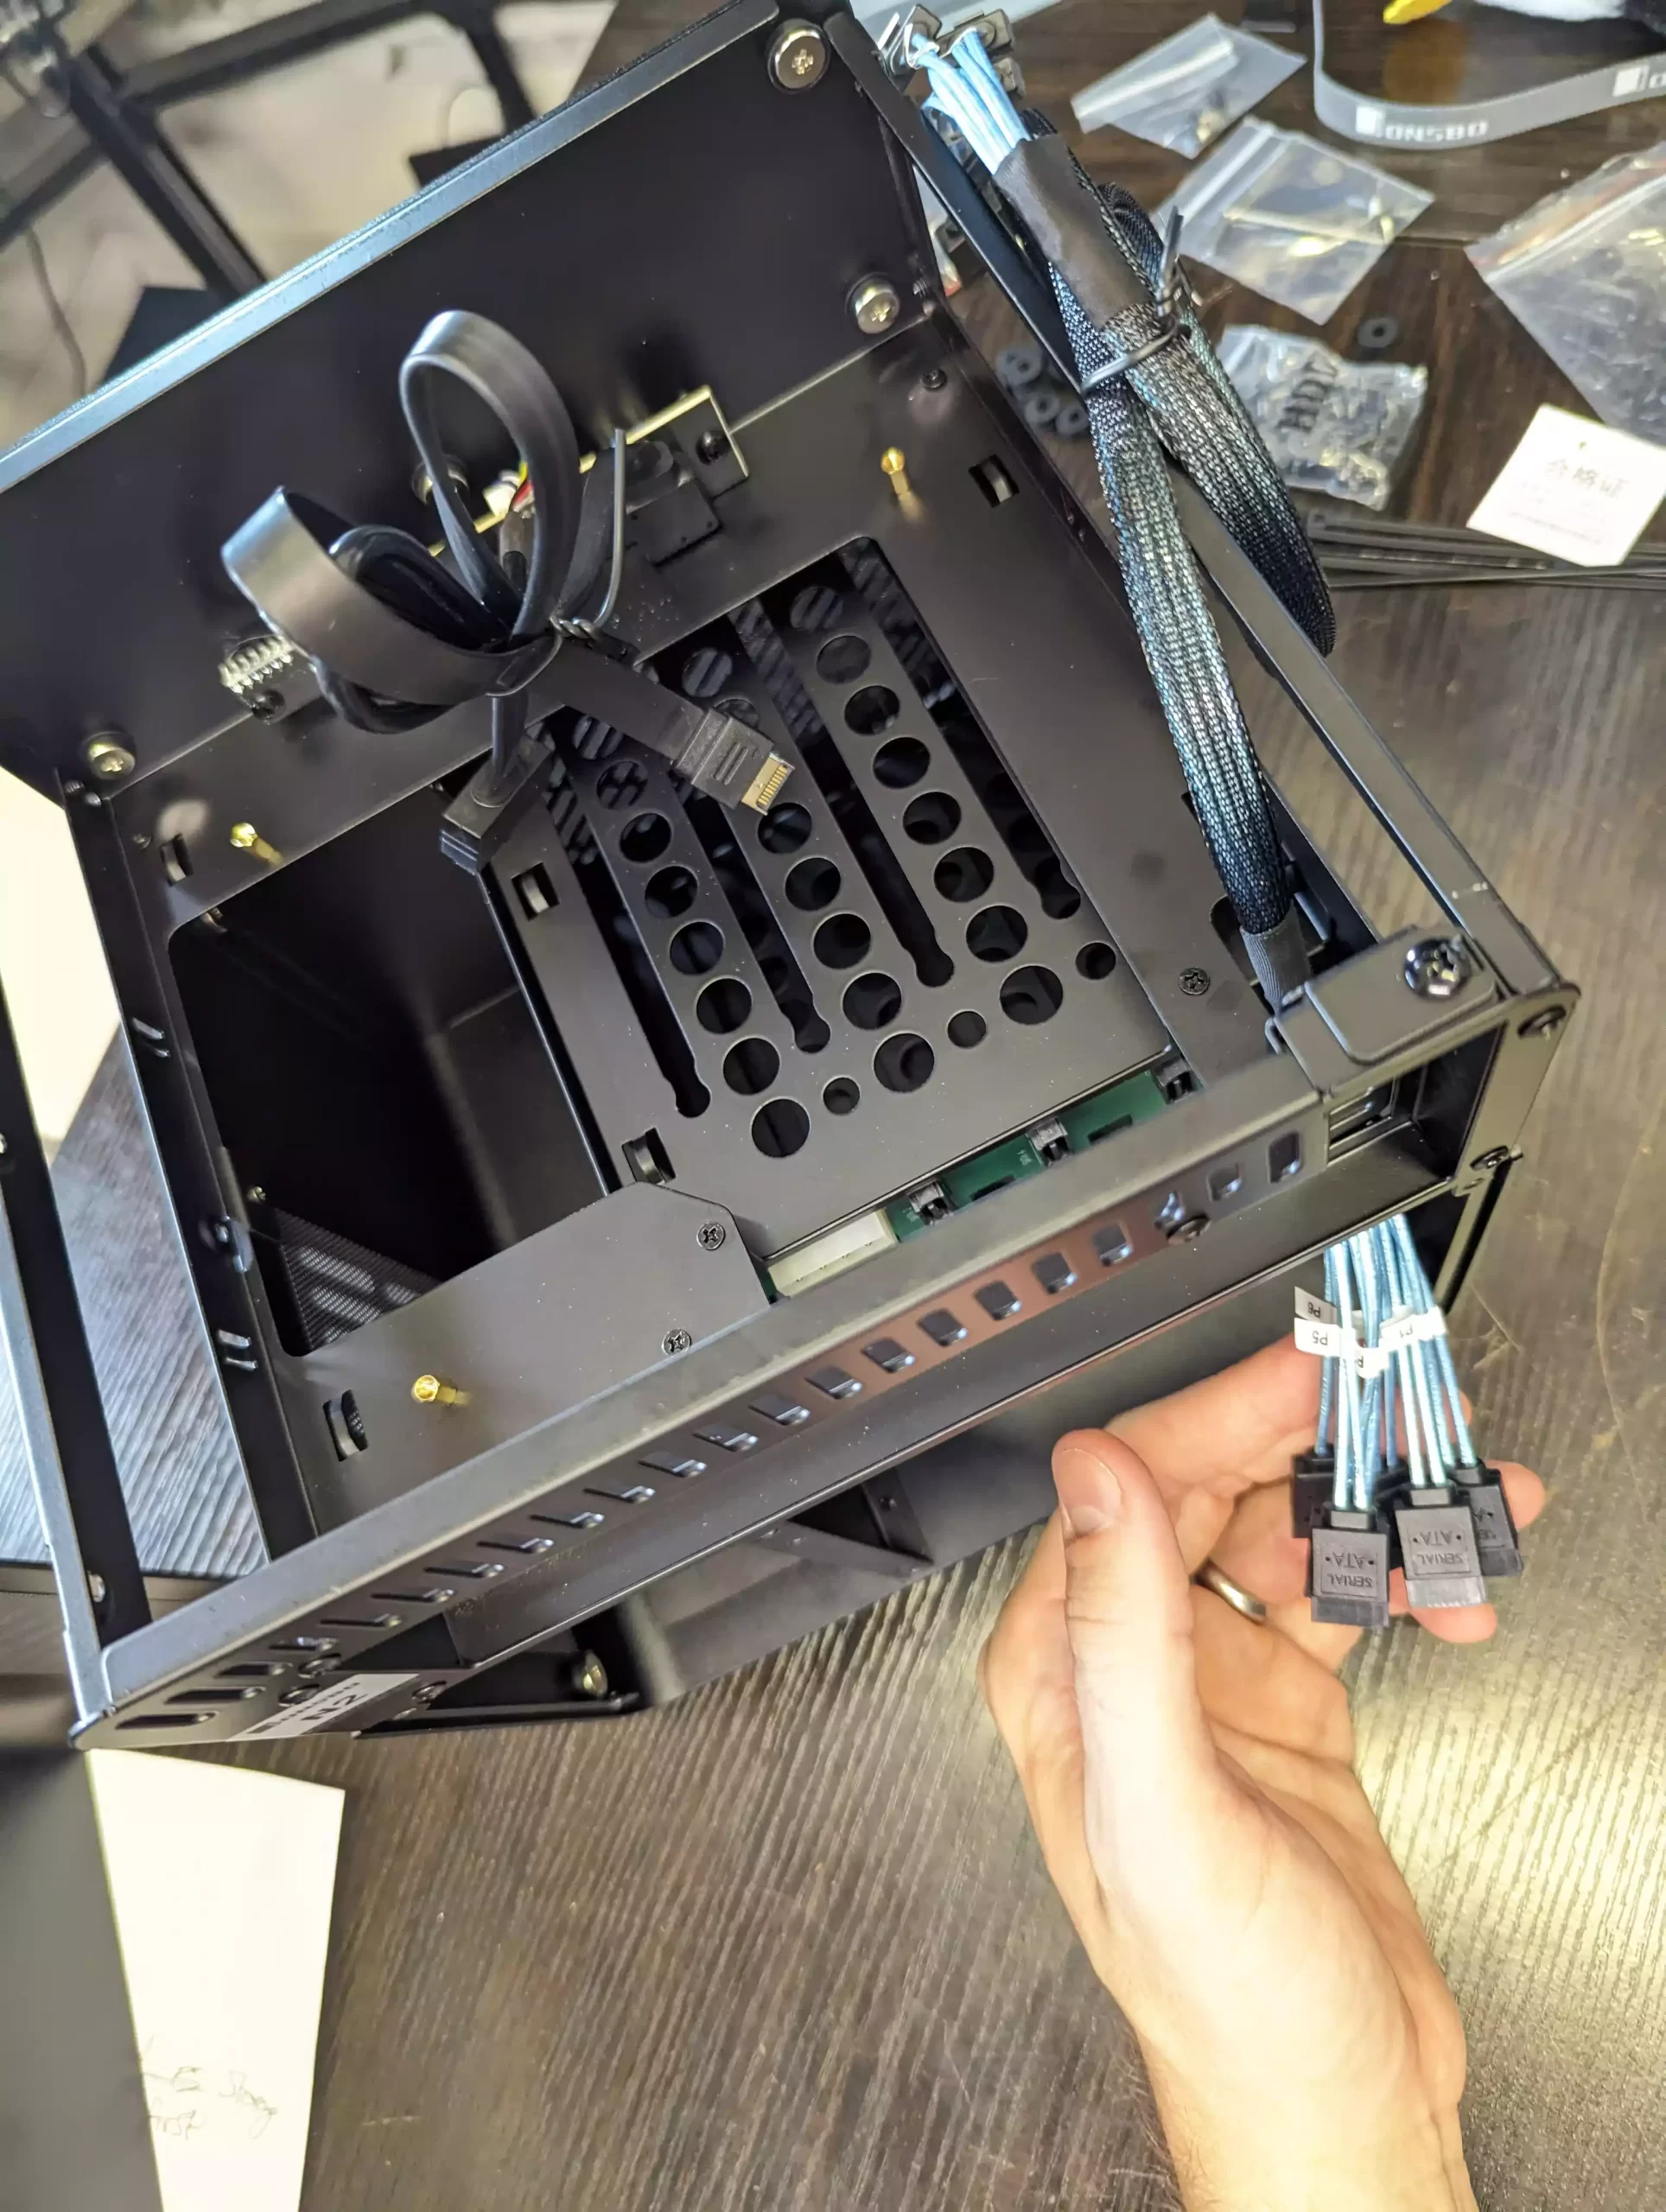
Grab the PSU and divide the power connectors into two sets: one set with individual SATA and molex connectors and another set with the thicker connectors.
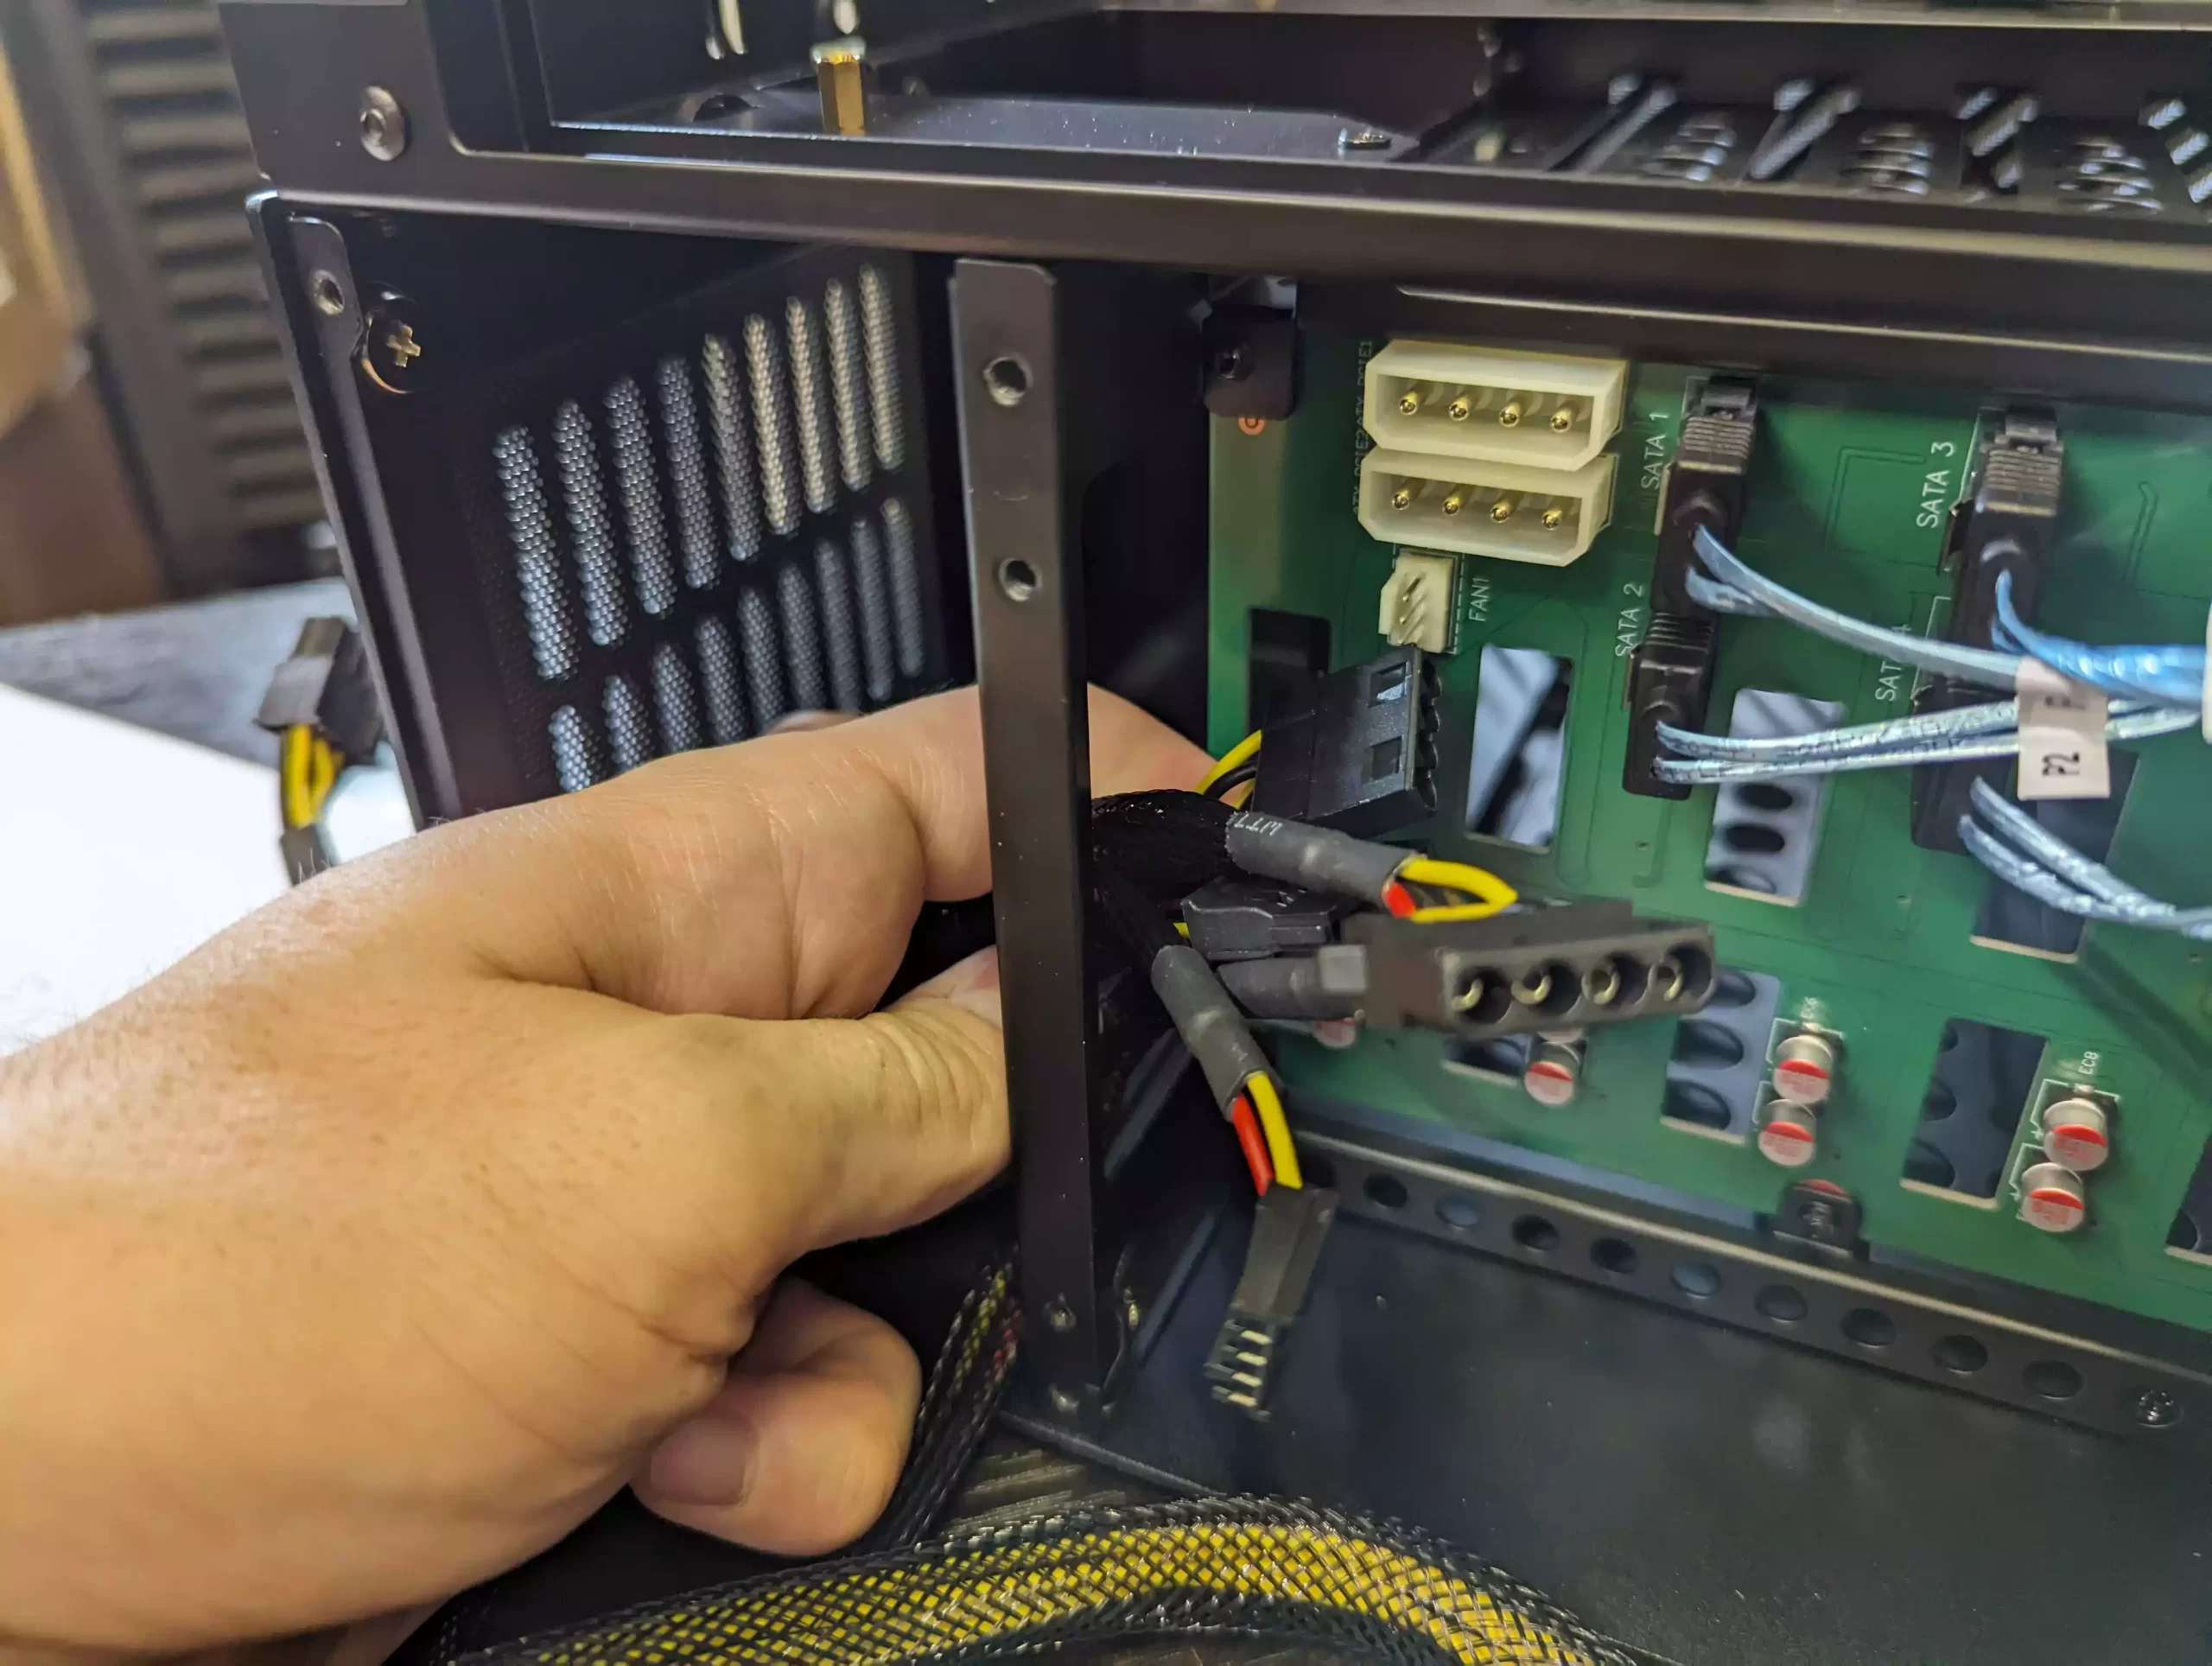
Feed the SATA and molex cables into the PSU compartment and immediately into the right cavity leading to the SATA backplane where drives connect.
Thread the larger power supply connectors into the back of the PSU compartment, lifting them out through the case’s top.
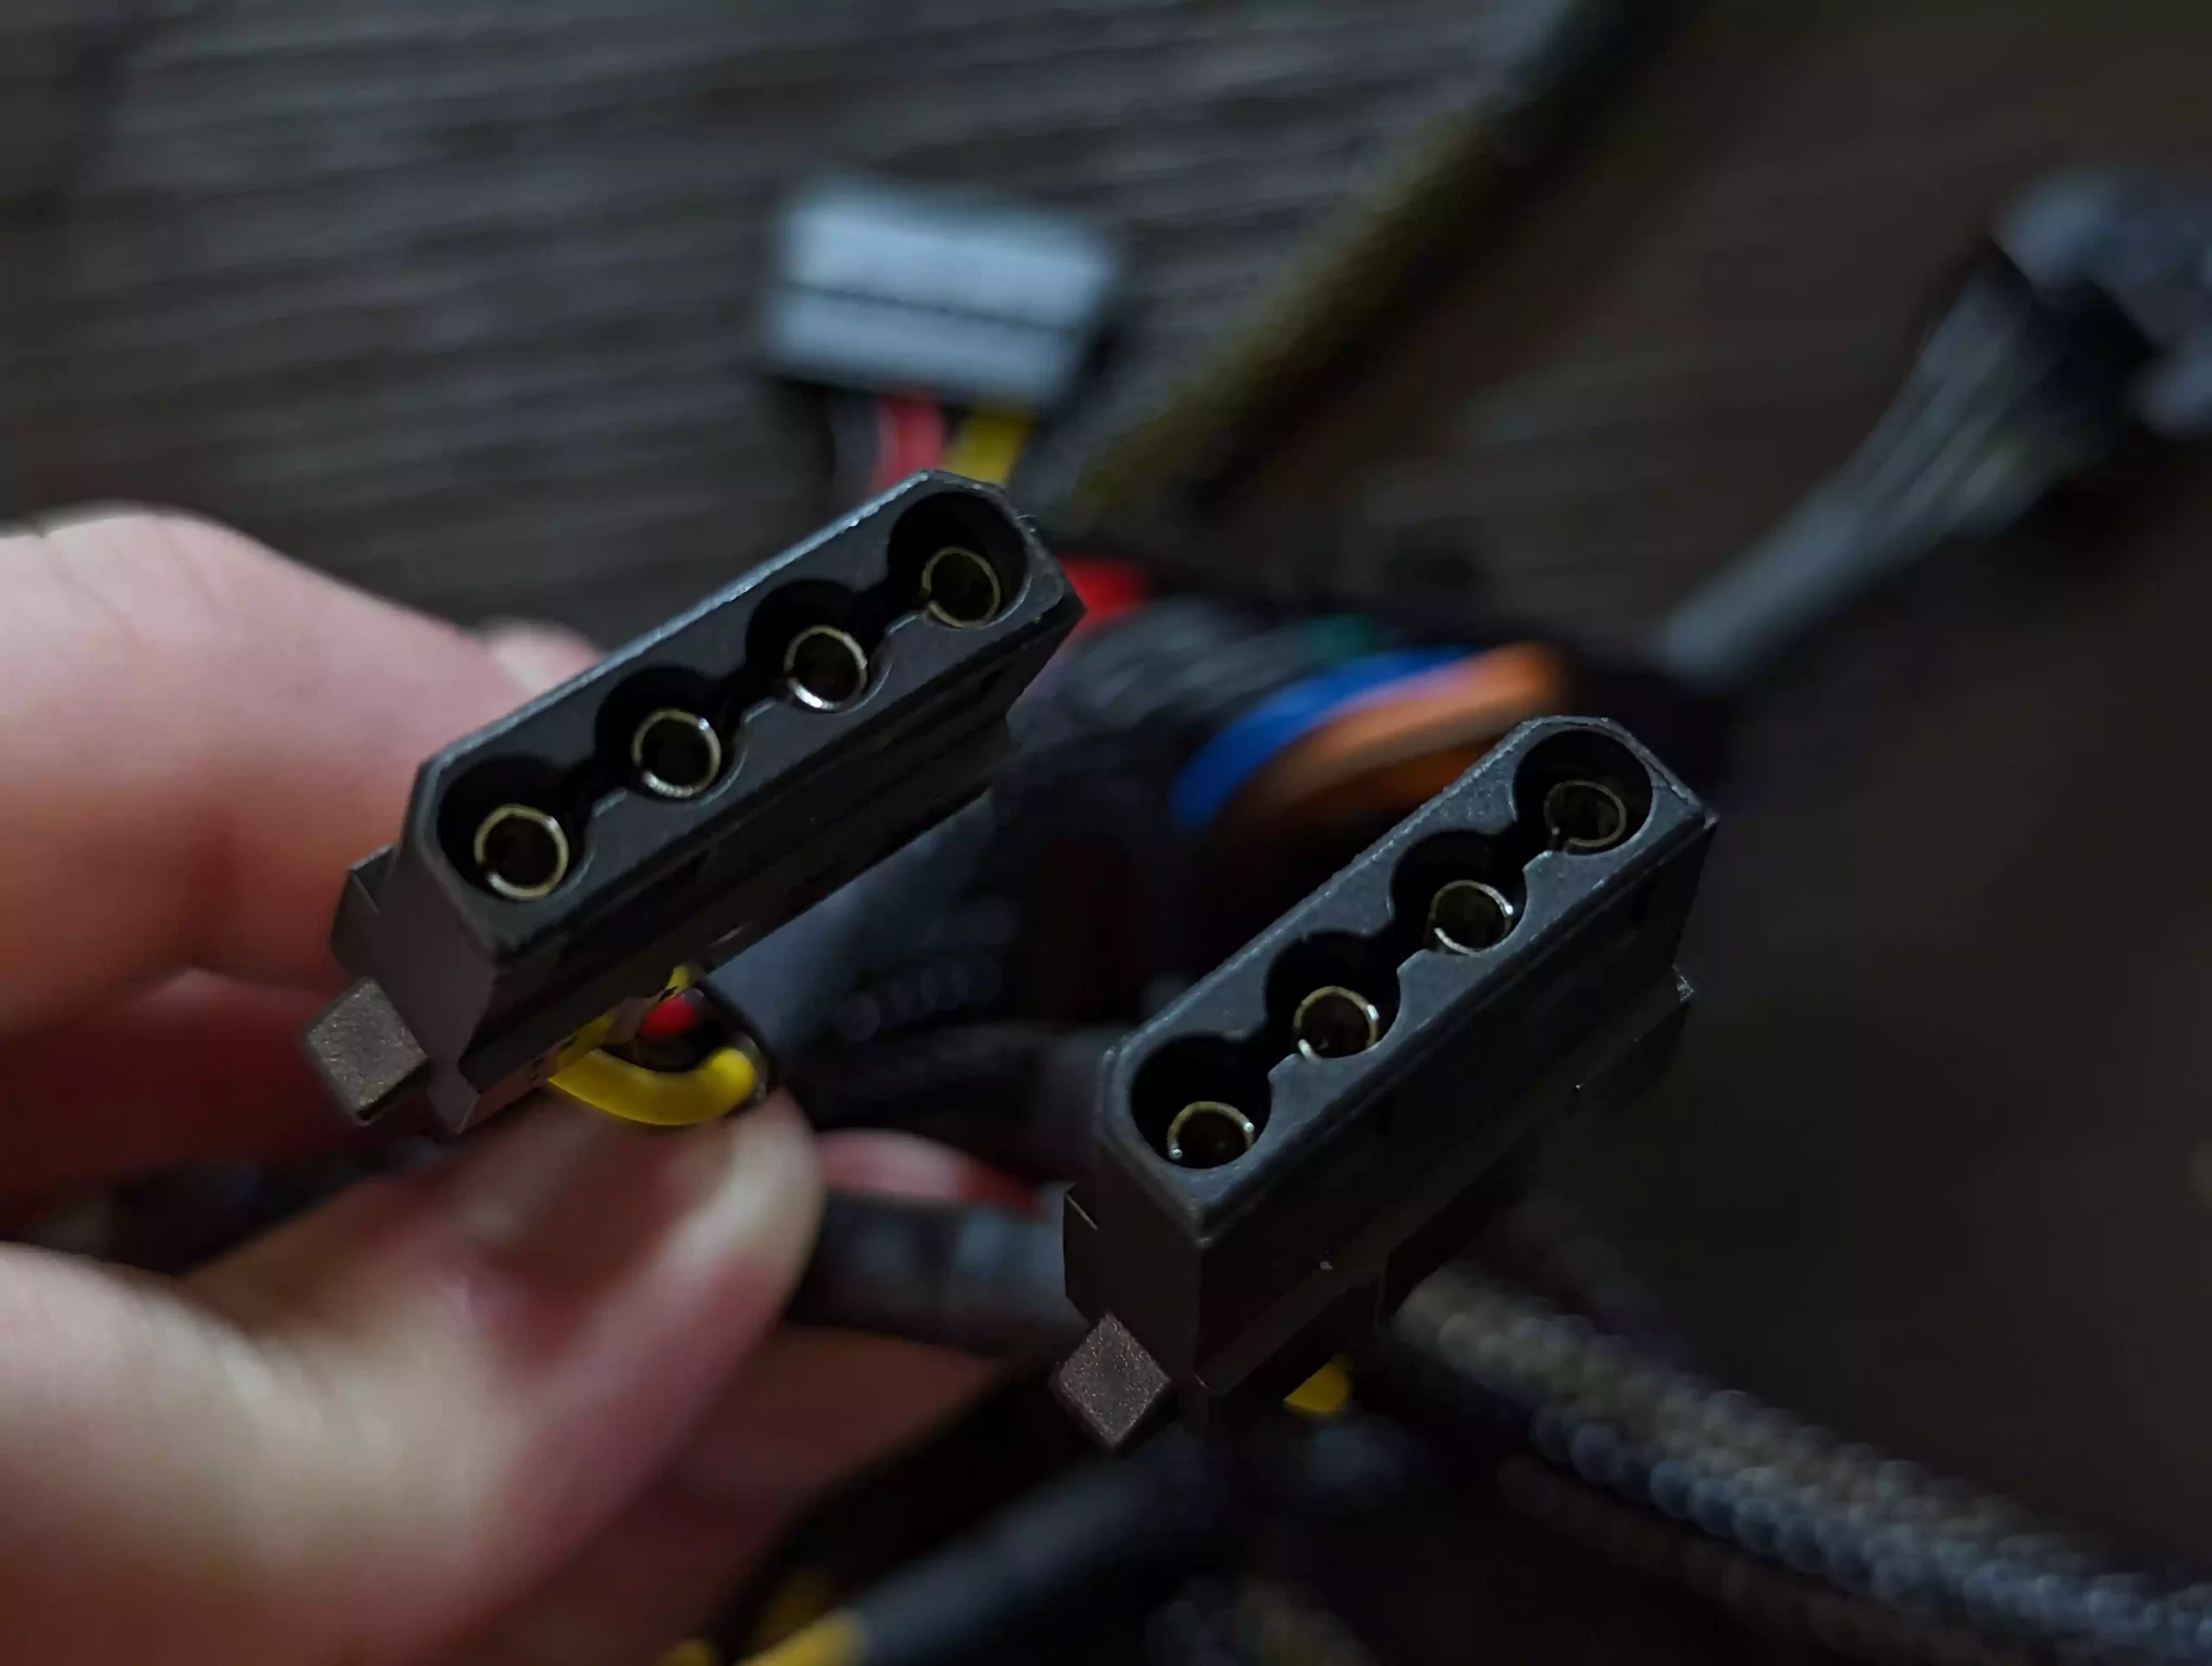
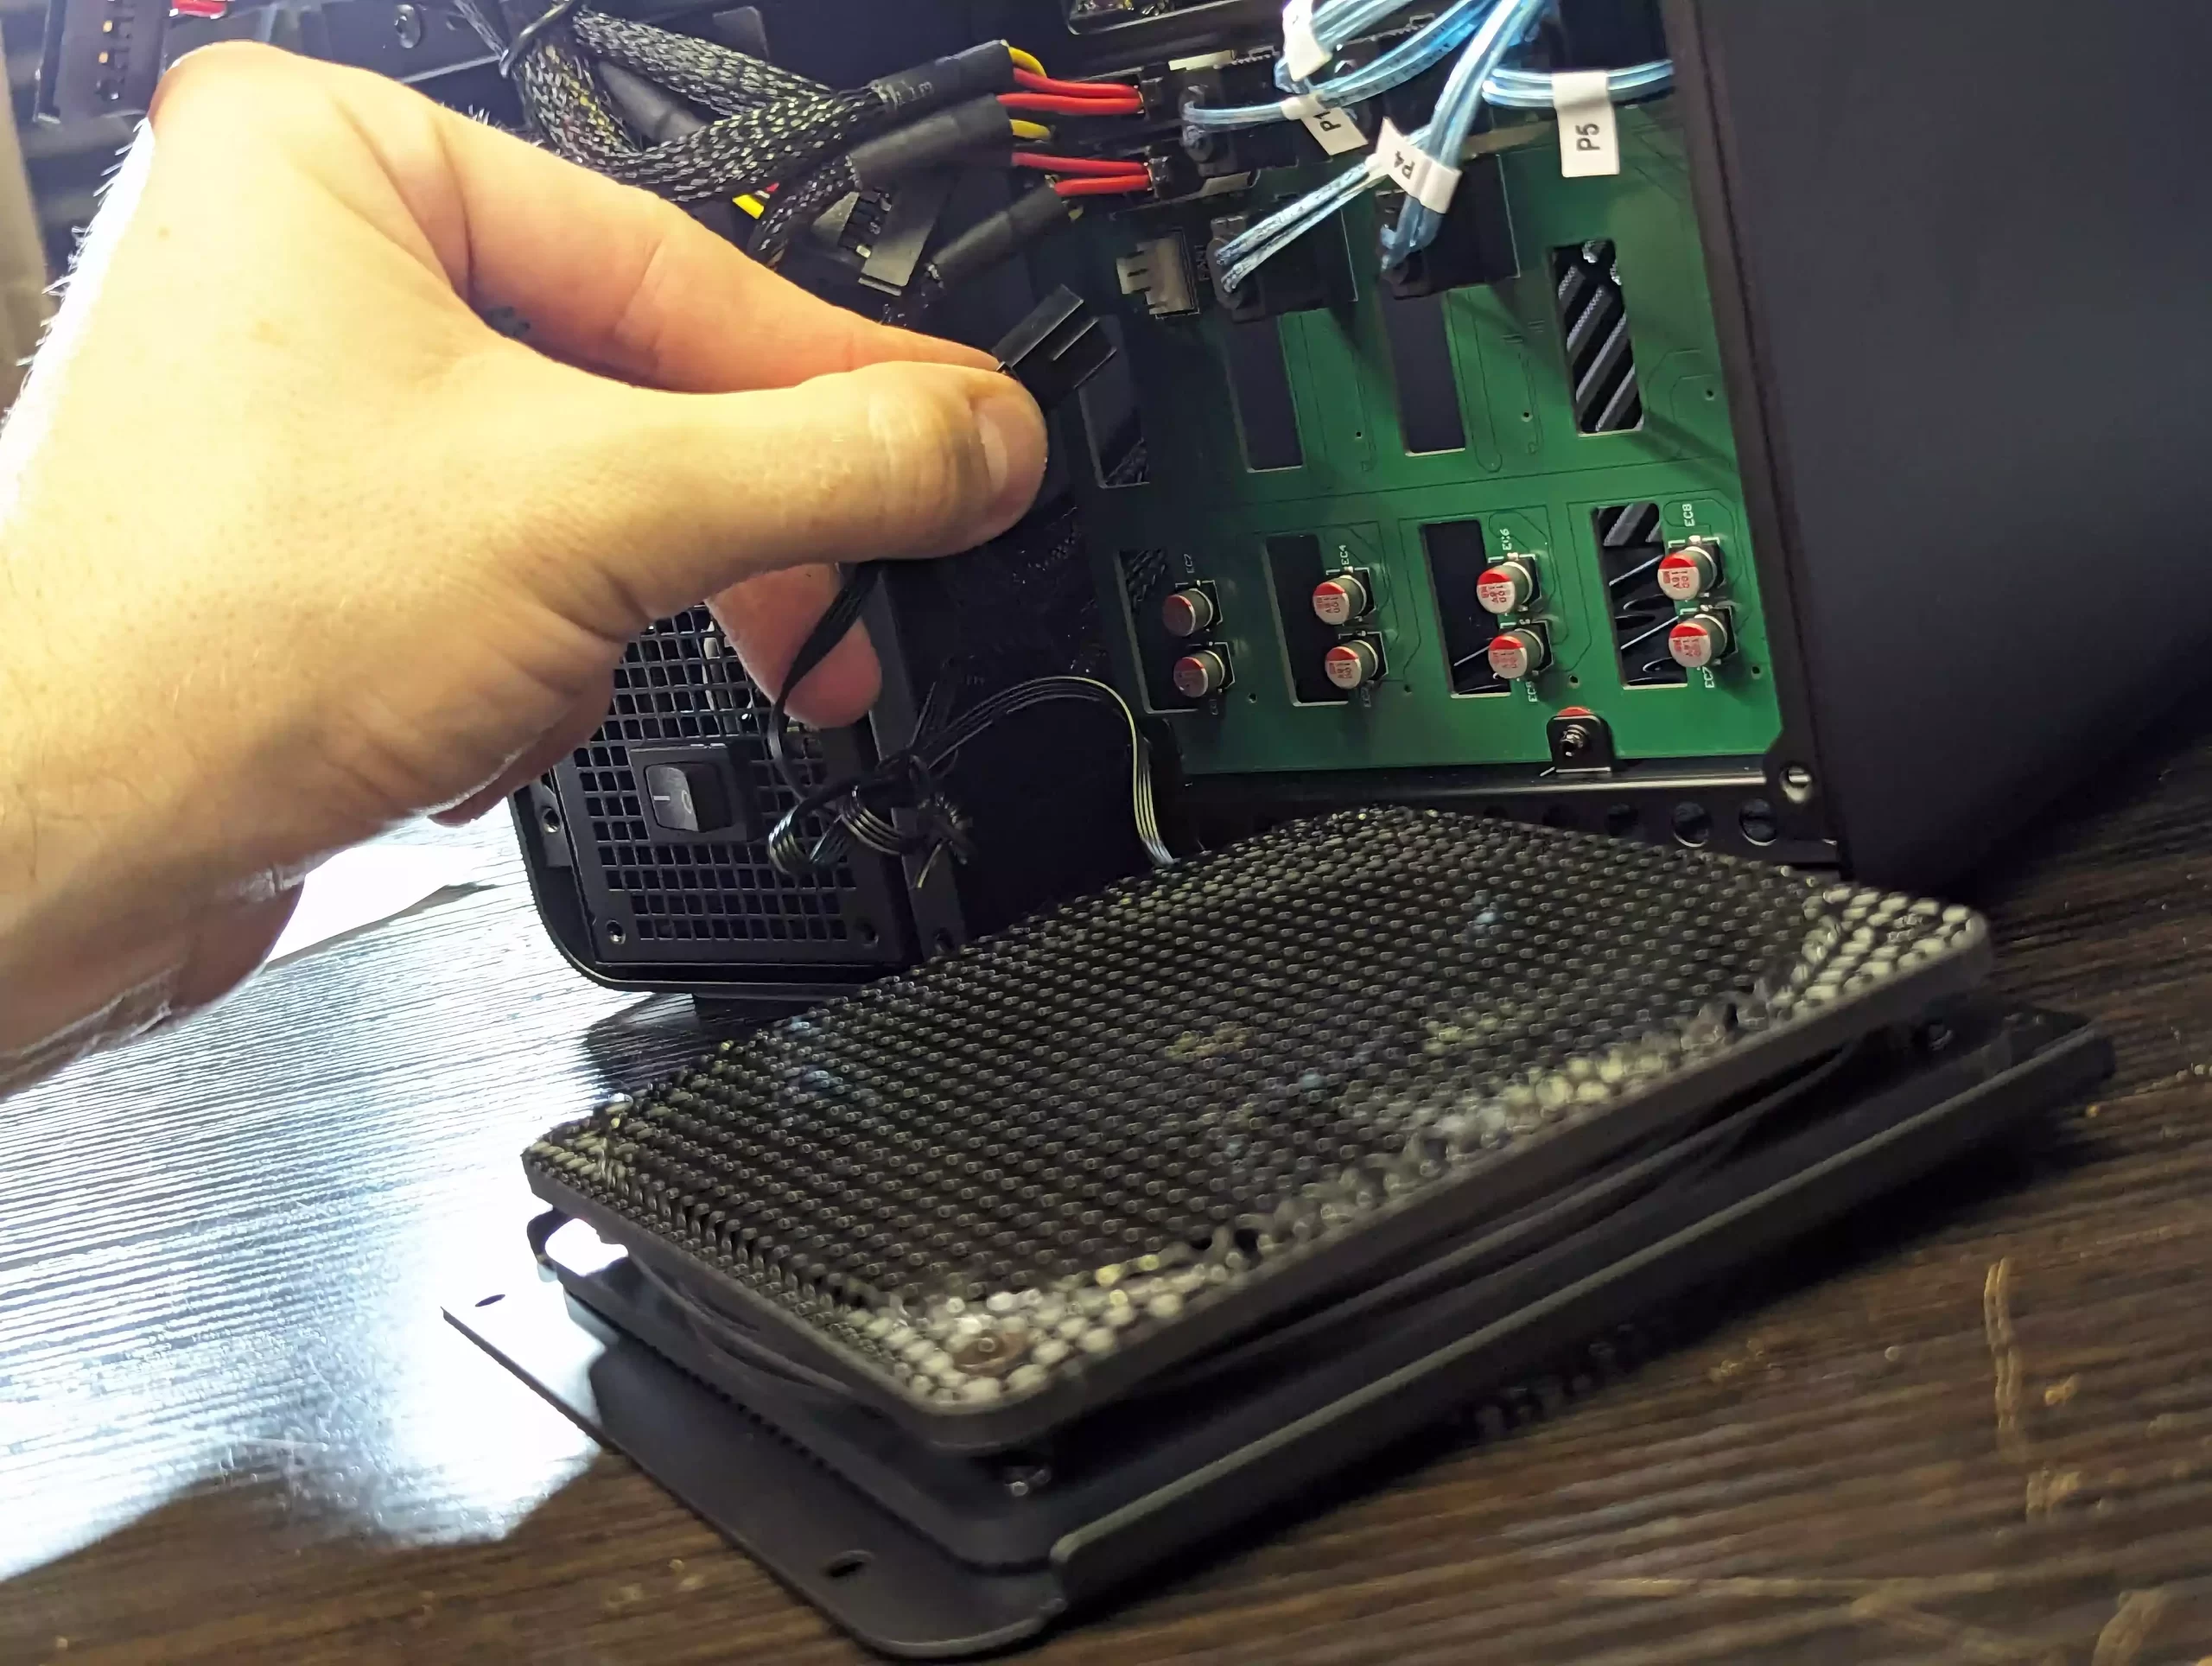
Now, link the two molex PSU power connectors to the white molex connectors on the backplane behind the primary storage bays.
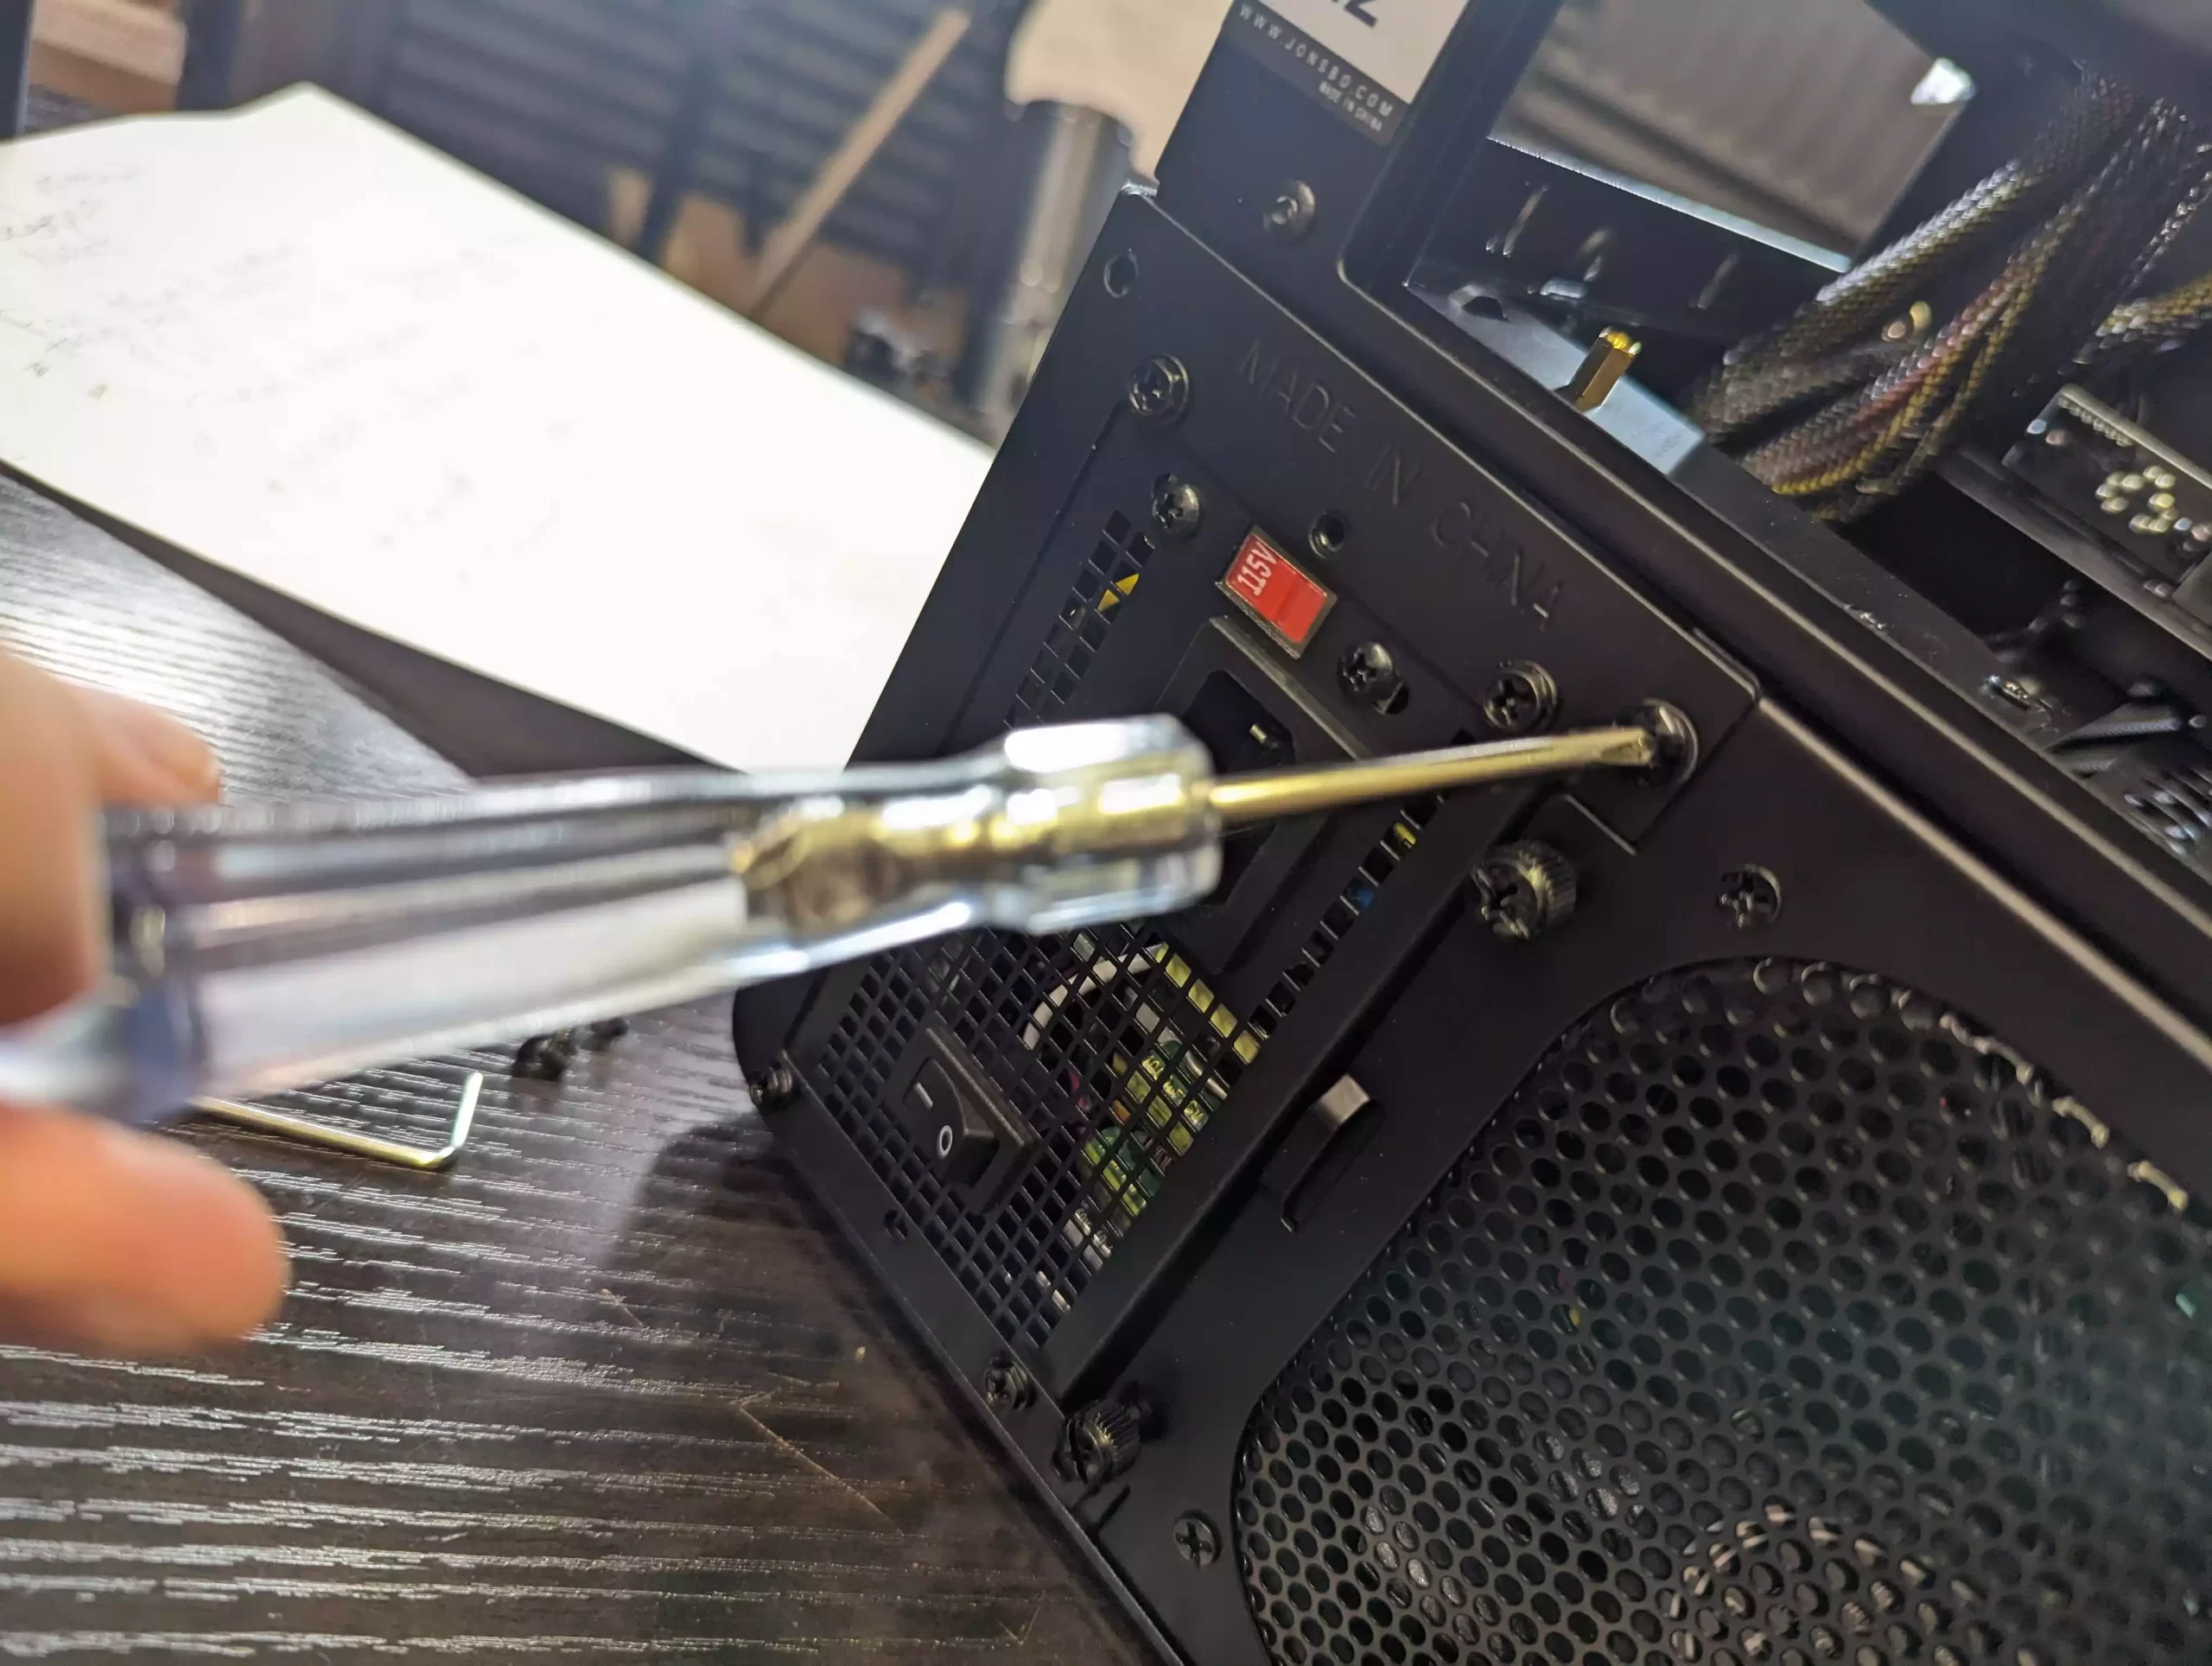
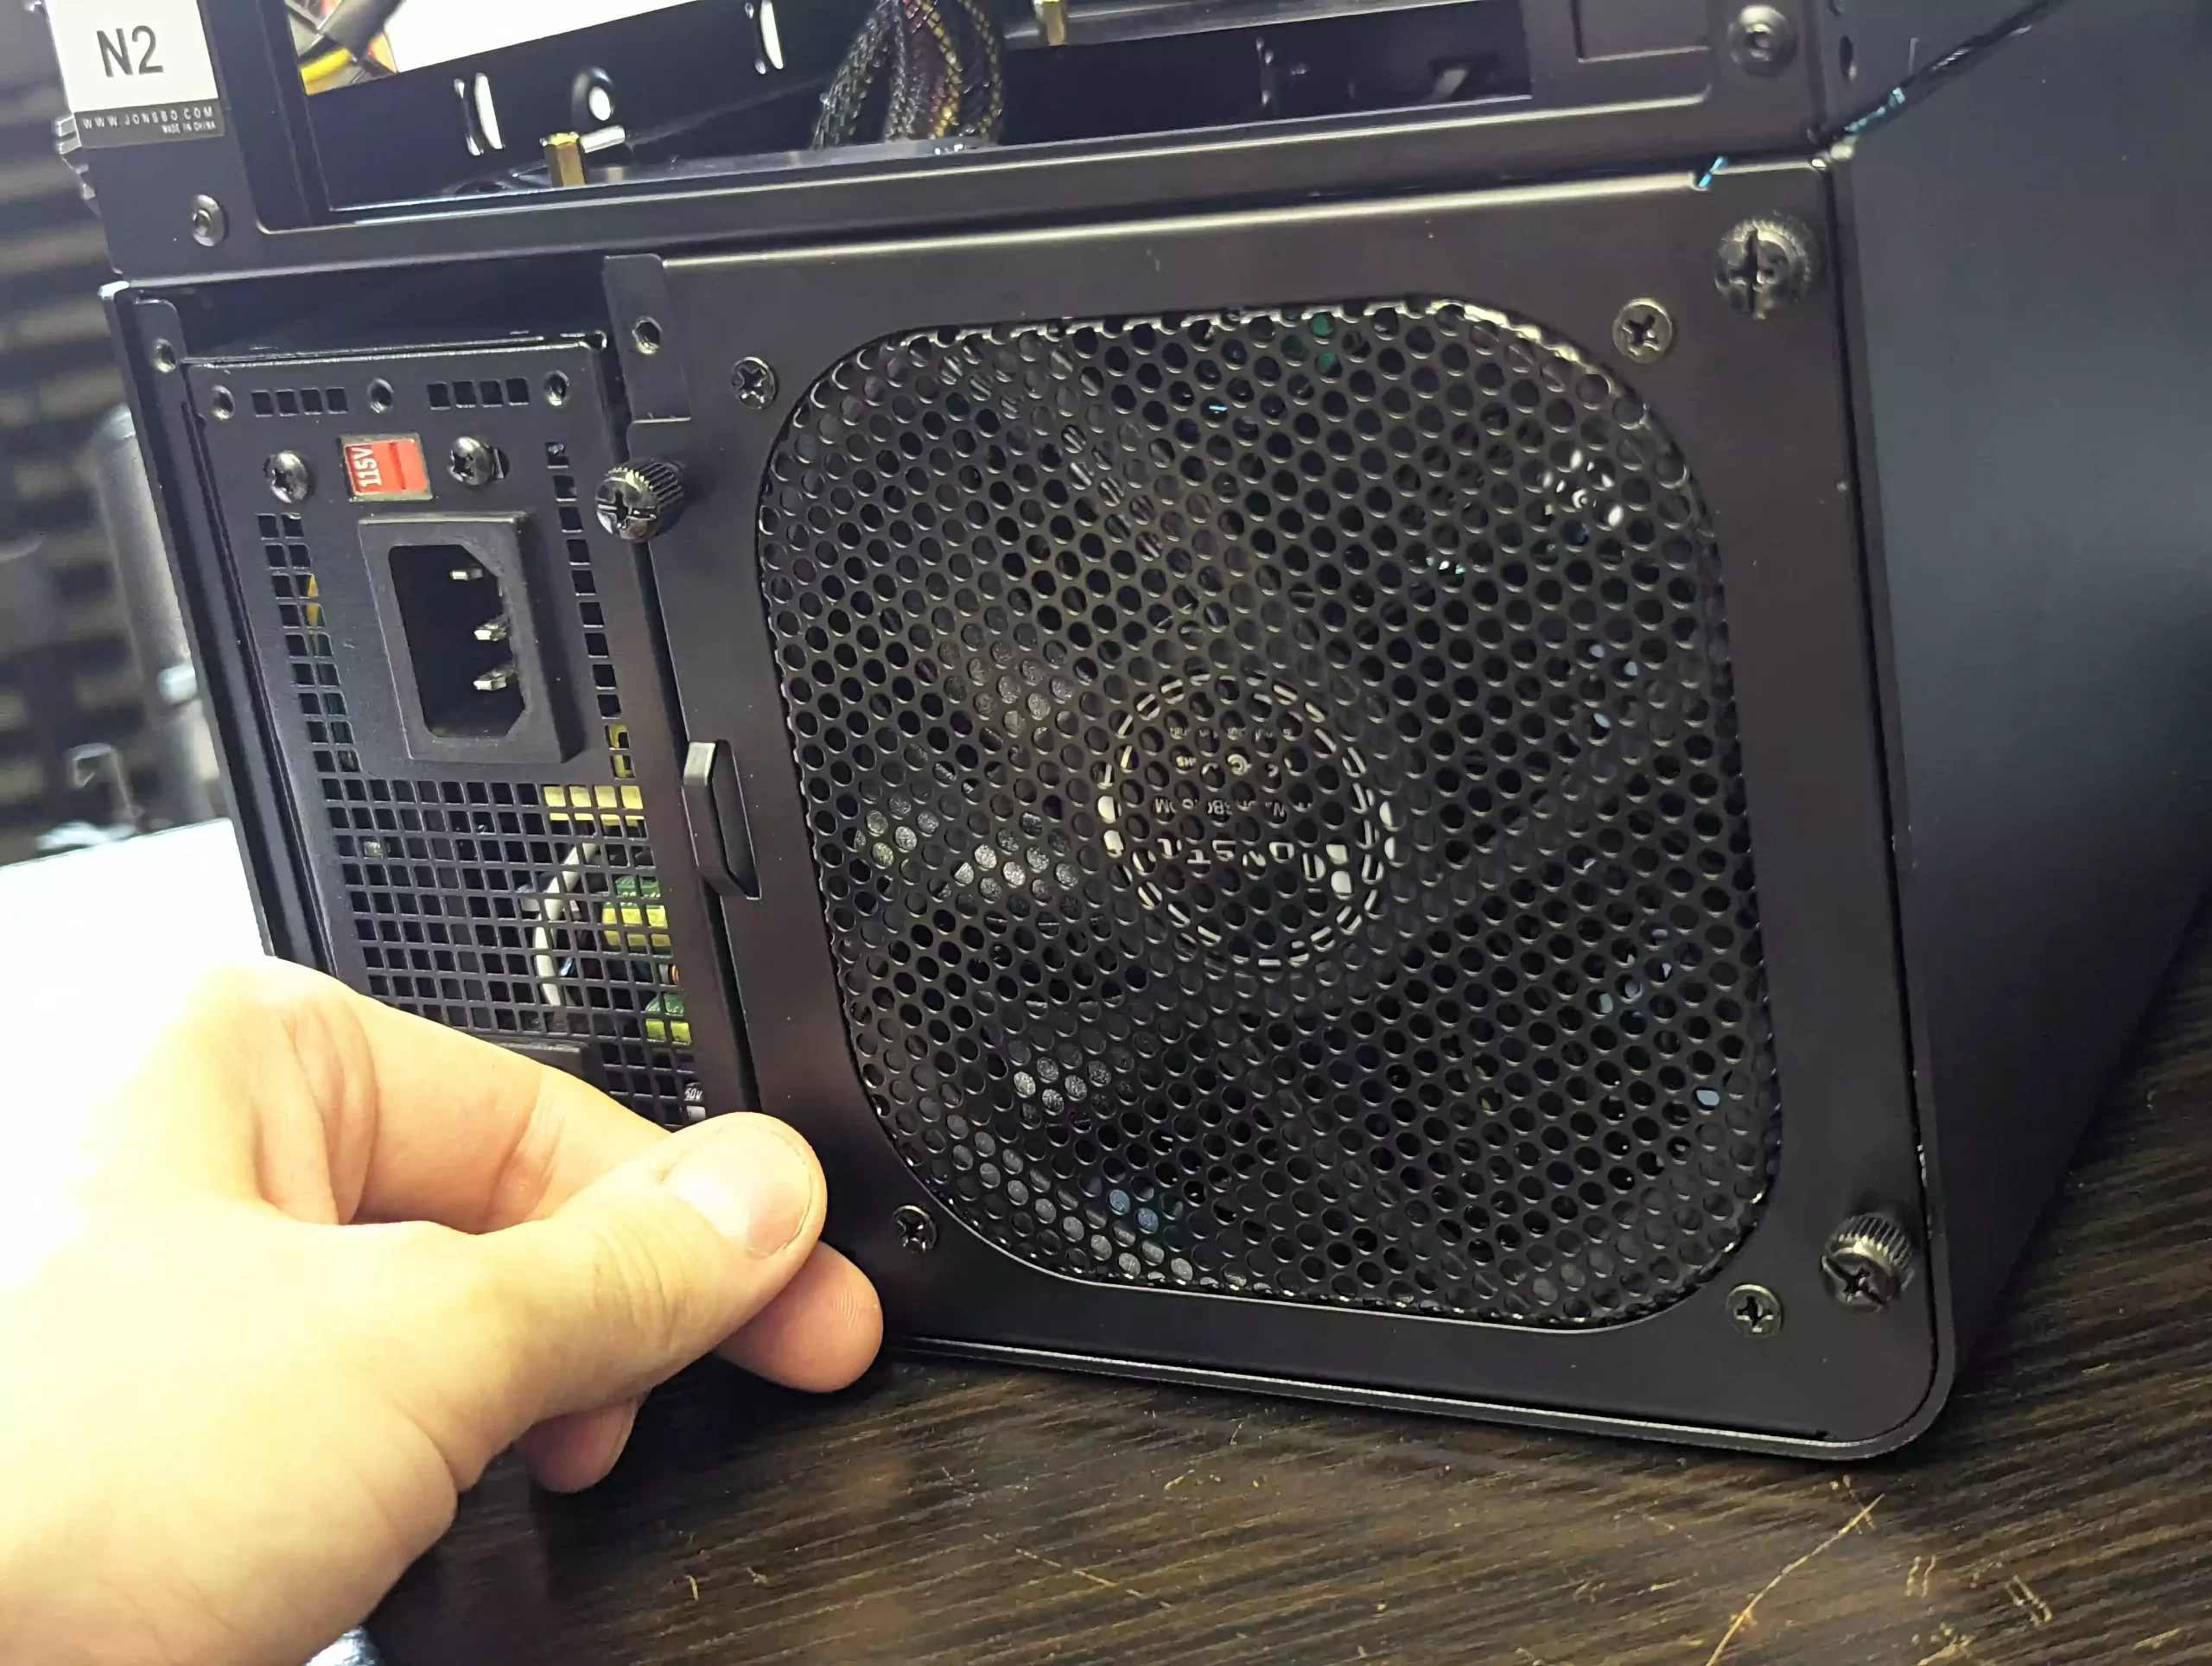
Affix the previously removed black plate from the Jonsbo case to the back of the PSU and Insert the PSU into its compartment in the Jonsbo case. Ensure the molex connectors remain in place and that the larger power cables are still outside the case.
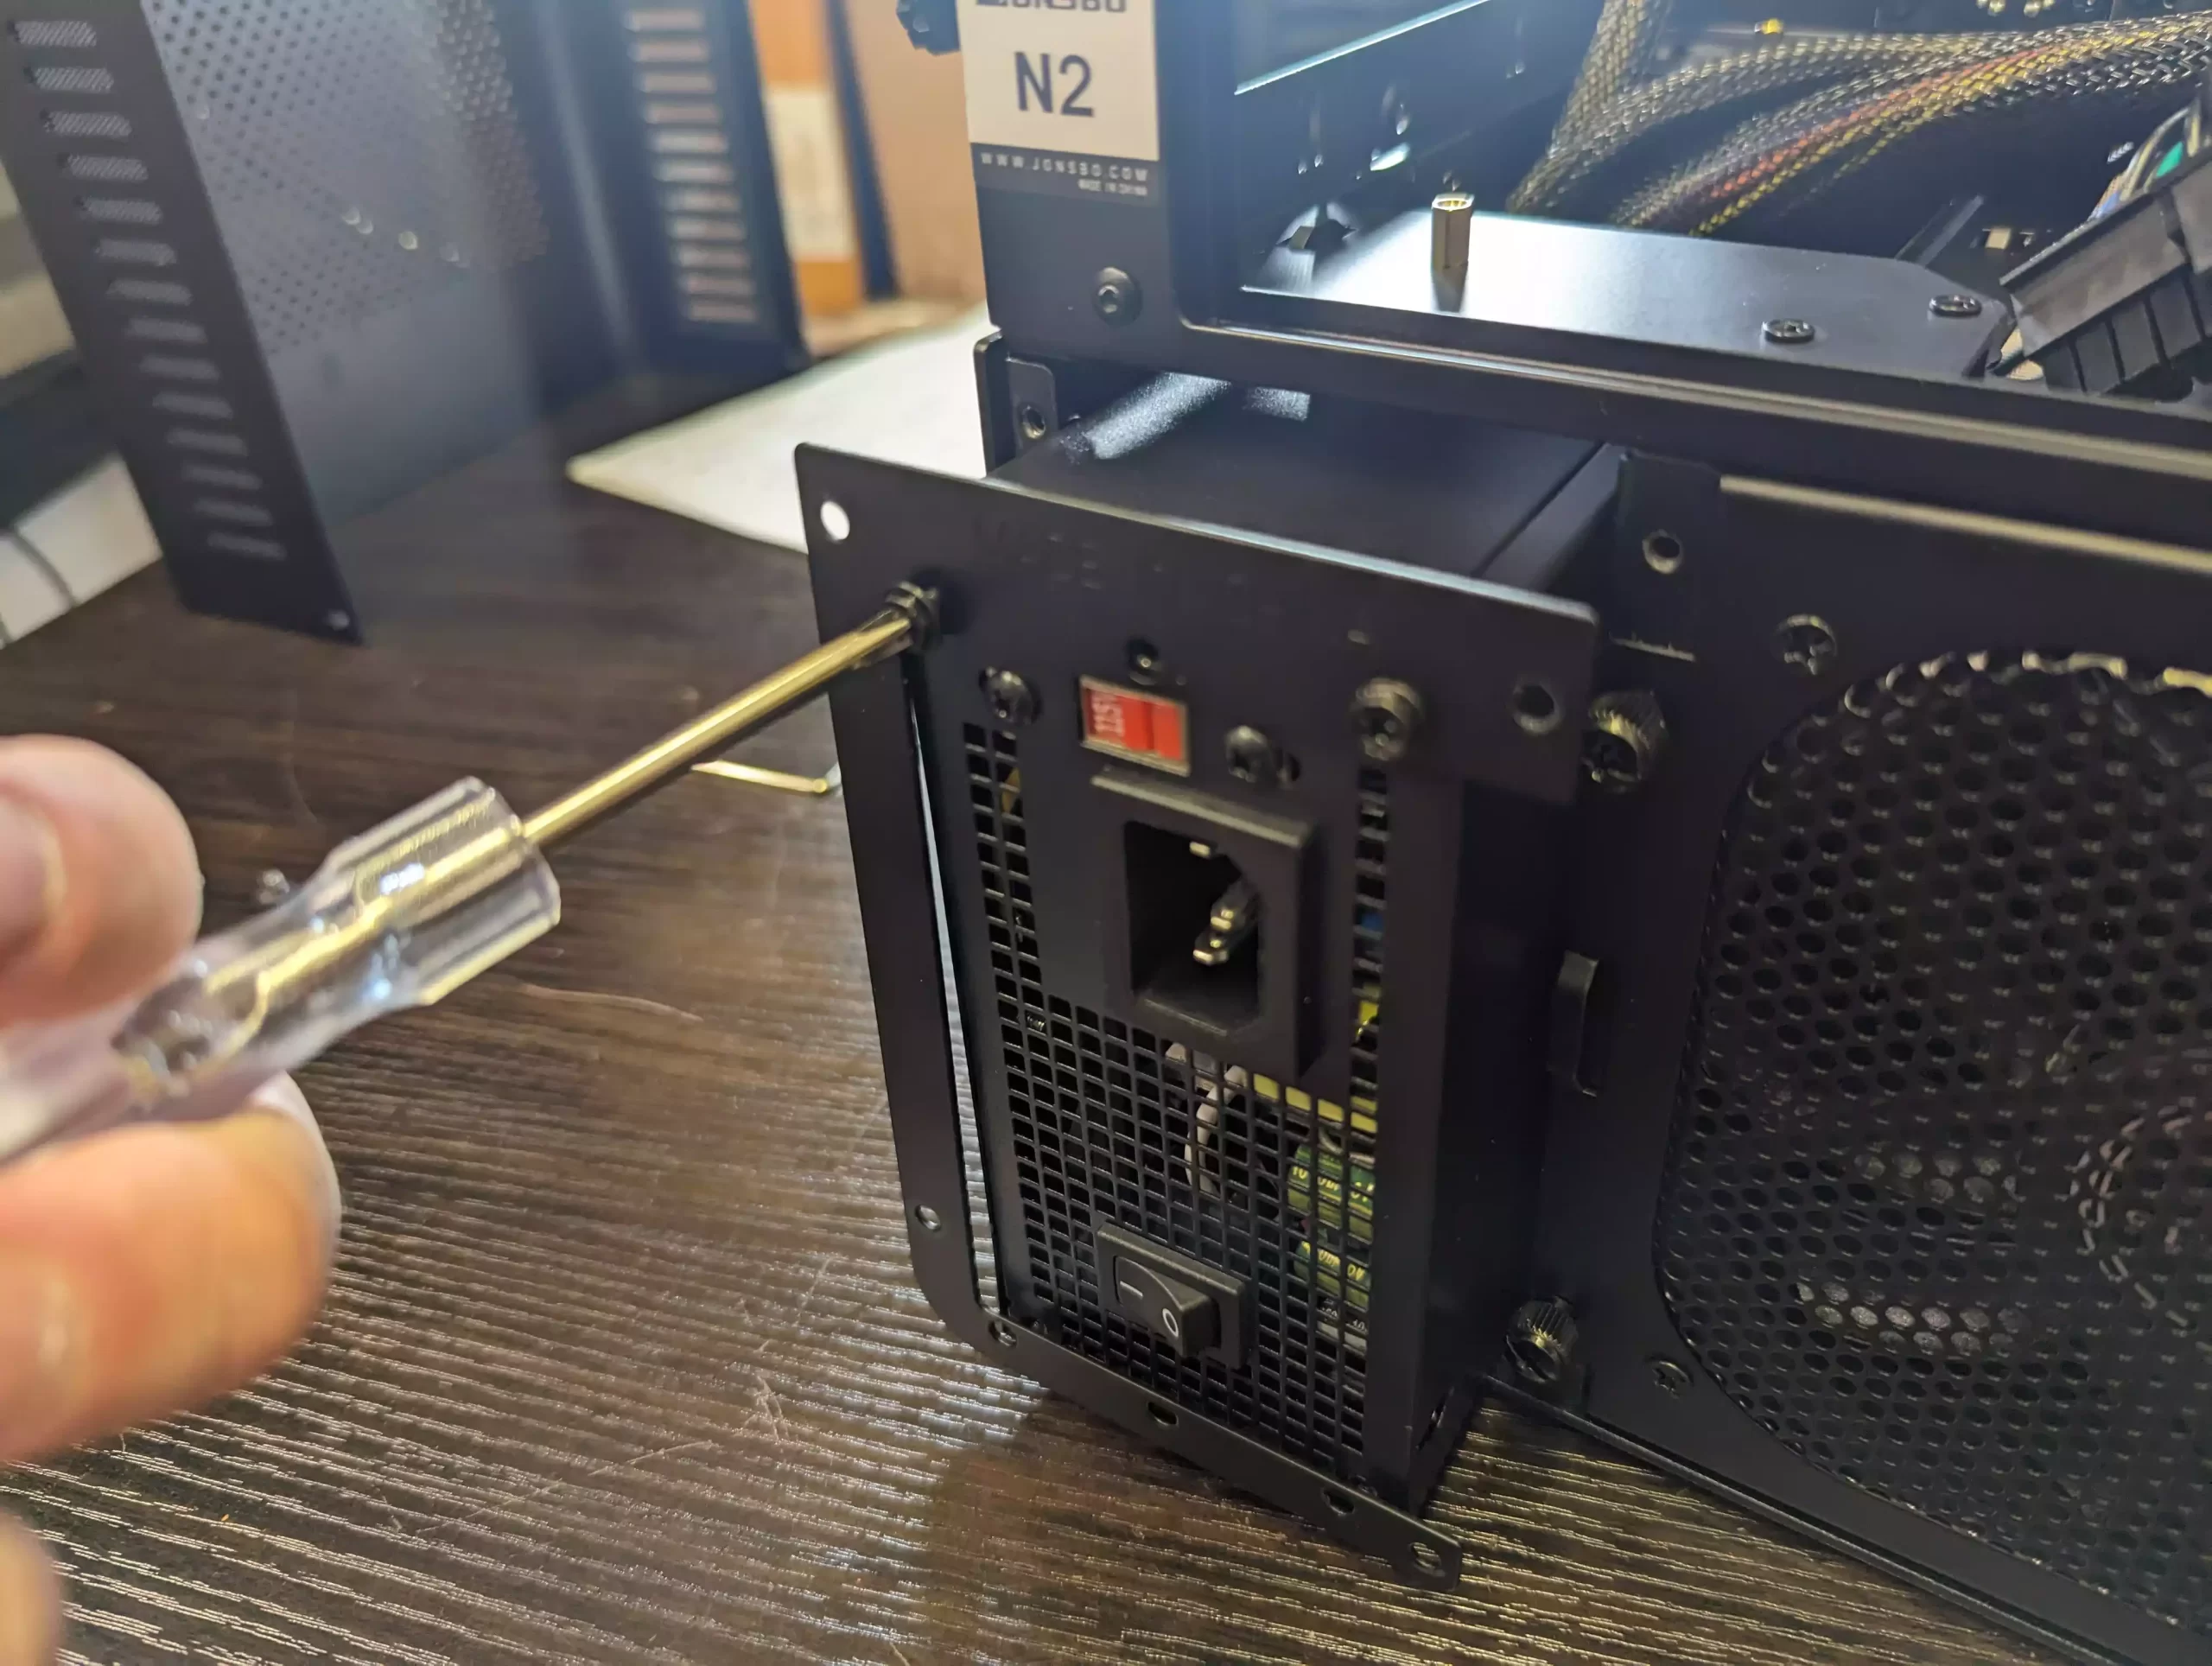
Fix the plate to the back of the Jonsbo case to secure the PSU.
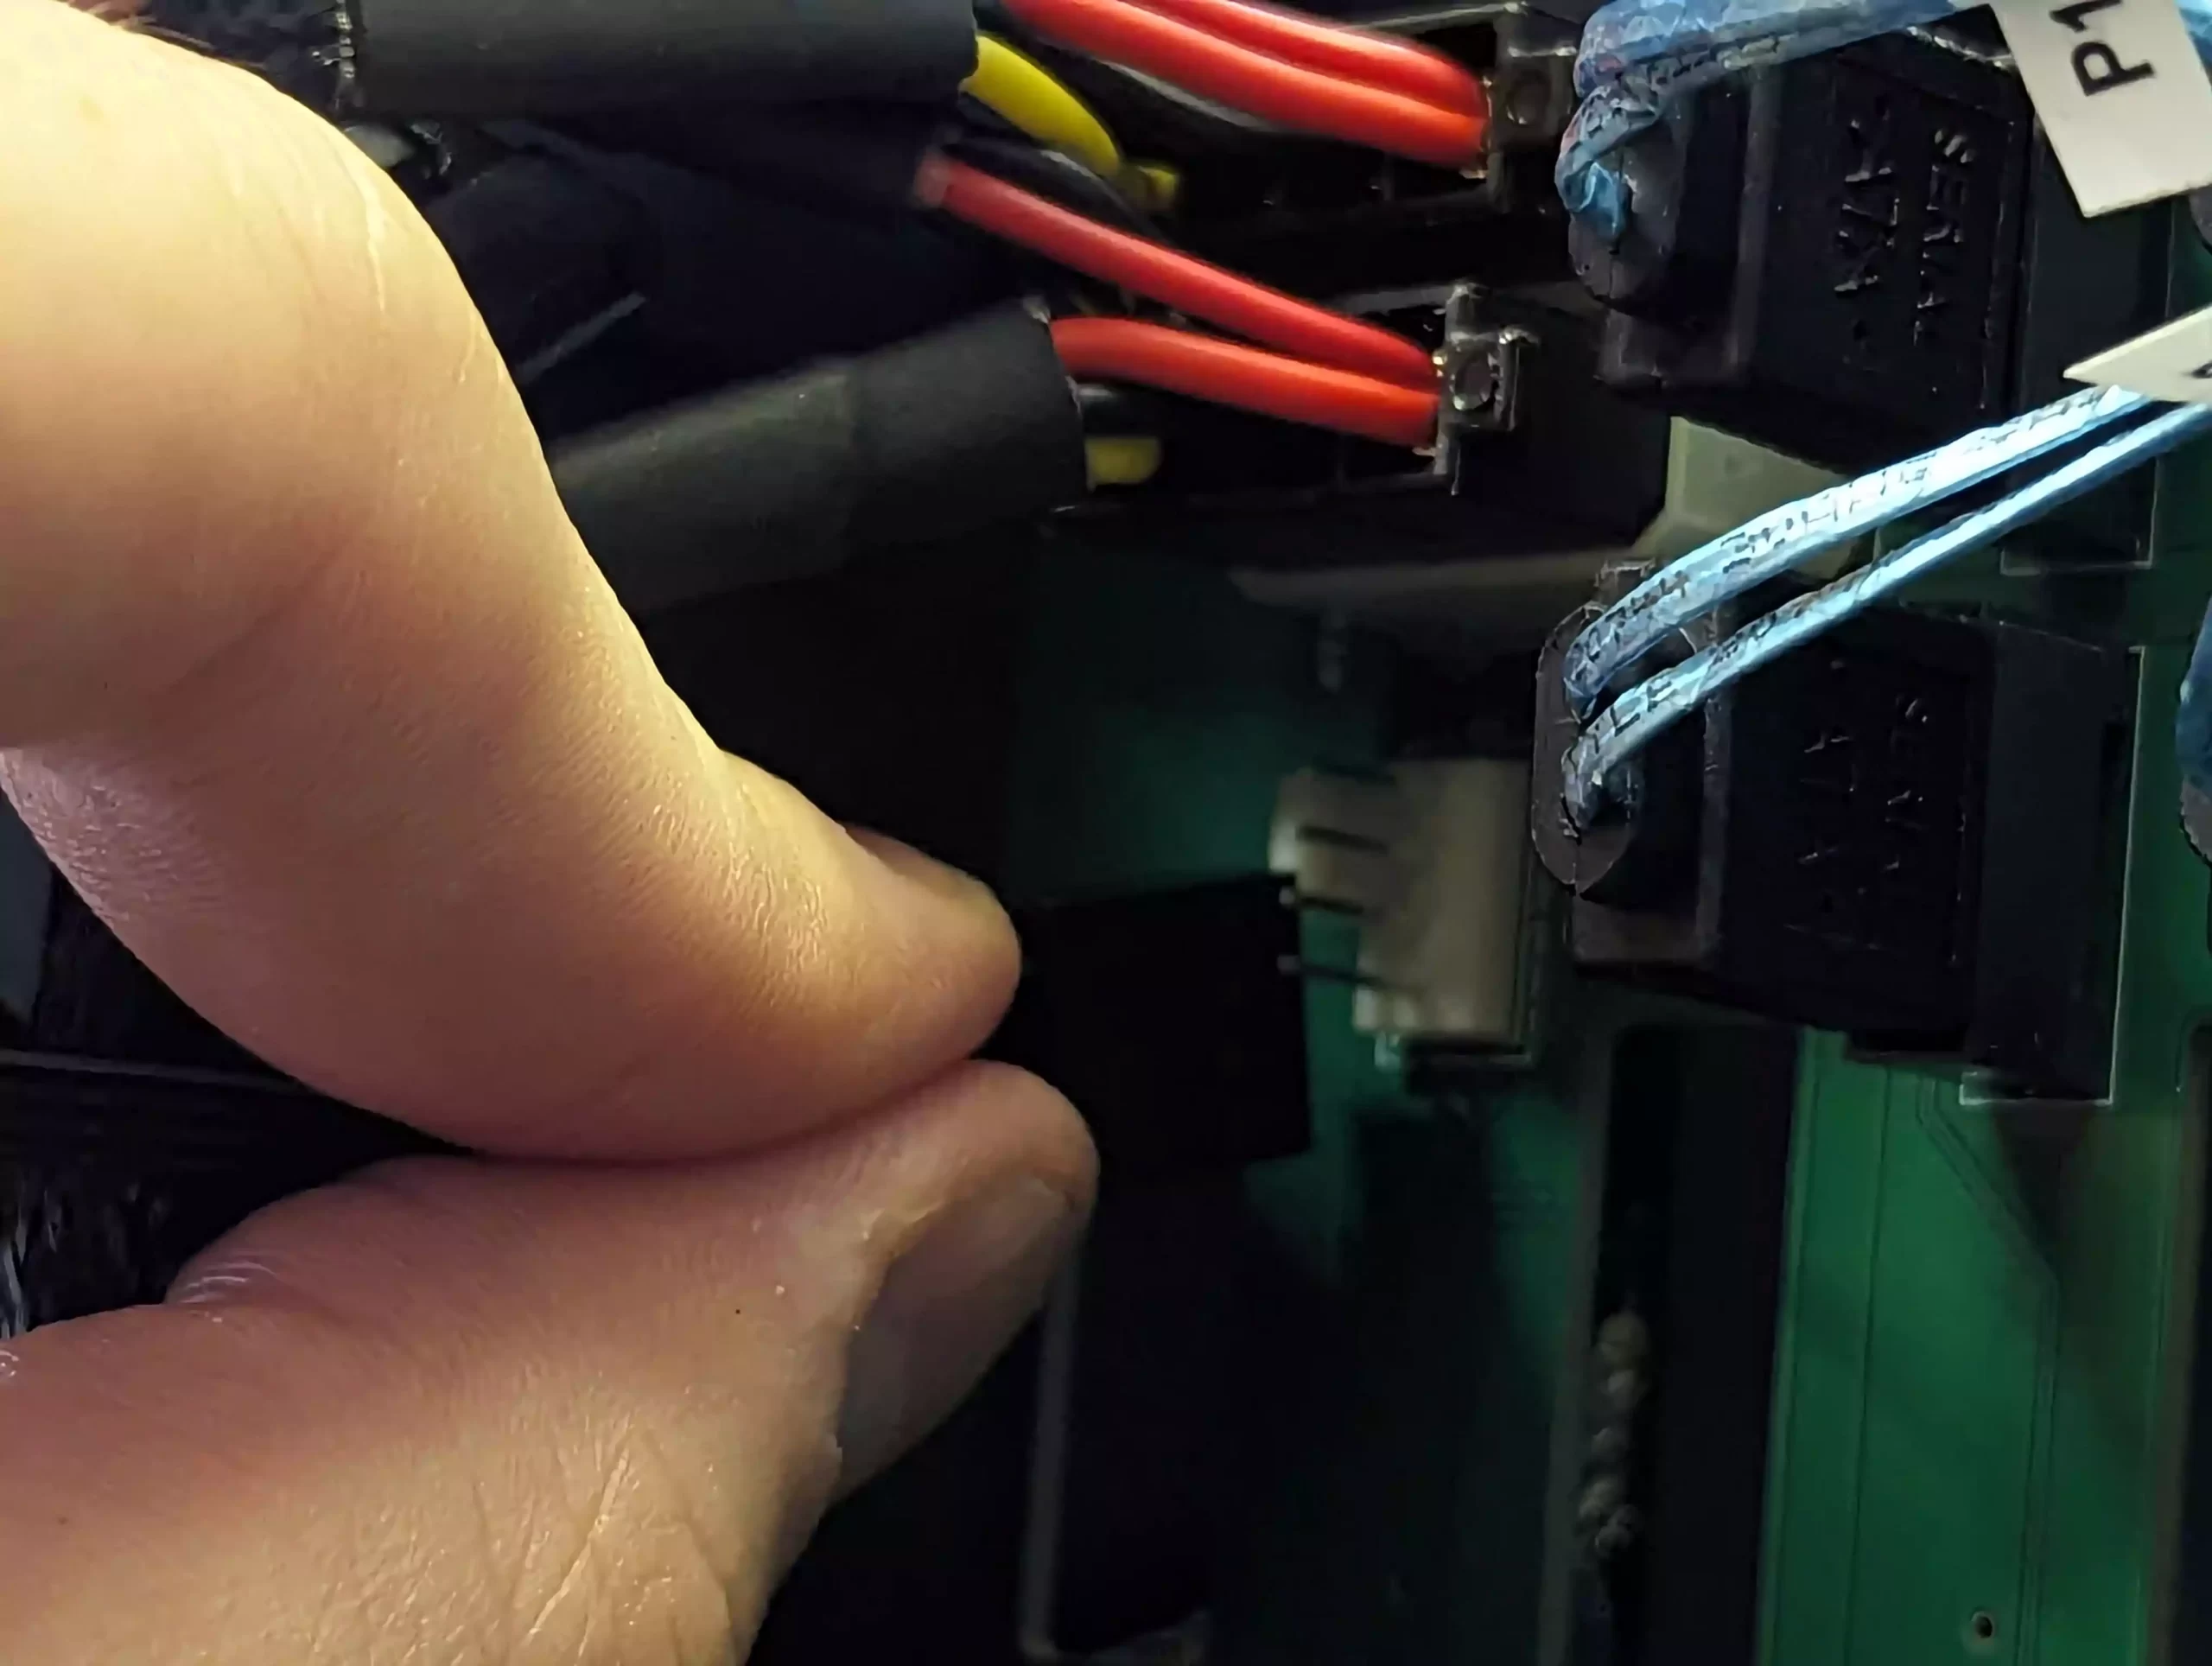
Connect the multi-lane SATA cable, carefully aligning each numbered cable with the corresponding SATA port on the backplane (next to the molex power ports).
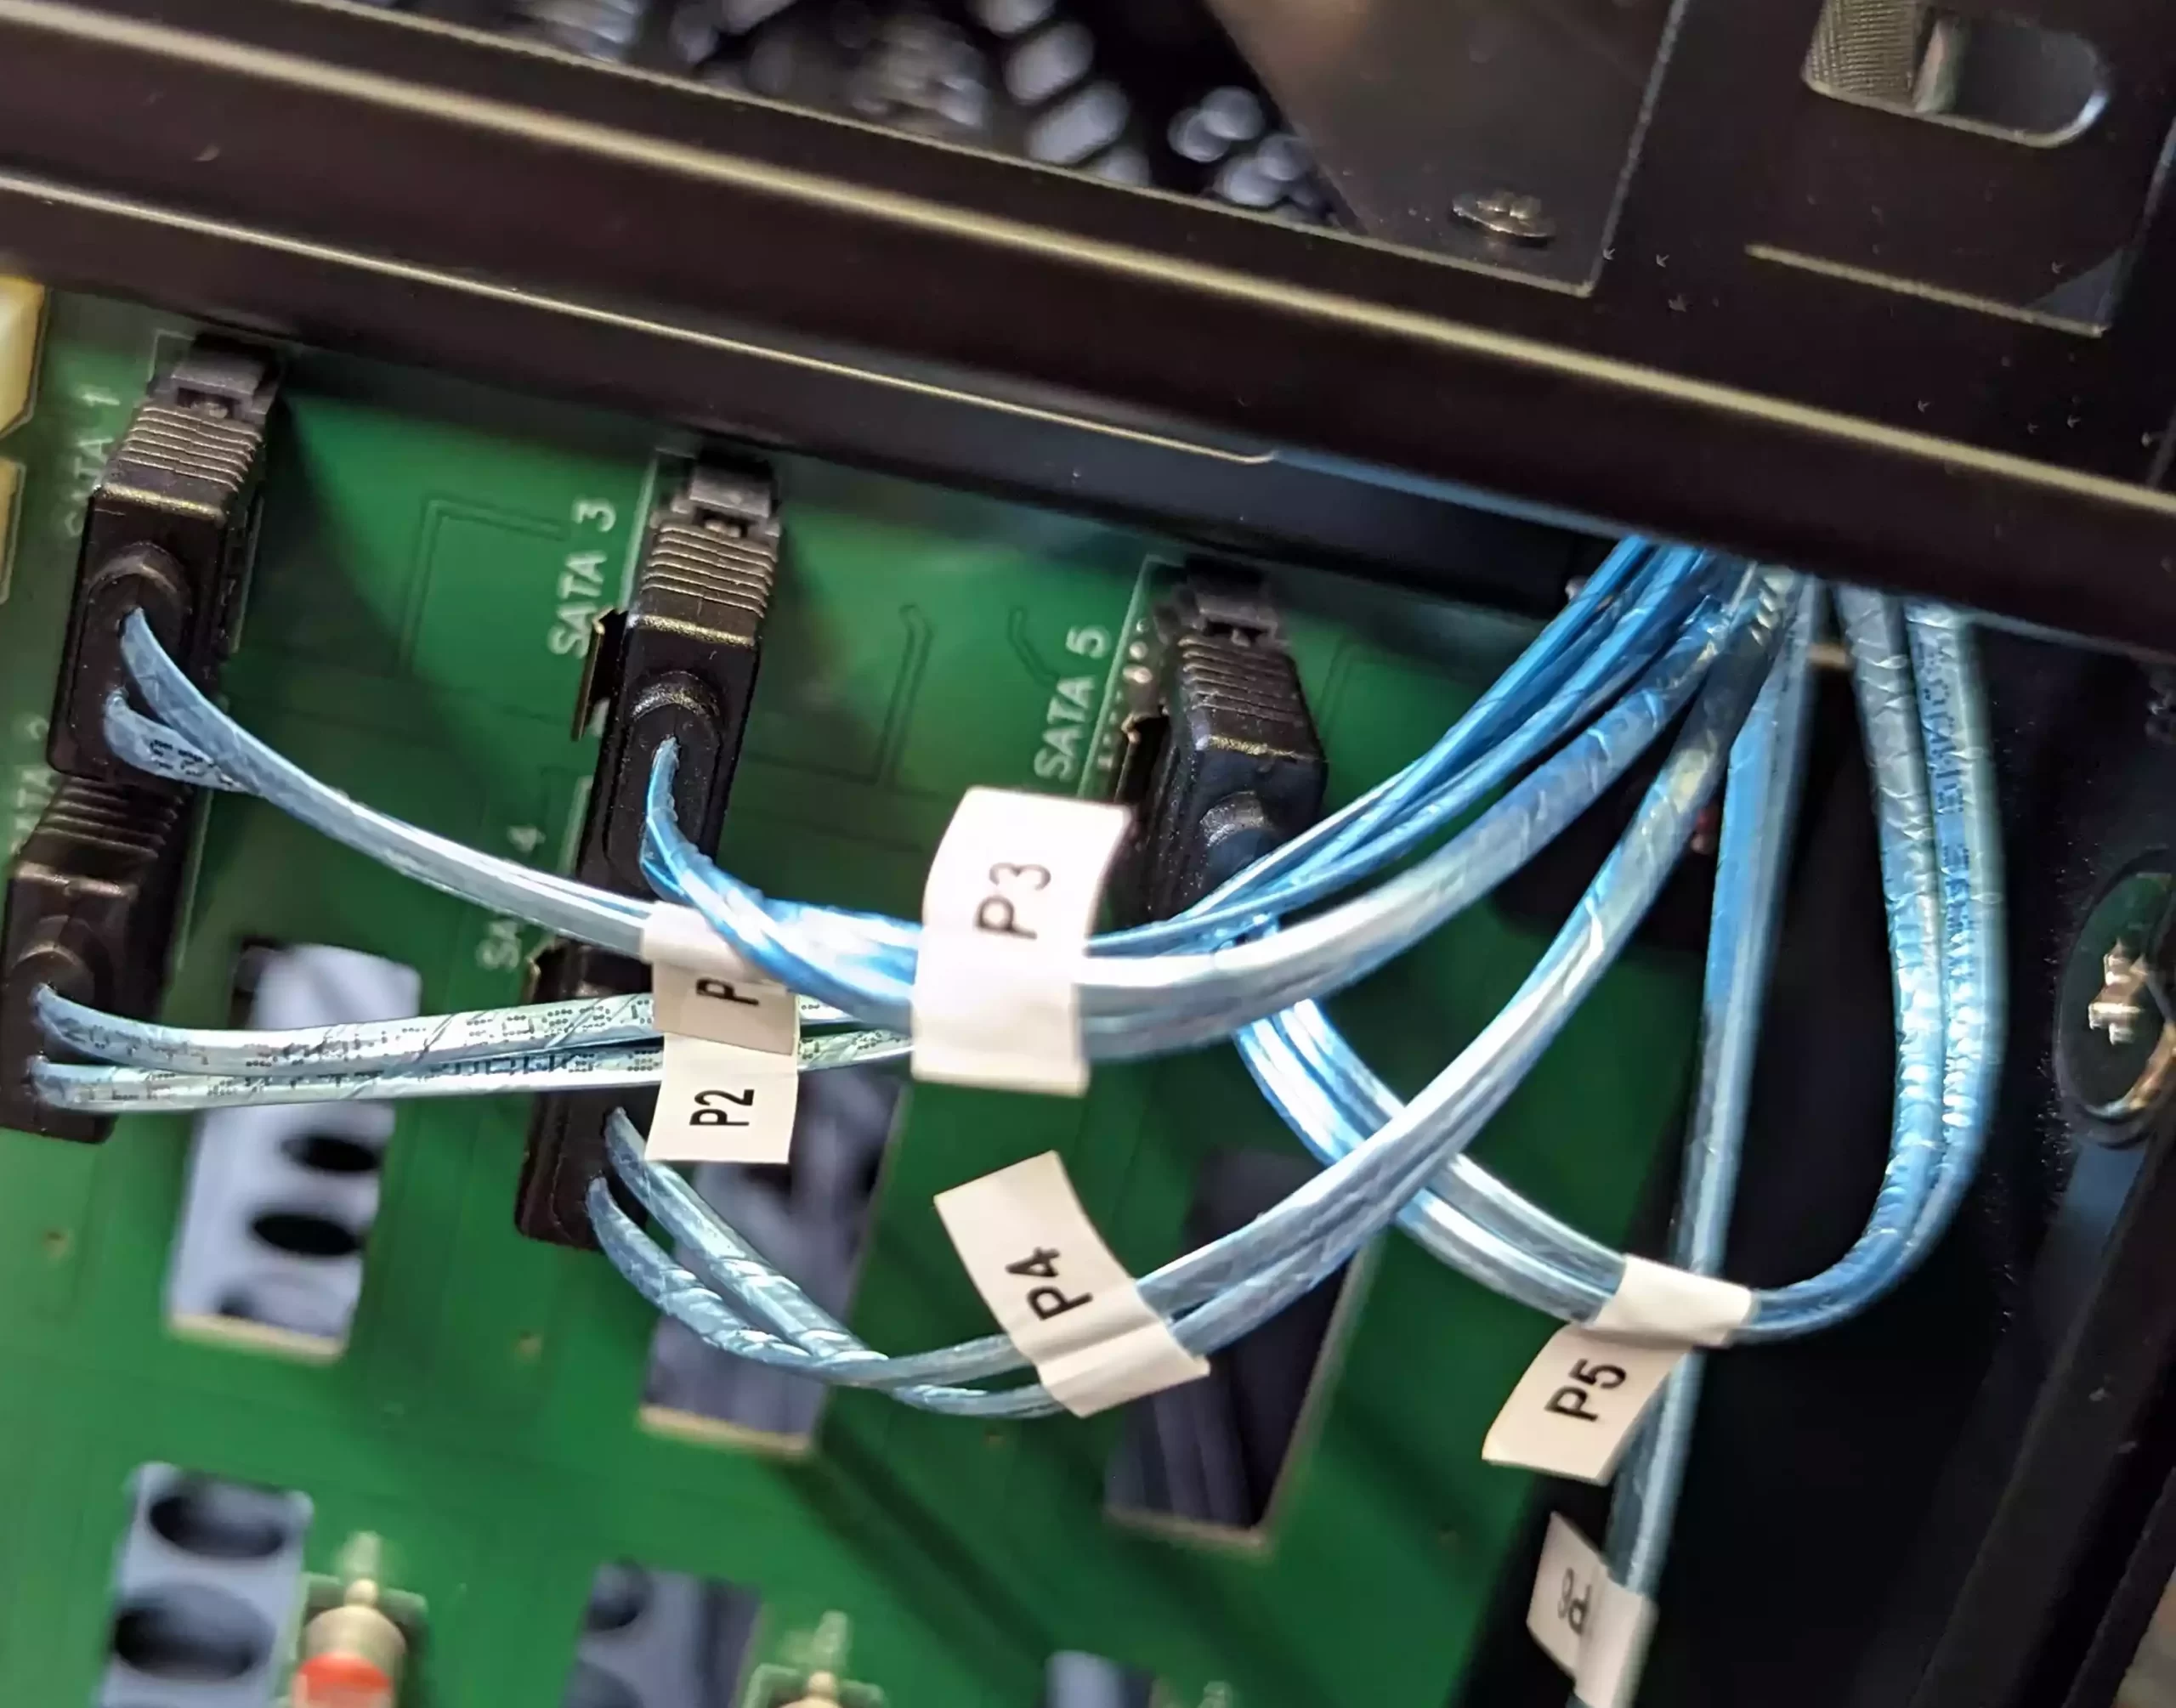

Guide the SATA cable through the cavity above and out of the top of the Jonsbo case. Ensure cables are attached to the right drive numbers and threaded correctly.

Reattach the fan to the rear of the case using its white four-pin connector and secure with the thumb screws.


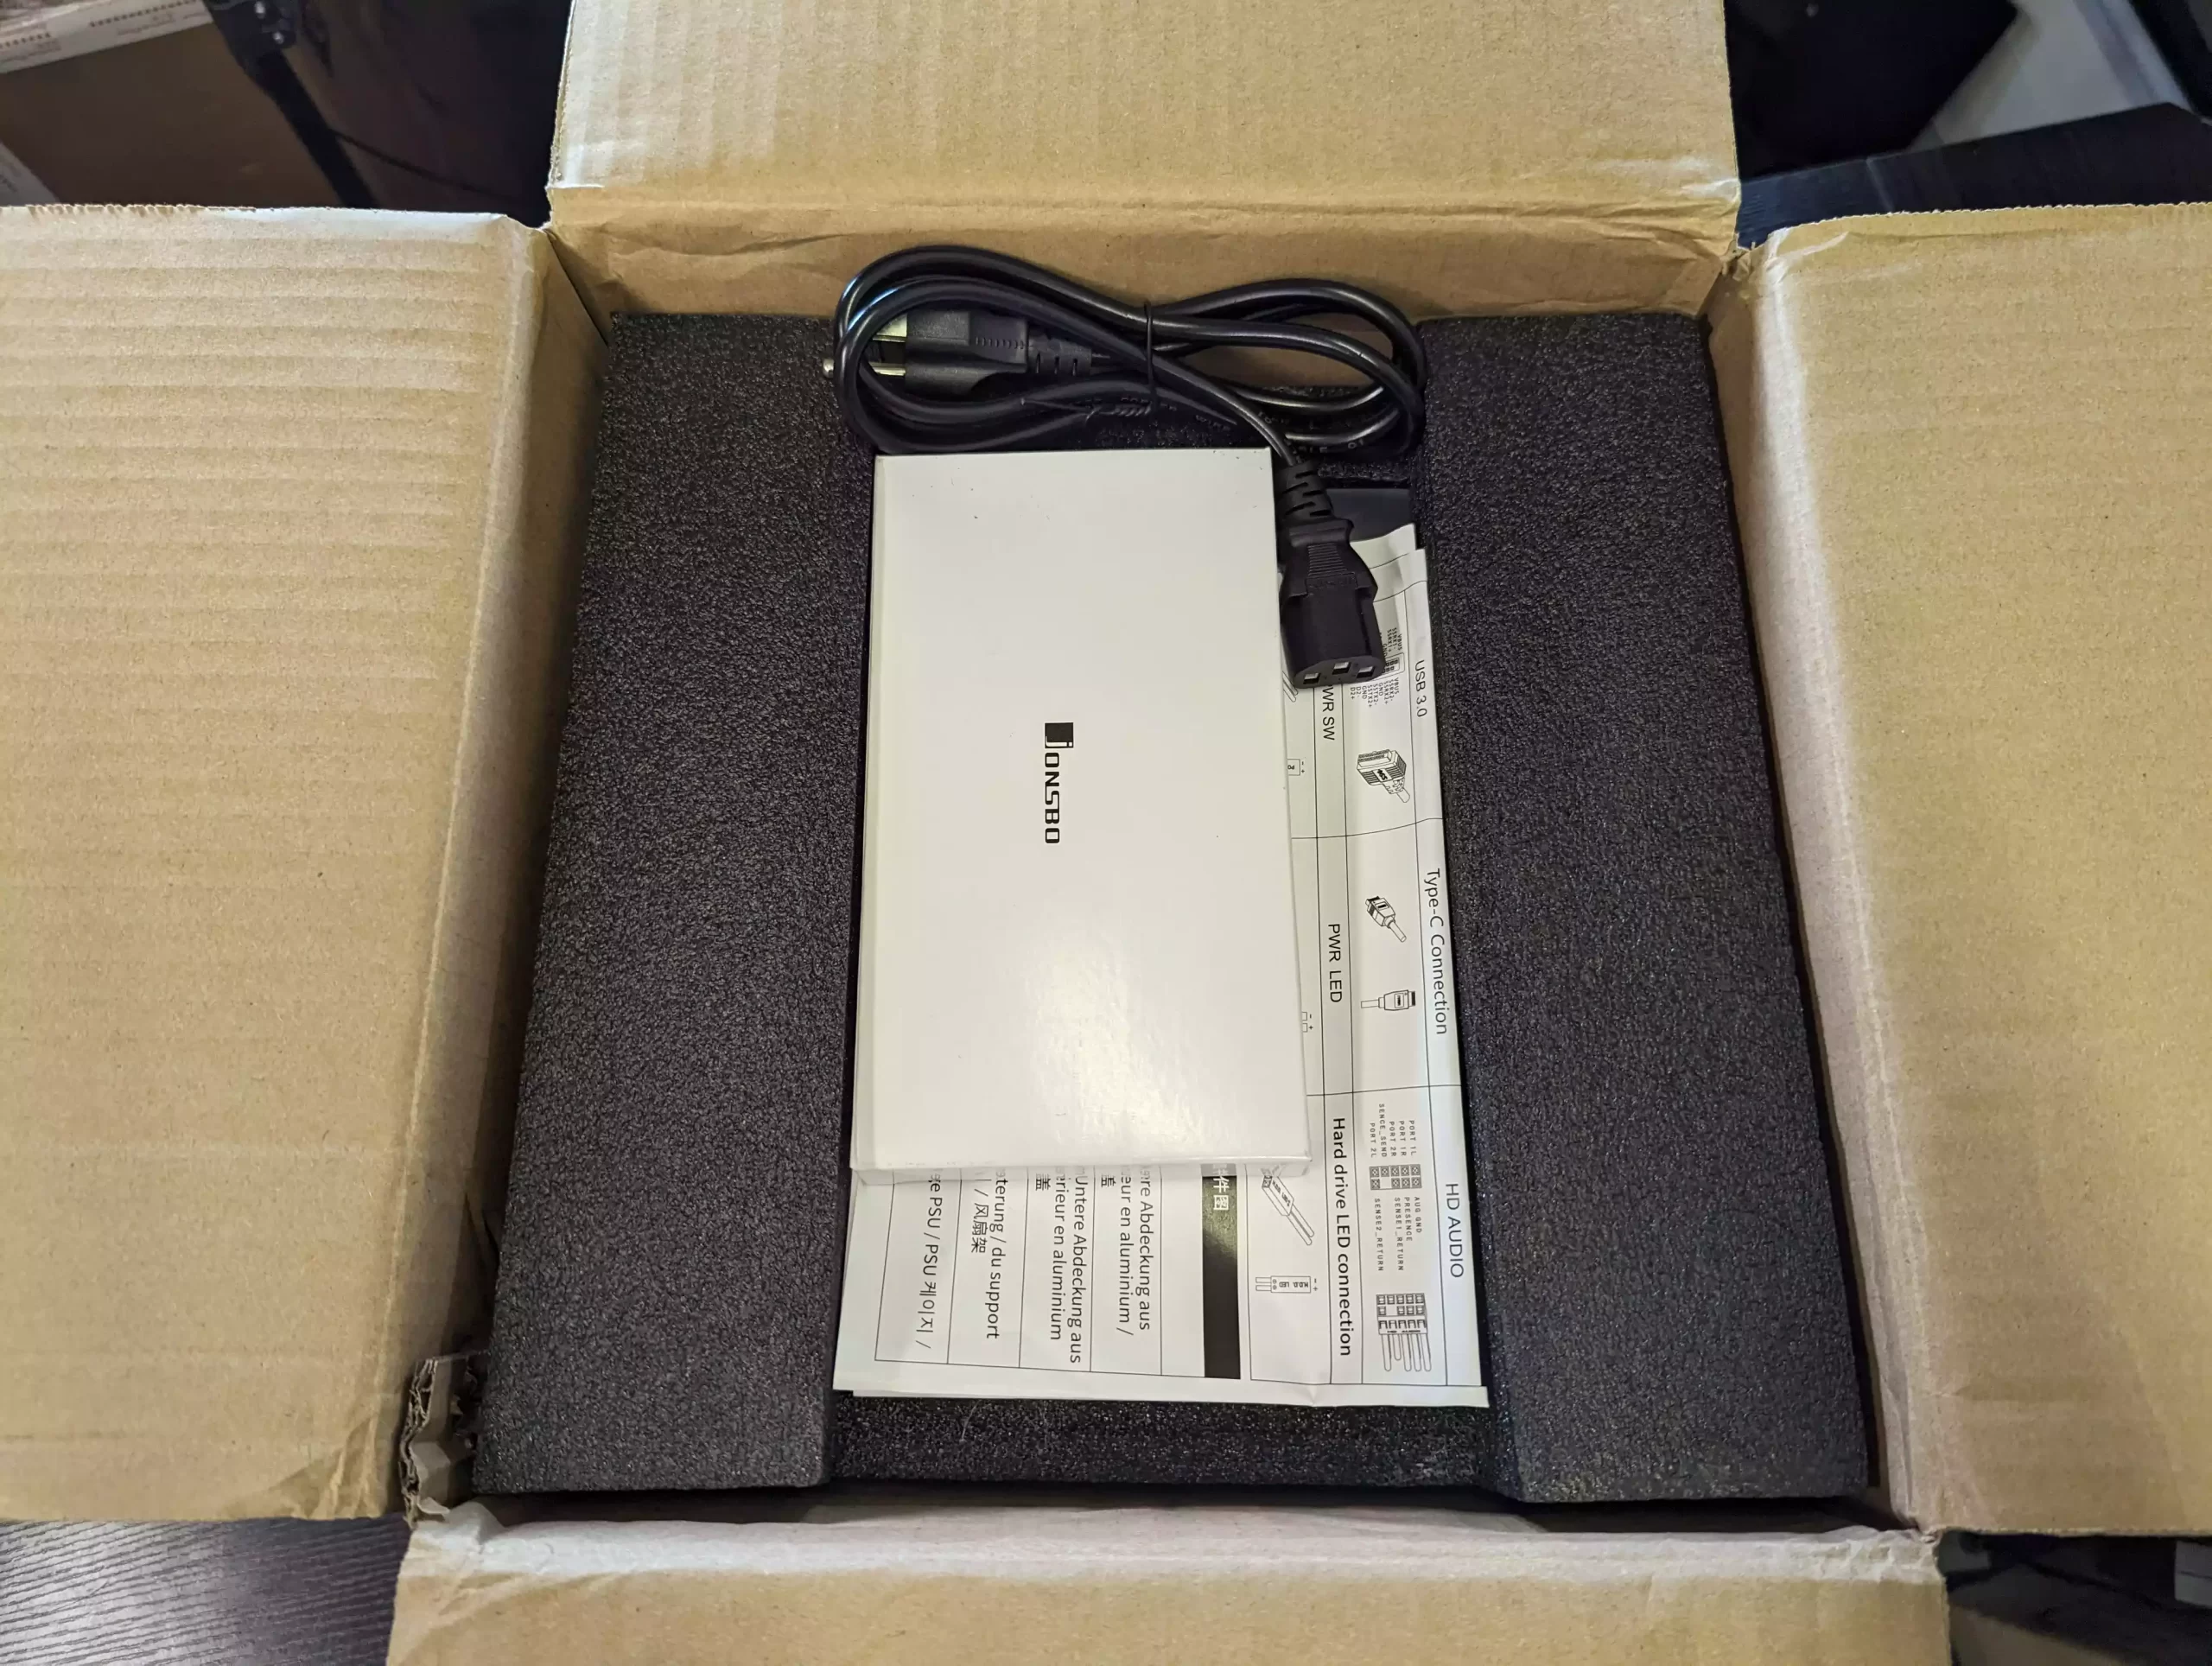
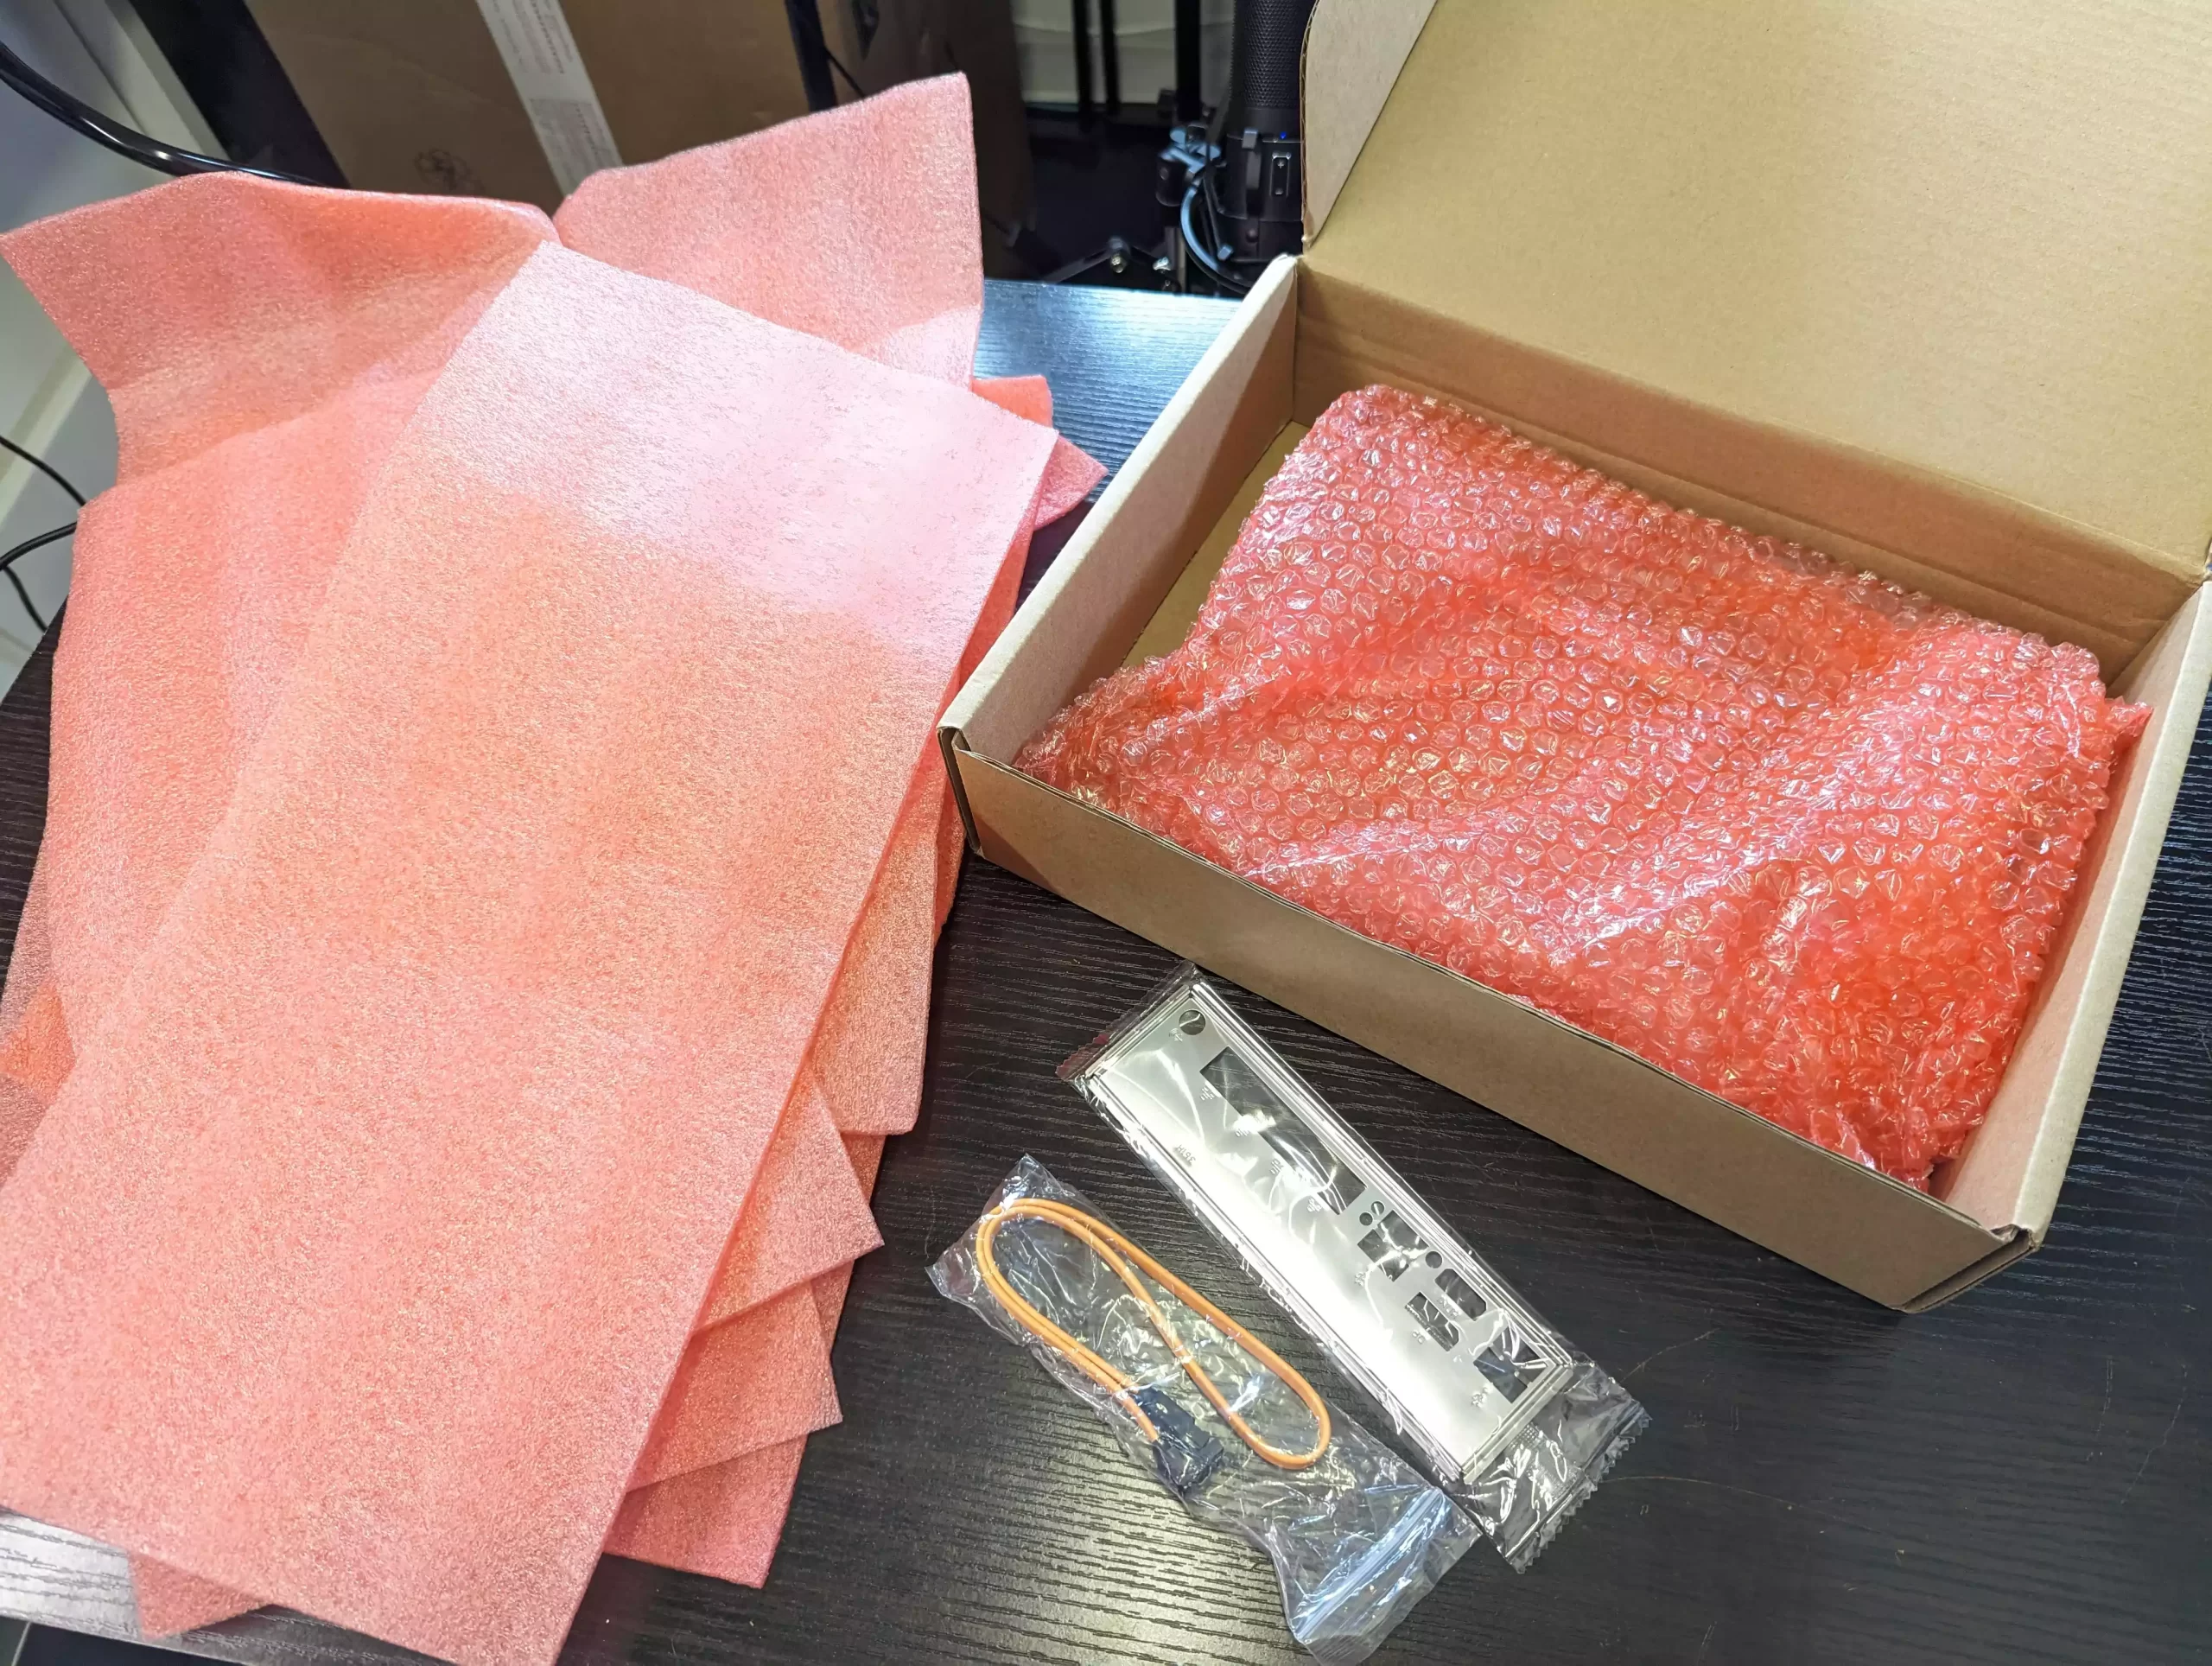
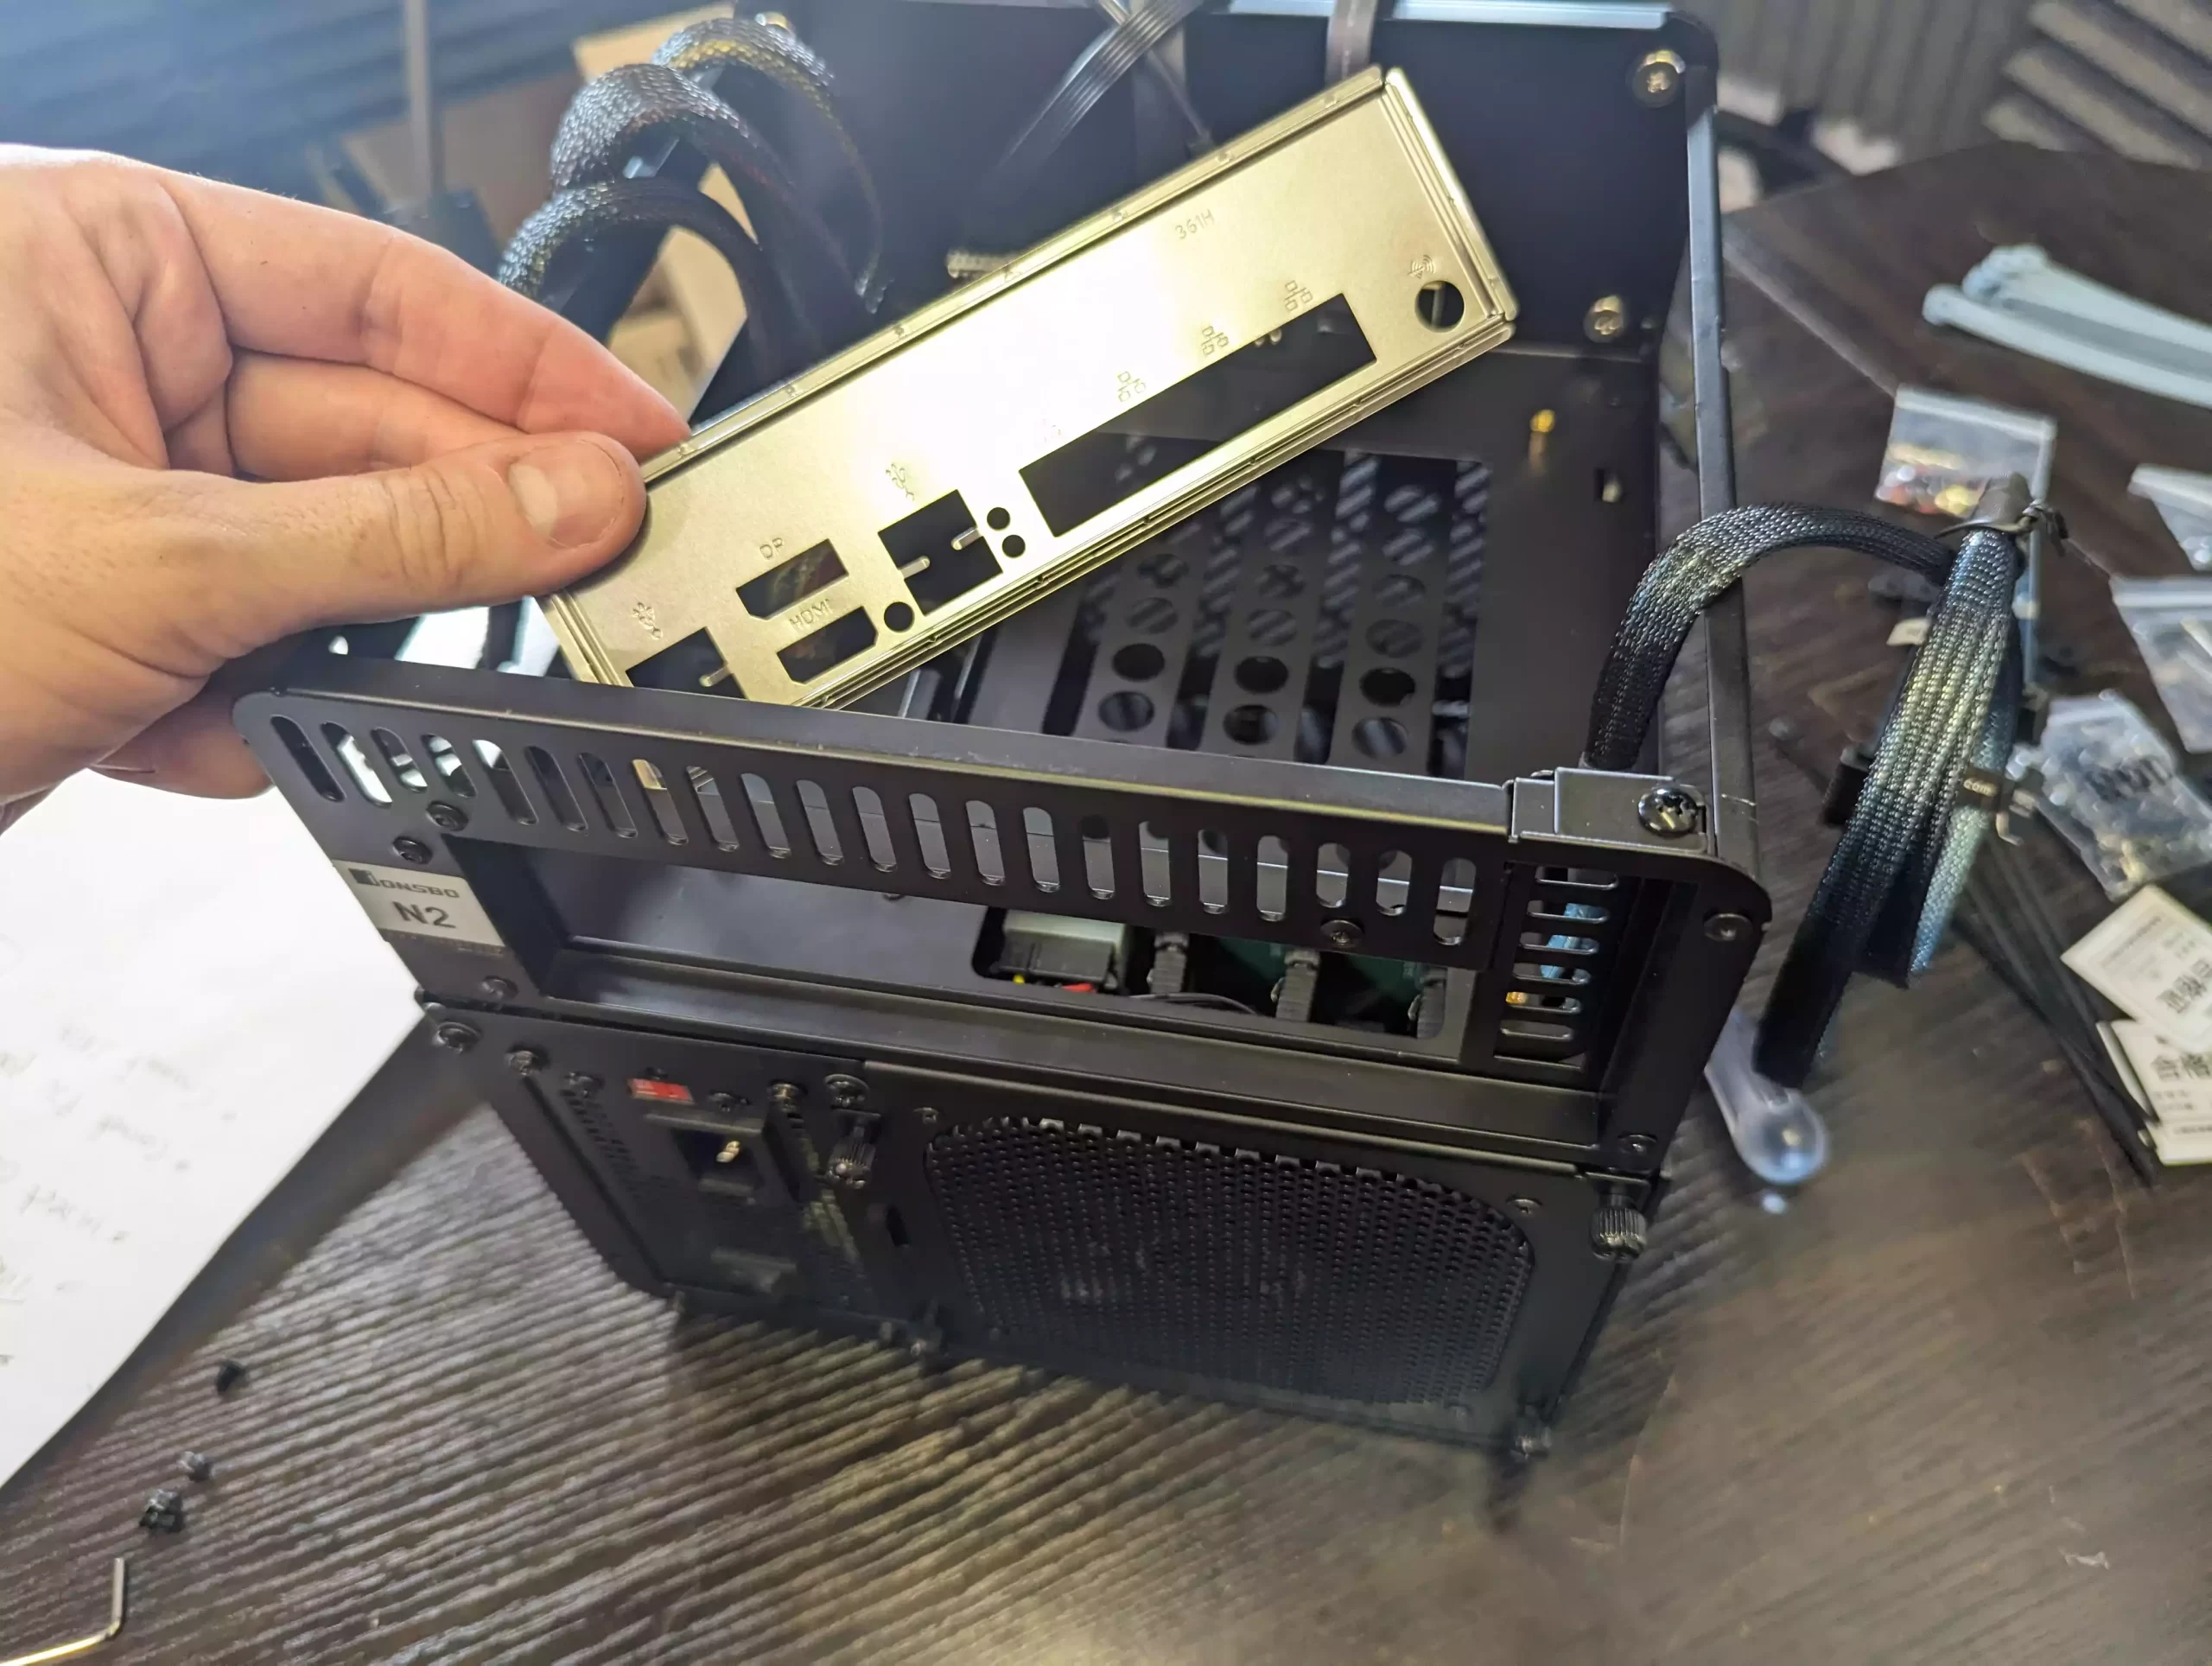
Unbox the TopTon NAS board, starting with the metal backplane.

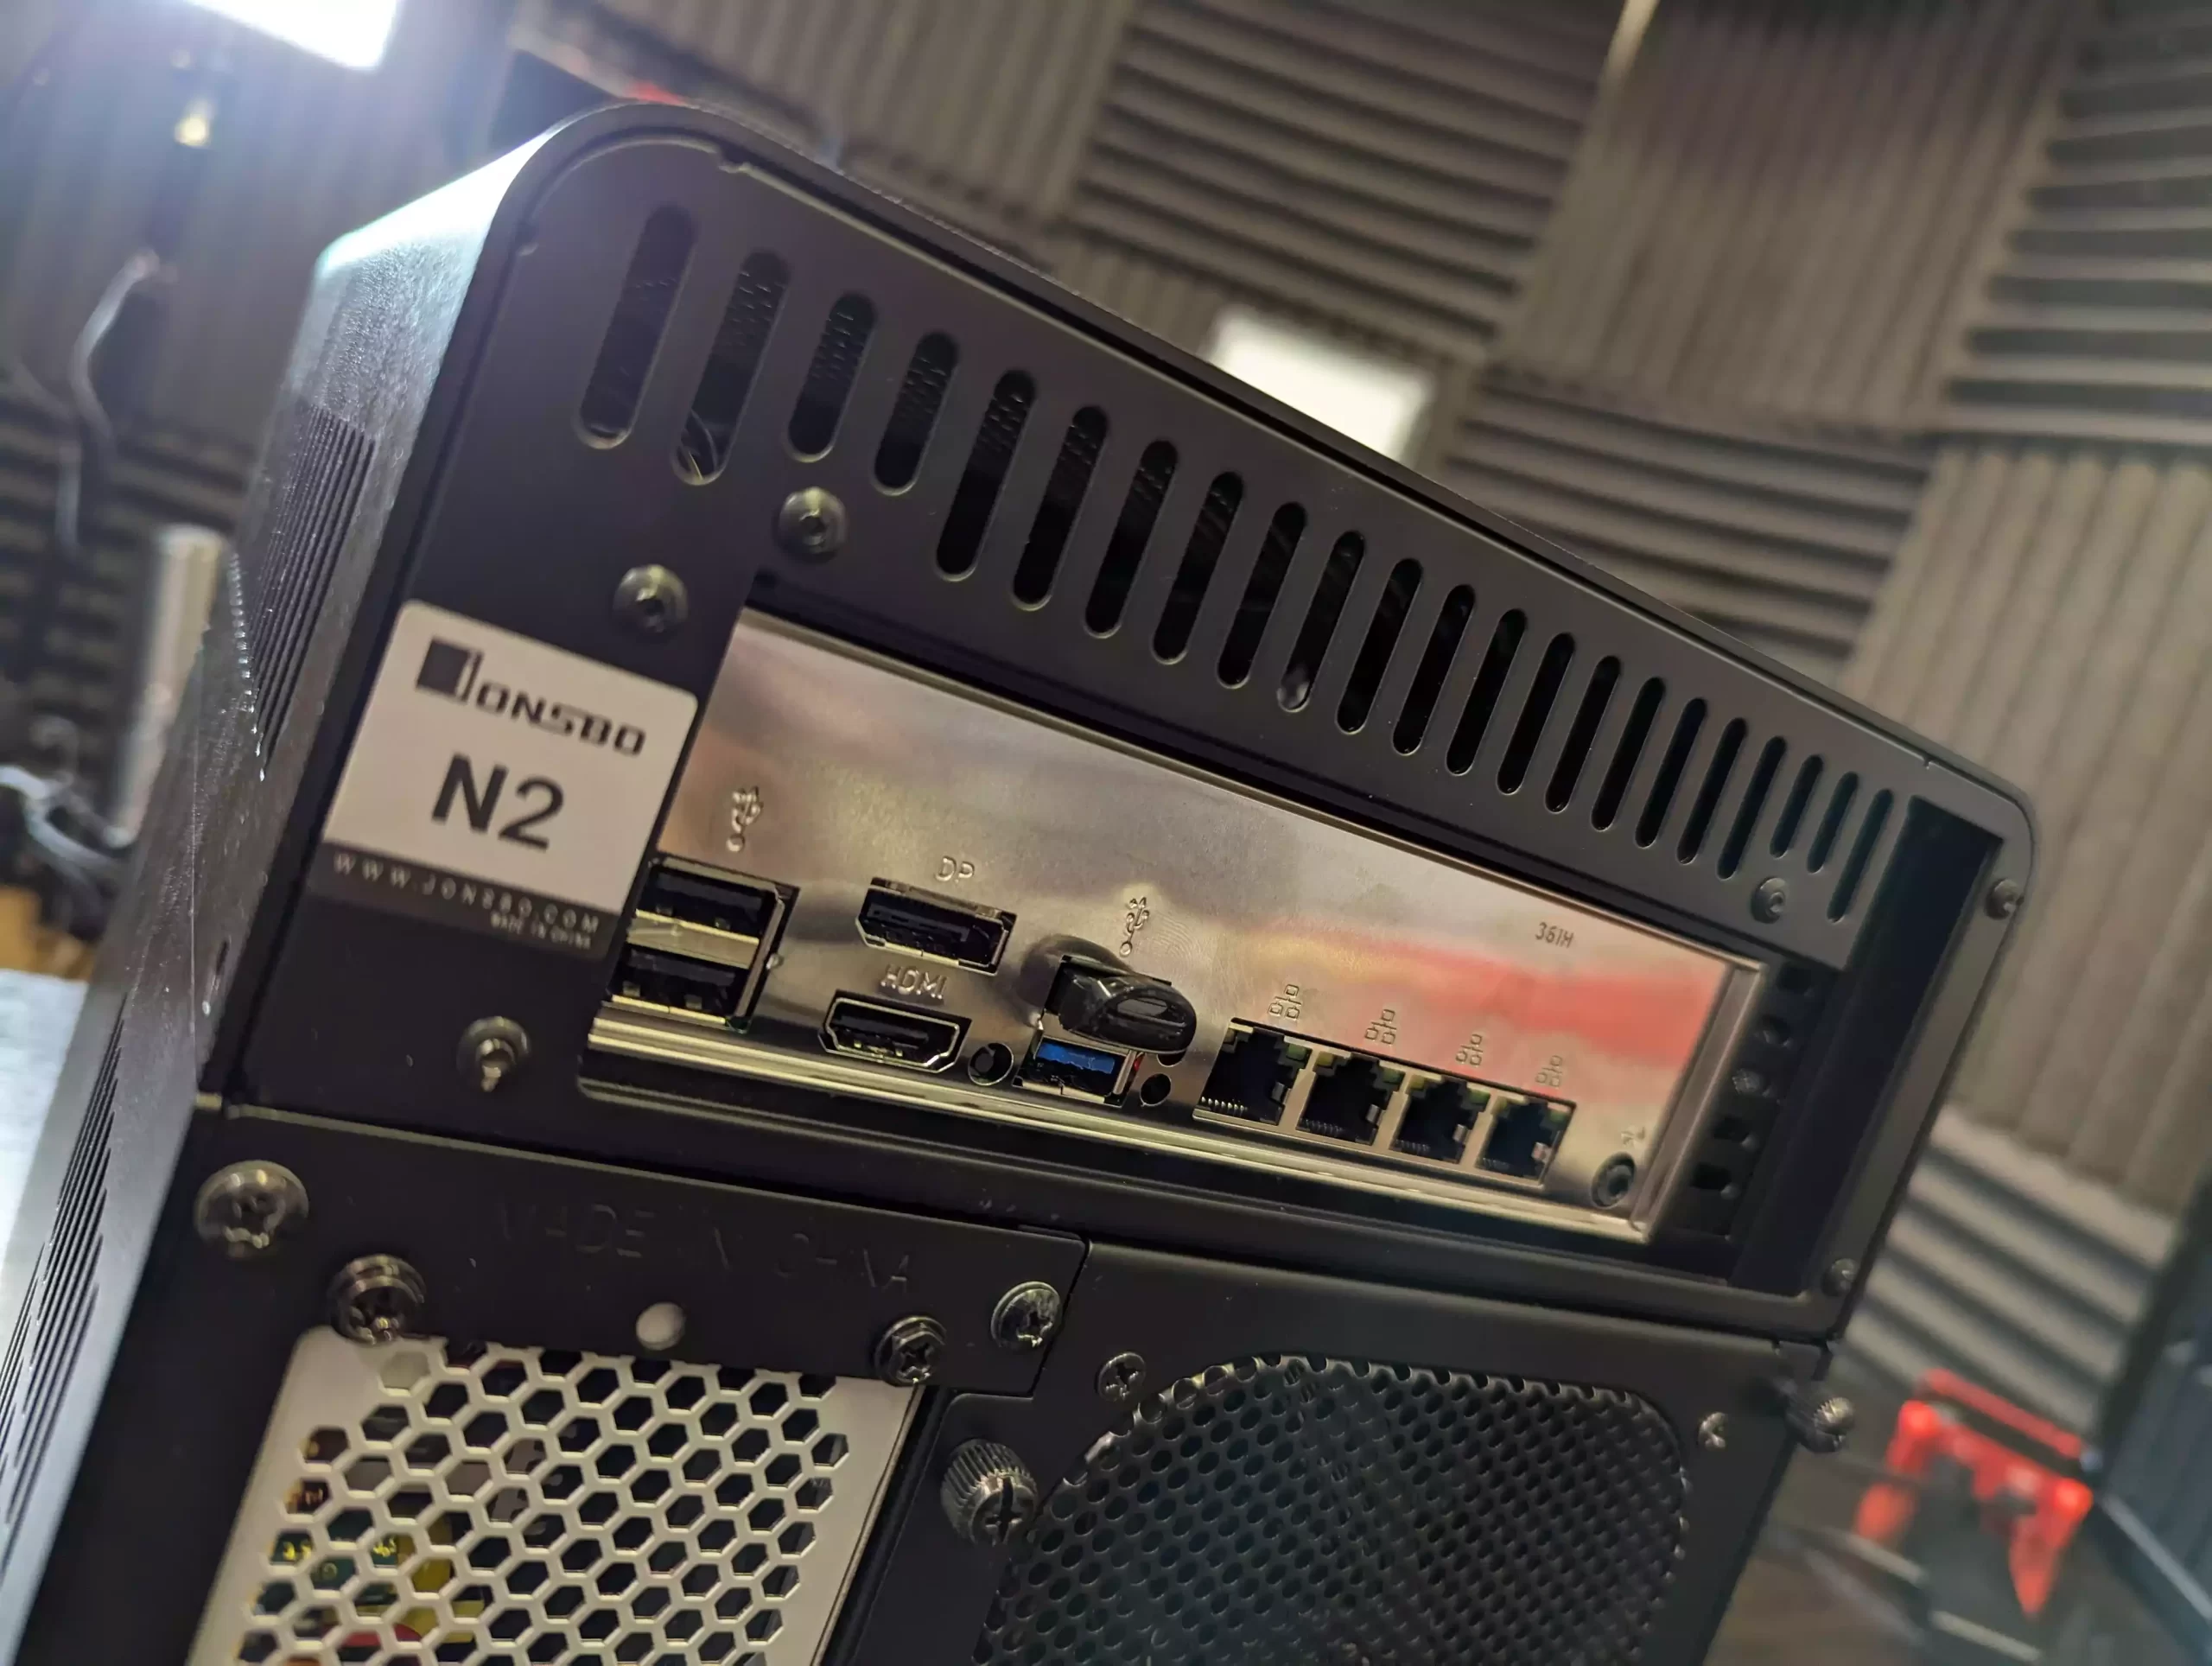
Mount the metal backplane in the available rectangular cavity of the Jonsbo case, ensuring readable text faces the right way. The network/ethernet port should be on the right when viewed from the case’s rear.
Carefully place the TopTon motherboard inside the top of the Jonsbo case, aligning connectors with the gaps in the backplane. If done right, the motherboard’s corner screws will align with the N2 case screw holes.
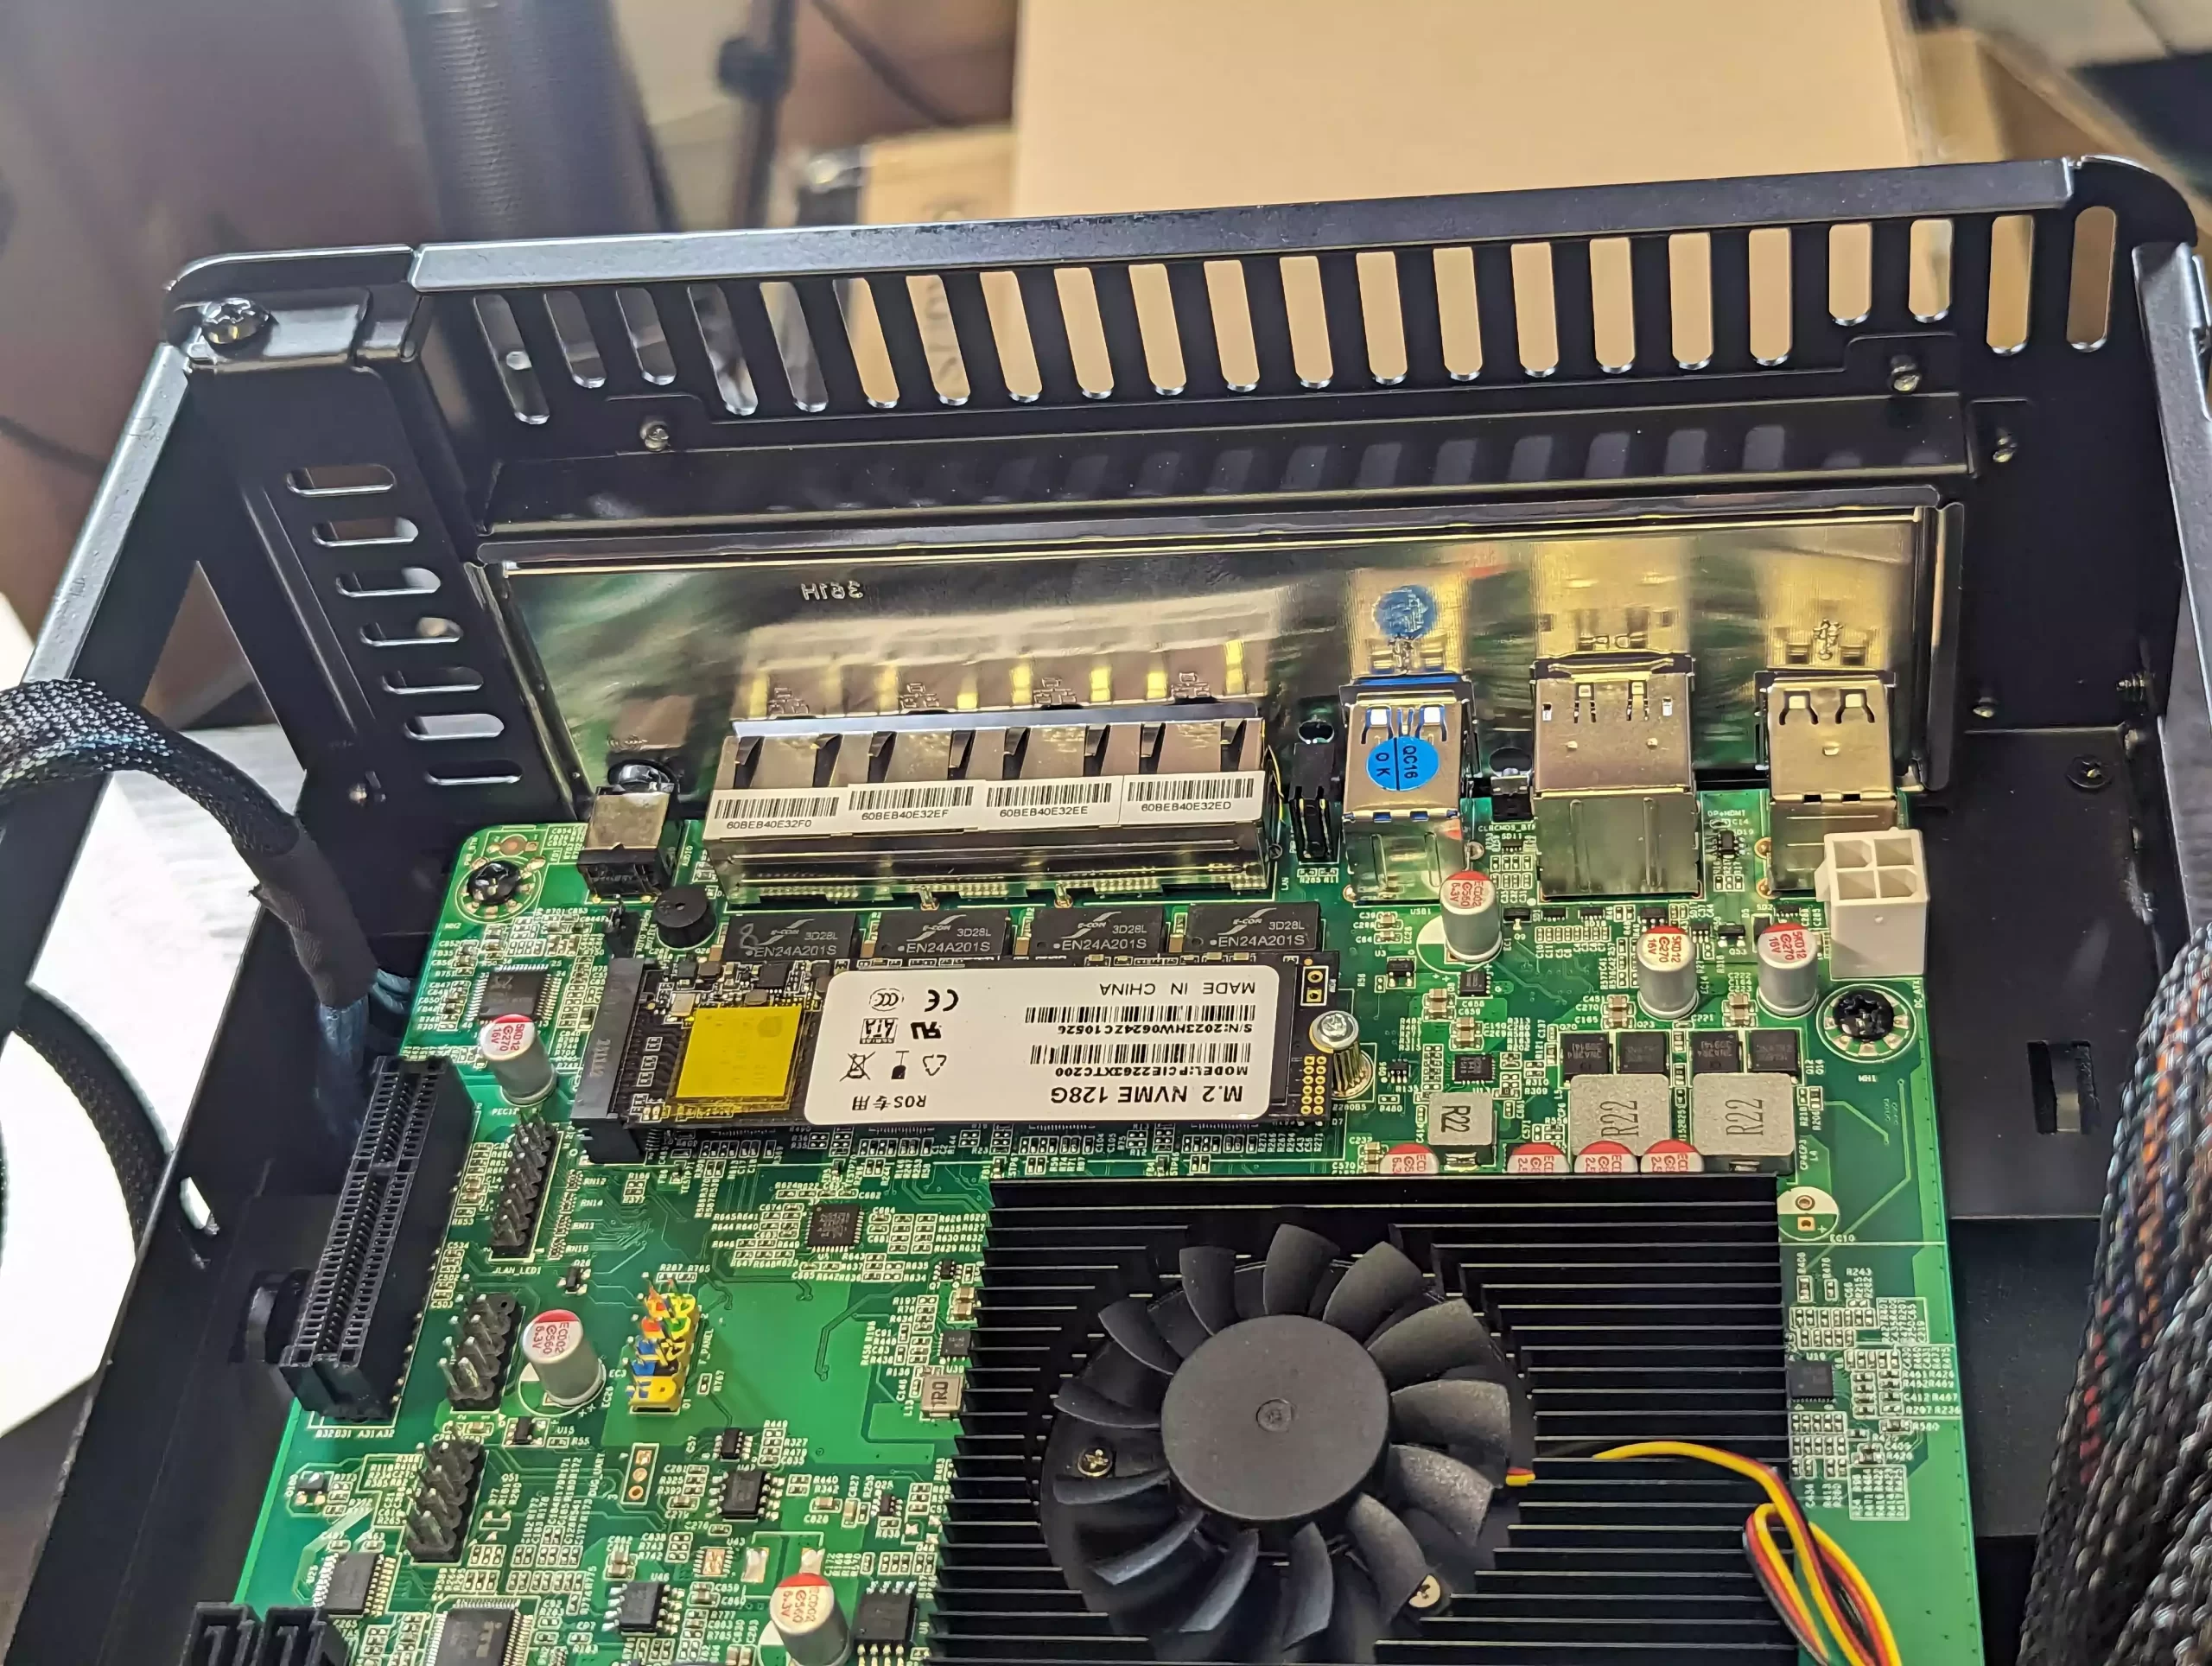
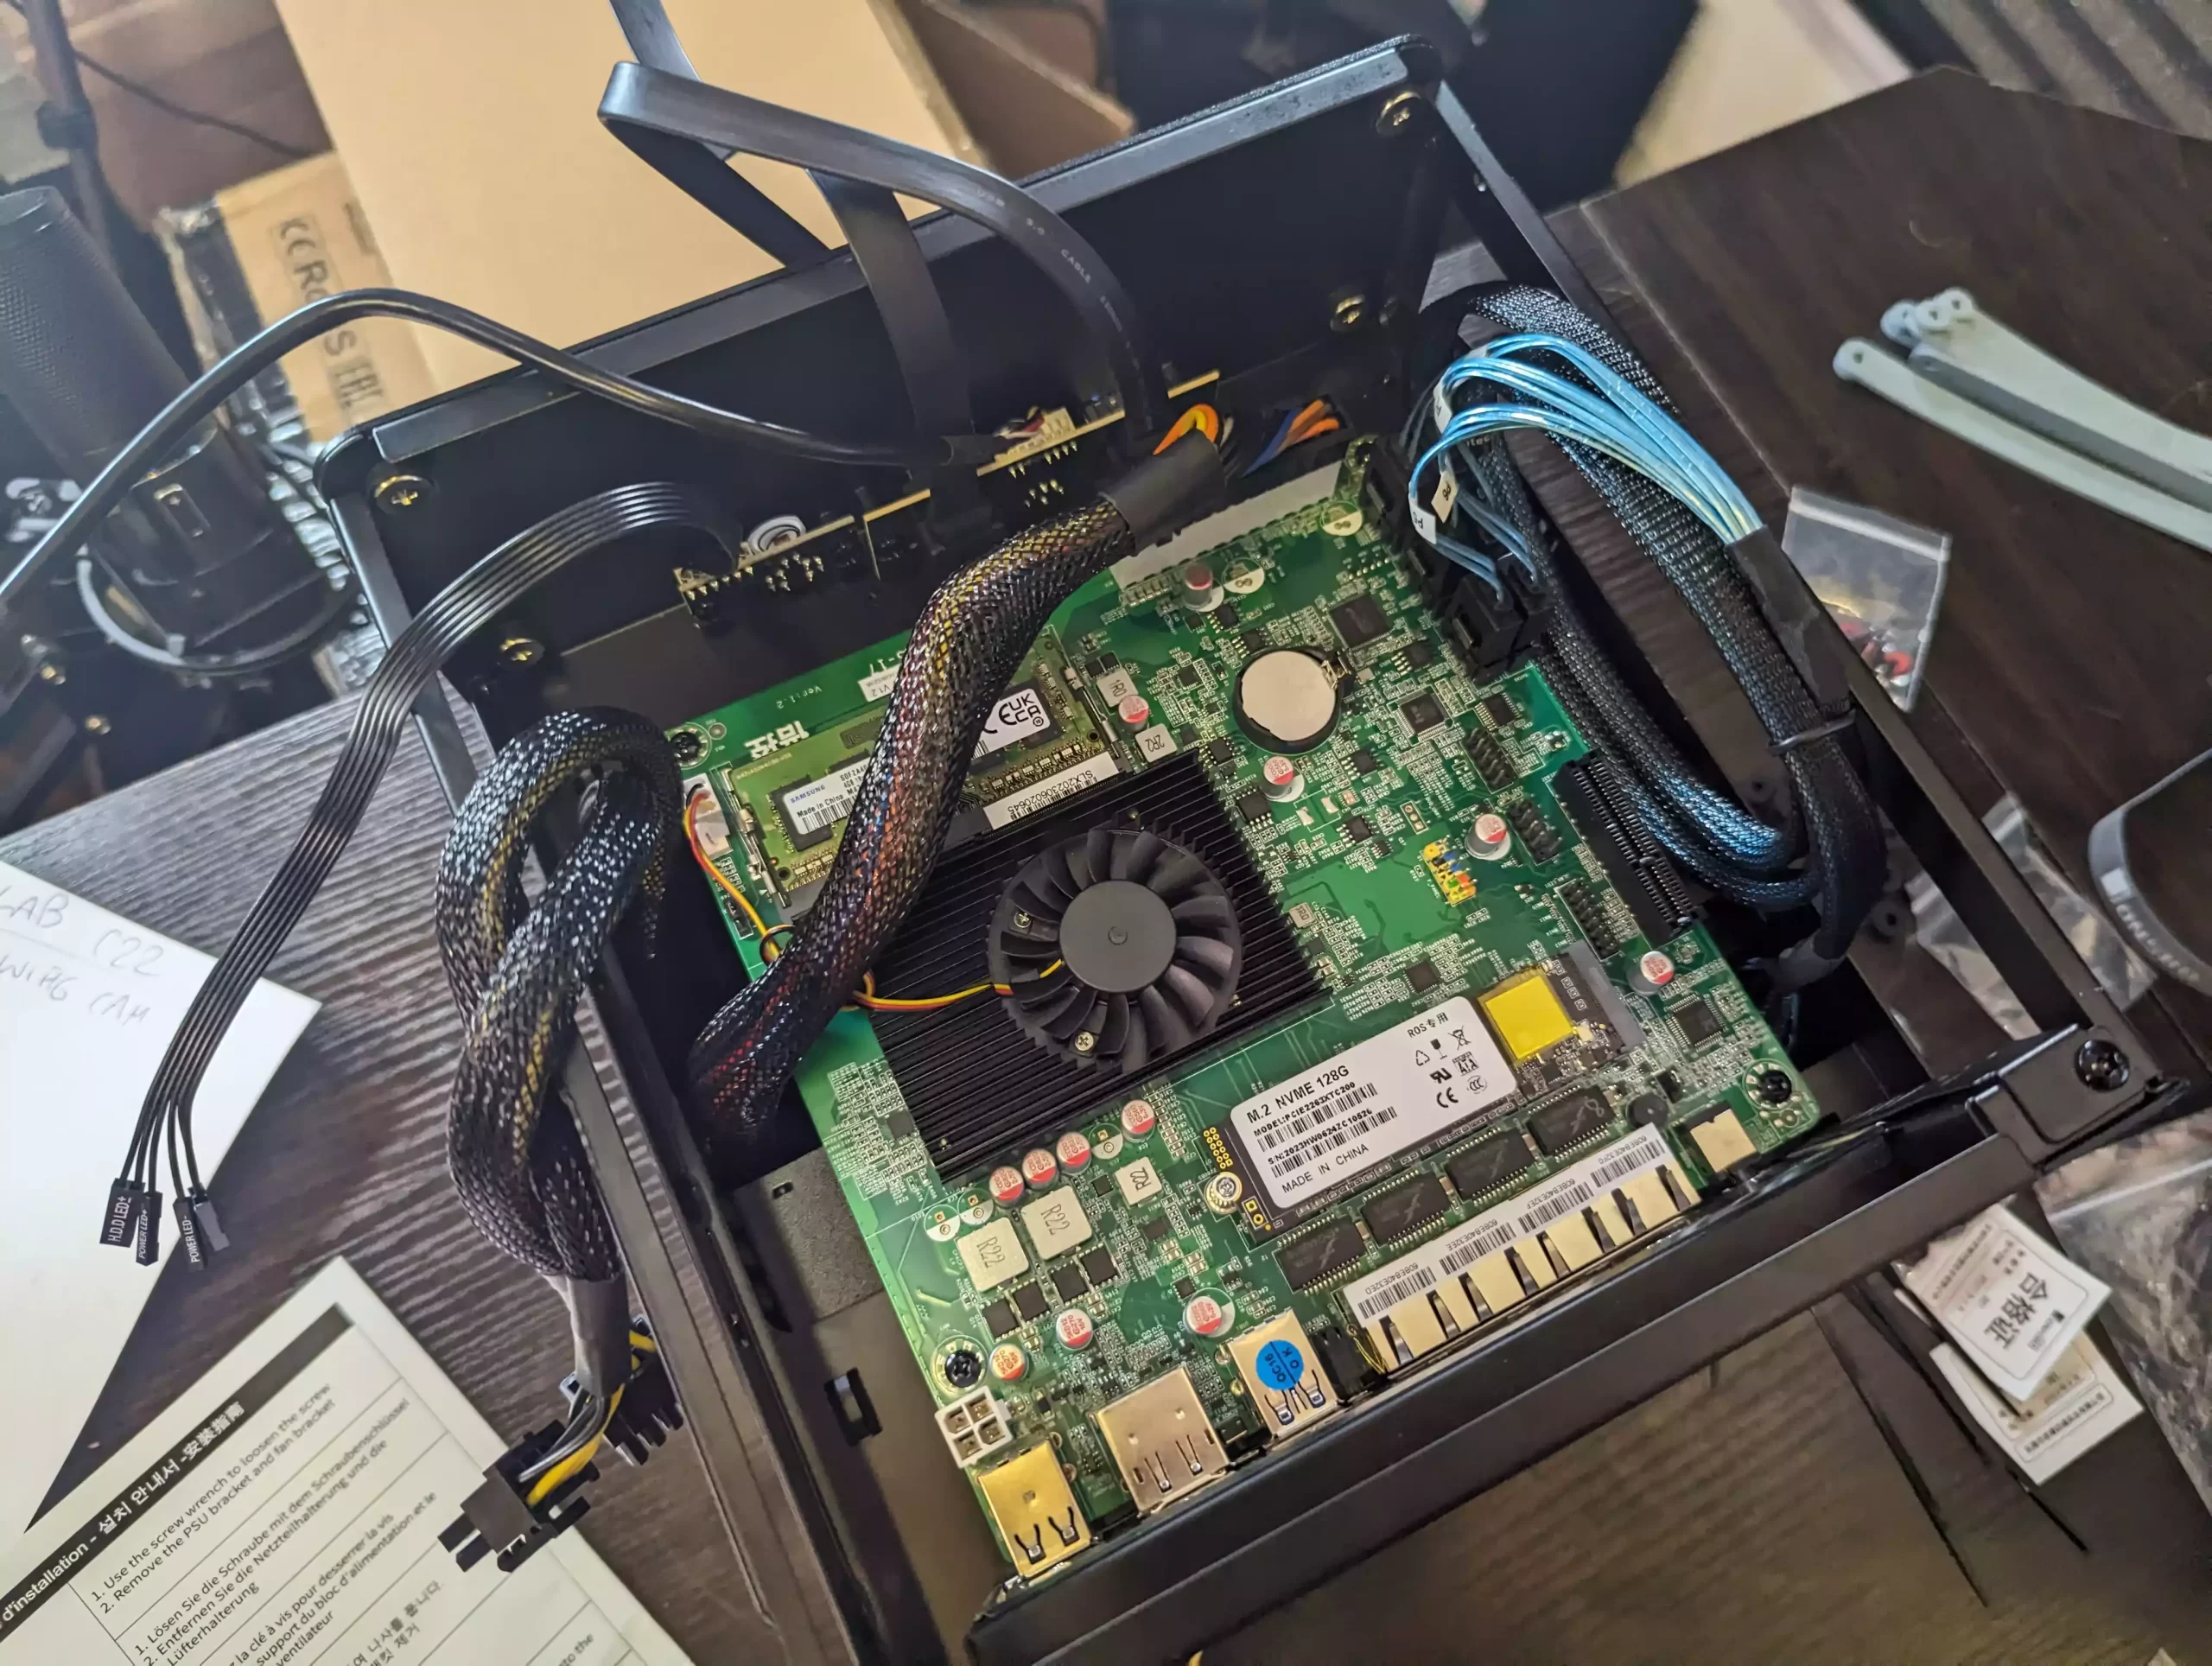
With all cables hanging outside, fasten the four corners of the TopTon motherboard to the Jonsbo N2 case.
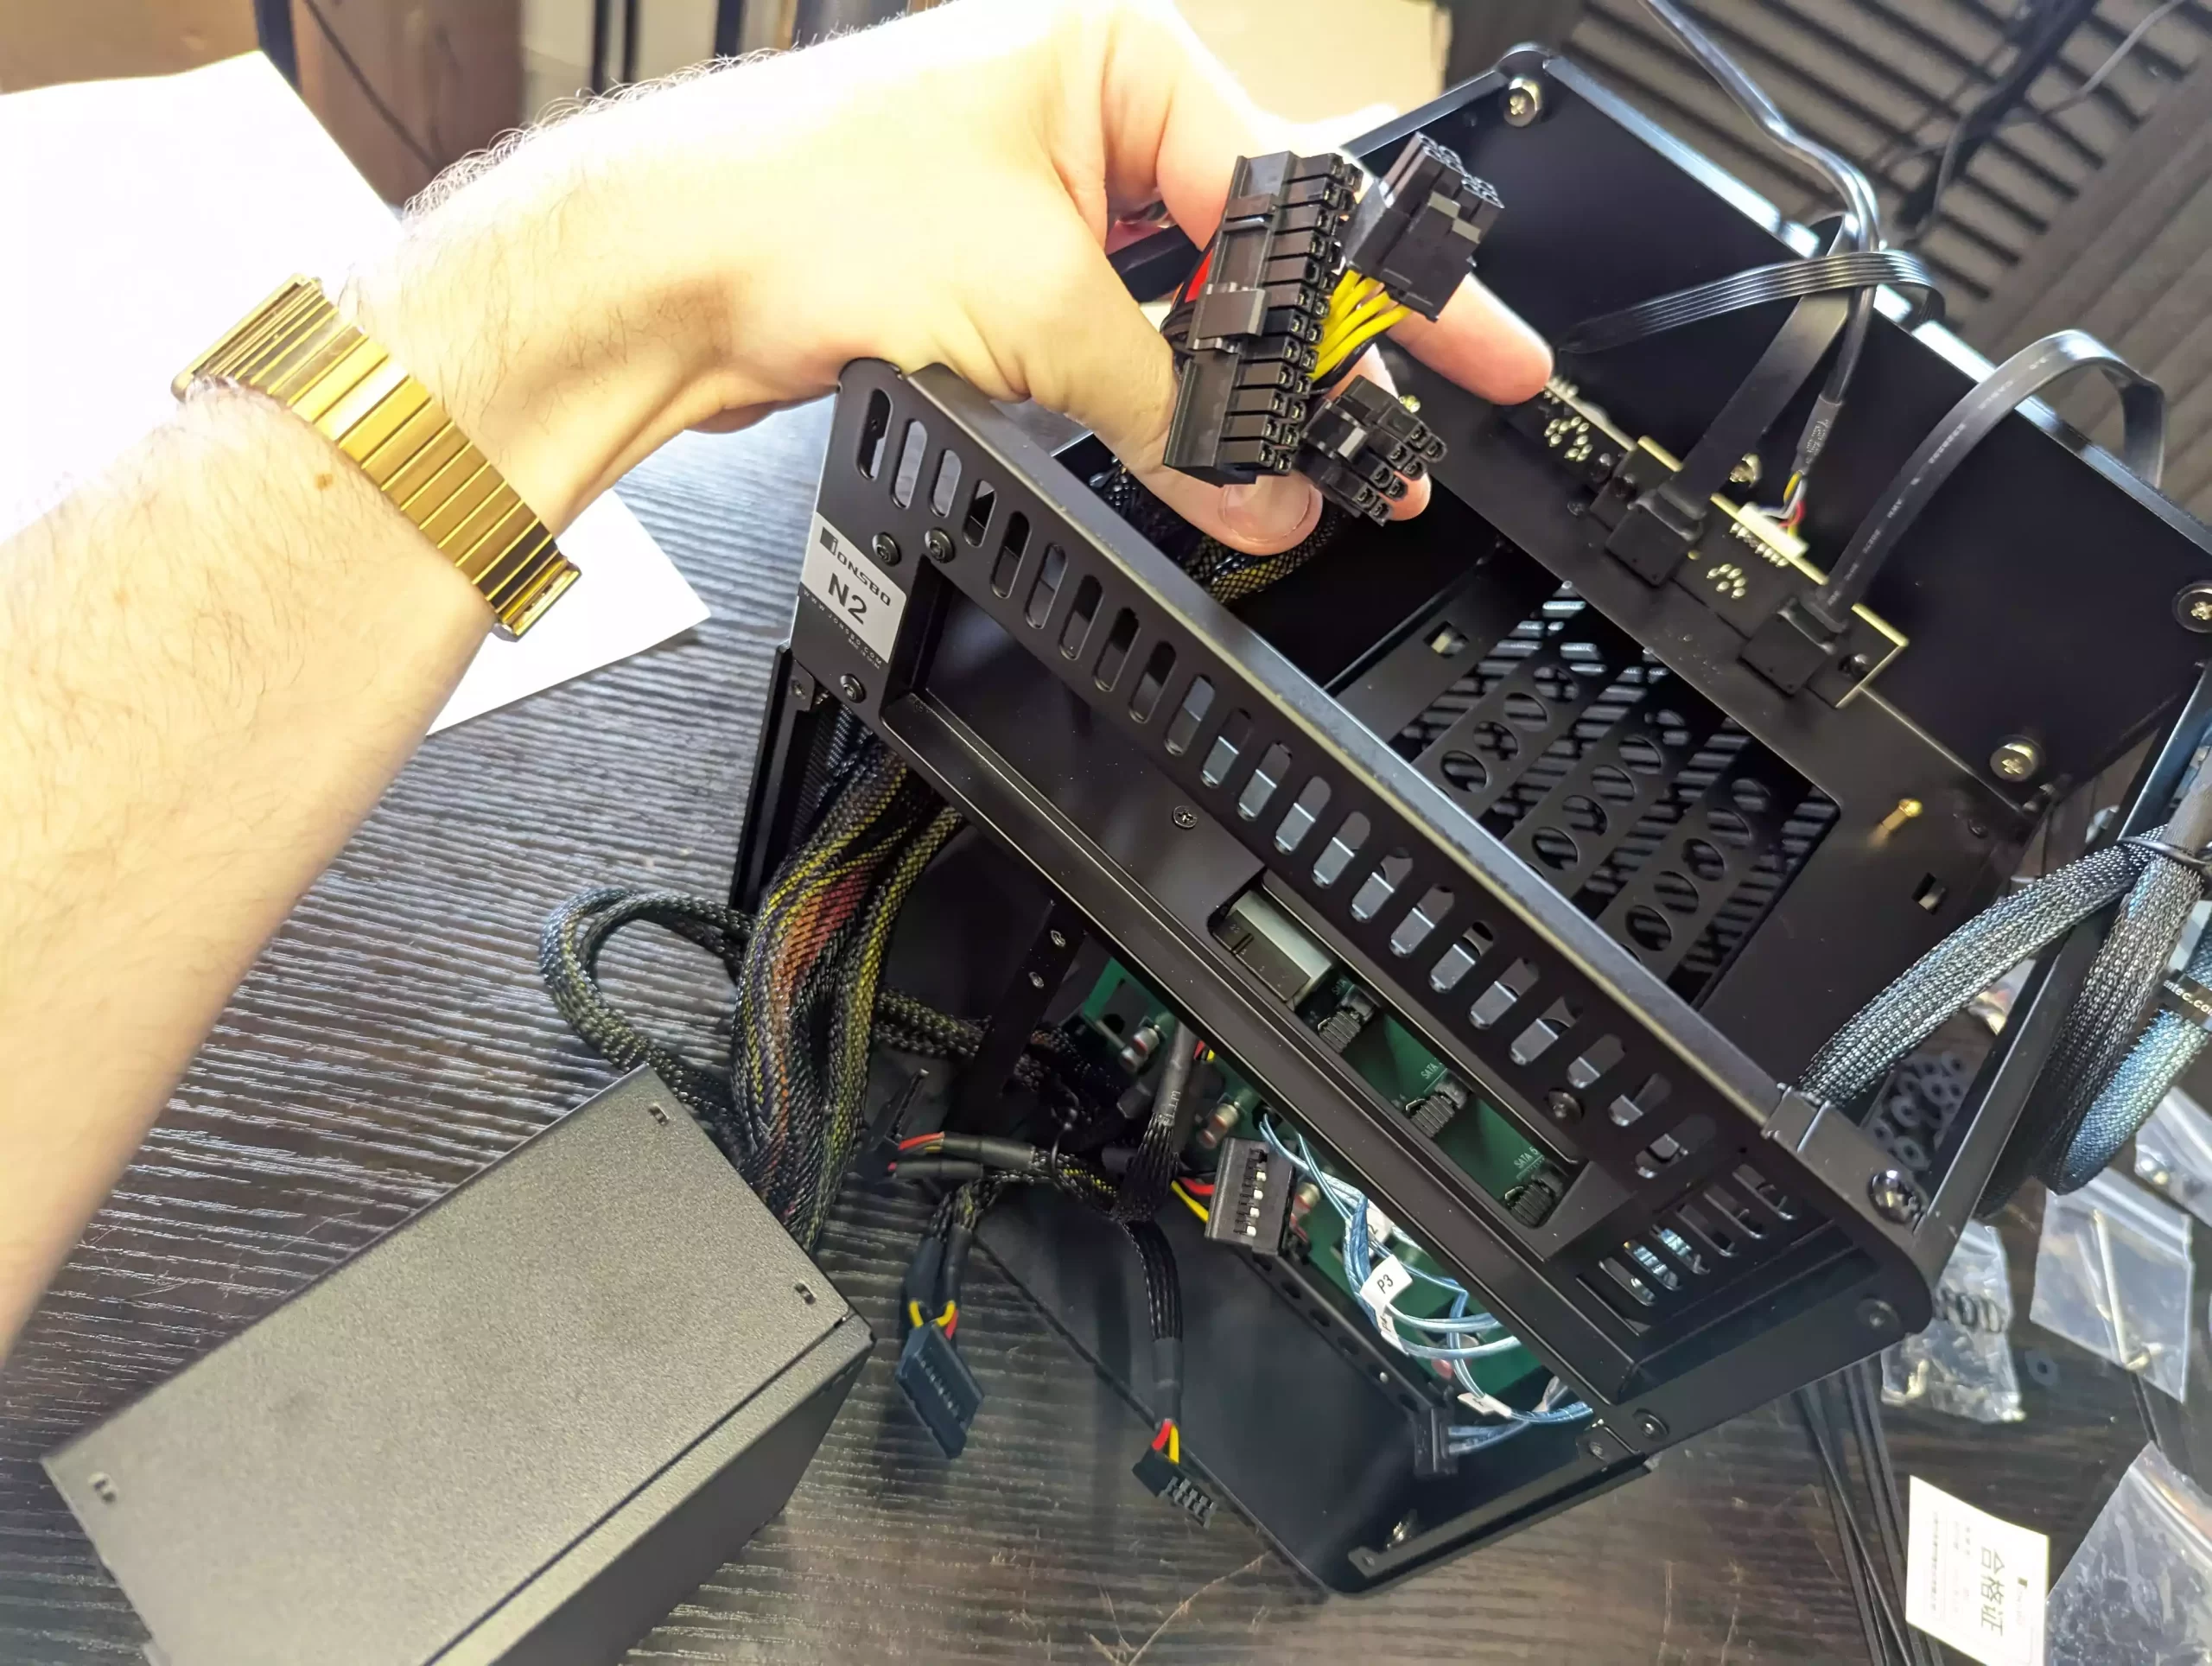
Right now, it should look like this (ignore the disconnected white 4 pin PSU connector, needed to disconnect briefly to take this photo):
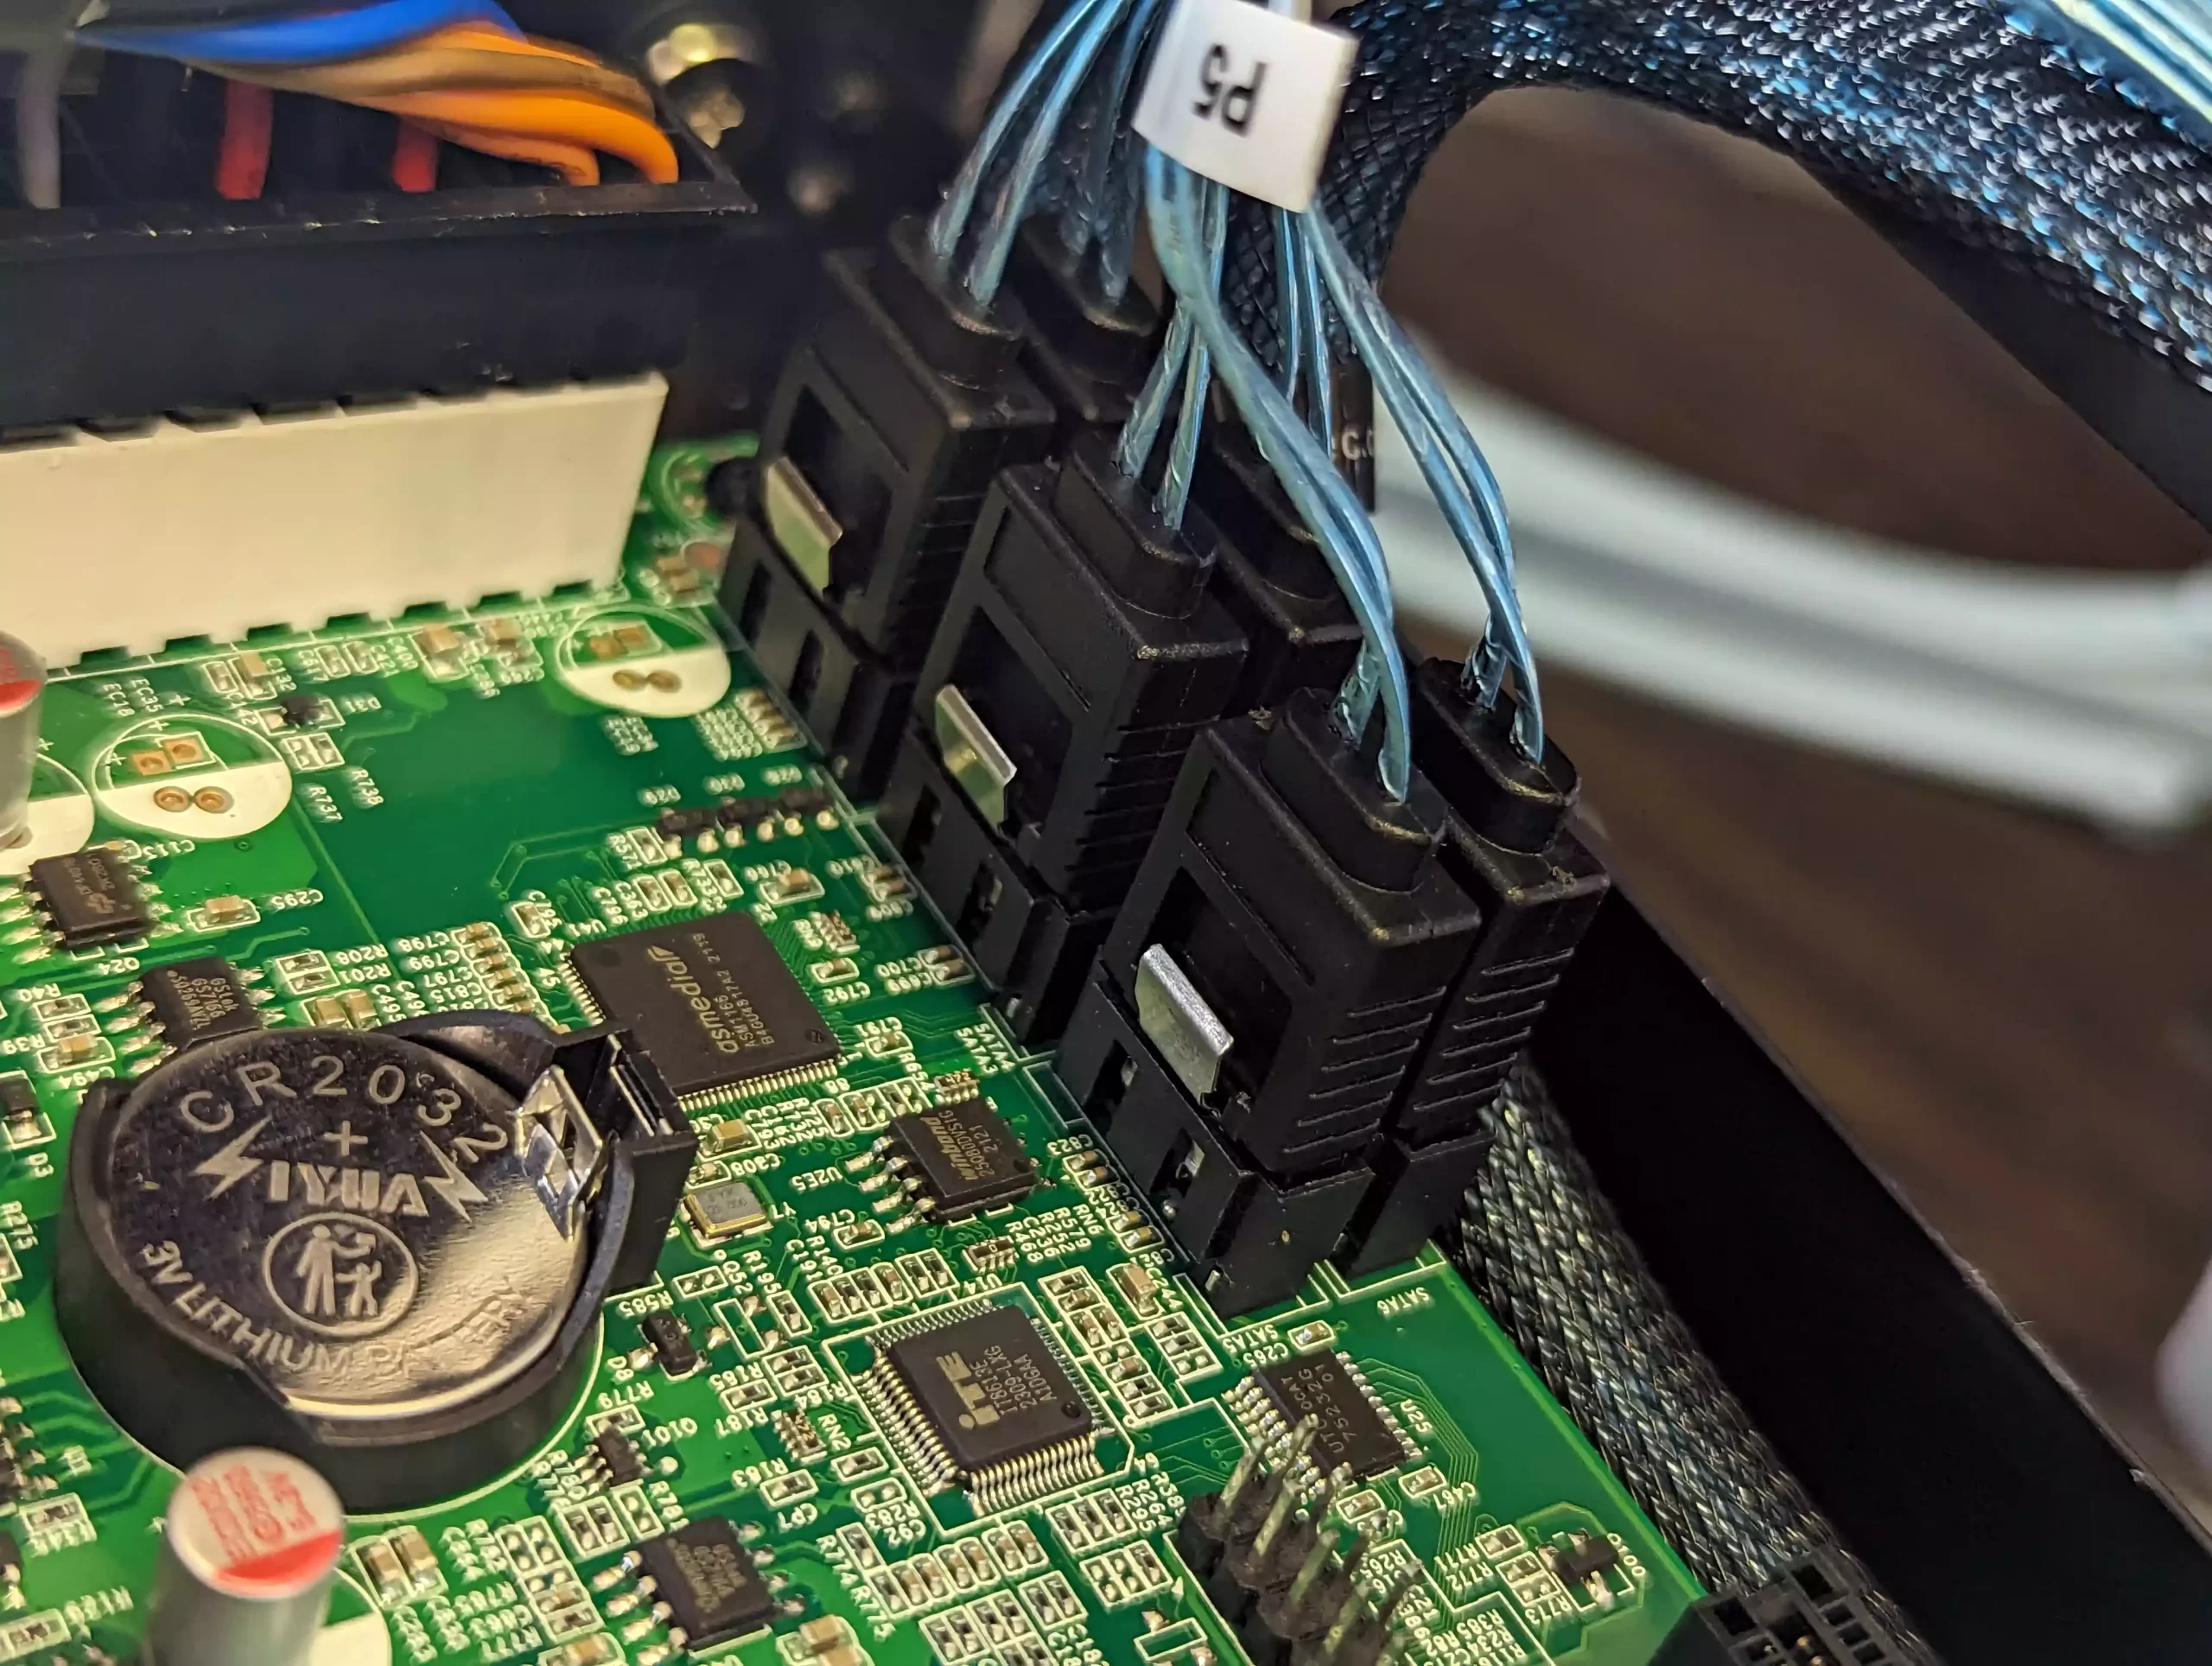
Connect each SATA connector from the multi-lane cable to its corresponding numbered SATA slot on the motherboard’s top right.
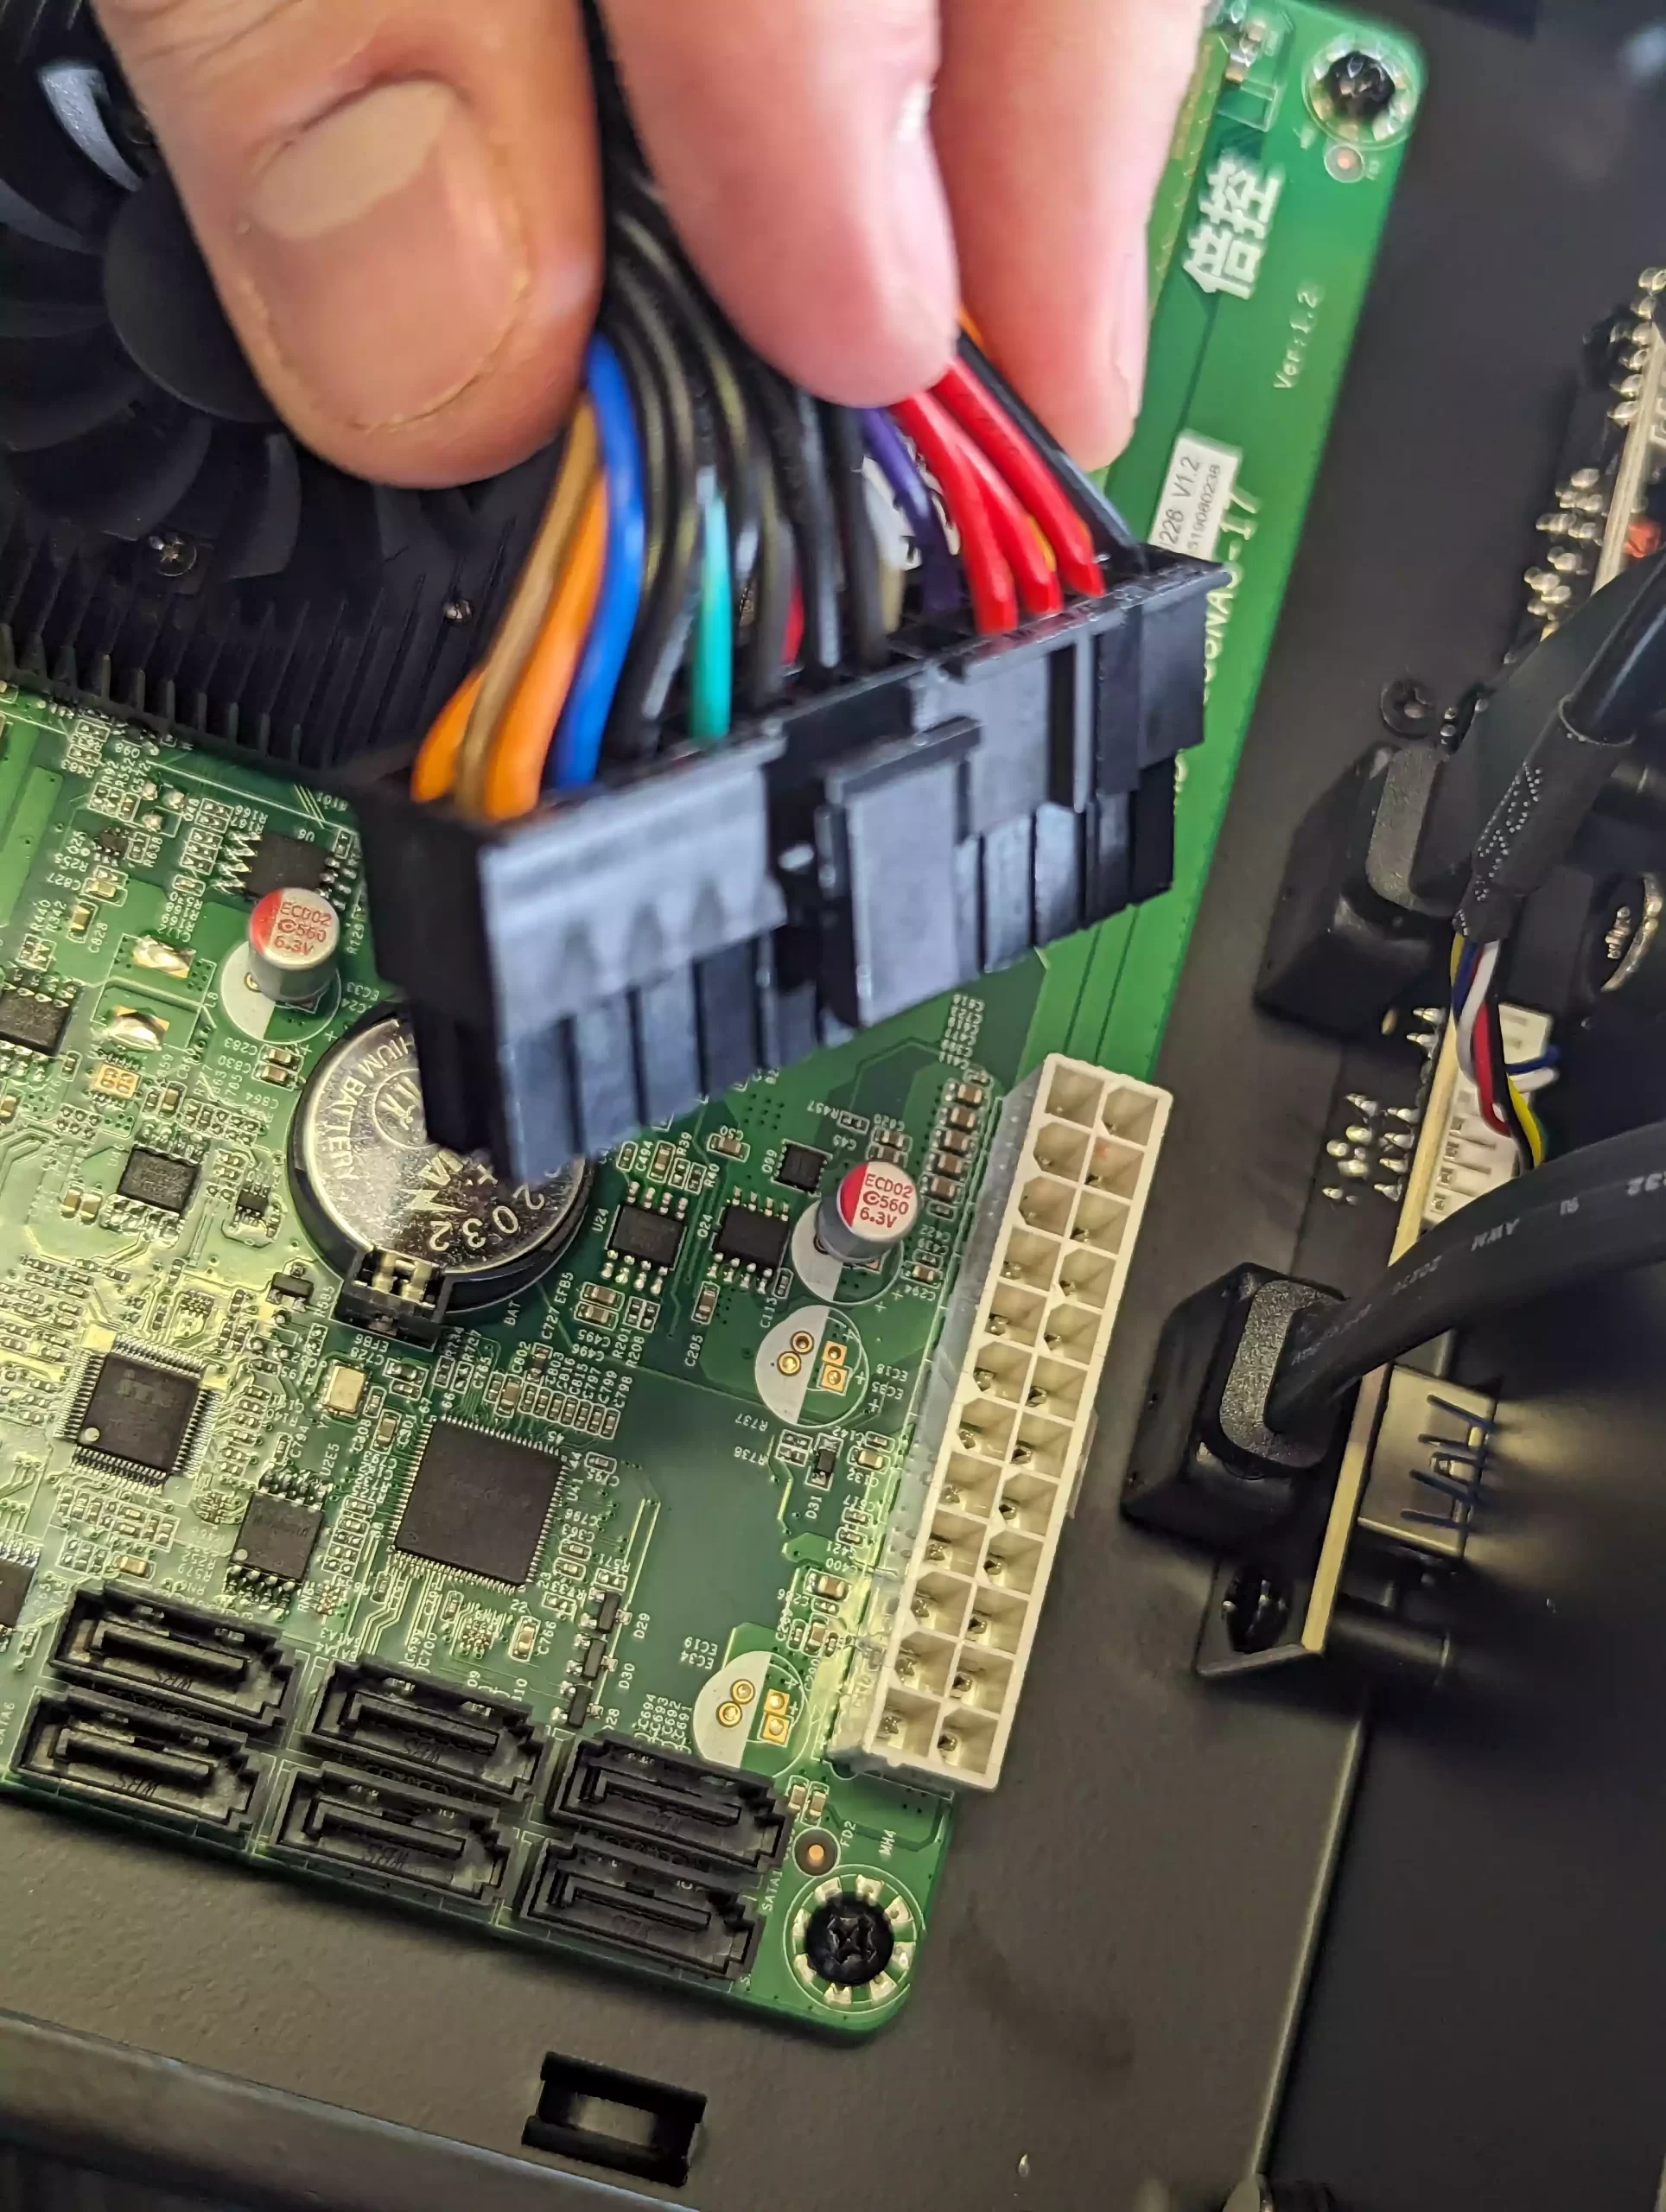
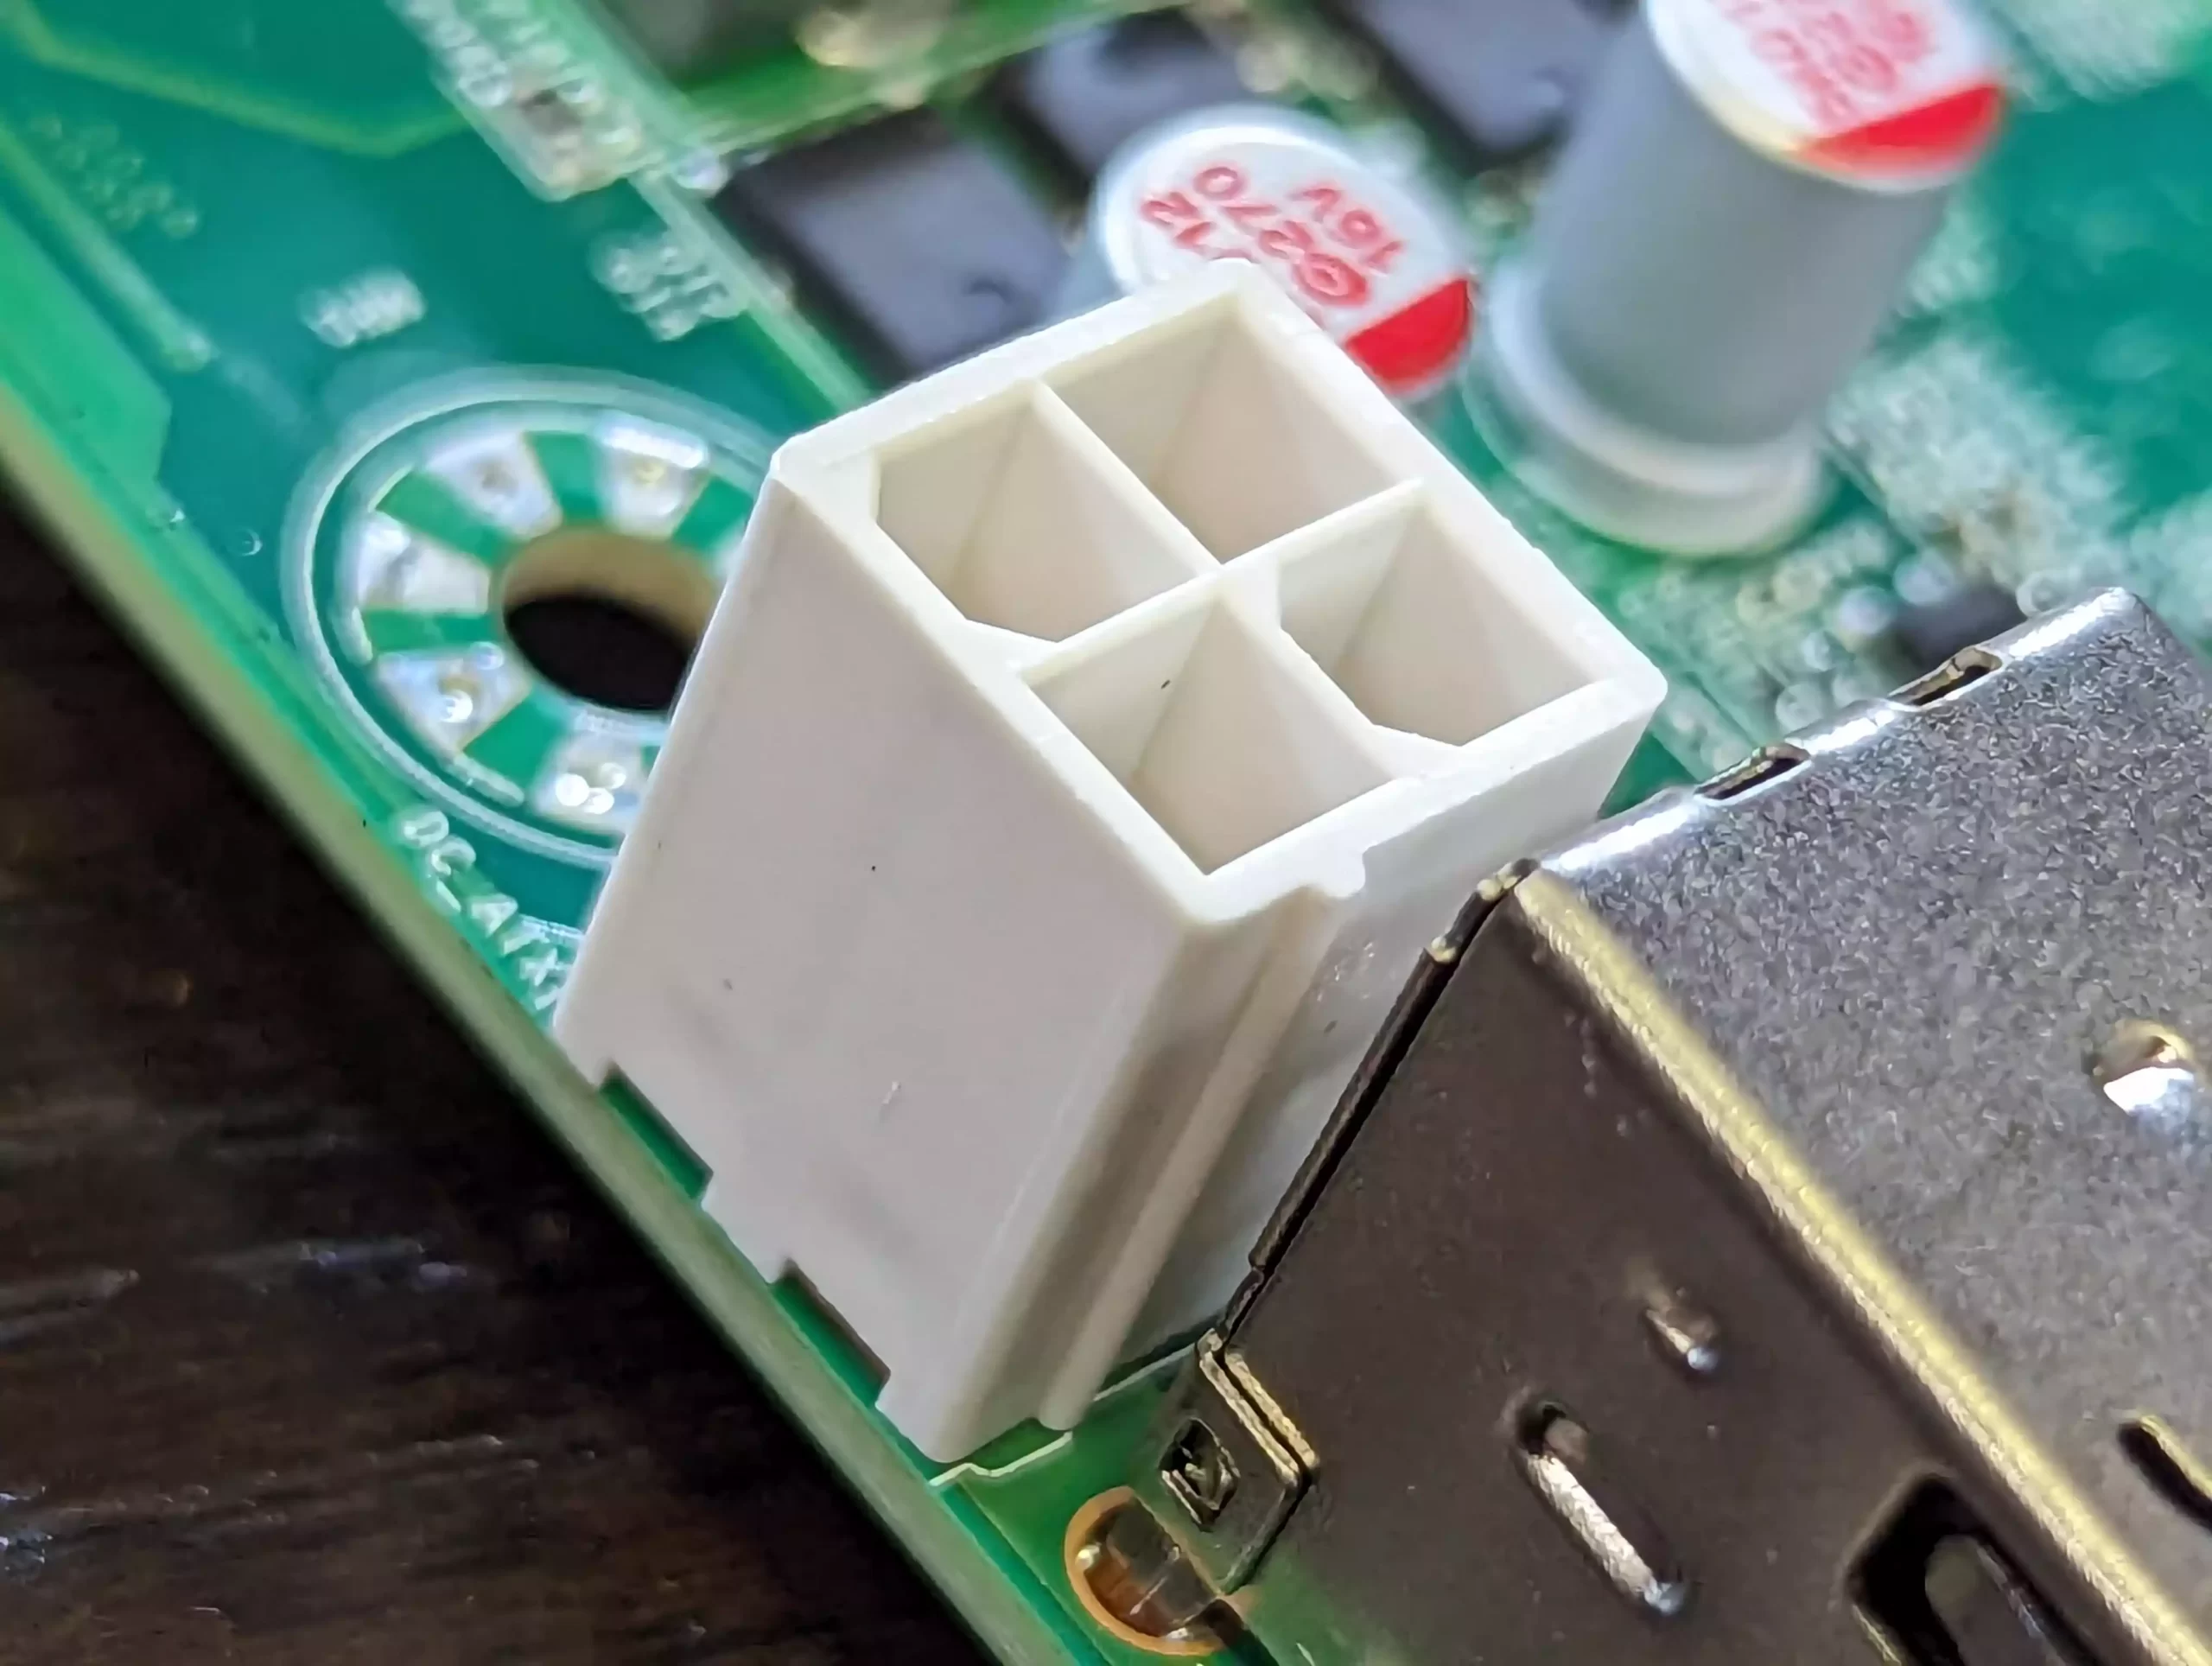
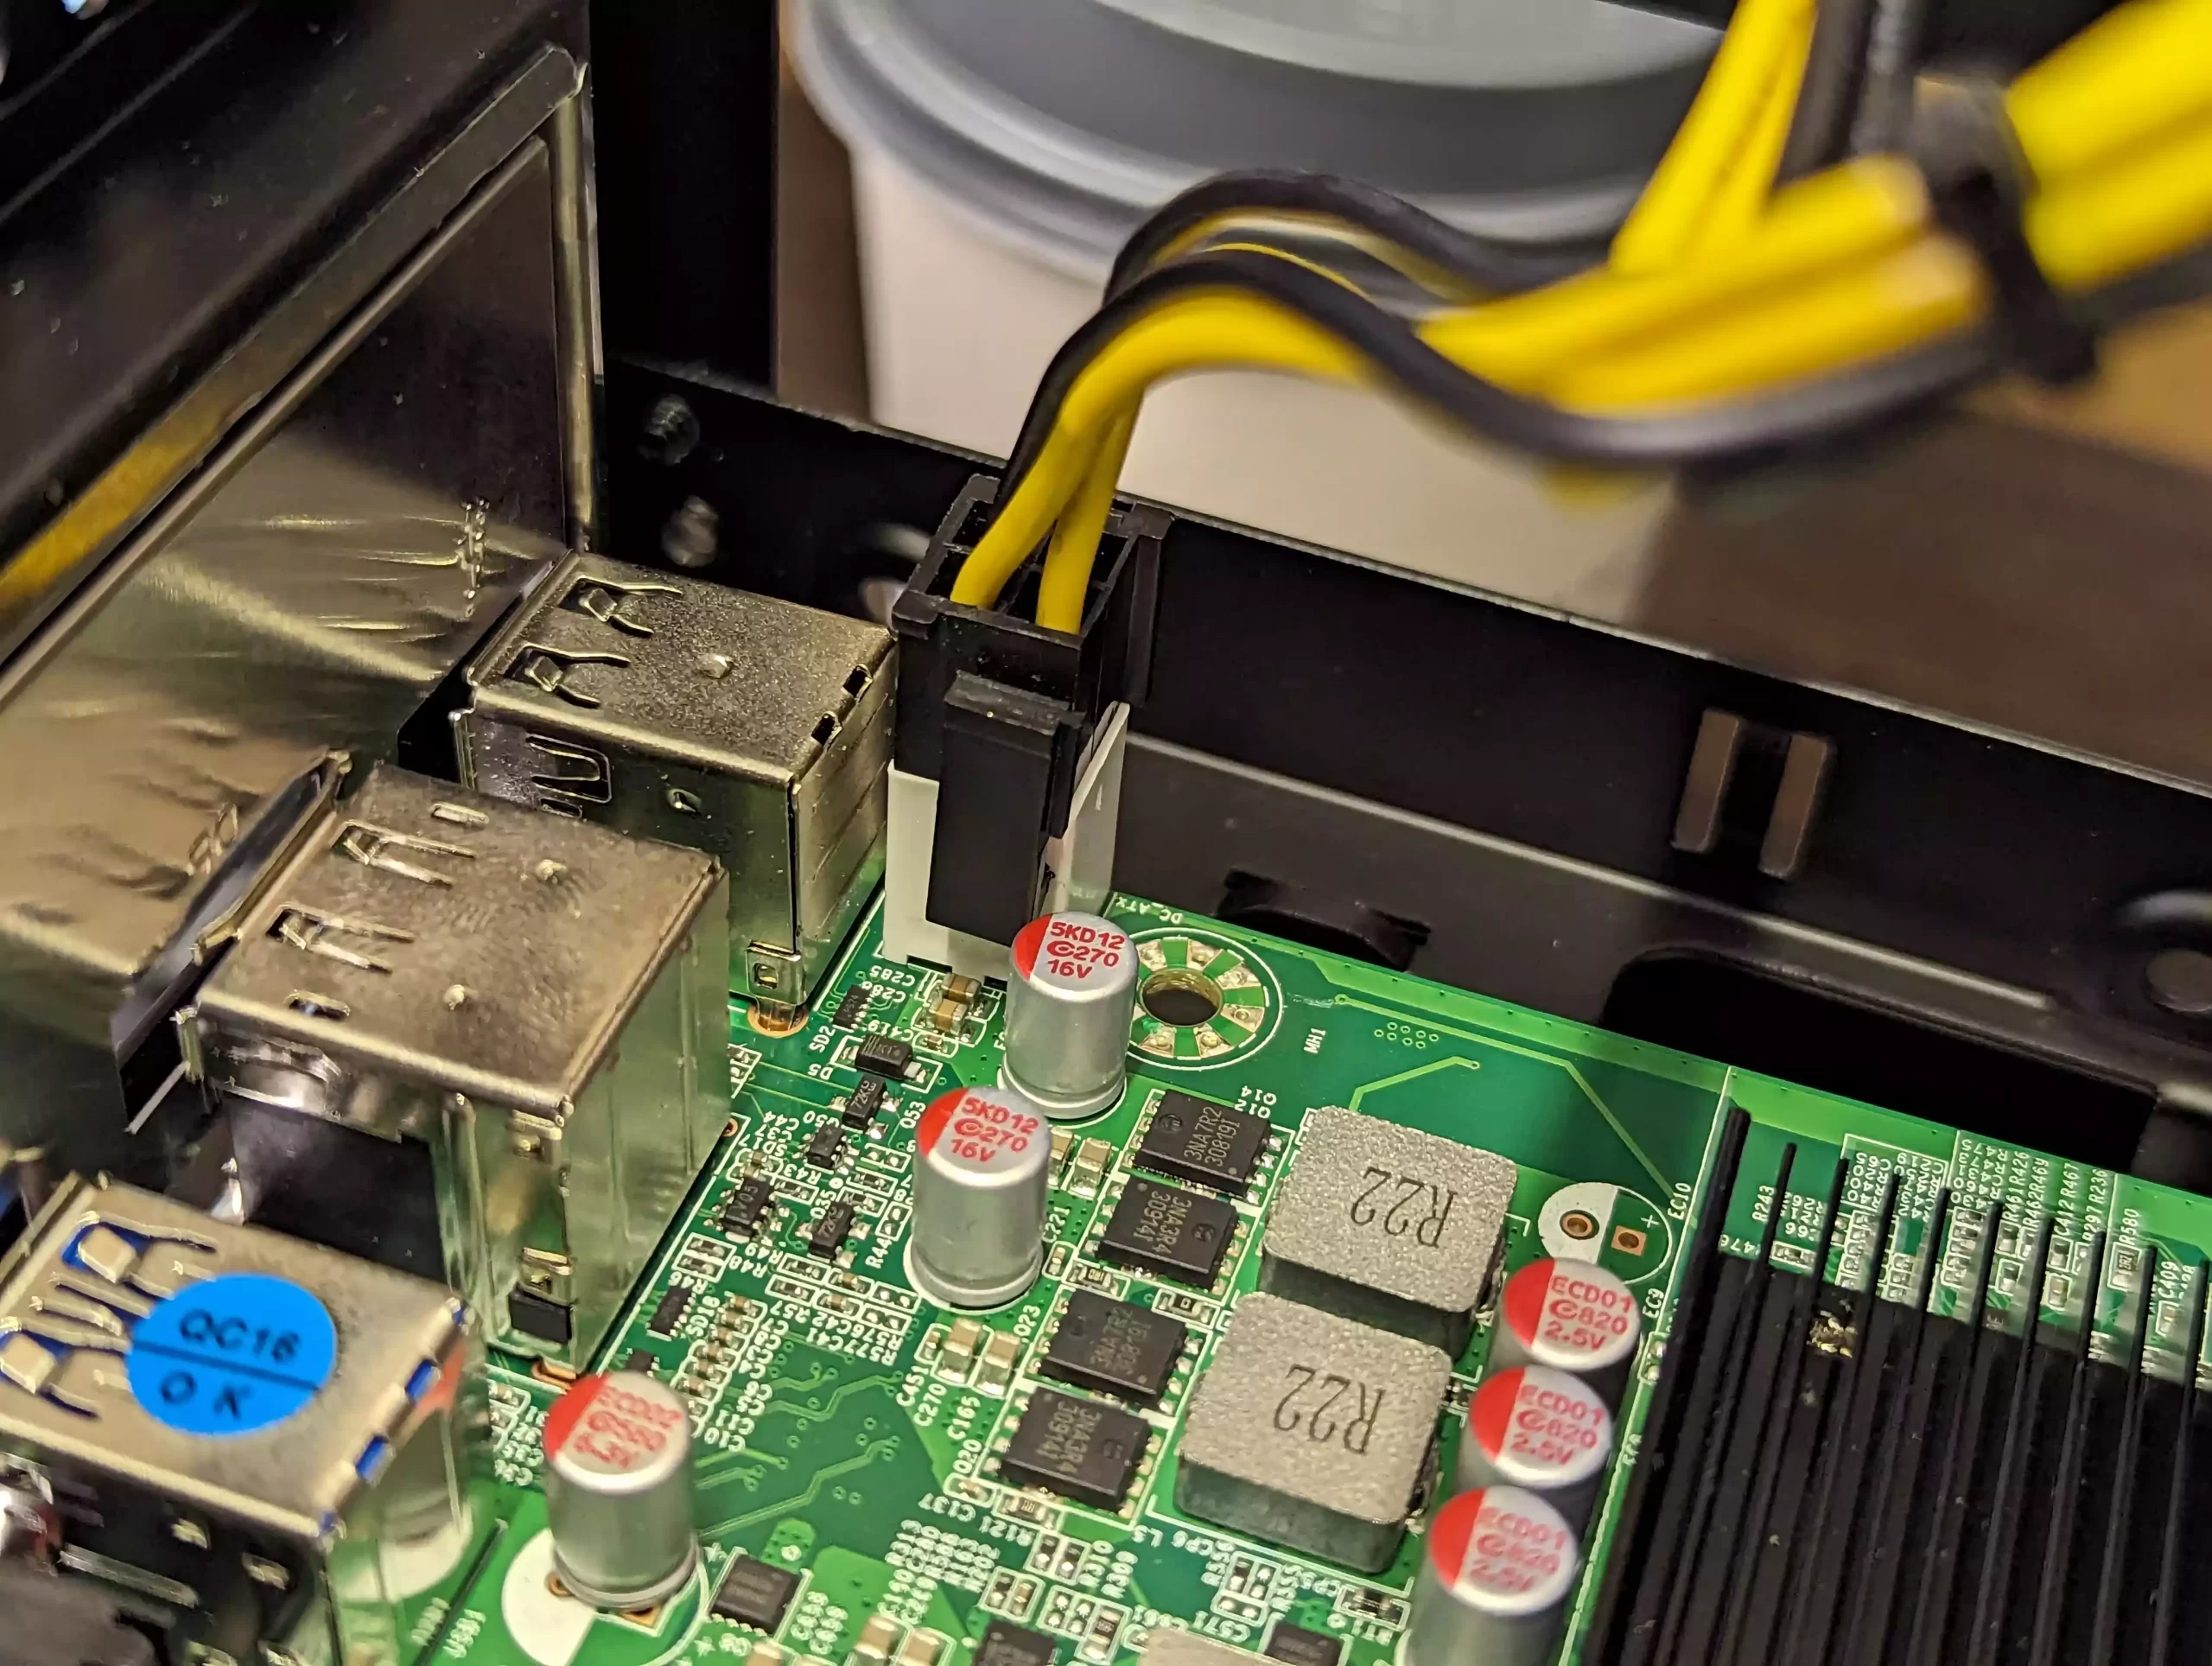
Plug the 20-pin PSU cable into the motherboard’s corresponding slot.

Connect the PSU’s four-pin port to the motherboard’s power port. If your PSU has a combined eight-pin plug, it might split into two four-pin groups. Ensure you select the right connectors and slots for this.
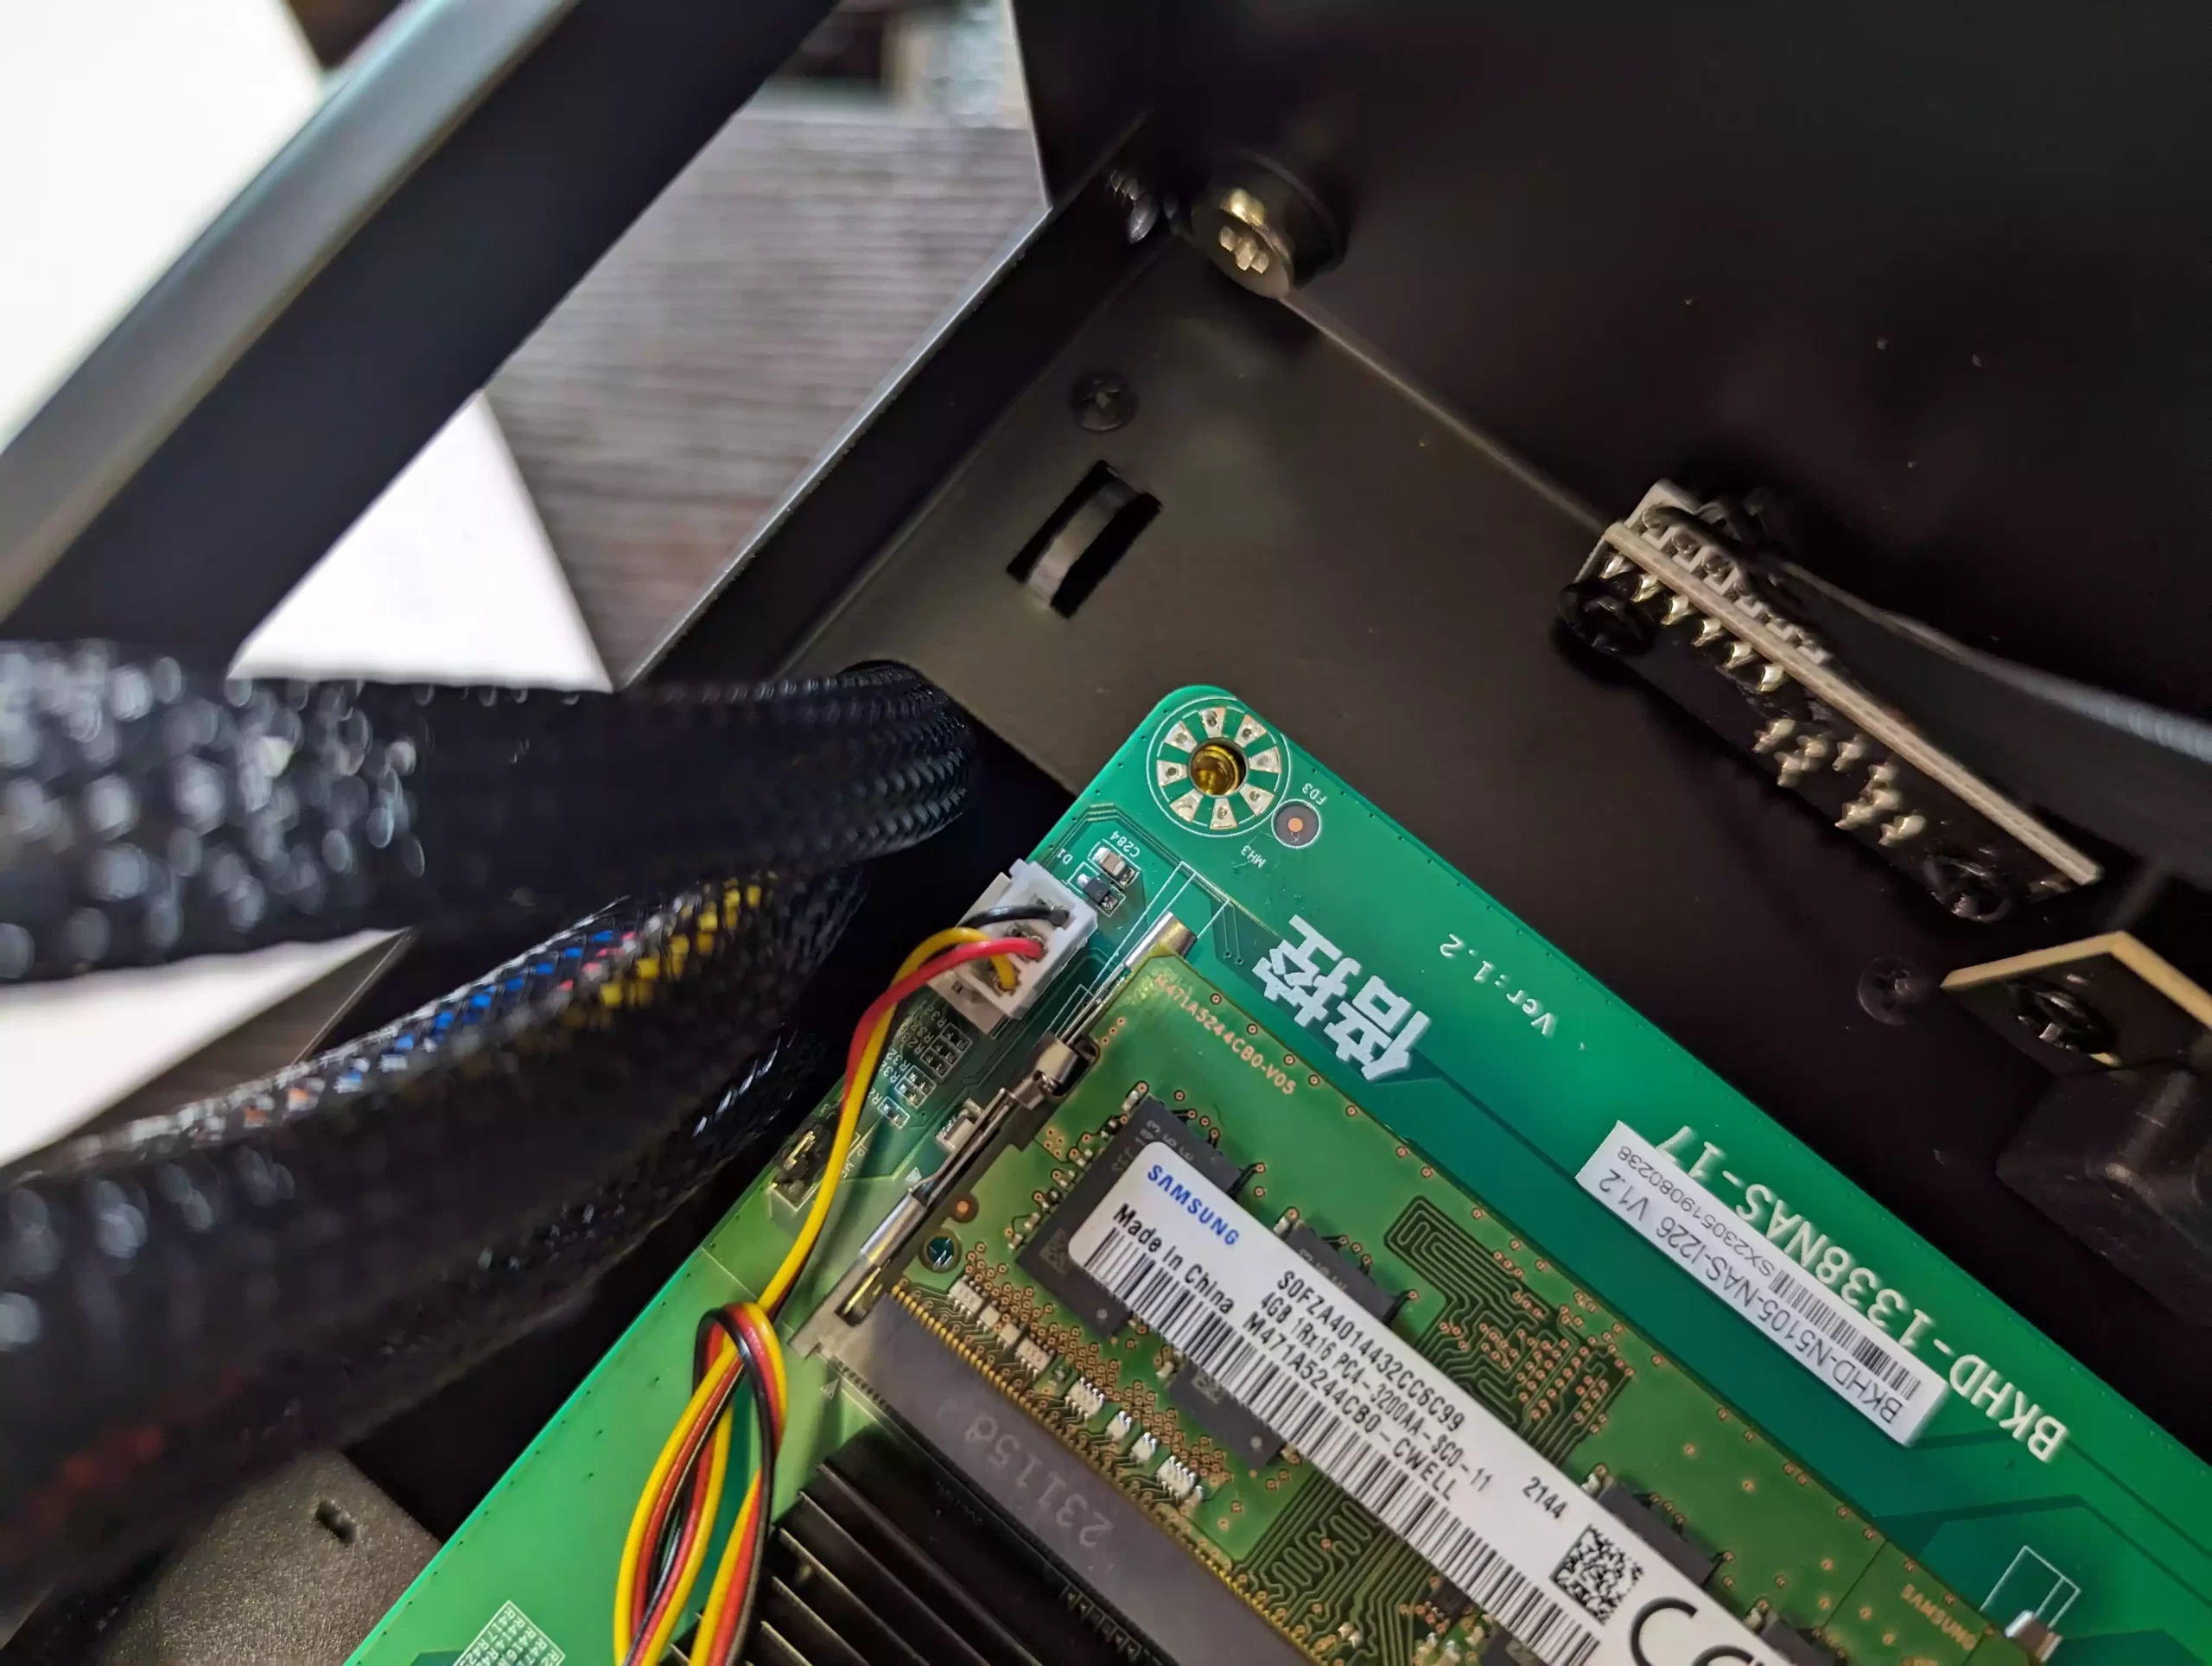
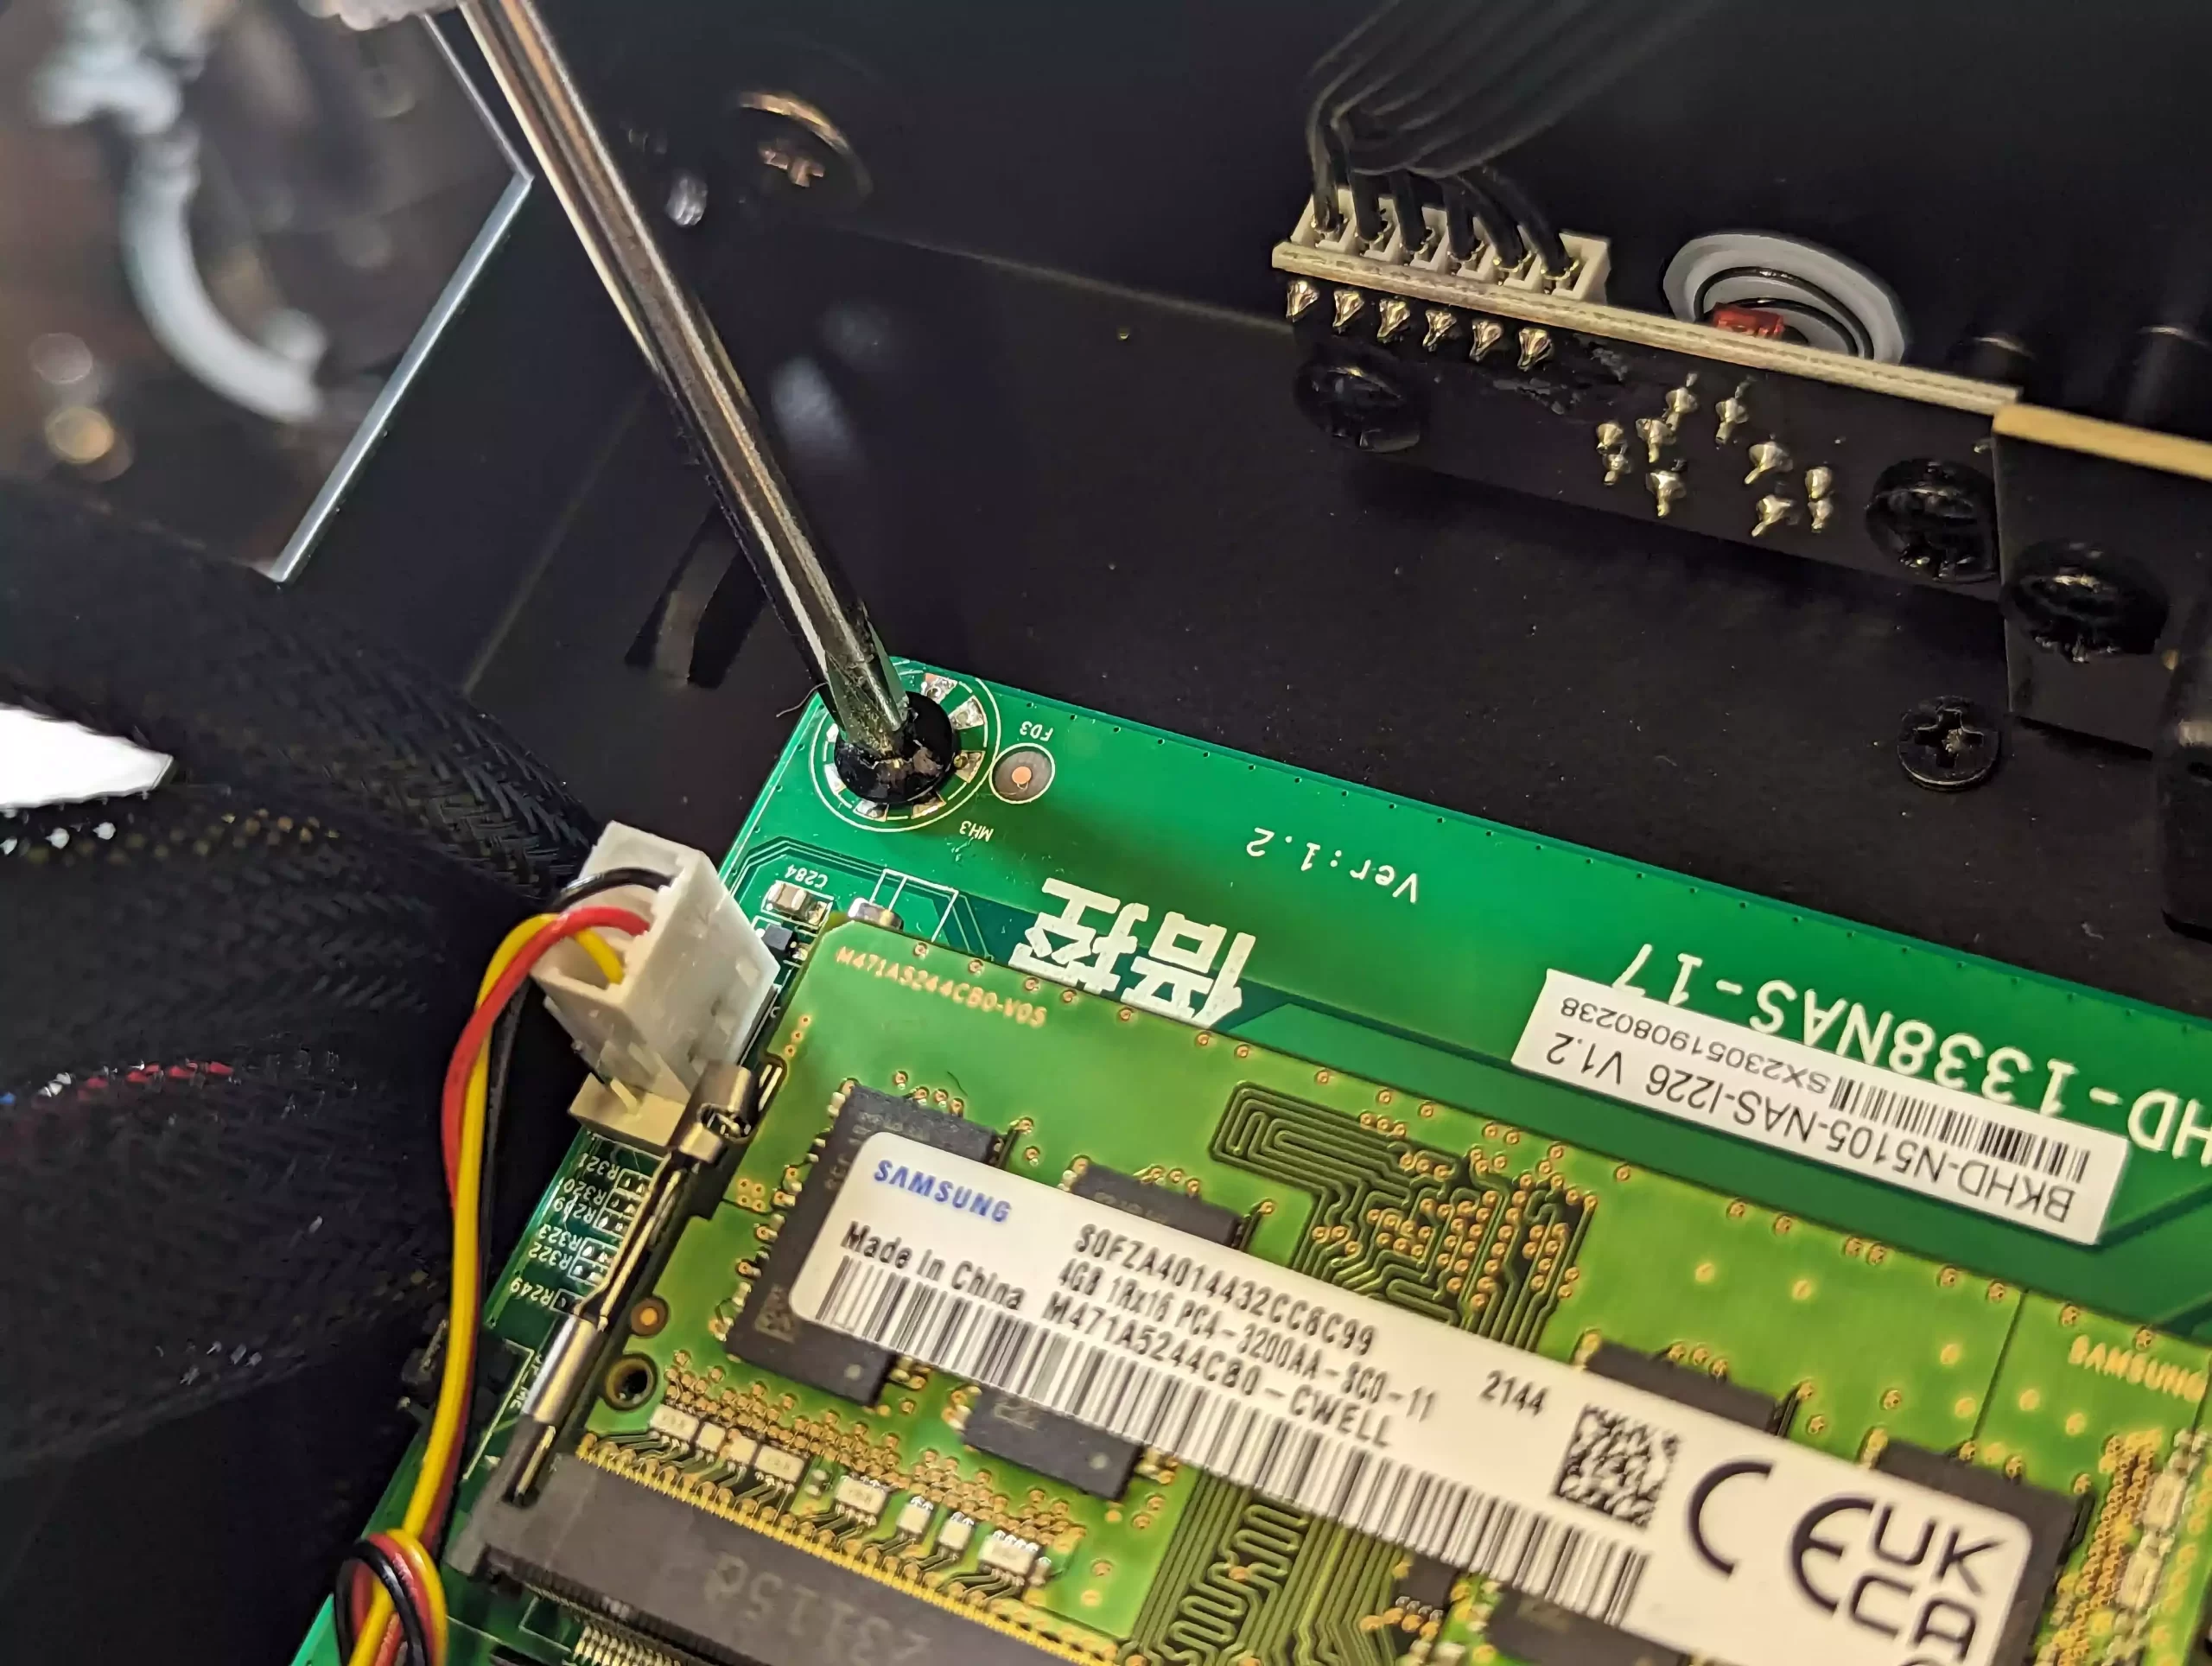
If you bought memory separately, install it in the available slot now.
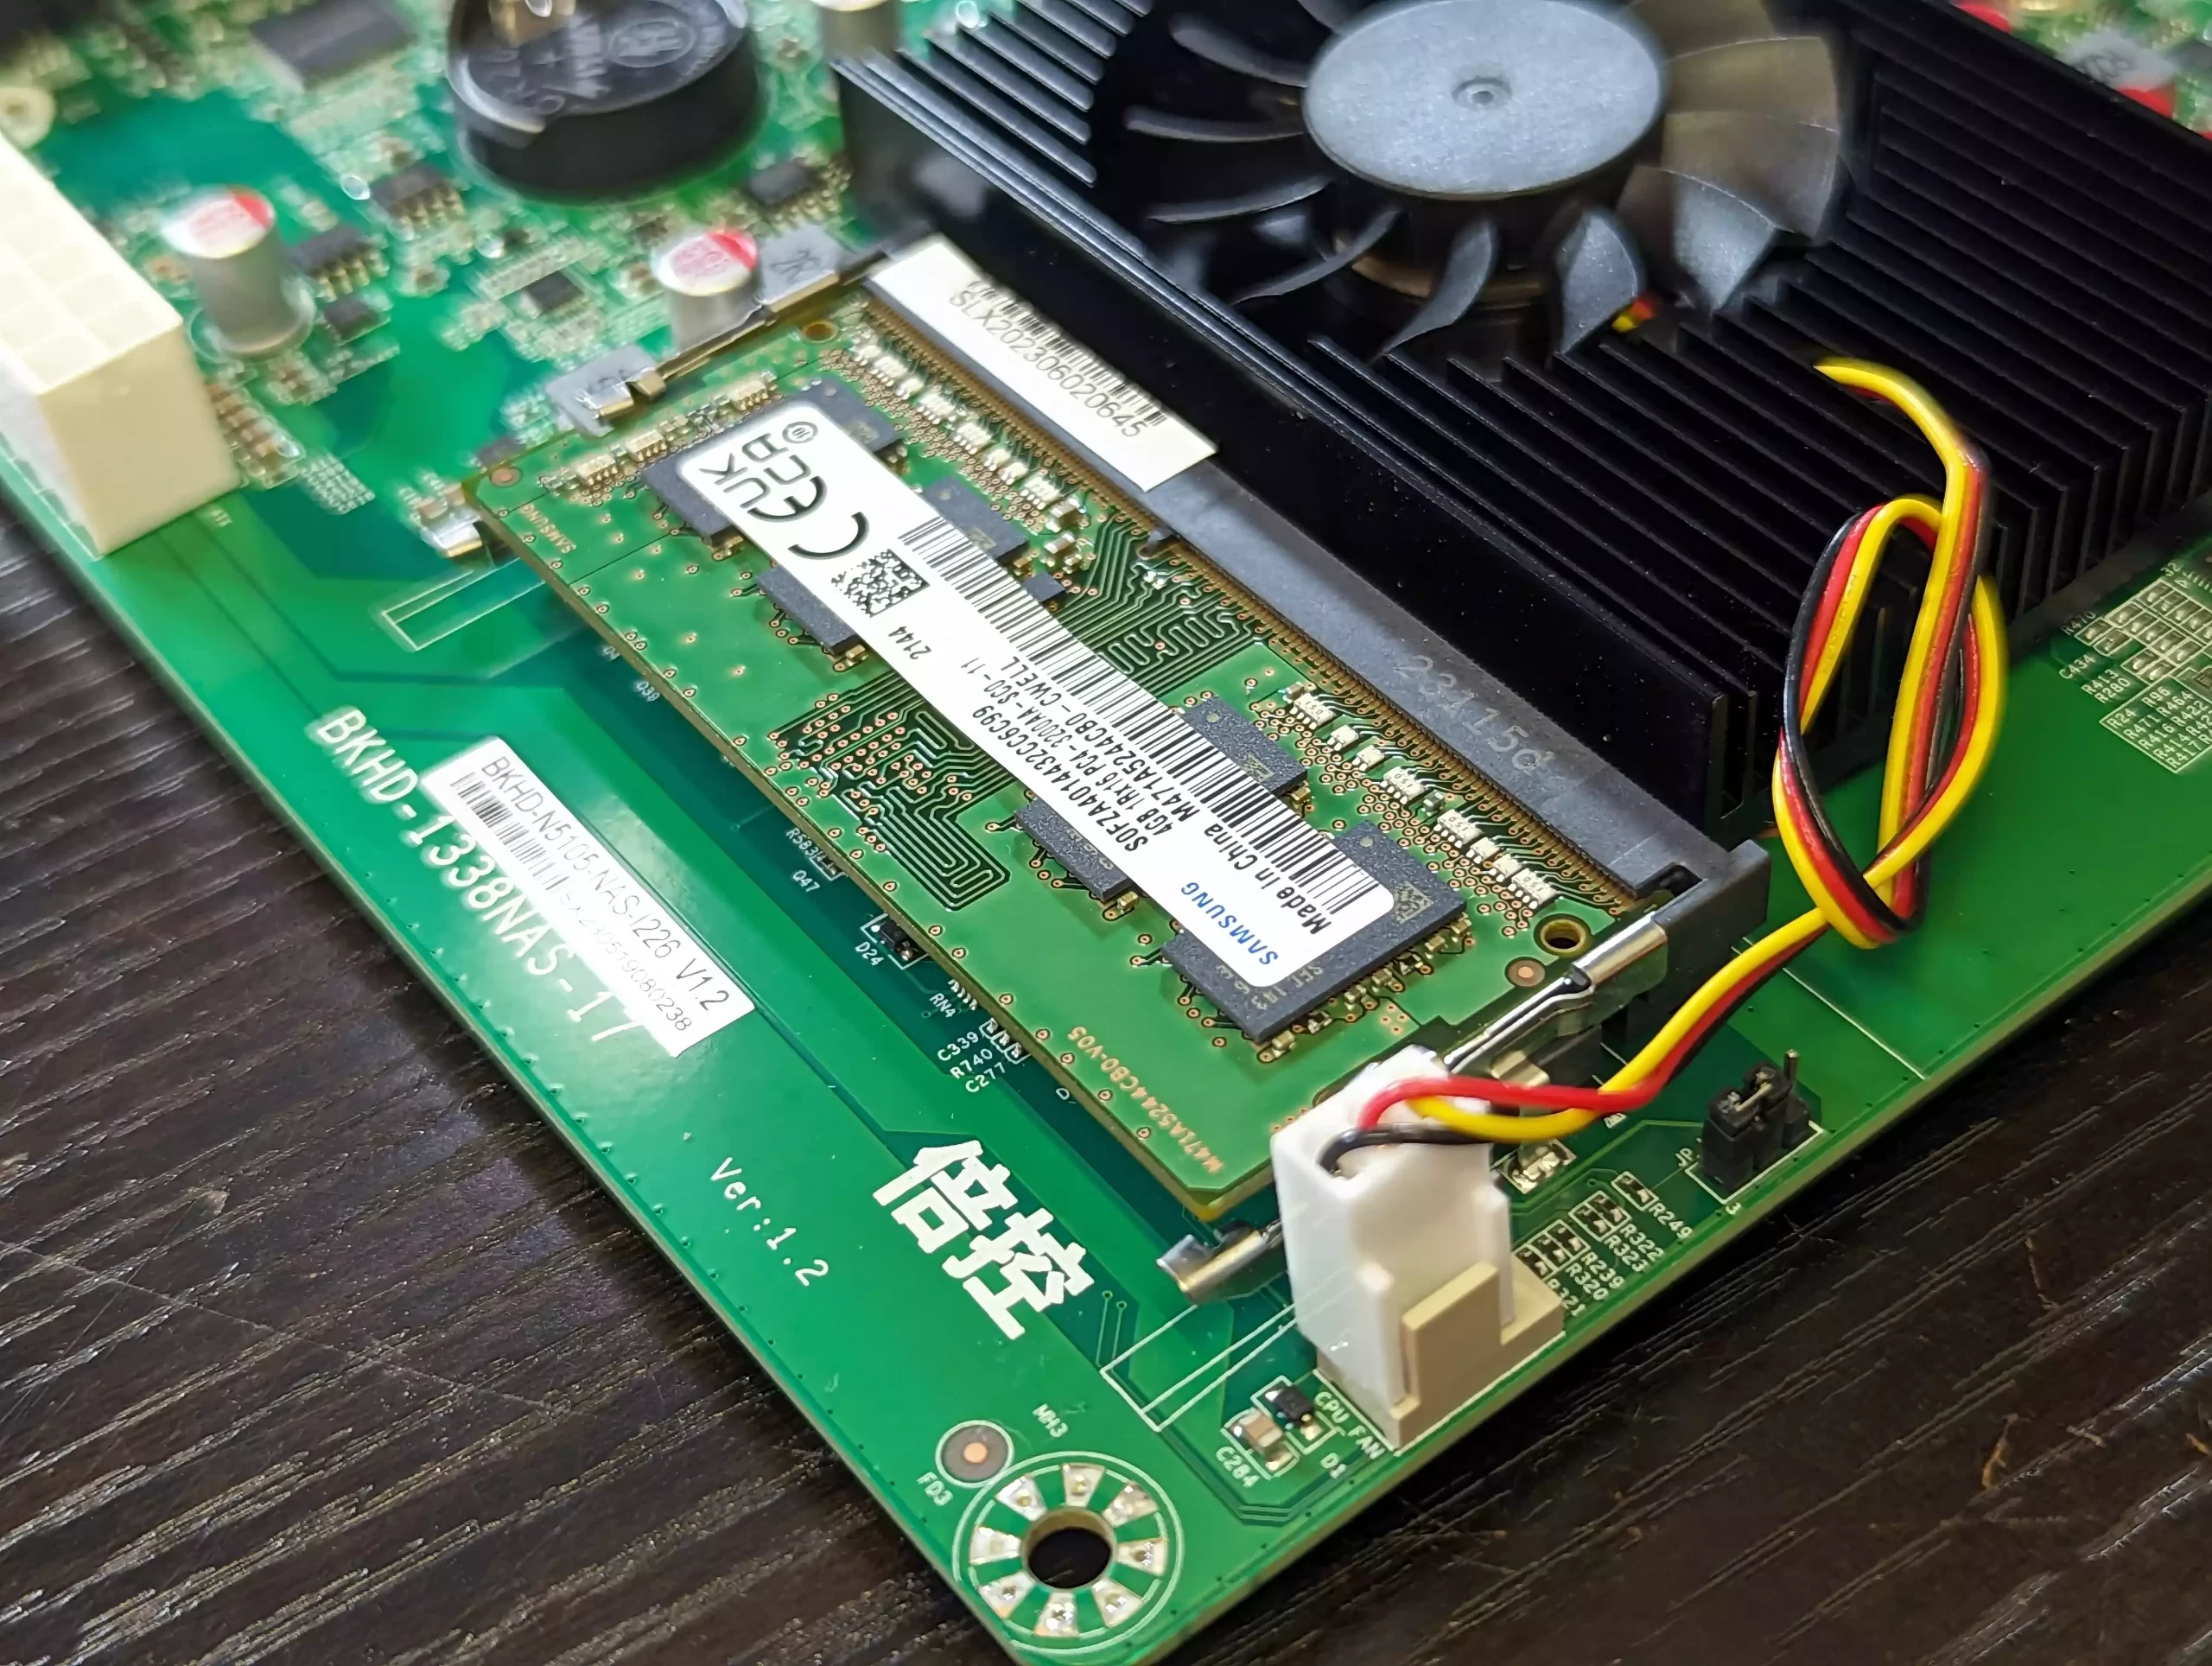
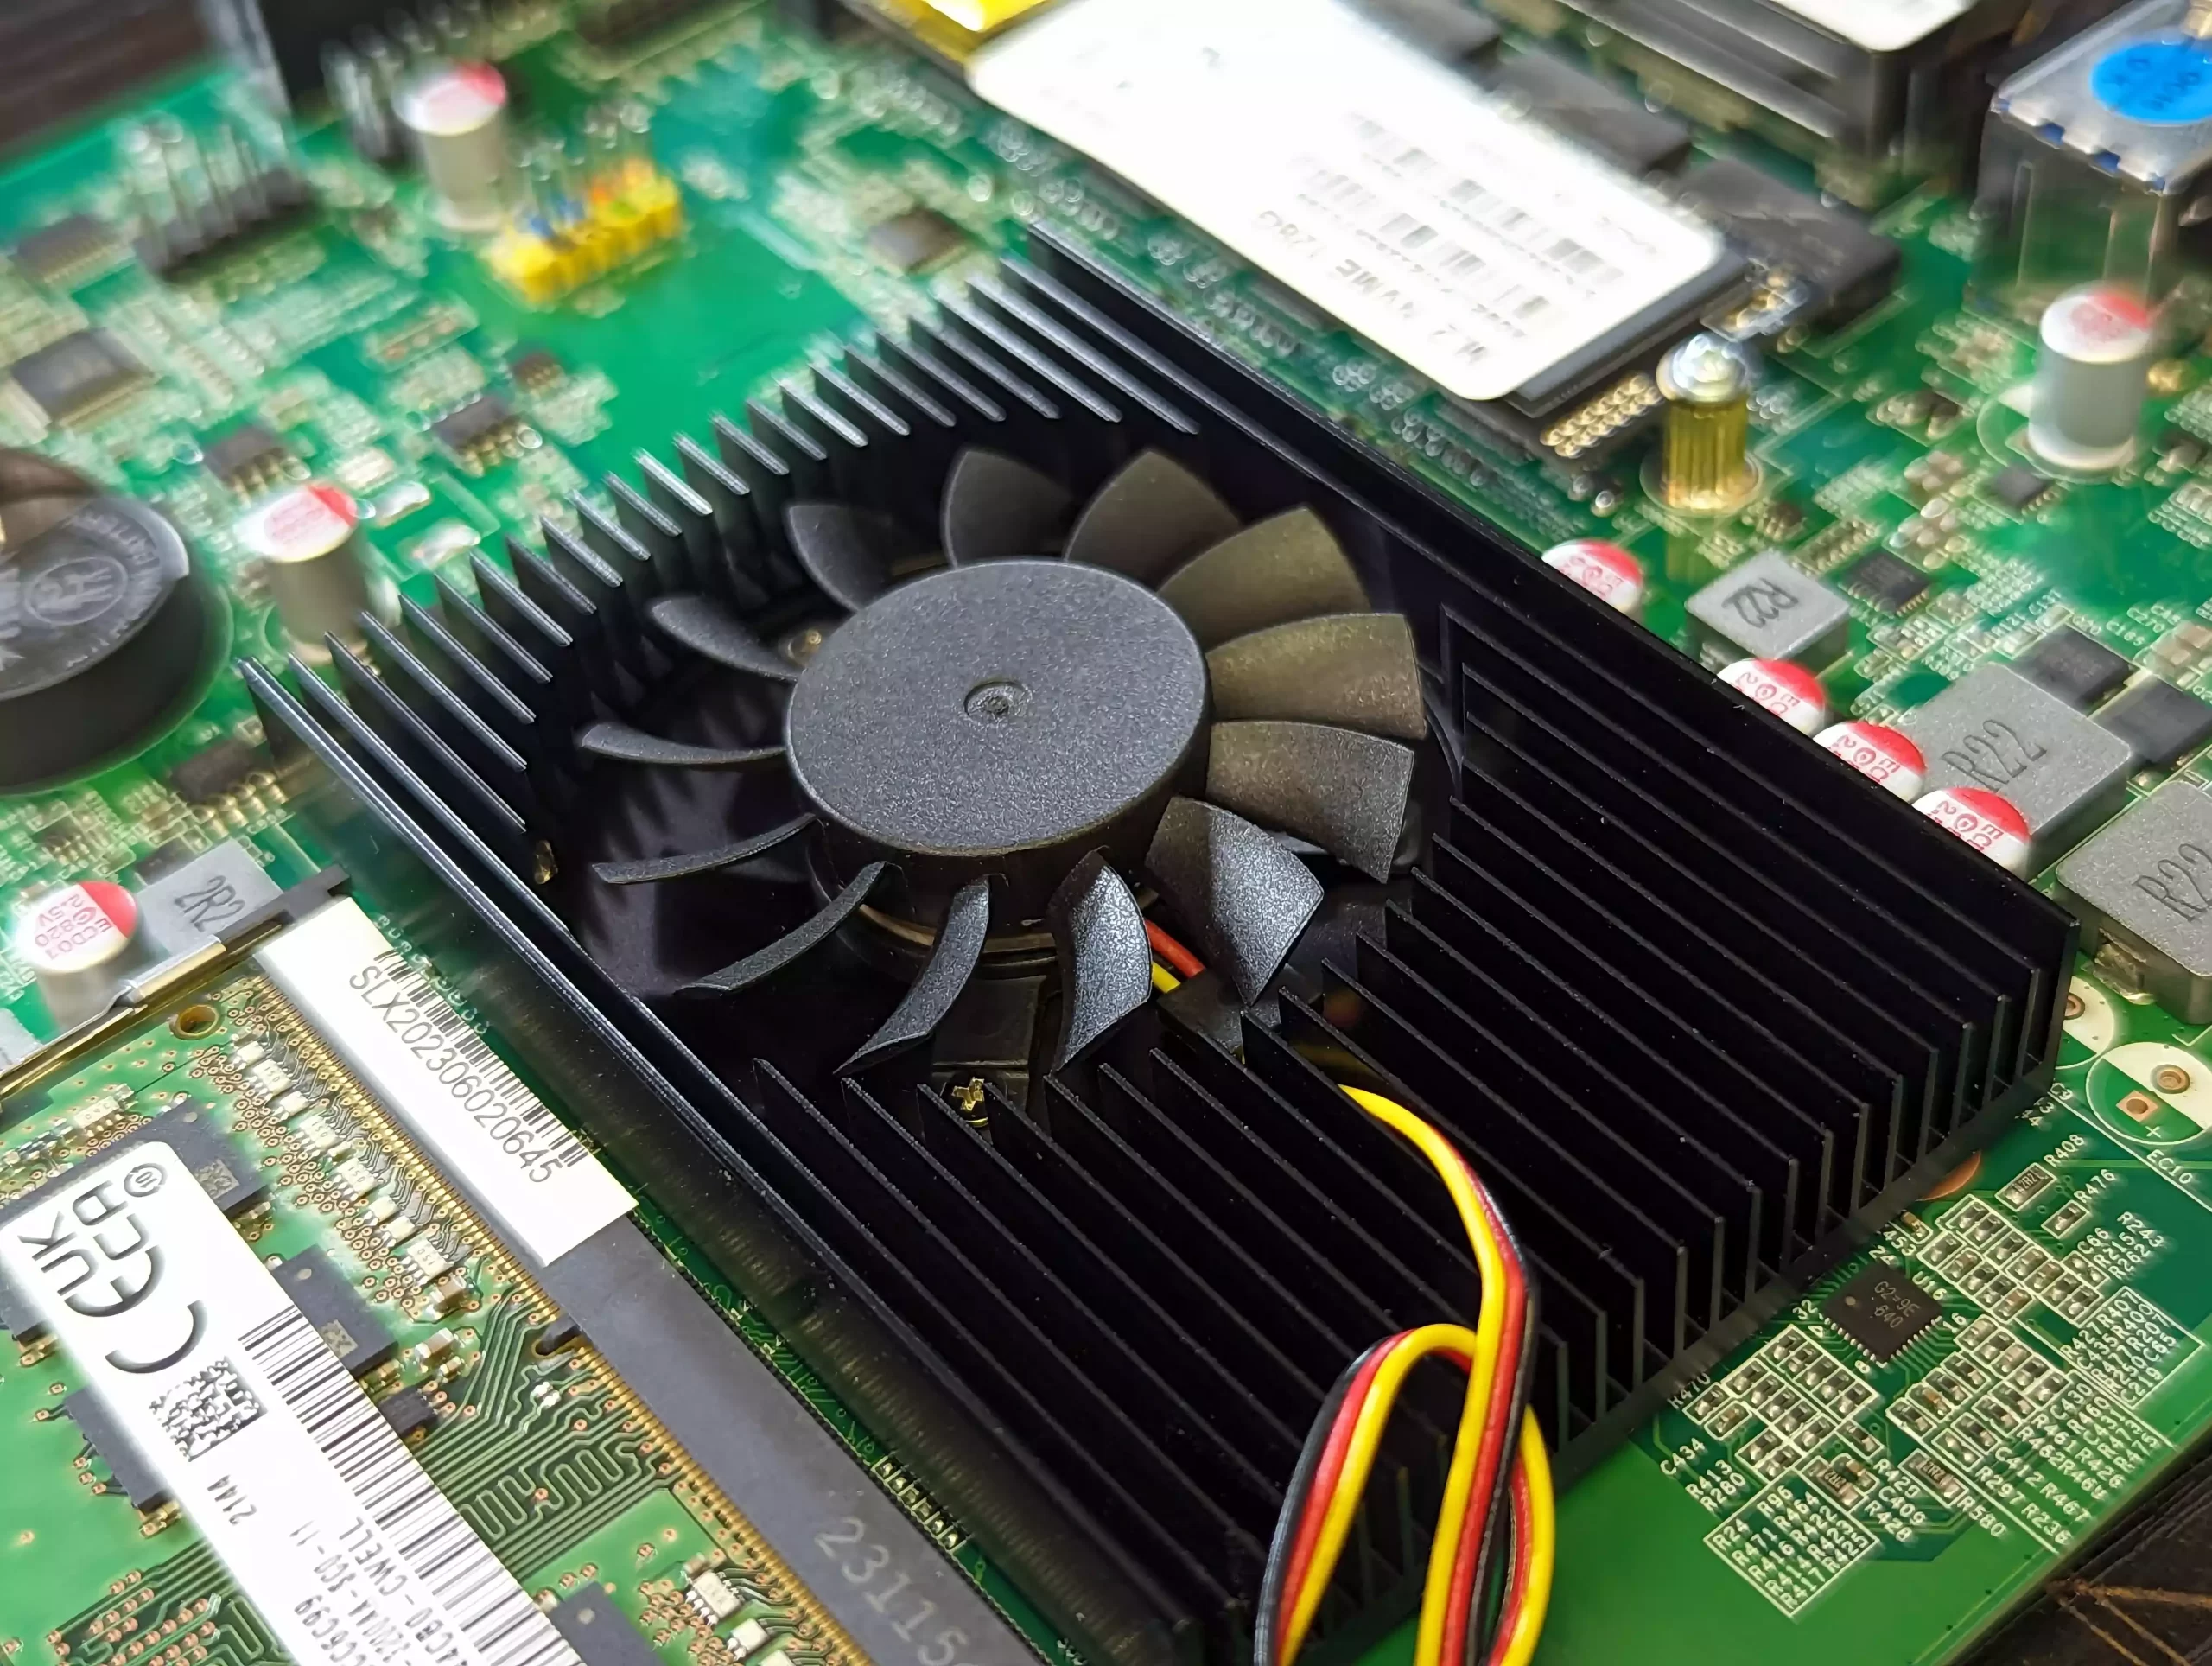
The same goes for if you have purchased a CPU fan separately + connect with the CPU fan power plug (white, next to the CPU socket)
Some TopTon motherboards have varying front panel, USB pins, and LED pins.
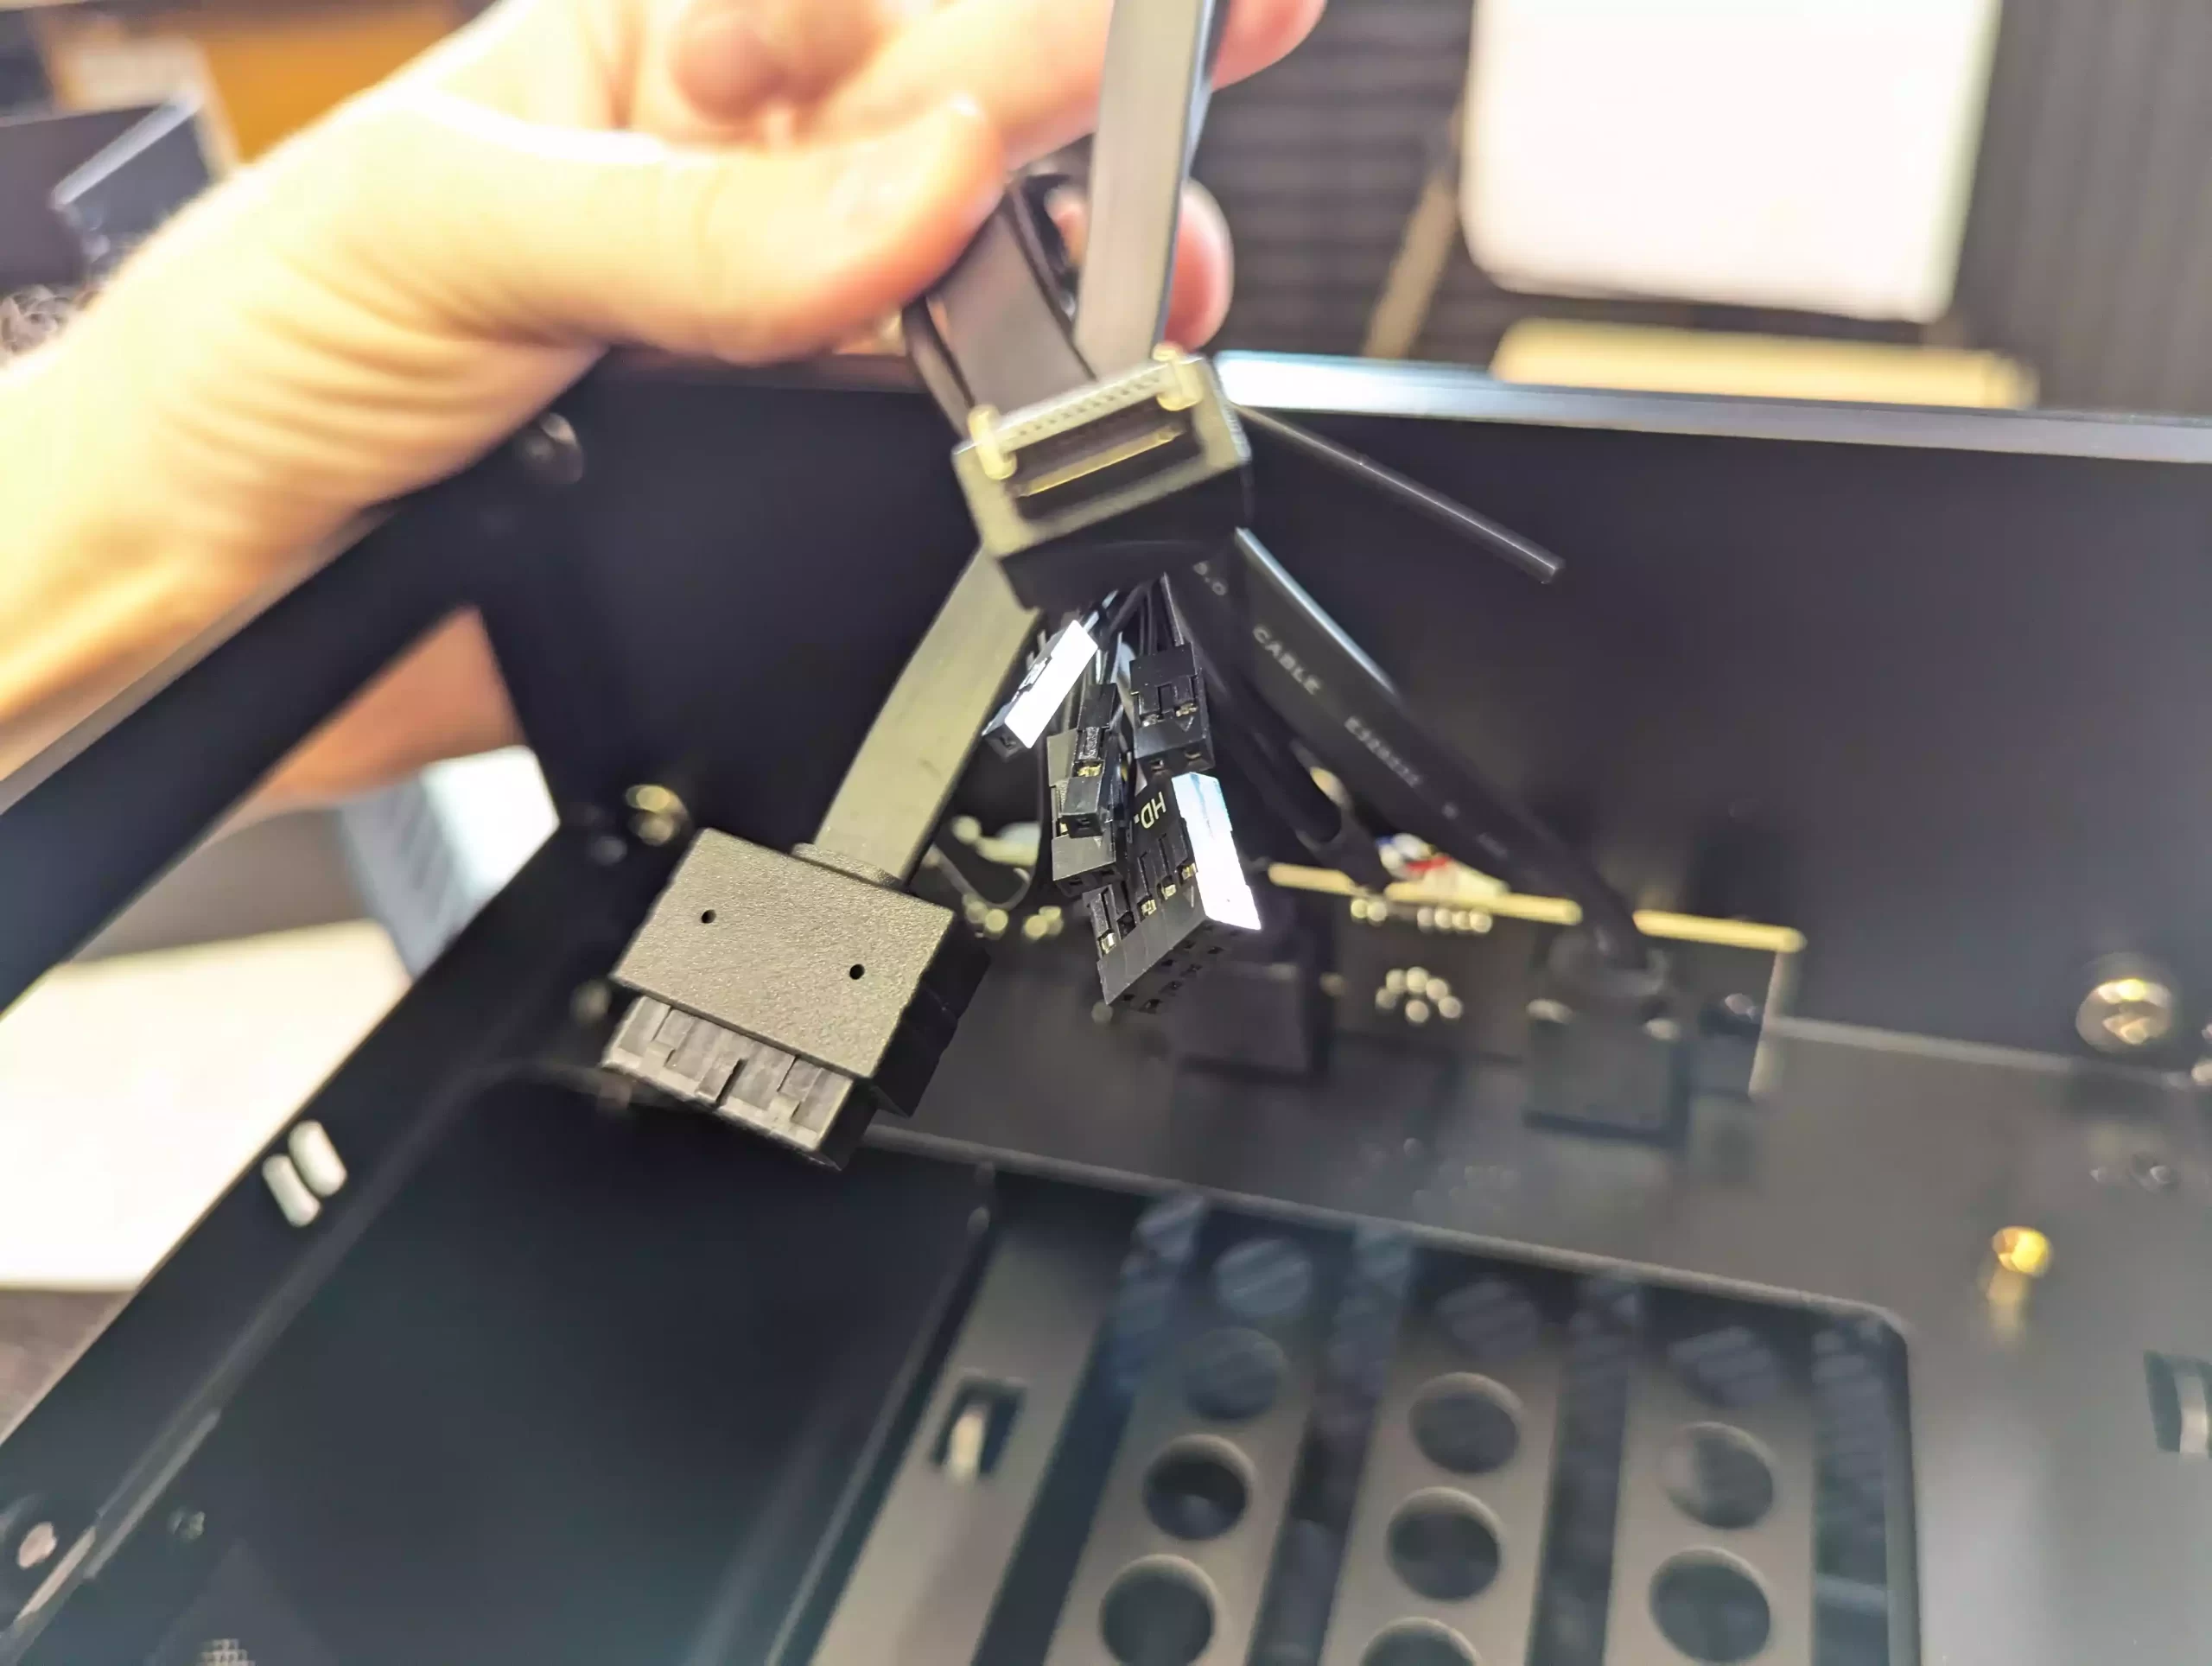
If yours doesn’t have the right USB pins for both USB type-A and type-C front panels, you’ll need specific adapters to connect them.
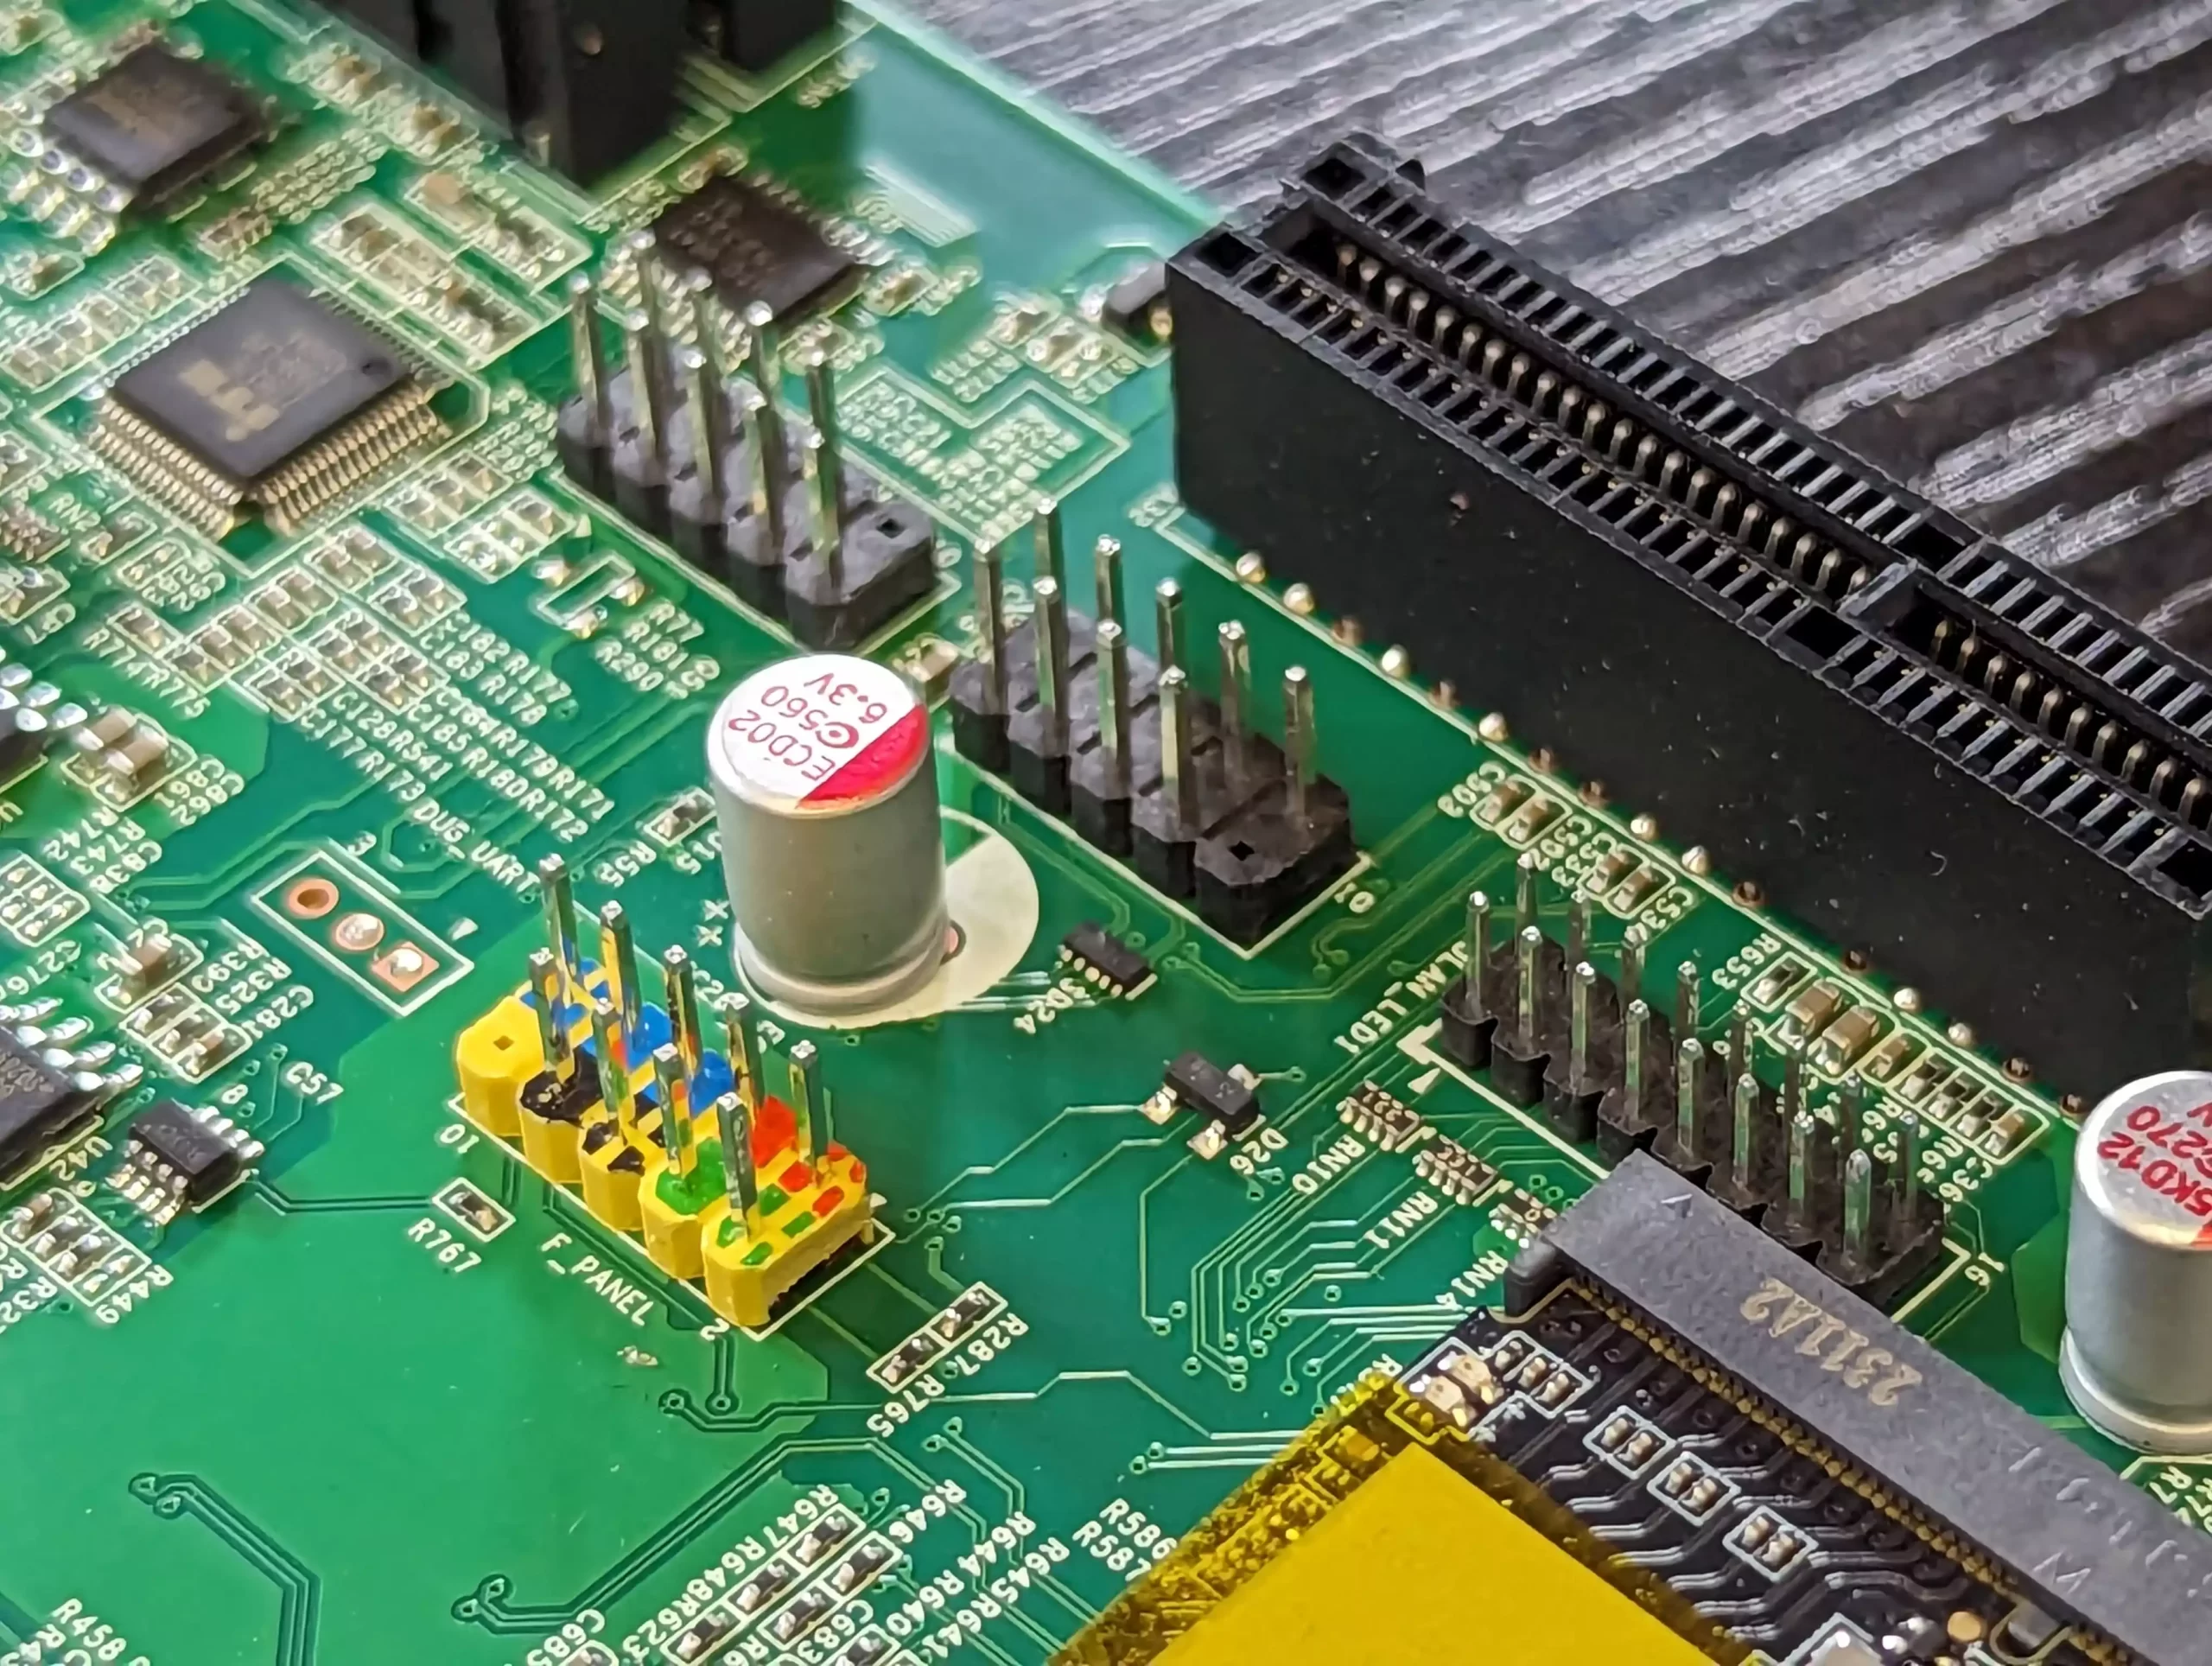
For front panel LEDs and the power button, consult your motherboard manual to identify the right pins.
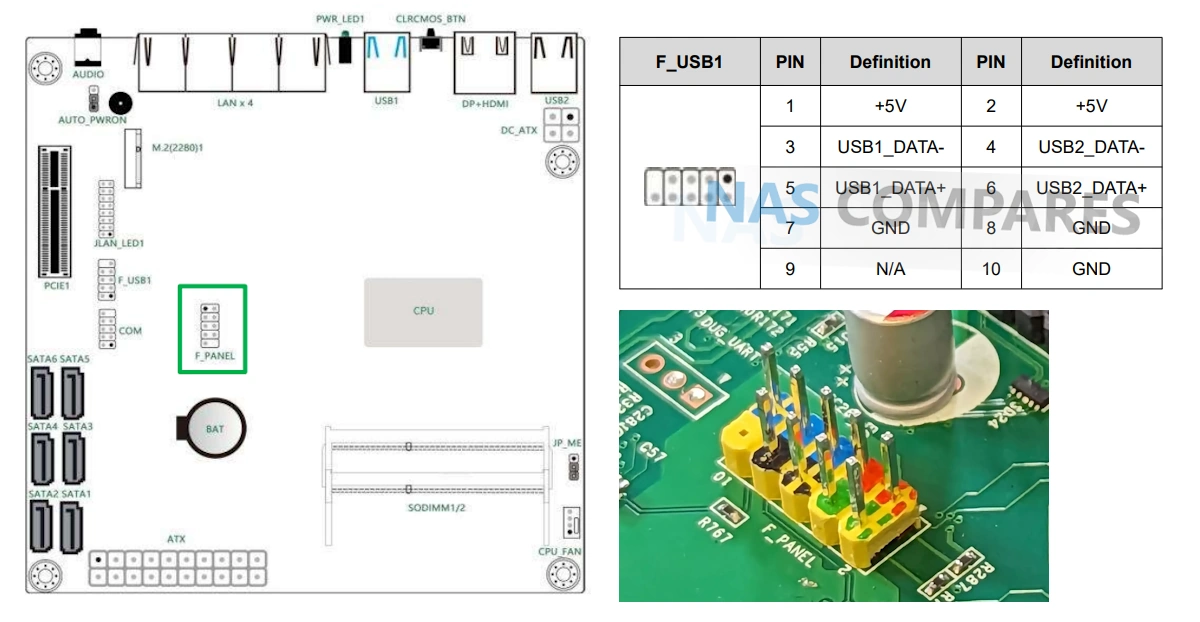

Note that the Jonsbo case doesn’t have a reset button, so you won’t find a corresponding pin.
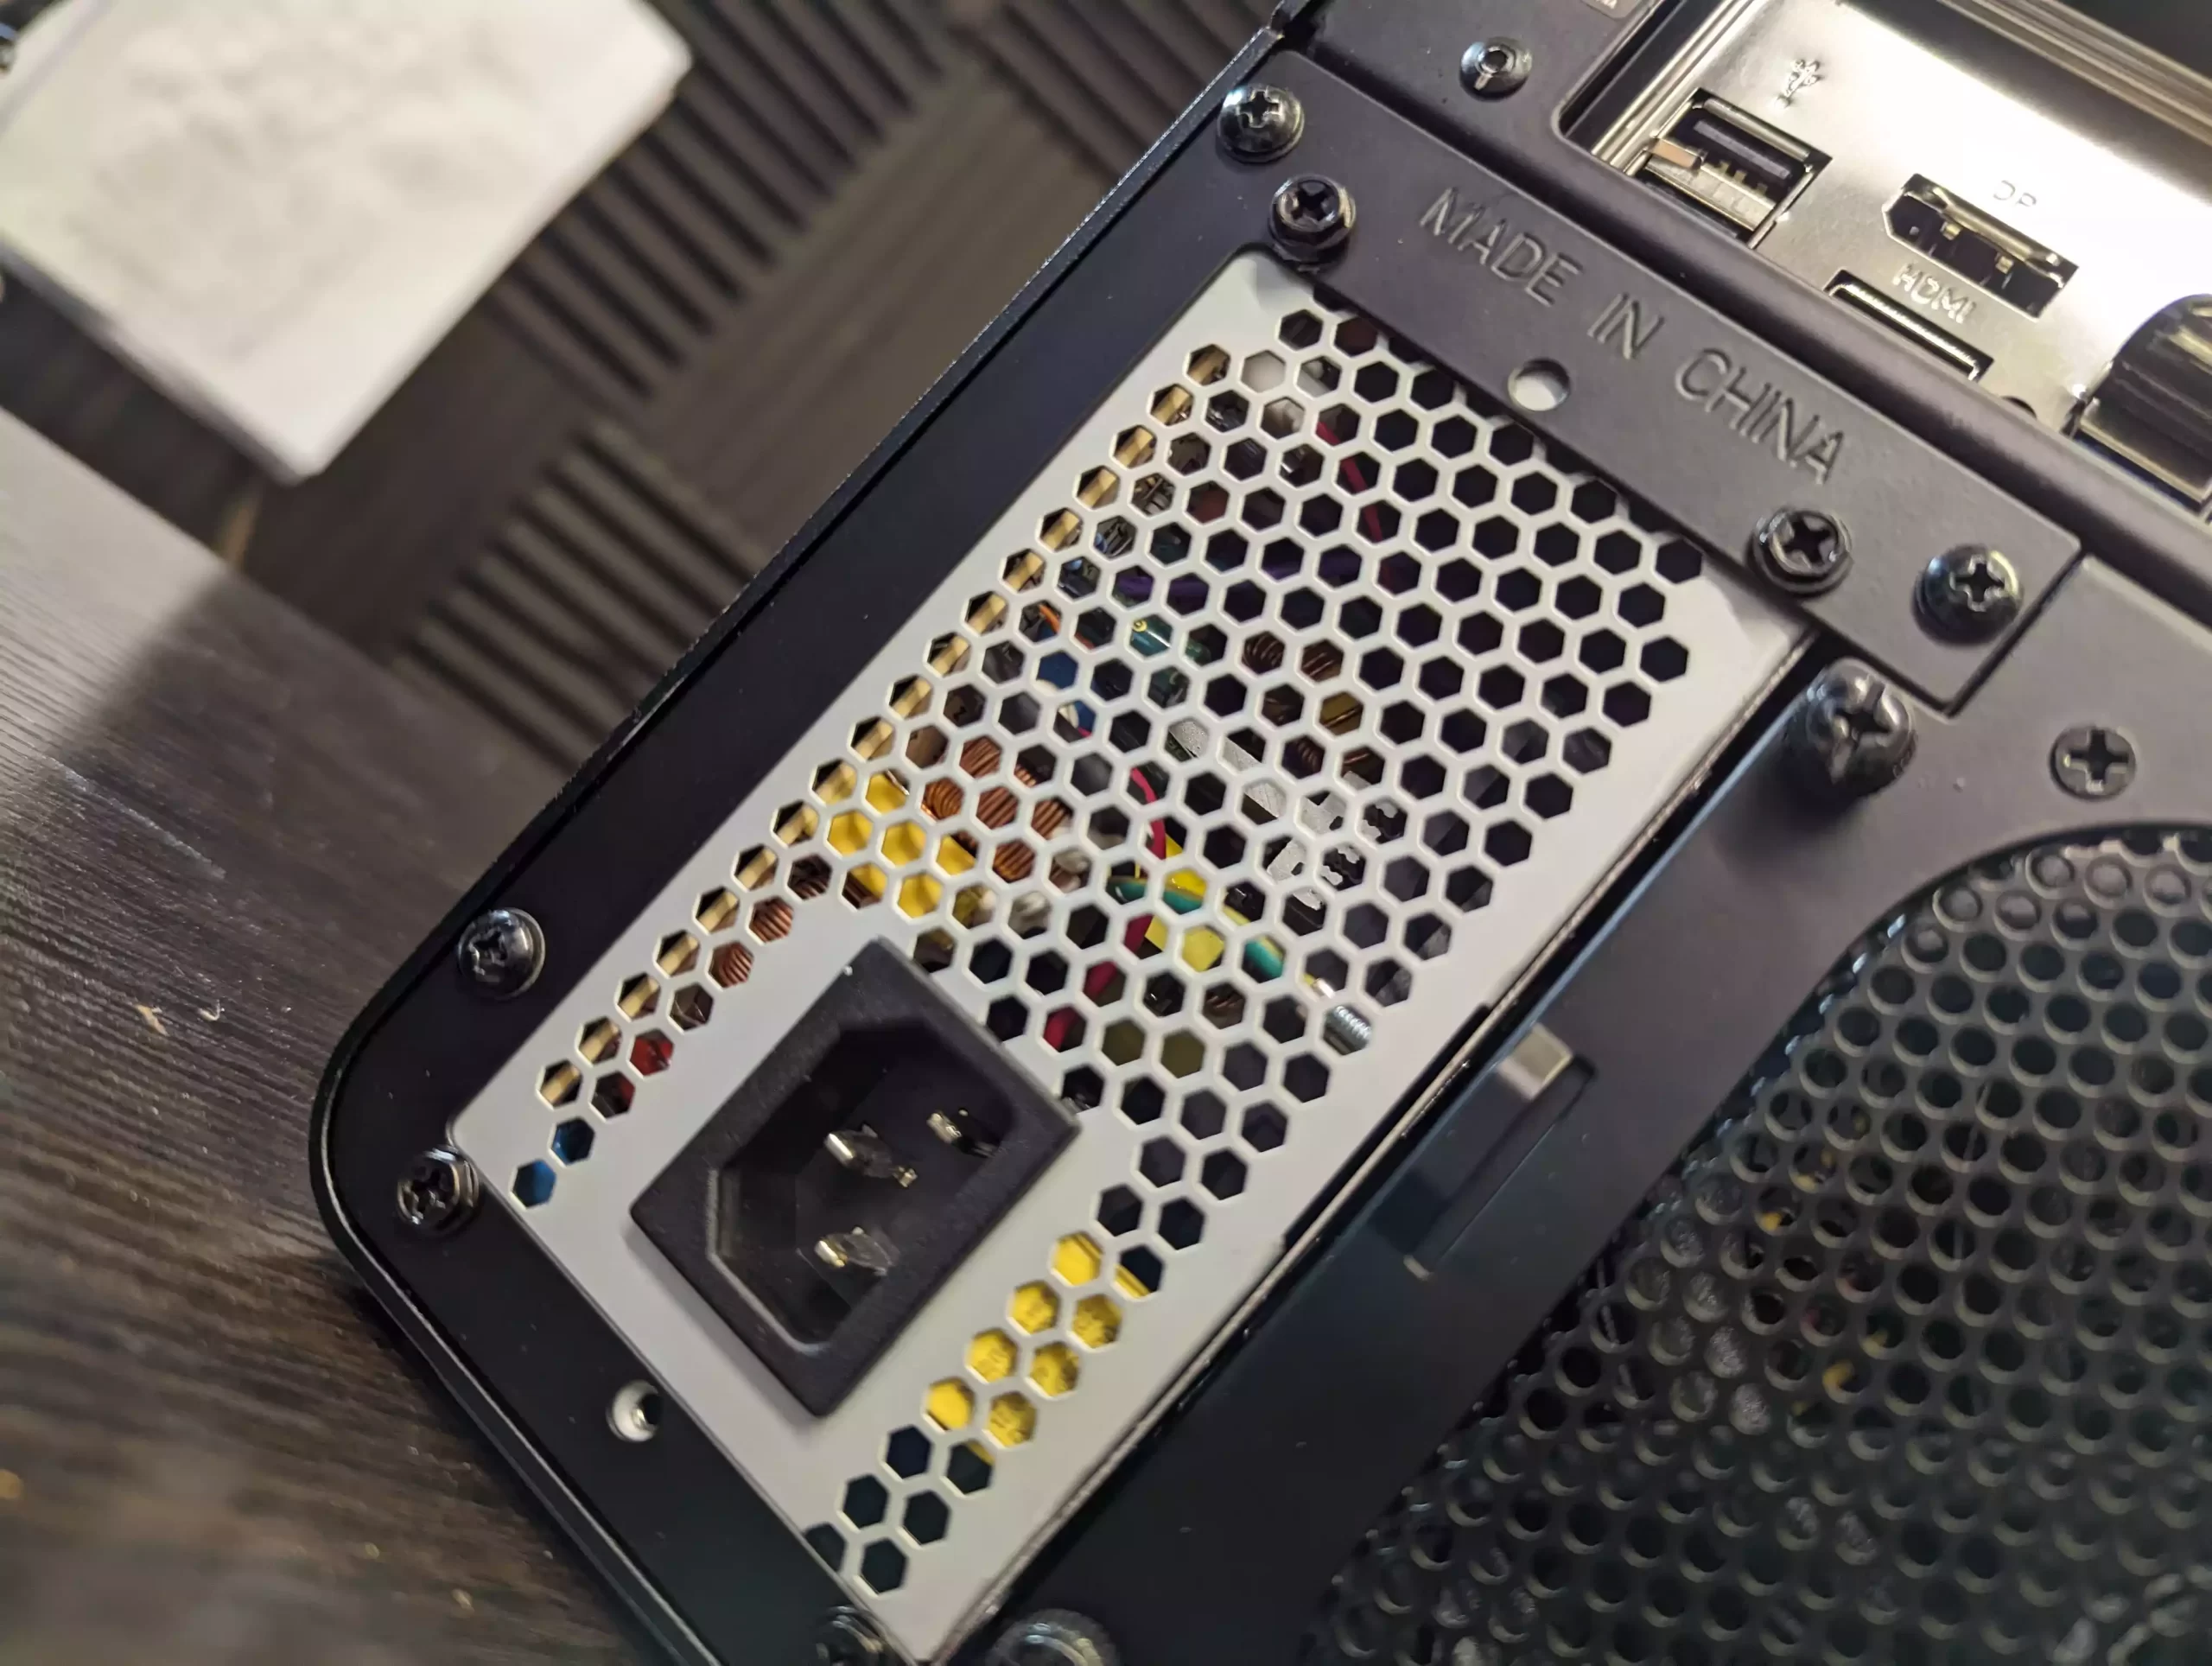
Before sealing the Jonsbo case, briefly test the PSU’s power delivery via the main port. Ensure the power button illuminates when pressed. When you plug in the PSU with a mains cable, a brief crackling sound indicates live power, and the PSU is responsive. If power flows and the power button is on, the CPU fan and/or rear fan should activate.
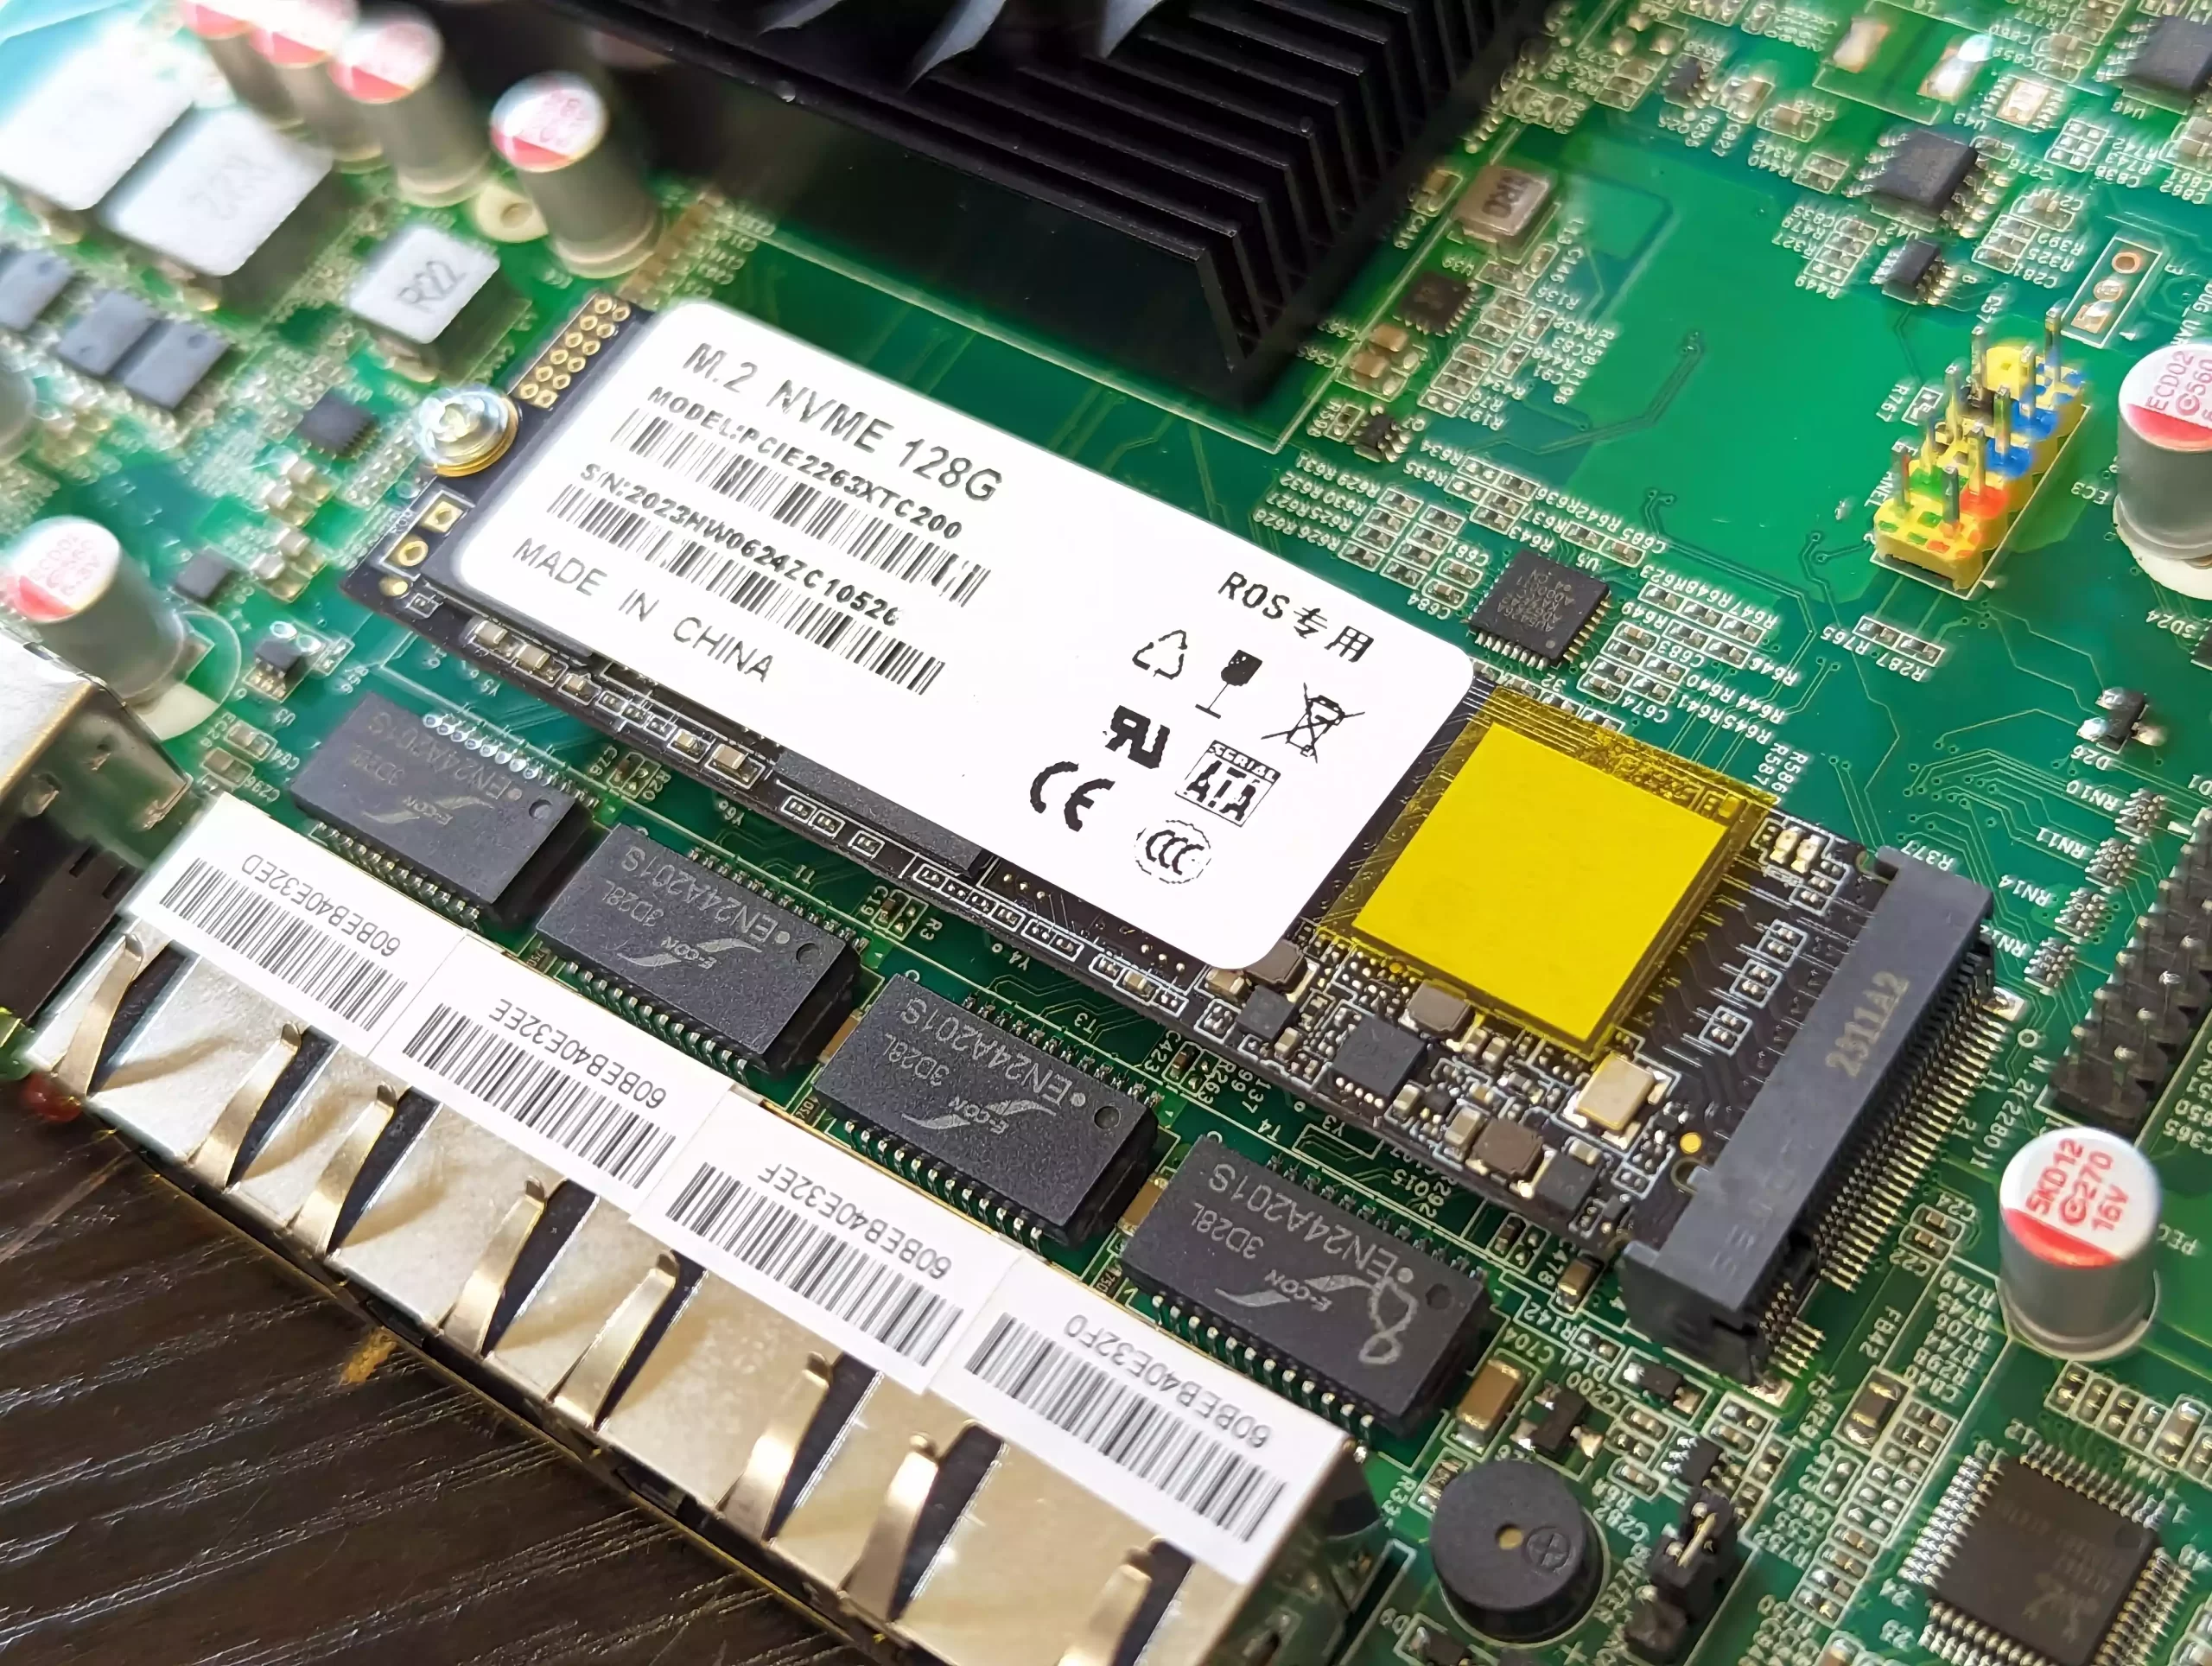
If you’re installing an M.2 NVME SSD, do so now. Afterwards, seal the top of the case using the four screws and Allen key.
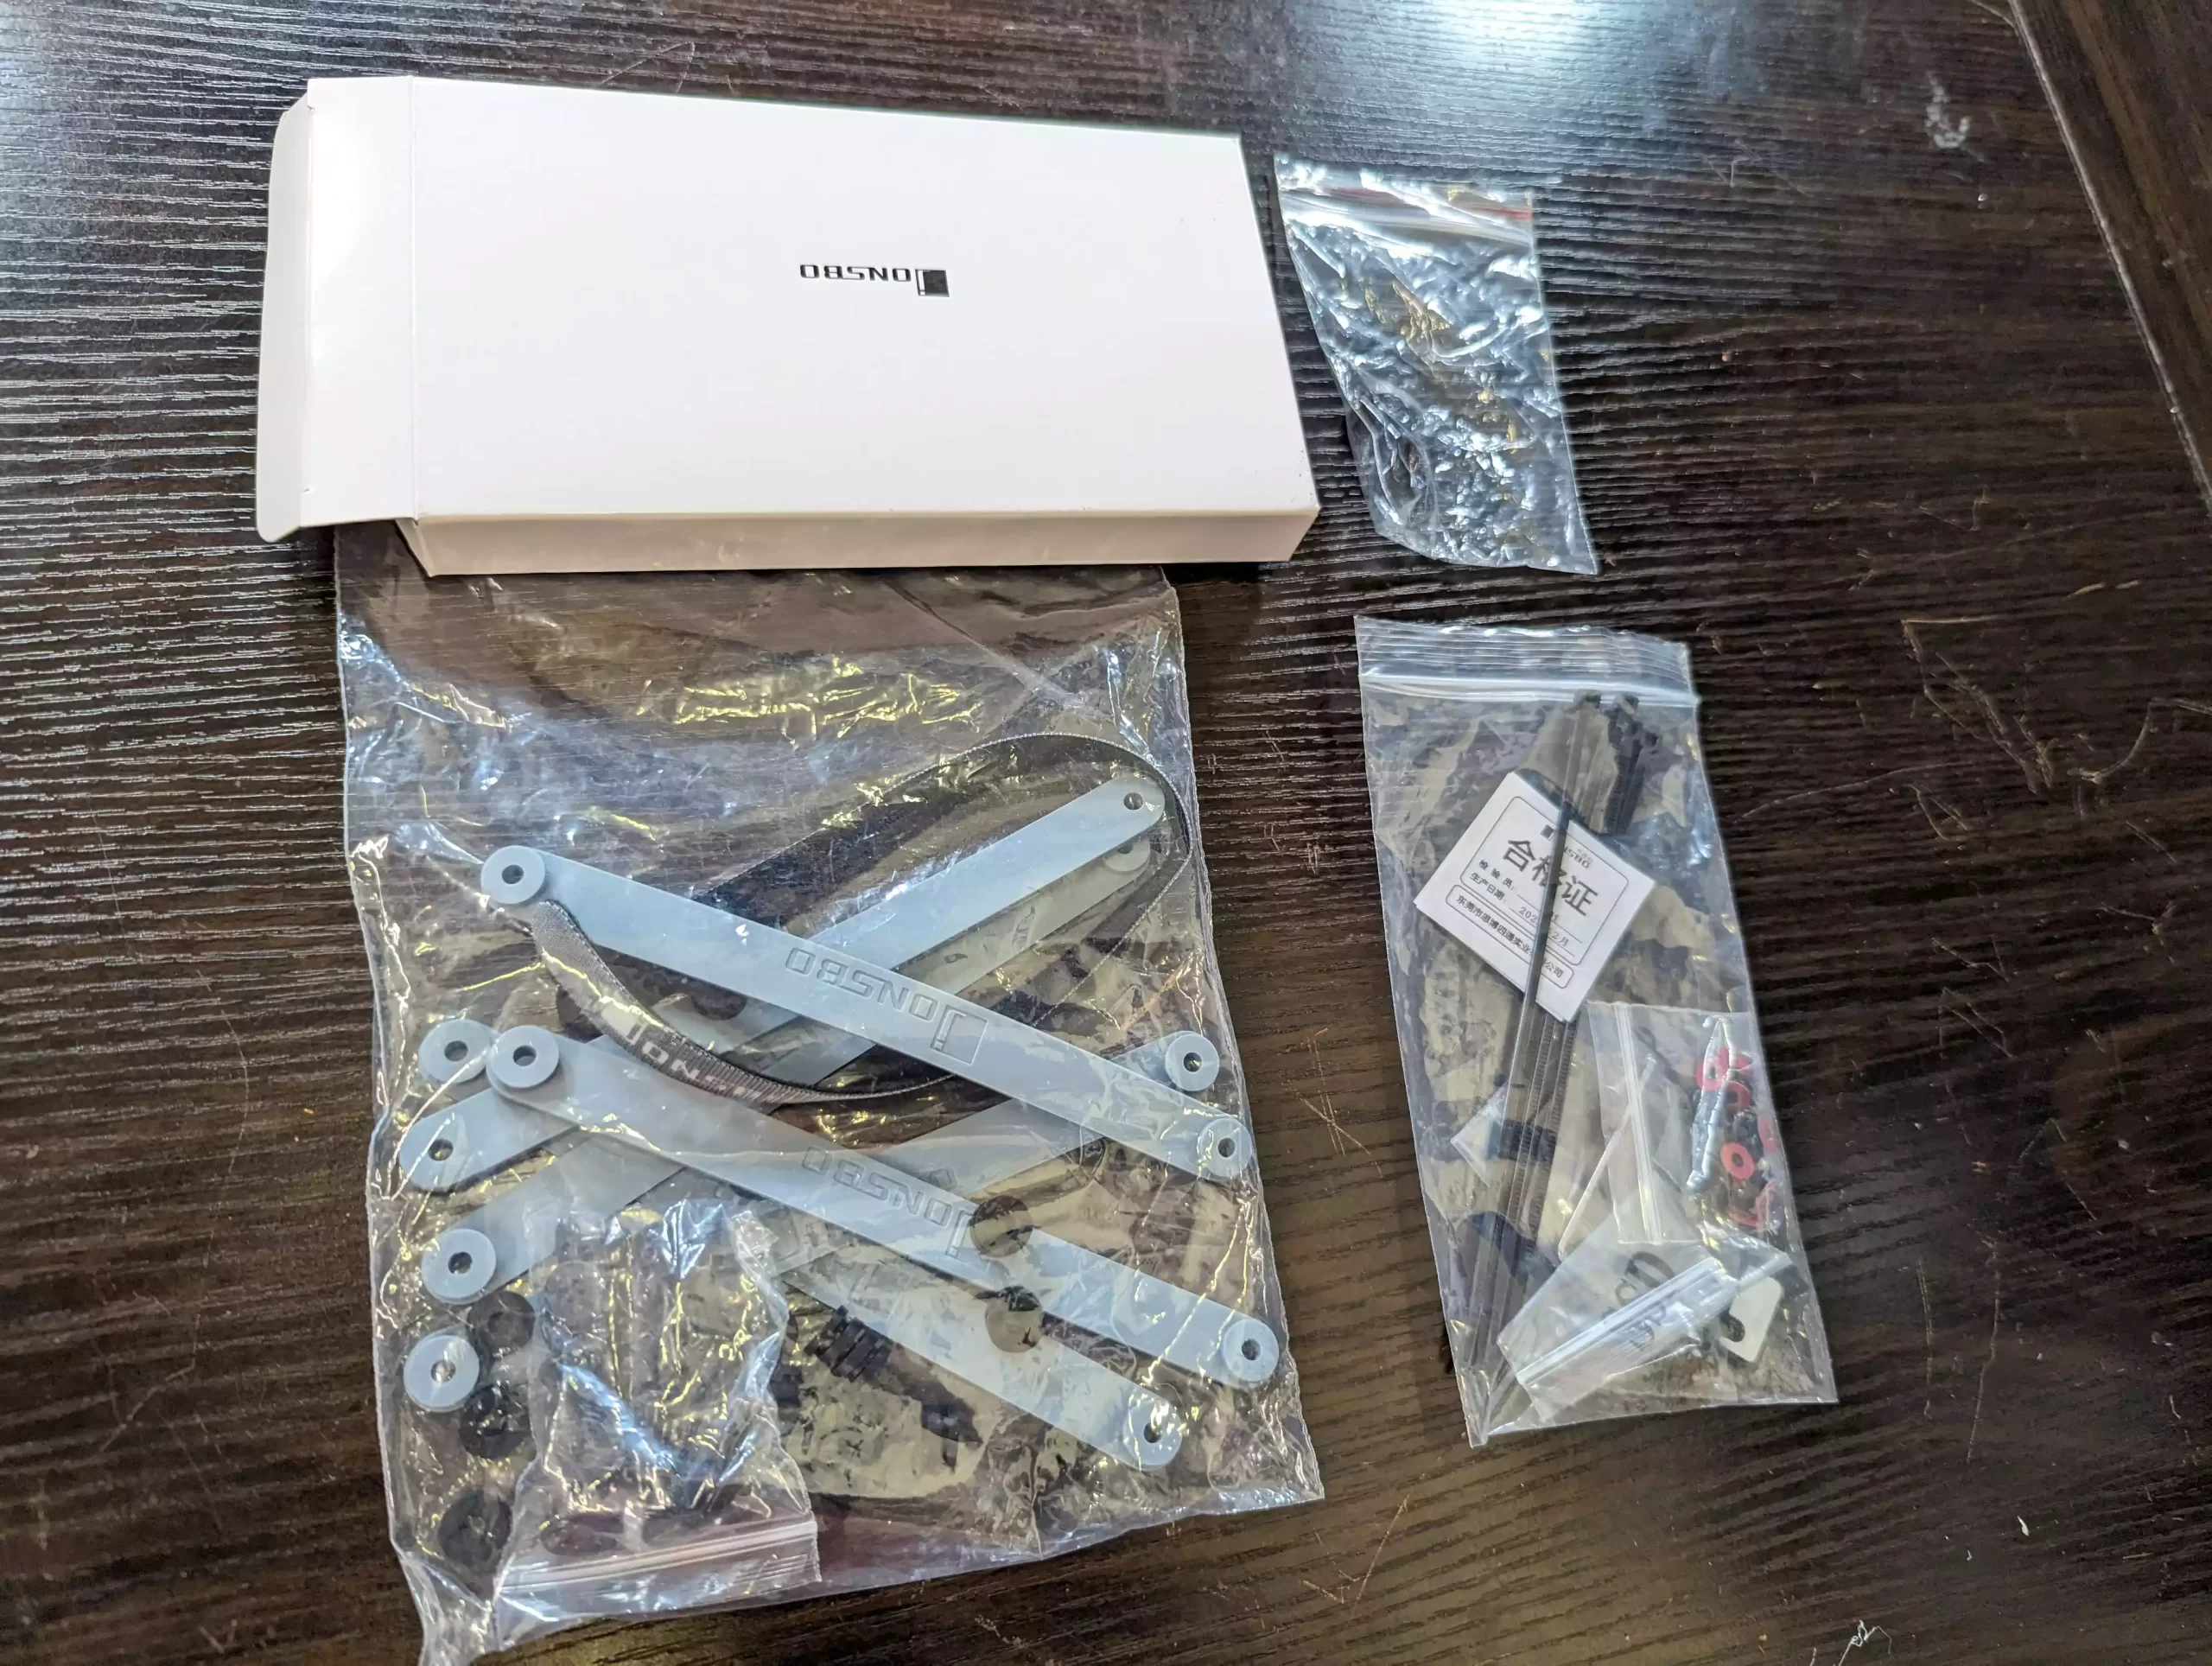
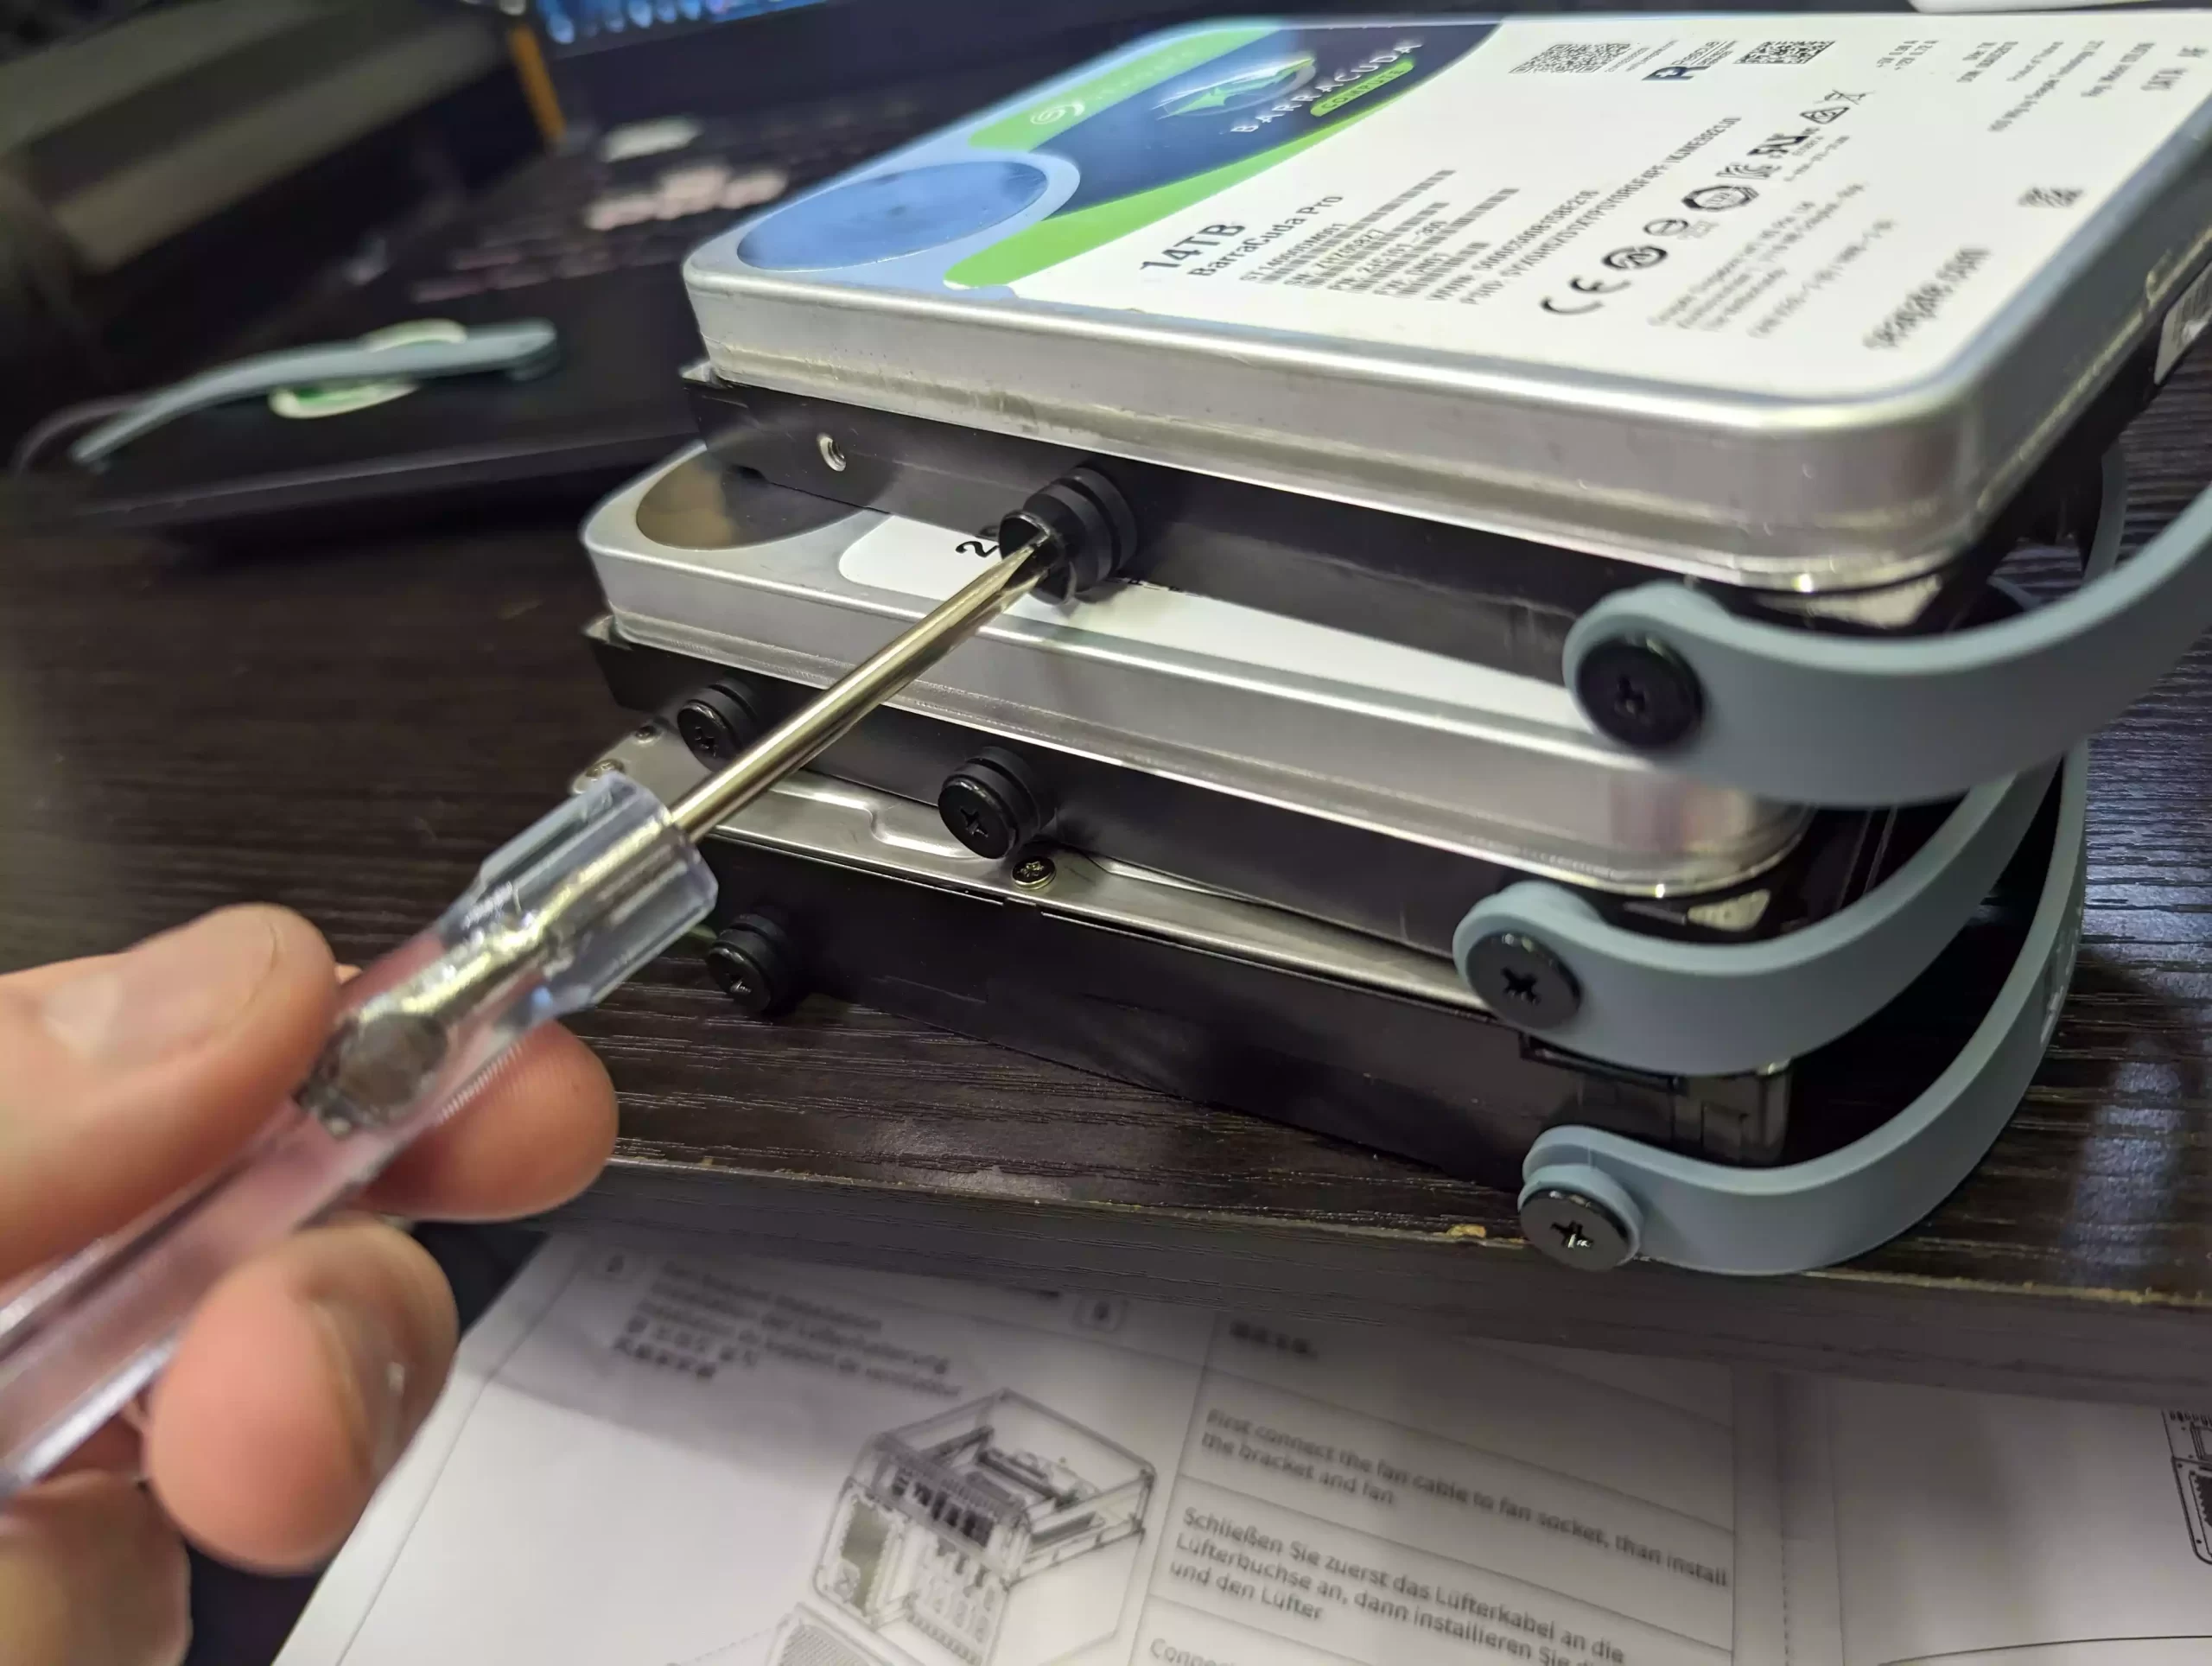
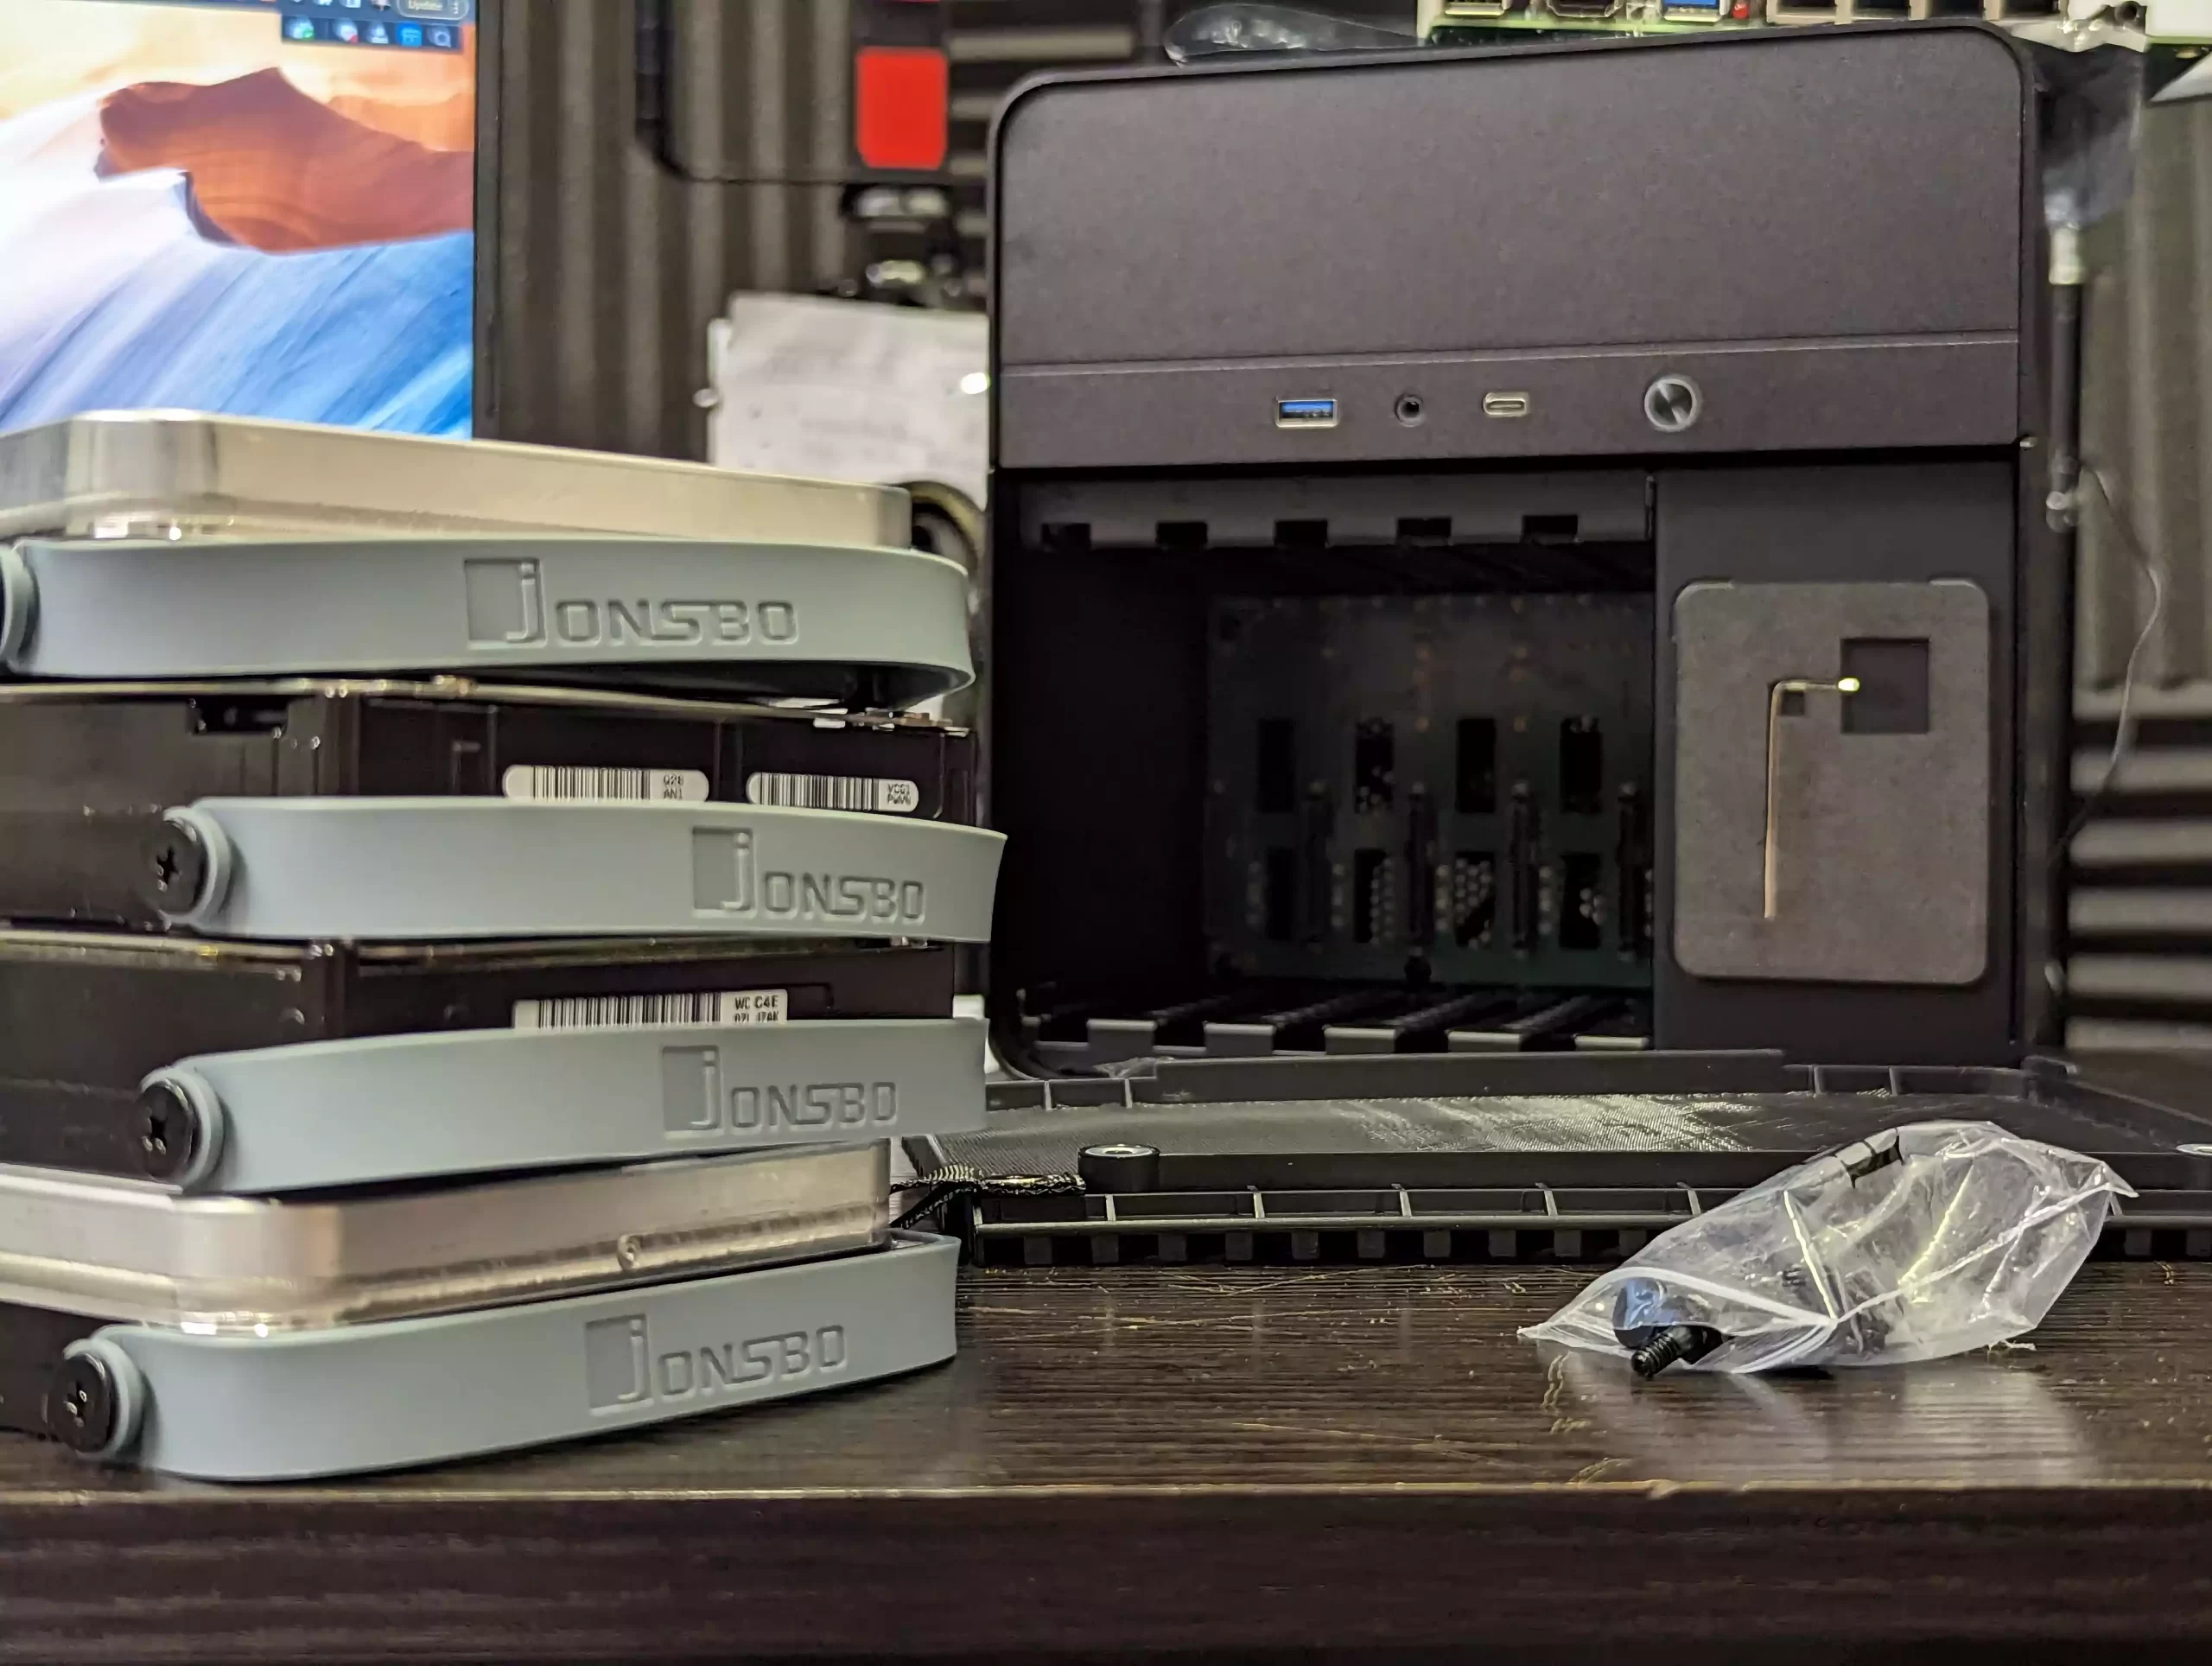
Prepare your storage media for installation. Unlike many cases, the Jonsbo N2 doesn’t have individual hard drive trays. Instead, it uses a combination of screwed guide plugs and silicone handles.
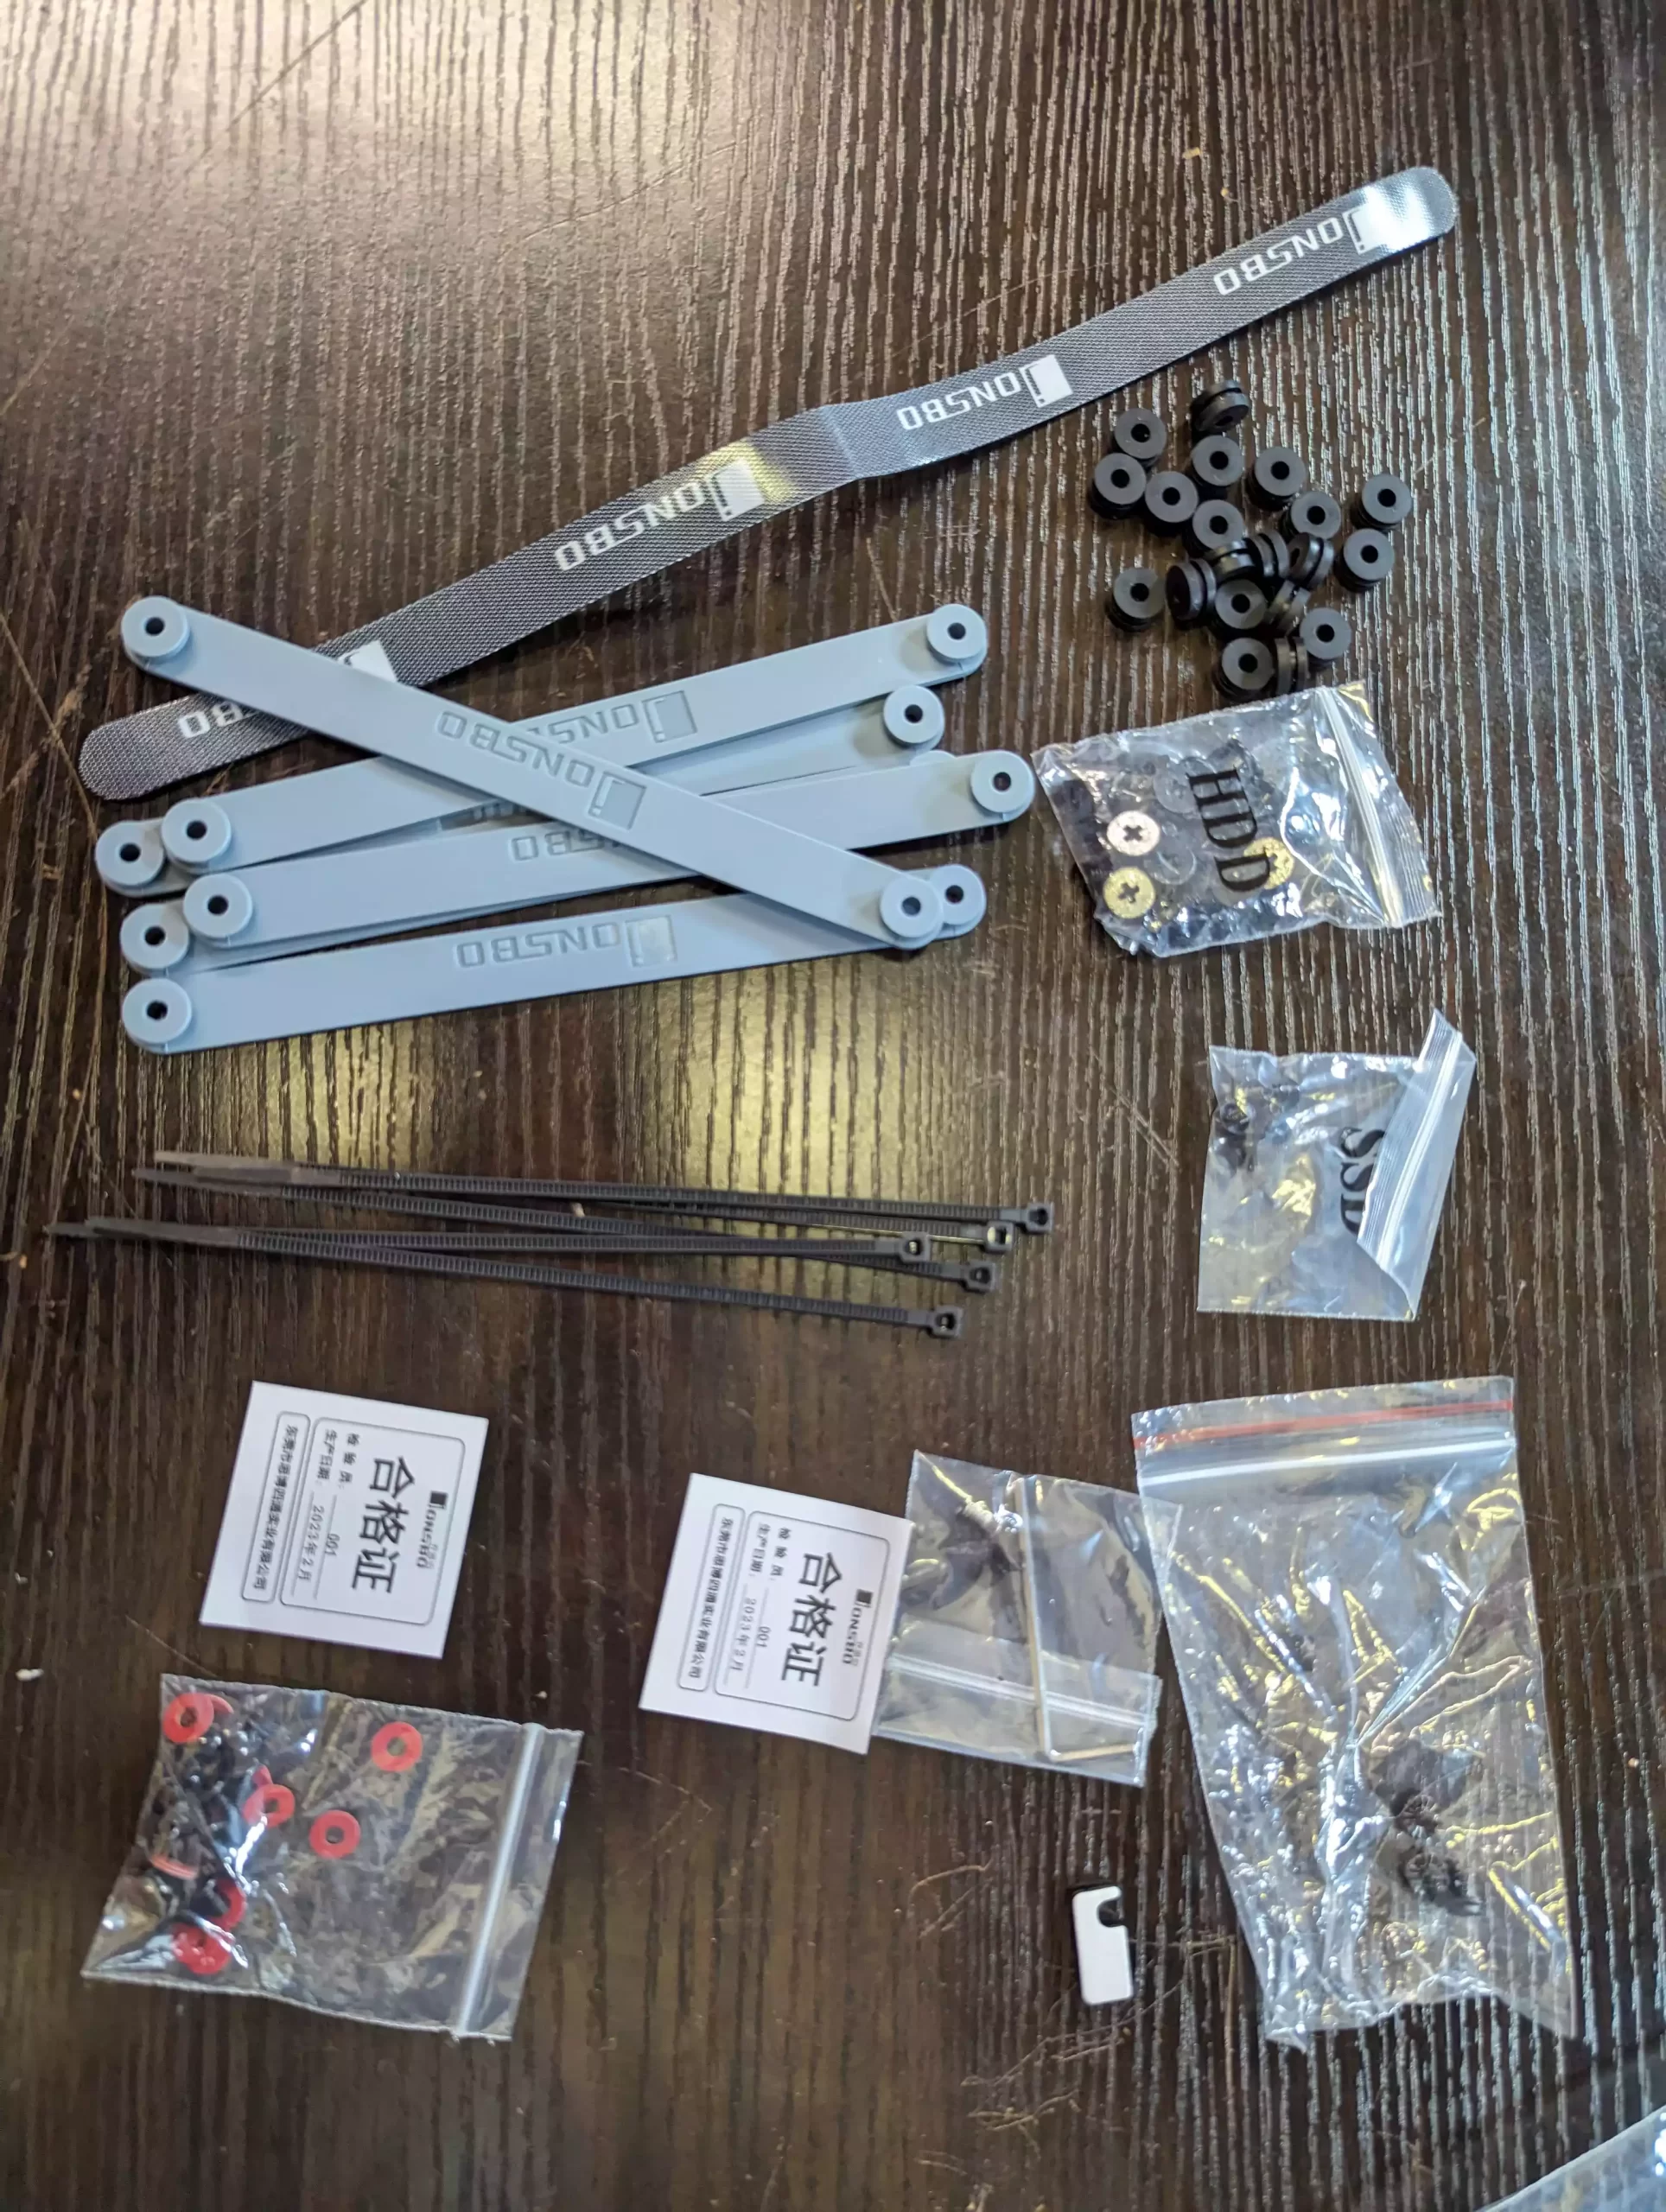
Attach the handles by screwing them into each hard drive’s base. Traditionally, the drive face is opposite the SATA connector.
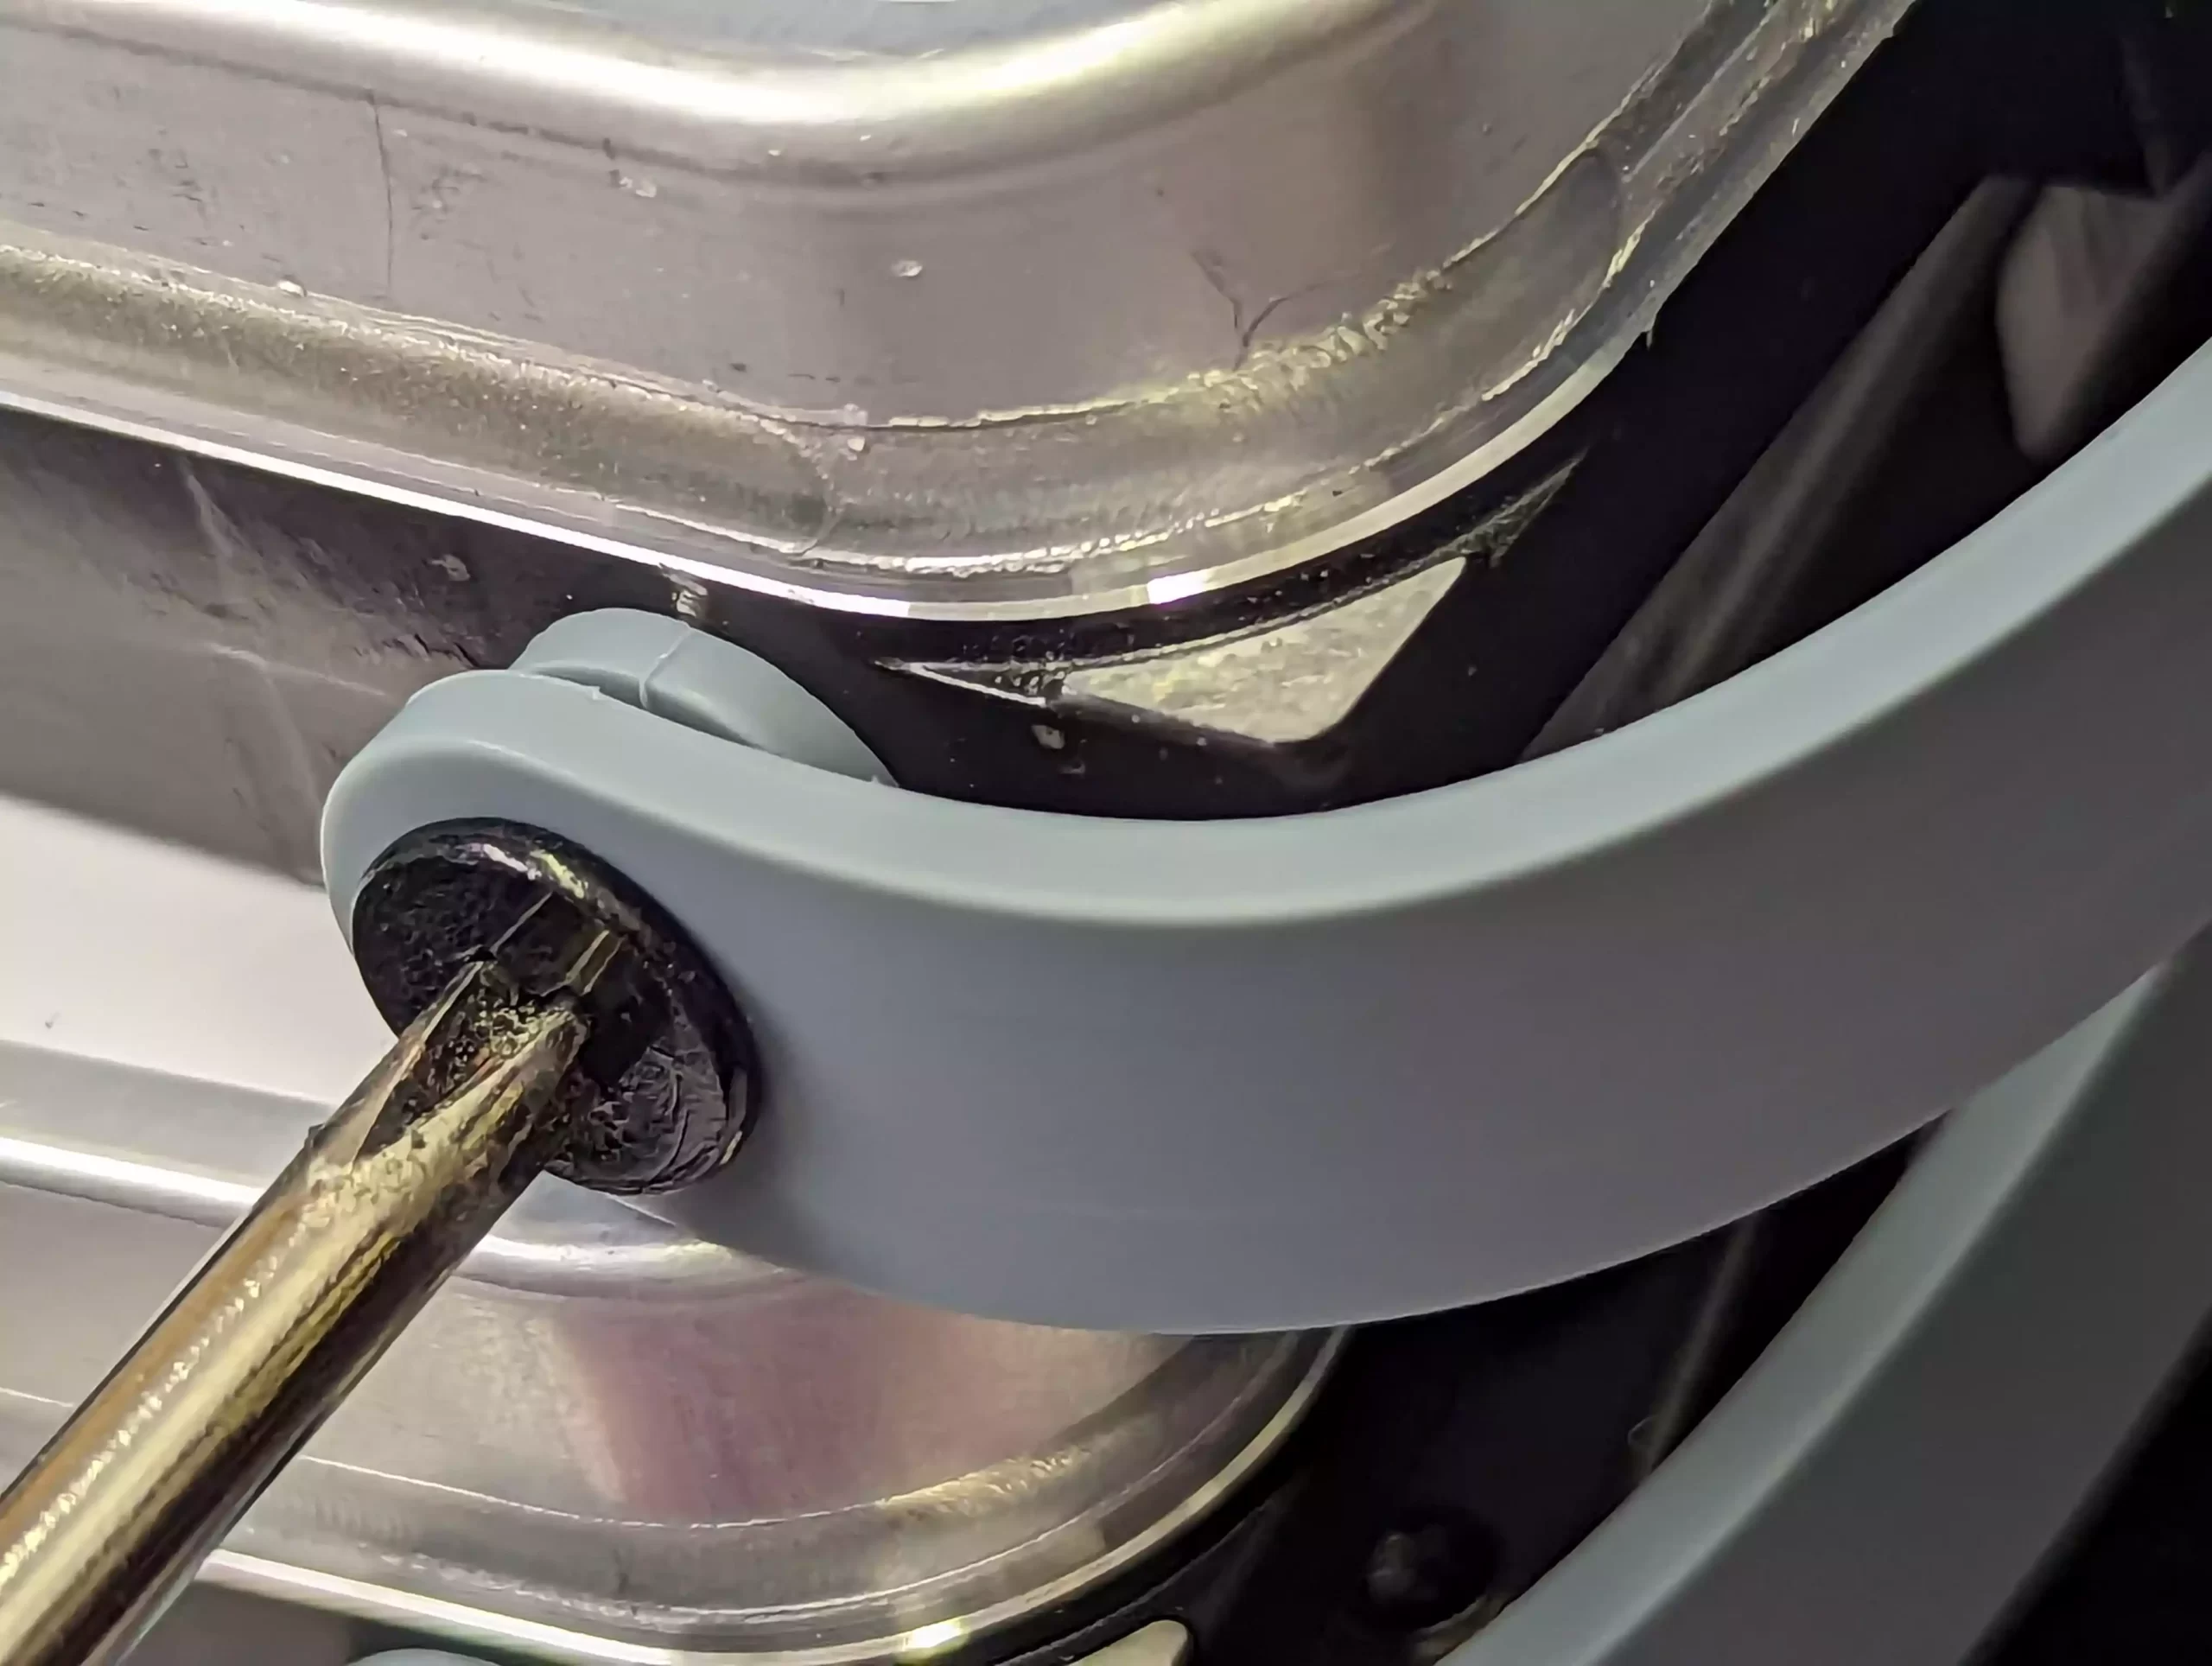
Insert four rubber thumb screws into each drive’s available screw holes. Screw each plug just enough to close its small gap. Over-tightening can misalign the drive inside the chassis.
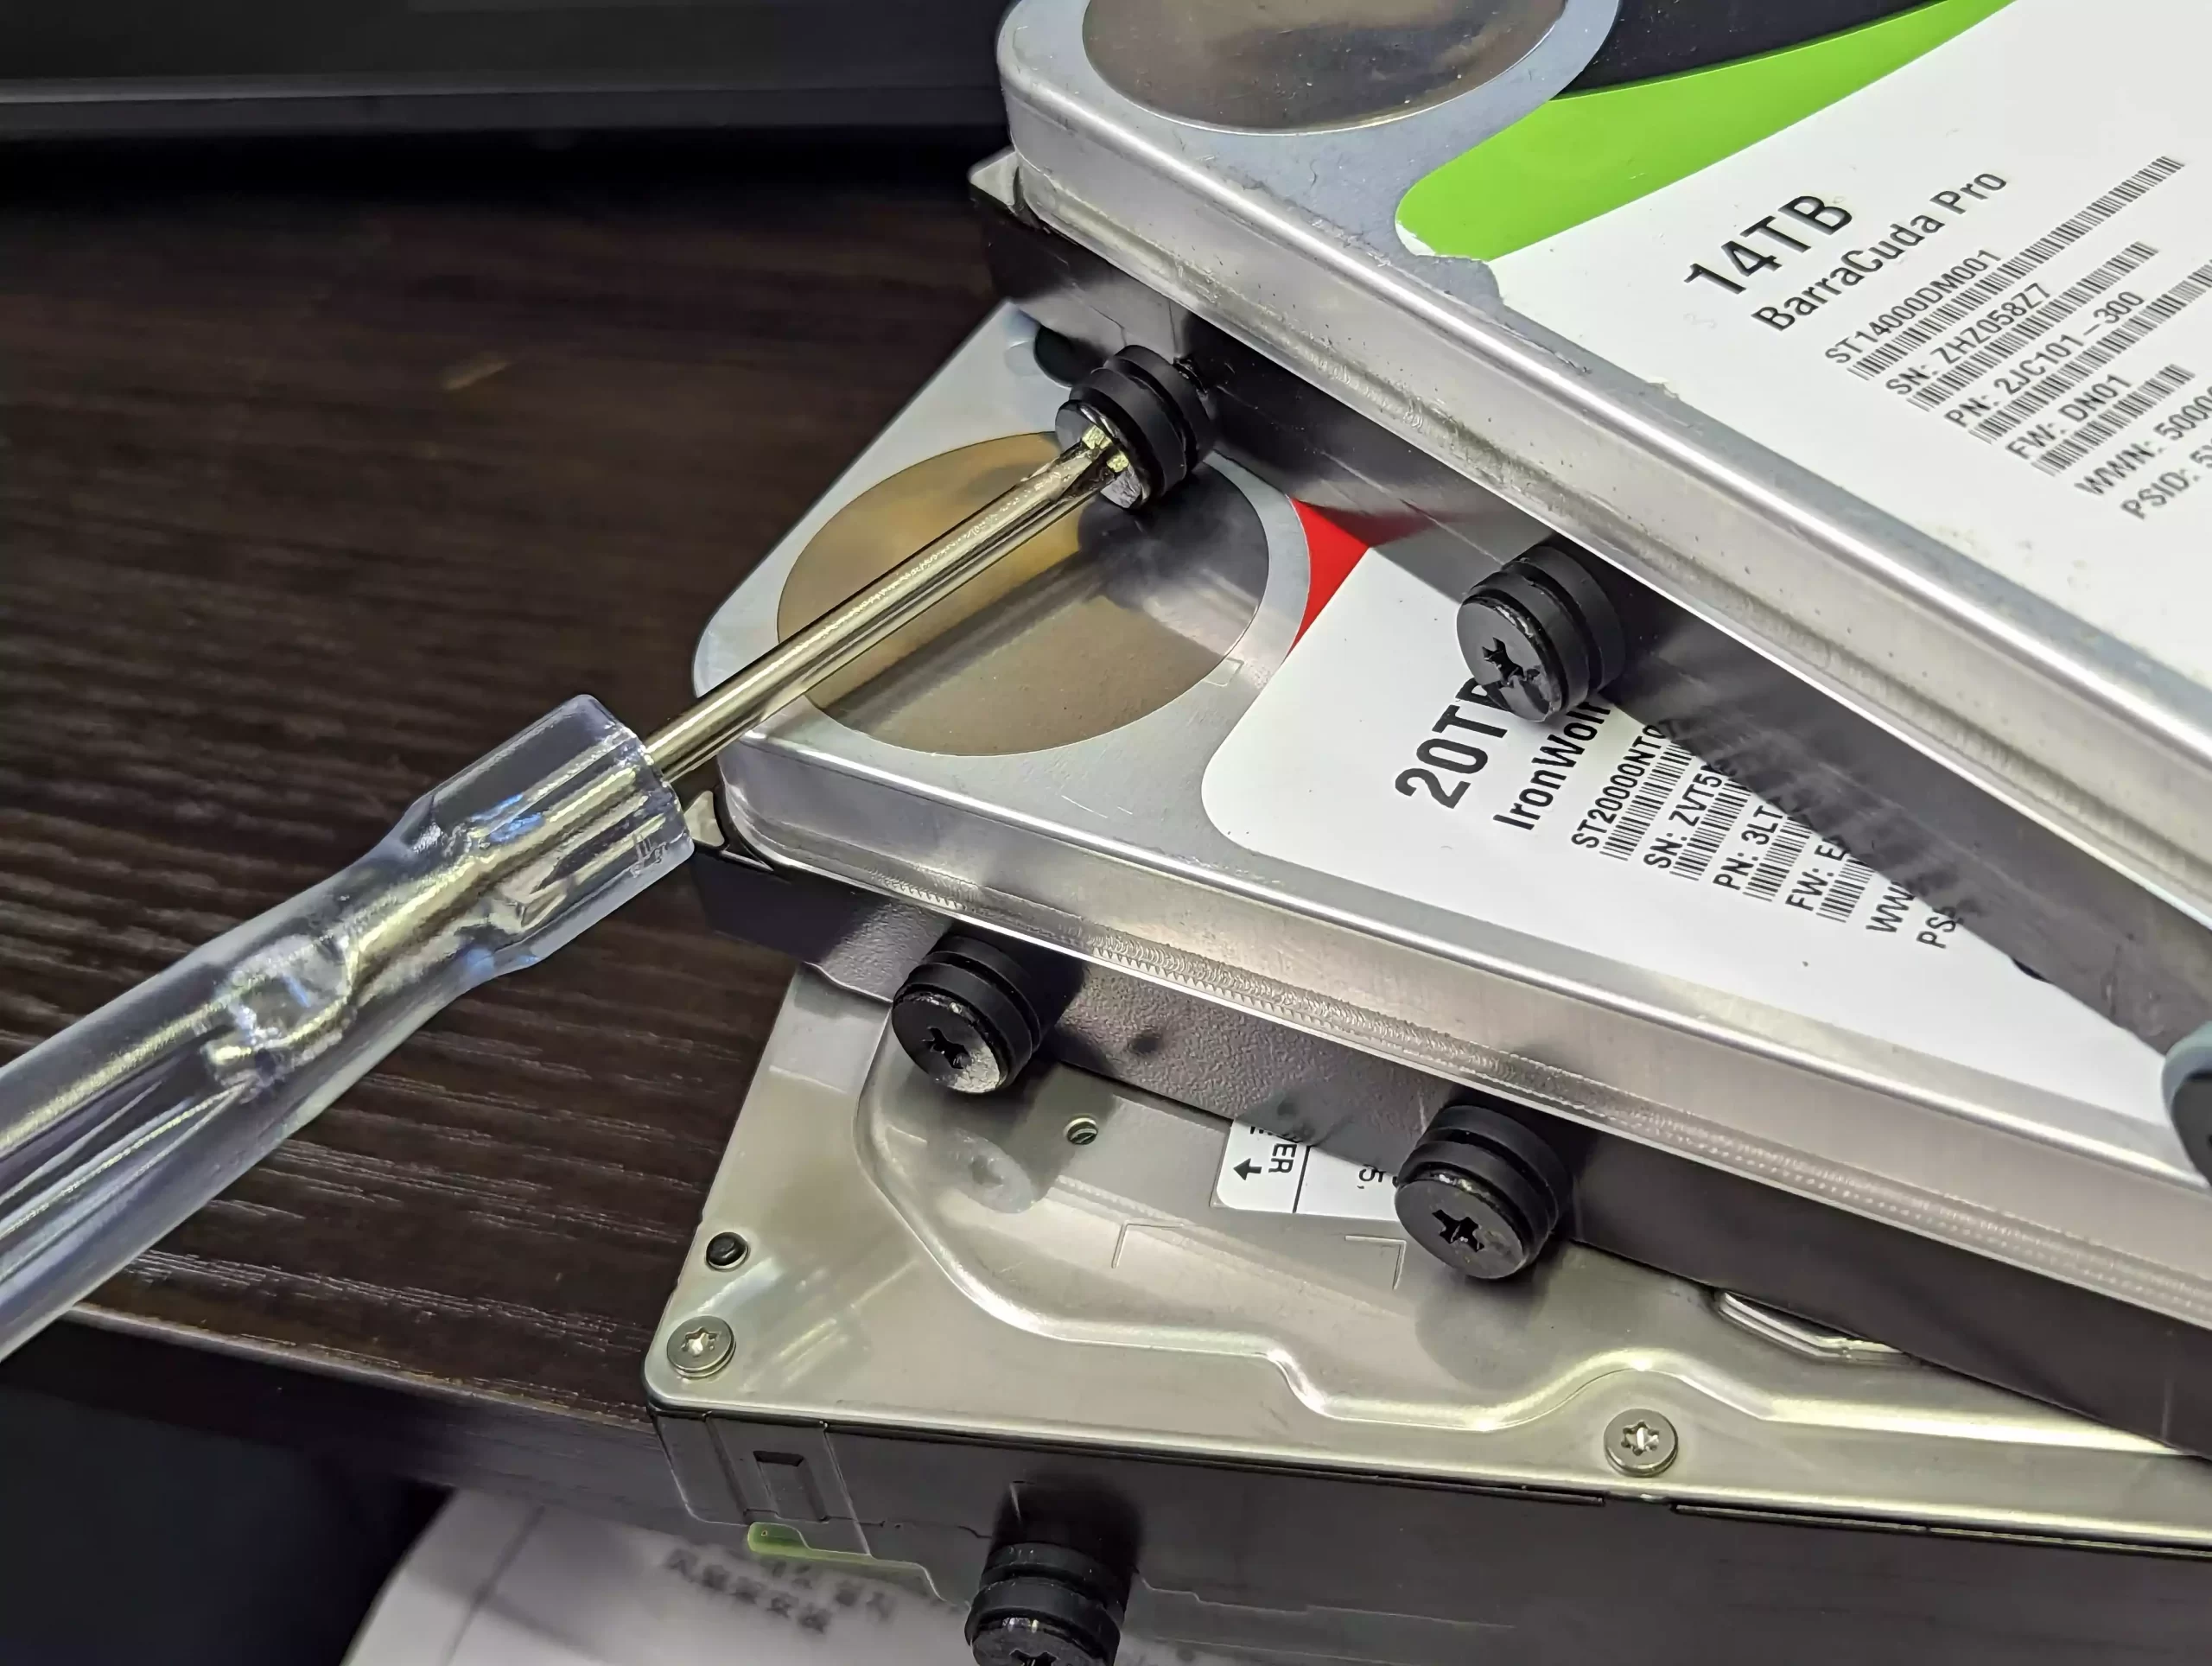
Repeat for each drive you’re installing.
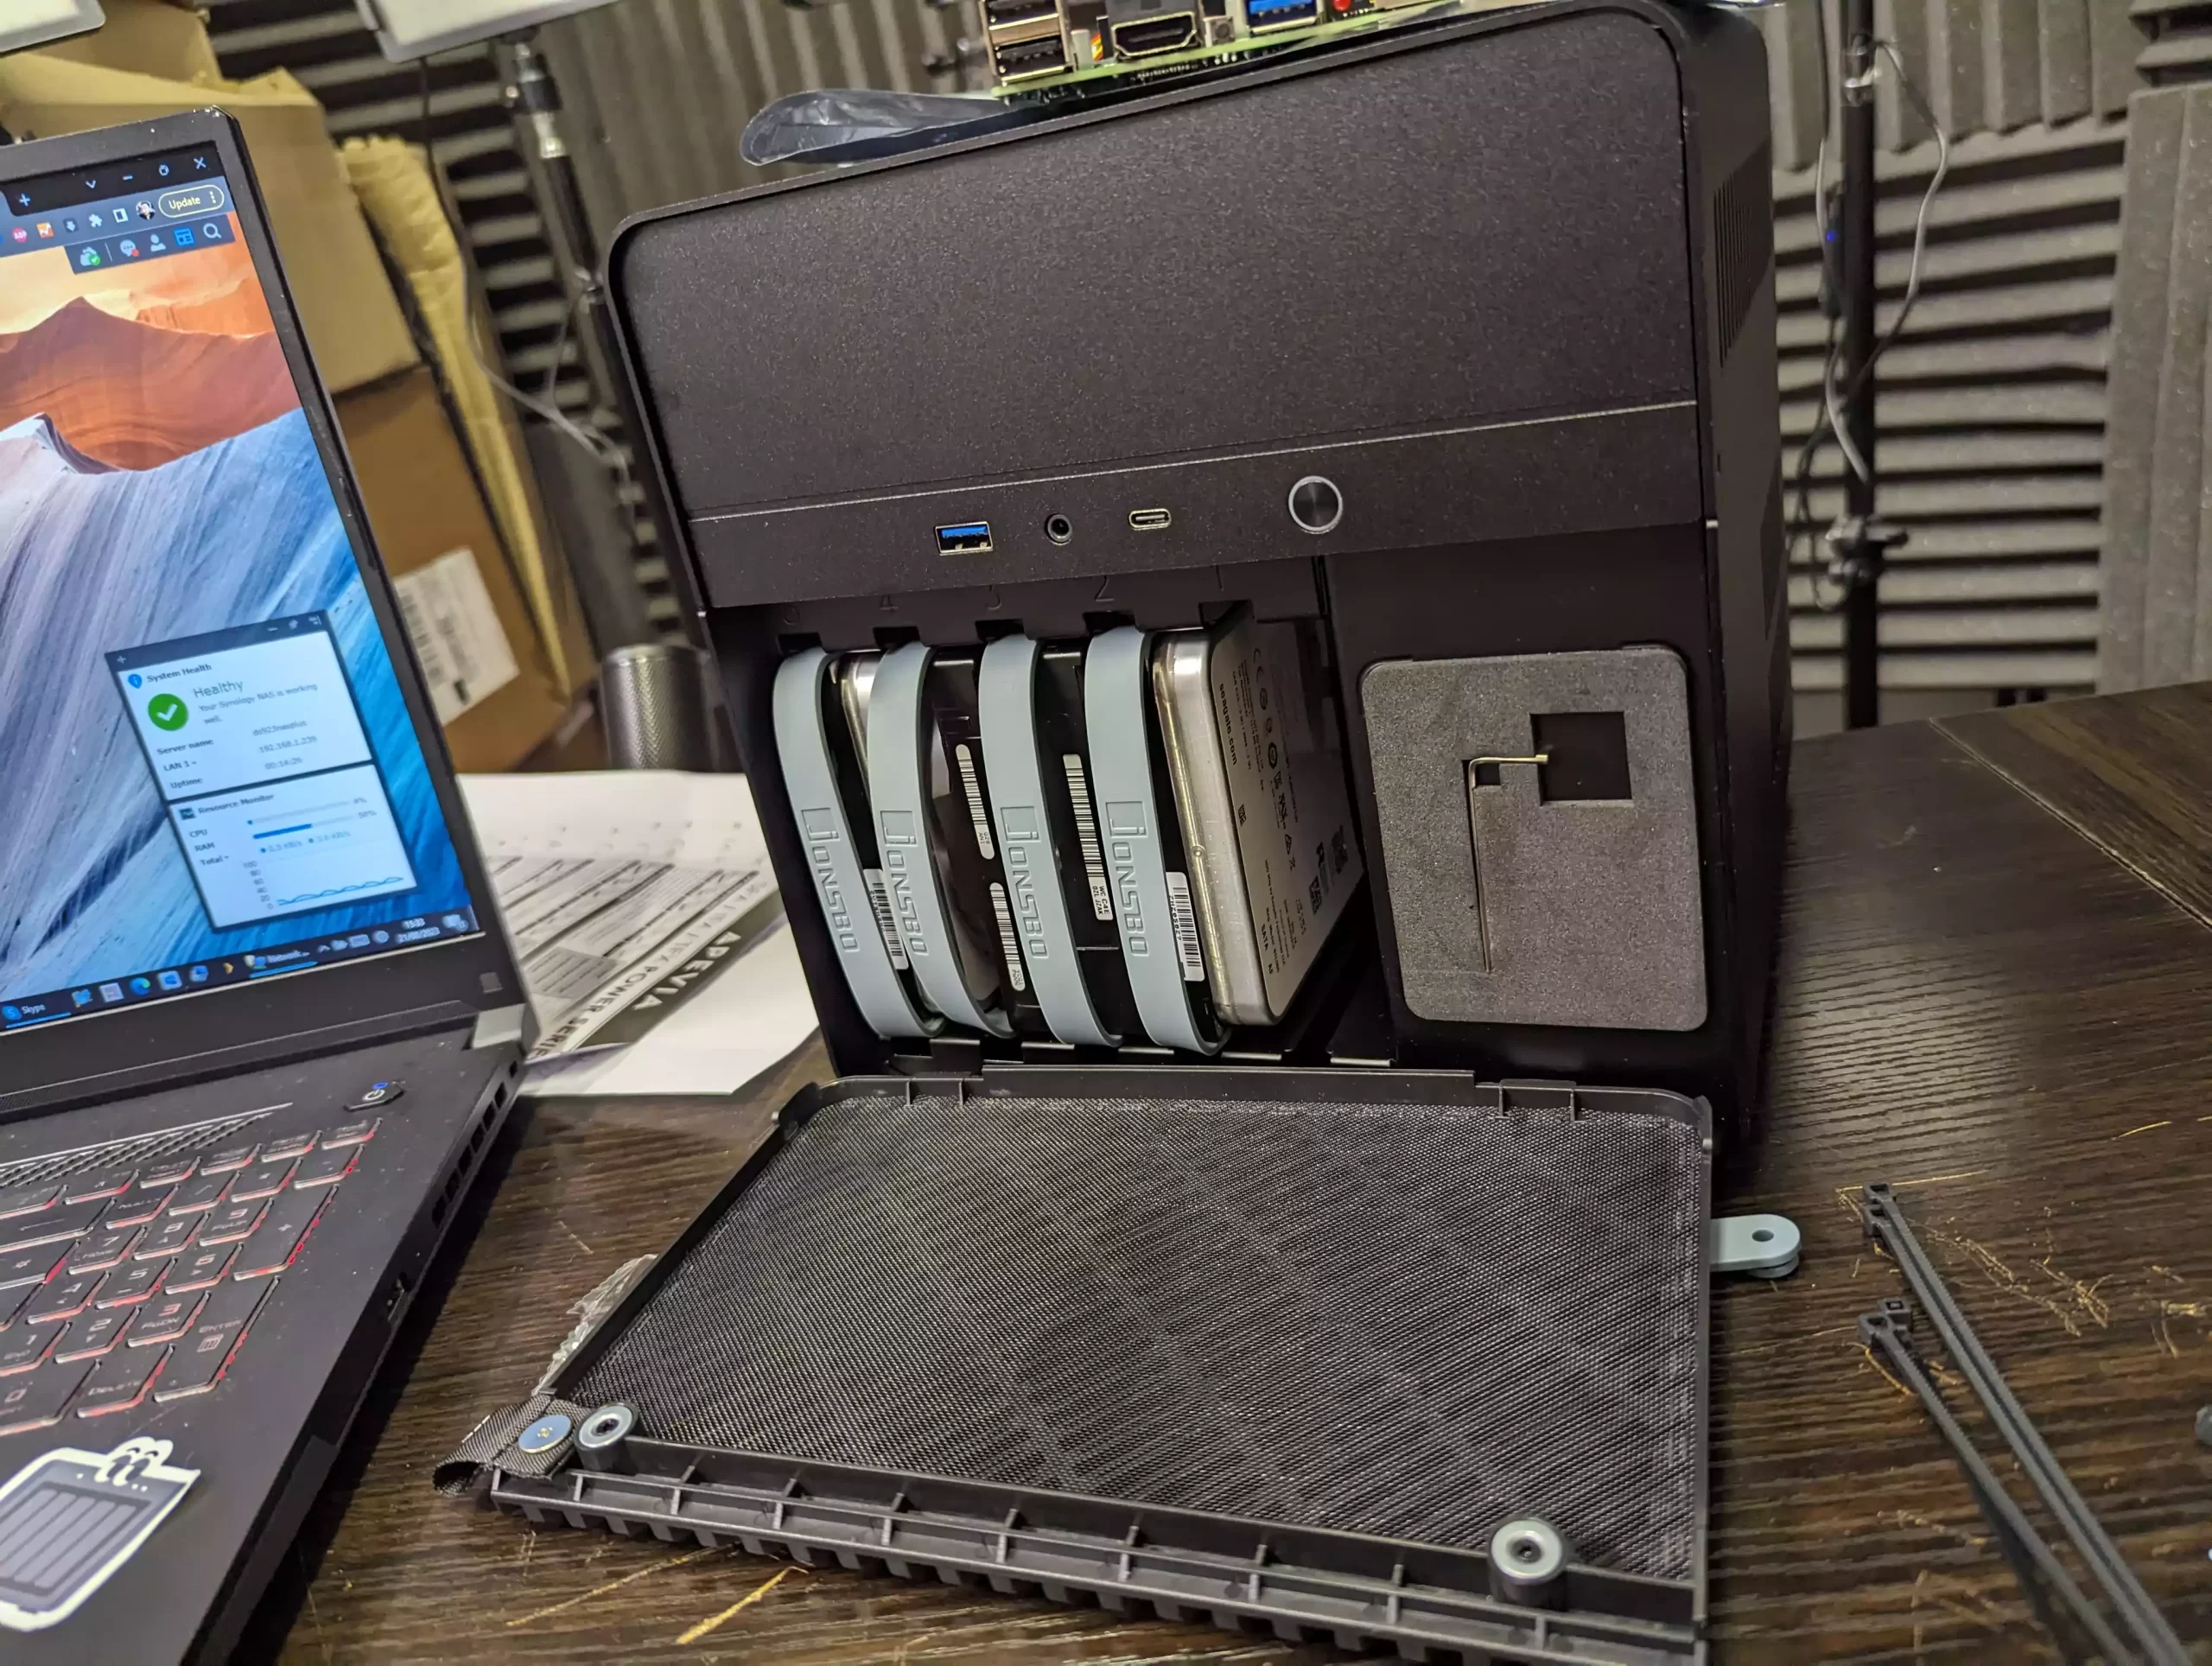
Guide each drive into the Jonsbo’s slot, ensuring the SATA connector is at the bottom. This positioning ensures the drive’s SATA connector meets the NAS board’s connector.
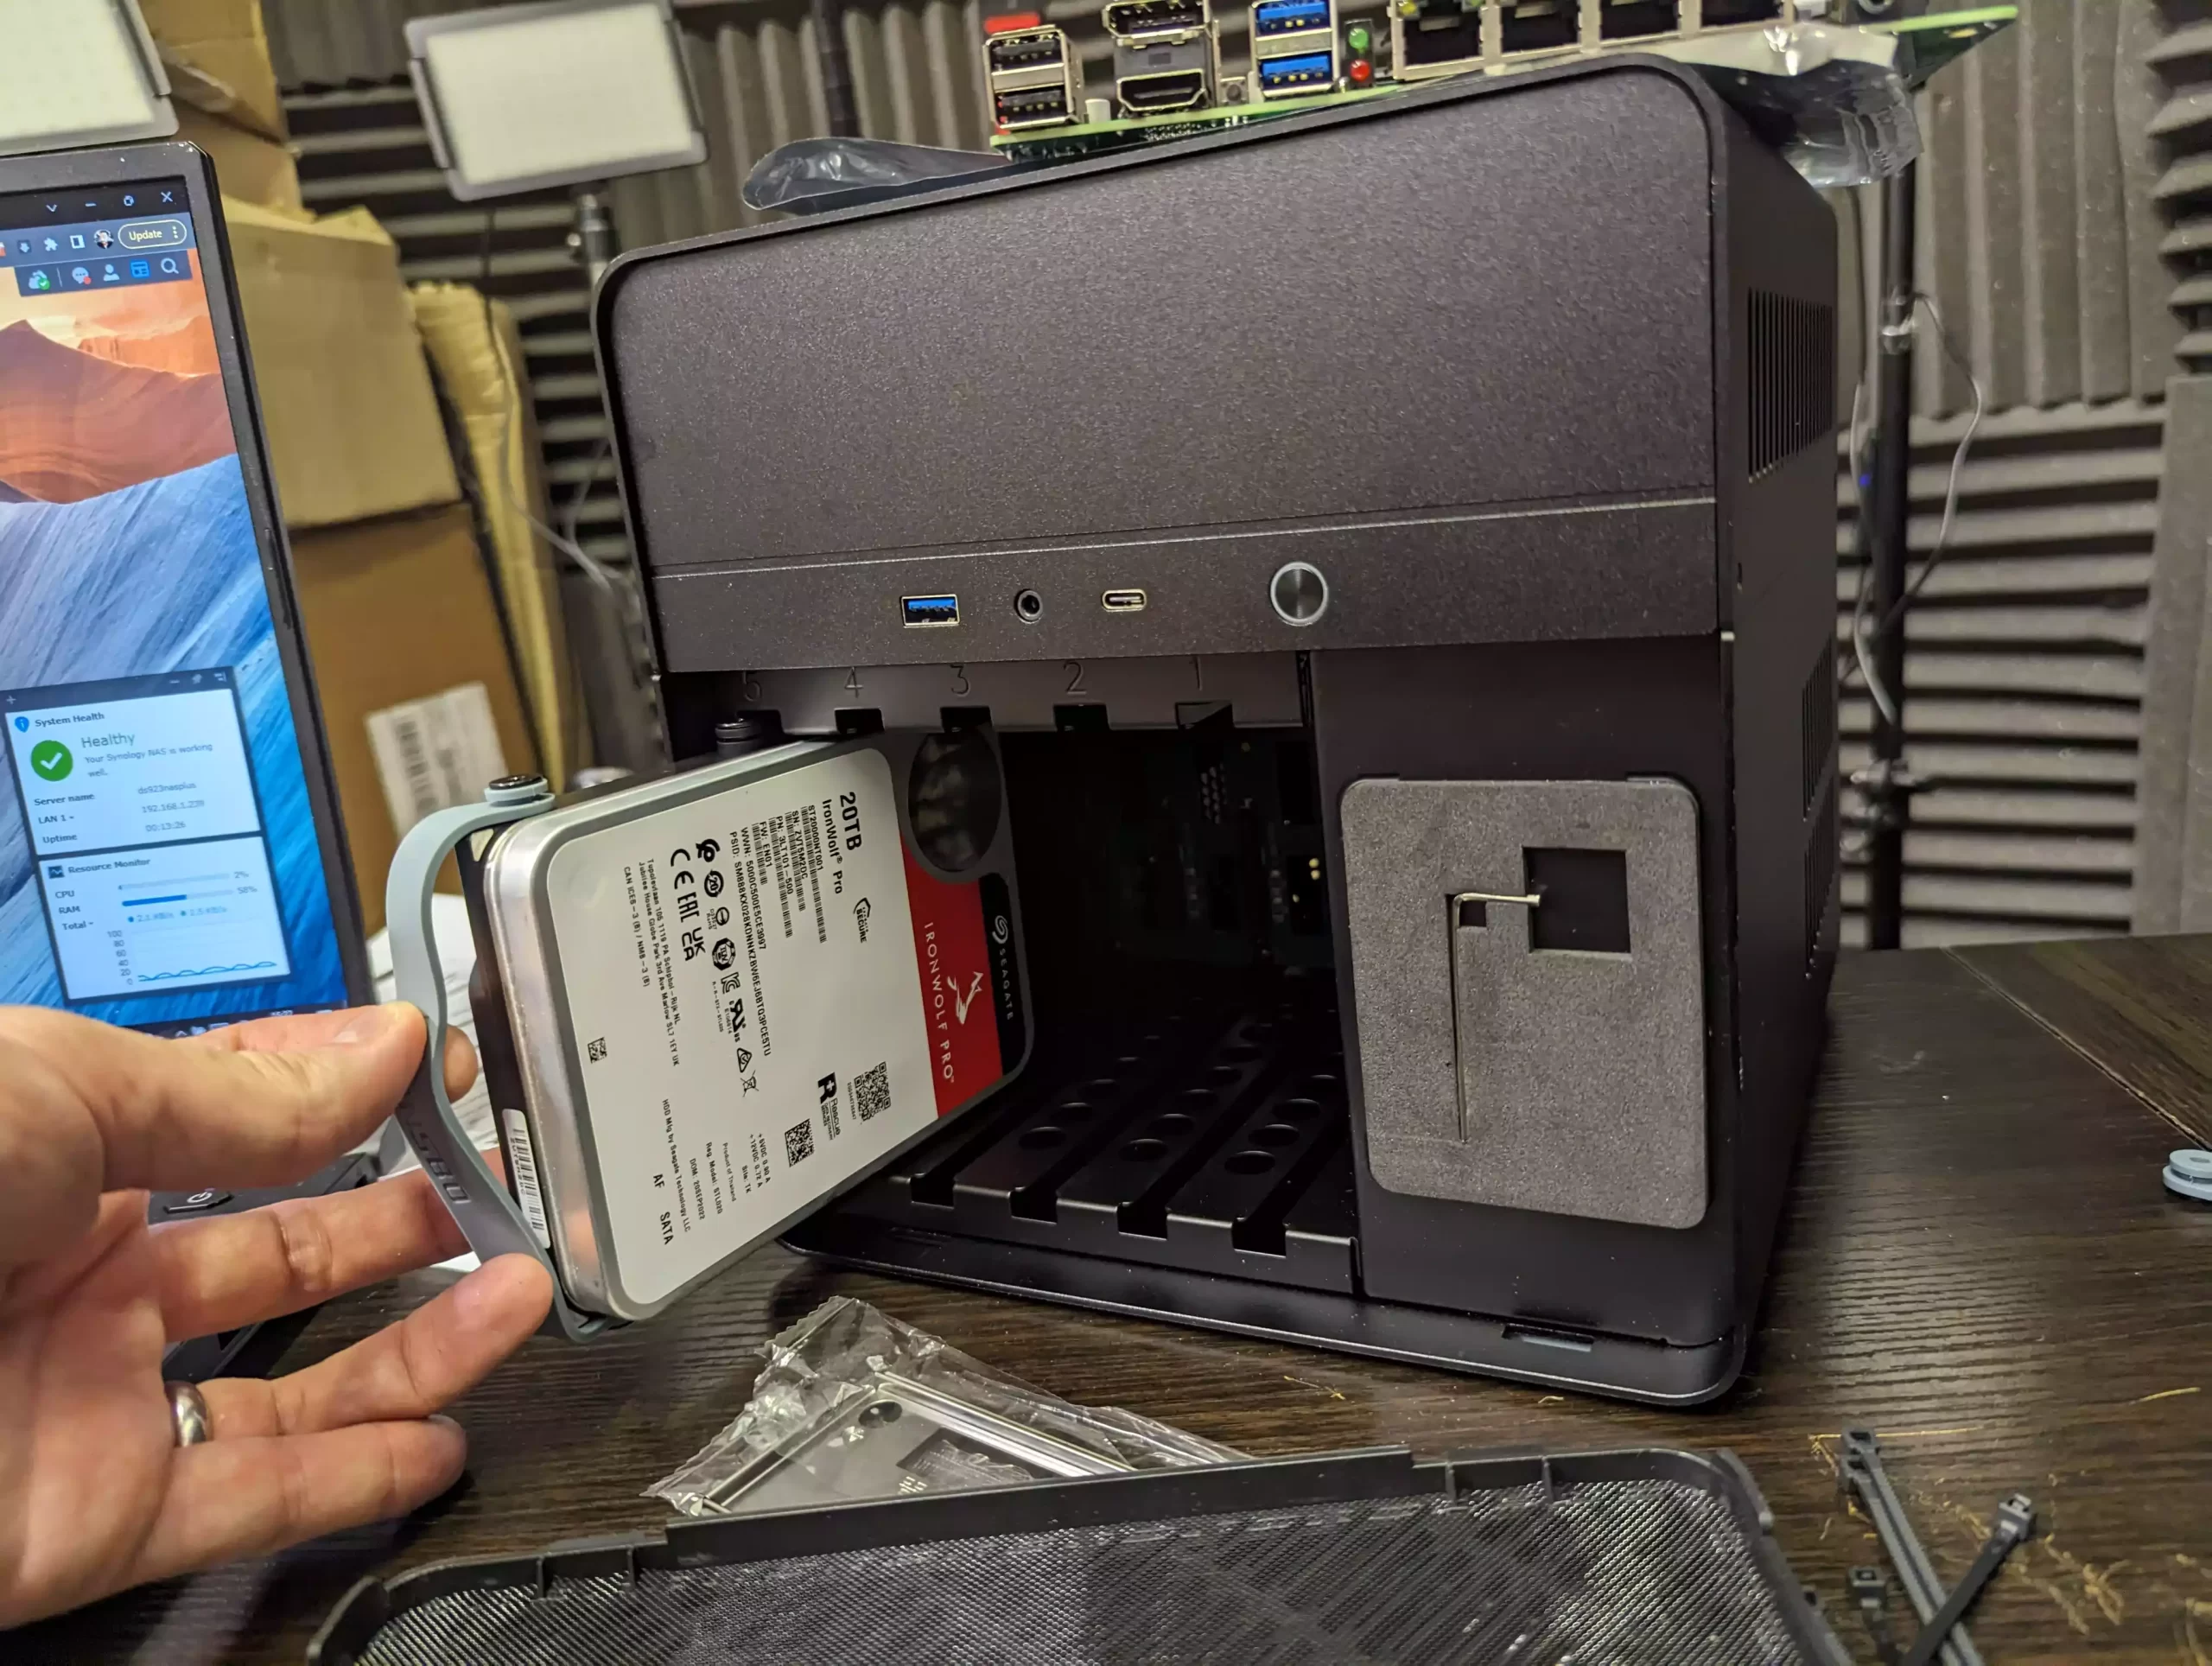
Reattach the front panel. If it doesn’t align with the rest of the N2 chassis, the drives might not be fully connected.
Your system is now boot-ready. From here, you must decide on the NAS server software for your Jonsbo N2.
UnRAID Installation on the Jonsbo N2 NAS Build Setup Walkthrough (Optional)
If you’ve chosen UnRAID as your desired software for the Jonsbo N2 NAS, the following steps will help you get started:
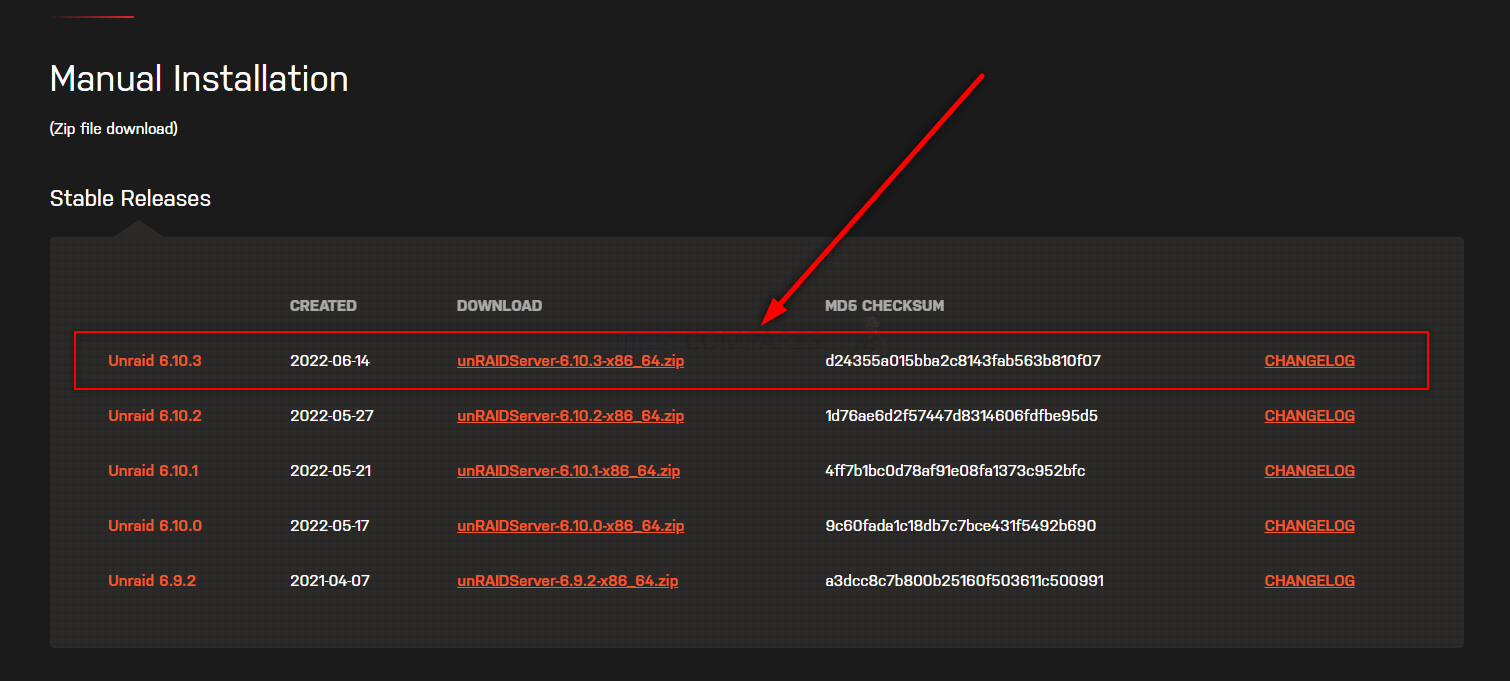
UnRAID on a Jonsbo N2 NAS – Step 1, Get the Latest Stable Release of UnRAID
Head to the UnRAID website HERE and download the latest stable release of the software to your local PC, Linux or Mac system. Make sure to remember where you downloaded it. You CAN recommend the USB creator tool and that can allow you to create a system image of the UnRAID loader, but some users have highlighted that compatibility issues with some USB sticks and capacities have been highlighted. So, that is why I recommend scrolling down and downloaded the latest stable release of UnRAID to your local PC/Mac system.

UnRAID on a Jonsbo N2 NAS – Step 2, Preparing the USB
Connect the small form factor USB Drive to your system (again, this is the one I used from Sandisk) and after a few seconds, it should appear as an available USB Drive. The drive MAY need formatting (you will be prompted to do so), if that is the case, then you can format it via the system prompts and by default, it will format it to FAT32 (as long as your USB is less than 32GB). If you are not presented with a system prompt to format your USB, then you can head into My PC, or My Computer via a windows computer and right-click the drive, select ‘format’ and format it that way. IMPORTANT – Make sure in the ‘volume label’ or Drive Label field, you call the drive UNRAID (all in caps and no spacing)

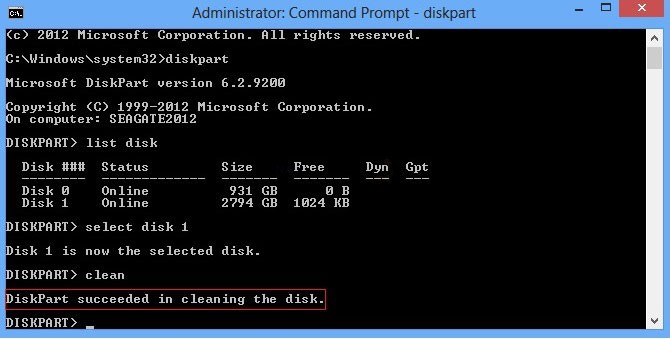
If you have used the USB for other things previously, there is a chance that the drive has existing partitions in place. For that, the quickest way to completely remove any partitions is to open up the bottom-left windows system menu as normal, and then just type diskpart and open the command-line GUI tool. From there, use the command list disk to show the available drives that are connected, you will see your USB (normally disk 1 or 2, but can differ depending on your system layout and can be spotted by the storage amount). From there, type select disk # (where # is the drive number that your USB is shown as) and then type clean, which will then remove any index structure for the drive (i.e the partitions and existing format) and then you can go back to the My Computer/My PC page and format the drive to FAT 32 as normal.

UnRAID on a Jonsbo N2 NAS – Step 4, Creating a USB Loader Image of UnRAID
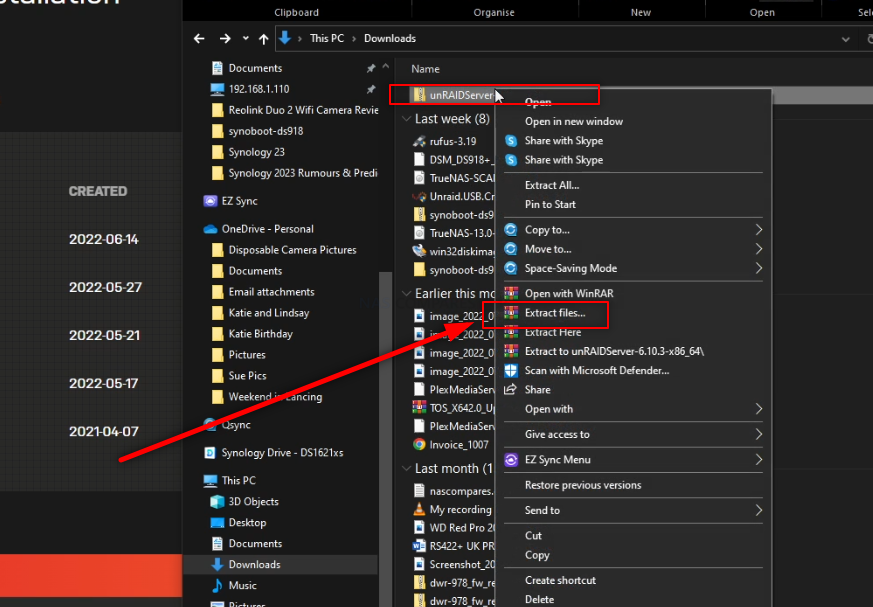
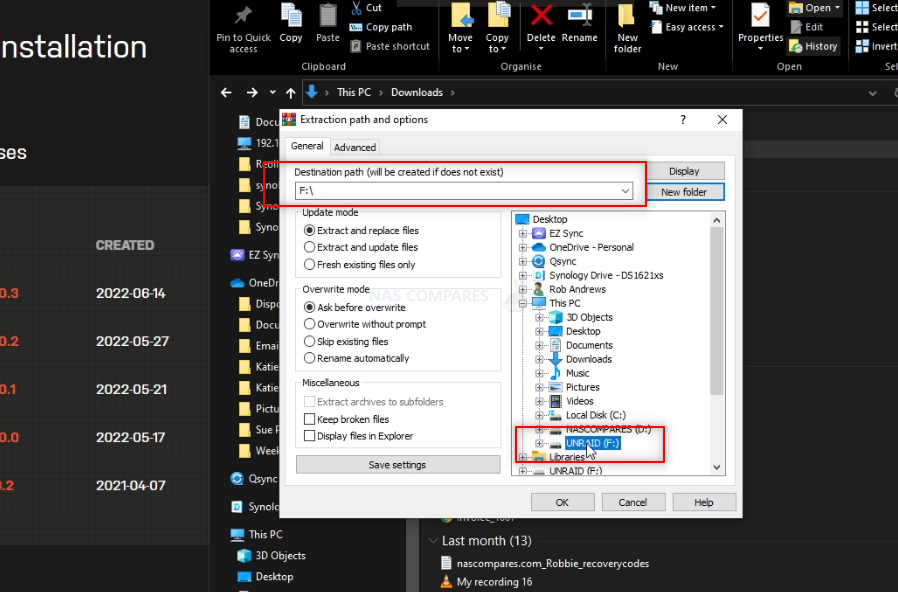
Now that your USB has been prepared for the UnRAID USB setup, the next thing you need to do is move the appropriate installation files over to it. Find the .zip UnRAID Server installation you downloaded earlier on your PC/Mac system.

Then use the 1st party extractor tool or 3rd party tools such as WinRAR, then extract the contents of the downloaded .zip to the UNRAID USB drive (DO NOT CREATE ANY ADDITIONAL FOLDER STRUCTURE)!

REMEMBER! This will completely format your USB drive and any files that are on that USB will be destroyed. The process upto this point will have turned the USB into a pure boot image tool – the USB will not be usable for traditional storage again unless you completely format it again.
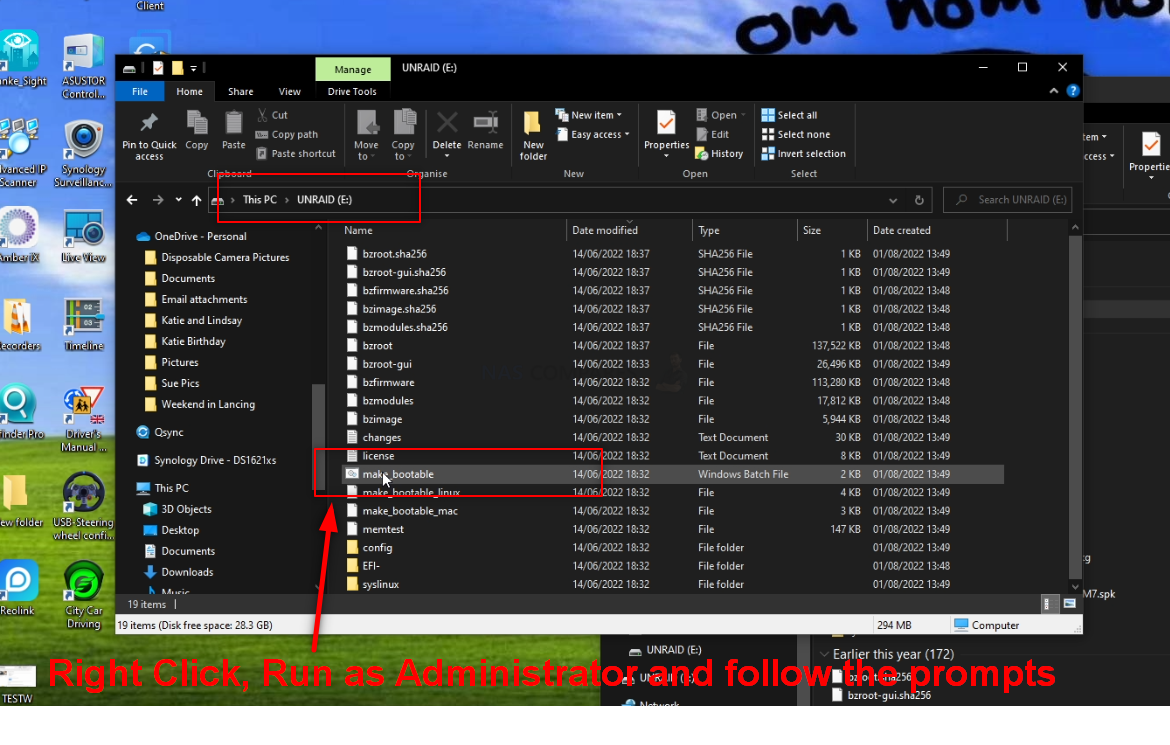
Now that you have the files extracted onto the UNRAID USB drive, you need to go into the folder structure and right-click the .bat file ‘make_bootable’, then select ‘run as Administrator’. This will open a new cmd window.

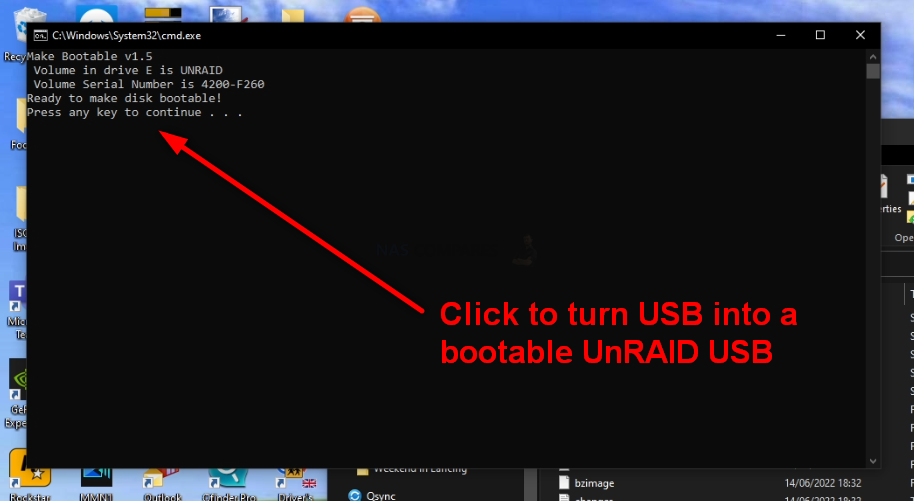
In this new CMD window, you simply need to press any button and the bootable batch file will do it’s thing in less than a second. Press any button again to exit the CMD window. Next, we need to amend a folder to ensure the drive is picked up as a bootable drive in the Jonsbo N2 mobo.

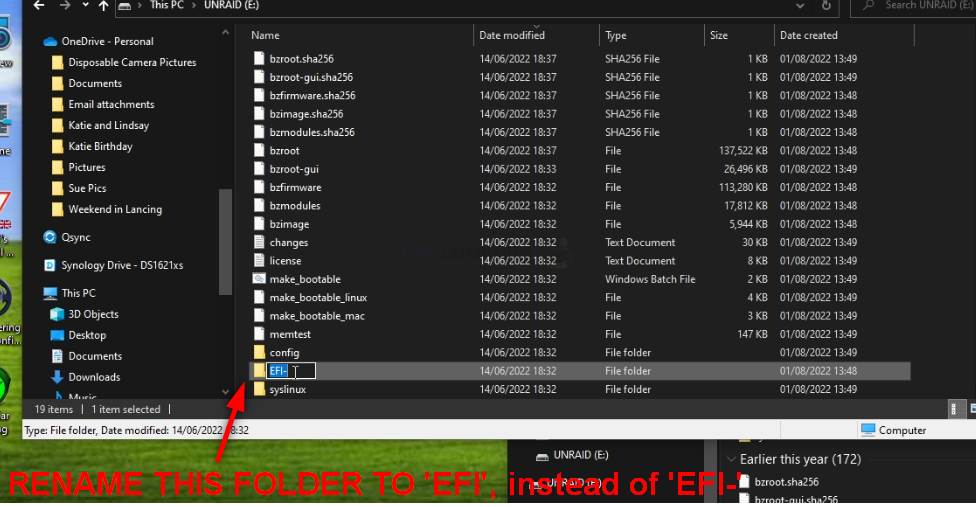
File the folder labelled ‘EFI-‘ and then rename it ‘EFI’. That’s all, there is nothing else left to change.

You can now safely remove the USB using the contextual system options on Windows/Mac systems and then prepare to install the USB inside the Jonsbo N2 NAS.

UnRAID on a Jonsbo N2 NAS – Step 7, Connecting the USB, Keyboard and HDMI Monitor
Next, we need to connect the external means to install UnRAID on the Jonsbo N2 NAS. Unlike when you set up your Jonsbo N2 NAS for the first time, UnRAID cannot typically be installed via the network. UnRAID requires you to use a KVM (keyboard, Video Mouse – though you won’t need a mouse!) and go through the installation using a low-res graphical user interface. Now you will ONLY need this setup/items for the installation and initialization of your UnRAID server and after that, you will be able to use the server over the network/internet as normal. You are going to need a basic USB Keyboard (not a Bluetooth or wireless one, as these may need drivers to run and you cannot install drivers at this point) and an HDMI Monitor/TV. You CAN use a mouse, but it is not hugely necessary and 99% of the choices in the setup of UnRAID can/will be via keyboard input. Also, I would also recommend connecting the NAS to the network during setup as this will allow the system to assume certain network values during setup that will save a tonne of time later. Once that is all connected, do NOT turn the NAS on yet – there is one small and slightly time-sensitive thing to do.
UnRAID on a Jonsbo N2 NAS – Step 8, Accessing the BIOS Menu of your Jonsbo N2 Motherboard
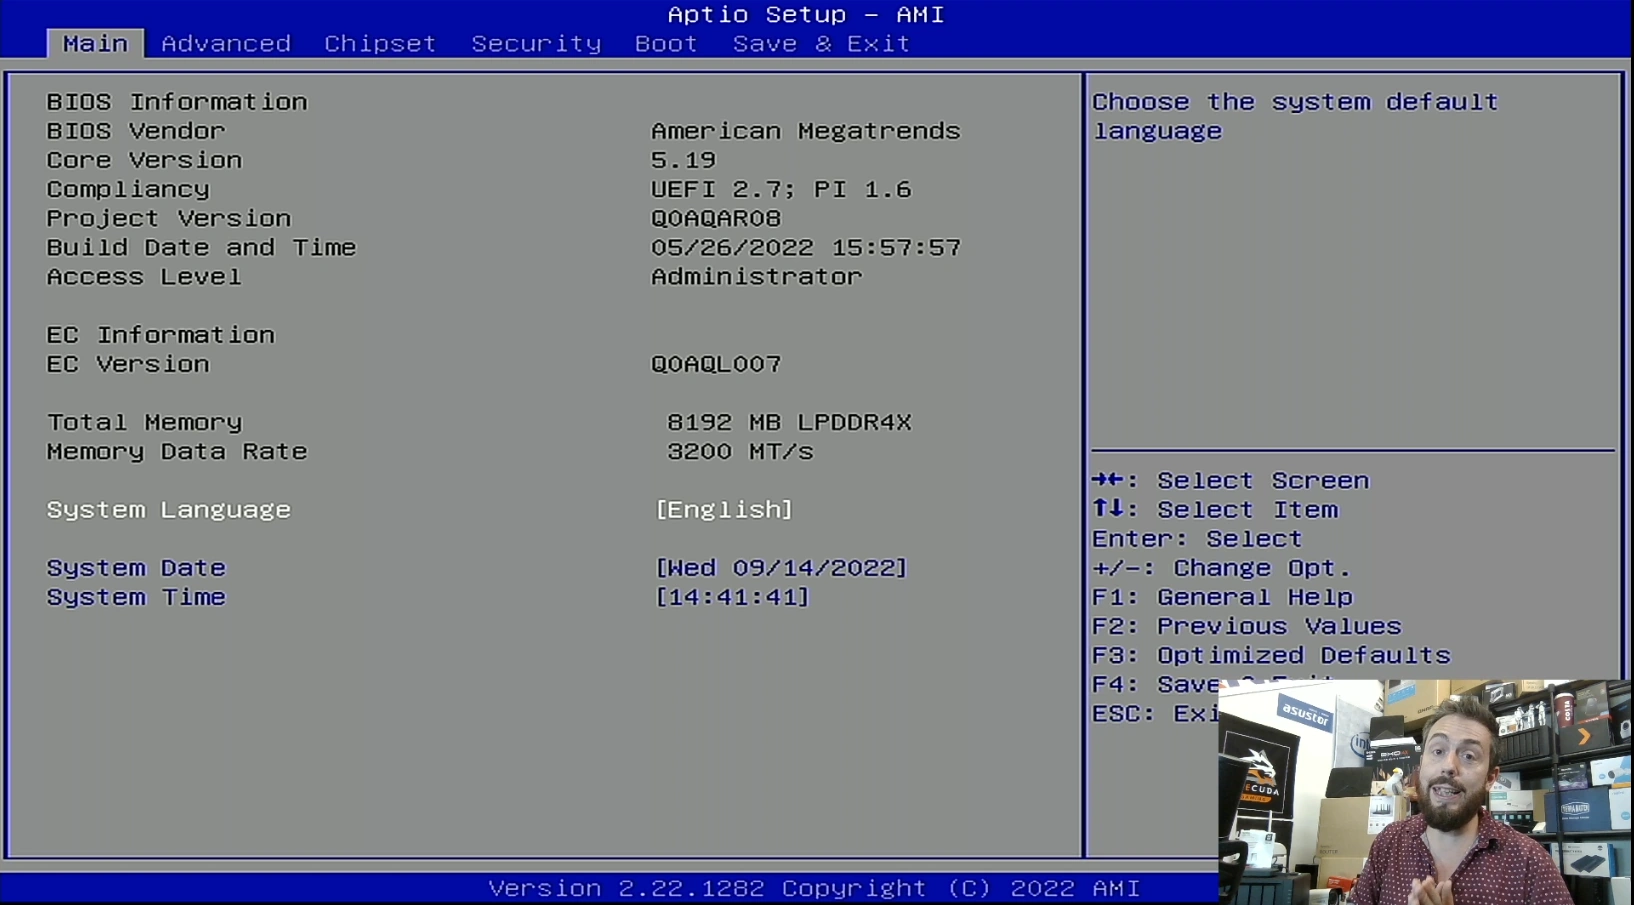
Now that your Jonsbo N2 NAS is all connected and you are ready at your keyboard/Monitor, turn the NAS on and wait till you hear a beep (should take between 5-15secs depending on the Jonsbo N2 NAS). As soon as your hear that noise (and likely see a flashing character or underscore on the monitor screen), you need to continuously hit the ESC / F12 / F2 and/or DEL keys (not at the same time, just back and forth). One of these will result in the system displaying the blue BIOS menu (it changes between motherboards and Jonsbo N2 uses a mixture of mobos in their Intel and AMD-powered systems). You need to be quick, as you only have about 3 seconds to do this before the Jonsbo N2 will automatically boot from the small internal 4GB/5GB flash OS module that boots into Jonsbo N2 .

UnRAID on a Jonsbo N2 NAS – Step 9, Booting from the New UnRAID Installer USB
When you are in the bios menu, tap right until you reach the ‘Boot’ menu. From here, you need to change the boot priority order and ensure that the USB Drive is in Boot Priority #1. This is because UnRAID loads and runs from the USB drive. Normally, the Jonsbo N2 NAS will boot from the internal SSD that contains the Jonsbo N2 OS by default (differs, depending on the board you bought from Topton, whether it inc an SSD and a pre-installed OS like pfsense, etc). When you are done, head into the ‘Exit’ tab using right and select save and exit. This should result in the system rebooting and you will be greeted with the UnRAID initialization page.


UnRAID on a Jonsbo N2 NAS – Step 7, Accessing the HDMI Port and Keyboard Control
Next, you need to start getting the system ready for Initialization and Setup. I would strongly recommend running the first-time installation via a direct interface with the Jonsbo N2 NAS over KVM locally connected. You will need to connect an HDMI Monitor/TV/Capture Card to the HDMI port of the NAS, a Keyboard (and/or mouse) to an available USB port) and then connect the power/network connections to the NAS and boot the device up.

After this method of connection (as it allows you to check everything is working), you can switch back to accessing the system over the network in future.

You have two options with how to access the configuration and controls.
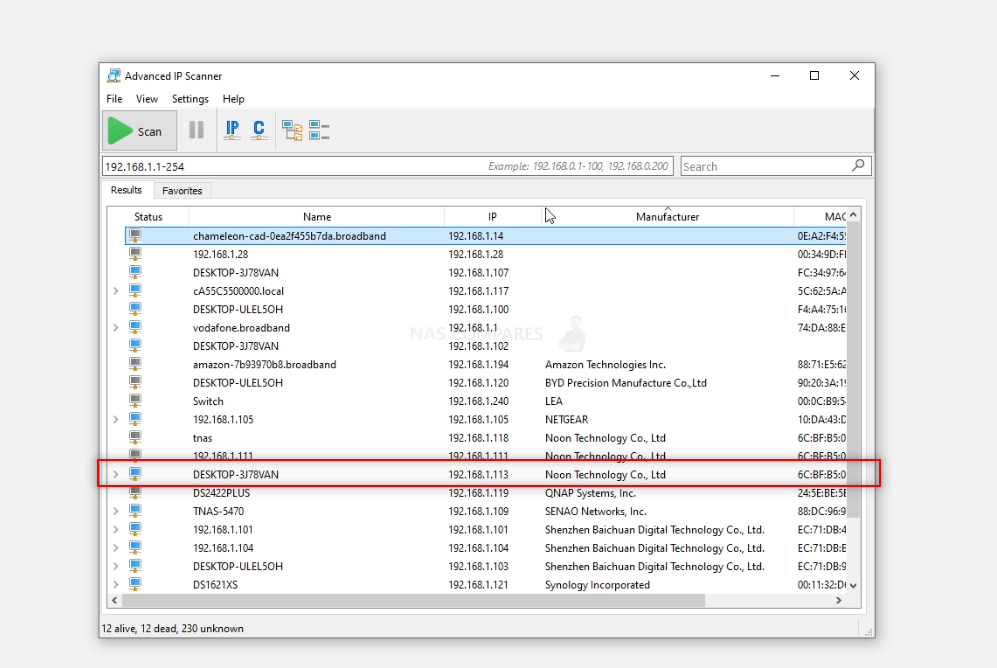

You can use the HDMI+Keyboard if you choose for console/command level access. Alternatively (much more recommended), use a program such as Advanced IP Scanner, which is free and VERY useful anyway, or even network command prompt) to scan your local area network and find where the Jonsbo N2 with UnRAID is located (i.e it’s IP).
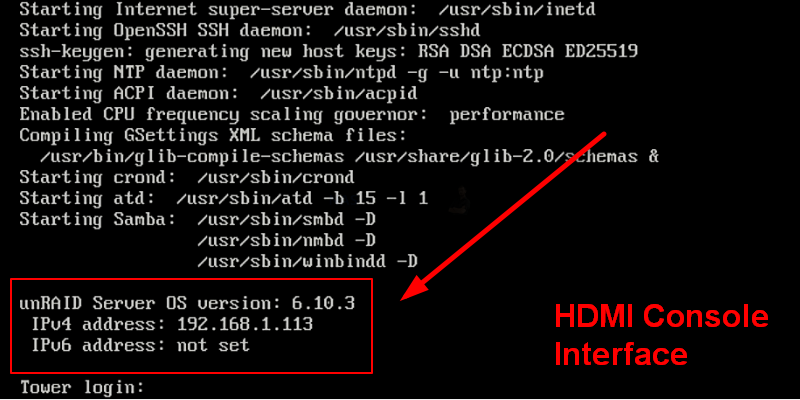

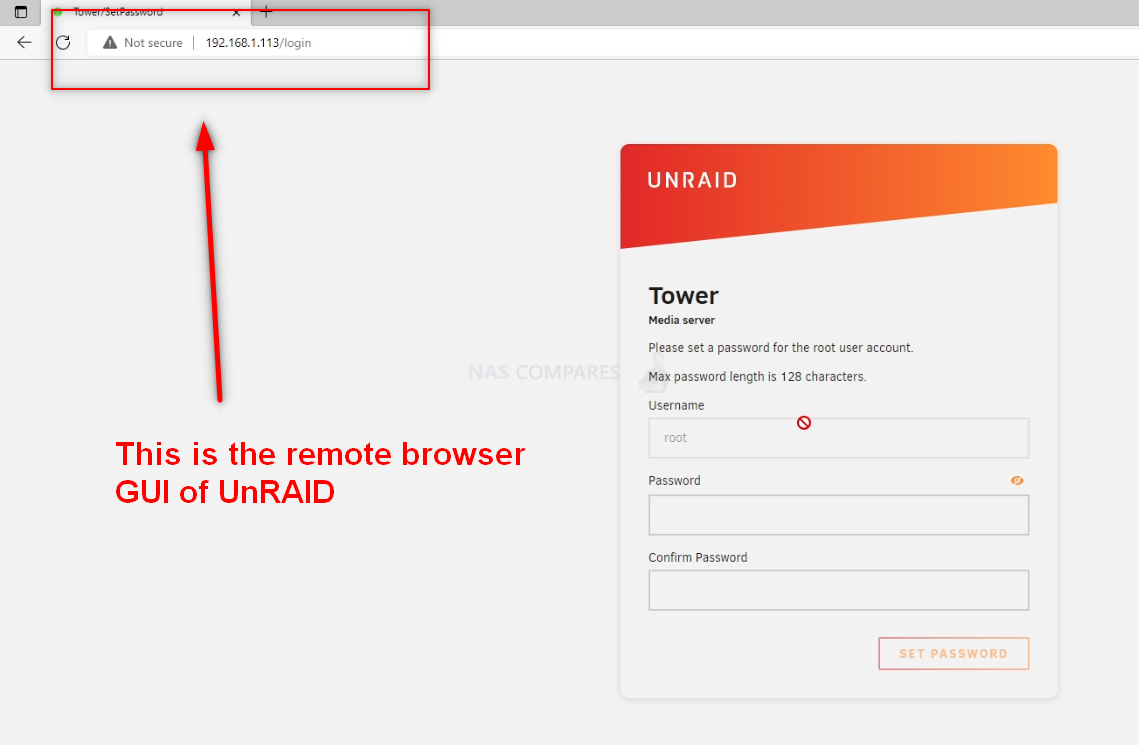
This IP (eg 192.168.1.113) is what you put into the URL bar of your web browser and it will load into the login GUI for UnRAID. From here you will need to use the username ‘root’ in combination with the password that you created during initialization.

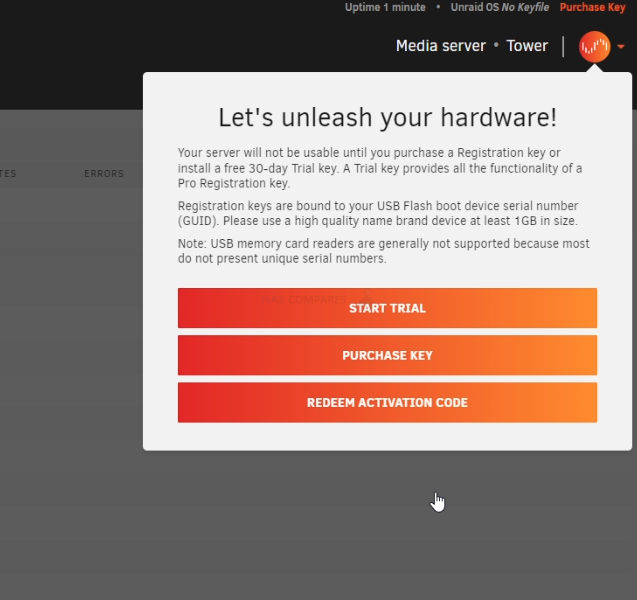
And that is about it. You now have UnRAID installed as the default OS of your Jonsbo N2 NAS. Now, it is worth remembering that UnRAID does require the use of a licence key in order to use all of the storage features. The type of licence you will need will be largely based on the scale of your storage (in terms of # of drives). However, you CAN go ahead and register for a free 30 day trial of UnRAID from within the GUI and get started.

From here you can do anything and everything that his highly regarded and exceptionally low resource-consuming server software offers. Head into the Storage area and start creating pools, as well as areas for caching and lots more features.
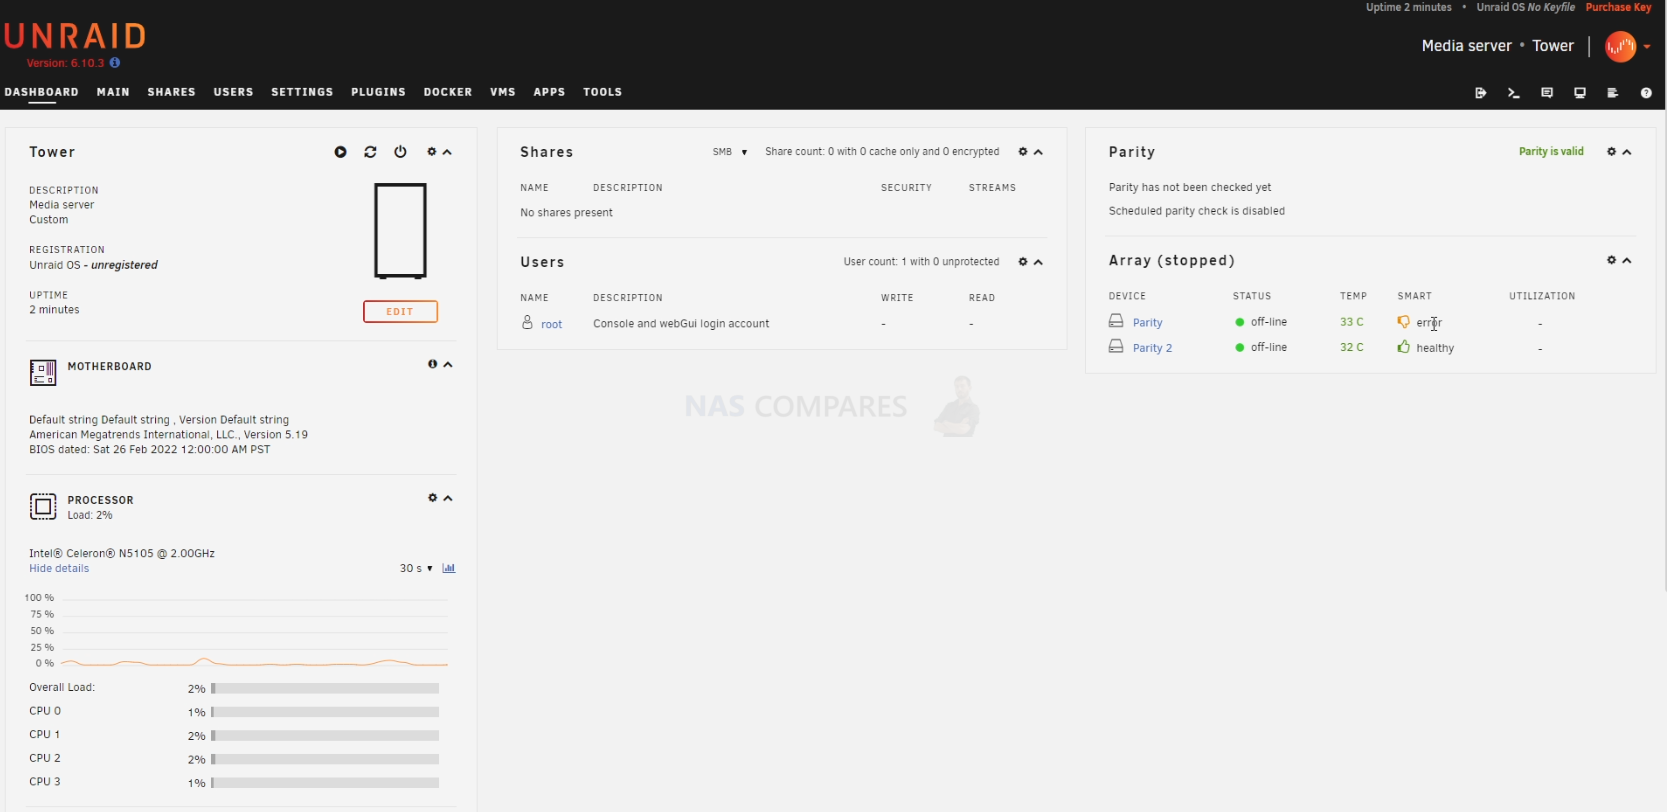

UnRAID was recently updated to ver.6.10.3 in a stable release of the massively portable format The first thing you are going to need to do when setting up your UnRAID > Jonsbo N2 NAS server is set up your storage. Do this by heading into the storage tab and following the handy steps on the screen. After that, you can pretty much do anything on your new lightweight NAS server!


TrueNAS Installation on the Jonsbo N2 NAS Build Setup Walkthrough (Optional)
For those leaning towards TrueNAS on the Jonsbo N2 NAS, keep in mind that TrueNAS requires more hardware resources. Thus, you might need to upgrade your CPU and memory. Follow these steps for the installation:
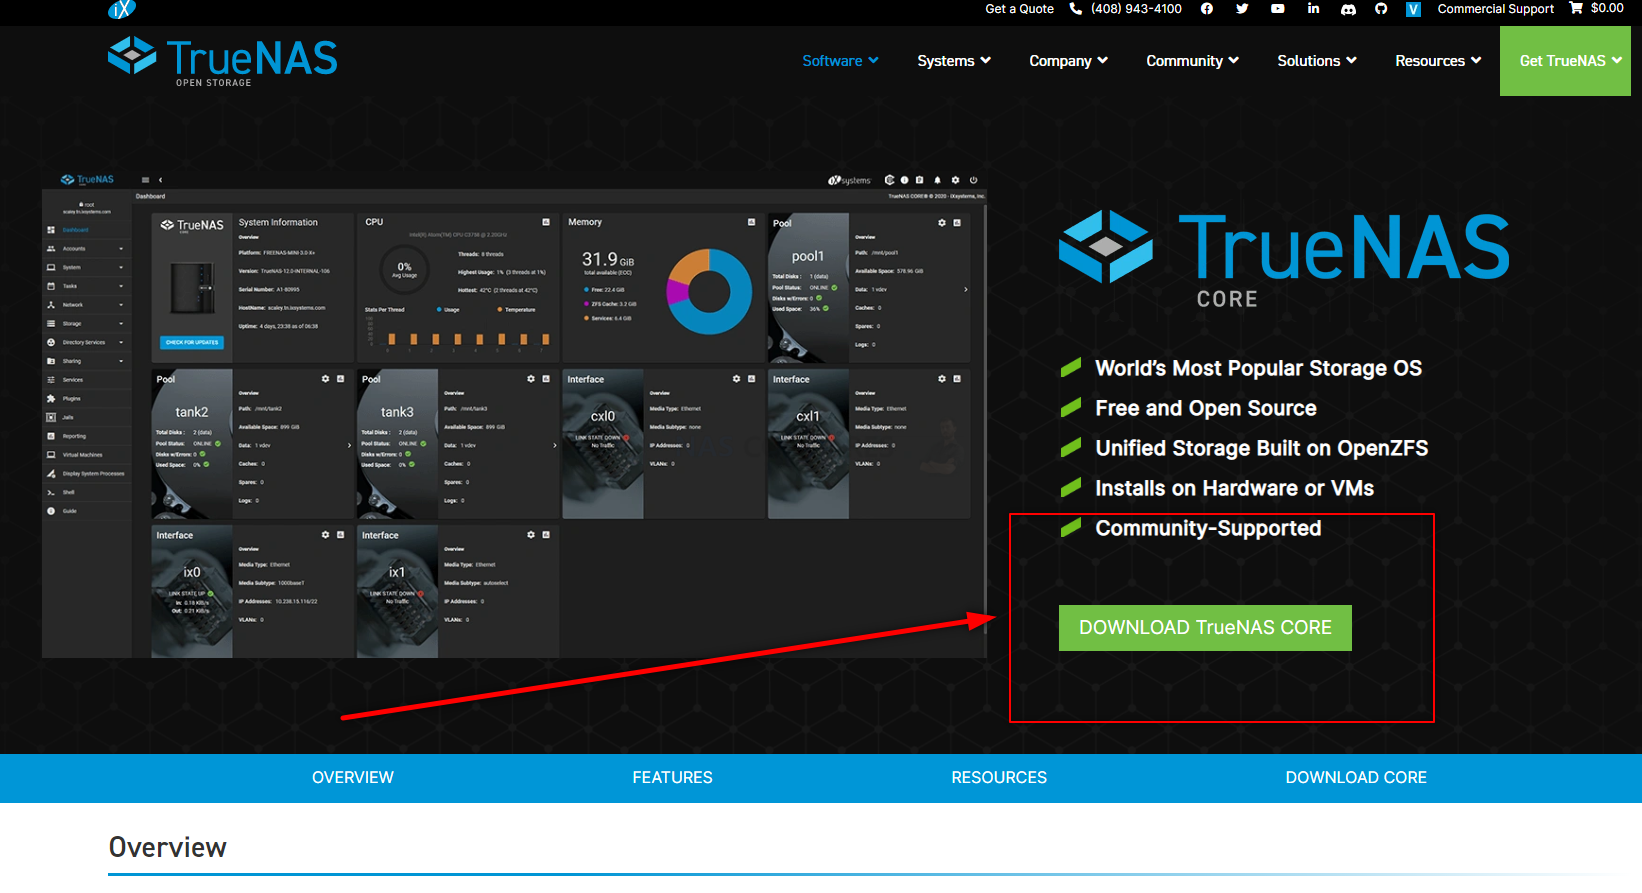
Head to the TrueNAS Core website HERE and download the latest stable release of the software to your local PC, Linux or Mac system. Make sure to remember where you downloaded it.

TrueNAS Core on a Jonsbo N2 NAS – Step 2, Download Rufus USB Image Tool
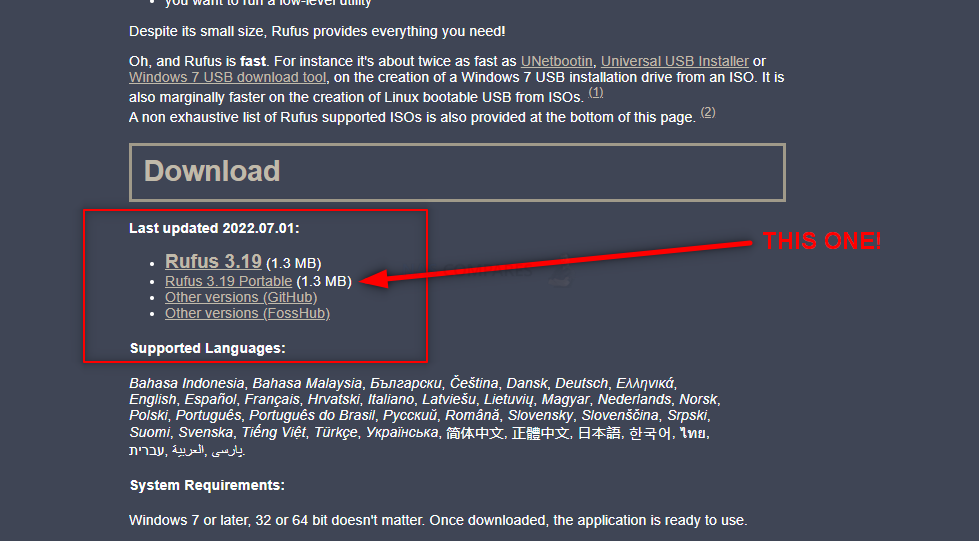
Head to the Rufus website and download the latest version of that tool – I recommend downloading the standalone executable file here, as then it will immediately run when you double-click the file, without installation etc. It may redirect you to Github, but it will be the same executable file. Once again, remember where you downloaded it.

TrueNAS Core on a Jonsbo N2 NAS – Step 3, Preparing the USB
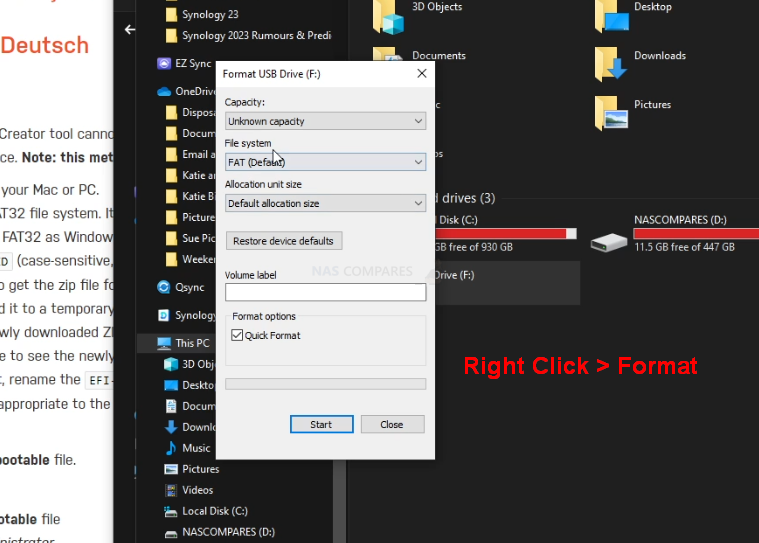
Connect the small form factor USB Drive to your system (again, this is the one I used from Sandisk) and after a few seconds, it should appear as an available USB Drive. The drive MAY need formatting (you will be prompted to do so), if that is the case, then you can format it via the system prompts and by default, it will format it to FAT32 (as long as your USB is less than 32GB). If you are not presented with a system prompt to format your USB, then you can head into My PC, or My Computer via a windows computer and right-click the drive, select ‘format’ and format it that way.

If you have used the USB for other things previously, there is a chance that the drive has existing partitions in place. For that, the quickest way to completely remove any partitions is to open up the bottom-left windows system menu as normal, and then just type diskpart and open the command-line GUI tool. From there, use the command list disk to show the available drives that are connected, you will see your USB (normally disk 1 or 2, but can differ depending on your system layout and can be spotted by the storage amount). From there, type select disk # (where # is the drive number that your USB is shown as) and then type clean, which will then remove any index structure for the drive (i.e the partitions and existing format) and then you can go back to the My Computer/My PC page and format the drive to FAT 32 as normal.
TrueNAS Core on a Jonsbo N2 NAS – Step 4, Creating a USB Installer Image of TrueNAS Core
Open the Rufus application and from there you will see the USB Drive (listed as NO NAME, or ‘UNTITLED’, ETC) at the top. From there, look to the select image/find image option (depending on the ver. of Rufus or your USB Image Creator tool of choice) and find the TrueNAS Core disk image you downloaded earlier). If the drive is not listed, it may have downloaded as a compressed/archive file. If that is the case, head to the location of where you downloaded TrueNAS Core (in your file explorer, not in Rufus) and right-click the file you downloaded. If the option to ‘extract‘ is visible, then you can extract it (i.e unpack it to the original form) in that same download directory. From there, head back into RUFUS and then the TrueNAS Core system image should be visible. Select it, then run the Rufus System image creator tool and create your USB bootable TrueNAS Core disk image.
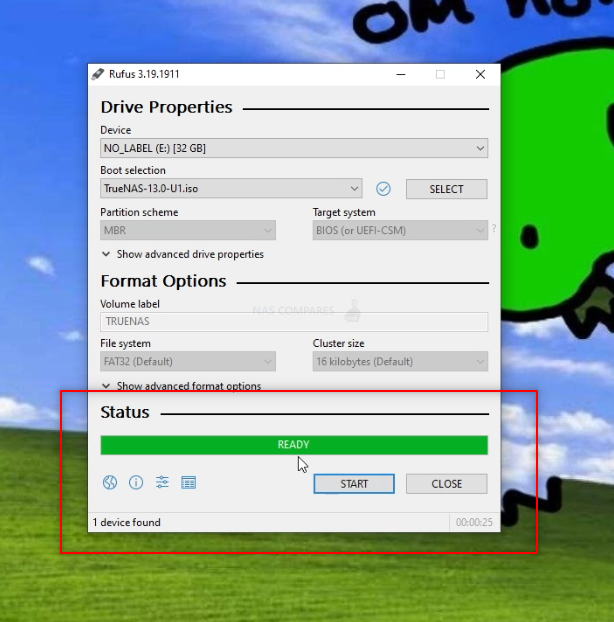

REMEMBER! This will completely format your USB drive and any files that are on that USB will be destroyed. The system image creator tool will turn the USB into a pure boot image tool – the USB will not be usable for traditional storage again unless you completely format it again.
TrueNAS Core on a Jonsbo N2 NAS – Step 5, REMOVE THE USB FROM YOUR PC!!!!!!!!!
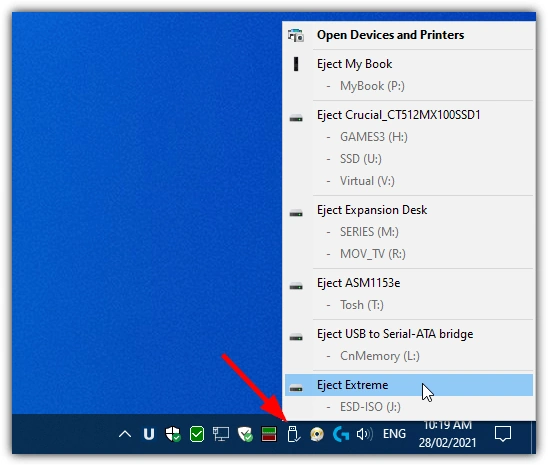
Really, really important and sometimes overlooked. Once the USB creation is completed, you need to remove the USB (using the eject hardware safely option at the bottom right of your windows machine taskbar as normal). DO NOT accidentally leave the USB in your USB Ports for any longer than necessary. If you leave it in and your system reboots at any point (eg in a normal ‘end of day shut down, go home, reboot tomorrow’ scenario), then the system might boot directly into the TrueNAS Core installation and although it is easy to exit from, it can change your system default boot preferences, maybe even remove your primary boot drive as the OS drive – requiring a little messing with a windows installation disk to change it back. The odds of this are very small, but not zero, so make sure to safely remove your USB drive when the TrueNAS Core system image creator tool is completed.

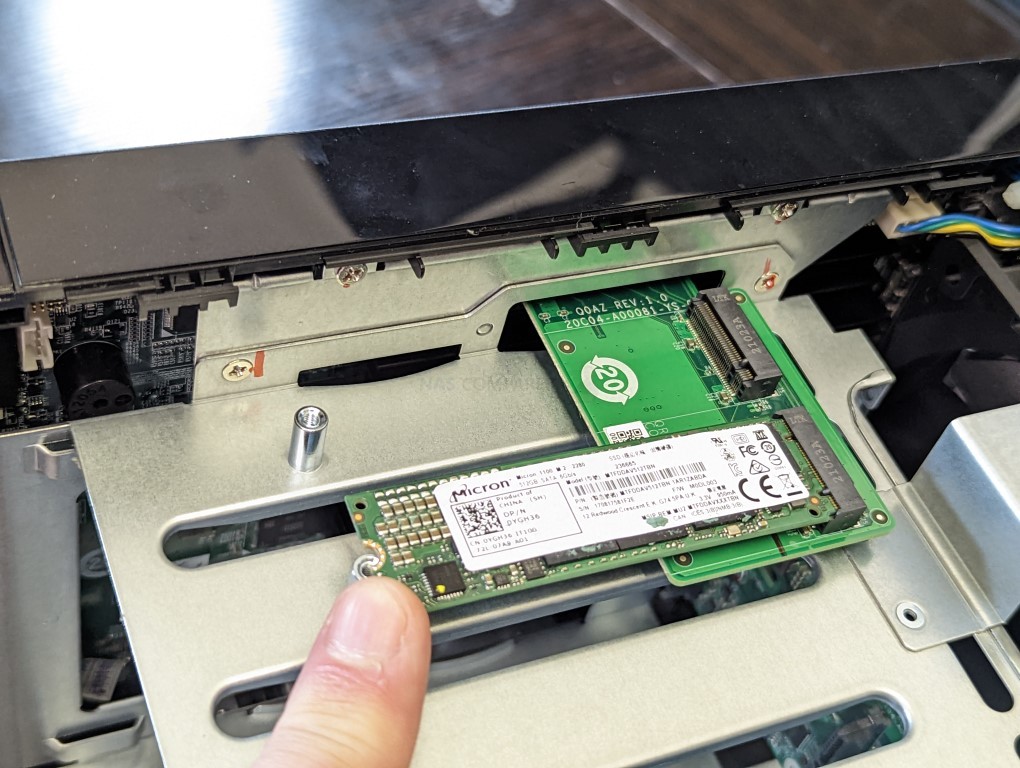
TrueNAS Core on a Jonsbo N2 NAS – Step 6, (OPTIONAL) – Install an NVMe SSD
This is an optional step, but one I would certainly recommend for newer-generation Jonsbo N2 NAS devices. TrueNAS is a lot like a traditional computer operating system (eg Windows or macOS) in it’s architecture and will run at its best when the necessary boot files are located on a seperate, smaller and faster area of SSD/flash storage away from the general bulk storage. So, if possible/available in your Jonsbo N2 NAS, I would recommend installing a smaller m.2 NVMe SSD drive and then using that as the target/location for your TrueNAS Core installation. This is not compulsory and you can also use a single HDD or SSD in one of the main storage bays of your Jonsbo N2 , however, it means that this drive will unusable for general storage (i.e in any RAID configuration or storage pool). This CAN be negated with some creative portion creation, but I wouldn’t recommend it. Additionally, do NOT try to install TrueNAS Core on another USB drive that is connected to the system – this isn’t particularly stable and tends to result in a poorer TrueNAS Core experience. M.2 NVMe bays and their location in the Jonsbo N2 NAS changes depending on the system. Reminder – TrueNAS is NOT a big program and you can use an SSD as small as 32GB and still have a tonne of provision for future storage space. However, M.2 NVMe SSDs are not available in smaller sizes than 120GB. Lower size than this and you will generally only find 2240 SSDs and/or SATA M.2 SSDs. These are still perfectly fine to use, but the performance difference between SATA and NVMe (PCIe) is HUGE! You can find many SSD options here on amazon for as little as $30 – Find Low Capacitiy and Low Price M.2 NVMe SSDs HERE on Amazon (already filtered the results)

NOTE – If you plan on upgrading the memory of your NAS to 4GB-8GB-16GB or higher (in order to use ALL of the features of TrueNAS Core to their fullest extent), I would recommend doing so at this point before rebuilding the physical chassis again, as many Jonsbo N2 NAS have the 2nd SODIMM memory slot in really tight locations.
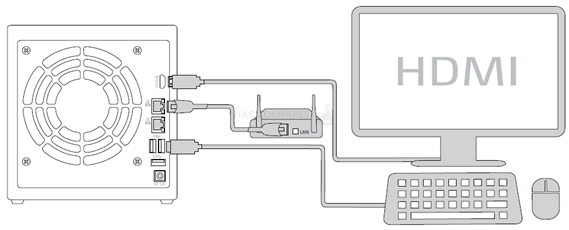
TrueNAS Core on a Jonsbo N2 NAS – Step 7, Connecting the USB, Keyboard and HDMI Monitor
Next, we need to connect the external means to install TrueNAS Core on the Jonsbo N2 NAS. Unlike when you set up your Jonsbo N2 NAS for the first time, TrueNAS cannot typically be installed via the network like QTS/DSM/etc. TrueNAS requires you to use a KVM (keyboard, Video Mouse – though you won’t need a mouse!) and go through the installation using a low-res graphical user interface. Now you will ONLY need this setup/items for the installation and initialization of your TrueNAS Core server and after that, you will be able to use the server over the network/internet as normal. You are going to need a basic USB Keyboard (not a Bluetooth or wireless one, as these may need drivers to run and you cannot install drivers at this point) and an HDMI Monitor/TV. You CAN use a mouse, but it is not hugely necessary and 99% of the choices in the setup of TrueNAS core can/will be via keyboard input. Also, I would also recommend connecting the NAS to the network during setup as this will allow the system to assume certain network values during setup that will save a tonne of time later. Once that is all connected, do NOT turn the NAS on yet – there is one small and slightly time-sensitive thing to do.

TrueNAS Core on a Jonsbo N2 NAS – Step 8, Accessing the BIOS Menu of your Jonsbo N2 NAS
Now that your Jonsbo N2 NAS is all connected and you are ready at your keyboard/Monitor, turn the NAS on and wait till you hear a beep (should take between 5-15secs depending on the Jonsbo N2 NAS). As soon as your hear that noise (and likely see a flashing character or underscore on the monitor screen), you need to continuously hit the F12 and/or DEL keys (not at the same time, just back and forth). One of these will result in the system displaying the blue BIOS menu (it changes between motherboards and Jonsbo N2 supports a mixture of mobos in their Intel and AMD-powered systems). You need to be quick, as you only have about 3 seconds to do this.
TrueNAS Core on a Jonsbo N2 NAS – Step 9, Booting from the New TrueNAS Installer USB
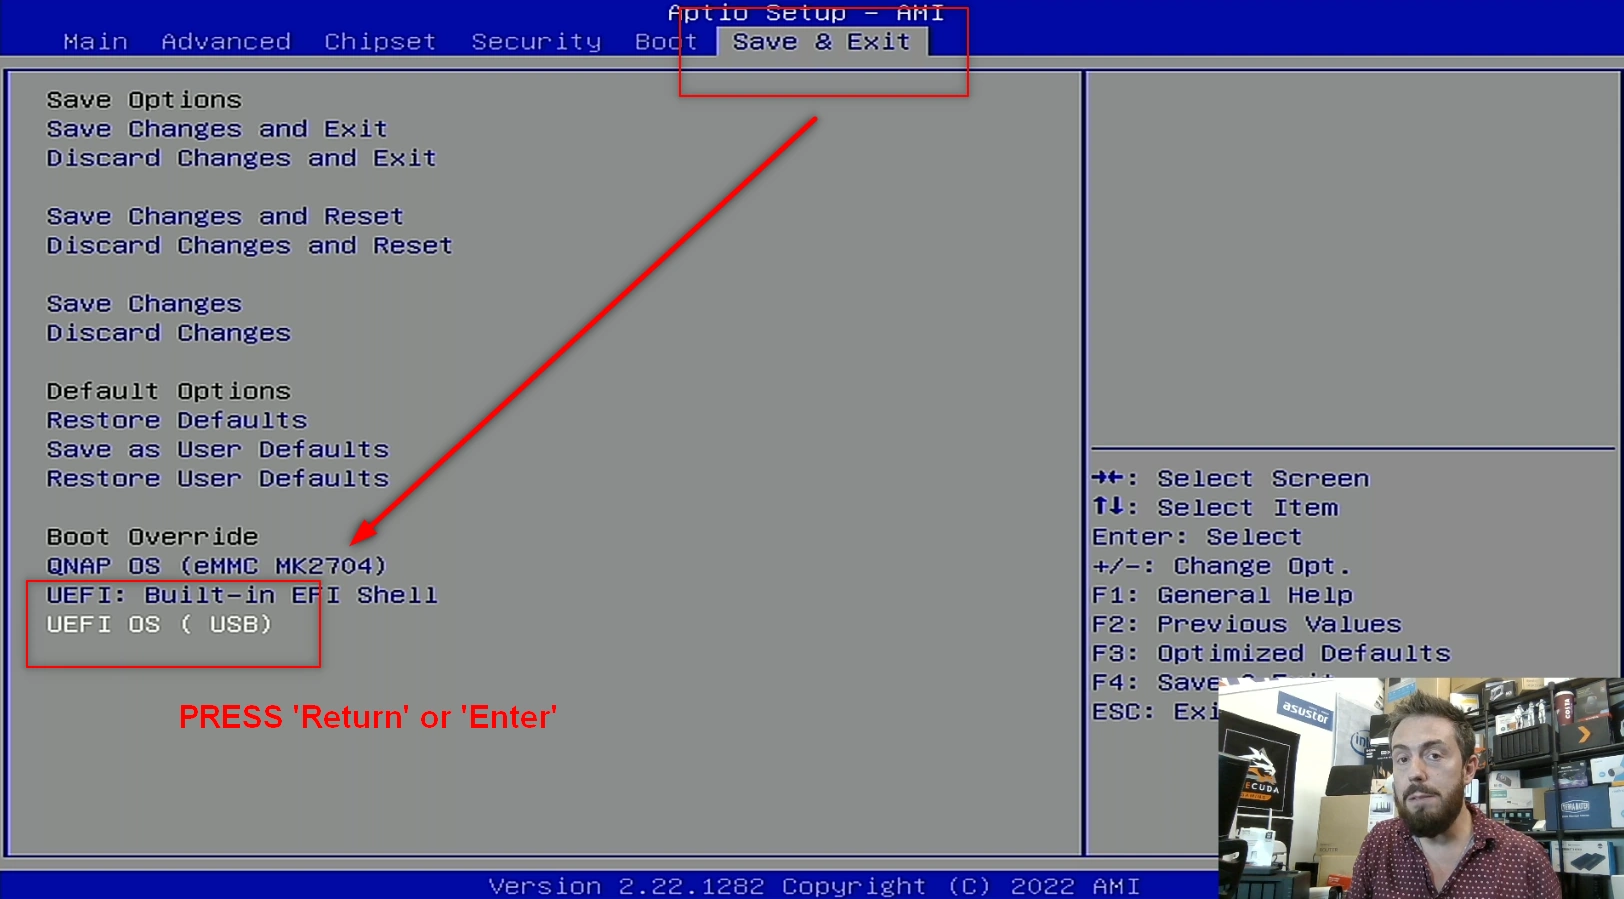
Next, you need to tap ‘RIGHT‘ on the keyboard and head to the ‘Save & Exit’ option. At the bottom, you should see, under the ‘boot override‘ option, your USB Drive. Tap ‘DOWN‘ until you are highlighting the USB and then tap ‘Enter‘ or ‘Return‘ on your keyboard, as this will push the Jonsbo N2 to boot from that USB and begin the TrueNAS Core installation. Later on I will show you how to force the system to ALWAYS boot into TrueNAS Core, but for now, we just need it to read from this USB this one time.

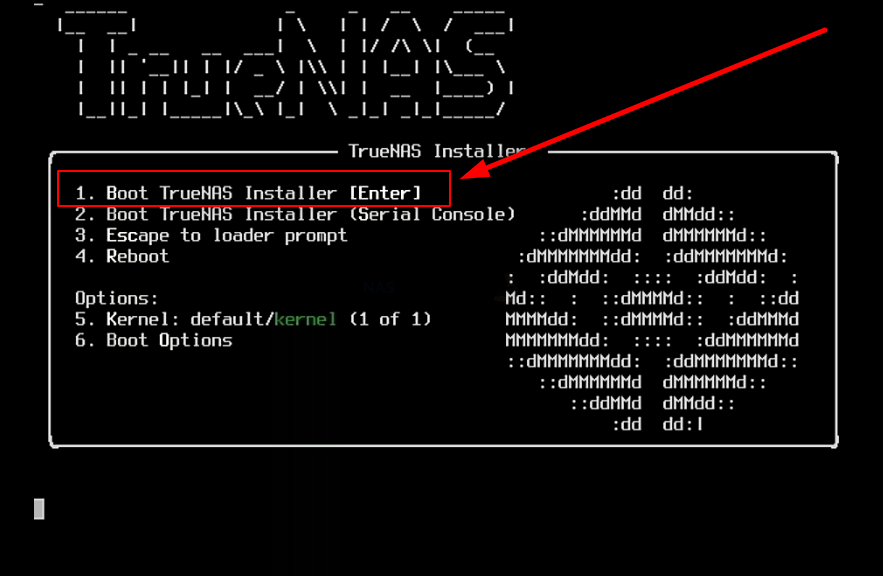
TrueNAS Core on a Jonsbo N2 NAS – Step 10, Rebooting and Starting the TrueNAS Installer
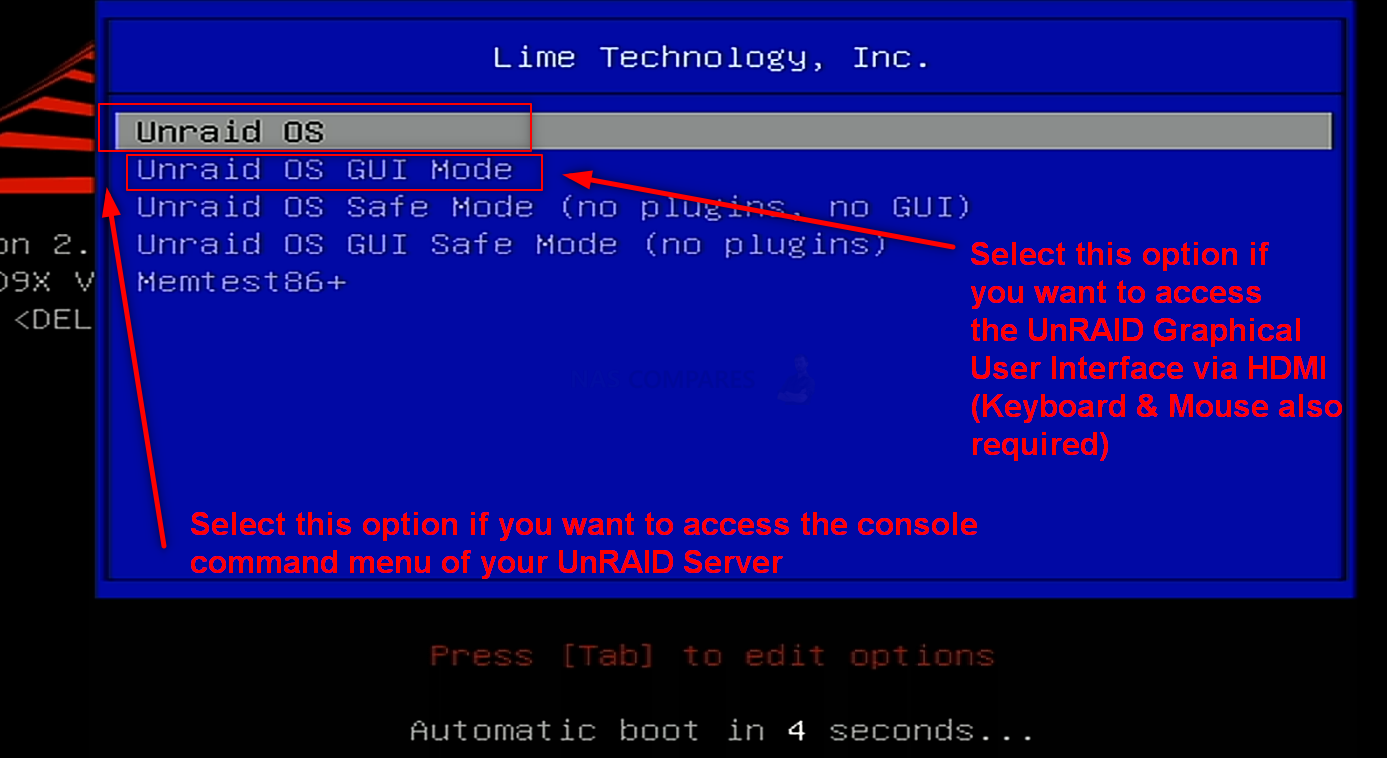
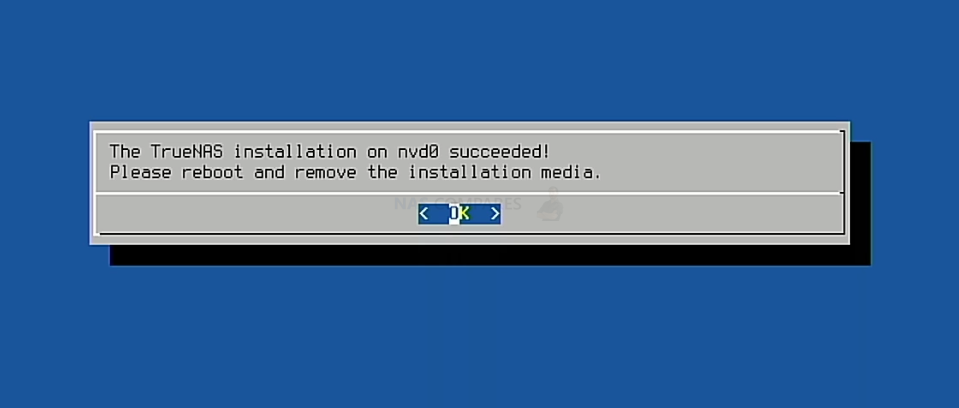
This next step is a bit of a quick one. Around 5-15 seconds after you selected the USB Drive in BIOS, the screen will display the TrueNAS Installer option page. Tap ‘Enter’ as soon as you see it, as the page is on a countdown and when it reaches zero it will (possibly, depending on the version) reboot and then you will have to repeat the last few steps again!), So, in order to avoid this, tap ‘ENTER‘ as soon as this page appears.

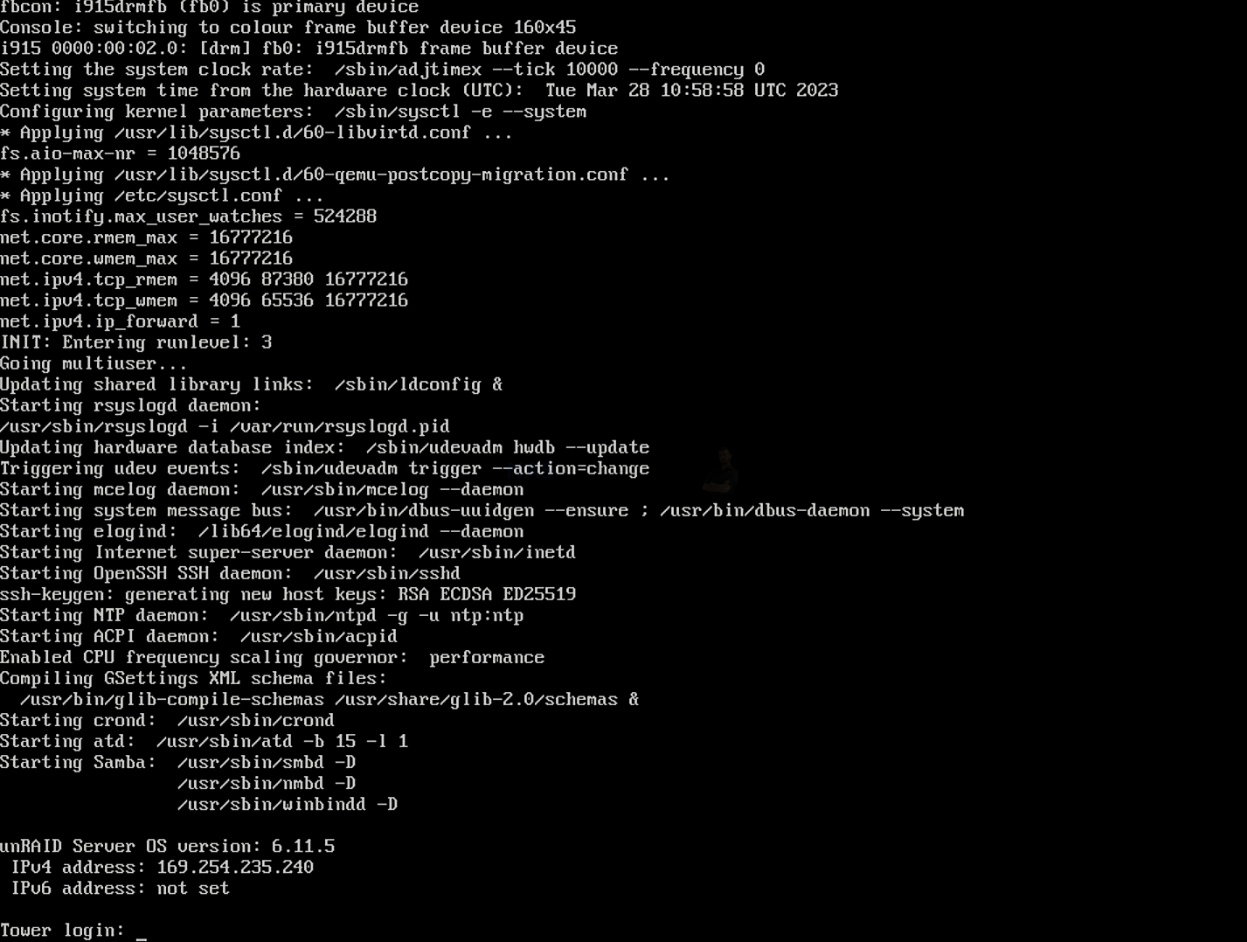
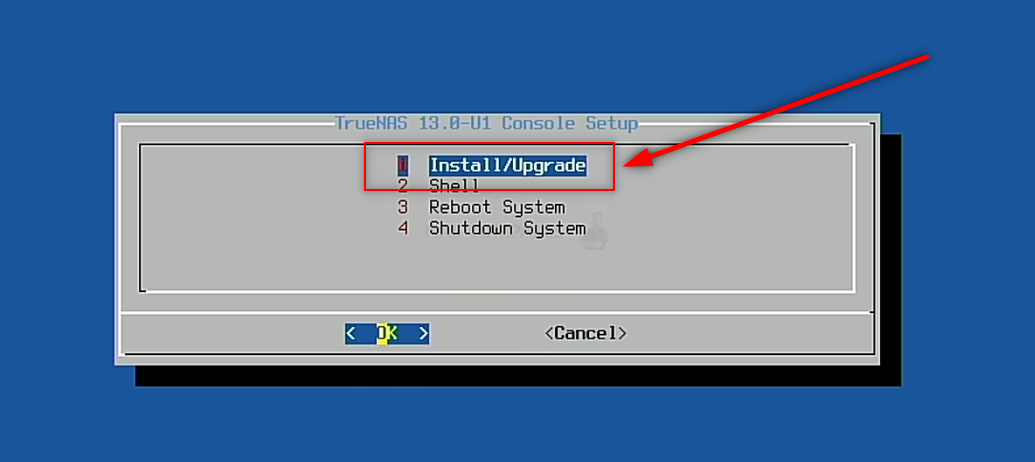
After a few minutes, the TrueNAS Core GUI/Command will appear on your monitor and all you need to do is navigate the config choices to set up your TrueNAS Core NAS the first time.

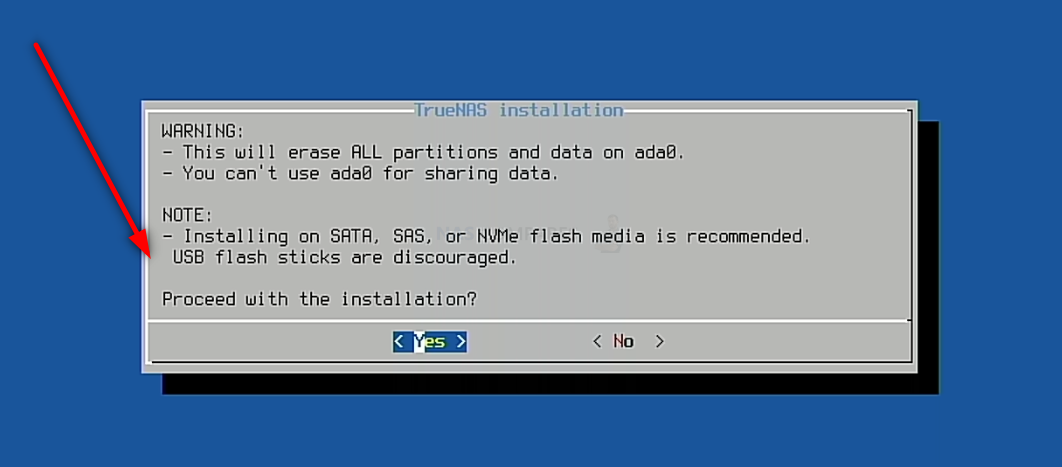
Important – TrueNAS Core runs at its best when it is run on a separate drive from your storage. Much like an Operating System, you can install TrueNAS Core on an available SSD in a SATA or NVMe SSD slot in the Jonsbo N2 NAS, then (after initialization) you can go into the TrueNAS Core > Storage area and create a pool of storage using the available storage media bays,


It is NOT recommended that you install it on a USB drive, for reasons of speed and power-connections.

After you have completed the setup and are back at the initial TrueNAS Core boot menu, select the ‘SHUTDOWN‘ option (not reboot/restart, for reasons I will explain in a moment).
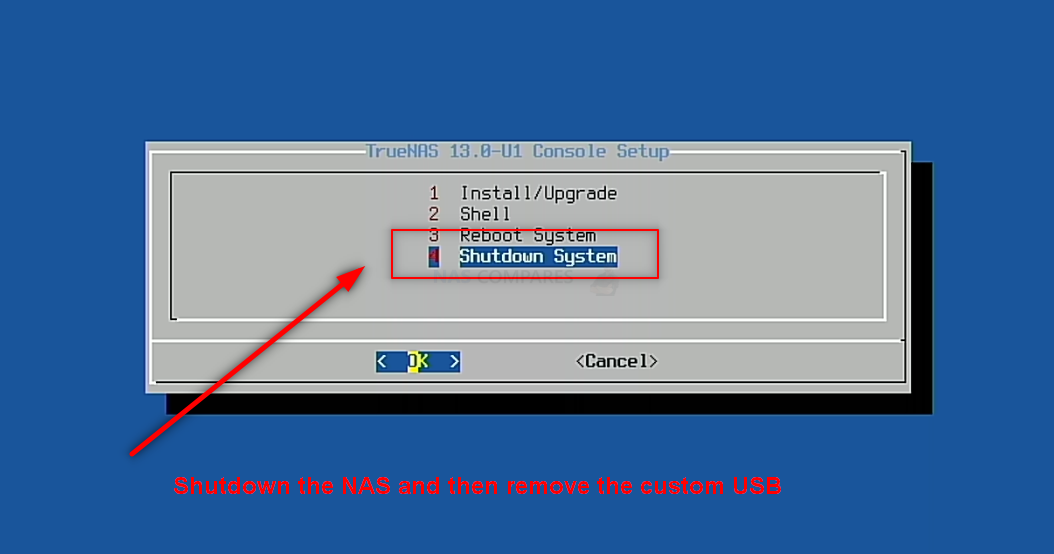

TrueNAS Core on a Jonsbo N2 NAS – Step 8, Remove the Boot USB Drive AND CHANGE BIOS!!!
Once your Jonsbo N2 NAS has fully powered down, you need to disconnect the USB drive you installed earlier with TrueNAS Core boot loader on it. You need to do this otherwise, when you reboot the Jonsbo N2 NAS, it can potentially reboot into the bootloader again. You can skip past this and/or it will not action a reinitialization without your input, but better to remove the USB and therefore allow the system to always immediately boot into the TrueNAS Core system you just created.

Next, you need to head back into the BIOS from earlier. Keep the Keyboard and HDMI Monitor connected and use the same method you used earlier during the initial boot of the Jonsbo N2 (pressing F12 and/or Delete repeatedly when you hear the first Jonsbo N2 beep after about 10-15 secs) and as soon as you are greeted with the familiar blue BIOS screen. From here, tap right a few times to highlight the ‘Boot’ option and change the option for Boot Priority #1. The default is Jonsbo N2 OS, you need to change it to the drive you installed TrueNAS on (whether that is a SATA/NVMe SSD or one of the main storage bays).
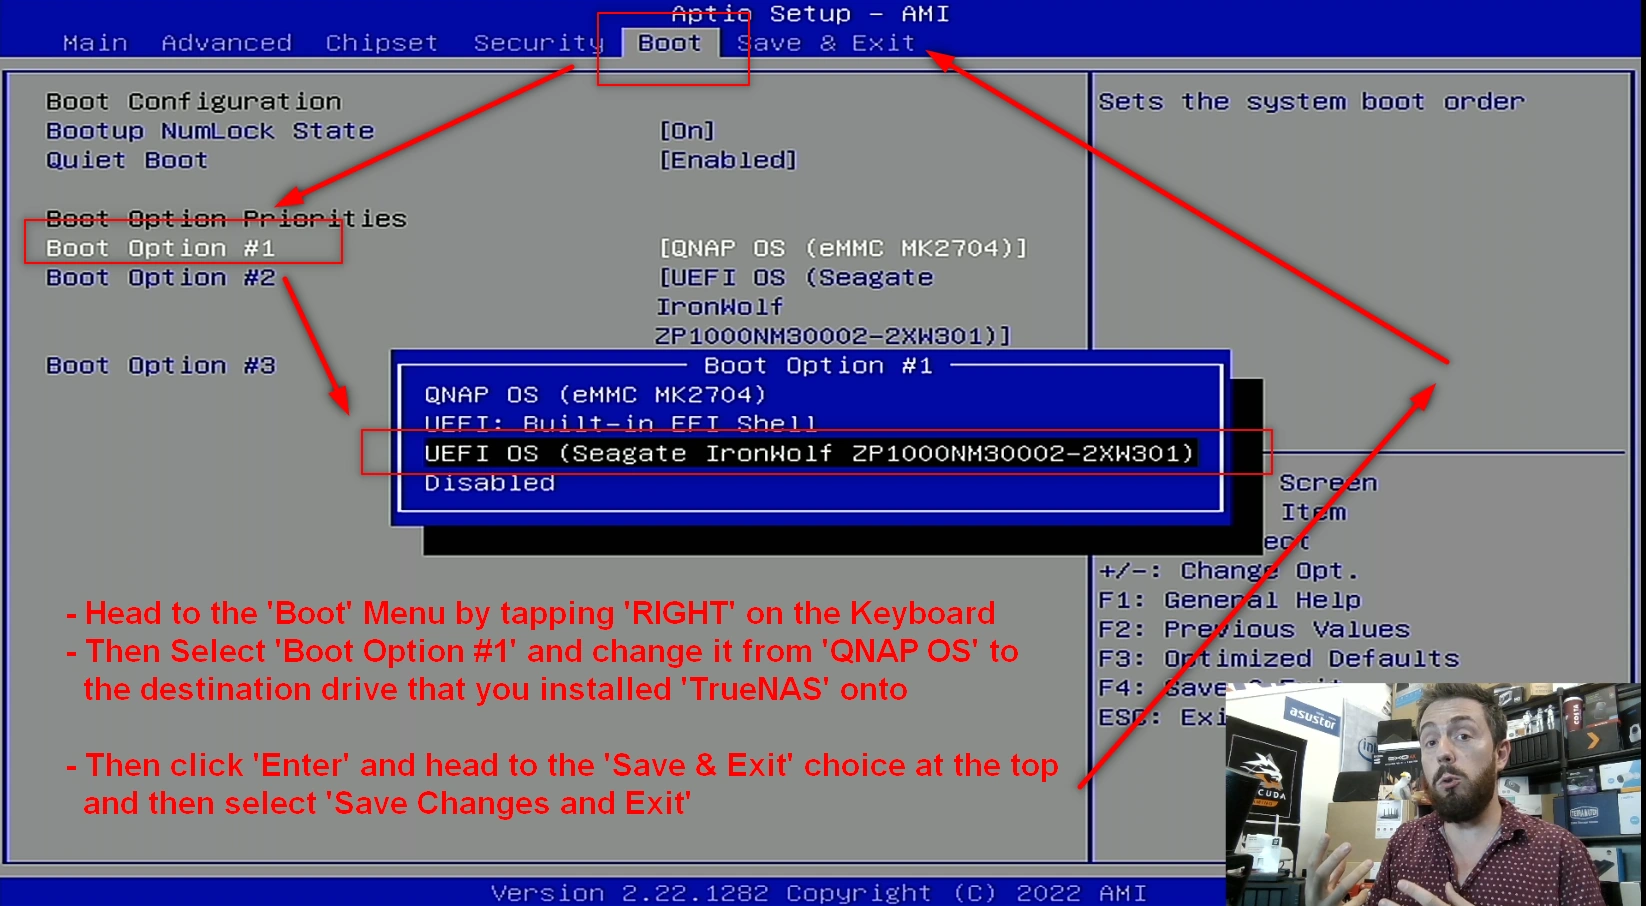

This will change the boot order to allow the system when it is first powered on to always boot into TrueNAS. After this, you can click right again in the BIOS menu to select the option to Save and restart. The system will then boot into the TrueNAS initialization (first time setup).
TrueNAS Core on a Jonsbo N2 NAS – Step 9, Reboot the NAS
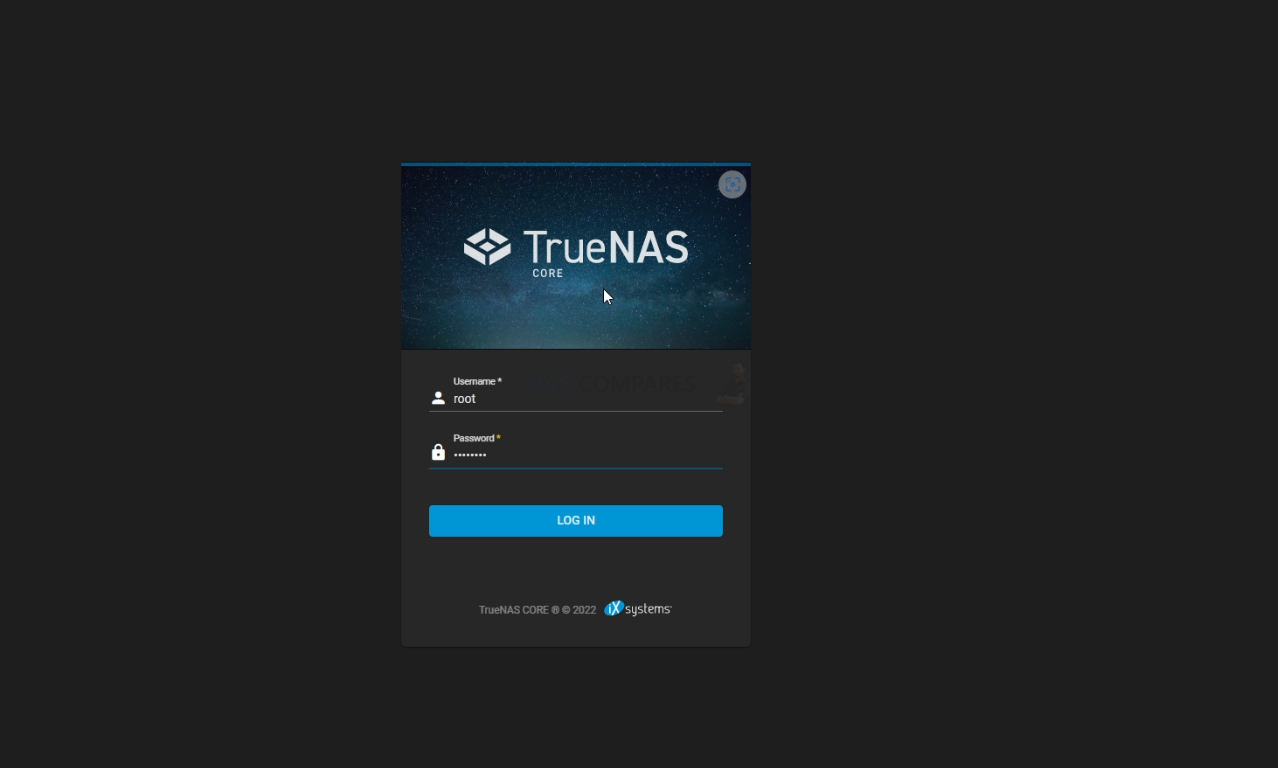
Upon rebooting the Jonsbo N2 into TrueNAS Core (can take up to 5 mins, but usually much quicker). You have two options with how to access the configuration and controls. You can use the HDMI+Keyboard if you choose for console/command level access. Alternatively (much more recommended), use a program such as Advanced IP Scanner, which is free and VERY useful anyway, or even network command prompt) to scan your local area network and find where the Jonsbo N2 with TrueNAS Core is located (i.e it’s IP). This IP (eg 192.168.1.111) is what you put into the URL bar ofay web browser and it will load into the login GUI for TrueNAS Core. From here you will need to use the username ‘root’ in combination with the password that you created during initialization.

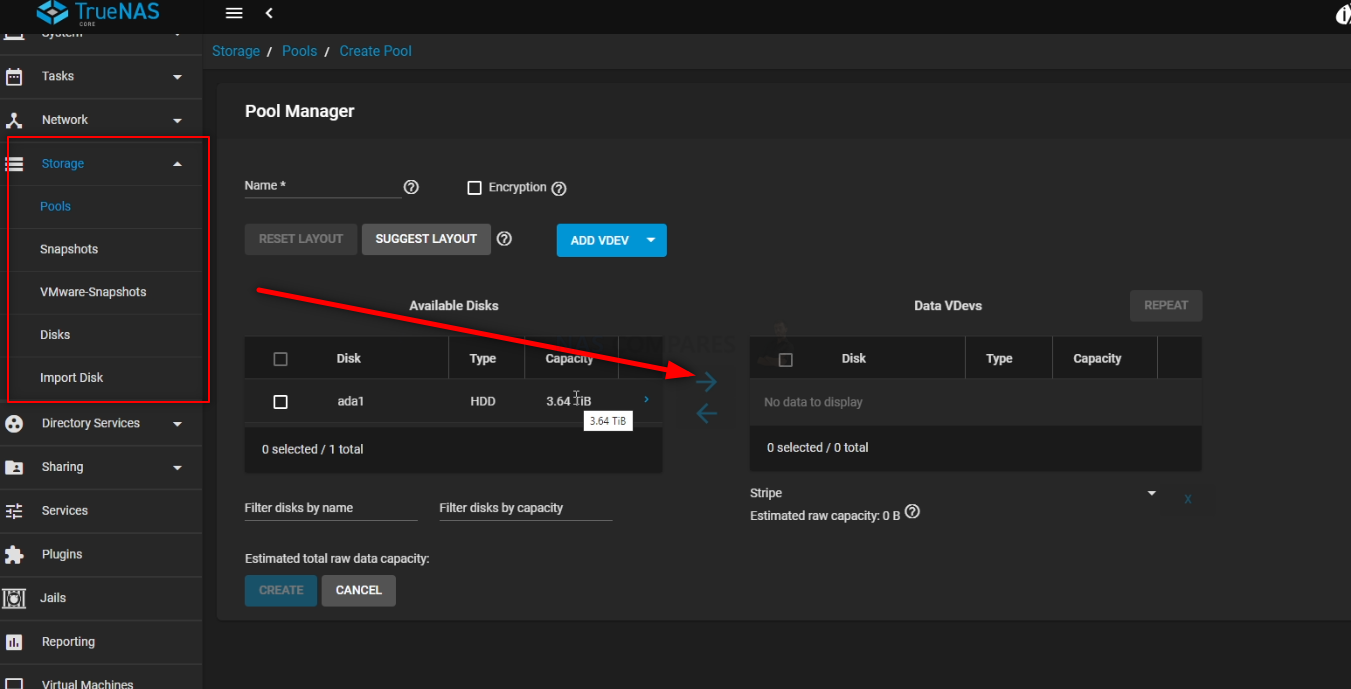
And that is about it. You now have TrueNAS Core installed as the default OS of your Jonsbo N2 NAS. From here you can do anything and everything that his highly regarded ZFS powered server software offers. Head into the Storage area and start creating pools, as well as areas for caching and lots more features.
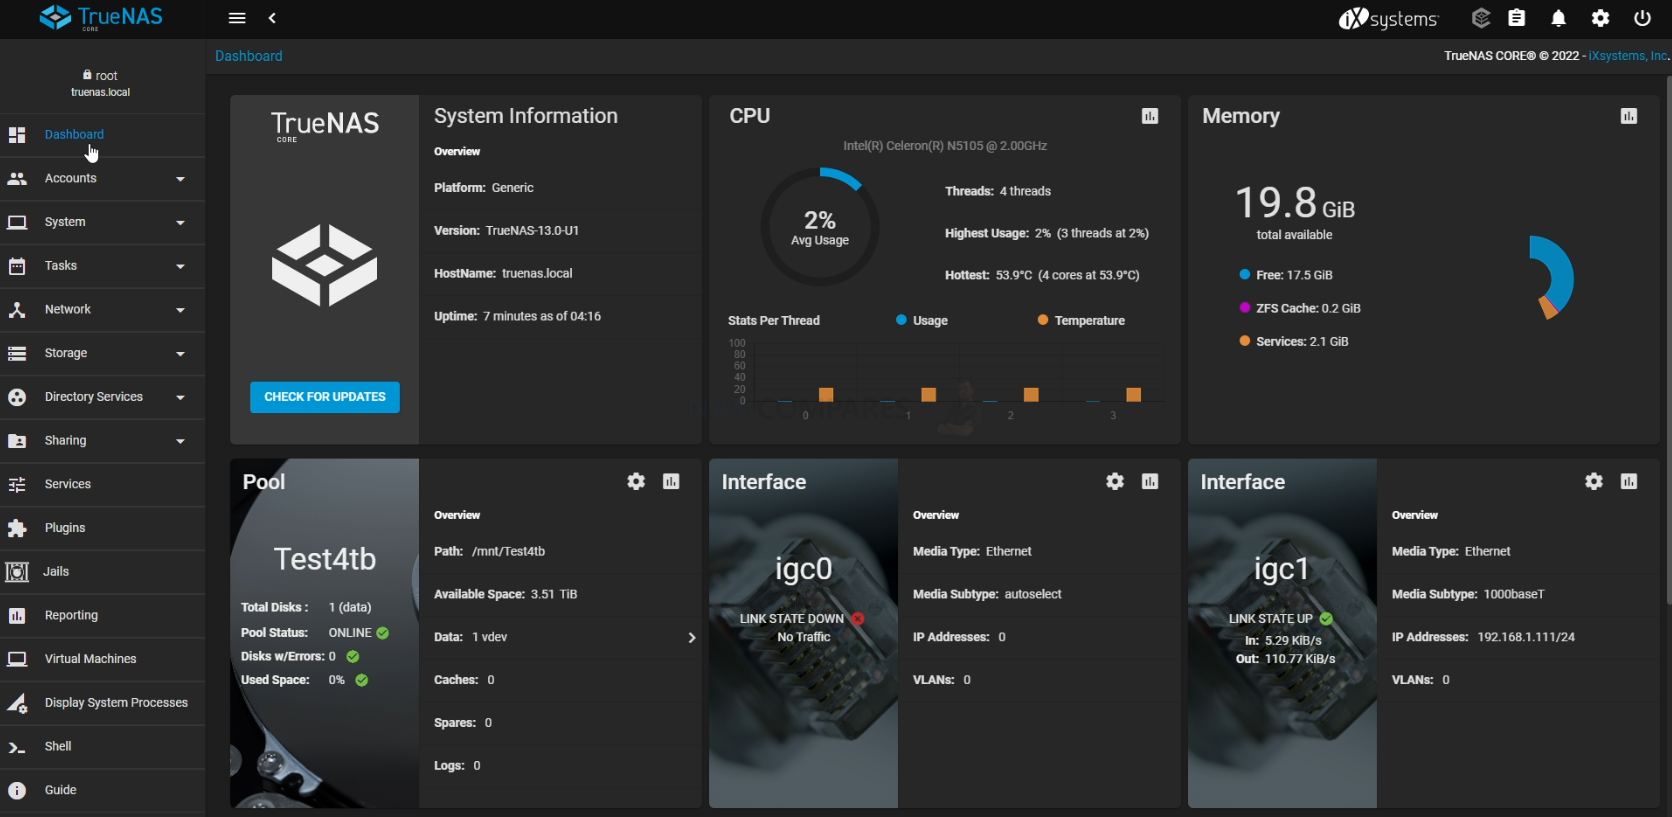

TrueNAS was recently updated to ver.13 in a stable release of the FreeBSD format, as well as new improvements in the Linux-based version ‘TrueNAS Scale’. The first thing you are going to need to do when setting up your TrueNAS Core > Jonsbo N2 NAS server is set up your storage. Do this by heading into the storage tab and following the handy steps on screen. After that, you can pretty much do anything on your new ZFS NAS!

You can find out more about TrueNAS in my full review below that covers everything I like and dislike about the platform:

Jonsbo NAS DIY Vs Synology and QNAP? Better or Worse?
The perennial question for many tech enthusiasts: how does a custom-built NAS stack up against pre-packaged solutions like Synology and QNAP? The decision largely boils down to convenience vs. cost. For individuals who prioritize convenience and have a bit more to spend, a pre-assembled NAS from brands like Synology and QNAP offers an attractive package. With everything set up out of the box, from hardware to software, and a unified warranty, it’s a hassle-free solution. On the other hand, for those with a tighter budget, technical knowledge, and time on their hands, a DIY NAS like the Jonsbo N2 offers an economical alternative. The detailed Jonsbo N2 build listed in the guide above provides a 5-6 bay NAS system with an Intel Celeron processor popular in the server market, 4GB of DDR4 memory, 4x 2.5 G LAN ports, M.2 NVME support, an unused PCIE slot for 10GbE additions, and KVM capabilities. Factoring in all components, delivery, and a lifetime UnRAID license, the entire build costs roughly £350. Here’s a price breakdown:
Hardware:
- Topton N5105 NAS Motherboard – £149.37 (with 4GB Memory + 120GB NVMe Included – £127.72 Bare)
- Jonsbo N2 5/6 Bay NAS Case – £74.60
- SATA 6 Cable Fan/Multi-Cable – £11.59
- SFX 250W PSU – £25
Total = £260.56 with 4GB Memory + 120GB SSD (£238.91 without SSD/Memory)
Additional (i.e. optional/flexible):
- + $59-89 for UnRAID Basic/Plus License HERE
- + $0 for TrueNAS Core/Scale
- + $7 for a 32GB USB
- +£29.40 Delivery to UK
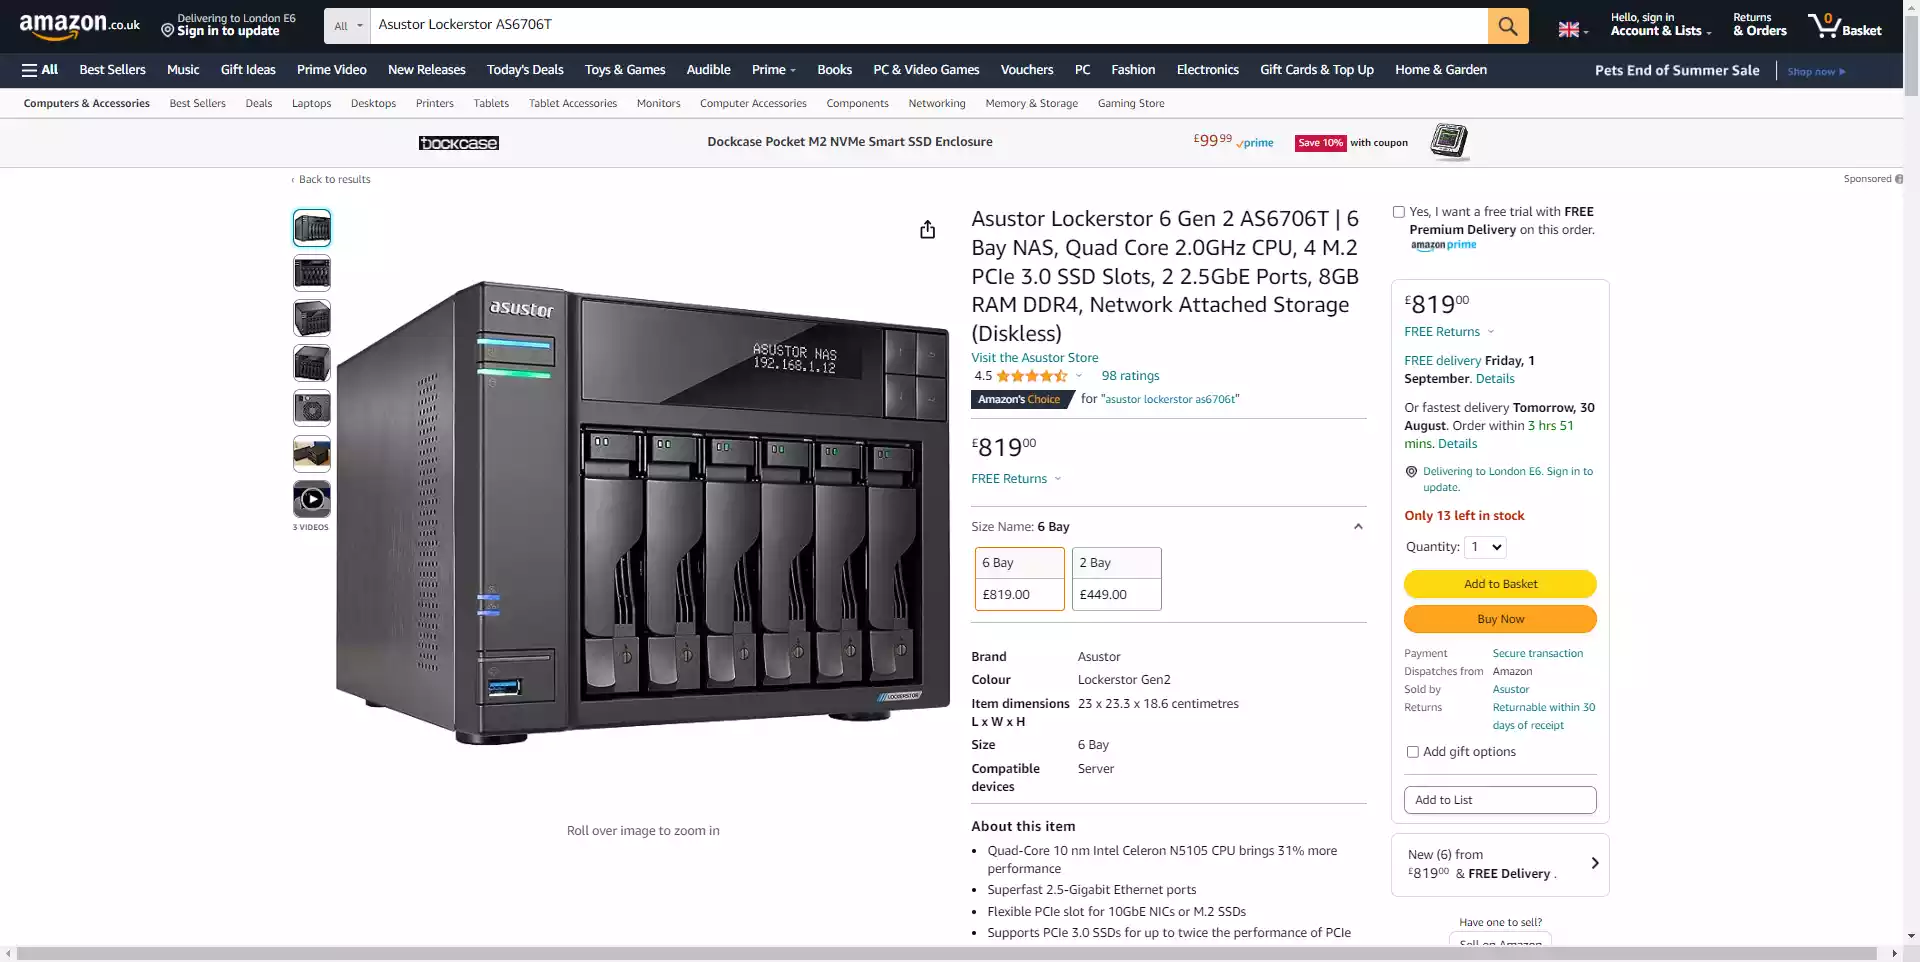
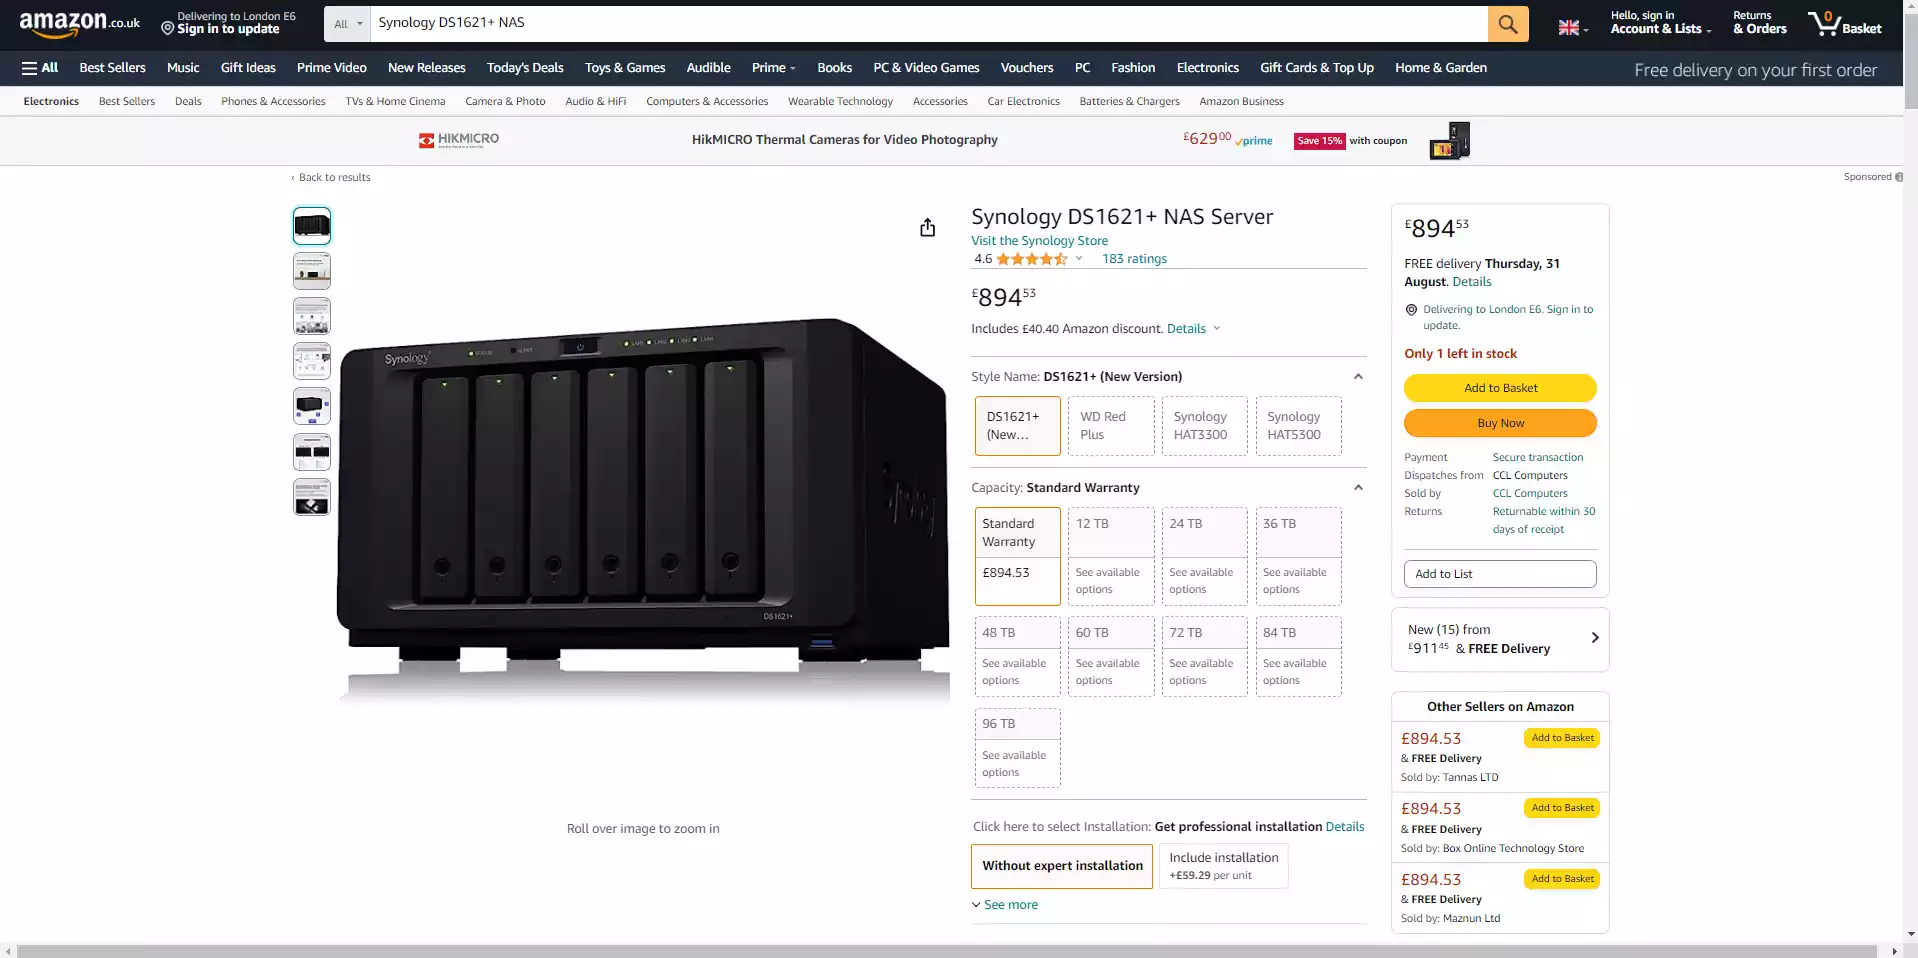
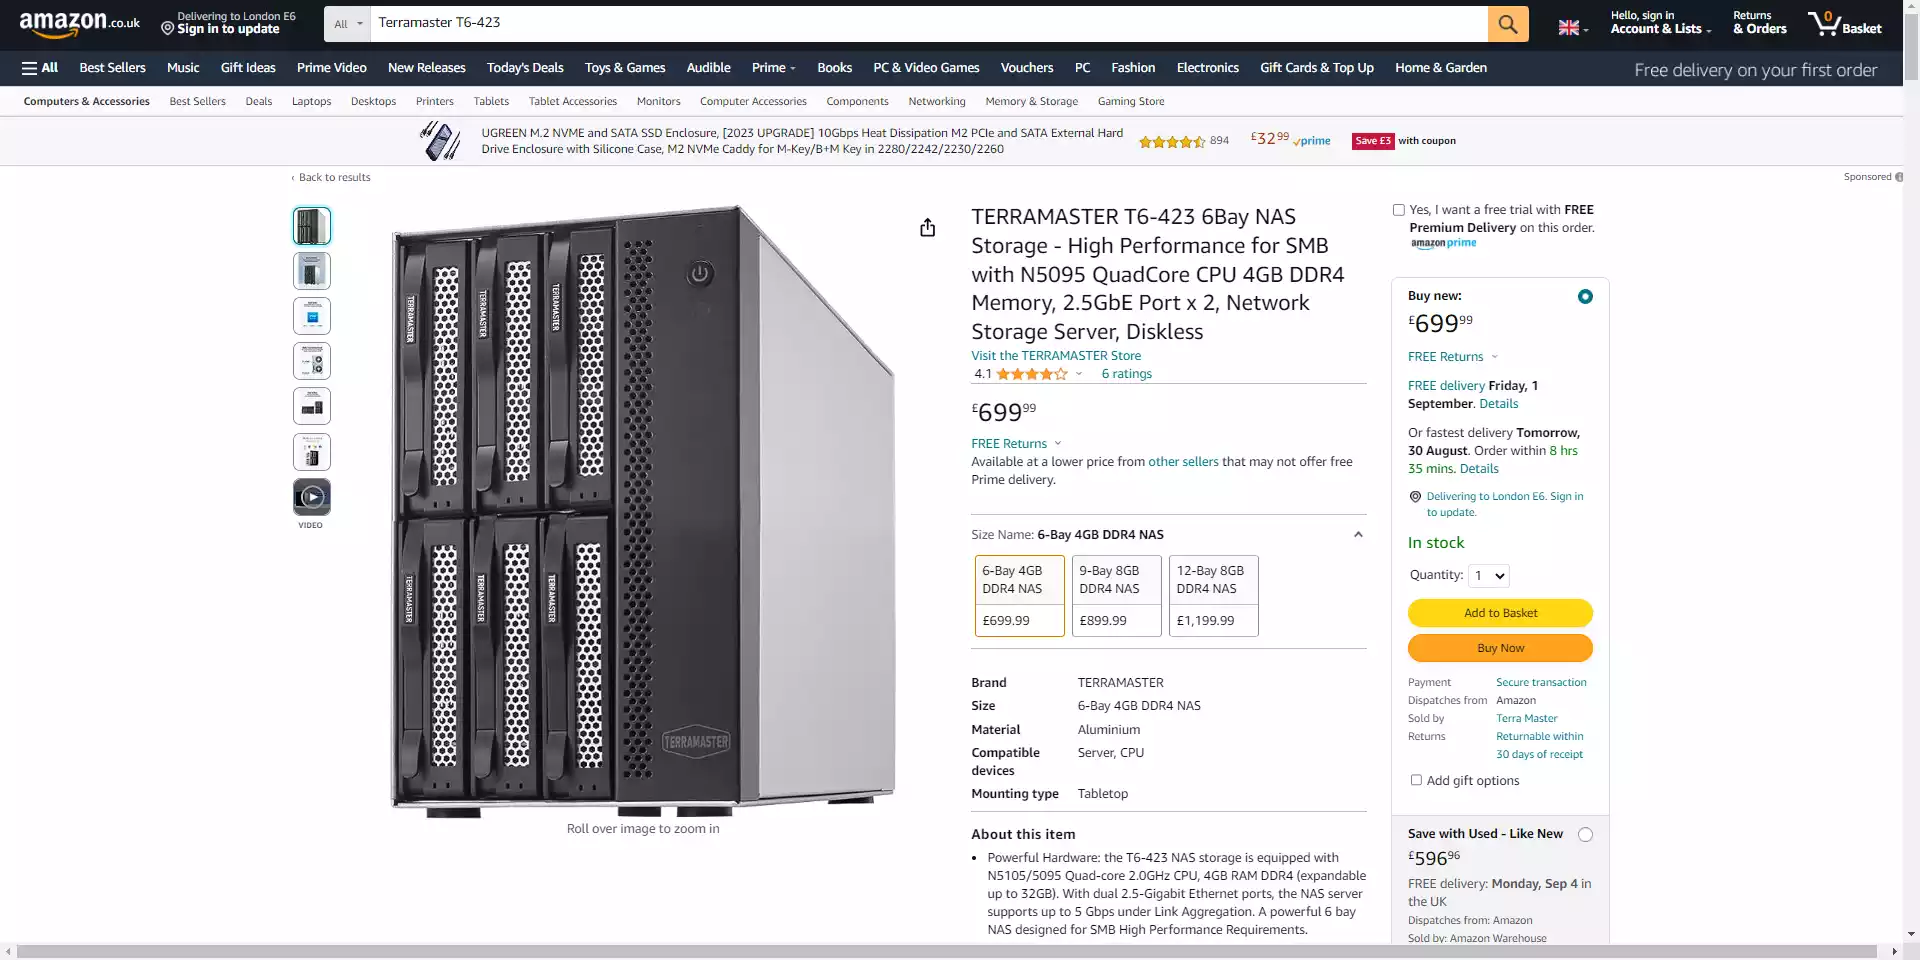
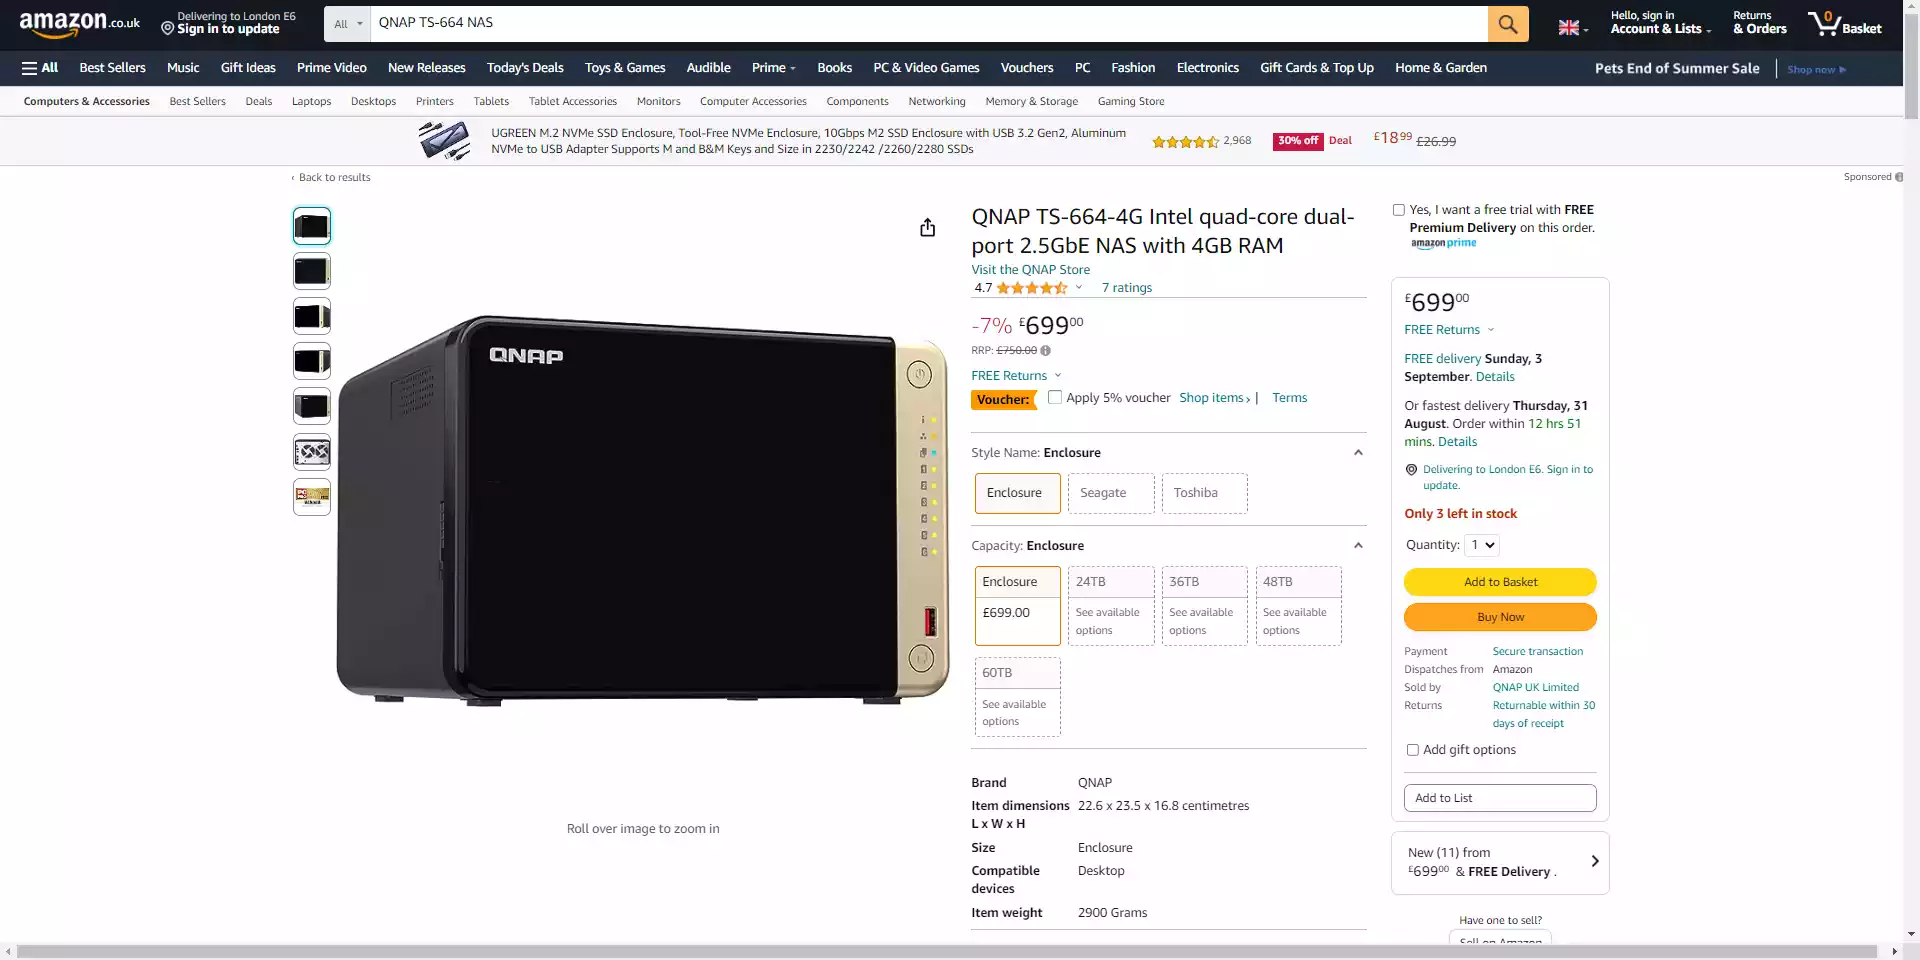
For comparison, acquiring a similar level of hardware from brands like Synology, QNAP, Terramaster, and Asustor will set you back between £600 to £800:
Clearly, the Jonsbo N2 build offers a significant cost-saving, coming in at over half the price of its branded counterparts. But this economical choice does come with trade-offs. You might end up relying on community-supported software, which could be less intuitive than proprietary software bundled with turnkey NAS solutions. Moreover, the time and effort invested in building and maintaining the NAS need to be factored in. Even with a clear guide, the DIY route will never be as plug-and-play as a pre-built solution.
Additionally, a custom-built NAS like the Jonsbo N2 typically involves dealing with warranties from various vendors. This means your components like the CPU, motherboard, case, PSU, and cables may all come with different warranty terms and lengths. Compatibility checks, troubleshooting, and potentially more maintenance time are other considerations. In conclusion, while building your own NAS can be both financially and personally rewarding, it does lack the comprehensive support and seamless experience associated with turnkey solutions from brands like Synology and QNAP.
📧 SUBSCRIBE TO OUR NEWSLETTER 🔔
🔒 Join Inner Circle
Get an alert every time something gets added to this specific article!
This description contains links to Amazon. These links will take you to some of the products mentioned in today's content. As an Amazon Associate, I earn from qualifying purchases. Visit the NASCompares Deal Finder to find the best place to buy this device in your region, based on Service, Support and Reputation - Just Search for your NAS Drive in the Box Below
Need Advice on Data Storage from an Expert?
Finally, for free advice about your setup, just leave a message in the comments below here at NASCompares.com and we will get back to you.


 |
 |


