How to Backup Your Synology NAS (Full System Image) with Hyper Backup to Another NAS
For many Synology NAS users, what started as a simple place to dump a whole lot of data gradually turned into something of a complex and strategically layered storage system for all their photos, docs, videos and business storage! Synology NAS and DSM have always provided a range off tools that allowed users to backup the files and folder contents of their NAS to another NAS, a USB drive, to the Cloud and more. HOWEVER, it has only been in the last couple of years that SERIOUS attention has been paid to ‘Whole System‘ and Full NAS Block Level backup‘ – i.e the ability to create a FULL system image, with all files, folders, apps, settings, configuration and precise system layout to be stored as a system image and backed up! Until recently, if you wanted to create a full Synology NAS system DSM image backup, you needed to use the rather enterprise ‘Synology Active Backup’ application. Aside from ABS/Synology-AB being a much more advanced tool to use that might be a touch complex for some, it is also not a tool that is available on ‘all’ synology NAS systems, due to its more aggressive hardware requirements. However, now that full system DSM image backup is now available in Synology Hyper Backup (a tool which is available on many, MANY more NAS systems), then will allow a lot more users to option of a full Synology NAS system backup! In today’s detailed article, I will walk you through how to setup, execute and restore a backup of a Full Synology NAS DSM system image from another NAS, using Hyper Backup. Let’s begin!
What You Will Need to Backup a Synology NAS System Image to Another with Hyper Backup
Before sinking your teeth into this guide, you just need to check that you have the following elements in place:
- Two Synology NAS that Support Hyper Backup/Hyper Backup Vault
- Synology NAS #1 (Source/PRIMARY) with Synology Hyper Backup 4.1.0-3425 or later
- Synology NAS #2 (Target/DESTINATION) with Synology Hyper Backup Vault 4.1.0-3425 or later
- Both NAS Systems on the same network (i.e connected to the same switch or router)
- More Storage Space on NAS #2 than NAS #1 (The more, the better!)
It is also worth keeping in mind that the Full DSM backup feature of Synology Hyper Backup (and Hyper Backup Vault, by extension) are currently in beta at the time of writing. So, keep this in mind if you choose to proceed with this feature for your Synology NAS setup.
IMPORTANT – You can watch the VIDEO version of this Guide HERE
How to Setup The Backup Destination Synology NAS (2)
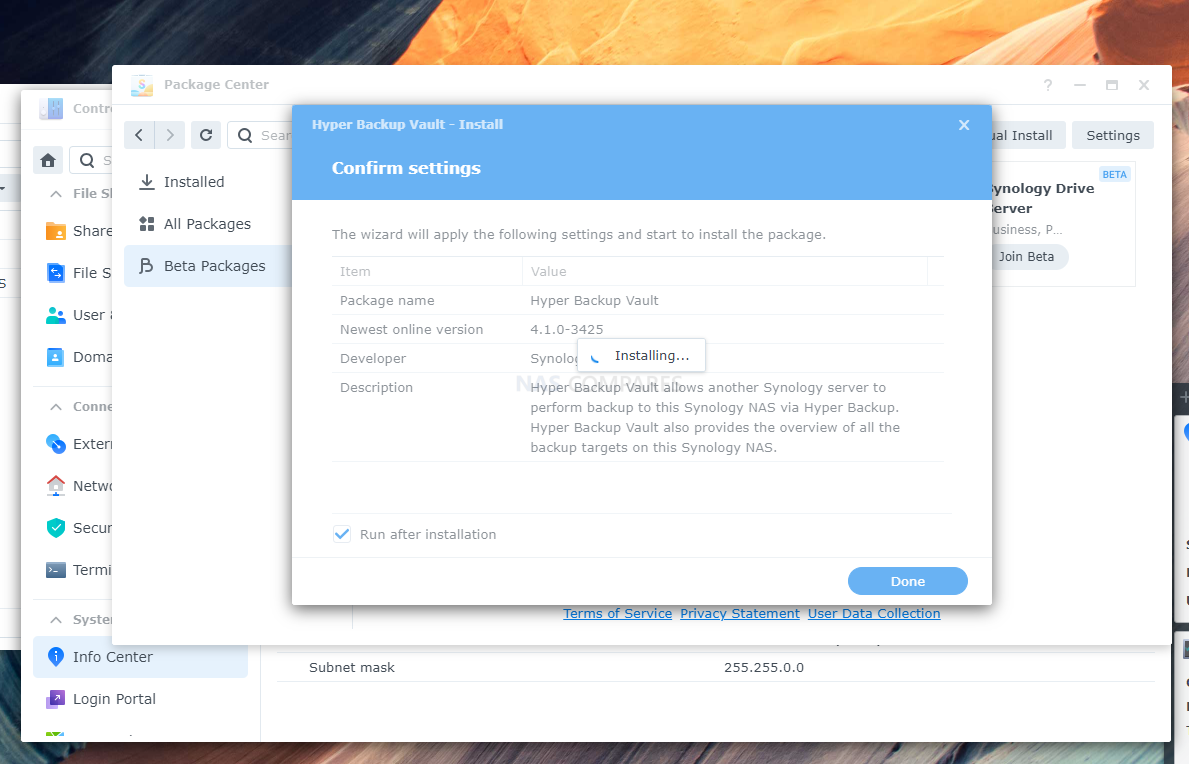
It may seen a little odd, but the FIRST THING we need to do is get the setup of your DESTINATION Synology NAS (i.e the NAS that is going to STORE the backups) configured first. This is because we need to have this ready before pointing our primary/host NAS at it. Head over to your 2nd NAS and in the package center, install Hyper Backup Vault 4.1.0-3425 (or later):
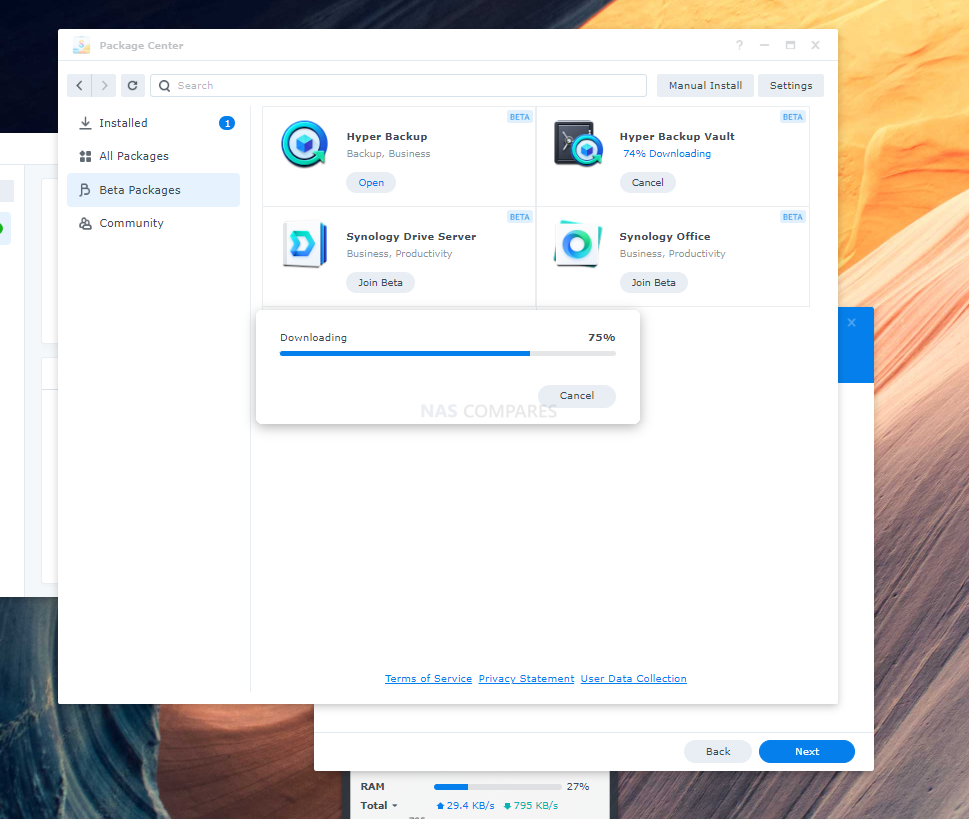
Installation will be very quick and it will appear as an available application in the app center and in your start menu quite quickly.
Next, head into the ‘Control Panel‘ and then select ‘Shared Folder‘:
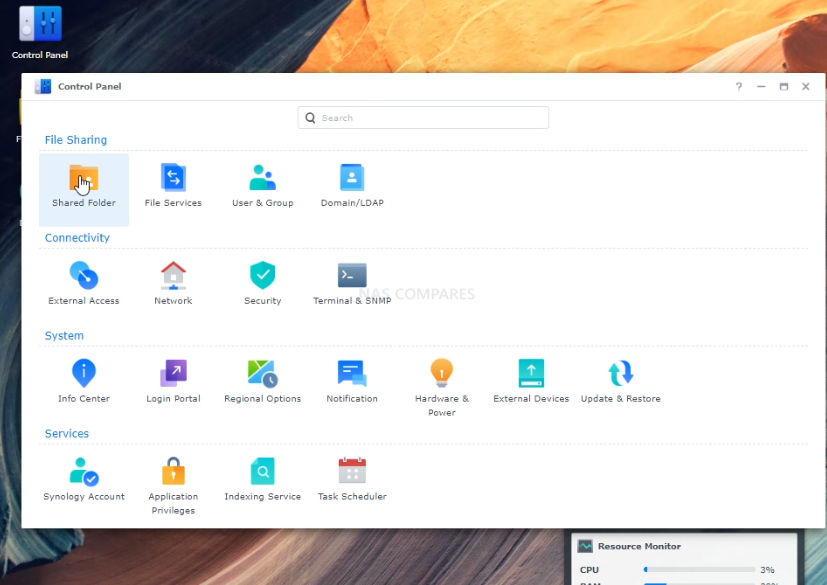
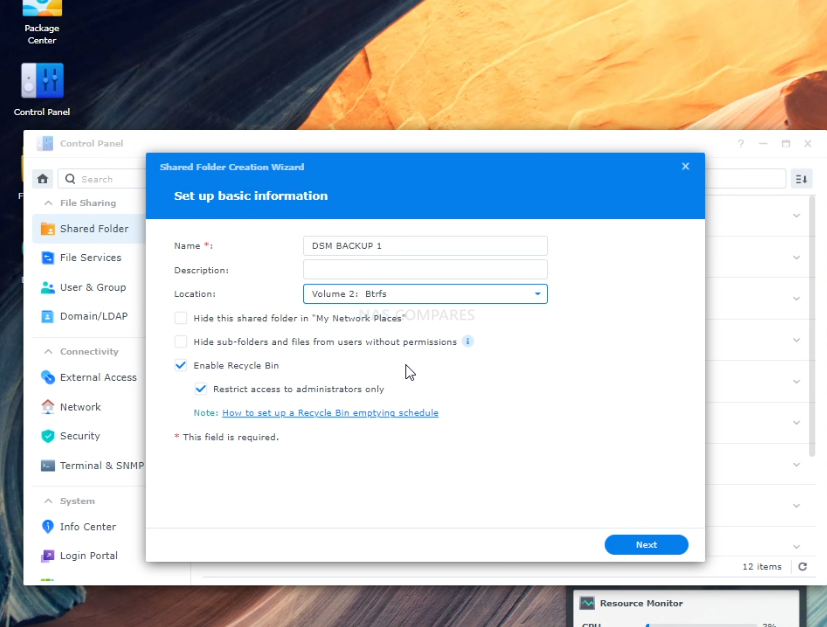
From here, create a new Shared Fodler to store the NAS backup images that you will be sending to this NAS later on. The name doesn’t;t matter, it’s just much more important to separate the DSM images that will be storage from the rest of your storage. I would also recommend putting them in their own volume, but this is optional.
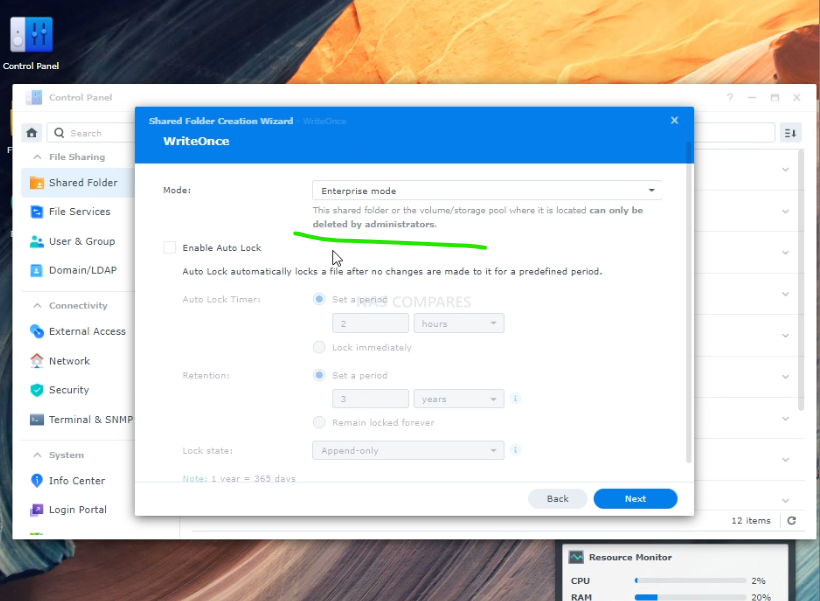
Another optional, but advised config option to consider is to enable ‘WriteOnce’ (a feature only available on Intel/AMD x86 CPU-based NAS). This ensures that the backup images are close to impossible to destroy/change without express admin powers.
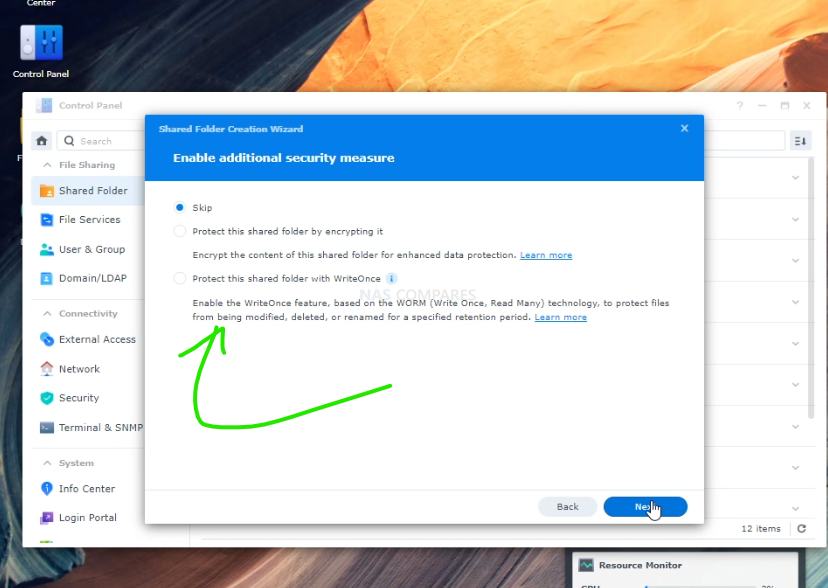
WORM / WriteOnce / Write-Once-Read-Many has two modes. Enterprise Mode ensures that ONLY an admin can change/delete this backup. Compliance Mode means NO ONE can change/delete it and you can set a time factor that ensures that unit X time has passed, the contents of this folder may not be changed – i.e your system images! Onnly the writing/adding of new data. Aagin, this is optional, but still remarkably useful for business system image backups.
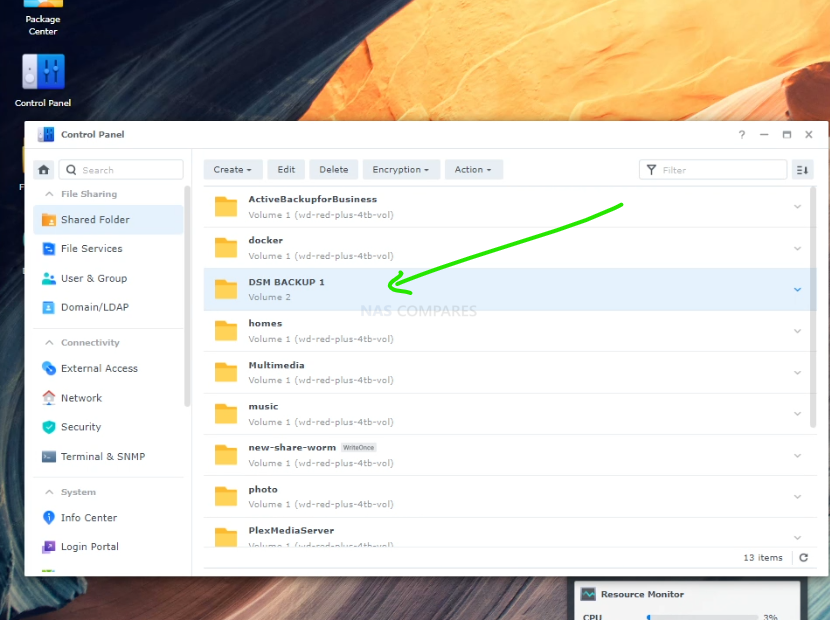
Once the Shared Folder is created, it will appear as another readily available, network visible folder.
Now we need to switch over to our MAIN/PRIMARY NAS to start arranging the backup.
How to Prepare and Setup Your Main Synology NAS for a Full Image Backup
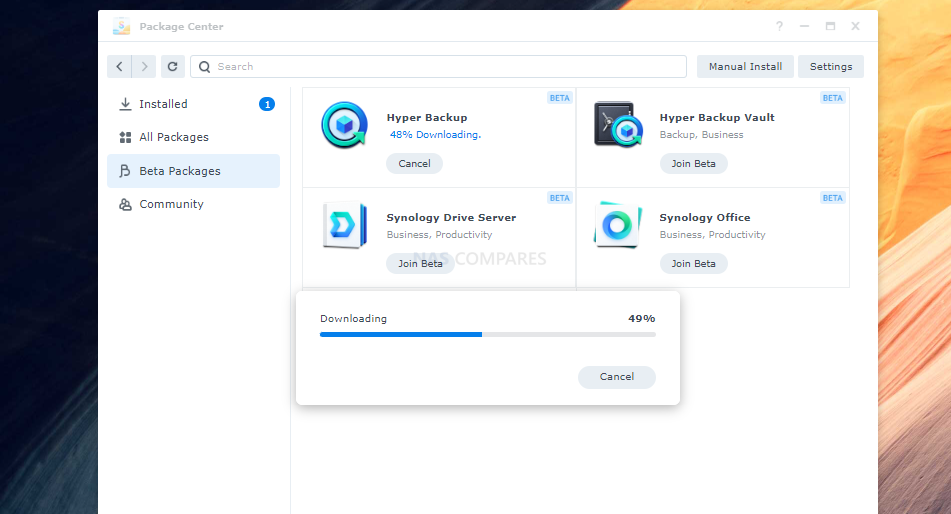
On your Main/Primary Synology NAS (1), head into the App center and download Synology Hyper Backup 4.1.0-3425 or later.
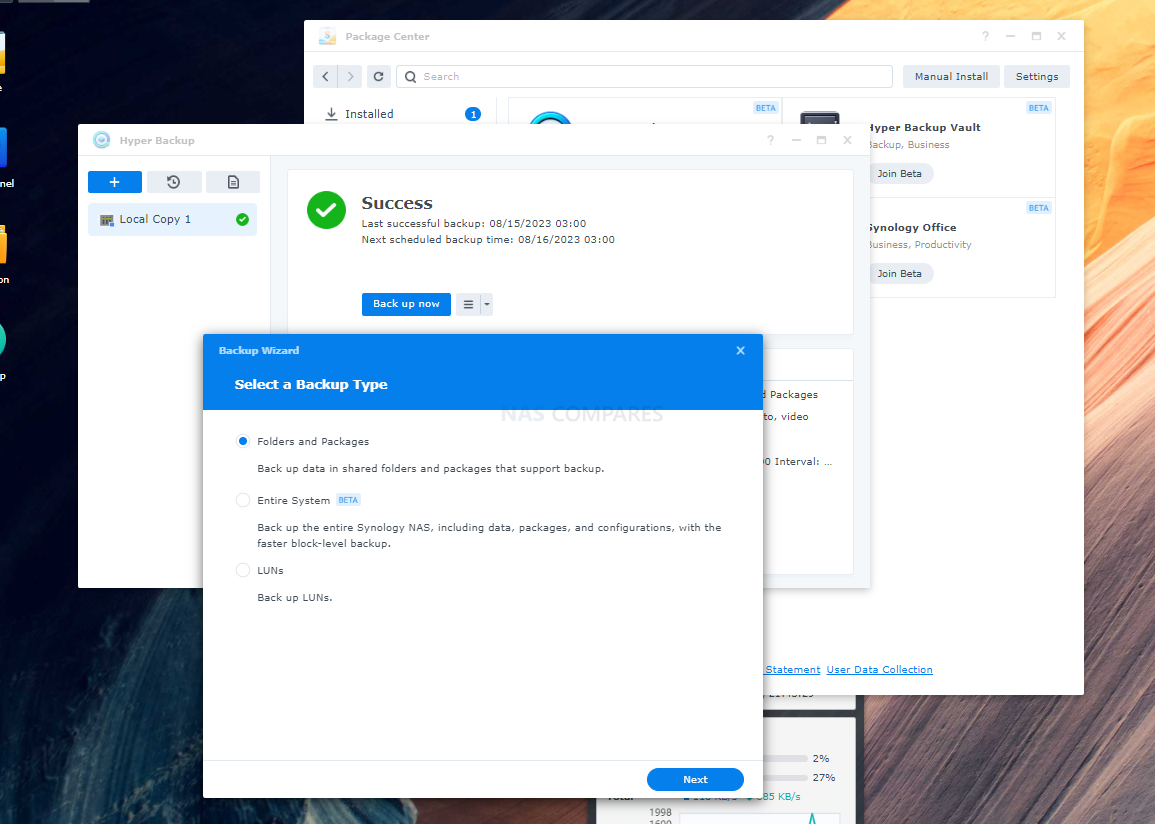
Once you have installed the Synology Hyper Backup application, you can open it up and you will be initially greeted by the Backup Wizard (if you have closed this or it simply does not appear, just click the blue ‘Plus’ symbol to bring it up. From here, click on the ‘Entire System‘ option and then click ‘Next‘
A new window will appear that invited you to start entering the information of the 2nd NAS (TARGET/DESTINATION) that you created earlier. If you know the network IP, enter it in the top. If you do not know it immediately, don’t worry…
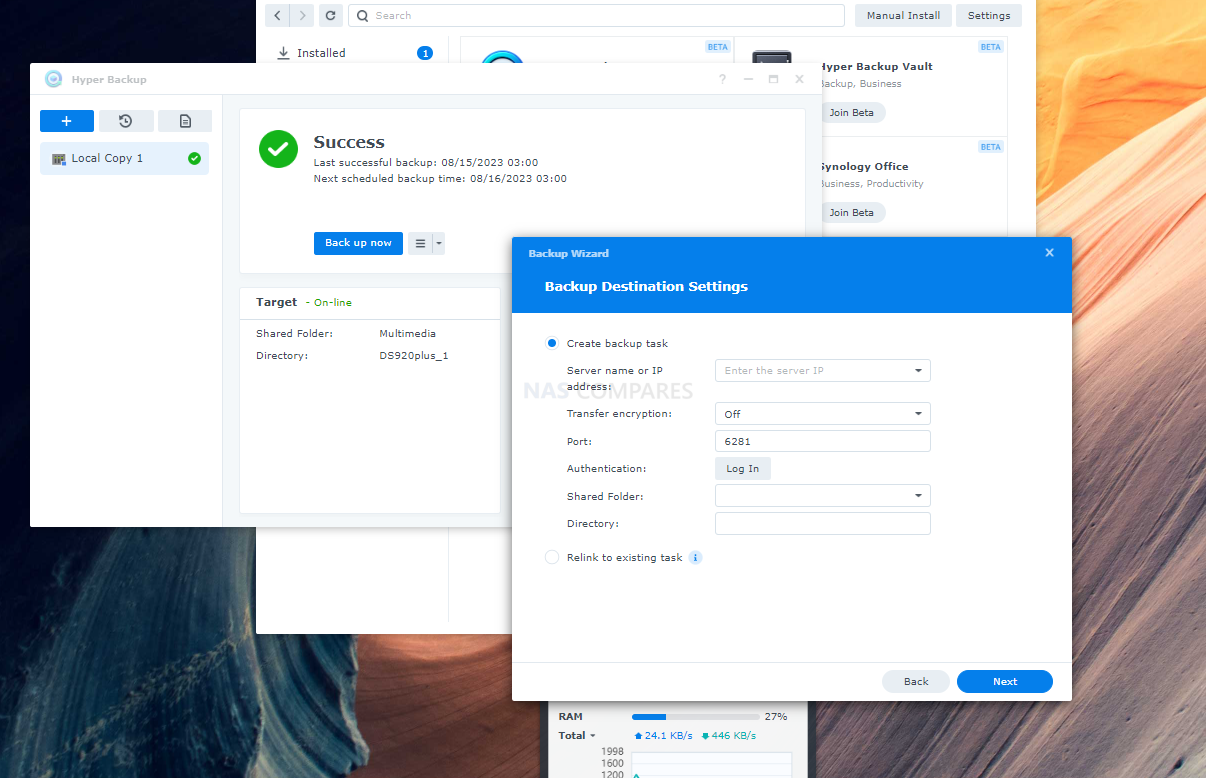
As you can use the down arrow next to it to search you local area network for any Synology NAS that are available. Just select the Name/I[ of the Target/Destination NAS you are going to send the backups towards.
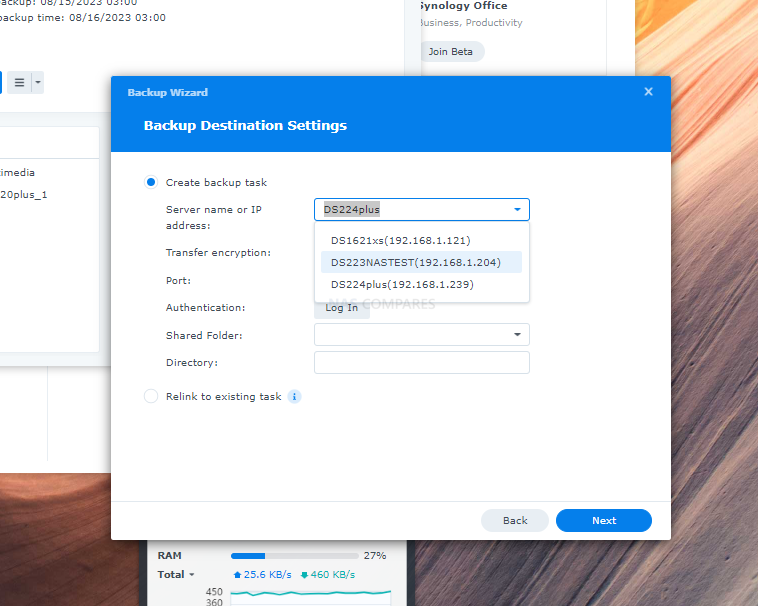
Next, you can choose whether you want to ensure that files transmitted over the network between each NAS are encrypted or not. This will keep packets of data unusable during transfers, but it will reduce the speed of backups, as it will require encryption/decryptions at either end. Its optional.
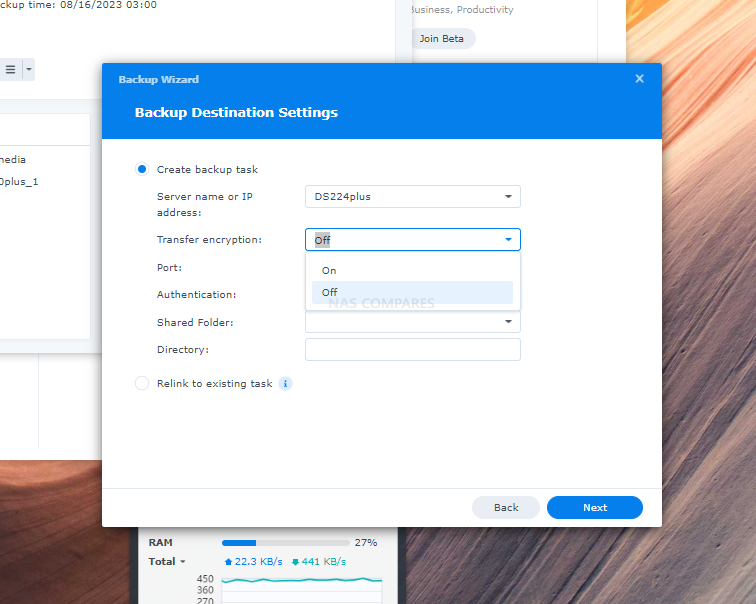
The Port of you Synology NAS will be ‘6281’ by default, but if you have set a new one in your system configuration from the destination NAS, put it in the box provided. Then click ‘Log in’, which will then create a new browser window to appear and you will need to enter the login credentials of an account on the Destination/target NAS that has access to Synology Hyper Backup Vault.
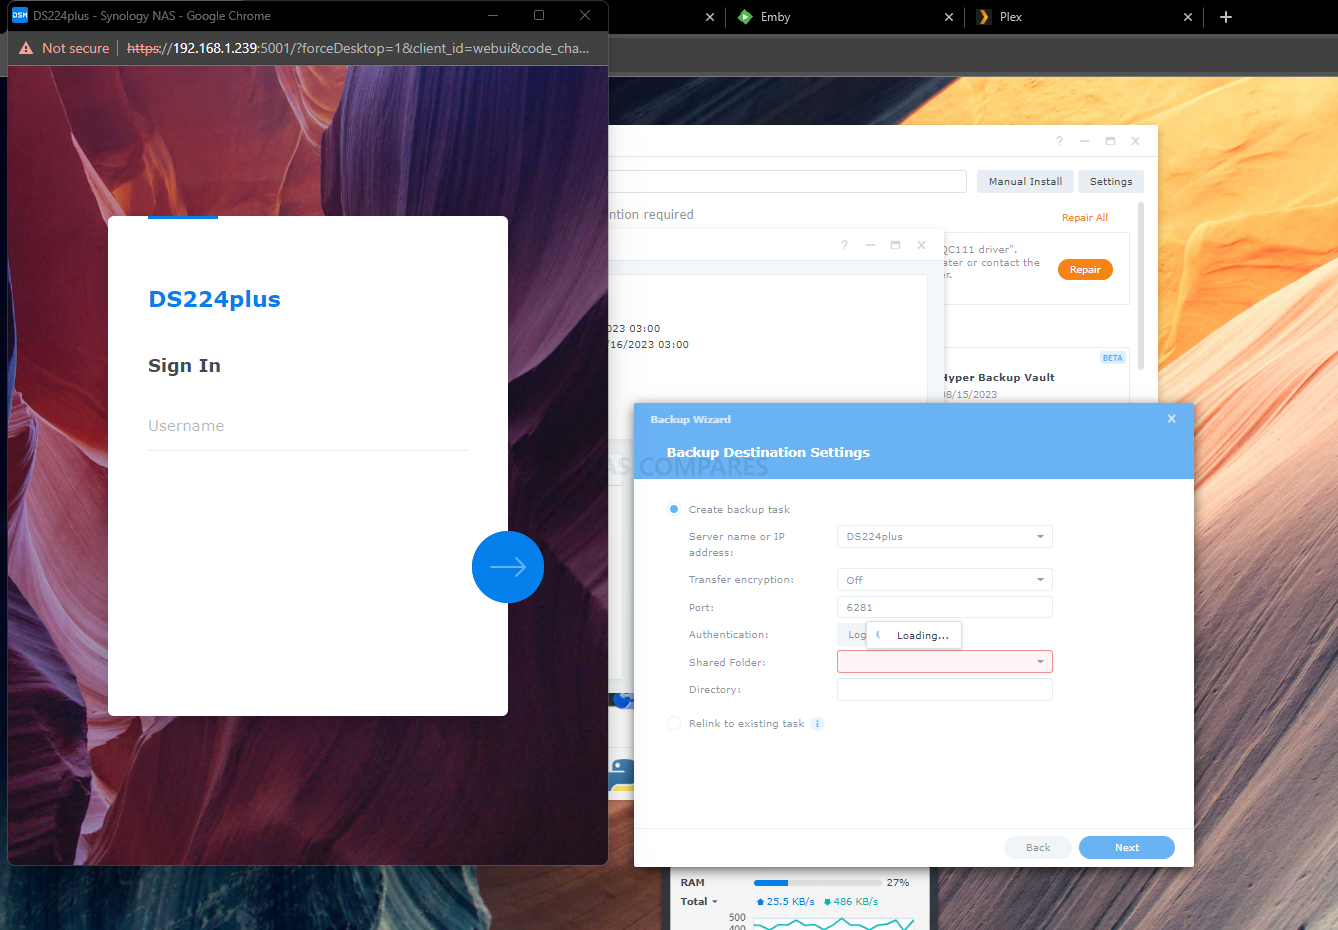
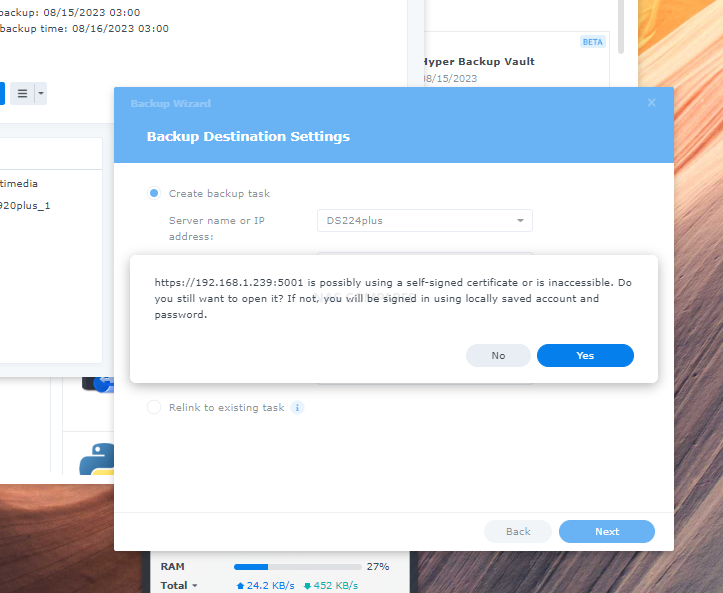
The Hyper Backup app will check the security certificate and if you are using the system in a locally deployed and unchanged setup, it will highlight the status of the self-signed certificate. for locked/local access only, you can larger click through this with Yes.
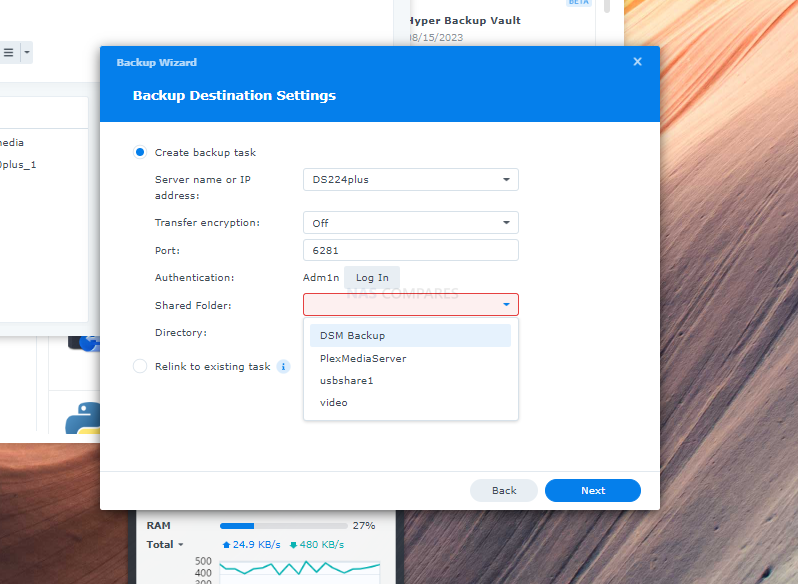
Next, when the access to the destination NAS is established, you will need to select the destination NAS folder that you want to send backups towards. THIS is why we needed to set up the target/destination (2) NAS up first, so we can see the shared folder we created earlier (i.e DSM Backup, in my case). Select the folder for the backups and then select ‘directory’.
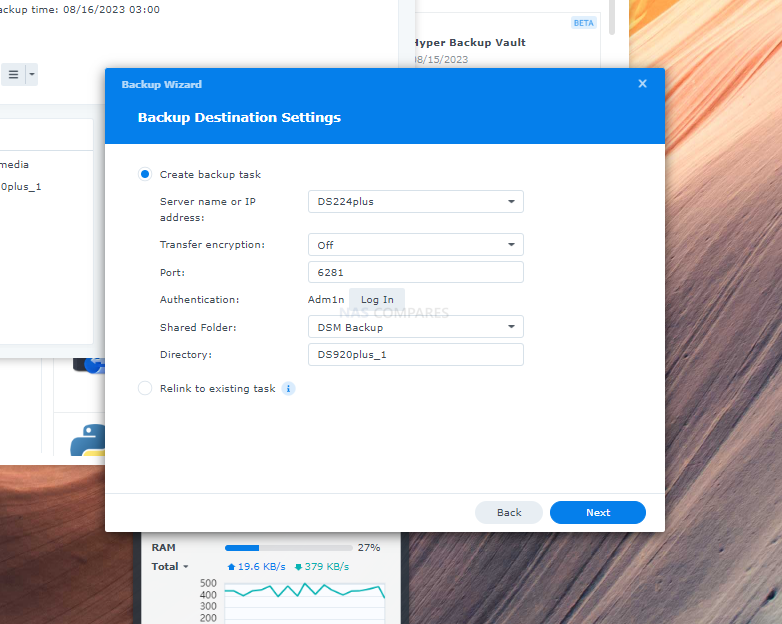
The ‘Directory’ is a sub folder that will contain one or more of your DSM system backup images. You can leave this as default or give it a specific/unique NAS if you plan on backing up multiple Synology NAS images to this from different source NAS’.
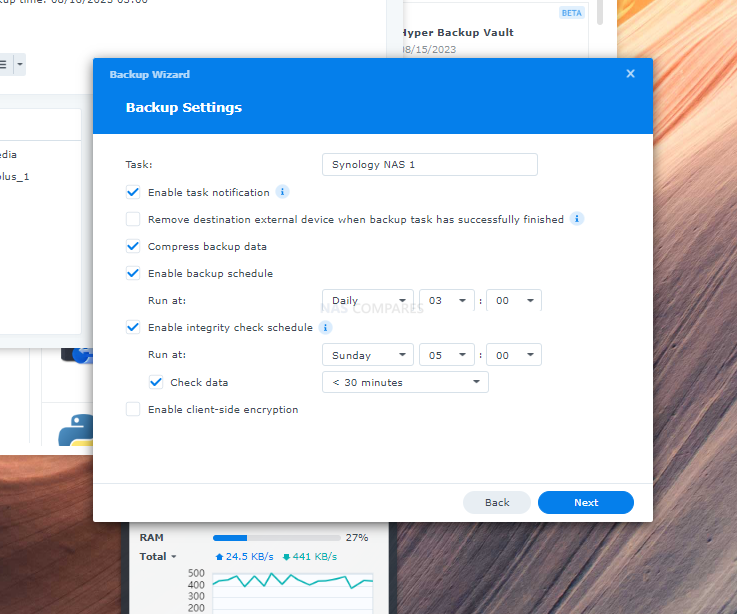
Now you have filled all this out, you can go ahead and click ‘next’ to proceed to the next step! This next step allows you to create a timed schedule for WHEN the backups from NAS (1) to NAS (2) take place! I would advice these take place during the night when you sleep (unless you are a night owl!) , as it willfully saturate the network connections of both NAS systems to upload/download the data. You can also add the option to run integrity checks periodically and on ‘in progress’ transfers to ensure the DSM images are healthy.
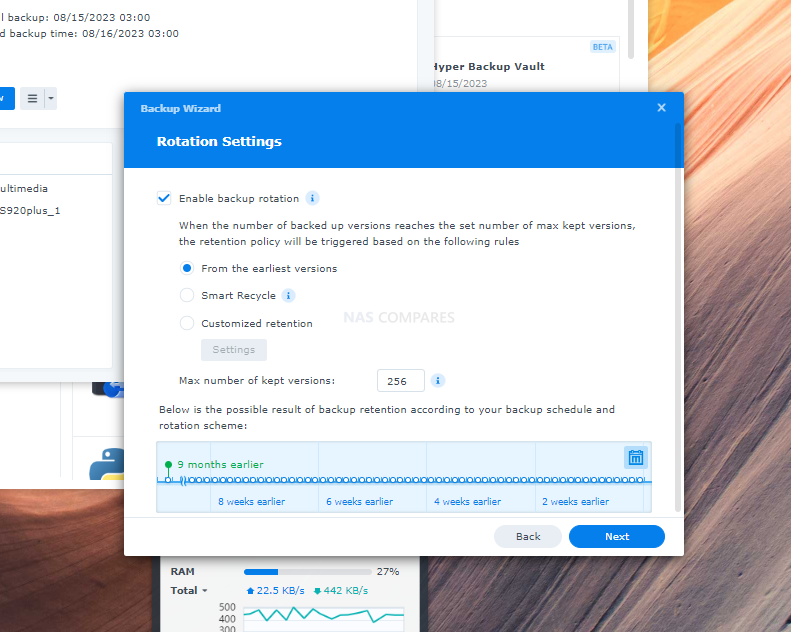
Next up you have the option to enable Backup rotation. This is an automated system that, if you create regular system DSM image backups, will create a pre-defined amount of them, before overwriting the oldest image with a new one. You can even use semi-automated systems for the system to understand ‘significant’ changes and change the retention policies quite a lot. Set the retention policy for your DSM image backups as best suited to your needs and then click next.
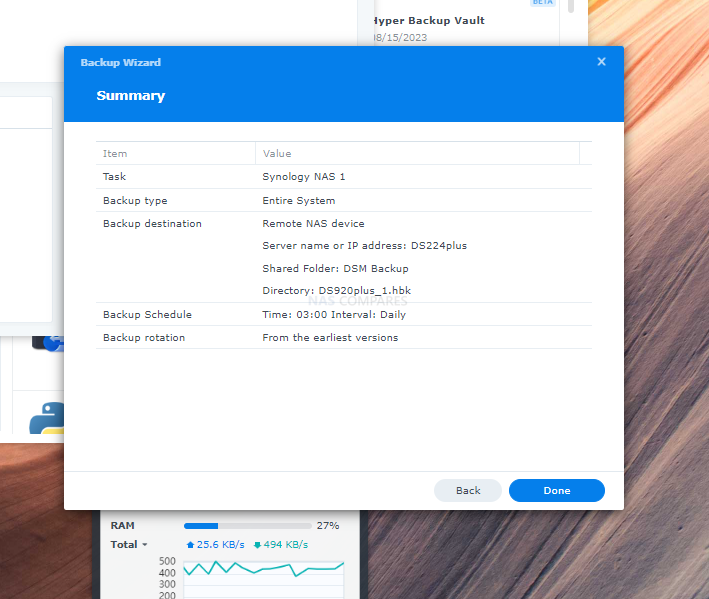
This final window is just to allow you to check your settings are correct before you confirm the NAS (1) TO nas (2) backup routine (not actioning it yet).
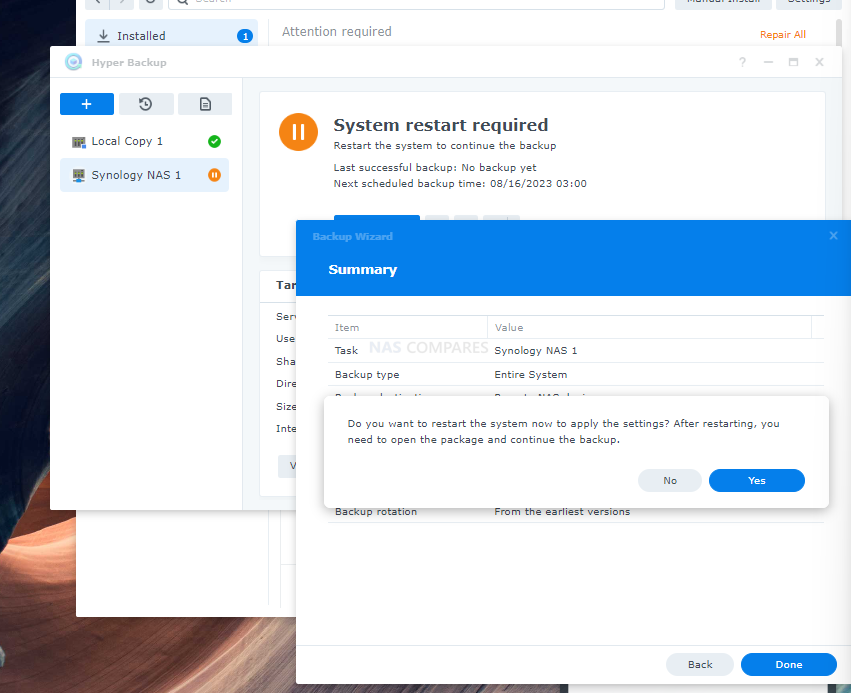
When you return to the Hyper Backup window on NAS (1), it will ask you to restart your Synology NAS system to confirm this backup settings. This is because the system needs to ensure the image backup creation settings are correct. Restart the system using the option on screen OR click no, then do anything/everything yo will need the system for, THEN restart.
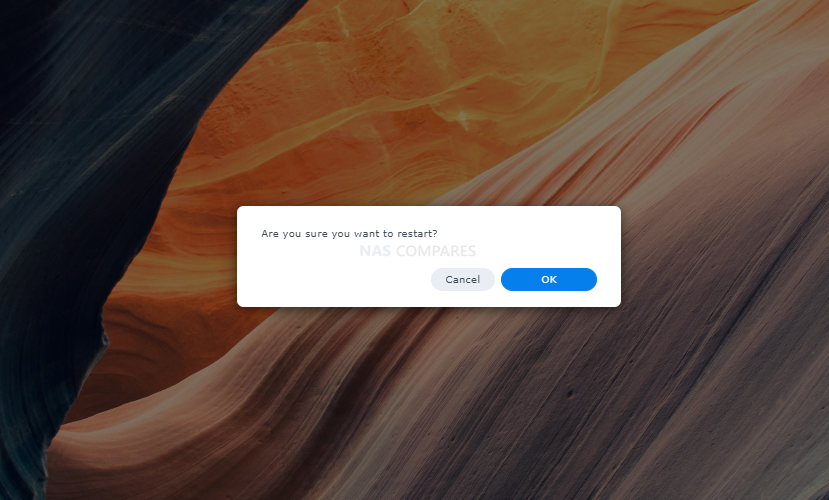
Restarting will take a few minutes, depending on the power of your system, the number of active processes and scale of your storage.
When the Synology NAS (1) has rebooted (you will hear a beep), you just need to head back into the Hyper backup tool.
How to Action a Synology NAS (#1) Full Image Backup to Another Synology NAS (#2)
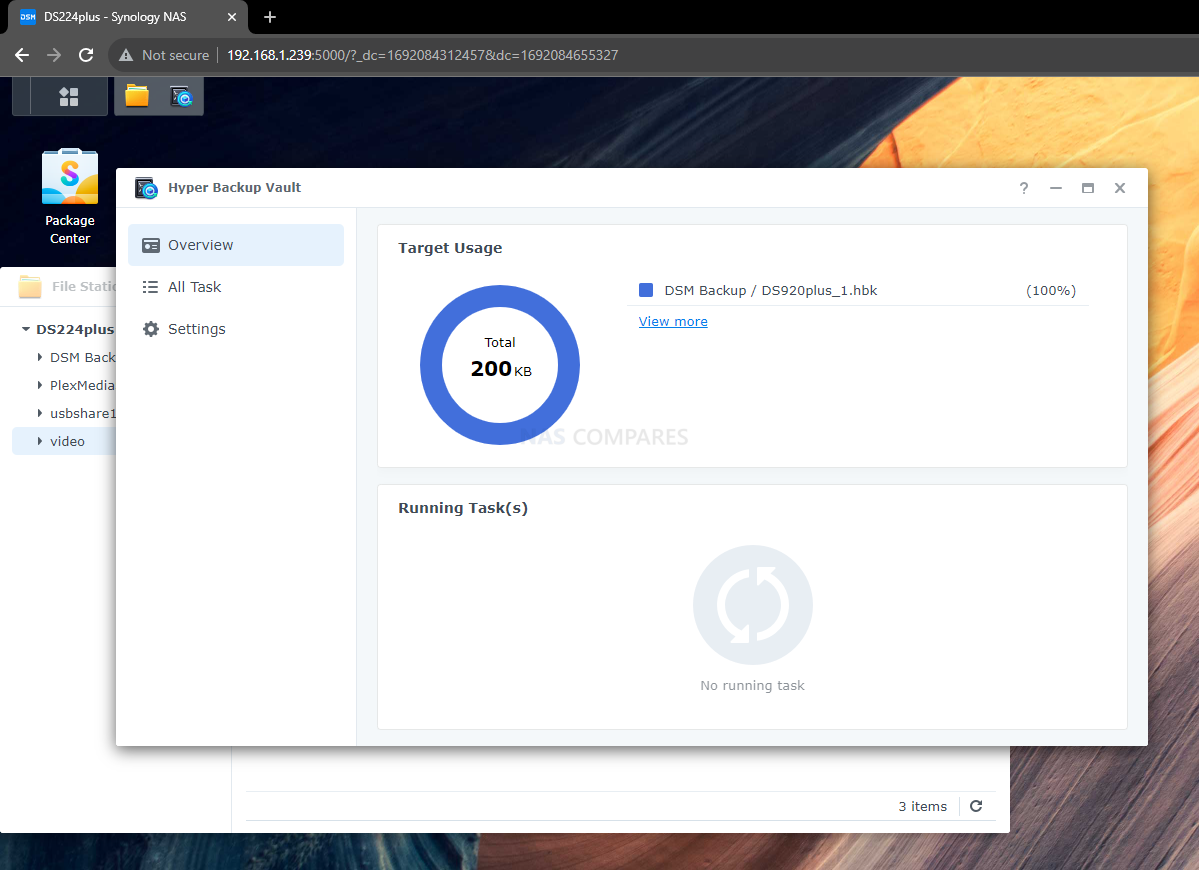
On the destination/target NAS (2), the Hyper Backup Vault app will now show that the primary NAS (1) is now connected.
Your new Synology Image backup routine is ready to run on your primary NAS. From here, you can choose to let the schedule you set earlier kick in when it is set for, or just click ‘Back Up Now‘ to start the DSM image backup immediately.
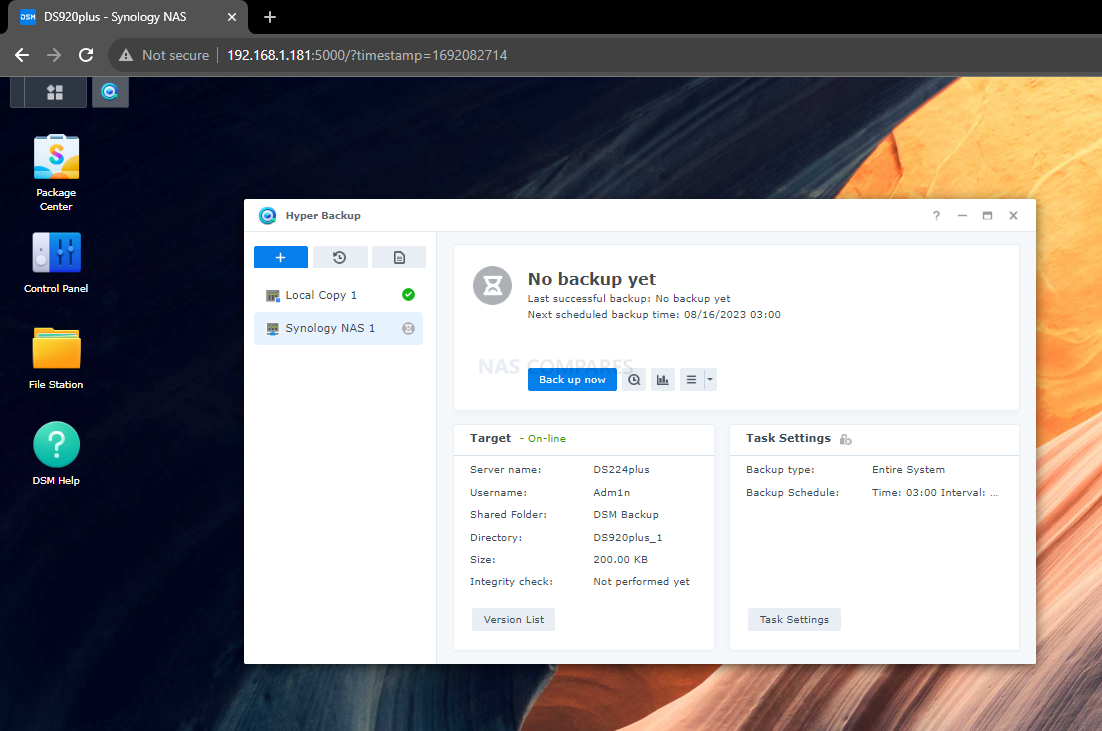
The amount of time the backup will take is HEAVILY dependant on the amount of data that is being backed up and the bandwidth/network connection of your network that these NAS are connected by. Also, the Hyper BAckup DSM image will only take up the amount of storage space of your destination NAS of ‘real data’. So, even if your primary NAS (1) has 12TB of capacity, if it only has 1TB of ACTUAL DATA, it will only take 1TB+space for DSM system data in the backup image.
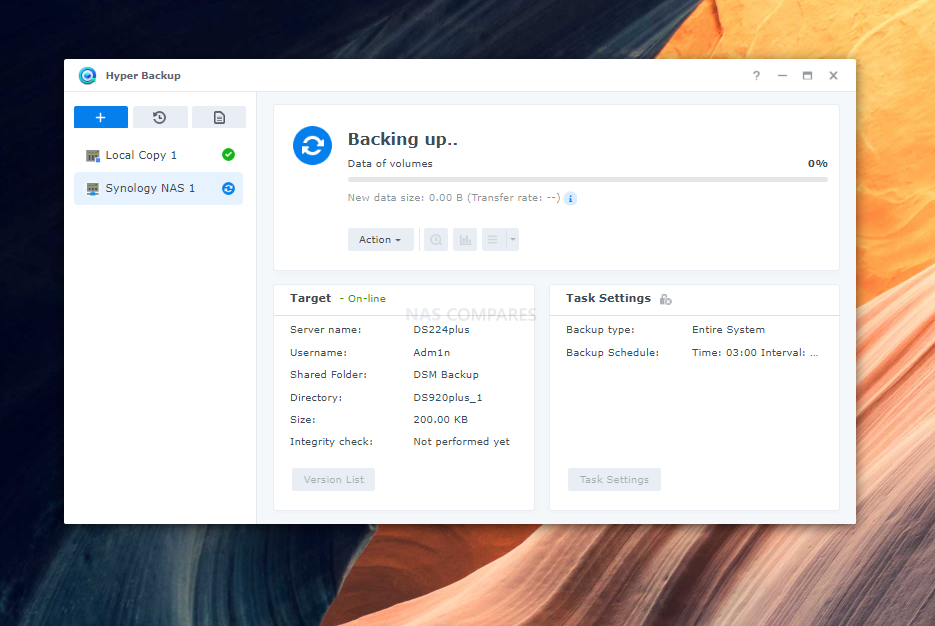
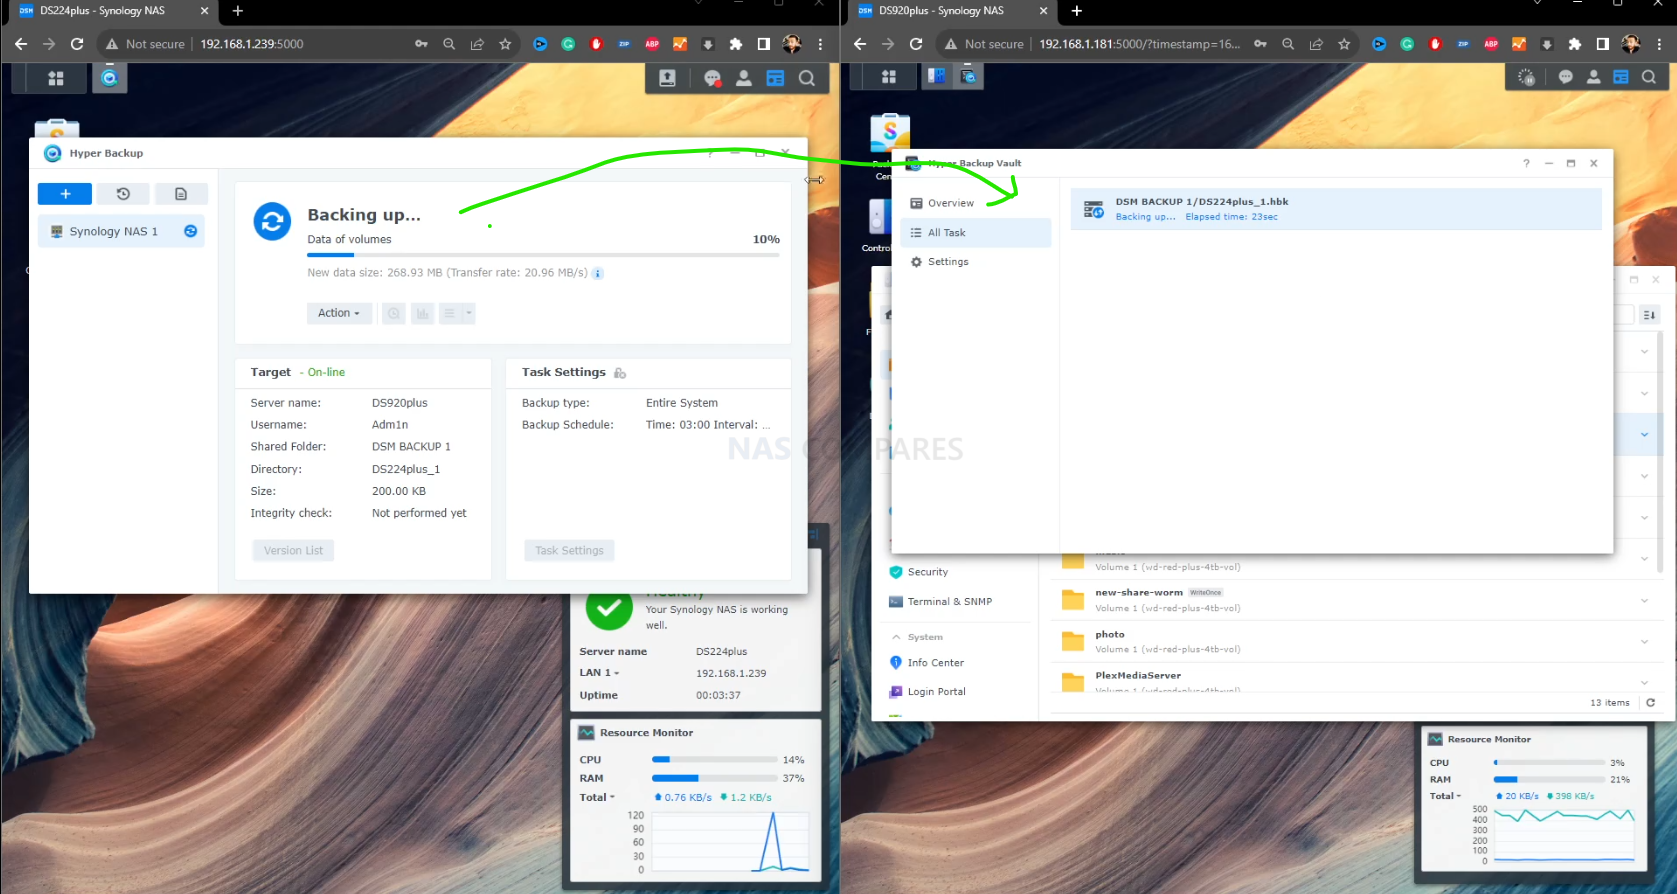
As you can see in the image below, as the primary/host NAS (1) sends data over, the destination/target NAS (2) is registering it as received. Both NAS can be used normally during this process too!
When the job is complete, you will be able to see that the primary/host NAS (1) is showing the job as complete and the target/destination NAS (2) BOTH SHOW A COMPLETE BACKUP.
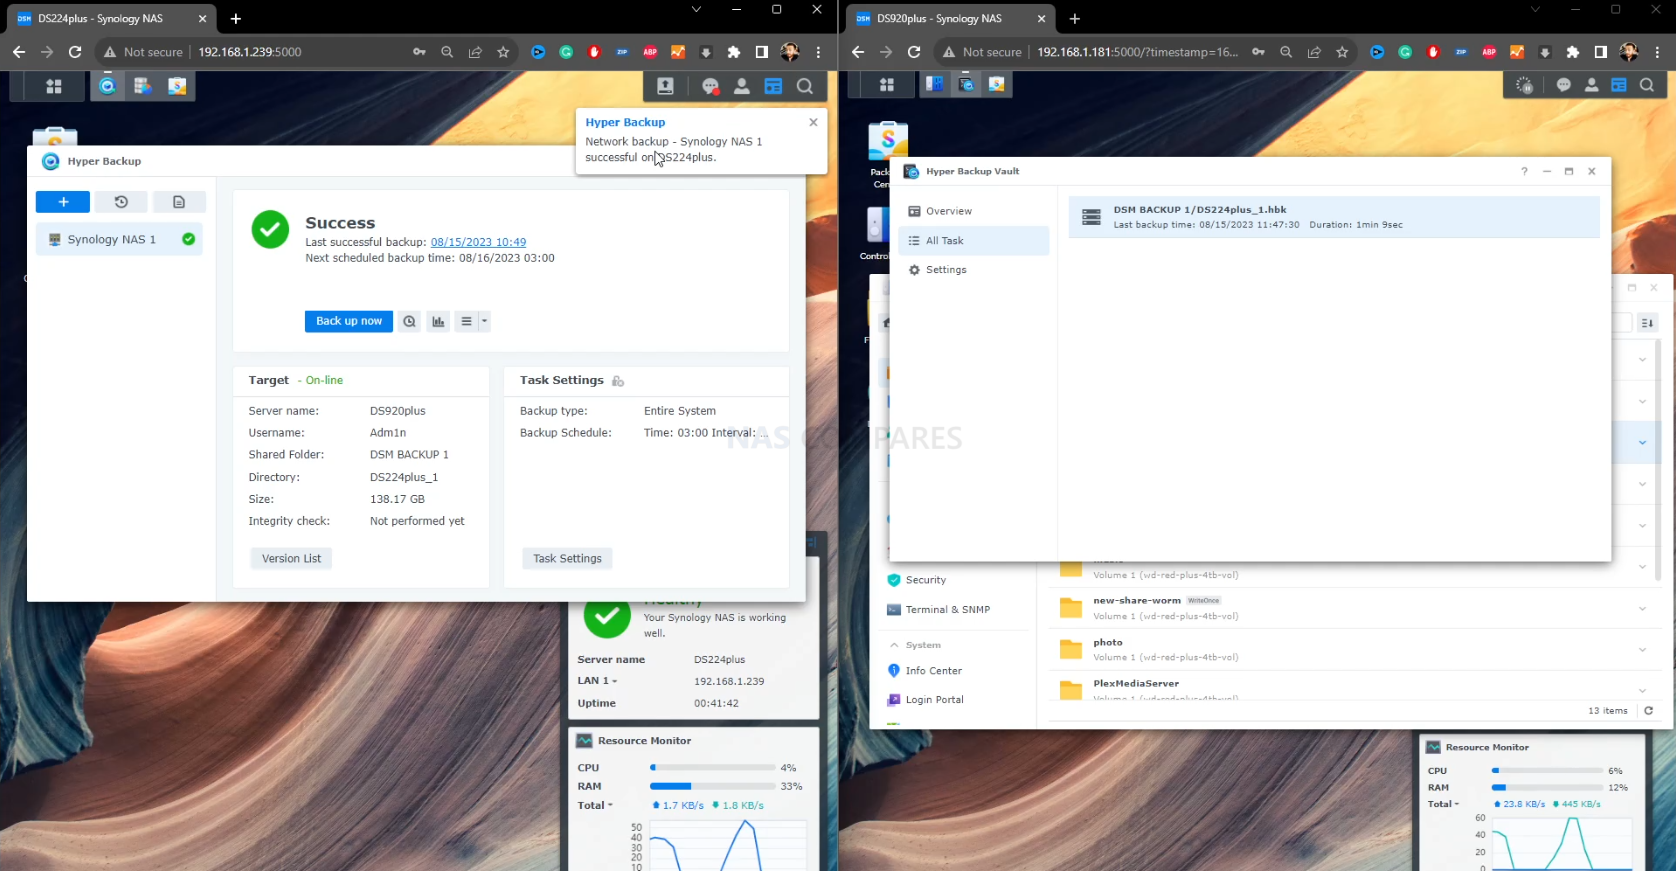
And there you go! Backing up a WHOLE system image of DSM from one Synology NAS to another is super easy with Hyper Backup now! Now, let’s go through the process of RESTORING a backup!
How to Restore Your Synology DSM Image NAS Backup
In order to restore a backup of a Synology NAS DSM image, you will need to have the SAME model/storage NAS setup and that NAS will also need Synology Hyper Backup 4.1.0-3425 or later installed. Most likely you will be reusing the same hardware that you already were using, but if you were restring to new hardware, this DSM image will only work with the same hardware you had previously when you created the backup. In the Primary NAS (1), head back into the time circle icon (restore) and a new window will appear:
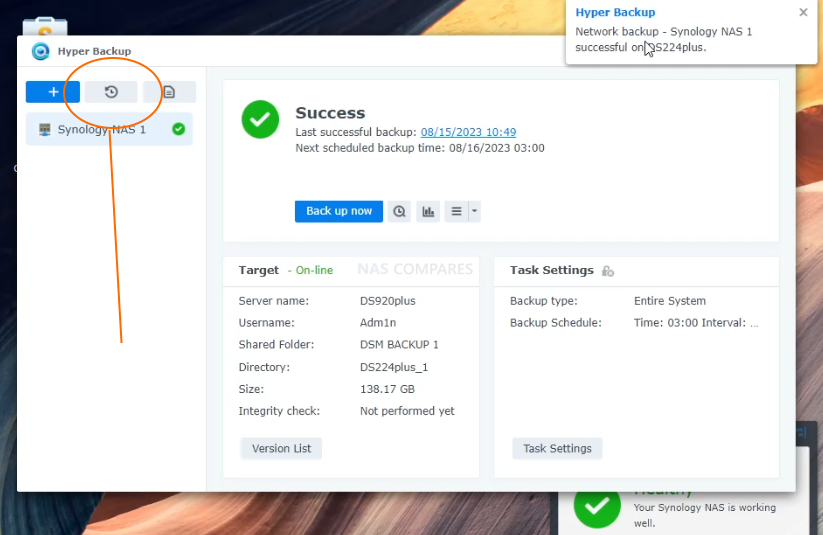
This new window has several options, but the one you want to look at is ‘Entire System‘ again. Select it and then click ‘next’.
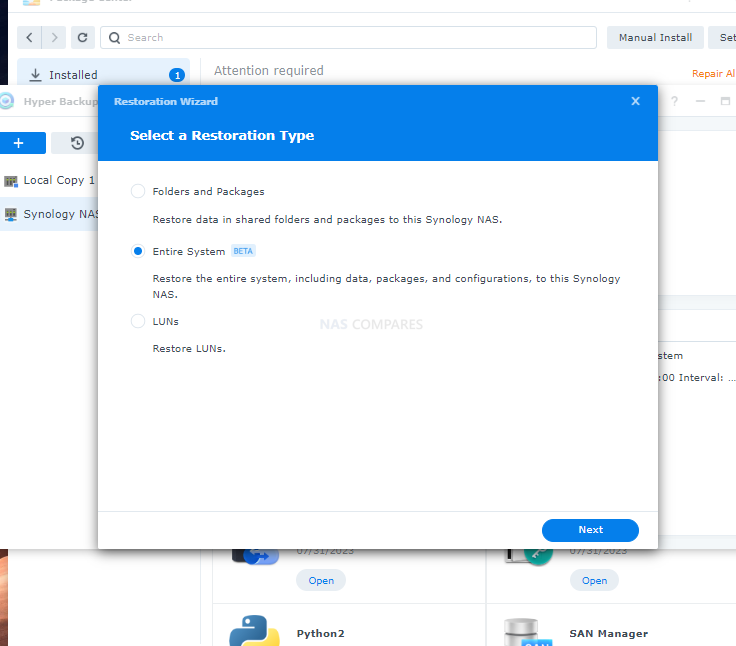
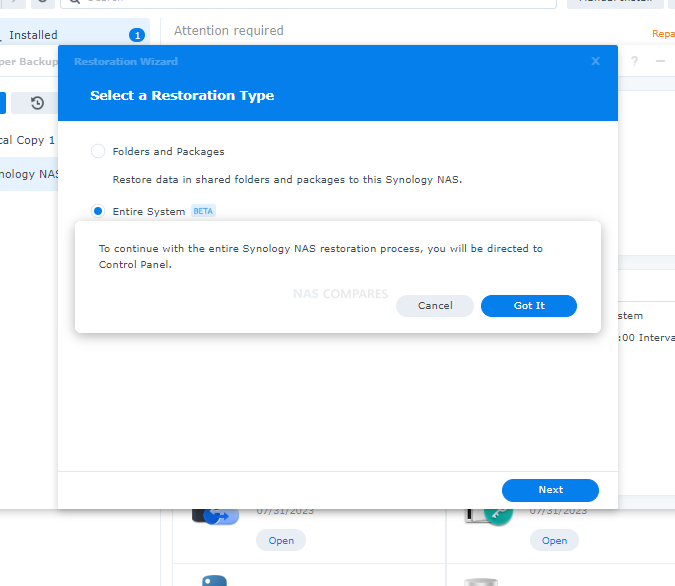
When you this, the system will then prompt you that it will open the ‘Control Panel’ to begin the ‘Restore Process’.
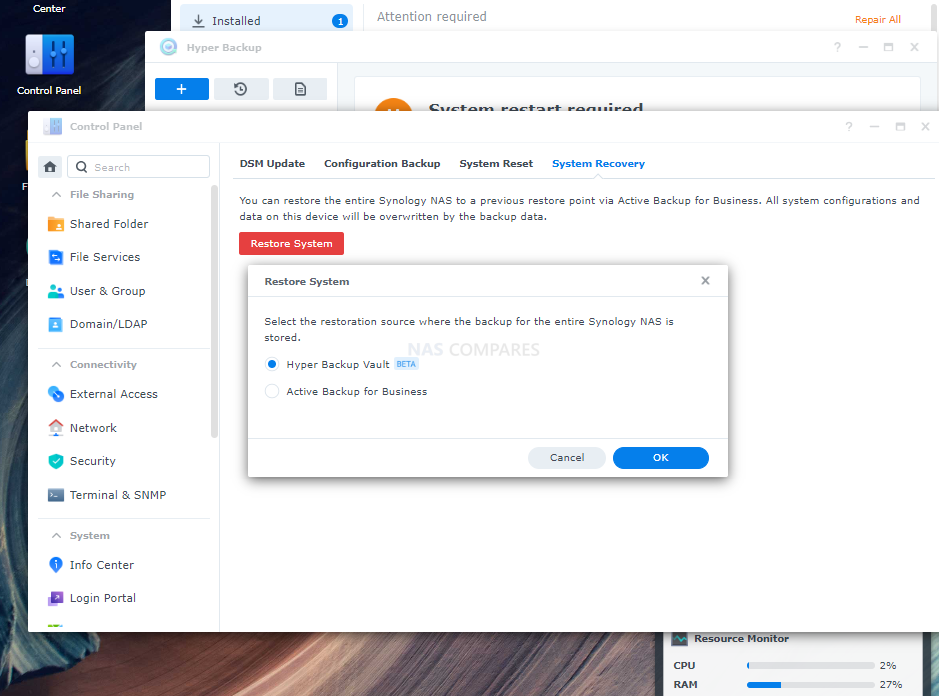
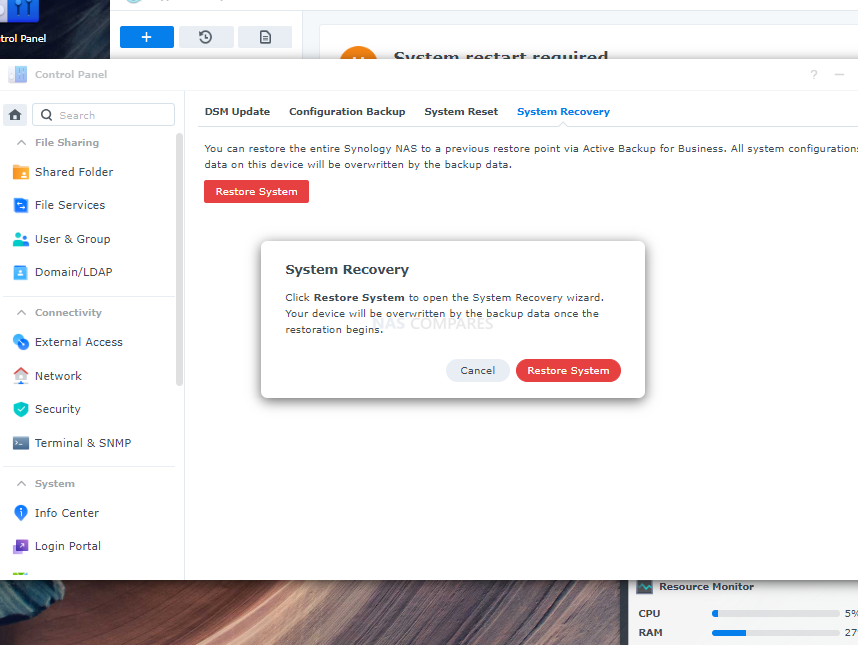
In the Control Panel, the ‘System Recovery’ tab will be selected and a new window will appear that asked you to select the backup/restore method. Select ‘Hyper Backup Vault’, then click ‘ok’.
The system will prompt you again, this time to urge you that it will load into the system restore window.
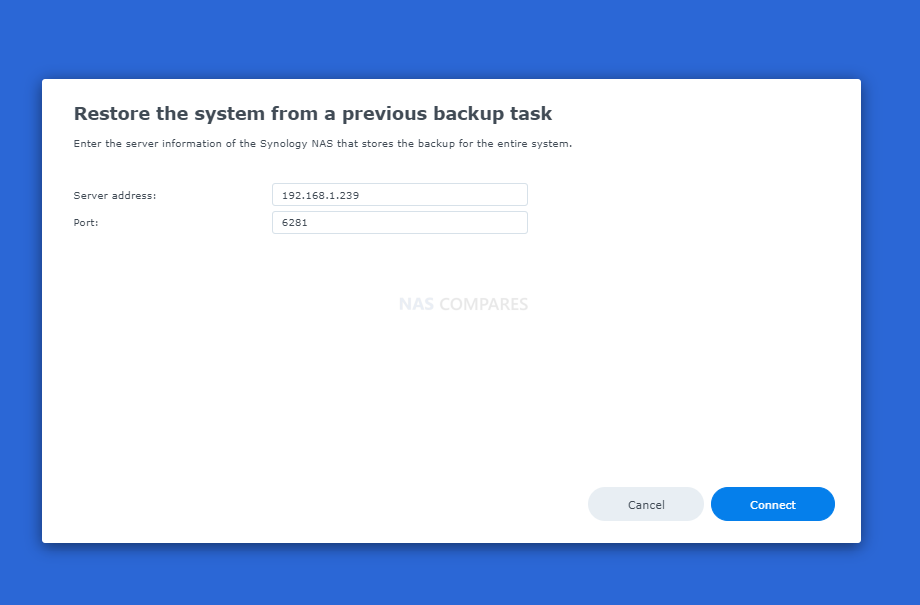
From here, you will need to add the Network IP of your target/destination NAS (2). There is no drop-down menu this time, so you will need to enter it manually (you can use the Synology Assistant tool to find the IP on the network)
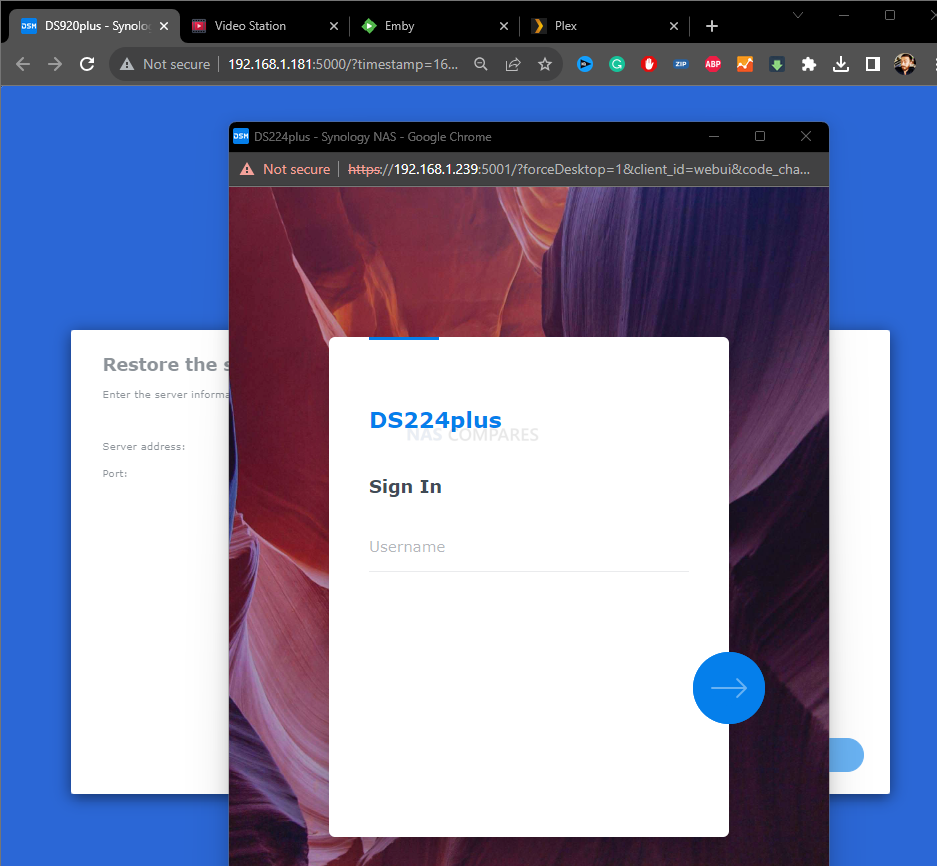
However, before then, you will need to authorize this action. Much like before, you need to enter the login credentials for your target/destination NAS (2) with user details that have access to the DSM IMAGE backup.
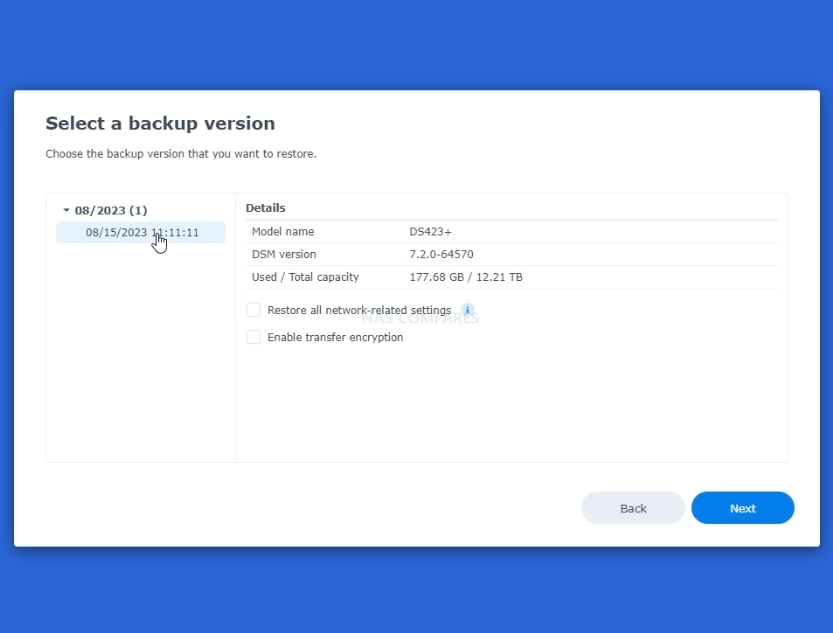
After that, the system will show a list of DSM Images (the number of them will depend on your own regularity of backups and rotation). Select the one you wish to use, choose whether you want to reinstate the network settings (ie the system’s original identity on the network, which will be invaluable to reestablish any connected shares and drives you had) and lastly decide if you want the data being sent between NAS (2) and NAS (1) to be encrypted. Once again, encrypted is safer, but slower. The, click Next.
The system then will display a summary of the actions that will take place. You need to check these, then (if you are happy with them), click restore.
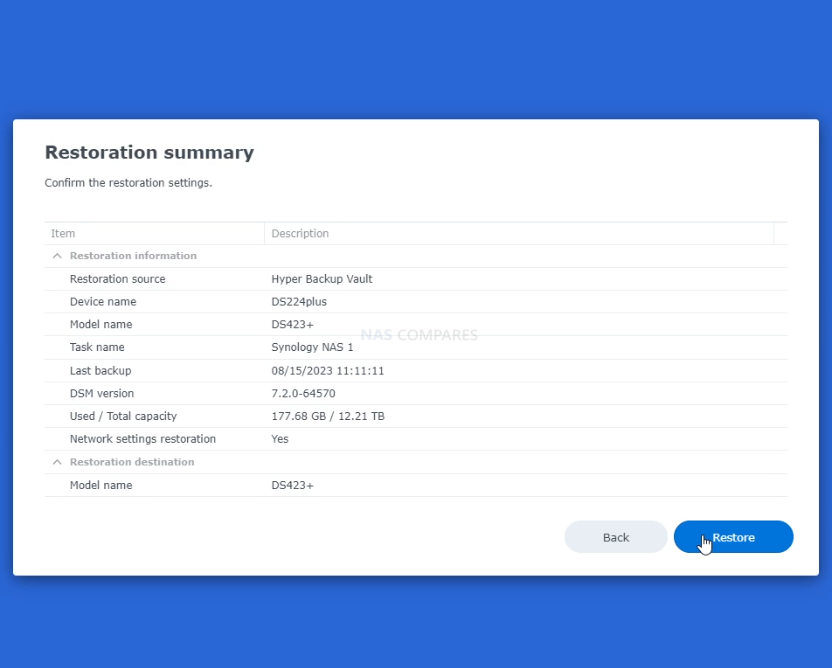
Not to take anything to lightly, the NAS will ask you to be SURE that you want to do this, as it will completely format the NAS to the DSM image settings. ANY data actions/creations that took place since this DSM image was created will NOT be kept!
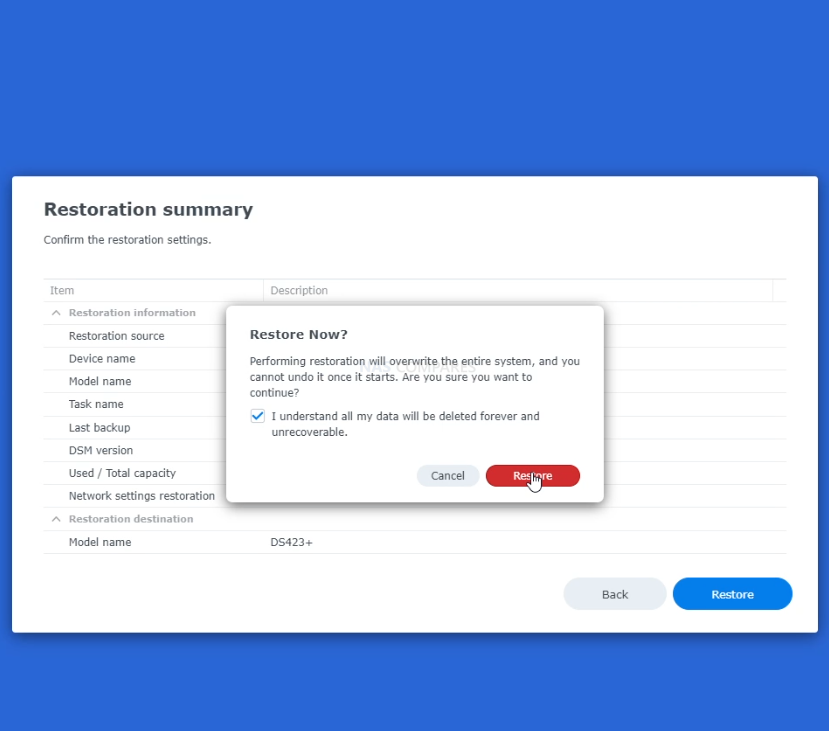
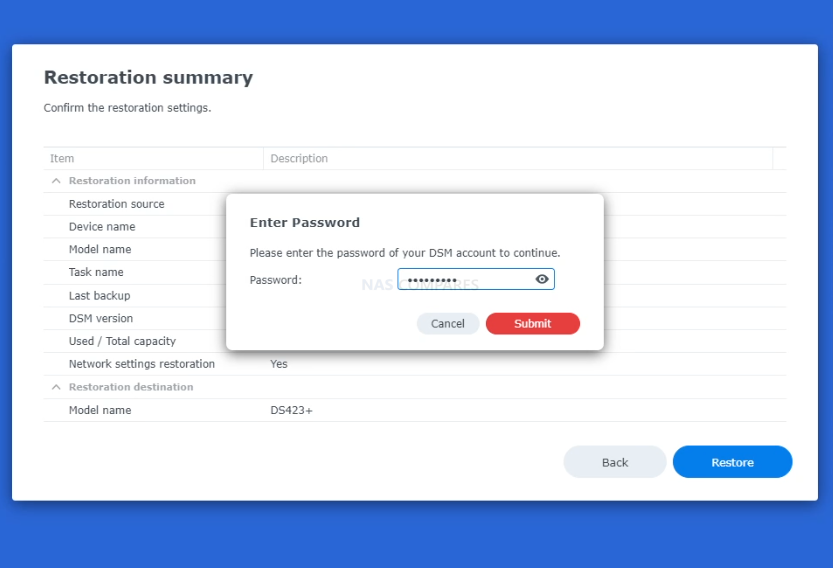
If you still want to reinstate this DSM image backup, go ahead and enter the local NAS (i.e NAS 1) password, then click ‘submit’ to begin the restoration process. BE WARNED, you cannot use the NAS for any other processes during this restoration and depending on the scale of the restoration, it can take many, MANY hours!
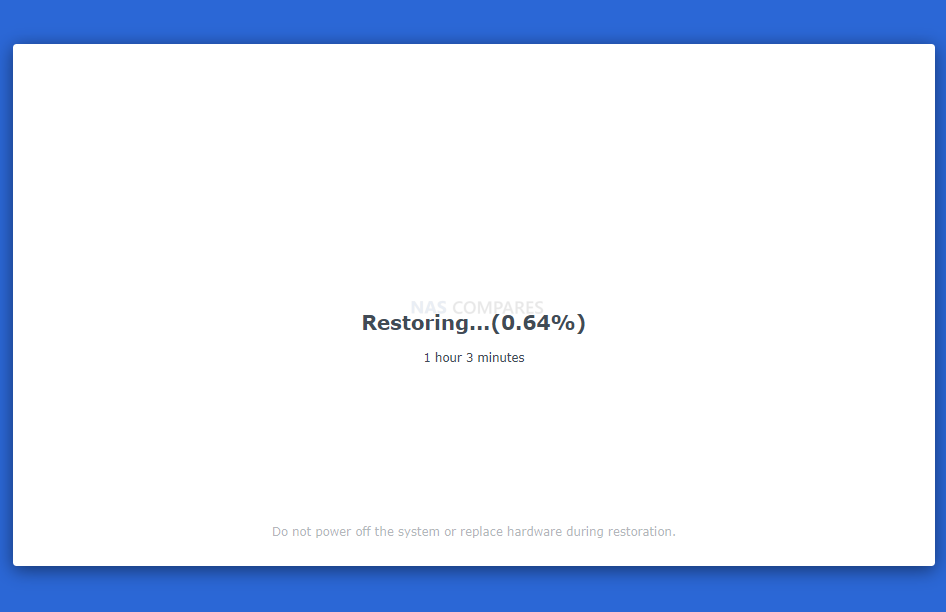
If you log into the NAS, or keep the window open, you will be treated with a % completion figure for the DSM restoration.
Which Synology NAS Models Support Hyper Backup DSM Full Image Backups?
Hyper Backup 4.1.0 requires DSM 7.2 and above to run. The entire system backup function is supported in specific models. As of Aug 2023, these are:
FS series: FS6400, FS3600, FS3410, FS3400, FS2500, FS1018
SA series: SA6400, SA3610, SA3600, SA3410, SA3400
23 series: RS2423RP-F, RS2423+, DS1823xs+, DS923+, DS723+, DS423+
22 series: FS822RP+, RS822+, RS422+, DS3622xs+, DS2422+, DS1522+, DVA1622
21 series: FS4021xs+, RS3621xs+, RS3621RPxs, RS2821RP+, RS2421RP+, RS2421+, RS1221RP+, RS1221+, DS1821+, DSLAZY+, DS1621xs+, DS1621+, DVA3221
20 series: RS820RP+, RS820+, DS1520+, DS920+, DS720+, DS620slim, DS420+, DS220+ #
19 series: RS1619xs+, DS2419+II, DS2419+, DS1819+, DS1019+, DVA3219
18 series: RS3618xs, DS2818RP+, RS2418RP+, RS2418+, DS3018xs, DS1618+, DS918+, DS718+, DS418play, DS218+
📧 SUBSCRIBE TO OUR NEWSLETTER 🔔 This description contains links to Amazon. These links will take you to some of the products mentioned in today's content. As an Amazon Associate, I earn from qualifying purchases. Visit the NASCompares Deal Finder to find the best place to buy this device in your region, based on Service, Support and Reputation - Just Search for your NAS Drive in the Box Below
🔒 Join Inner Circle
Get an alert every time something gets added to this specific article!
Need Advice on Data Storage from an Expert?
Finally, for free advice about your setup, just leave a message in the comments below here at NASCompares.com and we will get back to you.
 Need Help?
Where possible (and where appropriate) please provide as much information about your requirements, as then I can arrange the best answer and solution to your needs. Do not worry about your e-mail address being required, it will NOT be used in a mailing list and will NOT be used in any way other than to respond to your enquiry.
TRY CHAT
Terms and Conditions


Do You NEED 5GbE NAS? (Or Should You Skip Ahead to 10GbE)
UGREEN DXP4800 PRO NAS Review
Minisforum G7 Pro Review
CAN YOU TRUST UNIFI REVIEWS? Let's Discuss Reviewing UniFi...
WHERE IS SYNOLOGY DSM 8? and DO YOU CARE? (RAID Room)
UniFi Routers vs OpenWRT DIY Routers - Which Should You Choose?
Access content via Patreon or KO-FI
Discover more from NAS Compares
Subscribe to get the latest posts sent to your email.




DS418 running 7.2.2-72806 Update 4 – I don’t see an “Entire System” backup option. Has it been removed from the full (non-beta) version?
REPLY ON YOUTUBE
Lets say one has a setup of 2 nas systems like in this video: nas_A and nas_A_backup. All is setup for backups and one day nas_A fails and it is an older unit (5 years or more). A newer unit is bought to replace it. Will the restore work as long as there is enough space available on the newer unit? Is space the only requirement? Thanks for the tutorial
REPLY ON YOUTUBE
Anyone knows how to back up to a different brand nas, I have just bought a 923+ and want to backup onto a WD PR4100, found out I can use the business backup to pull the data from the PR4100 but have not found any options the other way around. Also google only spitted out to use rsync looked into it and not enough knowledge and webdav similar and is not supported by Pr4100 anymore (and again looking at the staff I found- not enough IT knowledge. Anyone any idea? if not what would be an older Synology I could by 2nd hand?
REPLY ON YOUTUBE
Why to another NAS? why not to a DAS or a bunch of disks?
REPLY ON YOUTUBE
Why can I not export the system image to a folder so I can copy it to my cloud storage? It’s so dumb that you need another SYNOLOGY (what about another brand?) NAS to do such a basic task that every one should be doing after they set up their system
REPLY ON YOUTUBE
To give you an idea how important backups are. My DS918 crashed and I had to buy a DS923. I inserted the HDDs and started it. As it was impossible to update DSM upon migration I contacted support.
The problem is that the DS918 was originally installed with DSM6 which I upgraded to 7. Originally DSM6 had less OS space allocated and the update is not possible. I now have to make a factory reset which also is not possible as I have immutable snapshots. It is a nightmare.
REPLY ON YOUTUBE
Just want to add that I have bought a DS223j and was able to do Hyper backup of my DS1522+. So J series NAS is now supported 🙂
REPLY ON YOUTUBE
Hey, great video????????
Can i mirgate from a DS 218 Play Raid 1 Ext4 2x 18TB Exos HDD to my upcomming DS 1821+ wich is gonna have three WD Red 10 TB in BTRFS SHR1 ?
I am asking because the original synology video always says that the target NAS does have to have twice as much storage than the source NAS.
In my case it would be 2x18TB (source) = 18TB and 3x 10TB (shr) (target)= 18TB so it would fit…..right?
REPLY ON YOUTUBE
How much space does the full system backup image take up on the remote nas?
REPLY ON YOUTUBE
I wonder if DSM rebuilds the array before restoring, that could explain the time..
REPLY ON YOUTUBE
It did the back up no worries, but now I’m stuck in an infinite loop of clicking restore entire system and it just sits there installing DSM and making partitions, then back to the install DSM screen. Right now it’s utterly useless
REPLY ON YOUTUBE
Hyper Backup is a broken heap of crap right now in my opinion. It doesn’t allow people with ONE nas to backup their entire system (this sucks and shouldn’t be the case), it claims to backup certain things and I’ve read reports that it doesn’t (like certain network-related settings), it doesn’t backup HB tasks, firewall, etc. I also don’t know a way to restore just application settings WITHOUT restoring relevant shared folders (useful for when app settings failed to restore and you don’t want to overwrite tons of shared folder data AGAIN). Synology SERIOUSLY need to get their asses in gear!
REPLY ON YOUTUBE
Can you still do this back up if you destination NAS is so old that it use old DSM (6.2) and your new NAS uses the DSM 7.2?. At the moment is asking me to update the Hyper Backup Vault (which is not possible because the NAS is too old (DS213)
REPLY ON YOUTUBE
Hi,
If I save my entire nas with ext4 file system, can I restore all the data on brtfs file system?
REPLY ON YOUTUBE
How can i backup my full system of i only have one nas, a dx517 and a usb drive? If it’s not possible then it really should be synologys priority to make this an option!
REPLY ON YOUTUBE
Thank you very much for this. Appreciated 🙂
REPLY ON YOUTUBE
Many qustions down here but no answers!? What about if the source have a lot of Maria db data, Webstation with lot of settings, docker containers and more. And supose the source crasched completely, could you then do restore from the target? Or do you have to install Hyperbackup first on source?
REPLY ON YOUTUBE
Great video!
When I click restore and verify that the local nas will be erased it asks me for a file path the latest DSM software. After the ‘Creating volumes for the restoration’ is complete I get a new window saying welcome back and give me the option to ‘Re-Install’ the DSM. It then asks for the file path to the latest DSM software and brings me back to the Welcome to DSM 7.2 page and gives me another opportunity to ‘Restore your device’. Which leads me back to the Hyper Backup wizard and then I’m stuck in Groundhog day.
Any idea how to break out of this loop and restore my NAS?
REPLY ON YOUTUBE
Backing up a system image to an external drive is not possible currently. I wonder if it’s possible to copy over the backup manually to an USB drive after backup and in case of emergency restore from the USB drive? I mean having an offline backup is the securest backup you can have so maybe worth a try?
REPLY ON YOUTUBE
For anyone following along trying to configure Hyperbackup to a a remote NAS, it is doable. If you aren’t using a VPN, you will need to create a port forward on the remote end for both TCP port 6281 and 5001 (used in newer DSM for authentication) on the remote router, to the local LAN IP of your remote NAS. Then when you configure the backup job you would specify the WAN IP as the destination.
REPLY ON YOUTUBE
Many thanks for your all amazing Videos… I have NAS Storage, RAID 5 configured with 1 volume, Right now data is 43% only but issue is after 10 or 15 days storage will be reaching to 100%, then it will be auto refresh to 43%, My concern is… Between the process getting WARNING ERROR. Please suggest me how fix it. Don’t want to reach 100% Unnecessary.
REPLY ON YOUTUBE
All nice and good, but my NAS is currently on the other side of the continent, can I still use hyper backup? If I can, how do I get the IP of my other NAS? (I assume I will have to set up port forwarding)
REPLY ON YOUTUBE
is this like mirroring two office? so I can work with my data in location 1 NAS and if move to office Location 2 also work on the local NAS there as I did on the Location 1? or this is only a backup ?
REPLY ON YOUTUBE
After you have done an ‘Entire System’ backup, are you then able to restore a single file or folder? Or can you only do an ‘Entire System’ restore?
REPLY ON YOUTUBE
Mmm, I hoped this would offer a nice way to easily upgrade/migrate from an old to a new NAS. But it only accepts other NASs or Synology Cloud as target and not a simple external USB drive. Too bad.
REPLY ON YOUTUBE
The restoration times are worrying. I wish HD could be swapped from one NAS for backup to the other “source nas” in case of a catastrophic loss in the NAS. It seems that usb backup regularly may be a more practical solution.
REPLY ON YOUTUBE
Your video/article doesn’t say the differences with using the highly efficient btrfs based snashop replication, would you mind elaborating a bit on that? Some of your subscribers might feel a bit confused. Thanks
REPLY ON YOUTUBE
I actually use your videos to work on my NAS, as I do not know much about it. I had bought a DS220+ for Plex and ran out of space so I bought a DS923+. I set them both up as I wanted (based on your videos). I just watched your video on this System Image Hyper-backup (full system), but I am having a problem in that the movies and tv shows are so many that I want to exclude Movies from the “entire system backup”. Is there a way?
Thank you in advance and for you advice.
Andy
REPLY ON YOUTUBE
been looking for a guide on hyperbackup between 2 synology and your the only one mention that hyperbackup vault is needed. Subscribed and liked the video more power!
REPLY ON YOUTUBE
So which solution for full-NAS backup is better? Hyper Backup or ActiveBackup for Business? Which one is faster and more reliable? Also, I suppose that both packages do an incremental backup, is that true?
REPLY ON YOUTUBE
Listen again at 07:03 minutes…
REPLY ON YOUTUBE
Both my DS220 and DS1522+ on latest 7.2 are not showing any Beta packages for these; I see Synology Drive, Office and Universal viewer betas. Nothing else =/
Any tricks or manual downloads of the package links?
REPLY ON YOUTUBE
Hi, I can see already an Hyper Backup in the apps, why should i use Beta version? What’s different?
REPLY ON YOUTUBE
This actually came as a regular update yesterday. Got a DS920+
REPLY ON YOUTUBE
Can I restore on a different, eg complete different Synology, NAS?
REPLY ON YOUTUBE
Thank you very much for this clear explanation.
The slow restore speed is a problem. How long will it take if I want to restore 4TB? Now you’re talking about several hours with less than 200GB.
It seems that not only the network speed is a bottleneck here.
Although I must say that Active Backup is also not impressive in terms of speed for restoring a complete image.
Which is a pity because in a professional environment you don’t want to be up and running in days but in hours after a fatal disaster.
That is precisely why your review is so nice because you go through every aspect.
It is perhaps good to mention that a restore must be to the same type and configuration NAS or to a larger system. But also here: Seeing is believing. 😉
REPLY ON YOUTUBE
I’m curious if there’s a third party competitor to Hyper Backup the same way Plex, Emby, and Jellyfin are third party (and far superior) competitors to Synology Video Station or whatever it’s called. I’m currently using Hyper Backup, but I don’t like the idea that if my Synology NAS dies and I get an Asustor NAS to replace it I’d have to install Hyperbackup Desktop and work with one folder at a time to get my stuff back.
REPLY ON YOUTUBE
5:55 “Select a volume that has sufficient space for at least one system image backup”. How do I know this number? Is it the size of the volume where DSM being backed up is installed? Or what size?
REPLY ON YOUTUBE
Perfect timing Rob! I’m thinking about a second NAS presently. ????????????????????????????????
REPLY ON YOUTUBE
As usual, thanks for ALL the AMAZING videos. Is there any reason to use Active Backup for Business instead of HyperBackup for a full BARE METAL DiskStation restore. Are are they IDENTICAL in end results? thanks for your words of wisdom. – Eric ZORK Alan & Sweetie [ Professional Poets & Bed Vloggers ]
REPLY ON YOUTUBE
tx for this feature introduction. i hope its transferable to another NAS model – in case of NAS burn/damage it could be impossible to get the same model from supplier so recovery to dissimilar NAS model would be perfect. BTW the feature I miss the most is logging Active Backup jobs in Active Insight. WE pay that for our customers but it checks only Hyperbackup jobs missing their best backup APP – Activebackup.
REPLY ON YOUTUBE
Im getting transfers lower than 1MBps on hyperbackup…. its horribly slow
REPLY ON YOUTUBE
Why doesn’t Synology open it up to backup to any accessible device? Why just another Synology?
REPLY ON YOUTUBE
What happens if NAS A is backing up NAS B, and NAS B is backing up NAS A… Anyway to exclude the backups of the other unit or avoid recursion where it ends backing up the backup if itself on the other NAS which gets added to next backup …etc.
REPLY ON YOUTUBE