

Qnap TS-251B compatible RAM (memory) Upgrade
Qnap original RAM:
RAM-2GDR3LA0-SO-1866 |
DDR type: DDRⅢL(204 PIN)
Capacity: 2GB Spec: 256M X 16 Manufacturer: ADATA Frequency: DDR3-1866 Form(PIN): 204PIN Manufacturer P/N: ADDS186622G13-BSSE Power Supply: 1.35V Dram Organization: 256M*64 Temperature: 0℃~85℃ Environmental Regulation: RoHS Note: Make sure all DIMMs meet the requirements for your NAS model (the information listed in product specifications). |
Compatible Qnap RAM Alternative
Exactly the same RAM memory is manufactured by other companies like Crucial and Hyper. Qnap warns that if you use any other but Qnap RAM, you will void the warranty. But sometimes this is the only option if you need NAS for specific tasks where more RAM is required and you do not want to use other NAS as an alternative. Crucial is one of the most popular alternative brands for Qnap RAM upgrades. The specs will look exactly like Qnap, which make someone think that all RAM comes from one place just with a different label on the top.
4GB Crucial alternative price:
Crucial CT51264BF160B 4 GB (DDR3L, 1600 MT/s, PC3L-12800, SODIMM, 204-Pin) Memory
Australia Ebay:
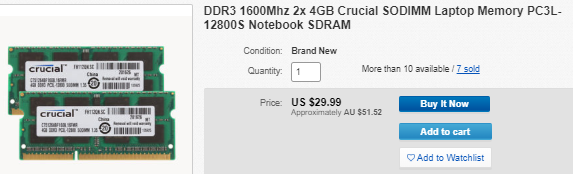
8GB (2x= 16GB) Crucial alternative price:
Crucial CT102464BF160B 8 GB (DDR3L, 1600 MT/s, PC3L-12800, SODIMM, 204-Pin) Memory
It is recomended to not mix different frequency RAM. If you do want to try faster RAM then 1600 MT/s – replace both sticks to be same.

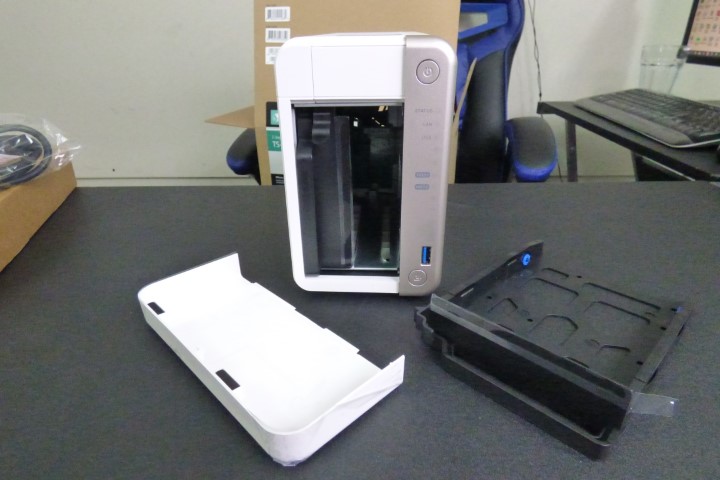
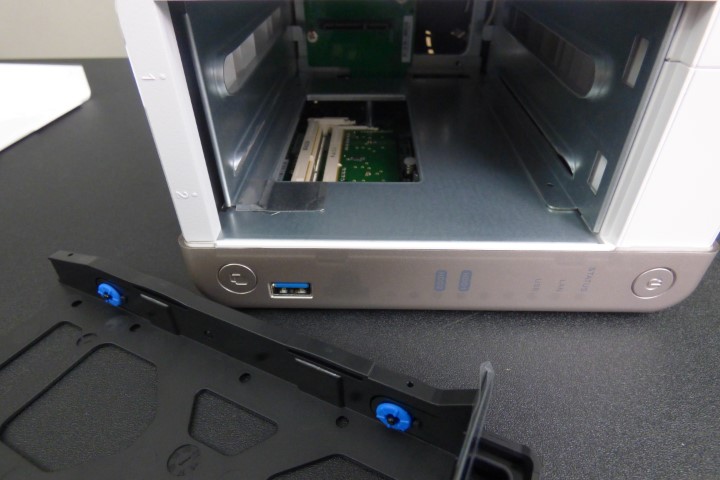
The TS-251B has two memory slots. You can increase the memory capacity of the NAS by upgrading the
memory modules. When using two modules, use only QNAP modules of the same type and capacity to
maintain system performance and stability. You can purchase QNAP memory modules from authorized
resellers.
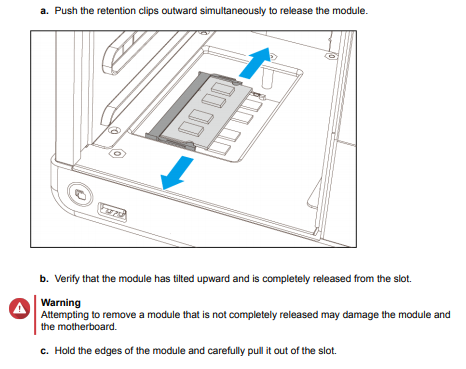
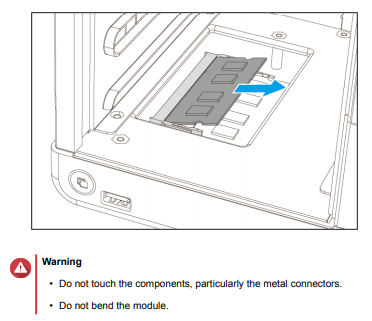
Warning
• Only qualified personnel should perform the following steps. Failure to follow
instructions can result in serious injury or death.
• Observe electrostatic discharge (ESD) procedures to avoid damage to components.
1. Power off the NAS.
2. Disconnect the power cord from the electrical outlet.
3. Disconnect all cables and external attachments.
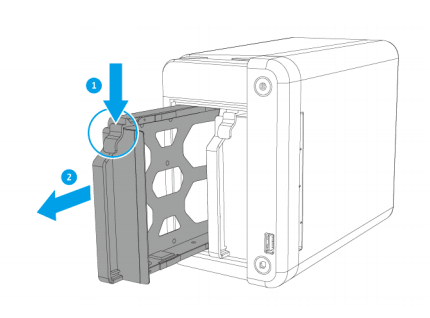
4. Remove the front cover.
a. Locate the locking mechanism on the left side of the NAS.
b. Slide the lock down to unlock the front cover.
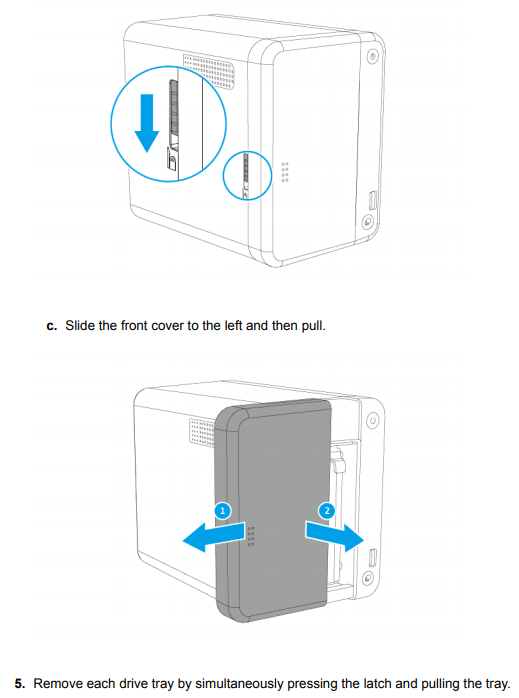
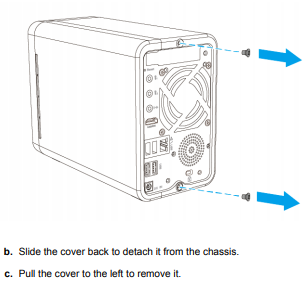
6. Remove the case cover.
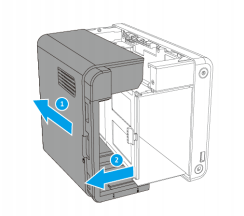
7. Position the NAS on its right side.
8. Remove an existing module
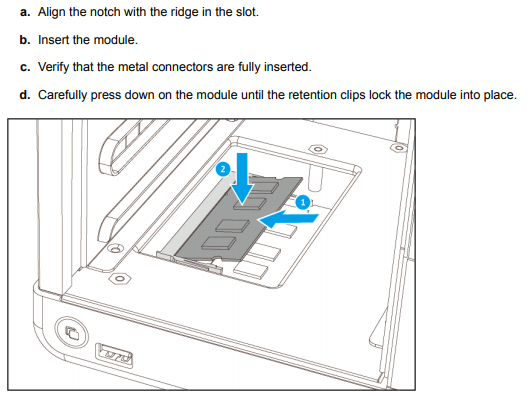
9. Install a new module.
10. Place the NAS in its normal upright position.
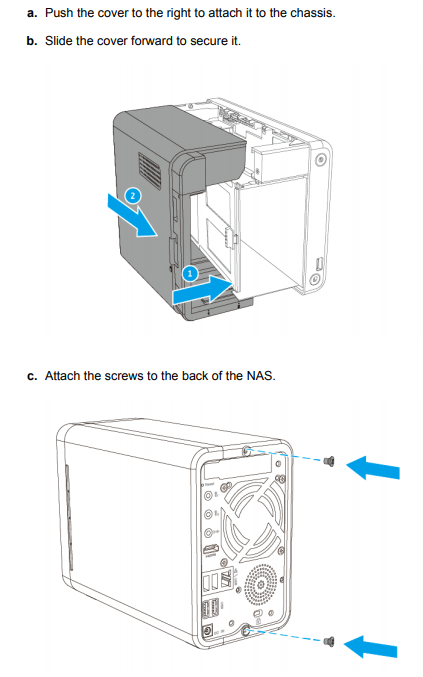
11. Attach the case cover.
12. Slide each drive tray back into the NAS.
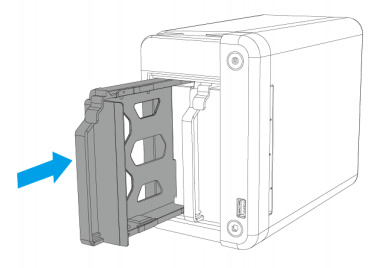
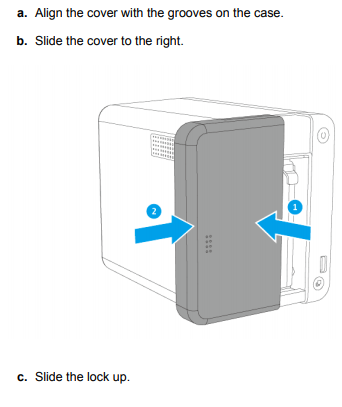
13. Attach the front cover
Verify that the module is recognized by the NAS.
a. Log on to QTS as administrator.
b. Go to Control Panel > System > System Status > Hardware Information .
c. Check the value for Total memory.


CAN YOU TRUST UNIFI REVIEWS? Let's Discuss Reviewing UniFi...
WHERE IS SYNOLOGY DSM 8? and DO YOU CARE? (RAID Room)
UniFi Routers vs OpenWRT DIY Routers - Which Should You Choose?
WHY IS PLEX A BIT S#!t NOW? IS 2026 JELLYFIN TIME? (RAID Room)
Synology FS200T NAS is STILL COMING... But... WHY?
Gl.iNet vs UniFi Travel Routers - Which Should You Buy?
Access content via Patreon or KO-FI
Discover more from NAS Compares
Subscribe to get the latest posts sent to your email.
DISCUSS with others your opinion about this subject.
ASK questions to NAS community
SHARE more details what you have found on this subject
IMPROVE this niche ecosystem, let us know what to change/fix on this site