


Video Editing over 10Gbe or Thunderbolt with a NAS Drive – The Easy Way
Of all the industries that have grown in terms of data storage, video editing and production has got to be one of the largest generators of unique and ever increasingly size data in the world. From wildlife photographers and fashion, to YouTube content creators and large scale movie production, video editing is BIG business and require power, speed and efficiency from it’s hardware environment in order to achieve success. Up until a few years ago, editing footage in post-production with popular editing software (Final Cut, Adobe Premiere, DaVinci, etc) could be done quite easily on your local HDD/SSD (your C:/) or via a connected external drive. However fast forward to last 2-3years and you see that the SIZE of the footage in 4K and 1080p, as well as the performance required to edit it is significantly higher than the performance available to most SATA SSD inside your machine or an external drive. From there the industry moved into NVMe SSD and Thunderbolt DAS RAID external storage, which do get the job done BUT with the prohibitive cost of NVMe AND it’s low top capacities, as well as the poor portability of Thunderbolt RAID DAS in the field and its single-connection-allow architecture, make them good but not perfect. Which leads me to 10Gbe and/or Thunderbolt NAS for video editing. Now, it too is not perfect, BUT it ticks ALOT of the boxes. Video Editing on a NAS over 10Gbe or via a Thunderbolt-equipped NAS drive presents a number of advantages and improvements of what came before, such as:
- Editing on a NAS over 10Gbe can provide up to 1000MB/s performance, which can be further increased with link aggregation or upgrading network interface ports later down the line
- Editing over Thunderbolt NAS can get up to 1600MB/s, depending on the storage media and thunderbolt NAS you choose
- Editing on a NAS allows you to upgrade the connection during the storage solutions lifespan (with PCIe upgrade cards on both the NAS and cards/external adapters on your physical system) to increase the connection to double, triple or even quadruple your performance
- Editing on a NAS allows you to improve the workflow in your video editing with multiple users in the chain. A NAS can be accessed by multiple users at once and each can have a dedicated speed and priority of access depending on their task needs
- Not only can you edit on the NAS, but factoring the NAS into your backup strategy allows you to significantly lessen the chances of losing your data – run a duplication task in the NAS, or use the NAS Backup Software to duplicate key files on a schedule or live to numerous devices (another NAS, USB, the cloud and more)
- Editing on a NAS also allows you to upload raw/pre-production footage remotely whilst off-site, so it is then ready to be edited on as soon as you return to your desk
Editing on a NAS Drive is not for everyone and thought is not quite as easy to set up and use as the plug-and-play architecture of traditional USB and Thunderbolt DAS, it isn’t that hard, provides numerous other advantages to your network hardware environments and also gives you the means to improve your entire workflow. So, let me show you how to set up a 10Gbe or Thunderbolt NAS for editing video. But first, let’s go through a few important things to remember before you proceed.
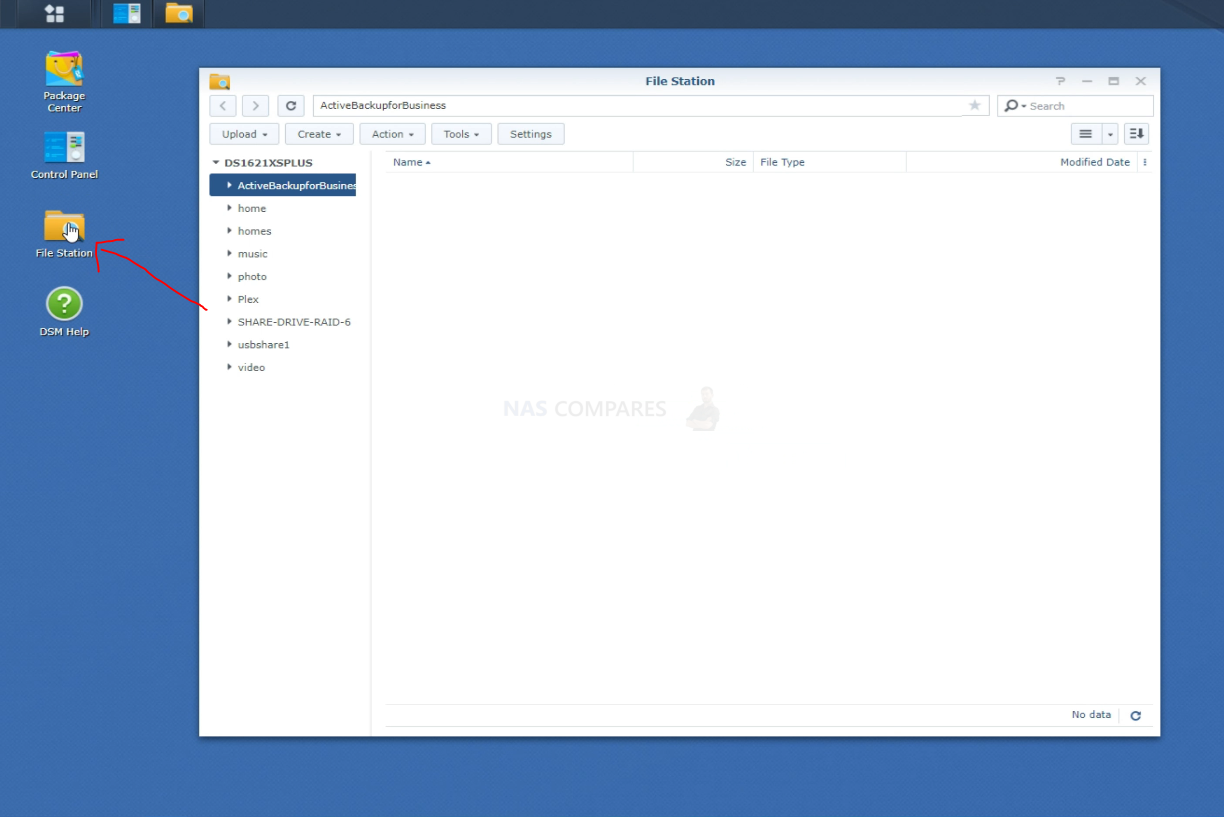
How to Edit Video on a Synology NAS

Video Editing on a NAS Drive – Important Things to Remember
It is worth highlighting that although editing on a NAS is easy, allows a lot more space to play with and have the potential (with the right HDD or SSD media) to be faster than your local/Internal SSD, there are some extra things to remember when making the switch to editing on a NAS drive, whether it is via 10Gbe, Thunderbolt 3 or both. Below are some key elements to keep in mind before you proceed:
- This guide is about setting up a NAS for Video Editing the EASY way, it is NOT the only way. There are ways to creating mounted targeted drives, using live sync tools with client apps from each brand (eg Synology Drive and QNAP QSync) with your local system to make a NAS appear as local storage for your video editing software to interact with. However, these are a little more technical and in some cases present the NAS storage area in a way that some video editing software does not understand/see. So use this guide to set up a NAS for video editing easily BUT remember there are other ways to do it that MIGHT be better for your particular storage needs.
- If you plan on using Hard Drives, you will need to have at least 4 Drives in a RAID 5 to get performance speeds that compare to a single SSD – the more drives, the BETTER!
- 10Gbe NAS are quite affordable, but the best transfer rates come from NAS systems with Intel/AMD based CPU (64bit x86) and at least 2GB of memory
- Make sure you Install the NAS-brand appropriate setup software on at least 1 PC/Mac system (eg Synology Assistant, QNAP QVR Pro, etc). They are completely free and can be removed later – they just make later stages of NAS Video Editing Setup CONSIDERABLY easier.
- NAS Systems for Video editing are recommended to be at least 5Gbe, 10Gbe and above
- You can choose where to connect to a NAS directly Mac/PC-to-NAS over 10Gbe via 10Gbe, or you can introduce a 10Gbe network switch in between so that many users can connect with the NAS on 1Gbe/10Gbe. Just be aware that it may affect the top speed of the media (HDD/SSD) in your NAS if multiple users connect at the same time.
- If you are using a Thunderbolt 3 Mac / PC System with Thunderbolt, you can use a simple Thunderbolt powered 10Gbe-to-TB3 adapter, 3 options below:
So, if editing on a NAS drive still sounds like something that will improve your video editing workflow and productivity, carry on with the guide.
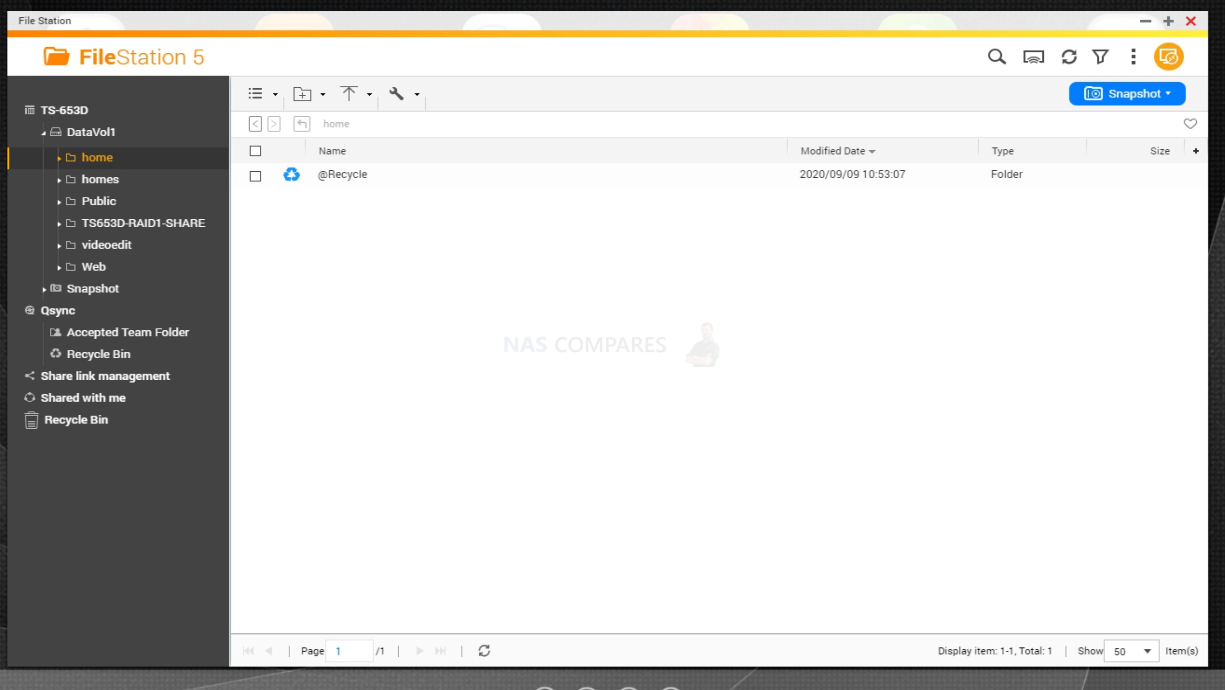
How to Edit Video on a QNAP NAS
Video Editing on NAS Drives Guide – What You Need to Do
These steps will guide you through how to setup editing on your NAS with software such as DaVinci Resolve, Adobe Elements, PowerDirector and more, as well as be applicable to NAS brands such as Synology, QNAP, Asustor and Terramaster. I will try to keep as many of the steps as ‘universal’ as possible, ut there might be the odd difference between one software brand and another. If you have any questions, scroll to the bottom of the page and content me directly on the ‘Free Advice’ section. It is all genuinely free advice, manned by me (so I apologise if I am not ‘lightning-fast’) and I will help get you all setup to the best of my ability. Let’s get the guide started.
Step 1 – Set Your NAS Up for Storage
Right so, this is probably the BIGGEST STEP! This guide is largely useless if your NAS system is not already set up – setting up a NAS (eg have it plugged in and ready to interact with, etc) is a whole guide in itself. Luckily I have made several of those in both written and video form. It is important that your NAS system has the following things done:
- Latest Firmware Installed (generally this is done when the system is first set up automatically, but always check)
- In the NAS User Setup, create a new ‘user’ for the video-editing with access to the folders in the NAS that are going to be used in your editing. You don’t HAVE to do this, but it’s best to leave the ‘admin’ account separate from this kind of thing, as you want that to be your ‘recovery’ if needed.
- Have your Storage Pool (the RAID) setup and a Volume created. The guides will go into more detail about this for each NAS platform, but I recommend a RAID configuration with at least 1 disk of redundancy (so, 1 disk safety net if a drive breaks/fails) across at least drives. The Volume setup will ask you lots of questions about file systems and Encryption – those can largely be set to ‘default’ or as your own storage preference dictates.
Depending on your NAS Brand of choice, you can find a guide to setting up your desired system below:
Synology NAS Written Setup Guide – HERE
Synology NAS Video Setup Guide – HERE
QNAP NAS Written Setup Guide – HERE
QNAP NAS Video Setup Guide – HERE
Asustor NAS Written Setup Guide – HERE
Asustor NAS Video Setup Guide – HERE
Terramaster NAS Written Setup Guide – HERE
Terramaster NAS Video Setup Guide – HERE
From here you should be ready to start setting up your Mac/PC with your NAS system for video editing over 10Gbe and/or Thunderbolt.
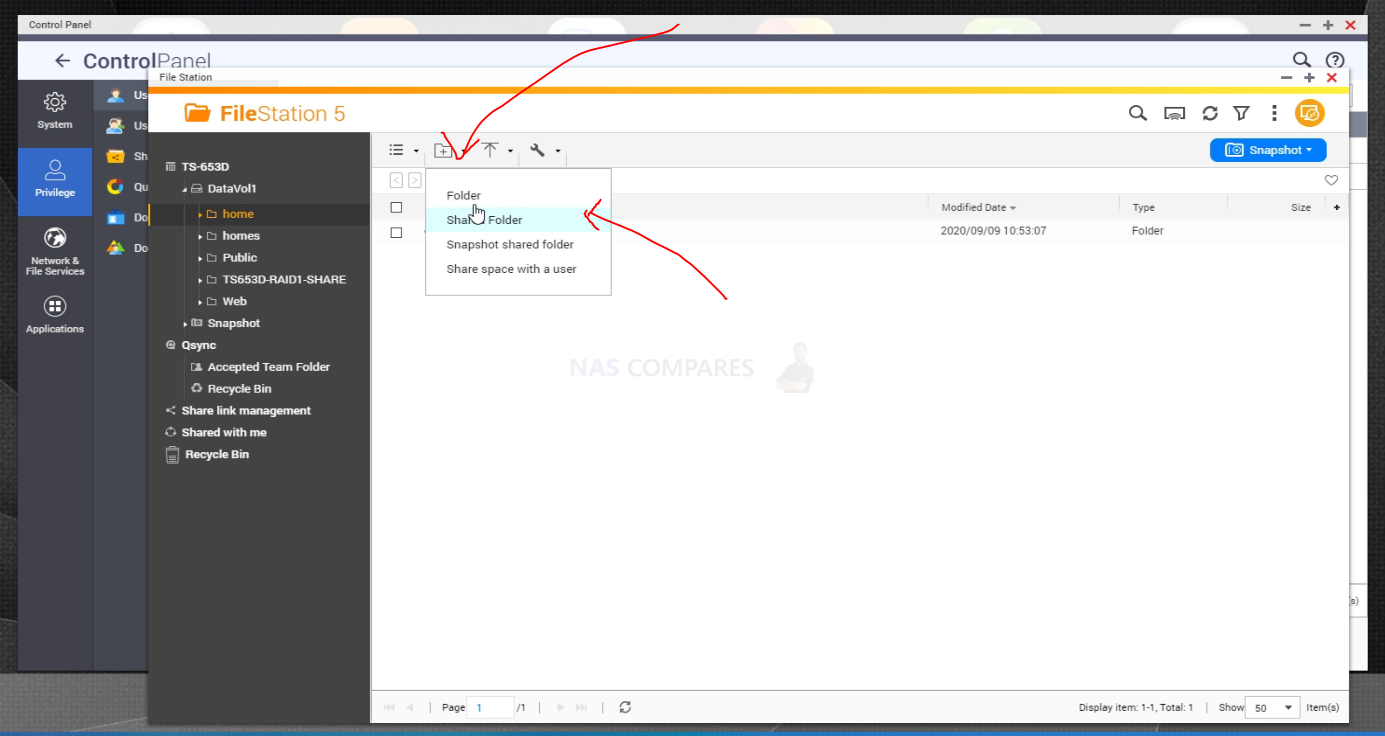
Next, you need to create an area of storage on your NAS system that can be accessed by your Mac/PC system and in-tern, the video editing software you are using. Remember, these steps will differ depending on the NAS brand you choose. First, you need to open up the NAS File Management tool (it will be called File Manager or File Browser).


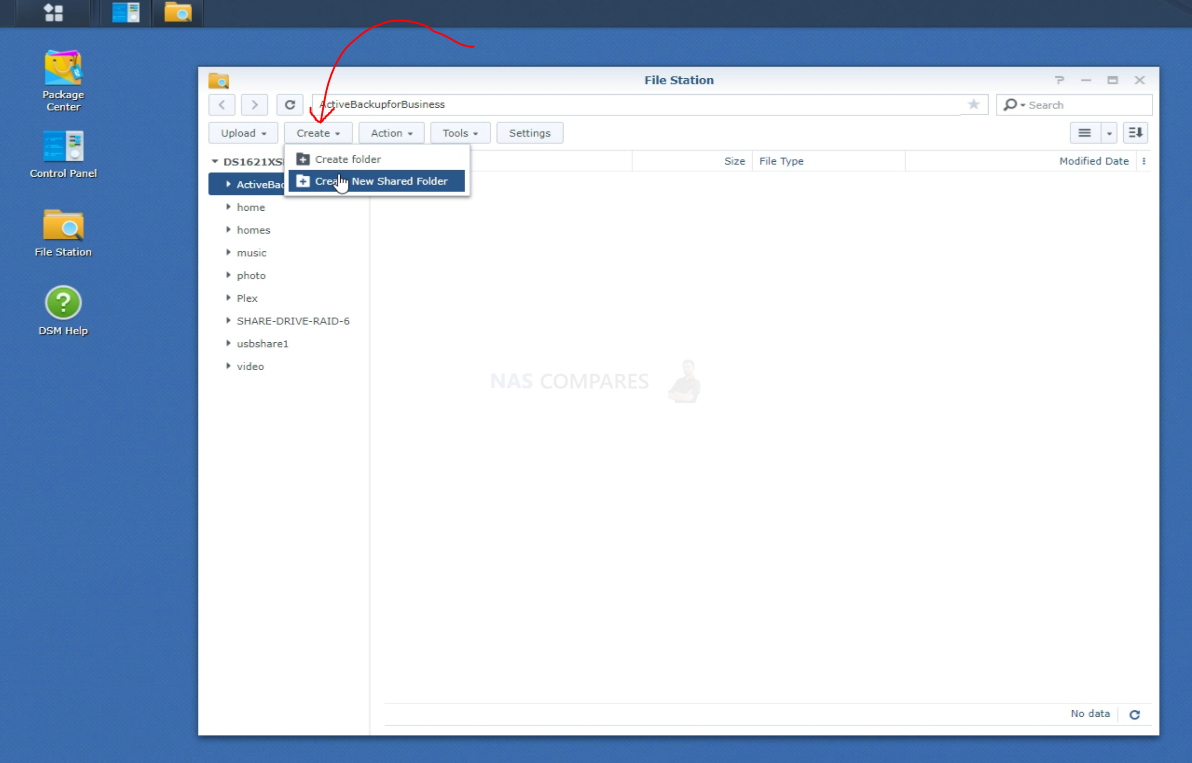
From here, somewhere at the top, you will find an option listed as ‘create a shared folder’ or simple ‘Shared Folder Options’.


You need to give this new shared folder a name. It is recommended that you should not use spaces or special characters in this name, as some software might have conflicts with it. Additionally, you will be asked about which volume on the NAS you want the shared folder to be within. Be sure to select the volume where your best-performing media (HDD/SSD) are based.
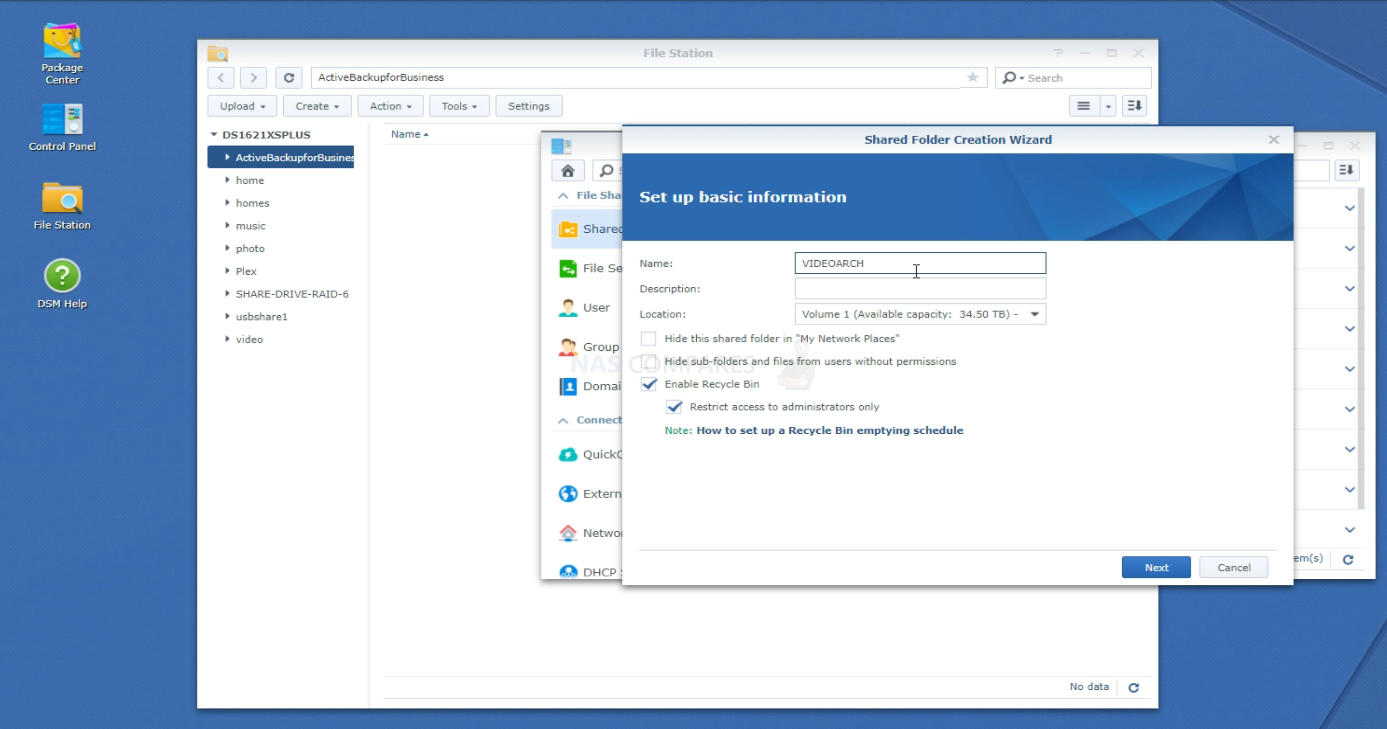
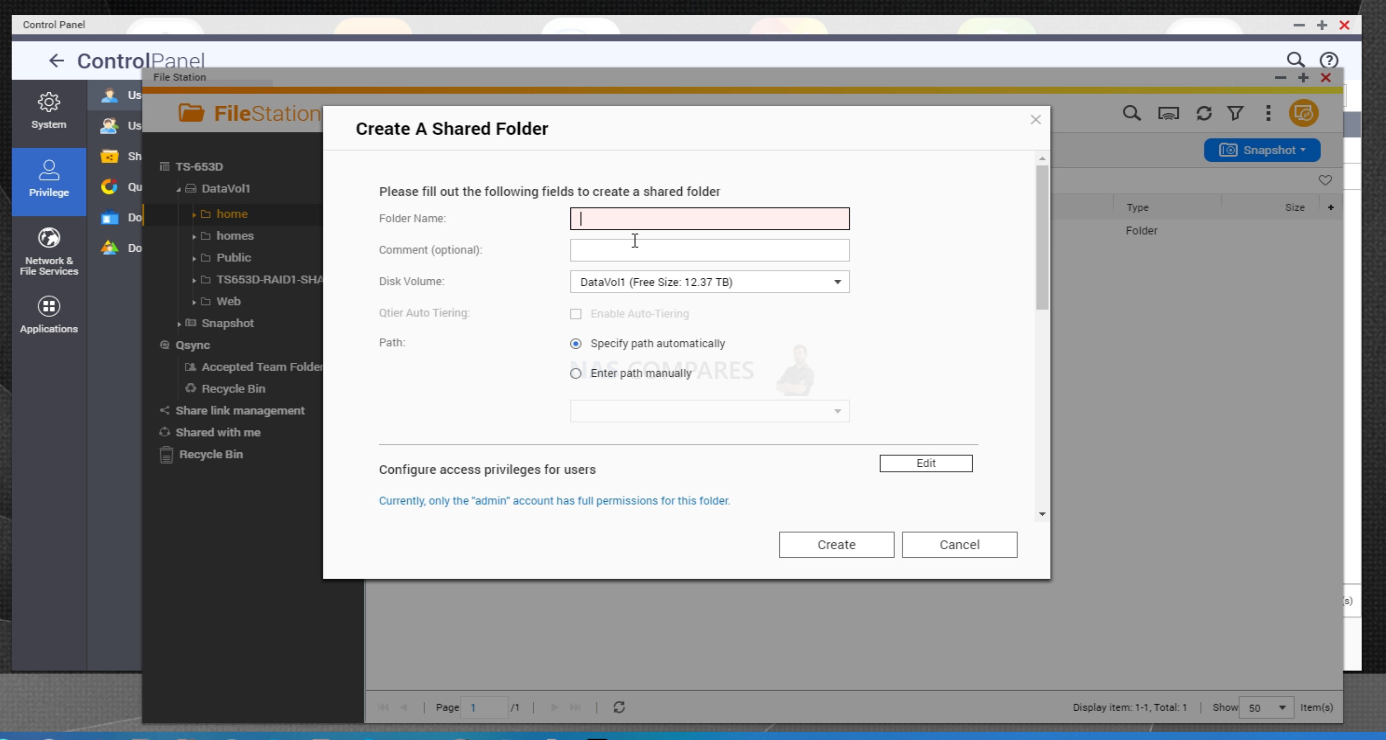


After this, you will be asked several options (depending on the brand. These will include 1) If you want to encrypt the shared folder (which will lock it to only be accessed within the NAS, but can lower performance a pinch), 2) Do you want to create a task of periodic data health checks (up to you), 3) Do you want to set a storage quota (maximum space this shared folder can accumulate) and 4) Do you want to create storage snapshots of the shared folder to revert to later if needed (again, personal preference).
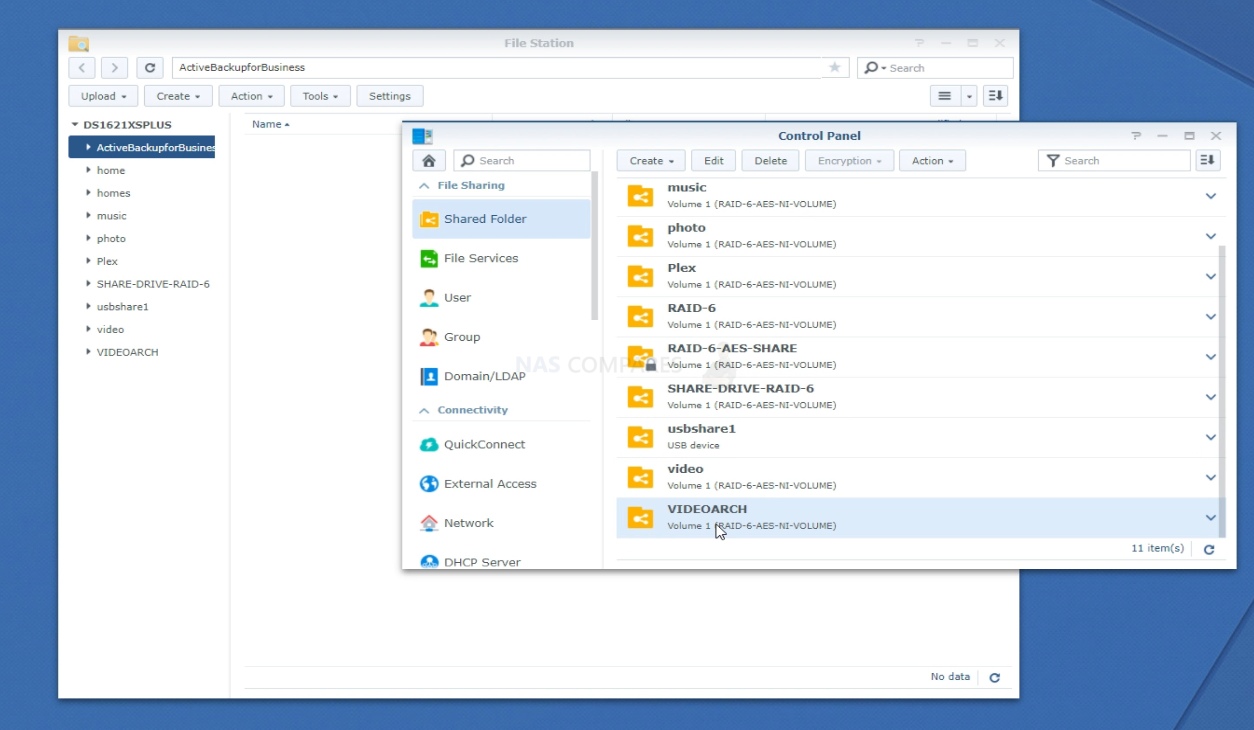
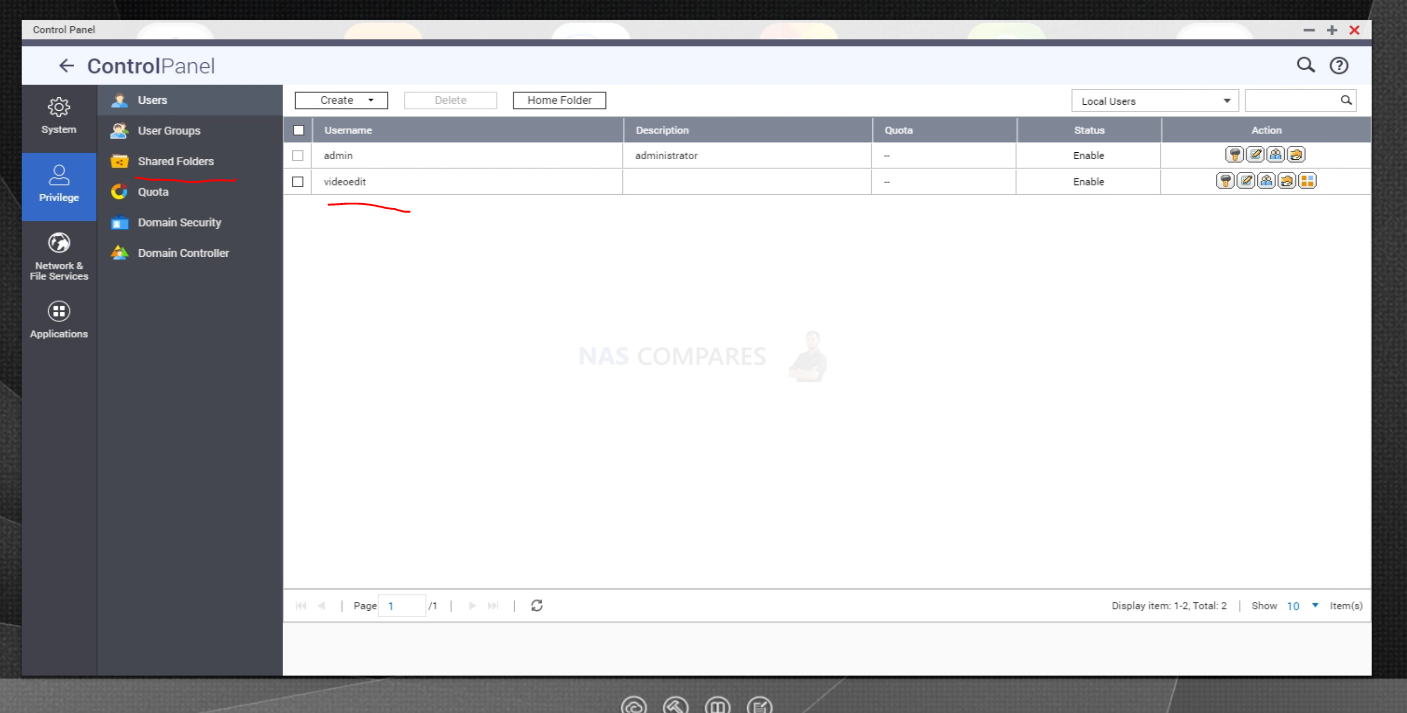


After this, you will then be asked which users on your NAS can access the shared folder. Be sure to allow both Read and Write access to both the Admin account and the one you created for your Video editing account.
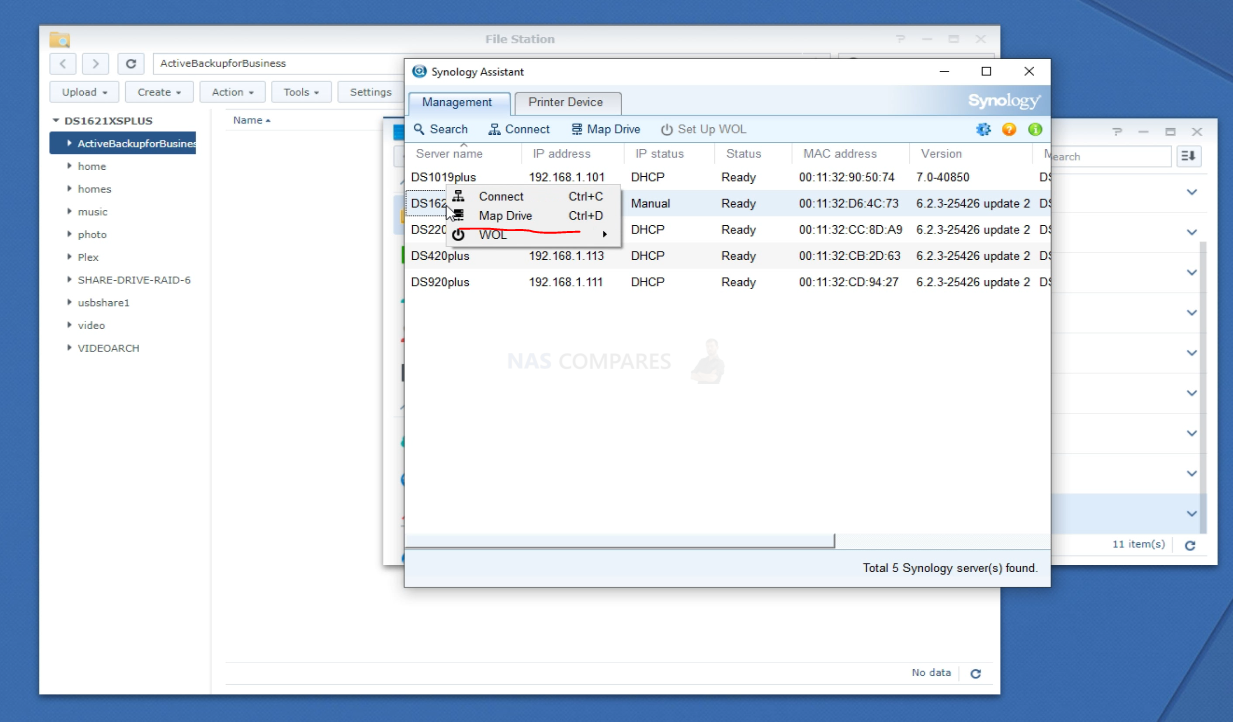
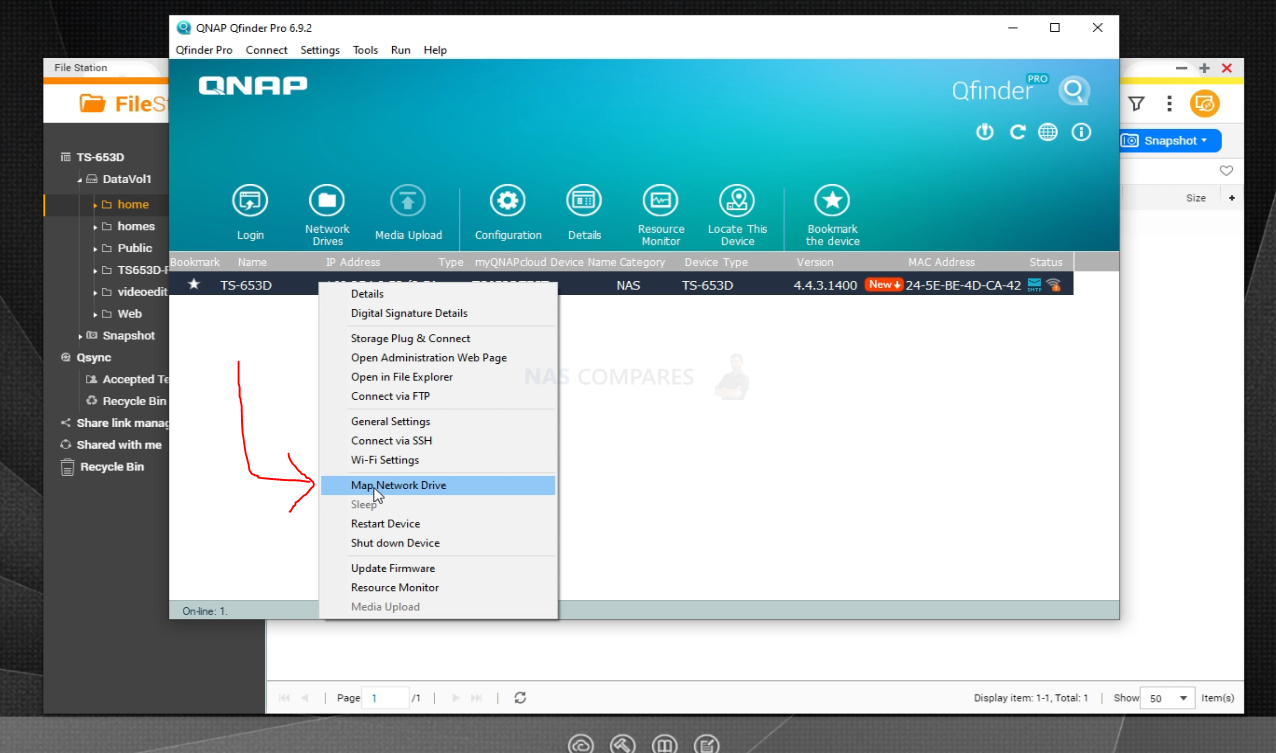
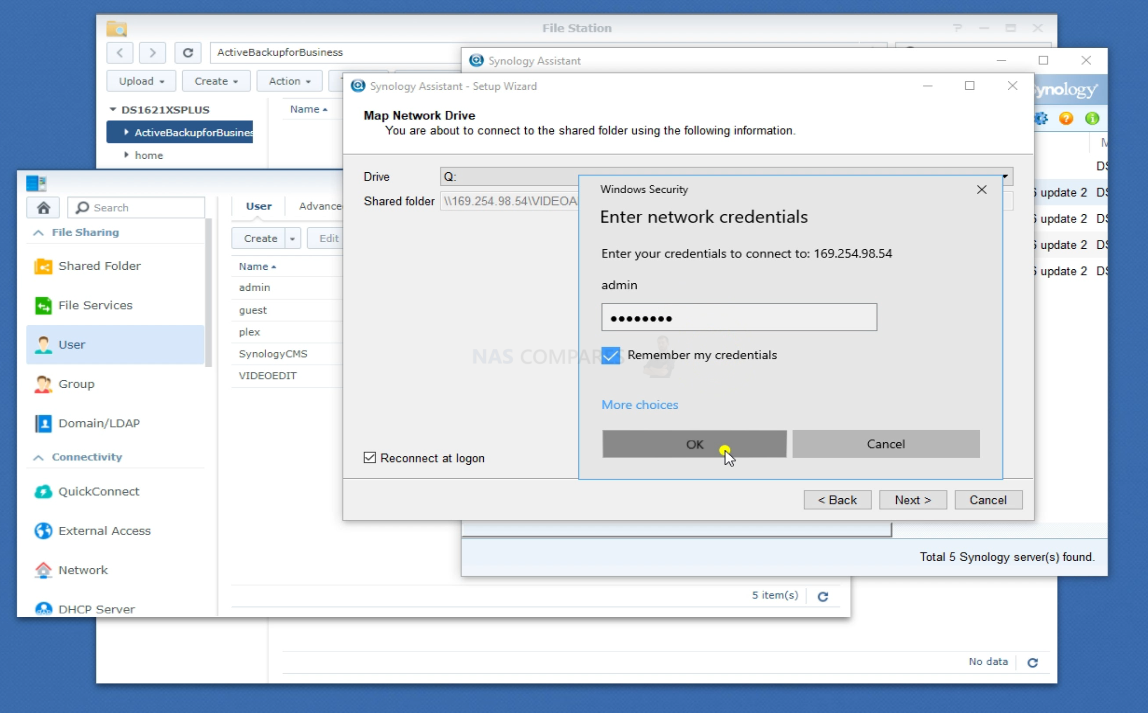
From here, open up the client tool (Synology Assistant / Qfinder Pro, etc) and ensuring that the PC/Mac you are using to interact with your NAS so far is on the same network/10Gbe/TB3, Right-click on the NAS on the available and select the option labelled ‘Map Network Drive’


From here, you will be asked to provide the login details you created for the NAS. Here you will need to enter the video editing account details you created (or the Admin account), which will then show you the list of available network drives on the NAS
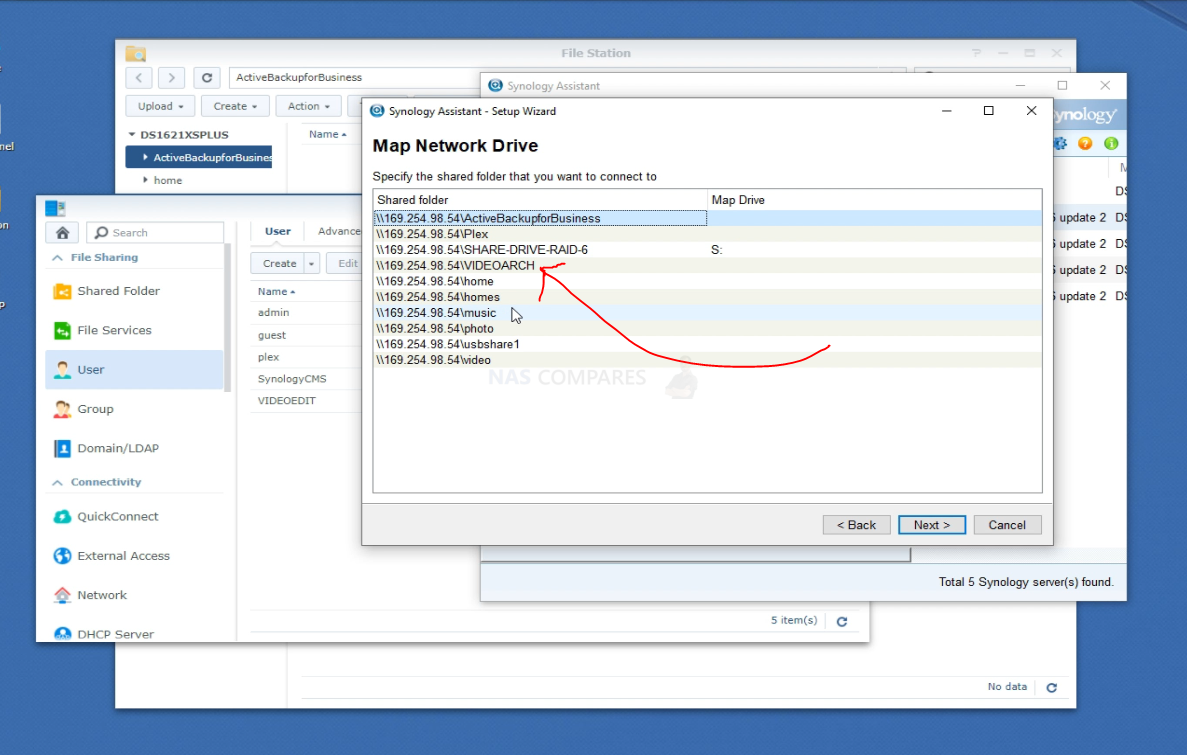
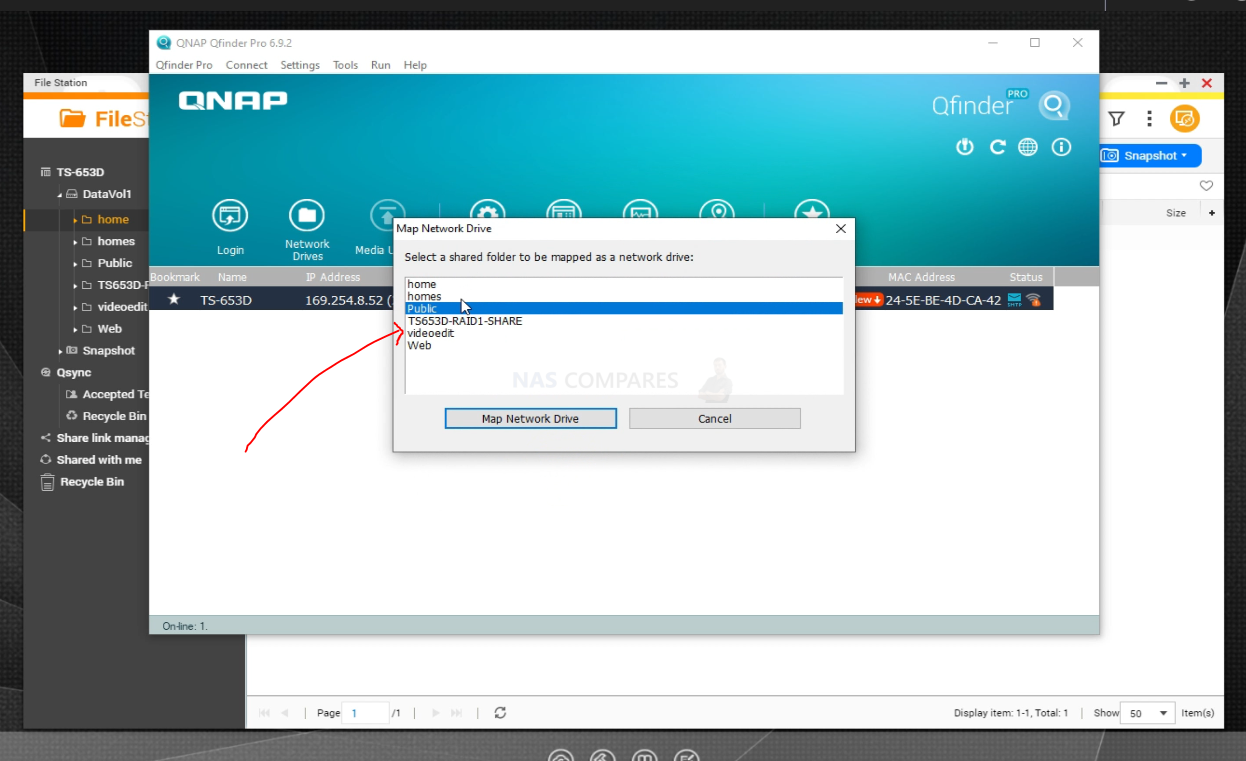


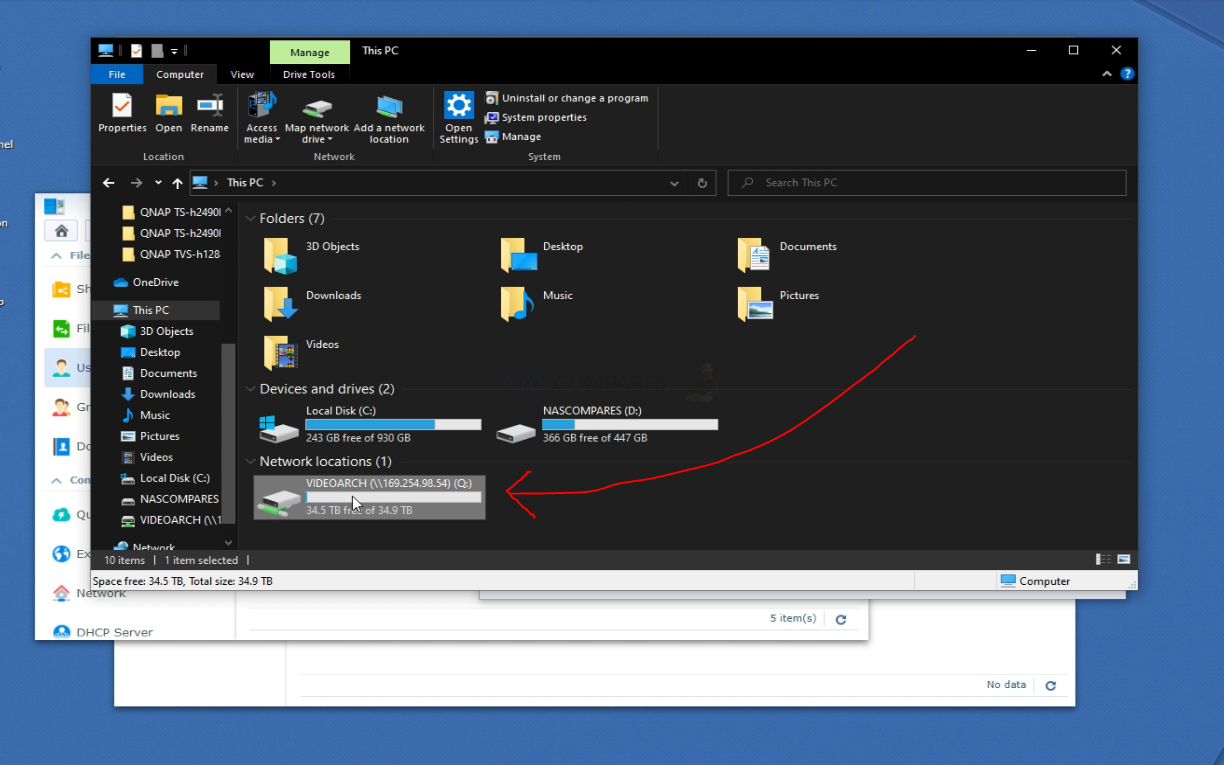
Select the shared folder that you created earlier, then you will be asked to give the NAS folder/drive a letter to assign on your Mac / PC (EG C:/ is the OS drive typically and D:/ is the CD/DVD/BD drive. Just give the drive a letter and then click confirm.

The new shared folder and Drive will now be available and visible on your My Computer / Finder and this is the drive that you will be editing your work on. As long as you connected to this drive via 10Gbe or Thunderbolt, it will allow considerably faster speeds than typical network/gigabit NAS connectivity.

Step 3 – Copy/Move your Asset Library to the NAS
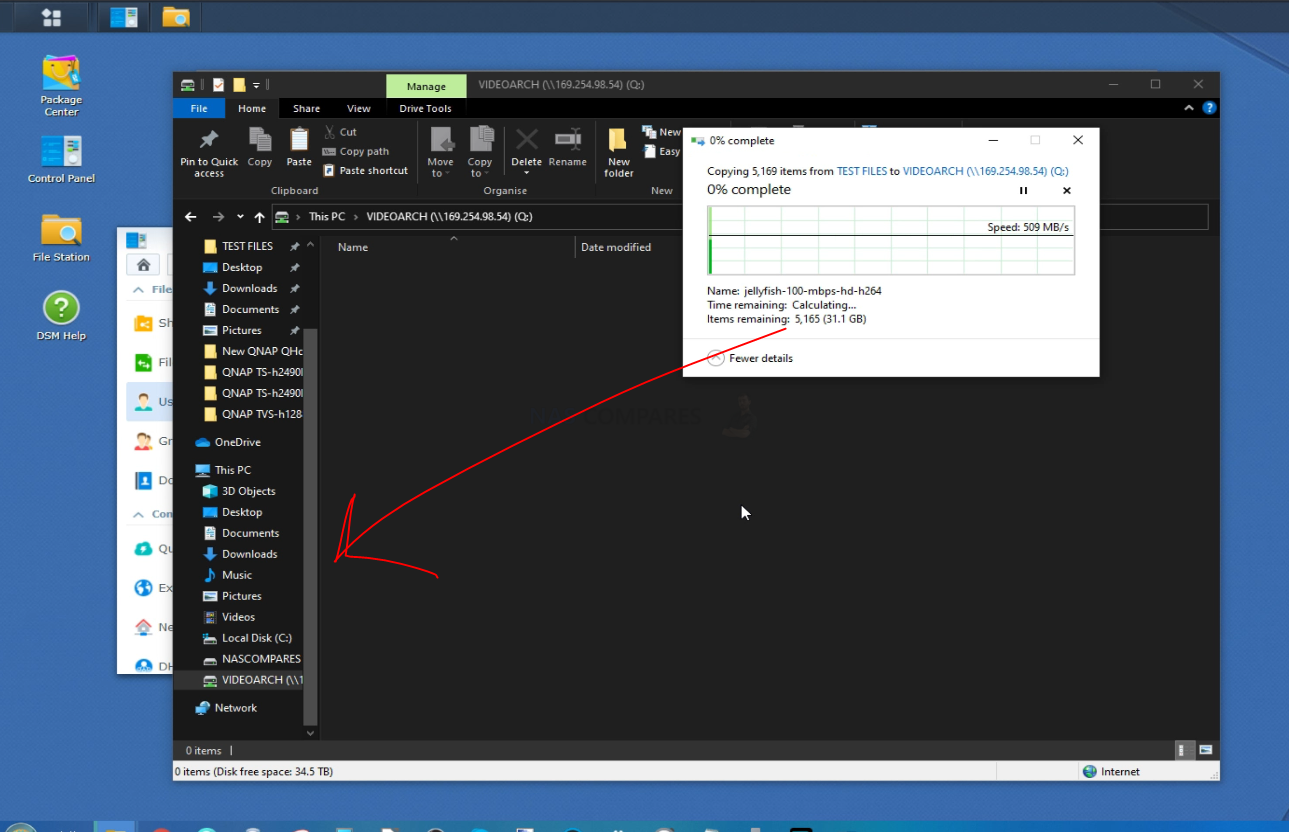
The next step is quite straight forward. You need to copy or move your existing library of work over to the NAS. This can be done in numerous ways:
Method 1 – Simply Drag and Drop / Copy and Paste into the Mapped network drive

Method 2- Go into the NAS via your web Browser and Upload directly from the File Manager
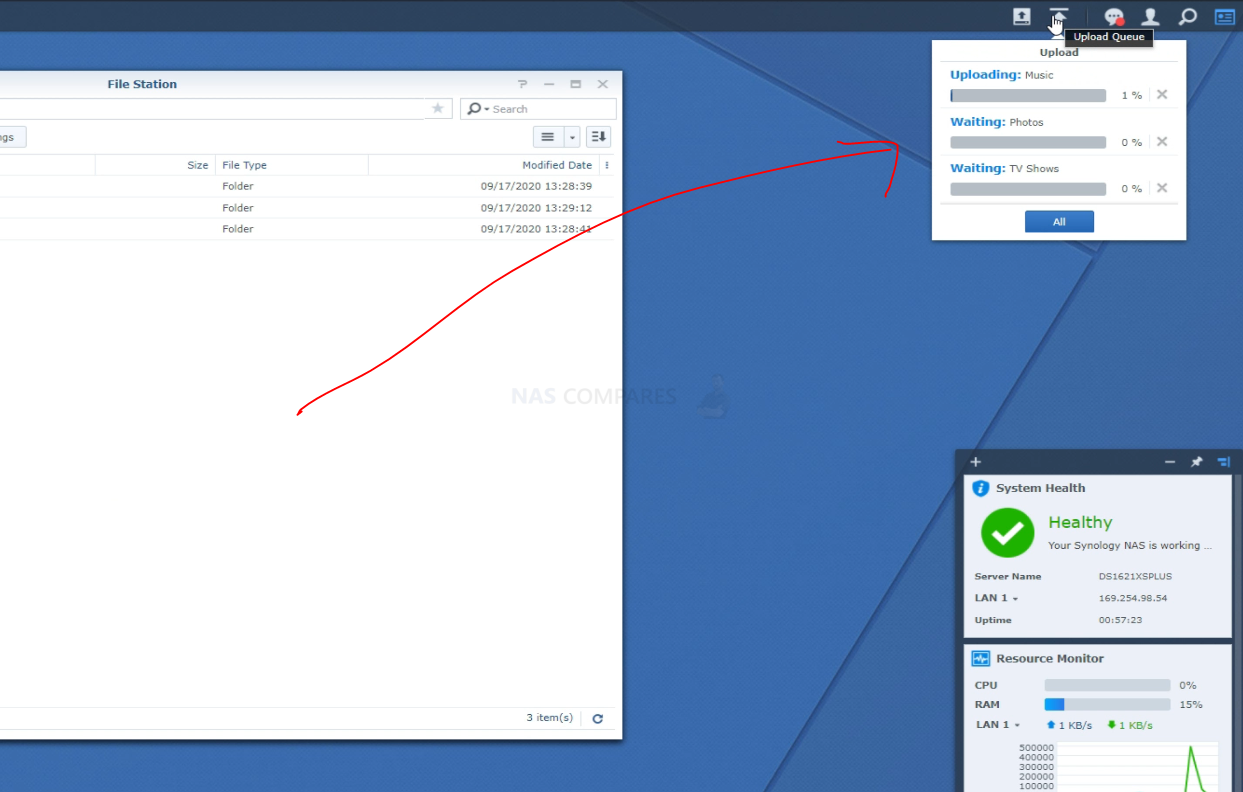

Method 3 – Create a Sync Jobbetweena folder on your PC/Mac and the NAS using the free first-party tools (Synology Drive or QSync)

You will need to make sure that the bulk of the stock footage, music, photos and more that you use on a regular basis are on the NAS.
Step 4 – If Necessary, Change The Default Media Directory on your Editing Software
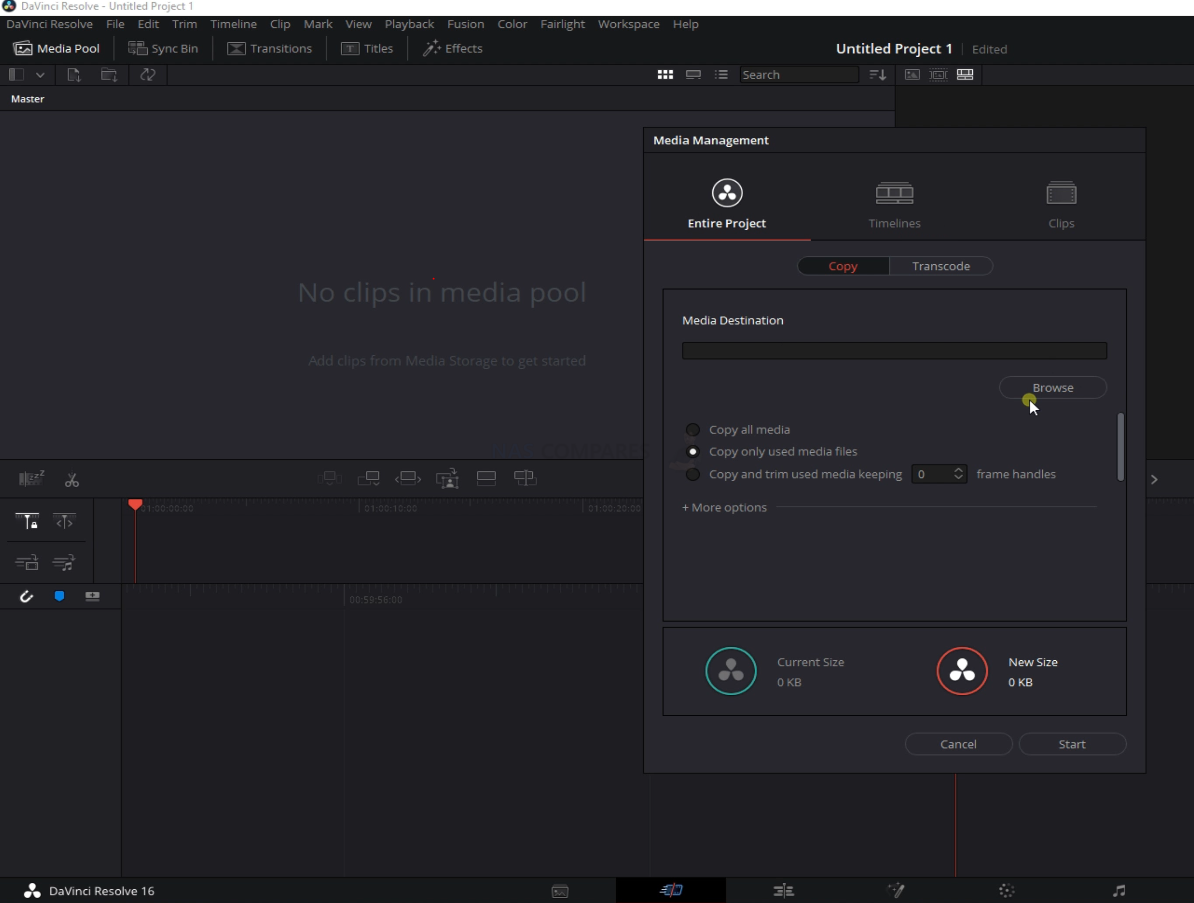
When you make the switch from editing video locally on your PC/Mac system and moving onto NAS based editing, the editing software you use (Adobe Premiere, Final Cut Pro, DaVinci Resolve, etc) will still have background actions and preferences that will be targeting your main system when in use. Typically these will be the default directories of when shadow files are created, the default location of where project assets are found and/or where temp files are saved.Each video editing software differs, so the options will be different from software to software. But it is recommended you change these to the NAS, as then the internal SATA SSD in your system, that will typically perform at 350-450MB/s (reported 550MB/s speed reports are based on ideal usage scenarios), will not present a bottleneck when your NAS can get up to 1,000MB/s on 10Gbe and more on a Thunderbolt-enabled NAS.
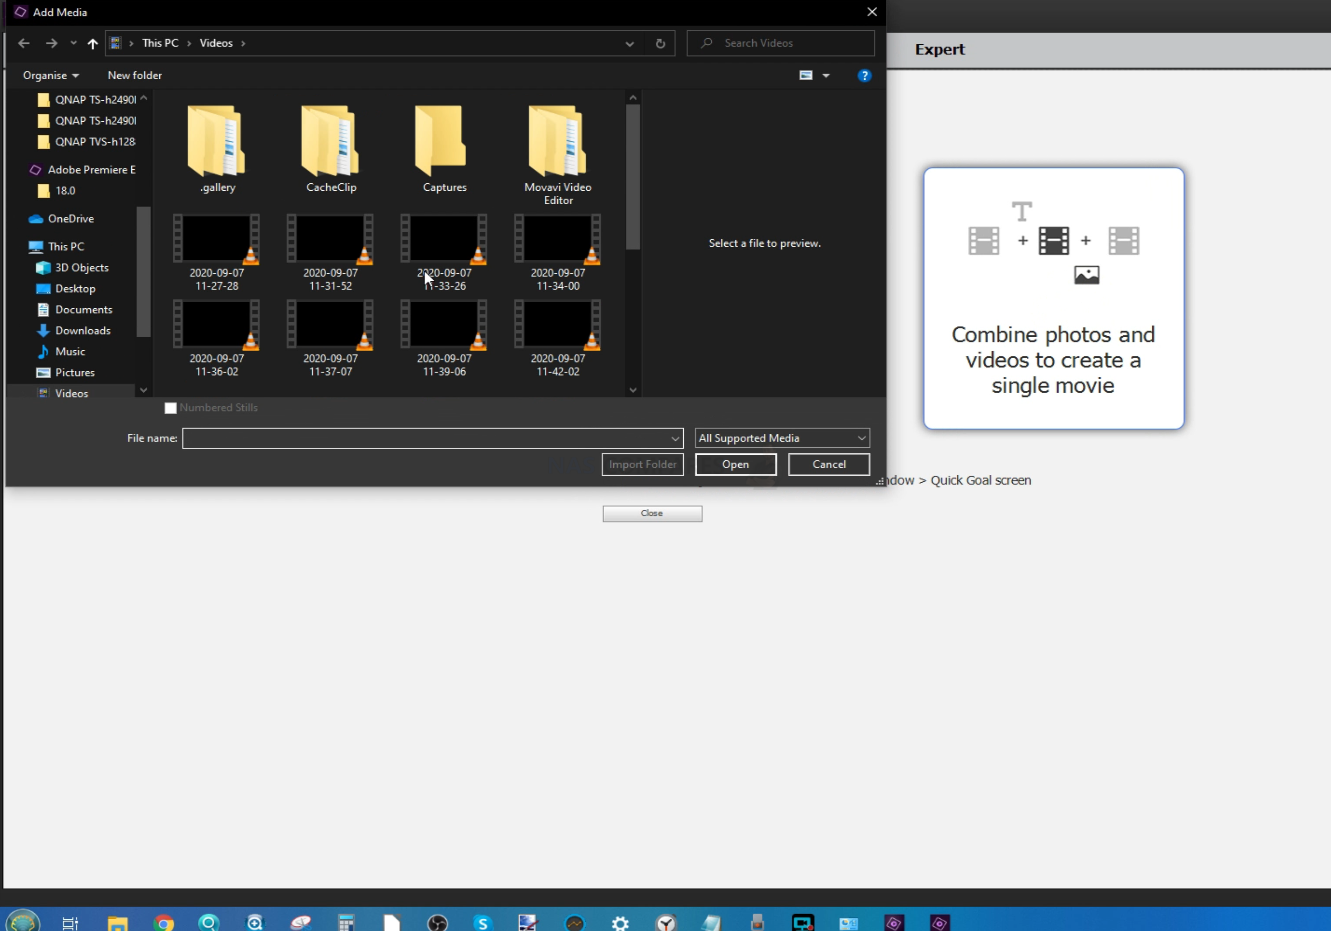
Adobe Premiere Essentials 2020

DaVinci Resolve

Step 5 – Optional BUT Important, Create a Job/Task on your NAS for Backing Up your Work Elsewhere
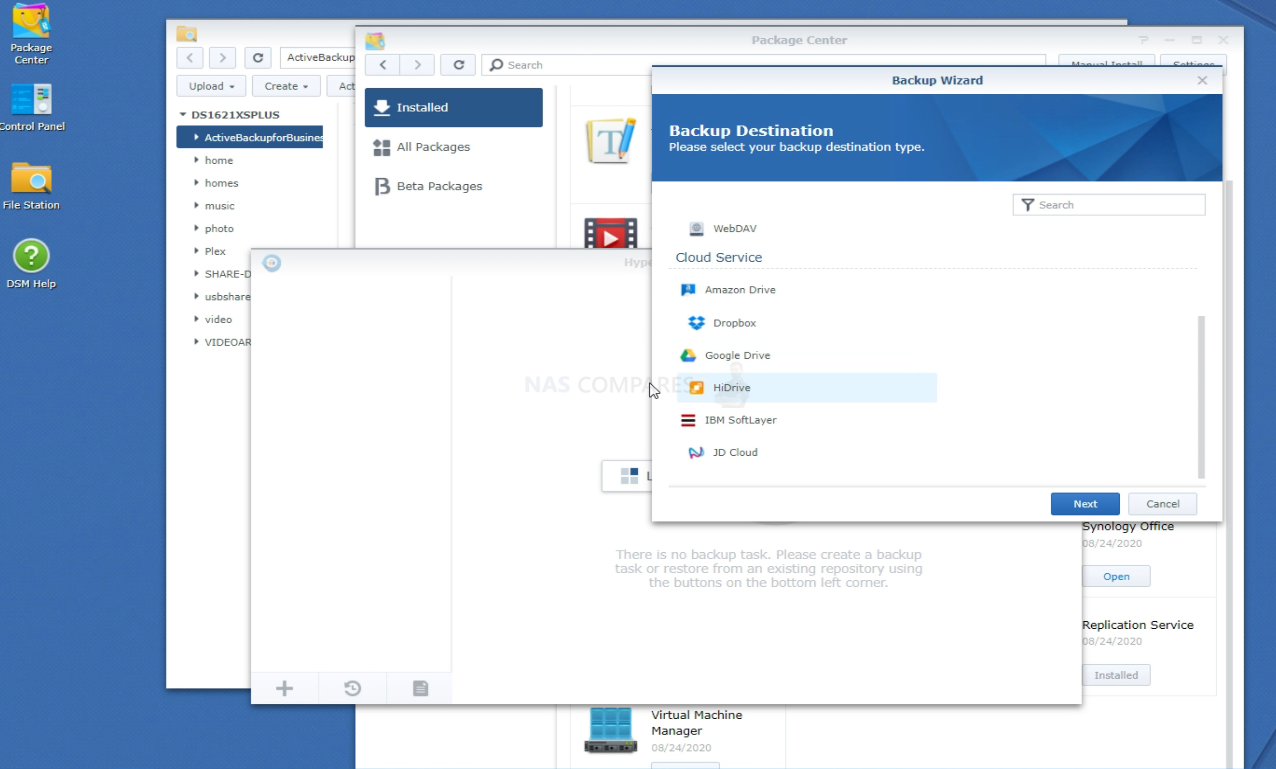
This one is not strictly essential, but I would recommend it. As you work on the NAS with your video editing, you are going to be creating both alot of files. Unlike when you were previously editing on a PC/Mac system and it’s internal SSD/HDD (whereupon you could then make a backup onto a USB drive or NAS), the video files you create will be living on the NAS drive ONLY. THAT is a big risk and means you do NOT have a backup. So, I recommend at least a 2 stage backup. That means that your data is in 1 location and then you have 2 more copies of ALL the important data in two more hardware and/or physical locations. Luckily, most NAS devices arrive with numerous multi-tiered backup software options included. In terms of backup options, I recommend one/two/all of the following (methods will differ between brands, but all of the top-tier NAS brands support these):
Backup the NAS Drive to a USB Drive

Backup the NAS Drive to another NAS Drive
Backup the NAS Drive to a Cloud Service
What is the Best NAS for Editing Video on a NAS Drive?
There are ALOT of different NAS options for editing video, but some are more suitable than others. Having a 10Gbe port and/or Thunderbolt is not enough and in order to avoid you spending month unnecessarily, I have listed a few options below that suit different personal budgets and the extent that you wish to edit. Take a look and if you are still in doubt, you can contact me directly for FREE and impartial advice at the bottom in my free support section.
The Cost-Effective Video Editing NAS Solution – QNAP TVS-472XT
If you want to edit video and you have a budget of £1500-2000, you should consider the QNAP TVS-472XT NAS


Released in early 2019, this solution arrives at just over £1000 (without VAT/TAX) and features 4 Bays of storage, 10Gbe connectivity, Thunderbolt 3, NVMe storage bays, USB 3.2 and at this price point is quite impressive for the amount of hardware and software it arrives with. You might struggle to get speeds of 1000MB/s, as this has 4 bays of storage only, but it DOES support numerous expansions and a 6-Bay and 8-Bay option are available too (at around £350+ increase in price with each tier larger).


Best Mid-Range Video Editing NAS Solution – Synology DS1621xs+ NAS
If you want to edit video and you have a budget of £2000-2500, you should consider the Synology DS1621xs+ NAS
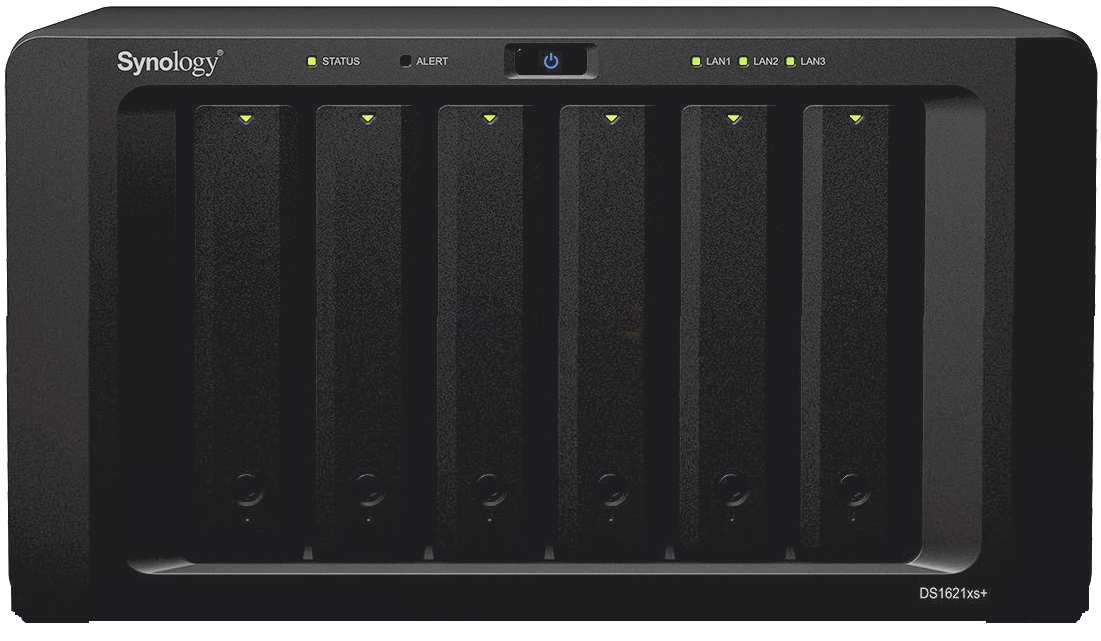

The Synology DS1621xs+ was released in September 2020 and is the first Intel-powered 10Gbe solution from the brand. Arriving with 6 Bays of storage, a Quad-Core Intel Xeon processor, NVMe SSD bays for caching improvements and a PCIe slot for adding more connections later in the lifespan of the product, it’s quite an interesting solution at £1300+ (without TAX or VAT) and has been discussed at length here on the blog for its uniqueness and proven speed (hitting 1000MB/s over 10Gbe with relative ease).
The Best Video Editing NAS Solution – QNAP TVS-1282T3
If you want to edit video and you have a budget of £2500-350, you should consider the QNAP TVS-1282T3 NAS
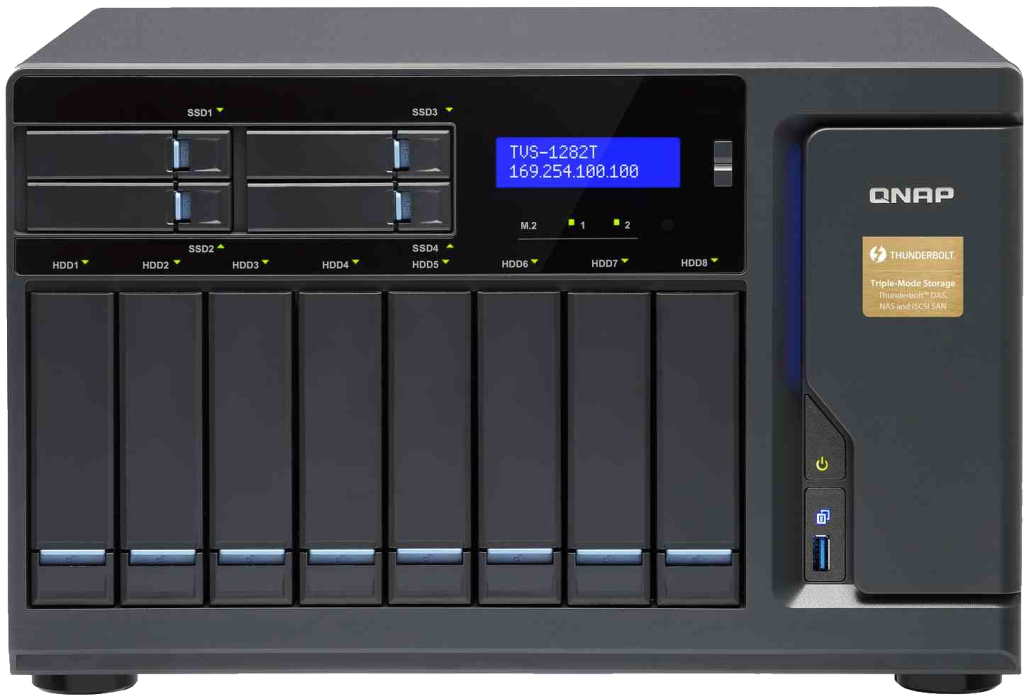

This NAS drive is a MONSTER! As overselling as that might sound, this ticks every single box in the ‘things you need in a video editing NAS’ list, but also ticks them several times over! Featuring an Intel i7 Quad-Core CPU, to 64GB of DDR4 Memory, 4 Thunderbolt 3 Ports, 2 10Gbe Ports, 8 Hard Drive Bays, 4 SSD 2.5″ Bays and 2 m.2 SSD Bays, this NAS has the lot and will comfortably provide several users with 1000MB/s each over 10Gbe and thunderbolt, or 1-2 users with even HIGHER. This is thanks to the triple-tier storage system and incredible architecture, inside and out. With a price tag in excess of £2500 (without VAT or TAX) it does not come cheap, but it certainly is still one of the very best NAS solutions to buy this year and even though this NAS has been around since early 2017, it still continues to be groundbreaking.
🔒 Join Inner Circle
Get an alert every time something gets added to this specific article!
This description contains links to Amazon. These links will take you to some of the products mentioned in today's content. As an Amazon Associate, I earn from qualifying purchases. Visit the NASCompares Deal Finder to find the best place to buy this device in your region, based on Service, Support and Reputation - Just Search for your NAS Drive in the Box Below
Need Advice on Data Storage from an Expert?
Finally, for free advice about your setup, just leave a message in the comments below here at NASCompares.com and we will get back to you.


 |
 |


x


