

Synology DS1019+ NAS Step by Step Guide
With the release of the already hugely popular DS1019+ NAS Drive from Synology, it is worth highlighting that is one of the most proficient and powerful network storage devices for home and small business users of 2019. Despite this popularity, for many users, the Synology DS1019+ diskstation is likely to be their first real experience of a NAS drive and despite its similarity to a desktop computer, the setup and use of a Synology NAS and DSM (diskstation manager) may be a little intimidating. Fear not, as it’s actually really user-friendly and I’ve created a whole bunch of guides to help you get to grips with your new piece of hardware. This guide is to help you get the most from your new NAS drive.
Synology DiskStation DS1019+ 5-Bay Desktop NAS for SMB

DS1019+ NAS – Physical Installation
Physical Installation of the hard drives or SSD into the Synology DS1019+ NAS is very, very easy and is completely toolless (for Hard drives, SSD require you to use 4 screws for each that are in the accessories box). Once you have unboxed all the accessories, you need to remove the trays (all of them, or as many as you need for your hard drives). Then each tray has removable clips on either side. Once removed, you can slot the hard drive into the tray, with the connector facing out and the manufacturer label faced up. Then put the clips back, ensuring the 4 plugs are inserted into the holes on the drive. Then just slide each tray+drive back into the NAS. Once this is done, connect the power brick into the rear of the NAS and then the mains power lead into the power brick and the wall socket. Finally, you need to connect the network LAN cable into the network port on the rear of the NAS and connect the other end to your router, modem or switch (in simple speak, the box your internet service provider have you or the box the other internet things are connected to. You can now click the power button on the front of the DS1019+ NAS and you will hear a beep and the device will take around 2-3mins to initialise.
I have purposely skipped more advanced setup factors, such as installing SSD for cache, upgrading RAM and using multiple LAN cables for link aggregation on the DS1019+ NAS, as these are a little more advanced. Though they are covered in more detail later in this guide
DS1019+ NAS – DSM Installation
The Synology DS1019+ NAS runs on its very own operating system, known as Diskstation Manager (DSM) and this is what separates it from most traditional USB direct-attached storage (DAS) and network drives that are just brainless storage. DSM allows users to run hundreds of applications, each with their own user interface (UI) on the NAS, that they can access on desktop computers, mobile devices and media devices.
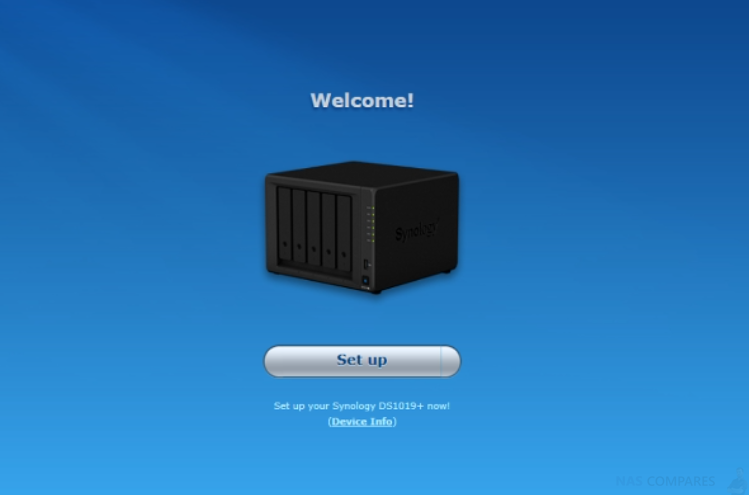
After you have installed hard drives and booted the device up, and found the device in your network (using the free Synology Assistant application for PC/Mac or DS Finder mobile app) you will be asked to proceed with the Synology DSM installation.
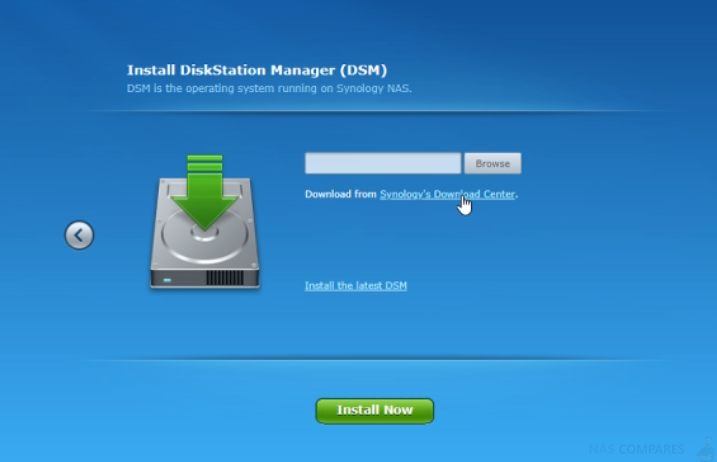
This can be done automatically by clicking proceed, or if you have a beta or specific version of DSM you want to install, you can download it from the Synology Download support site and browse your local download folder for the .pat file using the option on the screen.
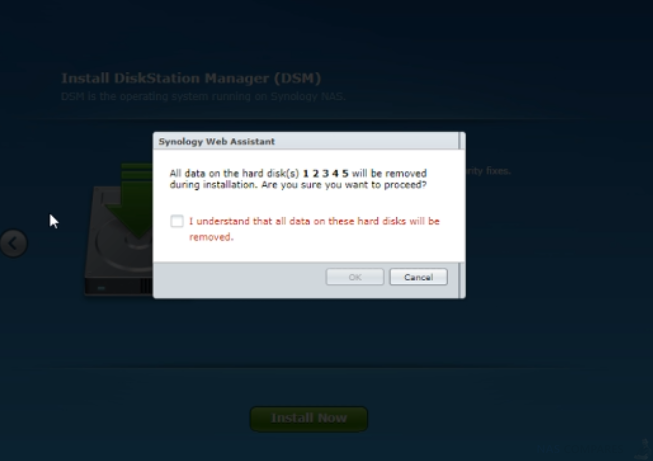
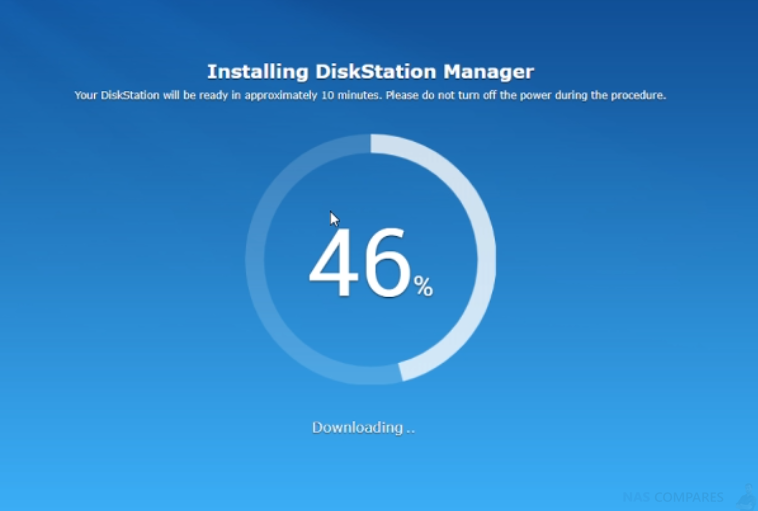
It is HIGHLY recommended that you install the latest version of DSM, as it will have the most recent and up to date security patches and software available. Once you have installed it, the NAS will then need to reboot and a timer will appear on the screen to count down how long it takes to restart.
DS1019+ NAS – Username and Password
It may seem obvious, but for your safety and security, the DS1019+ requires all connected users to have a username and password to access the contents of the NAS. During the first time setup, you will be asked to give the NAS a name and this will help identify the NAS on the network/internet. Alongside this, you will need to give a username and password.
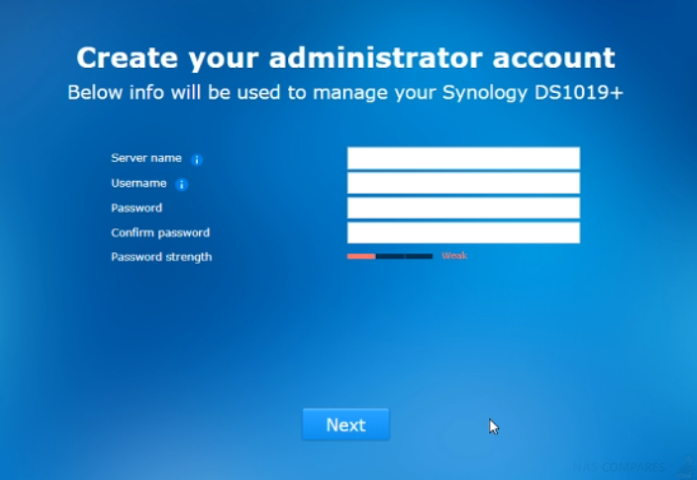
This will be an administrator user and Ultimately have full and unrestricted access to the entire NAS. You can create multiple users and groups, each with their own login credentials, as well as controlled access to files and apps, but for now, we just need to set up the admin user. Later in the guide, I will cover how to create users and groups on the DS1019+ NAS.
DS1019+ NAS – DSM Updates
The Synology DSM software on your DS1019+ diskstation NAS is constantly updated and evolving with new security fixes (the hackers don’t stop, so nor does Synology), apps, improvements and more.
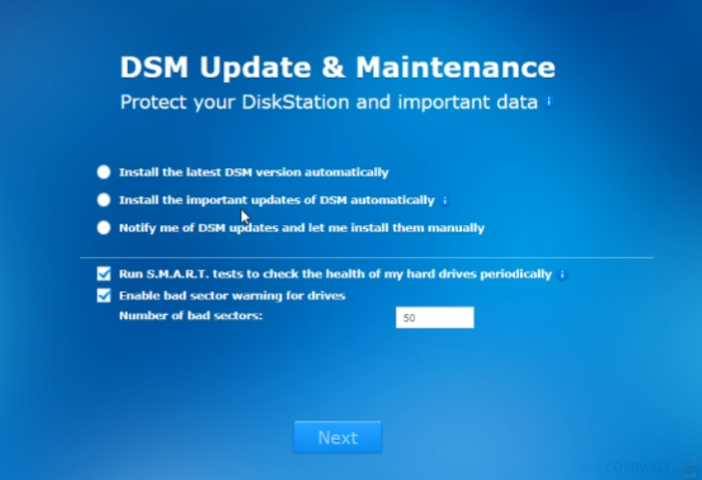
How you want to apply these updates is up to you and you can choose to apply these automatically, at your discretion, or never. I really, REALLY recommend automatically but that is a choice for you.
DS1019+ NAS – Synology Internet Access
During installation, you will be asked if you want to set up a Synology account. You will need to do this to have access to your DS1019+ NAS drive outside of your home/office network (basically, ANY internet connection other than your own).
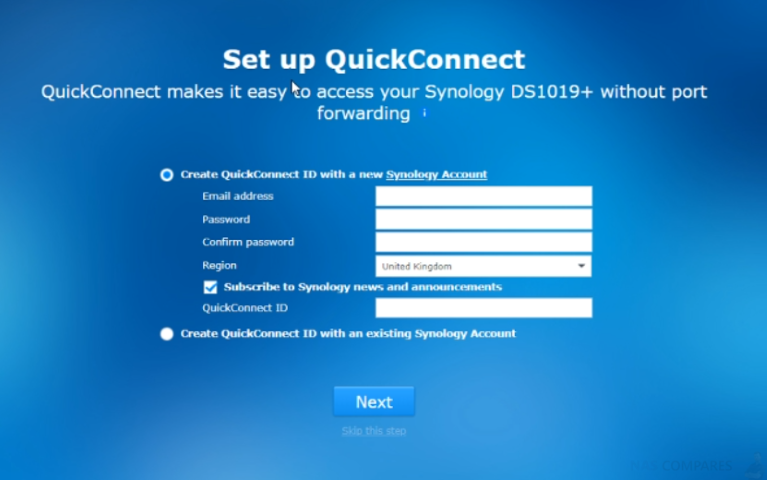
You do not need to do this now, but you should definitely do this at some point, as it allows you to access your NAS anywhere in the world! It doesn’t cost you anything and only takes about 2-3 minutes, as well as an email address to register. If this is something you aren’t hugely worried about for now, just click skip.
DS1019+ NAS – RAID or BTRFS
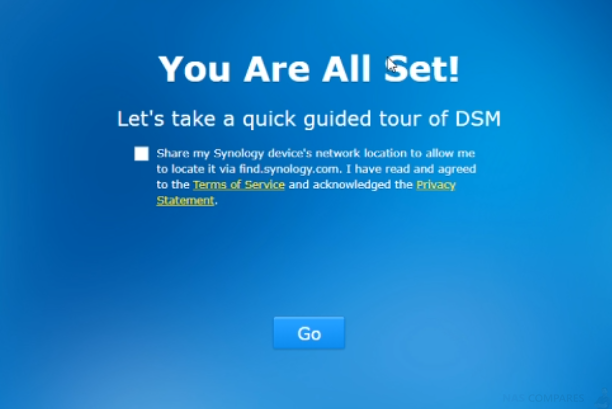
Once you get past the installation, you will be greeted with the Synology DS1019+ NAS user interface, DSM. It is very similar to popular operating system desktops such as OSX, Windows and Android. Your next step will be to prepare your storage for use in your new NAS Drive.
One of the things that make the Synology DS1019+ such a popular NAS Drive is the inclusion of RAID protection. RAID, or Redundant Array of Independent Disk, is a system of hardware protection that spreads your data across multiple drives in your DS1019+ in such a way, as to ensure that if a drive breaks, your data is still retrievable. The DS1019+ NAS supports the following RAID configurations:
RAID 0 – Built for speed, it combines ALL storage into 1 big volume (space), but has ZERO protection.
RAID 1 – Built for 2 Hard drives, this gives you speed and lets you withstand the loss of 1 hard drive. Though it does this by creating exact copies of your data across the 2 drives in your NAS. Though you lose 50% of your overall capacity
RAID 5 – Built for 3 or more hard drives, this is the most common and popular RAID configuration for NAS drives with 4-Bays or more, as well as smaller NAS using an expansion device for more drives. You can withstand the loss of 1 hard drive, and data is spread across all available drives, with each wave of data creating a blueprint of all data being written (known as parity) on a different drive each time. The only downside is a slight dip in performance, as the DS1019+ NAS CPU needs to work a little harder to build the party each time.
RAID 6 – The exact same principle as RAID 5, but instead of 1 safety net of hard drive failure, you have 2. Very popular with enterprise NAS users and if you are considering this business RAID level for your DS1019+ NAS drive, do remember that you require at least 4 hard drives and is a pinch slower than RAID 5, due to the system requiring twice the amount of parity to be built, ever time data is sent/written to the Synology NAS.
RAID 10 – The same principles as RAID 0 and RAID 1, but combined. Requiring 4 drives, this pairs the drives into 2 groups of two drives, them creates a mirror of them (as you have in RAID 1). Though technically, you can withstand the loss of two hard drives in this DS1019+ RAID configuration, if you lose the two drives that are their respective mirror, you lose the entire array. Still, easily one of the fastest Read/Write RAID configurations on the Synology NAS and popular with photo and video editors.
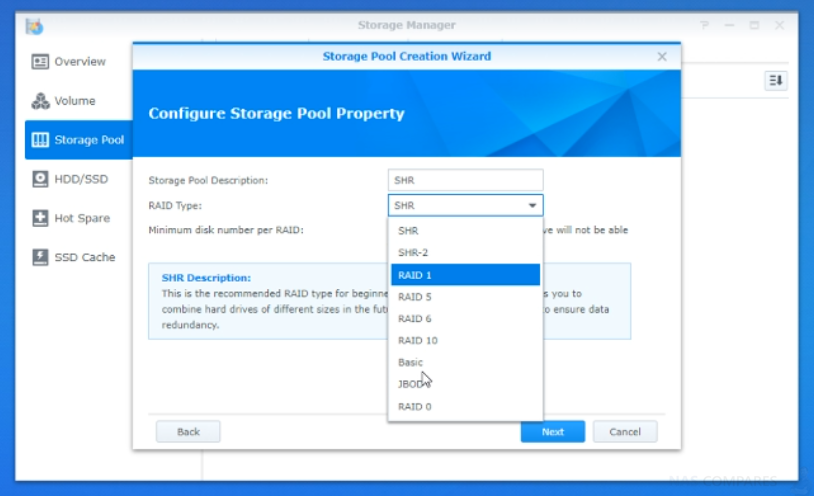
SHR and SHR-2 – This is a Synology NAS drive only RAID configuration, that is not available on XS or enterprise devices. Synology Hybrid RAID gives you a greater degree of flexibility, allowing you to mix different hard drive brands, sizes end capacities, so you can get the best storage environment available. You can also choose this RAID on your DS1019+ to add bigger or better hard drives later in your NAS devices life, whereas traditional RAID configurations strictly require drives to be the same. SHR allows you to have 1 drive of failure protection and requires at least 2 hard drives. SHR-2 provides a safety net of up to 2 drives on your Synology DS1019+ NAS drive and requires at least 3 drives. For those looking to only partially populate their NAS, this is recommended in the long run.
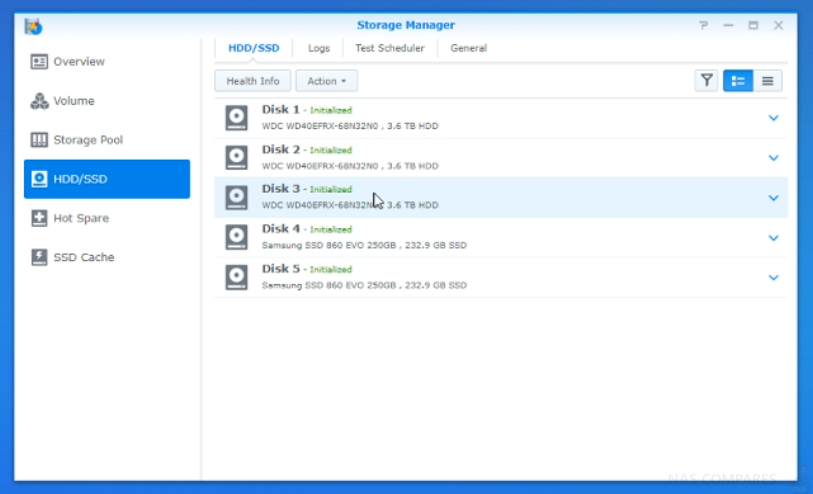
In order to do this, click at the top-left icon and open the menu. From their select ‘Storage Manager’. You will be greeted with a few options to start building your storage area. Many of the newest generations of Synology NAS drives will already initiate your storage building and, by default, set your hard drives in a Synology Hybrid RAID. This can easily be undone and changed to one of the configurations mentioned above, but for home users and small businesses, SHR is a good, long term configuration for your storage.
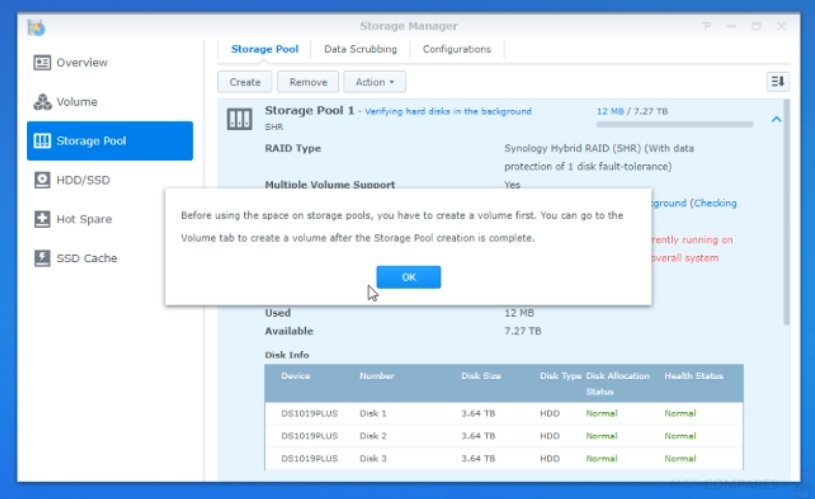
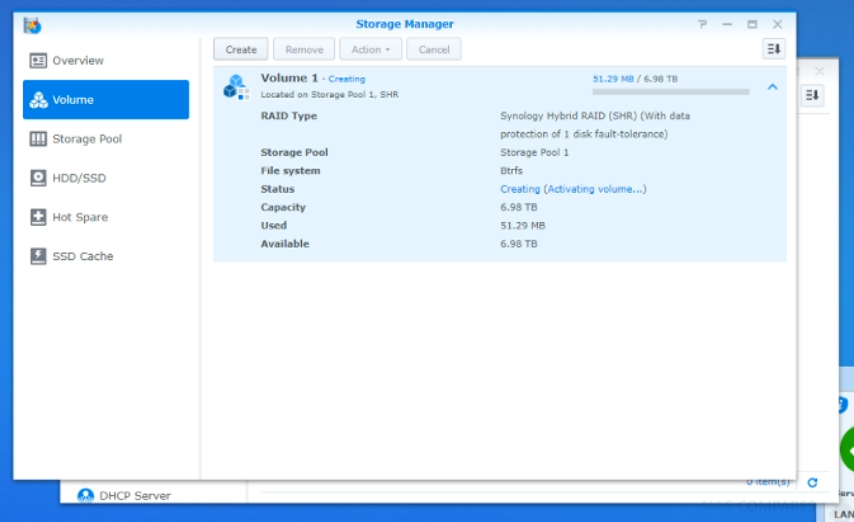
Just remember that in most cases, changing your RAID configuration on the DS1019+ is tough/impossible to do later down the line without having to reset your storage and deleting all your data (though RAID 1 to RAID 5 and RAID 5 to RAID 6 when adding more drives is possible). After you have setup your storage pool, you need to head over to the ‘Volume’ option to create a manageable space for your apps, files, folders and tasks.
DS1019+ NAS – Static Vs Dynamic IP
After the relative ease of setup so far, you may be slightly intimidated by the next setup screen on the DS1019+ NAS that asked you about your IP. Don’t worry if you aren’t too technical. Put simply, your IP is your address on your own network. All the devices in your home and/or office that share the same internet/files (your WiFi devices, your gaming computer, your console, your smart TV, etc) and each has an address (an IP) that declares their location. This helps them communicate.
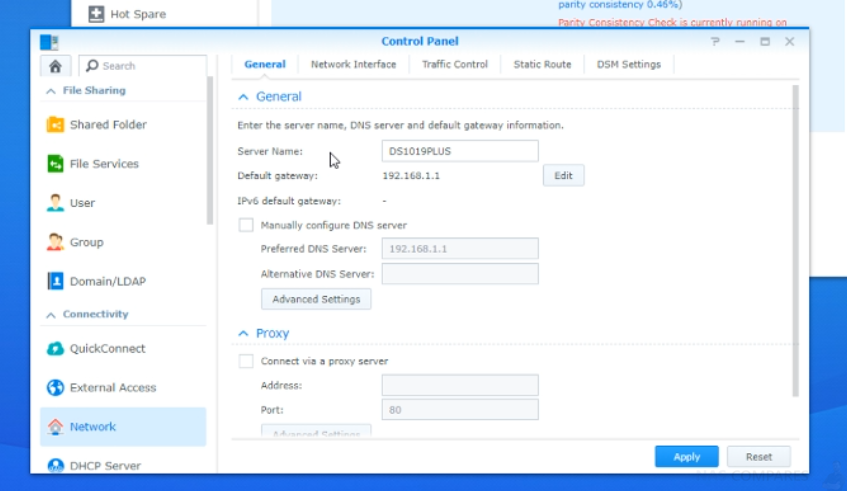
A dynamic IP means that the address of your NAS can change on the network as new/old devices are connected and allows for a more fluid network environment. A static IP (as the name suggests) means that the NAS will ALWAYS be on that address. For basic media use and easy access, I recommend a dynamic IP (the default option), however if you are using the DS1019+ Synology NAS for Surveillance, regular network backups, internet access or network drives for work, then a static IP is recommended as it ensures less sophisticated (dumb) devices do not lose the NAS.
DS1019+ NAS – SSD Cache
Originally a very business only, expensive and niche option, adding SSD cache is now something many home users include in their Synology NAS drive and the DS1019+ supports this function. Solid State Drives, or SSD, are a much, MUCH faster form of storage compared with hard drives, as they are chip-based – whereas hard drives use mechanical moving parts. A NAS that is populated with SSD will be 4-5 times faster than a DS1019+ populated with Hard drive.

However, SSD is also 4-5x more expensive and also are only available in smaller capacities. One way to bridge the gap on your DS1019+ NAS is to use SSD cache. This means you use 1 or 2 SSD drives to support the large hard drive storage, to hugely increase internal speeds. Think of it as hybrid storage and with the right RAID and SSD cache combination, you can get higher speeds than traditional SSD storage, at a lower cost.
The Synology DS1019+ NAS – VERDICT
| PROS | CONS |
|
|
Synology DiskStation DS1019+ 5-Bay Desktop NAS for SMB
🔒 Join Inner Circle
Get an alert every time something gets added to this specific article!
This description contains links to Amazon. These links will take you to some of the products mentioned in today's content. As an Amazon Associate, I earn from qualifying purchases. Visit the NASCompares Deal Finder to find the best place to buy this device in your region, based on Service, Support and Reputation - Just Search for your NAS Drive in the Box Below
Need Advice on Data Storage from an Expert?
Finally, for free advice about your setup, just leave a message in the comments below here at NASCompares.com and we will get back to you. Need Help?
Where possible (and where appropriate) please provide as much information about your requirements, as then I can arrange the best answer and solution to your needs. Do not worry about your e-mail address being required, it will NOT be used in a mailing list and will NOT be used in any way other than to respond to your enquiry.
Need Help?
Where possible (and where appropriate) please provide as much information about your requirements, as then I can arrange the best answer and solution to your needs. Do not worry about your e-mail address being required, it will NOT be used in a mailing list and will NOT be used in any way other than to respond to your enquiry.


|
 |


Terramaster F4 SSD NAS - Should You Buy? (Short Review)
Minisforum N5 Pro NAS Review - Did Minisforum just WIN at NAS?
What Can You ACTUALLY DO with HDMI on Your NAS?
Best NAS for under $499
Best NAS for Under $250 (2025)
Minisforum N5 Pro NAS - FIRST IMPRESSIONS
Access content via Patreon or KO-FI
I have two Synology NAS’s. I use SHR. I can see where SHR will be a little slower due to extra software that must be executed but I have a large SSD cache that mitigates this difference with very high percentage hit rates. BTW, the Synology Web management tool says my SSD cache is too big but the two 512GB SSD were the smallest I could find with the new faster technology. My IT guys thinks SHR is only for beginners. He read that off the Synology website but I don’t see the difference. I just looked. My SSD cache has a 96% hit rate for the month and I am only using 54 GB. My SSD cache is read-write.
REPLY ON YOUTUBE
seems you ignore your comments
REPLY ON YOUTUBE
You should have tested with an external NVME connected to the usb 3.1 port to eliminate the network bottleneck. Otherwise you won’t see the real difference.
REPLY ON YOUTUBE
Would love to see the read/write speed while drive is rebuilding. That is where my synology perform the worst
REPLY ON YOUTUBE
All these questions asked in the comments and the guy hasn’t even replied to any. What a loser.
REPLY ON YOUTUBE
thank you so much for the testing. very helpful for me that I’m choosing the raid of my new Sinology. And we both know that once you choose one is going to be there for a while… 🙂
REPLY ON YOUTUBE
No idea why you like to say, not clear, your speaking very blur, pls don’t post this type, we need good prepared video, not waste time watch yourself not know what is what.
REPLY ON YOUTUBE
You need be clear, concise and accurate, you say than do too much, at end you don’t give result. We don’t have this much time for uncertainty, do you know yourself? Your videos repeats all topics and repeats, and very long repeats.
REPLY ON YOUTUBE
Isn’t SHR more comparable to RAID 5?
REPLY ON YOUTUBE
How long would adding another drive to existing raid 5 take?
REPLY ON YOUTUBE