

Before you begin using your NAS, please make sure that you have installed hard disks, connected the
NAS and have properly initialized it. For detailed instructions on setting up your ASUSTOR NAS and
installing ADM, please see the Quick Installation Guide for your ASUSTOR NAS model. The Quick
Installation Guide may be found on the Installation CD that came with your NAS or downloaded from
the Downloads section of the ASUSTOR website (http://www.asustor.com/service/downloads).
| (ASUSTOR Control Center, Windows) | Control Center can help you to find and configure your NAS within the local area network. You can also use it to manage your NAS devices without logging in to the ADM web console.
Version: 2.1.2.9170 |
| ACC (ASUSTOR Control Center, Mac OS X) |
Control Center can help you to find and configure your NAS within the local area network. You can also use it to manage your NAS devices without logging in to the ADM web console.
Version: 2.0.1.207210 |
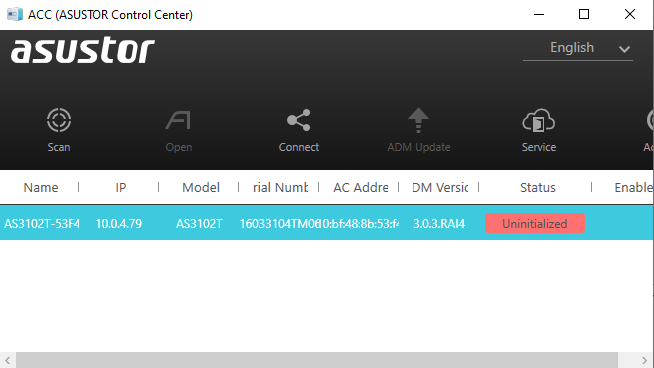
Click on Uninitialized
This will take you to the NAS location
![]()
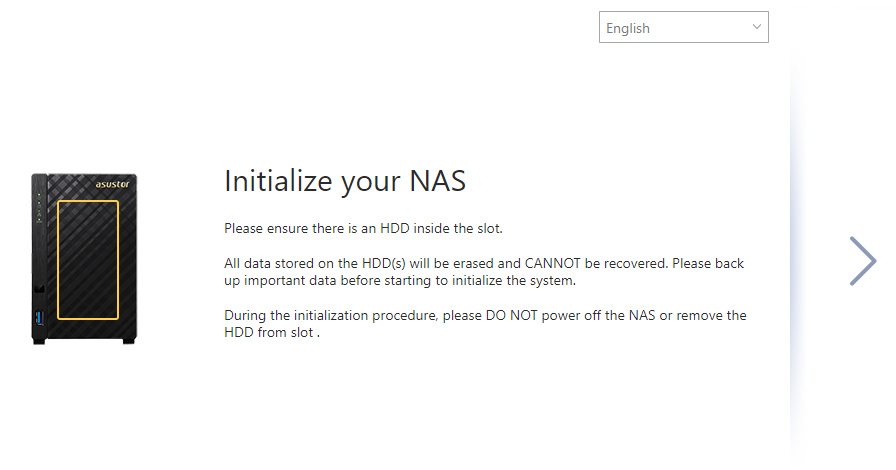
You can then start setting it up
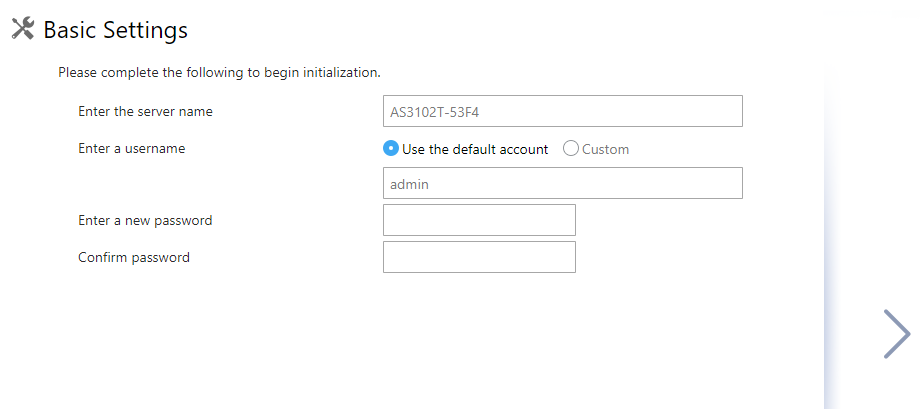
You can then configure the system. There is a quick option with preset values or advanced mode with customizable options.

Choose the User name and password. You can keep default admin name or make your own one.
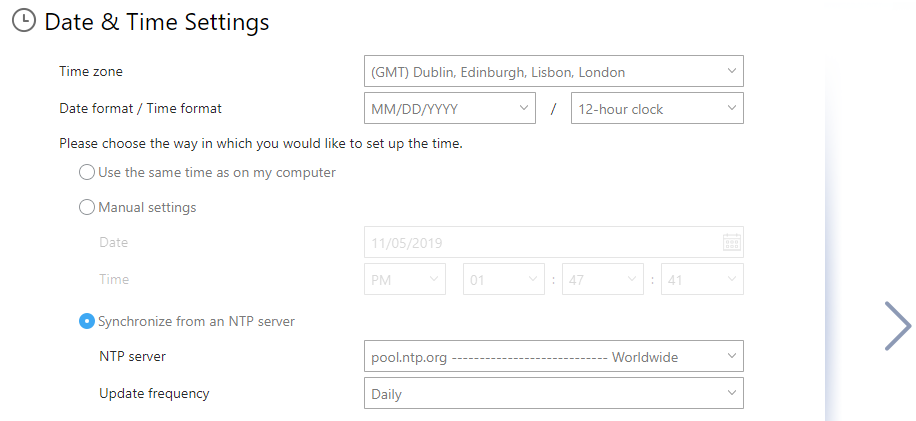
You can set the time or make it update automatically using time servers
You can choose either dynamic IP or fixed IP. It is recommended to choose fixed IP so that location will never change and you won’t need to us Asustor Finder app any more.

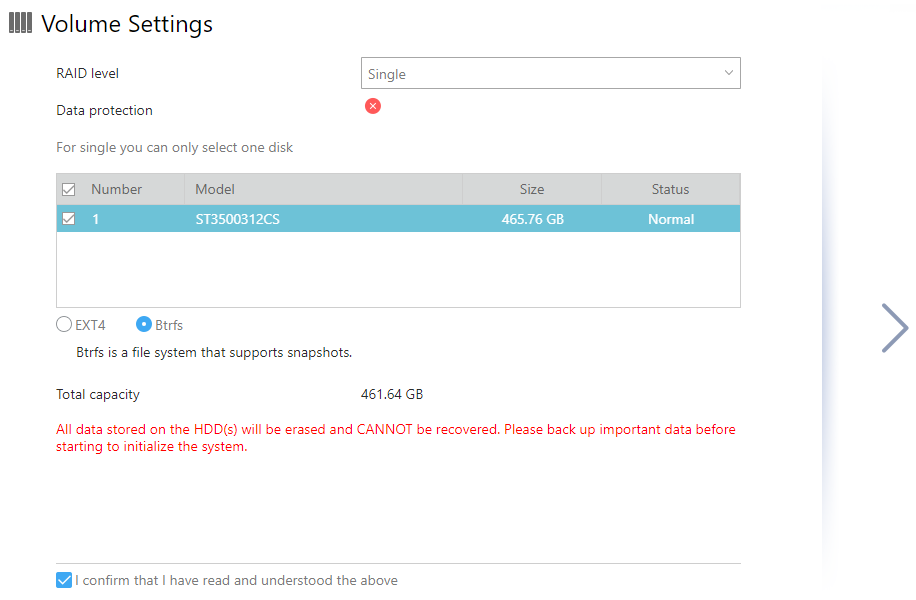
You can then choose the RAID.
Single- for one disk setup with no data protection.
JBOD- merging all disks together as one big drive with no protection again.
RAID0 – similar like JBOD, but data will be written across both drives simultaneously with no drive failure protection.
RAID1 – Drive mirror with one drive failure protection.
RAID5 – One drive failure protection in 3 or more drive setup
RAID6 – Two drive failure protection in 4 or more drive setup
RAID10 – Half of the total drive failure protection in 4 or more drive setup
You can also choose the File System. EXT4 is simple and fast file system. But BTRFS will add aditional functionality like disk version control and other data protection options.
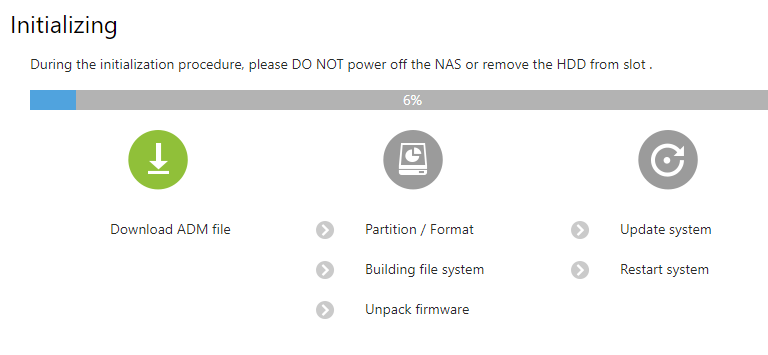
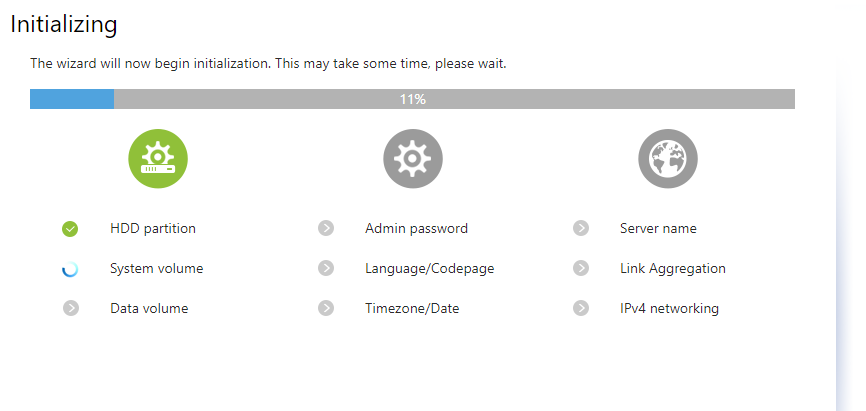
The initialising can be then finalised
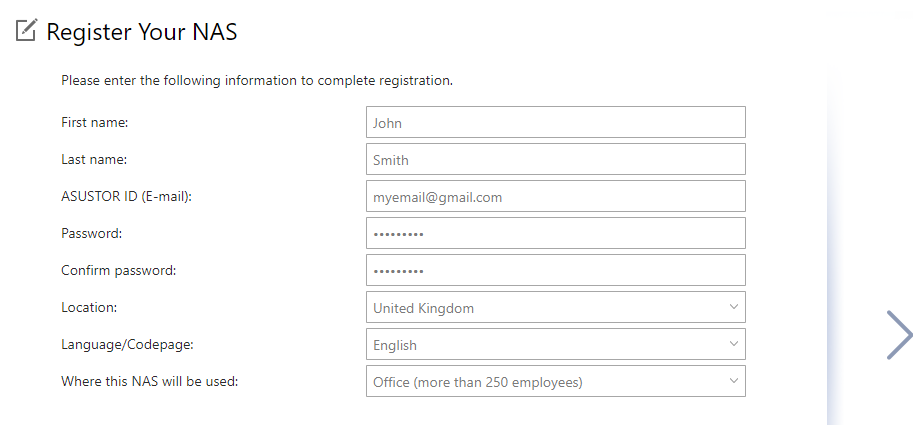
You can then register your NAS.
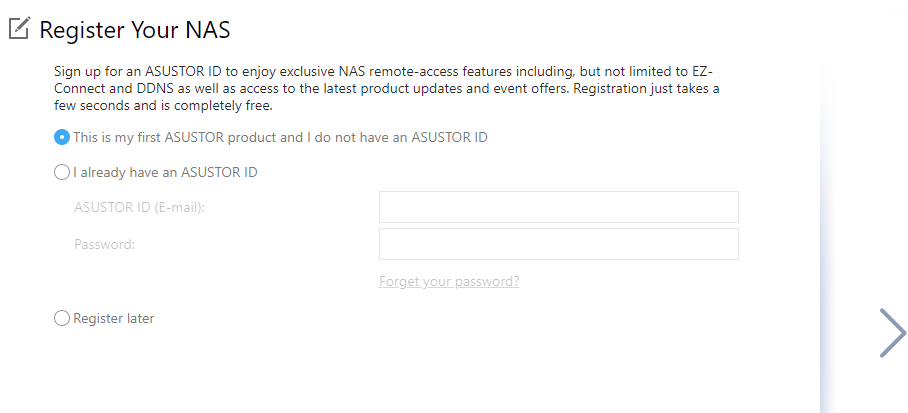
This will create an account allowing you to find and connect to your NAS even over the Internet.
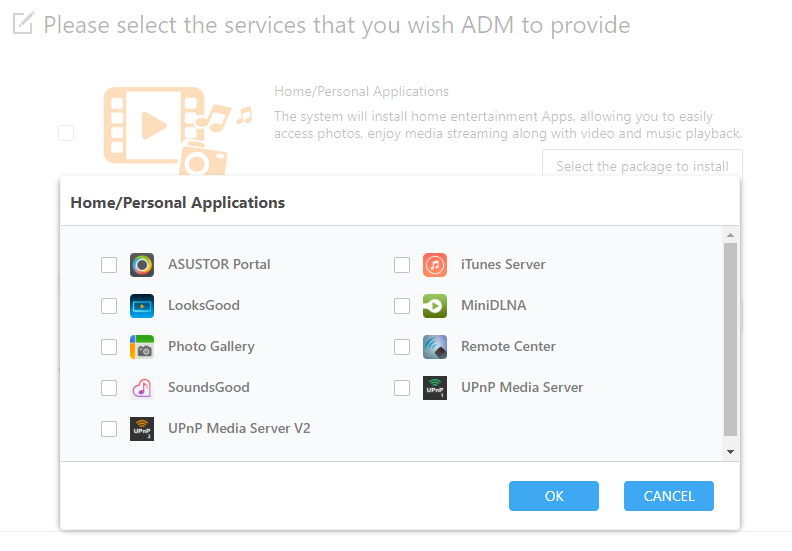
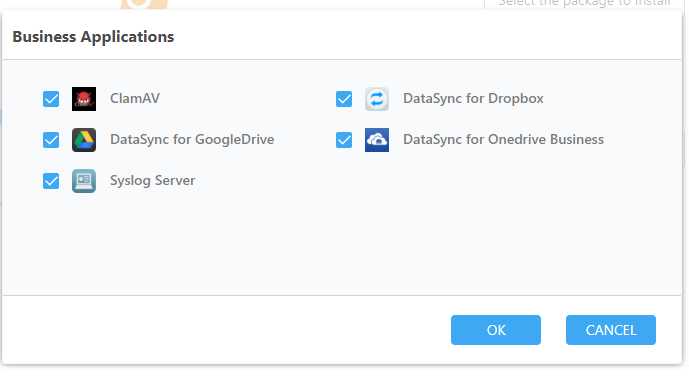
Choose which apps to install automatically.
For multimedia:
And for business:
Find a Asustor own guide here:
https://images-eu.ssl-images-amazon.com/images/I/C1f2WmiPeES.pdf