How to Make Your Synology 4-Bay NAS Cooler and Quieter in Just 20 Minutes!
The appeal of having your very own private cloud space, accessible much more securely and faster than the average third-party cloud service, is undeniable. Purchasing a Synology DS923+, DS423+, DS920+ or DS420+ NAS to centralize all your data, granting true control over who accesses your data, as well as how, when, and where it’s distributed, has long been a desirable alternative to services like Google Drive and Dropbox. Whether you’re a home user or a business user, it’s clear that a NAS comes with its own unique downsides. Two of the most frequently mentioned issues are that the systems can be noisy when in operation, which can become annoying if you’re in close proximity. Additionally, keeping the system on 24/7 results in the generation of a significant amount of heat, necessitating increased active cooling through fans, which inevitably leads to even more noise. The level of noise generated by your NAS varies from user to user, affected by factors such as the scale of the system’s storage capacity, the specific drives used, and the extent of its utility. However, there are several clever hacks and modifications you can apply to a broad range of Synology 4-Bay NAS devices to reduce operational noise and improve system temperature, ensuring your device runs cooler and quieter in the future. In this guide, I will show you step-by-step how to apply these modifications in around 20 minutes.
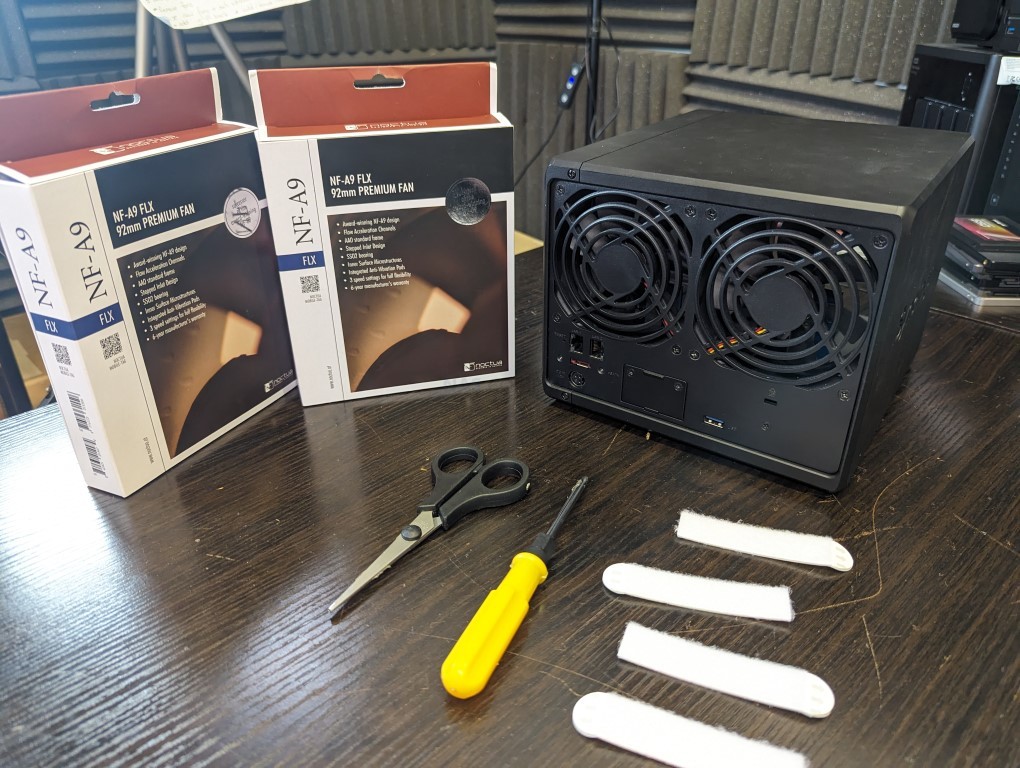
In a Hurry? Here are the parts for this guide:
|
Before You Start – Disclaimer and Important Considerations
Before following this step-by-step guide to improve the noise and cooling performance of your Synology NAS, it’s crucial to understand whether your system will benefit from these modifications, as well as the potential risks to your support and warranty from Synology. So, before we begin, please keep the following in mind:
- Synology does not endorse physical or software modifications to their systems using non-Synology components or methods not approved by Synology. The changes and suggestions detailed in this guide do not align with the recommended maintenance and use of your Synology NAS. By following these steps, you will almost certainly void your hardware warranty. Consider this carefully if you rely on Synology’s support, warranty, and guarantees.
- Many users are mistaken about what components within their Synology NAS are generating the ambient noise during operation. It’s important to realize that in many high-use, high-capacity setups, the primary source of noise is not the Synology unit itself but the professional and enterprise-class hard drives. These drives, designed for larger capacity and business use, incorporate more platters and actuator movements and are inherently more enterprise-grade in their architecture. As a result, most of the noise comes from within the hard drives themselves, making it nearly impossible to eliminate this noise from any storage system. If your system uses hard drives larger than 10 to 12 terabytes, then the noise during heavy/active use is likely emanating from the drives. While the modifications in this guide can help mitigate some issues (e.g., the Velcro tray modification will reduce vibration), noisy hard drives will remain noisy, regardless of any changes made to the NAS enclosure. Keep this in mind before investing in accessories for the modifications suggested in this guide.
- Lastly, not all Synology units are built the same. The physical size of the DiskStation or RackStation, the number of fans, the size of individual fans, and the placement of storage drives can vary significantly. While you can compare systems with the same number of hard drive bays and enclosure size for modification purposes, you cannot apply the same modifications to larger or smaller models. For instance, the DS224 Plus features a single rear-mounted fan and twin hot-swappable ‘click and load’ bays within a largely plastic enclosure, whereas the DS420j is mostly metal, features internal-only, non-hot-swappable trays, and two rear fans smaller than those found in most other NAS systems. Ensure you are purchasing the correct size fans for your specific Synology NAS model.
That’s it! Let’s get started on upgrading the cooling and reducing the noise on your Synology NAS.
BACKUP, BACKUP, BACKUP!
Ensure you have a backup of all the data stored on your Synology NAS. This can be on another NAS device, a connected USB device, or a cloud service. Although the risk of data loss from the modifications you’re about to make is exceptionally low, you will be handling your storage media and ejecting and inserting drives, which could lead to accidental mishandling. Therefore, having a backup of your data before proceeding is crucial.
FULL GUIDE TO SYNOLOGY BACKUP OPTIONS IN THE LINK BELOW (opens in new tab):
Next, safely power down your Synology NAS system via the controls in DSM (DiskStation Manager). After the system has fully shut down, allow 3 to 4 minutes for the storage media to completely spin down.
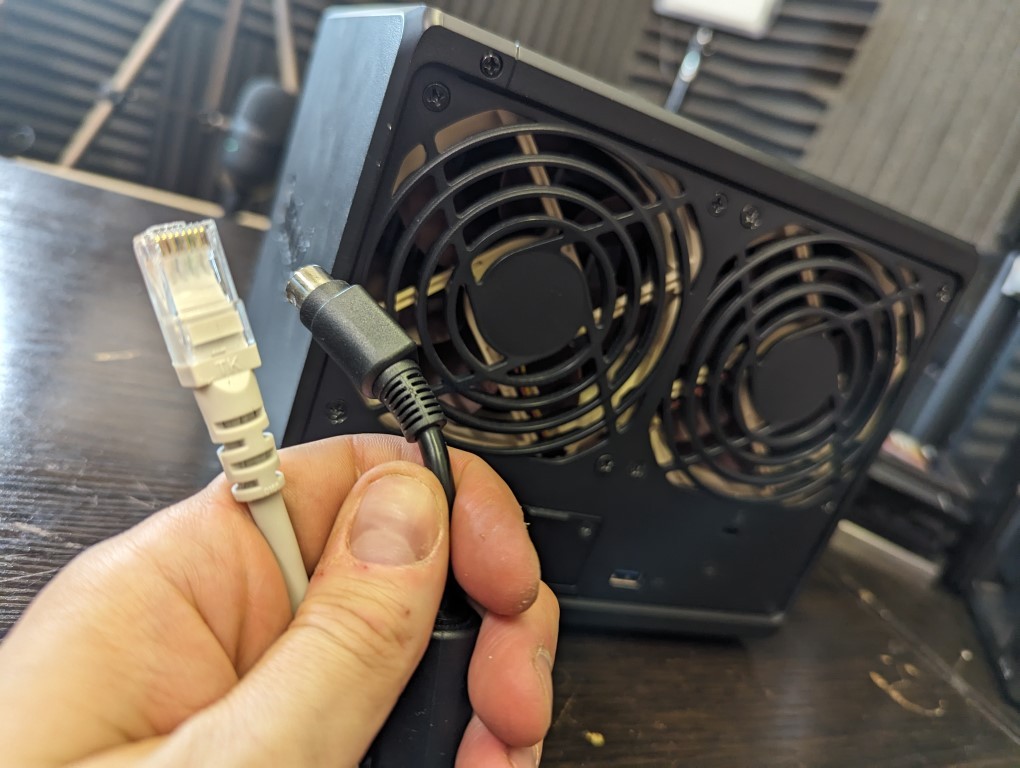
Now, disconnect the power, network connectivity, and any other accessories or peripherals connected to the Synology system.
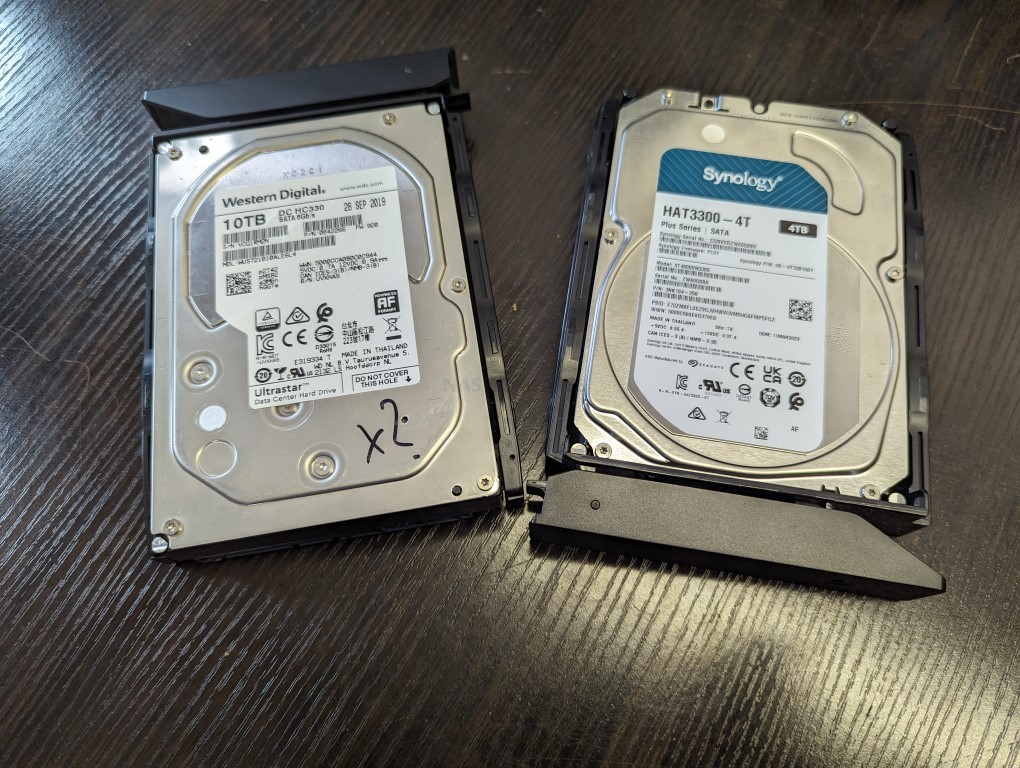
Carefully remove each hard drive from the Synology unit, placing them safely to one side. It’s important to avoid jostling these drives while you’re making modifications to your system. If you have internal M.2 NVMe SSDs inside the system, these can remain in place. Additionally, try to keep track of which bay each hard drive is removed from so you can ensure they are returned to their correct slots. Although modern versions of Synology DSM can still identify drives if they are placed in different slots, it’s best not to risk potential complications.
Synology NAS Velcro Hard Drive Mod Guide Start
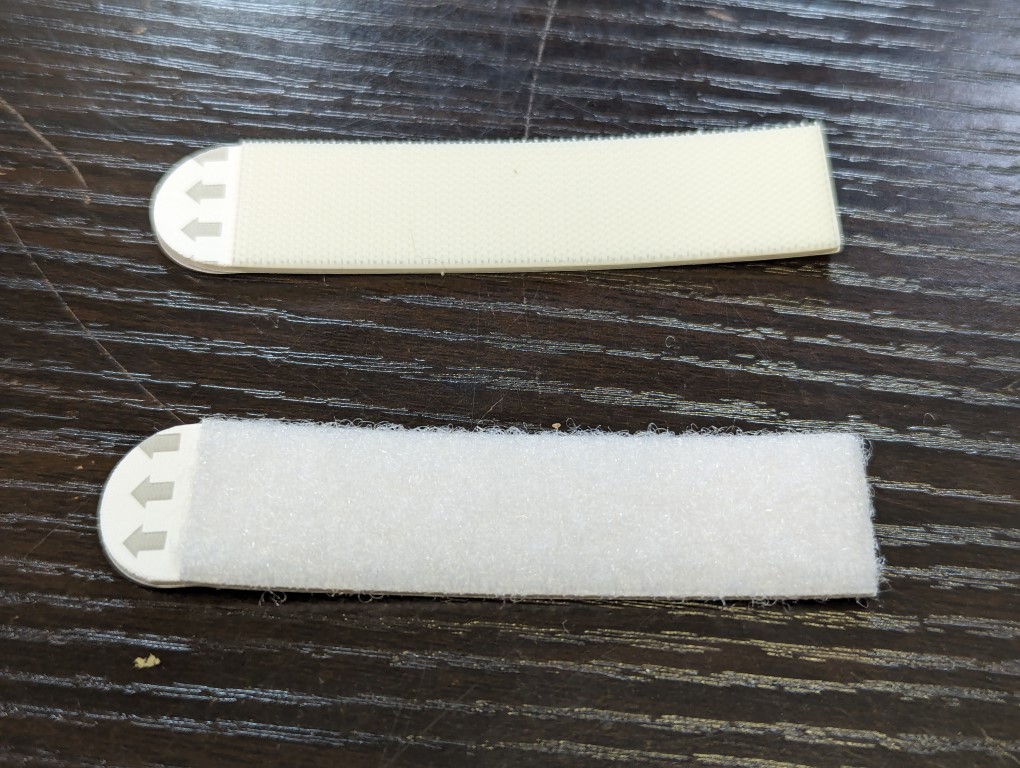
As mentioned earlier, a significant source of ambient noise from a Synology NAS during operation comes from the internal hard drives. As they spin, they cause vibrations throughout the NAS. The larger the drive’s capacity, the more ambient vibration and access noise it tends to produce. This is where the Velcro modification for the individual trays comes into play. The goal is to neutralize the vibration caused by these drives, preventing it from being transmitted through the chassis of the Synology NAS. There are two methods to use Velcro within the Synology NAS, each with its own advantages and disadvantages. It’s important to only use the soft, fuzzy side of the Velcro.
Velcro Method 1
One approach is to place strips of Velcro into the individual SATA storage slots of the Synology NAS.
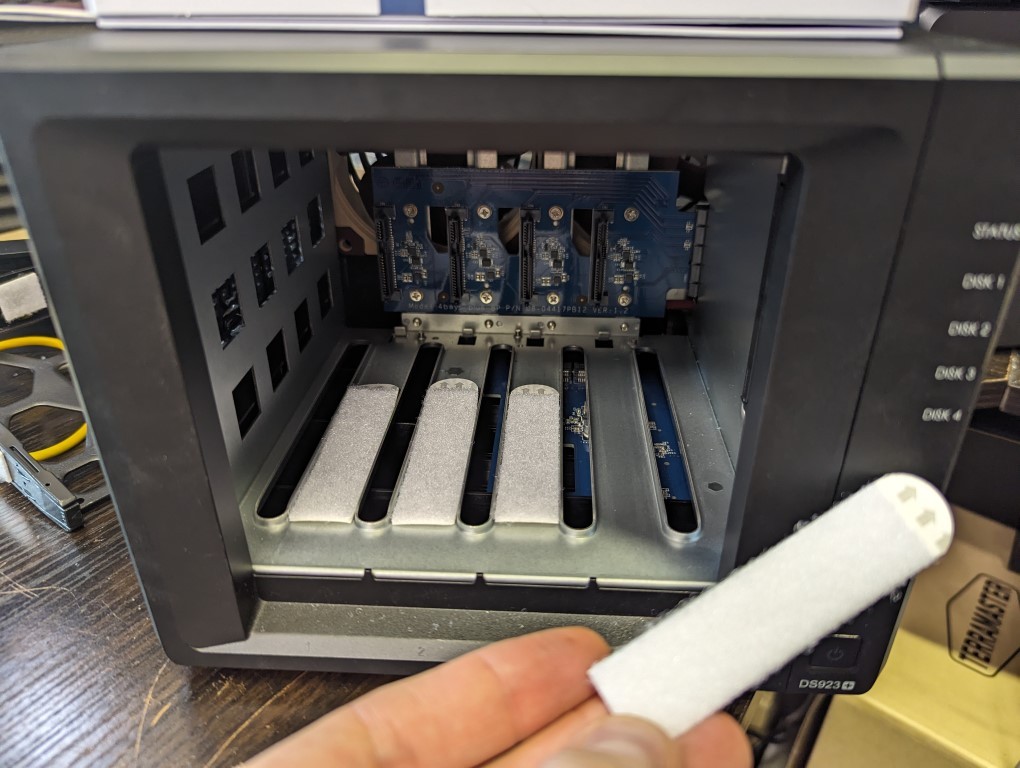
It’s optional to place a Velcro strip at both the top and bottom of each slot. A single piece of Velcro at the base of the drive bay should be sufficient to neutralize the vibration traveling through the system, though adding a second piece at the opposite end can enhance stability. These modifications will not increase the system’s operating temperature but may make reinserting the drives slightly more challenging. This is expected, as the Velcro strips are designed to secure the drive more firmly in place.
Velcro Method 2
Velcro method 2 is a little bit more surgical and requires a pair of scissors and the removal of the drives from each of the trays.
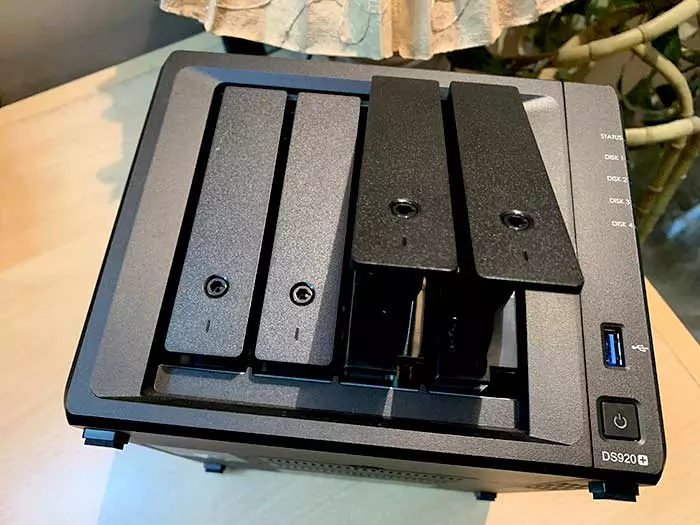
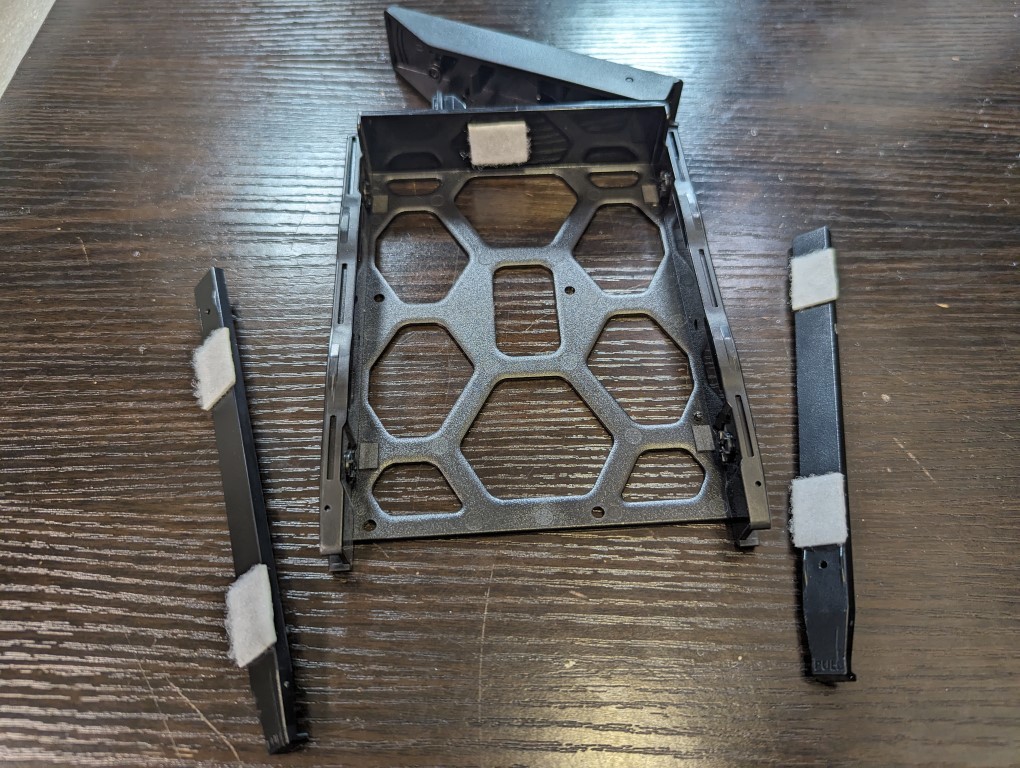
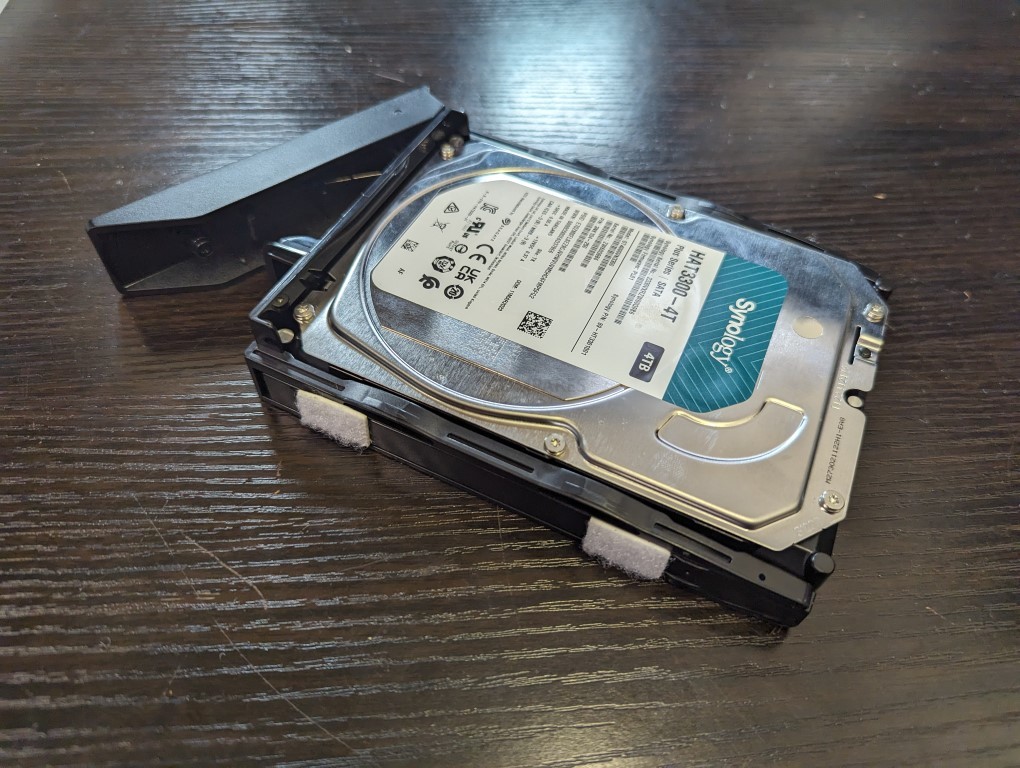
Once you have removed the drive from each tray, you need to place five individual squares of the soft side of the Velcro in each of the areas displayed in the images. Place four squares, two on each side, at the points where the Synology tray clips traditionally go into the holes of the drive as shown here.
Then, also add an additional Velcro square on the inside of the tray where the back of the drive meets the handle of the tray, as shown in the image below.
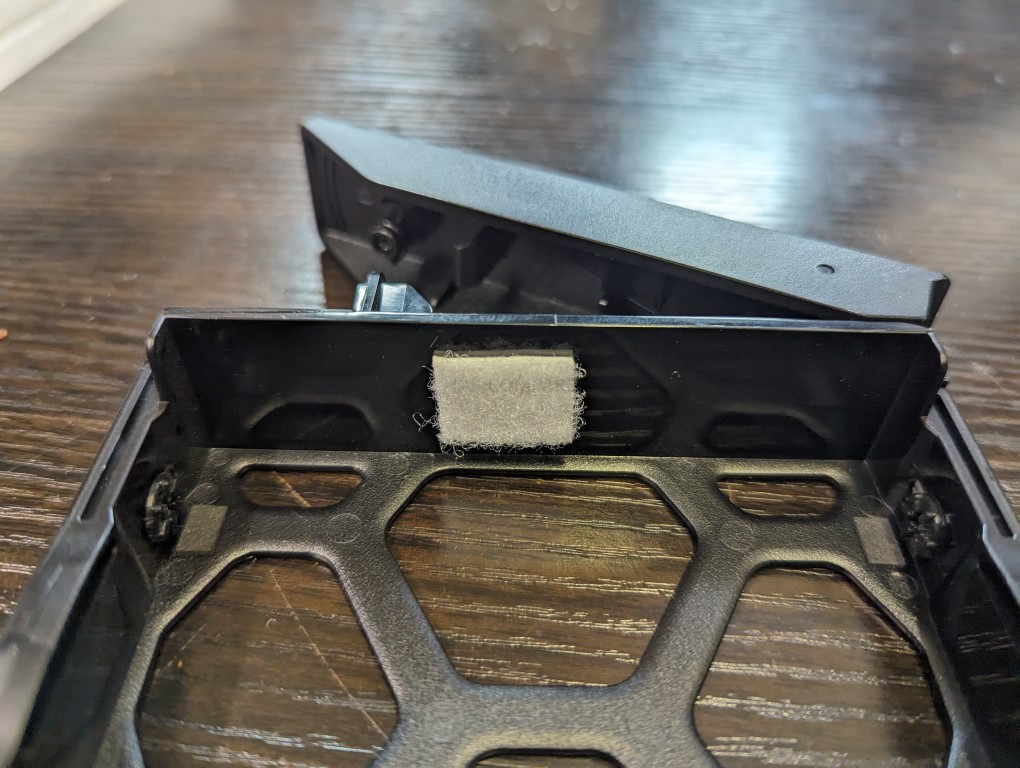
Once you have done this, reintroduce the hard drive into the tray. You may notice that aligning the clips into the drive is a little harder this time around and this is because the additional fifth Velcro square is wedged between the drive and the tray. This is normal and just requires a little bit more pushing to apply the clips into the tray and secure the drive.
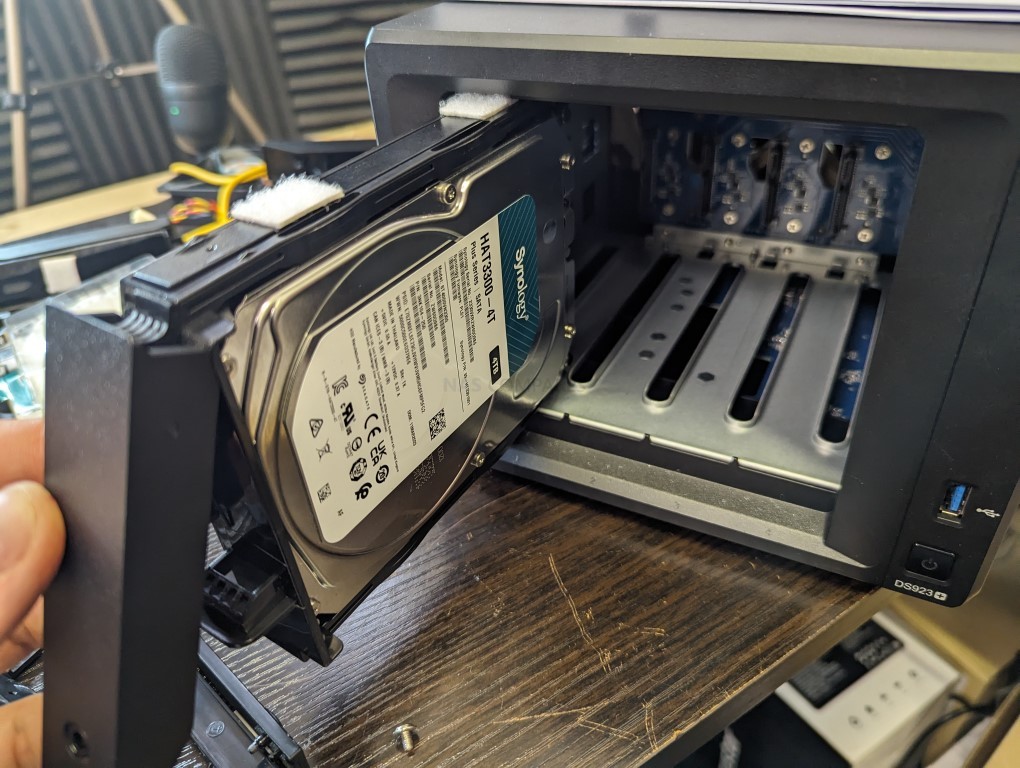
Now, regardless of which method you chose to apply the Velcro absorption panels into the Synology storage area, you may now reintroduce each of the drives into the Synology NAS. Once again, be aware that the drives will go in with a little more friction than previously, and this is part of the way in which the vibration of the drives will be decreased during operation. The tray should still neatly connect with the back SATA connection.
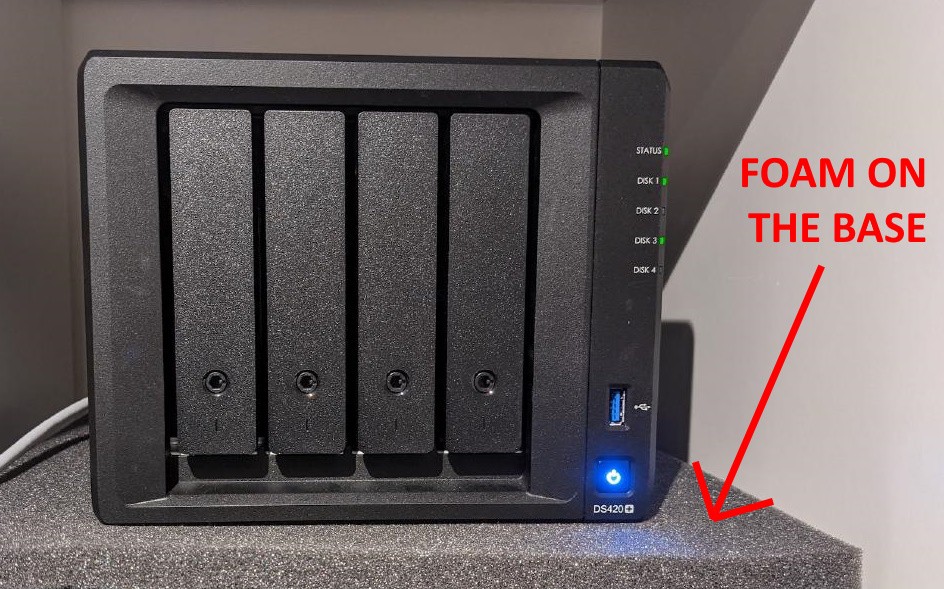
There you go, you now have the means to hugely reduce ambient vibration noise from the drives traveling through the Synology NAS system. If you are especially concerned about vibration and the Synology NAS creating increased ambient noise, you may also introduce a foam panel underneath the Synology unit, which will further decrease any vibration being caused between the network-attached storage device and the desktop that you deploy the system onto.
Next, let’s discuss how to swap out the default fans on the NAS for faster and lower noise alternatives.
Synology NAS Noctua Fan Modification Guide Start
The first thing you need to do is ensure that the hard drives are completely disconnected from your Synology NAS, as you will be disassembling the system and rotating it at certain points which can all add up to drives being jostled and potentially damaged. So make sure that all storage media has been removed from the Synology NAS before proceeding.
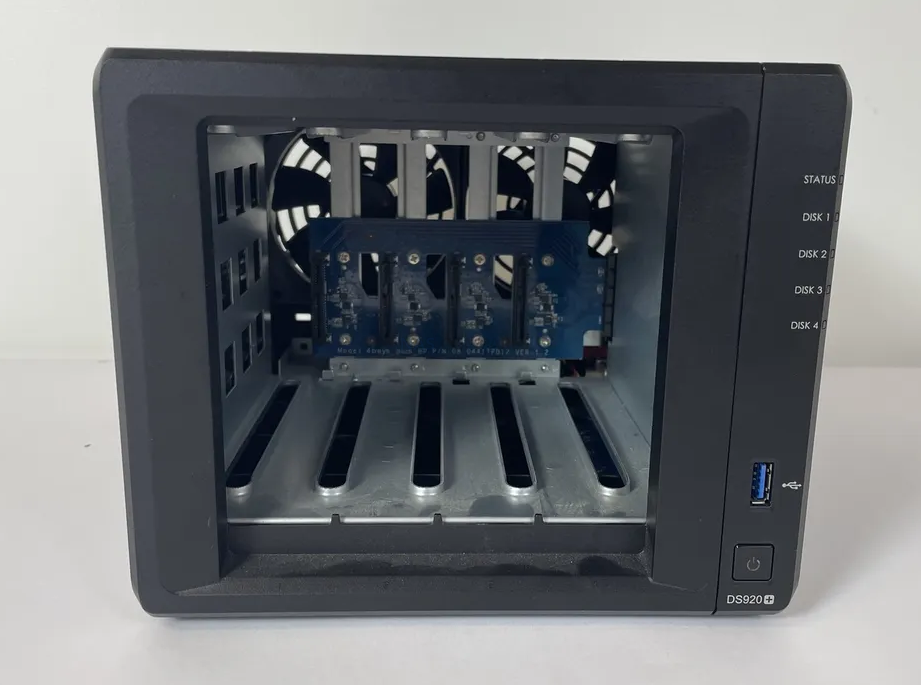
Next, rotate the Synology NAS and remove the two screws located on the left-hand side of the chassis as indicated in the image below:
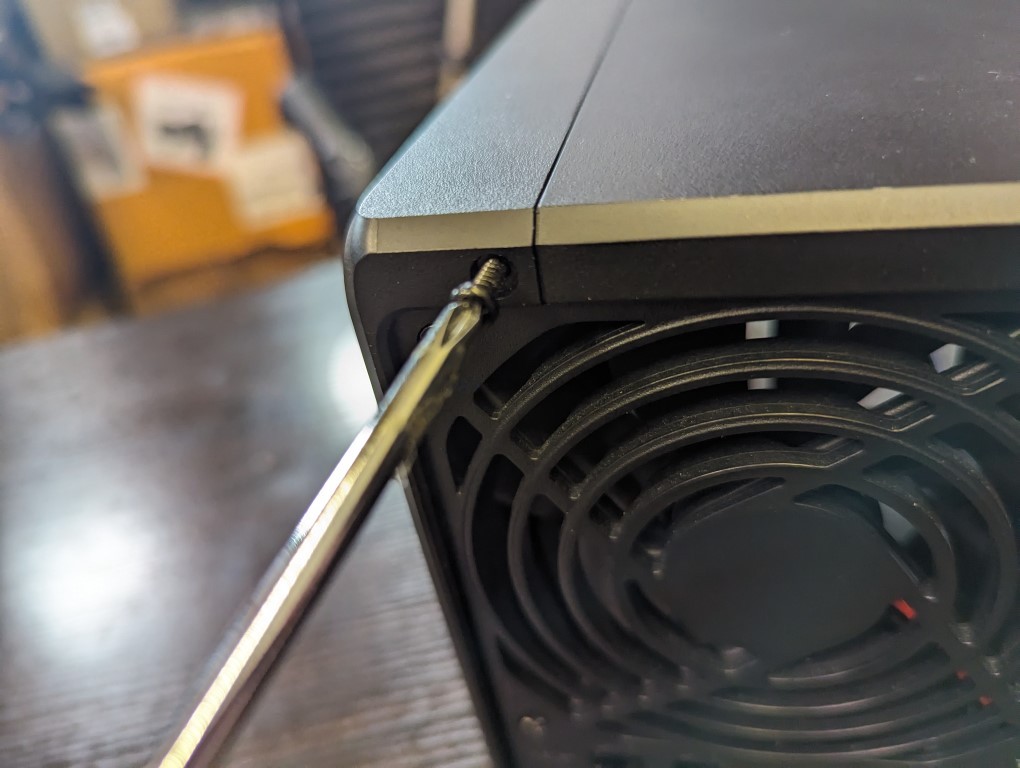
Once you have removed these two screws, the chassis should slide apart into two pieces. If the two pieces do not neatly slide apart, then gently place your hand on the inside of the storage area and apply a small amount of pressure in the area shown in the image below:
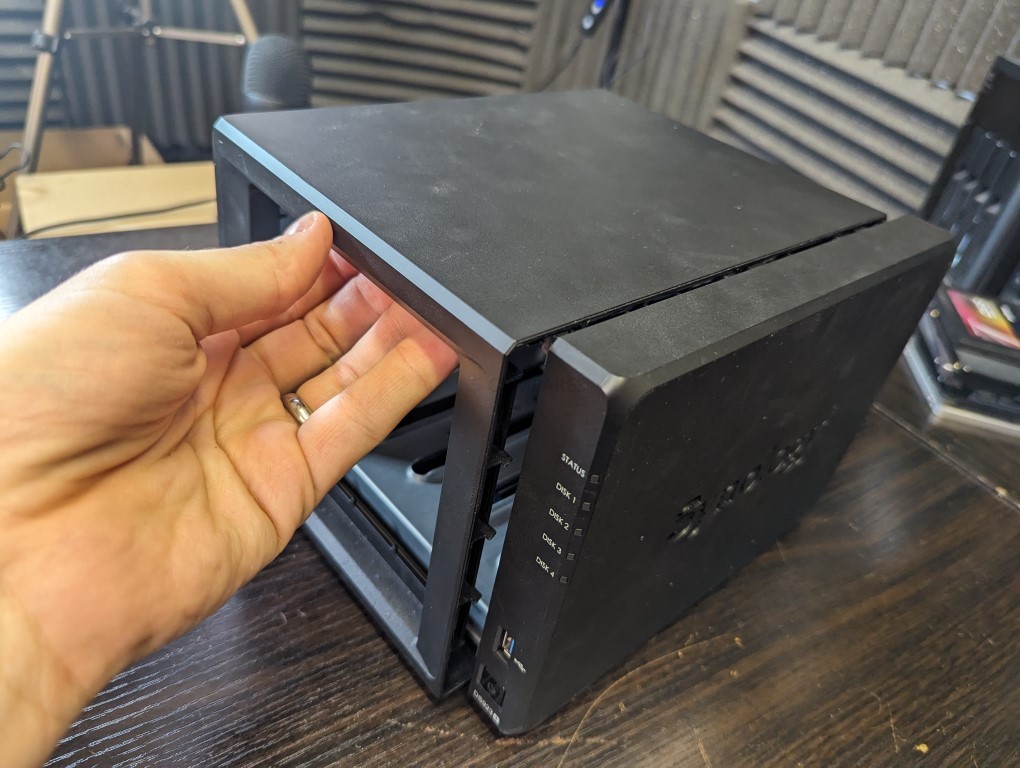
This should allow the larger area of the external casing to come off neatly, allowing you full access to the internal metal SATA cage and internal components.
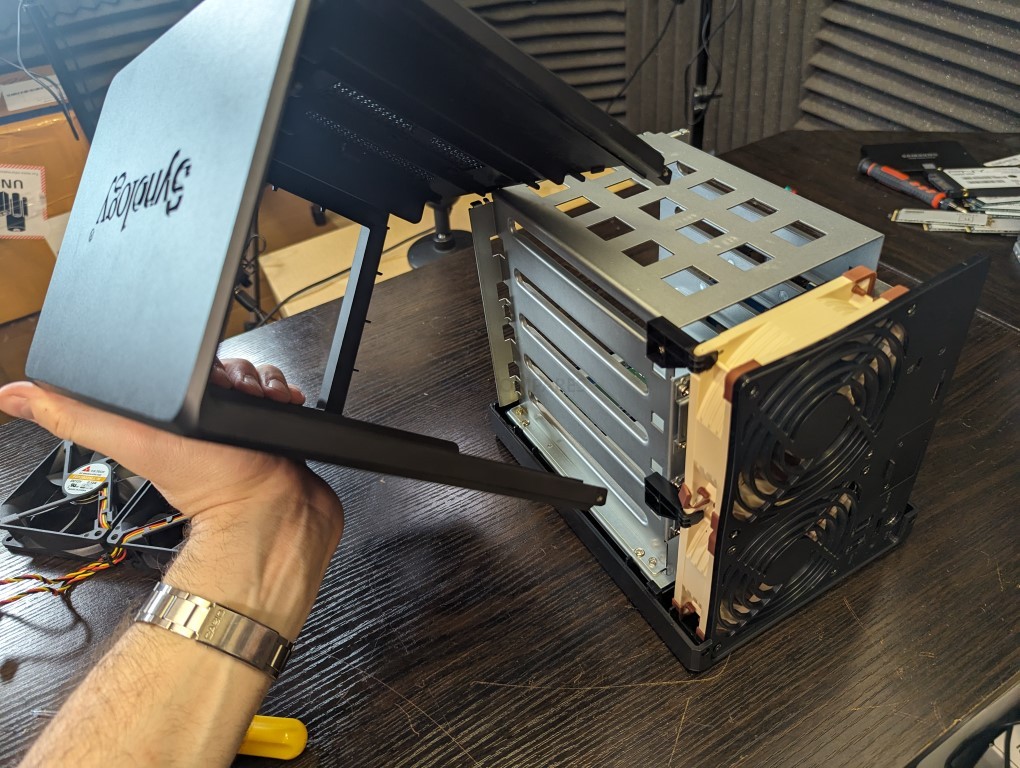
Next, you need to make your way to the rear of the NAS and remove the two black clips that hold the individual fans in place at the top of the SATA cage.
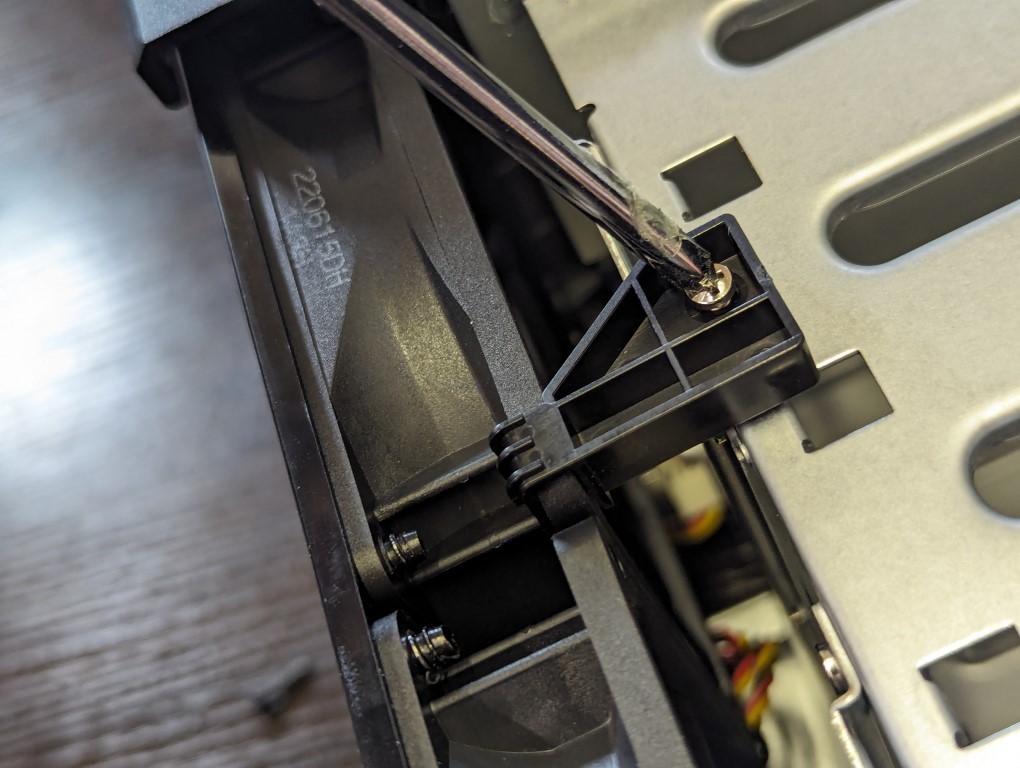
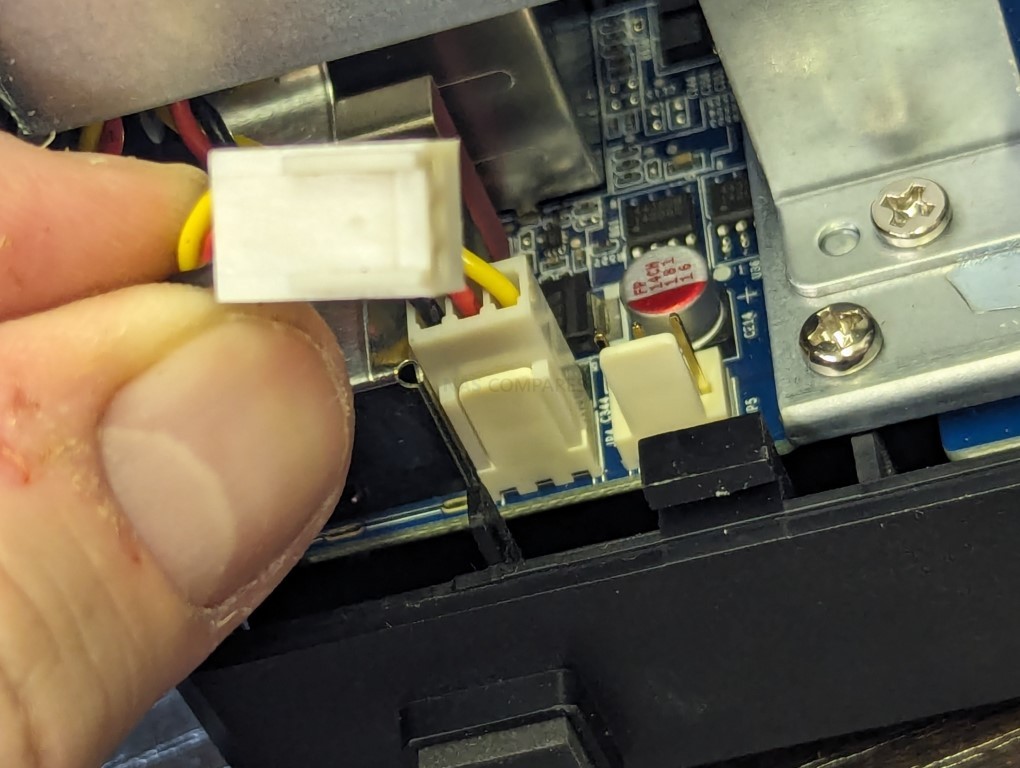
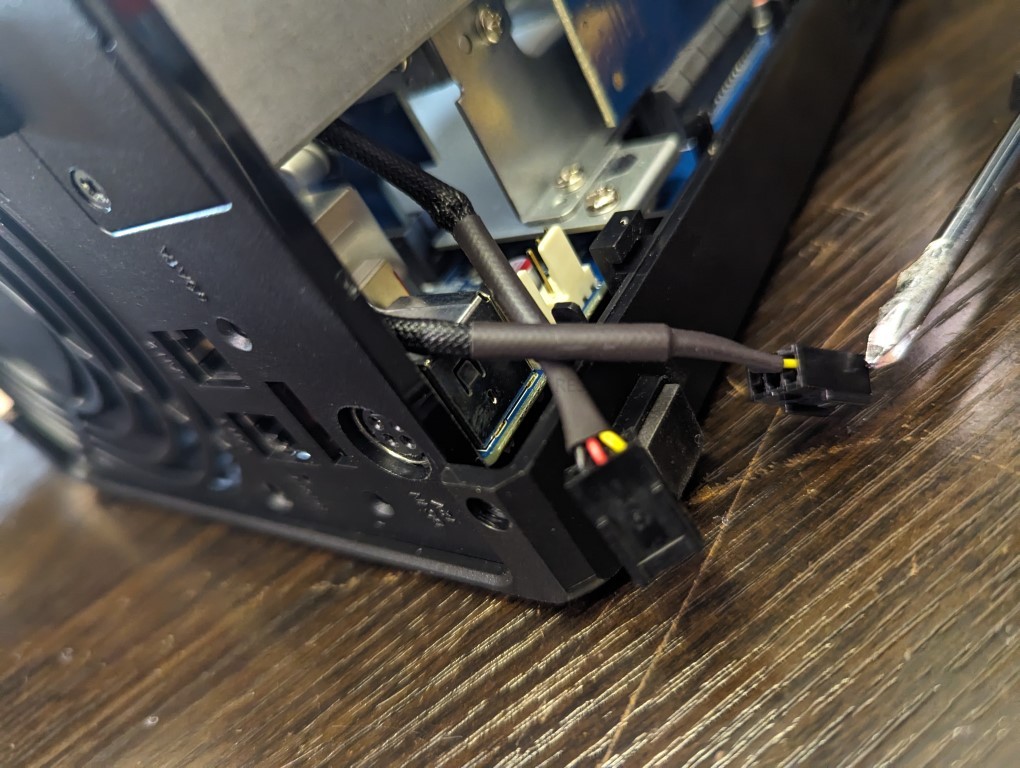
Next, head to the side of the Synology NAS frame and gently remove the fan power clips from the internal board. They are white clips that you can see in the image below:
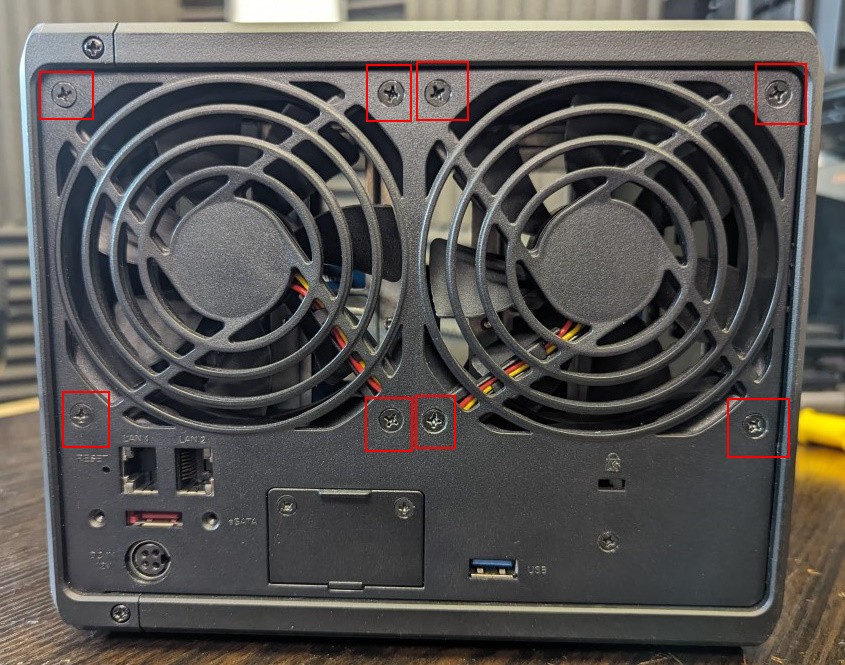
Next, return to the rear of the Synology NAS chassis and remove all eight of the screws indicated below, as these hold the default Synology fans in place.
The fans should neatly slide out from their cavity in the rear of the Synology NAS.
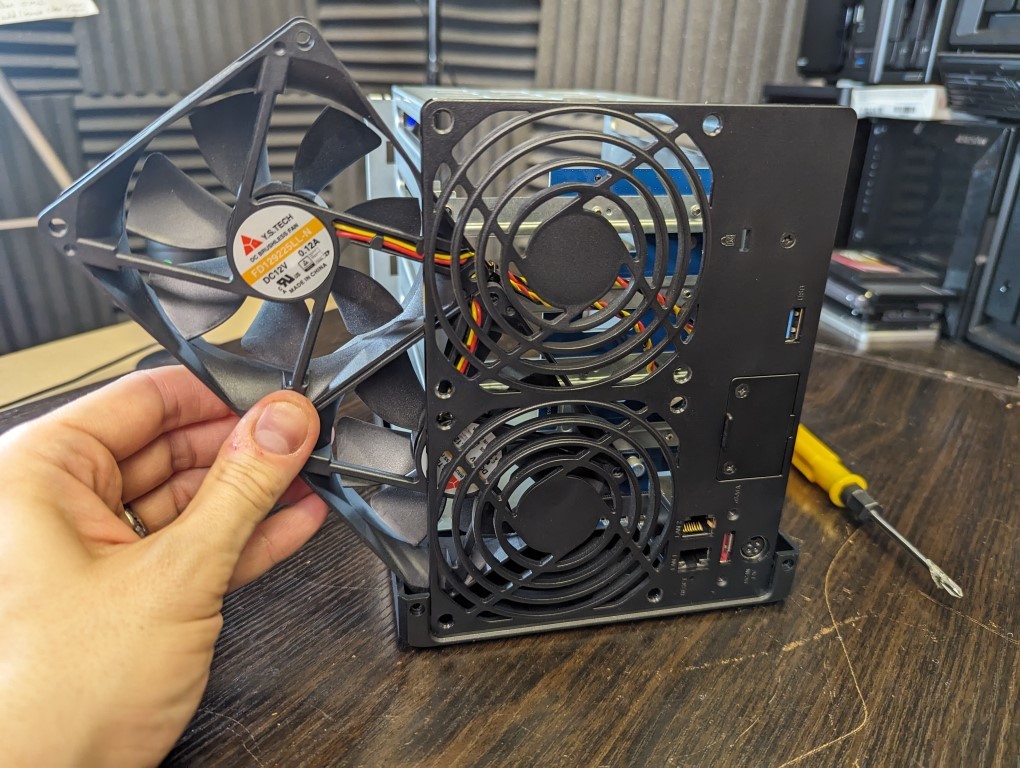
While doing this, do take note of the direction of the fans, as well as their alignment, which shows you exactly where the cables feed into the base of the Synology NAS cavity for the fans.
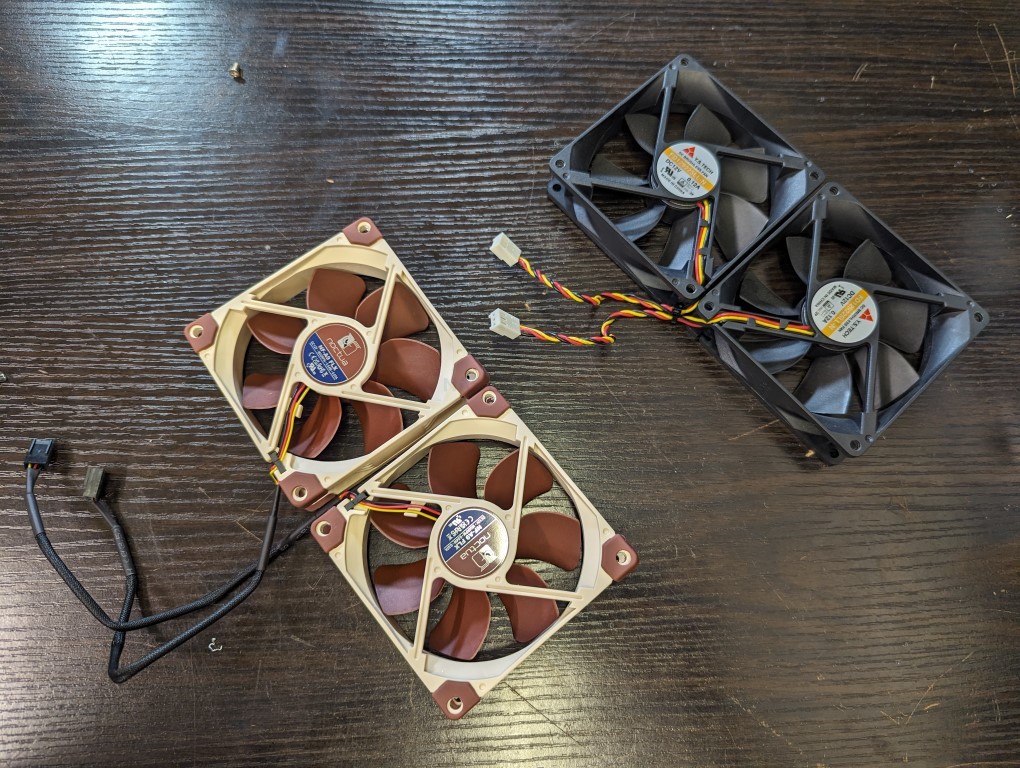
Now you need to get the two noctua replacement fans (or the third-party fans you have opted to buy) and hold them in the identical alignment and direction that you found the official fans when you removed them.
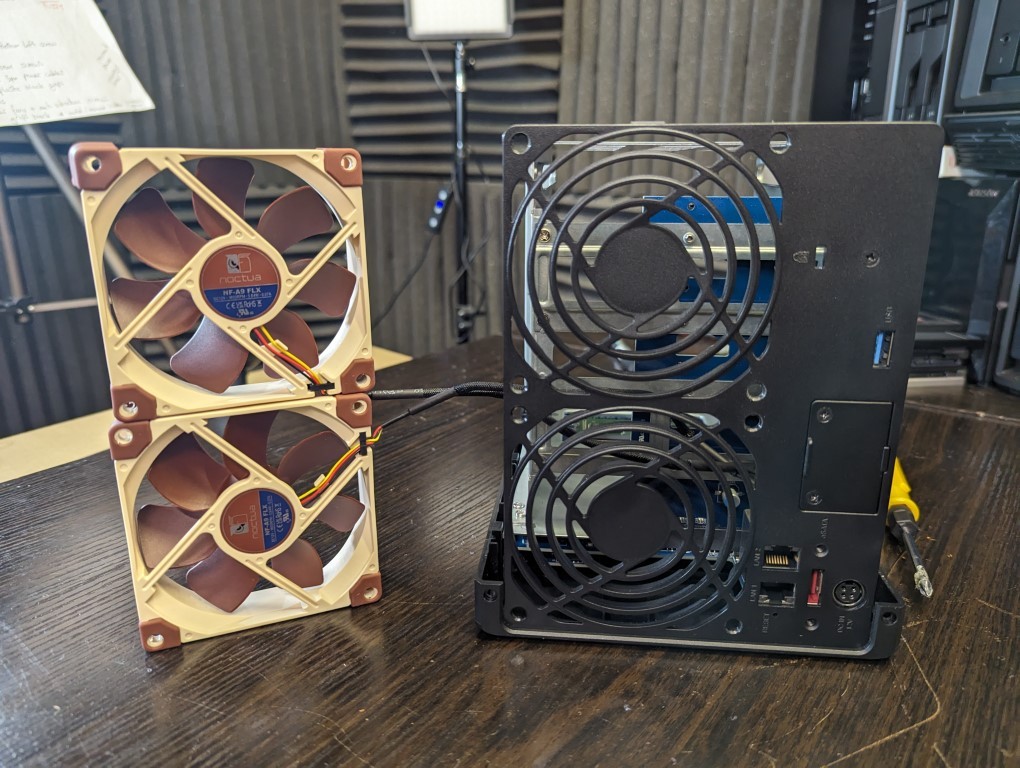
Gently insert the left fan first and guide it into the cavity that is now available.
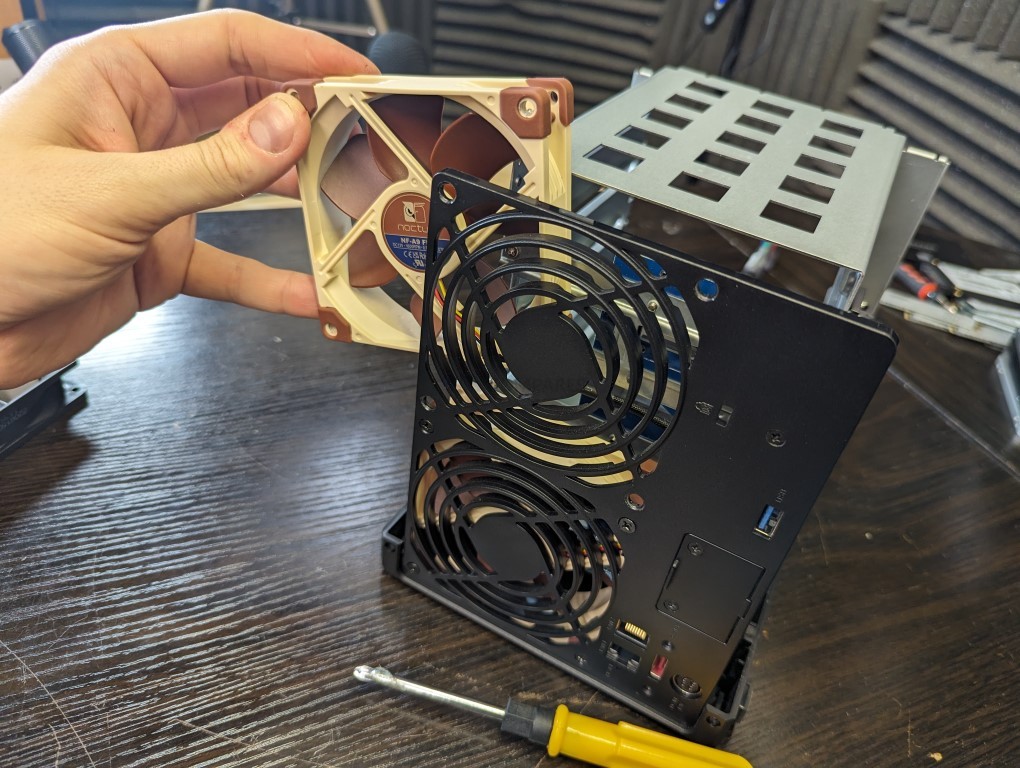
When doing this, make sure that you guide the fan power cable through first to ensure that you are able to reconnect it later.
Some fans, like the Noctua fans, arrive with their own rubber screws or just general screws for reinstalling these fans
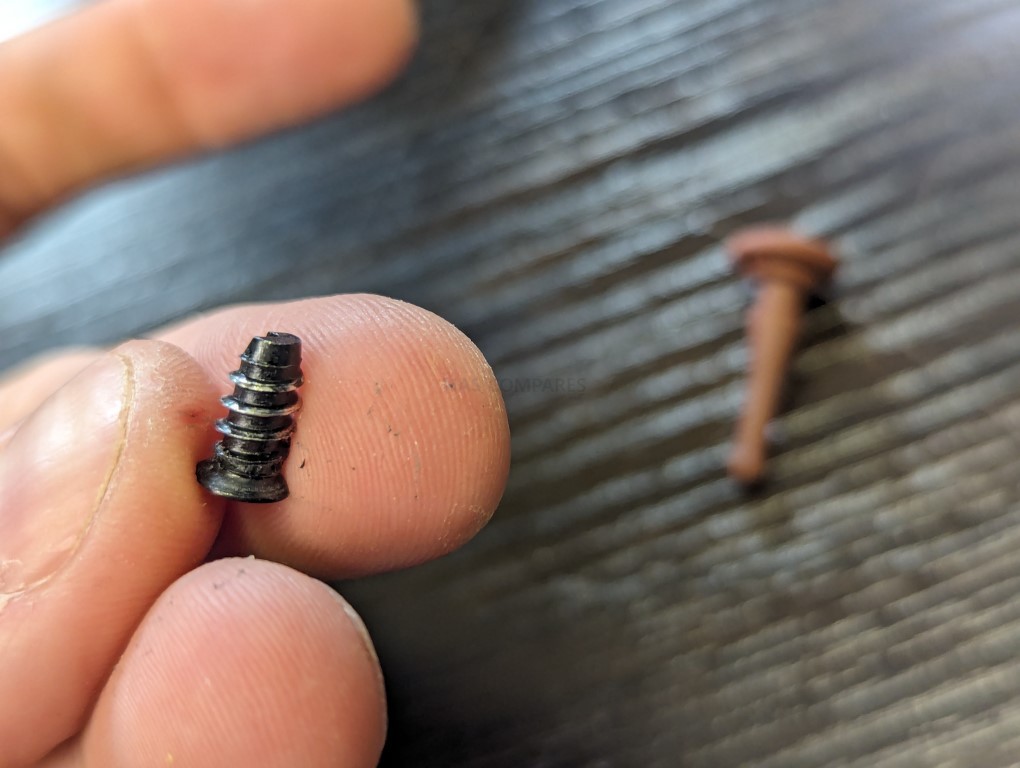
It is recommended that you use the original Synology screws when installing these new fans, as using other screws may lead to causing damage to the rear of your chassis. After you have screwed the new fans into the Synology NAS, connect the fan power cables appropriately back into the Synology motherboard as shown below:
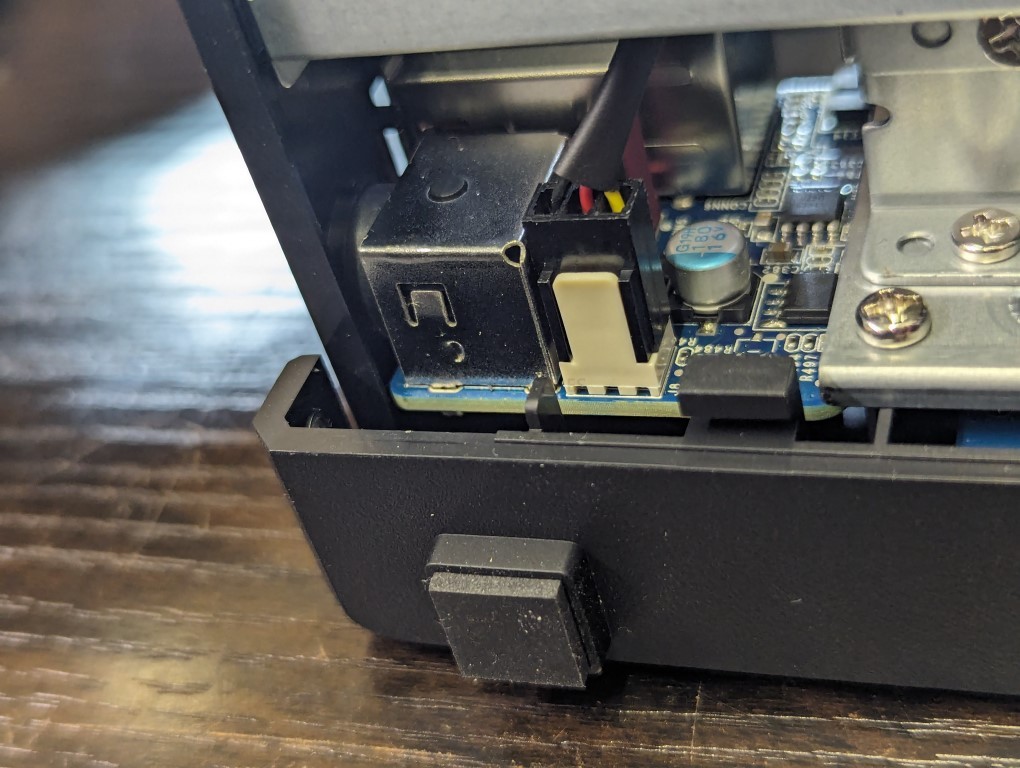
Next, you need to reattach the clips that hold the fans in alignment and in place with the SATA cage at the top. It’s worth noting that premium fans often come with rubber covers at their corners.
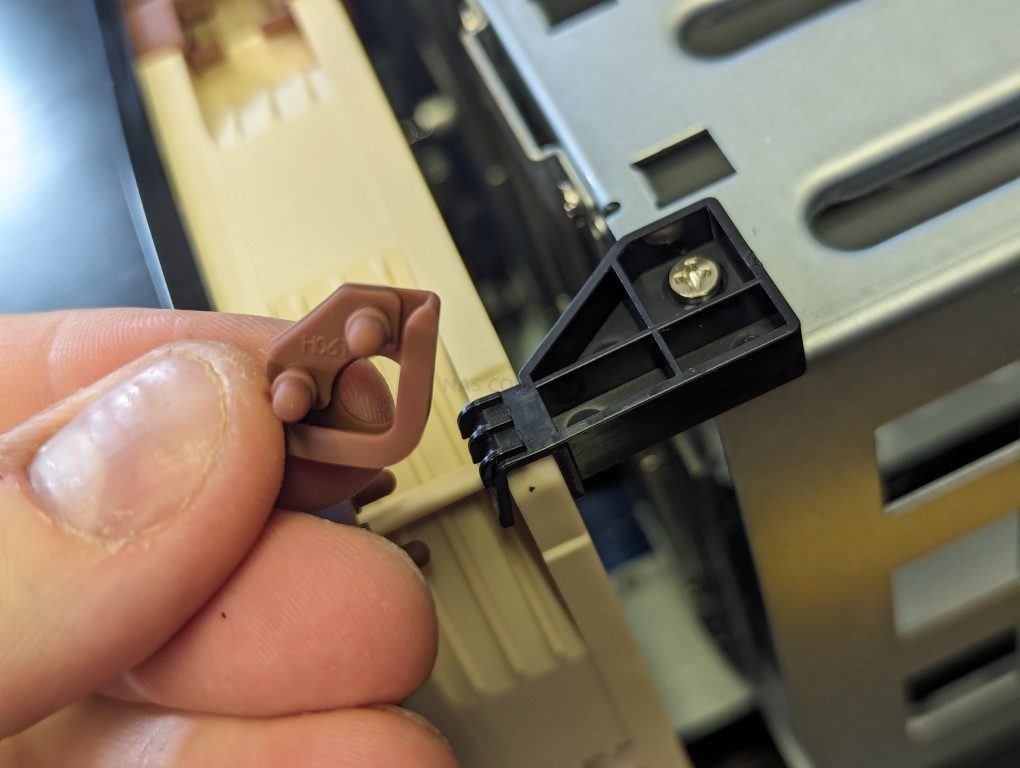
These can interfere with the placement of the fan clips on the Synology NAS, so it is recommended that you remove these rubber covers to ensure that the fans fit neatly within the Synology fan cavity.
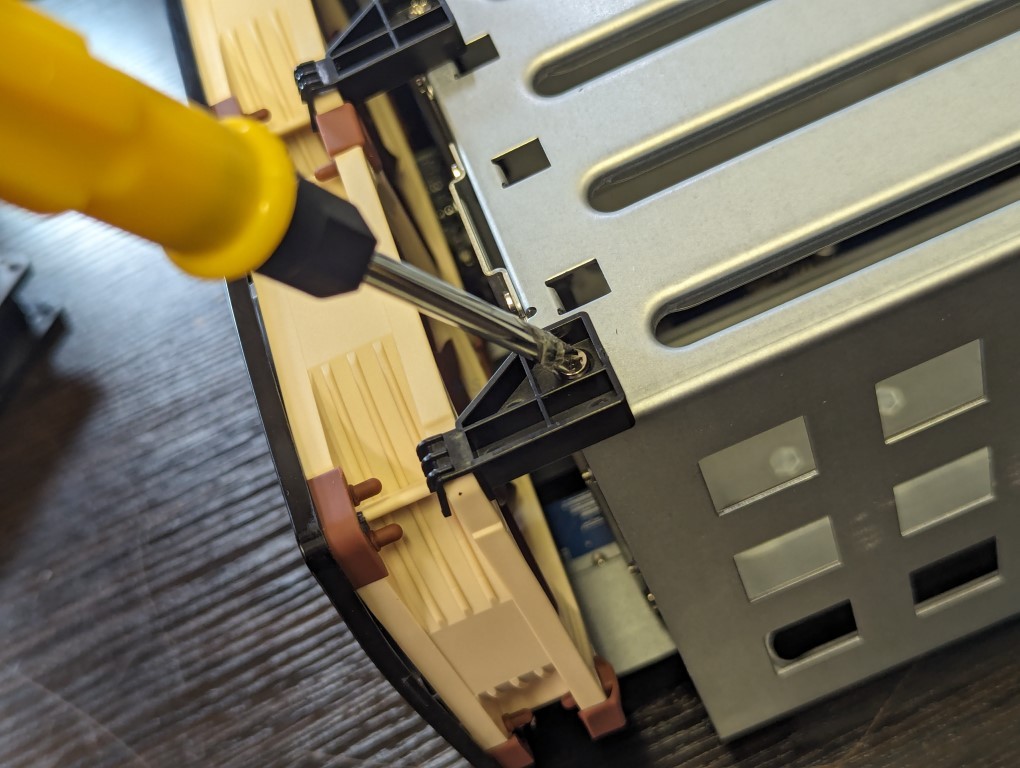
Ensure that the power cables are not trapped when reattaching the external enclosure, as this could damage the cables and prevent the fans from functioning properly! Once the external casing is back in place, reattach the two individual screws on the left-hand side of the rear of the case to secure the enclosure.
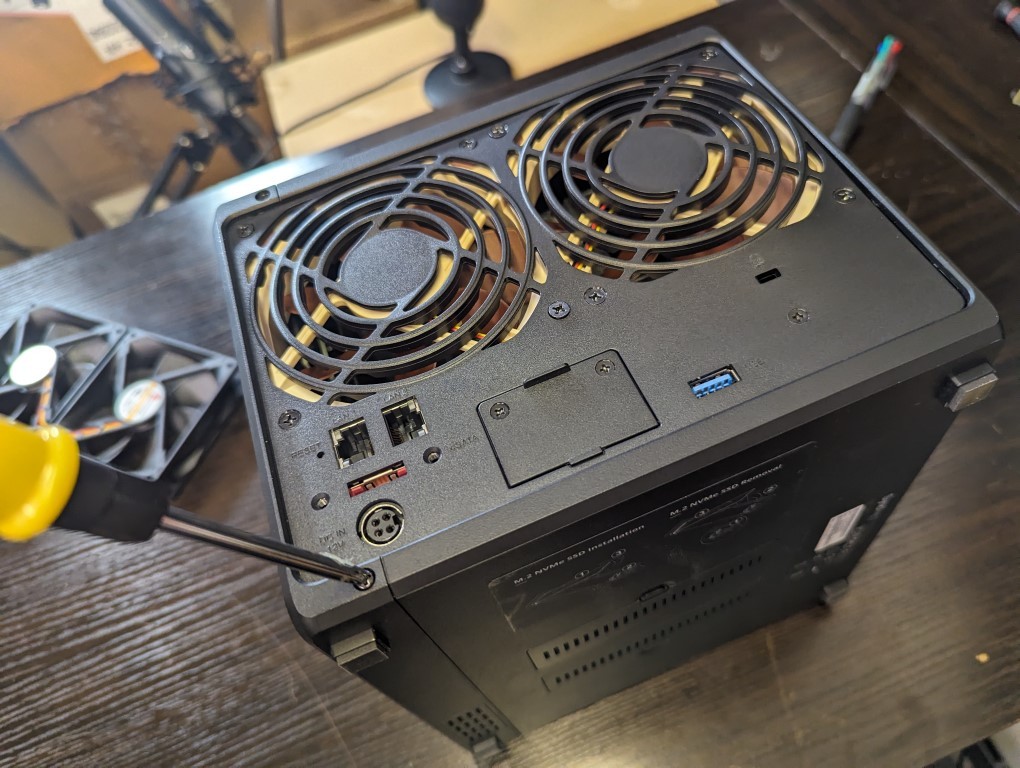
Now you can reintroduce the storage media that you removed earlier, ensuring to place them back in the same slot alignment as before. Finally, reattach power and network connectivity to your Synology NAS to reboot the system.
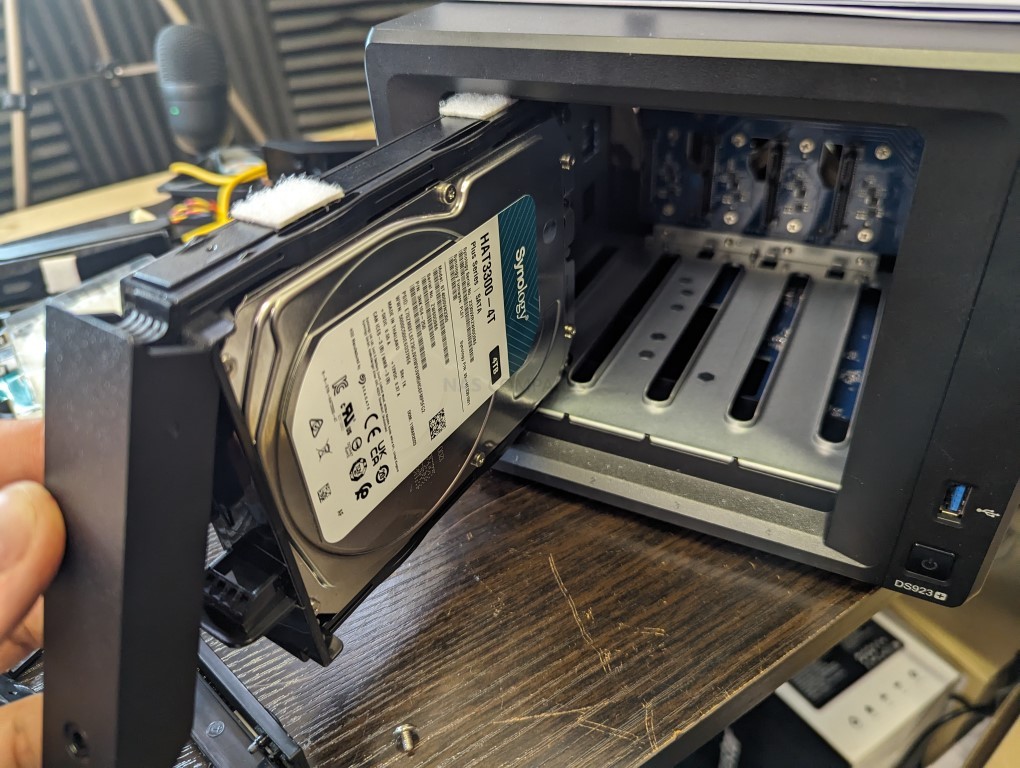
Now you will need to reboot the system. Depending on the quality of the fans you’ve purchased, the impact of replacing fans in a Synology NAS can range from minimal to massive! To ensure that the installation has been successful, once your Synology NAS has rebooted, navigate to the Control Panel > Power and Hardware. From there, you can check the system’s operational temperature as well as the RPM of the fans. If you’ve correctly connected the fan power cables, you should still be able to control the RPM of these fans if you choose.
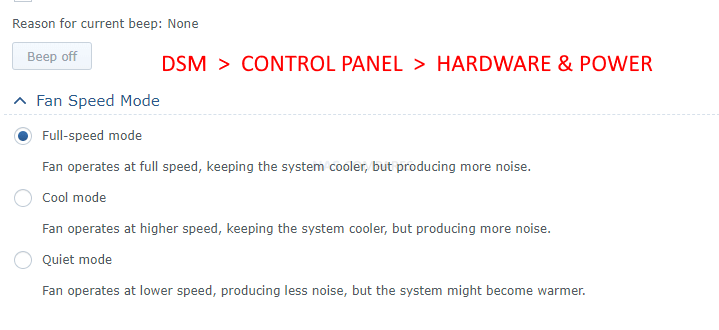
And that’s it! Adding new, low-noise optimized fans to your Synology NAS will definitely have a significant impact on reducing the ambient sound of the NAS when it’s running. Likewise, applying the Velcro modification to each of the individual storage bays will mean that hard drive vibration that travels through the system during heavy write operations will be significantly reduced. However, keep in mind that if your system is housed in a larger metal enclosure, or you are using Pro/enterprise-grade hard drives, achieving noise reduction in the Synology NAS can be challenging. You are reducing the operational sounds of the NAS, but few modifications can prevent the inherent noise levels of more industrial-quality drives.
Would NOT Recommend This:
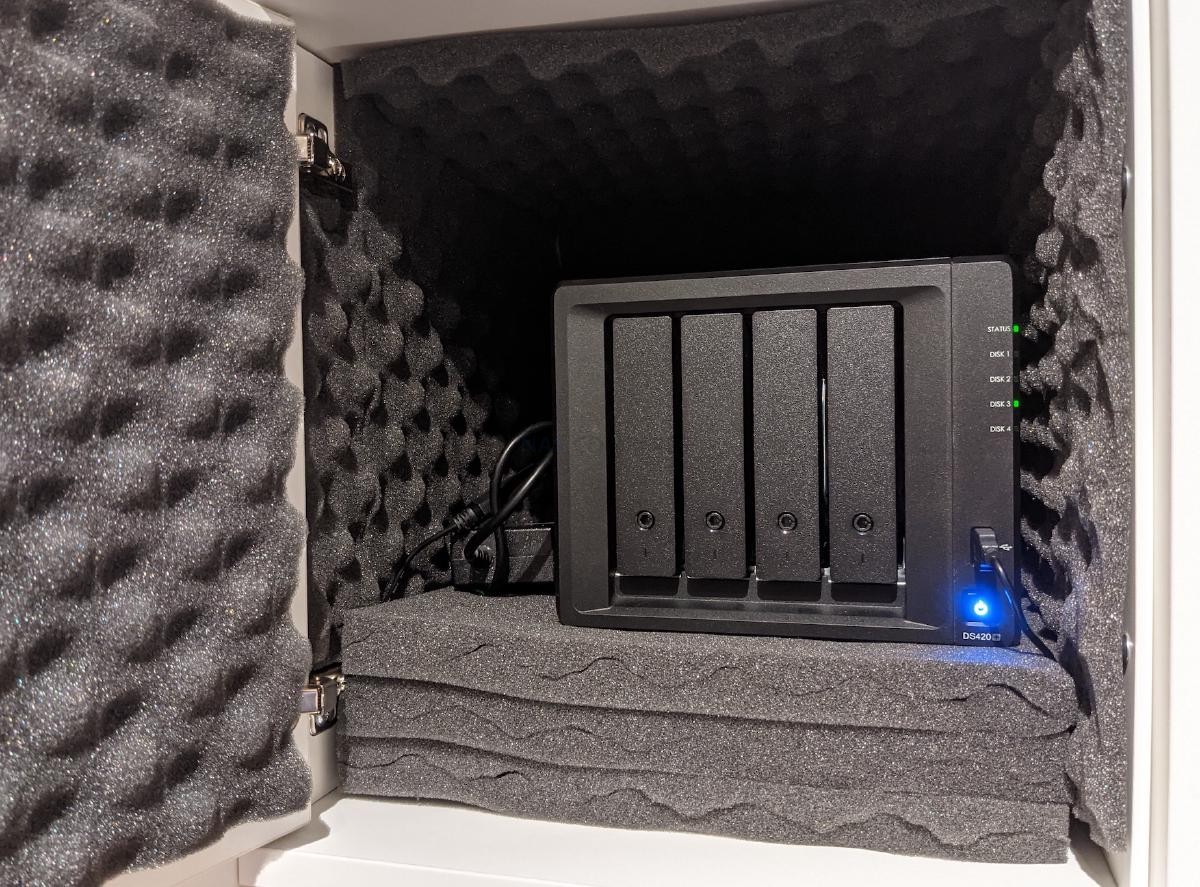
You might be tempted to place your Synology NAS in a contained foam noise-dampening cube, which is a solution some people mention online. While this can effectively reduce total ambient noise, it may also restrict active airflow to your system and potentially lead to recirculating warm or hot air inside the system. This can exacerbate poor operational temperatures, leading to increased fan usage and higher power consumption. So, just keep in mind that while these modifications can positively impact your Synology NAS, their effectiveness has limits, especially in more industrial or enterprise deployments.
| In a Hurry? Here are the parts for this guide:
Noctua NF-A9 Fans (x2 Needed) $16-20 – AMAZON – ALIEXPRESS Velcro Strips/Spots $4-6 – AMAZON – ALIEXPRESS Foam Panel $6-10 – AMAZON – ALIEXPRESS Synology 4-Bay NAS $499+ – AMAZON |
📧 SUBSCRIBE TO OUR NEWSLETTER 🔔 This description contains links to Amazon. These links will take you to some of the products mentioned in today's content. As an Amazon Associate, I earn from qualifying purchases. Visit the NASCompares Deal Finder to find the best place to buy this device in your region, based on Service, Support and Reputation - Just Search for your NAS Drive in the Box Below
🔒 Join Inner Circle
Get an alert every time something gets added to this specific article!
Need Advice on Data Storage from an Expert?
Finally, for free advice about your setup, just leave a message in the comments below here at NASCompares.com and we will get back to you.
 Need Help?
Where possible (and where appropriate) please provide as much information about your requirements, as then I can arrange the best answer and solution to your needs. Do not worry about your e-mail address being required, it will NOT be used in a mailing list and will NOT be used in any way other than to respond to your enquiry.
TRY CHAT
Terms and Conditions


UGREEN iDX6011 Pro NAS Review
Beelink ME PRO NAS Review
UGREEN iDX6011 Pro - TESTING THE AI (What Can it ACTUALLY Do?)
OWC TB5 2x 10GbE Dock, UGREEN NAS Surveillance Software, AceMagic Retro PCs, Gl.iNet Comet 5G @CES
What IS the Digiera OmniCore NAS? Is it Worth $599?
New UGREEN NAS Expansion, DXP4800 PRO NAS and eGPU Revealed
Access content via Patreon or KO-FI
Discover more from NAS Compares
Subscribe to get the latest posts sent to your email.





The article images show 3 PIN fan headers but that’s never mentioned anywhere. The links to the fans point to 4 PIN variants which will not fit. I don’t know if all Synology devices have 3 PIN connectors or if some support PWM but this should be clarified somewhere in the text. I wouldn’t be happy if I ordered through an affiliate link and the parts don’t fit.
Thank you. Yes its 3pin.