

Steps to set this all up
Create NAS user for time machines access only
If you want to be able to run timemachine backupe remotely over the internet, consider using Tailscale or nConnect VPN:
How to access your NAS remotely? A Comparison of NKN nConnect and Tailscale
To create a NAS username for use only with Time Machine on DSM 7 (Synology DiskStation Manager 7), follow these steps:
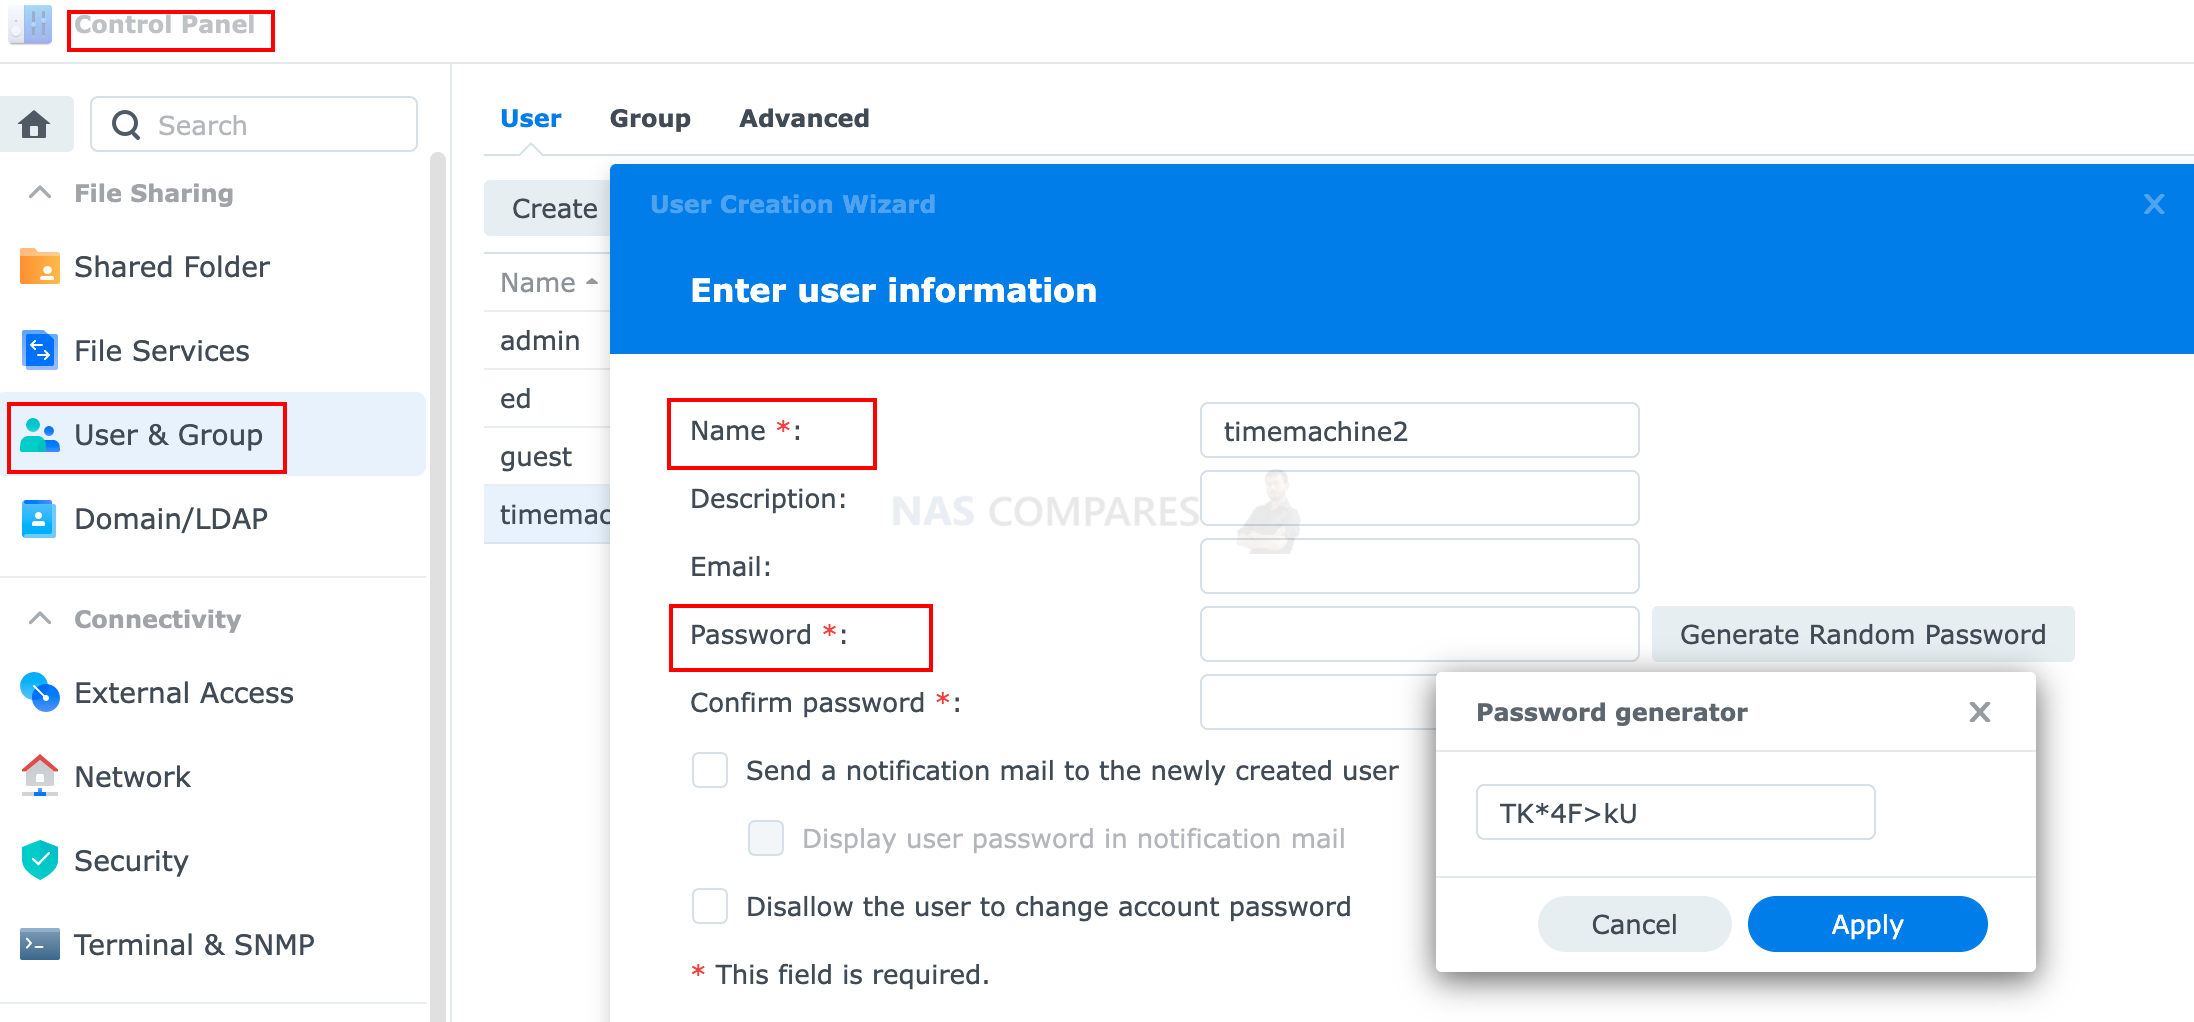
- Log in to the DSM web interface as an administrator.
- Go to the “Control Panel” and click on “User.”
- Click on the “Create” button to create a new user.
- Enter a username and password for the new user.
- Click “Apply” to create the new user.
The new user will now be able to use Time Machine to back up their data to the NAS, but will not have access to any other parts of the DSM system.
To create a separate shared folder for use with Time Machine on DSM 7 (Synology DiskStation Manager 7), follow these steps:
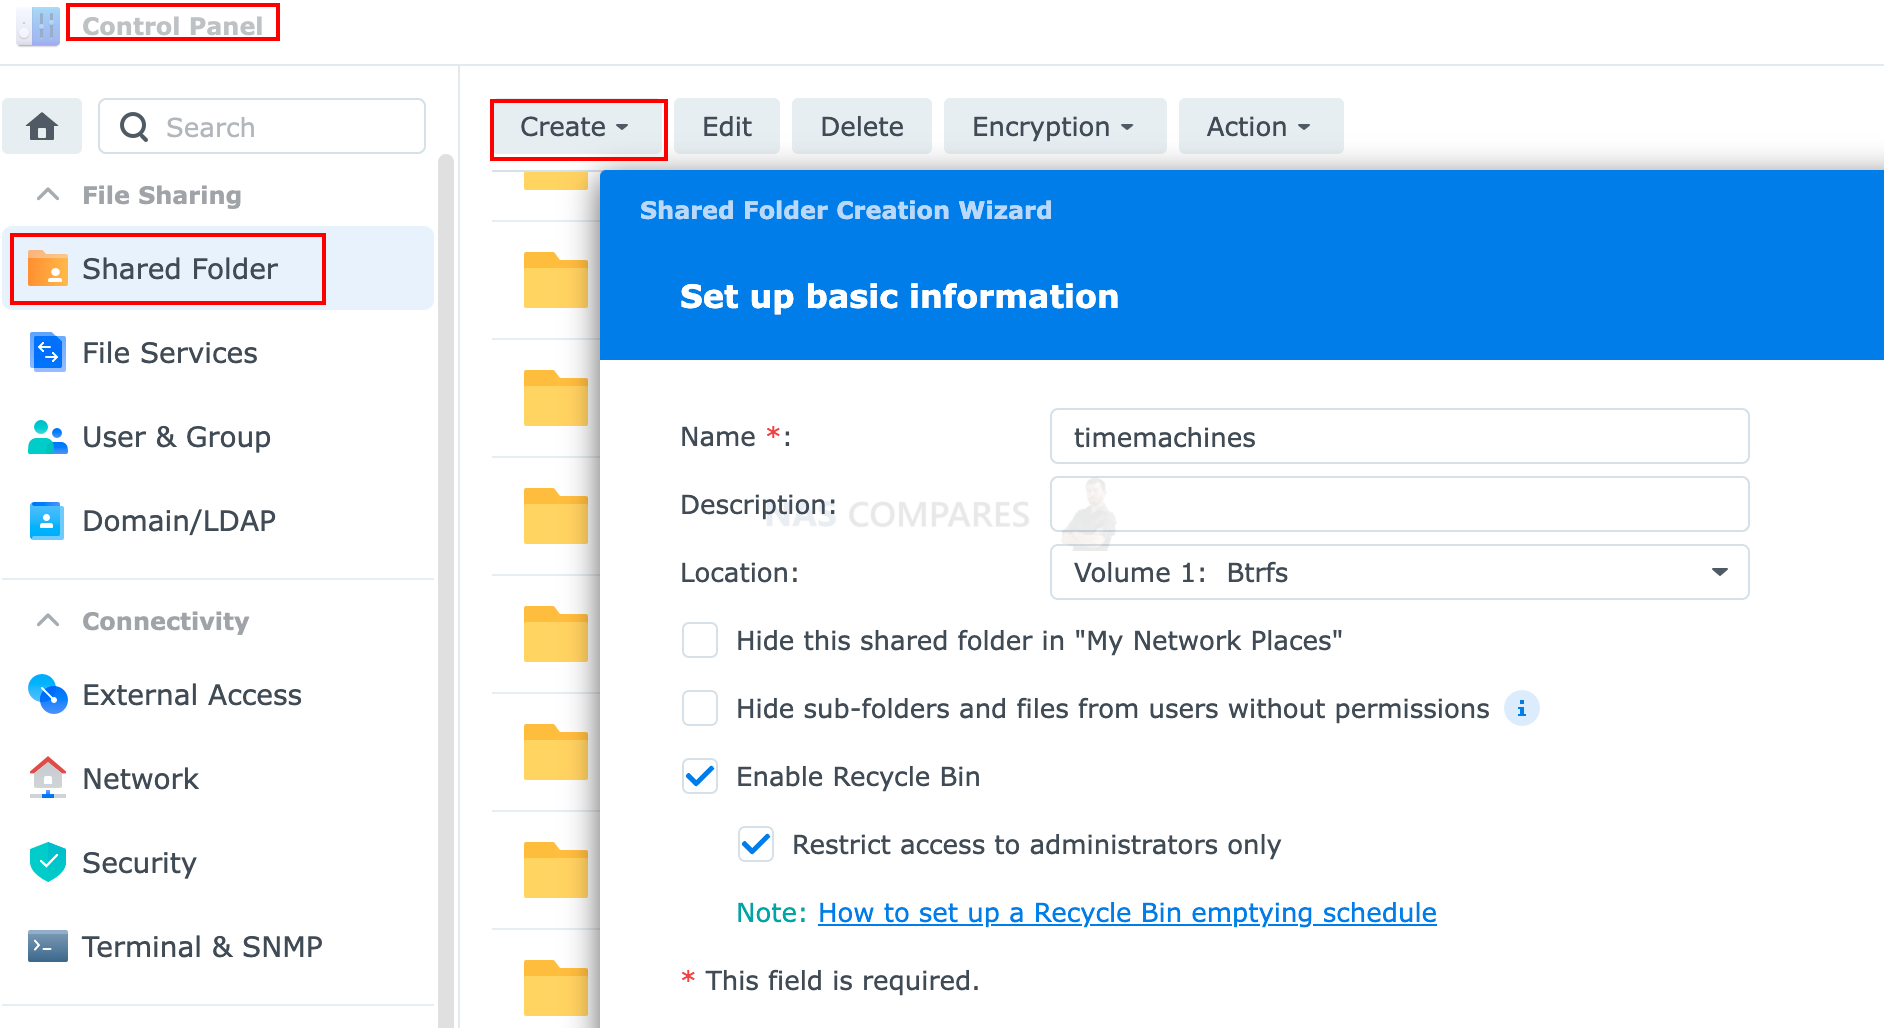
- Go to the “Control Panel” and click on “Shared Folder.”
- Click on the “Create” button to create a new shared folder.
- Enter a name for the new shared folder and select a location for the folder on the NAS.
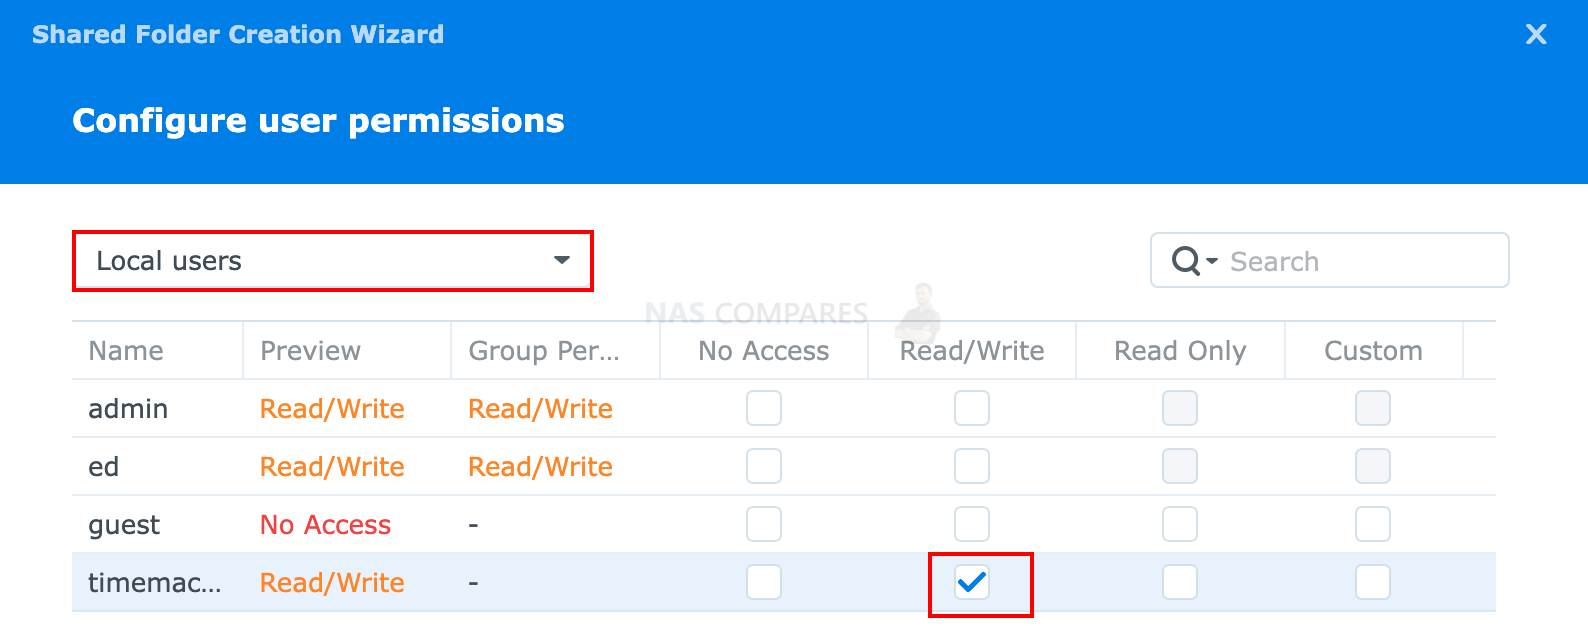
- Under the “Privilege” section, select the user that you want to have access to the shared folder (e.g. the Time Machine user you created earlier)
- Click “Apply” to create the new shared folder.
The new shared folder will now be available only to the user or group you specified and can be used for Time Machine backups.
Additionally, you may also want to enable the option “Enable Time Machine backup” in the advanced settings of the shared folder for better compatibility.
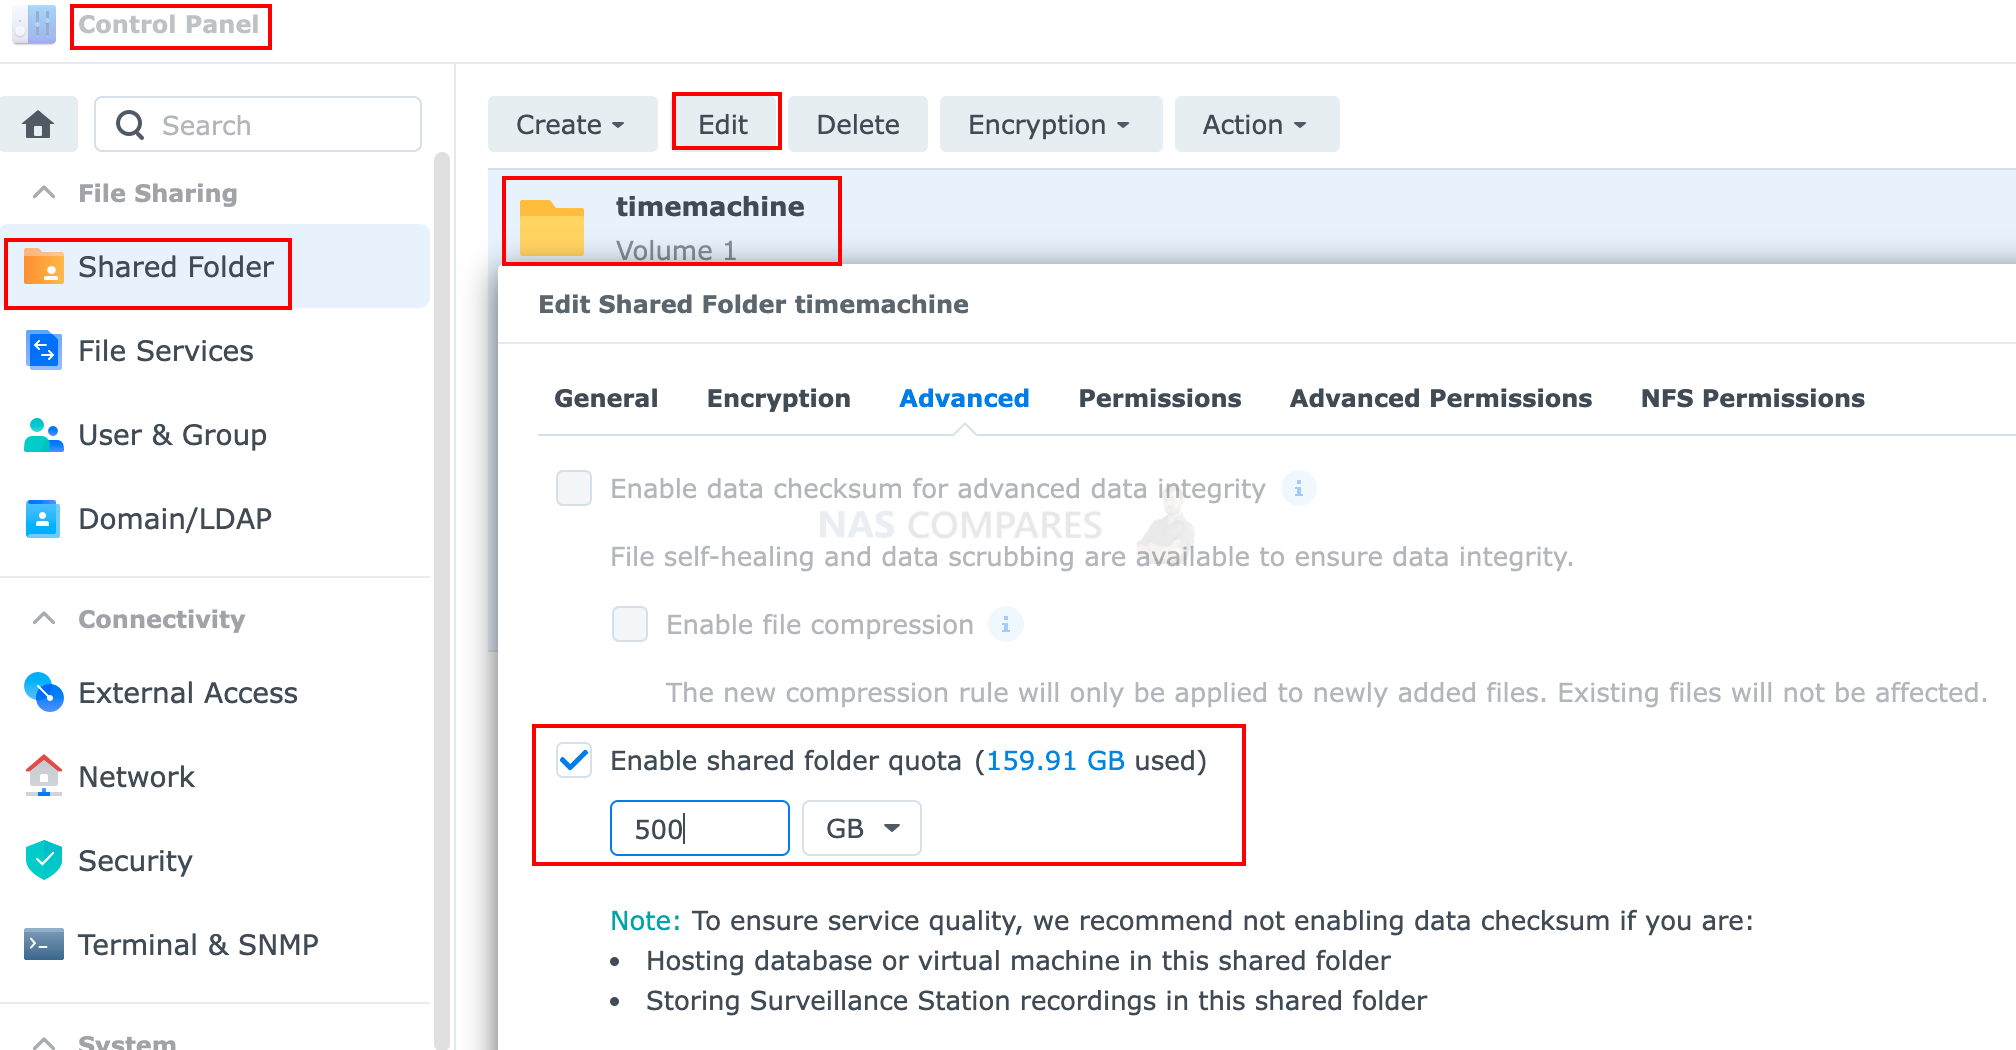
Set shared folder quota
To set a shared folder quota in DSM 7 (Synology DiskStation Manager 7), follow these steps:
- Go to the “Control Panel” and click on “Shared Folder.”
- Select the shared folder for which you want to set the quota.
- Click on the “Edit” button.
- Go to the “Advanced” tab.
- Check the “Enable Quota” checkbox.
- Enter the desired quota limit in the “Quota Limit” field. This can be entered in MB, GB, or TB.
- Click “Apply” to save the changes.
If you do not have BTRFS file system enabled you can only create user Quotas and not Shared folder Quotas.
Configure your time machine backup on your MAC
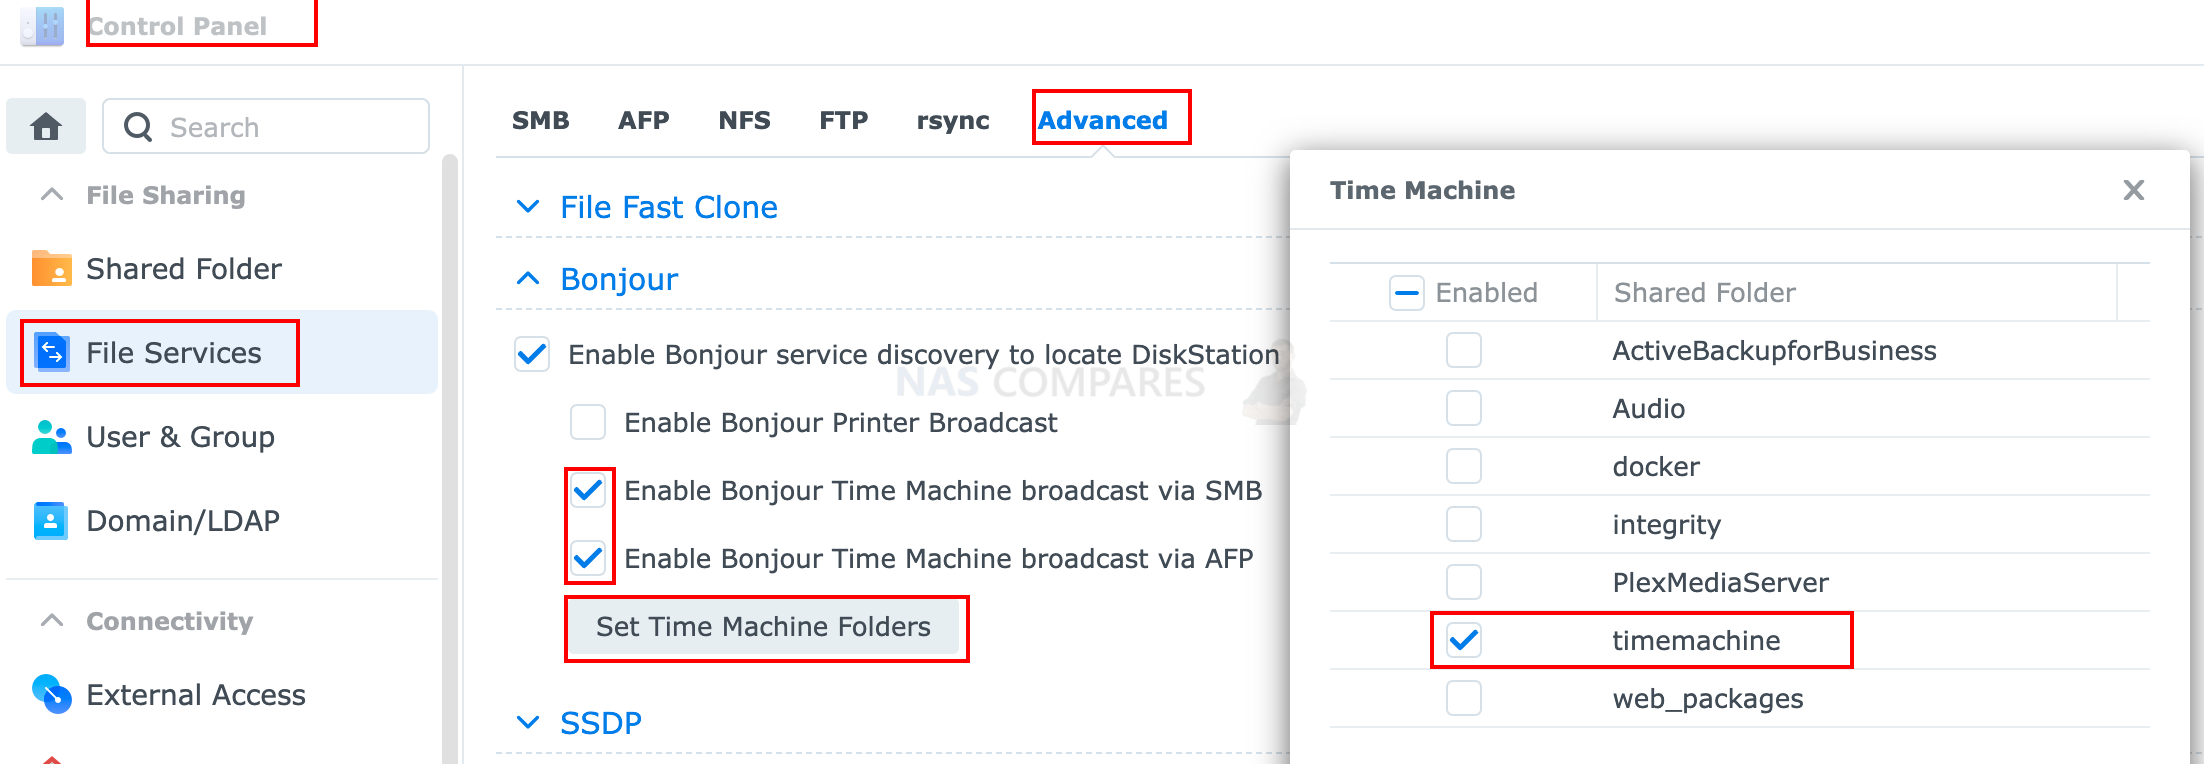
- Set the shared folder as Time Machine’s backup target.
- Go to Control Panel > File Services.
- Do the following depending on your DSM version:
- Go to the Advanced tab and tick the Enable Bonjour Time Machine broadcast via SMB or Enable Bonjour Time Machine broadcast via AFP checkbox, according to the file service you use. Then, click on the Set Time Machine Folders button.
- Choose the shared folder that you just created from the Time Machine menu and save your settings.
Perform Time Machine Backup to your Synology NAS
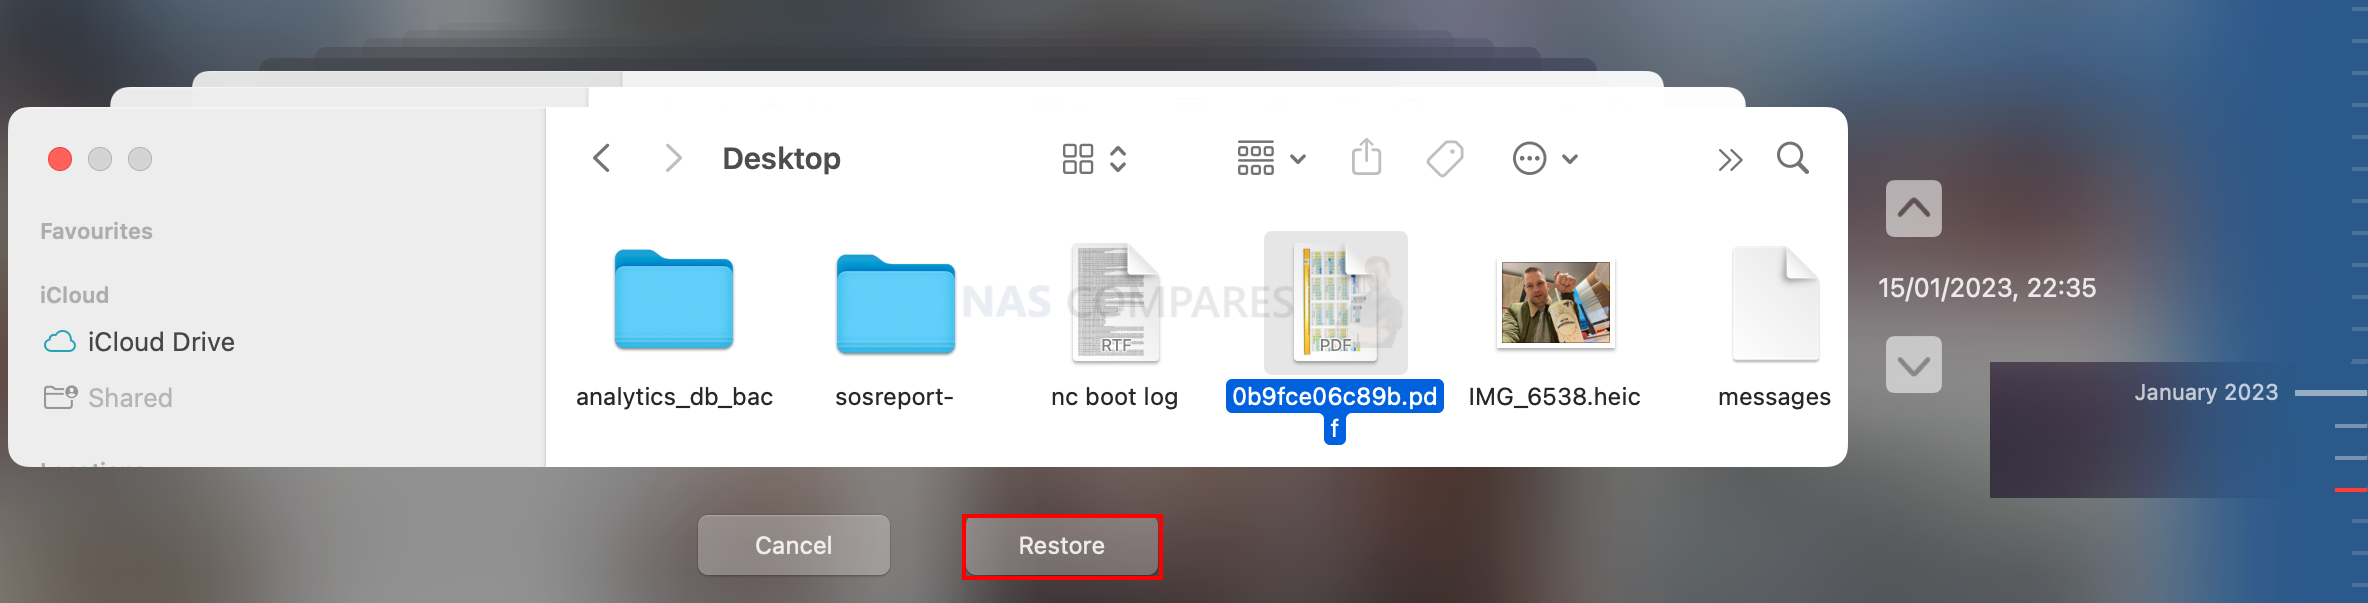
- On your Mac, open System Preferences from the Dock, and click Time Machine.
- Click Select Backup Disk.
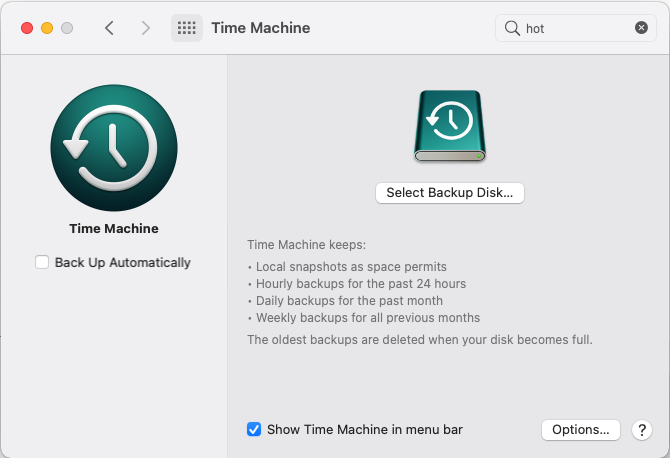
- Choose the shared folder that you created (i.e., Time Machine Folder on “Server name of your Synology NAS.local”) and click Use Disk.
- The system will prompt you to provide your account credentials. Enter the username and password for the user that you have just created and click Connect.
- Time Machine will soon start backing up your data.
Notes:
| Where to Buy a Product | |||
 |
    
|

|
VISIT RETAILER ➤ |
 |
|
|
VISIT RETAILER ➤ |
We use affiliate links on the blog allowing NAScompares information and advice service to be free of charge to you. Anything you purchase on the day you click on our links will generate a small commission which is used to run the website. Here is a link for Amazon and B&H. You can also get me a ☕ Ko-fi or old school Paypal. Thanks! To find out more about how to support this advice service check HERE


Do You NEED 5GbE NAS? (Or Should You Skip Ahead to 10GbE)
UGREEN DXP4800 PRO NAS Review
Minisforum G7 Pro Review
CAN YOU TRUST UNIFI REVIEWS? Let's Discuss Reviewing UniFi...
WHERE IS SYNOLOGY DSM 8? and DO YOU CARE? (RAID Room)
UniFi Routers vs OpenWRT DIY Routers - Which Should You Choose?
Access content via Patreon or KO-FI
Discover more from NAS Compares
Subscribe to get the latest posts sent to your email.
Can I transfer an existing Time Machine backup on an external usb drive onto my new Synology NAS? All of the tutorials on YouTube and the Internet only talked about starting fresh with a New time machine back up on the NAS.
Yes, you should be able to do this.