

This was all done on a QNAP TS-h973AX, I can’t tell you if this would work on any other non-HDMI device or if the DOM I purchased would work in any other system. So try this at your own risk, if you kill your machine, that’s all on you and your decision to try this.
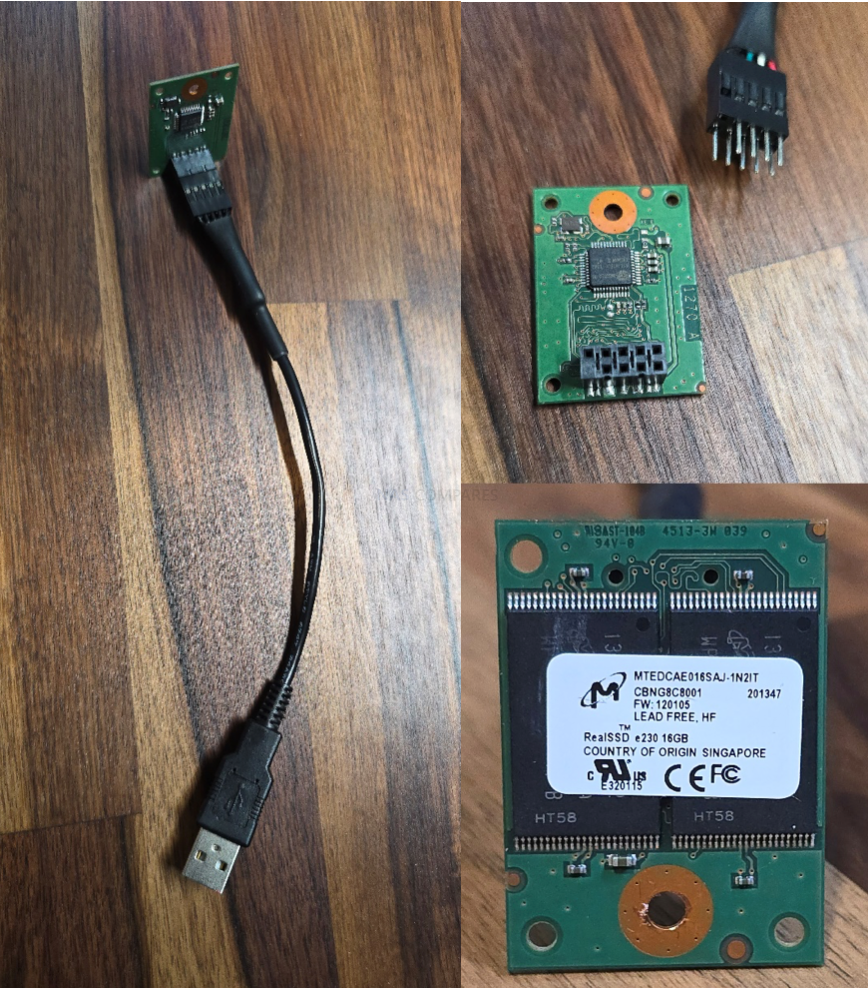
- The DOM that comes with the TS-h973AX is 8gb, TrueNAS requires a minimum of 16Gb. So getting a new DOM is necessary. Here is my setup I got from Ebay.
- DOM Link This was a SUPER hard decision to make, I was not able to find ANY references to the stock DOM, but needed a larger one. I took a big risk (IMO) choosing this and plugging it into the NAS.
- Cable Link
- Install TrueNas Scale onto a 16GB (Minimum) USB stick using balenaEtcher.
- Install the USB stick and the DOM/USB cable combo into USB ports on the back of a PC. I had better luck with the ports directly on the back of the computer than I did with my USB hub (YMMV)
- Reboot to BIOS.
- Set PC boot to the 16G USB stick, save settings and reboot.
- Set the 9-Pin DOM as the installation path (Mine shows as eMMC). Be sure of which one you’re setting as the INSTALLATION path; You don’t want to overwrite your main drive OS.
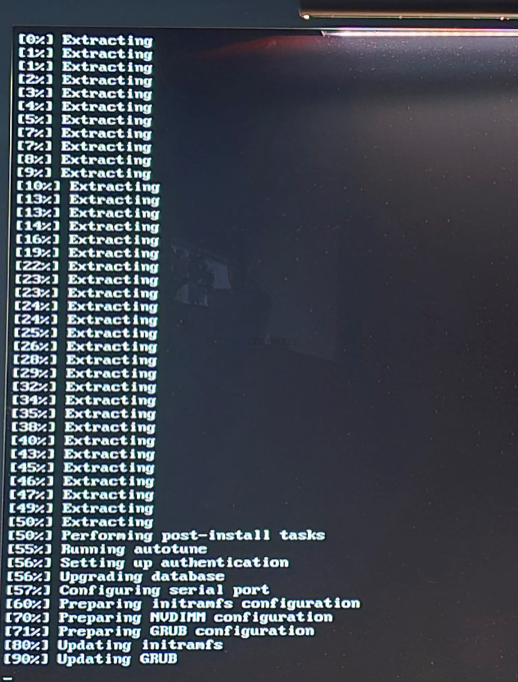
- Do the installation of TrueNAS Scale as normal.
- After you set the Administrator password and the installation is completes, SHUT DOWN the PC. Do NOT Reboot the PC
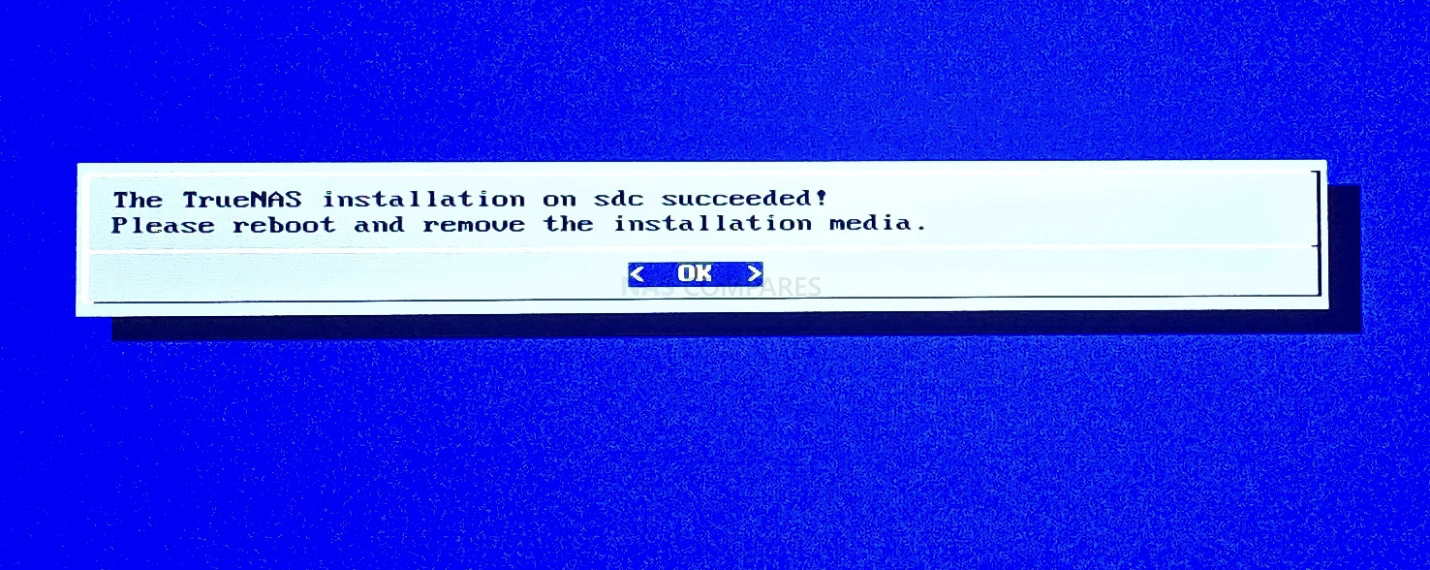
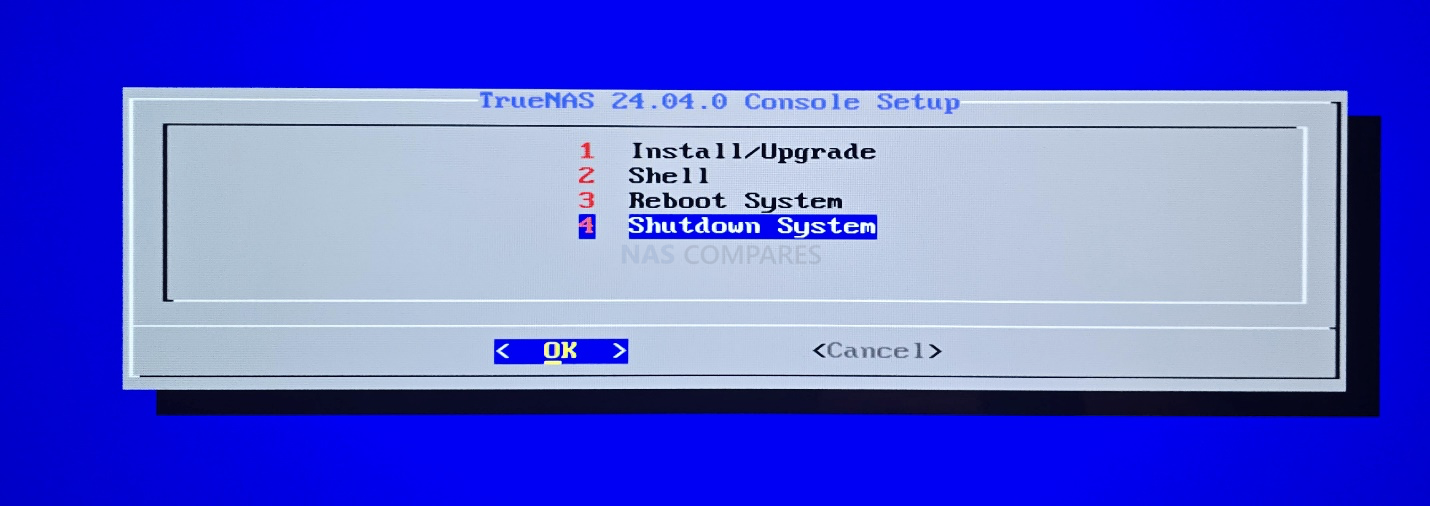
- Remove both the DOM/USB cable combo and the USB stick from the PC. (Set your PC BIOS back to boot to your regular boot drive)
Prep the TS-h973AX
- Remove power, all connections and all the drives from the TS-h973AX.
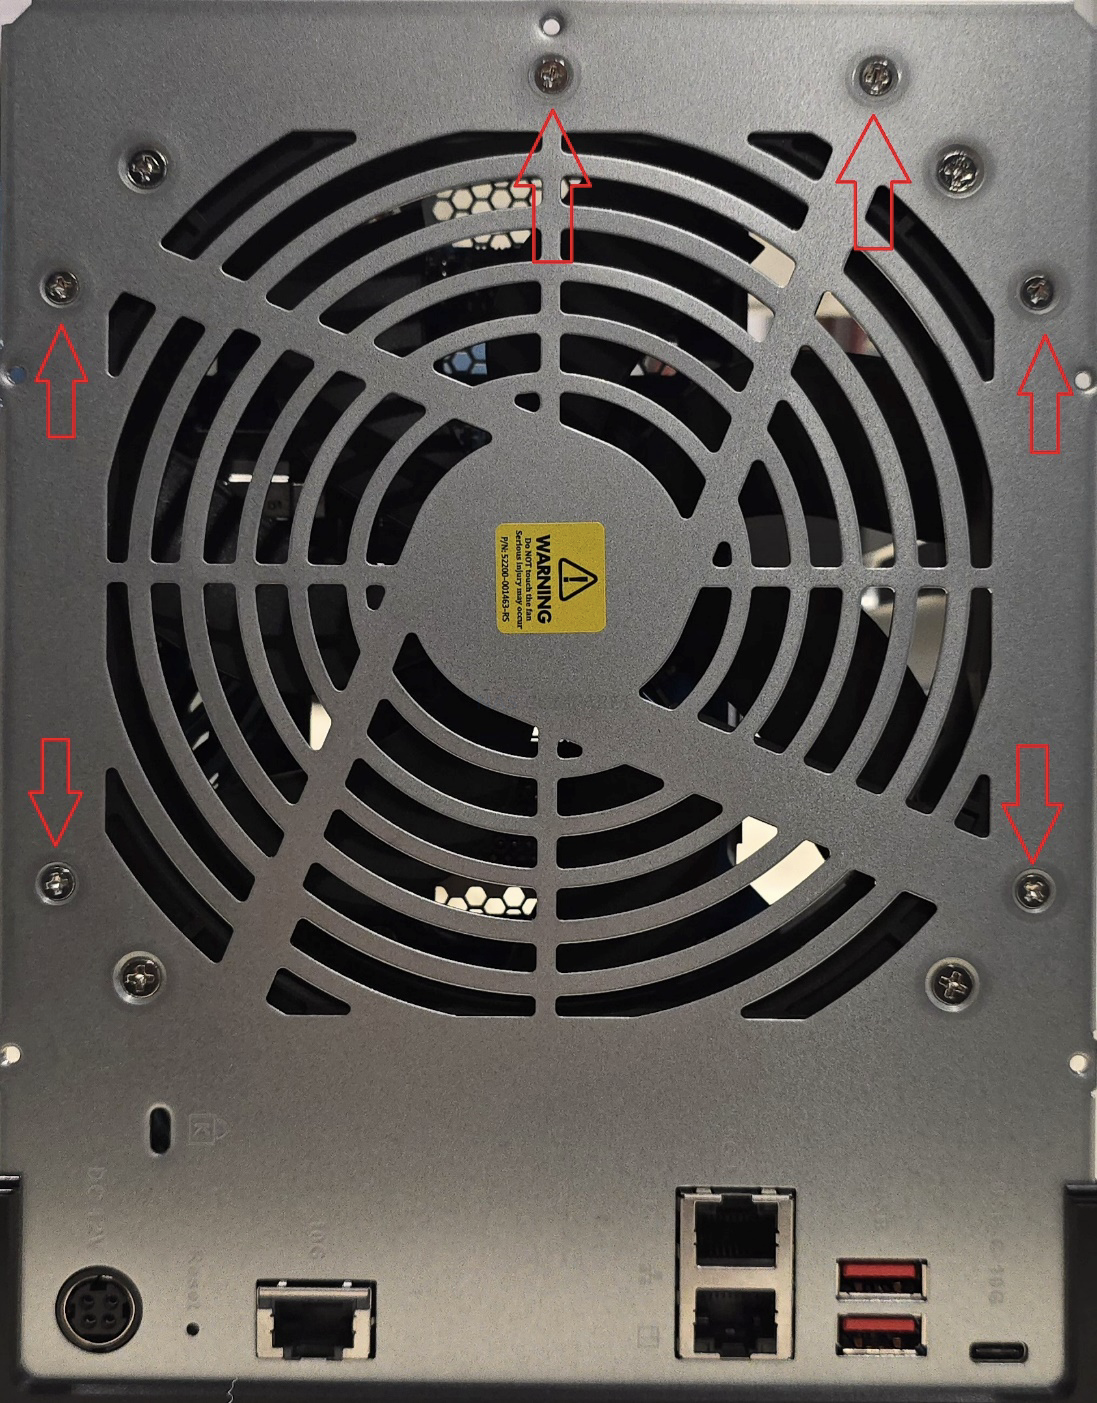
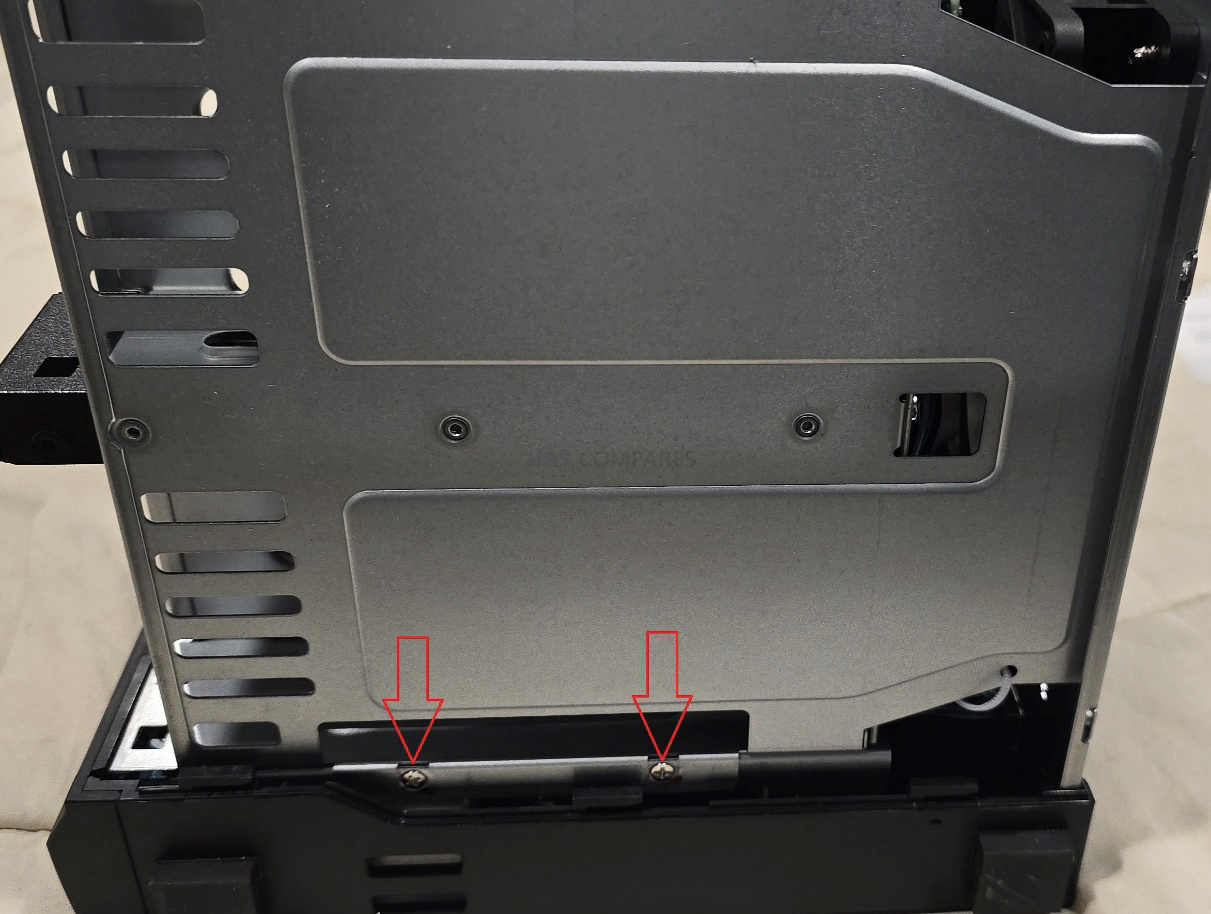
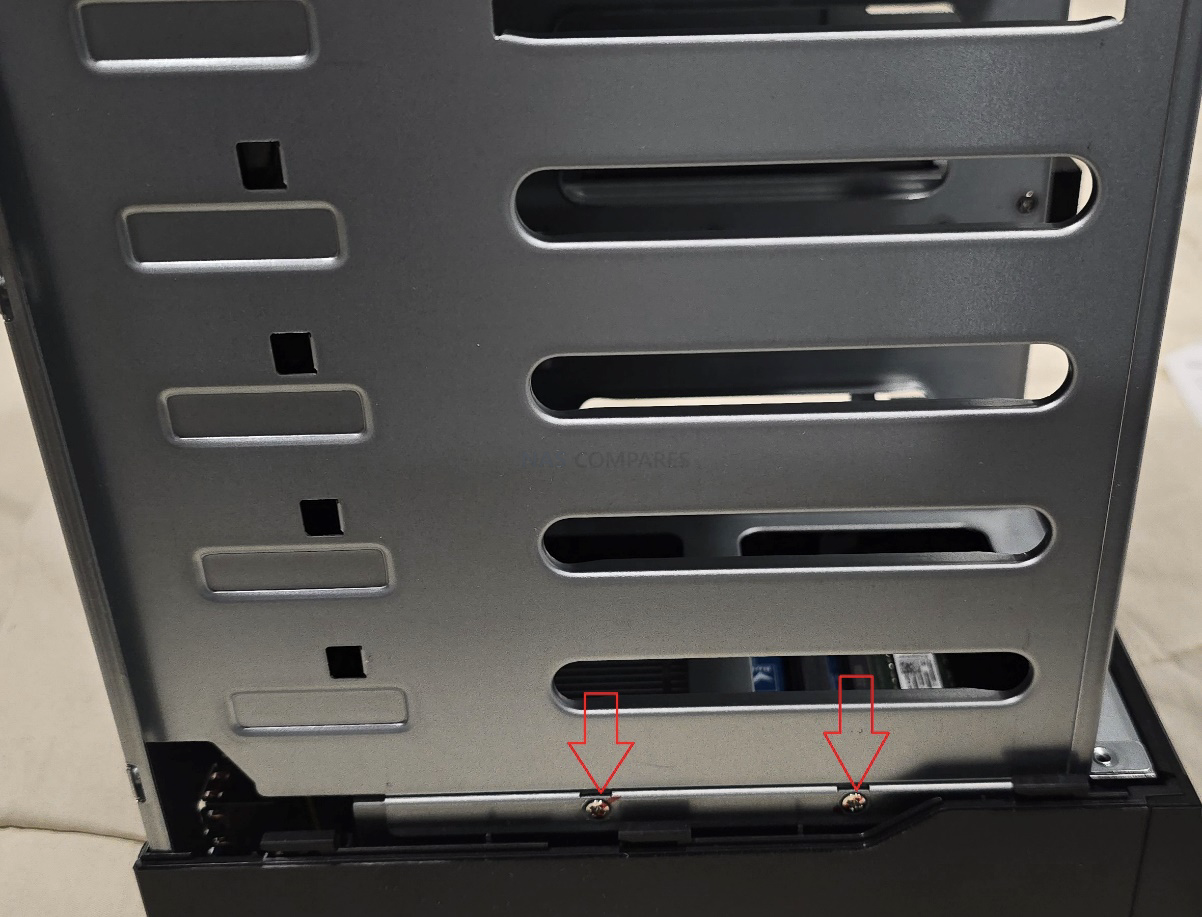
- Remove the cover and then the drive cage.
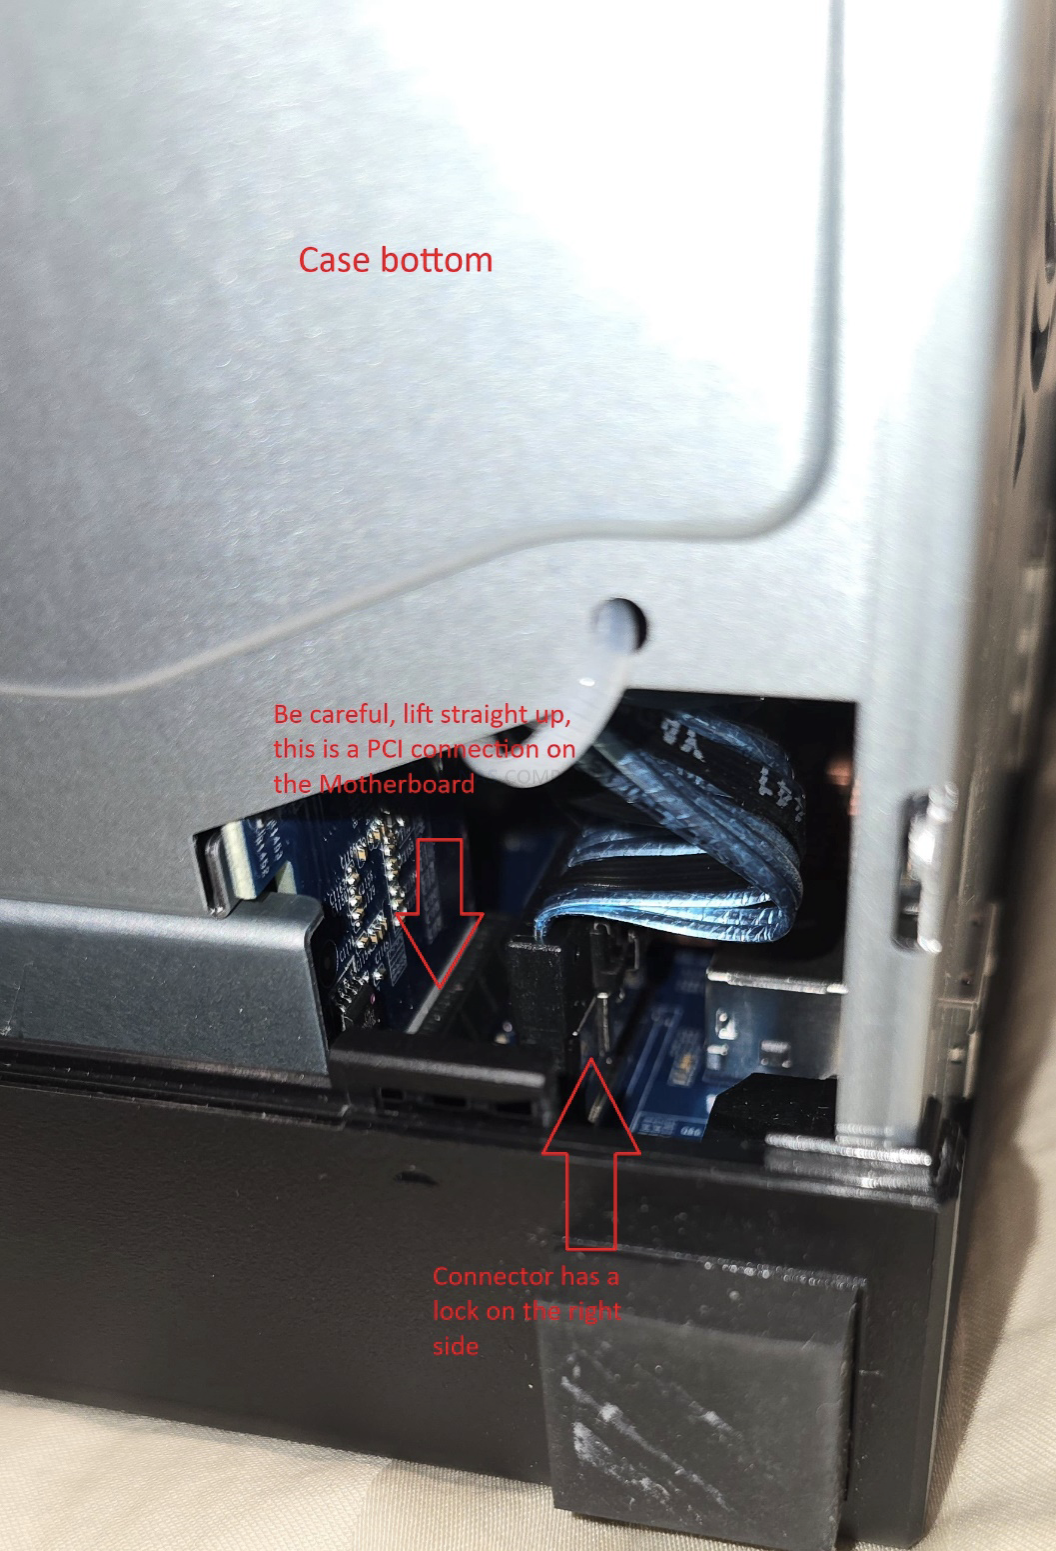
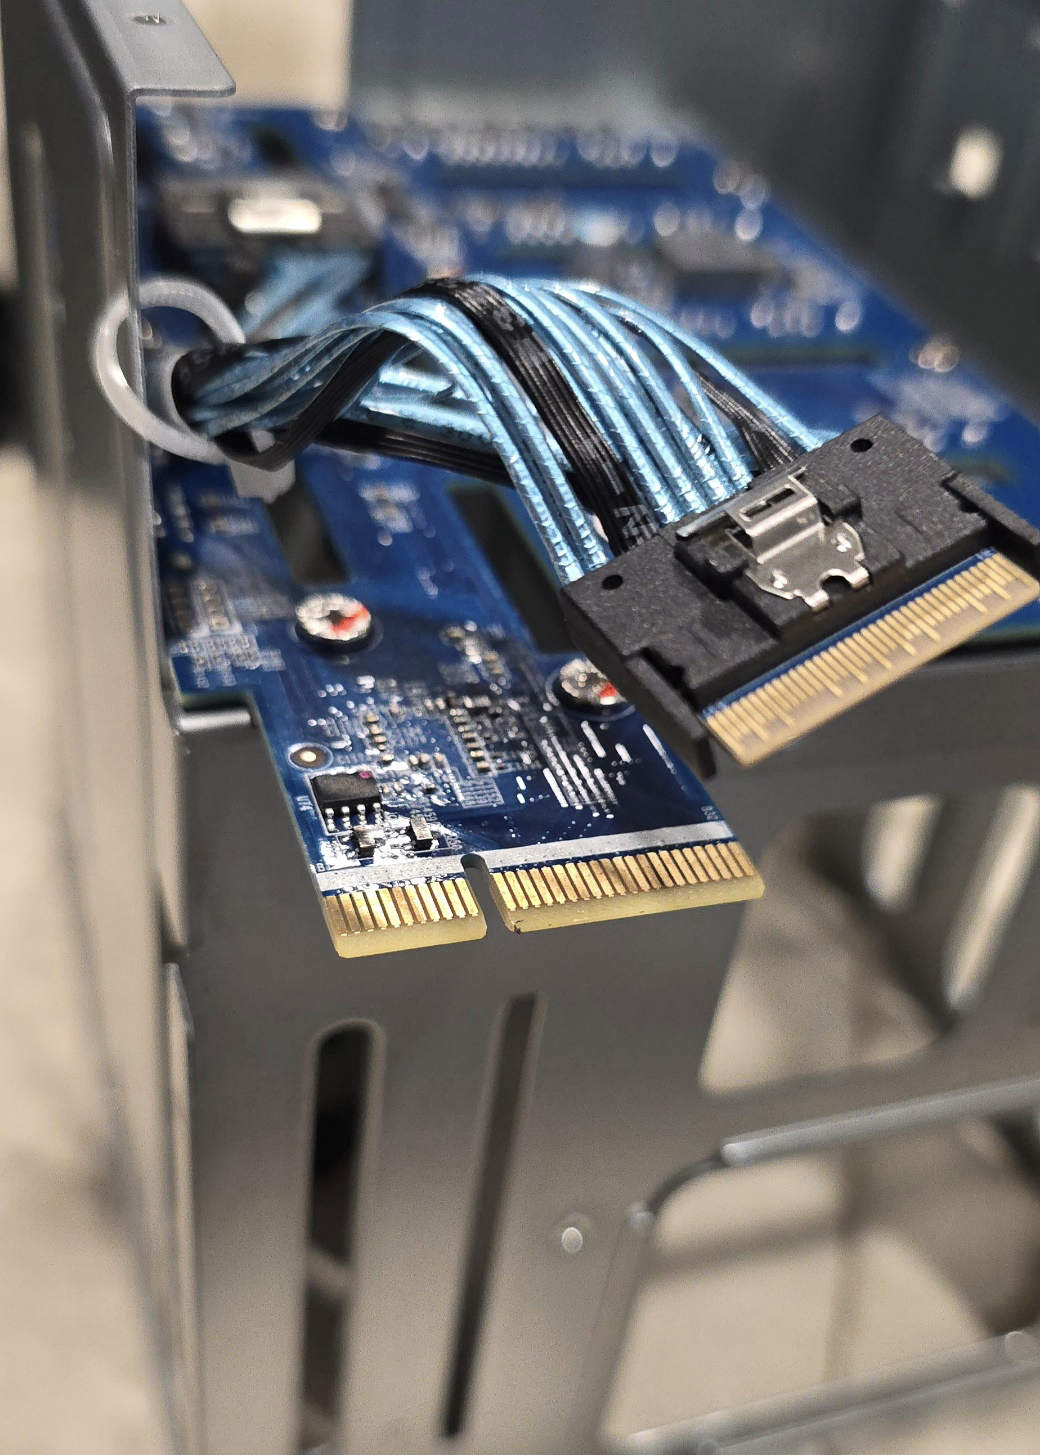
- Note there is a cable and a PCIe riser from the drive cage connected to the main board.
- CAREFULLY remove the stock 9-Pin DOM. There will be a goo holding it in. You’ll need to cut the goo away from the upper part of connector, being very careful to not cut anything else. (It’s just a non-conductive adhesive to prevent the DOM from coming loose.)
- Disconnect the TrueNAS DOM from the USB cable and install the TrueNAS 9-Pin DOM into the TS-h973AX.
- During this phase, since the unit is pretty disassembled, I upgraded my RAM to 64Gb of OWC EEC RAM, and the rear fan to a Noctua 140mm . NF-A14 PWM Chromax Black
- Reassemble the TS-h973AX
- Install the drives, connect your network cable (IMPORTANT), and your power cable.
- Boot up the device. This will boot the TrueNAS OS installed on the DOM and should detect all of the TS-h973AX hardware. This phase doesn’t need any input from the user at all.
- This 1st boot can take upwards of 20 min for everything to initialize and an IP address to be assigned.
- Use a network device scanner (I use Fing on my Android phone) to locate the TrueNAS device. You can use something like Advanced IP Scanner, a free tool (Thanks Robbie from NASCompares and his installation video from HERE
- You can now access the device from your browser to start setting TrueNAS up.
| Where to Buy a Product | |||
 |
    
|

|
VISIT RETAILER ➤ |
 |
|
|
VISIT RETAILER ➤ |
If you like this service, please consider supporting us.
We use affiliate links on the blog allowing NAScompares information and advice service to be free of charge to you. Anything you purchase on the day you click on our links will generate a small commission which is used to run the website. Here is a link for Amazon and B&H. You can also get me a ☕ Ko-fi or old school Paypal. Thanks! To find out more about how to support this advice service check HERE
We use affiliate links on the blog allowing NAScompares information and advice service to be free of charge to you. Anything you purchase on the day you click on our links will generate a small commission which is used to run the website. Here is a link for Amazon and B&H. You can also get me a ☕ Ko-fi or old school Paypal. Thanks! To find out more about how to support this advice service check HERE


Private 🔒 Inner Circle content in last few days :
UniFi Routers vs OpenWRT DIY Routers - Which Should You Choose?
WHY IS PLEX A BIT S#!t NOW? IS 2026 JELLYFIN TIME? (RAID Room)
Synology FS200T NAS is STILL COMING... But... WHY?
Gl.iNet vs UniFi Travel Routers - Which Should You Buy?
UnifyDrive UP6 Mobile NAS Review
UniFi Travel Router Tests - Aeroplane Sharing, WiFi Portals, Power Draw, Heat and More
Access content via Patreon or KO-FI
Discover more from NAS Compares
Subscribe to get the latest posts sent to your email.
Here’s a question: what is your take on the need (or strong recommendations) for ECC memory to use TrueNAS/ZFS ? I mean, I just bought a QNAP TS-464, with an NVMe drive with plans to run TrueNAS on it (I dont like the look & feel of QTS and all of its proprietary software, etc!). But my bad, before buying all of this, I did not read on ZFS and these memory expectations! Im having a hard time finding the real answer: is ZFS + NON-ECC ram (16GB in my case) STILL BETTER than EXT4+NON-ECC ram ? Would there be a sceanrio where ZFS would potentially be WORST ? Thanks for you thoughts!
REPLY ON YOUTUBE
To much blablablablablabla so little information.
REPLY ON YOUTUBE
I have installed TrueNAS Scale on my QNAP, currently no pools, only using it for zero formatting some older drives. But I’m running into a weird issue; The NAS goes to sleep?!
There are seemingly no settings in BIOS or in TrueNAS to avoid this, and I don’t understand why it happens. Has this happened to you? Very annoying, as it pauses the formatting… I have to start it by pushing the power button on the NAS itself.
REPLY ON YOUTUBE
To add a side note to these instructions. I’ve found that it’s even more important that a replacement DOM is used (Or at the very least the stock one is protected) Going back to QTS/QuTS is a PAIN. I did on my older TS-451+ and I can’t get back to QTS on it. I’m not able to find a bootable image to create a bootable USB drive.
Food for thought
For simply tellling me which F12 / delete command to press: muah!
REPLY ON YOUTUBE
Is it possible to do this on a QNAP TS-932x 9 Bay NAS?
I’m not too keen on the istalled QNAP OS.
REPLY ON YOUTUBE
bonjour il faut traduir en français
REPLY ON YOUTUBE
Very good job, as always, thanks a lot ❤
REPLY ON YOUTUBE
Hey, nice vid on this topic great explanation!
I’ve got a basic question, i have a AMD R-Series RX-421ND 4-core 2.1 GHz processor (Turbo Core to 3.4 GHz) without a HDMI output thingy, but can install one in the Optional PCIe adapter.
If i do that will Truenas Scale then work on that NAS?
REPLY ON YOUTUBE
thank you, wasn’t sure it was doable, i am using an old ts-469L it as NO internal extra port but it as 2 eSATA, so i am using a old 80gb SSD with an old eSATA (power and sata to eSATA) adapter ! woa that thing is slow.. but it works!
REPLY ON YOUTUBE
Have been playing around with Trunas Scale in VM, not sure I’m ready to jump QTS ship until I figure out the Trunas permissions . Seems just too complicated compared to QTS
REPLY ON YOUTUBE
nice video but honestly out of the 40 minutes, the real tutorial is around 5min – the rest is… bla bla 😉
REPLY ON YOUTUBE
I have an old Qnap 209 Pro that I would like to give a new life, would it be possible to install something like Truenas on it?
REPLY ON YOUTUBE
qnap is bs the hard drives never shup down you can nothing going and it will go full bore sick of it
REPLY ON YOUTUBE
Anyone know if TrueNAS on QNAP will support external GPU for QNAP with PCIe but originally not GPU supported?
REPLY ON YOUTUBE
You’re the man bruv. I bought a asustor 6404t because of you and i’m running truenas scale on it. your tutorial helped me do it.
ADM has next to no apps and the media servers were slow and glitchy. I haven’t setup plex on it yet but i have my media library of 1750 movies ready to go. On truenas its more complicated and i hope its smoother once i have it up and running. Cheers!
REPLY ON YOUTUBE
Would this be viable on a TS-451 (not TS-451+)?
REPLY ON YOUTUBE
Hmmmm a small USB because you might ‘knock it’ sounds strange. Product placement? Lol.
REPLY ON YOUTUBE
Nice guide – I did this a couple weeks ago on my TS-453D (16GB RAM) but reluctantly reverted back to QTS. The main show-stopper for me was the inability for TrueNAS to control the fan speeds of the NAS based on processor load like QTS can. You have to use the BIOS to set fan speeds in TrueNAS, which only has two options: Automatic (fan stays quiet at 900rpm but processor hits 100 degrees under any load and throttles) and Manual (fan stays full pelt at 100% all the time, extremely noisy). Spent days looking into user made drivers to control fan speeds in software, but nothing worked in the end. This isn’t the only thing that wasn’t fully working too, are a lot of “gotcha” moments when you venture into it. If loud fan noise doesn’t matter to you, TrueNAS is fine. Otherwise, it’s not worth the trouble on QNAP models.
REPLY ON YOUTUBE
Will it all work with PCIE video card? I can get to the BIOS screen with the add-on NVidia Quadro P600 on my TS-873A.
And is Windows Server an option? That would be great as ZFS deduplication is pathetic (compared to Windows Server deduplication).
REPLY ON YOUTUBE
Please try to improve your workflow. Audio and video aren’t in sync. It’s really annoying. Content is great though.
REPLY ON YOUTUBE