

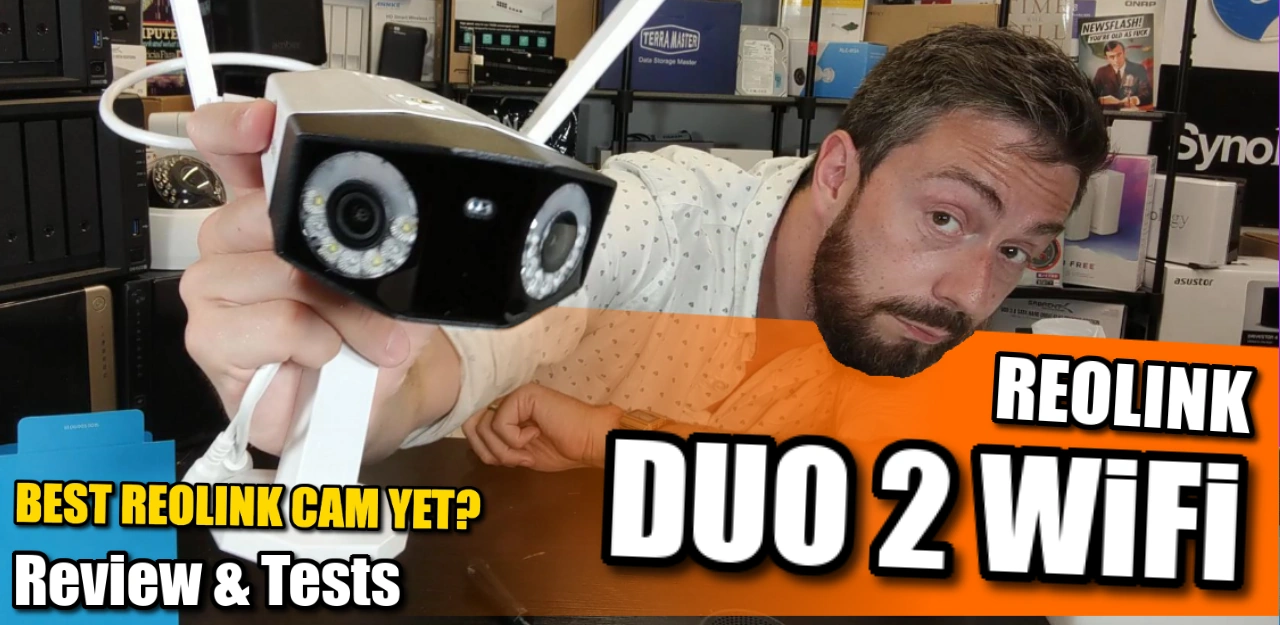
Review of the Reolink Duo 2 WiFi Camera – Any Good?
I have quite a large number of cameras here on the blog/video and I think it would be fair to say that although most are all functional and reliable bits of kit, they are not particularly exciting! Security cameras are not designed to be particularly thrilling, as they are chiefly designed to be setup-and-forget pieces of equipment that are on 24×7 and rarely thought of outside of when you need to review surveillance footage live/archived. Now, why am I starting a review about an IP camera with such a low-key intro? Well, because the Reolink Duo 2 Wifi outdoor IP camera MIGHT be the first surveillance camera that I actually find GENUINELY interesting! It has a number of cool software and hardware features that really set it apart from other brands right now targeting the same home/SMB user market – especially the chief selling feature of this camera, the dual lens 180-degree view mode! Arriving in a wired POE version and WiFi version, today I am reviewing the wireless version to see if this surveillance IP camera is another great release from Reolink, or something of a niche/fad item.
| Where to Buy a Product | |||
 |
    
|

|
VISIT RETAILER ➤ |
 |
|
|
VISIT RETAILER ➤ |
 |
|
|
VISIT RETAILER ➤ |
|
|
|
|
VISIT RETAILER ➤ |
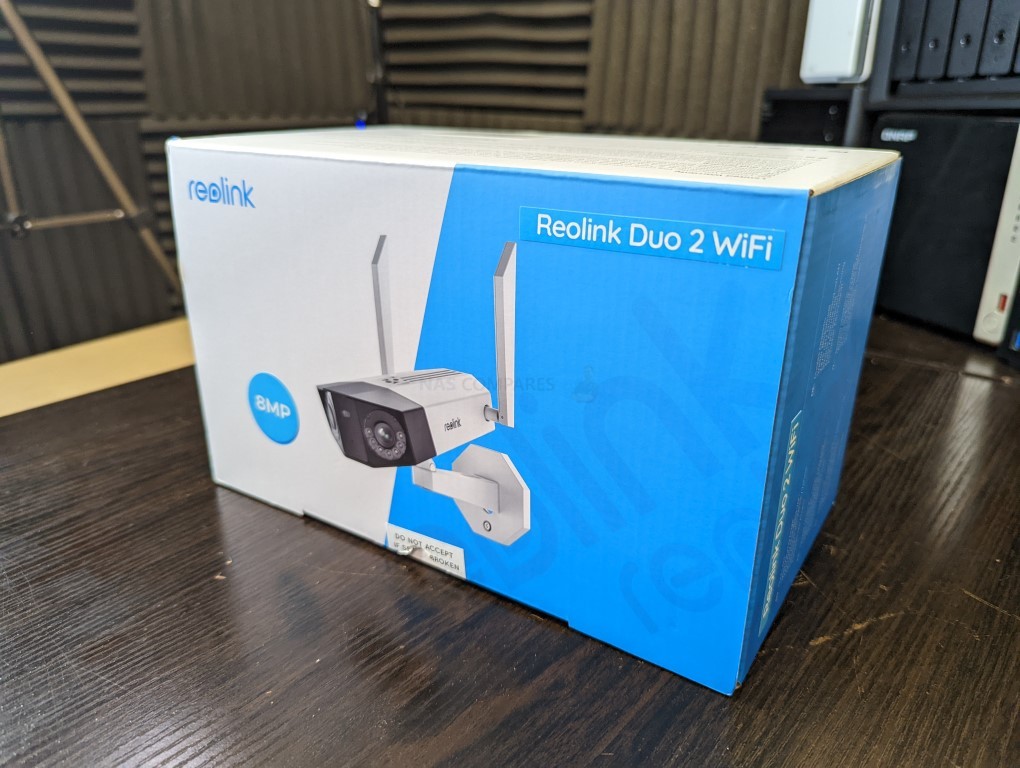
Reolink Duo 2 WiFi Camera Review – Packaging
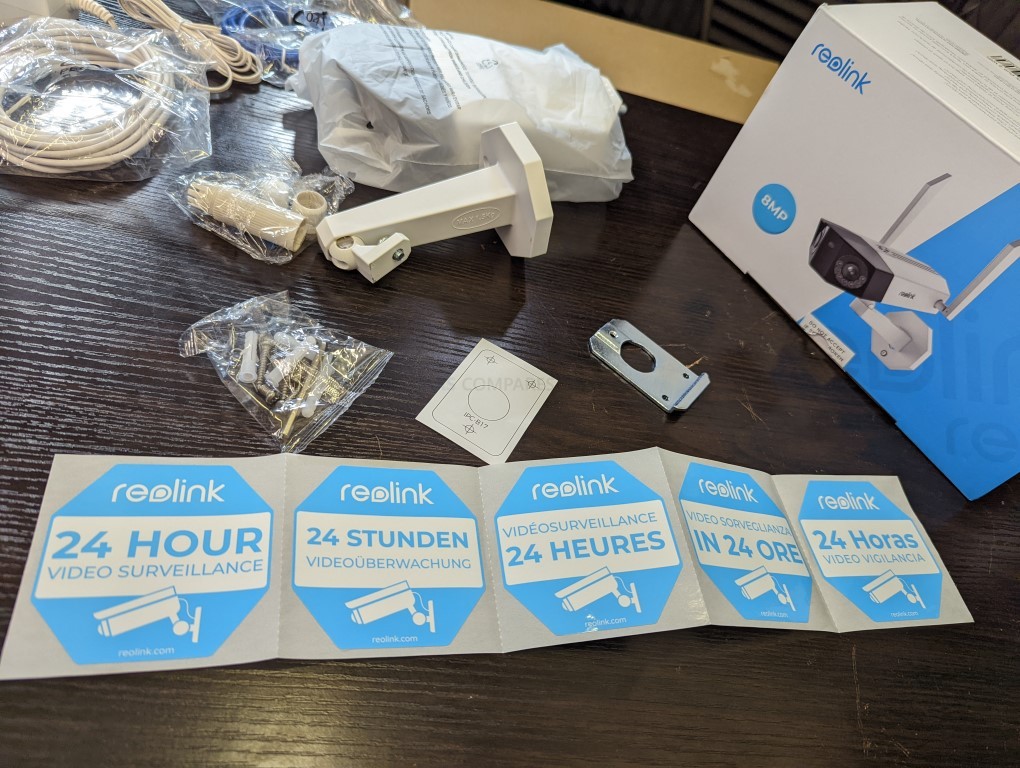
For such a decent-sized camera when it is fully deployed (195x103x56 mm), the retail box for the Reolink Duo 2 WiFi is surprisingly small/compact, weighing in at a little over 600grams. The retail box is covered in Reolink livery (something the brand has definitely stepped up on in recent years).
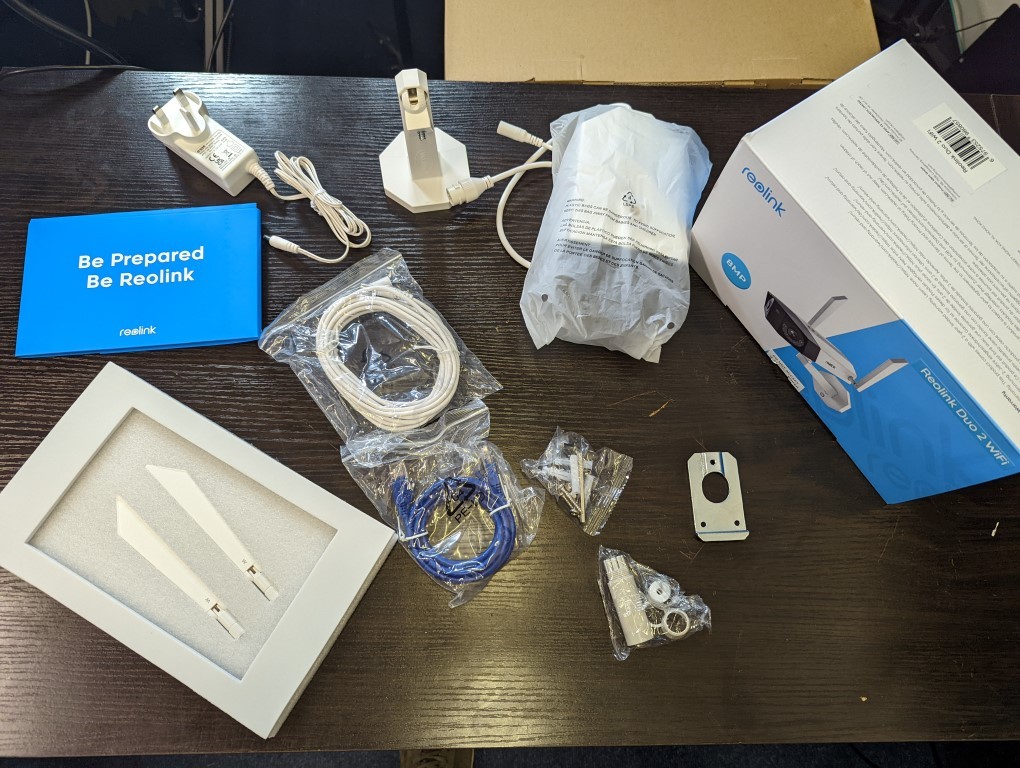
The contents of the Reolink Duo 2 WiFi retail kit are also pretty diverse too, with the standard WiFi model arriving with the camera itself, wall-hinged bracket, two high-def antennae, power cable, extension cable, screwdriver, screws+raw plugs, wall mounting kit, mounting plate, water-seals, wall guide, adhesive CCTV stickers and manuals on the setup+2 year warranty coverage. The LAN/PoE version also includes a Cat 6 ethernet cable.
Like most cameras designed for outdoor use, the question of a power source raises its head. Many people do NOT want a CCTV camera inside their home, even with scheduled recording patterns. So outdoor cameras that cover entrances and exits serve a good middle ground.
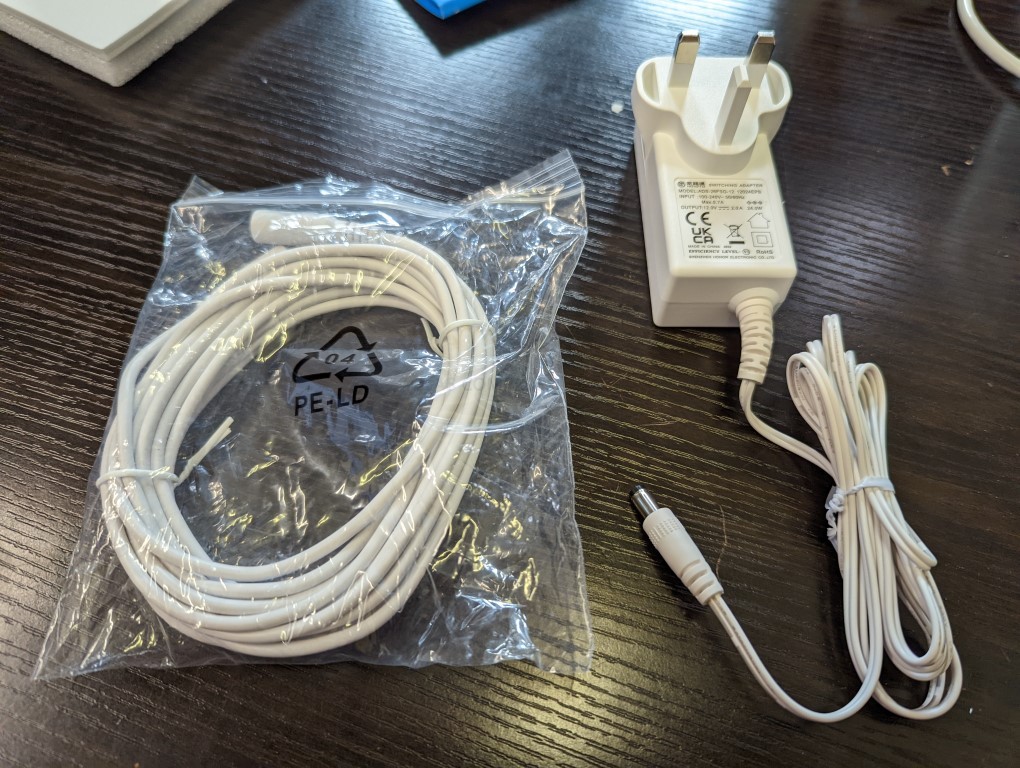
The previous generation Reolink Duo series arrived in three versions (Wired with Power over Ethernet supplied, Wireless but with a mains power connection or Battery powered and connected to a solar panel) and I assume the Reolink Duo 2 WiFi will arrive in these, but the Mains power cable is the only option right now in the WiFi version and although the initial 1.8 metre cable seems a little underwhelming for a high height, outdoor camera, it DOES arrive with a 5-metre mains power extension that goes between the included PSU and the camera easily. The connector can also be made completely water/dust tight in the connectors with the included weather cover clips.
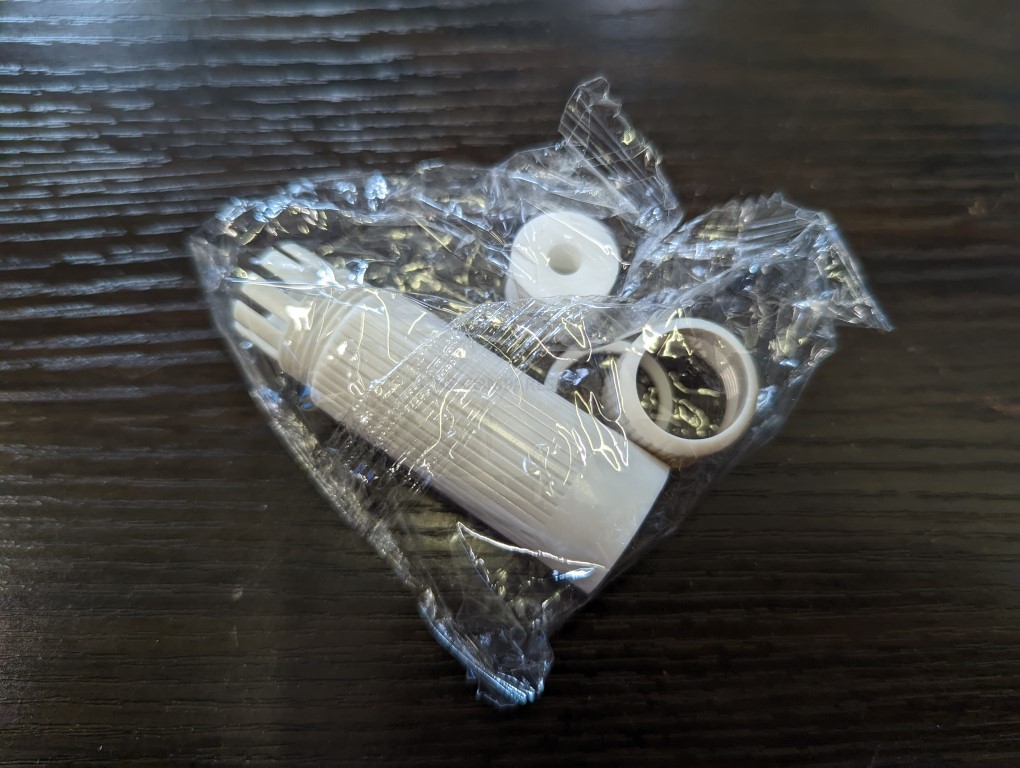
The kit also includes a bunch of smaller bits for when you want to wall mount the camera. The deterrent stickers that declare that ‘this property is under 24-hour surveillance’ are a little naff, but I can imagine some users using them. The first-time setup instructions are a little thin on the ground to be honest, but there are extensive guides online for setting up reolink cameras and Reolink seemingly updates them regularly.
The retail kit for the Reolink Duo 2 WiFi is all fairly standard stuff and I can’t really fault it. It’s not the most protective of packaging, but this product looks very much like the kind of ‘off the shelf’ solution found in your local IT shop, so I can overlook it here. Let’s discuss the design of the camera itself.
Reolink Duo 2 WiFi Camera Review – Design
Even at a quick glance, it is clear that the Reolink Duo 2 WiFi arrives in a significantly different design than like 90% of other IP cameras on the market, breaking the mould from the usual dome/bullet style outdoor cameras. Indeed, this might be the most anthropomorphized camera that Reolink has ever produced.
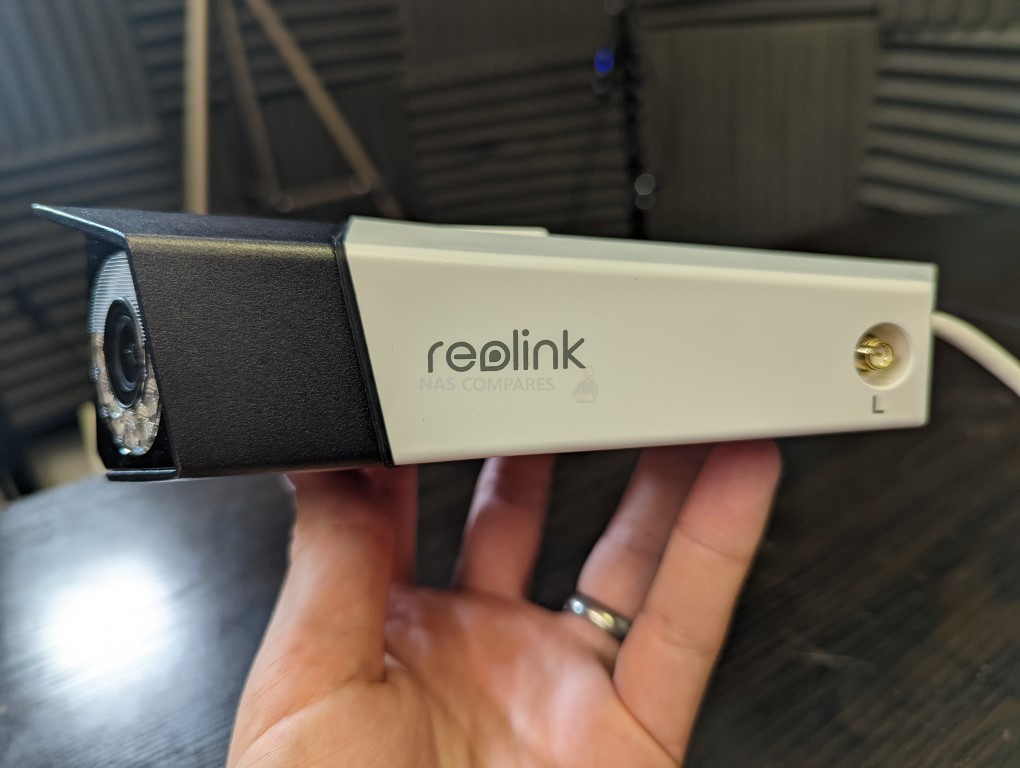
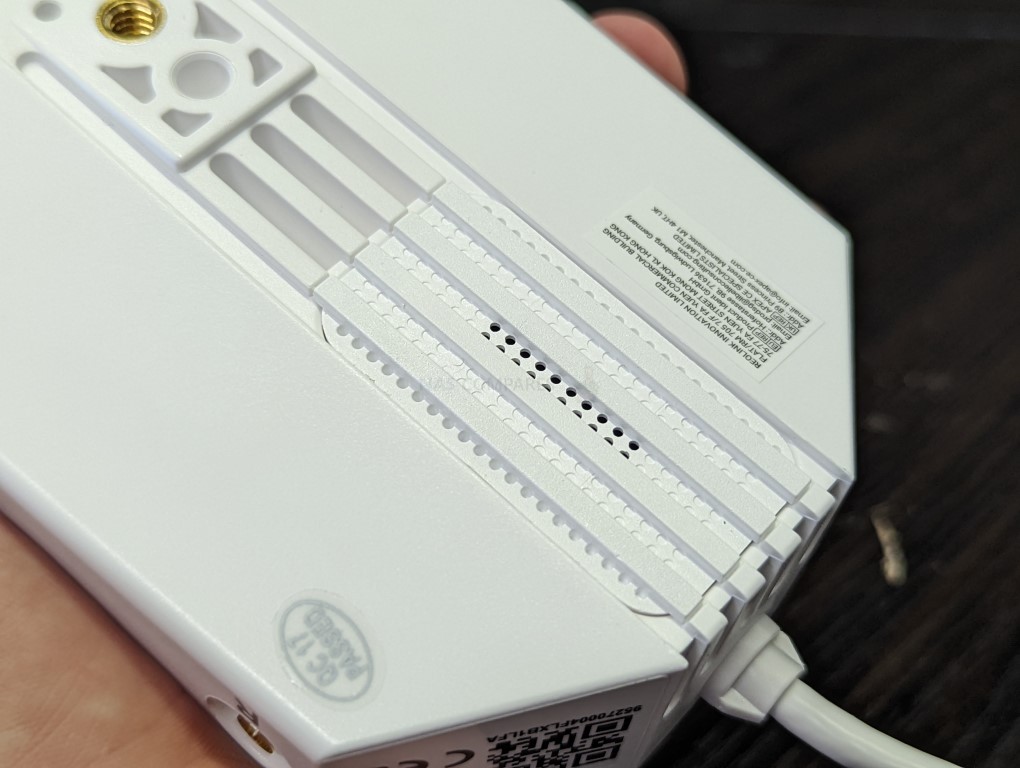
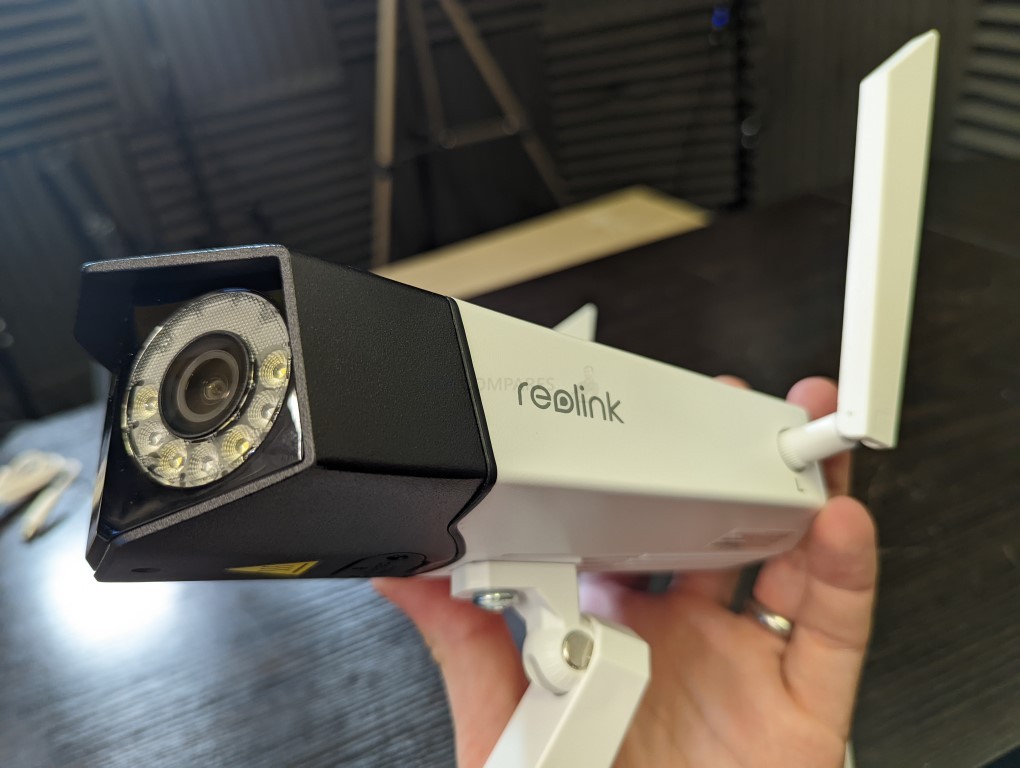
The Reolink Duo 2 WiFi is completely metal externally and it’s sharp edges and black/white colour scheme result in a fantastically modern-looking camera. The sides do not feature any ventilation or marks aside from the Reolink logo.

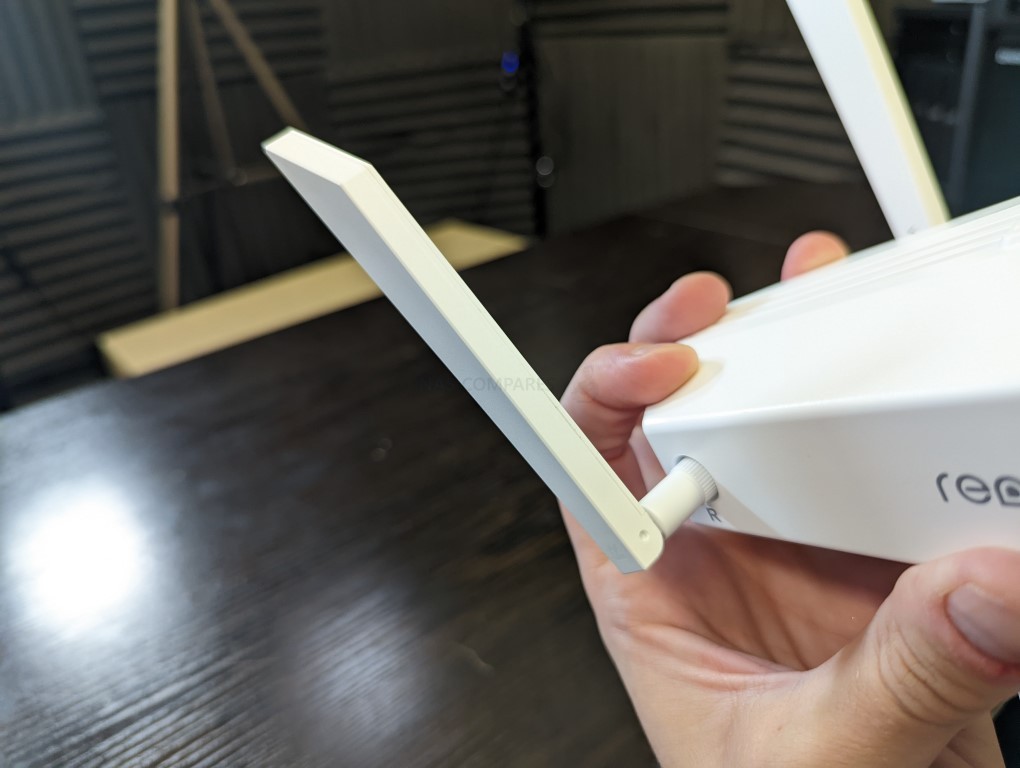
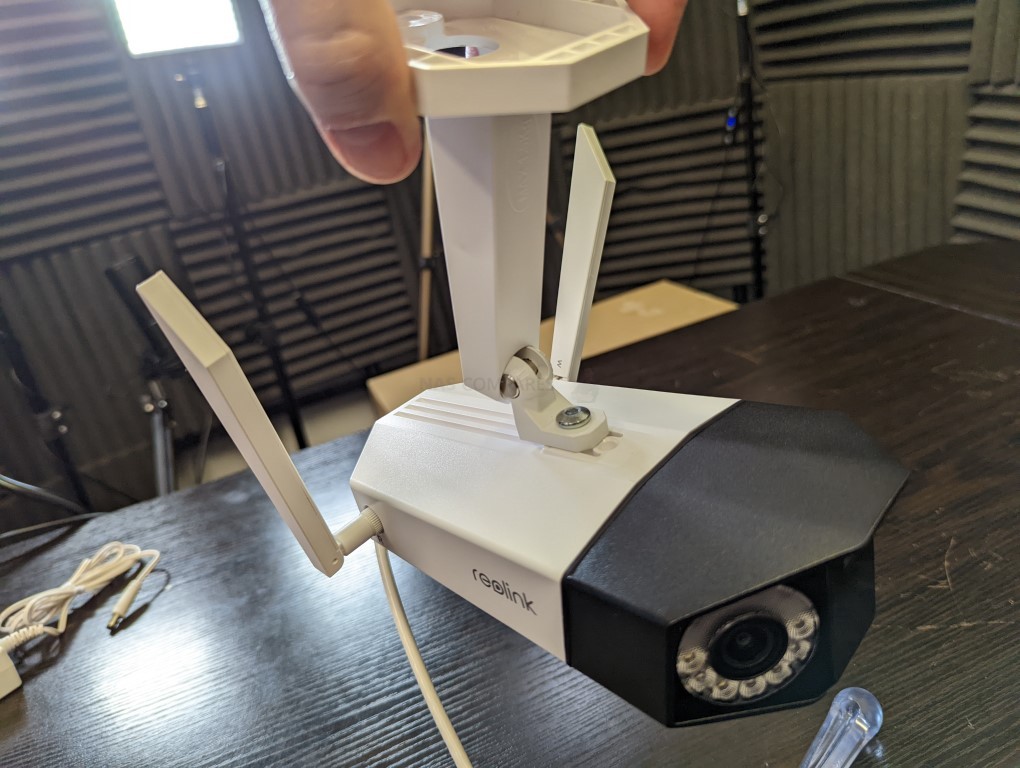
The side panels of the Reolink Duo 2 WiFi camera feature screw threads to attach the twin antennae to this camera. For such a small camera, these are some pretty high-quality antennas, supporting both 2.4Ghz and 5Ghz, but only supporting up to WPA2 encryption, instead of WPA3. The antennae are 2T2R MIMO architecture and allow for dual streaming and dual frequency.
The top and bottom of the camera rather uniquely BOTH feature the screw hole for attaching the mounting kit, so this camera cab wall or ceiling mounted very easily, as well as the base of the camera also features a few little extra bits.
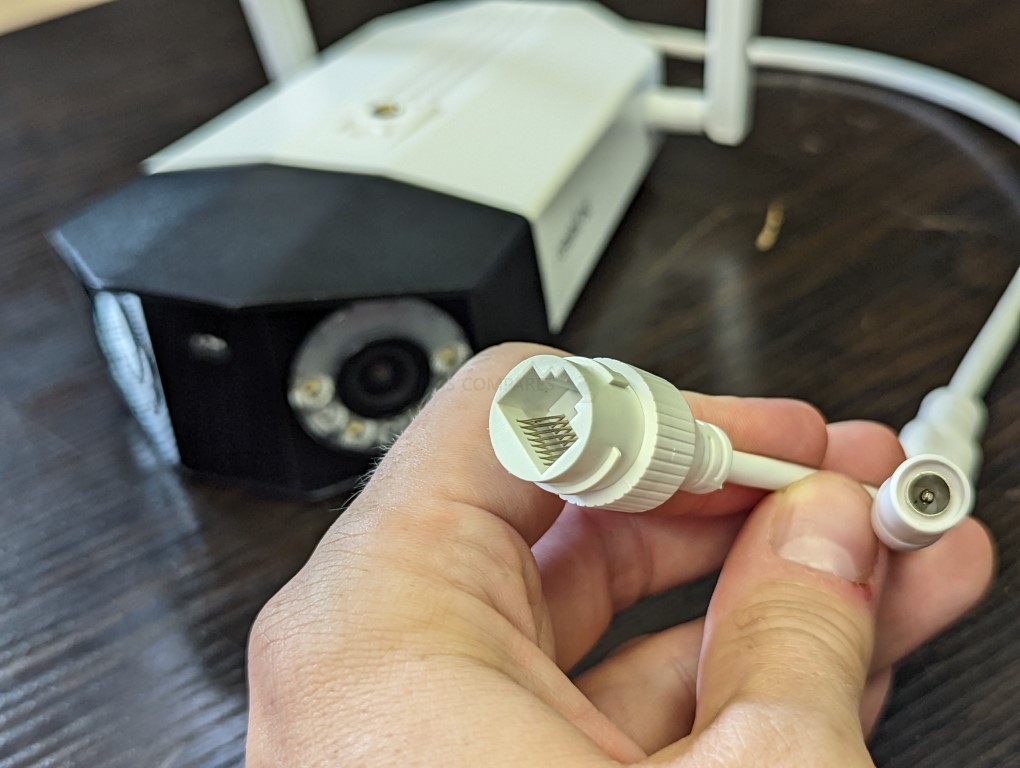
However, one overlooked feature of this camera is that although it is marketed heavily as WiFi, it DOES have an ethernet port (1GbE RJ45 Copper). This port, although not PoE like the other non-wifi version) is exceptionally useful for the first-time setup of the camera, as although you CAN set the device up wirelessly or the first time, it is 100x EASIER to setup IP cameras the first time with a LAN connection, THEN add your local SSID/Wireless connection identity to the camera via the software. Then you can just disconnect the camera from the LAN and it will switch to the local WiFi immediately. I am really surprised that the Reolink Duo 2 WiFi camera still has a wired LAN connection, despite it being mentioned hardly anywhere on the official pages!
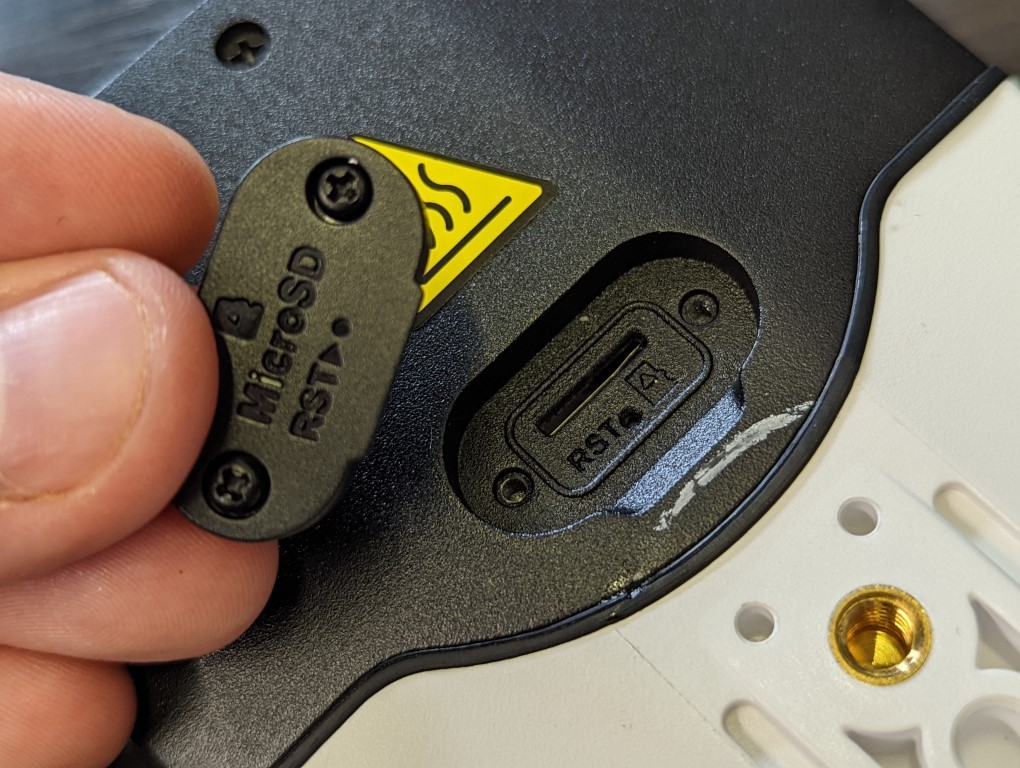
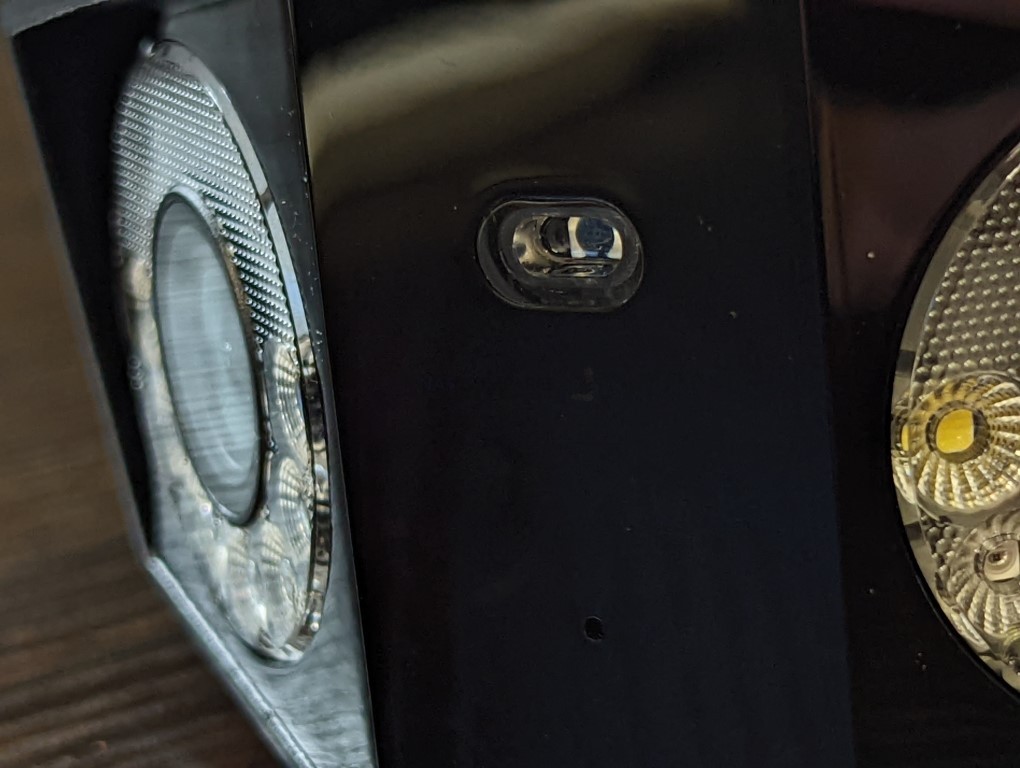
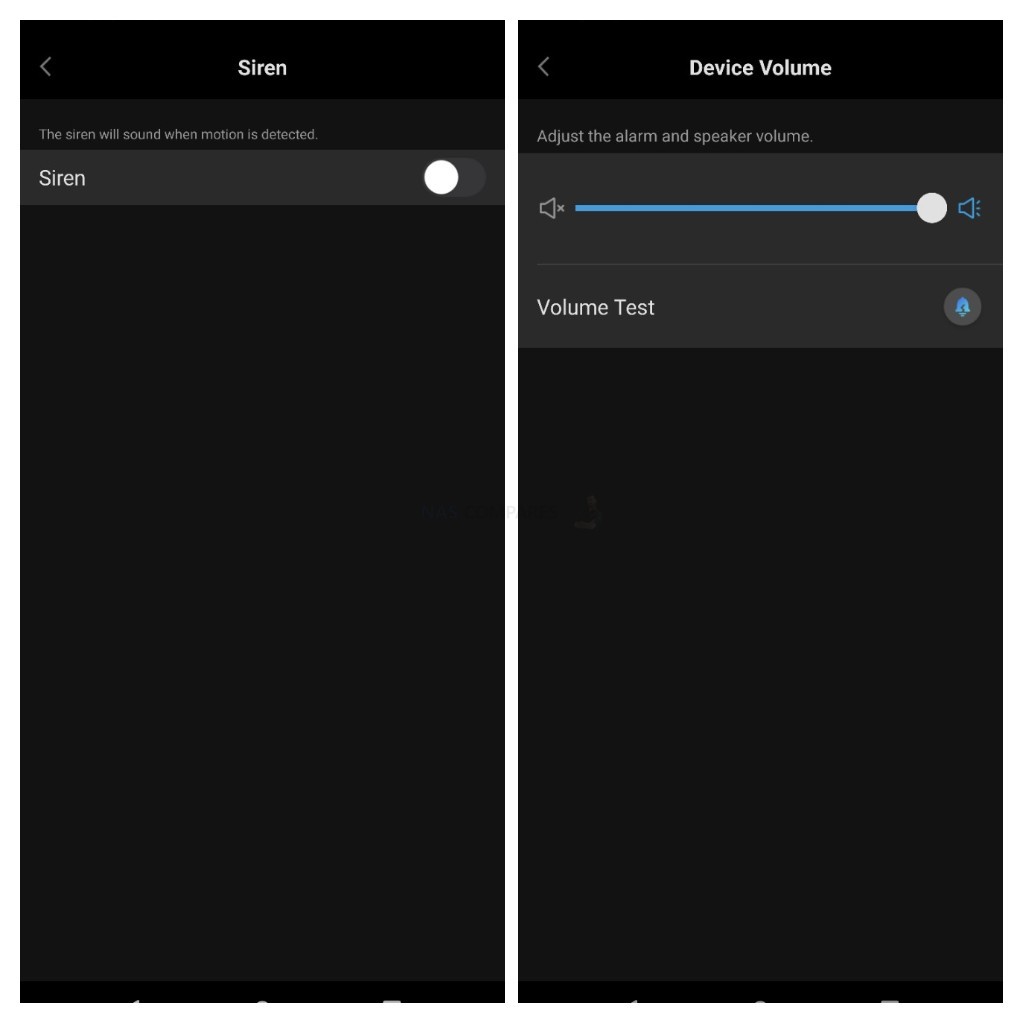
The base of the Reolink Duo 2 WiFi reveals several things. There is the additional screw joint, but also there is the audio OUT speaker. This speaker can be used to speak out from the Reolink mobile application (to warn an intruder, reassure a pet or just give a simple instruction), or it can be used to action the fantastically loud inbuilt alarm/siren at the touch of a button. This can also be linked to an automated trigger that you can set up in the camera software events/alerts area – but again, it is REALLY loud. Additionally, the underside of the camera has a screw panel-covered area where you can install a mini SD Card of upto 256GB.
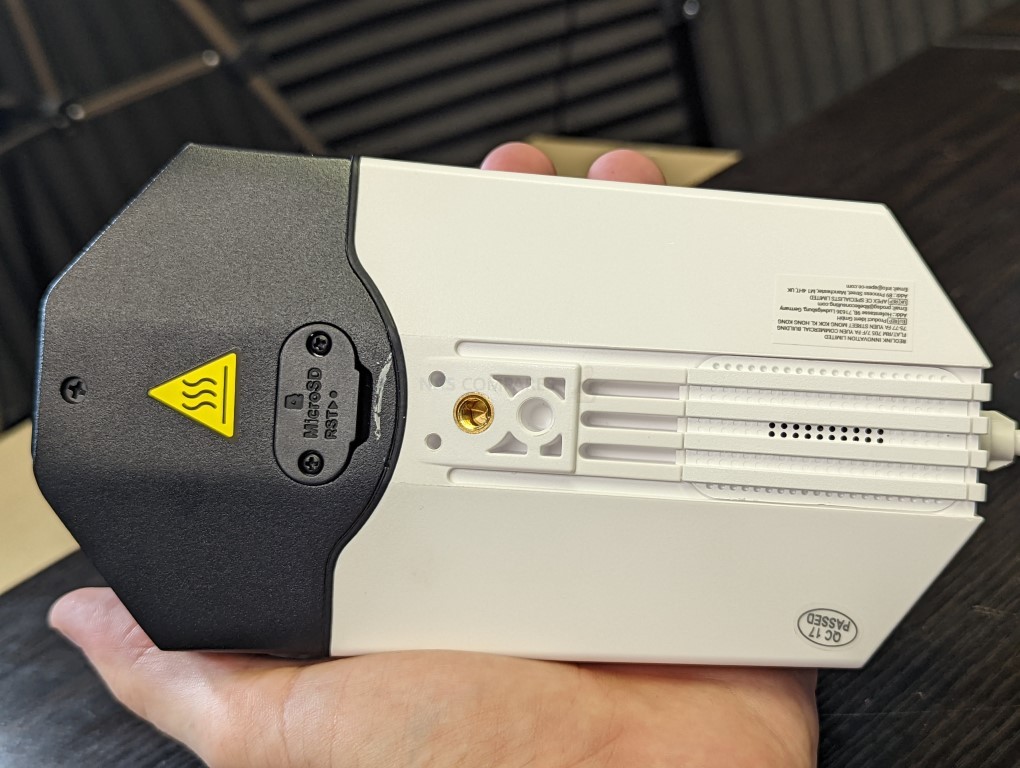
It is worth highlighting that you can only use this feature if you want to maintain local recordings to the camera (24×7 on rotational over-writes and/or accessing recordings and snapshots via your mobile/desktop browser from alerts), as you can always choose to storage recordings on the subscription cloud services from Reolink or via an ONVIF camera supporting NAS drive (such as QNAP or Synology – full confirmation of support and testing coming soon on the YouTube channel).
The wall/ceiling mount that the camera comes bundled with is a little plasticky, but is still sturdy enough to support the weight of the camera easily. All the kit you will need to put it together and mark out where it will be deployed is included and even heavy-duty screws and raw plugs are included too.
 |
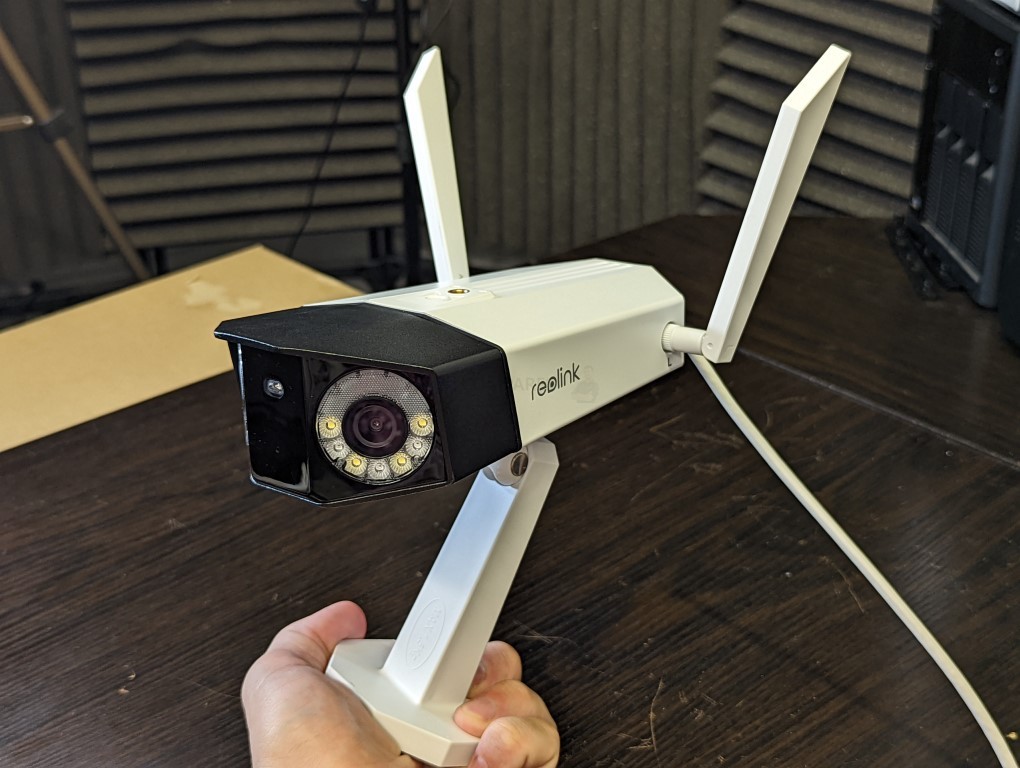 |
Now, as the attached wall/surface mount indicates, the Reolink Duo 2 WiFi camera does NOT support any kind of remote control Pan or Tilt in its operation. Likewise, although there is digital zoom support, the use of the dual lens design for a wider angle means that optical zoom is absolutely not possible either. So, this is definitely a camera that you need to set up correctly, FIRST TIME!
Overall, I cannot fault the design of the Reolink Duo 2 WiFi camera at all. It manages to be surprising petite considering it is effectively two cameras that have been bolted and digitally stitched into one. Likewise, there is plenty of scope for easy deployment and you can clearly see how this camera is IP66 rated, as all opportunities for moisture/dust ingress are almost completely negated. Let’s discuss the hardware and abilities of the Reolink Duo 2 WiFi camera.
Reolink Duo 2 WiFi Camera Review – Hardware
Now, the hardware of any I Surveillance camera is going to be in the sort of tech spec speak that only a fraction of users is really going to understand. So, below I have the full hardware specifications table and then I have broken down each of the important elements that you should care about, for good or bad! The Reolink Duo 2 WiFi camera specifications are:
| Feature | Reolink Duo 2 WiFi Camera |
| Image Sensor | 1/2.7″ CMOS Sensors |
| Video Resolution (Max) | 4608X1728 (8.0 megapixels) at 20 frames/sec |
| Lens | f = 3.2 mm fixed, F = 2.0 |
| Video Format | H.265 |
| Field of View | 170° x 60° x 180° |
| Day & Night | Auto-switching with IR cut filter |
| Infrared Night Vision | 30 meters (LED: 6pcs/20mil/850nm) |
| Color Night Vision | Spotlight: 8pcs/5W/6500K/560 Lumens |
| Audio | Mic and Speaker (Separate) |
| DC Power | DC 12.0V=2A, <15W , Mains Power (PoE Camera version Available) |
| Storage | Micro SD card slot (Max. 256GB) + Reolink Cloud Support, NAS Support TBC |
| Frame Rate | Dual Stream, 20fps (default: 20fps) / 4fps – 15fps (default: 10fps) |
| Code Rate | Dual Rate, 1024Kbps -5120Kbps (default: 3072Kbps) / 64Kbps – 512Kbps (default: 256Kbps) |
| Smart Alarm | Motion detection; person detection; vehicle detection; pet detection (beta) |
| Record Mode | Motion-triggered recording (default); scheduled recording; 24/7 recording |
| Maximal User Access | 20 Users (1 admin account & 19 user accounts); Support up to 12 simultaneous video streams (10 substreams & 2 mainstreams) |
| Operating Frequency | 2.4GHz/5GHz |
| Wireless Security | WPA-PSK/WPA2-PSK |
| Dimension | 195x103x56 mm |
| Weight | 680g with Stand |
| Warranty | 2-year limited warranty |
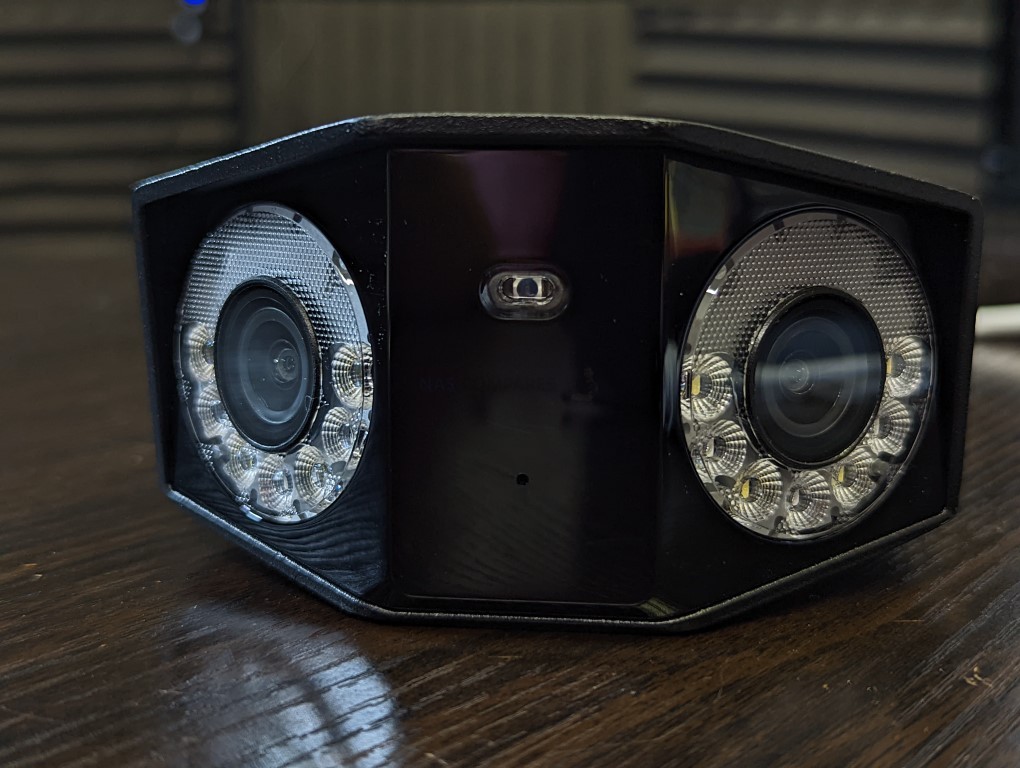
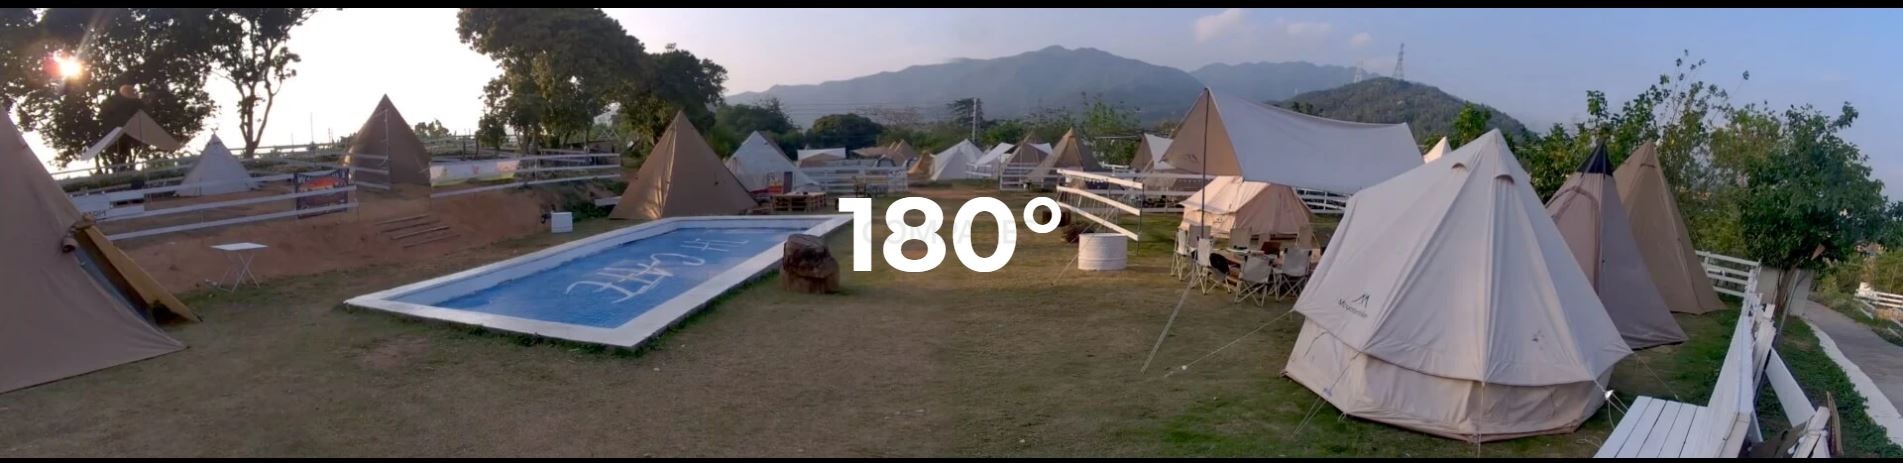
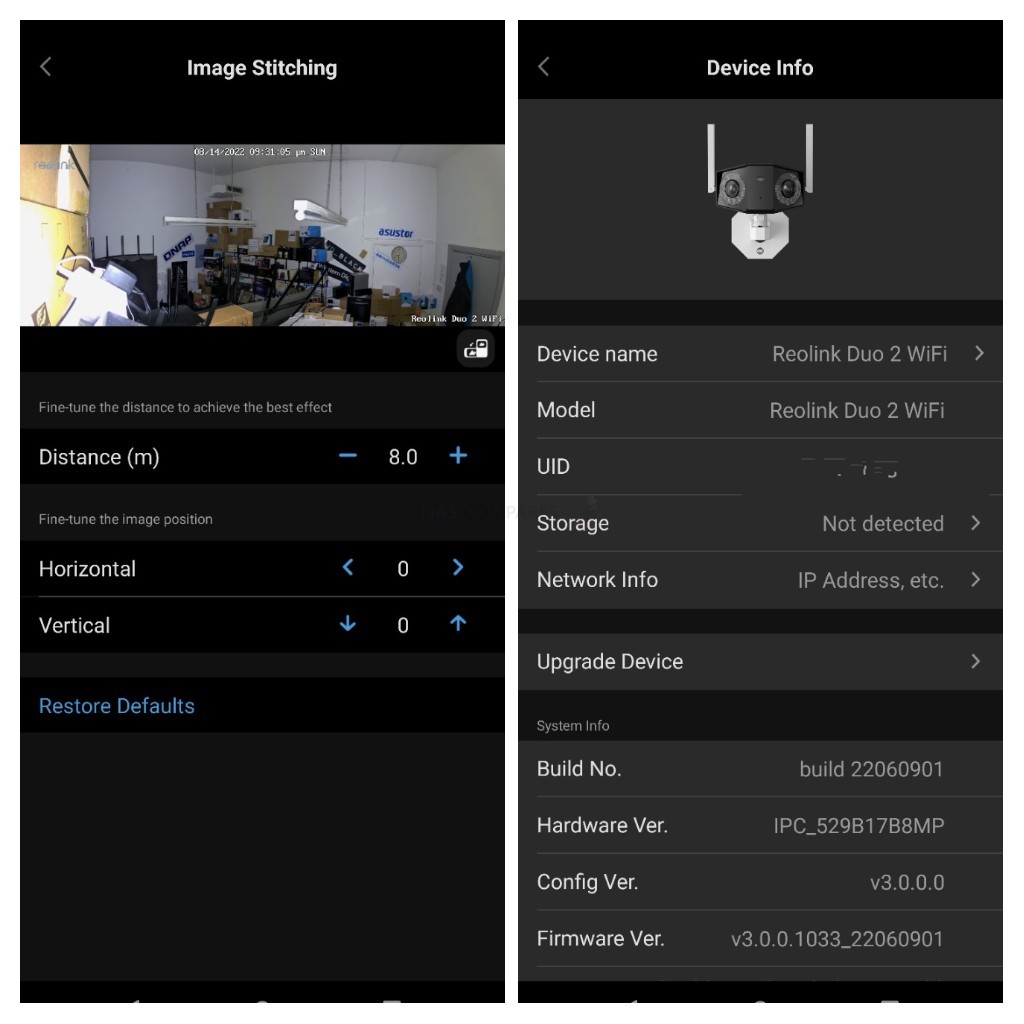
The two cameras on the front of the Reolink Duo 2 WiFi camera are mounted at angles (not unlike a bird) and each one records in 4K in up to 20FPS. Then the internal system takes the small amount of overlap in between the feed of each camera lens and creates a rectangular image feed with very minimal blur in the center. This means that the cameras can provide a wide lens view (without using any fish eye techniques that warp the image) that covers a staggering 180 degrees.
So, if you take a moment and think about the field of view that you have via your eyes right now. Their combined coverage (with overlap) means you have approx 120 degrees of site, with around 20+ degrees either side that forms your peripheral vision that is constantly being mentally supported/filled in. If you had your back flat against a wall and had the 180-degree field of view afforded to the Reolink Duo 2 WiFi camera – that would mean you have the FULL view of EVERYTHING in your vicinity from immediate left to the immediate right

Then you have the light control and handling of recordings in darker areas/times of day. Each lens features 3 IR sensors and 4X 560 Lumens lights when needed, that allow up to 30 metres of nightvision sight for recording (supporting the automated tracking and triggers).
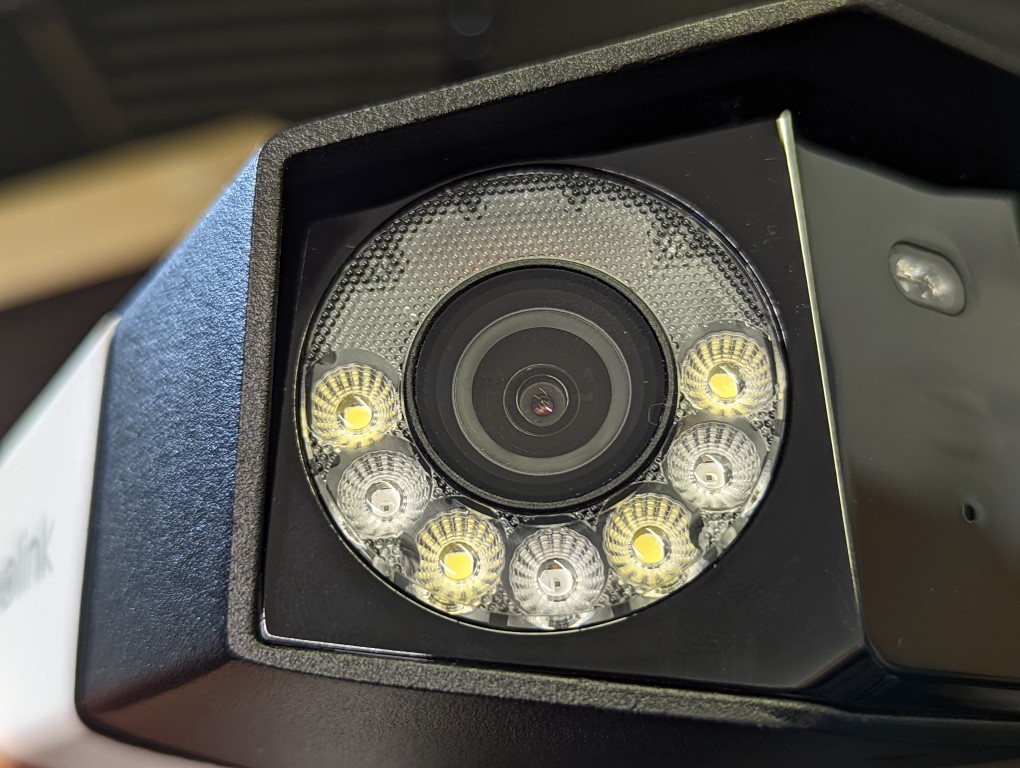
However, the Reolink Duo 2 WiFi camera goes one step further by including Colour Nightvision, a system of the camera that allows traditionally black-and-white camera recordings to be (on-the-fly) converted into colour.
This is achieved with the camera supporting a sophisticated colour identification system that is not possible in regular two tones black+white night vision modes. I will show an example of this cool colour technique in the software section below, but (alongside the tremendously wide angle of recording) it is really one of the big selling points of the Reolink Duo 2 Camera. Here is a short example of how it appears:
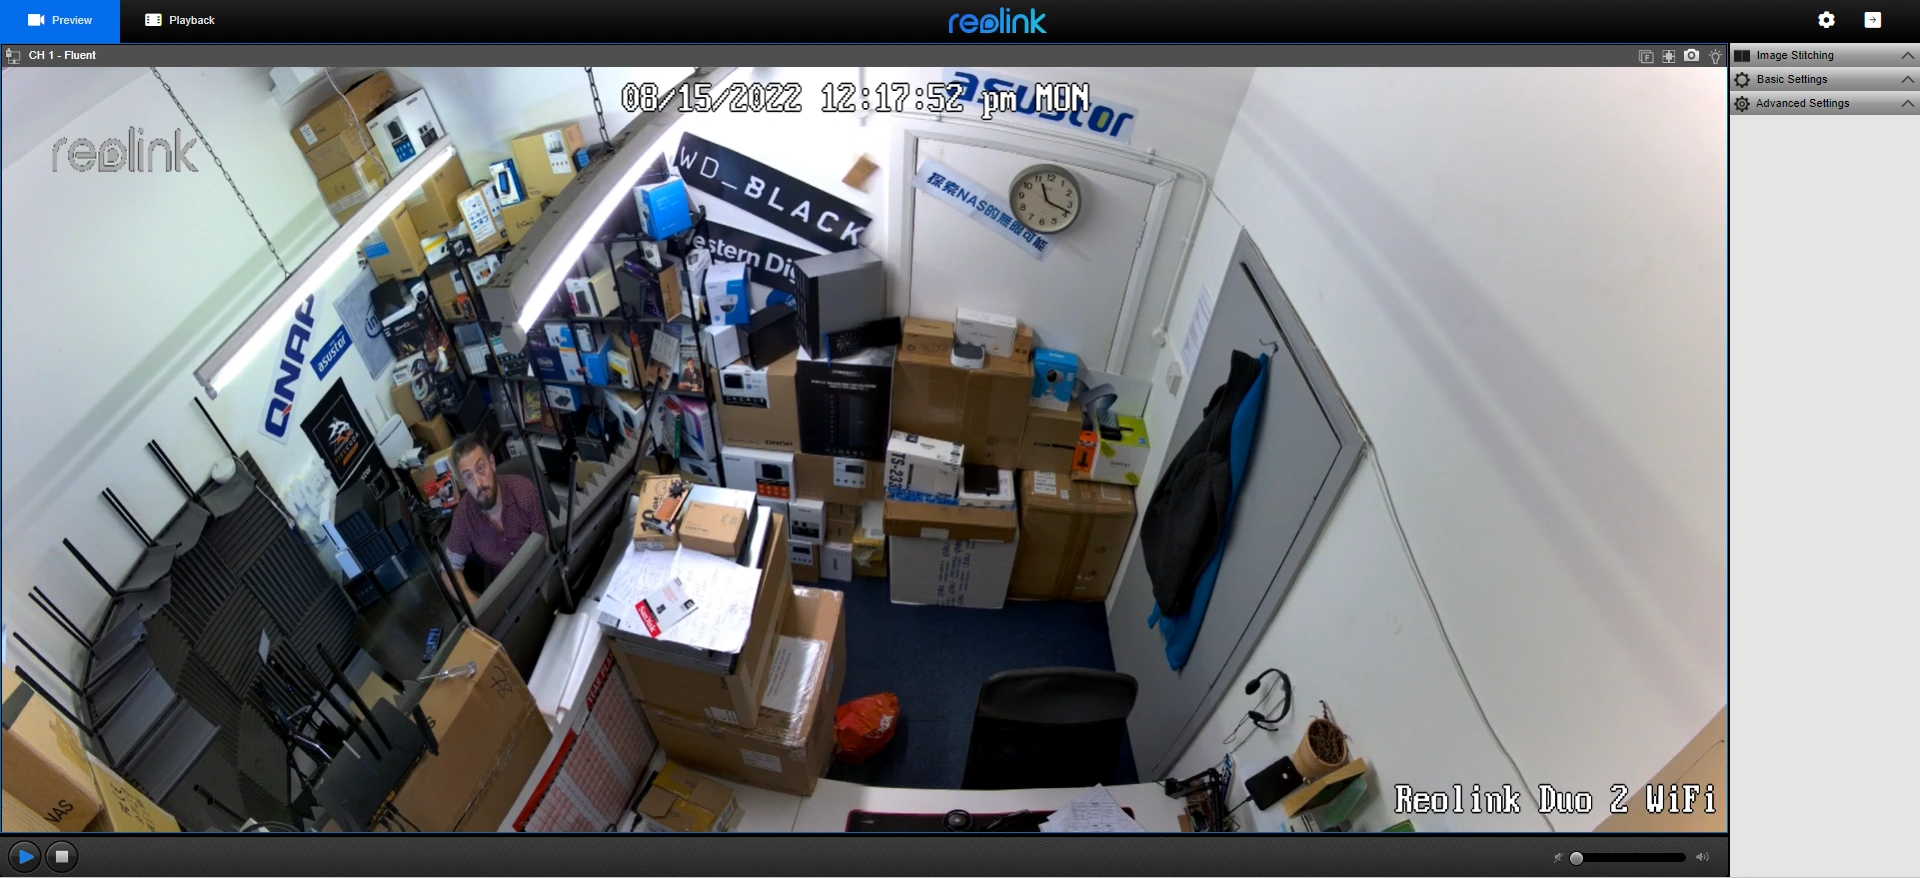
The hardware inside the Reolink Duo 2 WiFi camera is effectively the same as most of the 4K cameras in the brand’s lineup – but effectively doubled. The Camera can be accessed using 3rd party NVR systems via the ONVIF protocol (this includes Synology and QNAP NAS drives, even supporting the dual stream protocol too as two separate feeds in more powerful instances), a desktop Reolink client application, an official mobile app for iOS and Android (more detail on that below) or simply via your web browser via the IP address.
However, you might well hit flash API/plug-in issues in most modern browsers (no fault of reolink, just the way these things go). Let’s go into more detail on the mobile application below.
Reolink Duo 2 WiFi Camera Review – Software
Now, the mobile application that you can use to access the Reolink Duo 2 WiFi camera is available (free, obviously) on iOS and Android. For the most part, all of the features, services and controls are exactly the same, regardless of the Reolink camera you choose to use. It’s only if you are using a camera that has very particular features (such as the Duo 2 camera’s twin lens and/or colour nightvision mode) that you will see any differences in presentation and performance. With well over a million downloads so far and regular updates, the app has come a hell of a long way from my first experiences with it in 2018.
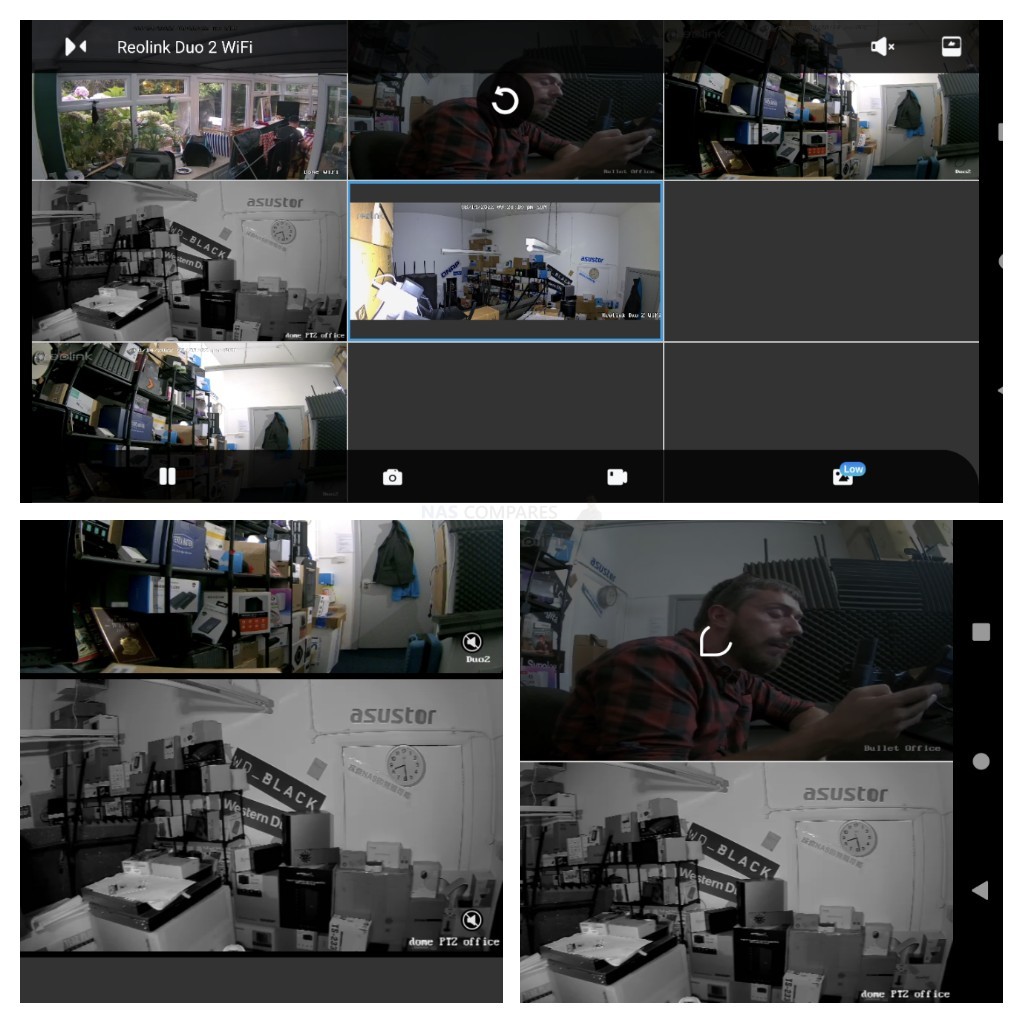
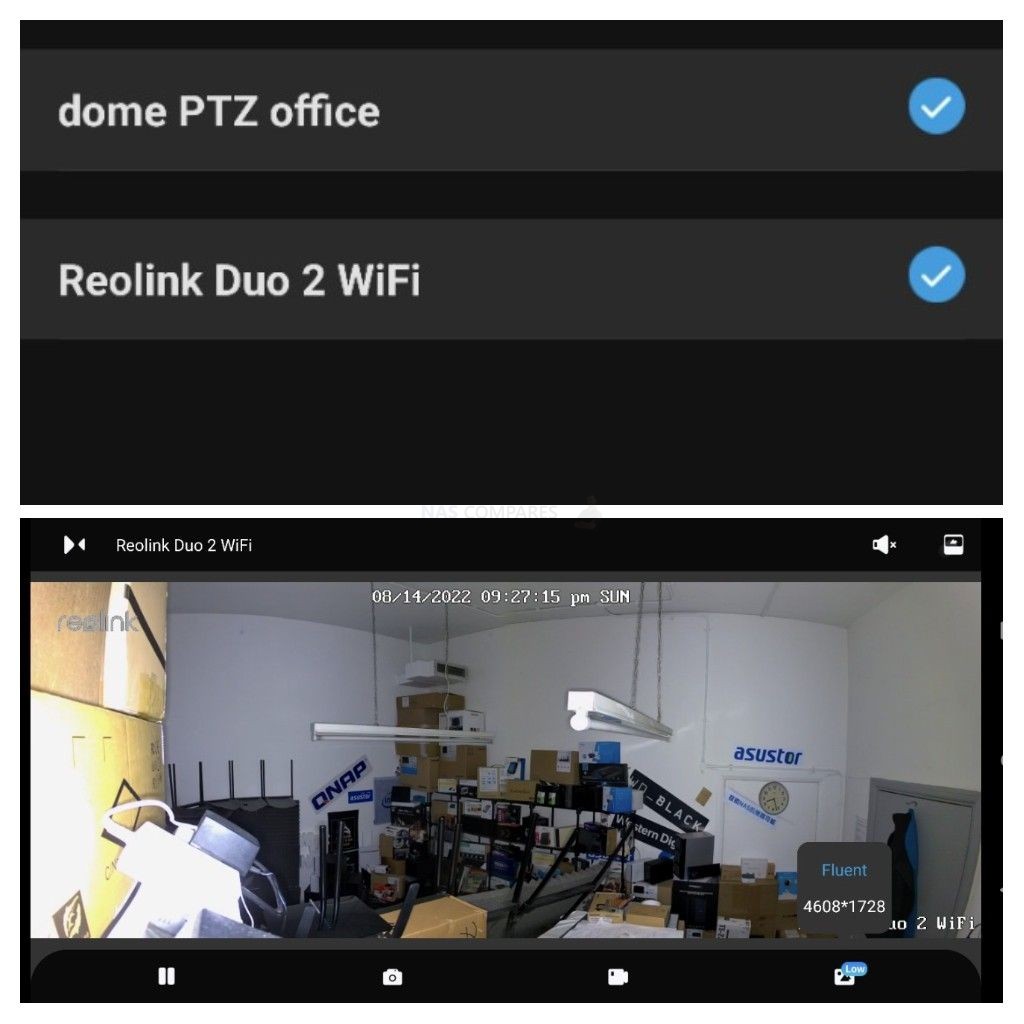
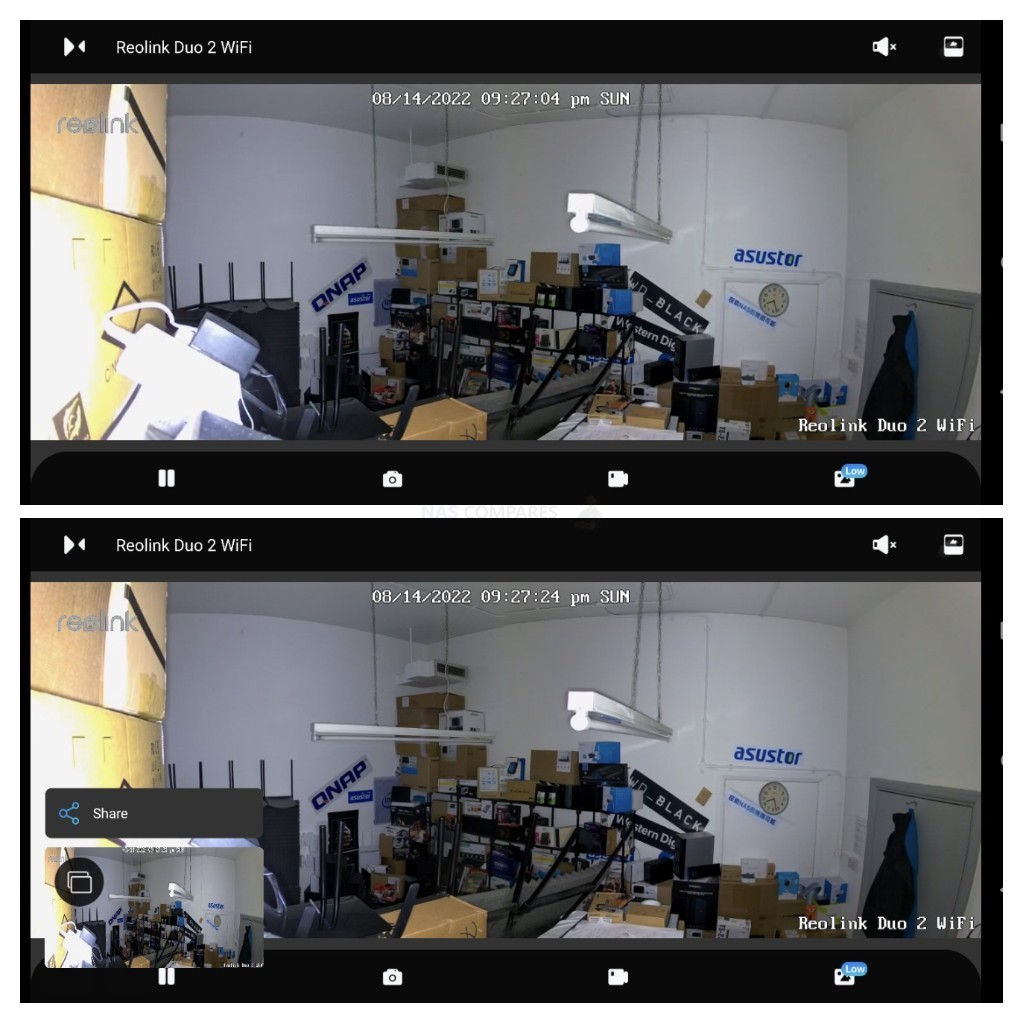
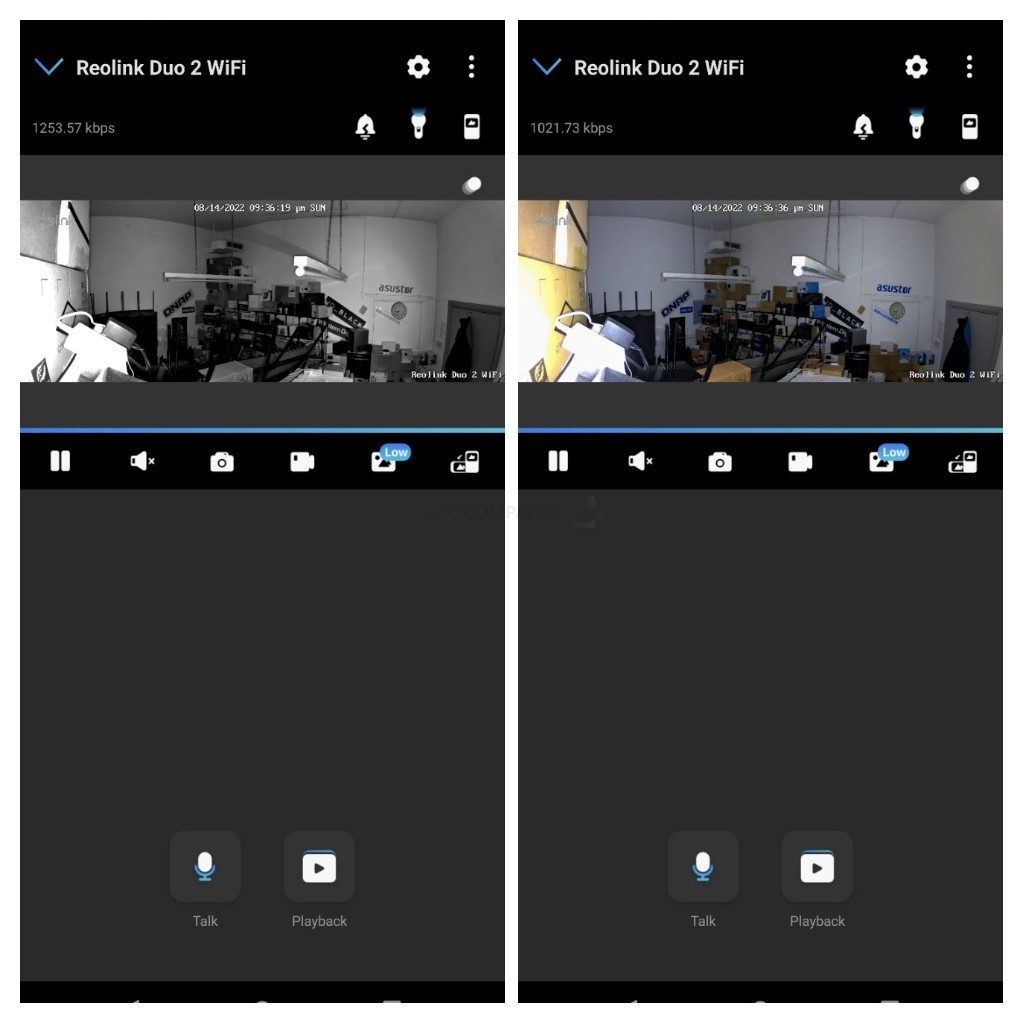
The user interface of the app can be viewed in a large number of ways. Initially (when the phone is in portrait view), you are shown a single camera view with its controls and settings menus visible. This can be switched to a landscape view that can be used to view 1, 4 and 9 split screen camera views. Each view can be set to a live-feed more (i.e. showing what each camera sees live, which will be something of a battery killer!) or each feed with have a static image of what is visible at that moment and you can click each camera manually to get a live feed enabled. These cameras can be accessed over the local area network or can access remotely using the Reolink remote link (HTTPS and Encrypted). It is worth remembering that you in this mode, you are accessing the feed, not a recording. We will touch on the recordings later. Additionally, each camera can have it’s audio in/out accessed as needed from this GUI, as well as any camera featuring pan, tilt, zoom support to be completely controllable on the fly via the app and the live feed.
The default range of cameras you can see on the main GUI/deck and the picture quality of each can also be easily adjusted. So, if you have SPECIFIC cameras that you want to keep an eye on (external perimeter cameras for example), this can be set up in seconds. Likewise, if your camera is running a multi-stream/profile setup (very common on 4K and High Framerate 1080p cameras, in order to run a secondary, low bandwidth intensive output), you can switch the default stream and/or on-the-fly choice very easily from the main GUI and on the control screen of each camera individually.
As mentioned, some cameras have their own unique features and the Reolink Duo 2 WiFi is no exception, with its dual camera design. This feature can be adjusted manually (though it is recommended to leave it at its default settings) as the small overlap in the middle of the field of view between each camera can be refined. This will be of much more useful to users using the camera in angular corridors and curved walled areas, as otherwise, the default image stitching will blur noticeably. Otherwise, I would leave these settings well alone, as most deployments of the Reolink Duo 2 WiFi will run best on the out-the-box setup.
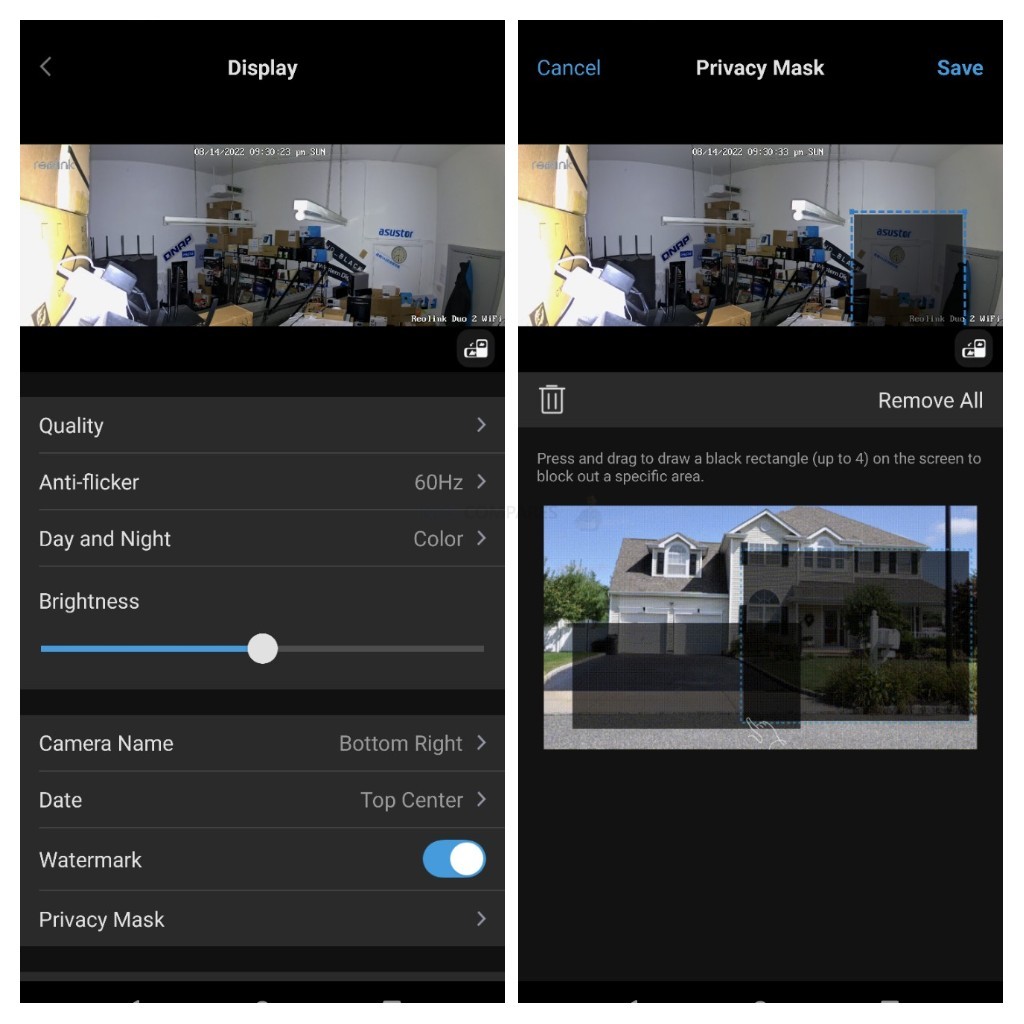
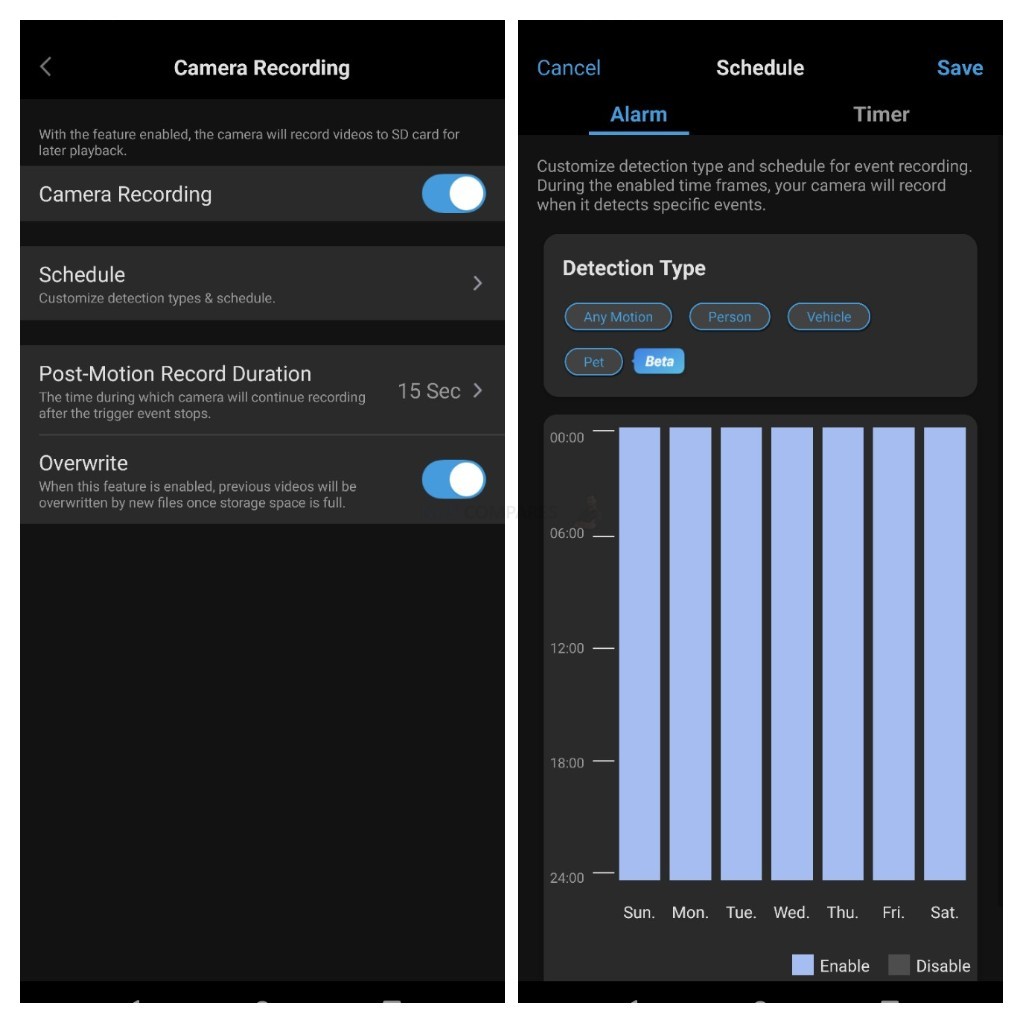
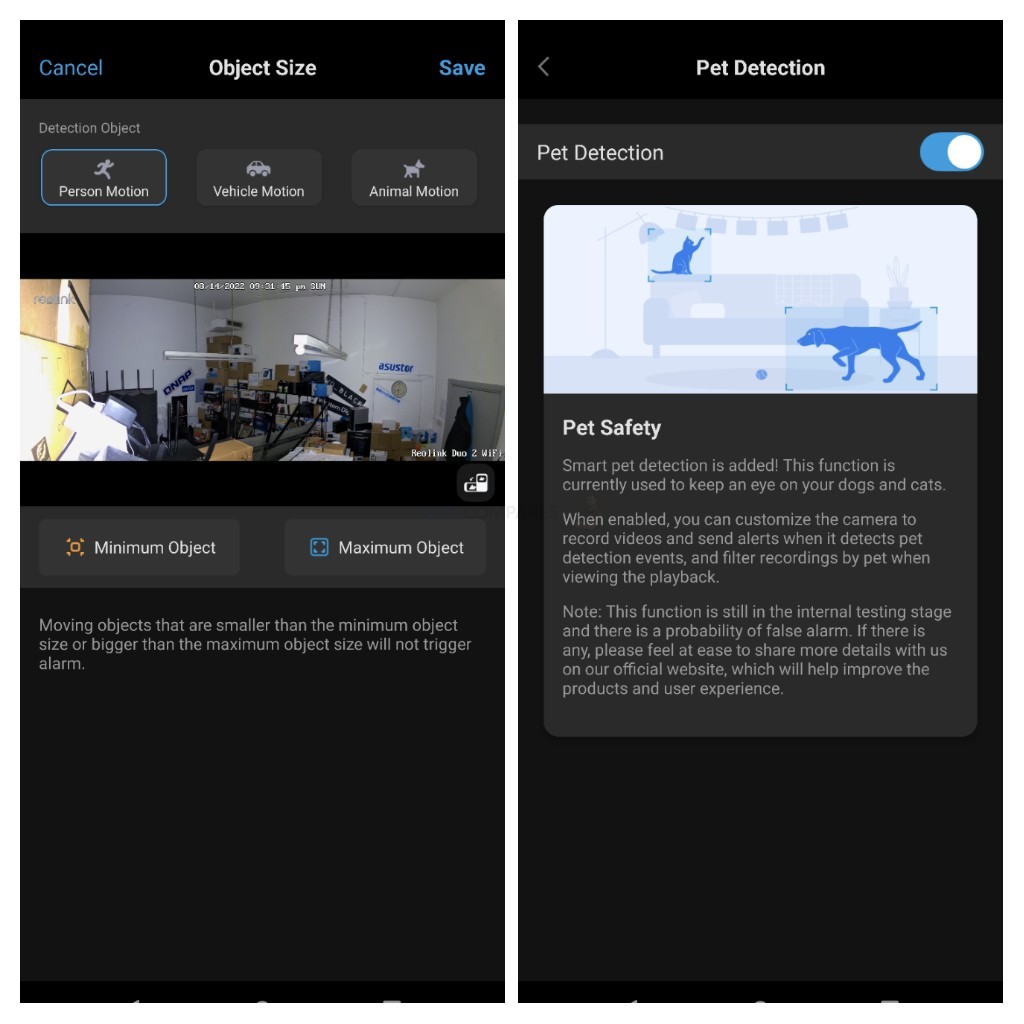
The Reolink application has continued adding features over the years in line with consumer demands in CCTV, as deployment in the home and small offices has become both popular and very easy. Features such as customized watermarks (i.e. a company logo, or Reolink’s own), privacy masks (where an area of the recorded/live ad-hoc field of view is permanently covered) and customized coverage areas, that allow you to select one/more specific area of the camera feed (such as a door and/or windows) to use for motion/person/pet/vehicle detection. Most recent updates to the Reolink on-camera firmware and the mobile application have massively increased the number of available features (even on older cameras).
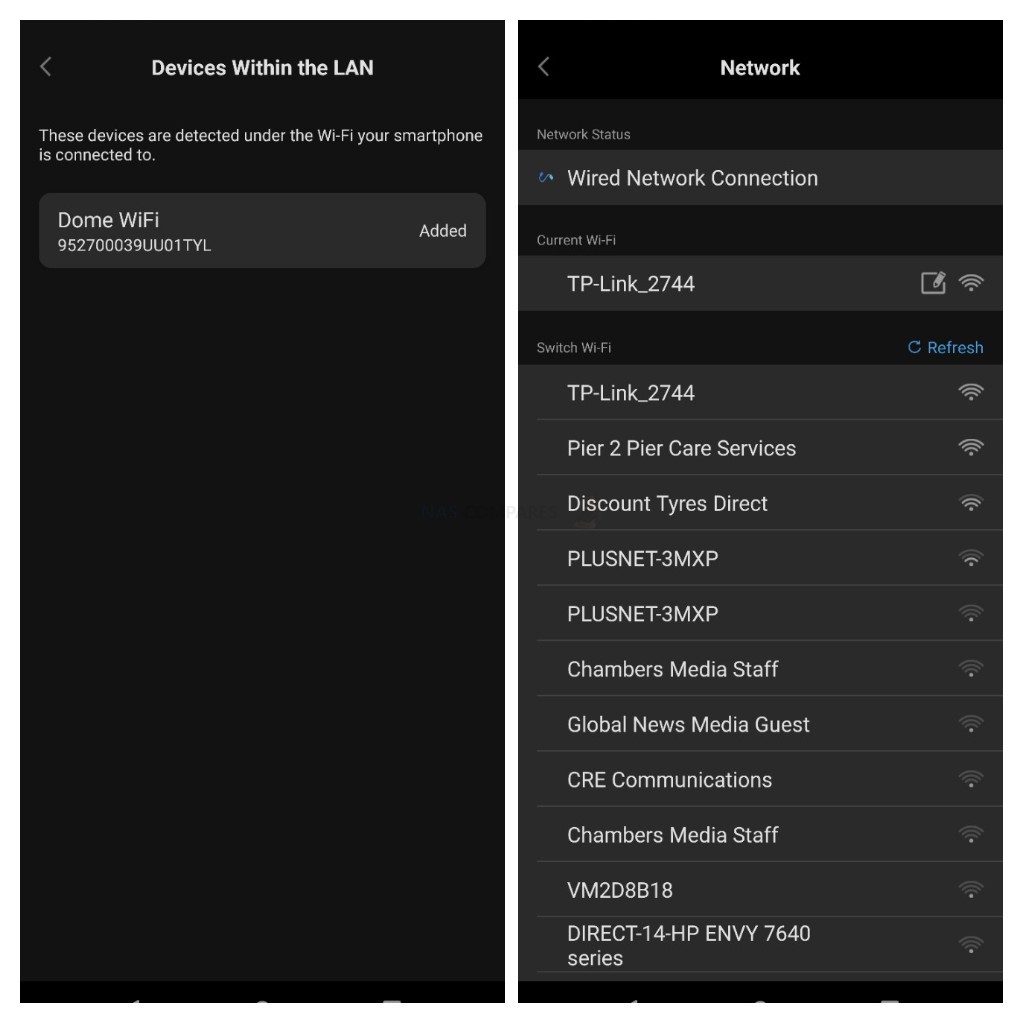
Adding and/or accessing the Reolink camera for the most part is exactly the same on any camera in the brand’s portfolio. You can either add the camera by attaching it to your local area network with a LAN/RJ45 camera, or using the 3rd barcode on the base and temporary connectivity via Bluetooth or a brief local hotspot connection. Practically all of the WiFi cameras in Reolink’s portfolio also arrive with RJ45 LAN ethernet ports and in most cases, it is easier to connect the camera to your local router via a cable, then after the app finds the camera, you can manually add the local SSIDs and their passwords as needed. Then just disconnect the camera and deploy it wherever you want and it will connect over WiFi automatically.
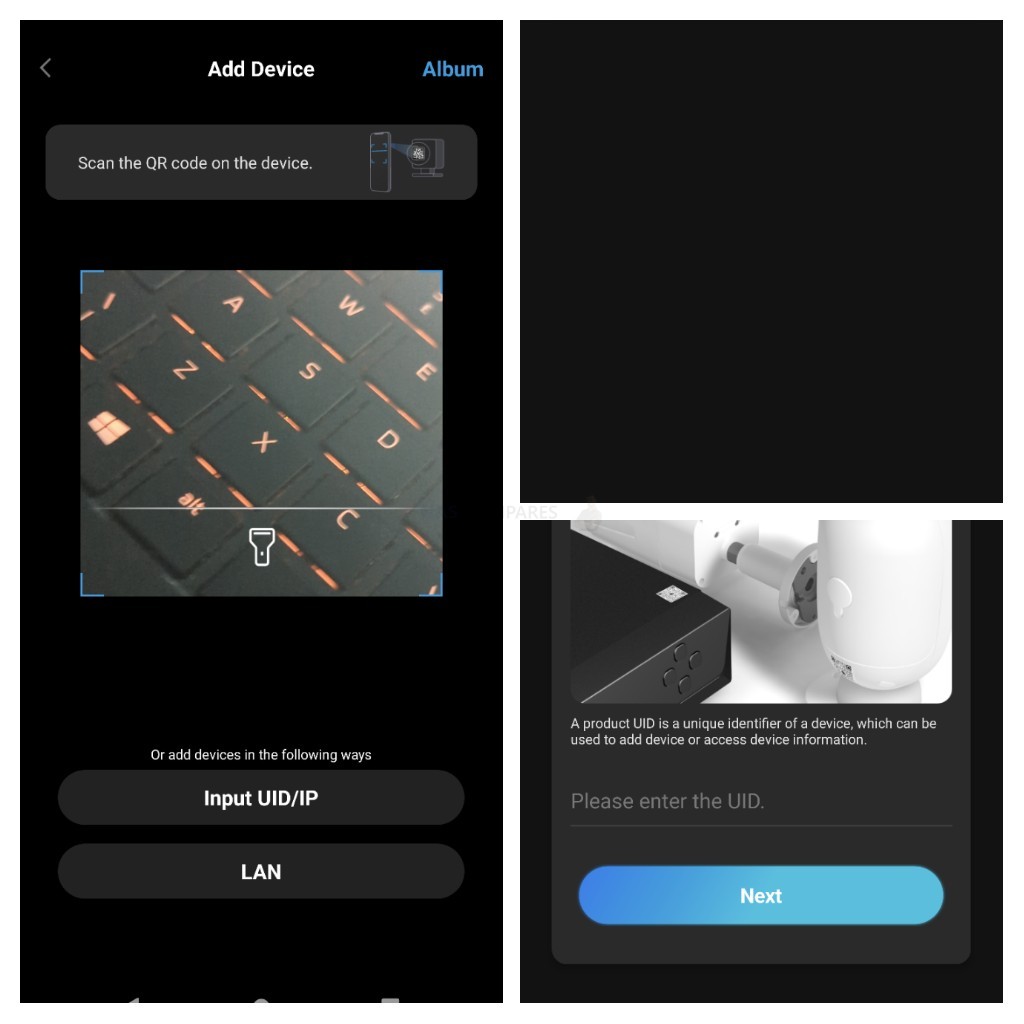
Modern camera hardware releases from Reolink take advantage of 3D barcodes which can be used to quickly interface and setup the camera for the first time. Again, just be away that (like the majority of IP Cameras in the home/SMB market) the initial hurdle is always going to be that adding the camera to your network so it can be accessed externally.
The settings and configuration of the Reolink camera can be broken down into three areas. The first is your Reolink account (you will need to create and register one of these before using the app) which allows you to register and claim cameras for your surveillance setup. The 2nd tier (discussed earlier) is the specific camera control and configuration that allows you to change the devices settings. The final tier of configuration is the Apps own configuration, which is surprisingly detailed! This allows you to create the perfect surveillance setup for your needs and cater your alerts and notifications to best suit your needs.
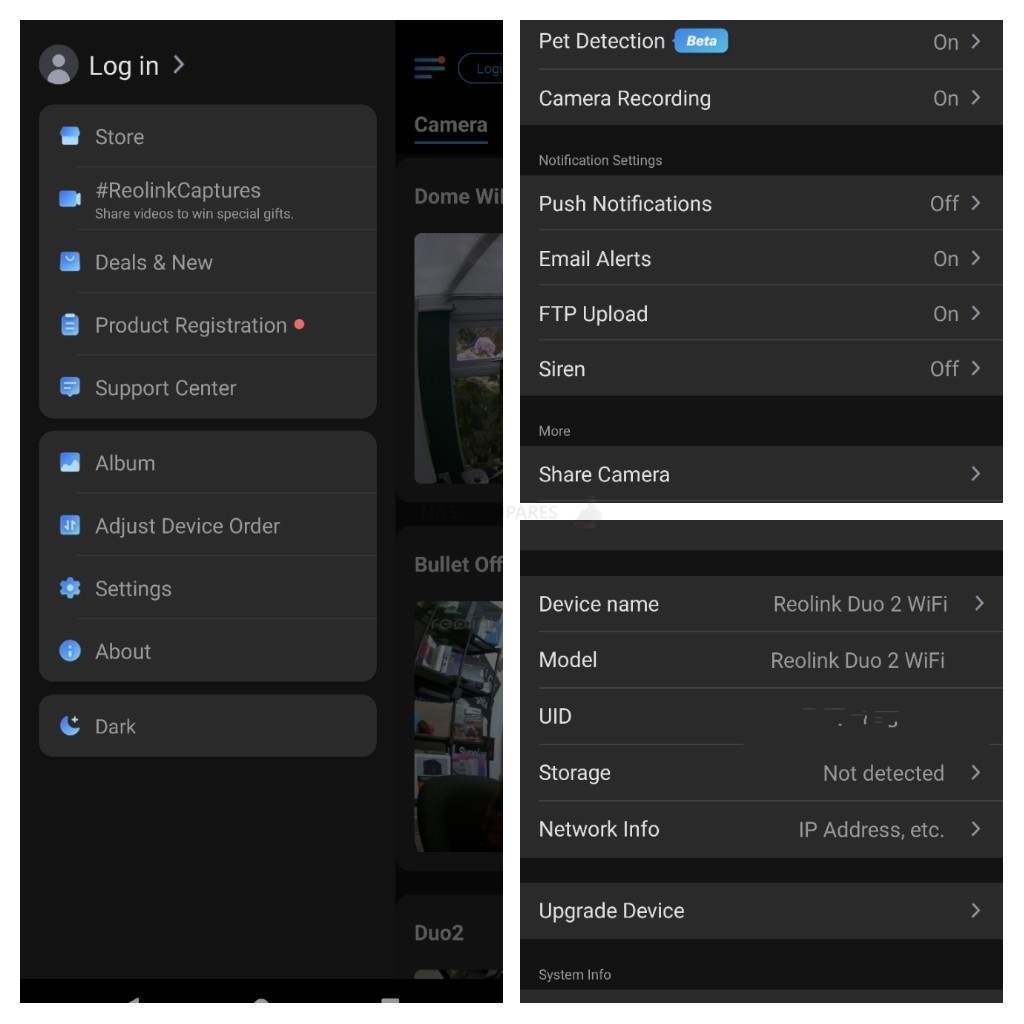 The alerts you receive can either/all be sent as push notifications to your mobile device via the app or via messaging systems (this requires further registration). These alerts and notifications can also be scheduled to ensure that you only get them when you want/need, as well as support of multiple user accounts and credentials can be created to ensure that key people get the notifications appropriate to their availability.
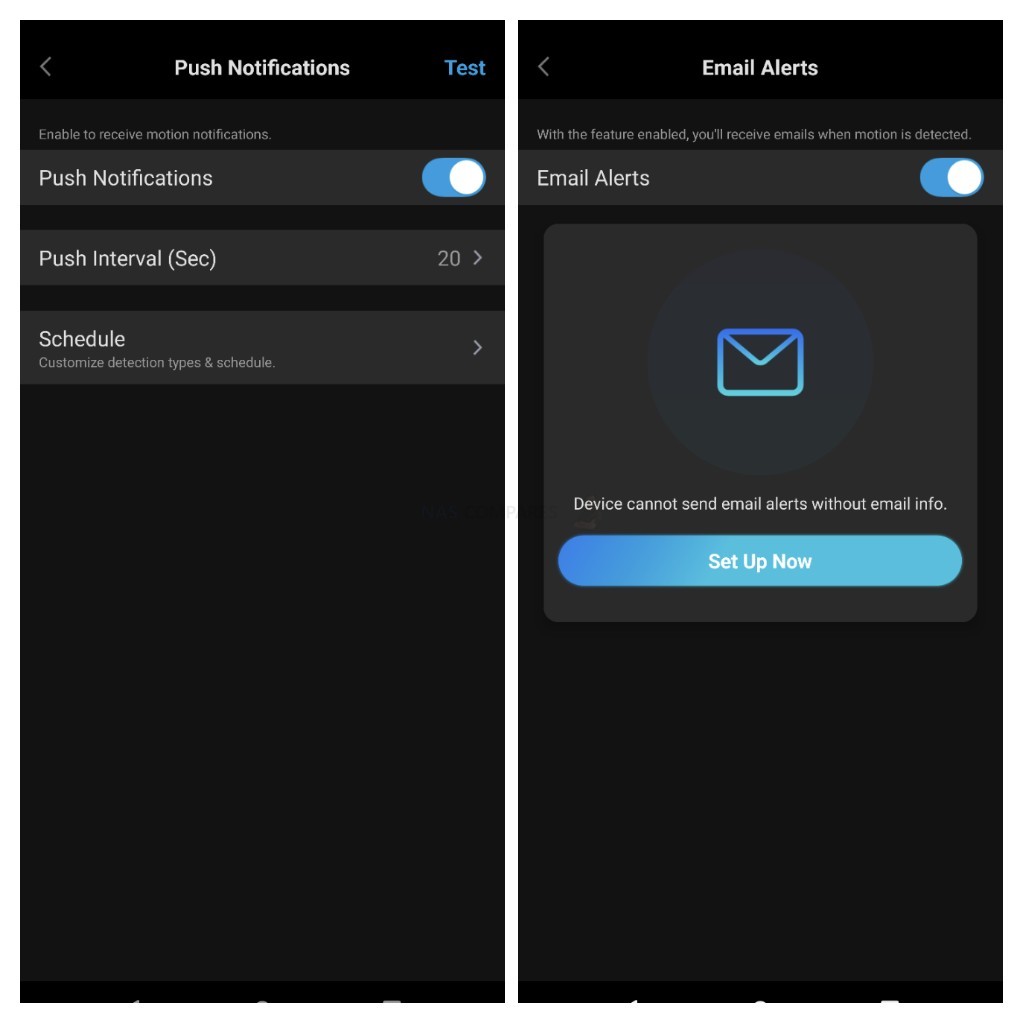
Now, having all these notifications and alerts for when your camera recognizes that a trigger/rule has been triggered is useful to allow you to connect with the camera and check the feeds on-the-fly, but what about recordings? What are the options for when you want to keep a record of the footage. There are several different options open to you here that scale is cost, utility and ease of use. ALL Reolink IP Cameras arrive with an available Micro SD Card slot that supports up to a single 256GB in the most recent hardware releases (pre 2019 it is 128GB) which can be used to store recordings for alerts OR 24×7 use, with customizable overwrite rules (i.e how many days or recording/retention you want, before you overwrite the oldest files). The higher the image/video quality (resolution AND framerate) and longer the decided clip, the more space you are going to need. Thanks to the customized recording schedules, areas of coverage control in the app camera feed AND the recently added support of Person, Vehicle and Pet detection, you should have considerably fewer false alerts sent your way and much less space wasted on recordings that were made in error. Additionally, all these recordings can be accessed remotely via the Reolink mobile app and there are improved and much more efficient tools such as smart lase playback and high playback speed options included, as well as the option to download a recording inside the camera to your local PC/Mobile device from inside the app.
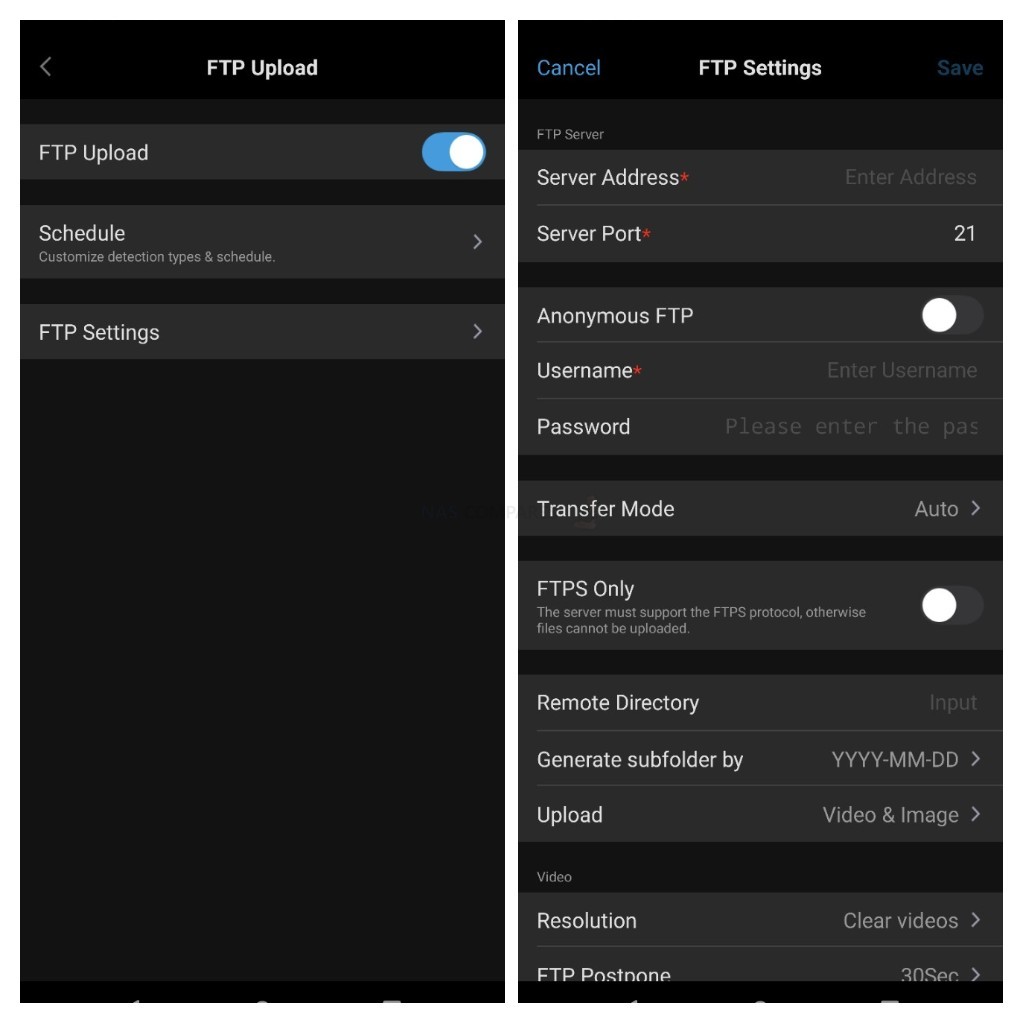
If you like the idea of using the Reolink software BUT the idea of relying on an SD card inside the camera seems risky (theft/damage of the camera), or you want to consider dual recording methods, then you still have a few different options available. ONVIF-supported Reolink cameras (more than half of the entire Reolink family is Onvif supporting) allow you to connect and existing 3rd party NVR or NAS surveillance software from Synology and QNAP with the camera. Alongside the option to store the recorded footage and events on the NAS, you also have the option to either use the camera’s own alerts/hardware to make it’s decisions on what to record OR you can allow the NAS/NVR to take full control with its own software. It is very adaptable. Lastly, when it comes to remote storage on your Reolink camera, you can use the app to connect your camera to a network/internet-based area of storage (perhaps a low-cost NAS that does not have its own NVR tool, or an area of storage on a server that you partitioned off as a LUN). The FTP Server protocol support is actually quite sophisticated and allows you to create rules for recording quality, naming, encryption and more.
Alongside all these recording methods, there is also the option via the mobile application to take advantage of local recordings. This option, although quite limited in its use compared with SD Card or connected NAS/Cloud storage (as it is much more ad hoc and manually actioned) CAN be useful if you get an alert/trigger pushed to your device, you connect to the camera and see something happening RIGHT NOW that you need to be captured in photo/video form. If you are watching an intruder or event take place anyway, why just rely on your camera storage and/or NAS? Use the local record function to IMMEDIATELY record the footage you have on-screen to your mobile device for faster saving AND to have another copy.
AI recognition has grown in popularity in the world of NVR/CCTV considerably in recent years for two simple reasons. 1) The space required for high quality and legally usable footage in an age of 4K and HEVC recordings has grown considerably and therefore more accurate recordings that only happen when they are needed are much more desirable, and 2) depending on the location of your camera(s), the ease of motion trigger getting triggered by a wandering cat, passing car or more is quite high. This 2nd point also highlights the desire by users for much more tailored alerts. i.e., you have a camera outside of your building and you know people will be walking back and forth all day, but you WANT to KNOW when a car pulls up outside – vehicle detection, area detection and tailored object detection allows you to o that. The same goes for a home where you want to know if you get an intruder, but do not want your dog accidentally triggering motion alerts.
Practically all Reolink cameras arrive with some form of nightvision, which can be broken down into two things. The first is that the camera has the ability to use multiple onboard LEDs to automatically enable when the cameras sensor notes that the ambient light has diminished. These LEDs allow the camera to see a considerable distance (typically, the more sensors, the further it can see) and the Reolink Duo 2 WiFi is one the best-equipped examples of this, thanks to its dual-lens design. Additionally, most Reolink cameras released after 2020 arrive with an onboard light that can be manually or motion-triggered to increase the light in the field of view.
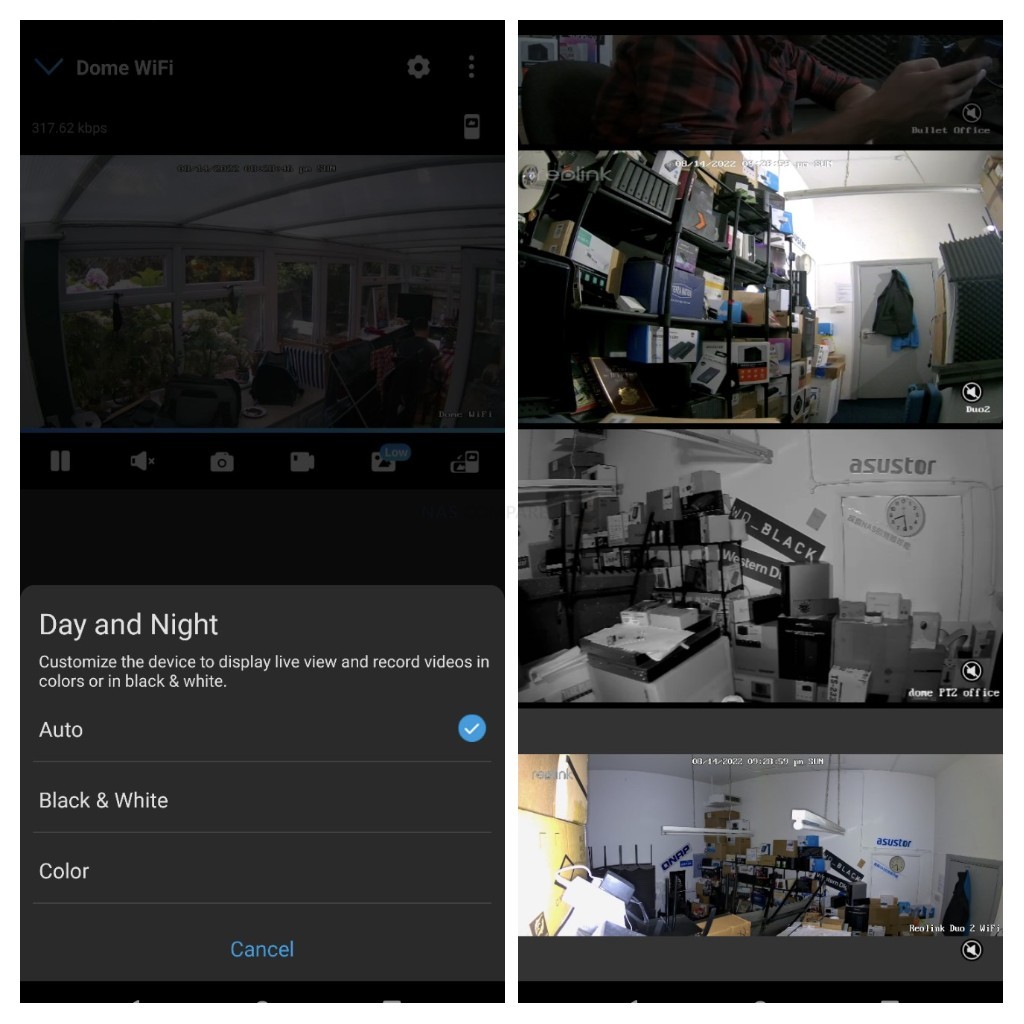
However, the Reolink Duo 2 WiFi also introduces a newer feature (available on other cameras but improved for this camera and future releases) that allows the camera to convert a black and white scale nightvision recording into colour with the use of light and identify particular colour spectrums. The difference between the two is quite notable and can be applied to BOTH low-quality and high-quality streamed feeds on the fly. Very impressive and VERY useful.
Finally, when it comes to interaction with your camera, if you have audio in/out (as found in the Reolink Duo 2 Wifi), you have the option on all camera feeds (at the click of the microphone icon) to talk into your phone and immediately output the audio to the camera location. Additionally, you can use the audio input function to hear/record any audio alongside your recordings (or independently if you choose). However, particular cameras (with the Reolink Duo 2 WiFi being one of them of course) have the option of an inbuilt alarm/siren that is remarkably loud! This can be set to action upon motion being detected (whole capture area or pre-set area with object detection) to deter would-be intruders OR you can manually action it in just two clicks remotely. The volume of the alarm and the sensitivity of the motion detection can be easily adjusted.
As I said at the start, the Reolink mobile application has evolved incredibly quickly over the last few years and although some features (such as cloud recording) are still locked behind paid subscriptions and/or only certain devices in the product family, the app is still free with your camera purchase AND allows you to use ALL the other features with an SD Card, NAS, NVR or FTP server (depending on the camera of course). Throughout my testing, it continued to be very responsive, smooth and aside from the inevitable range of permissions (storage access, mic access, camera access, etc) that you will need to enable on your client device to use all the features, it felt very secure and stable.
Reolink Duo 2 WiFi Camera Review – Conclusion
It is really, REALLY hard to fault the Reolink Duo 2 camera! Although it is by no means the most affordable home/business camera that the brand has ever released, considering we are talking about a 2 lens camera, that outputs in 4K, has an incredible 180-degree capture area, is IP66 outdoor weather protected, supports Alexa/Google-Home AND has some substantial wireless area coverage – for the £169 pricetag, it’s a bloody good deal. It’s worth noting that this price tag does NOT include your storage, which (depending on your retention needs) is going to range from as little as £10 for a 128GB SD Card, to a NAS server and/or a cloud subscription every month. You cannot even really fault Reolink for it’s range of supported connections, with the Reolink Duo 2 range arriving in this WiFi form, a PoE form, a Battery powered (solar panel too) form and even a 4G SIM version to use it’s own data plan. The camera is a little heavy than you might think, is a little more power hungry than your atypical 1 lens camera and is slightly wider/deeper than your typical bullet/dome camera – but these are very small complaints and overall this is probably (IMO!) the best camera that Reolink have ever released.
| PROs of the Reolink Duo 2 WiFi Camera | CONs of the Reolink Duo 2 WiFi Camera |
|
|

🔒 Join Inner Circle
Get an alert every time something gets added to this specific article!
This description contains links to Amazon. These links will take you to some of the products mentioned in today's content. As an Amazon Associate, I earn from qualifying purchases. Visit the NASCompares Deal Finder to find the best place to buy this device in your region, based on Service, Support and Reputation - Just Search for your NAS Drive in the Box Below
Need Advice on Data Storage from an Expert?
Finally, for free advice about your setup, just leave a message in the comments below here at NASCompares.com and we will get back to you. Need Help?
Where possible (and where appropriate) please provide as much information about your requirements, as then I can arrange the best answer and solution to your needs. Do not worry about your e-mail address being required, it will NOT be used in a mailing list and will NOT be used in any way other than to respond to your enquiry.
Need Help?
Where possible (and where appropriate) please provide as much information about your requirements, as then I can arrange the best answer and solution to your needs. Do not worry about your e-mail address being required, it will NOT be used in a mailing list and will NOT be used in any way other than to respond to your enquiry.


|
 |


Beelink ME Pro NAS Revealed
Best SOLID STORAGE NAS of 2025
Should You Worry About the NanoKVM Hidden Microphone?
Best Cheap NAS of 2025
Minisforum MS-02 Ultra - WHO IS THIS FOR??? (The First 48HRs)
Why People Use TrueNAS, UnRAID and Proxmox to Turnkey NAS (Synology, QNAP, etc)
Access content via Patreon or KO-FI
Discover more from NAS Compares
Subscribe to get the latest posts sent to your email.
7:10 8:53 Onvif.
REPLY ON YOUTUBE
Thankyou
REPLY ON YOUTUBE
I have Nas at Home and want to connect IP camera from to that So how do it?
REPLY ON YOUTUBE
will this work with Synology surveillance station
REPLY ON YOUTUBE
Would it work with the antennas folded down for right spaces?
REPLY ON YOUTUBE
does each lens record in 8mp 4k while using NVR RNL8?
REPLY ON YOUTUBE
A great review, it is informative and well balanced review. Thank you
REPLY ON YOUTUBE
Can you set it to record when a vehicle approaches your motorbike so if they knock it over you got the proof as I’ve got to park it on the street
REPLY ON YOUTUBE
Excellent mate. I’ve subbed now, found this because I’ve just ordered one and was looking for a review, Like your style and you sad a couple of things incidentally that sound as if you are aware of shizzle ????????????
REPLY ON YOUTUBE
Sorry Ronnie here again.
Do I need to use a sd card to only get the alerts and to live watch on my phone?
Thanks again
Ronald Fry
REPLY ON YOUTUBE
Hi I have enjoyed your review very much, mostly because I have just purchased the Duo 2, 180degree for to keep tabs on my small dog and cats.
My problem is that I cannot get it to give me an alert when it sees my dog or cat. In my settings page under the heading off “Alarm Settings” you have 3 sub titles,
1. Detection Alarm
2. Pet Detection
3. Camera recording. ( as shown in your video at 22.55 mins ).
Under my “Alarm Settings” I have only 2 sub titles,
1. Detection Alarm
2. Camera recording.
How do I get, or why am I missing the title “Pet Detection”
If I cannot get it to detect my Yorkshire Terrier or cats, the camera is a waste of time for me.
I would be obliged of any help you can give me.
Thanks
Ronald Fry
REPLY ON YOUTUBE
Why don’t you camera review guys ever show how bright the light is in your videos? I need something to illuminate my driveway and no videos ACTUALLY show the light
REPLY ON YOUTUBE
The RJ-45 spec is wrong its not 1Gbe, it’s only 10/100 Mbps
REPLY ON YOUTUBE
its this type of guy that give me hope for the human race
REPLY ON YOUTUBE
the camera license thing isn’t an issue on frigate, right?
REPLY ON YOUTUBE
Thank you for your great Videos, thumbs up! Question: if you have more than one NAS – lets say one principal and one for backup, can you use the 2 free licenses per NAS (Syno) with lets say 4 cameras? or must all point to one NAS? And its possible to mix like NAS and Synology for the Cams? thank you. KR
REPLY ON YOUTUBE
Can you do a video on how to get this to work with QVR Pro?
REPLY ON YOUTUBE
Thks
REPLY ON YOUTUBE
It looks cute! ????
REPLY ON YOUTUBE
SO does it work with my Synology?
REPLY ON YOUTUBE
Algorithm.
REPLY ON YOUTUBE
What application on truenas would you recommend for security? I’m looking to have four 8K at either 30 or 60 FPS cameras
REPLY ON YOUTUBE
Love your reviews man, you are my goto for so much advice, thanks again.
REPLY ON YOUTUBE
I don’t understand all these reviews using a cell phone? Even using a 32″ monitor I could not see any detail in the view of this camera plus no one will use a camera like this inside. The description in this video was good, the video was horrid! It does look like you will be zooming a lot with this camera because the details look small at this resolution. Again on a cell phone everything looks tiny…So who knows?
REPLY ON YOUTUBE
No one gives a shit
REPLY ON YOUTUBE
Can you delete individual videos from the sd card or do you have to delete them all by formatting the card. Thanks for your video and reply.
REPLY ON YOUTUBE
With these duo 2 or any reolink wiht 2k or above “CLEAR” vidio showing facial marks etc, ive had every crim defence council change plea to guilty soon as the super clear 2k+ vid is shown.. dont mess around saving $50 or $100 get the reolinks 2k resolution plus now.. 720 or 1080 HD is not enough unless you have other evidence they were clearly there.
REPLY ON YOUTUBE
All the reolinks are awesome for Nas’s and best of all amazing pricing and warrenty is excelent.. they even do advance replacments and upgrade if theres no stock for a cheap price. If only more places had them, unless you get 2k to 4k video no court will convict anyone unless its 100% clear dont get anything less, you need the freekles on there faces for a conviciton otherwise defence roles up with 5 randoms that look simular and its reasonble doubt.
REPLY ON YOUTUBE
Do Seagulls count as pets?
REPLY ON YOUTUBE
Is the camera truly 180° FOV? I’ve seen places mention it being 170°… Would it cover corner to corner if I install it centrally on a wall? Nice video, was looking for a detailed review and here it is!
REPLY ON YOUTUBE
I have no idea why you are comparing the price of single lens camera with this dual lens camera. Obviously, people who buy this camera like my self need more than 100 degree coverage that a typical single lens camera can provide. I have even looked into fisheye camera that costs $700. I chose this camera and the price wasn’t the consideration. Software was the key for choosing Reolink. Reolink’s software is one of the most competent software on the market. They support not only mobile but desktop as well which is important to me.
REPLY ON YOUTUBE
Did he say how it works with synology ?
REPLY ON YOUTUBE
Why would individual cameras need more than Gigabit port considering that bit rate of a single camera hardly reaches 100 Megabits/s?
Faster ports are needed for uplinks on switches, that aggregate traffic from multiple cameras, but not for the cameras themselves.
The only use for the faster port on a camera I can think of is to quicker download files from Micro SD card.
REPLY ON YOUTUBE
Wireless cameras susceptible to wifi deauth attacks? Deauth attacks are simple and can be done with a $5 circuit board
REPLY ON YOUTUBE
I have 4 of the Reolink RLC-522 cameras around my home. I reduced the resolution down from 2560×1920 to 2048×1536 and the bitrate from 8192 to 1024 to reduce file size and the detail is more than sufficient for most needs. 4K may be way over the top for many users, especially for surveillance, and a little bit of experimentation may be in order. ( I like the smaller file size because I use Cloud Sync to send my files to Google Drive so I can view them while I’m away from home.)
And while I’m here, I think many Reolink camera owners should spend some time with the Reolink desktop app. I found both the Synology and QNAP Surveillance Station apps were way over the top for my simple home surveillance needs. The Reolink app works very well with my Synology NAS and I don’t need to buy licenses for my extra cameras.
REPLY ON YOUTUBE
He said dollars first!! We’ve converted him friends ????????
REPLY ON YOUTUBE
Can you review Reolink doorbell cam ?
REPLY ON YOUTUBE
Alles sehr schön. Aber zuerst zusammen die Nummern 10 und 1. Eine empru.ONLINE Brünette und eine anderew Blondine. Es wäre unfair, wenn ich 4 wählen würde
REPLY ON YOUTUBE
The only downside with this camera is digital zoom and when you mount it upside down (mount on the top), the cabling is exposed (facing Front)
REPLY ON YOUTUBE
♥️???????????????????????????????? ???????????????????? ???????????????? ???????????????????????? ????????????????❤️ Alles sehr schön. Aber zuerst zusammen die Nummern 10 und 1. Eine empru.ONLINE Brünette und eine andere Blondine. Es wäre unfairf, wenn ich 4 wählen würde
REPLY ON YOUTUBE
Do these come in PoE with no wifi?
REPLY ON YOUTUBE
Nintendo dropping the new 2022 R.O.B.
REPLY ON YOUTUBE
I just wanted to say thank you. Over the past couple of years I’ve been working on setting up my NAS in some fairly complex ways and I always seem to find myself stumbling across your videos, and I’ve never been disappointed. You provide a bias-free opinion on all products I see you speak about, and you really seem to do your research. Thank you for being here, so much. Your work is appreciated.
REPLY ON YOUTUBE
Thanks!
REPLY ON YOUTUBE
Can you tell me if it is possible to connect 2 cameras (POE) and a Modem/router to the nework port of my Synology DS218+ Nas using an Ethernet Switch | Ethernet Splitter?
REPLY ON YOUTUBE
Can my cameras be on a separate network from The NAS device? Can I use my home Nas to monitor cameras at my business if both have high-speed fiber connections?
REPLY ON YOUTUBE
I’m kinda amazed there isn’t an open source protocol for this. It seems simple enough to feed multiple data streams into a single server.
REPLY ON YOUTUBE
nice video
but tell me, what is a good camera.
that is what I am looking for, not for all the talk around it.
REPLY ON YOUTUBE
Thank you so much
REPLY ON YOUTUBE
Nice video, thanks from Morocco
REPLY ON YOUTUBE
You got a LOICENSE for those cameras?
REPLY ON YOUTUBE
How do u connect a poe camera to synology nas ds1019+? The damn thing has almost NO ports. Lol
REPLY ON YOUTUBE
a medium expensive couple of camera compatible with qnap?
REPLY ON YOUTUBE
Excellent video!!
REPLY ON YOUTUBE