11 Steps to set up homeschooling for kids
Idea of home schooling is nice, but in real live it is not that easy. Kids just like adults need a someone like a manager who will encourage them to do the tasks assigned. With new technology and social platforms it is more challenging to focus then ever. Computers used to be a tool for a single task. Either it was used as a digital typewriter or a tool to run a business software. But nowadays, computer can be many things- a gaming device, multimedia player or a portal for interacting with your friends and follow online influencers. Just like psychologists recommend to avoid places like bedroom as a place to work, same applies to digital devices. It is difficult to use a device for work or studies which most of the time is used for fun activities. But luckily there is an easy way to limit yourself or your children of what and when they can do with their computers, tablets and phones. All you need is a good router with a Parental controls. Lately the most popular router we have tested is Synology Mr2200AC. Not only it will increase your WiFi speed, but thanks to its mesh capabilities it will also allow you to set up a profile for every device or group of devices in your home network. If you indeed want to increase your WiFi coverage you can link it with RT2600ac which covers bigger area. They will work like WiFi range extenders but your phone would not keep disconnecting when you walk between one or another mesh point, like it used to with regular WiFi extenders. If your home office does not have a LAN connection, you can have one by connecting one of these mesh points to your broadband modem and other placed in the room without LAN. Then use one of the LAN ports on the mesh point to connect your RJ45 cable and your computer.
What are the best homeschooling websites?

You can try Udemy courses.
3D Geography: printable paper templates for learning about geography
KM Tuition: printable worksheets and past exam papers
GamED Academy: learning through Minecraft (for a subscription fee)
Code Studio: computer science activities and lessons
Literacy Trust: support for parents of children age 12 and under
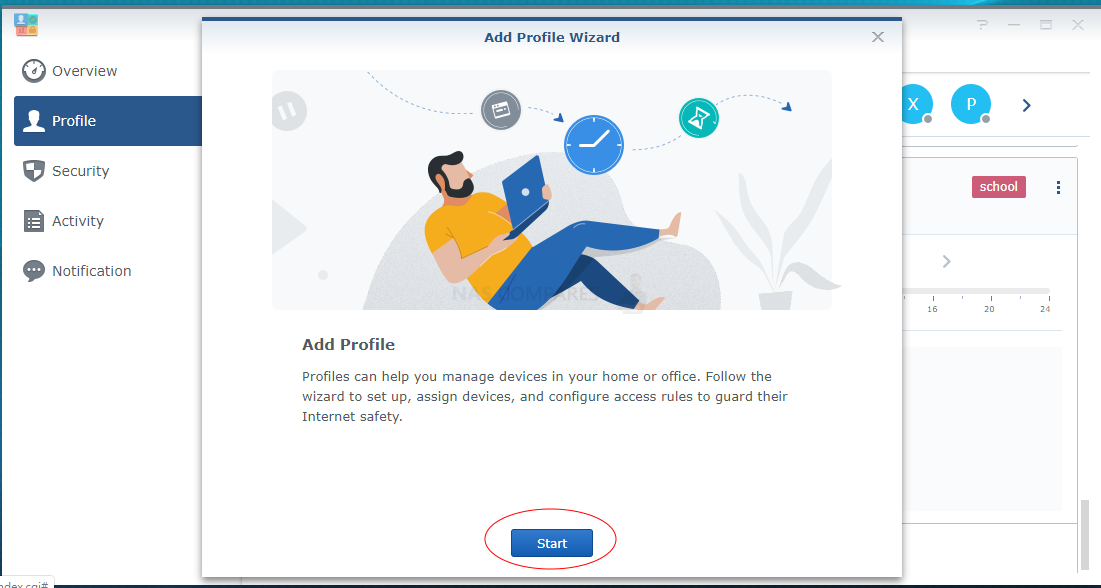
If you have one of these routers already, then this is how you set it up the way it will only allow schoolwork. It all starts with Safe Access app. The plus (+) icon will start a wizard of creating a new profile. This will include finding a computer and limiting what it can do.
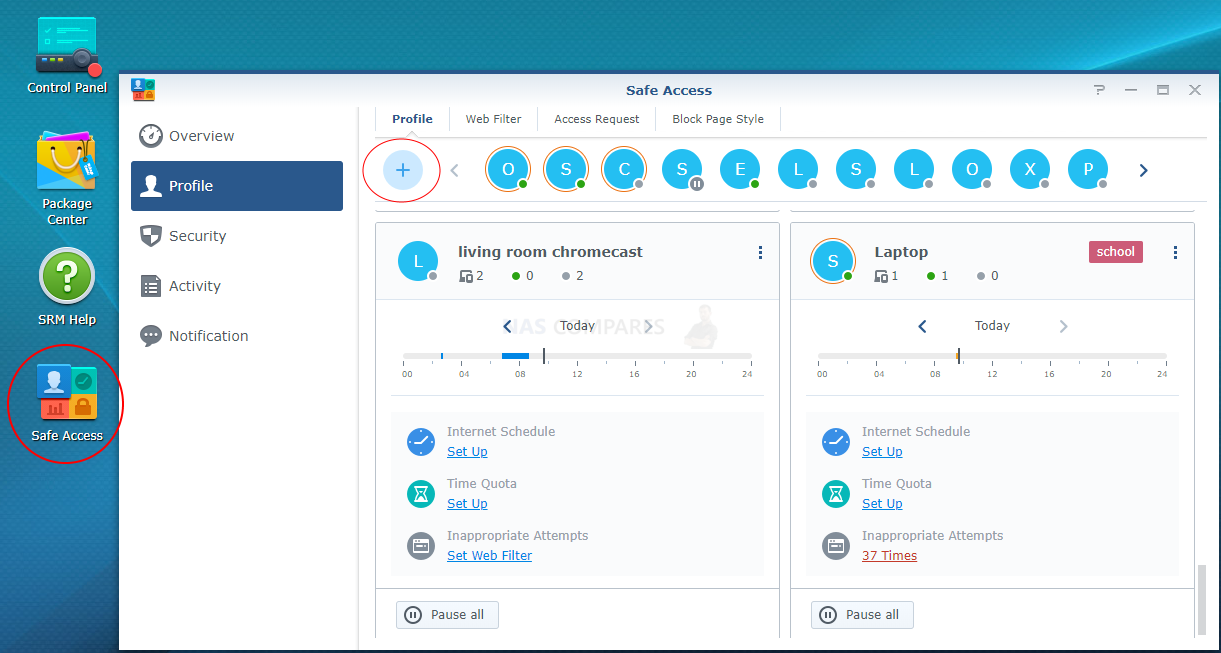
You will be able to limit things like what time a device can access internet, how long and what content can these devices see.
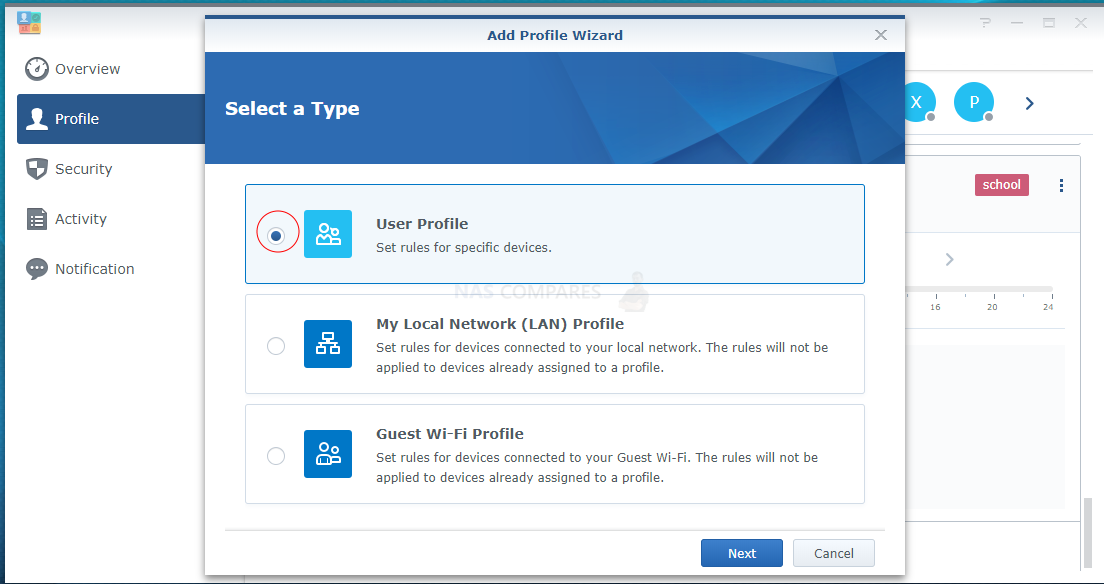
First of all you will be asked to choose what kind of profile you want to create. You will need to choose option “user profile” in order to select one or more devices. The “LAN profile” option is quick option to group every device found on your network so far (which is not already linked to any profile).
Choose a a name for the profile. Something what describes what devices are linked to this profile. If you want to link all children tablets then name could be tablets. Or if this profile is for an individual then the name will probably be actual person’s name.
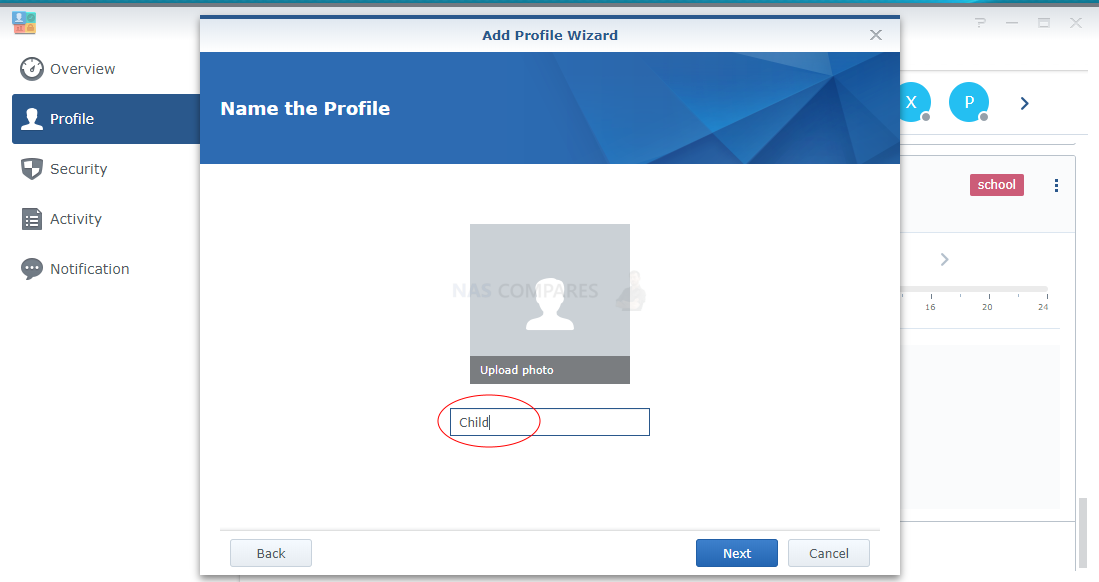
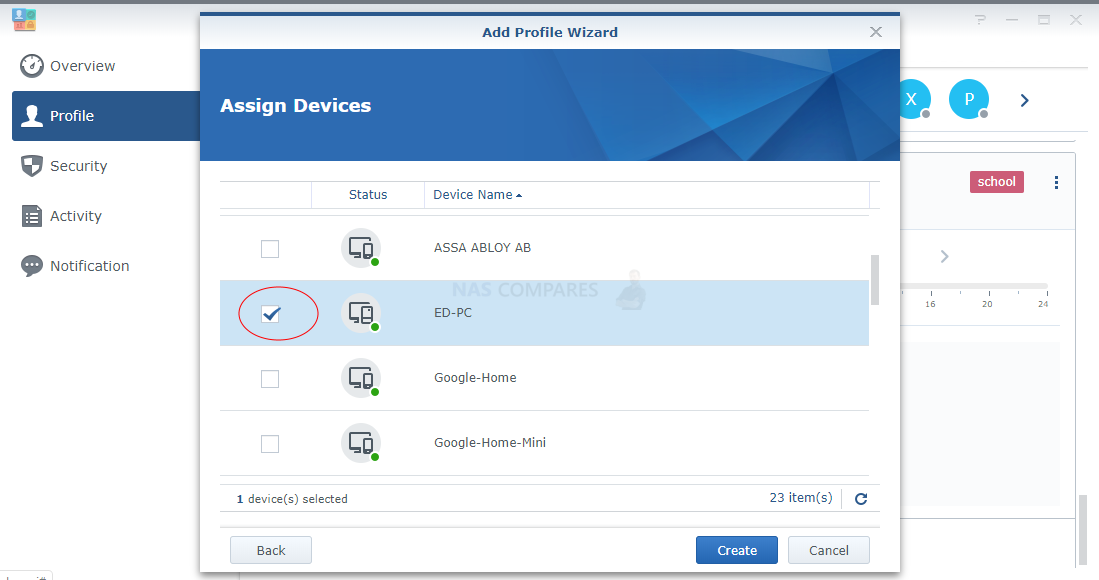
When assigning devices to a profile you may find them easily by a names set in every individual phone, tablet or computer settings. This is how you change it on a MAC, Windows, Android, iPad, iPhone and other.
Remember that some devices like TV and computers have both LAN and WiFi connectivity. You need to make sure you add both connections because router treat every connection as a separate device.
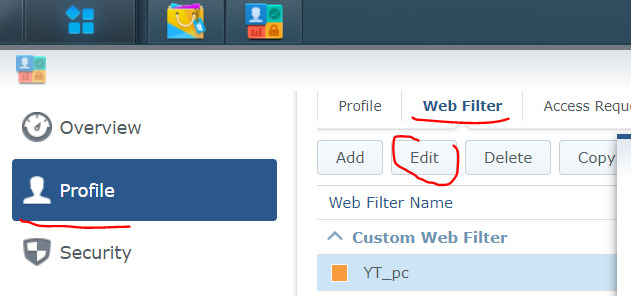
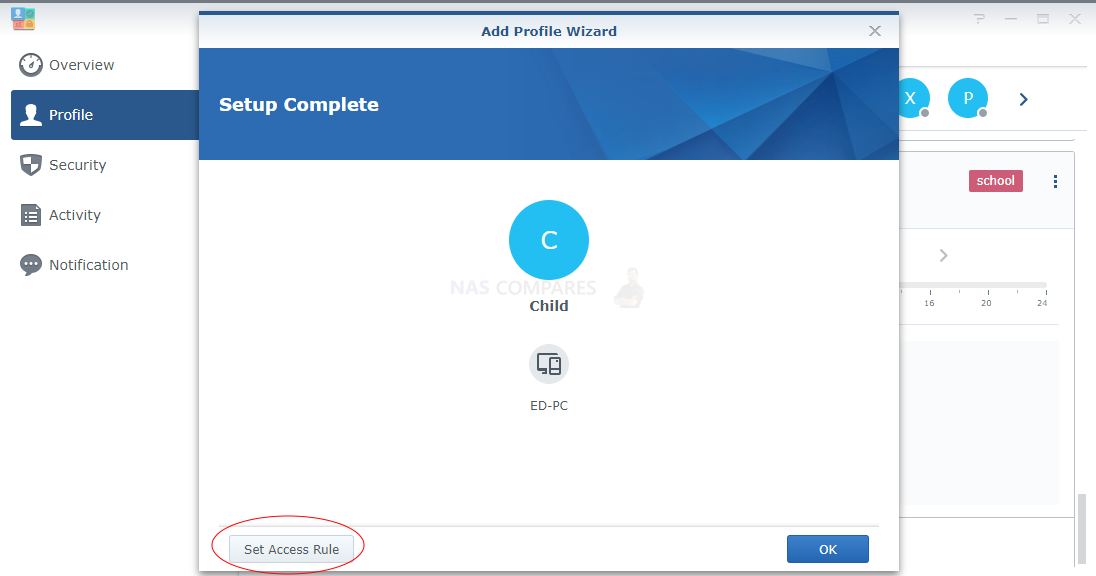
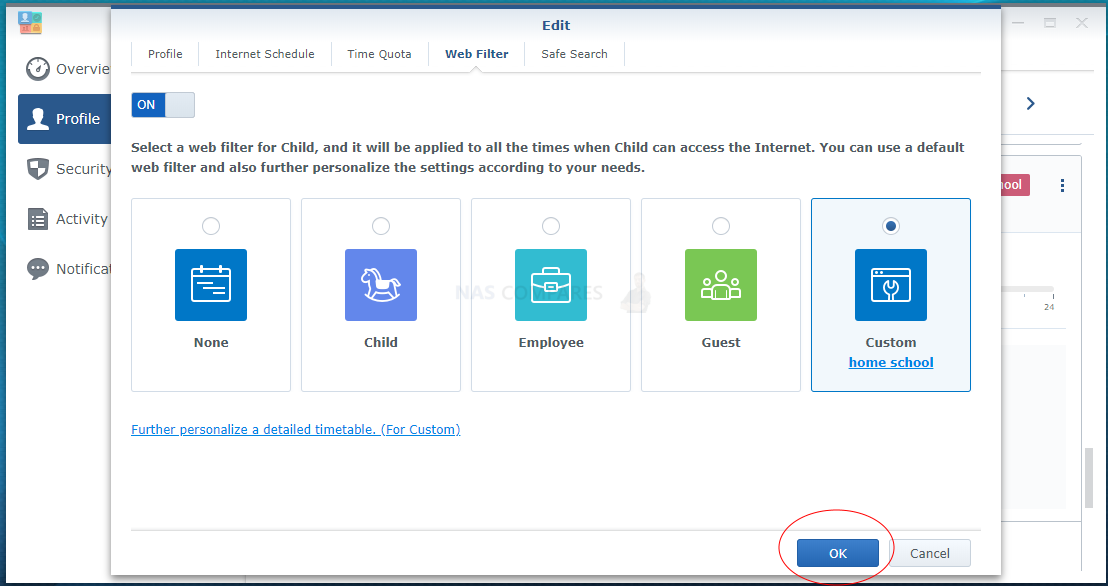
Once you have found all devices, you can already create a filter which will hold actual restrictions. You will be able to set restriction of which website can be visited and which ones can not.
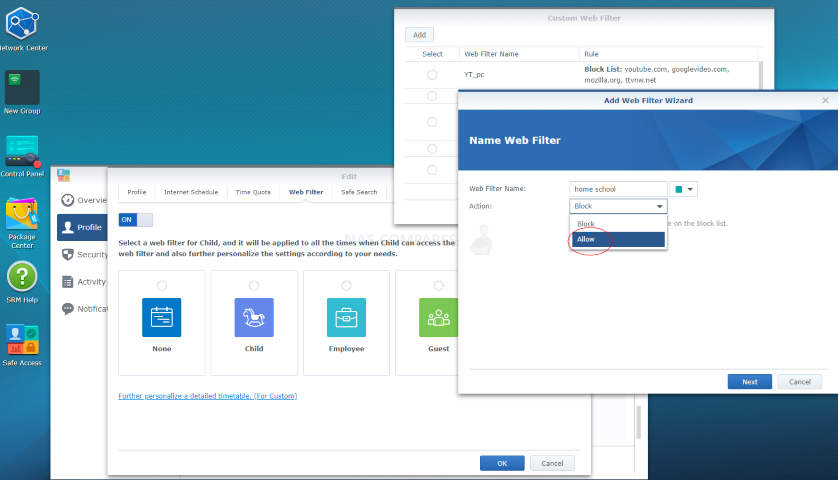
A slider On/Off will allow you to quickly disable a restriction if there is for example half term holidays or a Friday cheat night. You can also select preset filers for “Child”,”Employee”, “Guest” or choose custom filer where you can define the list of allowed or not allowed websites and servers.
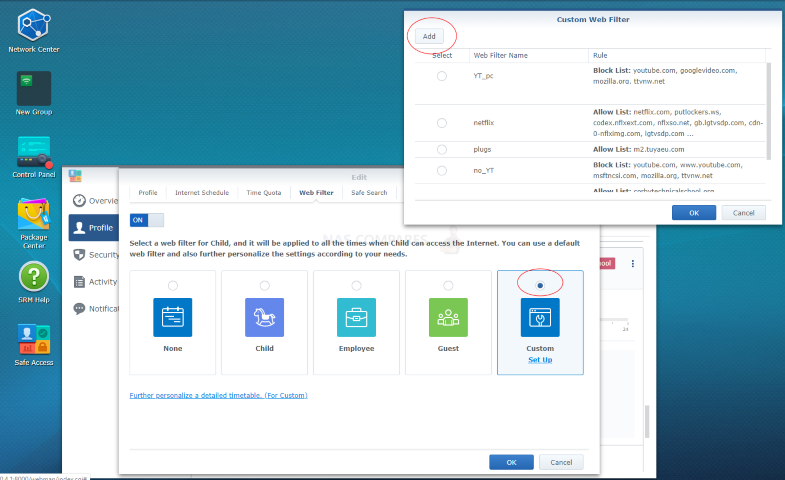
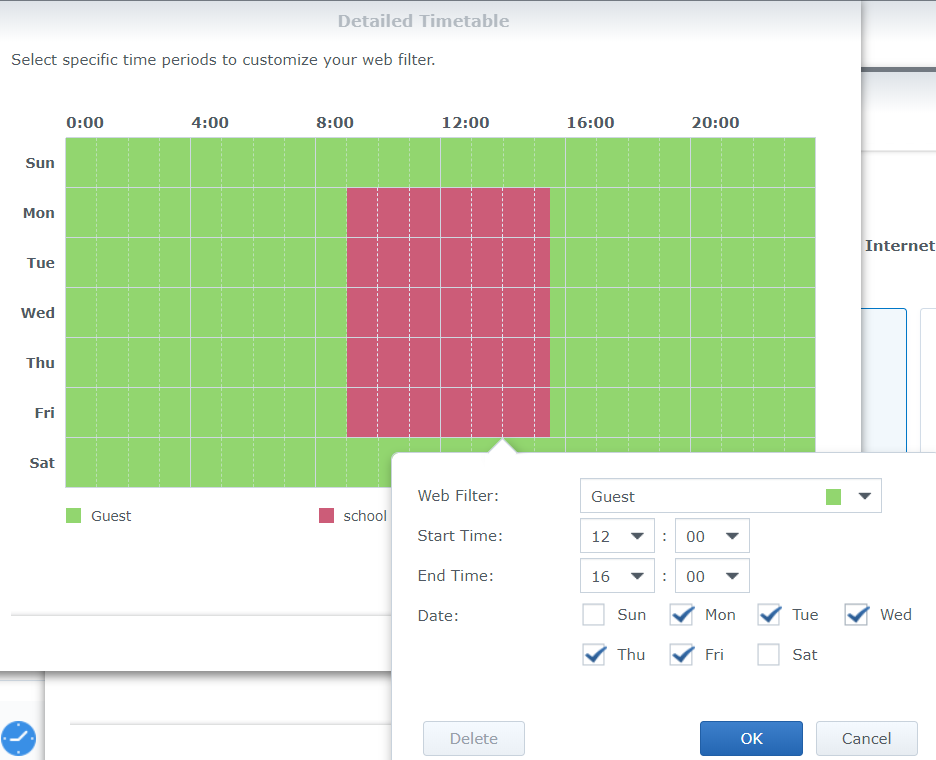
If you choose preset filer then you can also define at what time these restrictions should be effective by clicking on a “Further personalize” link.
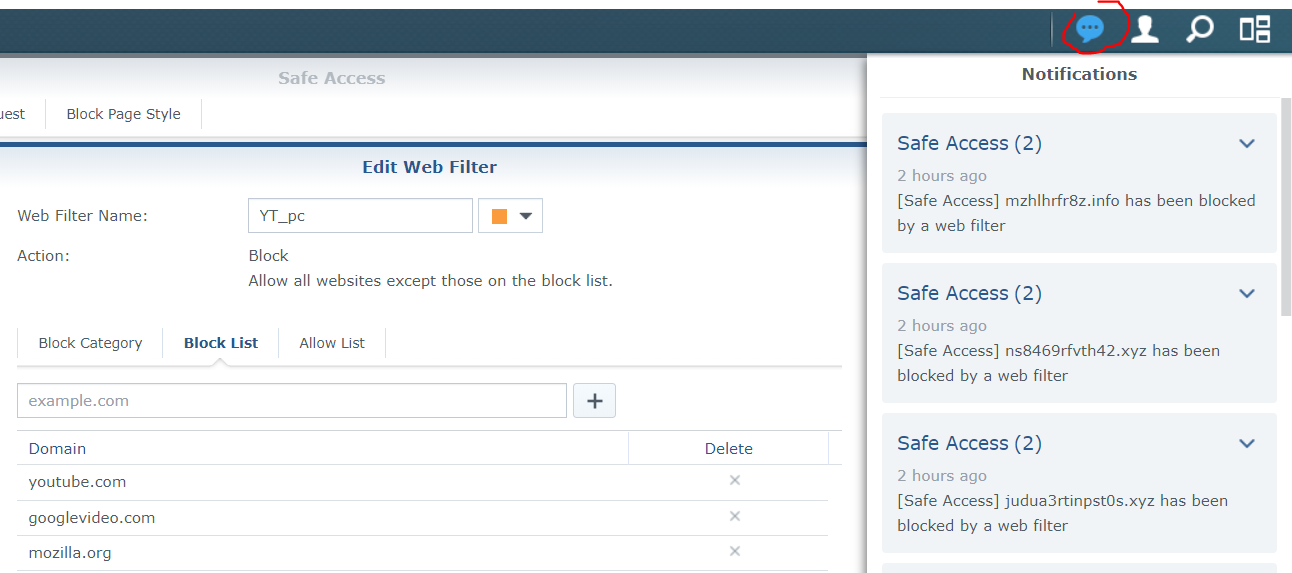
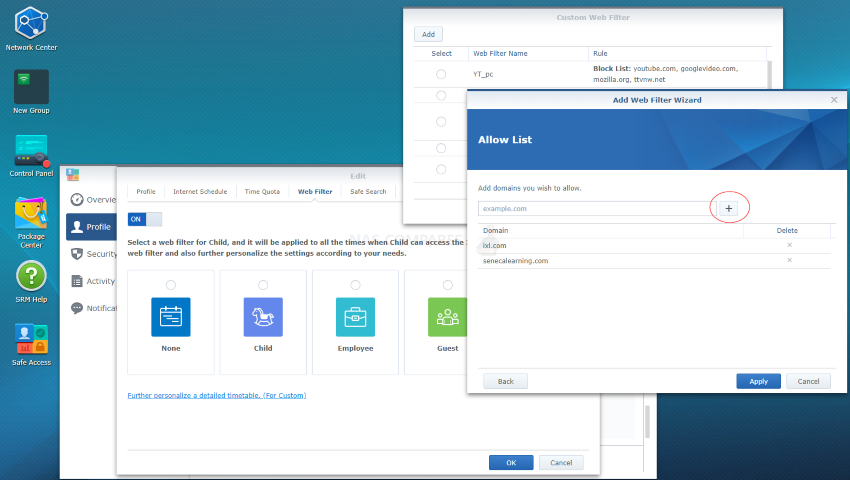
If you are setting up custom filter then you have a choice to either block everything and have a white list containing all website which are allowed to visit. Or choosing back list strategy where everything is allowed apart from the listed websites which need to be blocked. The problem with black list is then some smarter kids might find a way to use VPN and cheat the filter. It is safer to block everything and built a whitelist.
There is a limit of 100 lines in every list. Sometimes you might find this very annoying since nowadays there are many proxy websites involved in accessing a single website. But this will be also very interesting research for you when you will find out about how many different website your service providers like Netflix, Facebook and even your TV like LG or Samsung is sharing your data.
Once you have finished your filter, click OK.
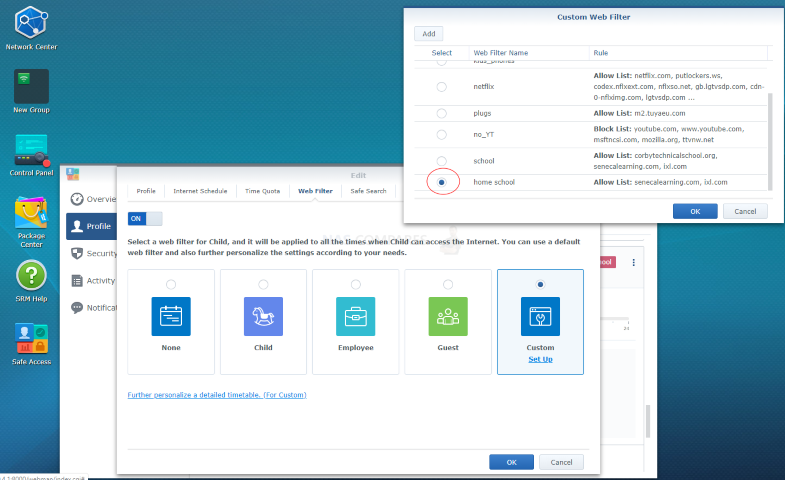
You will see your filter added to the freshly created profile. To confirm, click OK.
You will very likely miss some of the websites on the white-list. And you will get notifications when these websites get blocked. But you can always come back yo the setting and add these websites to the list.