How to setup your Synology Network Video Recorder NVR1218 Surveillance NAS
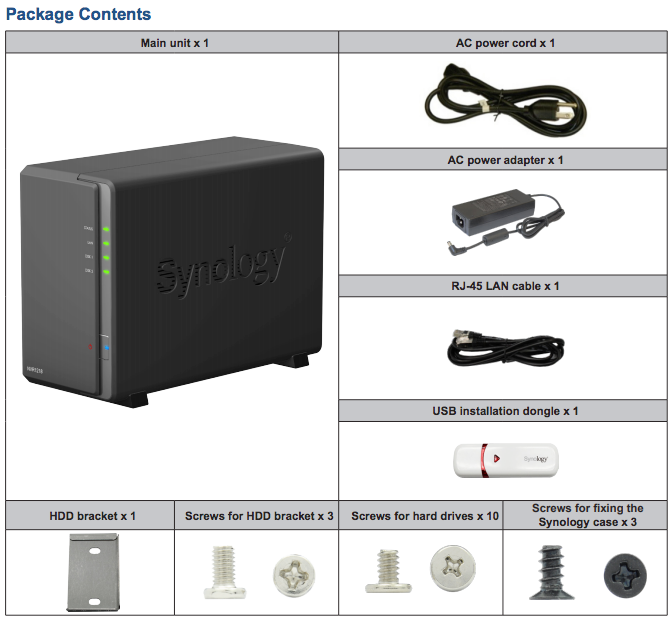
Well done on purchasing a Synology Network Video Recorder (NVR1218). NVR combines the network-attached storage (NAS) with PC-less configuration, operation, and local display of the network video recording package – Surveillance Station. Before setting up your new NVR, please check the package contents to verify that you have received the items below. Also, make sure to read the safety instructions carefully to avoid harming yourself or damaging your NVR Surveillance System.
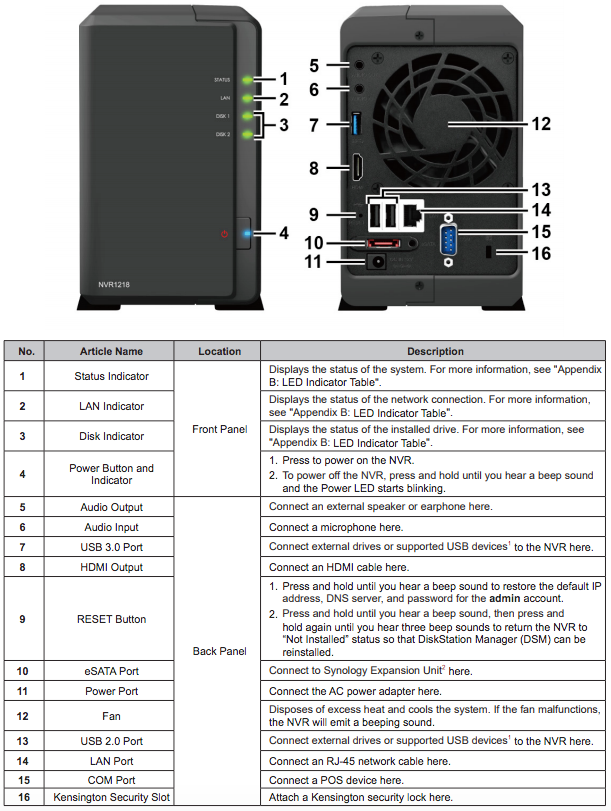
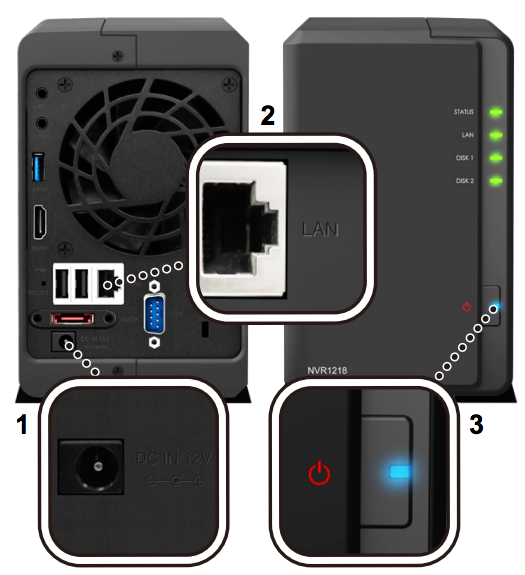
The hardware of the Synology NVR1218 NAS Surveillance System
How to install the HDD or SSD Media into the Synology NVR1218 NAS
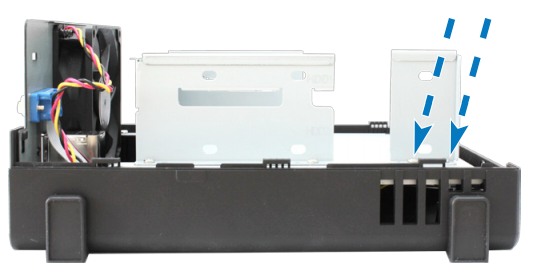
- Push the upper case in the direction as shown below. Lift the upper case and set it aside
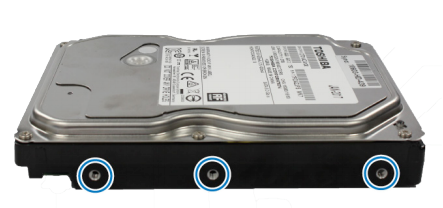
- Install drives. For traditional 3.5″ SATA Hard Drives with 3 Screw Holes on either side-
i) Slide the drive into the hard drive bay, and push it all the way until it’s firmly connected to the SATA connector
ii) Secure the drive with the screws
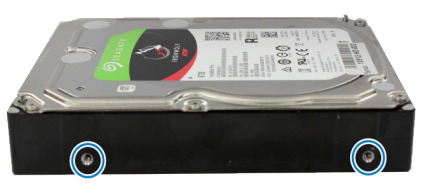
- Install drives. For Newer 3.5″ SATA Hard Drives with 2 Screw Holes on either side-
i) Place the HDD bracket on the NVR, and fasten the bracket with the screws provided.
ii) Slide the drive into the hard drive bay, and push it all the way until it’s firmly connected to the SATA connector.
iii) Secure the drive with the screws provided.
- Repeat the steps above to install the other drive if you have prepared one.
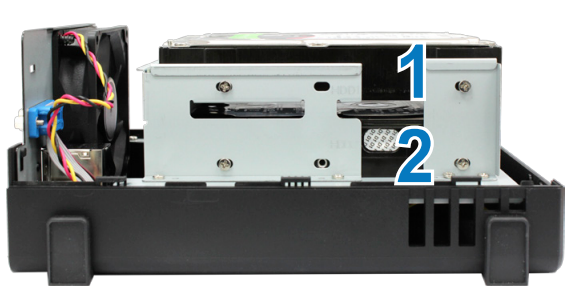
- The position of drives is as follows:
Pro-Tip – If you want to create a RAID volume, we recommend that all installed drives are of the same size to make the best use of drive capacity.
- Replace the upper case, and tighten the screws on the back panel.
Setting up the Synology NVR1218 Operating System and Surveillance Software
- Connect one end of the AC power adapter to the power port of the NVR. Connect the other end to a power outlet.
- Use the LAN cable to connect the NVR to your switch, router, or hub.
- Press the power button to turn on the NVR.
Congratulations! Your NVR is now online and detectable from a network computer. Time to install the latest Firmware.
How to Install the NVR1218 Firmware with Synology USB Installation Dongle without the internet
After hardware setup is finished, please install NVR firmware with the USB installation dongle included in the package content, or with Web Assistant. NVR firmware includes the NVR operating system and Surveillance Station. For offline or PC-less installation, your NVR comes with a USB installation dongle that helps you install NVR Firmware via Local Installer when the Internet is not available. NVR Firmware includes the operating system of Synology NVR and Surveillance Station. To install NVR Firmware with a Synology USB installation dongle, please follow the steps below.
- Plug in the USB installation dongle
- Connect an HDMI monitor and a USB mouse to your NVR
- Power on your NVR
- Select a language to use as the default language
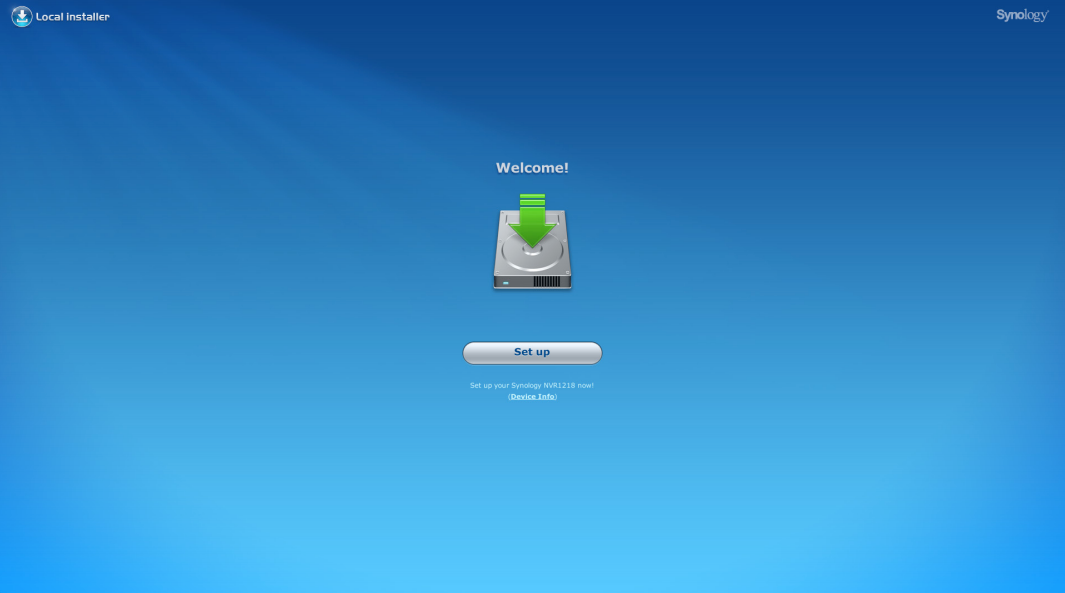
- Click Set up to continue
- Check to confirm the patch version, and click Install Now to start the installation
- After NVR Firmware has been installed, you can set up your administrator account and enjoy an intuitive experience with Surveillance Station via HDMI
- If the installation of Surveillance Station was not completed, please log in to DSM via your PC, then go to Package Center to install Surveillance Station manually
How to install the latest Synology NVR1218 Firmware with Web Assistant via the internet
Your NVR comes with a built-in tool called Web Assistant that helps you download the latest version of the operating system and Surveillance Station from the Internet and install it on your NVR. To use Web Assistant, please follow the steps below.
- Power on the NVR
- Open a web browser on a computer connected to the same network as the NVR 1218
- Enter either of the following into the address bar of your browser ‘find.synology.com‘ or ‘nvr:5000‘
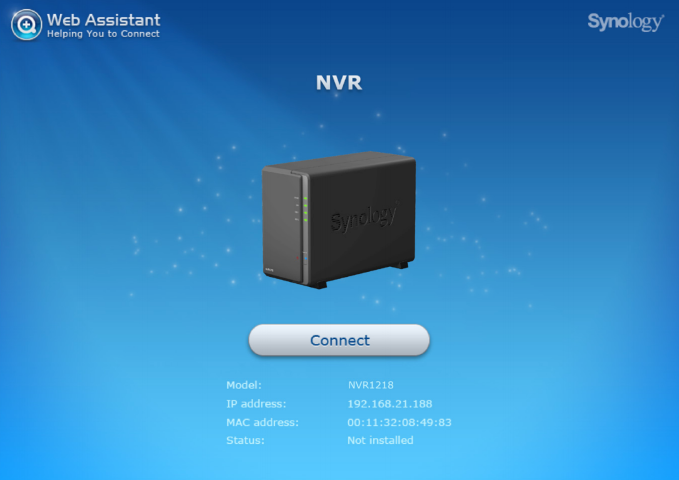
- Web Assistant will be launched in your web browser. It will search for and find the NVR within the local network. The status of the NVR should be Not Installed.
- Click Connect to start the setup process and follow the onscreen instructions
Special Note – The NVR must be connected to the Internet to install NVR operating system and Surveillance Station with Web Assistant. Suggested browsers include Internet Explorer and Safari. If you accidentally leave the installation process before it is finished, login to the OS as admin (default administrative account name) with the password left blank. If the installation of Surveillance Station was not completed, please go to Package Center in DSM to install Surveillance Station manually.
Congratulations! Your NVR is now ready for your Surveillance needs. Well done, go have a coffee/beer.
📧 SUBSCRIBE TO OUR NEWSLETTER 🔔
🔒 Join Inner Circle
Get an alert every time something gets added to this specific article!
This description contains links to Amazon. These links will take you to some of the products mentioned in today's content. As an Amazon Associate, I earn from qualifying purchases. Visit the NASCompares Deal Finder to find the best place to buy this device in your region, based on Service, Support and Reputation - Just Search for your NAS Drive in the Box Below
Need Advice on Data Storage from an Expert?
Finally, for free advice about your setup, just leave a message in the comments below here at NASCompares.com and we will get back to you. Need Help?
Where possible (and where appropriate) please provide as much information about your requirements, as then I can arrange the best answer and solution to your needs. Do not worry about your e-mail address being required, it will NOT be used in a mailing list and will NOT be used in any way other than to respond to your enquiry.

|
 |
UniFi Routers vs OpenWRT DIY Routers - Which Should You Choose?
WHY IS PLEX A BIT S#!t NOW? IS 2026 JELLYFIN TIME? (RAID Room)
Synology FS200T NAS is STILL COMING... But... WHY?
Gl.iNet vs UniFi Travel Routers - Which Should You Buy?
UnifyDrive UP6 Mobile NAS Review
UniFi Travel Router Tests - Aeroplane Sharing, WiFi Portals, Power Draw, Heat and More
Access content via Patreon or KO-FI
Discover more from NAS Compares
Subscribe to get the latest posts sent to your email.


