

A Guide to Moving your Photos and Drive Data to Synology NAS
Today I want to show you guys how to make the switch from your Google Photos and/or Google Drive account and onto a Synology NAS. Whether you are looking into migrating your data from the cloud to a private server because of safety, cost or the recent announcement by Google to stop unlimited photo backups in June 2021, there are lots of good reasons to make the jump. Additionally, there are several different ways to move data over from Google to Synology NAS available. Today I want to talk about two of the most reliable ways to do it, namely using Google Takeout and Synology Cloud Sync. Both have their advantages and disadvantages, but below is a guide to walk you through both methods on a Synology NAS and both methods will cover Google Photos and Google Drive, to migrate your data over manually or automatically.
Video Guides Below (if you prefer)
What Photo Apps are Available on Synology NAS?
Technically there are THREE Synology applications for photography. However, two of them (Synology Photo Station and Synology Moments) are on DSM 6.2, whereas the latest application (Synology Photos) is in DSM 7, which is in beta and plans to combine both of the previous two apps into a single, multi-purpose tool. So, let’s take a quick look at the tools on offer for photo storage on Synology NAS when moving away from Google Photos and Google Drive.
Synology Photo Station
The original Synology Photography app, used by both home and business users alike. This is quite a professional application with a tonne of configuration options for sharing, streaming, album creation and building a fantastic portfolio of your work. It lacks a few of the AI-powered features that are present in Synology Moments and Synology Photos, but it is still a remarkably popular application and recommended for those that take their photography seriously when moving from Google Photos to a Synology NAS.
Synology Moments
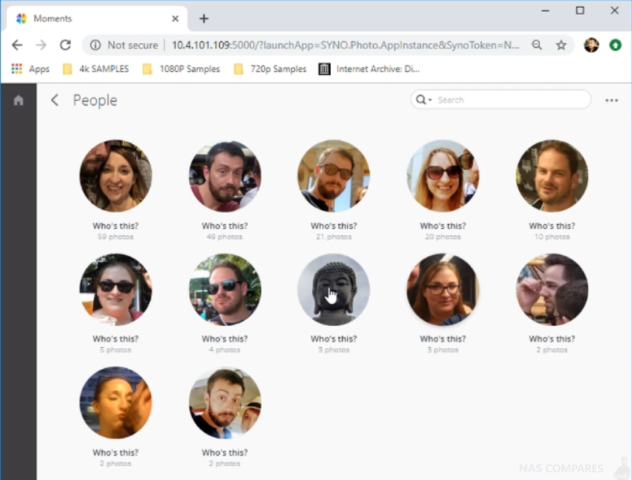
Although not quite as established as Synology Photo Station, the Synology Moments application is considerably more familiar to those who use the Google Photos application on mobile device or via the web browser. It supports the usual photo album display, but then includes facial recognition, ‘thing’ recognition to identify the contents of photos and group them together, geo-tagging recognition and more. Finding a much more user-friendly and simplified GUI, Synology Moments is the tool for users who are more interested in using their photos for personal use (though it does still support many sharing and classification options).
Synology Photos – Coming in DSM 7.0
Synology Photos is a re-imagining of how a NAS handles your photos in Synology DSM 7.0. Their latest firmware (in beta that time of writing, but with a full version coming soon) it combines the Photo Station and Synology Moments application into a single tool – Synology Photos. With the sharing and home/business separation where needs in Personal and Shared pace options, all the AI-powered recognition you need and it even bring s few new tools into the mix (AI Tagging combined with intelligent album creation for example), it is more like Google Photos in it’s GUI, but has a few more business options in the background for sharing photo shoots and professional portfolios at your finger tips.
So there you go, the tools you can use on your Synology NAS to migrate your Google Photos into. Let’s talk about the two most popular and straight forward ways to transfer your Google Photos and Google Drive data over to your NAS.
How to Copy Your Google Photos & Drive to Synology NAS using Google Takeout
For those that are not aware, all the data that you send to google (via app synchronization, backups, cloud shares, emails, everything!) can actually ALL be downloaded if you want. You just need to head over to Google Takeout and from there you can download your data (from each app, or all) and then you can move that data to your NAS ecosystem as needed. Below is how you would use Google Takeout to move your Google Photos and Google Drive data over to a NAS. Let start!
First thing to do, is to head over to Google Takeout. Google Takeout can be found HERE – https://takeout.google.com
Once you have logged into your Google Account, you will be presented with this screen:

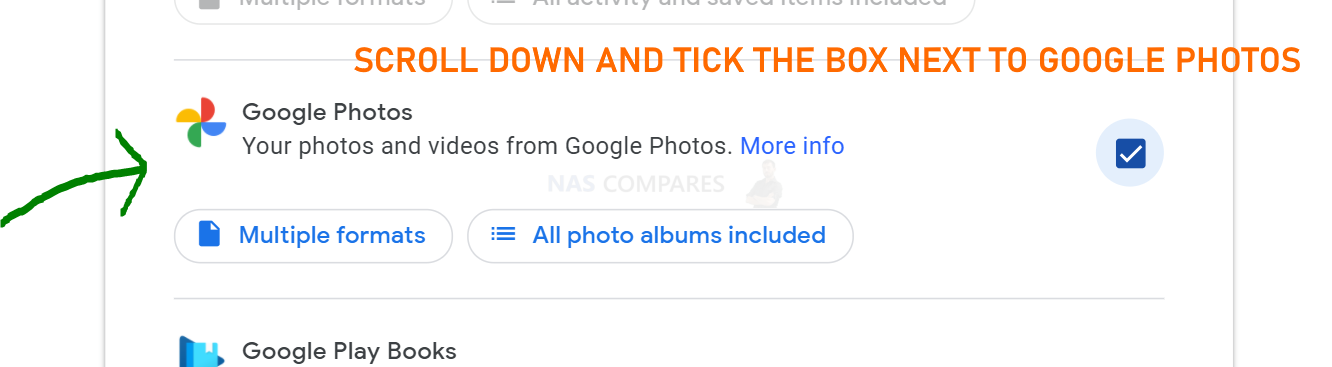
This is the full list of applications and services that Google has and you can select them which ones you want to download/migrate. So, for Google Photos, scroll down and tick the box new to ‘Google Photos‘:
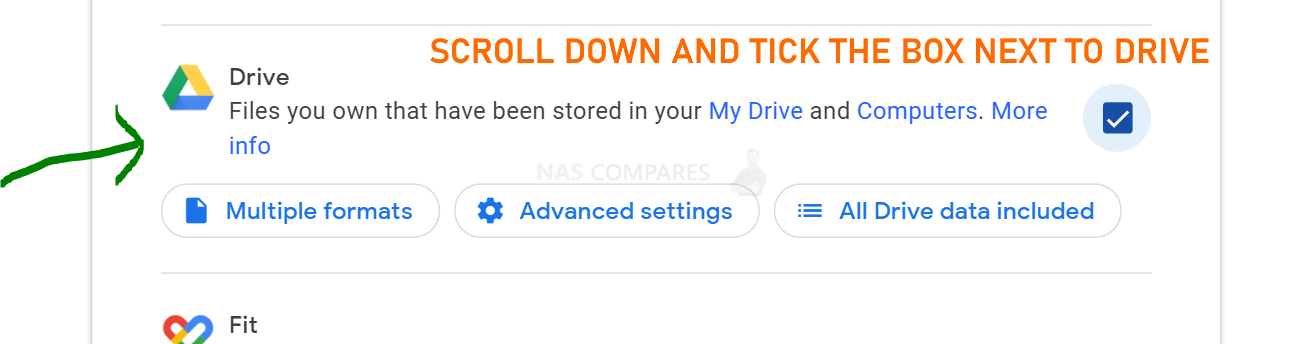
You can also/alternatively download your Google Drive data here too, just tick the box next to ‘Drive‘.
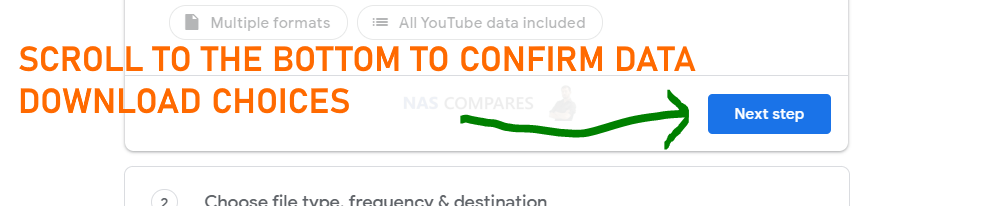
Once you have selected which data to download (in this case, you photo and/or Drive data), scroll to the bottom and click Next Step.
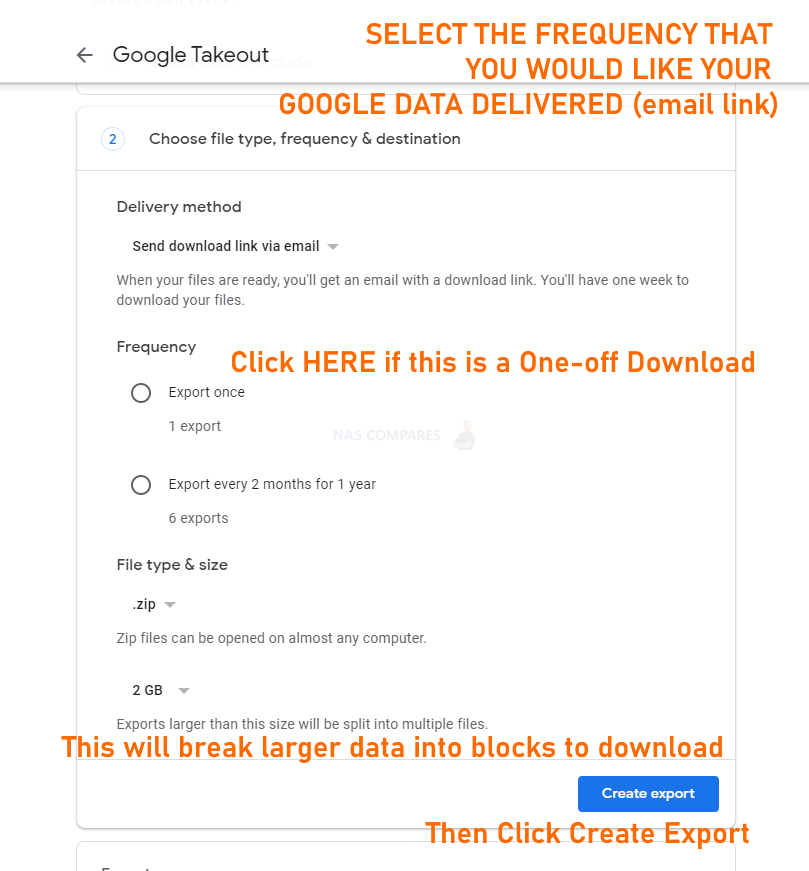
After clicking to proceed, it will then ask you to verify if this is just a 1-off download or if you want to regularly download your google data (with links sent via email). Additionally, it will ask you if you want to break the download into smaller blocks (2GB by default) as some file systems have difficulty with larger files (eg FAT32). I recommend 2GB blocks to be safe. When ready, click ‘Create Export’.
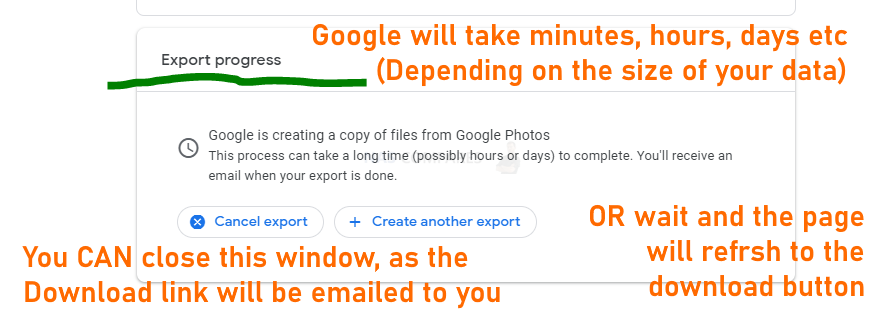
Once you click Create Export, Google will then prepare your download. Depending on the size of your photo/drive data, this can take minutes, hours or even days. You do not need to keep this window open the whole time, as Google will email you with a link to when it is done to download everything.
Once Google has finished preparing your download, you will be given the option to download the .zip of all your data. Just click the Download Arrow icon and it will begin.
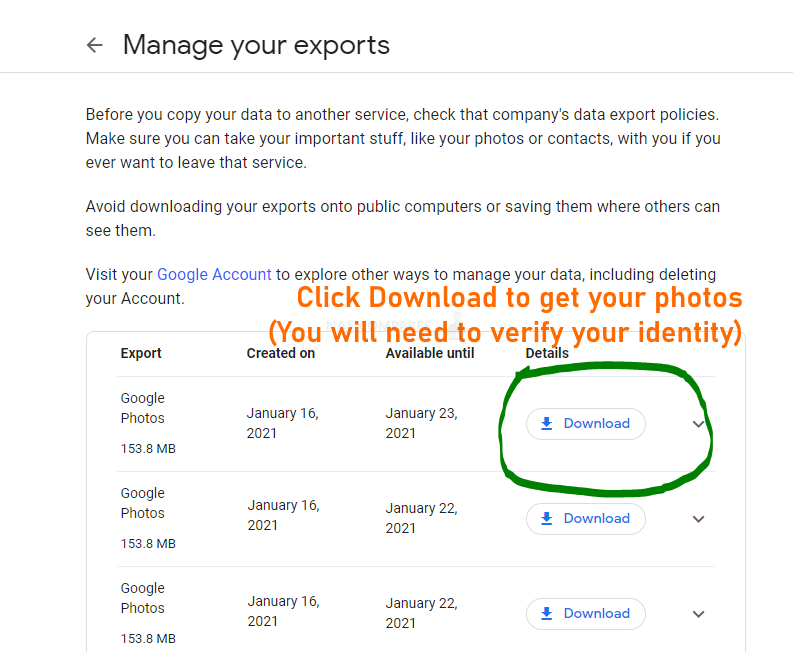
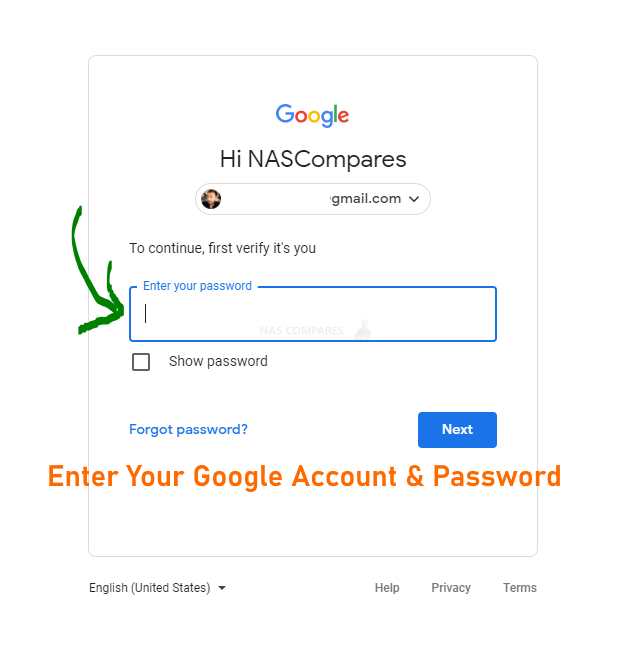
Google might ask you to verify that it is you (as this IS your personal data) before allowing you to download it all – this is perfectly normal.
Once you have downloaded the file (eg to your Downloads folder of your PC/Mac/Android/Lunix machine), you will need to extract the .ZIP file (normally by right-clicking and selecting ‘extract’.
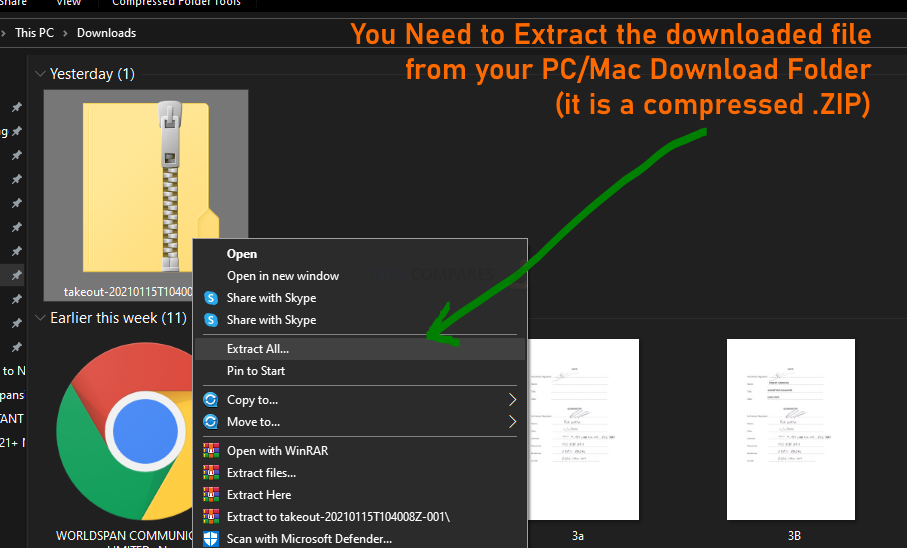
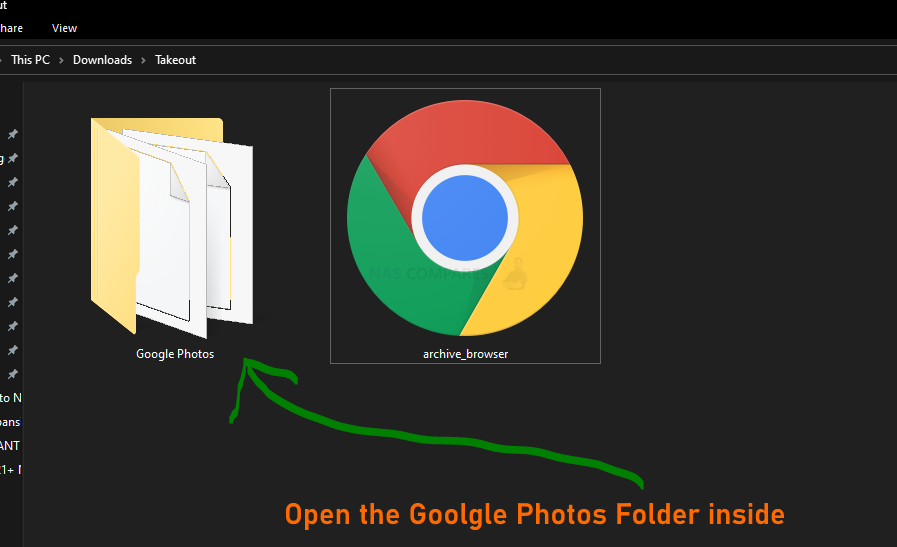
The Folder that is extracted will be called ‘Takeout‘ and contains all of your Photo/Drive data. So, open it up!

Inside this folder will be another folder called ‘Google Photos‘. There may well be other folders, if you selected other Google services to download earlier. We are just focusing on Photos, for now, so head into that folder.
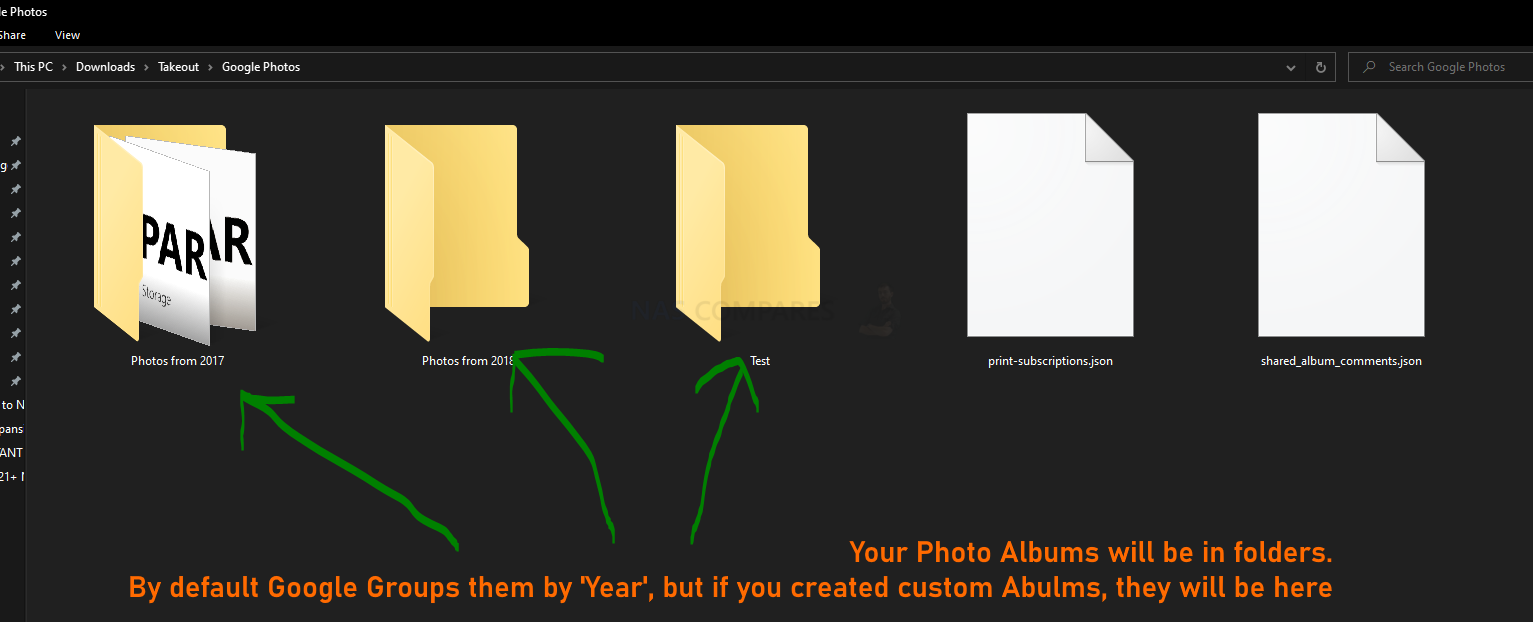
Depending on how you catalogue your Google Photos, inside you will find a folder for each year of photos and or every album you made yourself in the Google Photos application. These are the photos we want to move onto our Synology NAS.
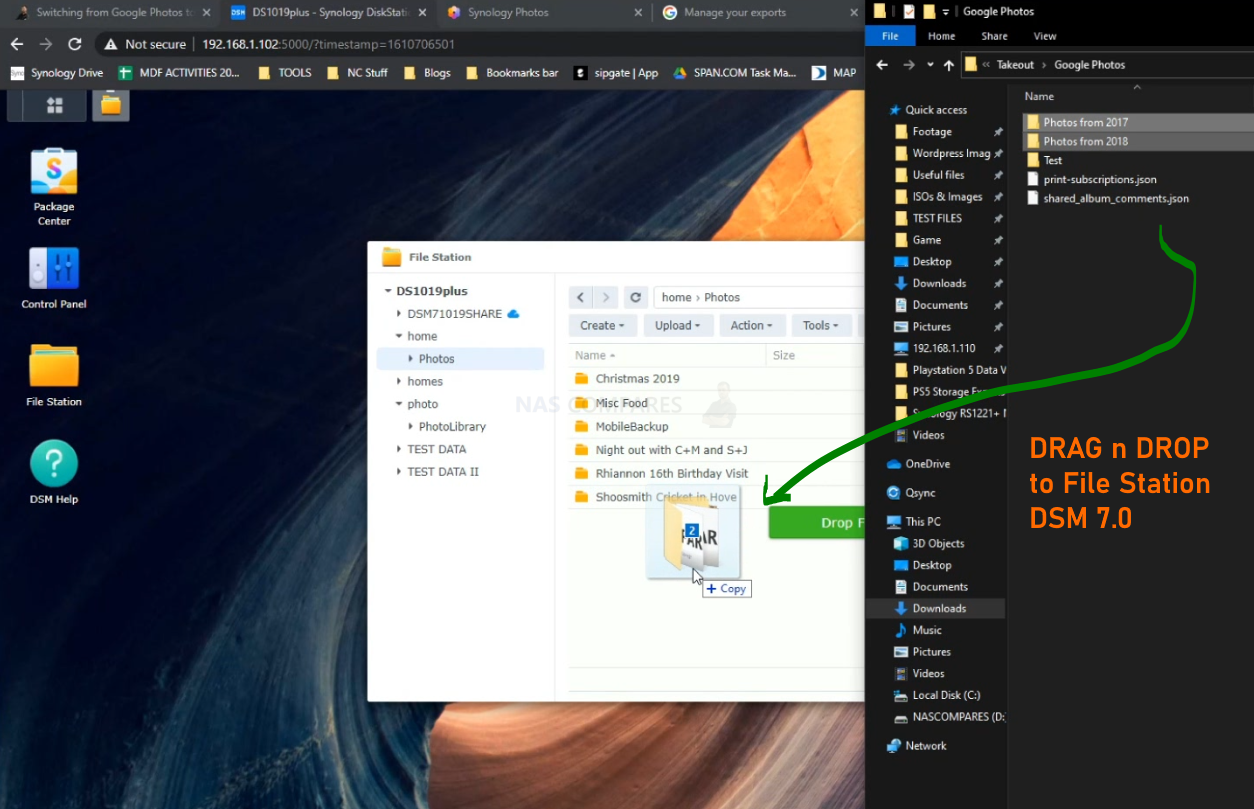
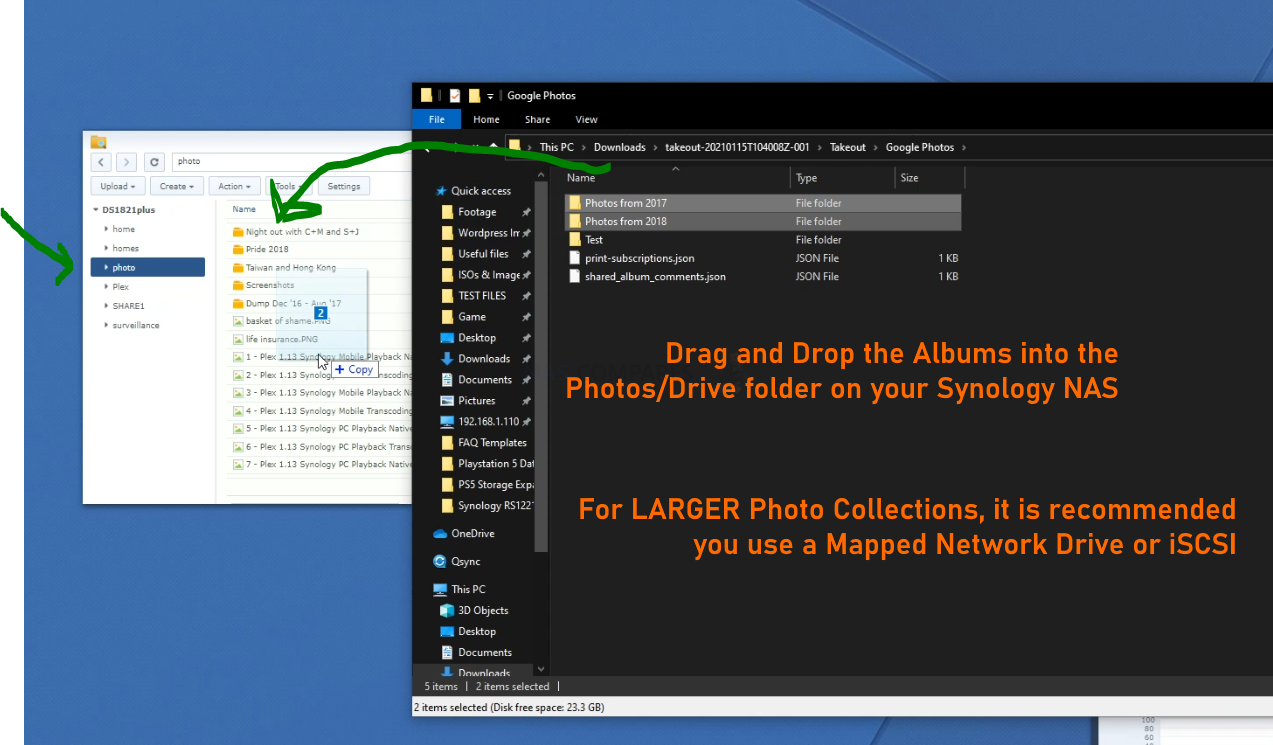
Next thing is to move them on to the NAS. This can either be done by simply dragging and dropping the Google Photos folders into the Synology File Station application (on both DSM 6.2 and DSM 7.0 shown below) or you can map the NAS as a mapped network drive and carry it over inside your own File Manager in the OS (learn how to map a network drive HERE).
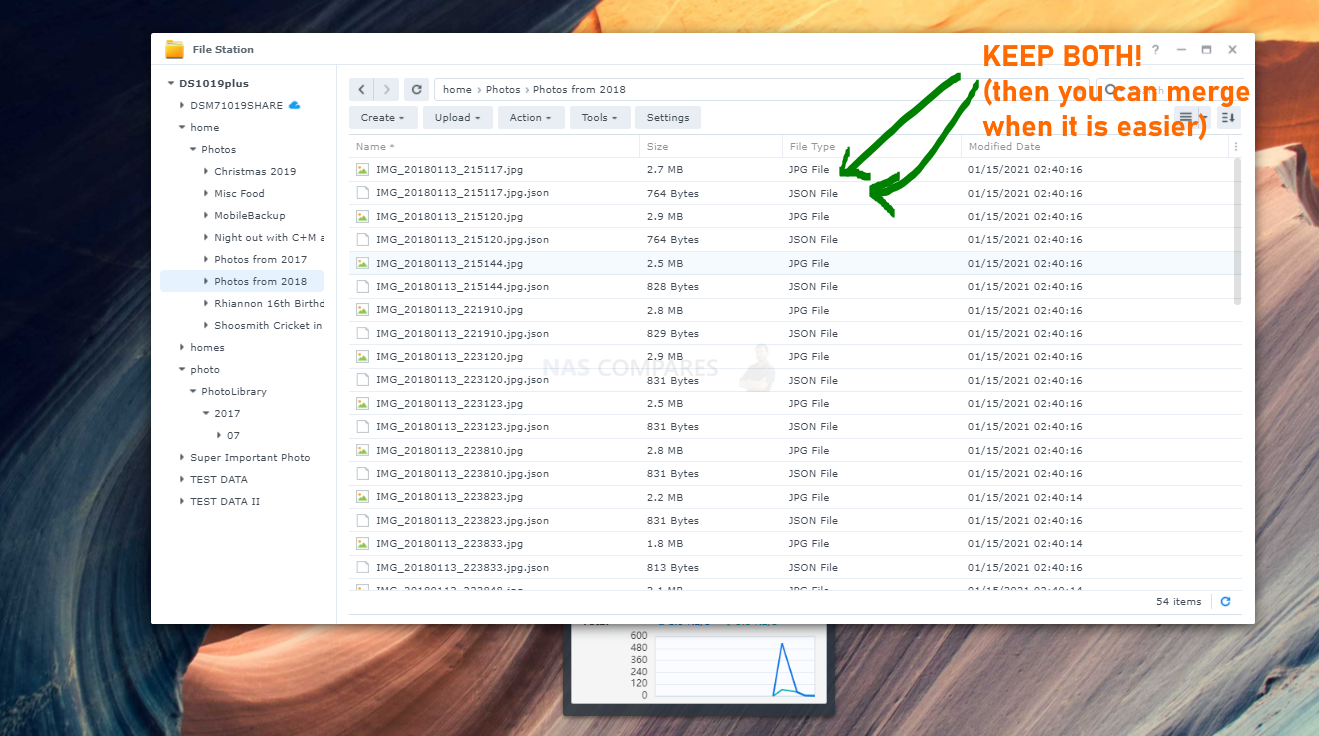
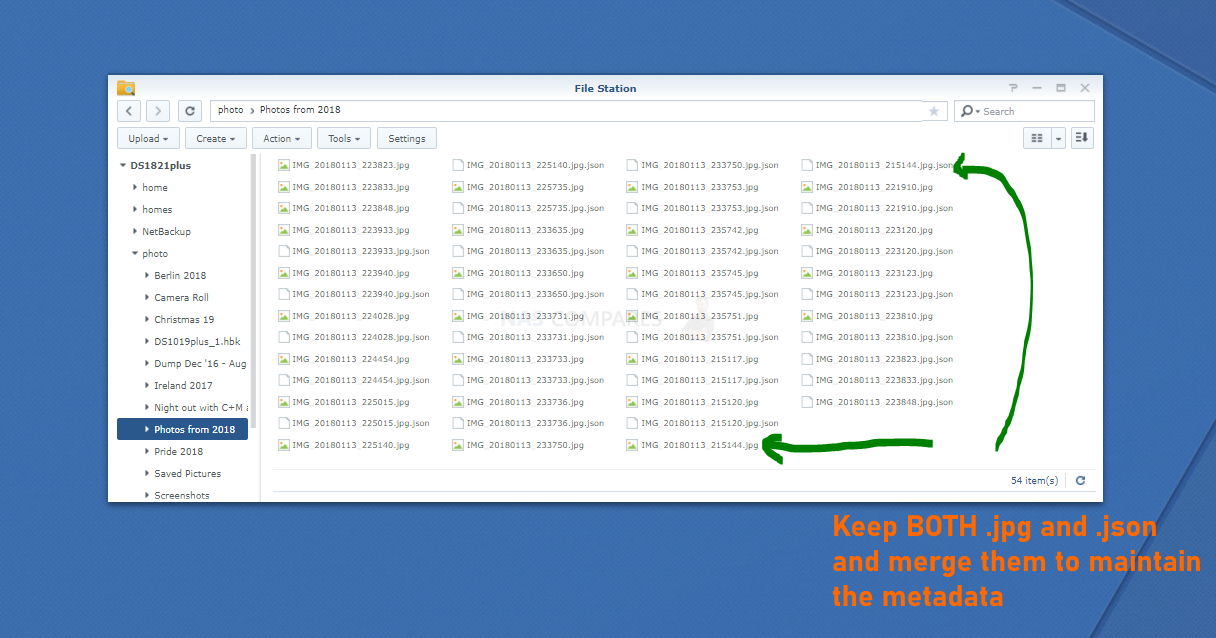
IMPORTANT UPDATE – (thanks to Sipan in the Netherlands for this extra note of caution) Alongside your Photos, you will find a large body of files with the prefix (the format) .json . These files are the metadata (time, geolocation, camera type, etc) from each picture, as Google strips this information from the files (generally hardcoded into the .png, .jpeg, etc) as a separate file (presumably for faster searching online. If you want to carry this data over effectively, you will need to merge the .json files with the photo files. There are several methods listen online (eg using https://exiftool.org/ or some github tools like this https://github.com/mattwilson1024/google-photos-exif) and I will trying a few out and updating this guide at a later date. In the meantime, you should copy the photos AND the .json files TOGETHER as then you have them all in one place for when you merge them.
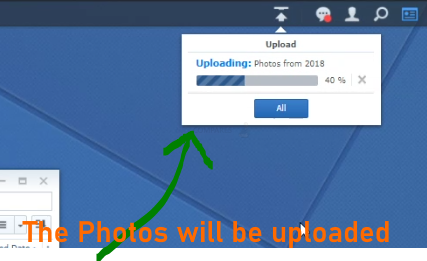
The amount of time it will take to upload the Google Photo and/or Drive data will depend on o nthe size fo the data AND your network connection. But there is an upload status time and status bar at the top right of Synology DSM.
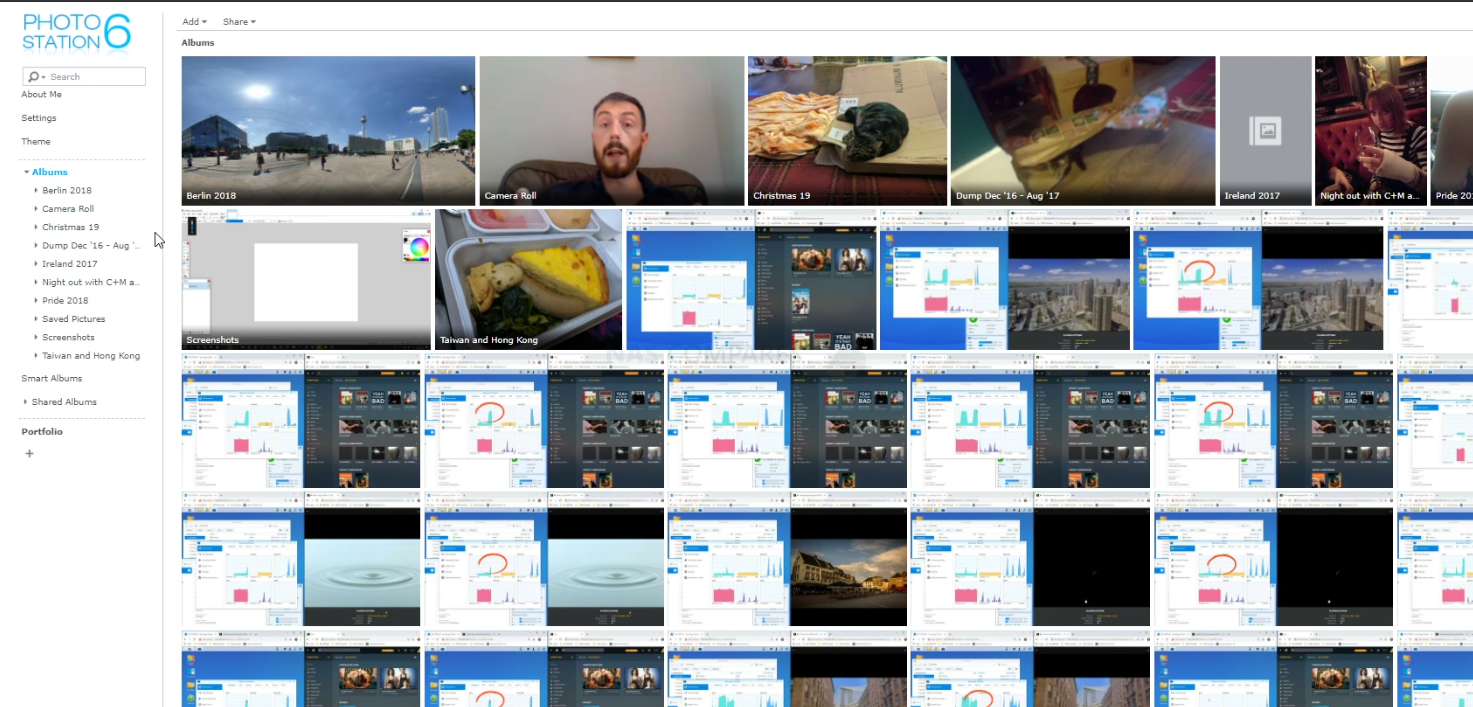
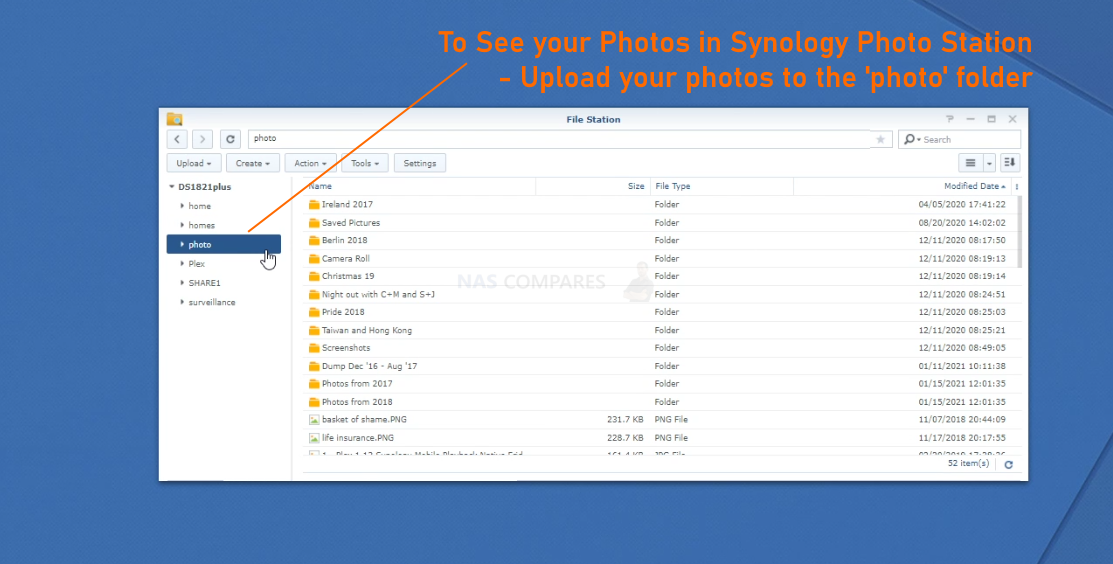
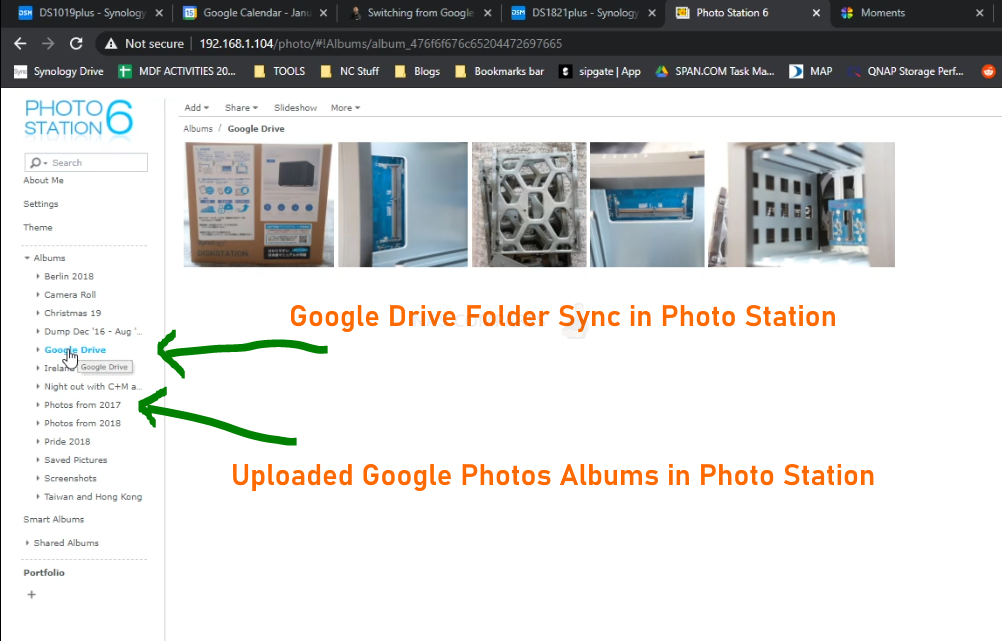
And there you go – you have now used Google Takeout to move your Google Photos and/or Google Drive data to a Synology NAS. In order for the individual Synology Photography applications to see and index your Google Photo collection, you will need to make sure that you put the albums into the correct folders (by default at least). Synology Photo Station needs you to place images int the ‘photo’ album that is created when Photo Station was installed. It will periodically check and index the images that you put inside this folder, as well as scrap metadata and camera data from the images to build a more useful photography database.
Once the photos albums are in the ‘photo’ directory, then a short while afterwards, the Synology will begin to index and build the database. It will not take long before the albums show in the Photo Station applications (as you see below):
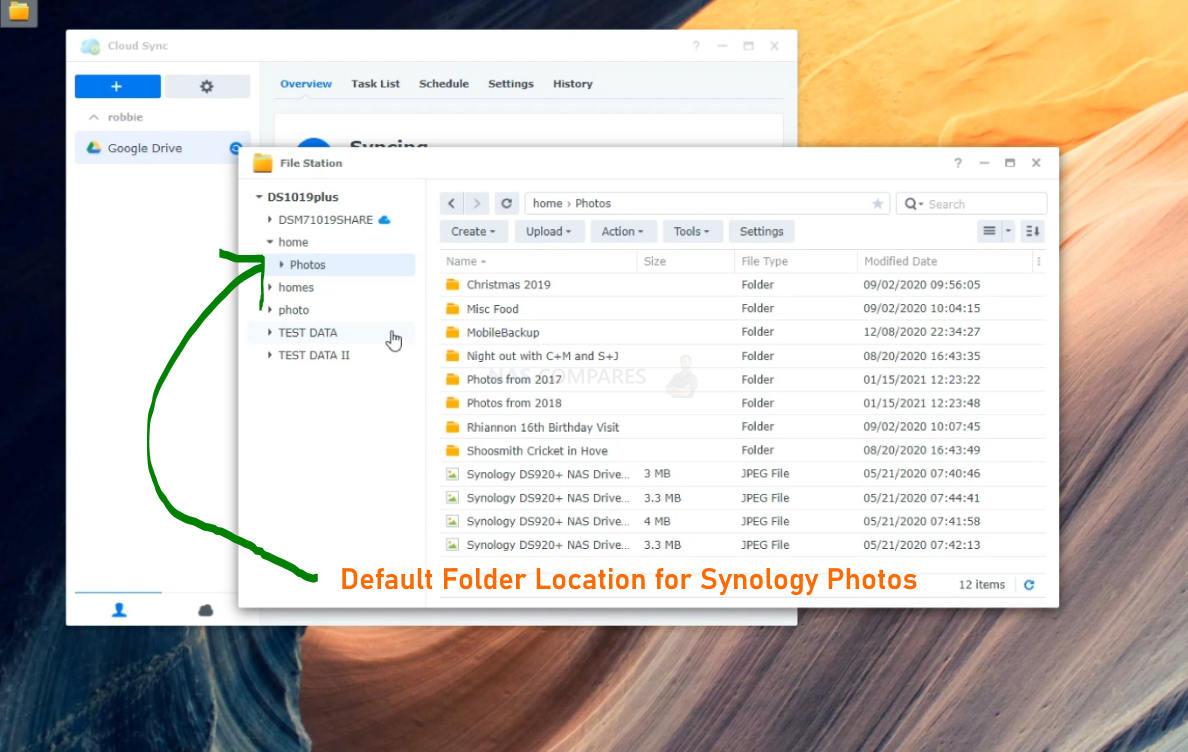
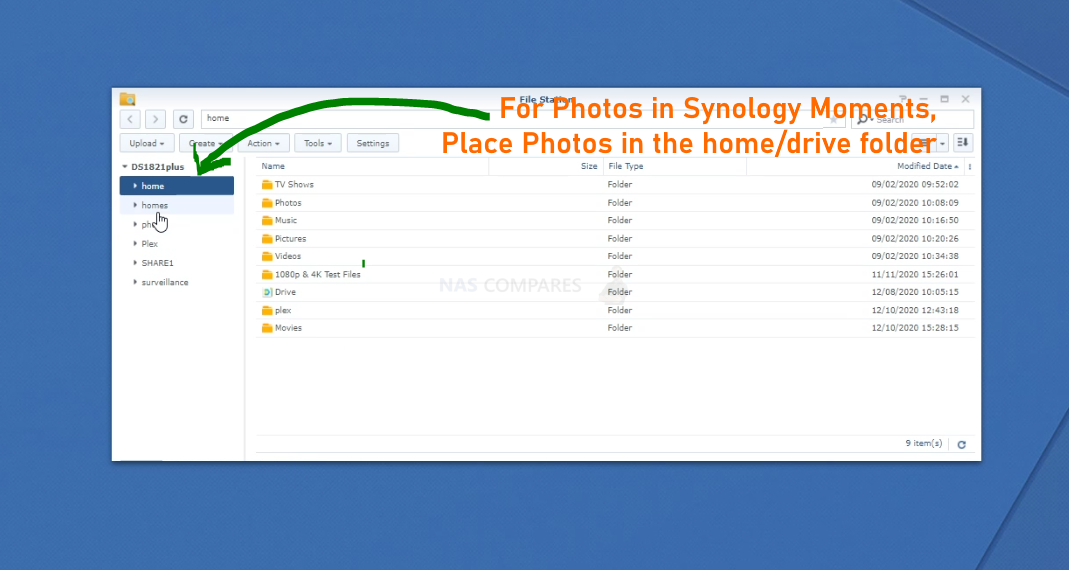
For Synology Moments, you need to place the Photo Albums from Google into the Home/Drive (depending on your setup) folder:

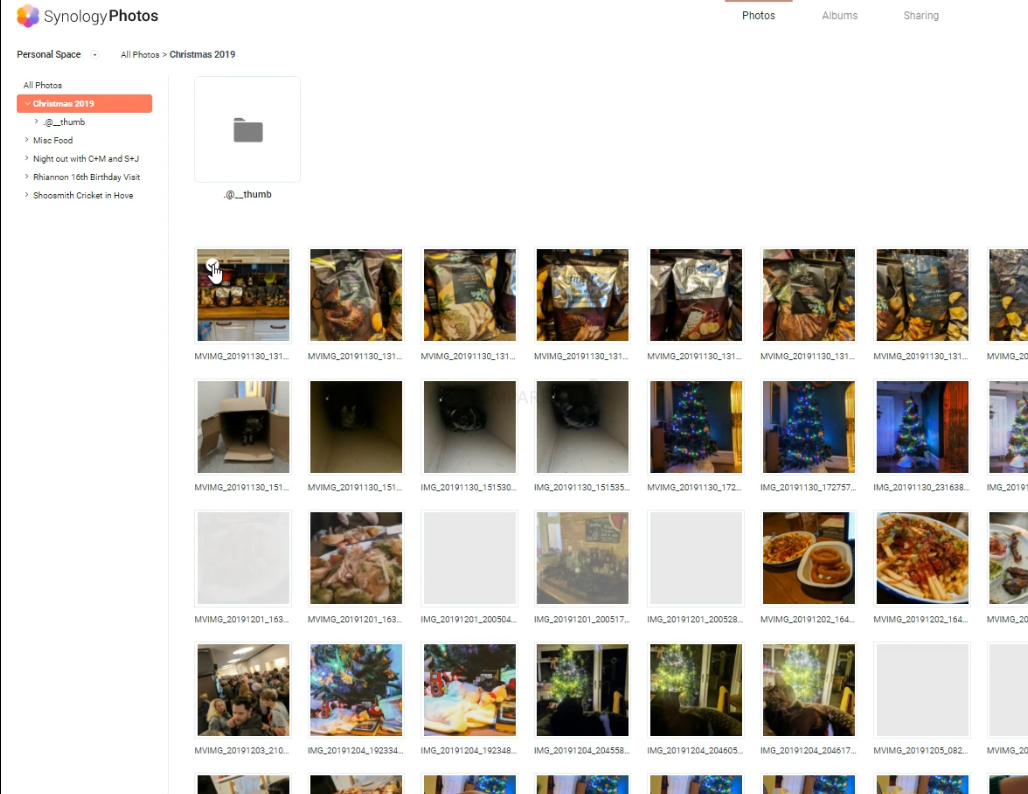
Finally, for Synology Photos, you will also need to place your Google Photo albums into the Home>Photos Folder.
And there you go – you have now successfully moved your Google Photos and Google Drive files onto your Synology NAS. Next, lets discuss how to use the SYnology automated tools to export and/or sync our Google Drive data with our NAS automatically and on a regular basis.
How to Copy Your Google Drive to Synology NAS using Cloud Sync
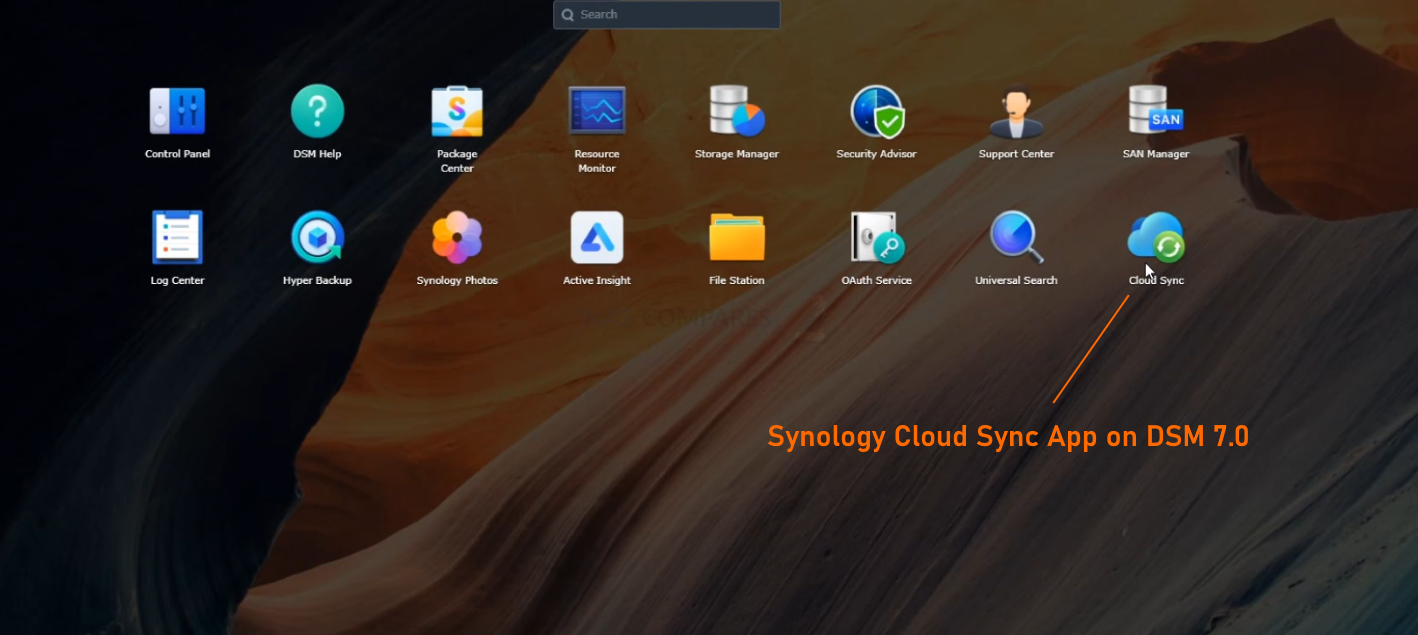
Synology has a multi-tier and incredibly useful Cloud Synchronization tool, called Cloud Sync. This tool allows you to establish a connection between your Google Drive and the Synolgoy NAS, then arrange data to be copied in either direction and on a regular basis. You can even have it so that after the initial backup of Google Drive to NAS (or visa versa) you can then only allow changed/added files to be backed up in future (otherwise known as a differential backup). Let’s go through how to do this. First thing to do is head into the App center on your Synology NAS and select+download the Cloud Sync tool.
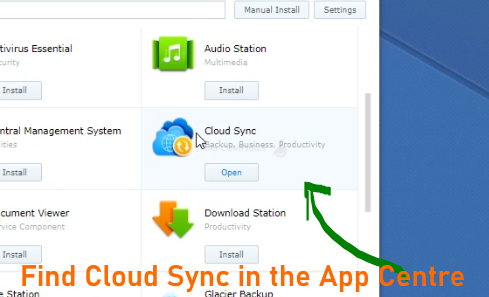
Cloud Sync is available in both Synology DSM 6.2 and DSM 7.0 and can be installed quickly and deployed in minutes. Below is how they look in both versions of the software:
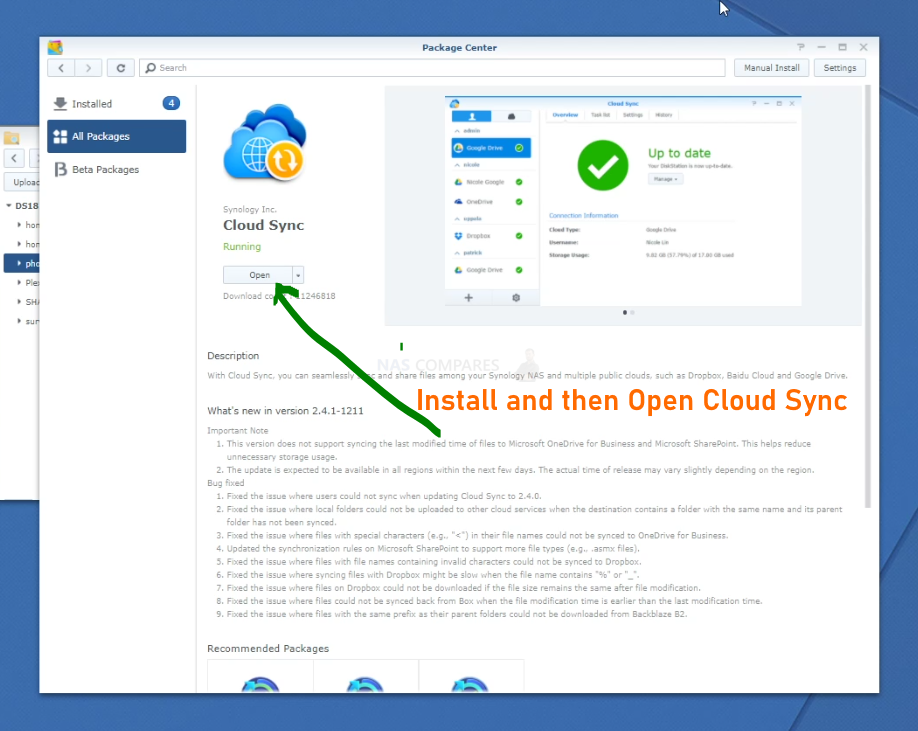
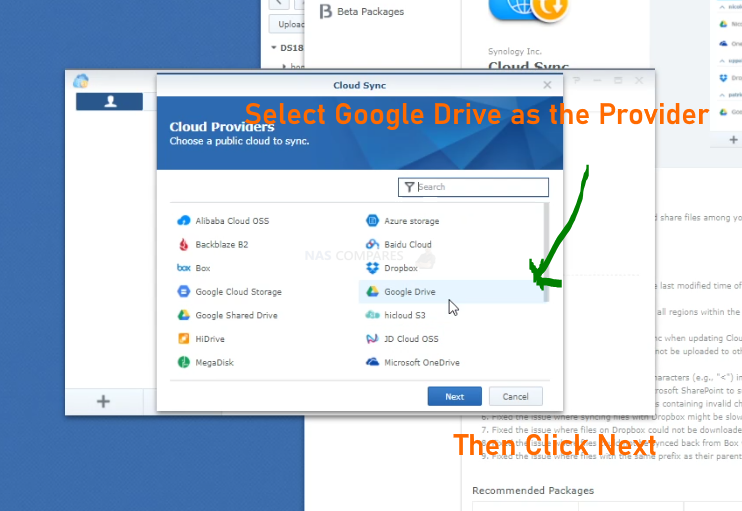
Once the application is installed and started, it will present you with a list of supported cloud providers that the Synology NAS will be about the synchronize with. Scroll down and find Google Drive and then click Next.
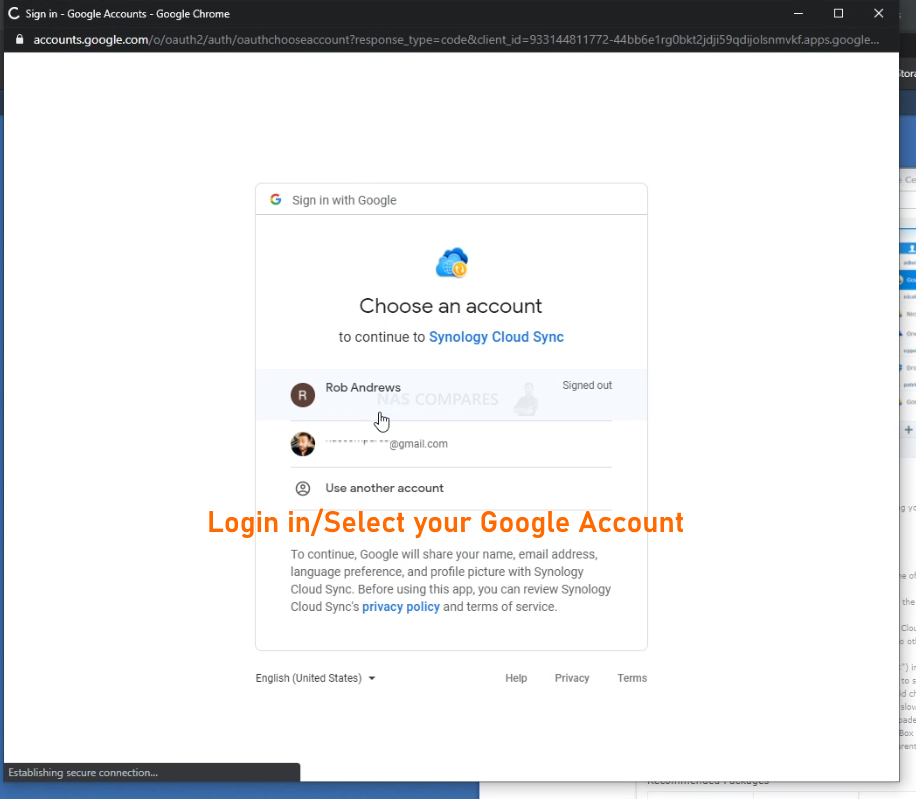
When you click Next, a pop-up window will appear that asks you to log in with your Google Account.
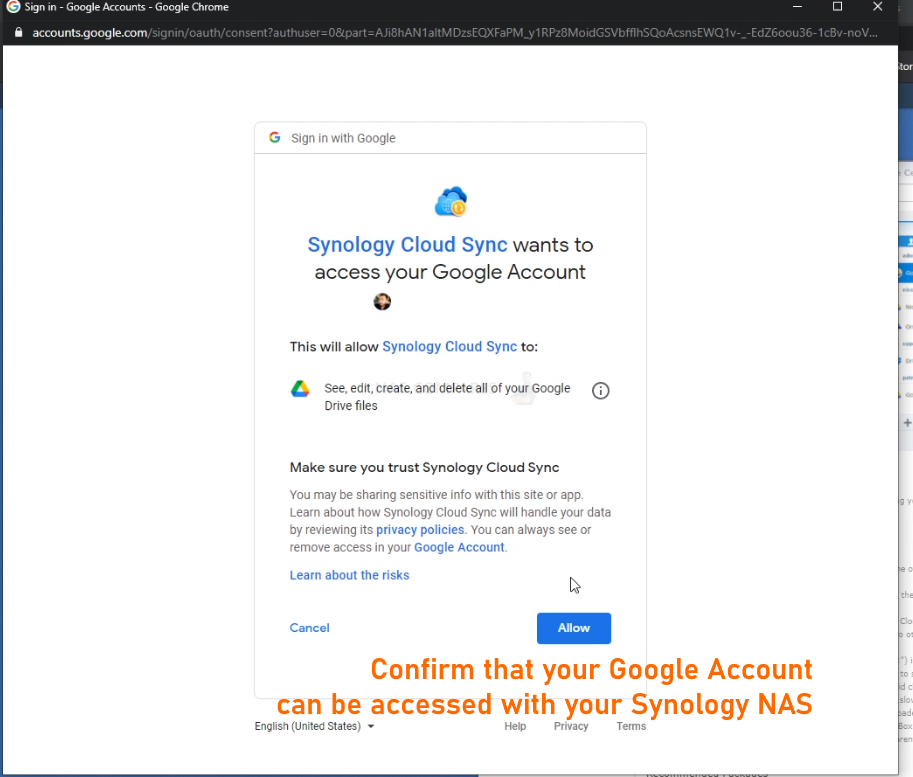
After you log in, Google will ask you to verify that you are happy to allow the Synology NAS and Synology Cloud Sync to access your Google Drive – you will need to allow this to let the Cloud and NAS communicate.
Once you have given your NAS permission to access your Google Drive, you will be presented with a screen that asks you to setup your synchronization task. Both DSM 6.2 and DSM 7.0 show this window, but they look a fraction different (see below). The Local Path is the folder on your NAS where you want the data to be on your NAS. The Remote Path is the folder structure of your Google Drive and you will need to select which folder(s) you want to sync. Data Encryption is available if you want the transmission of data between each platform to be safer and finally there is the Sync Direction option:
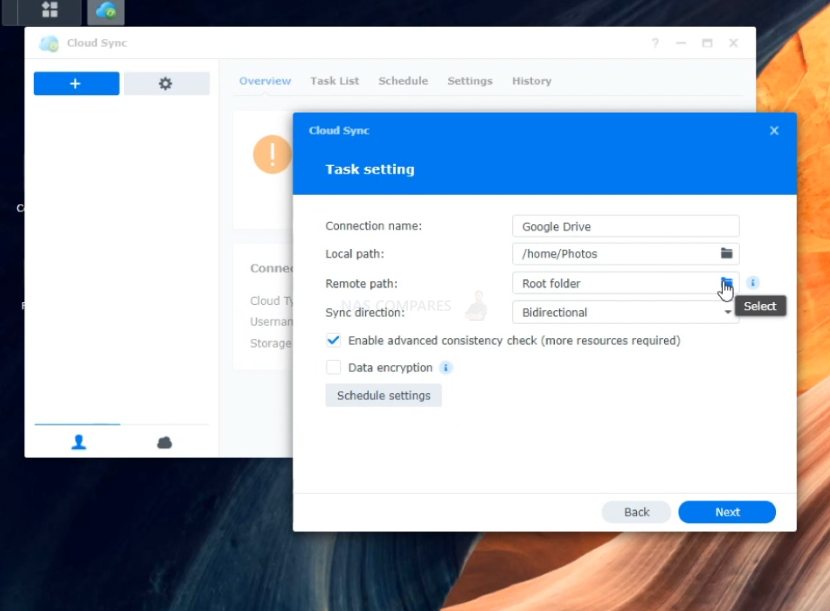
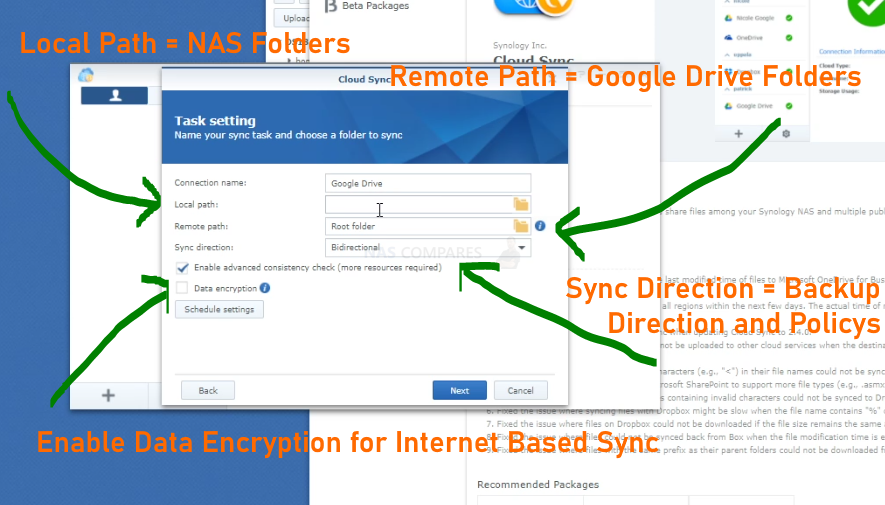
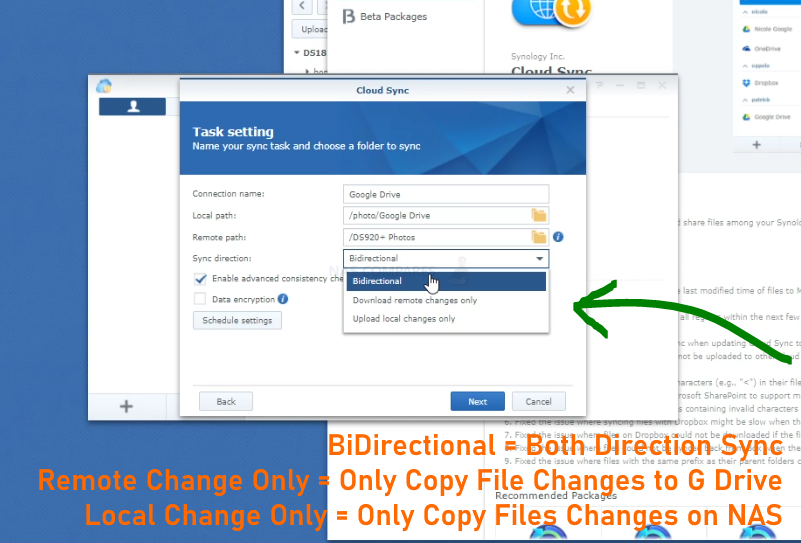
The Sync direction drop-down is to help you decide if you want the folders on the NAS and Google Drive to be fully synced at all times (identical in contents and data), or a one-way sync (in either direction) that means that the changes on one side (ie uploading a files to google drive) will send a copy over to the other (i.e the NAS), but not the other way around. I recommend the ‘Download Remote Changes Only’ if you are looking to copy your Google Drive data over to the NAS long terms, or BiDrectional if you intend to still use your Google Drive as another tier of backup.
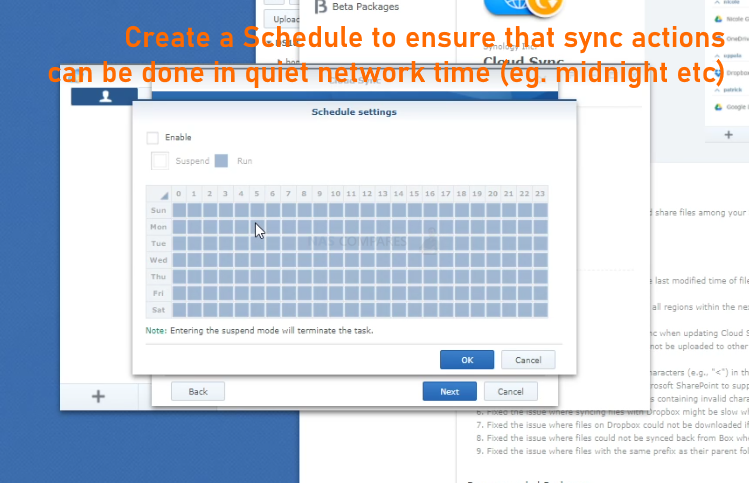
There is also an option to allow further backup and sync actions to happen on a schedule – ie if you do not want a large and regular Google Drive backup to consume all your network or slow other tasks down, you can set the sync task to happen at 1 AM when everyone is gone/asleep.
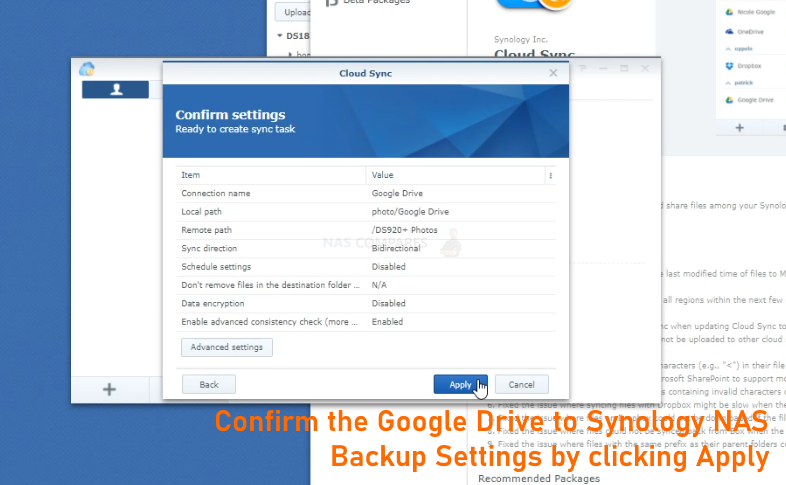
Once you click Next, you will get a summary of the Sync Task you have created. Check it’s all correct and then click Apply.
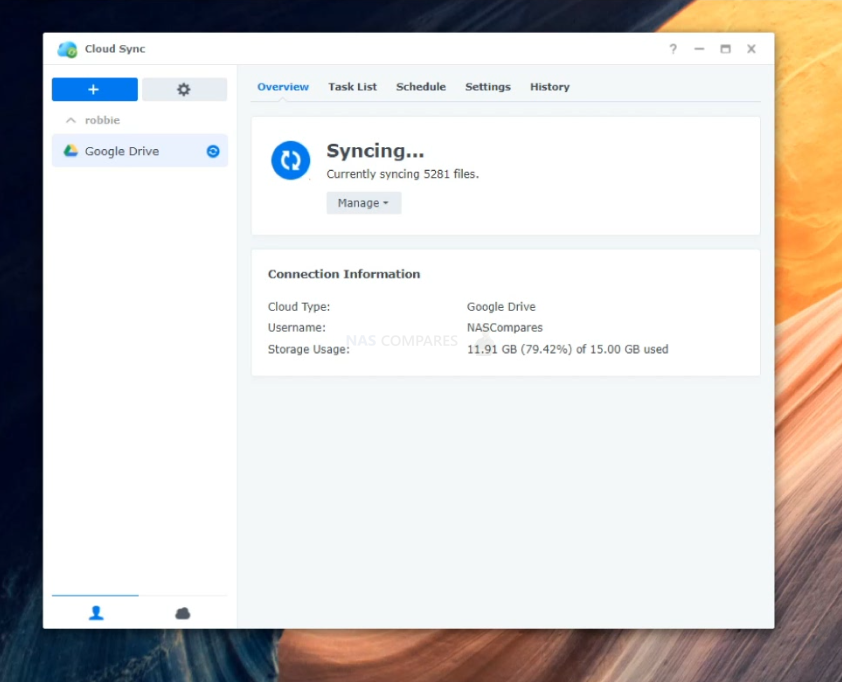
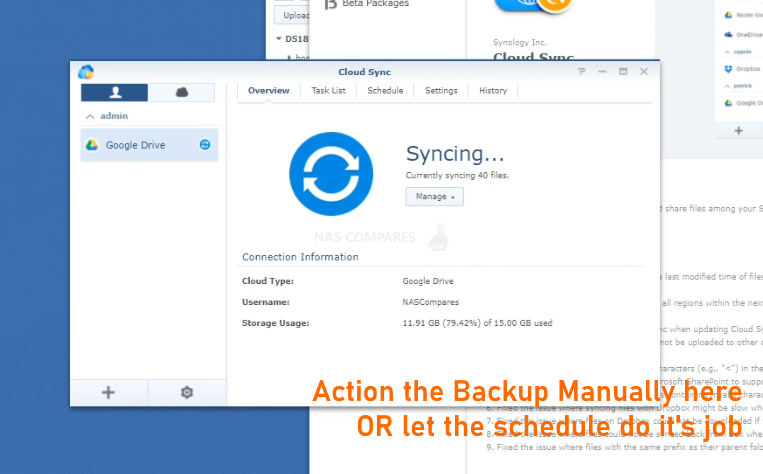
The Syncronization and task list menu looks very similar in both DSM 6.2 and DSM 7.0 (as you can see below) and allows you to action a task manually at any time or on a schedule as needed.
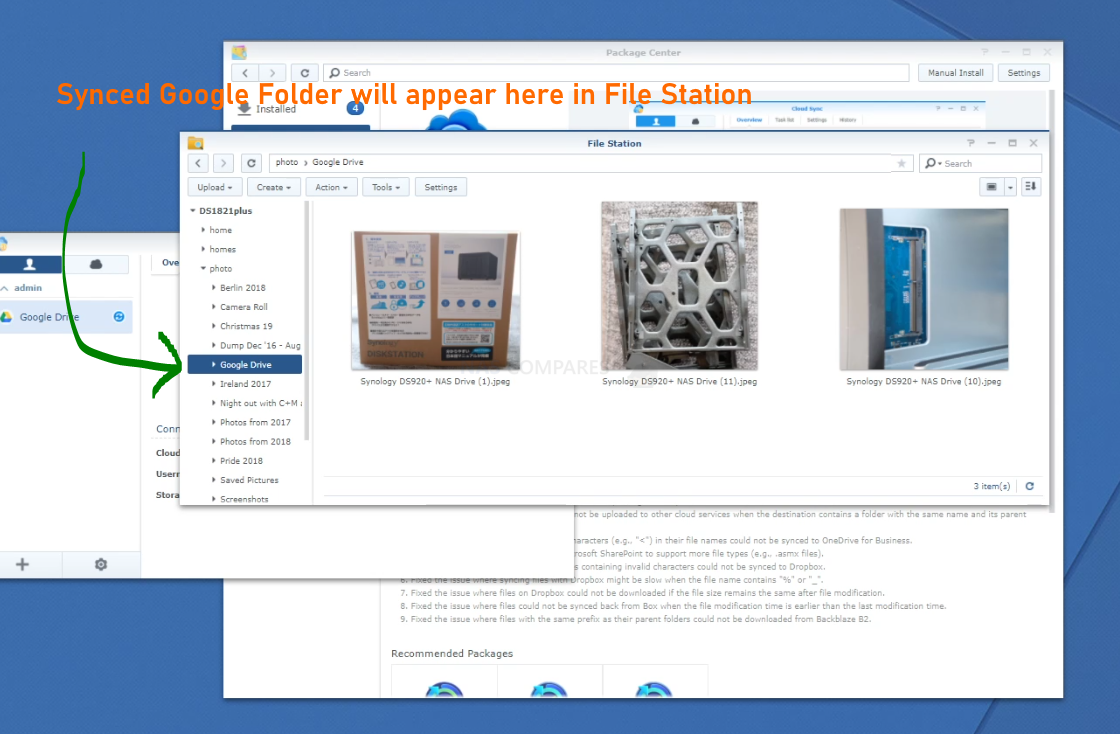
Whatever Local Path you selected for your Google Drive connection in Cloud Sync will appear on the File Station application. You can even arrange for the Google Drive Sync to send the contents directly to the Photos, Music, Video folders where appropriate on the Synology NAS and then the system will automatically index them as they arrive.
So, just as before, the Synology Moments default folder is Home and/or Drive (depending on how you setup).
And if you Selected the Photos folder as your default path, the contents of the Google Drive folder you synced will appear in Photo Station like this:

And there you go. Two easy and quick ways to transfer your data from Google Photos and Google Drive to your Synology NAS. Google Takeout is the longer but more precise of the two – but the Cloud Sync option is much easier and automated. So, next question. Why Should you choose a Synology NAS?
Why Choose Synology NAS after Google Photos?
![]()
Easily one of the most popular brands in the world for home and small business uses, Synology provides numerous NAS solutions. With their smallest one-bay solution arriving at around £100 without a hard drive, they are a brand that market very heavily on the ease and utility of their software more than anything else. With a gorgeous software GUI that can be accessed via your web browser, several mobile applications for photo and general backup and file management, and several desktop utilities that allow you to share your photos easily, Synology is a very attractive brand for those making the move away from the Google cloud services and Google Photos. Popular Synology NAS drives for photography backups are:
| Cheap/Small NAS |
Solid Value NAS
|
Photographer NAS | Photo Business NAS |
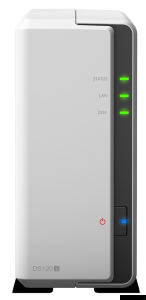
Synology DS120J – $99 |
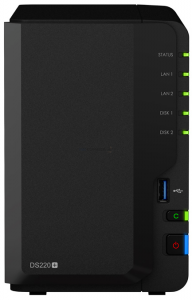
Synology DS220+ – $299 |
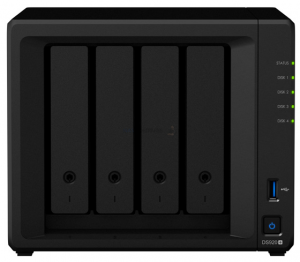
Synology DS920+ – £599 |
Synology DS1621+ – $799 |
|
|
|
|

Synology NAS Advantages
- Easily the most user-friendly NAS brand
- Excellent software focus
- Good range of intuitive applications included with the device
Synology NAS Disadvantages
- Slightly more expensive than most other brands
- Configuration options are a little more hidden in an effort to maintain simplicity
Thanks for reading and I hope you found this article helpful. If you still need more help on the right NAS solution for you whether it is to move from Google Photos/Cloud, or just a server for your home or business, use the completely free advice section below. It’s run by just me and a little help and is done with unbiased advice and without profit in mind. I might not be the quickest to reply, but I respond to every one! Please donate to the site if you found this guide helpful and want to help me to help others. Have a great 2021!
📧 SUBSCRIBE TO OUR NEWSLETTER 🔔
🔒 Join Inner Circle
Get an alert every time something gets added to this specific article!
This description contains links to Amazon. These links will take you to some of the products mentioned in today's content. As an Amazon Associate, I earn from qualifying purchases. Visit the NASCompares Deal Finder to find the best place to buy this device in your region, based on Service, Support and Reputation - Just Search for your NAS Drive in the Box Below
Need Advice on Data Storage from an Expert?
Finally, for free advice about your setup, just leave a message in the comments below here at NASCompares.com and we will get back to you. Need Help?
Where possible (and where appropriate) please provide as much information about your requirements, as then I can arrange the best answer and solution to your needs. Do not worry about your e-mail address being required, it will NOT be used in a mailing list and will NOT be used in any way other than to respond to your enquiry.
Need Help?
Where possible (and where appropriate) please provide as much information about your requirements, as then I can arrange the best answer and solution to your needs. Do not worry about your e-mail address being required, it will NOT be used in a mailing list and will NOT be used in any way other than to respond to your enquiry.


|
 |


Beelink ME Pro NAS Revealed
Best SOLID STORAGE NAS of 2025
Should You Worry About the NanoKVM Hidden Microphone?
Best Cheap NAS of 2025
Minisforum MS-02 Ultra - WHO IS THIS FOR??? (The First 48HRs)
Why People Use TrueNAS, UnRAID and Proxmox to Turnkey NAS (Synology, QNAP, etc)
Access content via Patreon or KO-FI

Discover more from NAS Compares
Subscribe to get the latest posts sent to your email.
Can you update this for u green?
REPLY ON YOUTUBE
Can I do the same operation on the beestation plus?
REPLY ON YOUTUBE
Is the location and photo information lost in the transfer? Do live photos also transfer? I’ve heard that with other types of transfers, this information does not transfer.
REPLY ON YOUTUBE
You dont need to merge the metadata of the pics before transferring them to the nas?
REPLY ON YOUTUBE
Is there a tool to clean up the junk folders and organize it in a more coherent fashion?
REPLY ON YOUTUBE
google take out is dumb – using a cloud sync direct to Google photos is what I was expecting. Truenas does this nicely – but it is a PITA. Google take out is is really stupid on how it is organized. you can have duplicates. you could be downloading 300GB++ where you have 3 duplicates or more. Shame on Google – they do this on purpose to give up… what a mess google photos is…. Once you get your stuff out of the labyrinth of a mess — congrats!
REPLY ON YOUTUBE
Is there a Cloud Sync option for iCloud Photos?
REPLY ON YOUTUBE
Just got gphotos-sync to work in a docker container. It’s much faster than cloud sync which doesn’t even support photos.
REPLY ON YOUTUBE
hmm. My photos from Google Photos didn’t download using Cloud Sync. They are taking up 3/4 of my 200GB but the Cloud Sync only downloaded all other files. Nothing from Google Photos.
REPLY ON YOUTUBE
the elephant in the room is its so slow to load its unusable
REPLY ON YOUTUBE
@nascompares ok I need one more improve 😉 How to do this job without third party PC. How to use something like wget to directly download takeout package to nas ?
REPLY ON YOUTUBE
– I also want to know how to merge the metadata with the photos. I also have a Flickr account I need to do this on, Please advise.
REPLY ON YOUTUBE
Love this and thanks
REPLY ON YOUTUBE
Please update the title of your video..Google Photos and Google Drive are separate things…
REPLY ON YOUTUBE
Perhaps I’m missing something here. 3 mins in you explain that photos backed up to Google Photos don’t reside in Google Drive, then you seem to suggest that using Cloud Sync is an alternative method to backup photos from Google Photos. Clearly the Test album from Google Photos was not accessible via Cloud Sync, so I think you needed to be clearer that Google Photos would not be able to be backed up via Cloud Sync.
REPLY ON YOUTUBE
6:40 there’s nothing caveman about a NAS man ????
REPLY ON YOUTUBE
This means that you can’t move your photos from Google Photos using the Cloud Sync. Why it is impossible?
I think that Cloud Sync lacks few important features like possibility to move files instead of copying them and some conditionals like possibility to move files which are older then 1 month for example. Why it is so primitive? Any alternative for Cloud Sync? Anyone tried MultCloud for this, although I would prefer native Synology app to third party service getting access to my NAS.
REPLY ON YOUTUBE
I have 1 TB photos and videos on Google Photos. Im Downloading them all in 10 GB .zip files atm. Extract them on my PC and then move them to my Synology NAS. Atm at Folder in my space at the NAS. Looks like this now:
takeout-20220502T131942Z-001
takeout-20220502T131942Z-002
takeout-20220502T131942Z-003
takeout-20220502T131942Z-004
…
takeout-20220502T131942Z-084
Can I now just move all those folders to the /homes/My name/Photos/ folder and Synology Photos does the work? Or should I break those folder structure first in one big folder? I’m a little worried that my albums are getting break apart when I just move it like this.
Any help is highly appreciated.
REPLY ON YOUTUBE
Hi, do you have a link to the video on how to do this on DSM7? Thanks
REPLY ON YOUTUBE
Can I do similar on a dRobo 5N?
I tried Drobo Access but it’s pretty shite, really. Cumbersome and ugly and those with whom I attempt to share a photo or video, are scared to follow my shared links because a security warning pops up at their end on their Samsung or iPhone.
REPLY ON YOUTUBE
Ah! So that’s how we say it: “PHO-Os”
REPLY ON YOUTUBE
This is outdated … synology photos is the best
REPLY ON YOUTUBE
hi there, i just set a cloud sync on my ds720+ but my images wont fetch.. any idea ?
REPLY ON YOUTUBE
Great video. Thanks for taking time the time to share this information.
REPLY ON YOUTUBE
Good stuff, mate.
Cheers.
REPLY ON YOUTUBE
@NASCompares as a viewer, I appreciate all your efforts on the videos you’ve produced. However, THEY ARE ALL TOO LONG. They need to be more concise to be more powerful. I hope this feedback can light up a re-strategy. Thanks!
REPLY ON YOUTUBE
What if I just want to backup the photos to the NAS?
REPLY ON YOUTUBE
Yep – really good stuff mate – just coming back to my yearly grab of stuff in google for the NAS – perfect mate. nice. Gavin in NZ
REPLY ON YOUTUBE
What will happen if you uninstall moments? Would you loose the structure of your photos/videos?
REPLY ON YOUTUBE
I recently got a new NAS and using DSM 7. It would seem with the new Synology Photo that Moments have been merged into the photo software combined.
REPLY ON YOUTUBE
I’ve recently added an external hard drive to my synology nas. Is there a way to point photo station to save albums on the external drive? There doesn’t seem to be a way to create a new directory path to the external drive for storing albums. Thank you
REPLY ON YOUTUBE
Why photo station instead of moments? Any advantages of Photo station over moments? feature wise synology moments looks closer to google photos.
REPLY ON YOUTUBE
hi, can Synology photo station or moments automatically search and list all photos stored on the nas drive
REPLY ON YOUTUBE
Love the concept of cloud sync to download files to the nas. My photos are in google photos and not google drive. Can’t work out how to copy them to drive to use cloud sync. Takeout splits the files so I can’t use that.
REPLY ON YOUTUBE
Thanks for info. Will full size images be downloaded to NAS? Ref that g Photo annoused lover res on g Photo
REPLY ON YOUTUBE
One very important thing to take note of is that Google Photos does not remove the metadata from the files. The files you downloaded have exactly the same data that was there when uploaded.
I watched the last part of the video. What you did not cover is once I upload the photos to google drive how are these photos accessed/incorporated into the Google photos app with my other photos. Do I need to rename said photo folder on Google drive in order to perform this process, etc.?
REPLY ON YOUTUBE
Sorry I spoke to soon. I see the second part of this video does show cloud sync. My BAD!
REPLY ON YOUTUBE
I actually need to know how to setup and use Synology Cloud sync. So I can upload the photos I have on my Synology NAS to Google photos and then Sync any new photos I upload to Google Photos back to Synology automatically. I found that accessing My synology from the internet is just to slow and just does not feel seamless. But I love Google photos. My brother convinced me just to pay for the extra storage on Google photos and I will have my photos backed up in 3 places. Google photos, My Synology Main NAS and then on my Backup Synology NAS. I hate, hate, HATE!! Synology Moments. Every time I turn around Synology want to index the photos which takes DAYS. Also, when the photos are not indexed, etc. It appears in Synology Moments like I have lost a bunch of photos. And that worries me. Did I loose said photos or is the drive not indexed properly. ALL AROUND A BAD IMPLEMENDATION. I decided just to use the app on my iPad call FileBrowser Pro and just access my Synollogy like you would any HDD by files and folders. At least this works.
REPLY ON YOUTUBE
Does it reat the metadata of the photos you import properly?
REPLY ON YOUTUBE
Got a Synology NAS since Google Photos is no longer an option. Loving it so far and getting the old photos from Google Photos this way is just amazing!
Thanks fort the guide!
REPLY ON YOUTUBE
If I can tell my experience, with google takeout it was a disaster, the photos lose their date and are not displayed in the correct order from moments. I solved by looking in a forum, you have to create an album with the photos of each year and then download all the albums one at a time. zip files will contain photos and videos with correct creation date.