

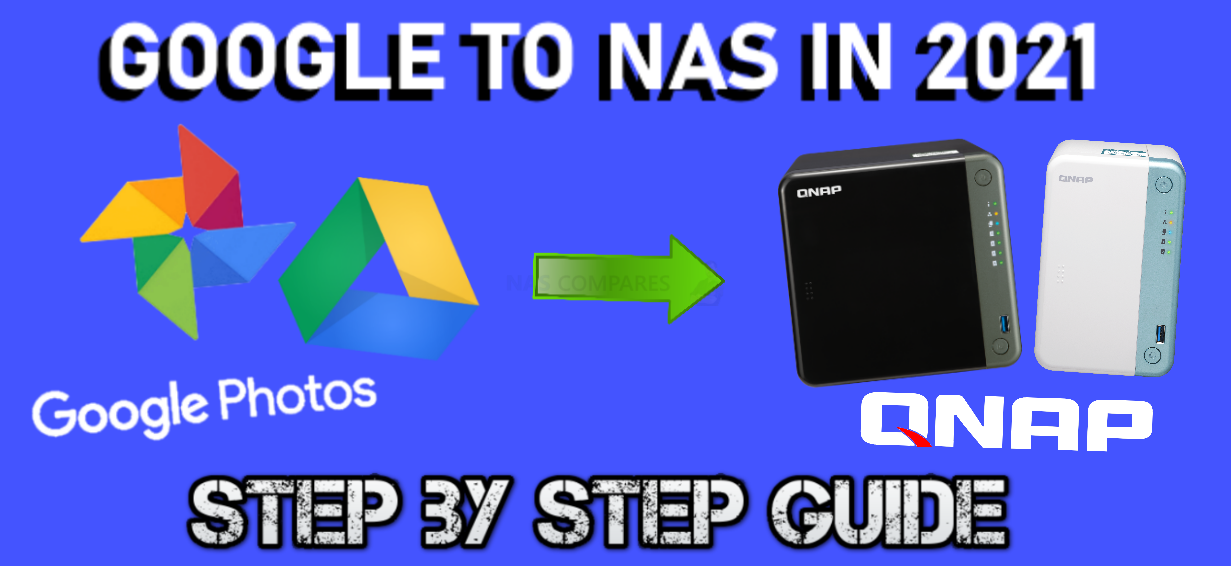
A Guide to Moving your Photos and Drive Data to QNAP NAS
Today I want to show you guys how to make the switch from your Google Photos and/or Google Drive account and onto a QNAP NAS. Whether you are looking into migrating your data from the cloud to a private server because of safety, cost or the recent announcement by Google to stop unlimited photo backups in June 2021, there are lots of good reasons to make the jump. Additionally, there are several different ways to move data over from Google to QNAP NAS available. Today I want to talk about two of the most reliable ways to do it, namely using Google Takeout and QNAP Hybrid Backup Sync. Both have their advantages and disadvantages, but below is a guide to walk you through both methods on a QNAP NAS and both methods will cover Google Photos and Google Drive, to migrate your data over manually or automatically.
Video Guide Below (if you prefer)
What Photo Apps are Available on QNAP NAS?
There are TWO main QNAP applications for photography, namely QNAP Photo Station and QNAP QuMagie, however, there is also a wide range of cloud-NAS migration/sync tools too (in the form of HBS 3, HybridMount and more) which I will also touch on later, but for now, we should take a look at the photo apps on offer for photo storage on QNAP NAS when moving away from Google Photos and Google Drive.
QNAP Photo Station
The first and original photo management application from QNAP, Photo Station has evolved massively since it was first revealed and is now one of the most adaptable photo programs on any NAS platform. Allowing a larger degree of internal file folder access that is not available from other brands to the same degree, the Photo Station application manages to provide a huge amount of access and fluidity, while still being hugely customizable to boot. Additionally, there are numerous share and privacy options on this photo application that other NAS brands have only just recently implemented, that QNAP has had since the beginning.
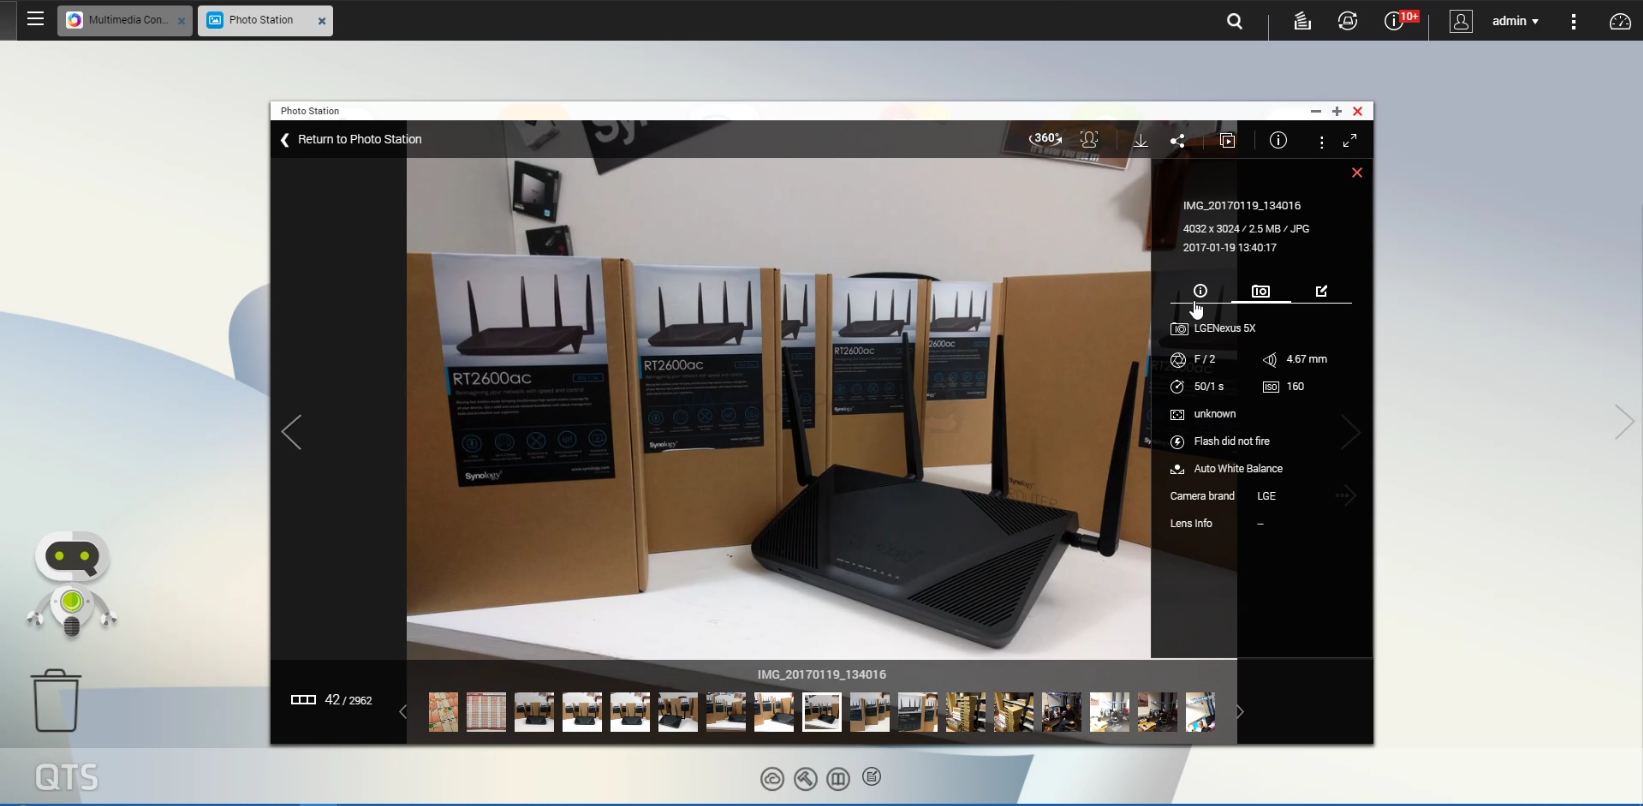
Finally, there is the integration of Photo Station with the client applications for iOS and Android Photo Backup that allows a lot of the backup of your photos to happen in the background without you knowing. In recent years it has been overshadowed a little by their QuMagie application that I will talk about in a moment, but never the less it is still a sound photo tool and massively useful for those long-term backups when moving away from Google Photos and Google drive towards something a little more ‘in-house’.
QNAP QuMagie
The QNAP QuMagie application, originally released almost 2 years ago is their powerful AI-supported photo recognition application that not only supports the majority of the settings of Photo Station but also has a huge degree of categorisation/search options integrated that allow facial recognition, subject/thing automated recognition and still supporting general file, folder and album browsing. The sub-classifications of photo recognition are hugely impressive too, such as when the QNAP QuMagie application manages to identify different plant and tree varieties (so, not just ‘tree’).

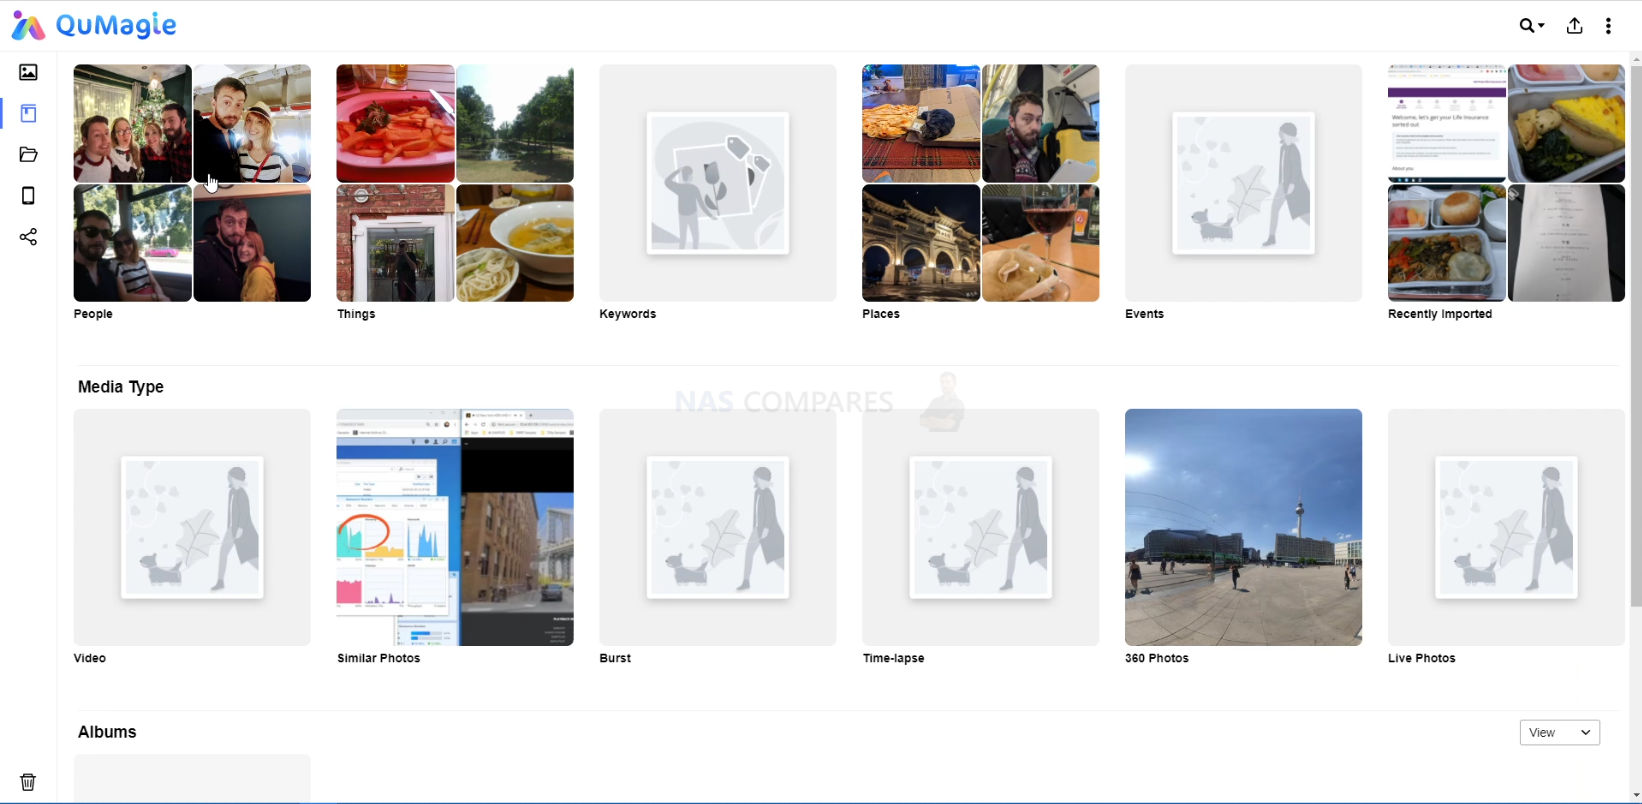

The same can be applied to food and drink, with the QuMagie AI core recognising numerous different cuisine variations. Photo recognition in this manner is not new and something that has already pioneered with Google photos previously, however, Google Photos does this with internet external support. In the case of NAS drives and photo recognition (such as found here in QuMagie), this is all achieved internally and without external hardware resources sharing your data, as found predominantly in cloud drives. So there you go, the tools you can use on your QNAP NAS to enjoy the images that you migrate from your Google Photos into. Let’s talk about the two most popular and straight forward ways to transfer your Google Photos and Google Drive data over to your NAS.
How to Copy Your Google Photos & Drive to QNAP NAS using Google Takeout
For those that are not aware, all the data that you send to google (via app synchronization, backups, cloud shares, emails, everything!) can actually ALL be downloaded if you want. You just need to head over to Google Takeout and from there you can download your data (from each app, or all) and then you can move that data to your NAS ecosystem as needed. Below is how you would use Google Takeout to move your Google Photos and Google Drive data over to a NAS. Let start!
First thing to do, is to head over to Google Takeout. Google Takeout can be found HERE – https://takeout.google.com
Once you have logged into your Google Account, you will be presented with this screen:

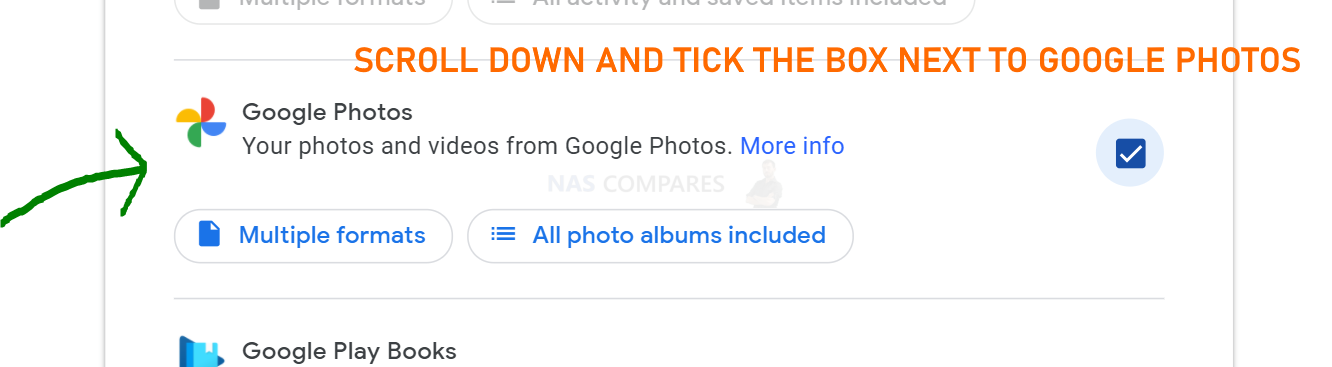
This is the full list of applications and services that Google has and you can select them which ones you want to download/migrate. So, for Google Photos, scroll down and tick the box new to ‘Google Photos‘:
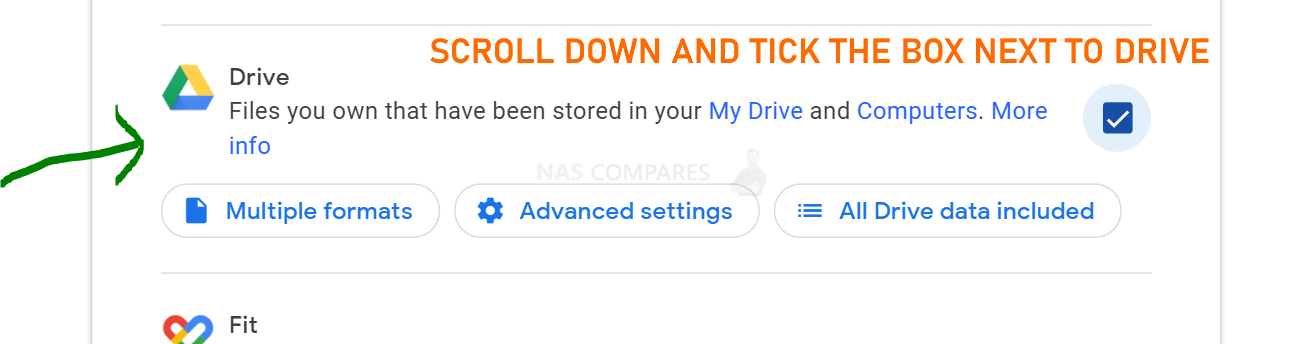
You can also/alternatively download your Google Drive data here too, just tick the box next to ‘Drive‘.
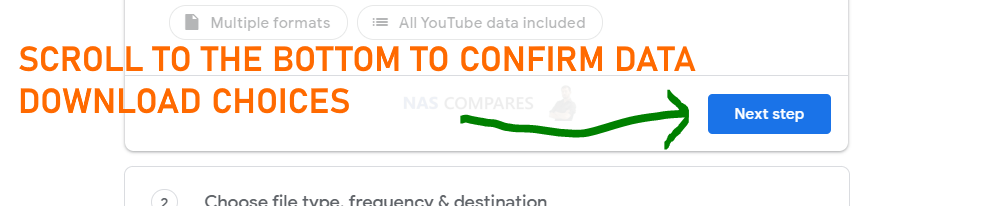
Once you have selected which data to download (in this case, you photo and/or Drive data), scroll to the bottom and click Next Step.
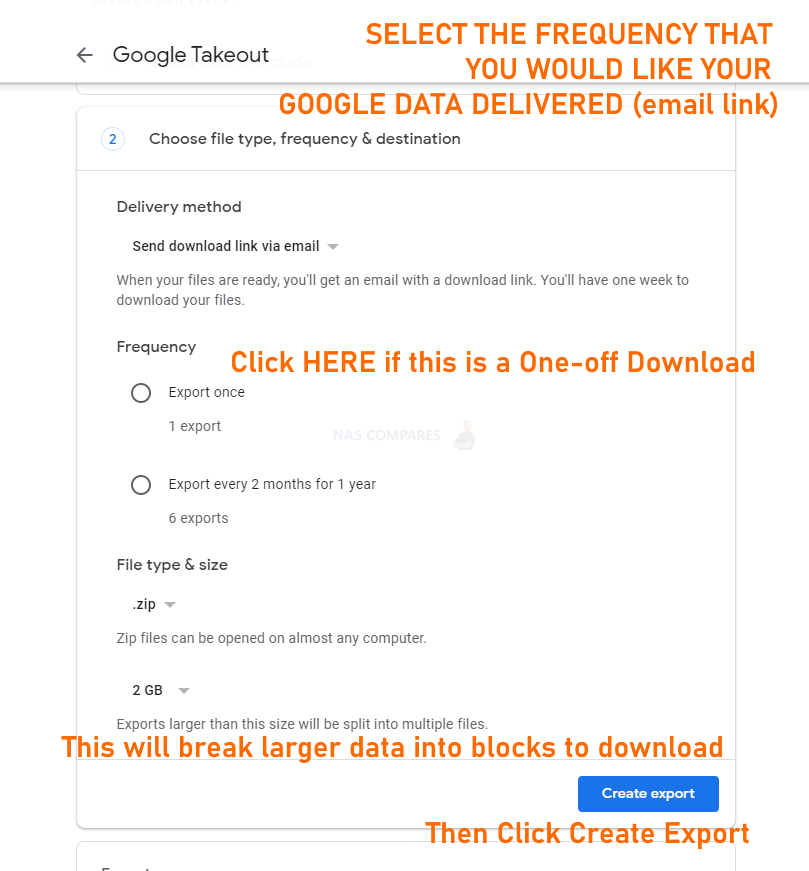
After clicking to proceed, it will then ask you to verify if this is just a 1-off download or if you want to regularly download your google data (with links sent via email). Additionally, it will ask you if you want to break the download into smaller blocks (2GB by default) as some file systems have difficulty with larger files (eg FAT32). I recommend 2GB blocks to be safe. When ready, click ‘Create Export’.
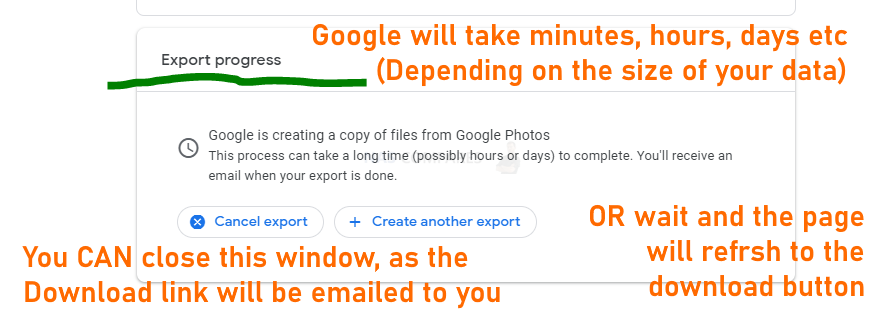
Once you click Create Export, Google will then prepare your download. Depending on the size of your photo/drive data, this can take minutes, hours or even days. You do not need to keep this window open the whole time, as Google will email you with a link to when it is done to download everything.
Once Google has finished preparing your download, you will be given the option to download the .zip of all your data. Just click the Download Arrow icon and it will begin.
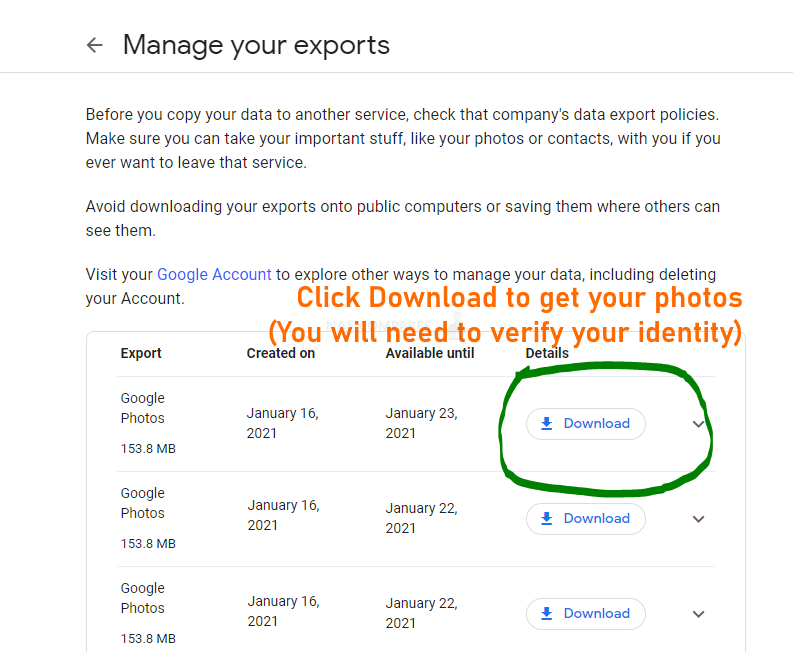
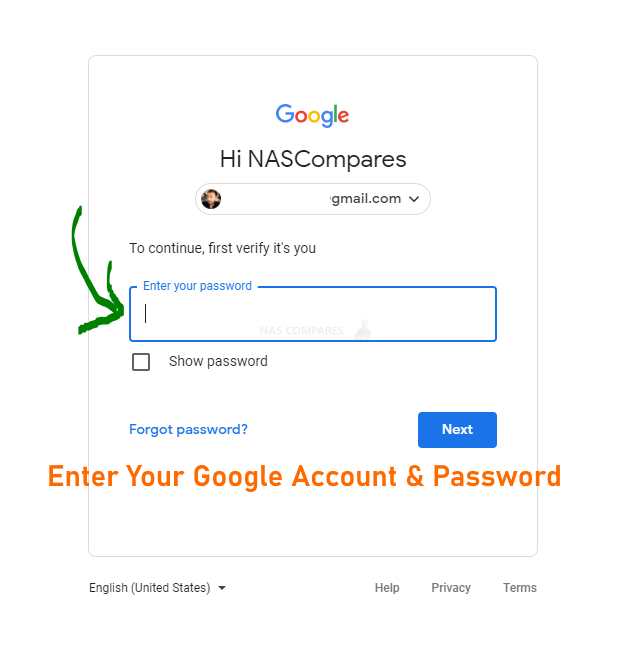
Google might ask you to verify that it is you (as this IS your personal data) before allowing you to download it all – this is perfectly normal.
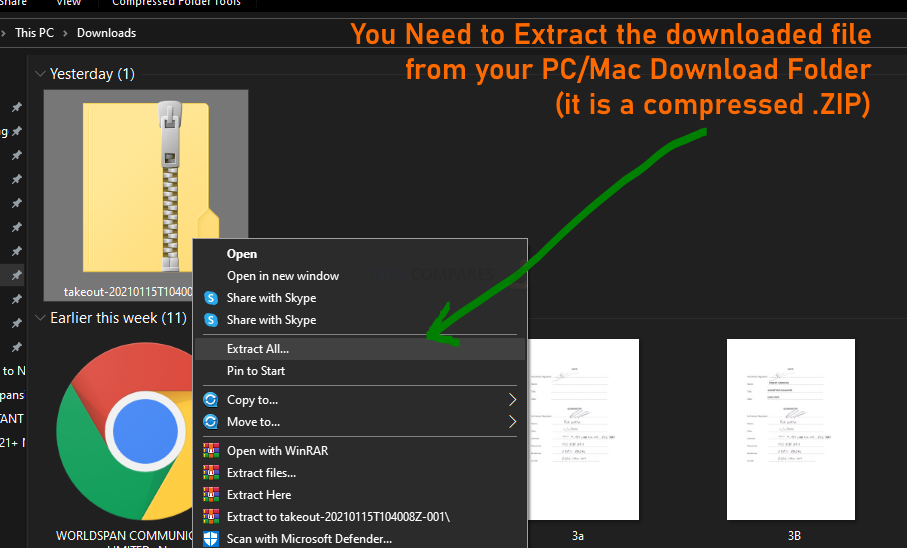
Once you have downloaded the file (eg to your Downloads folder of your PC/Mac/Android/Lunix machine), you will need to extract the .ZIP file (normally by right-clicking and selecting ‘extract’.
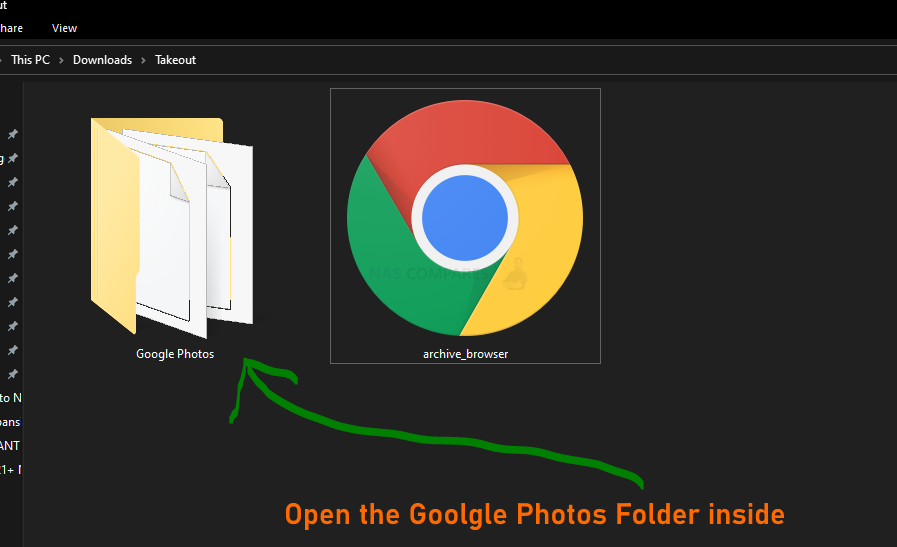
The Folder that is extracted will be called ‘Takeout‘ and contains all of your Photo/Drive data. So, open it up!

Inside this folder will be another folder called ‘Google Photos‘. There may well be other folders, if you selected other Google services to download earlier. We are just focusing on Photos, for now, so head into that folder.
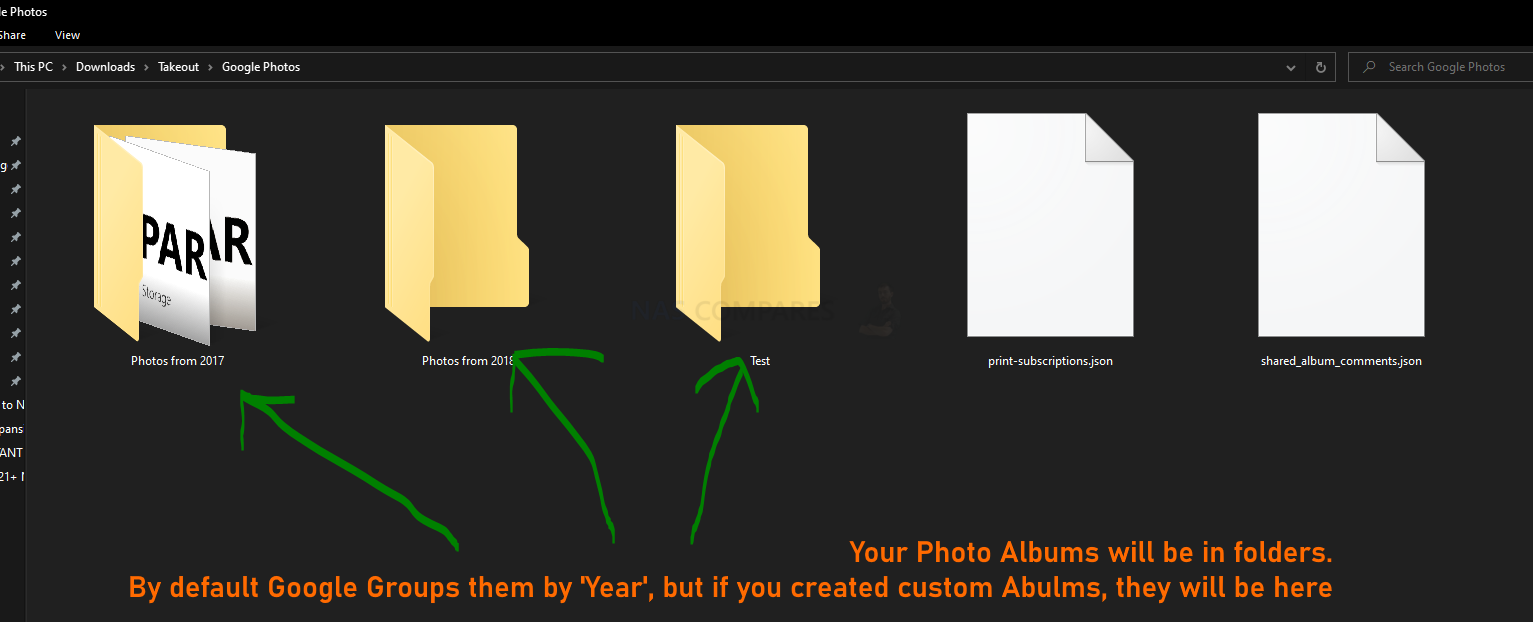
Depending on how you catalogue your Google Photos, inside you will find a folder for each year of photos and or every album you made yourself in the Google Photos application. These are the photos we want to move onto our QNAP NAS.
Next thing is to move them on to the NAS. This can either be done by simply dragging and dropping the Google Photos folders into the QNAP File Station application or you can map the NAS as a mapped network drive and carry it over inside your own File Manager in the OS (learn how to map a network drive HERE).
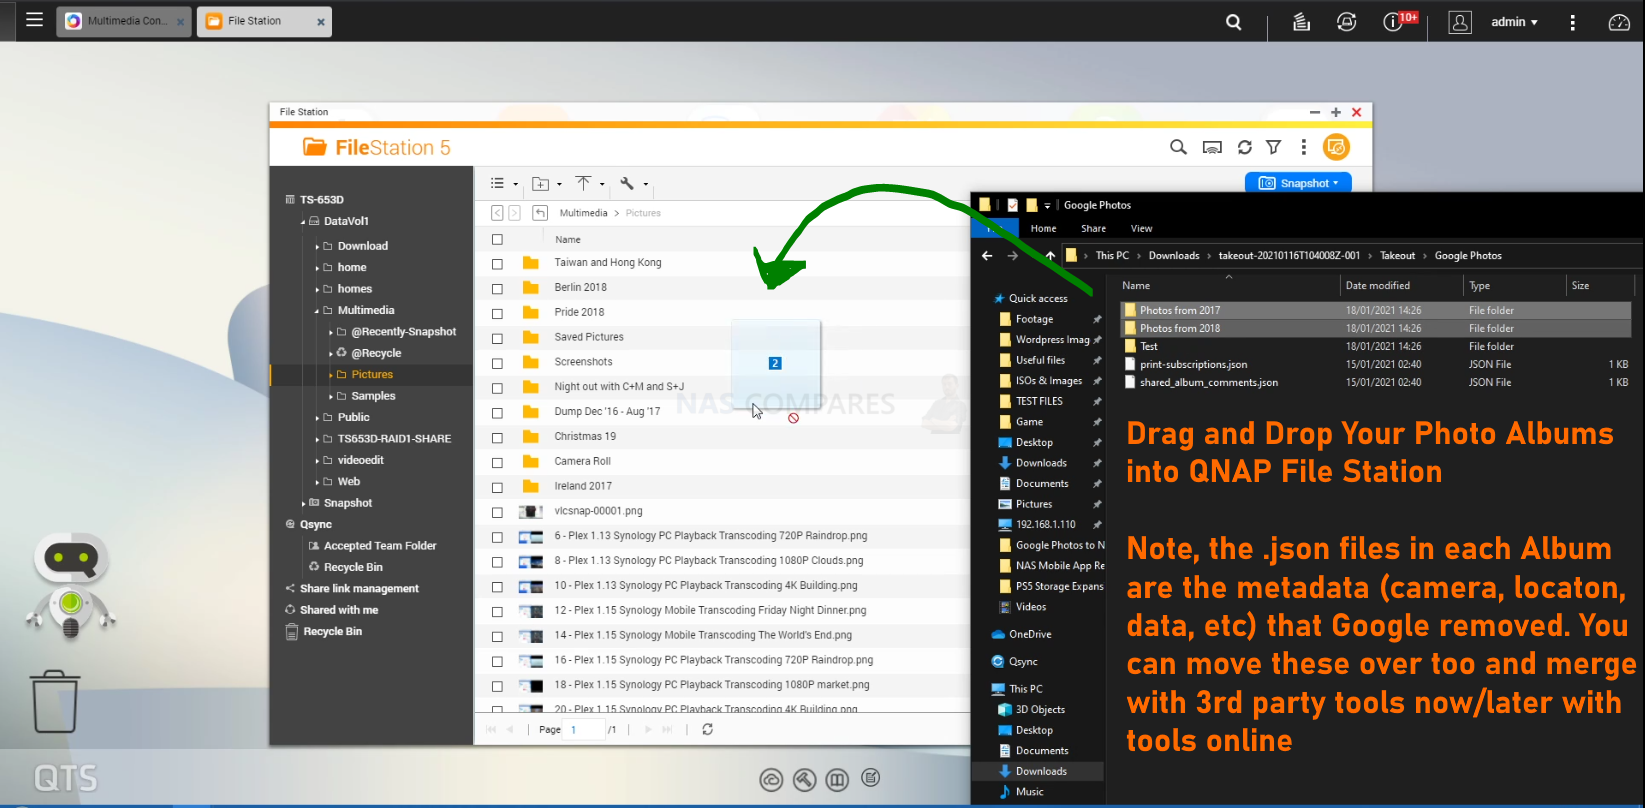
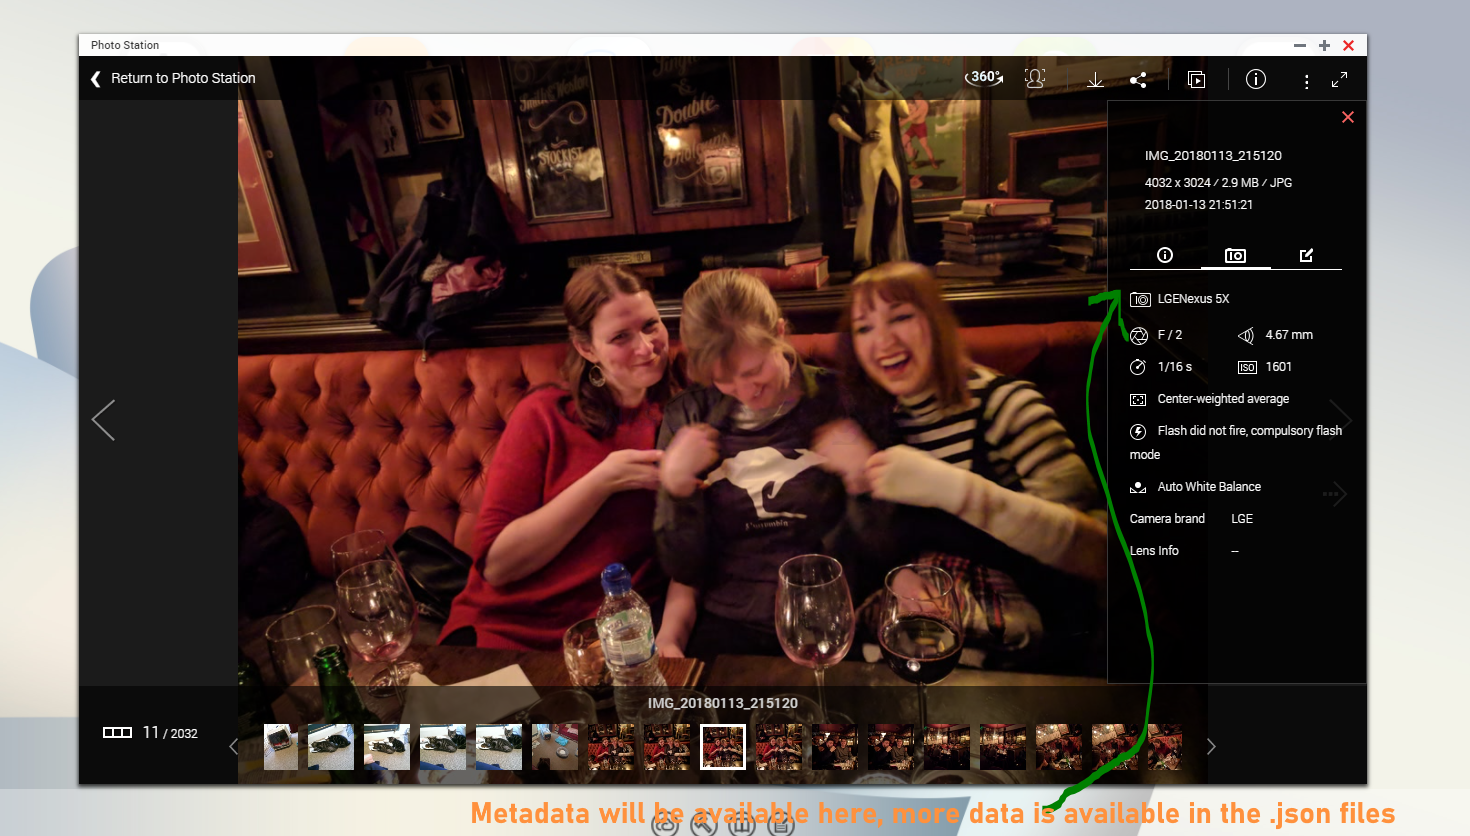
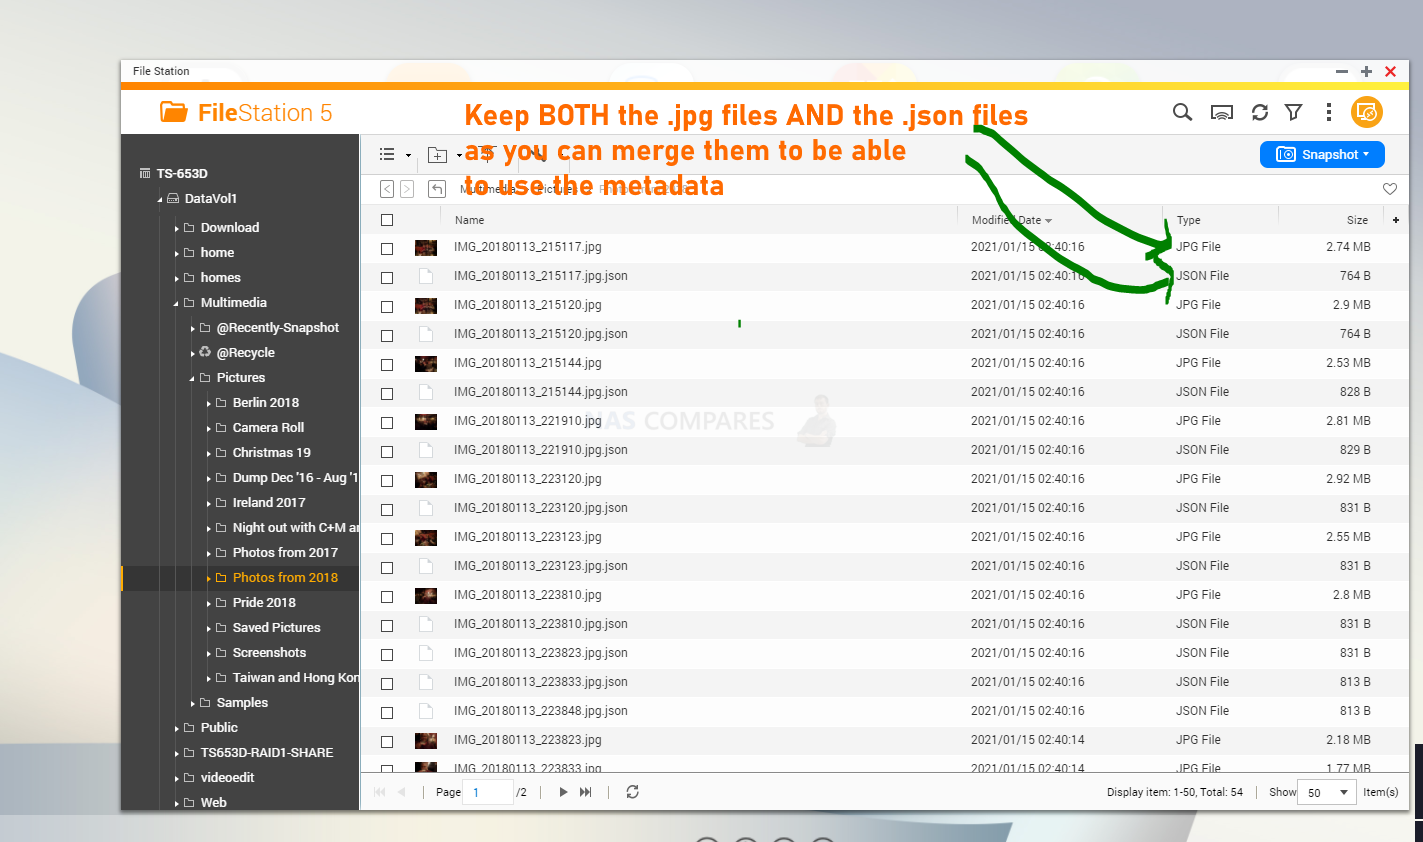
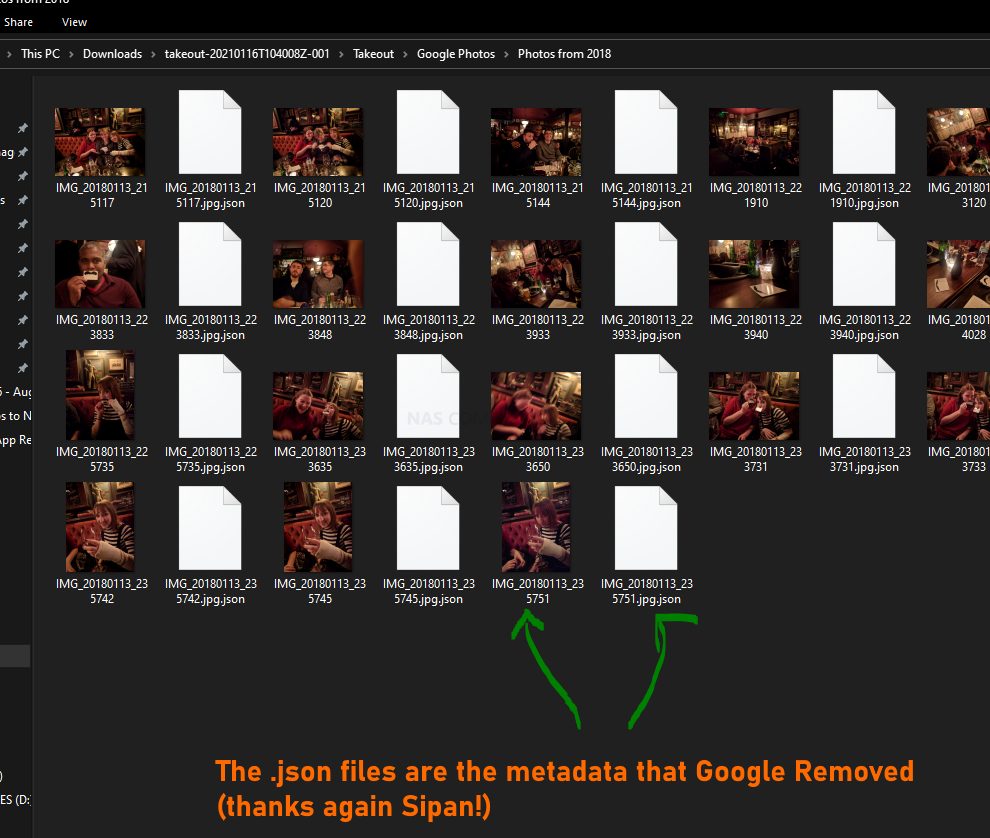
IMPORTANT UPDATE – (thanks to Sipan in the Netherlands for this extra note of caution) Alongside your Photos, you will find a large body of files with the prefix (the format) .json . These files are the metadata (time, geolocation, camera type, etc) from each picture, as Google strips this information from the files (generally hardcoded into the .png, .jpeg, etc) as a separate file (presumably for faster searching online. If you want to carry this data over effectively, you will need to merge the .json files with the photo files. There are several methods listen online (eg using https://exiftool.org/ or some github tools like this https://github.com/mattwilson1024/google-photos-exif) and I will trying a few out and updating this guide at a later date. In the meantime, you should copy the photos AND the .json files TOGETHER as then you have them all in one place for when you merge them.
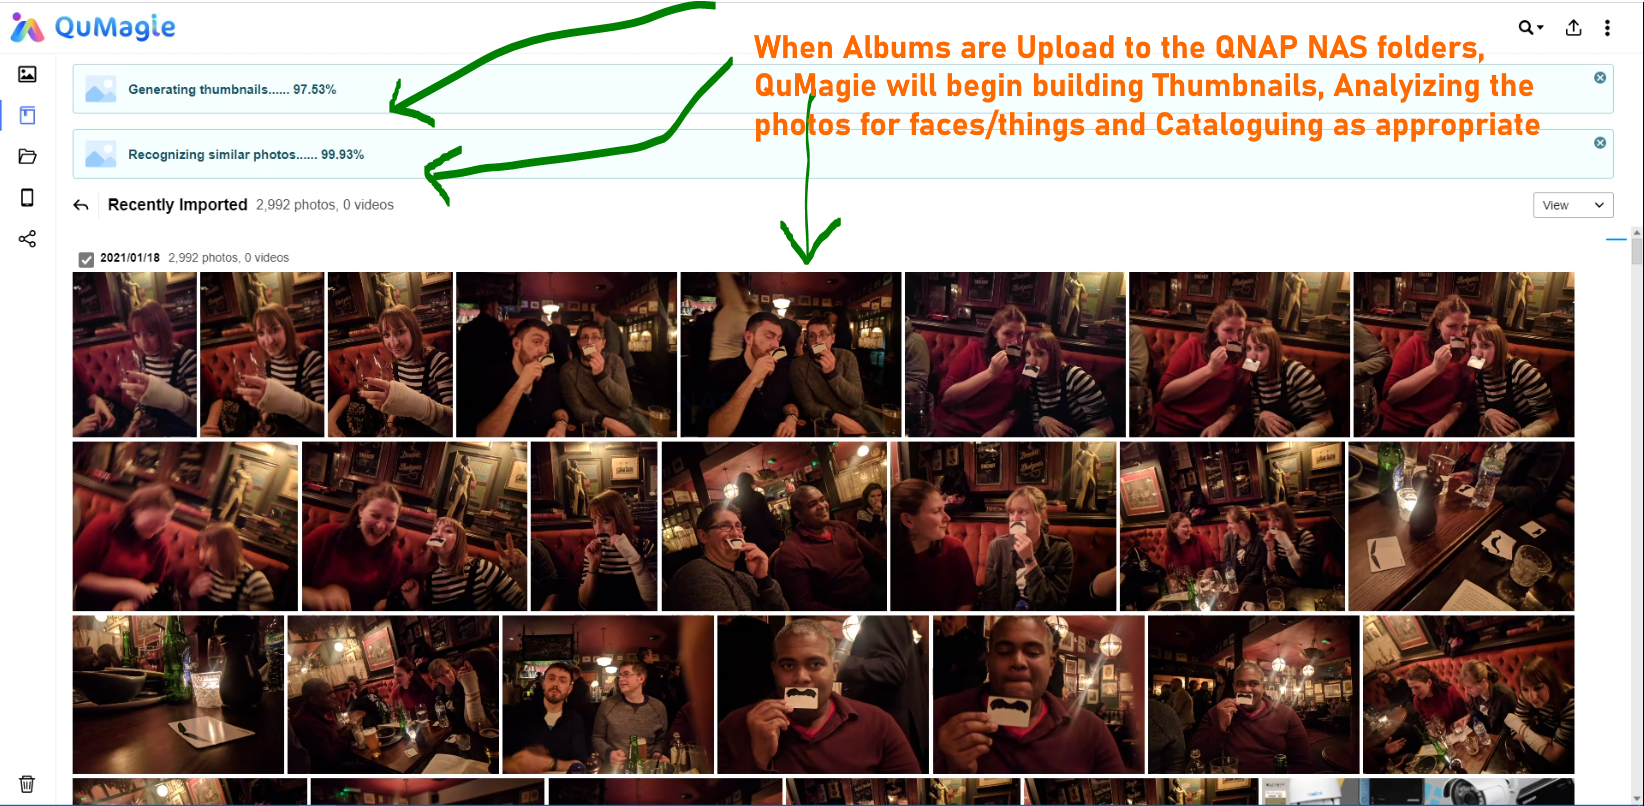
The amount of time it will take to upload the Google Photo and/or Drive data will depend on on the size of the data AND your network connection. But there is an upload status time and status bar at the top right of QNAP QTS.
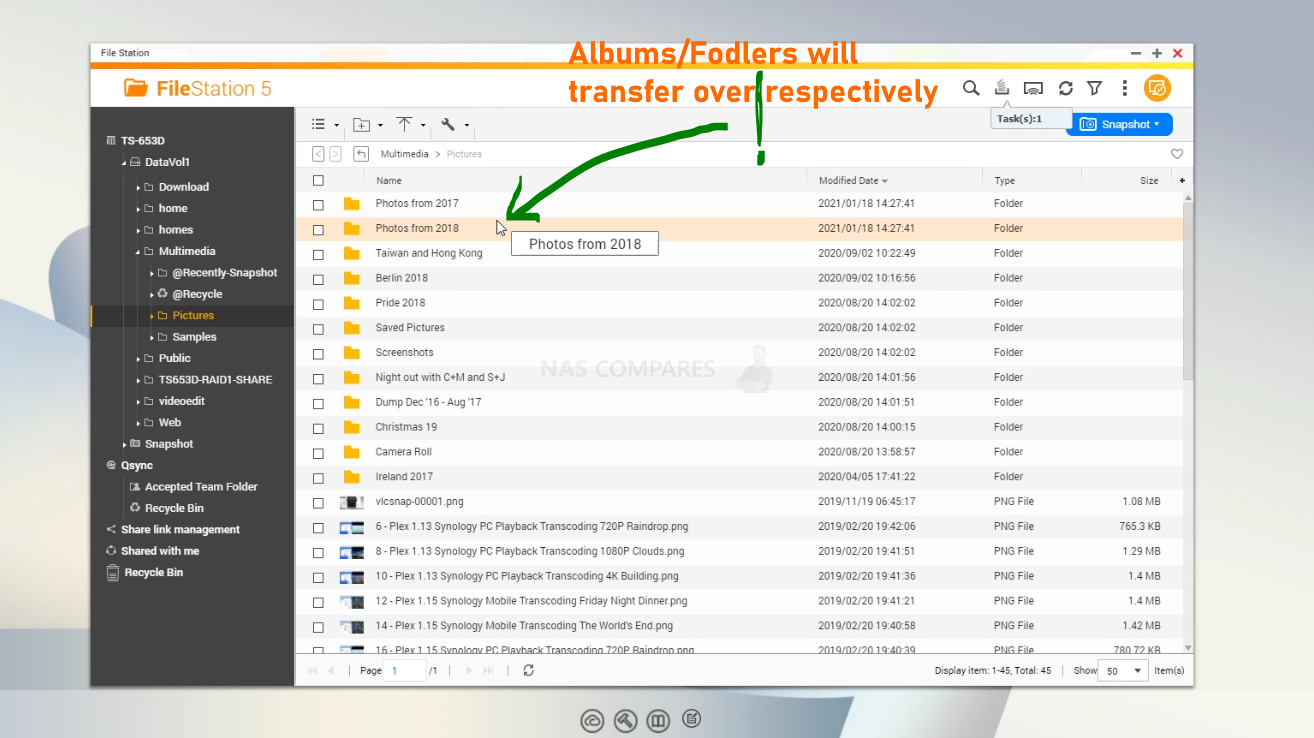
And there you go – you have now used Google Takeout to move your Google Photos and/or Google Drive data to a QNAP NAS. In order for the individual QNAP Photography applications to see and index your Google Photo collection, you will need to make sure that you put the albums into Photo/Photo Gallery folders that are in the QNAP system OR you can put them ANYWHERE you like and then use the Multimedia Console tool to tell the apps where to look
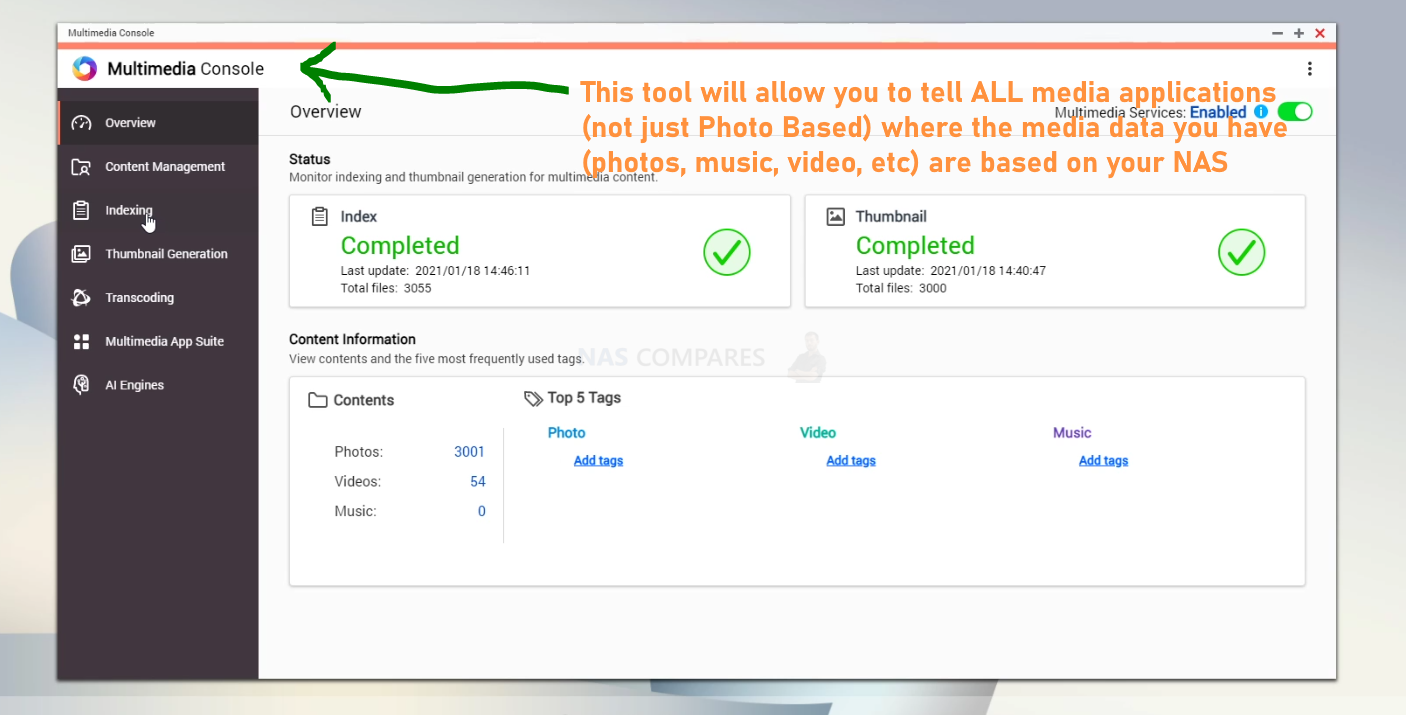
The app is free and available in the App center. Once installed, you can head down to the Content Management tab and select the app you want to configure/customize. Then just select the ‘Edit‘ Button
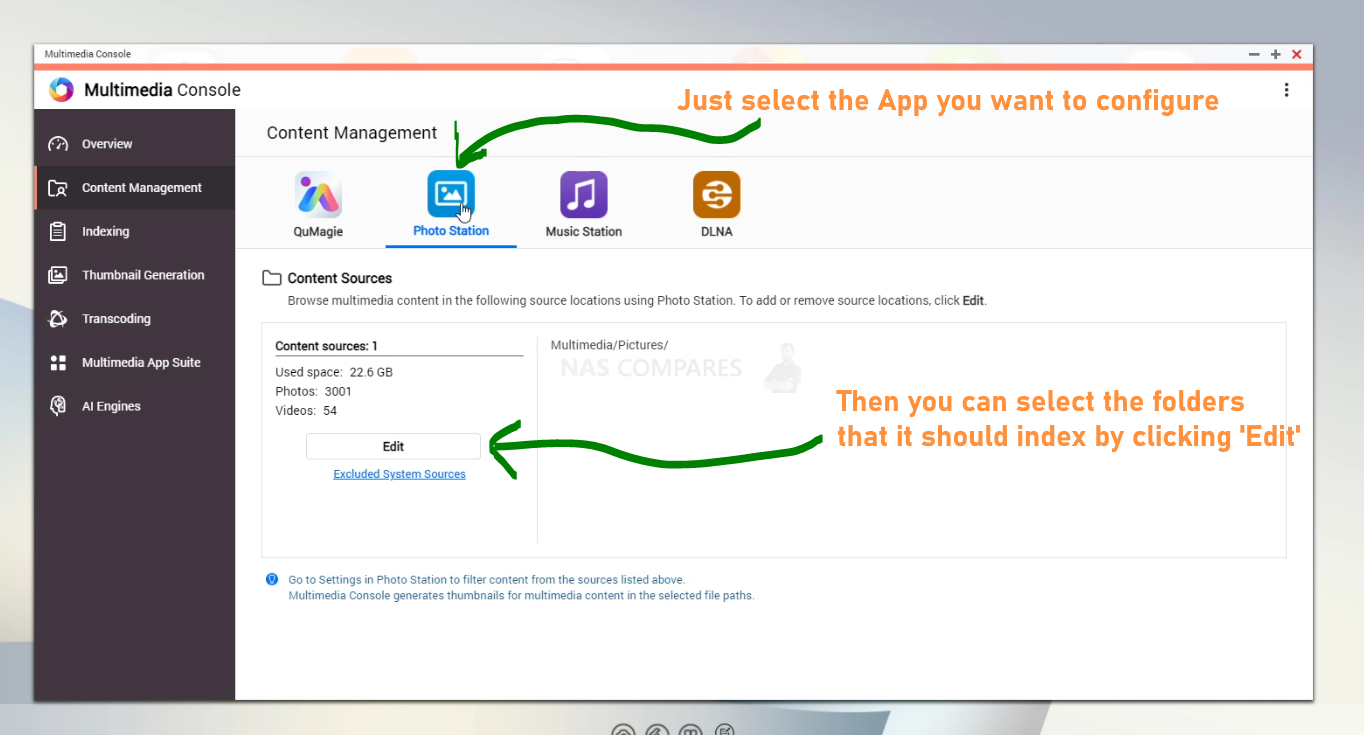
From here you can select each of the folders and sub folders (if appropriate) that you want each of the media tools (Photo Station, QuMagie, Media servers and more) to index and build your collection from (including scraping metadata, thumbnail generation, albums, etc)
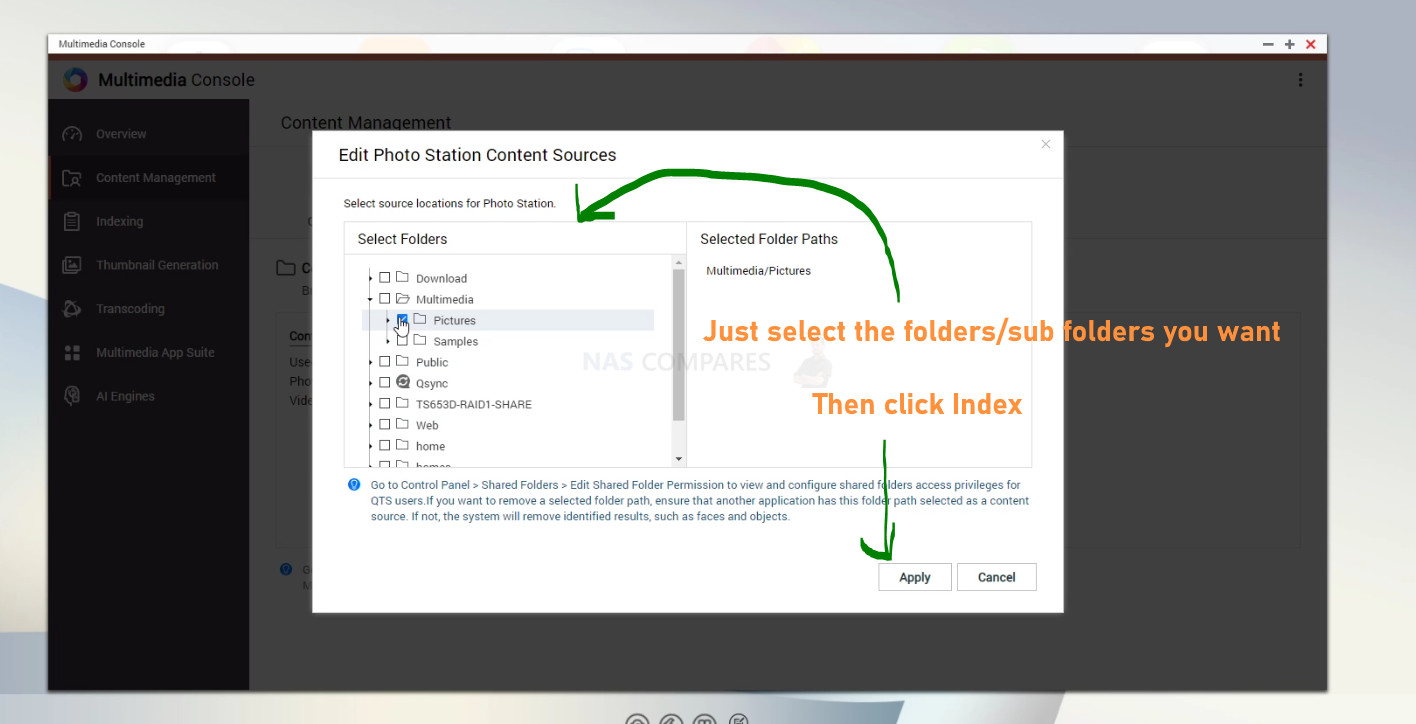
You can also choose to SPECIFICALLY select albums you do NOT want the photo tools to index (eg family albums, personal content or images from video data like covers and art)

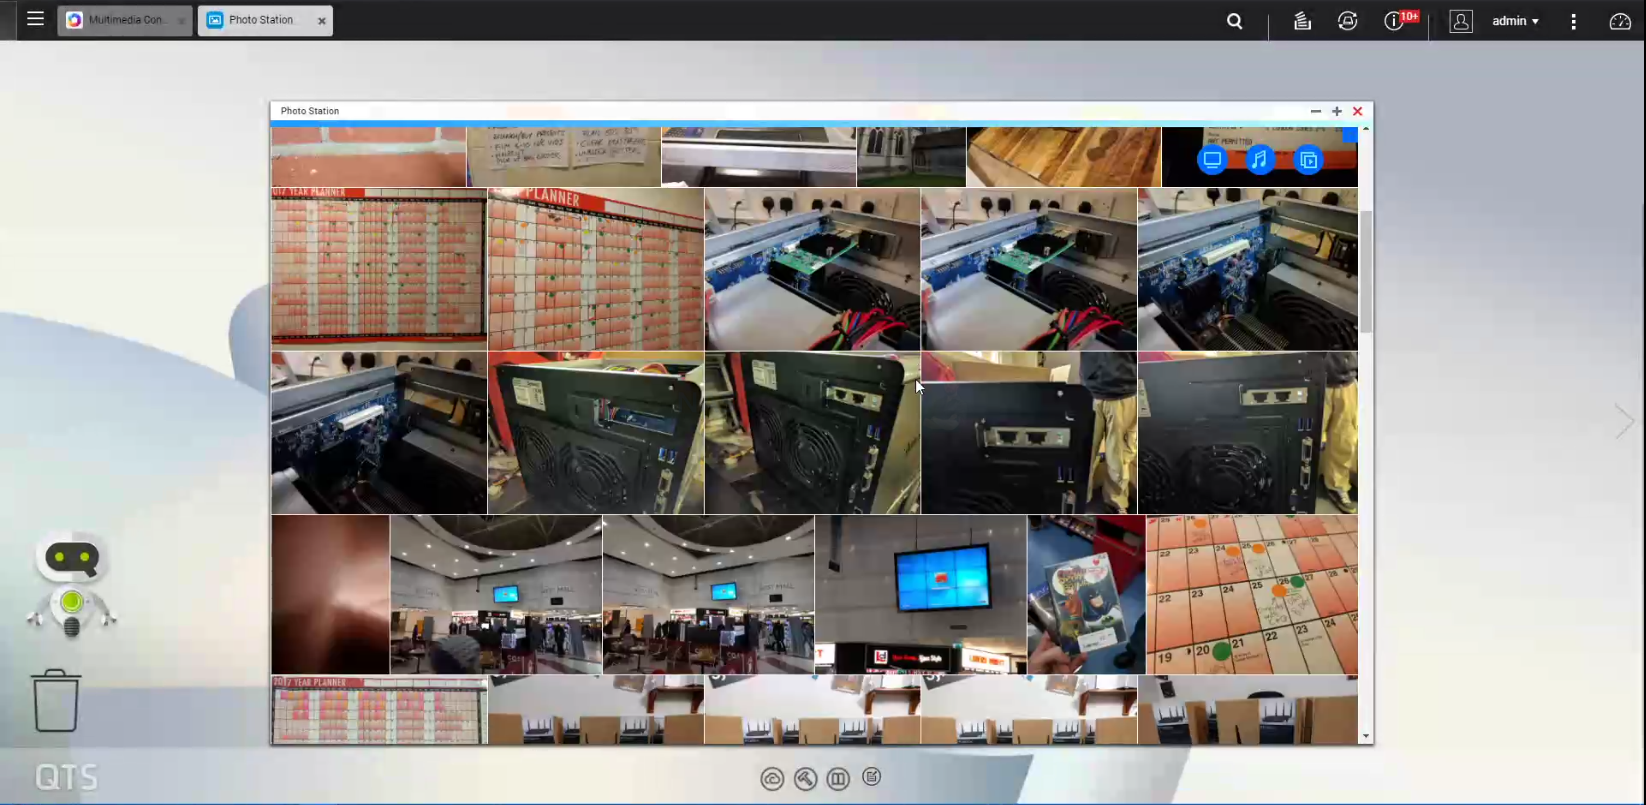
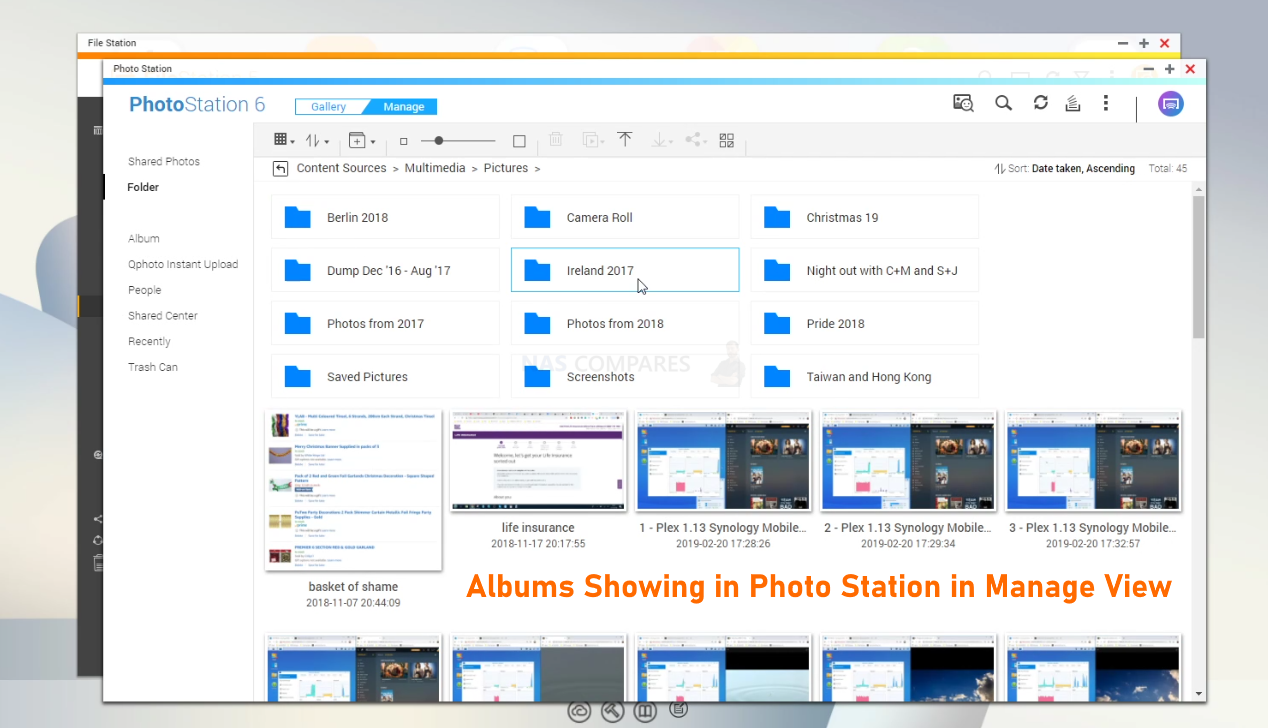
Once the photos albums are in the ‘photo’ directory of your choice and you have used Multimedia Console to point the apps at the folders, then a short while afterwards, the QNAP will begin to index and build the database. It will not take long before the albums show in the Photo Station applications (as you see below):
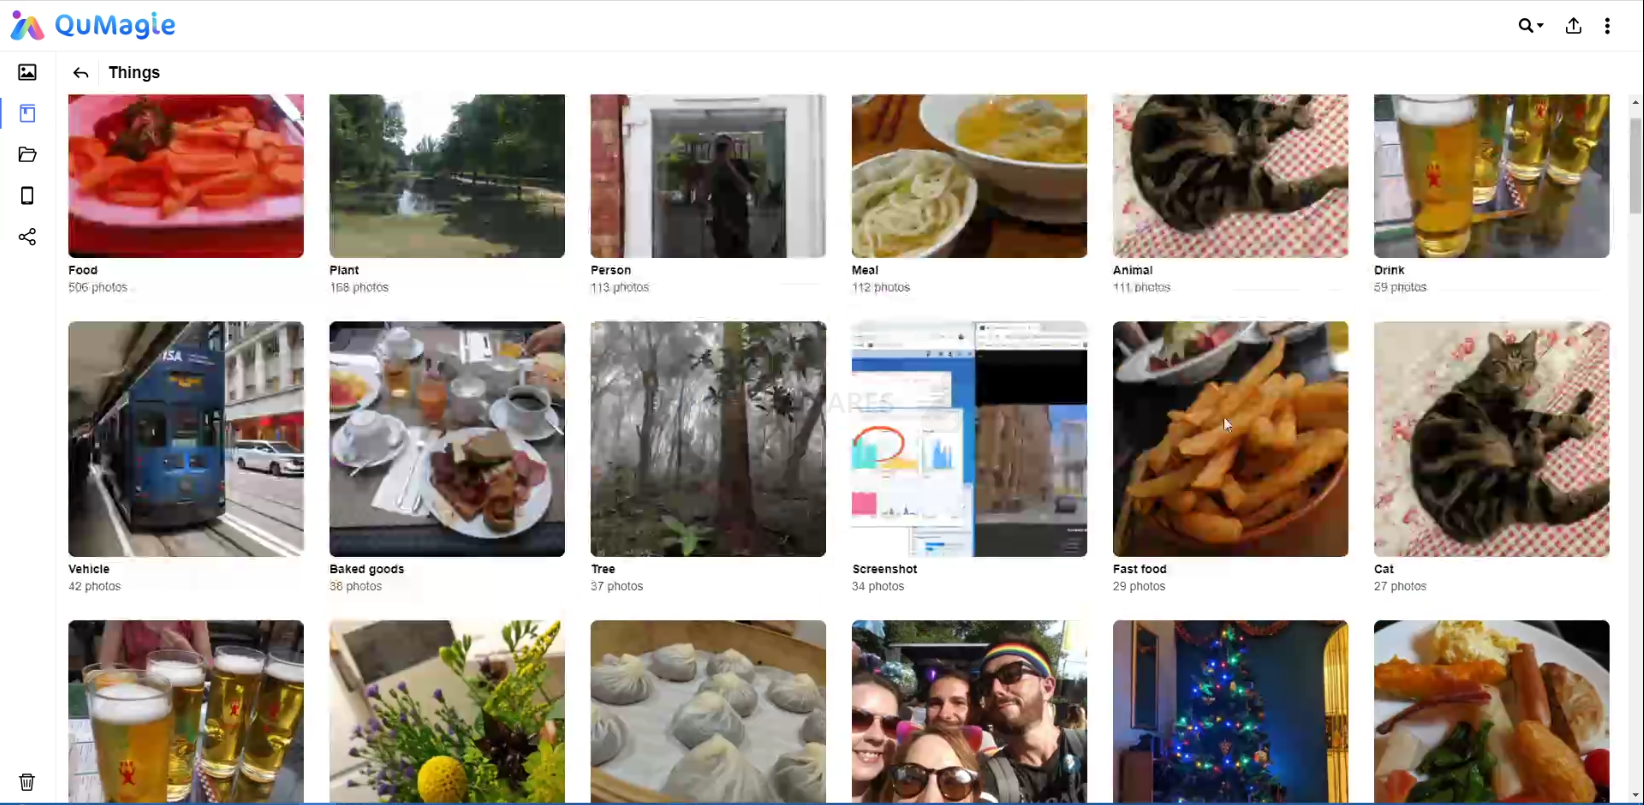
And here is the folders being indexed in QNAP QuMagie:
And there you go – you have now successfully moved your Google Photos and Google Drive files onto your QNAP NAS. Next, let’s discuss how to use the QNAP automated tools to export and/or sync our Google Drive data with our NAS automatically and on a regular basis.
How to Copy Your Google Drive to QNAP NAS using Hybrid Backup Sync
QNAP has a multi-tier and incredibly useful Backup and Synchronization tool, called Hybrid Backup Sync. This tool allows you to establish a connection between your Google Drive and the QNAP NAS, then arrange data to be copied in either direction and on a regular basis. You can even have it so that after the initial backup of Google Drive to NAS (or visa versa) you can then only allow changed/added files to be backed up in future (otherwise known as a differential backup). Let’s go through how to do this. First thing to do is head into the App center on your QNAP NAS and select+download the HBS tool.
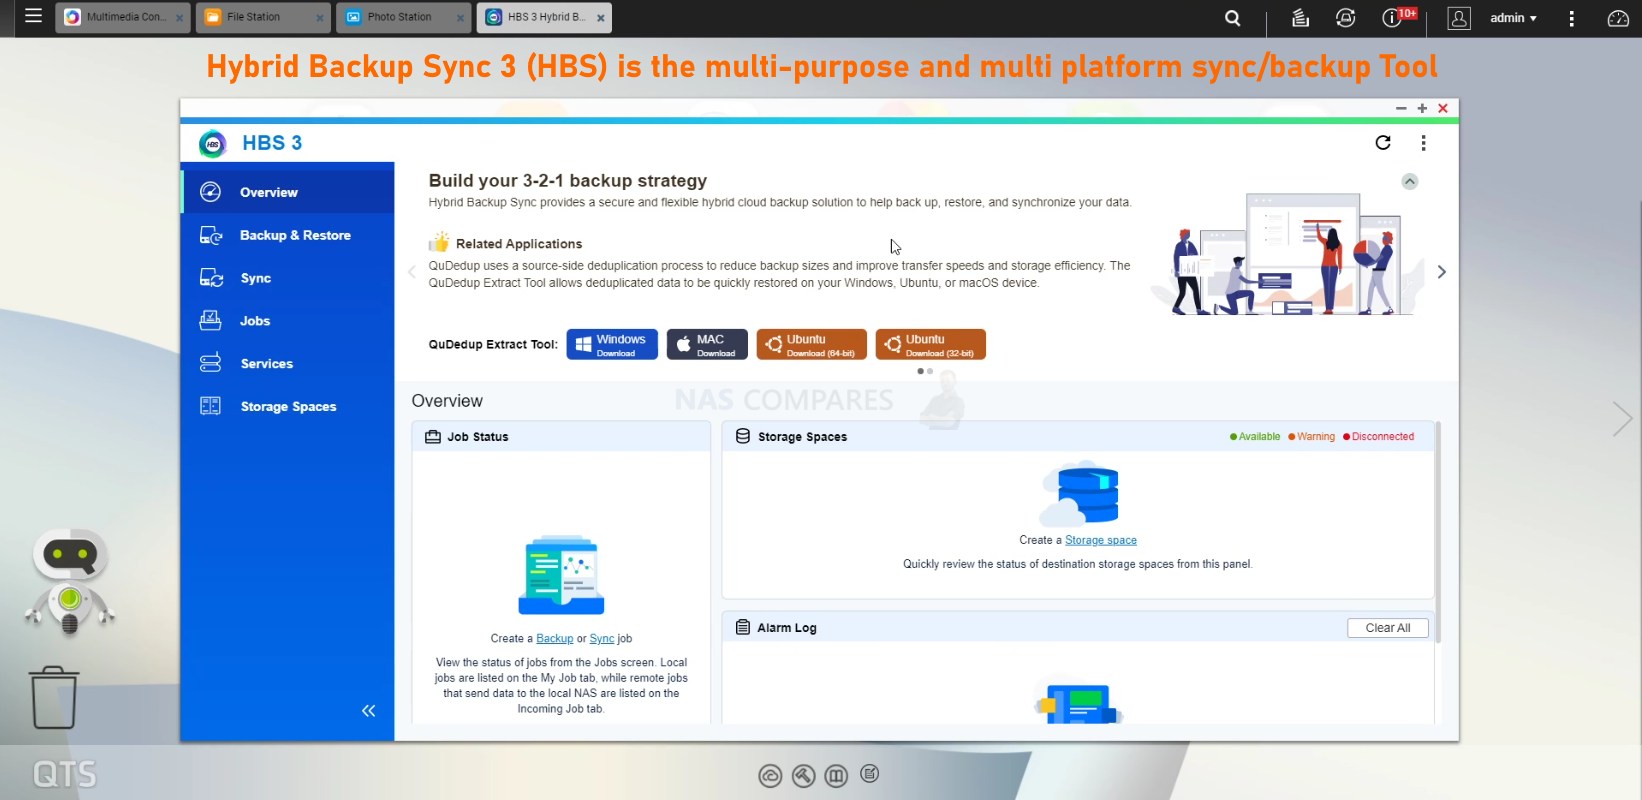
Hybrid Backup Sync is available in both QNAP QTS and QuTS Hero, and can be installed quickly and deployed in minutes.
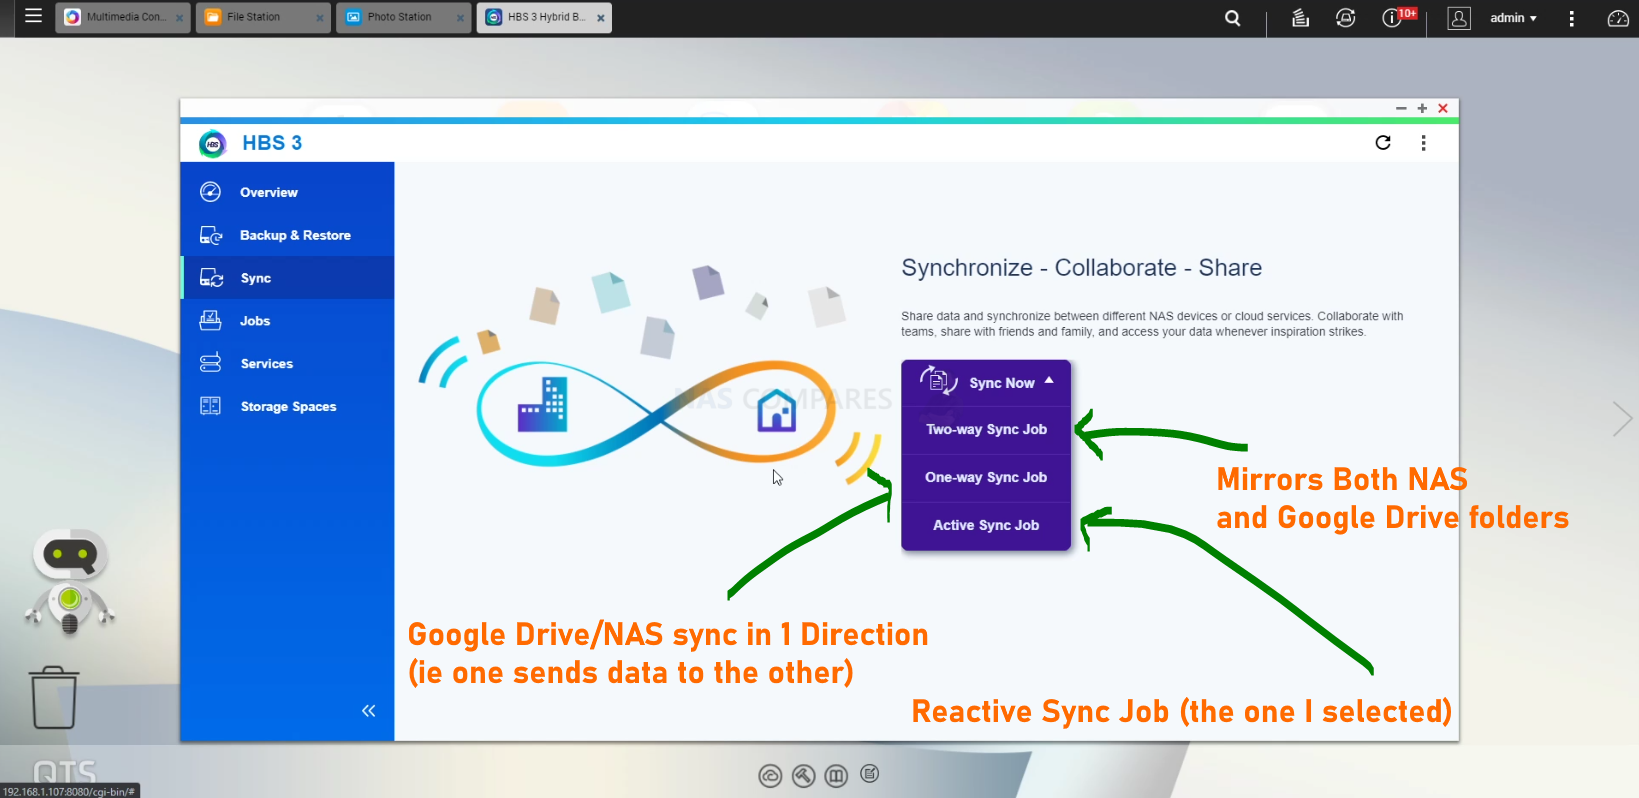
Once the application is installed and started, it will present you with a list of supported sync and backup options that the QNAP NAS will be able to run, connecting local, cloud and USB backups. I selected an Active Sync Job but you might want to select one more appropriate to your hardware and network requirements.
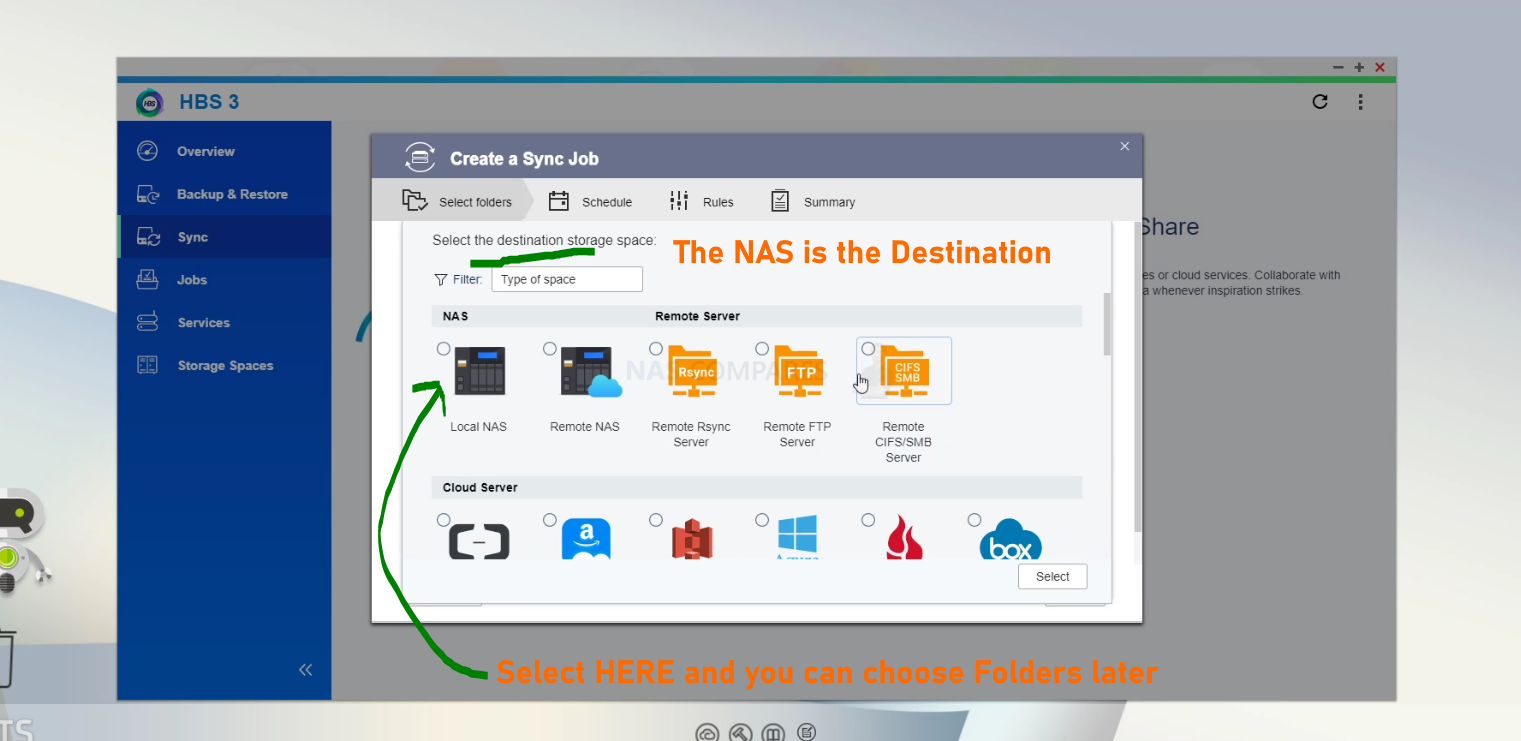
From here, you first need to select the ‘Destination’, in this case, the destination is the NAS, so select it.
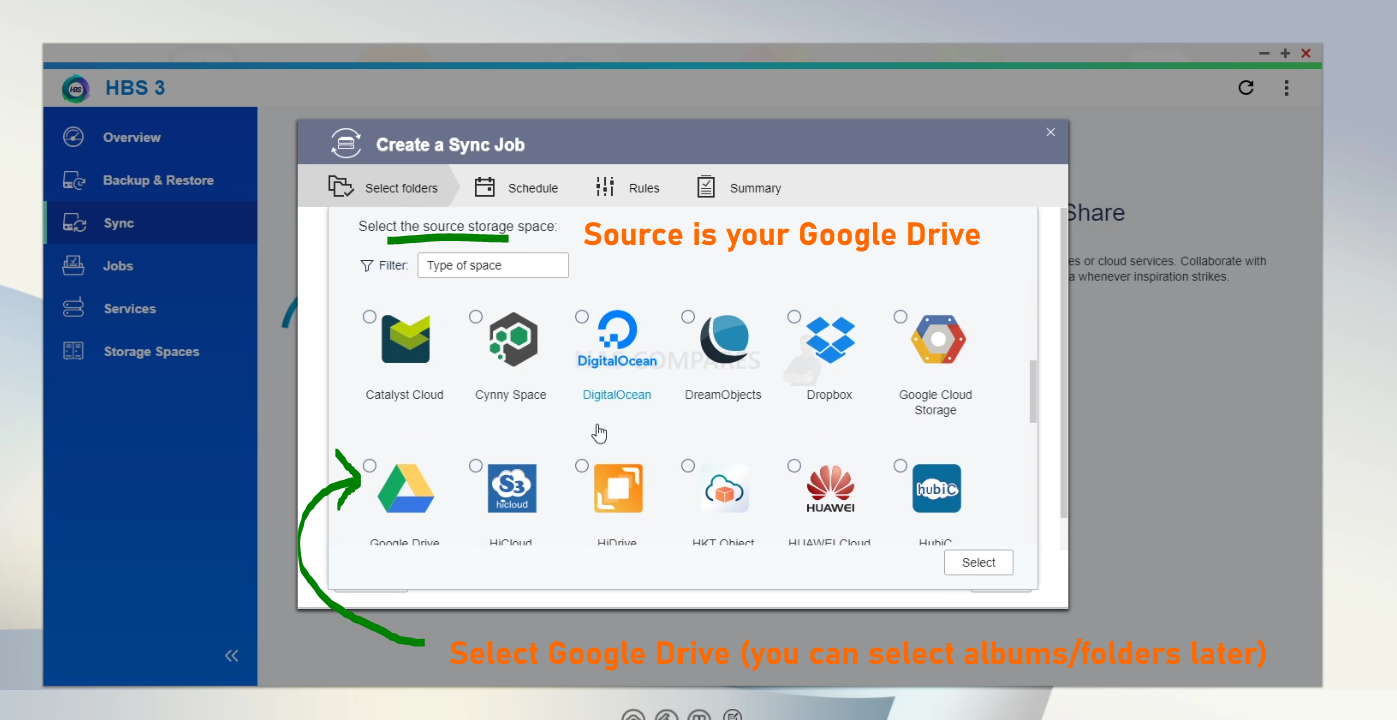
Next, you need to select the Source, which in this case is a Google Drive, so scroll down and select it.
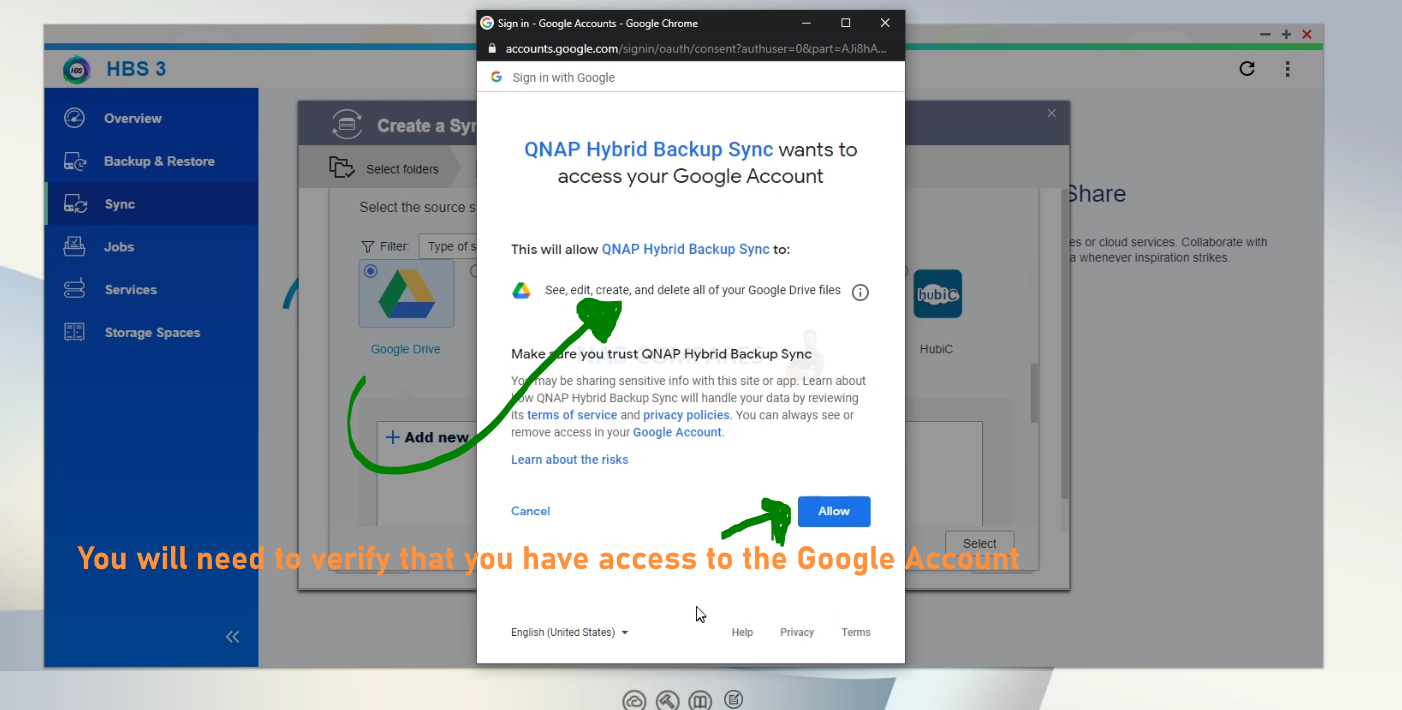
When you click Next, a pop-up window will appear that asks you to log in with your Google Account. Google will ask you to verify that you are happy to allow the QNAP NAS and QNAP Hybrid Backup Sync to access your Google Drive – you will need to allow this to let the Cloud and NAS communicate.
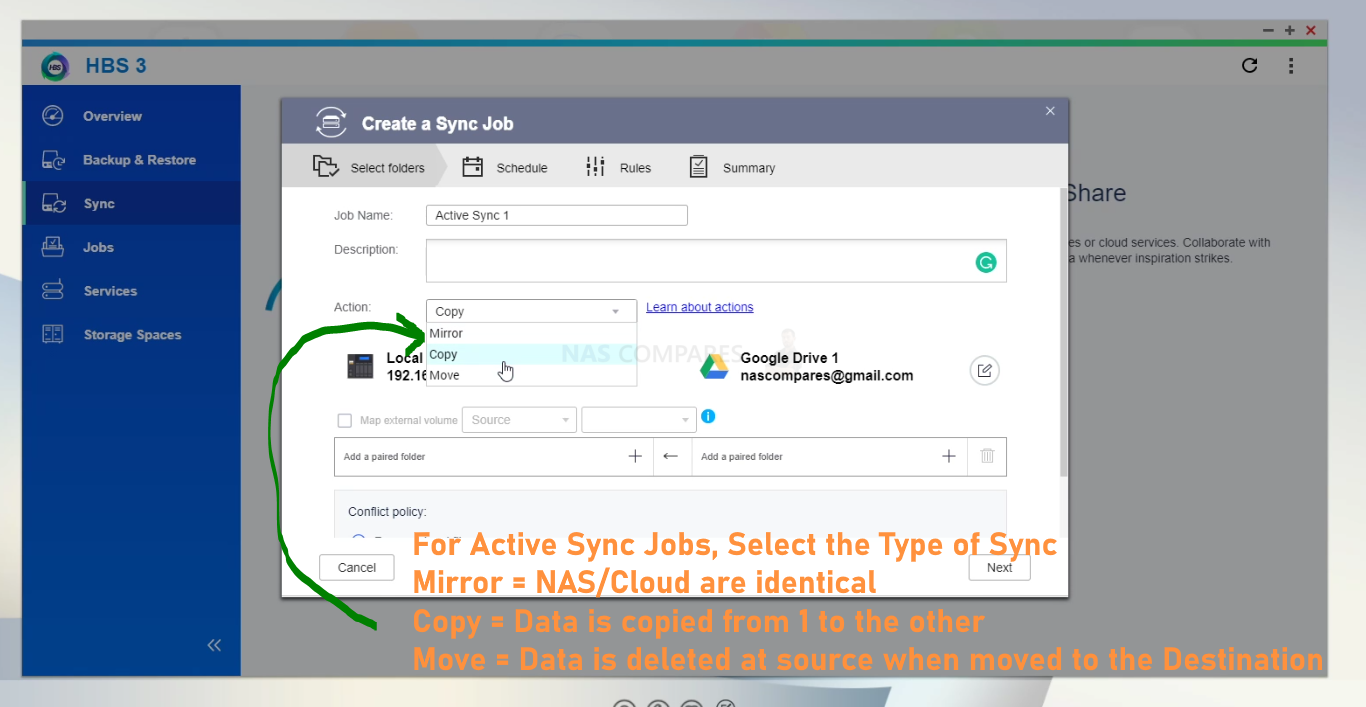
Next, you will need to choose what kid of sync job this is, in terms of data retention and updates. You can either select data to be mirrored on the NAS/Google-Drive, or you can have it that only changes to one are copied over (eg as new photos are added to your Google Drive, they are copied to the NAS, but if you delete them from your Google Drive to make space, they are kept on the NAS anyway). Select which one is appropriate to you and your storage needs.
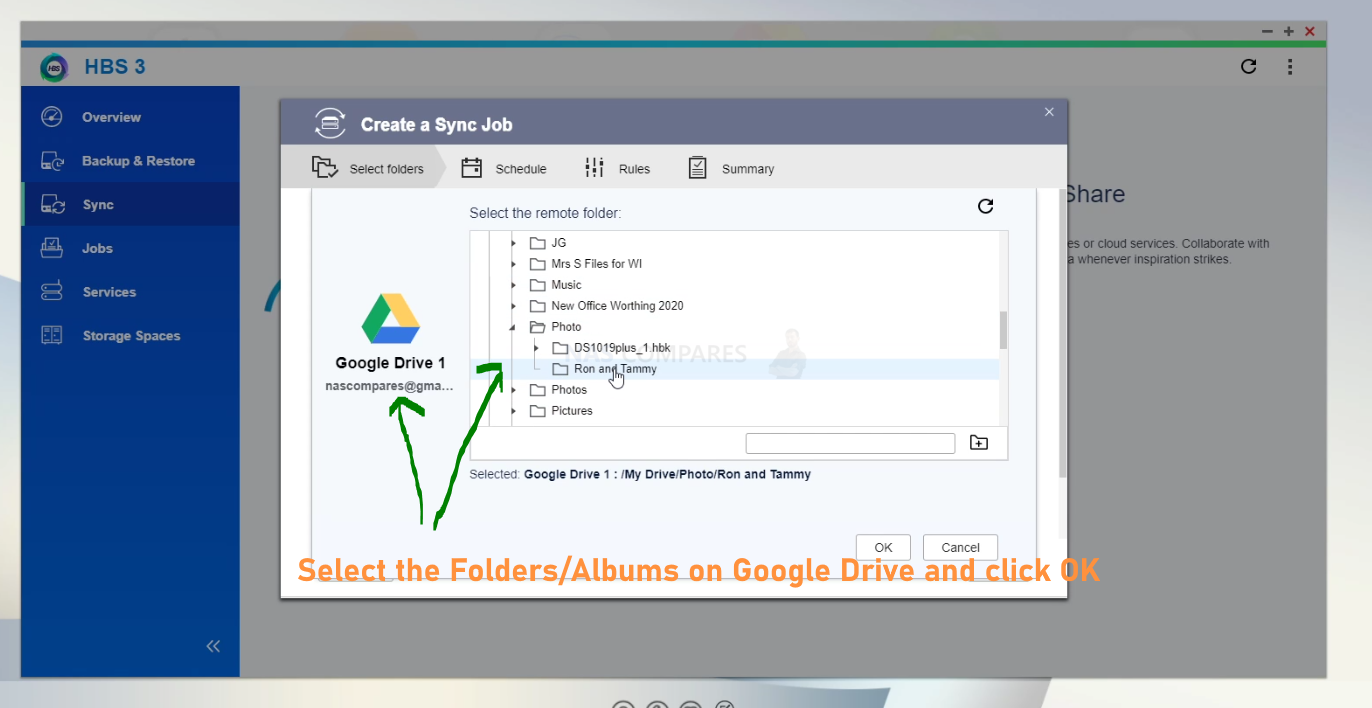
Next, select the edit icon next to the Google Cloud service and it will allow you to select the folder/sub-folders on the Google Drive to copy to the NAS.
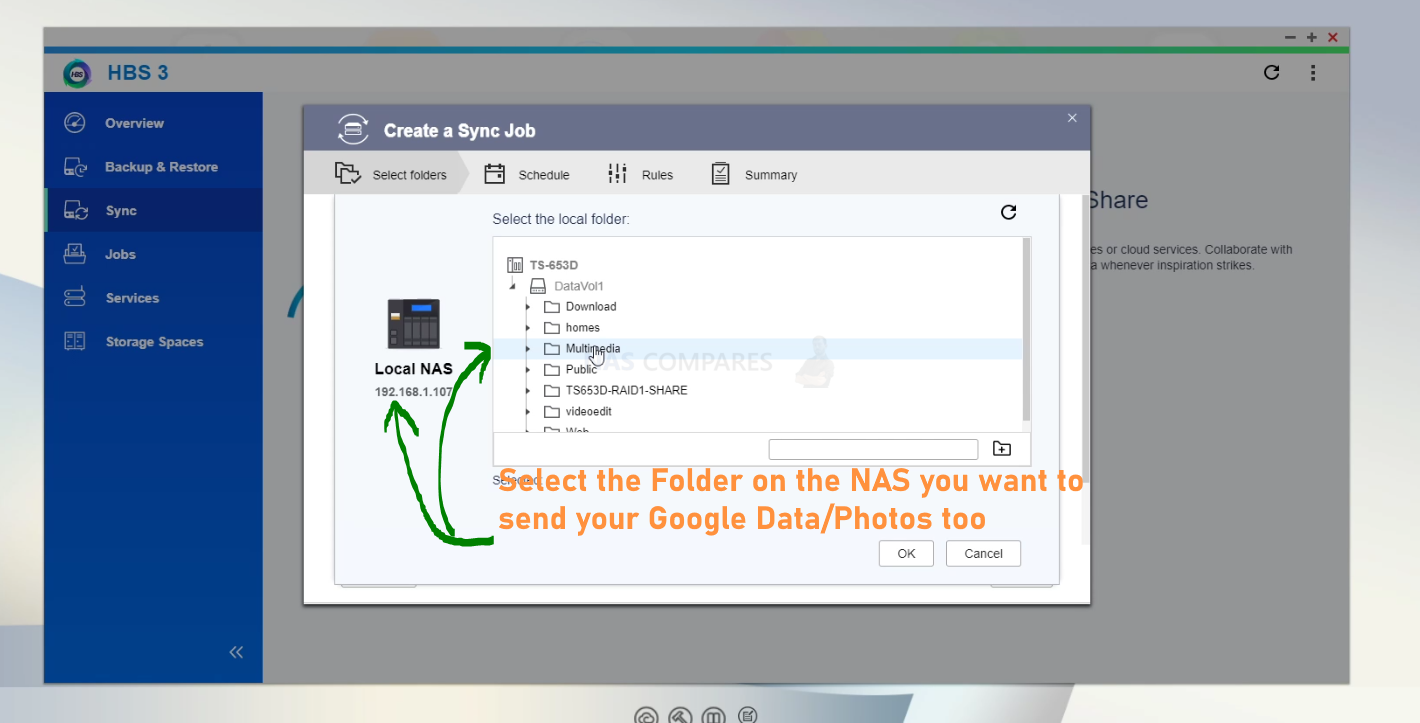
Then you need to repeat this on the NAS and select the destination folder that you want the Google Drive data to be copied too.
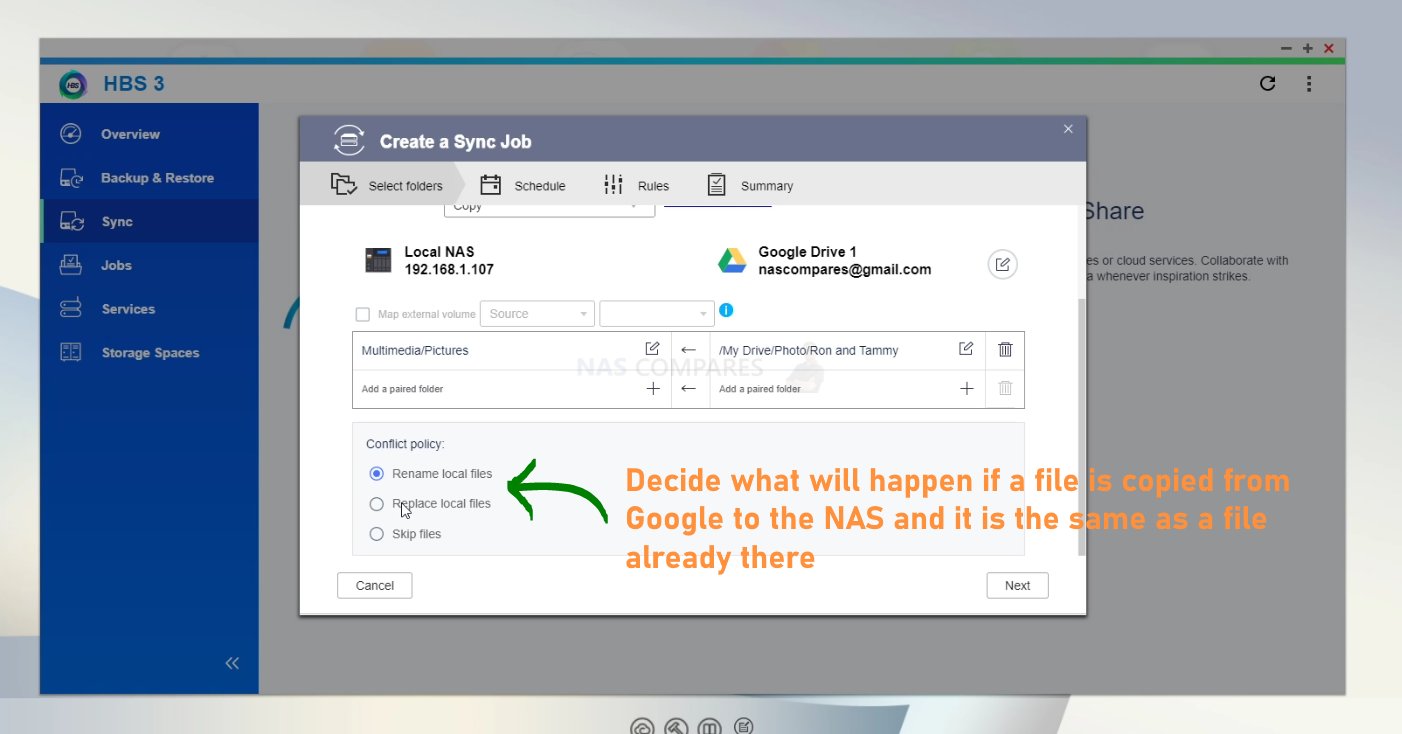
Next, you will need to select what the QNAP NAS will do if it copies a file over that is identical to a file already in the folder (ie duplicated photos), you can choose to ignore, overwrite or make a new version to be safe.
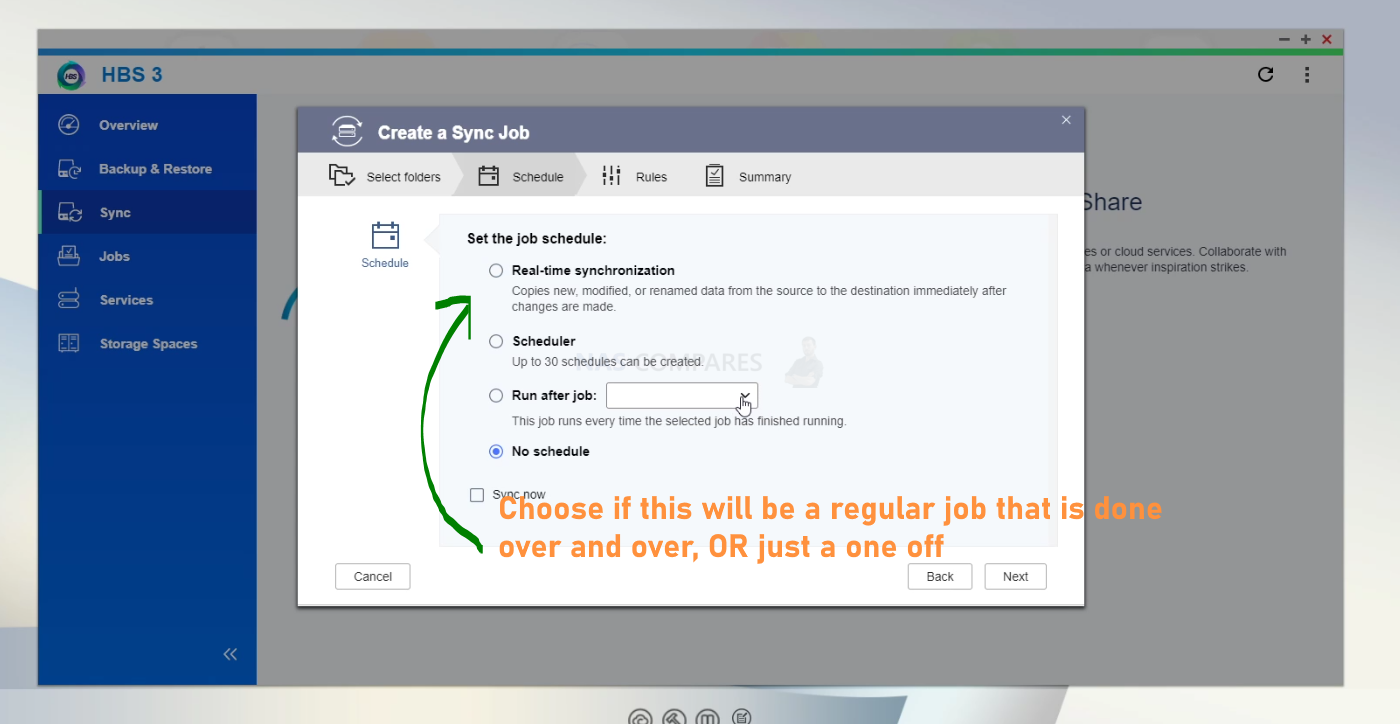
There is also an option to allow further backup and sync actions to happen on a schedule – ie if you do not want a large and regular Google Drive backup to consume all your network or slow other tasks down, you can set the sync task to happen at 1 AM when everyone is gone/asleep.
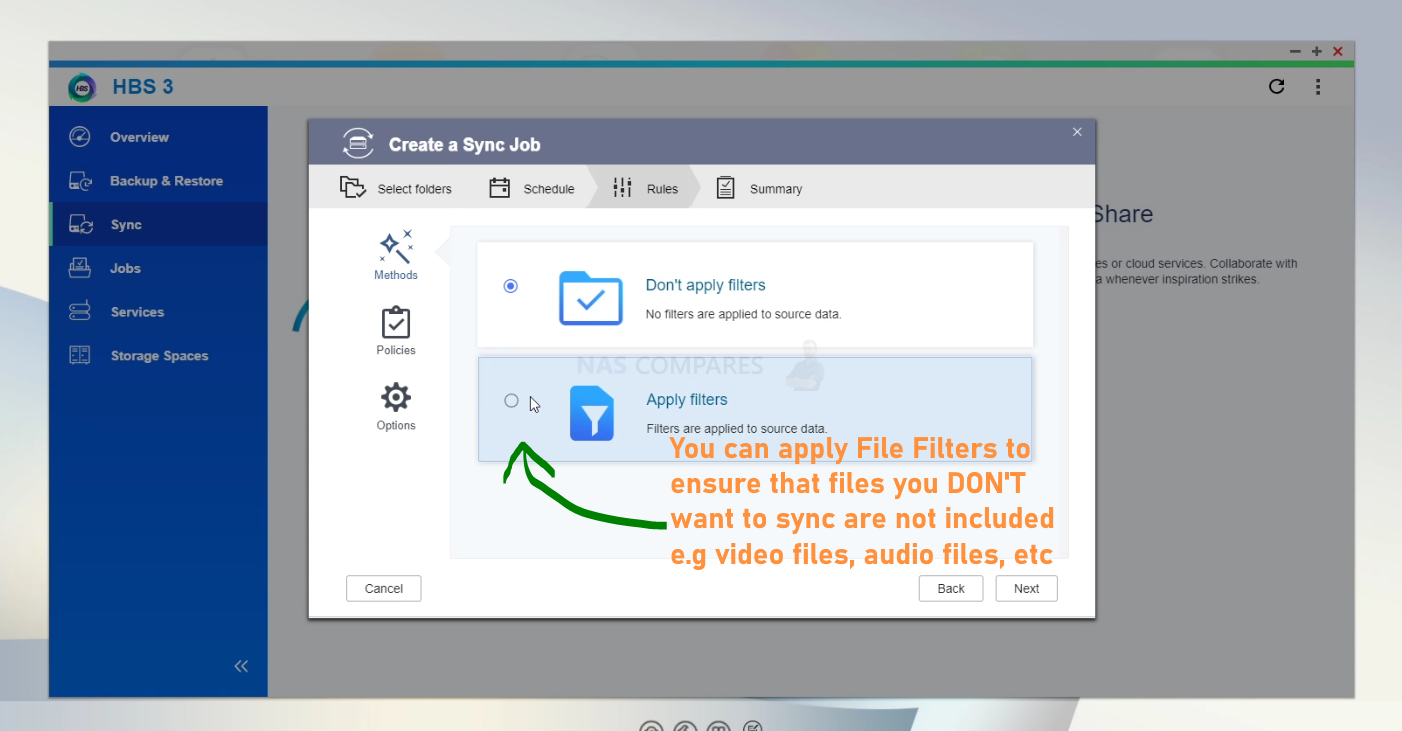
Then you can select files to be EXCLUDED in the sync/backup task.
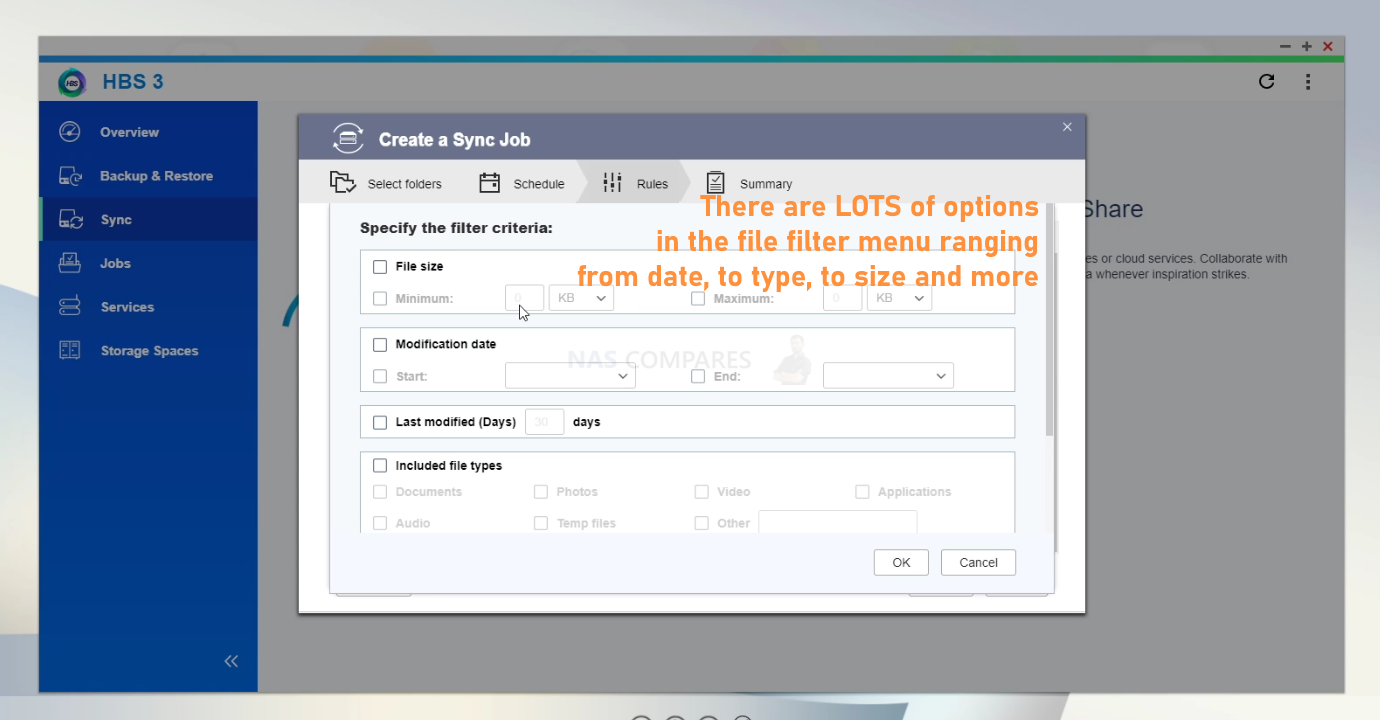
This can be ignored, but it DOES allow you to make sure larger and less appropriate files in the Google Drive are ignored and/or not copied to the wrong location (eg video, system files, etc) as well as allow file size limits and date of creation limits.
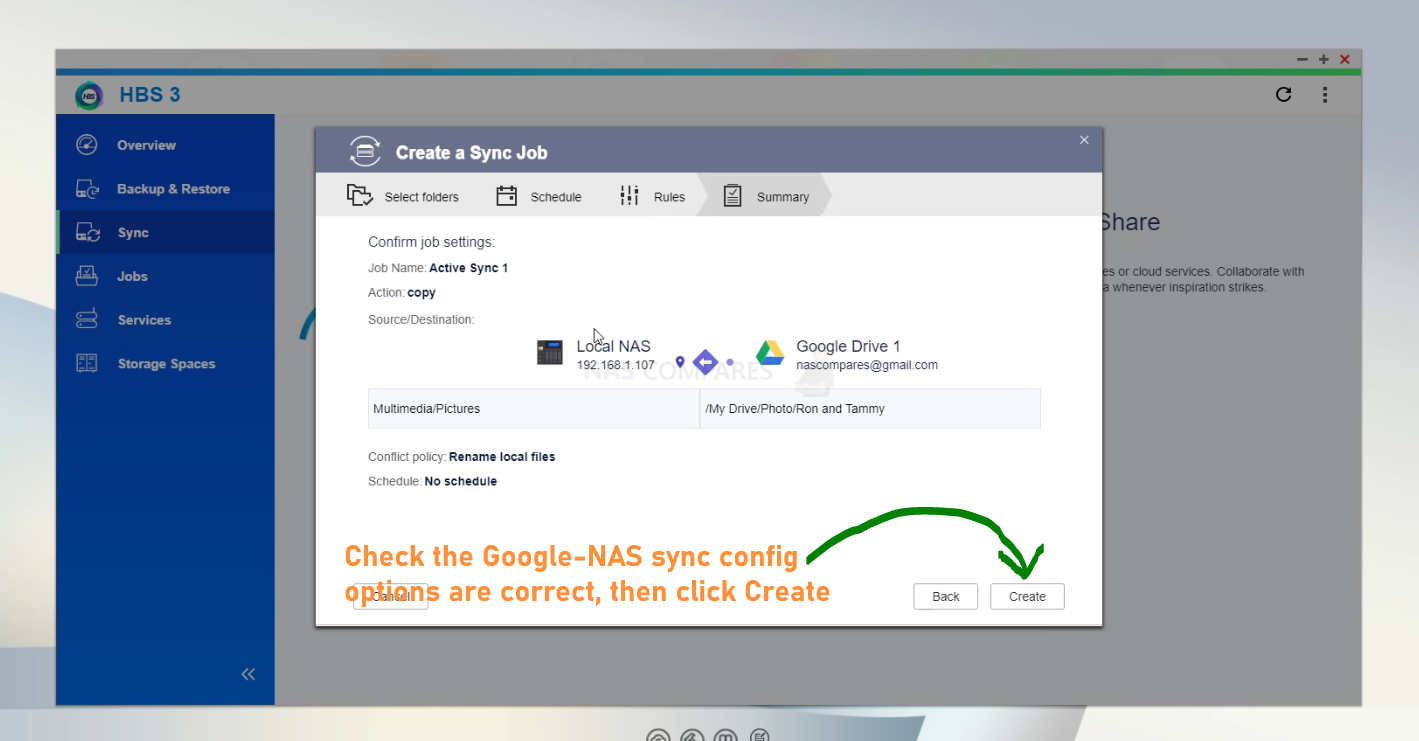
Once you click Next, you will get a summary of the Sync Task you have created. Check it’s all correct and then click Apply.

Don’t forget that if you selected a NEW directory for your Google Drive to NAS sync/backup job, to head into Multimedia Console again and include the new folder in your Photo Station and QuMagie indexed directories..
And there you go. Two easy and quick ways to transfer your data from Google Photos and Google Drive to your QNAP NAS. Google Takeout is the longer but more precise of the two – but the Hybrid Backup Sync option is much easier and automated. So, next question. Why Should you choose a QNAP NAS?
Why Choose QNAP NAS after Google Photos?
![]()
Of all the brands in NAS, QNAP is one of the most innovative and generally considered to be one of the most flexible brands in terms of their software architecture. Whereas the previous brand, QNAP, will typically ask you to do things their way, QNAP is a great deal more customisable in its software and hardware architecture, allowing you to do things in a way you’re already familiar with and the NAS drive will adjust accordingly. With a greater range of hardware solutions on offer than most other NAS brands, the portfolio can be a touch intimidating. There are significantly more applications available on the software, mobile devices and desktop clients than any other brand and this applies to both photography and generally with data. This large degree of flexibility and hardware options can often be to their detriment, as users that want their hand held a little or just want something to work straight away out of the box might find a QNAP a bit of a steep climb by comparison to Google Photos. That said, the software user interface accessible via your web browser is more stylized and comparable to that of Windows and Android, considerably more customisable than any other NAS software but this is presented at the expense of the relative ease of QNAP’s software. Most popular photo backup solutions in the portfolio include:
| Cheap/Small NAS |
Solid Value NAS
|
Photographer NAS | Photo Business NAS |
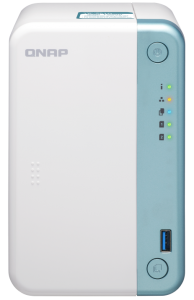
QNAP TS-230 – $139 |
QNAP TS-251D+ – $249 |
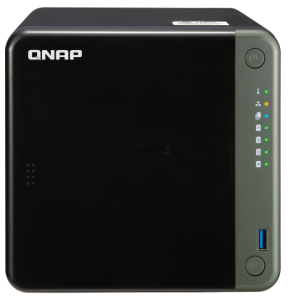
QNAP TS-453D – £549 |
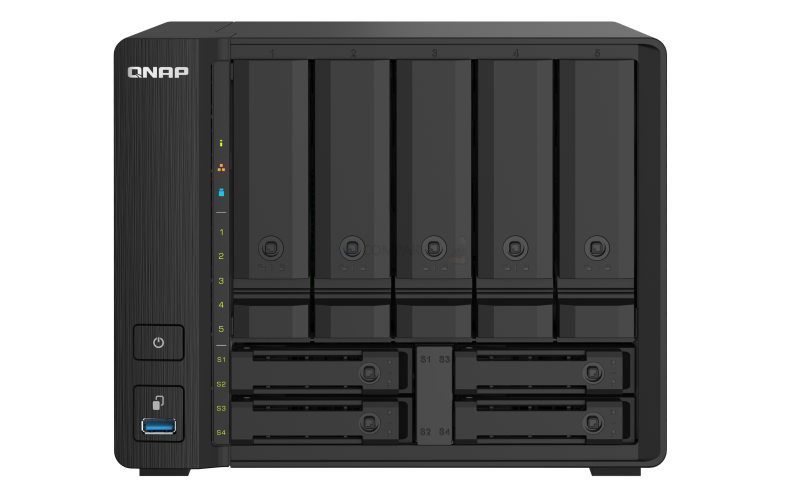
QNAP TS-h973AX – $799 |
|
|
|
|

QNAP NAS Advantages
- By far the most hardware equipped NAS brand
- The largest number of applications for media and backups
- A wider range of supported 3rd Party platforms and services
- Very software/folder path customizable
- Excellent indexing/thumbnail generation (Multimedia console)
QNAP NAS Disadvantages
- Can be a touch intimidating on day 1
- Less suitable for ‘setup and forget’ users
Thanks for reading and I hope you found this article helpful. If you still need more help on the right NAS solution for you whether it is to move from Google Photos/Cloud, or just a server for your home or business, use the completely free advice section below. It’s run by just me and a little help and is done with unbiased advice and without profit in mind. I might not be the quickest to reply, but I respond to every one! Please donate to the site if you found this guide helpful and want to help me to help others. Have a great 2021!
📧 SUBSCRIBE TO OUR NEWSLETTER 🔔
🔒 Join Inner Circle
Get an alert every time something gets added to this specific article!
This description contains links to Amazon. These links will take you to some of the products mentioned in today's content. As an Amazon Associate, I earn from qualifying purchases. Visit the NASCompares Deal Finder to find the best place to buy this device in your region, based on Service, Support and Reputation - Just Search for your NAS Drive in the Box Below
Need Advice on Data Storage from an Expert?
Finally, for free advice about your setup, just leave a message in the comments below here at NASCompares.com and we will get back to you. Need Help?
Where possible (and where appropriate) please provide as much information about your requirements, as then I can arrange the best answer and solution to your needs. Do not worry about your e-mail address being required, it will NOT be used in a mailing list and will NOT be used in any way other than to respond to your enquiry.
Need Help?
Where possible (and where appropriate) please provide as much information about your requirements, as then I can arrange the best answer and solution to your needs. Do not worry about your e-mail address being required, it will NOT be used in a mailing list and will NOT be used in any way other than to respond to your enquiry.


|
 |


OWC TB5 2x 10GbE Dock, UGREEN NAS Surveillance Software, AceMagic Retro PCs, Gl.iNet Comet 5G @CES
What IS the Digiera OmniCore NAS? Is it Worth $599?
New UGREEN NAS Expansion, DXP4800 PRO NAS and eGPU Revealed
Gl.iNet Flint 4 10G+2.5G Router Revealed @CES 2026
EVERYTHING NEW from Minisforum @ CES 2026
Gl.iNet Slate 7 PRO Travel Router (and Beryl 7) REVEALED
Access content via Patreon or KO-FI

Discover more from NAS Compares
Subscribe to get the latest posts sent to your email.
Good morning
I have really been enjoying your channel
I am a pro photographer based in Sedona
Each year I shoot 4-6T of photos
I have been buying two external 5t drives every year.
I am looking more of a Das but was thinking of a NAS
I use light room and photoshop to edit my photos
Do you have a solution for me
I was thinking
Qnap TS 433
Qnap TS 664
Qnap TR 004
Qnap TS 473A
What are your thoughts
I would have two computers, desktop and a lap top
REPLY ON YOUTUBE
Thanks
REPLY ON YOUTUBE
Why is PhotoStation not showing up on my QNAP? TS-873A using QuTS Hero? Searched everywhere in my AppCenter. QNAP is really really Jenky. Been using Asustor for about 6 years, recently bought QNAP for ZFS and it’s been nothing but weird Jenky Behavior. (Like no Photo Station and Plex dying then not uninstalling. Had to command line uninstall)
REPLY ON YOUTUBE
Thanks for the instructions – I don’t know if anything has changed significantly since the video was released, but I only had one option left – using Google Takeout.
At the moment, I don’t have Hybrid Backup Sync in the app center, nor is it possible to install Photostation, which is such a pity, even though QuMaie seems to be doing a good job.
REPLY ON YOUTUBE
You can’t sync directly from “GOOGLE PHOTOS” with these methods…
REPLY ON YOUTUBE
Is there Still not a way to backup just Google Photos? Since Drive is the only option we have now with Hybrid Mount
REPLY ON YOUTUBE
so this video doesn’t contain a normal way to export Google Photos to NAS. I am sorry, you mislead me by your video title.
REPLY ON YOUTUBE
are there any QNAP apps that can leverage the Google Photos JSON to pull all the google metadata in to supplement locally generated metadata?
REPLY ON YOUTUBE
Has someone looked at google one. Does it give us a better way to download photos
REPLY ON YOUTUBE
Great video. Really informative and just what I was after.
A couple of constructive points.
1. The volume of your voice was fading in and out.
2. Throwing your mouse pointer around like it was having a seizure was very distracting.
But I’ve now made my mind up on my NAS of choice. QNAP it is!!
REPLY ON YOUTUBE
2nd and 3rd options will not work: https://support.google.com/photos/answer/9316089?hl=en#zippy=%2Cconfirm-if-you-used-the-google-photos-folder-in-google-drive