Synology DS1019+ NAS Guide to Users and File Handing
With the release of the already hugely popular DS1019+ NAS Drive from Synology, it is worth highlighting that is one of the most proficient and powerful network storage devices for home and small business users of 2019. Despite this popularity, for many users, the Synology DS1019+ diskstation is likely to be their first real experience of a NAS drive and despite its similarity to a desktop computer, the setup and use of a Synology NAS and DSM (diskstation manager) may be a little intimidating. Fear not, as it’s actually really user-friendly and I’ve created a whole bunch of guides to help you get to grips with your new piece of hardware. This guide is to help you get the most from your new NAS drive.
In order to access and share your files within other devices over the network and internet, you will need to create shares folders. Unlike regular folders, these are directories that, when needed, can be made accessible to multiple users. If you intend to use the Synology DS1019+ NAS as a mapped network drive in Windows, or as remote access storage in popular editing software such as Photoshop, Premiere or Final Cut, then shared folders are essential.
Synology DiskStation DS1019+ 5-Bay Desktop NAS for SMB
Go to Control Panel, then Shared Folder to manage the shared folders, which are the root folders of Synology NAS. You can store data in the shared folders and share them with users or groups with access privileges.
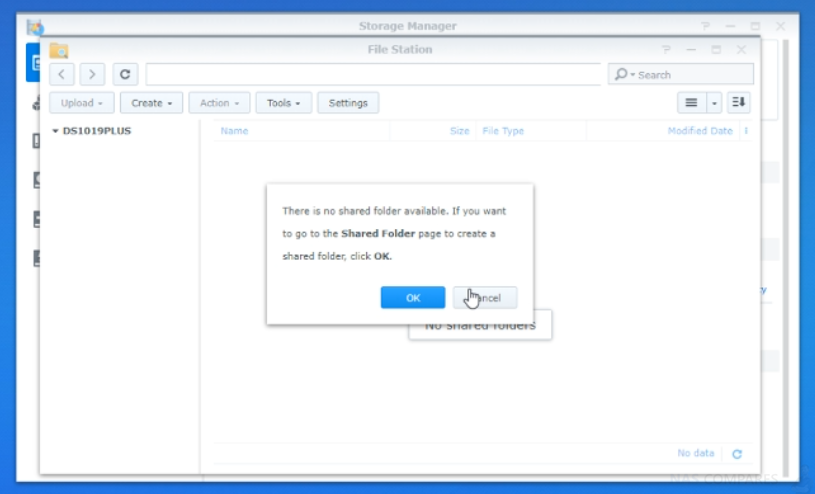
If you are a user belonging to the administrator’s group, you can click Create to create shared folders and assign access privileges to the folders.
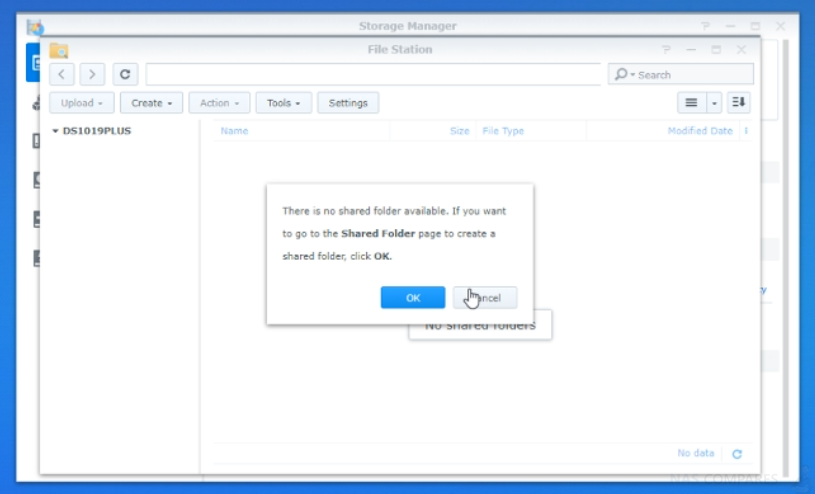
When creating a shared folder, you can choose to encrypt it.1 After a folder is encrypted, you can use the Encryption drop-down menu to mount/unmount the folder or export the encryption key. The AES 256-bit encryption can block off all unauthorized access attempts. Without the encryption key, other people will not be able to use the encrypted data even if they remove the hard drives from your Synology NAS and mount it on their device.
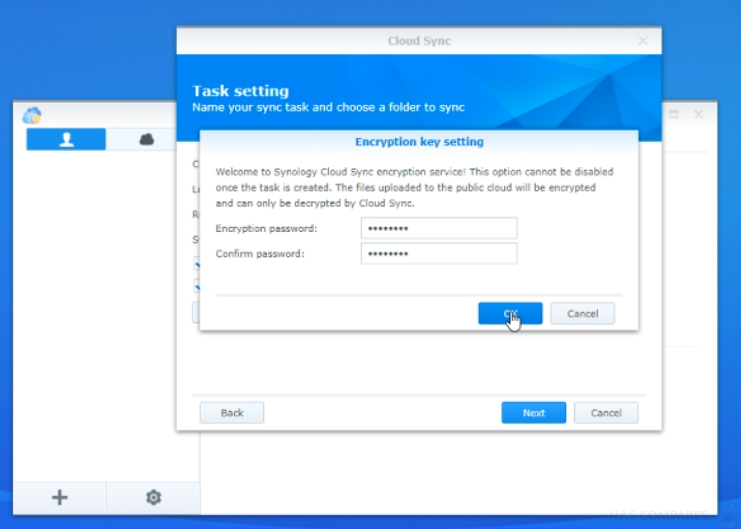
By default, encrypted shared folders will be unmounted automatically on startup for security reasons. If you reset default passwords with the reset button located on the Synology NAS, encrypted shared folders will be unmounted, and the option to automatically mount will be disabled.
To access shared folders from Windows, you can do it by using the Synology Assistant application to map shared folders as network drives:
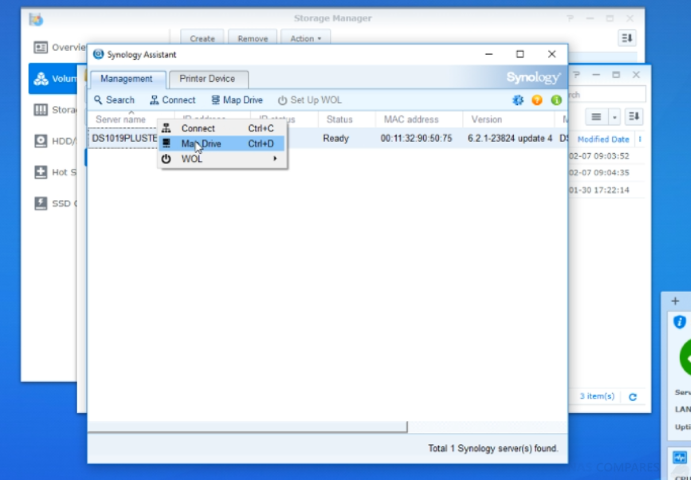
Run Synology Assistant (available at Synology’s Download Center) and select the server from the server list. Then click Map Drive and follow the onscreen steps to finish the setup.
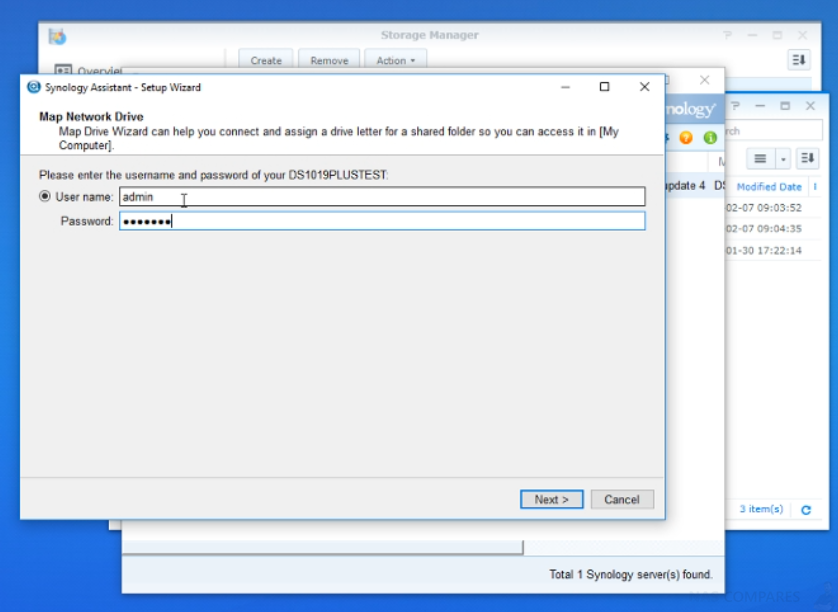
Click Browse to locate the shared folder, and then click OK.
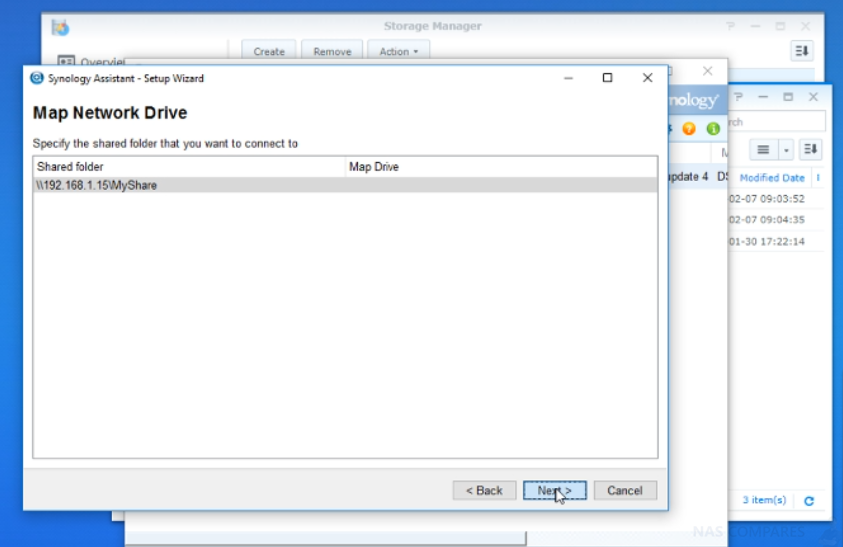
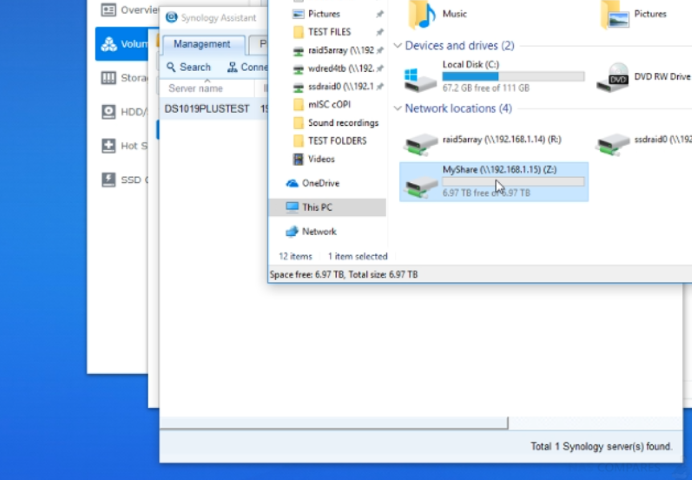
Enter your username and password for Synology DiskStation Manager and click OK. Upon completion, you can access the mapped shared folder directly in Windows Explorer.
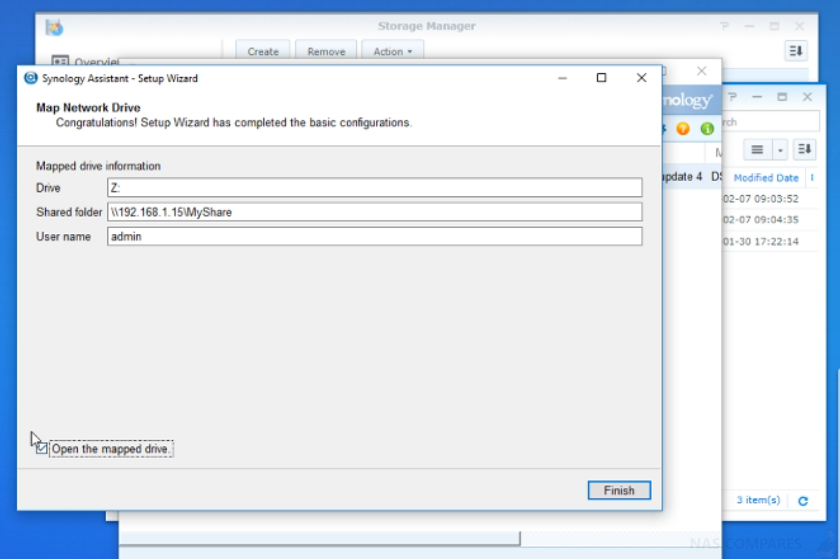
The Mapped network Drive can be found on your ‘My Computer’ list of drives.
DS1019+ NAS – Users and groups
As previously mentioned, your DS1019+ NAS can be accessed by many, many users at the same time, as well as each user having their own login name and password. Once created, you can give each individual user distinct folder and application access, as well as a quota of available storage space. If you plan on sharing the Synology DS1019+ with family and/or work colleagues, then creating individual logins and user parameters for every person is highly recommended. It’s incredibly easy.
Alternatively, if you have many more users accessing and/or backing up to the DS1019+ NAS, such as an employee, department or team-based structure, then it is recommended to create user groups and then assign individual members to those groups. This makes both the access rights and storage quota much, much easier to adjust when needed and also allows faster bulk action control.
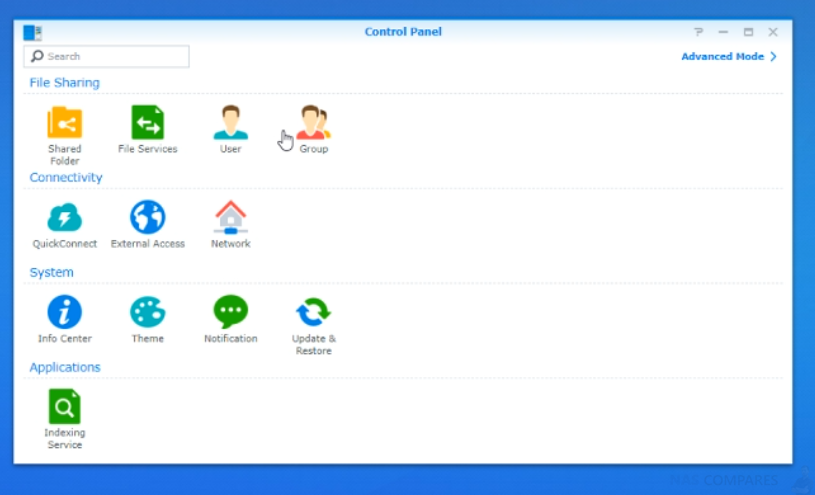
In order to create a User, you need to:
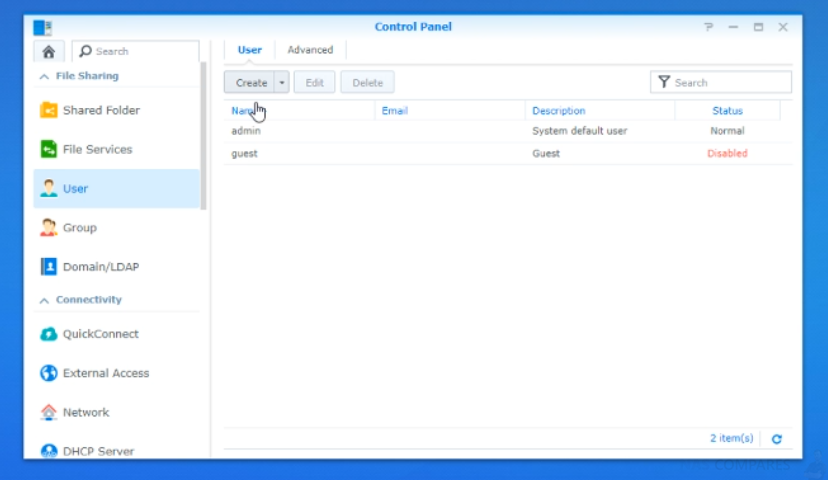
Go to Control Panel, then User or Group to create users or groups, and allow or deny their access to different shared folders.
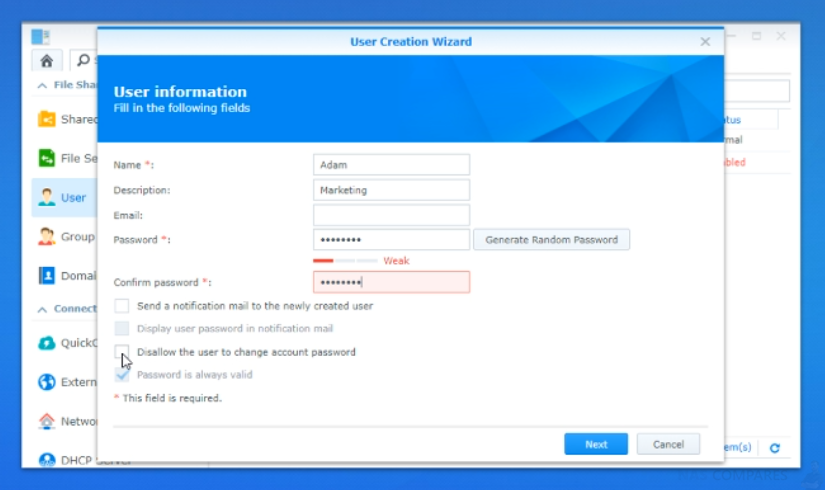
Click Create to create a user account. The user can log in to edit his/her account info after the user account has been established. You can also choose to set an account expiration date or disallow the user to change the account password.
In order to create a Group, you need to:
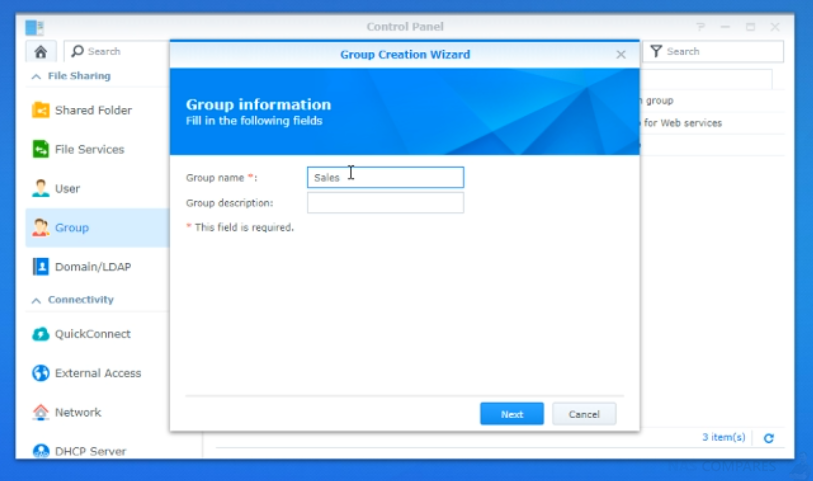
Go to Control Panel, then Group to create and edit a group, add users to the group, and then edit the group’s properties, saving you the trouble of editing users one by one. Groups created by default include the following:
‘administrators‘: Users belonging to the administrator’s group have the same administrative privilege as admin.
‘users‘: All users belong to the user’s group
DS1019+ NAS – Downloads
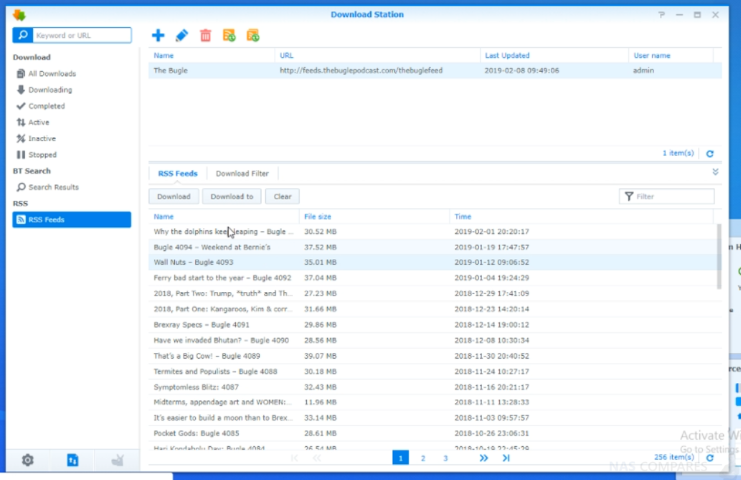
A popular area of Synology NAS drive use is for a centralized download station. Most of us through one means or another, ranging from pictures to podcasts, or from programs to films, will download files on a regular basis and often want these to live on the NAS, so they can be accessed by all devices/users. The Synology DS1019+ NAS arrives with the ‘Download Station’ application, that allows users to add internet URLs, RSS feeds, BitTorrent links, NZB private links and web sources to the NAS and it will automatically download any/all content for you to the device. This is especially helpful for episodic content like podcasts and web movie shorts, as they will be on your NAS regularly, For when you want them.
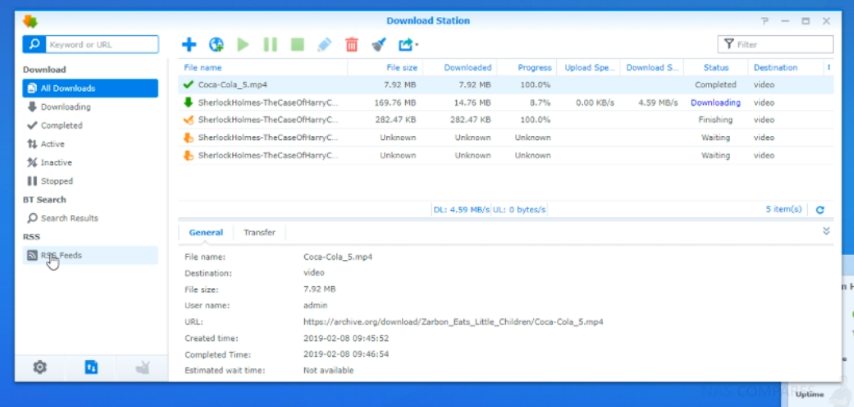
Download Station is a web-based download application which allows you to download files from the Internet through BT, FTP, HTTP, NZB, Thunder, FlashGet, QQDL, eMule, and Xunlei-Lixian, and subscribe to RSS feeds to keep you updated on the hottest or latest BT. The Auto Extract service automatically unzips files downloaded to Synology NAS
The Synology DS1019+ NAS – VERDICT
| PROS | CONS |
|
|
🔒 Join Inner Circle
Get an alert every time something gets added to this specific article!
This description contains links to Amazon. These links will take you to some of the products mentioned in today's content. As an Amazon Associate, I earn from qualifying purchases. Visit the NASCompares Deal Finder to find the best place to buy this device in your region, based on Service, Support and Reputation - Just Search for your NAS Drive in the Box Below
Need Advice on Data Storage from an Expert?
Finally, for free advice about your setup, just leave a message in the comments below here at NASCompares.com and we will get back to you. Need Help?
Where possible (and where appropriate) please provide as much information about your requirements, as then I can arrange the best answer and solution to your needs. Do not worry about your e-mail address being required, it will NOT be used in a mailing list and will NOT be used in any way other than to respond to your enquiry.

|
 |
UniFi Routers vs OpenWRT DIY Routers - Which Should You Choose?
WHY IS PLEX A BIT S#!t NOW? IS 2026 JELLYFIN TIME? (RAID Room)
Synology FS200T NAS is STILL COMING... But... WHY?
Gl.iNet vs UniFi Travel Routers - Which Should You Buy?
UnifyDrive UP6 Mobile NAS Review
UniFi Travel Router Tests - Aeroplane Sharing, WiFi Portals, Power Draw, Heat and More
Access content via Patreon or KO-FI
Discover more from NAS Compares
Subscribe to get the latest posts sent to your email.





thank you so much ????????????????????????????????????????????
REPLY ON YOUTUBE
Hi mate I have 2 18tb hdd but I want to add them to a plex server. How is this possible
REPLY ON YOUTUBE