

Synology secure Remote access via VPN.
Small business data protection
Looking to force users to not have company data on private computers.
Mail server.
Remote access required.
Does this require a VM?
Prefer synology after watching all of your YouTube videos.
Open to suggestions or hopefully a idiots guide for setting up a SMB setup like your 2020 synology guide. But covering mail server setup (I think it can do it) and remote file access with protection to stop people stealing any.
Virtual machines are used for Windows or Linux seekers for virtual access.
Connecting via a decrypted channel like VPN would make all data transfers encrypted and hidden within this tunnel.
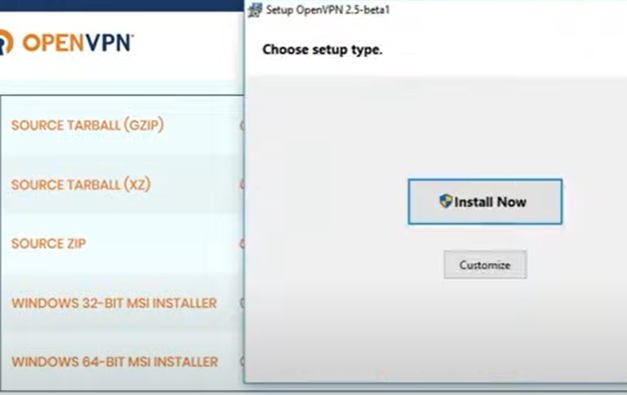
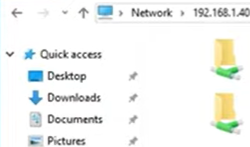
I would recommend OpenVPN. Once you connect, you will see your remote NAS as it was connected locally.
Here is some more info: https://www.synology.com/cgi/knowledgebase/findHelpFile/dsm/VPNCenter/1.2/enu/5.2-5644/synology_avoton_415+/100/vpn_setup.html
I hope this helps:
https://www.youtube.com/watch?v=YOjrHLnq_wM&ab_channel=TripleM
Set up VPN Server
With the VPN Server package, you can easily turn your Synology NAS into a VPN server to allow DSM users to remotely and securely access resources shared within the local area network of your Synology NAS. By integrating common VPN protocols – PPTP, OpenVPN and L2TP/IPSec – VPN Server provides options to establish and manage VPN services tailored to your individual needs. To choose any of the following types of VPN server and to enable VPN services on your Synology NAS, install and launch VPN Server.

Note:
- Enabling VPN service affects the network performance of the system.
- Only DSM users belonging to the administrators group can install and set up VPN Server.
OpenVPN
OpenVPN is an open source solution for implementing VPN service. It protects the VPN connection with the SSL/TLS encryption mechanism. For more information about OpenVPN, visit here.
To enable OpenVPN VPN server:
-
- Open VPN Server and then go to Settings > OpenVPN on the left panel.
- Tick Enable OpenVPN server.

- Specify a virtual internal IP address of VPN server in the Dynamic IP address fields. Refer to About Dynamic IP Address below for more information.
- Set Maximum connection number to limit the number of concurrent VPN connections.
- Set Maximum number of connections with same account to limit the number of concurrent VPN connections with the same account.
- Tick Enable compression on the VPN link if you want to compress data during transfer. This option can increase transmission speed, but might consume more system resources.
- Tick Allow clients to access server’s LAN to permit clients to access the server’s LAN.
- Tick Enable IPv6 server mode to enable OpenVPN server to send IPv6 addresses. You will first need to get a prefix via 6in4/6to4/DHCP-PD in Control Panel > Network > Network Interface. Then select the prefix in this page.
- Click Apply for the changes to take effect.
Note:
- VPN Server does not support bridge mode for site-to-site connections.
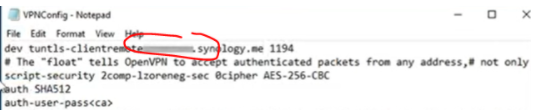
- Please check the port forwarding and firewall settings on your Synology NAS and router to make sure the UDP port 1194 is open.
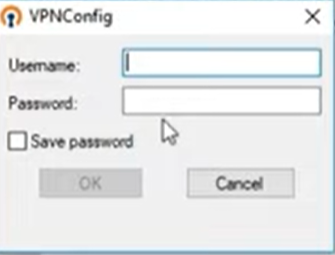
- When running OpenVPN GUI on Windows Vista or Windows 7, please note that UAC (User Account Control) is enabled by default. If enabled, you need to use the Run as administrator option to properly connect with OpenVPN GUI.
- When enabling IPv6 server mode in Windows with OpenVPN GUI, please note the following:
- The interface name used by the VPN cannot have a space, e.g., LAN 1 needs to be changed to LAN1.
- The option redirect-gateway has to be set in the openvpn.ovpn file at the client side. If you do not want to set this option, you should set the DNS of the VPN interface manually. You may use Google IPv6 DNS: 2001:4860:4860::8888.
- When Allow clients to access server’s LAN is not ticked, VPN clients will still be able to access your server’s LAN in the following situations:
- VPN server is set as the default gateway at the client side.
- Related routing rules are added manually at the client side.
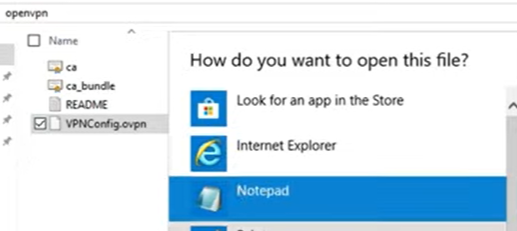
To export configuration file:
Click Export Configuration. OpenVPN allows VPN server to issue an authentication certificate to the clients. The exported file is a zip file that contains ca.crt (certificate file for VPN server), openvpn.ovpn (configuration file for the client), and README.txt (simple instruction on how to set up OpenVPN connection for the client). For more information, refer to here.
Note:
- Each time VPN Server runs, it will automatically copy and use the certificate shown at Control Panel > Security > Certificate. If you need to use a third-party certificate, please import the certificate at Control Panel > Security > Certificate > Action and restart VPN Server.
- VPN Server will automatically restart each time the certificate file shown at Control Panel > Security > Certificate is modified.

| Where to Buy a Product | |||
 |
    
|

|
VISIT RETAILER ➤ |
 |
|
|
VISIT RETAILER ➤ |
We use affiliate links on the blog allowing NAScompares information and advice service to be free of charge to you. Anything you purchase on the day you click on our links will generate a small commission which is used to run the website. Here is a link for Amazon and B&H. You can also get me a ☕ Ko-fi or old school Paypal. Thanks! To find out more about how to support this advice service check HERE


Do You NEED 5GbE NAS? (Or Should You Skip Ahead to 10GbE)
UGREEN DXP4800 PRO NAS Review
Minisforum G7 Pro Review
CAN YOU TRUST UNIFI REVIEWS? Let's Discuss Reviewing UniFi...
WHERE IS SYNOLOGY DSM 8? and DO YOU CARE? (RAID Room)
UniFi Routers vs OpenWRT DIY Routers - Which Should You Choose?
Access content via Patreon or KO-FI
Discover more from NAS Compares
Subscribe to get the latest posts sent to your email.
DISCUSS with others your opinion about this subject.
ASK questions to NAS community
SHARE more details what you have found on this subject
IMPROVE this niche ecosystem, let us know what to change/fix on this site