PS5 compatible NVME M.2 SSD

Have you tested any SSD yourself? Let others know!
Tested other SSD and it works? Add that to comments bellow and help others!
Get an alert every time something gets added to this specific article!
Compatibility requirements
Interface: PCIe Gen4 x4 M.2 NVMe SSD
Capacity: 250GB – 4TB
Cooling structure: Using an M.2 SSD with your PS5 console requires effective heat dissipation with a cooling structure, such as a heatsink. You can attach one to your M.2 SSD yourself, either in a single-sided format, or double-sided format. There are also M.2 SSDs that have cooling structures (such as heatsinks) built in.
Sequential read speed: 5,500MB/s or faster is recommended
Module width: 22mm width (25mm width is not supported)
Form Factor: M.2 type 2230, 2242, 2260, 2280 and 22110.
These numbers can be found on retail listings for M.2 SSD devices. The first two digits refer to the width, the remaining digits to the length.
Socket type: Socket 3 (Key M)
Total size including cooling structure:
In millimeters: smaller than 110mm (L) x 25mm (W) x 11.25mm (H).
In inches: smaller than 4.33in (L) x 0.984 in (W) x 0.442in (H).
See below for full requirements.
- Both single-sided and double-sided M.2 SSD devices are supported.
- M.2 SATA SSDs aren’t supported.
M.2 SSD installation steps
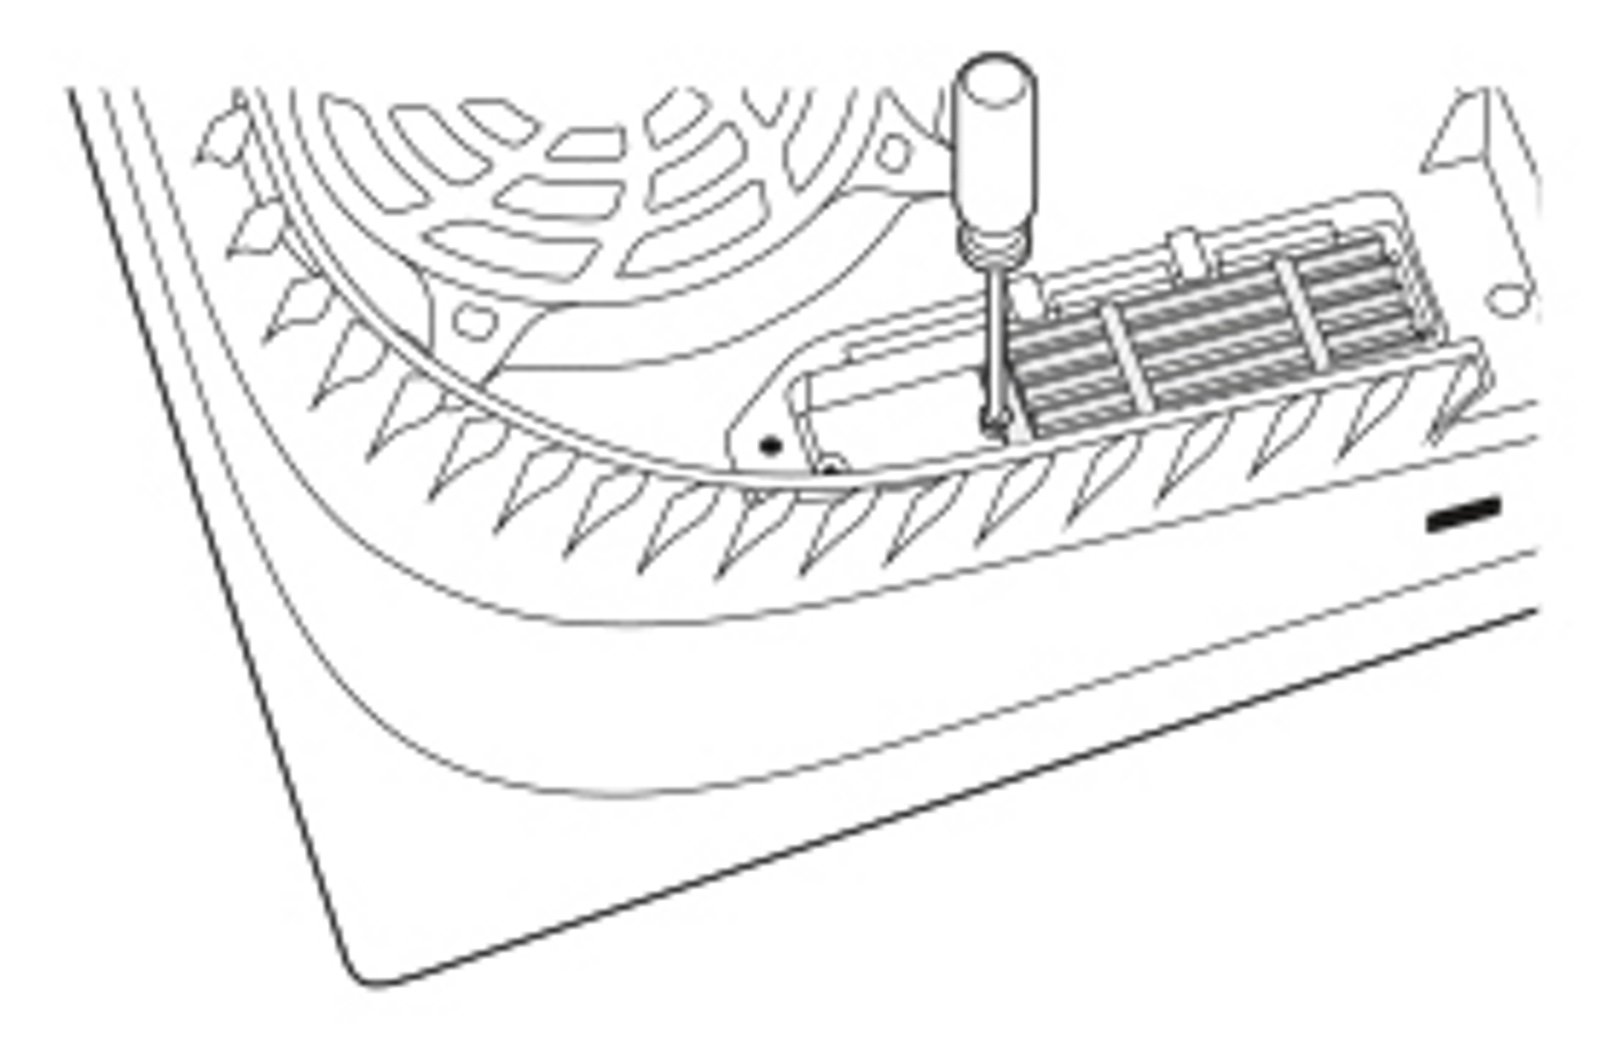
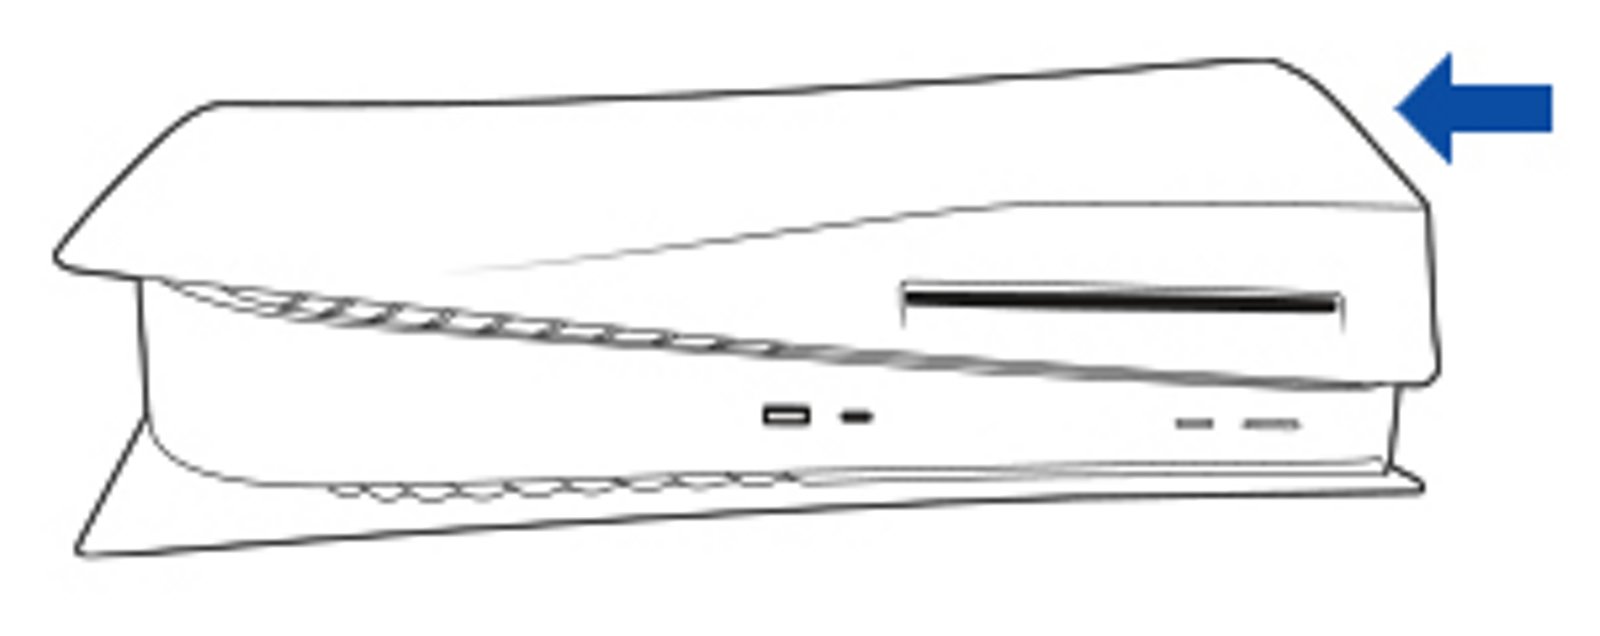

Note: Don’t power on or play on your console while the cover is off.
If it is the first time using your M.2 SSD with your PS5 console, you’ll need to format your M.2 SSD after installing. When you format your M.2 SSD, any data saved on the drive is erased. Data erased this way can’t be recovered, so be careful and make sure you don’t erase important data.
Do not turn off the power while saving data or while your M.2 SSD is being formatted. Doing so may cause data loss, corruption, or damage to your M.2 SSD or PS5 console.
Do not use an M.2 SSD without a heat-dissipation mechanism, such as a heat sink or heat transfer sheet. Your M.2 SSD may come with such parts or you may need to purchase them separately.
- Go to Settings > System > System Software > Console Information to check that the beta system version is installed.
- Press and hold the power button for three seconds to turn off your PS5 console, then remove all cables and devices from the console. Wait a while for the PS5 console to cool down.
- Place the console on a soft cloth on a flat surface and remove the base.
- Position the console so that the screw hole for the base is facing you, the PS logo is facedown and the power button is on your left side.
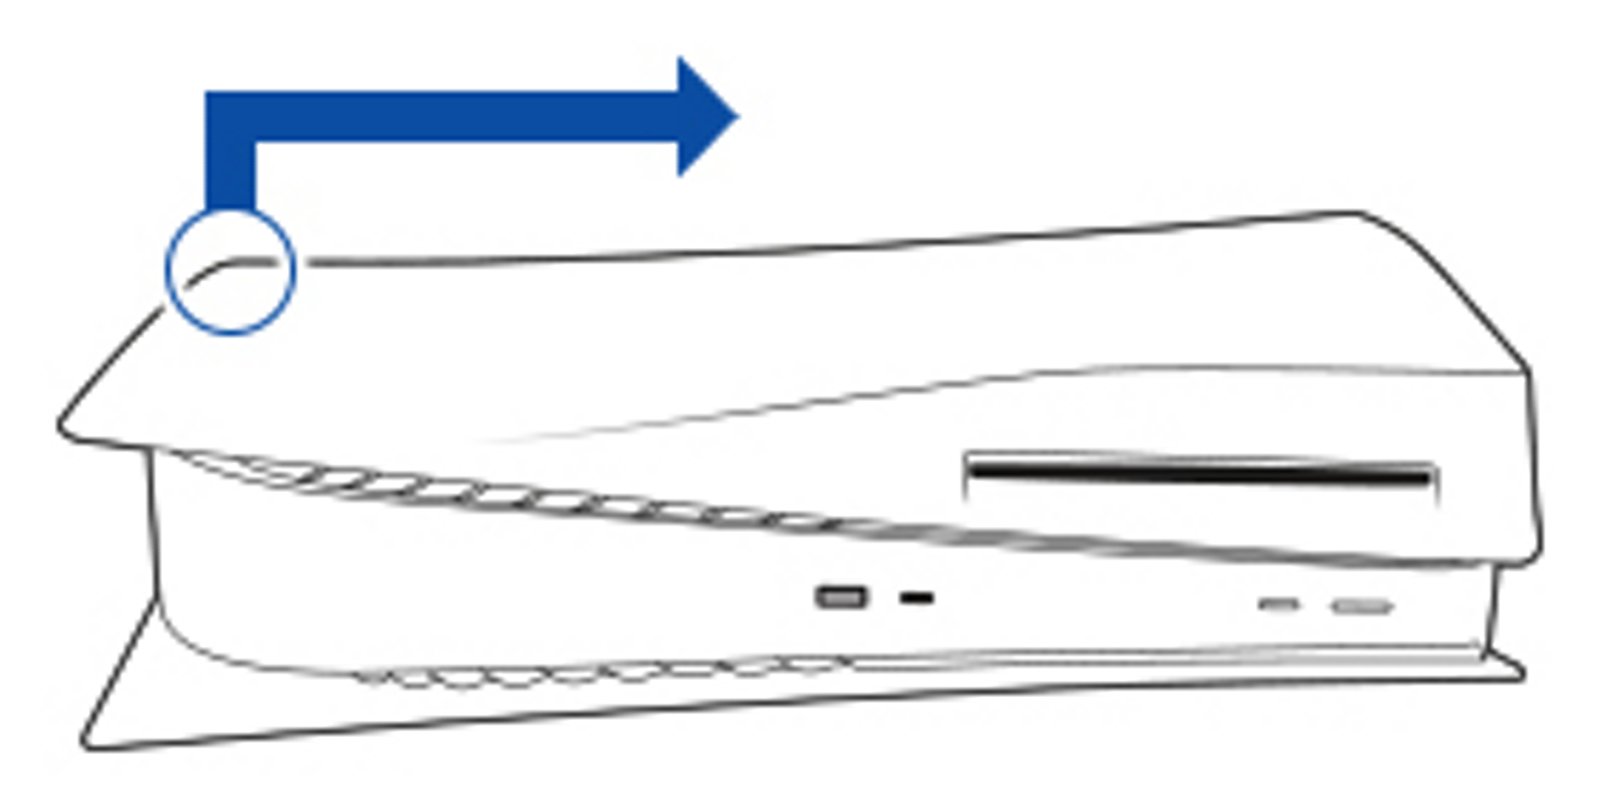
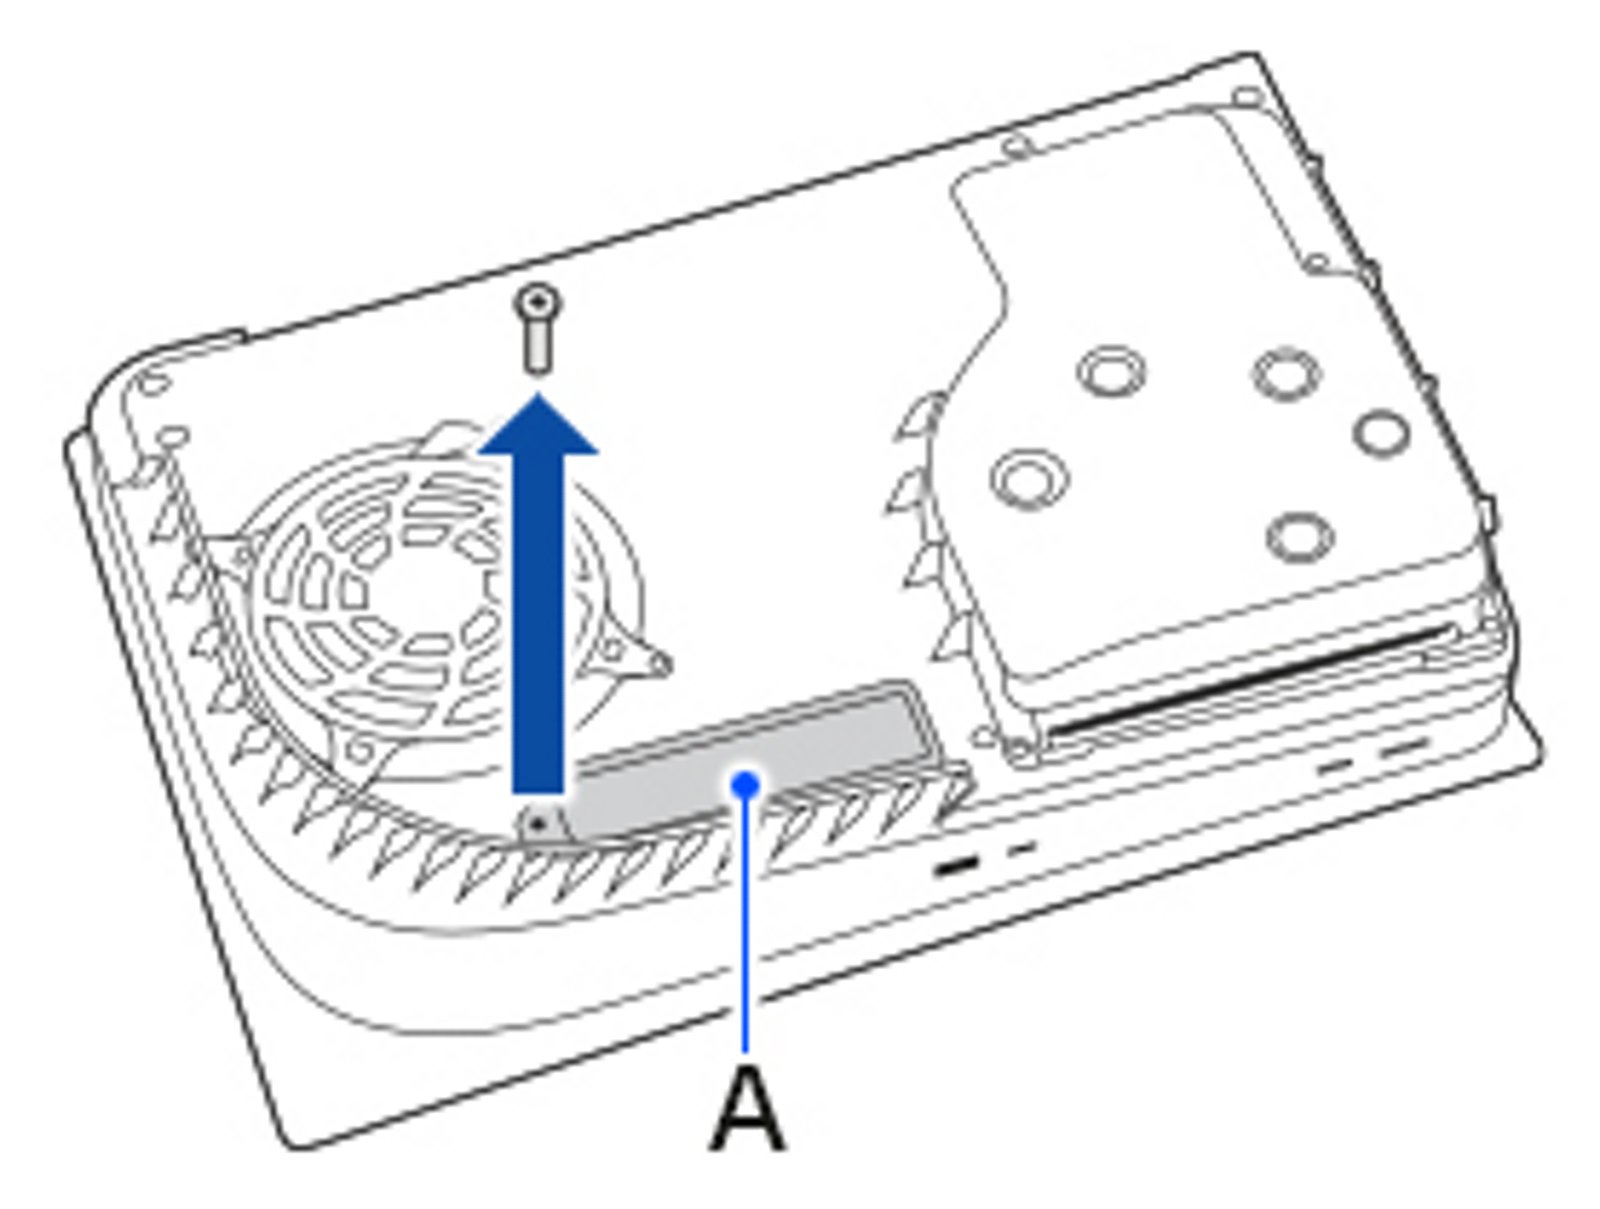
- Place your palms near the top corners and grip the edge of the cover. Gently pull the cover up and towards yourself. You may hear a click. The cover lifts away. There is a long rectangular cover over the expansion slot, secured with one screw at the top.
- Remove the screw from the expansion slot cover (A) and then remove the cover.
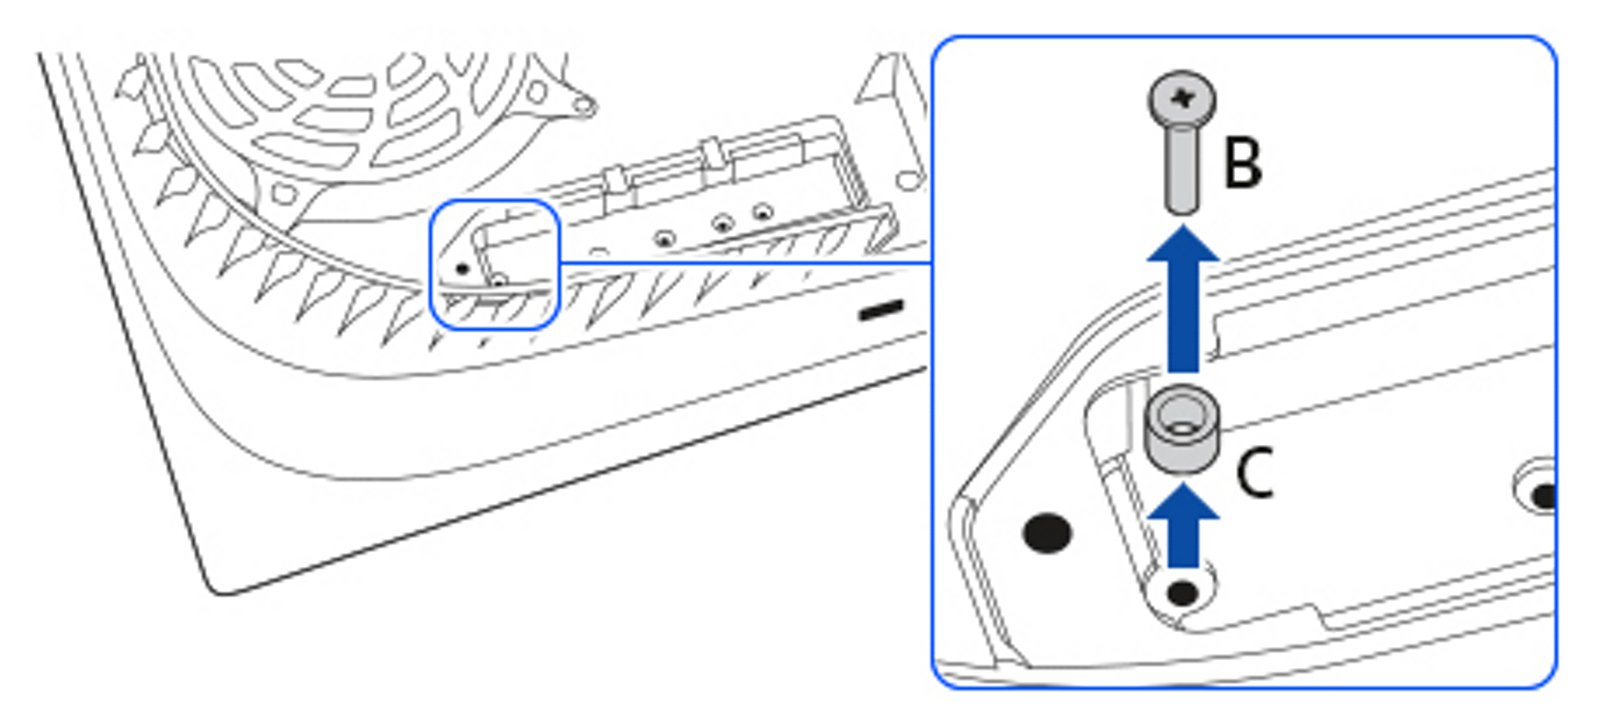
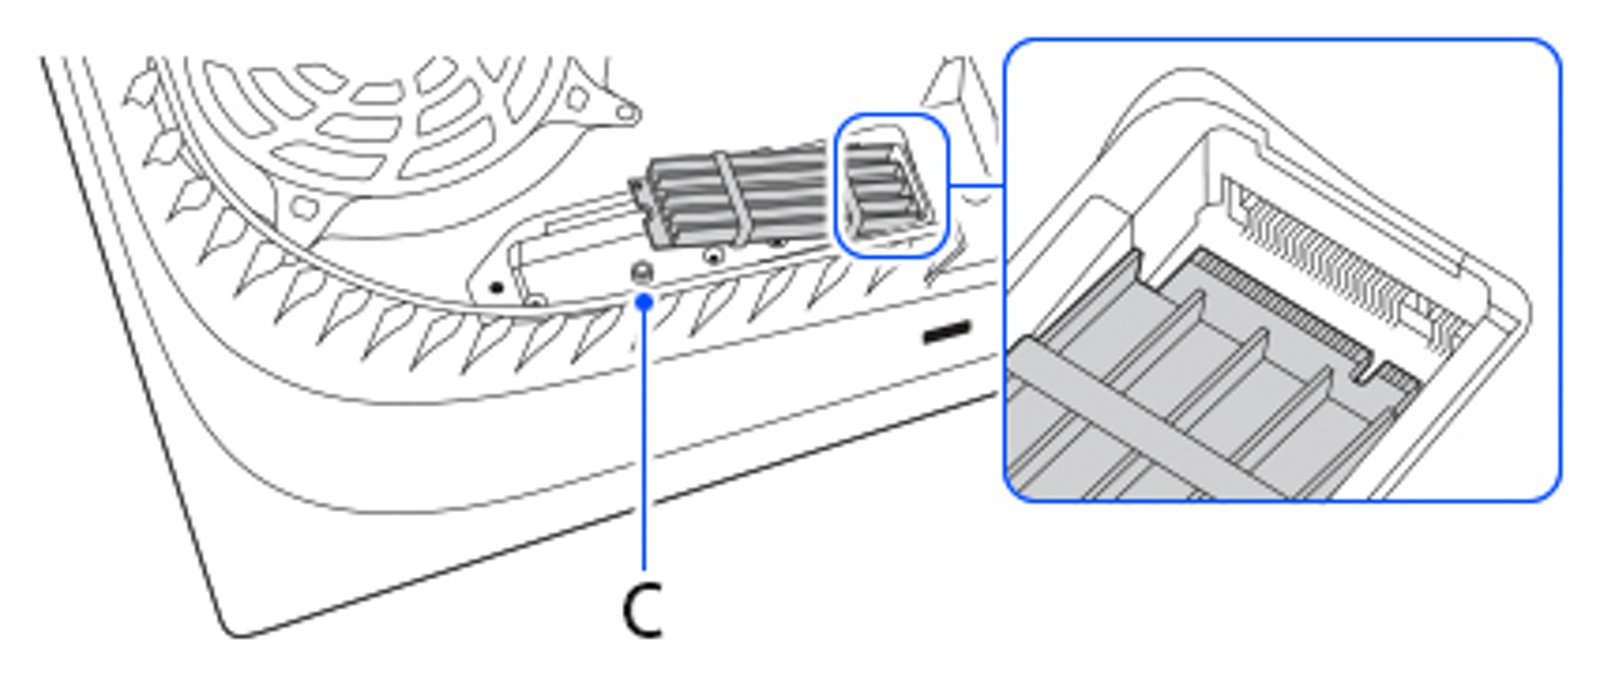
- Remove the screw (B) and spacer (C), and then adjust the spacer to the size of your M.2 SSD.
- Hold the edge of your M.2 SSD, align it with the notch on the expansion connector, and then starting from diagonally upward firmly insert it all the way in. If you proceed to the next step while your M.2 SSD is incorrectly inserted or not firmly inserted all the way in, it may cause damage to the terminal and your PS5 console.
- Tilt your M.2 SSD down and fasten it with screws.
- Attach the expansion slot cover and fasten the screw.
- Replace the cover by positioning it slightly away (about 2 cm or 3/4 inch) from the top edge and sliding it back into place. You’ll hear a click when the cover is secured.
- Connect the AC power cord, cables, and base, and then turn on the power.
When your PS5 console turns on, the formatting guide appears. Follow the on-screen instructions and format your M.2 SSD.
| Where to Buy a Product | |||
|
|
    
|

|
VISIT RETAILER ➤ |
 |
    
|

|
VISIT RETAILER ➤ |
We use affiliate links on the blog allowing NAScompares information and advice service to be free of charge to you. Anything you purchase on the day you click on our links will generate a small commission which is used to run the website. Here is a link for Amazon and B&H. You can also get me a ☕ Ko-fi or old school Paypal. Thanks! To find out more about how to support this advice service check HERE
WHERE IS SYNOLOGY DSM 8? and DO YOU CARE? (RAID Room)
UniFi Routers vs OpenWRT DIY Routers - Which Should You Choose?
WHY IS PLEX A BIT S#!t NOW? IS 2026 JELLYFIN TIME? (RAID Room)
Synology FS200T NAS is STILL COMING... But... WHY?
Gl.iNet vs UniFi Travel Routers - Which Should You Buy?
UnifyDrive UP6 Mobile NAS Review
Access content via Patreon or KO-FI
Discover more from NAS Compares
Subscribe to get the latest posts sent to your email.


DISCUSS with others your opinion about this subject.
ASK questions to NAS community
SHARE more details what you have found on this subject
IMPROVE this niche ecosystem, let us know what to change/fix on this site