

How to access files on Synology NAS with WebDAV
Overview
WebDAV is an extension of HTTP designed to let users edit and manage files stored on remote servers. With Synology DiskStation Manager’s WebDAV service, client programs that support WebDAV, such as Windows Explorer, Mac OS Finder, Linux File Browser, will be able to remotely access a Synology NAS just like accessing a local network drive.
This tutorial will explain how to enable WebDAV on your Synology NAS and start accessing files from anywhere.
1. Before You Start
This article assumes that you have already done the following:
- Set up your Synology NAS.
- Installed Synology DiskStation Manager (DSM) on your Synology NAS.
- Configured your Synology NAS to be accessible over the Internet (see this tutorial).
Note:
- For information about basic hardware and software setup, please refer to the Hardware Installation Guide for your Synology product. In addition, you can also see Synology NAS User’s Guide for additional information related to this article. Both documents are available at Synology’s Download Center.
1.1 Enabling WebDAV on Your Synology NAS
Before accessing files via WebDAV, you will need to enable it on your Synology NAS.
To enable WebDAV service:
- Log in to DSM with an account belonging to the administrators group.
- Go to Package Center to install the WebDAV Server package.

- After the installation is done, launch WebDAV Server, and tick the Enable HTTP checkbox.
- Click Apply to save settings.

2. Accessing Files on Synology NAS with WebDAV
Once WebDAV has been enabled on your Synology NAS, please follow the instructions below to begin accessing files with Windows, Mac, or Linux devices.
Note:
- We recommend using a WebDAV client which supports UTF-8 to avoid encoding errors when WebDAV services are in use.
2.1 For Windows
For Windows users who would like to use WebDAV protocol to access files on Synology NAS devices, we suggest using NetDrive, a drive mapping application free for non-commercial use for the evaluation period of 60 days.
Note:
- If you would like to use Windows’ Map Network Drive to access files on your Synology NAS via WebDAV, please obtain a valid SSL certificate and access your Synology NAS via an HTTPS connection.
To access files on your Synology NAS with Windows 7 and NetDrive:
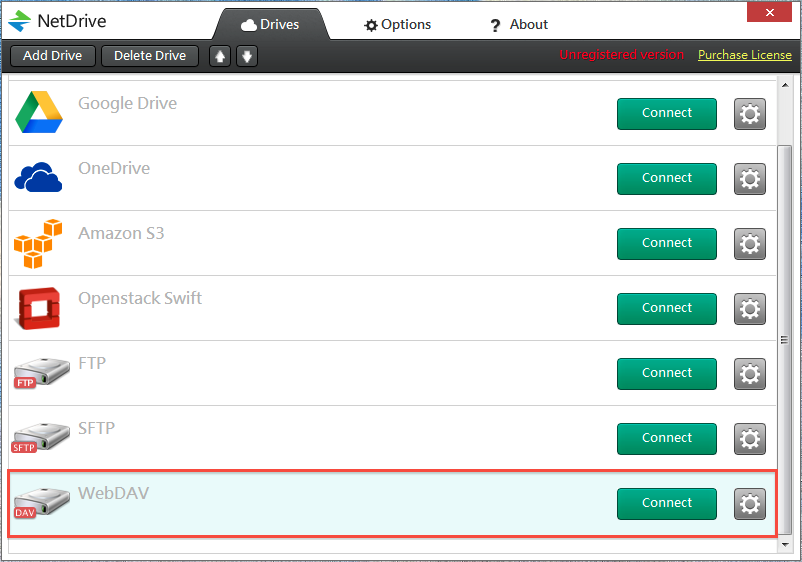
- Download, install, and open NetDrive.
- Click the Connect button next to WebDAV.
- Enter the following information:
-
- Type: Choose WebDAV from the drop-down list.
- Drive: Select a network drive letter from the drop-down list to map to WebDAV service.
- Name: Provide a name for the connection.
- URL: Enter the IP address or hostname of your Synology NAS.
- Port: 5005 (or whichever port number you specified when enabling WebDAV service on your Synology NAS).
- User: Your DSM user name.
- Password: Your DSM password.

-
- Click Save to save the settings.
- Click Connect.
- Now you should be able to see the shared folders on your Synology NAS in Windows Explorer. They should also appear as a mapped network drive under Start > Computer.

2.2 For Mac
For Mac users, you can connect to your Synology NAS via WebDAV by simply using Finder.
To access your Synology NAS via WebDAV with Mac devices:
- In Finder, click Go > Connect to Server from the menu bar.

- In the Server Address field, enter your Synology NAS device’s IP address or domain name preceded by “http://” and followed with “:5005” (or whichever port number you specified when enabling WebDAV service). For example: http://pm.synology.com:5005/.
- Click Connect to continue.

- Enter your DSM user name and password in the Name and Password fields. Then click Connect.

- Now you should be able to see the shared folders on your Synology NAS in Finder.

Alternatively, you may also find your Synology NAS and its shared folders under SHARED on the Finder sidebar.

2.3 For Ubuntu
For Ubuntu users, please follow the instructions below to access files on your Synology NAS via WebDAV.
- Go to File Browser (or Files).
- Click Connect to Server from the menu bar.
- Enter the Server Address. Click Connect to continue.
Note: If HTTP protocol is not recognized by your Ubuntu, please try to use DAV protocol.

- Enter your credentials and click Connect.

- Now you should be able to see the shared folders on your Synology NAS in the File Browser.

3. What to Know before Using WebDAV over HTTPS
To access your Synology NAS using WebDAV over HTTPS, a valid SSL certificate must be exported from the Synology NAS first. The certificate must then be imported to your client device.
Please follow the instructions below:
- Log in to DSM with an account belonging to the administrators group.
- Launch the WebDAV Server package, and tick the Enable HTTPS checkbox.

- Go to Control Panel > Security > Certificate to create and export a certificate.

- On your client device, import the certificate you have exported. For detailed instructions, please see the Help and tutorials of your client device.
Source: Synology.com