

What is Qnap default password?
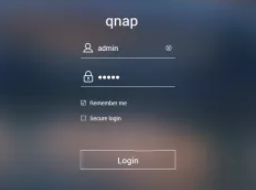
A Quick answer is : admin
The default username :admin
and default password :admin
If Qnap has been set up by SPAN, then default password will be: password
After QTS 4.4.2
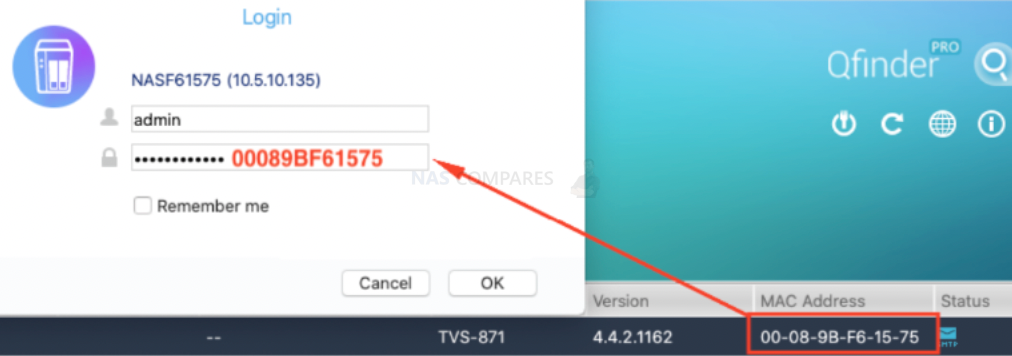
The default admin password is the first MAC address of the NAS in uppercase letters and without special characters.
For example, the first MAC address of a TVS-871 is 00-08-9B-F6-15-75. The default admin password is 00089BF61575. You can log in to the NAS with admin/00089BF61575 after resetting the NAS.
Where can I find the first MAC address of my NAS?
There are two ways to find the First MAC address.
- Open Qfinder Pro and look at the MAC Address column.
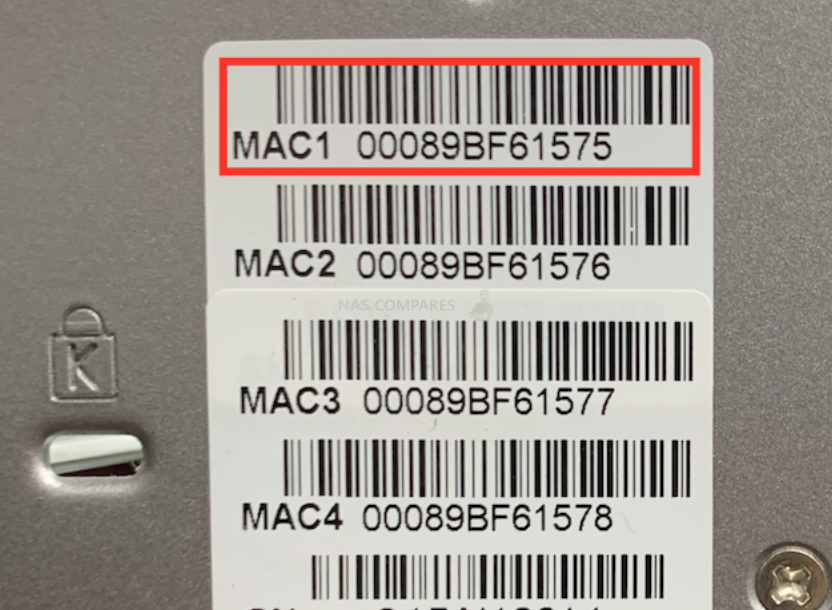
- Look at the rear of your NAS and find the MAC Address sticker. The MAC Address to use is MAC1.
Before QTS 4.4.1 (QTS 4.2.2/QTS 4.3.3/QTS 4.3.5/QTS 4.3.6/QTS 4.4.1 are included)
The default admin password is admin. You can log in to the NAS with admin/admin after resetting the NAS.
NAS Access
|
Method |
Description |
Requirements |
|---|---|---|
|
Web browser |
You can access the NAS using any computer on the same network if you have the following information:
For details, see Accessing the NAS Using a Browser. |
|
|
Qfinder Pro |
Qfinder Pro is a desktop utility that supports Windows, macOS, Linux, and Chrome OS. For details, see Accessing the NAS Using Qfinder Pro. |
|
|
Qmanager |
Qmanager is a mobile application that enables administrators to manage and monitor NAS devices on the same network. You can download Qmanager from the Apple App Store and the Google Play Store. For details, see Accessing the NAS Using Qmanager. |
|
|
Explorer (Windows) |
You can map a NAS shared folder as a network drive to easily access files using Explorer. For details on mapping shared folders, see Mapping a Shared Folder on a Windows Computer. |
|
|
Finder (macOS) |
You can map a NAS shared folder as a network drive to easily access files using Finder. For details on mounting shared folders, see Mounting a Shared Folder on a Mac Computer. |
|
There are essentially five different ways of resetting your NAS. We’re going to take a look at these and explain what exactly they will do to your configuration and data. These 5 methods can be divided into two others – reset button (hardware reset) and via the user interface (software reset).
Hardware reset by the physical reset button located on the back of the unit
 Please find a sharp object such as a paperclip or pin and insert it to the hole located below the “Reset” sign on the back of the unit. A little click can be felt when the button is pressed.
1. Three second press and hold of the reset button
Please refer to the picture above and hold the reset button for 3 seconds. You will hear a beep to let you know the reset has been successful.
Your data will not be deleted, but the following settings will be reset:
- Password for the admin account will be changed to the default “admin“. Please refer to the following article if you are still not able to log in to QTS with the default admin/admin login after this.
- TCP/IP configuration: Obtain IP address settings automatically via DHCP.
- TCP/IP configuration: Disable Jumbo Frame.
- TCP/IP configuration: If port trunking is enabled (dual LAN models only), the port trunking mode will be reset to “Active Backup (Failover)”.
- System port: 8080 (system service port).
- Security level: Low (Allow all connections).
- VLAN will be disabled
- Service binding: All NAS services run on all available network interfaces.
2. Ten second press and hold of the reset button
Please refer to the picture above and hold the reset button for 10 seconds. You will hear two beeps, one at 3 seconds and one at 10 seconds to let you know the reset has been successful.
In this case all settings including users and groups as well as shared folders will be removed. Your data on the drives will not be deleted. To retrieve the old data after advanced system reset you need to create the same network shares on the NAS and the data will be accessible again.
Software resets executed from the QTS interface (web browser)
To locate these options, open Control Panel > Backup / Restore > Restore to Factory Default

1. Restore Factory Defaults & Format All Volumes
This will reset the system settings to its defaults and it will also format all of the volumes currently in the unit.
2. Reset Settings
Comparable to the 10 second button press mentioned in the Hardware resets section earlier. No data will be deleted.
3. Reinitialize NAS
All data will be deleted. The disk partitions will be cleared and the NAS will have to be set up again by the QTS Quick Setup after rebooting.
| Where to Buy a Product | |||
 |
    
|

|
VISIT RETAILER ➤ |
 |
|
|
VISIT RETAILER ➤ |
 |
|
|
VISIT RETAILER ➤ |
|
|
|
|
VISIT RETAILER ➤ |
We use affiliate links on the blog allowing NAScompares information and advice service to be free of charge to you. Anything you purchase on the day you click on our links will generate a small commission which is used to run the website. Here is a link for Amazon and B&H. You can also get me a ☕ Ko-fi or old school Paypal. Thanks! To find out more about how to support this advice service check HERE If you need to fix or configure a NAS, check Fiver Have you thought about helping others with your knowledge? Find Instructions Here
