head to Synology
- Login to your NAS
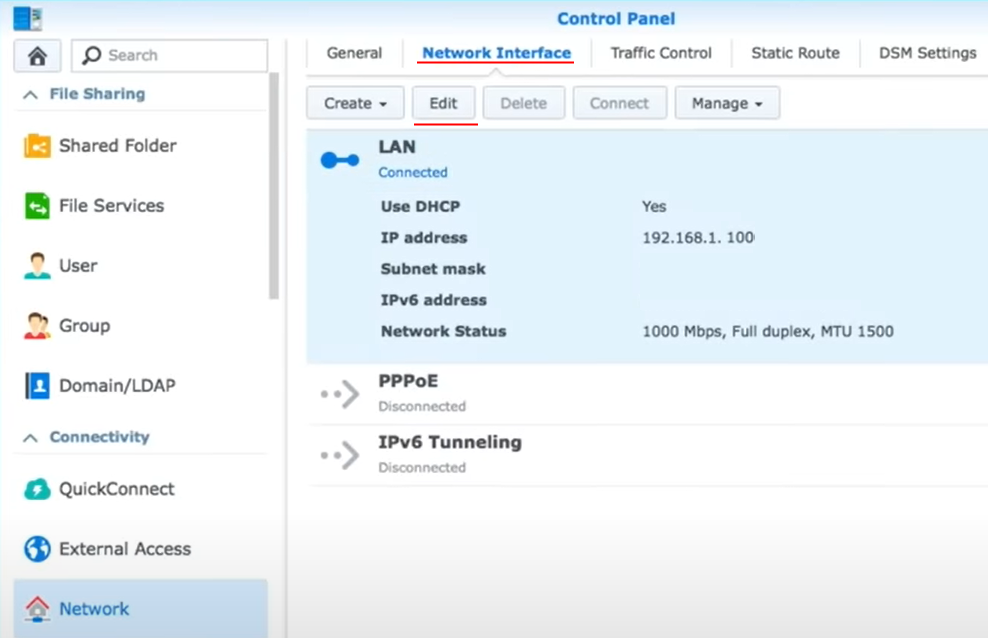
- Open Control Panel
- Open Network
- Select Network Interface from the tabs above
- Select LAN, click on Edit
- and choose manual configuration
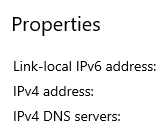
- you can provide your NDS server (router IP, which you found next to IP settings earlier)


Make sure you have the same IP range as the original NAS. If both NAS have only one LAN port this means you have no access to DHCP and you need to set the IP manually on both NASes. Make sure one IP has last digit different.
NAS No 1 could be 192.168.1.10 and another 192.168.1.11
Map network drive in Synology
You can mount remote folders from remote servers (such as network computers or other Synology NAS devices) to navigate and manage the mounted folders via File Station.
To mount a remote CIFS shared folder*:
-
- Click Tools > Mount Remote Folder > CIFS Shared Folder.

-
- In the Folder field, specify the remote folder path in the format of
\\Remote_Server\Remote_Folder, such as\\192.168.0.2\shareor\\chad\cheeseburger\pictures. - If the remote server requires access privileges to the remote folder, enter your user credentials of the remote server in the Account name and Password fields.
- Click Browse to select or create an empty destination folder on your Synology NAS for mounting the remote folder.
- In the Folder field, specify the remote folder path in the format of

- Tick Mount automatically on startup if you want Synology NAS to mount this remote folder on every system startup or reboot.
- Click Mount to have the remote folder mounted to the destination folder. You can now navigate and manage the remote folder from your Synology NAS.
To mount a remote NFS shared folder:
-
- Click Tools > Mount Remote Folder > NFS Shared Folder.

-
- In the Folder field, specify the remote folder path in the format of
Remote_Server:/Remote_Folder_Path, such as192.168.0.2:/volume1/share. - Select the desired NFS version and transport protocol.
- Click Browse to select or create an empty destination folder on your Synology NAS for mounting the remote folder.
- In the Folder field, specify the remote folder path in the format of

- Tick Mount automatically on startup if you want your Synology NAS to mount this remote folder on every system startup or reboot.
- Click Mount to have the remote folder mounted to the destination folder. You can now navigate and manage the remote folder from your Synology NAS.
Note:
- NFSv4 only supports the TCP protocol.
- To mount a remote folder from an alternative Synology NAS to your Synology NAS, follow the steps:
- Log in to the alternative Synology NAS, go to File Station, and browse to the desired folder.
- Right-click on the folder and select Properties.
- Go to General and copy the Location folder path for use.
To unmount a remote folder:
-
- Select the remote folder you want to unmount, and click Tools > Unmount.

-
- Alternatively, simply right-click on the remote folder and select Unmount.

Note:
- The maximum number of concurrent remote folders is 100.
- You are only allowed to mount remote folders from a remote server that supports the CIFS or the NFS protocols.
- Remote folders can only be mounted to subfolders under shared folders.
| Where to Buy a Product | |||
|
|
    
|

|
VISIT RETAILER ➤ |
 |
    
|

|
VISIT RETAILER ➤ |
If you like this service, please consider supporting us.
We use affiliate links on the blog allowing NAScompares information and advice service to be free of charge to you. Anything you purchase on the day you click on our links will generate a small commission which is used to run the website. Here is a link for Amazon and B&H. You can also get me a ☕ Ko-fi or old school Paypal. Thanks! To find out more about how to support this advice service check HERE
We use affiliate links on the blog allowing NAScompares information and advice service to be free of charge to you. Anything you purchase on the day you click on our links will generate a small commission which is used to run the website. Here is a link for Amazon and B&H. You can also get me a ☕ Ko-fi or old school Paypal. Thanks! To find out more about how to support this advice service check HERE
Private 🔒 Inner Circle content in last few days :
UniFi Routers vs OpenWRT DIY Routers - Which Should You Choose?
WHY IS PLEX A BIT S#!t NOW? IS 2026 JELLYFIN TIME? (RAID Room)
Synology FS200T NAS is STILL COMING... But... WHY?
Gl.iNet vs UniFi Travel Routers - Which Should You Buy?
UnifyDrive UP6 Mobile NAS Review
UniFi Travel Router Tests - Aeroplane Sharing, WiFi Portals, Power Draw, Heat and More
Access content via Patreon or KO-FI
Discover more from NAS Compares
Subscribe to get the latest posts sent to your email.


DISCUSS with others your opinion about this subject.
ASK questions to NAS community
SHARE more details what you have found on this subject
IMPROVE this niche ecosystem, let us know what to change/fix on this site