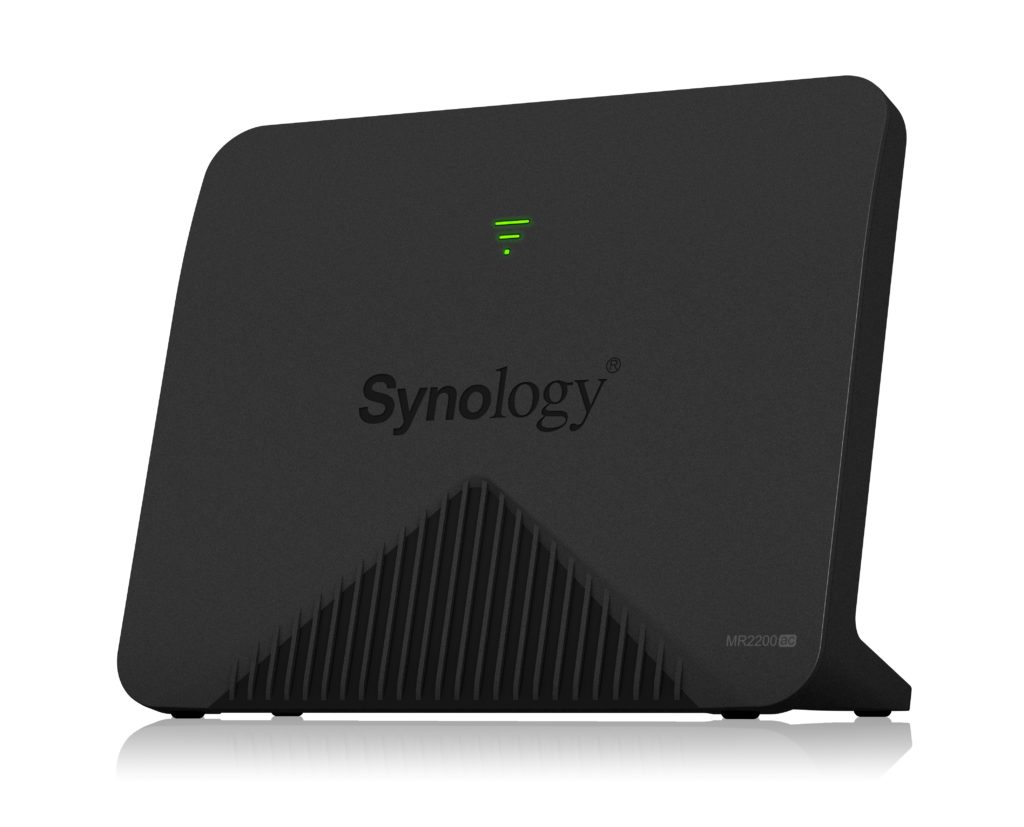
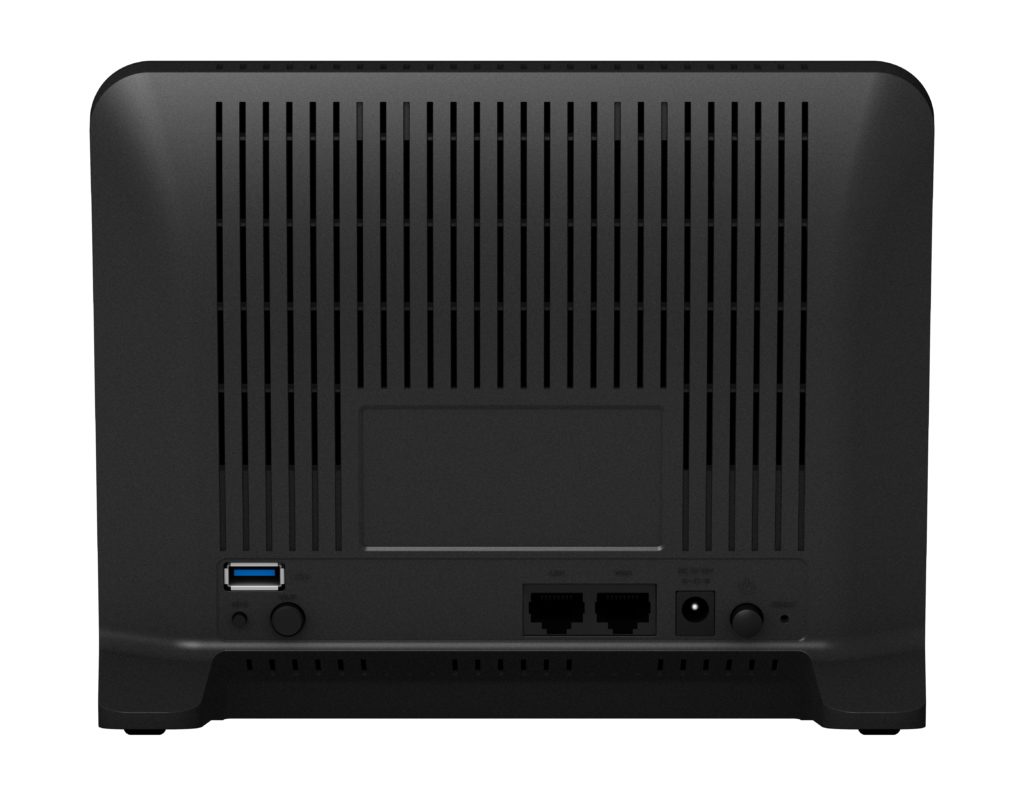
Synology MR2200ac Mesh Router Setup Guide
Thank you for purchasing this Synology product! Before setting up your new Synology Wi-Fi Router, please check the package contents to verify that you have received all of the items below. Also, make sure to read the safety instructions carefully to avoid harming yourself or damaging your Synology Wi-Fi Router.
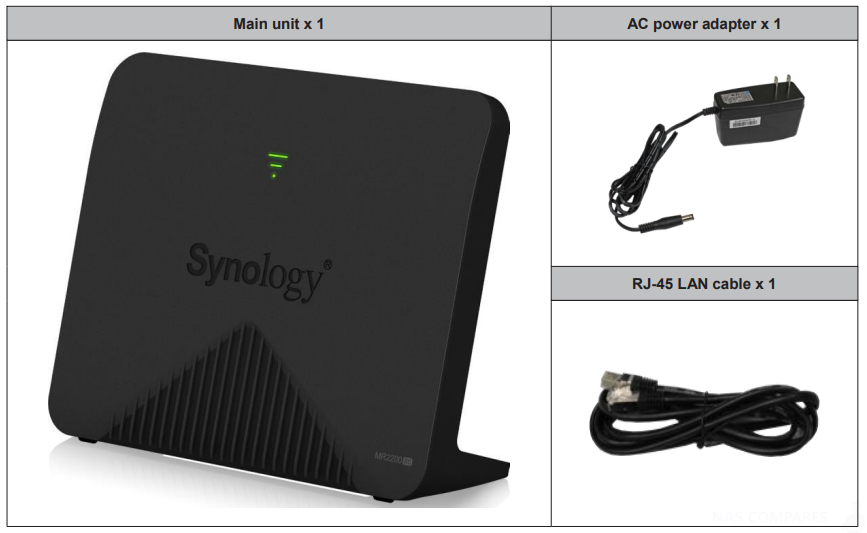
Synology Mesh Router and Accessories
- Main unit x1
- AC power adapter x1
- RJ-45 LAN cable x1
Set up Your Synology Wi-Fi Router Position Your Synology Wi-Fi Router For optimal performance, it is recommended to position your MR2200ac as advised below. • On a stable surface (e.g. an elevated shelf) away from any possible physical interruptions. • Close to the center of the area where the wired/wireless client devices are placed, and within a visible distance from the wireless devices. • In a position where few walls and ceilings are between your MR2200ac and its client devices. • Away from any potential electrical signal sources, such as other wireless routers, 3G/LTE bases, and microwave ovens. • Away from large expanses of metal or other materials, such as metal doors, glass panels, and concrete.
How to Setup the Synology MR2200ac as your Primary WiFi Router
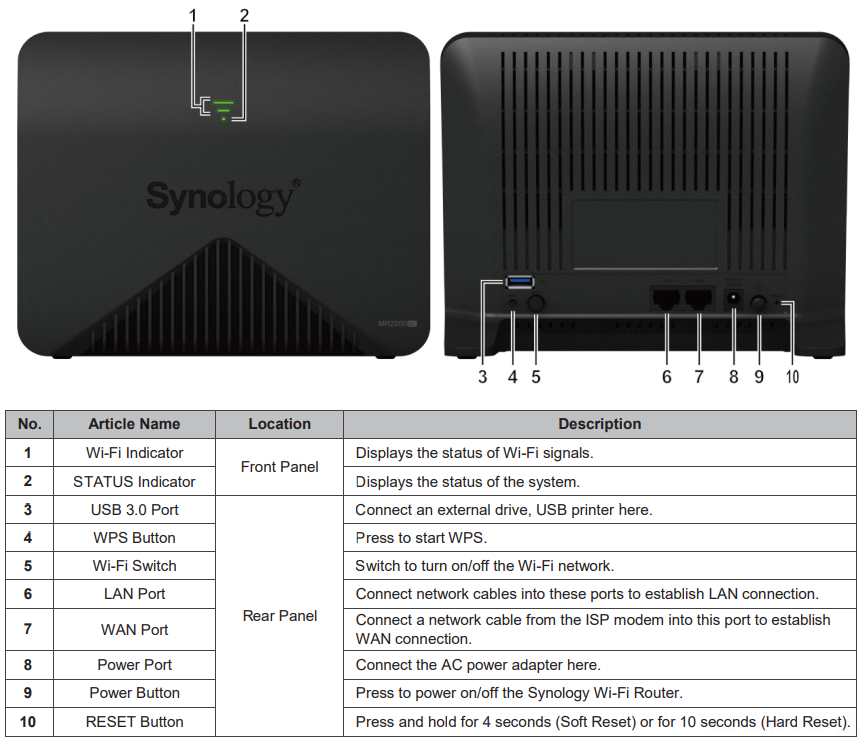
1. Use the included network cable to connect your MR2200ac (at the WAN port) to the ISP modem
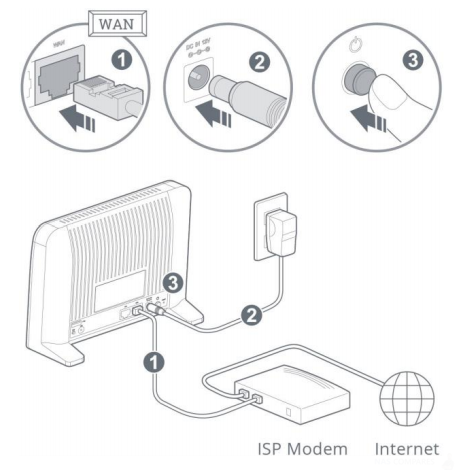
2. Connect one end of the power adapter to the power port on your MR2200ac, and the other end to the power outlet. Press the power button to power on your MR2200ac. Wait for around two minutes until the STATUS LED indicator starts blinking blue slowly
3. Connect wireless client devices to your MR2200ac:
a) When the Wi-Fi Signal LED indicator turns blinking blue, MR2200ac is ready to connect to other devices
b) Use your wireless device to scan and join the Wi-Fi network created by your MR2200ac
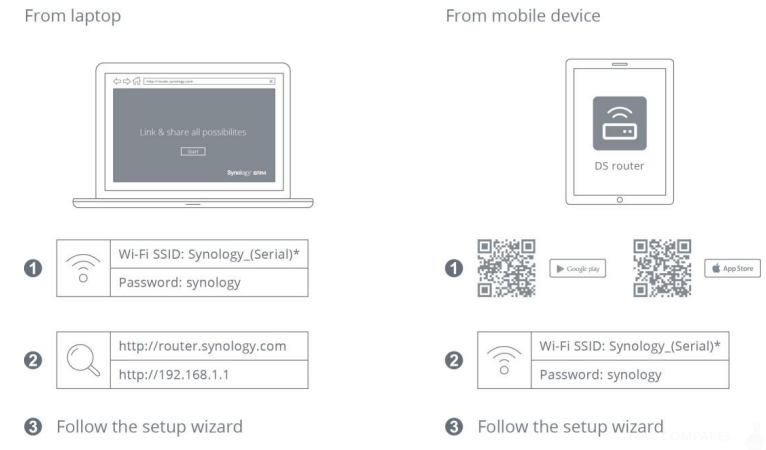
TIP – Below are the default credentials for the Wi-Fi network: 1. Wi-Fi SSID: Synology_serial number 2. Password: synology The default credentials can be changed during the initial SRM setup.
How to Setup the Synology MR2200ac as a Mesh Router to Extend your Existing WiFi
1. Connect one end of the power adapter to the power port on your MR2200ac, and the other end to the power outlet. Press the power button to power on your MR2200ac. Wait for around two minutes until the STATUS LED indicator starts blinking blue slowly
2. Sign in to Synology Router Manager (SRM) on the primary Wi-Fi point, go to Wi-Fi Connect > Wi-Fi Point to add your MR2200ac to the Wi-Fi system
How to Setup and Use Synology Router Manager (SRM)
1. Use a computer or wireless device connected to the MR2200ac’s local network. If you use a wireless device, scan and join the Wi-Fi network (SSID: Synology_serial number; Password: synology)
2. Open a web browser, and enter either URL into the address bar:
a) http://router.synology.com
b) http://192.168.1.1:8000
3. Once connected, click Start to launch the SRM Setup Wizard

4. Fill in the information to set up the administrator account. Click Next to continue
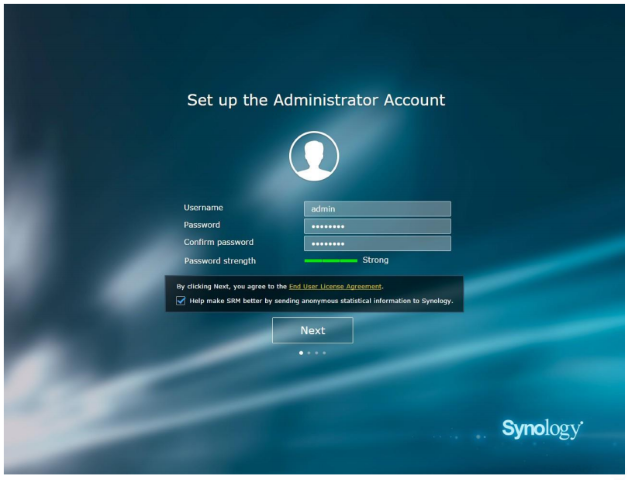
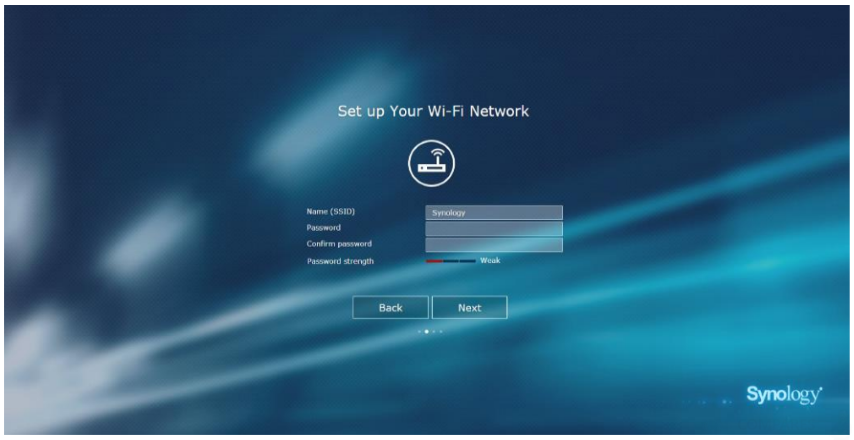
5. Fill in the information to set up the Wi-Fi network. Click Next to continue
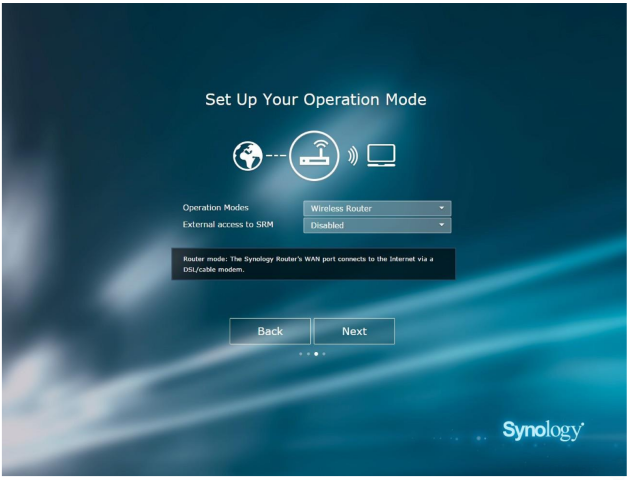
6. Set up the operation mode. When choosing the Wireless Router mode, you can also enable External access to SRM so that only external access via the HTTP(S) port (e.g. 8000/8001) can reach SRM
7. Choose an Internet connection type:
• PPPoE: Choose this option if you have obtained PPPoE credentials from the ISP
• Manual IP: Choose this option if you have obtained an available IP address for use
• Auto IP: Choose this option if you rely on an ISP modem for automatic IP assignment
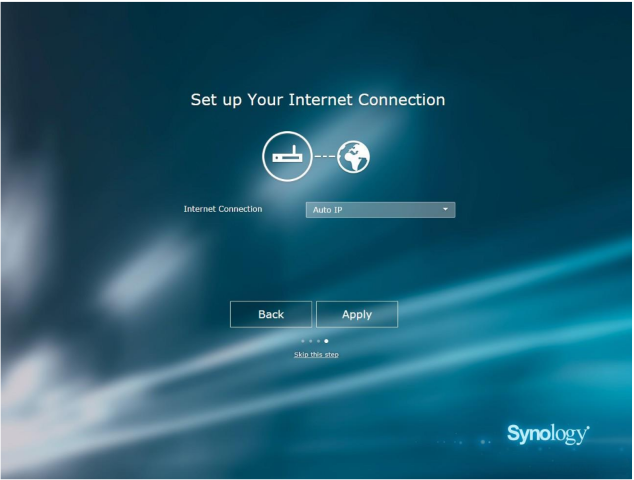
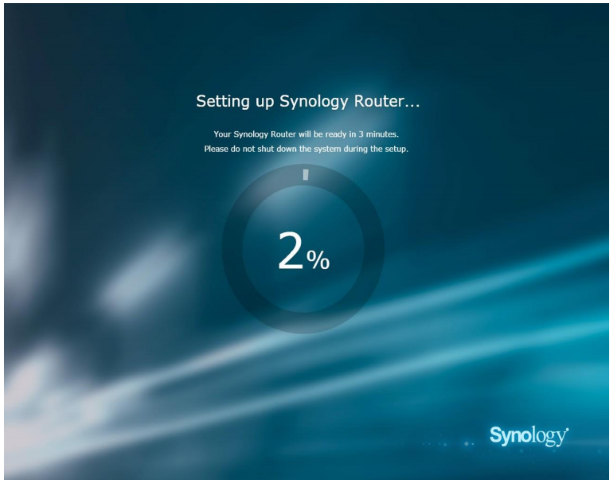
8. The wizard will continue to set up your Synology Router, and it may take up to three minutes to complete the setup
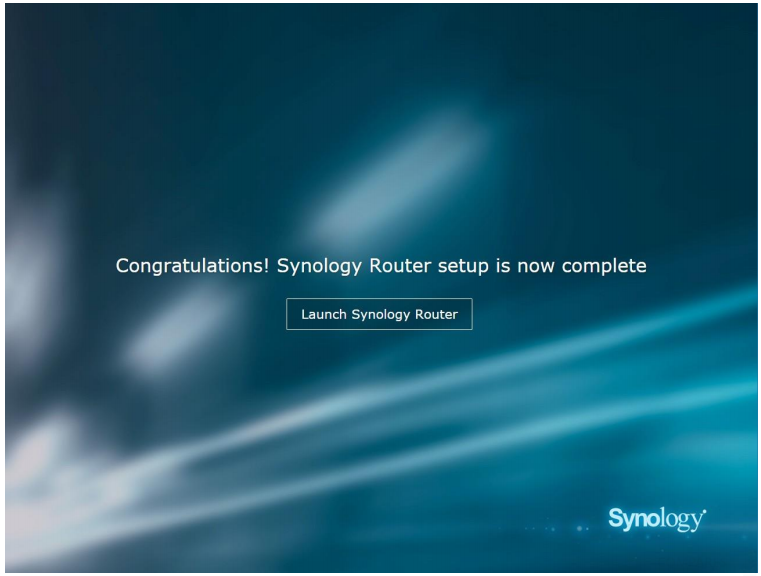
9 After the setup is complete, click Launch Synology Router to enjoy SRM and its various features
It is worth remembering that this is a general demonstration of the SRM setup steps. The steps and available options may somewhat vary depending on your device type (e.g. PC or wireless device), access type (LAN, WAN, or Wireless LAN), and chosen operation mode (Wireless Router or Wireless AP).
https://www.youtube.com/watch?v=NF-yp09ZRnM
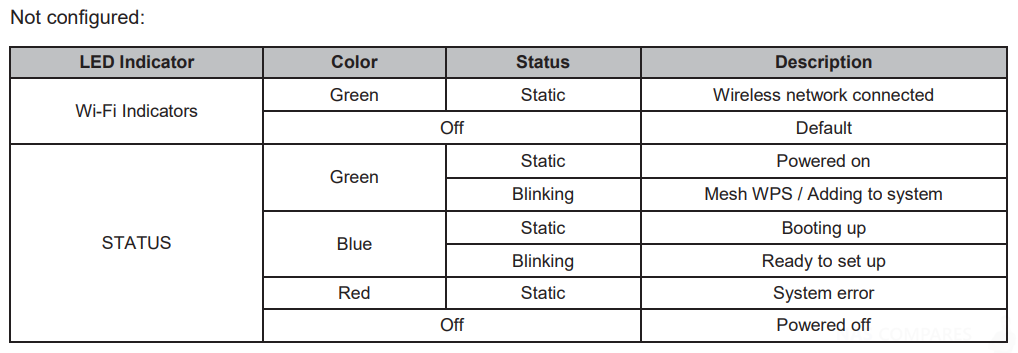
Guide to the LED Indicators on the Synology MR2200ac Mesh Router
Here is a guide to the meaning of different LED lights and colours whilst the Synology MR2200ac is in operations.
When the device has not been configured yet:
When the device is set up and your primary WiFi Router
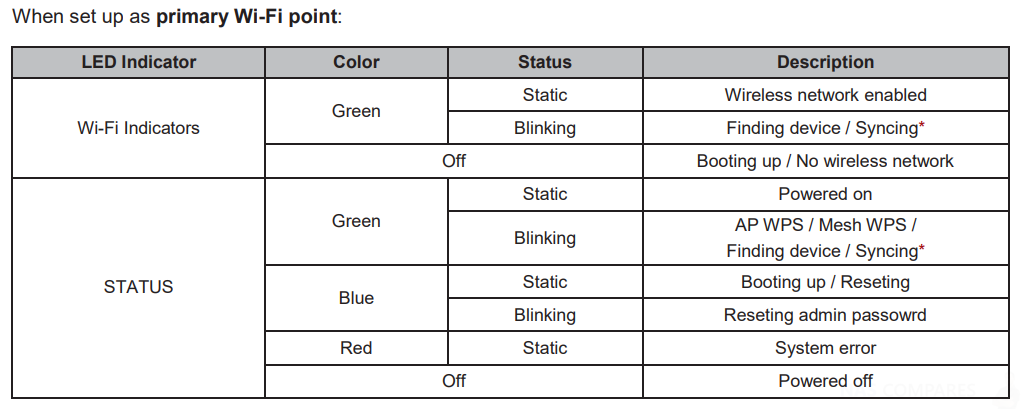
When the Device is acting as a mesh Extention of your existing WiFi
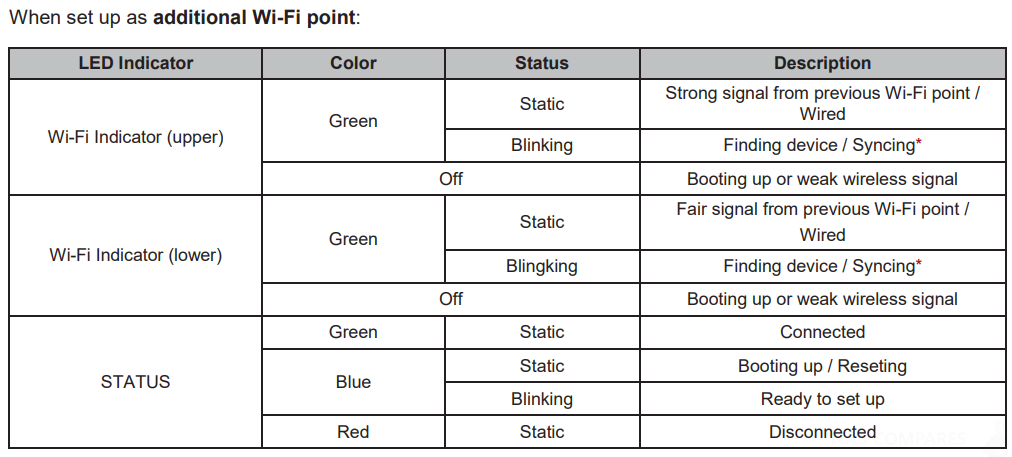
TIP – Finding device: All three indicators will blink simultaneously.2. Syncing: The three indicators will blink in turn.
📧 SUBSCRIBE TO OUR NEWSLETTER 🔔🔒 Join Inner Circle
Get an alert every time something gets added to this specific article!
This description contains links to Amazon. These links will take you to some of the products mentioned in today's content. As an Amazon Associate, I earn from qualifying purchases. Visit the NASCompares Deal Finder to find the best place to buy this device in your region, based on Service, Support and Reputation - Just Search for your NAS Drive in the Box Below
Need Advice on Data Storage from an Expert?
Finally, for free advice about your setup, just leave a message in the comments below here at NASCompares.com and we will get back to you. Need Help?
Where possible (and where appropriate) please provide as much information about your requirements, as then I can arrange the best answer and solution to your needs. Do not worry about your e-mail address being required, it will NOT be used in a mailing list and will NOT be used in any way other than to respond to your enquiry.

|
 |


