

Install Zappiti on Synology DSM7 via docker
You will need Celeron based models such as ds220+/ DS218+ etc to run a docker.
Step 1 – Shutdown and Uninstall Zappiti Server
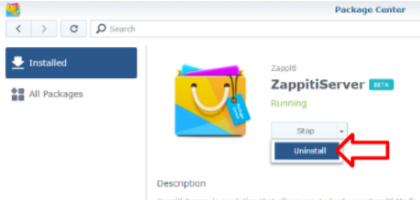
Open the Package Center.
● Go to Installed section.
● Select the package Zappiti Server.
● Click on Action.
● Select Uninstall.
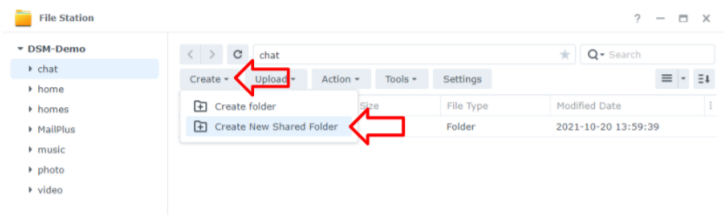
Step 2 – Create a shared folder
Go to File Station.
● Click on Create.
● Select Create New Shared Folder.
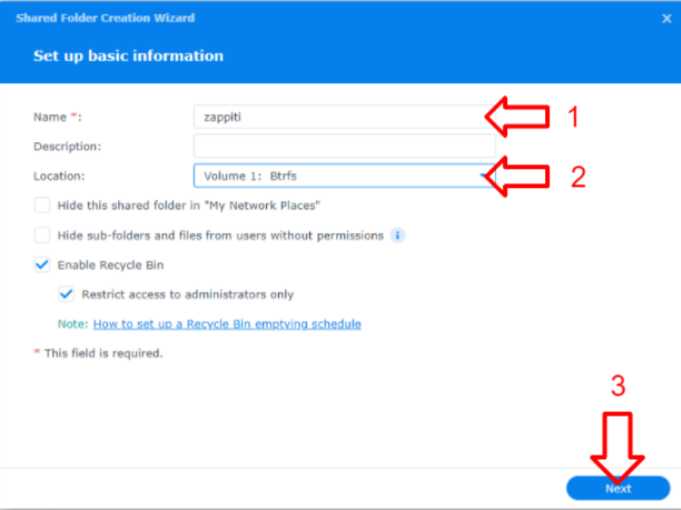
In the field Name, enter zappiti (in lowercase) (1).
● Select the destination volume (default is Volume 1) (2).
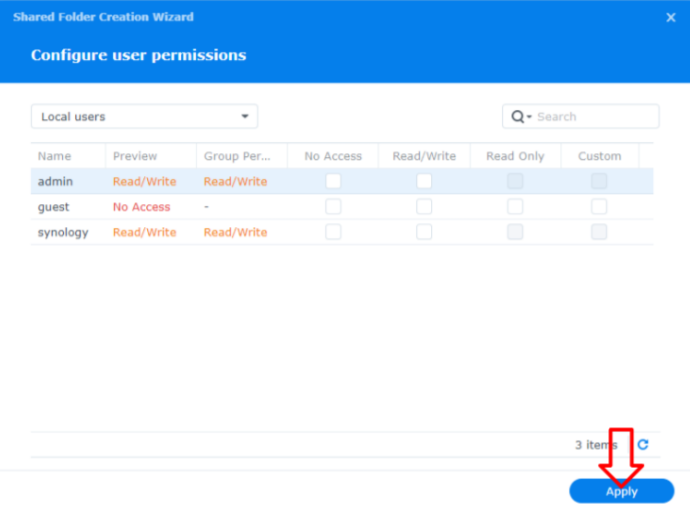
● Validate by clicking on OK / Next (3).
Click OK
Step 3 – Create data and app folders
● Return to File Station.
● Do a right click on the shared folder zappiti previously
created.
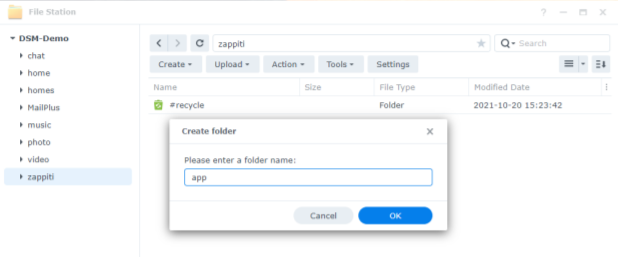
● Select Create folder.
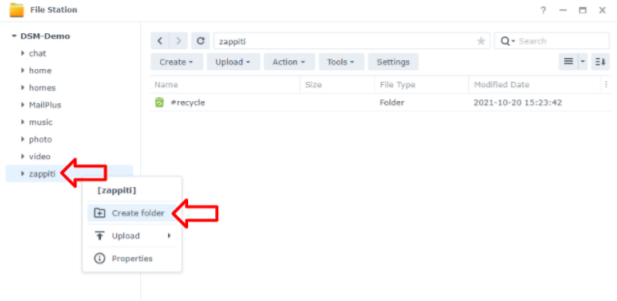
● Enter the folder name app
● Validate by clicking on OK
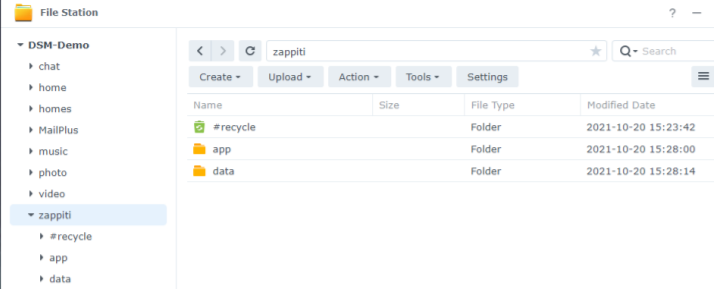
Create folder named – data
Step 4 : Recover your collection
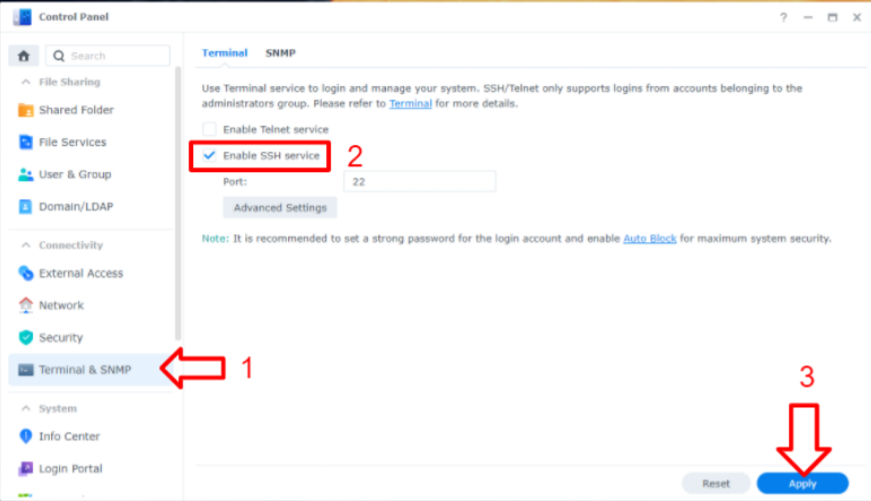
1 – Enable the SSH service on your Synology
● Open the Control Panel
● Go to Terminal & SNMP (1) tab
● Tick the Enable the SSH service (2) box
● Click on Apply (3)
2 – Connect with SSH on your Synology.
Windows process
● Download PuTTy and install it.
● Launch it.
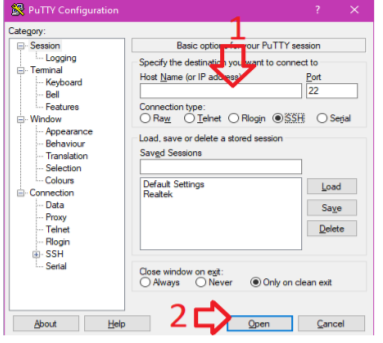
● Enter the IP address of your Synology in the Host Name (or
IP address) (1) field
● Click on Open (2)
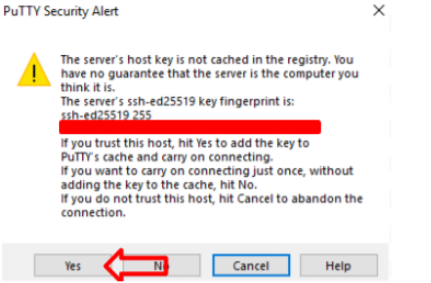
● If needed, accept the certificate by clicking on Yes.
● Enter your administrator credentials
● Validate with Enter
Mac process
● Launch the app Terminal (located by default in
LaunchPad/Others/Terminal)
● Type the command ssh [user]@[nas_ip_adress] where
[user] is a user have administrator privileges.
Example : ssh admin@192.168.1.200.
● Accept the certificate if necessary by typing yes then validate.
● Enter your administrator credentials
● Validate with Enter

3 – Move the Zappiti Server files to their new location.
Windows and Mac
● Type this command :
sudo mv $(sudo find /volume* -maxdepth 1 -type d -name “Zappiti-Server” -print -quit)/zappiti/* /volume1/zappiti/data

● Validate with Enter
This command will search where your Zappiti-Server folder is located on your Synology, then will move the contents of the zappiti subfolder
in the zappiti/data folder which we have previously created.

Step 5 – Docker installation
● Return to the Package Center.
● In the search bar, type Docker.
● Once finding it, install it.

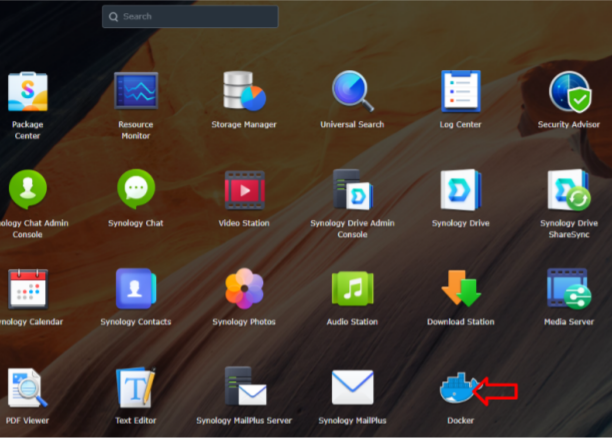
Once installed, Docker is now available from the Main Menu.
● Launch it.
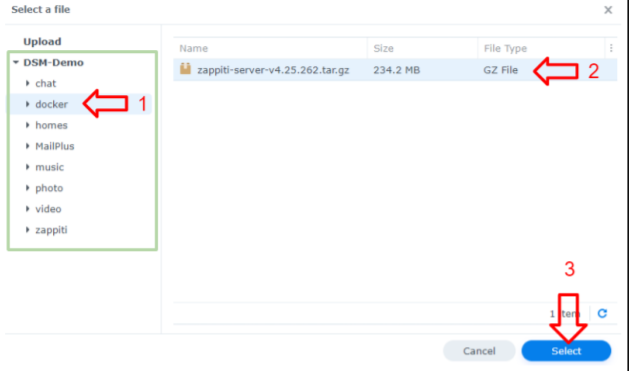
Step 6 – Retrieve the Zappiti Server image
● Download the image from this address :
https://storage.sbg.cloud.ovh.net/v1/AUTH_fbded571e5e14cf4b5ccf3f2717efb01/DockerImage/zappiti-server-v4.25.262.tar.gz
● Copy the file on your Synology.
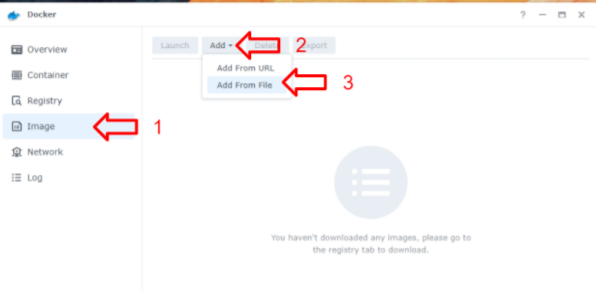
● In Docker, go to the Image (1) section.
● Click on Add > Add From File (2).
● Search your image file on your Synology (Green frame)
(1)(2).
● Click on Select to load the image (3).
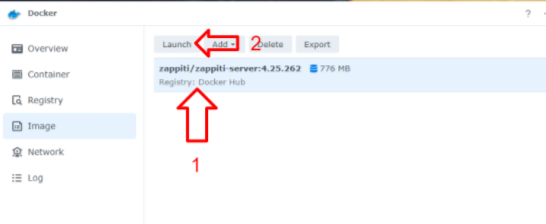
- new image should appear on the list
- Select it [1]
- Launch it [2]
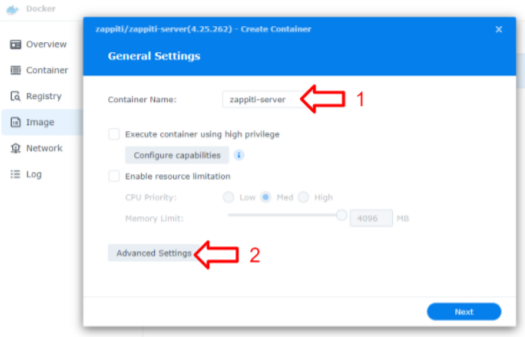
Step 7 – Create the container
● Name your container zappiti-server.
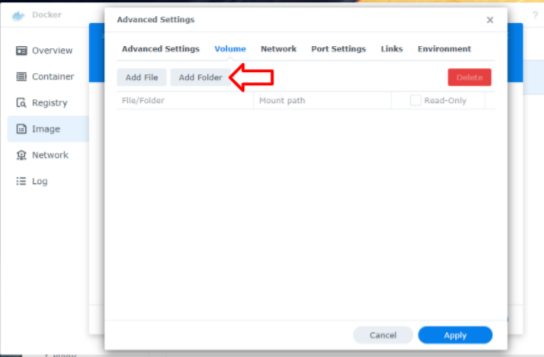
● Click on Advanced Settings.
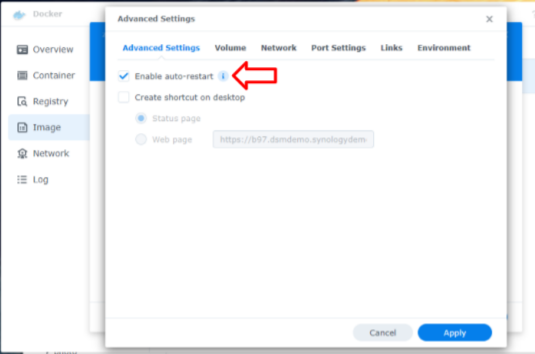
● Check the box Enable auto-restart.
● Do not click on OK / Apply.
● Click on the Volume tab
● Click on Add Folder.
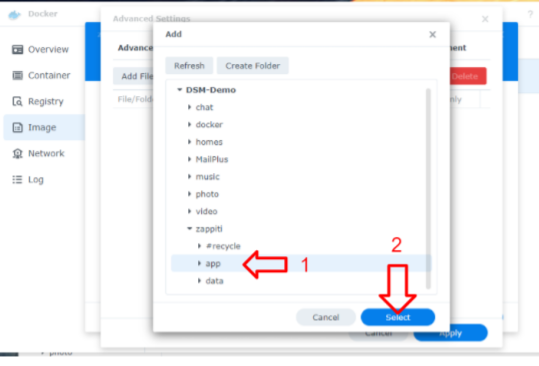
● In the new opening window, select the app folder inside the
zappiti(1) shared folder.
● Click on Select(2).
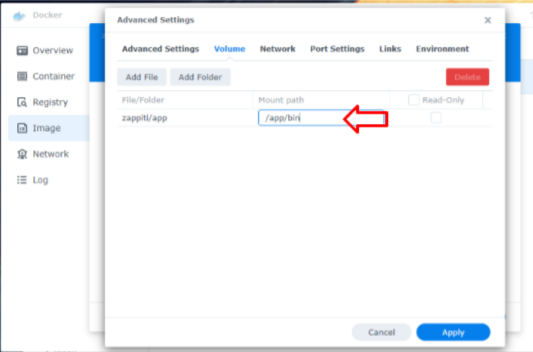
● In Mount Path, type /app/bin
● Do not click on OK / Apply
● Repeat the process with this time selecting the data folder
of the zappiti shared folder.
● For the mount path, type /app/data
● Still do not click on OK / Apply
● Click on the Port Settings tab
● In Local Port replace Auto by 8777
● Now you can click on Apply.

● Back from the container creation window. Click on Next.
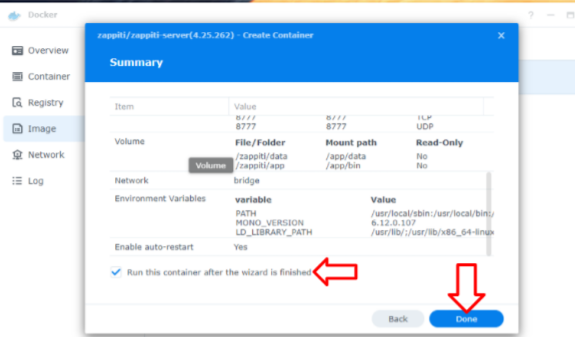
One last window is displayed and shows the summary of the
container options.
● Make sure the option “Run this container after the wizard
is finished” is checked.
● Finally, click on Apply / Done.
| Where to Buy a Product | |||
 |
    
|

|
VISIT RETAILER ➤ |
 |
|
|
VISIT RETAILER ➤ |
We use affiliate links on the blog allowing NAScompares information and advice service to be free of charge to you. Anything you purchase on the day you click on our links will generate a small commission which is used to run the website. Here is a link for Amazon and B&H. You can also get me a ☕ Ko-fi or old school Paypal. Thanks! To find out more about how to support this advice service check HERE


Do You NEED 5GbE NAS? (Or Should You Skip Ahead to 10GbE)
UGREEN DXP4800 PRO NAS Review
Minisforum G7 Pro Review
CAN YOU TRUST UNIFI REVIEWS? Let's Discuss Reviewing UniFi...
WHERE IS SYNOLOGY DSM 8? and DO YOU CARE? (RAID Room)
UniFi Routers vs OpenWRT DIY Routers - Which Should You Choose?
Access content via Patreon or KO-FI
Discover more from NAS Compares
Subscribe to get the latest posts sent to your email.
DISCUSS with others your opinion about this subject.
ASK questions to NAS community
SHARE more details what you have found on this subject
IMPROVE this niche ecosystem, let us know what to change/fix on this site