How do I configure a second NAS as a snapshot repository on Qnap

how do I configure a second NAS as a snapshot repository on Qnap

Creating a Snapshot Replica Job

Important:

When running a Snapshot Replica job for the first time, all data on the volume or LUN is transferred to the destination NAS. This may take a long time, depending on the network connection speed and the read/write speeds of both NAS devices.

  1. Go to Main Menu > Storage & Snapshots > Snapshot Backup > Snapshot Replica.
  2. Click Create a Replication Job.

    The Create a Snapshot Replication Job wizard opens.

  3. Select the source volume or LUN.
  4. Optional: Specify a job name.
    Tip:

    The default job name is the first 6 characters of the source volume or LUN name followed by “_rep”.

  5. Click Next.
  6. Specify the IP address of the destination NAS.

    Perform one of the following actions.

    Action

    Destination NAS Location

    Description

    Manually specify the NAS address

    LAN, WAN, Internet

    You can enter an IP address, hostname, or FQDN.

    Click Detect and then select a NAS from the list

    LAN

    QTS displays a list of all QNAP NAS devices on the local network. You can sort the list by hostname or IP address.

    Click Local Host

    N/A

    Choose this option to replicate snapshots between different storage pools on the same NAS.

  7. Enter the password for the default admin account on the destination NAS.
  8. Optional: Specify a port.
    Tip:

    The default port is 22.

  9. Click Test.

    QTS connects to the destination NAS using the specified admin password, and then checks that there is sufficient space at the destination to store the source volume or LUN.

  10. Click Next.
  11. Specify how many replicated snapshots will be kept on the destination NAS.

    After the specified number is reached, the QTS will delete the oldest snapshot each time it replicates a new snapshot.

  12. Select the destination storage pool.
  13. Select a backup plan.

    Backup Plan

    Description

    Start replication job after taking a local snapshot

    The replica job will run each time QTS creates the specified number of snapshots. These snapshots may be created manually or on a schedule.

    Start replication job on a schedule

    The replica job replicates all snapshots created since it was last run. If no new snapshots were created, it will not replicate any data.

    Choose one of the following scheduling options:

    • Run on a schedule: The job automatically runs daily, weekly, or monthly. Settings:

      • Schedule: How often the job runs

      • Day: The day that the job runs on

      • Expiration date: The replica job stops running after this date

      • Frequency: How often the job runs on the days specified by “Schedule” and “Day”

      • Start at: The time that the job starts running.

    • Run once: The job runs once on a specific time and day.
    • Manually start: The job does not run unless a user starts it.

    Take a new snapshot on a schedule, then run replication job

    The job runs daily, weekly, or monthly. QTS takes a new snapshot immediately before starting the job. This ensures that there is always at least one snapshot to replicate.

  14. Click Next.
  15. Optional: Configure transfer settings.

    Setting

    Description

    Encrypt transfer

    QTS encrypts the snapshot before sending it.

    • The job must be run by the NAS admin user

    • The port used by this job must be the same as the SSH port on the destination NAS

    Compress transfer

    QTS will compress snapshots when replicating them. This consumes more CPU and system memory, but reduces the amount of bandwidth required.

    Tip:

    Enable this setting in low bandwidth networks, or if the NAS devices are connected through a WAN.

    Maximum transfer speed

    Limit how much network bandwidth this job uses.

  16. Export the source data to an external storage device.

    To save time and bandwidth, you can export the source data to a connected external storage device such as a USB disk. After connecting the external storage device to the destination NAS, QTS will import the source data when the job is next run.

  17. Click Next.
  18. Optional: Select Execute backup immediately.

    When enabled, the job will run immediately after being created.

  19. Review the job information.
  20. Click Finish.

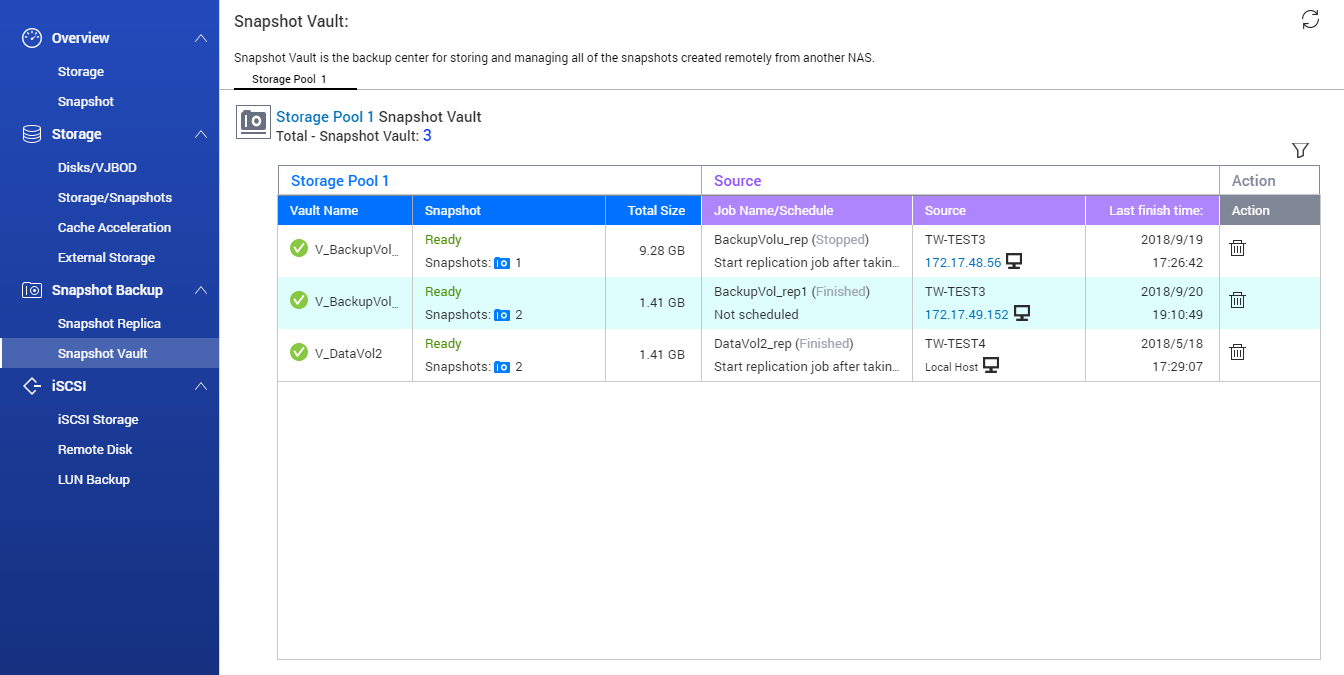
Snapshot Vault

After setting a NAS as the destination for a Snapshot Replica job, the replicated snapshots are stored in Snapshot Vault. Each replica job has its own separate vault.
 

Cloning a Volume from a Remote Snapshot

Important:

The time required to clone the volume depends on the amount of data stored on the volume and the connection speed between the two NAS devices.

  1. Go to Main Menu > Storage & Snapshots > Storage > Storage/Snapshots.
  2. Select a thick or thin volume.
    Important:

    The volume must have at least one snapshot.

  3. Select Snapshot > Snapshot Manager.

    The Snapshot Manager window opens.

  4. Under Select snapshot location, select a remote NAS.
  5. Select a snapshot.
  6. Click Clone.

    The Clone Snapshot window opens.

  7. Specify a volume alias.
  8. Select a storage pool.
  9. Select Enable encryption during transfer.

    QTS encrypts the snapshot before sending it for additional security.

  10. Click OK.

QTS clones the volume and shared folders, and then displays a confirmation message.


If you like this service, please consider supporting us.
We use affiliate links on the blog allowing NAScompares information and advice service to be free of charge to you. Anything you purchase on the day you click on our links will generate a small commission which is used to run the website. Here is a link for Amazon and B&H. You can also get me a ☕ Ko-fi or old school Paypal. Thanks! To find out more about how to support this advice service check HERE   If you need to fix or configure a NAS, check Fiver   Have you thought about helping others with your knowledge? Find Instructions Here  

☕ WE LOVE COFFEE ☕

Or support us by using our affiliate links on Amazon UK and Amazon US
     

locked content ko-fi subscribe
Private 🔒 Inner Circle content in last few days :
(Early Access) Minisforum MS-A1 - A Good DIY 4 Bay NAS Server? (Review)
(Early Access) $30 Synology Upgrade = 5x NETWORK SPEEDS
(Early Access) The BEST Alternatives to PLEX for Your NAS Media
(Early Access) Phison E31T Gen5 SSD Review - Who Need DRAM?
(Early Access) UniFi Protect & ONVIF Support - How It Works and What To Expect
(Early Access) Alternatives to Synology NAS - Which Is Best?
(Early Access) The BEST USB Network Upgrades of 2024/2025
(Inner Circle) Aoostar TB4S-OC USB4/Oculink SSD Box Review - Unreal NAS Expansion?
(Early Access) Asustor Flashstor vs Terramaster F8 SSD PLUS NAS - Best SSD NAS Drive?
(Early Access) A Guide to NAS - Things People STILL Get Wrong
(Early Access) $30 5GbE-to-USB Adapters Are a THING NOW (Wavlink Adapter Review)
(Early Access) Acasis TBU405 Pro Max TB4/USB4 NVMe Docking Station Review
Access content via Patreon or KO-FI

DISCUSS with others your opinion about this subject.
ASK questions to NAS community
SHARE more details what you have found on this subject
CONTRIBUTE with your own article or review. Click HERE
IMPROVE this niche ecosystem, let us know what to change/fix on this site
EARN KO-FI Share your knowledge with others and get paid for it! Click HERE

ASK YOUR QUESTIONS HERE!