

How to Install and Set Up an unRAID NAS Server (with SMB, Tailscale VPN, and Plex)
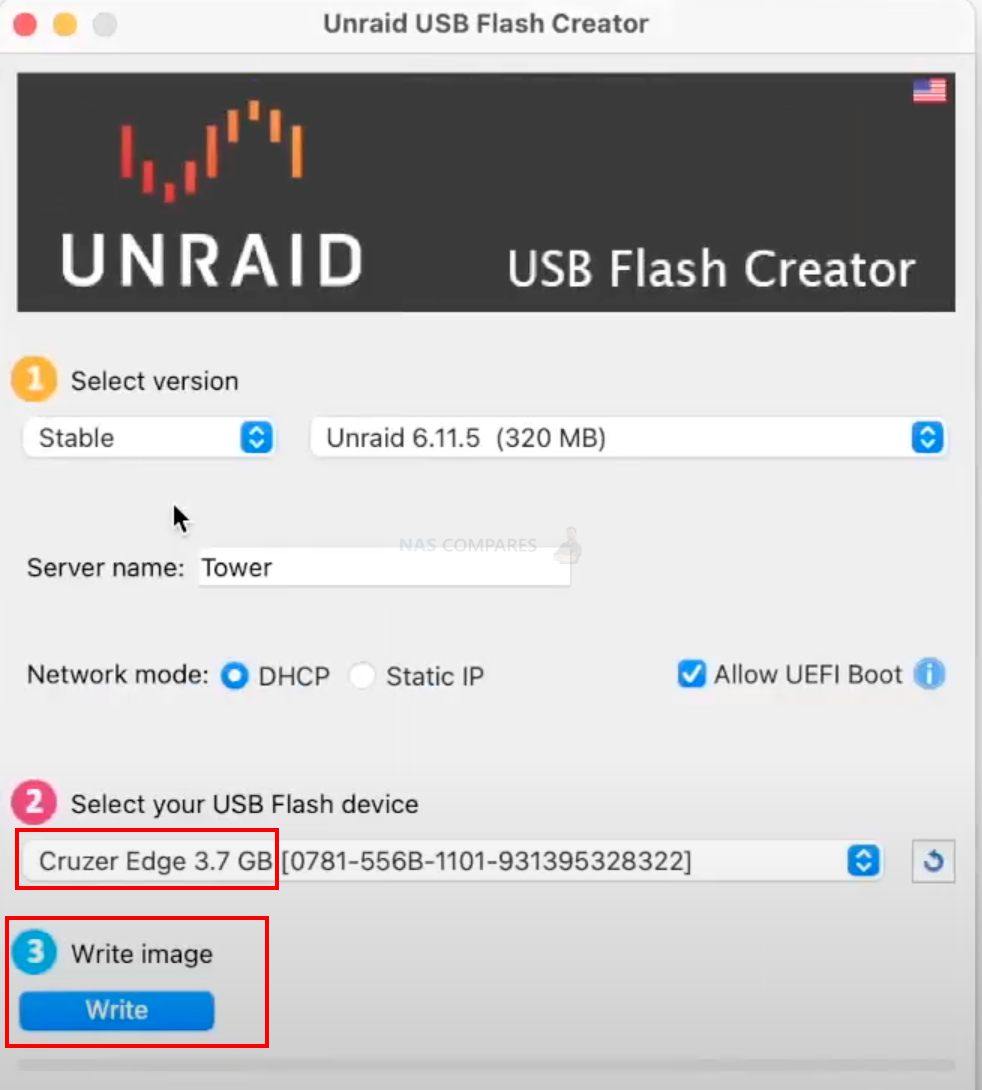
- Go to unraid.net/download and download the USB creator app for your Windows or Mac computer.
- Connect the USB drive or data drives or M.2 drives that you want to use for the unRAID OS to boot from.
- Connect the USB boot drive to your old QNAP NAS or any other NAS or PC with an HDMI port on board. Also, connect a keyboard and monitor and LAN cable.
- Press F2, F8, Del, or F9 repeatedly right after you press the power-on button on the NAS to load the BIOS, where you can change the boot order.
- Go to the boot section and disable any other boot device, leaving only the USB you just made bootable via the unRAID app.
- After a few minutes, unRAID will finish loading and display an IP address for the web admin panel. Alternatively, you can continue with the graphical interface, which will be an option when you restart the NAS.
- If not, go to an internet browser and type in the given IP or type in tower.local/login, which will also work.
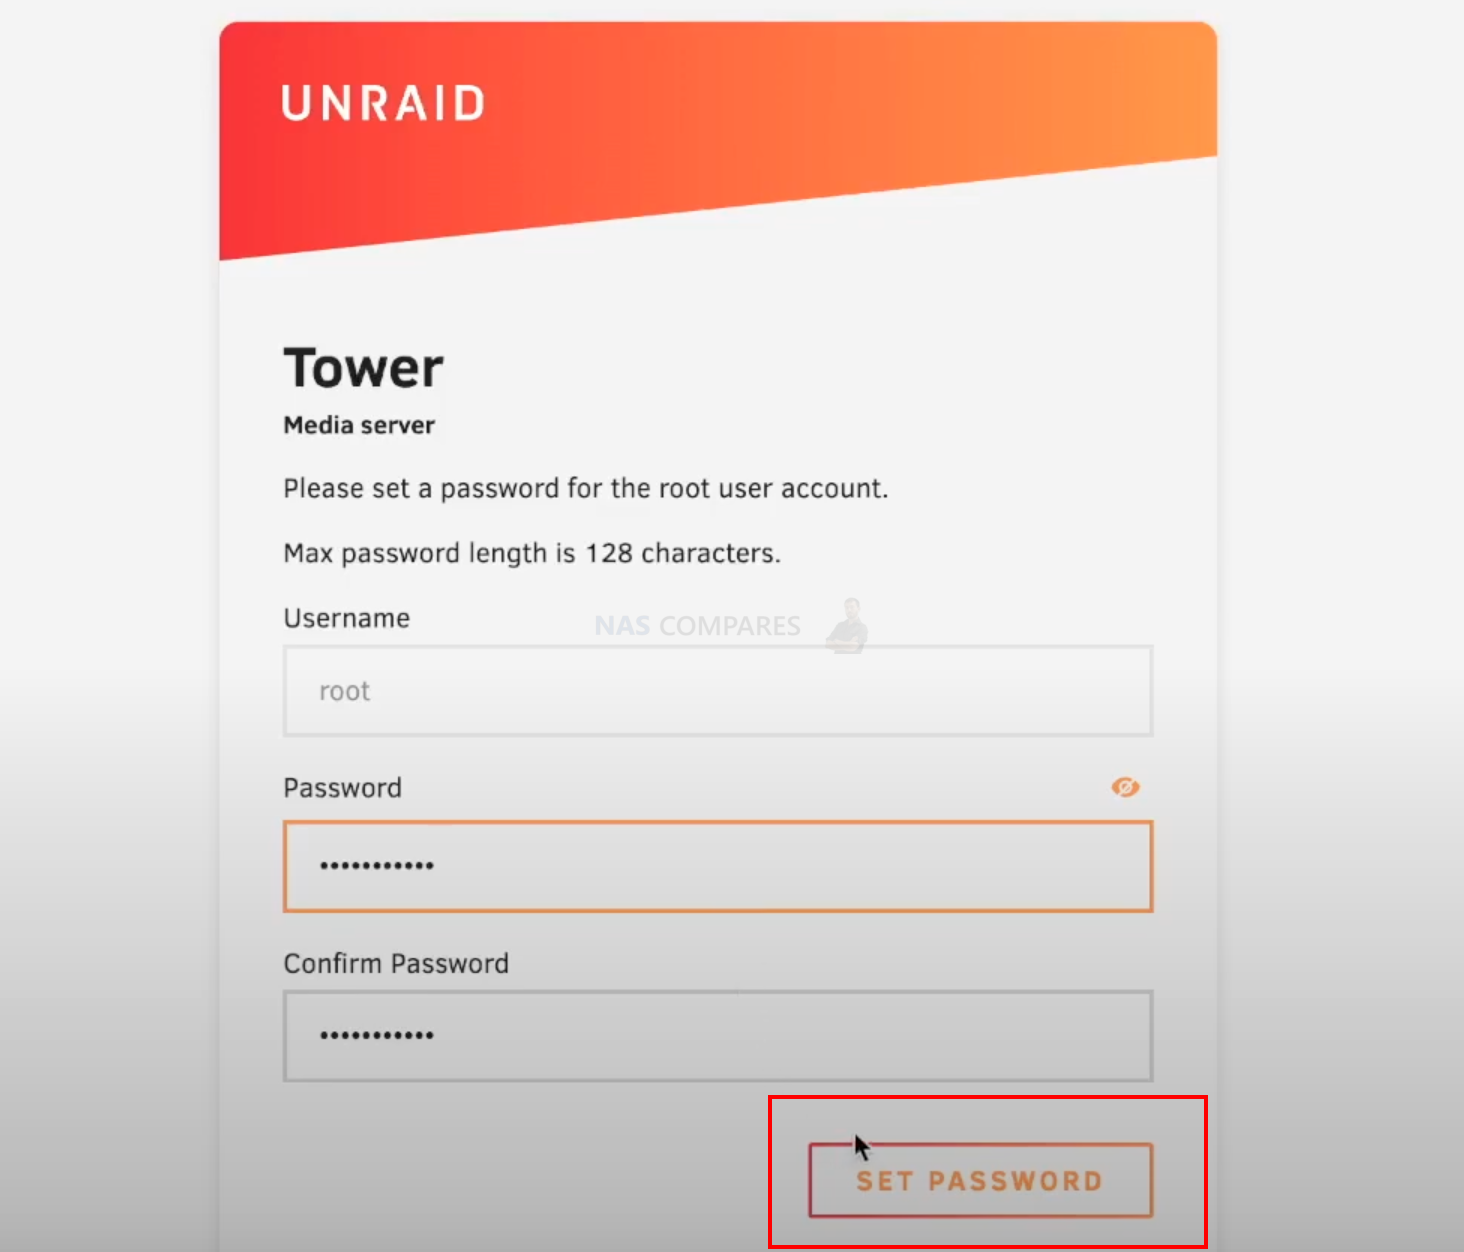
- Set the root password, which will be used for the admin panel.
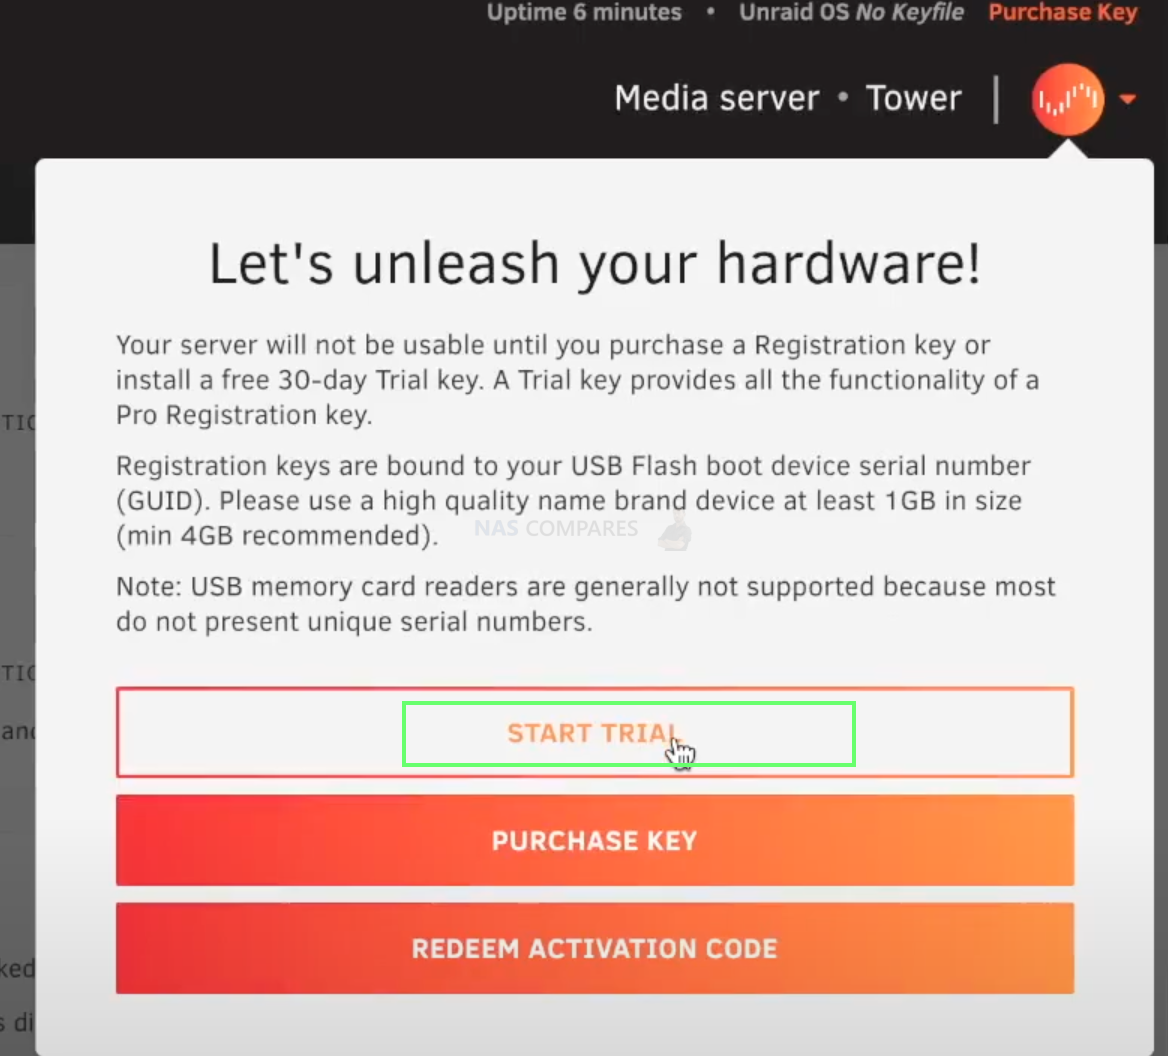
- Click the Start Trial button and login or register an account with unRAID.
- Install the unRAID Cloud Admin plugin for easier management and remote access.
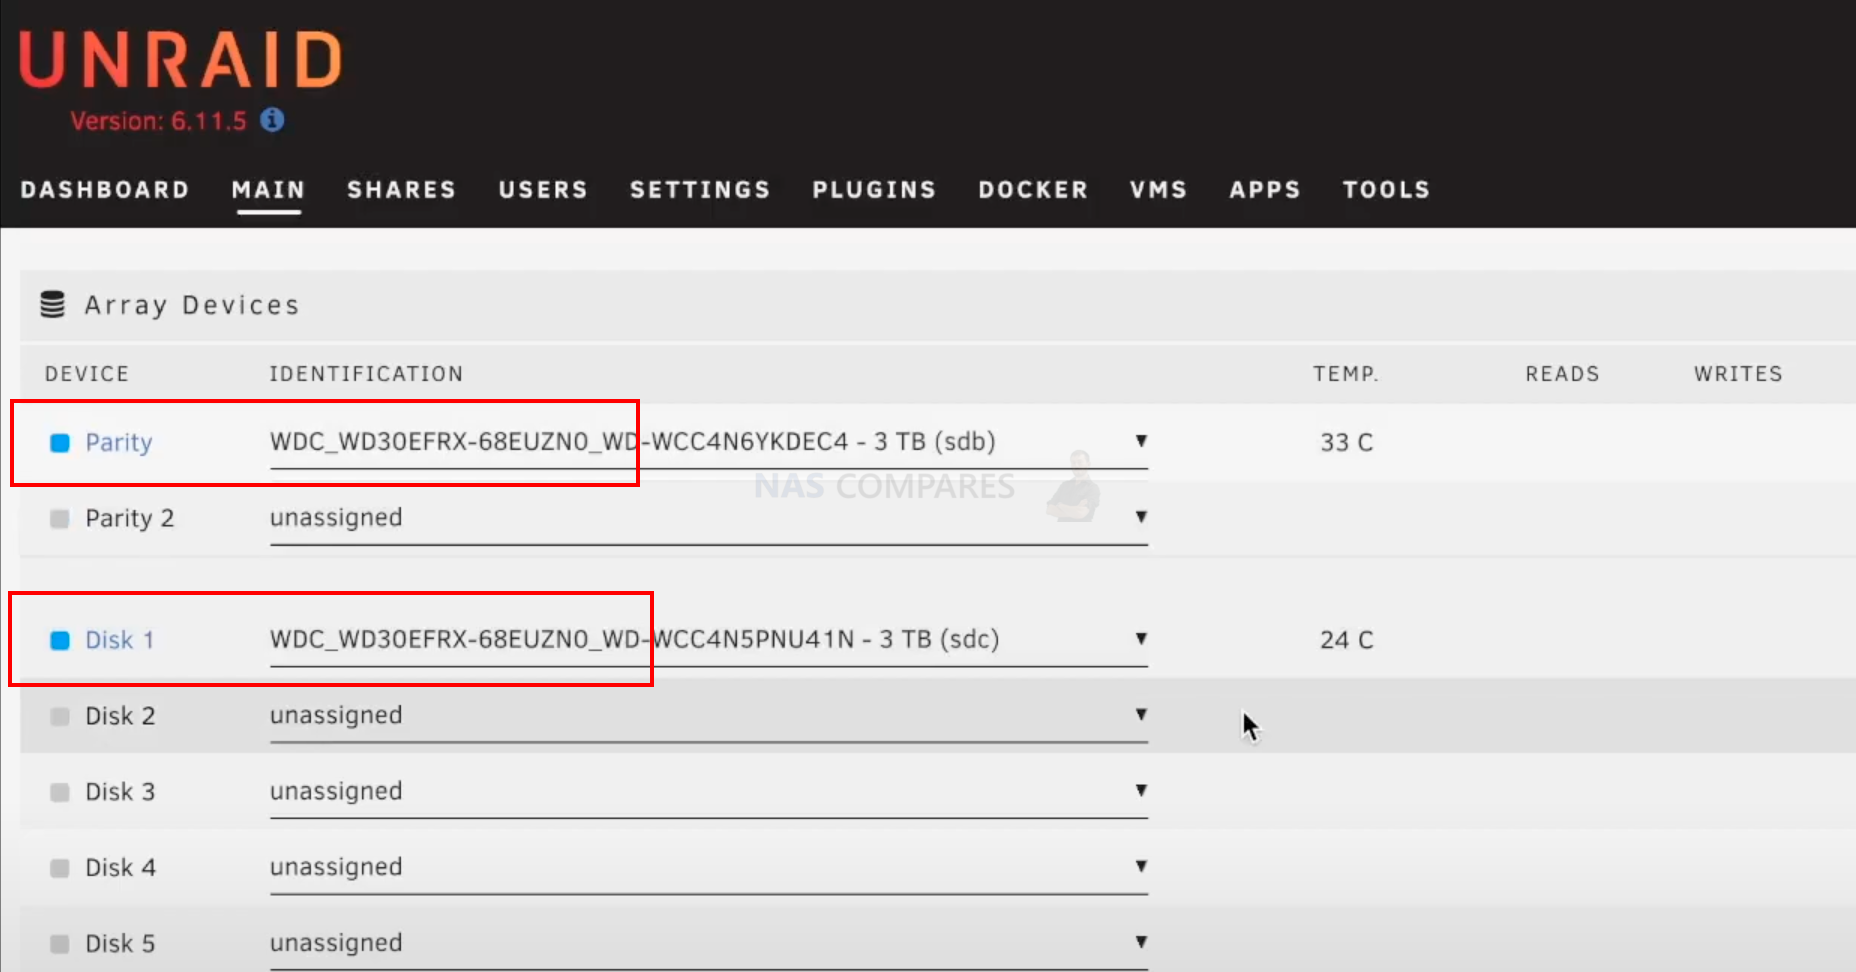
- Go to the main tab in the admin panel and select the parity drive and drives that will be used for data storage.
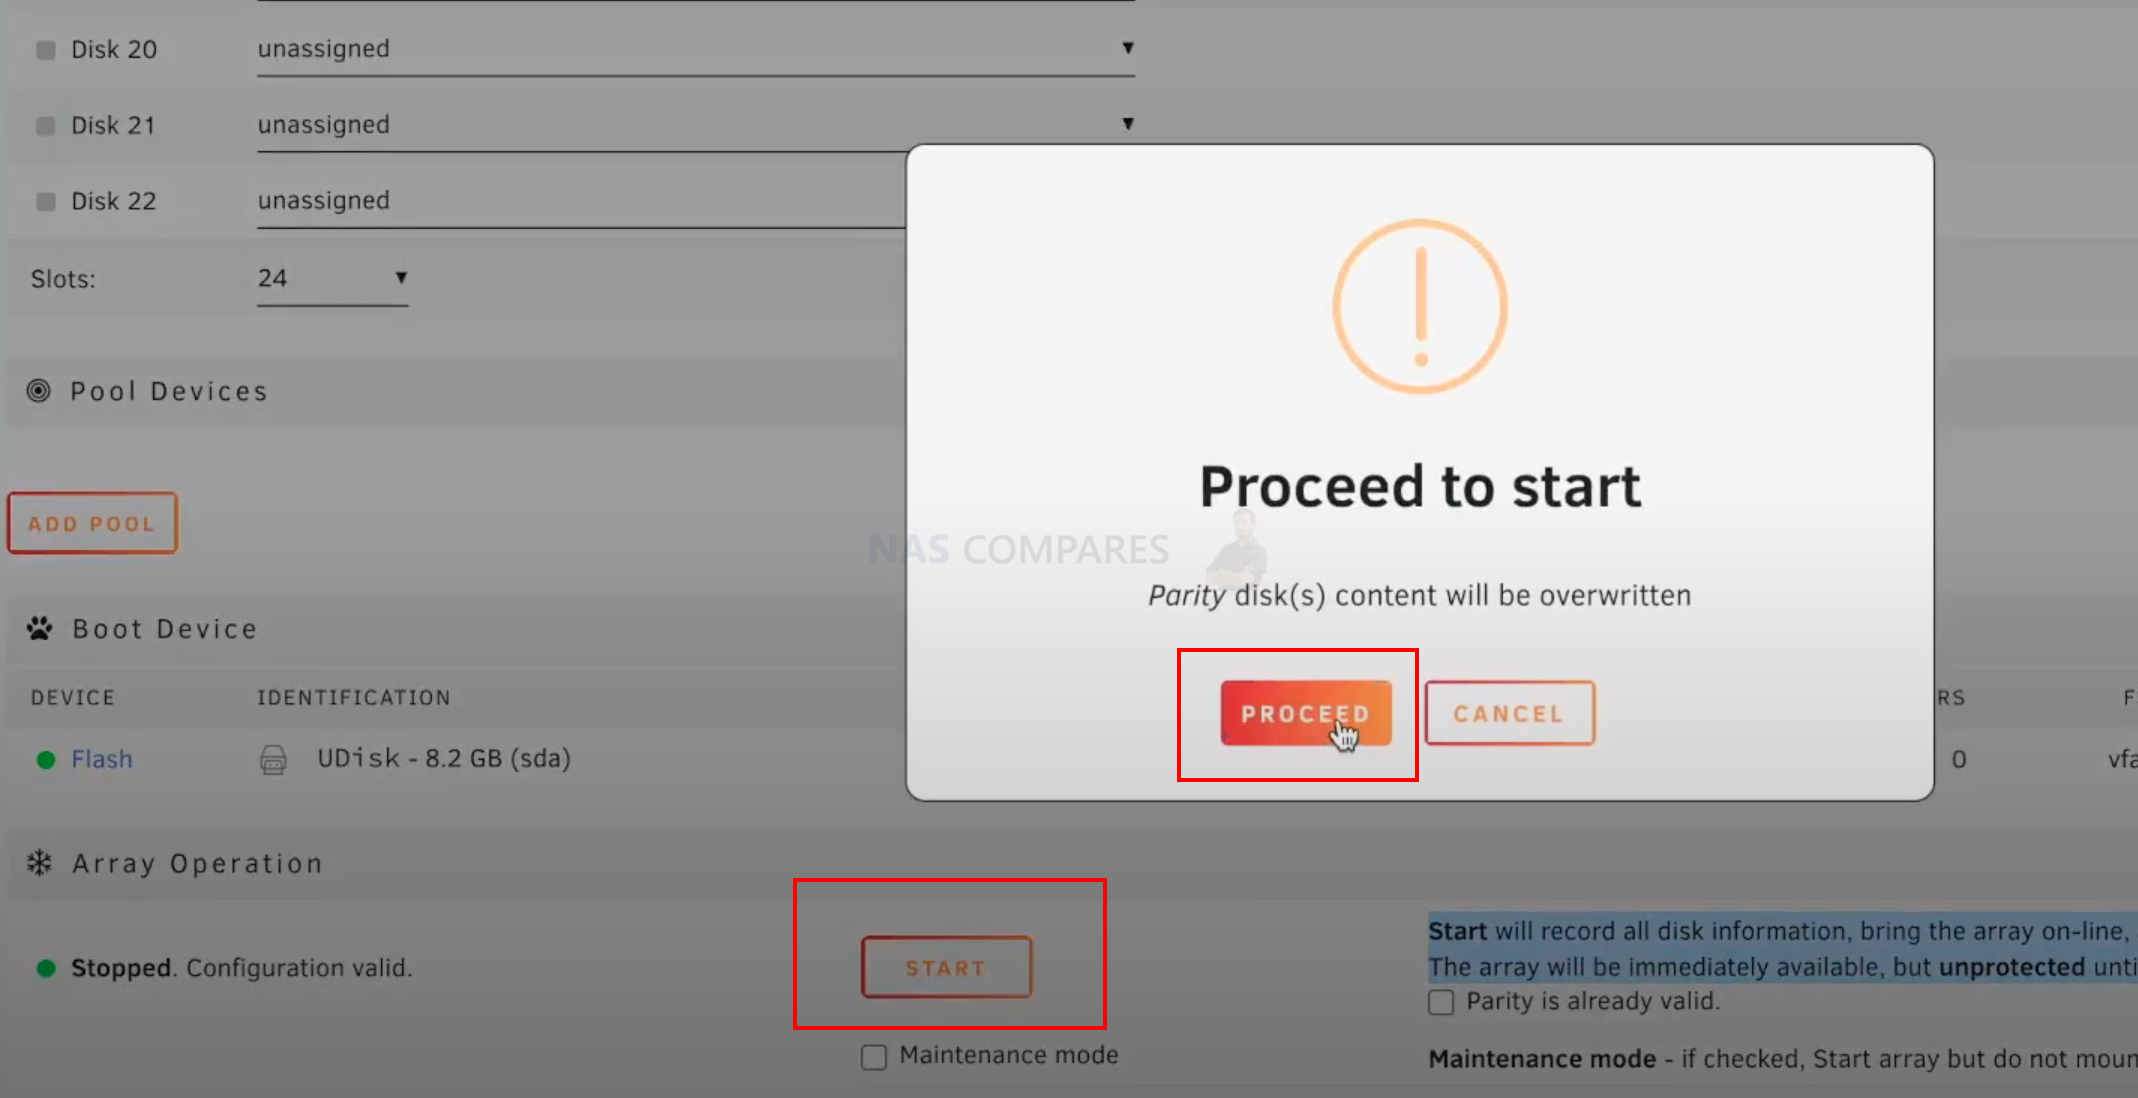
- At the bottom, click Start, which will create a volume and create parity data.
- Leave it for a few hours until parity processing is completed.
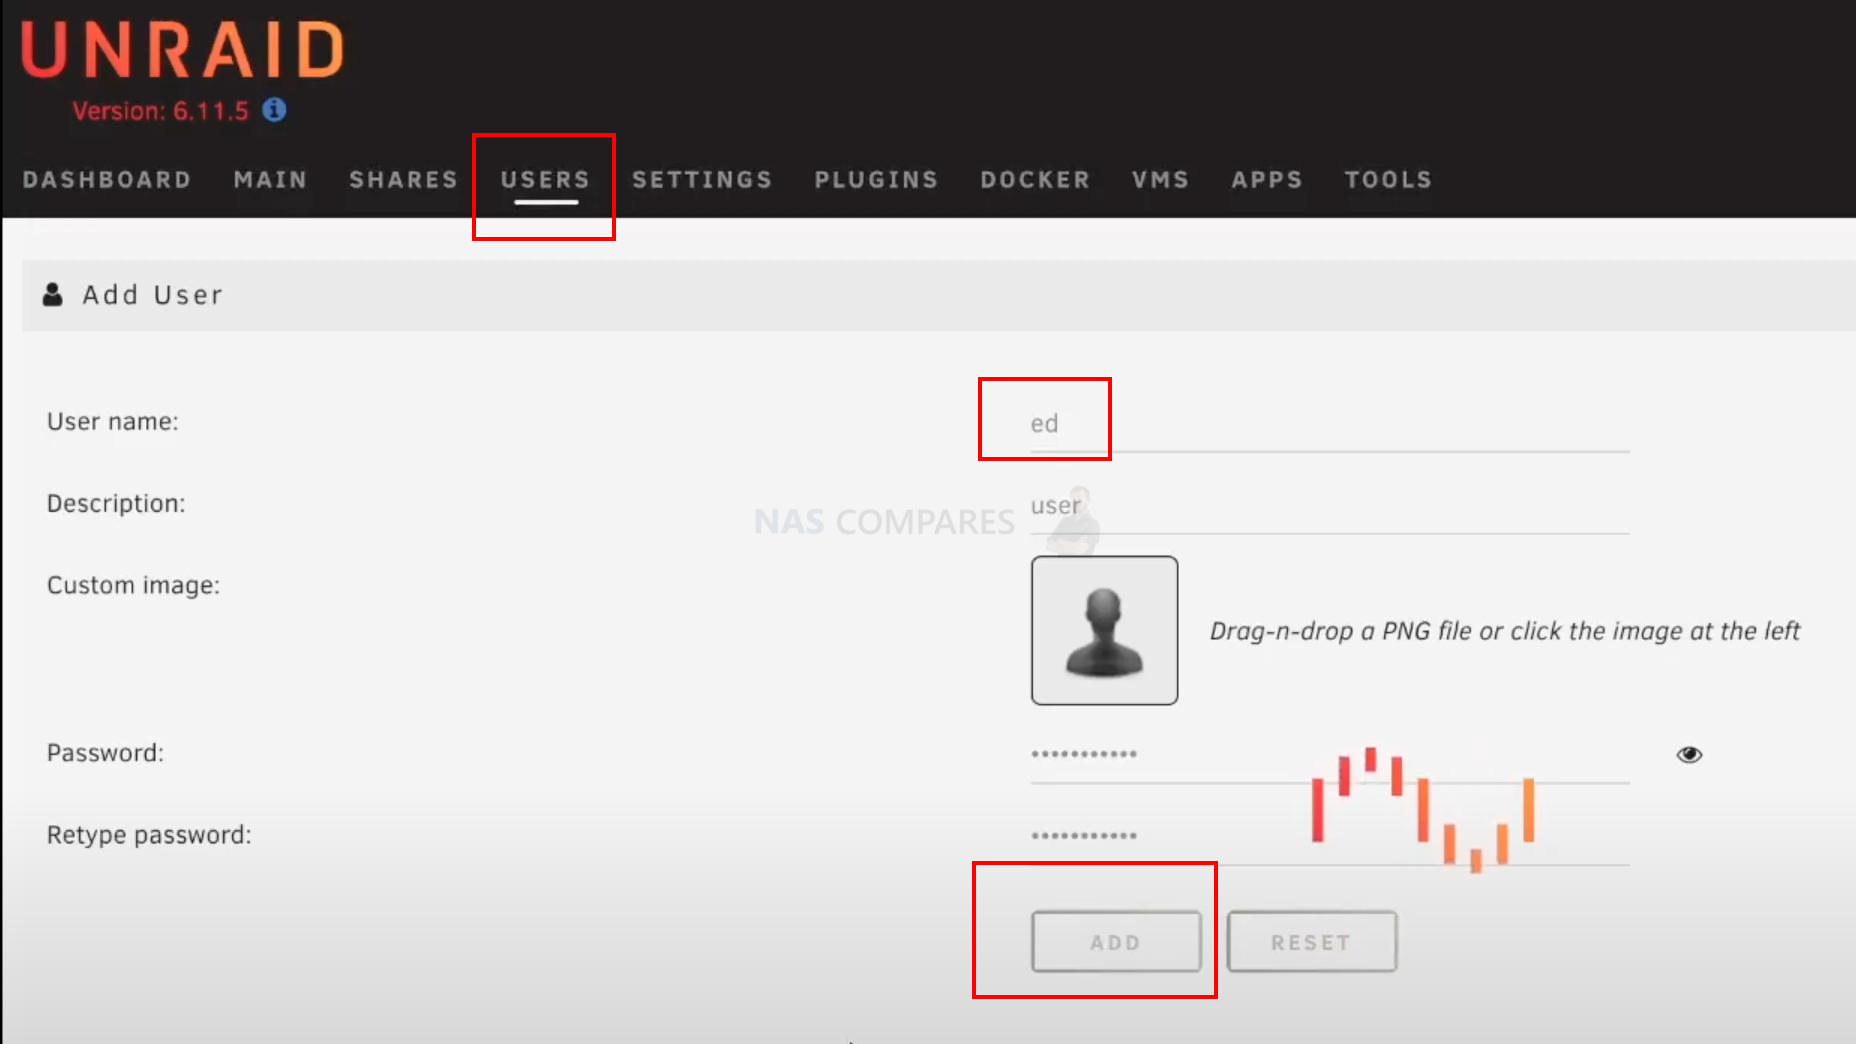
- Then, go to the Users tab and create a user for SMB shares. This user is not for logging into the unRAID admin panel but only for accessing it via services.
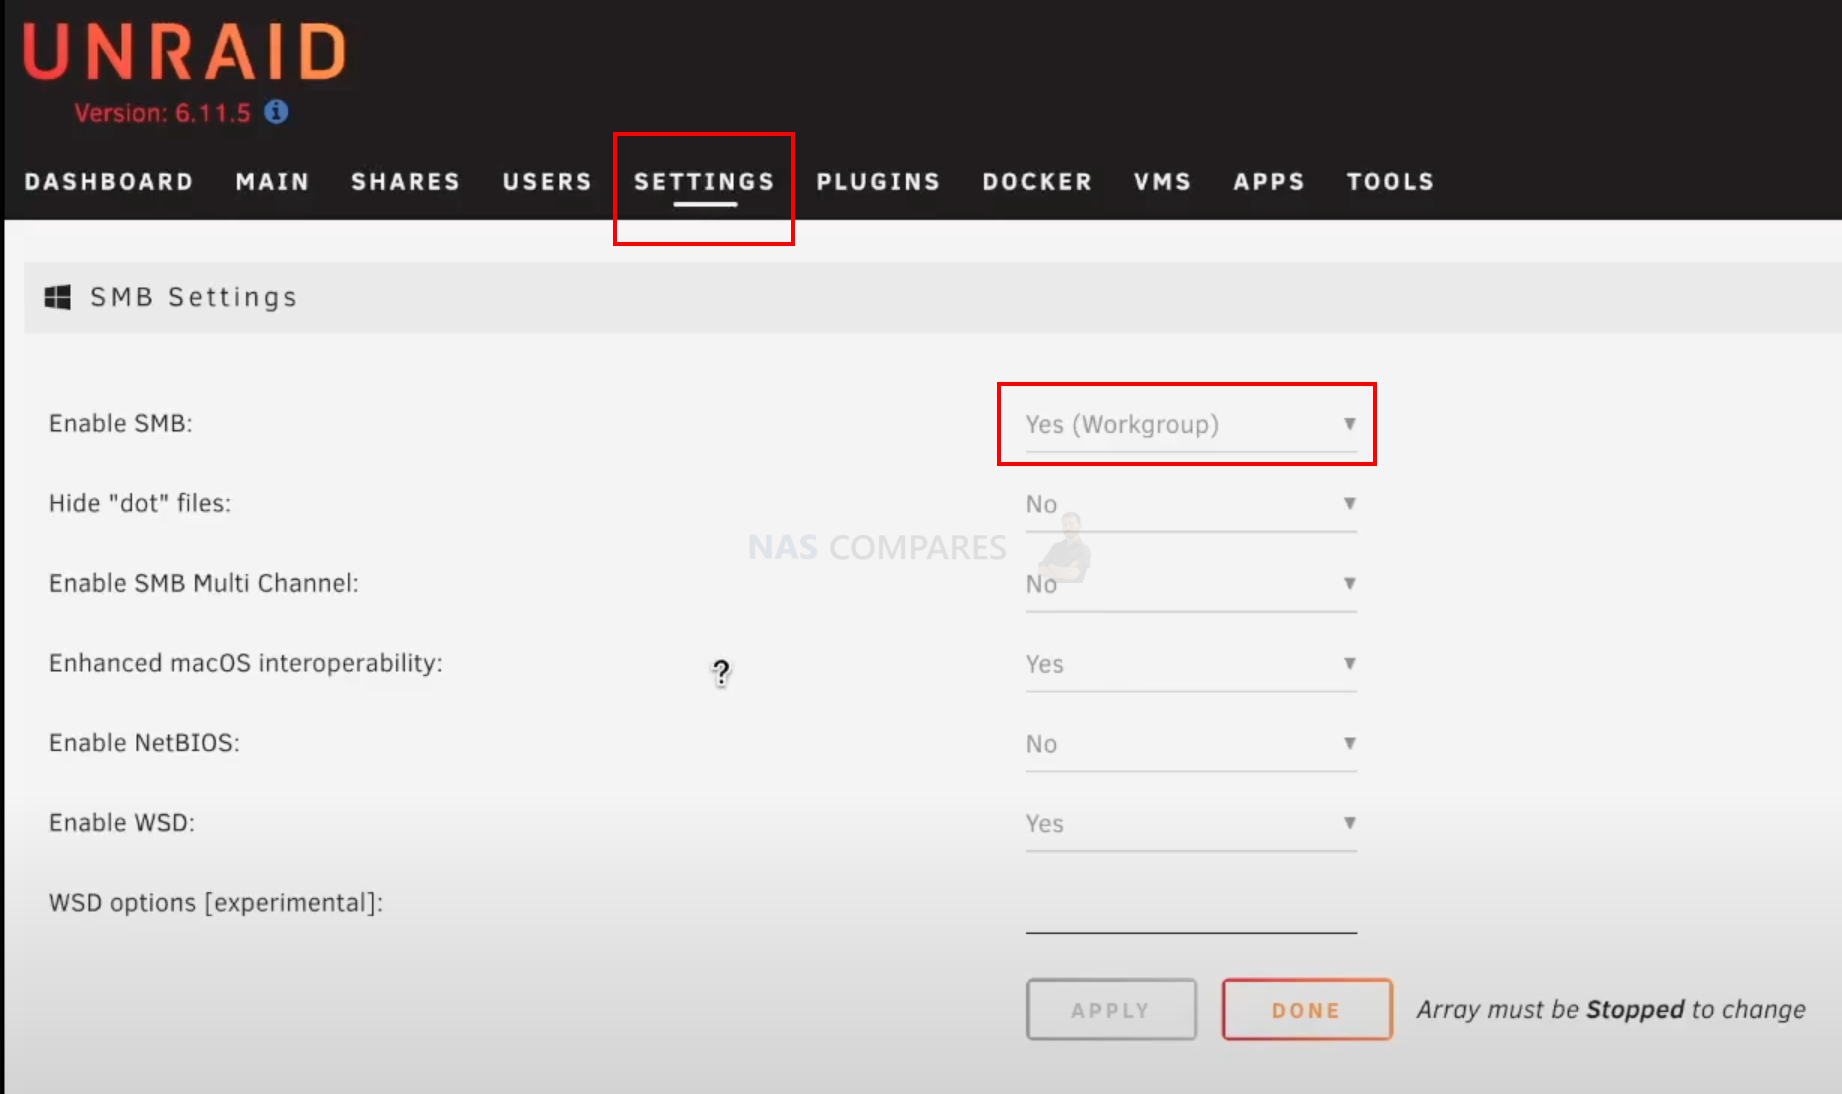
- Make sure you have SMB enabled under the Settings tab.
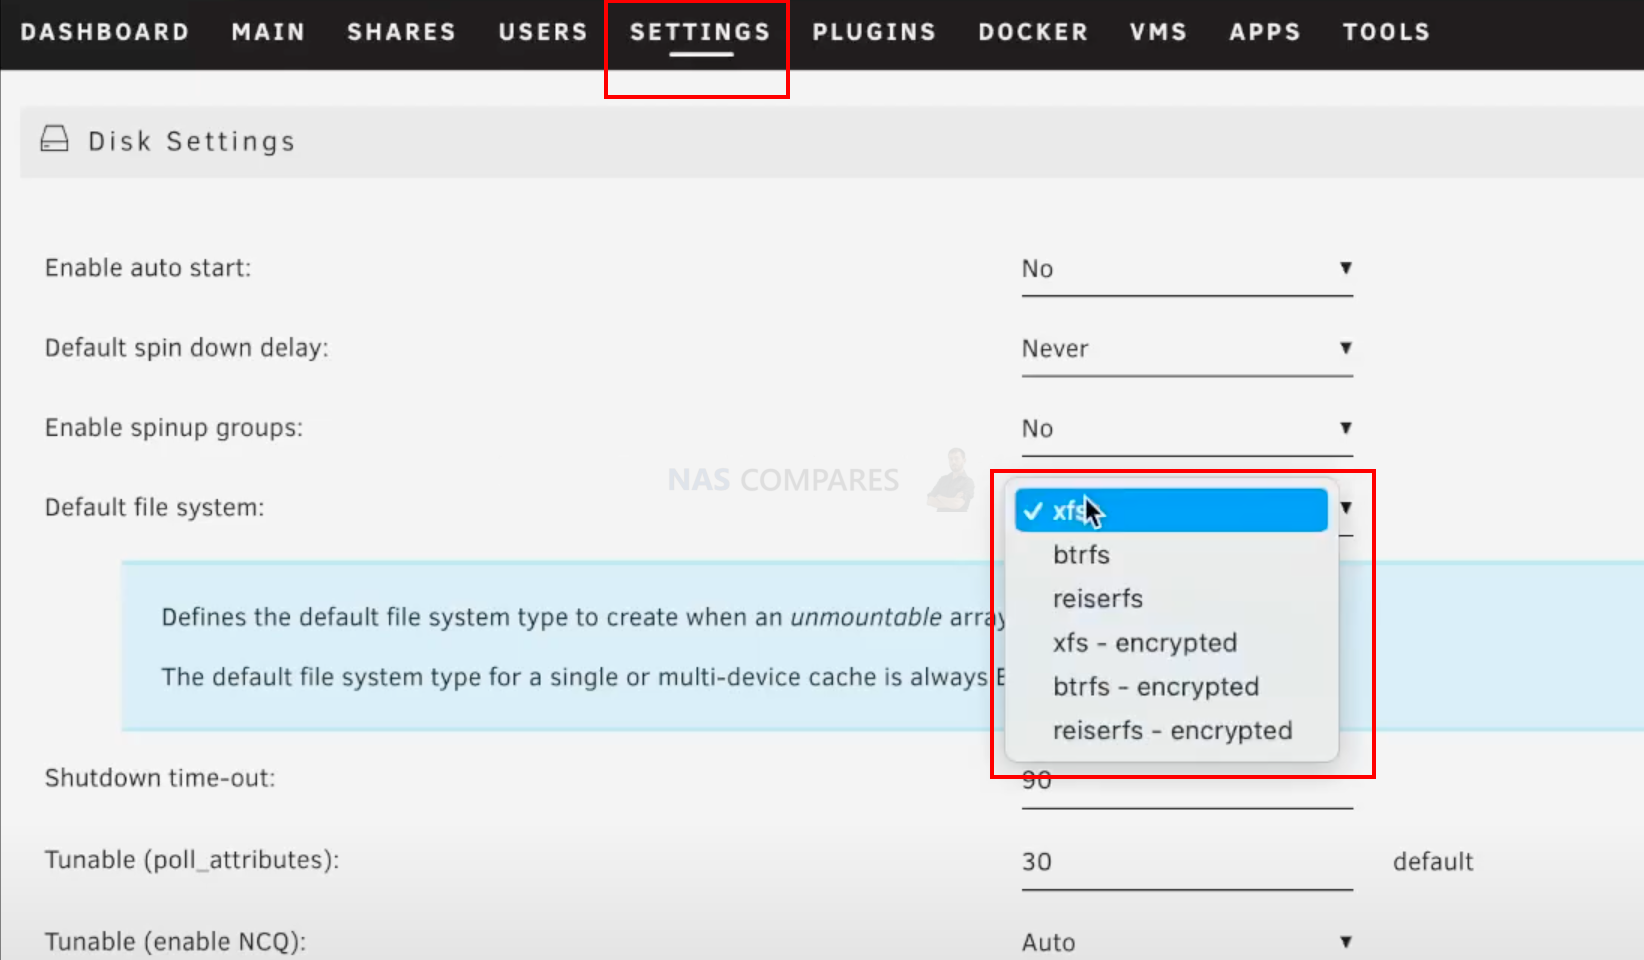
- You can also choose a different file system for your storage. The default is XFS.
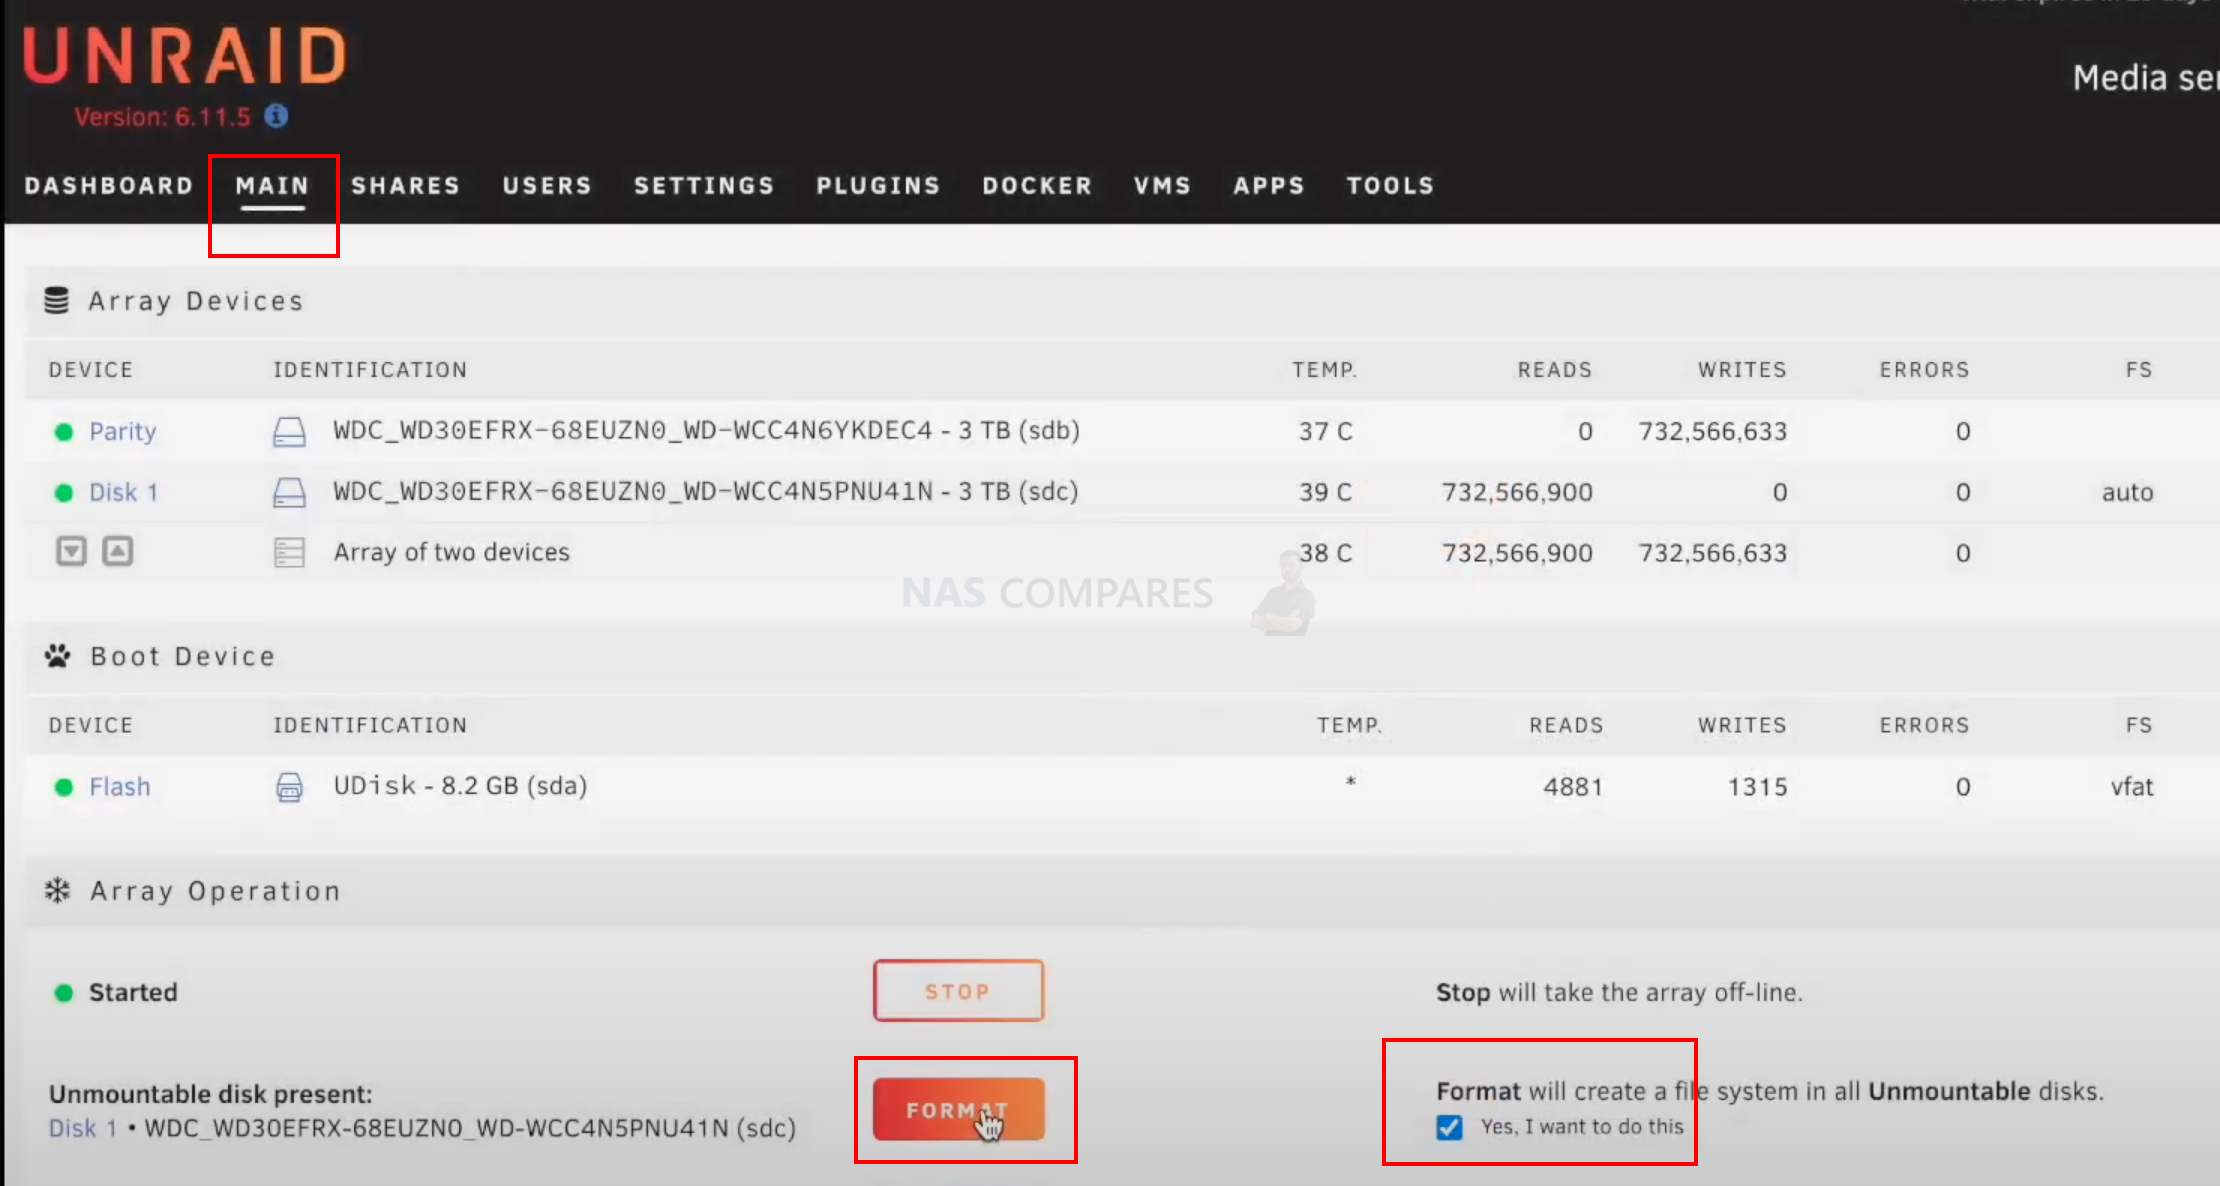
- Format your volume under the Main section. At the bottom of the page, tick Format and click the Format button.
- You can then create shared folders. Go to the Shares tab and create a new share. You can choose how data need to be written: high-water, fill-up, or most-free. Click Add Share.
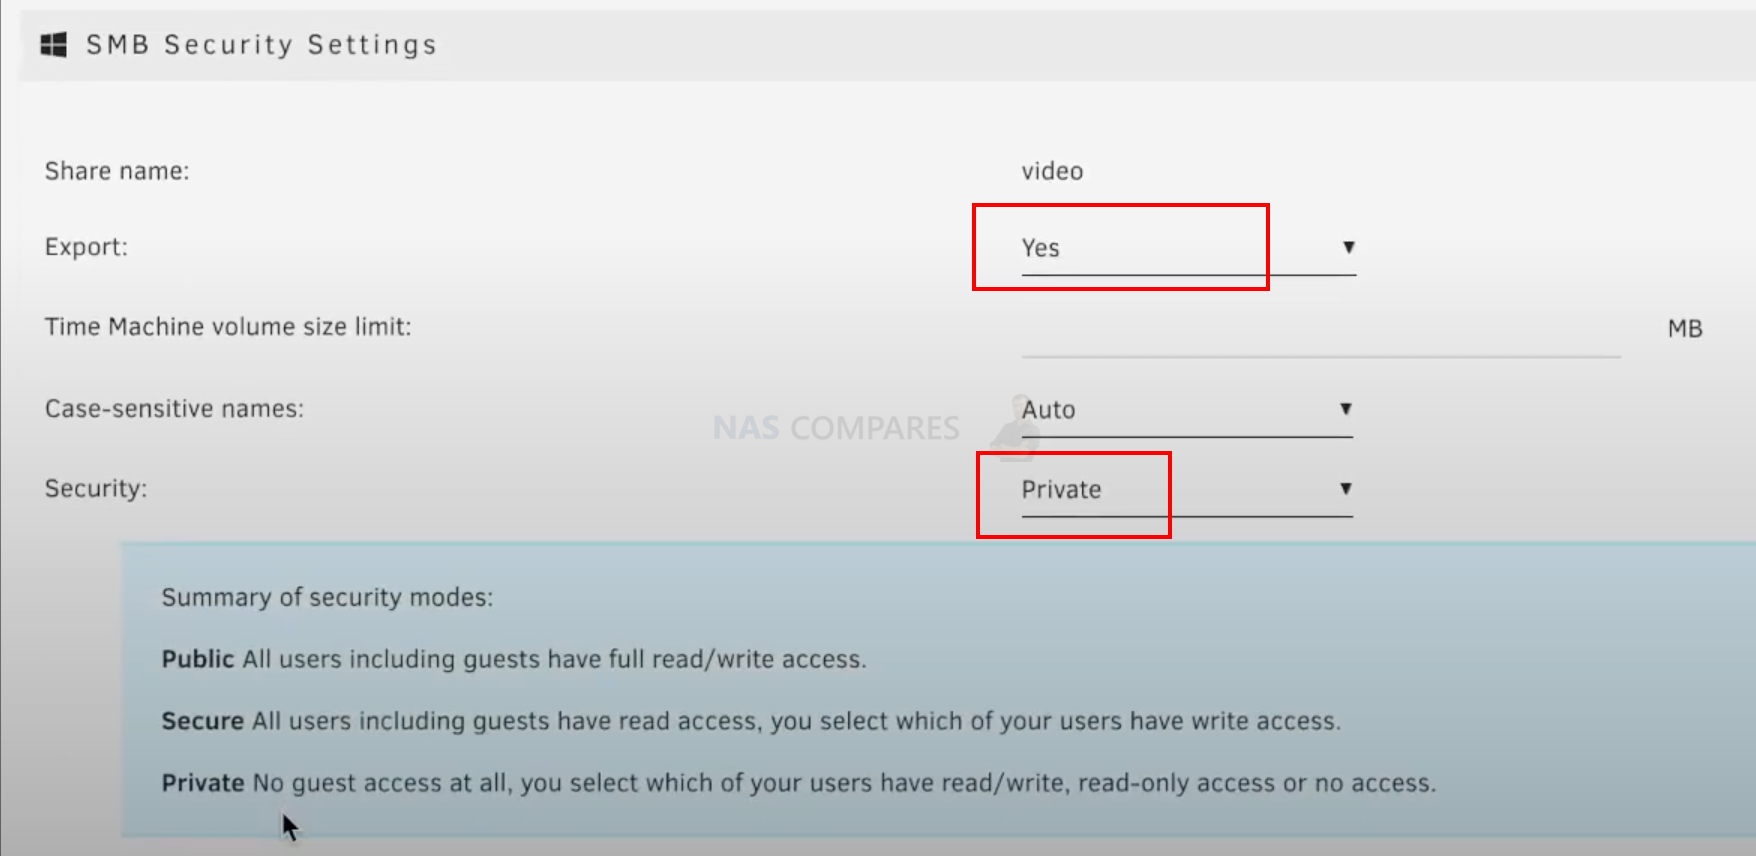
- Then, scroll down and choose Export modes to Yes and Security mode to Private.
- Lastly, scroll down and set access rights for previously created users. Read/write mode is what I choose.
- Then, you can map your shared folder on your Mac or Windows computer.
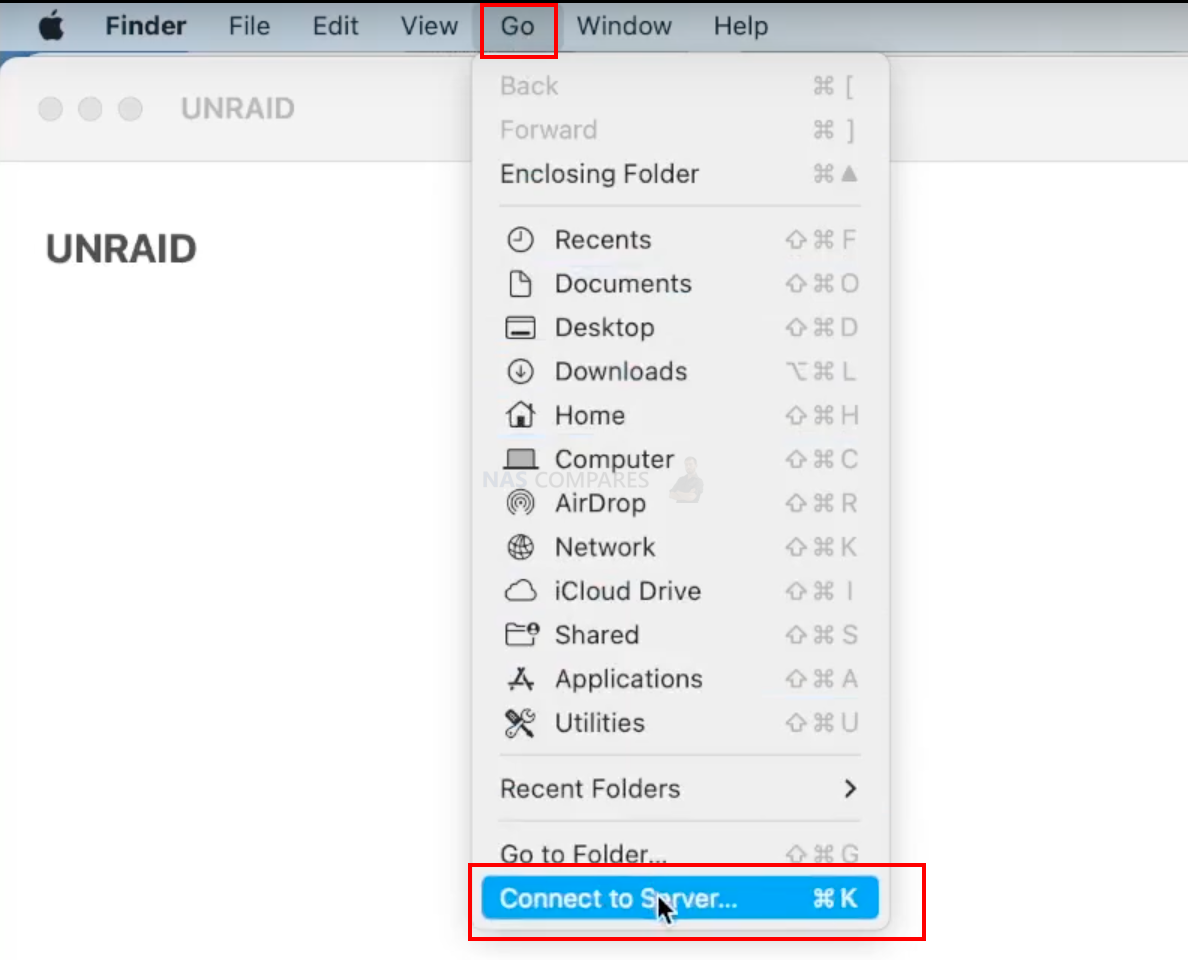
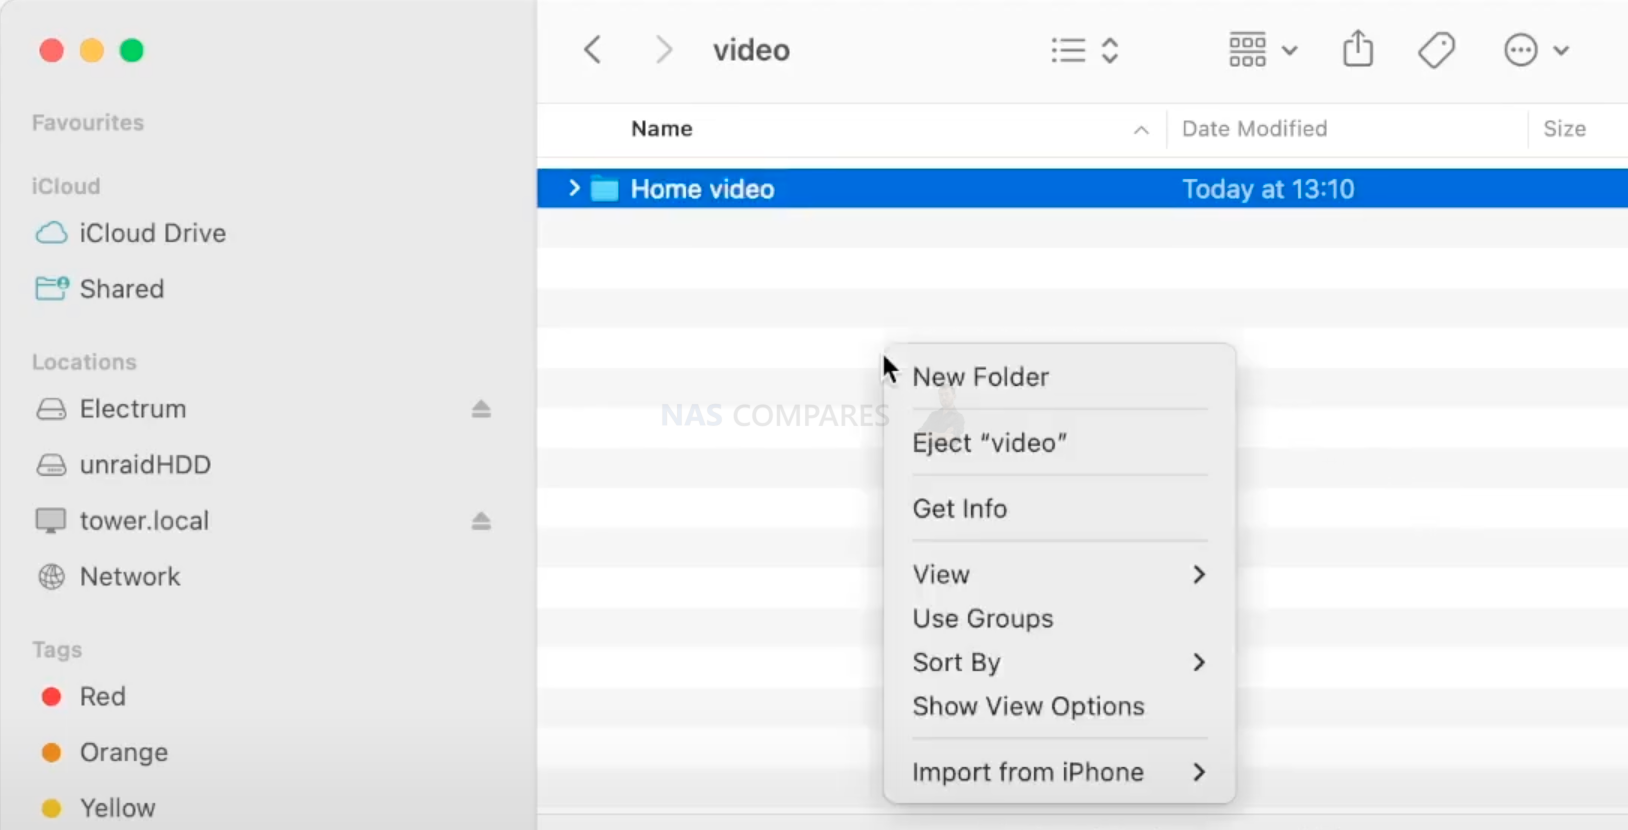
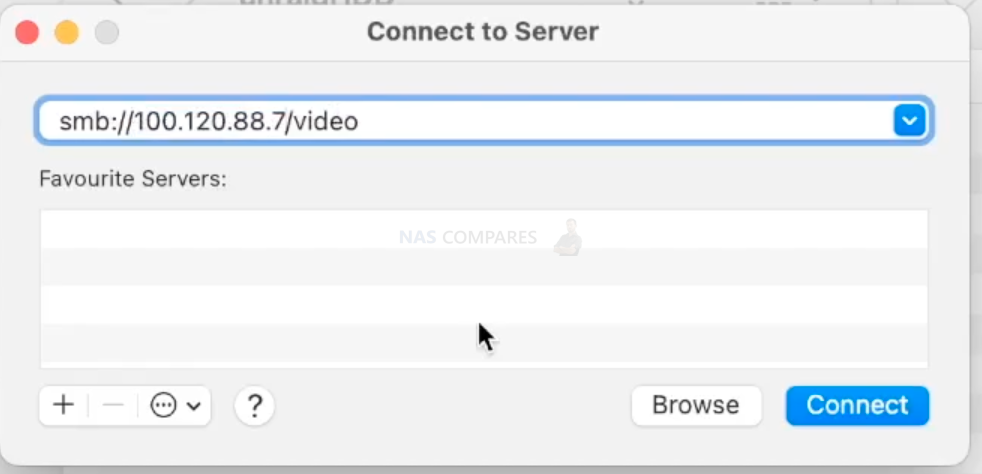
- On a Mac, open Finder, click Go/Connect to Server.
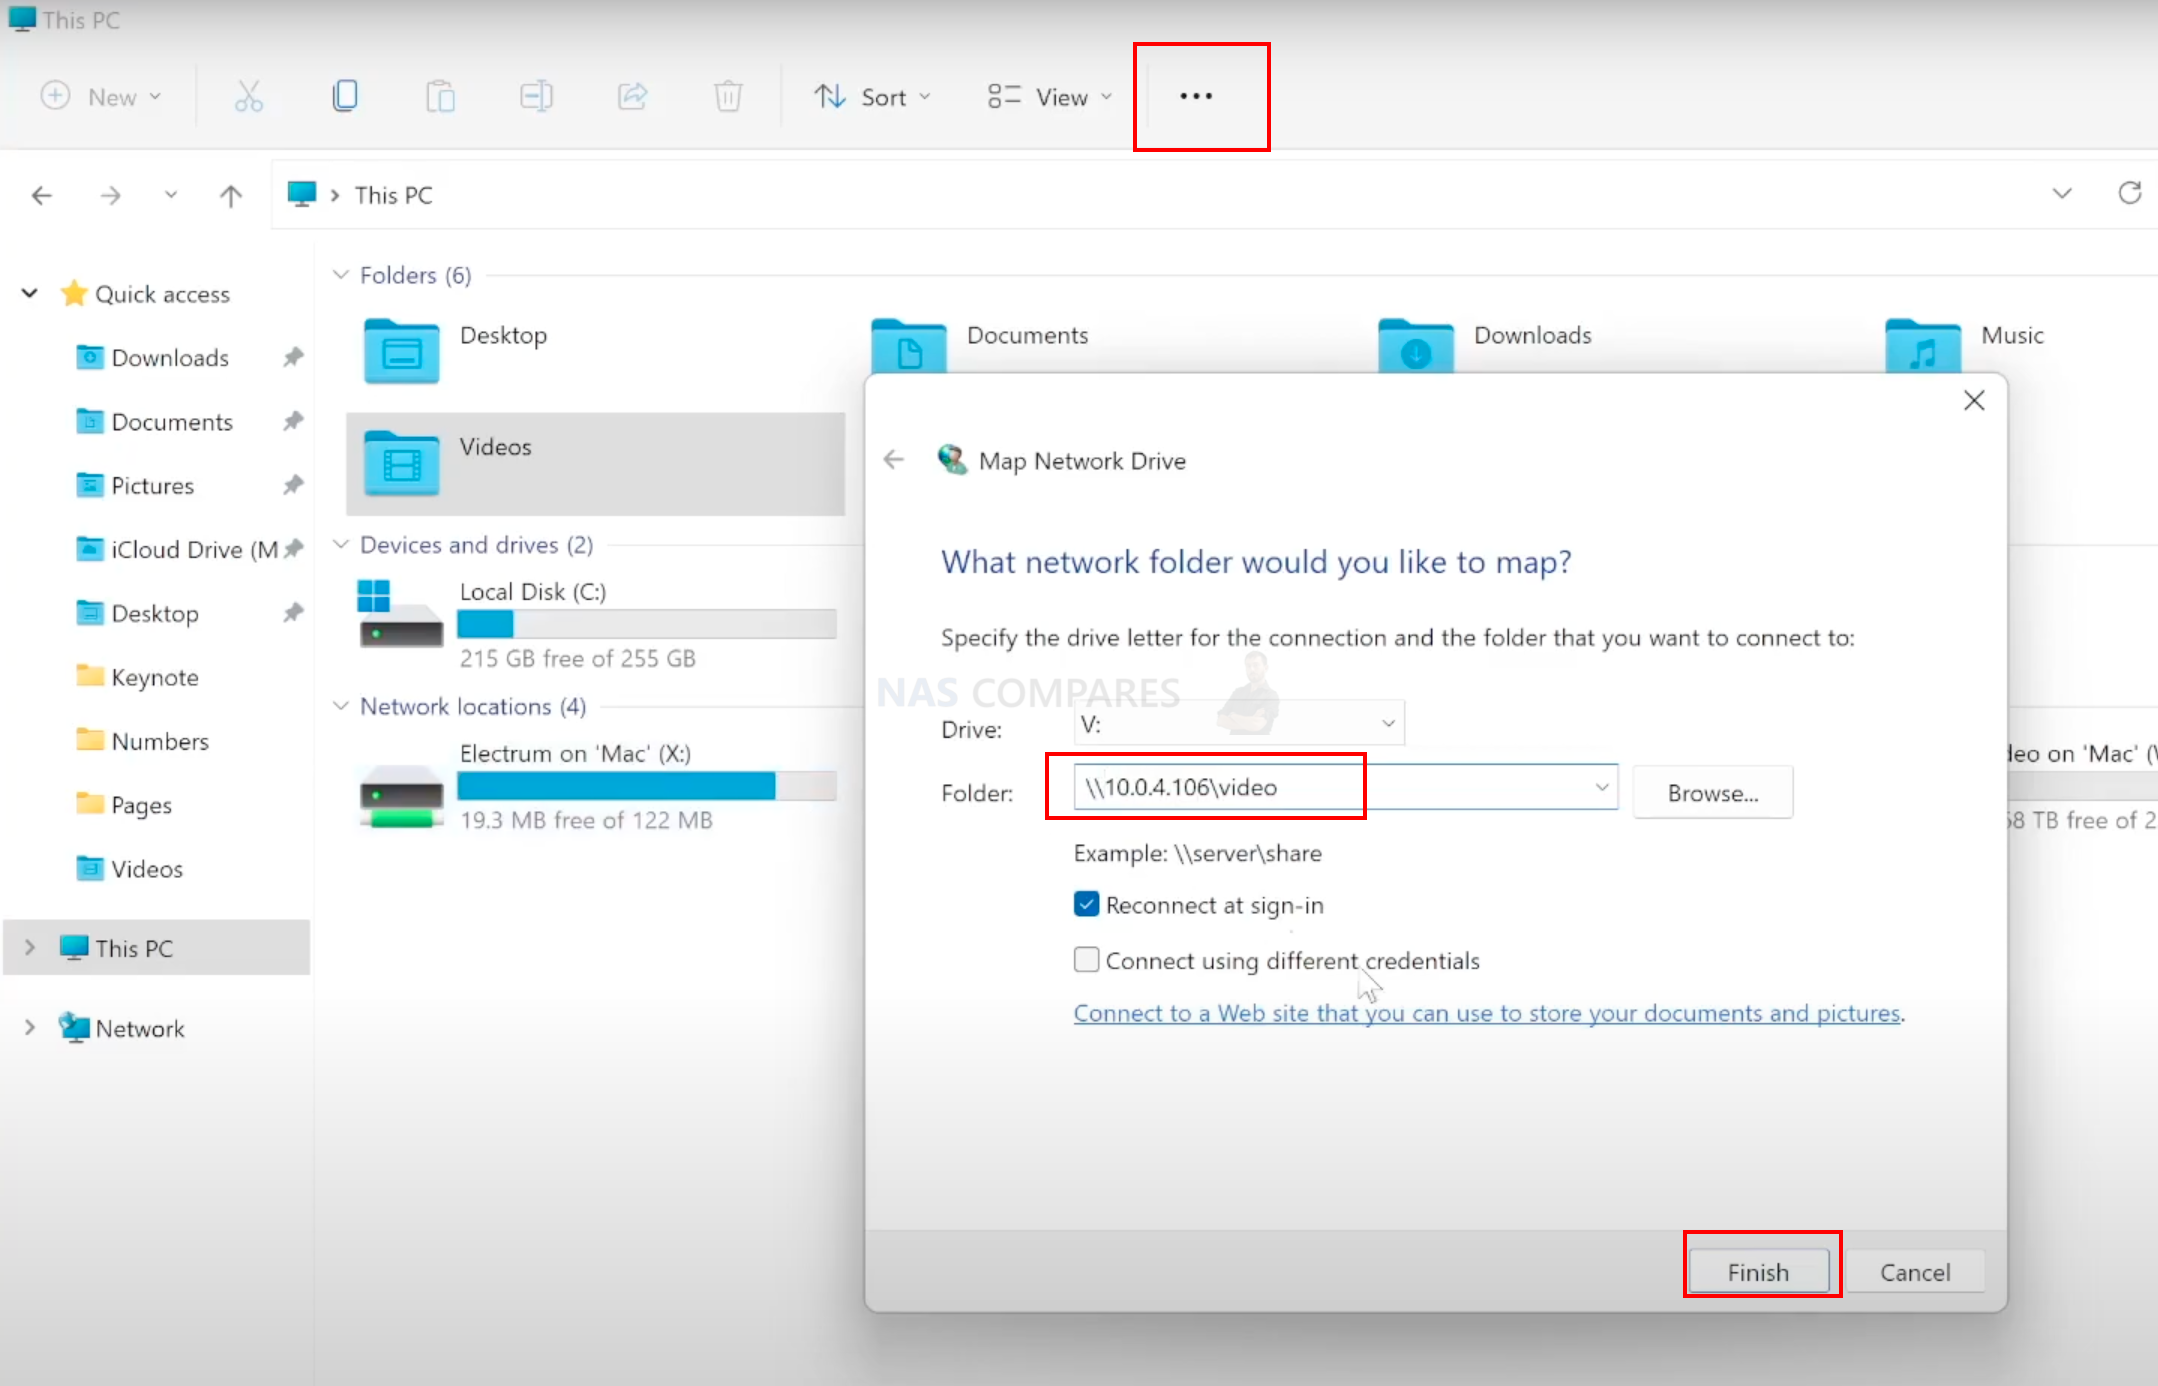
- On Windows, open My Computer/This PC. In the top bar, there will be an option to Map the drive. Type in the IP address and a shared folder you want to connect to.
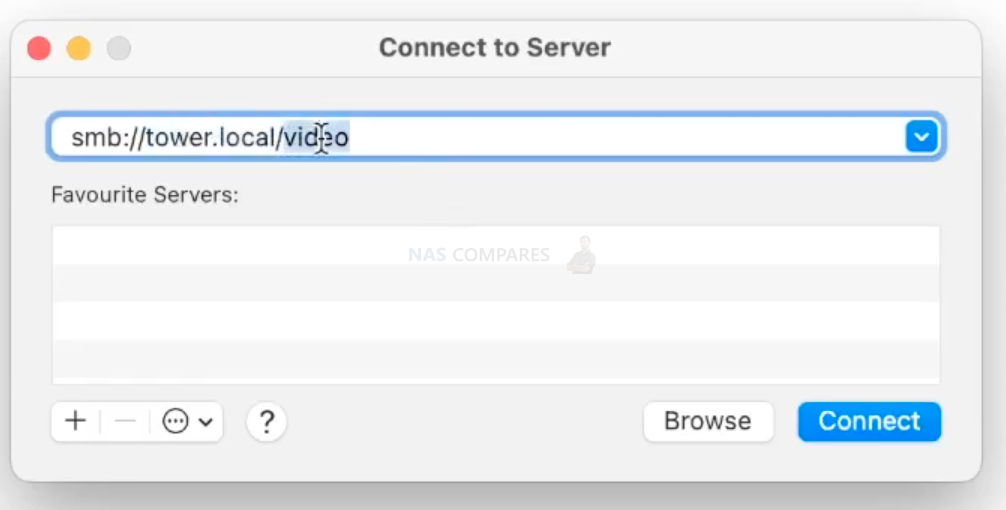
- On a Mac, the IP is not that important, and you can use tower.local instead.
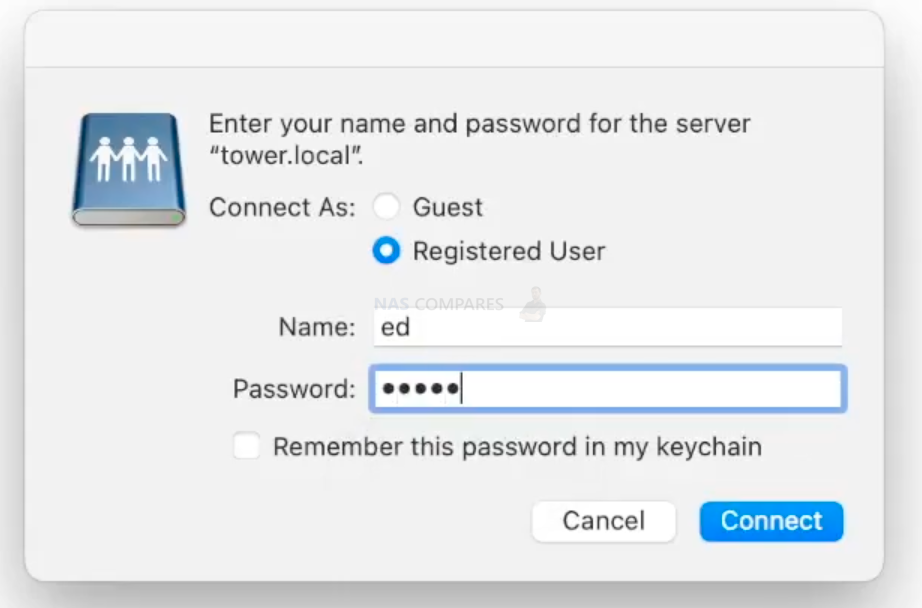
- Click Connect and you will be asked for a username and password. Tip here: never use root as a user for SMB shares; it will not work.
- Then, the folder will be mapped, and you can start adding things to the folder.
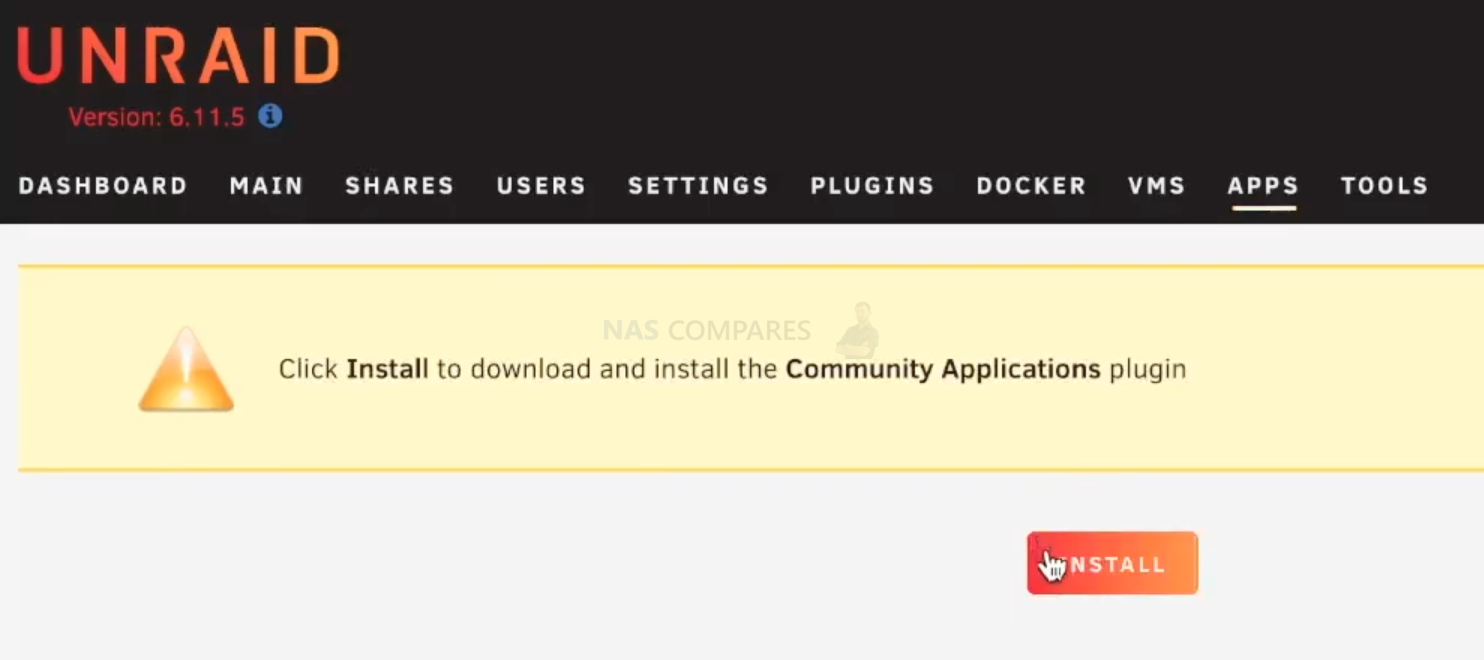
- Install a few apps. Go to the unRAID admin panel, then click on the Apps tab, and click Install Community Applications.
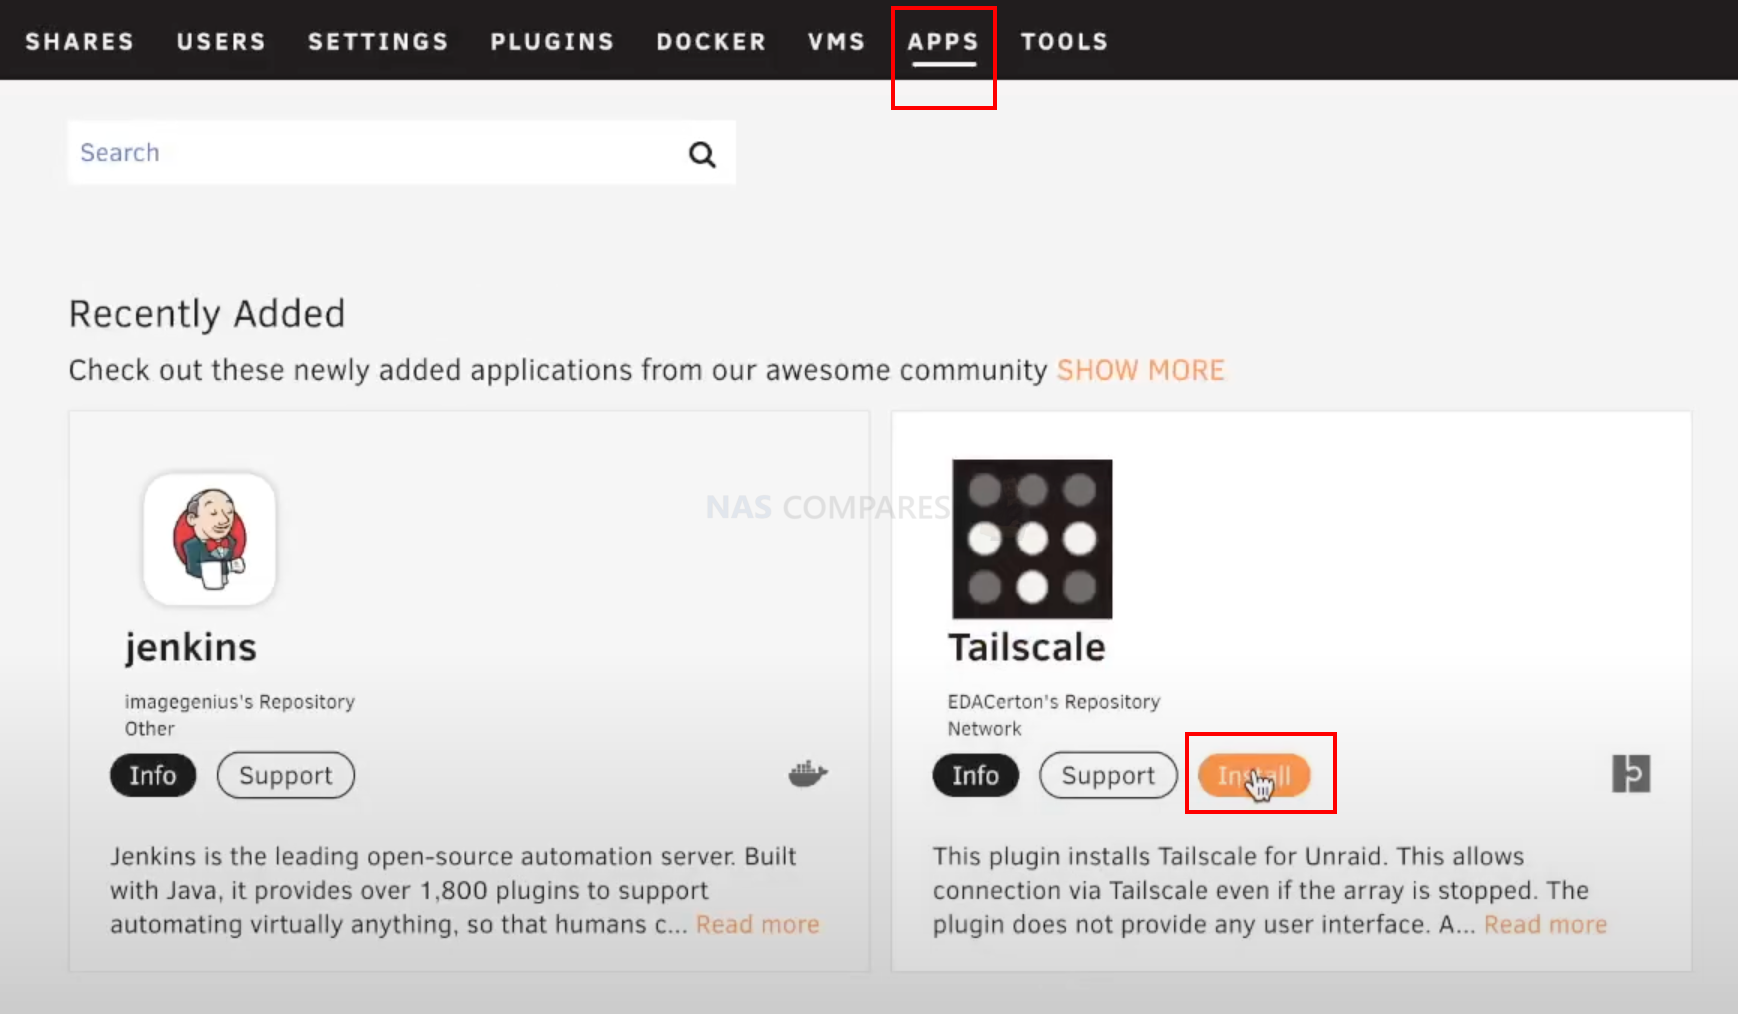
- In the apps section, find Tailscale and install it. This will allow you to connect to the NAS remotely via VPN. It will also make it easier to access your files securely while away from your local network.
- Configure Tailscale by following the instructions provided by the app.
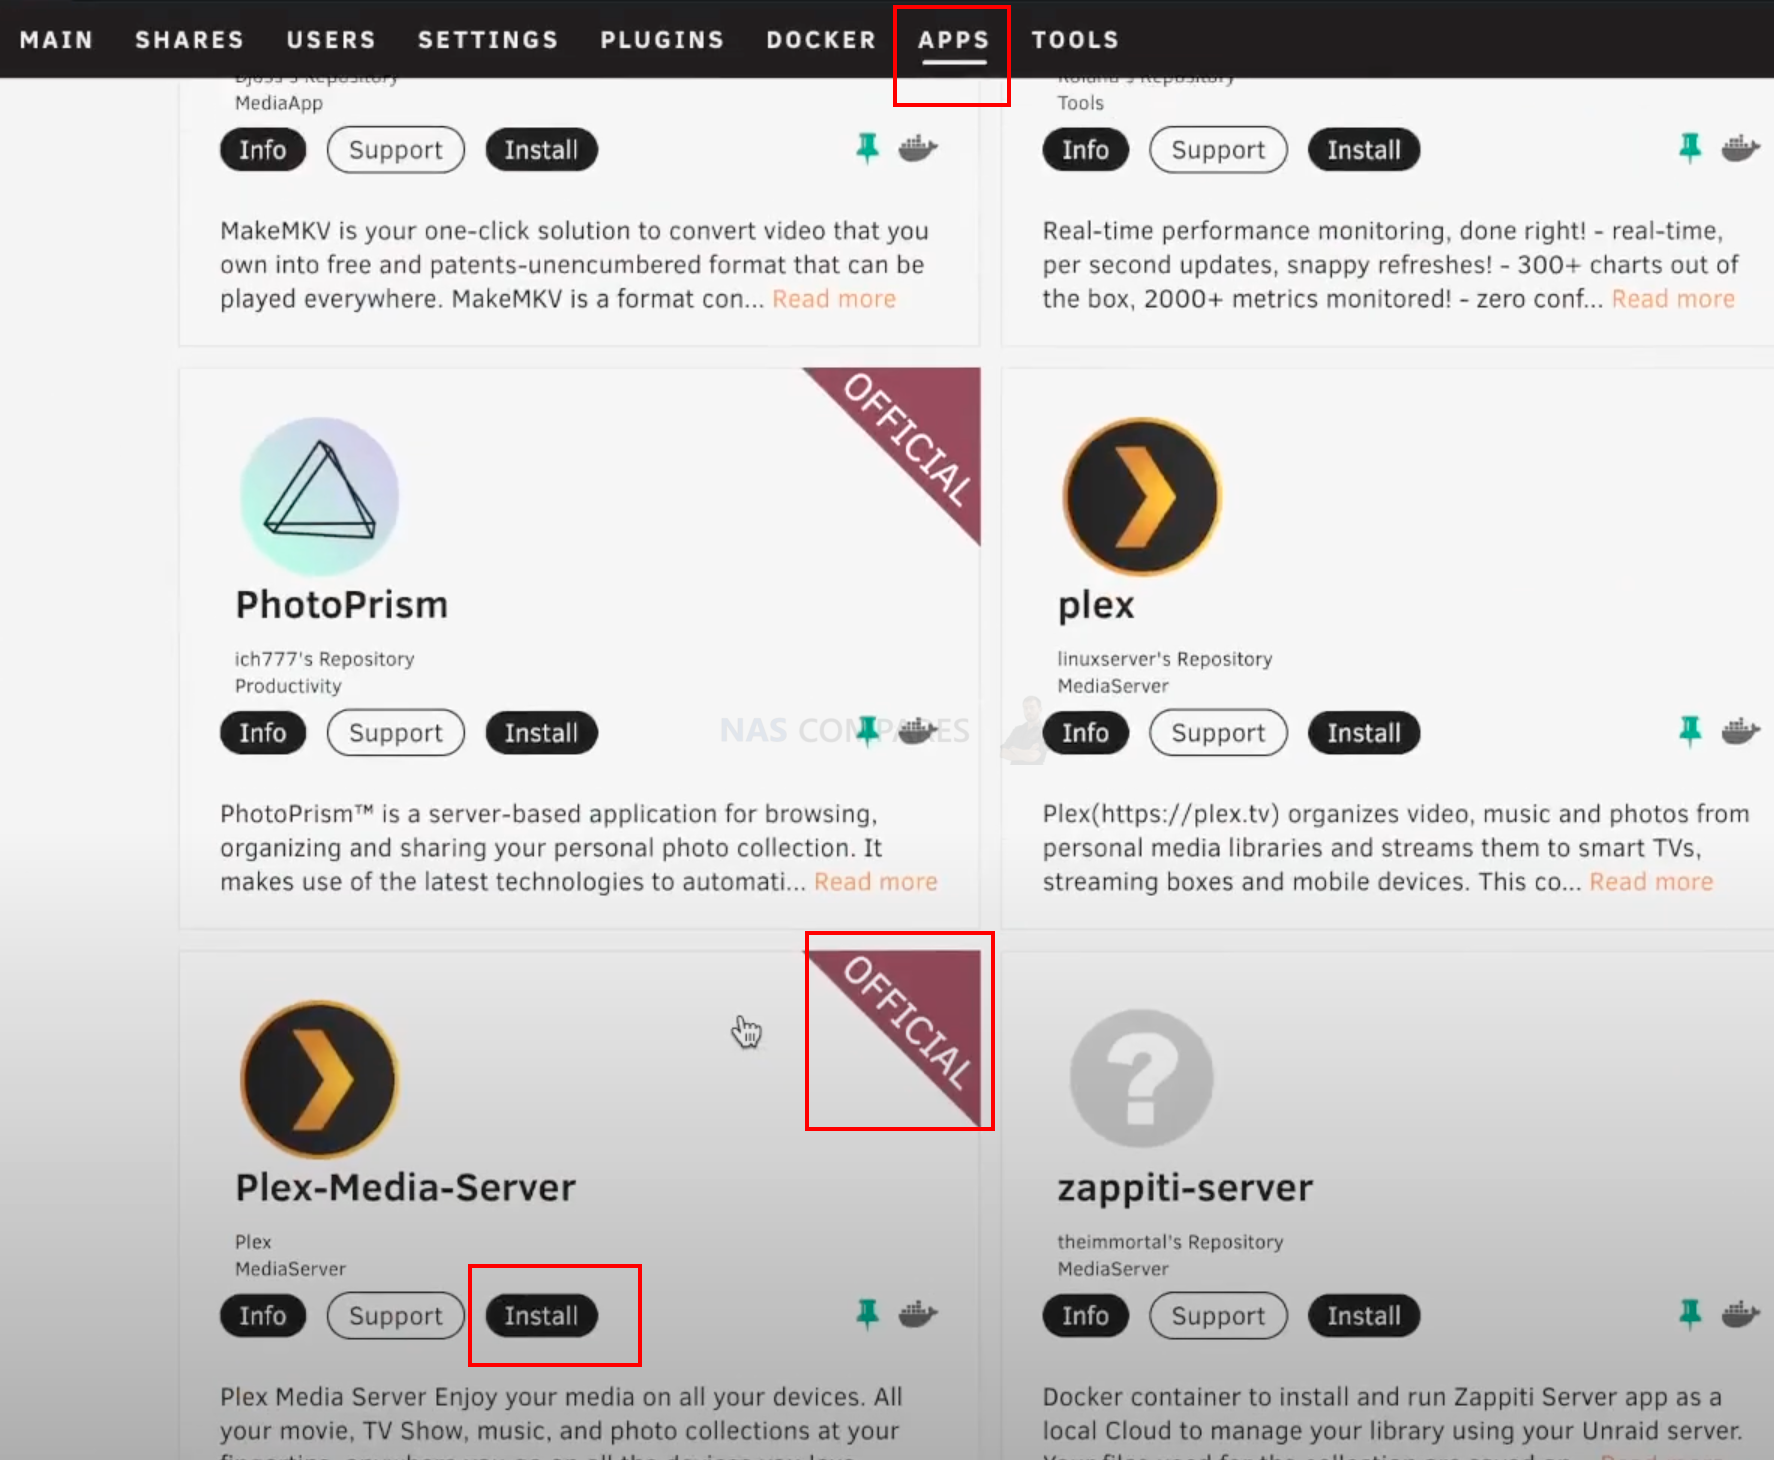
- Install Plex by going to the Apps tab in the unRAID admin panel and clicking on Install Community Applications.
- Search for Plex and click Install. This will allow you to stream media files from your unRAID NAS to other devices.
- Configure Plex by following the instructions provided by the app.
- Finally, make sure to regularly backup your data to an external hard drive or cloud storage service to prevent any loss in case of hardware failure or other issues.
Hardware Used in today’s Tests
|
 WD Red 3TB –
  Microsoft Keyboard –
  HDMI cable –
  HDMI capture –
  SanDisk USB stick –
  MACbook AIR M1 –
  Qnap hs-453dx –
How to install & set up UNRAID NAS server (SMB, Tailscale VPN and plex) visual guide.
Go to unraid.net/download

download USB creator app for windows or mac.
Connect USB drive or data drives or m.2 drives. whichever you want to use for unraid OS to boot from.
Connect this USB boot drive to your old Qnap NAS or any other NAS or PC with HDMI port on board.
Also connect the keyboard and monitor and LAN cable.

press f2 or f8 or del or f9 . keep pressing any of these keys right after you press the power on button on a NAS. this will load BIOS where you can change the boot order.
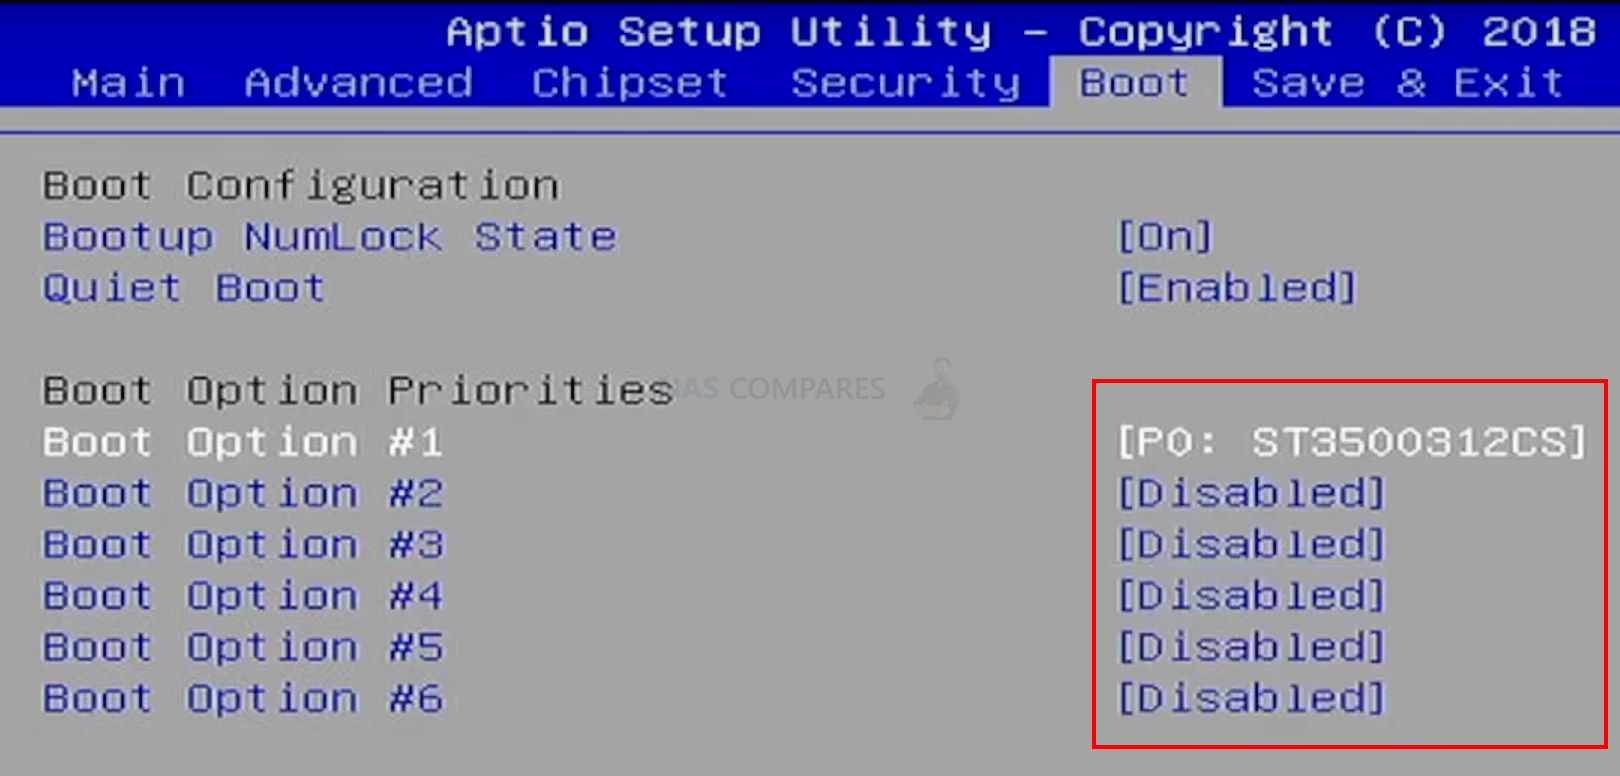
Go to the boot section and disable any other boot device leaving only USB you just made bootable via unraid app.
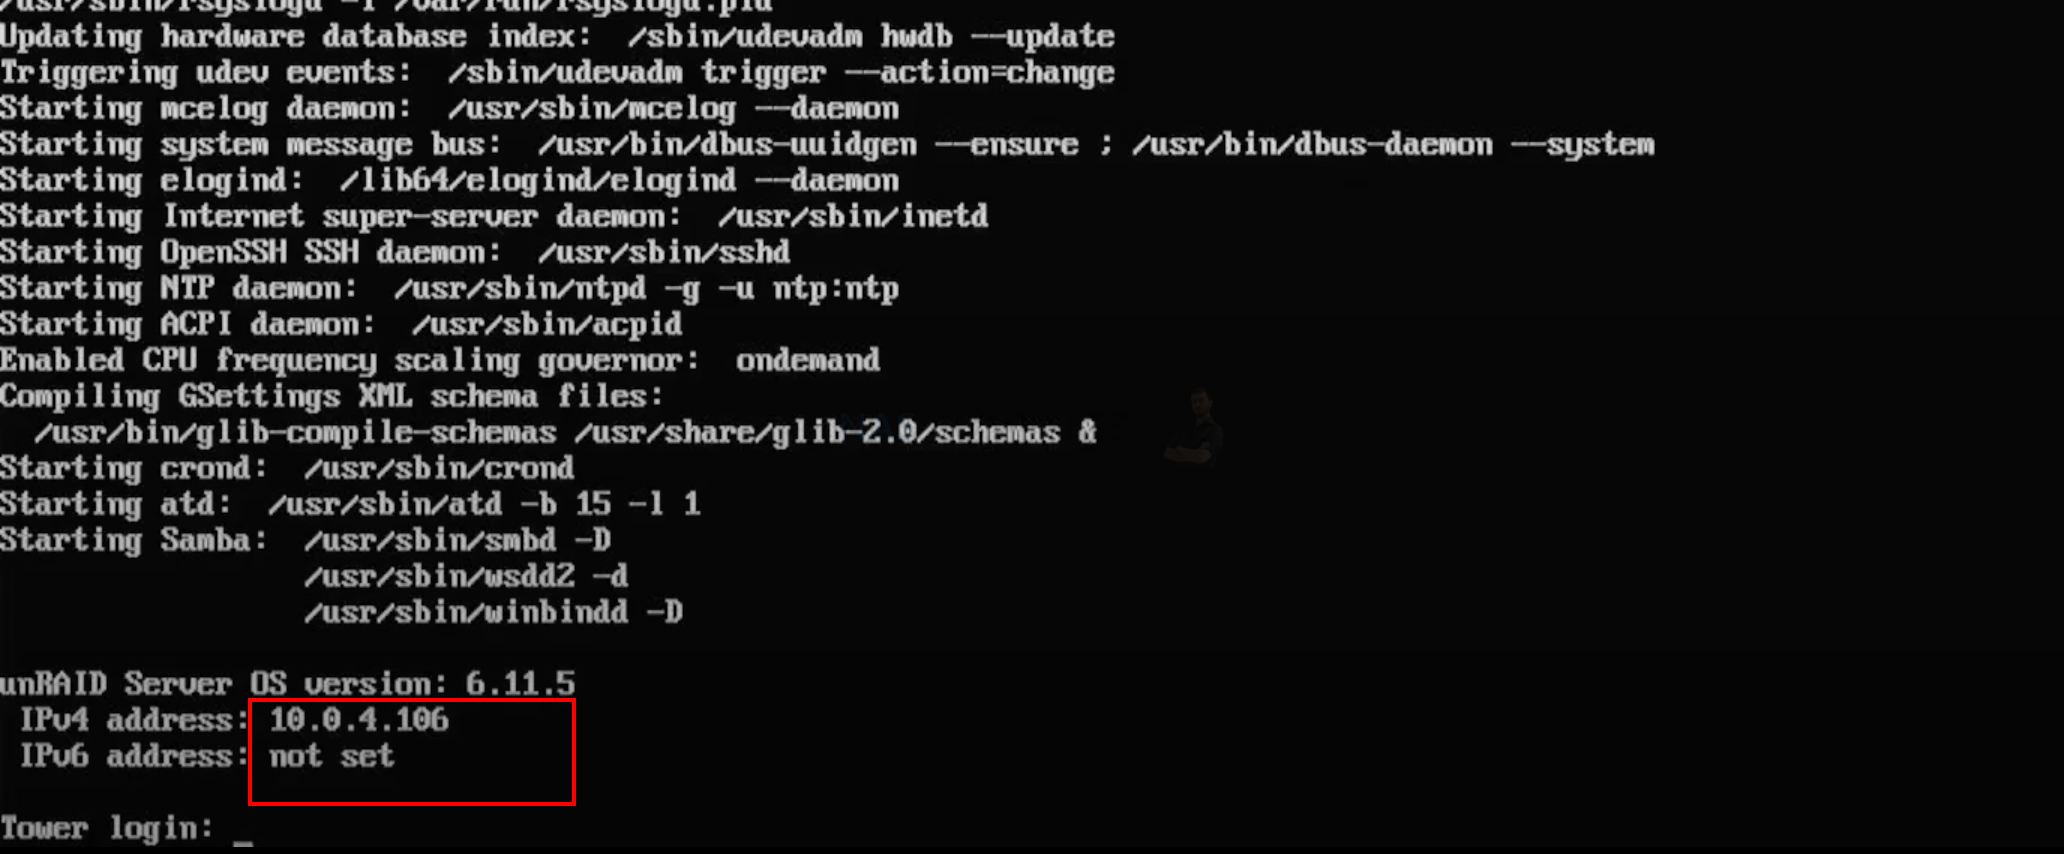
After few minutes unraid will finish loading and display an IP address for the web admin panel. alternatively, you can continue with the graphical interface which will be an option when you restart the NAS.
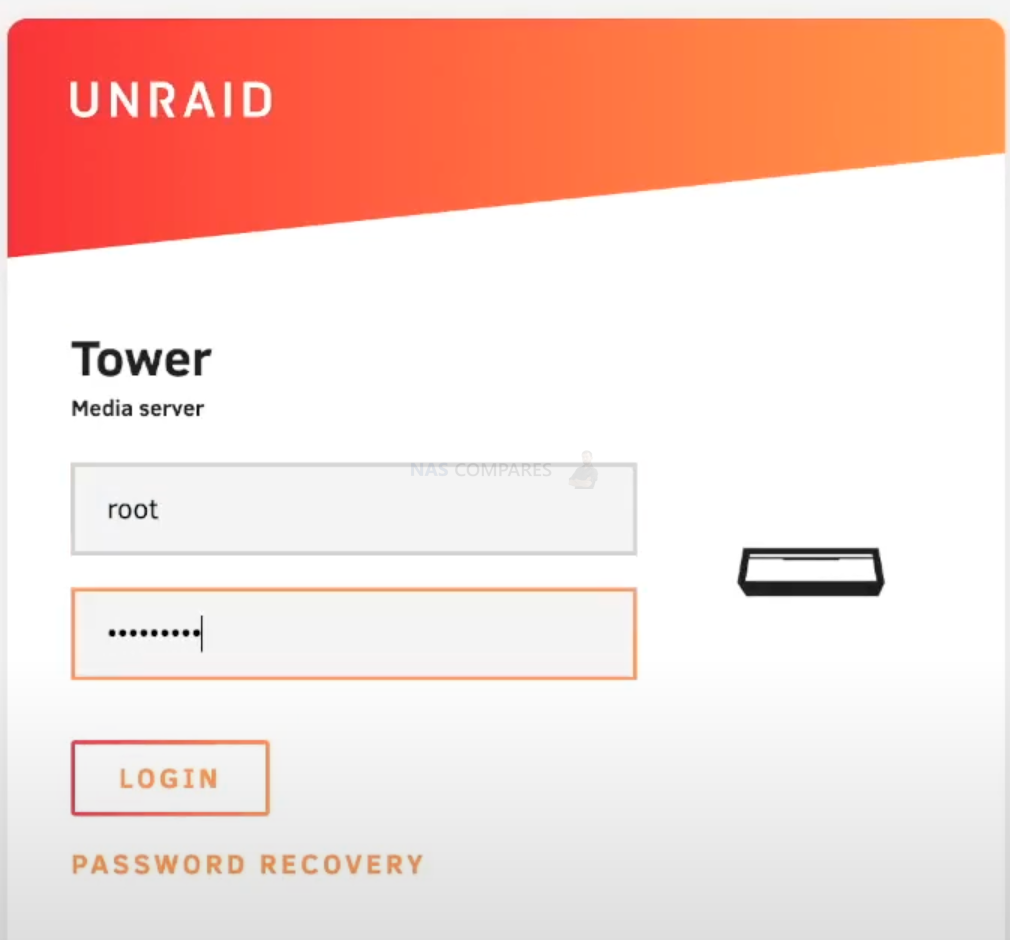
if not go to the internet browser and type in given IP. or type in tower.local/login which will also work.

then set the root password which will be used for admin panel.
then click “start trial” button and login or register an account with unraid.
install unraid cloud admin plugin for easier management and remote access.

go to main tab in admin panel. select parity drive and drives that will be used for data storage.
at the bottom click start which will create a volume and create parity data.
Leave it for few hours until parity processing is completed.
then go to users tab and create a user for SMB shares. This user is not for logging into unraid admin panel. only for accessing it via services.
then make sure you have SMB enabled under the settings tab.
You can also choose different file system for your storage. default is XFS.
Then format your volume under main section. at the bottom of the page tick format and click format button.
You can then create shared folders. go to shares tab and create a new share. you can choose how data need to be written: high-water, fill-up or most-free. click add share.

Then scroll down and choose export modes to yes. and security mode to private.
Lastly, scroll down and set access rights for previously created users. Read/ write mode is what I choose.

Then you can map your shared folder on your mac or windows.
On a mac open finder. click go/ connect to the server.
On windows open My computer/ This PC/ In top bar there will be an option to Map the drive. type in IP address and a shared folder you want to connect to.
On a MAC, IP is not that important and you can use tower.local instead.
Click connect and you are gonna be asked for username and password. tip here. never use root as a user for smb shares, it will not work.
Then the folder will be mapped. you can start adding things to the folder.
Then you can install few apps. Go to unraid admin panel/ apps. Click install Community applications.
Then in apps sections find Tailscale and install it. This will allow us to connect to the NAS remotely via VPN. Safe and fast option.
After installing the app, move back to HDMI , keyboard monitor setup if you are using browser to do all this. You will see unraid command line.
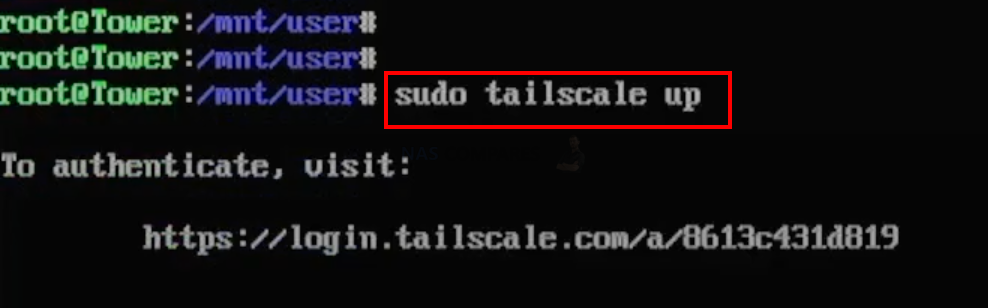
Type in sudo tailscale up.
This will generate an URL you need to type in your internet browser. Create a Tailscale account beforehand. This URL will link this NAS to your account.
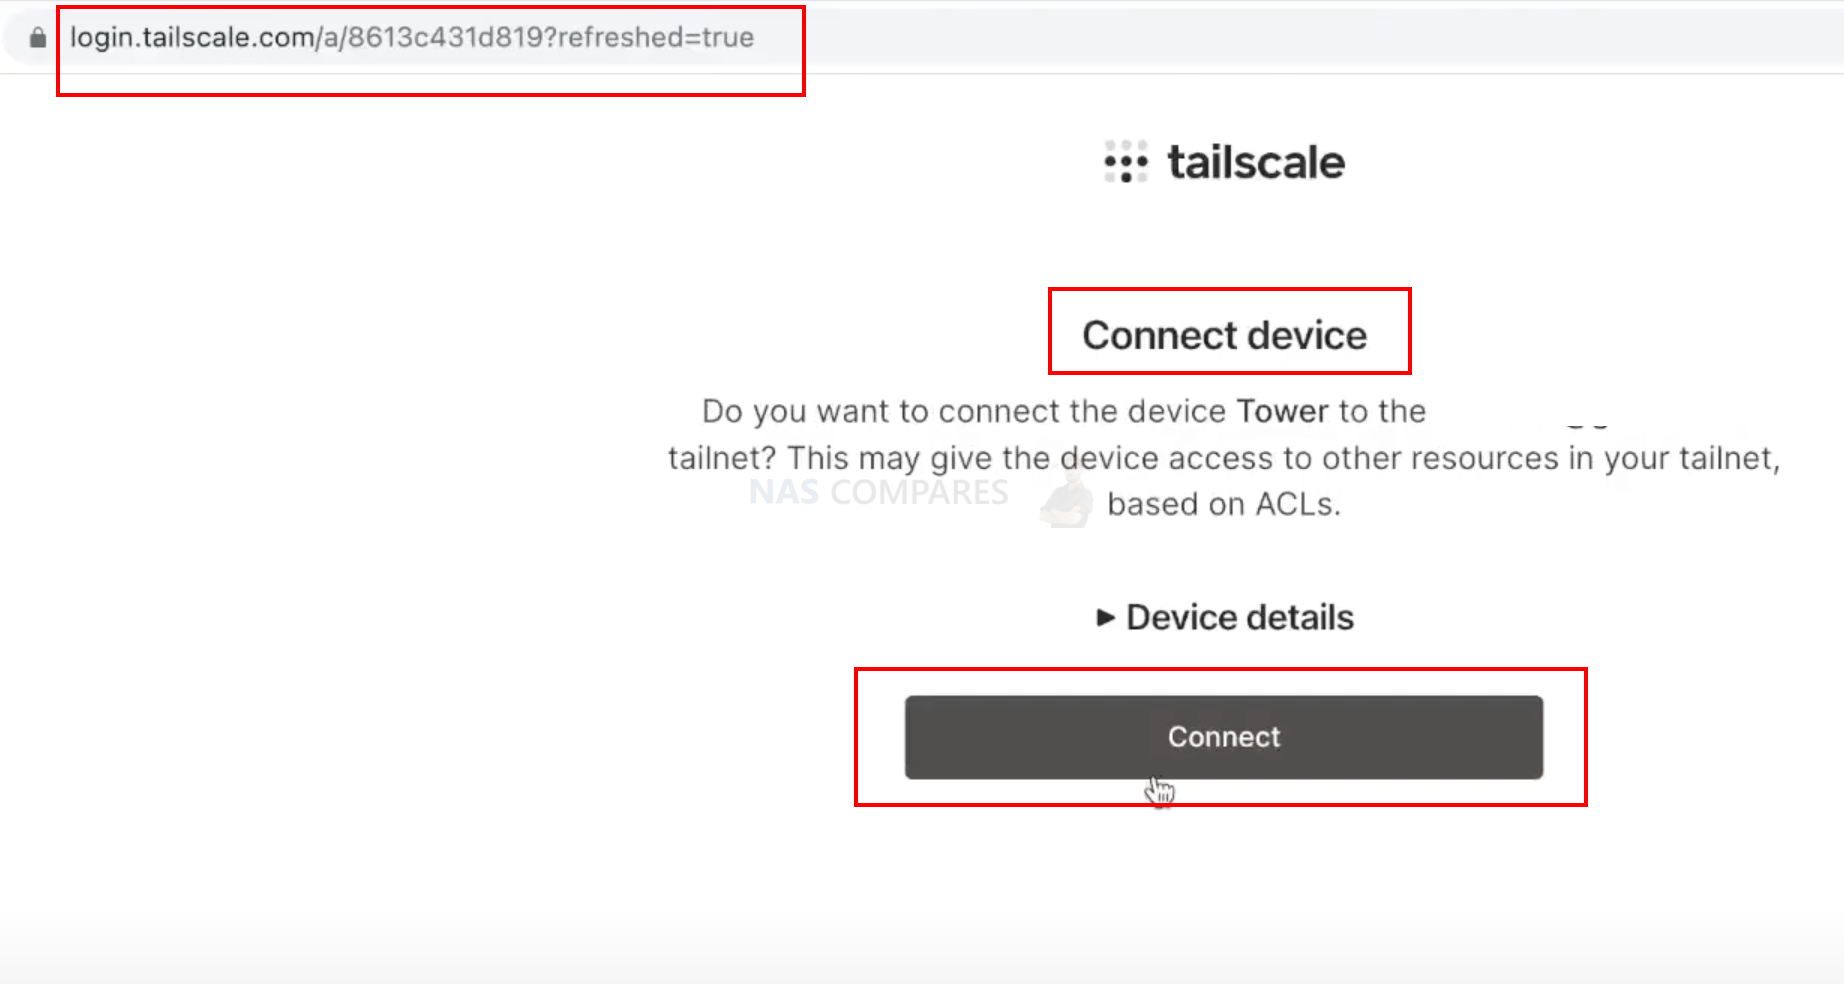
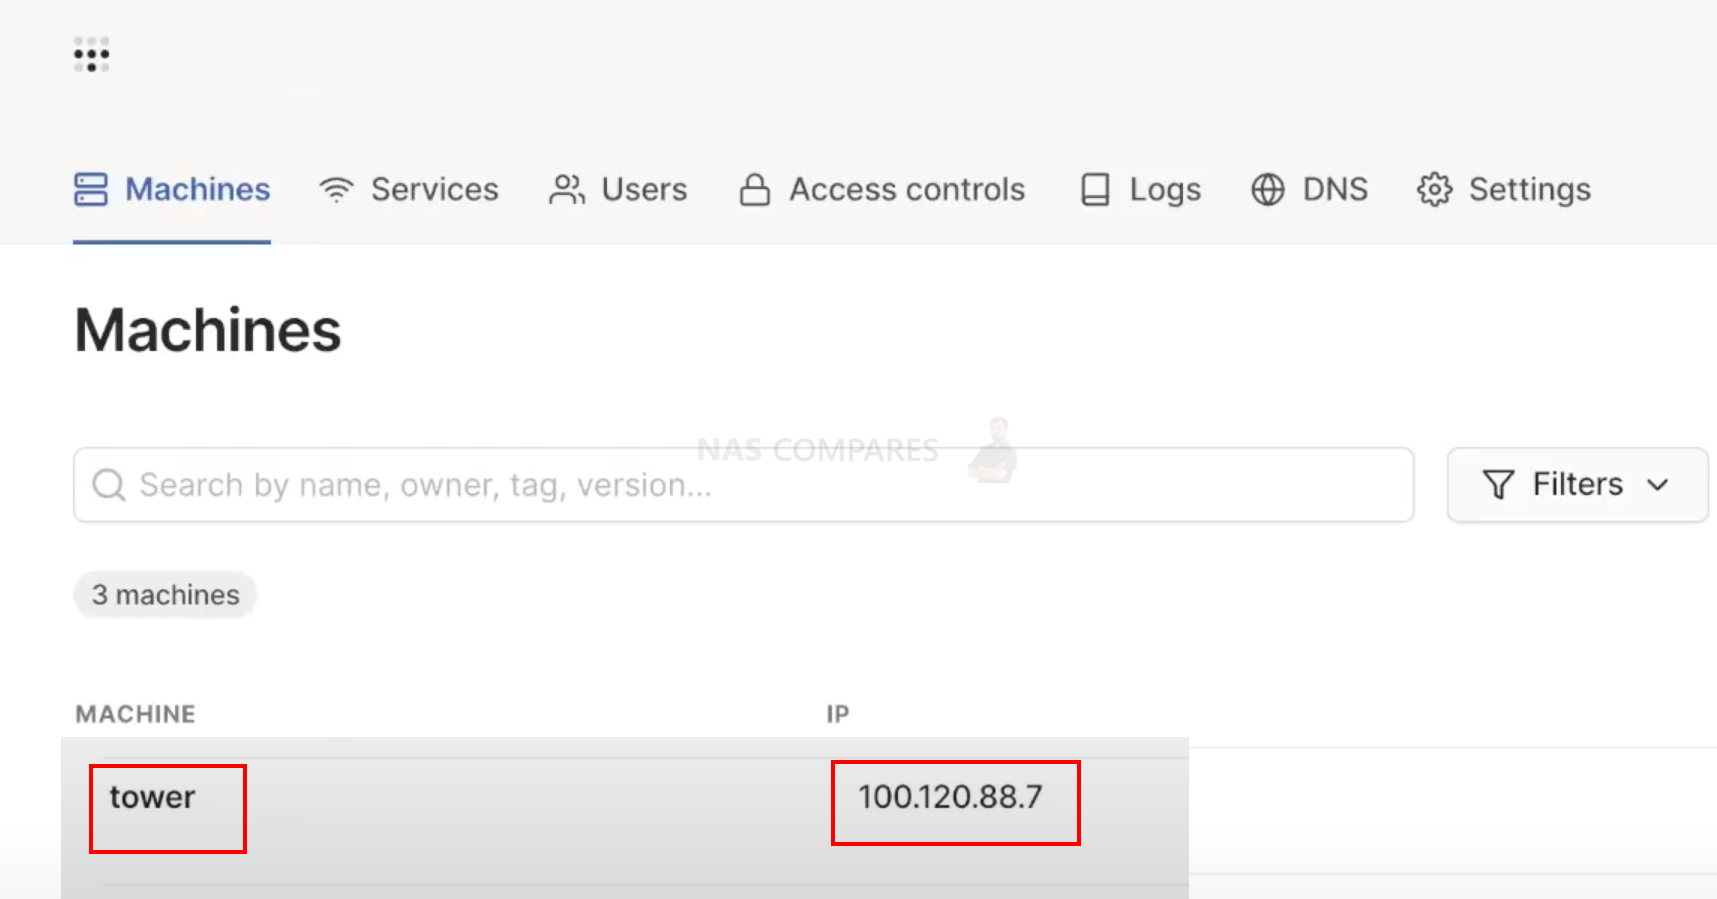
You will then see a unique IP for this NAS in your Tailscale admin panel. You can use it to connect to it remotely.
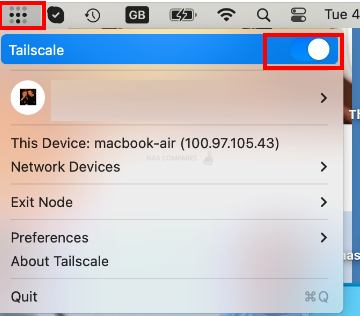
Before you do so, make sure your laptop is also connected to the tailscale. There is a windows and MAC app for Tailscale. Enable it.
You can then copy and paste the IP in web browser to access your NAS.

Then as before, you will use it as a local NAS with user name and password.
You can also connect to your unraid NAS via SMB while VPN is active.
Finally, you can install Plex. Go to app sections and find official Plex app and click install.
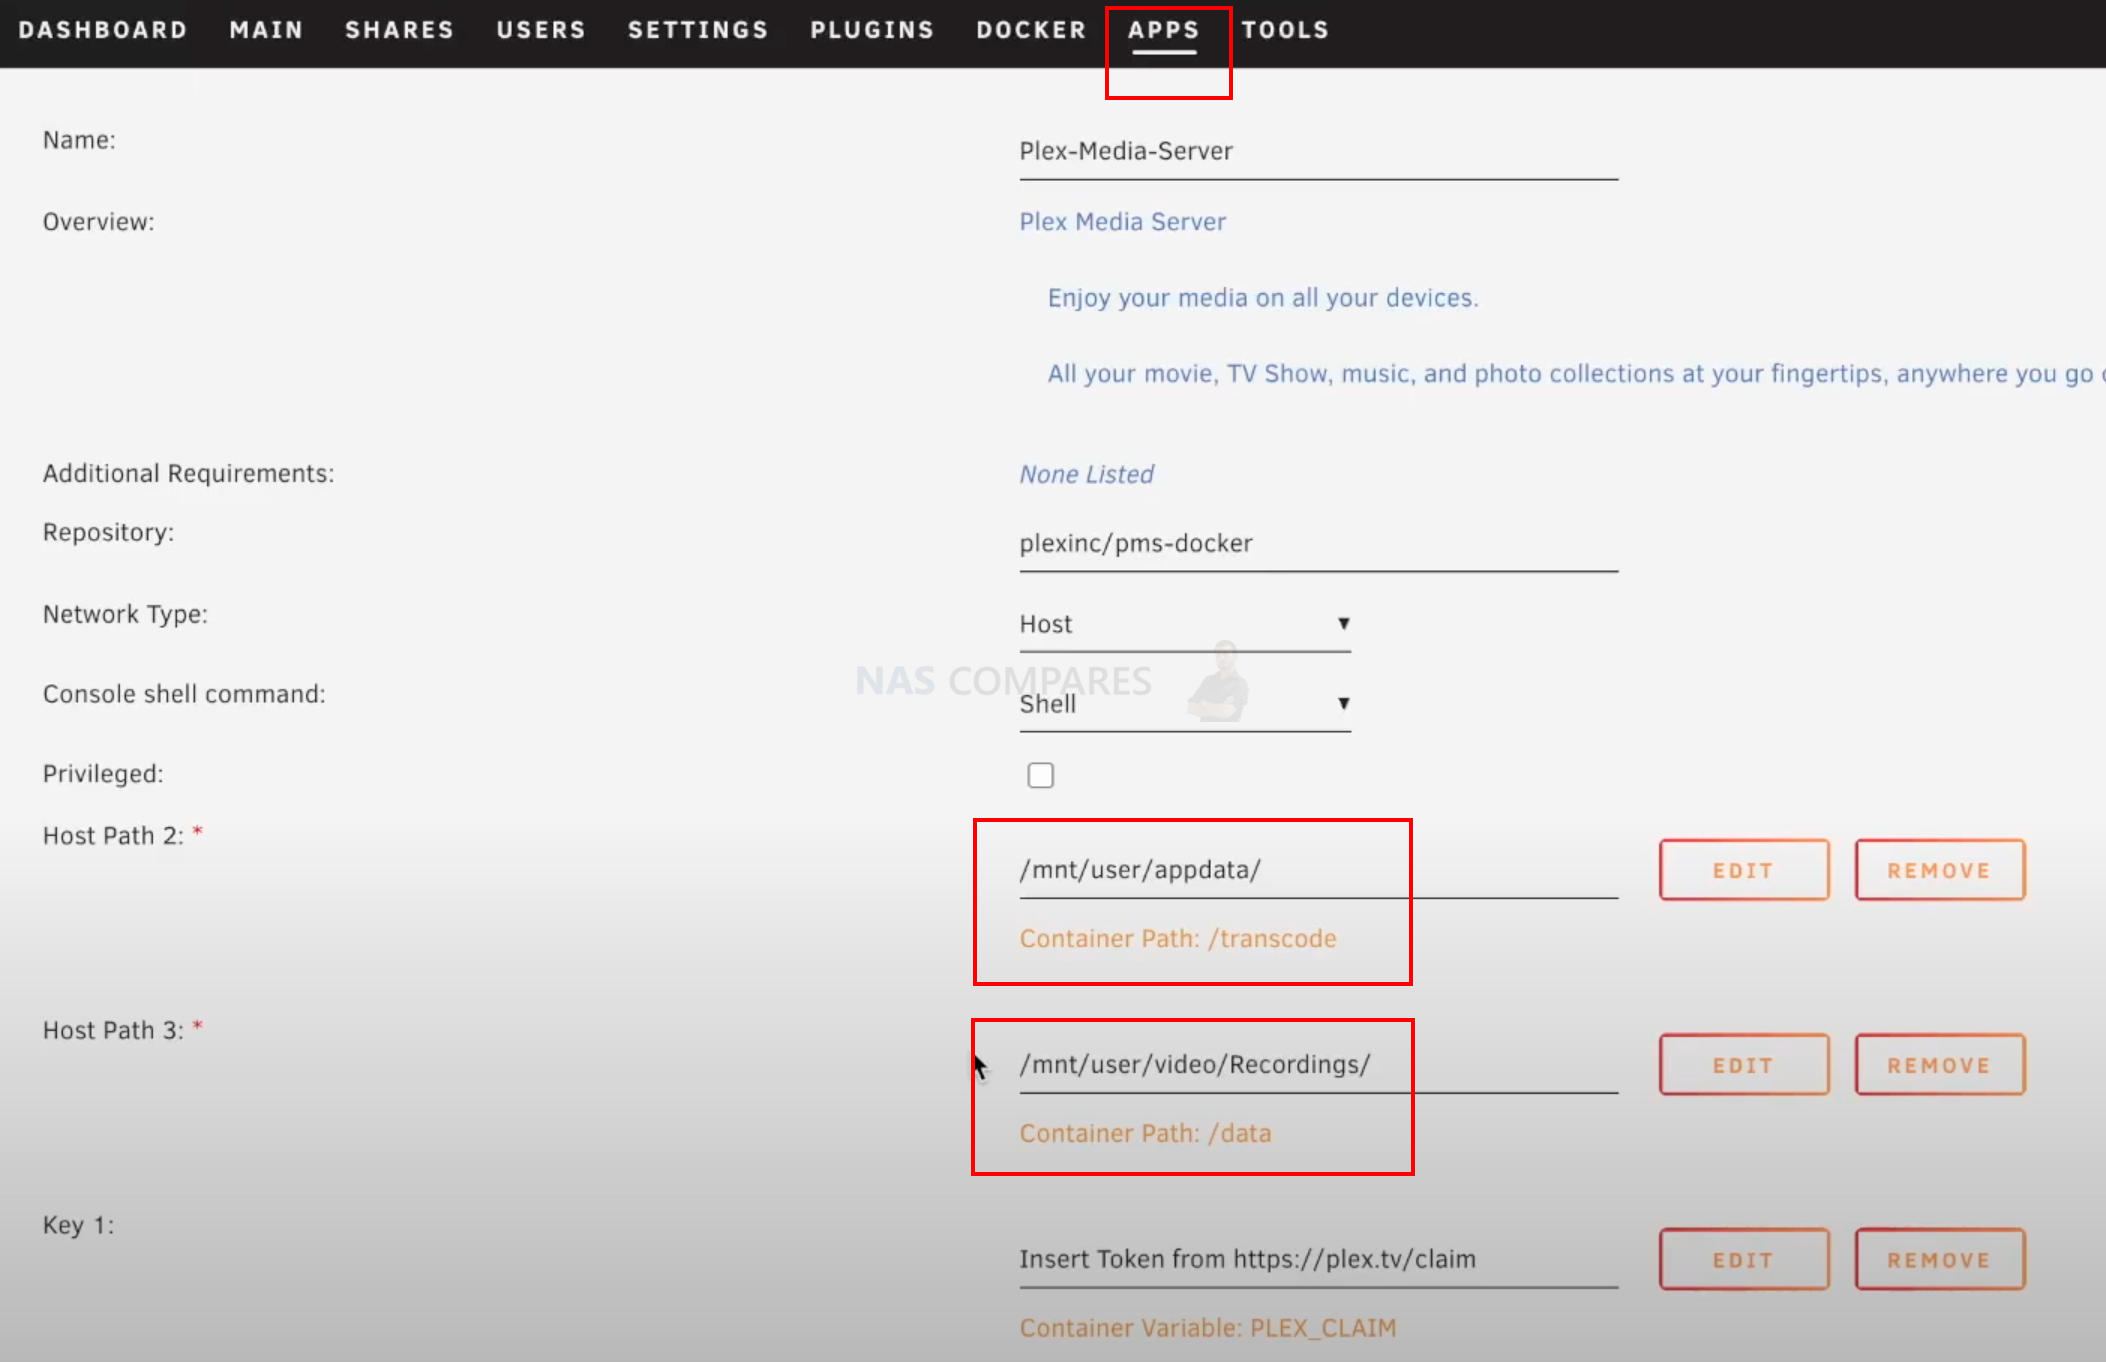
You will then need to set up two folder – transcoding and media folder.
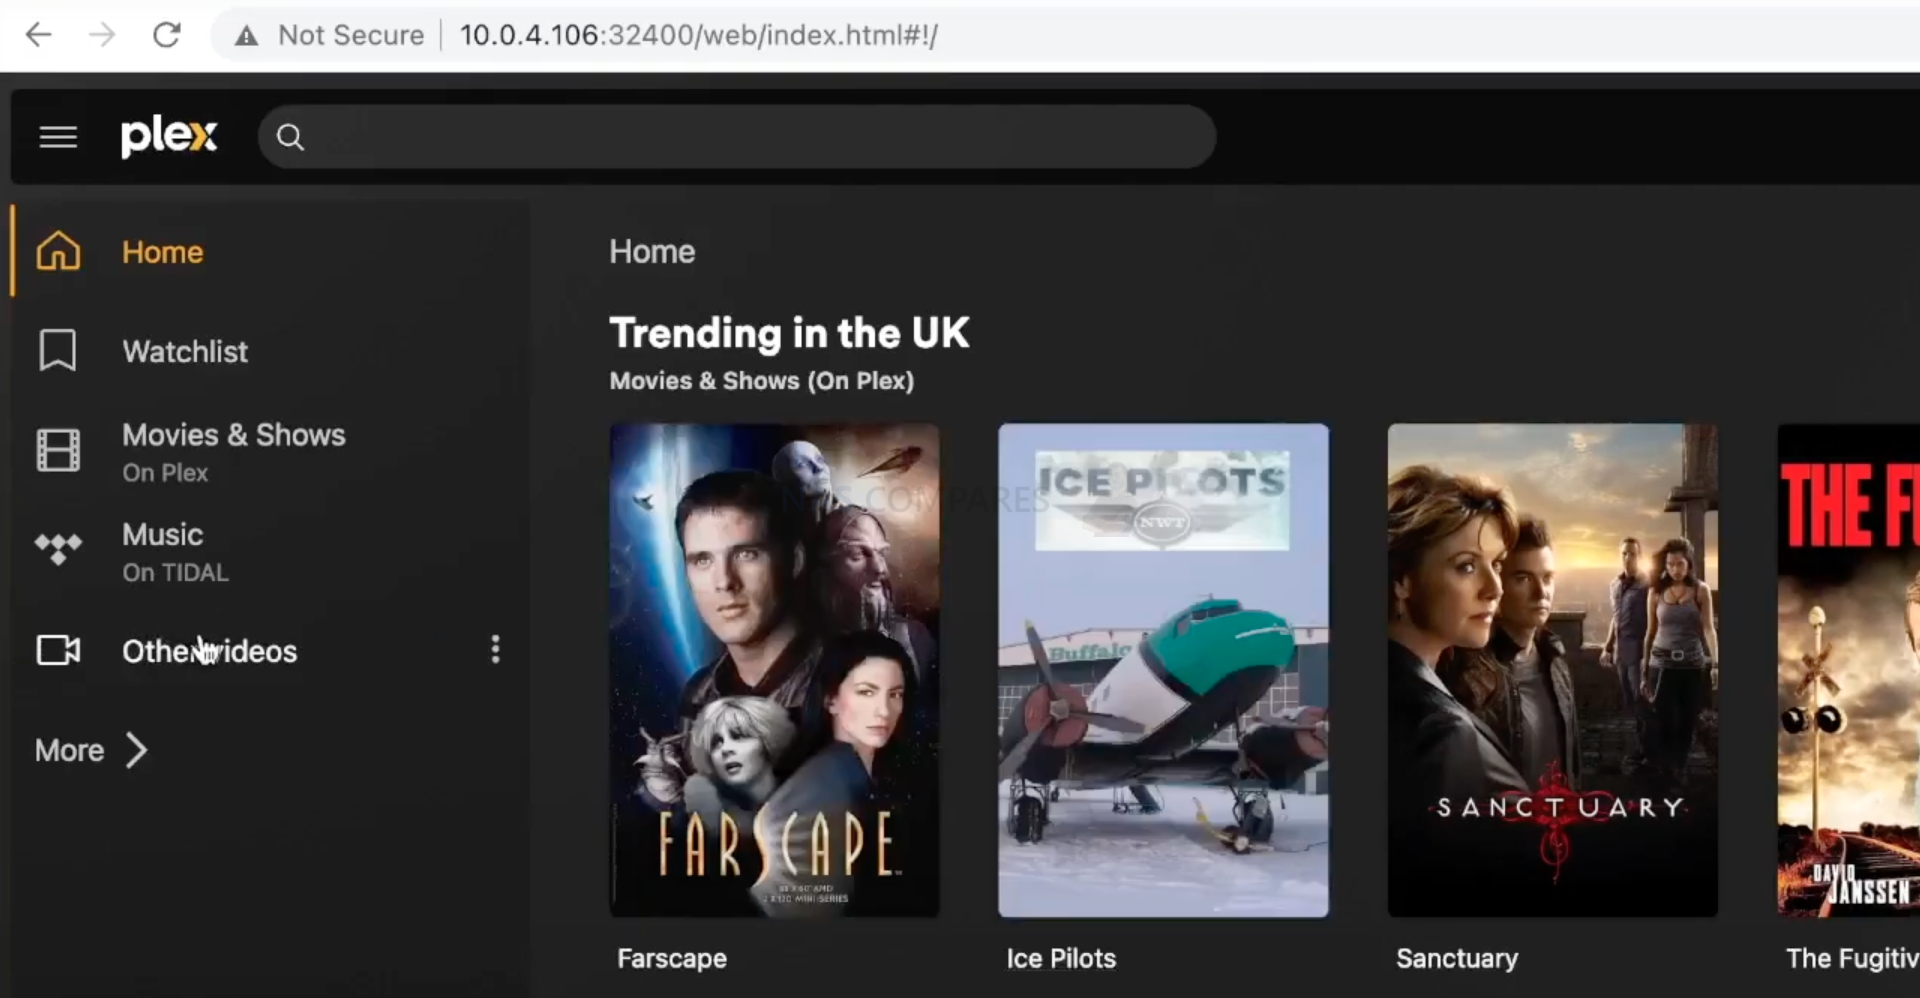
You can then load the Plex app in WEBUI interface.
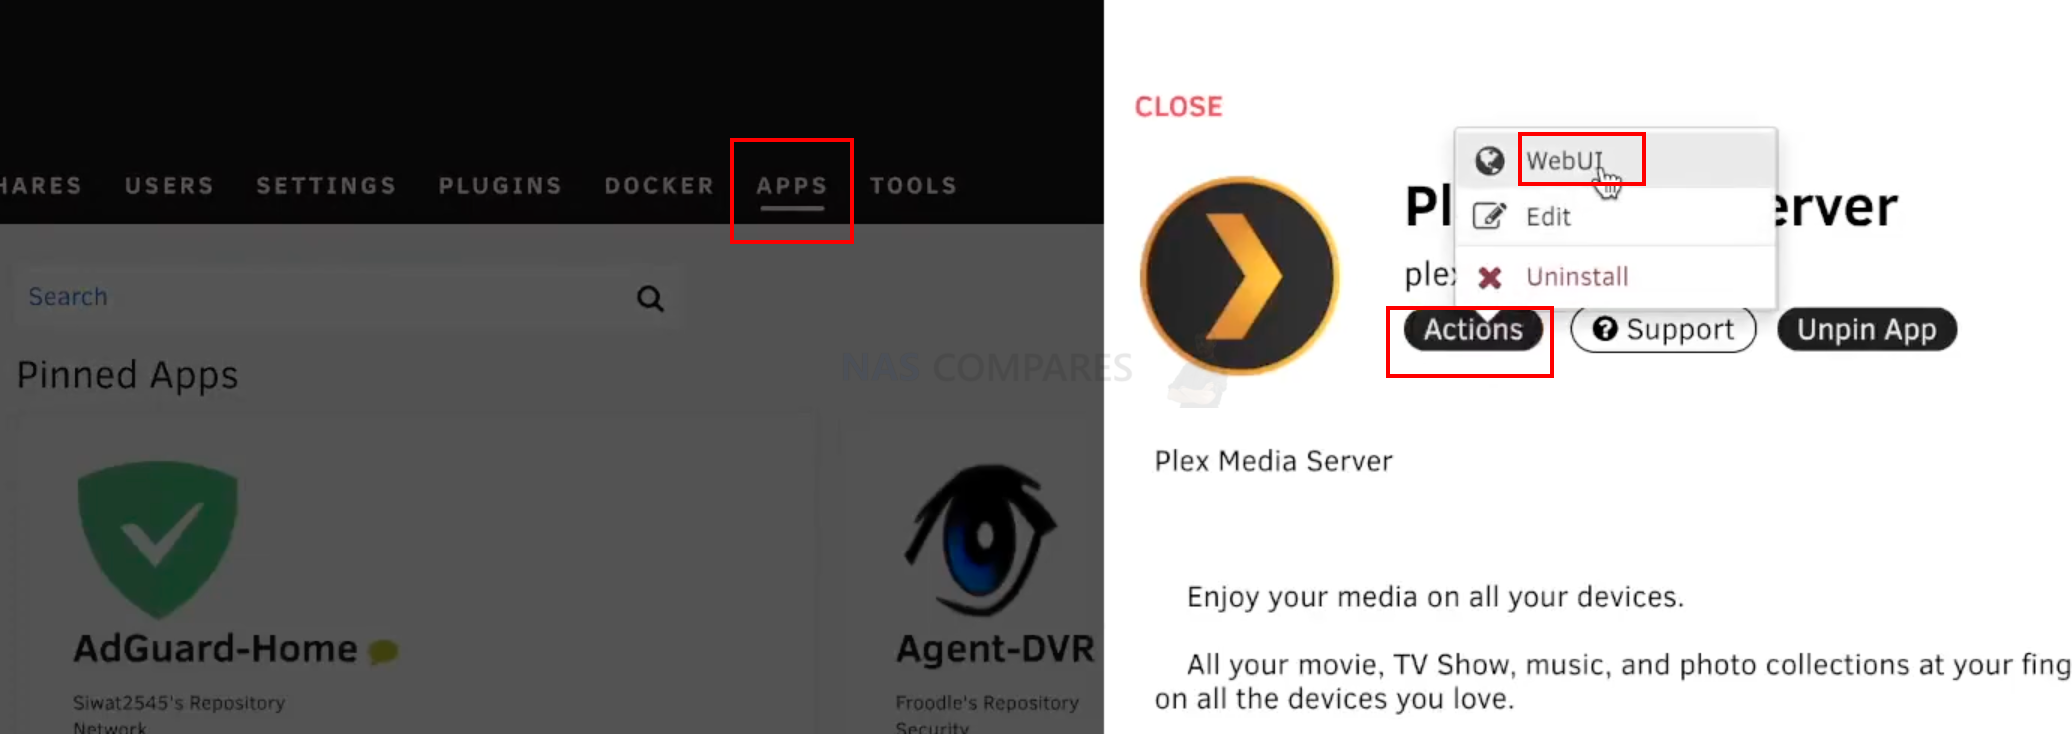
That easy you Plex is installed. Just give it a name and choose your parameters in the Plex first load wizard.
This has been a guide how to install unRAID and enable SMB shares and map the drive. Also showed how to install Tailscale VPN and Plex.
Some additional tips and details to keep in mind:
- Make sure to use high-quality, reliable drives for your unRAID NAS server to prevent any data loss.
- Keep your unRAID NAS server in a well-ventilated area to prevent overheating and potential hardware damage.
- Regularly check for updates and install them to ensure that your server is secure and functioning optimally.
- Use caution when granting access to your shared folders and make sure to use strong passwords to prevent unauthorized access.
- Consider adding a UPS (uninterruptible power supply) to your unRAID NAS server to prevent data loss in case of power outages.
- Take the time to explore the various features and options available in the unRAID admin panel to fully optimize your server’s performance and functionality.
With these tips and detailed steps, you should be able to install and set up your own unRAID NAS server with SMB, Tailscale VPN, and Plex to easily store and stream your media files while ensuring their security and accessibility from anywhere.
| Where to Buy a Product | |||
 |
    
|

|
VISIT RETAILER ➤ |
 |
|
|
VISIT RETAILER ➤ |
We use affiliate links on the blog allowing NAScompares information and advice service to be free of charge to you. Anything you purchase on the day you click on our links will generate a small commission which is used to run the website. Here is a link for Amazon and B&H. You can also get me a ☕ Ko-fi or old school Paypal. Thanks! To find out more about how to support this advice service check HERE


UniFi Routers vs OpenWRT DIY Routers - Which Should You Choose?
WHY IS PLEX A BIT S#!t NOW? IS 2026 JELLYFIN TIME? (RAID Room)
Synology FS200T NAS is STILL COMING... But... WHY?
Gl.iNet vs UniFi Travel Routers - Which Should You Buy?
UnifyDrive UP6 Mobile NAS Review
UniFi Travel Router Tests - Aeroplane Sharing, WiFi Portals, Power Draw, Heat and More
Access content via Patreon or KO-FI
Discover more from NAS Compares
Subscribe to get the latest posts sent to your email.
DISCUSS with others your opinion about this subject.
ASK questions to NAS community
SHARE more details what you have found on this subject
IMPROVE this niche ecosystem, let us know what to change/fix on this site