

How to Join to an Active Directory Domain and Assign Domain Users to Shares on WSS NAS
Set a Static DNS server address
By default, the Windows Server NAS is set to automatically obtain an IP address and a DNS server address. Seagate recommends you set a static IP and DNS server address manually.
In this example we will only set a static DNS server address.
- Open the Control Panel.
- Select View network status and tasks or Network and Sharing Center.
- Select Ethernet.
- Select Properties.
- Select IPv4, then Properties.
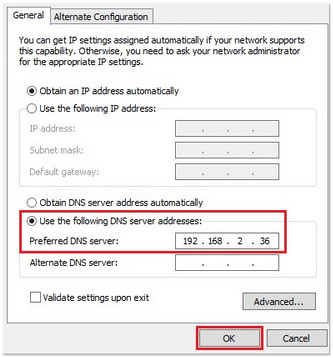
- Select Use the following DNS server addresses.
- Enter the Domain Controller / DNS Server’s IP Address, then click OK.
Join the Windows Server NAS to a Domain
- Open the Start menu.
( Press the Windows key ( ) + D to arrive at the desktop first.)
 - Open File Explorer (
 ).
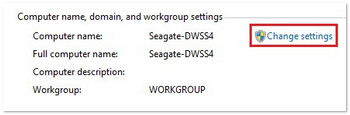
). - Right-click on Computer and select Properties.
- Select Change settings Under Domain, and workgroup settings.
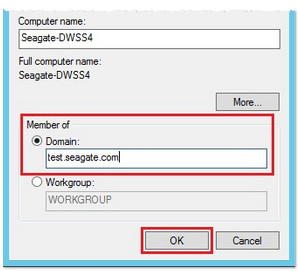
- Select Change…
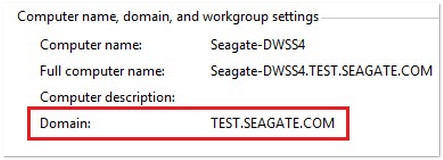
- Under Member of, select Domain, then enter the Fully Qualified Domain Name (FQDN), then click OK.
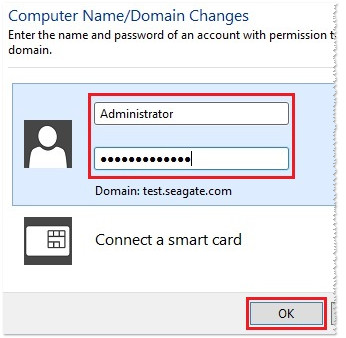
- Enter the user name and password of the Domain Administrator that has permissions to join the domain, then click OK.
- Click OK at the Welcome to the domain prompt. Click OK again.
- Restart the NAS to apply changes.
- Upon restarting, System Properties displays the Windows NAS on the domain.
- Click on the Server Manager icon (
 ) on the bottom left of the Windows screen.
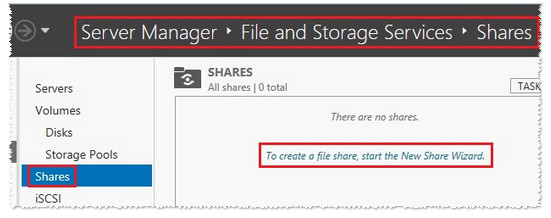
 - Select File and Storage Services.
- Select Shares , then To create a file share, start the New Share Wizard.
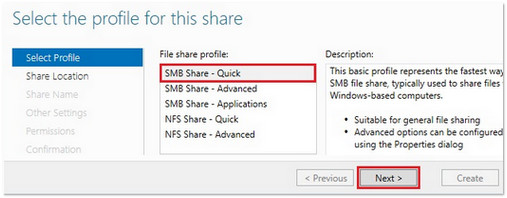
- Select SMB Share – Quick, then Next.
- Select a Server and Share Location.
- For the Share location, choose select by volume.
- Select the drive letter/volume where the share will be created.
 It is not recommended to choose the C: drive to store the share.
In this example we chose a RAID volume, drive letter R:.
Select Next.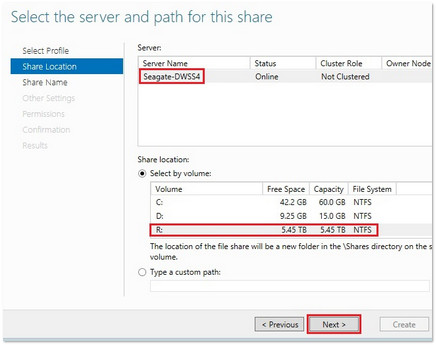
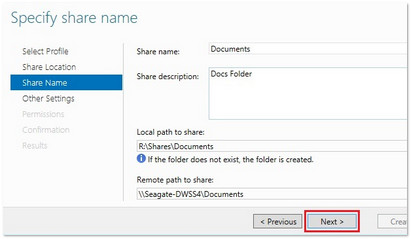
- Specify the Share Name and Description , then click Next.
- Configure Share settings, then click Next.
- Select Customize permissions.
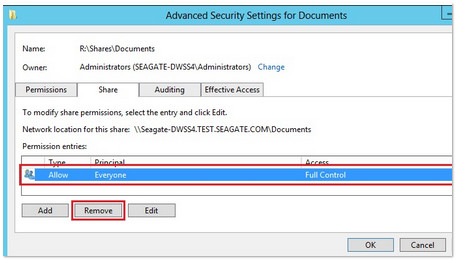
- In Advanced Security Settings for the Share, click the Share tab.
- Select Allow Everyone Full Control, then select Remove, then select Apply.
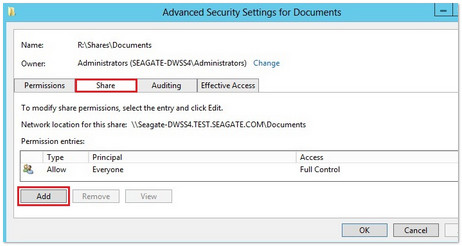
- Add a specific user by selecting Add.
- Click Select a principal.
Select a Domain User
There are two ways to select a domain user.
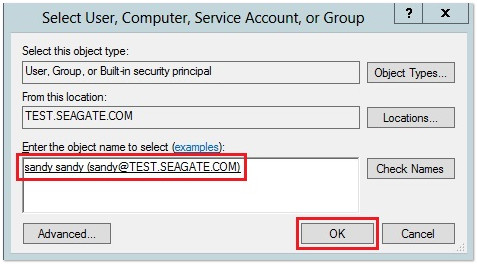
- Under Enter the object name to select, enter the name of a Domain User and select Check Names.
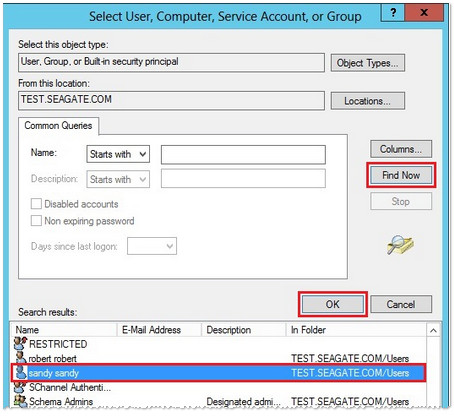
You may be prompted for the Domain Controller Administrator login credentials. - Select Advanced , then Find Now. A list of Domain Users will populate. Click the correct User, then OK.
You may be prompted for the Domain Controller Administrator login credentials.
The following screenshot is for option 2:
The Domain User now listed as an object. Click OK.
Set Permissions for the User
- By default, permissions are set to Read and Execute only.
Check the Full Control and Change options, then click OK.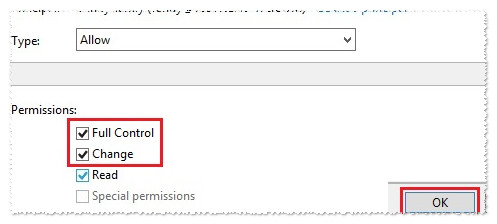
- Select Apply, then OK.
- On the Specify permissions window to control access, select Next.
- Confirm that the settings are correct, then click Create.
- Note that the Share was created successfully.
- Click Close.


Private 🔒 Inner Circle content in last few days :
(Early Access) THE ULTIMATE SIM ROUTER DOES EXIST - The GL.iNet Puli AX Mobile Router Review
(Early Access) Building a MAXIMUM STORAGE Desktop NAS - A DiY NAS Builders Guide
(Unlisted) Why is 25GbE and 40GbE not a THING for Home and Smaller Business Users?
(Early Access) Running a NAS on Solar Power - IS IT WORTH IT?
(Early Access) M.2 to 10GbE Adapters ARE A THING! - Review and NAS Testing
(Early Access) Minisforum MS-01 - But As a NAS Drive? (Review)
(Early Access) PLEX PASS - Price Increases Coming?
(Early Access) How to Install UnRAID/TrueNAS on a UGREEN NAS - A Quick Install Guide
(Early Access) The UnRAID 7 Beta - The Highlights (with Ed @SpaceinvaderOne )
Why Is This 1TB USB SSD $149? And Is It Safe?
(Early Access) Best User Friendy NAS OS for Your DiY/BYO NAS Build
(Early Access) CLOUD Prices vs NAS Prices - HOW MUCH??????
Access content via Patreon or KO-FI