

Bitcoin Node and Synology NAS Setup Guide
In a sense, Bitcoin is about claiming back full ownership: your keys, your money. Network-attached storage is also about claiming full ownership over your data. Considering that a typical NAS might likely have spare storage, and typically runs 24/7, this makes them perfect candidates on which to run a bitcoin node. In this tutorial, we will be setting up a bitcoin node docker container on a Synology Network-attached storage (NAS) device using just a few simple steps. Synology Inc. is a Taiwanese corporation that specialises in Network-attached storage appliances, working with a linux based distribution out of the box, and it is with a Synology NAS that we are going to show how this handy combination of hardware and software can be used to create a bitcoin node of your own.
Bitcoin Node and Synology NAS – What you need
For this tutorial, we will be deploying a bitcoin docker instance using Synology Disk Station Manager (DSM), the linux based operating system running your Synology NAS. Through DSM, you can manage and search files/folders, view files of various types, share private files with external users, mount remote folders and virtual drives for access, and do much more. To continue, you will need to access your NAS via a web browser. The default HTTPS port number is 5001, so you can securely access DiskStation Manager (DSM) by visiting https://server-hostname:5001/, where server-hostname is the host or ip address of your NAS.
Bitcoin Node and Synology NAS Step 1
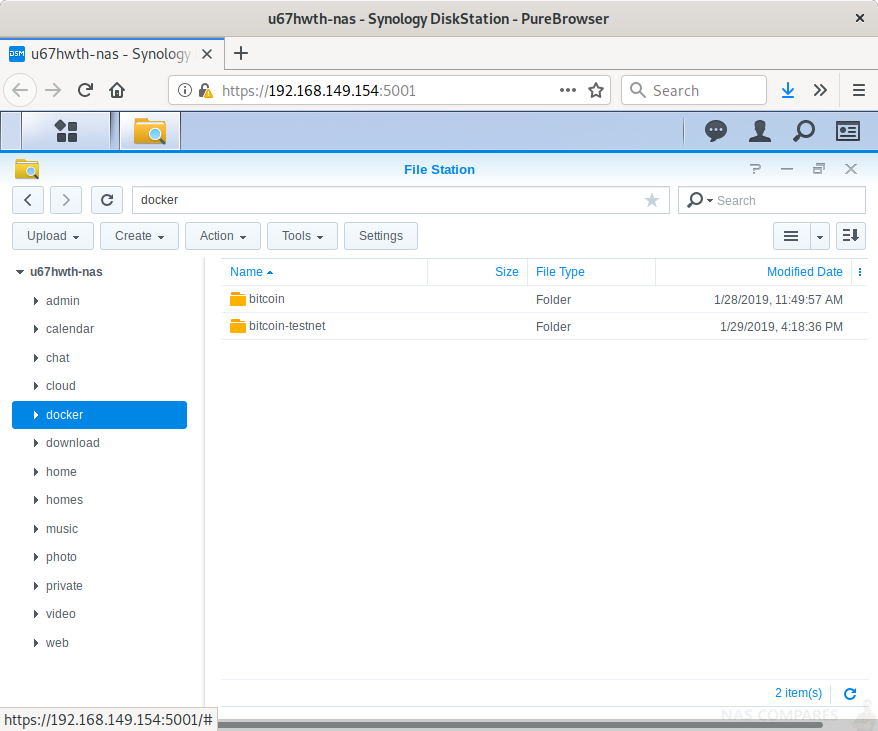
Once we have successfully accessed the DSM interface, we can continue by creating a folder where Docker will store our bitcoin node data. To do this, access File Station, then create a “docker” folder in the root of your NAS. We can then create as many subfolders for each separate node we might want to run, e.g. “bitcoin-mainnet”, “bitcoin-testnet”, etc..
For the purpose of this tutorial, we will be creating a bitcoin node configured in testnet mode.
Bitcoin Node and Synology NAS Step 2
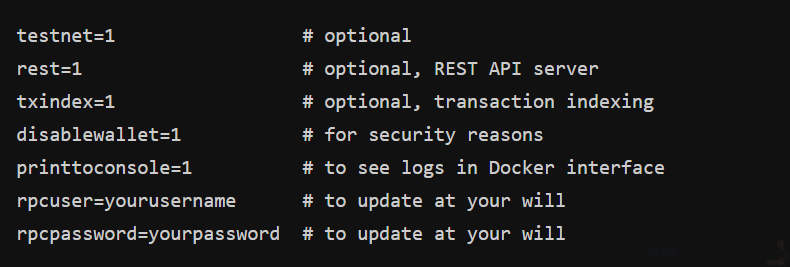
You will need to create a bitcoin.conf file in the root of each instance you wish to run. In our example, we will be adding a few lines as follows to the <NASRoot>/docker/bitcoin-testnet/bitcoin.conf file:
Bitcoin Node and Synology NAS Step 3
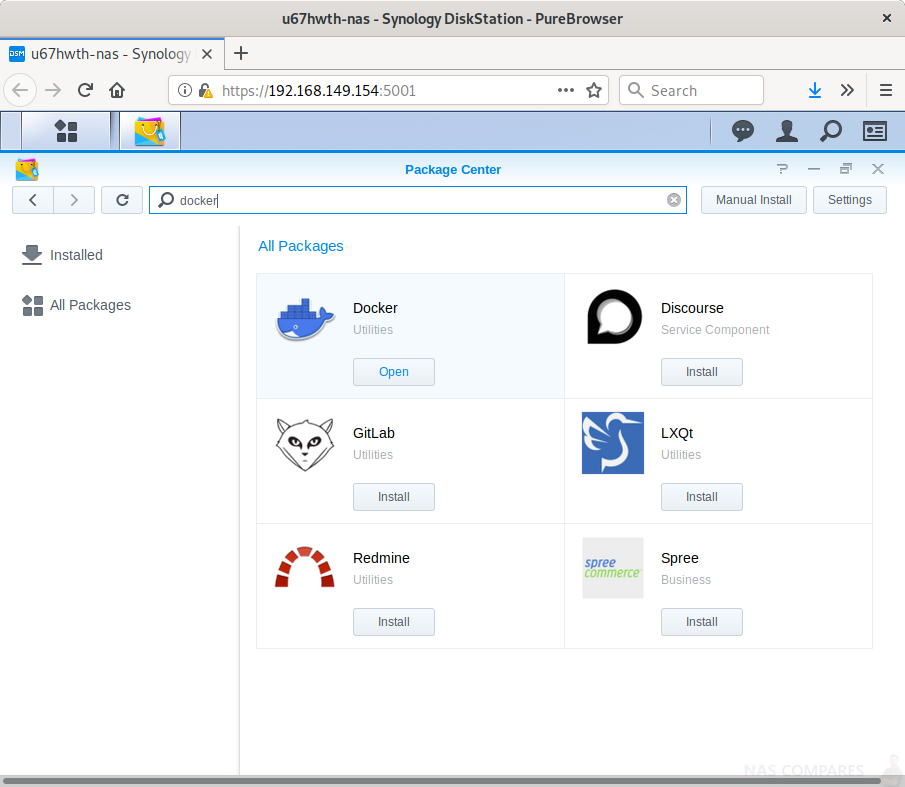
Next, we will need to install docker by accessing the Package Center from our NAS administration page. From here search for the “docker” package, then select the install option
Bitcoin Node and Synology NAS Step 4
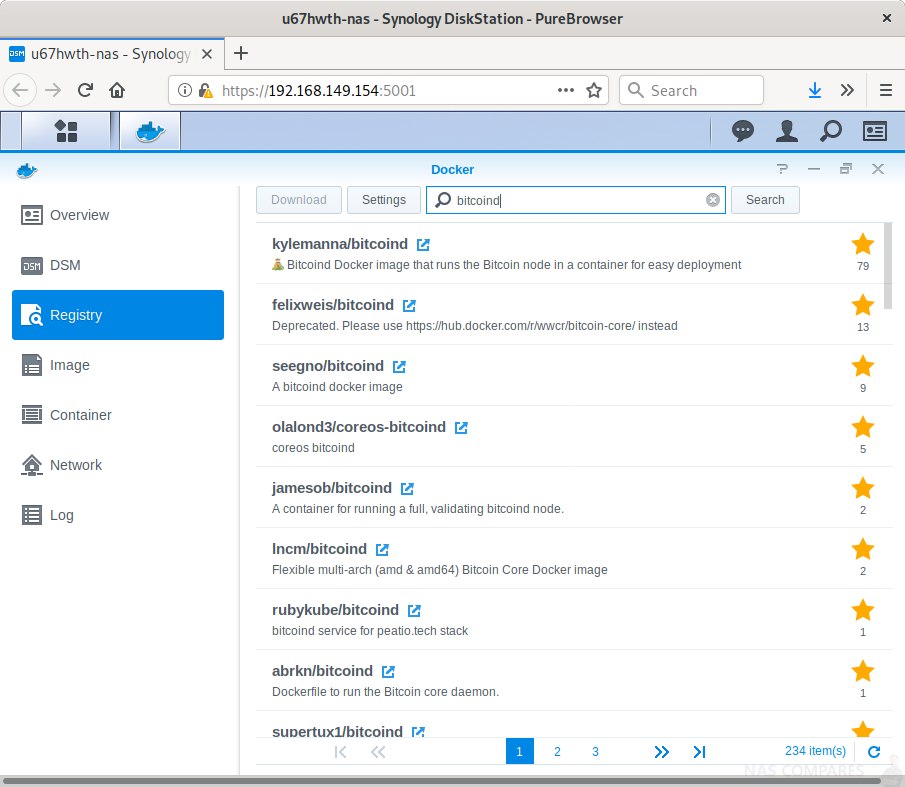
We are now ready to install our bitcoin docker instance by opening the Docker package, then selecting Registry and searching for “bitcoind”. I recommend downloading the kylemanna image which will simply install bitcoind on an Ubuntu instance and from its official repository – feel free to inspect the code at Github
Bitcoin Node and Synology NAS Step 5
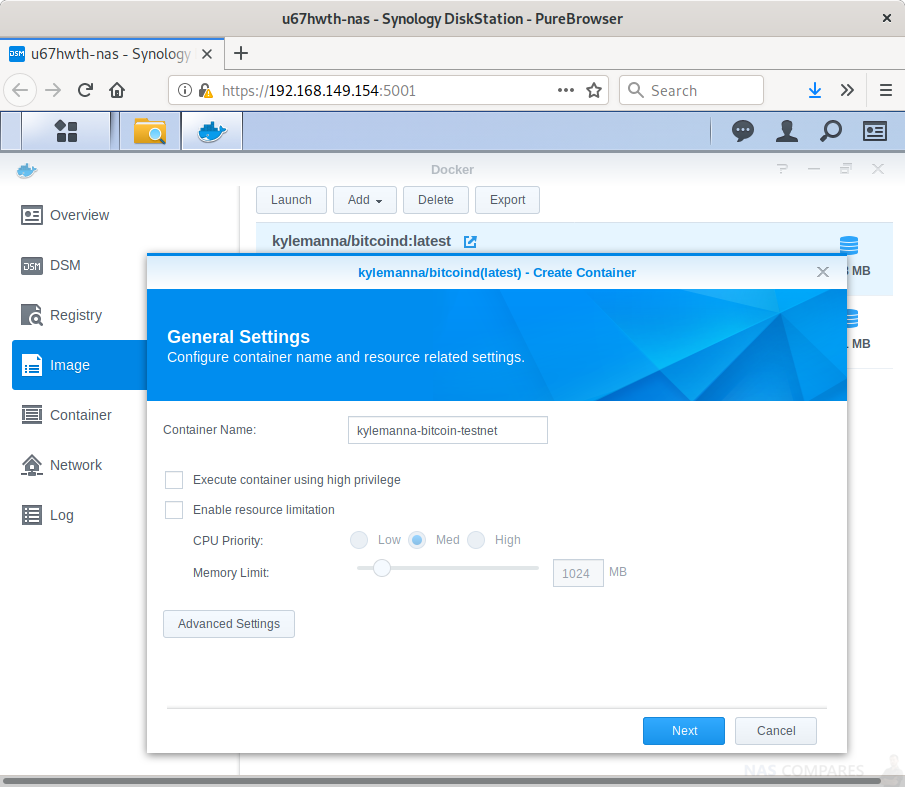
Next, go to Images within Docker and select the Launch option of the image you just downloaded. A Create Containerdialog is shown. You can adjust the name to something which suits your needs e.g. bitcoind. We can leave the other options at default unless you have any specific preferences here. Next, select the Advanced Settings option.
Bitcoin Node and Synology NAS Step 6
To restart your container after an OS update or reboot, select the Enable auto-restart.
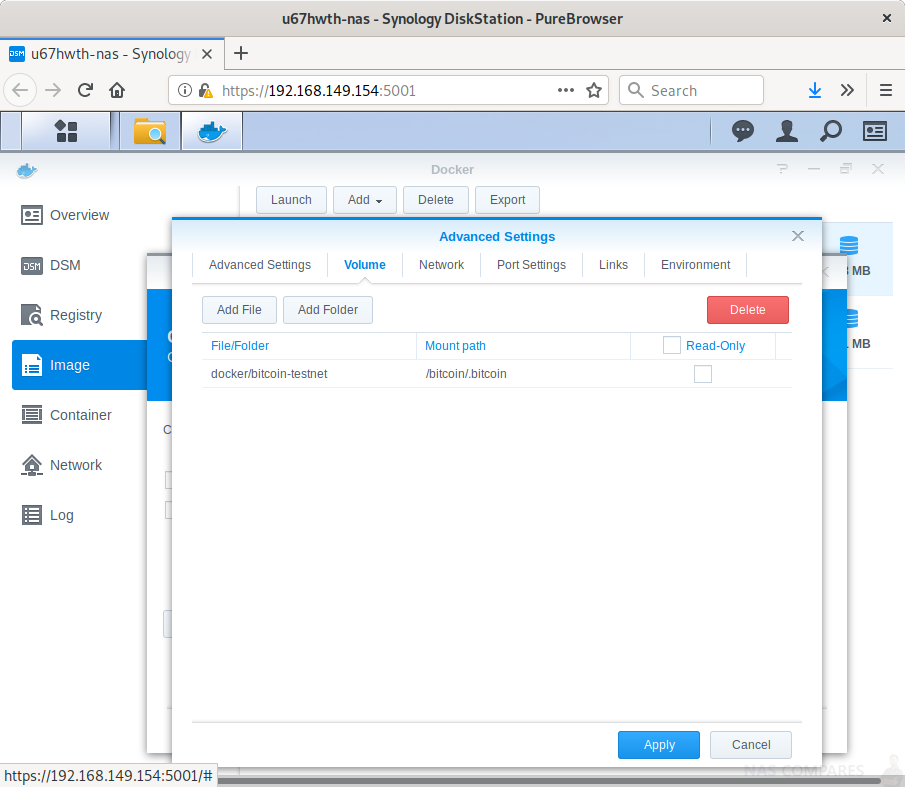
From the Volume tab, select Add Folder, enter your local path in File/Folder and /bitcoin/.bitcoin as Mount path.
Bitcoin Node and Synology NAS Step 7
Next, select the Network table, and check the Use the same network as Docker host option if you want to accept external connections. Not selecting this option may cause your node to ban all incoming connections due to a single misbehaving node, since all nodes would be seen coming from a single IP over the Docker network bridge.
Bitcoin Node and Synology NAS Step 8
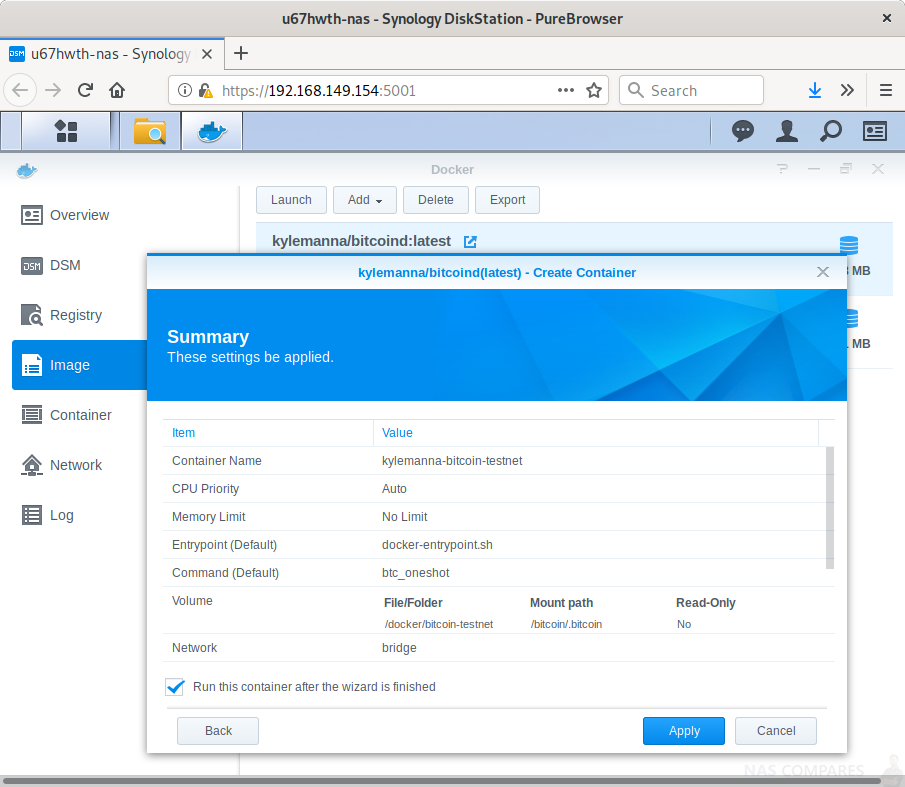
Finally, select Apply to verify your settings, followed by Next, and Apply to launch your container.
Bitcoin Node and Synology NAS – Optional Checks and Steps
Don’t forget to open ports required for the Remote Procedure Call (RPC, default is port 18444) and Peer-to-Peer (P2P) interfaces for external access if required. The following defaults are used based on the network you’ve configured in your bitcoin.conf file.

These defaults can be overridden using the port and rpcport configuration options.
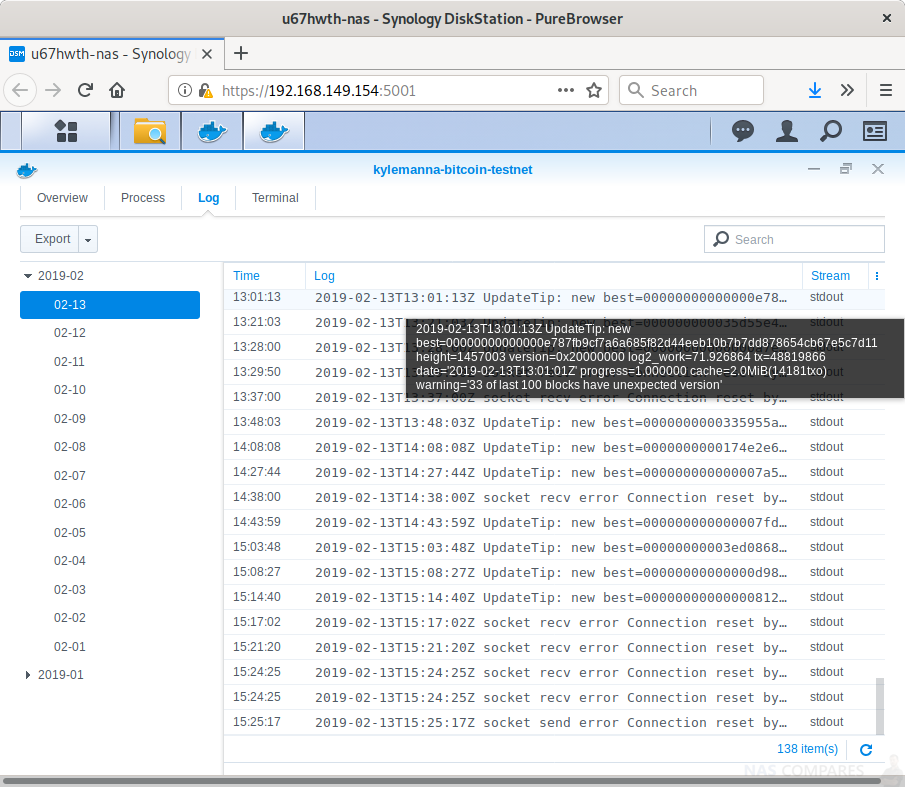
To upgrade your instance, repeat the process starting at image download when needed. You may also check node logs through Docker interface by going to Container, Details and Logs.
Bitcoin Node and Synology NAS Guide Conclusion
It may take up to a couple of hours to download the whole blockchain and index transactions for the first time, but we have a full node running on testnet in a few minutes. You can now go to sleep while contributing to the bitcoin network, setup another node on mainnet, or play around with your (test)node, querying for transactions, crawling the network or anything else you’d like to do with.
Credit to Simon Castano
Special thank you to SIMON CASTANO at https://bitcoindev.network/ for giving us permission to share this guide with fellow Synology NAS owners. Find out more on how to make the most of your NAS and he aims at developing an open source crypto fund management application, at https://www.brane.cc/
📧 SUBSCRIBE TO OUR NEWSLETTER 🔔 This description contains links to Amazon. These links will take you to some of the products mentioned in today's content. As an Amazon Associate, I earn from qualifying purchases. Visit the NASCompares Deal Finder to find the best place to buy this device in your region, based on Service, Support and Reputation - Just Search for your NAS Drive in the Box Below
🔒 Join Inner Circle
Get an alert every time something gets added to this specific article!
Need Advice on Data Storage from an Expert?
Finally, for free advice about your setup, just leave a message in the comments below here at NASCompares.com and we will get back to you.
 Need Help?
Where possible (and where appropriate) please provide as much information about your requirements, as then I can arrange the best answer and solution to your needs. Do not worry about your e-mail address being required, it will NOT be used in a mailing list and will NOT be used in any way other than to respond to your enquiry.
Need Help?
Where possible (and where appropriate) please provide as much information about your requirements, as then I can arrange the best answer and solution to your needs. Do not worry about your e-mail address being required, it will NOT be used in a mailing list and will NOT be used in any way other than to respond to your enquiry.
![]() TRY CHAT
Terms and Conditions
TRY CHAT
Terms and Conditions

![]()
![]()
![]()
![]()
![]()
![]()
![]()
![]()
![]()
This description contains links to Amazon. These links will take you to some of the products mentioned in today’s video. As an Amazon Associate, I earn from qualifying purchases


The BEST NAS of 2026.... ALREADY??? (UnifyDrive UP6)
How Much RAM Do You Need in Your NAS?
A Buyer's Guide to Travel Routers - GET IT RIGHT, FIRST TIME
Jonsbo N6 DIY NAS Case Review
The Best Bits (and Worst Bits) of NAS of 2025!
Minisforum MS-02 Ultra Review
Access content via Patreon or KO-FI
Discover more from NAS Compares
Subscribe to get the latest posts sent to your email.
Alright, setting up the miner was easy.
But: how do I eventually use whatever it mines? How to add the bitcoin-dust (or even a bitcoin) to a bitcoin-wallet like crypto.com? Or how to sell the dust resp. the coins? In other words: how does this eventually make a profit?
How will you benefit from setting a botcoin node?