

Remote Mount
https://docs.qnap.com/nas-outdated/4.3/cat2/en/index.html?file_station.htm
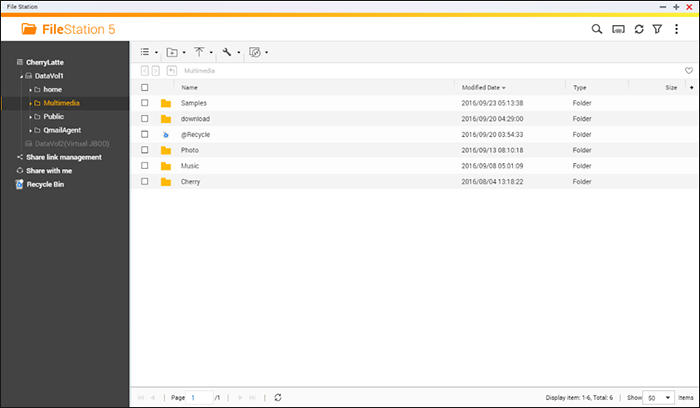
File Station
The remote connection mount service allows you to easily manage files across local devices, external devices, cloud services and remote devices from a single interface. You can easily carry out file management tasks such as copying and moving from remote to local devices or vice versa. The remote connection mount service supports multiple cloud services (such as Google Drive, Dropbox, and OneDrive), and remote device network protocols (such as CIFS/SMB, and FTP.), and automatic searches for local devices.
Create remote mounts
1. Click “Remote Mount” > “Create remote mount”.
2. Choose to connect to a remote storage via Auto Search, SMB/CIFS, or FTP.
3. Fill out the necessary details (including the protocol, codepage, hostname/IP, port, username/password, destination folder, and connection name) and choose to enable support for multimedia playback and thumbnail display (the system will generate thumbnails at the destination. If the destination is another QNAP NAS, it must have QTS 4.2 or later installed).
4. Click “Create”.
Check recent connection records
2. Review recent connection records and their details including the connection time, connection name, protocol, Hostname/IP, port, account username, codepage and source path.
3. To sort the records, click on a header.
Check the current connection status
1. Click “Remote Mount” > “Current connection status”.
2. Review the status of the current connections records and their details, including the owner, connection time, protocol, Hostname/IP, port, source path, status and creation time.
3. To sort records, click on a header.
Hybrid Mount
https://www.qnap.com/en-us/how-to/knowledge-base/article/mounting-a-remote-device-folder-into-the-file-station
To mount a remote device folder into the File Station, it will be necessary to have the HybridMount app installed on the App Center, please, make sure it is well updated to its latest available version. Besides of that, on the Remote Server, PC or Mac, the folder which you want to mount on the File Station should have the shared rights assigned to a specific user, in our example we will use the user called “share”, make sure this folder can also be found on the network by other devices, if you have others to verify and confirm, otherwise it will not be possible for the NAS to locate it, please note it.
Following the picture below, after opening the HybridMount, you will find at the top right the option “Create Remote Mount”, after that should select the option “Create Network Drive Mount”.
Then on the “Remote storage” selection, please choose “Remote Devices”. Continuing with the setup, need to add the Server URL, which can be the IP or the Server name, where is located the shared network folder to be added into the NAS.
It will be necessary to input the information of the Account user name, that has the permission to access the folder, and its password, as it can be seen on the reference picture below.
Please, after inputting the necessary information mentioned above, you may click on the “Browser” button, to locate the folder you wish to add into the File Station of the NAS.
Then the folder(s) that are shared in the network by the remote server will be displayed, please, see the example on the picture below, at this point you may select the folder you wish to add into the NAS and click on the “Apply” button.
After that, everything is almost done, just need to finish the process by clicking on the “Create” button (reference picture below) and the folder from the remote server will be mounted and displayed on File Station.
Afterwards, the folder can be seen just like the picture below.
On the example showed on this tutorial pictures, you can see that the folder named “test2” from our remote server is displayed on the File Station.
https://nascompares.com/mount-a-network-drive-on-a-qnap-from-another-nas/
| Where to Buy a Product | |||
 |
    
|

|
VISIT RETAILER ➤ |
 |
|
|
VISIT RETAILER ➤ |
 |
|
|
VISIT RETAILER ➤ |
|
|
|
|
VISIT RETAILER ➤ |
We use affiliate links on the blog allowing NAScompares information and advice service to be free of charge to you. Anything you purchase on the day you click on our links will generate a small commission which is used to run the website. Here is a link for Amazon and B&H. You can also get me a ☕ Ko-fi or old school Paypal. Thanks! To find out more about how to support this advice service check HERE If you need to fix or configure a NAS, check Fiver Have you thought about helping others with your knowledge? Find Instructions Here


Why Do Cheap NAS Boxes EXIST????
Minisforum N5 Pro NAS - Should You Buy?
UGREEN DH4300 & DH2300 NAS Revealed - Good Value?
Aoostar WTR Max NAS - Should You Buy?
Xyber Hydra N150 NAS Review - Is This COOL?
Minisforum N5 Pro vs Aoostar WTR Max - The BIG Showdown
Access content via Patreon or KO-FI
DISCUSS with others your opinion about this subject.
ASK questions to NAS community
SHARE more details what you have found on this subject
CONTRIBUTE with your own article or review. Click HERE
IMPROVE this niche ecosystem, let us know what to change/fix on this site
EARN KO-FI Share your knowledge with others and get paid for it! Click HERE