

How to setup your Synology DS718+ 2-Bay NAS for the first time in just 15 mins
With the Synology DS718+ 2-Bay NAS release on the horizon, many people are pondering how to set up their NAS Server for the first time. It is worth bearing in mind that although for many of us, setting up a Synology NAS for the first time is remarkably simple. However, for those with either no or a very basic level of I.T. knowledge, it is worth it to have an easy, chewable guide for setting up your Synology NAS for the first time. So, here is the hardware and software setup guide for the DS718+ NAS.
Chapter 1: Before You Start your DS718+ NAS Installation
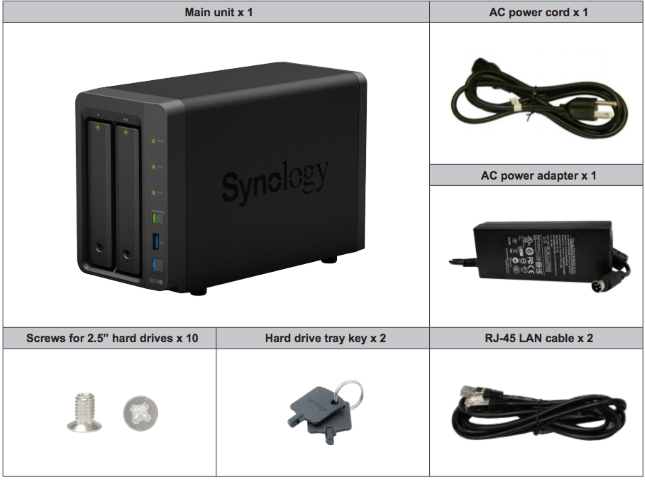
Before setting up your new DiskStation, please check the package contents to verify that you have received the items below.
Also, make sure to read the safety instructions carefully to avoid harming yourself or damaging your DiskStation.
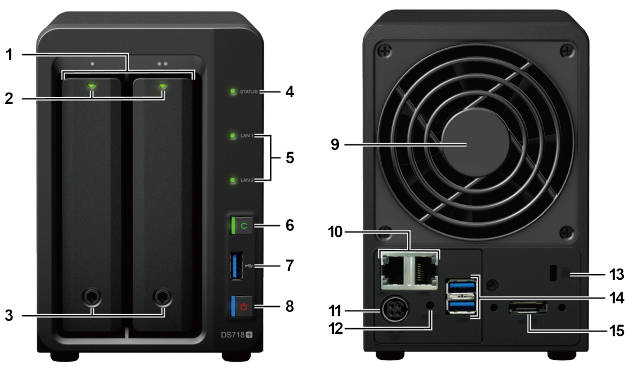
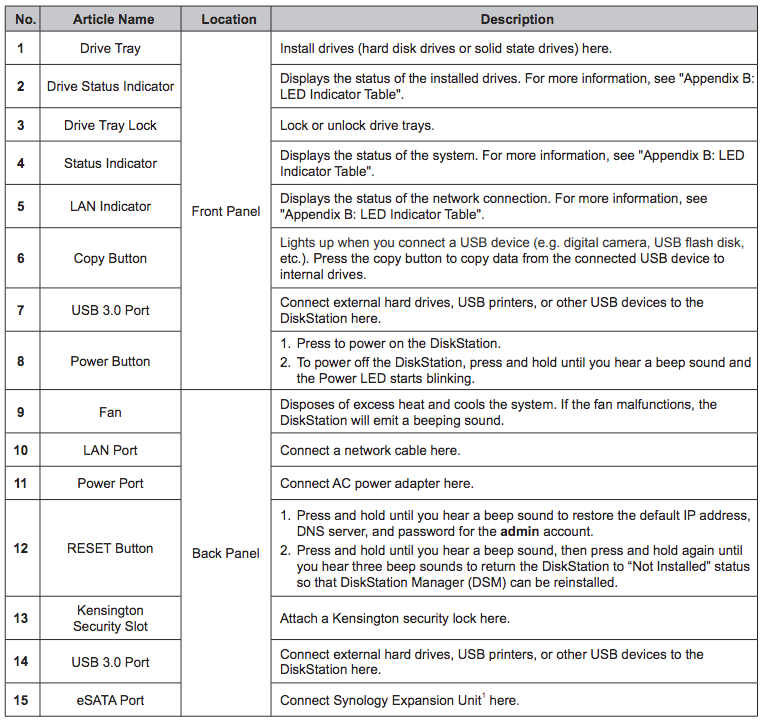
Chapter 2: Hardware Setup of your Synology DS718+ NAS
Tools and Parts for Drive Installation
- A screwdriver (only for 2.5″ drives)
- At least one 3.5” or 2.5” SATA drive (Ideally WD Red or Seagate Ironwolf)
Install Drives
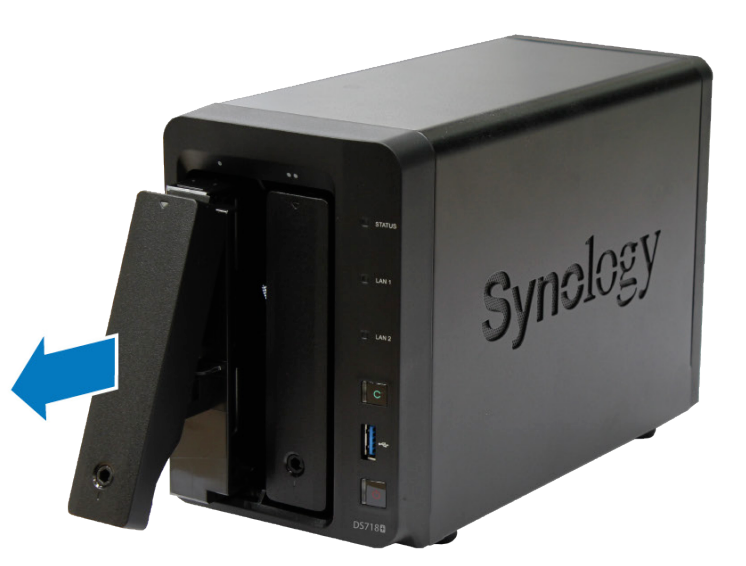
1. Press the lower part of the hard drive tray to pop out the handle.
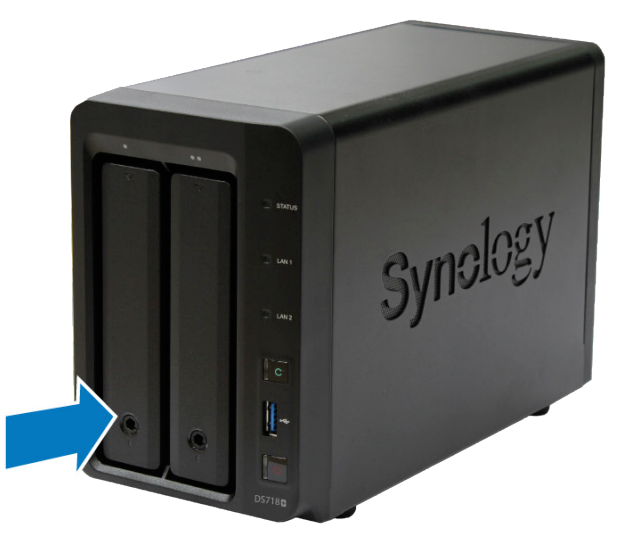
2. Pull the hard drive tray handle in the direction as indicated below to remove the hard drive tray.
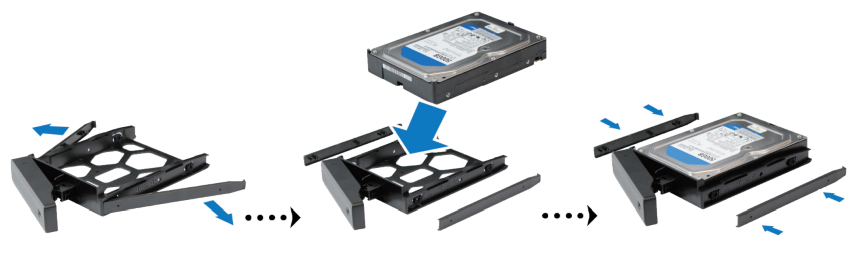
3. Load drives in the drive trays
i) For 3.5” drives: Remove the fastening panels from the sides of the drive tray. Place the drive in the drive tray. Then insert the fastening panels to secure the drive in place.
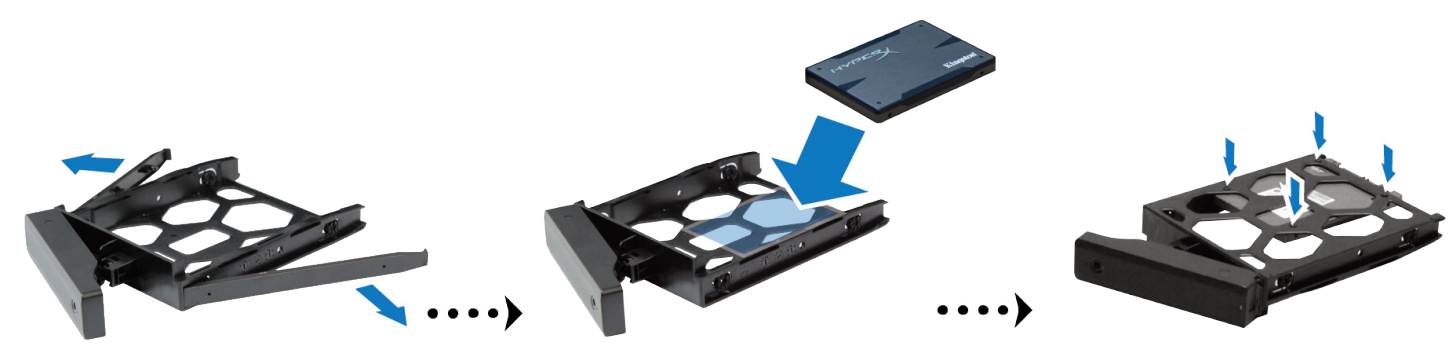
ii) For 2.5” drives: Remove the fastening panels from the sides of the drive tray and store them in a safe place. Place the drive in the blue area (shown below) of the drive tray. Turn the tray upside down and tighten the screws to secure the drive in place.
4. Insert the loaded hard drive tray into the empty hard drive bay
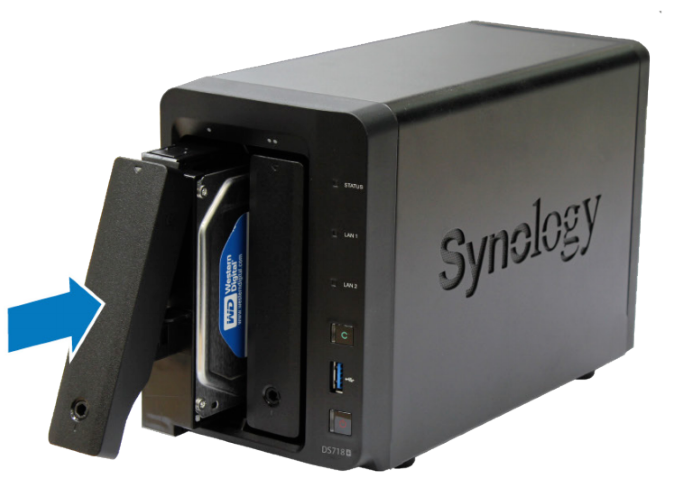
5. Press the handle in flush with the front panel to hold the hard drive tray in place.
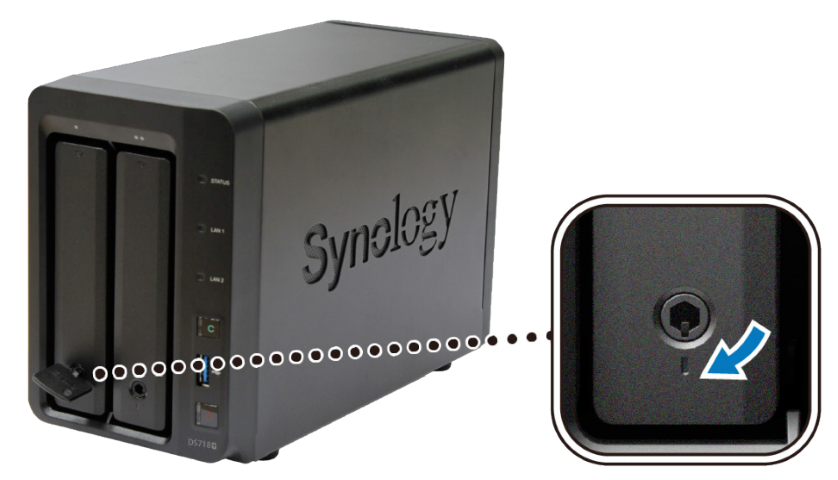
6. Insert the hard drive tray key into the hard drive tray lock, turn the key clockwise (to the “I” position) to lock the handle of the hard drive tray, and then remove the key.
7. Repeat the steps above to assemble the other drives you have prepared. Be warned, if you want to create a RAID volume, we recommend that all installed drives are of the same size to make the best use of drive capacity
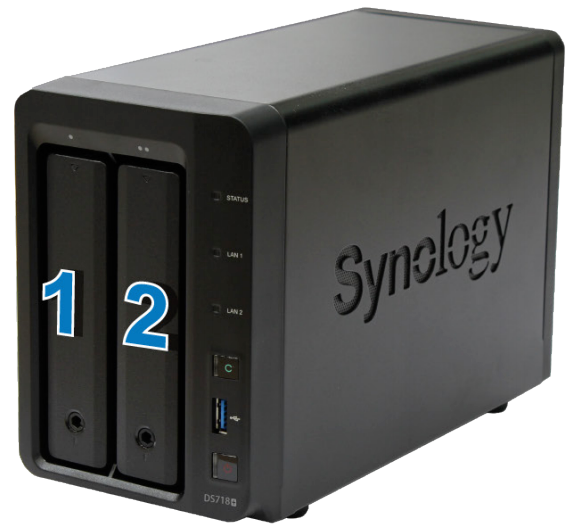
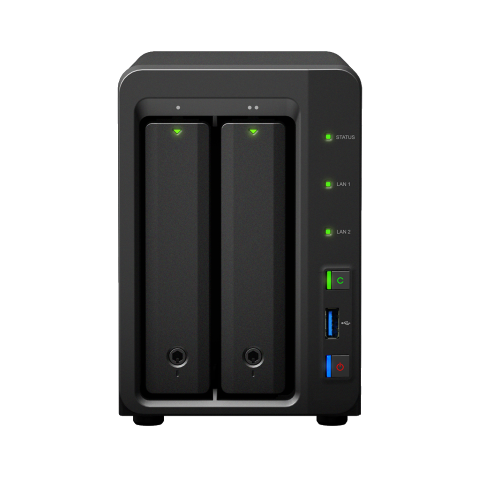
8. Drives are numbered as shown below.
Start Up Your DiskStation
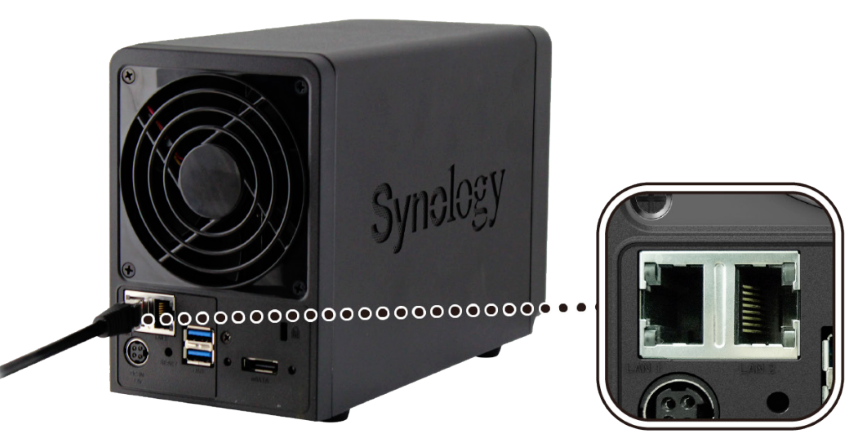
1. Use the LAN cable to connect the DiskStation to your switch, router or hub.
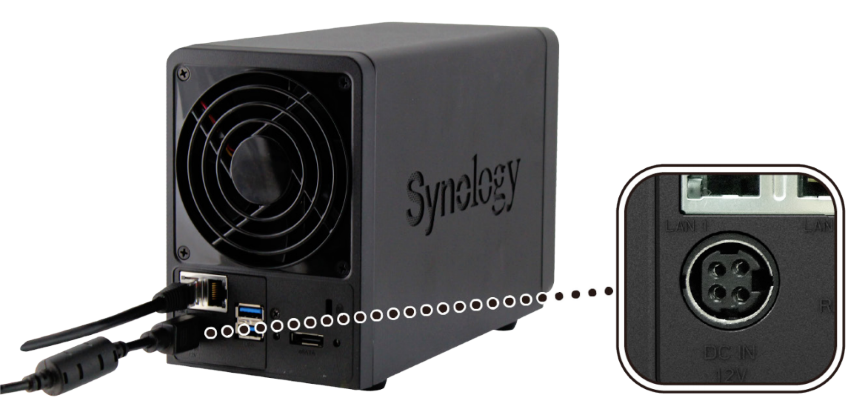
2. Connect the AC adapter to the power port of the DiskStation. Connect one end of the AC power cord to the AC power adapter, and the other to the power outlet.
3. Press the power button.
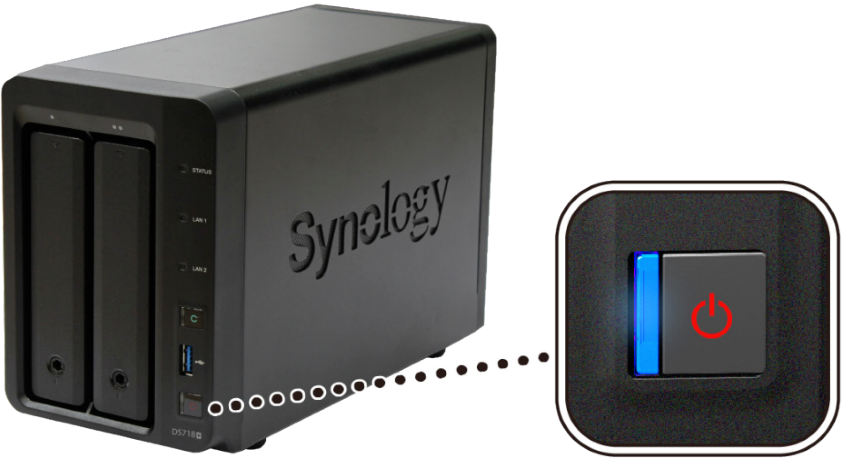
Congratulations! Your DiskStation is now online and detectable from a network computer.
Add more Memory to your DS718+ NAS DiskStation
The optional Synology memory module is designed for DiskStation memory expansion. Follow the steps below to install, check, or remove a memory module on your DiskStation.
To install a memory module:
1. Shut down your DiskStation. Disconnect all cables connected to your DiskStation to prevent any possible damages.
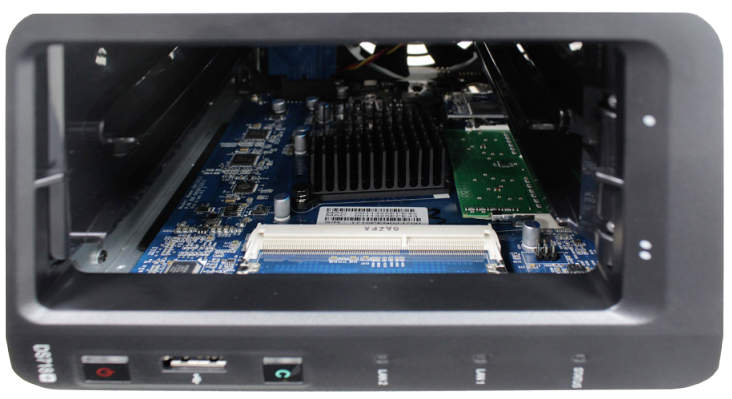
2. The memory slots are located on the inner right side of your DiskStation.
3. Remove the two hard drive trays from the two drive bays. You will see one empty module slot for memory expansion.
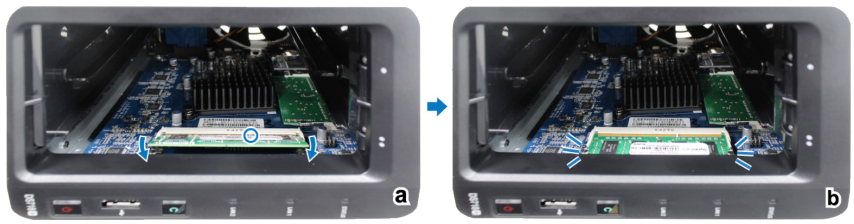
4. Insert the new memory module into the empty slot:
i) Align the notch on the gold contacts of the memory module with the notch on the empty slot. Insert the memory module into the slot. Make sure the module is properly inserted.
ii) Push down on the memory module with moderate pressure until you hear a click.
Remember: Synology will not provide complete product warranty or technical support if a non-Synology memory module is used for memory upgrade.
5. Insert the two hard drive trays back into the hard drive bays.
6. Reconnect the cables you removed in step 1, and then press and hold the power button to turn on your DiskStation
To make sure DS718+ DiskStation recognizes the new RAM/memory capacity:
1. Install DiskStation Manager (DSM). Please see the next chapter for more information.
2. Log into DSM as admin or a user belonging to the administrators group.
3. Check Total Physical Memory in Control Panel > Info Center.
If your DiskStation does not recognize the memory or does not start up successfully, please make sure that the memory module is installed correctly.
To remove the memory module for your Synology DS718+ NAS
1. Follow step 1 and 2 of the “To install a memory module” section to shut down your DiskStation, disconnect the cables, and then remove the two hard drive trays
2. Push the levers on both sides of the memory module outward. The memory module will be released from the slot
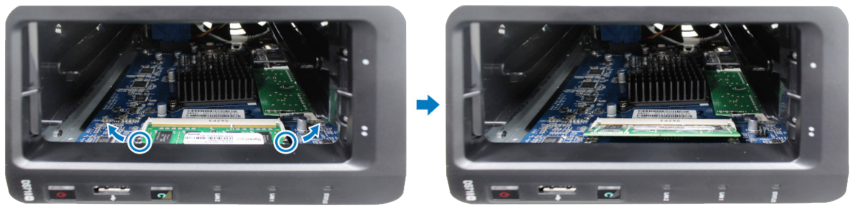
3. Hold the memory module by its notches and remove it from the slot.
4. Insert the hard drive trays back into the hard drive bays
5. Reconnect the cables removed in step 1. Now you may turn on your DiskStation.
Chapter 3: Install DSM 6.2 or higher on your Synology DS718+ DiskStation NAS
After hardware setup is finished, please install DiskStation Manager (DSM) – Synology’s browser-based operating system – on your DiskStation.
Install DSM with Web Assistant to access your Synology DS718+ NAS
Your DiskStation comes with a built-in tool called Web Assistant that helps you download the latest version of DSM from the Internet and install it on your DiskStation. To use Web Assistant, please follow the steps below:
1. Power on the DiskStation.
2. Open a web browser on a computer connected to the same network as the DiskStation.
3. Enter either of the following into the address bar of your browser:
i) find.synology.com
ii) diskstation:5000
4. Web Assistant will be launched in your web browser. It will search for and find the DiskStation within the local network. The status of the DiskStation should be Not Installed.
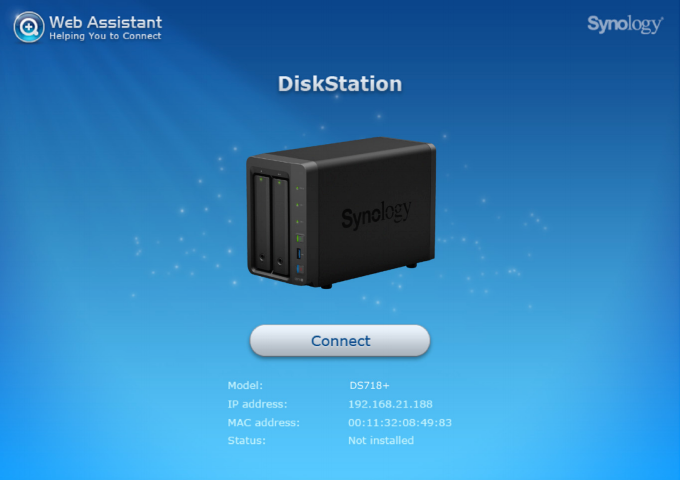
5. Click Connect to start the setup process and follow the onscreen instructions.
IMPORTANT – The DiskStation must be connected to the Internet to install DSM with Web Assistant. We recommend using browsers such as Chrome, Firefox, Opera or Safari. Lastly, both the DiskStation and the computer must be in the same local network to see the device via your web browser and desktop apps
The Synology DS718+ – £350-360 (pending) without VAT and HDD media
- Expected Release Date – Late September 2017
- 2-Bay NAS – Expandable to 9 with DX517
- Intel Celeron J3455 Quad Core 1.5 GHz (up to 2.3 GHz)
- 2GB DDR3 Memory, expandable to 8GB (some places state 6GB but I think that is error)
- In terms of connectivity, this NAS has 3 USB 3.0 ports (including 1 on the front), 2 Gigabit network ports and 1 eSATA port.
- 2 Channel 4K Transcoding of H.264 and decoding H.265
- BTRFS support and SHR / SHR-2 Support

📧 SUBSCRIBE TO OUR NEWSLETTER 🔔
🔒 Join Inner Circle
Get an alert every time something gets added to this specific article!
This description contains links to Amazon. These links will take you to some of the products mentioned in today's content. As an Amazon Associate, I earn from qualifying purchases. Visit the NASCompares Deal Finder to find the best place to buy this device in your region, based on Service, Support and Reputation - Just Search for your NAS Drive in the Box Below
Need Advice on Data Storage from an Expert?
Finally, for free advice about your setup, just leave a message in the comments below here at NASCompares.com and we will get back to you. Need Help?
Where possible (and where appropriate) please provide as much information about your requirements, as then I can arrange the best answer and solution to your needs. Do not worry about your e-mail address being required, it will NOT be used in a mailing list and will NOT be used in any way other than to respond to your enquiry.
Need Help?
Where possible (and where appropriate) please provide as much information about your requirements, as then I can arrange the best answer and solution to your needs. Do not worry about your e-mail address being required, it will NOT be used in a mailing list and will NOT be used in any way other than to respond to your enquiry.


|
 |


ZimaOS is the BEST Beginner NAS OS - Watch Your Back UnRAID and TrueNAS !!!
30TB Hard Drives are TOO BIG ! (and here is why)
COMPLETE UGREEN NAS Setup Guide - 2025 EVERYTHING VERSION
$110 USB4 to 2x10Gb Adapter Review - What the WHAT?
UGREEN NAS Now has iSCSI, 2FA and Jellyfin (and more) - FINALLY!
Seagate 30TB Ironwolf and EXOS Hard Drive Review
Access content via Patreon or KO-FI