Accessing your Synology NAS with Teamviewer 2019
When tracking the device landscape out there, there is definitively a trend to replace large standalone servers with small, easy to administer NAS boxes. They are quick to set up, do not eat up too much space and are convenient to use. So especially SMBs/SMEs and home users start to pick them up more and more for easy file sharing or backup purposes. These boxes also create add on values by offering interfaces to calendars, webmails, audio players, photo collections and more. And now, you can easily access everything on there just by double-clicking a device in your TeamViewer Computers & Contacts List.
And here is how you start:
At first, you have to download the correct package for your Synology NAS box. Usually, your Synology App Center picks the correct architecture for your device, but you have to know the device details and find out what your CPU is to get the right download.
Teamviewer currently support ARM and Intel-based devices. For both, Intel and ARM, you will find two download packages: armv7 and armv5 target different ARM architectures, while amd64 (x86-64) andi386 (x86-32) target Intel. armv5 are used on older models dating back to the 2011s, while x86-32 is not used by many models (DS214play and DS415play). So, if you are in doubt and you want to access a recent system: In case you have an Intel CPU, try out the amd64 package and if you have an ARM CPU, use armv7.
Download for Synology DS119j, DS216j and DS216se NAS – ARM V5
Download for Synology DS218J, DS216, DS115, DS416, DS2015xs and DS1817 NAS- ARM V7
Download for Synology DS1819+, DS1517+, DS1817+, DS1513+, DS1815+ DS1618+ and DS2415+ NAS – x86
Download for Synology DS918+, DS218+, DS718+, DS418play, DS916+, DS216+, DS216+II, DS716+II, DS3018xs and DS3617xs NAS – x86 64bit
Download for Synology DS418, DS418j, DS218play, DS218, and DS118 NAS
After downloading the package, you have to install it using the package centre from Synology. Log into your DSM as an administrative user. Please note that we only support systems from DSM 6 onward.
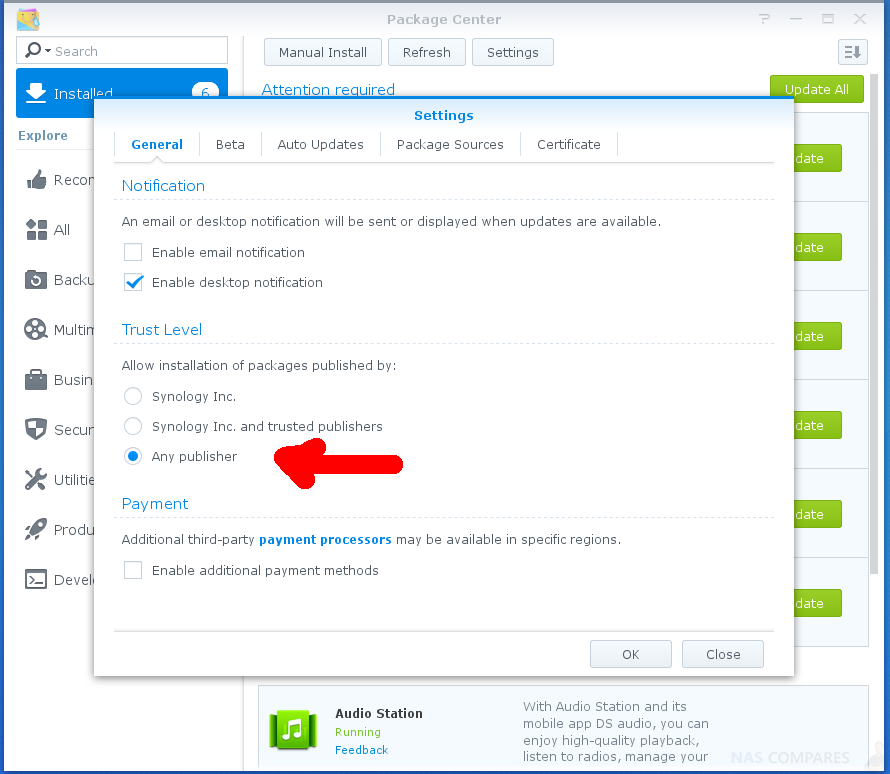
Open the package centre. First, you have to adapt the trust level of the package centre to allow packages from any publisher. You can do so by selecting Settings and by setting the Trust Level to Any Publisher.
Then you can hit Manual Install and upload the package file.
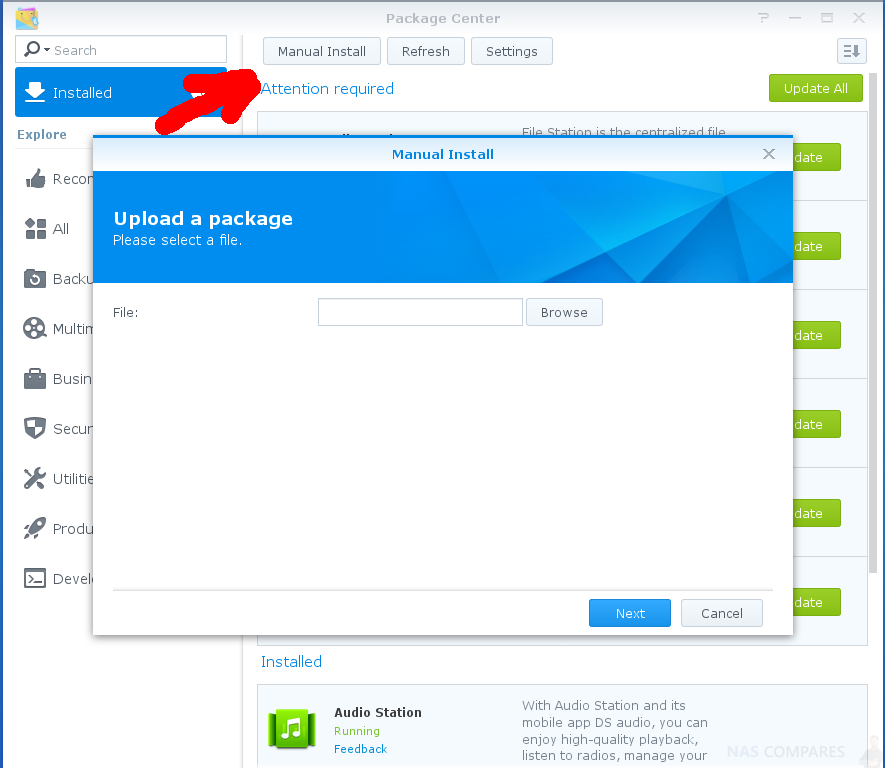
Click “Manual Install”
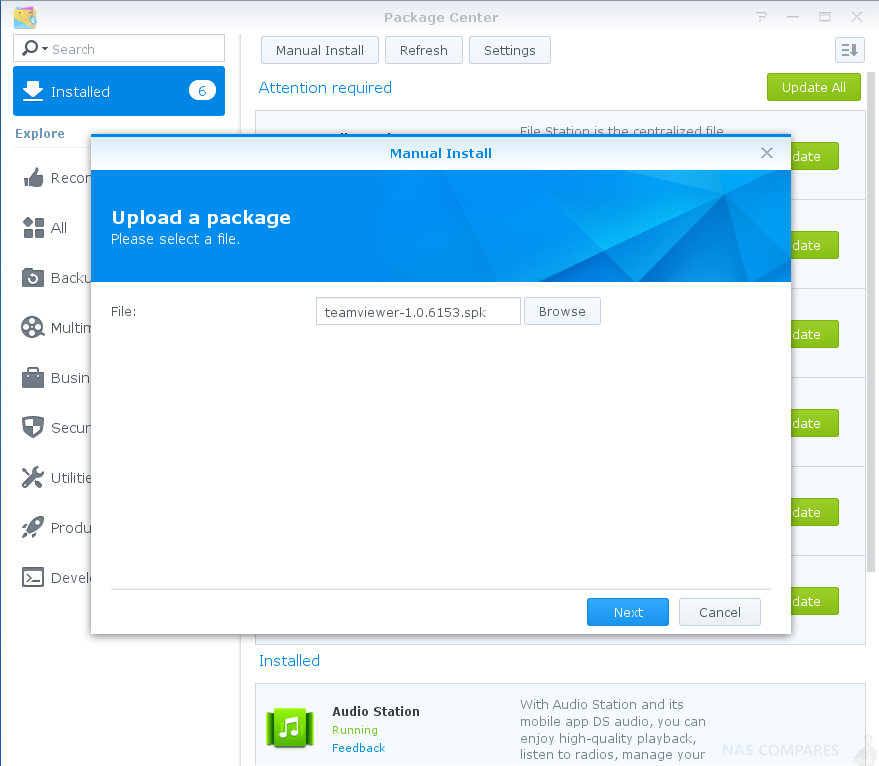
Upload the package file, After that, you will have to accept our EULA for proceeding with the installation.
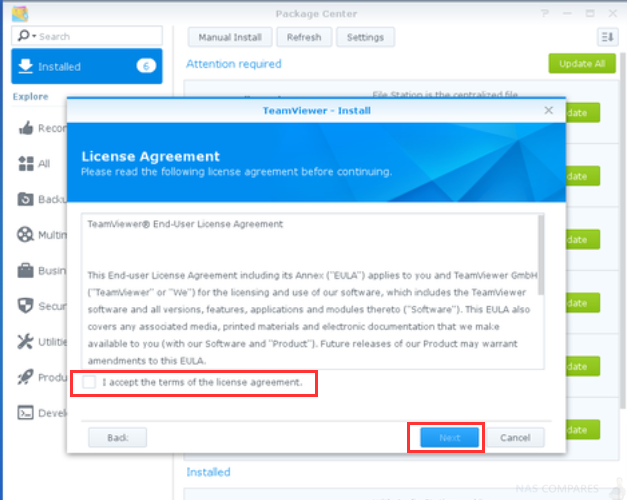
Once you finish the wizard, your TeamViewer installation will start automatically if you had previously selected the autostart checkbox in the last screen.
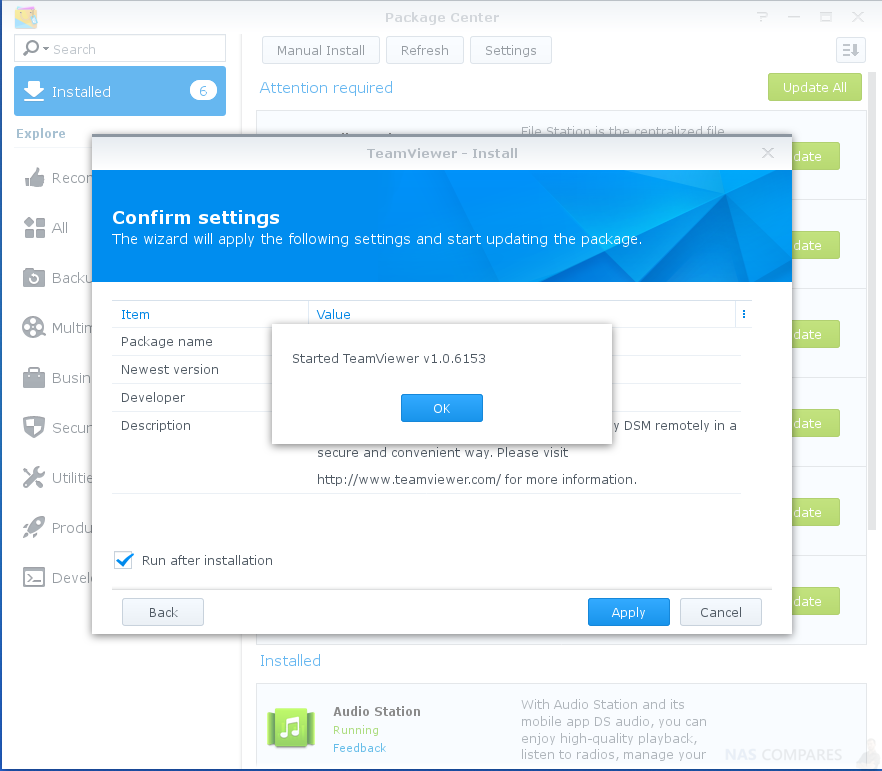
Now your TeamViewer is ready to connect to your account. But before doing so, please make sure that you reset your Trust Level to its former value.
Hint: Leaving it at Any Publisher is not required for operation and may make your DiskStation susceptible to attacks.
Now it is time to assign your DiskStation to your account. There are two ways to do that. If your device is in the same subnet you can use the Nearby feature of TeamViewer.
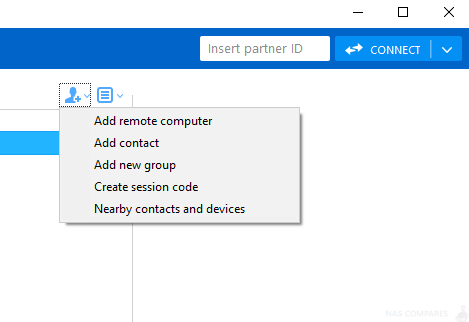
Just click the Add item-button in your Computers & Contacts List and select Nearby contacts and devices. A list with all devices in the same network running TeamViewer will show up and you should be able to locate your Synology device in this list. Just double click on it, and you are all set: You can now directly connect to your device. Please note that now, as long as the device is assigned to your account, it will not show up in this list anymore.
If the device is not located in your subnet or cannot be found, you will need to do a few more clicks. Open the TeamViewer dialog from the DSM application menu.

You will find your assignment ID and assignment password in this dialog. Add the assignment ID to your Computers & Contacts list by selecting Add item –> Add remote computer. Enter the assignment ID as TeamViewer ID in the shown dialog. Enter the assignment password as Password and press OK.
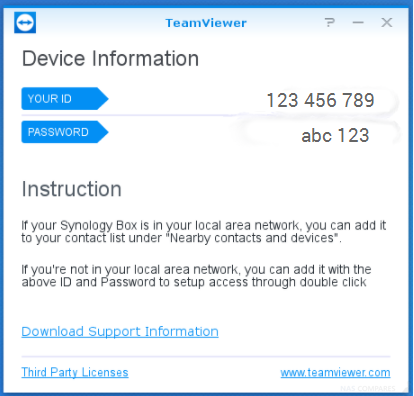
Please note: You cannot connect to your DiskStation yet and your password is only valid for assignment and cannot be used to connect to a device. This means that you to have to assign it to your account. To do this, go to your option dialog of your device and select Remote assignment. If all goes right, you can now connect to your Synology NAS device.
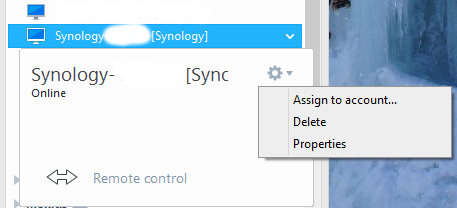
Go ahead, double click on your new entry in the Computers & Contacts list, log in and start enjoying your DiskStation from everywhere. Download files or listen to your music — (almost) everything is possible now, and all via TeamViewer.
Please note that there are some known issues:
- Connections are currently only possible from TeamViewer 13.1 running on Windows.
- macOS, Linux or mobile clients are not supported.
- Links opening a new browser window will not work, so MailStation or VideoStation (just to name a few), will not be able to run.
🔒 Join Inner Circle
Get an alert every time something gets added to this specific article!
This description contains links to Amazon. These links will take you to some of the products mentioned in today's content. As an Amazon Associate, I earn from qualifying purchases. Visit the NASCompares Deal Finder to find the best place to buy this device in your region, based on Service, Support and Reputation - Just Search for your NAS Drive in the Box Below
Need Advice on Data Storage from an Expert?
Finally, for free advice about your setup, just leave a message in the comments below here at NASCompares.com and we will get back to you. Need Help?
Where possible (and where appropriate) please provide as much information about your requirements, as then I can arrange the best answer and solution to your needs. Do not worry about your e-mail address being required, it will NOT be used in a mailing list and will NOT be used in any way other than to respond to your enquiry.

|
 |
ZimaOS is the BEST Beginner NAS OS - Watch Your Back UnRAID and TrueNAS !!!
30TB Hard Drives are TOO BIG ! (and here is why)
COMPLETE UGREEN NAS Setup Guide - 2025 EVERYTHING VERSION
$110 USB4 to 2x10Gb Adapter Review - What the WHAT?
UGREEN NAS Now has iSCSI, 2FA and Jellyfin (and more) - FINALLY!
Seagate 30TB Ironwolf and EXOS Hard Drive Review
Access content via Patreon or KO-FI




So I am trying to assign to my account but its giving me a password error. I know my password. (funny it dosn’t ask for a user id). It’s also not finding it even though I am on the same network. I use TeamViewer all the time between my phone and my laptop and never had this type of issue. Is it assuming the Admin account is active? That is the first thing I disable.