


How to Setup a Virtual Machine on your Asustor NAS Drive
Regardless of wherever you are in the world right now, the virtues of conducting your business operations remotely, as well as ensuring the security and dependency of your assets (physical or digital) have never been more relevant. Perhaps you are considering shifting a % of your workforce into remote access roles so they can do their jobs from home, or you are an employee or self-employed individual that is weighing up their options need a robust virtual machine solution? Into this arena, we have Asustor NAS and the third party Virtual Machine software, VirtualBox that has developed over the last 5 years into quite an impressively featured, yet user-friendly VM platform. Supporting numerous VM image types (ranging from Windows to Linux Ubuntu, Android and even virtual Asustor QTS – vQTS) it is quite a powerful tool that allows you to create a virtual desktop computer experience that will reside on your NAS drive for access over the network or internet. Despite the technical nature of virtual machines, it is actually surprisingly simple to set up a Windows 10 virtual machine on a Asustor NAS, with free tools online to convert your physical Windows PC into a virtual image (with VMware- VMware VCenter Converter and Hyper-V/Microsoft Disk2vhd), as well as the option to download a free trial copy of Windows 10 from the Windows store (if you click that link with a Windows PC, it won’t show the ISO file, so visit it with an Android/iOS/OSX based device to see the link properly), which you can then validate with your own product key, or start with a new one, there are lots of options to set up your Asustor NAS based Windows 10 virtual machine. So, let’s go through how to do it.
What you need to Setup a Windows Virtual Machine on your Asustor NAS Drive
Setting up a virtual machine is easy, but does require some specific hardware and software available from the beginning. So, go through this checklist to ensure you have the following to hand/ready:
- A virtual image (ISO, VHD, OVA, etc) of Windows that is downloaded from the Windows Image Store, or a virtual image of your own PC that you created with VMware VCenter Converter and Hyper-V/Microsoft Disk2vhd tools as discussed. Be sure to be using a 64bit version of the VM guest
- Sufficient storage space on the Volume you are storing this VM onto within the NAS to save the VM
- An internet connection – not strictly necessary, but you may well need updates to the tools that are used in this Asustor VM installation guide, as well as use the VirtualBox 3 VM Converter tool – so if your VM image is not showing when looking in the folder it is located in, it might be an incompatible version and you should be cable to convert it using the tools included.
- A laptop or tablet that is on the same network as your Asustor NAS that can be used to input/setup the NAS for the first time. After this, you can arrange for the VM to be internet accessible, but the first time should ideally be conducted locally (not strictly necessary, but really, REALLY makes it easier)
- A Asustor NAS that has at least a 4-Core Intel x86 64bit Processor (Intel Celeron, Pentium, Core, Xeon, etc) and 4GB of Memory (ideally 8GB, as you need spare memory to run the Asustor in the background). Below are the best options ranging from between £500-2000+.
A virtual machine (VM) is much like a regular physical PC, however, it is a virtual equivalent that, in the case of NAS, lives on your network storage device and can be accessed by one or more users over the local network or via the internet. A virtual machine allows you to create a duplicate of (or replacement for) your physical PC and converts it into a digital format. This version can then be used for software testing, duplication for multiple staff users or as a virtual copy of your existing setup for use when working from home, in coffee shops, the commute or more. Below are three solutions that scale depending on budget and power.
|
Asustor Nimbustor 4 – $479+ ££££ Intel J4105 Quad-Core 1.5 GHz (burst up 2.5GHz) 4-8GB DDR4 Memory 2.5Gbe x2 Suitable for 1-2 VMs
|
Asustor AS7004T 4-Bay – $900+ ££££ Intel i3 2.5Ghz Dual Core / i5: 3.0GHz Quad-Core 4-16GB DDR4 Memory 1Gbe x2 Suitable for 2-4 VMs
|
Asustor AS6508T 8-Bay – $1100 ££££ Intel Denverton-based Atom C3538 Quad-Core CPU 4-32GB DDR4 Memory 1Gbe x2 Suitable for 4 VMs
|
Asustor Lockerstor 10 Pro – $1299 ££££ Intel 4-Core Xeon CPU 4-32GB DDR4 Memory 10Gbe x2 and 2x 2.5Gbe Suitable for 4+ VMs
|


Install and configure the VirtualBox Virtual Machine Manager package
This guide to install a Windows 10 VM on your Asustor NAS is based on the idea that you have your Asustor NAS already setup, updated to the latest QTS firmware, have your storage pool and volume arranged and have access to the internet or the Asustor VirtualBox app already installed, in the latest version (to ensure that the virtual environment dropdown list has every option). Additionally, the Windows 10 Virtual Machine image you are going to use is already stored on the NAS storage or is on a USB drive connected to the NAS device.
Installing VirtualBox
In this section, we will demonstrate how to use VirtualBox to configure a virtual machine.
Please first prepare the items listed below.
- Keyboard and mouse
- The virtual optical disk file for the operating system that you wish to install.
STEP 1
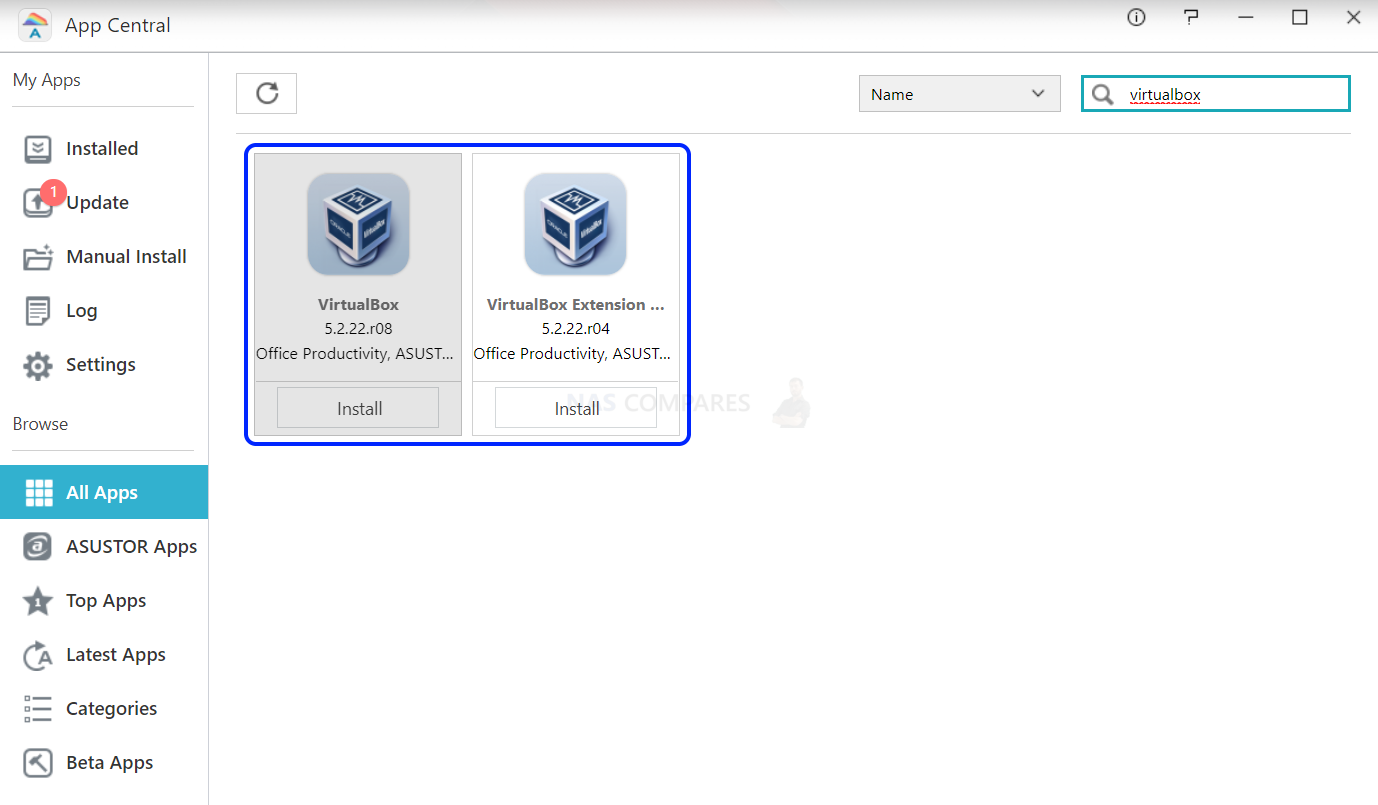
Log into ADM, open [App Central], and make sure that the following Apps are installed:
- ASUSTOR Portal (*)
- VirtualBox
- VirtualBox Extension Pack(*)
Note: For models without HDMI supporting, you have to install VirtualBox Extension Pack, but ASUSTOR Portal is not needed.
If the Apps listed above have not been installed yet, you can use the search field in the upper right-hand corner of the App Central window to search for and install the Apps.
STEP 2
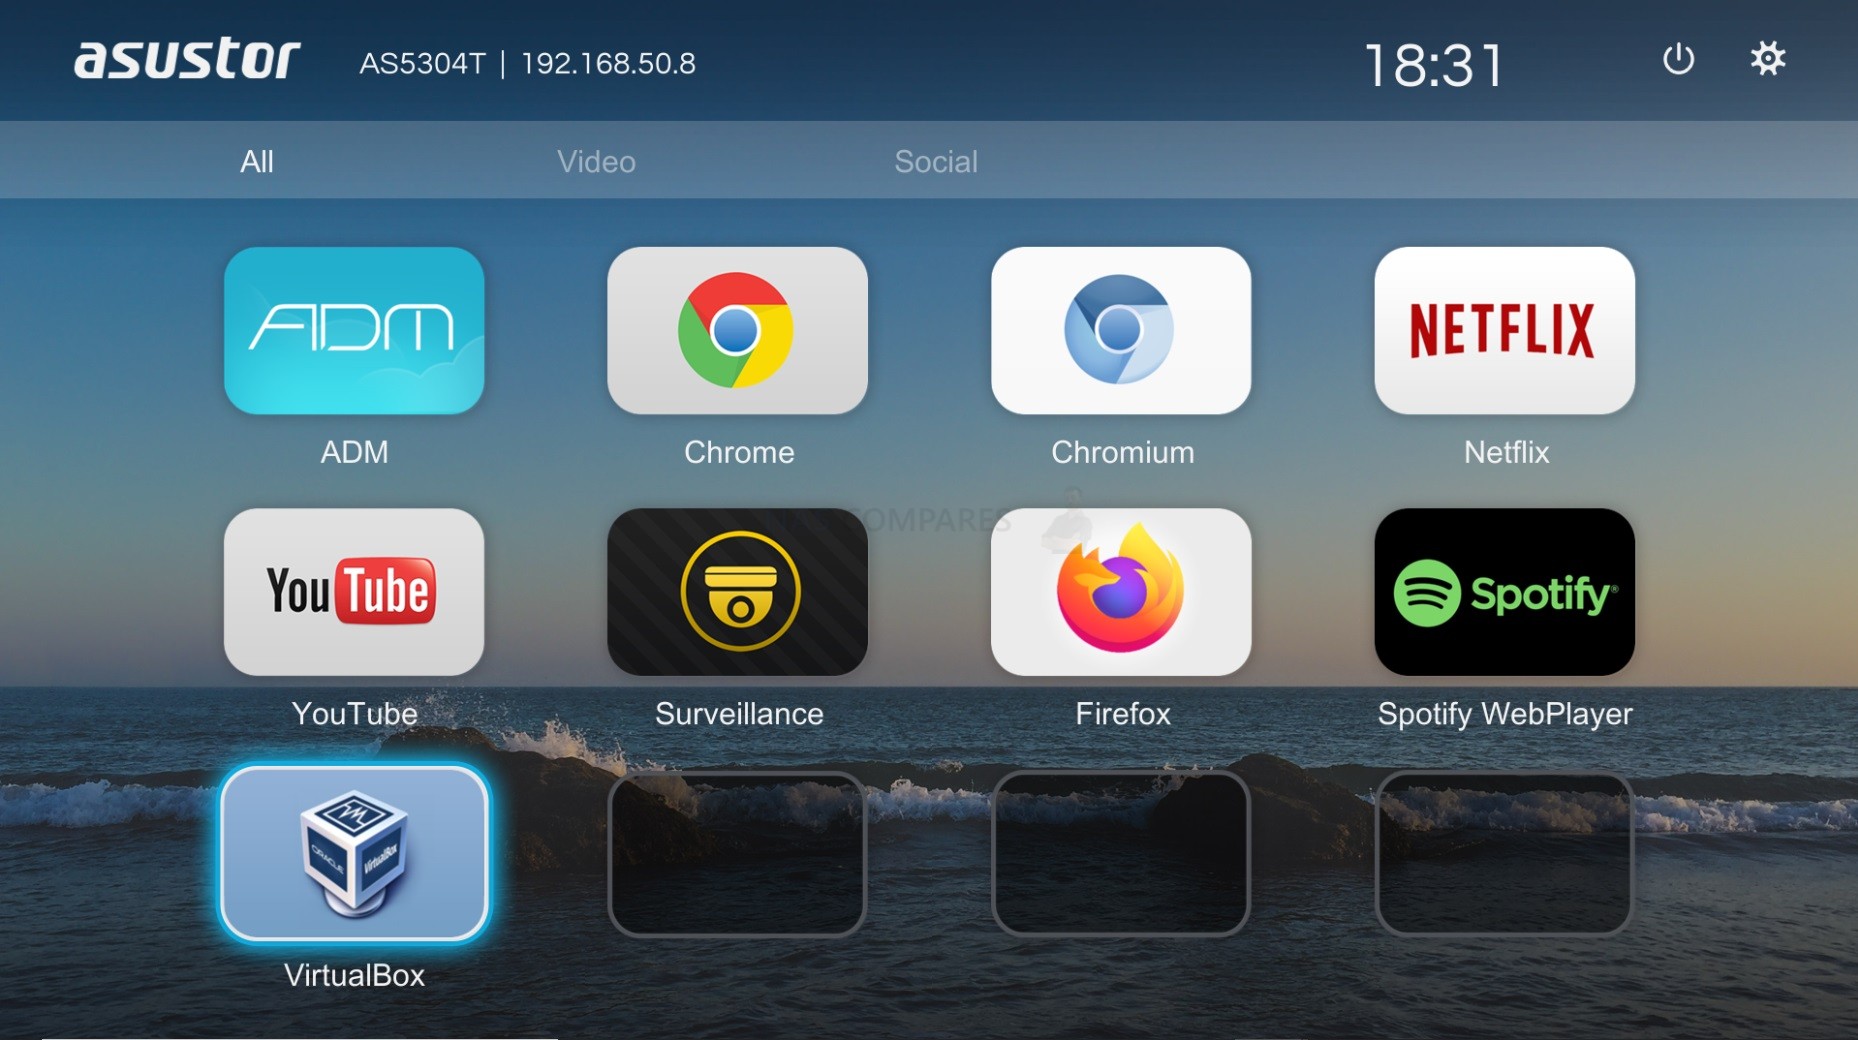
Connect the keyboard and mouse to the NAS and then click on the VirtualBox icon.
Note: Keyboard and mouse are not needed for the models without HDMI. Installation and settings will be done through VirtualBox on the ADM desktop.
- Portal:
- ADM:

STEP 3
After opening VirtualBox you should be able to see the VirtualBox management interface as shown in the graphic below. Here, you will be able to add and manage virtual machines.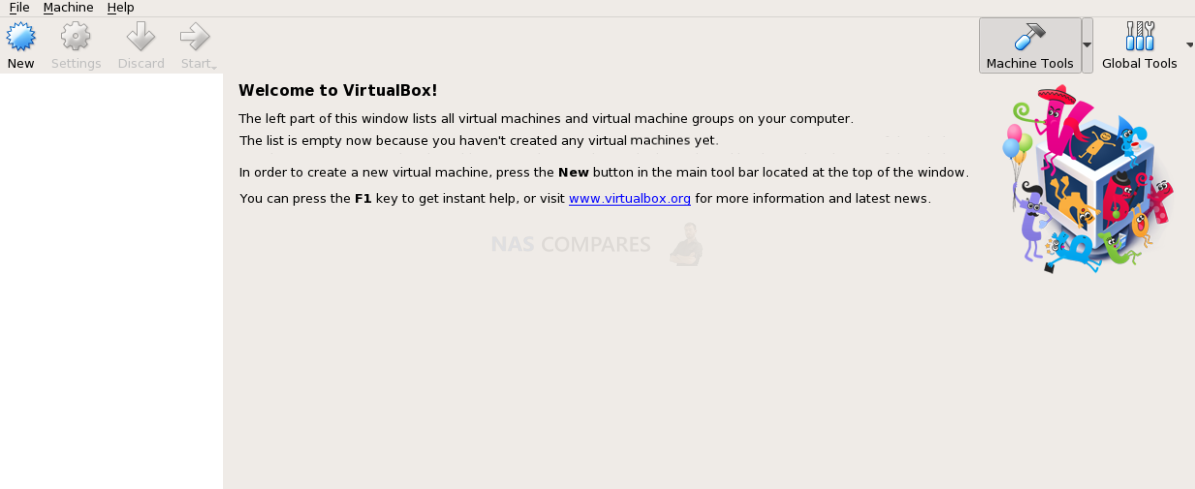
STEP 4
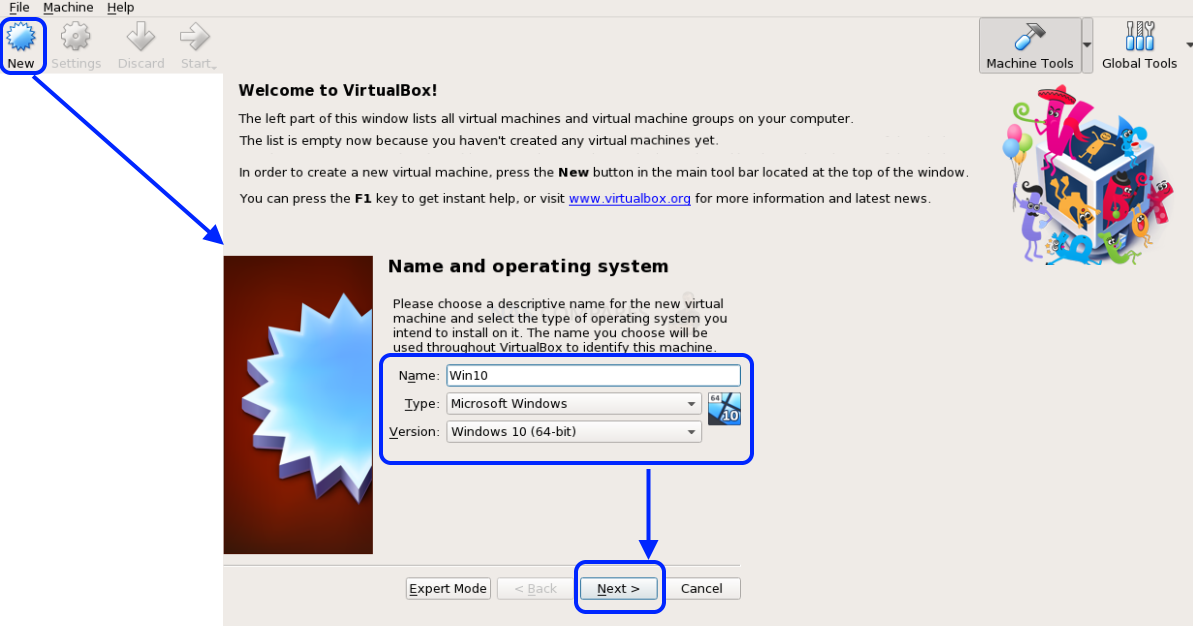
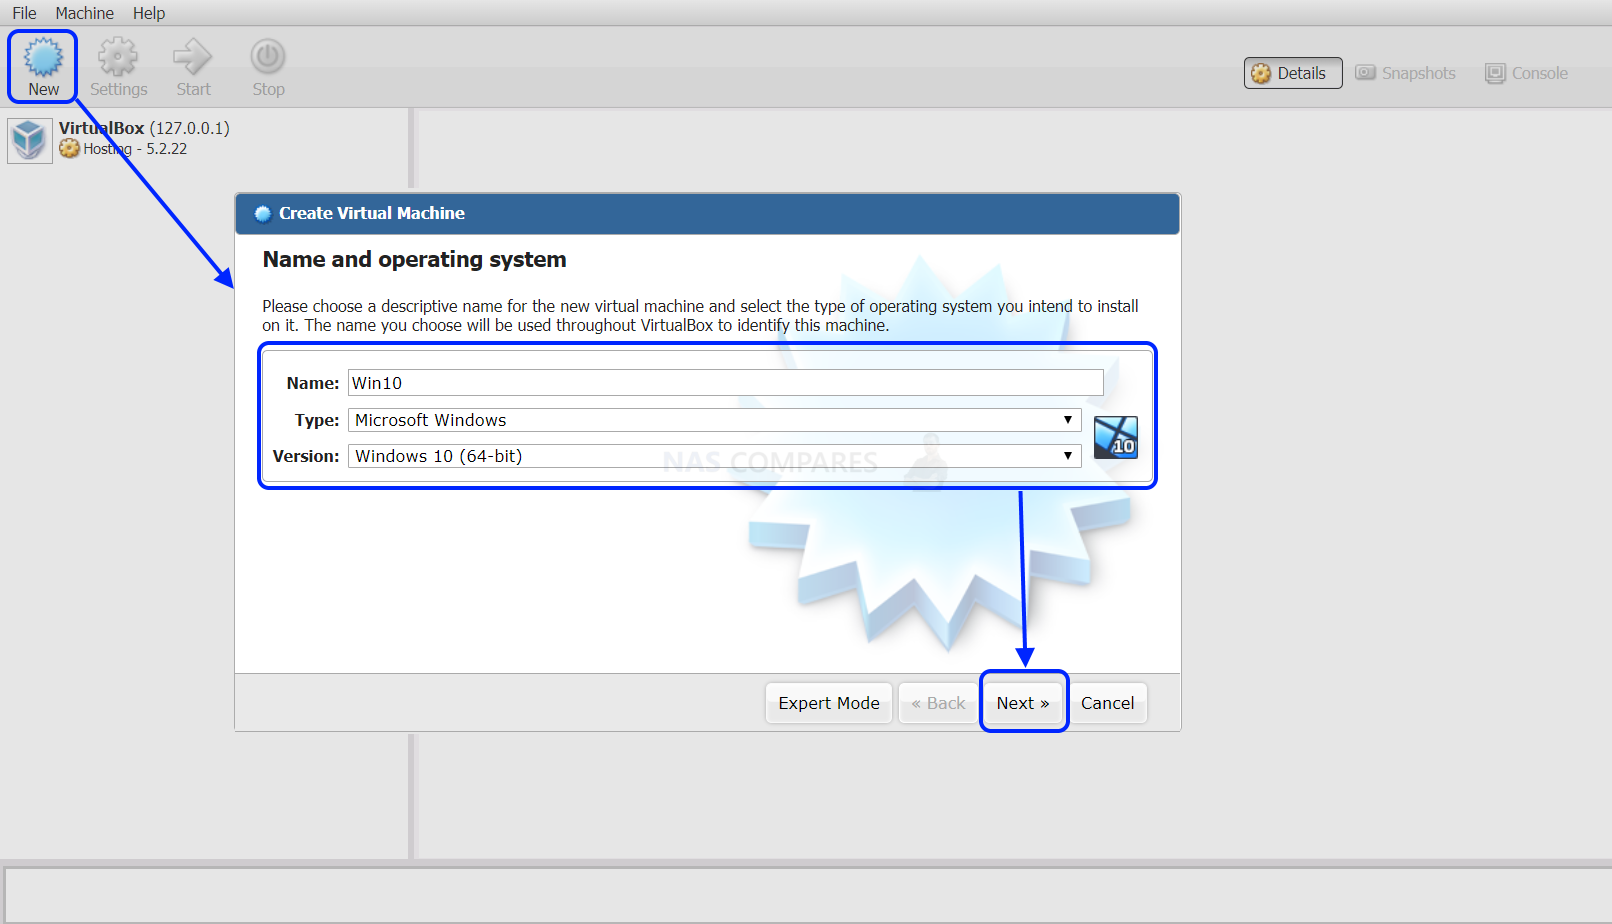
Click on [New] to begin configuration for a new virtual machine.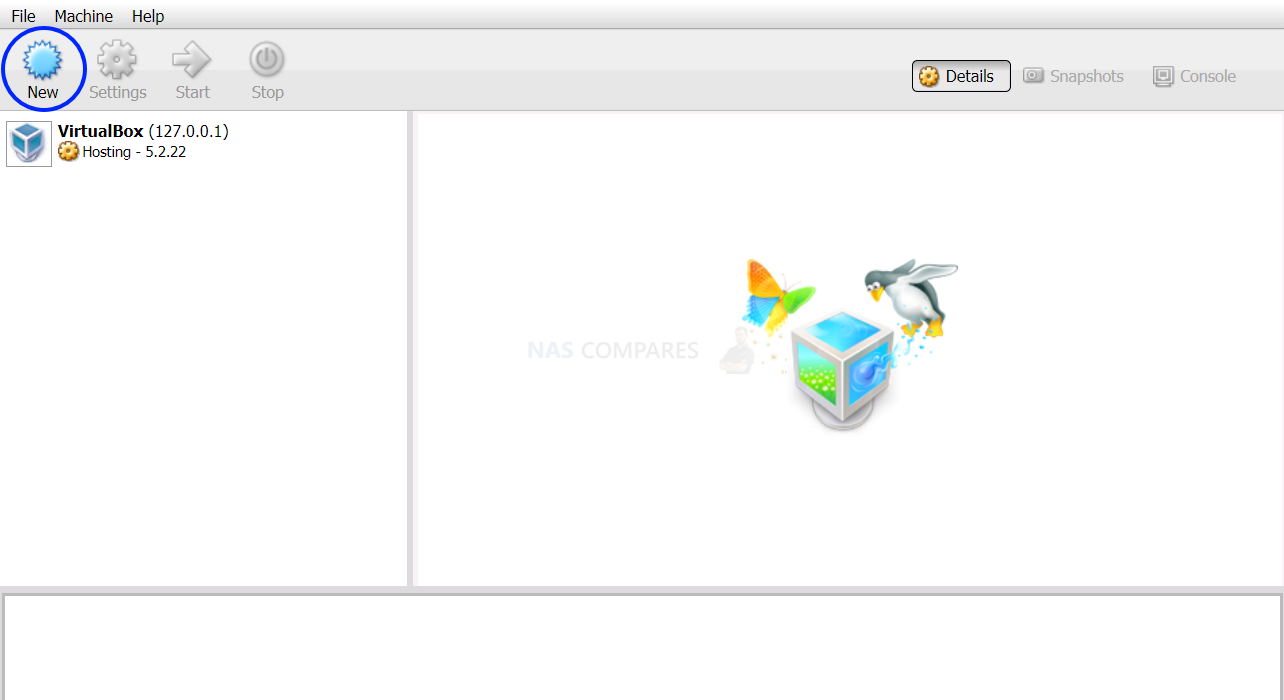
STEP 5
Enter a name for your virtual machine, select the type of operating system you will be installing and then click on [Next].
- Portal:
- ADM:
STEP 6
Now, you will need to select the amount of memory (RAM) that wish to allocate to the virtual machine. The more memory you allocate, the smoother the performance of the virtual machine. After allocating memory, click on [Next] to continue.
Note: Please remember to take into account your NAS memory usage when allocating memory for virtual machines.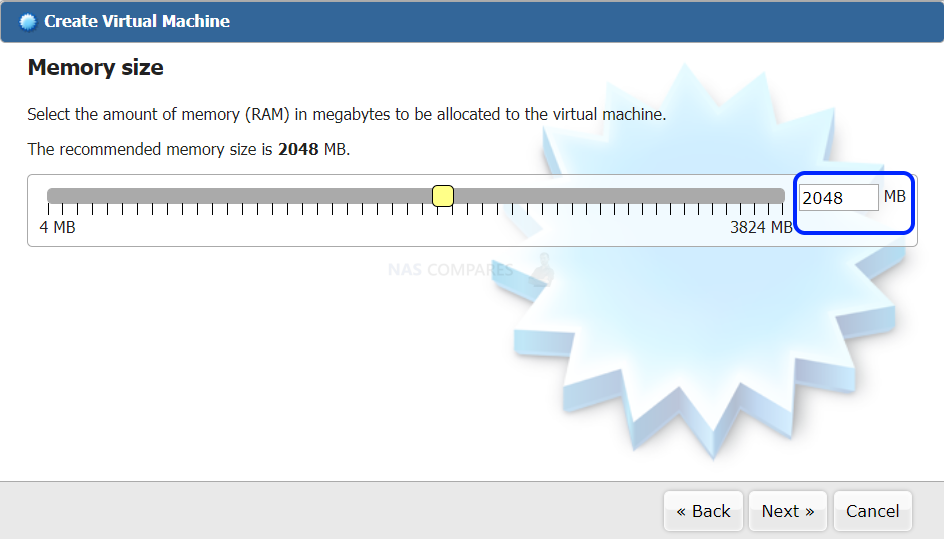
STEP 7
At this time you will need to configure the hard drive settings for the virtual machine. These settings are as follows:
- Creating a virtual hard drive
- Configuring virtual hard drive file properties
- Configuring virtual hard drive expansion flexibility properties
- Selecting a location on the NAS for the virtual hard drive and configuring its size.(Note: The default location for the virtual hard drive is /home/admin/VirtualBox VMs)
Select the [Create a virtual hard drive now] radio button and then click on [Create].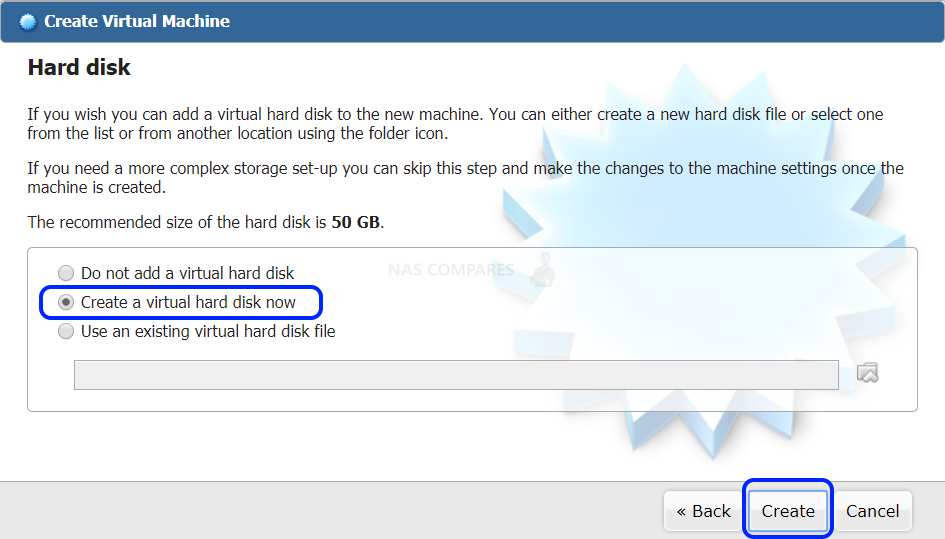
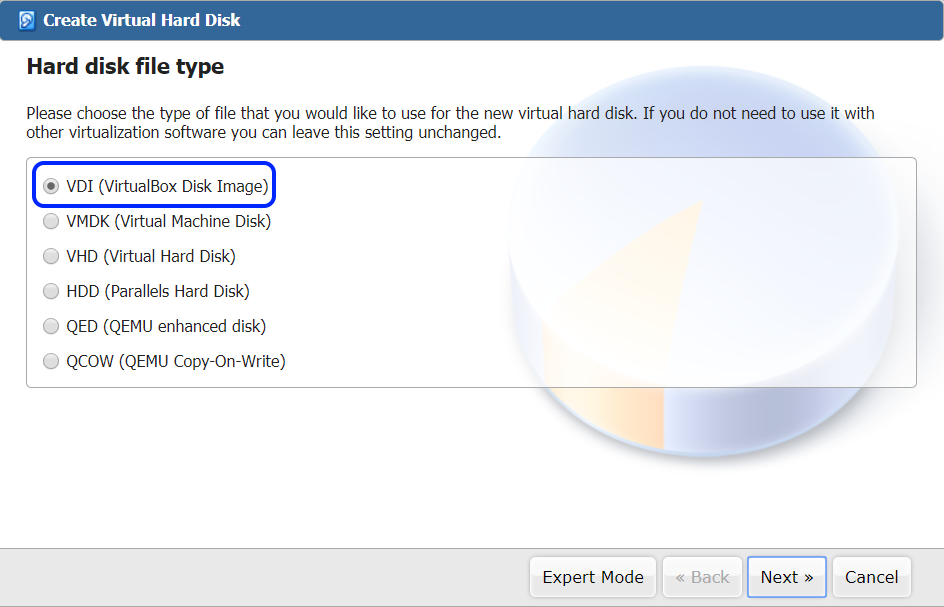
Select the type of file that you wish to use for the new virtual hard drive. In our example, we select [VDI (VirtualBox Disk Image)] and then click on [Next]

Select whether the new virtual hard drive should grow as it is used (dynamically allocated) or if it should be created at its maximum size (fixed size). In our example, we select [Dynamically allocated] and then click on [Next].
Now, you will need to enter a name for the virtual hard drive, select a location for it on the NAS, and configure its size. In our example, we will use the VirtualBox default location and size (50 GB) and then click on [Create].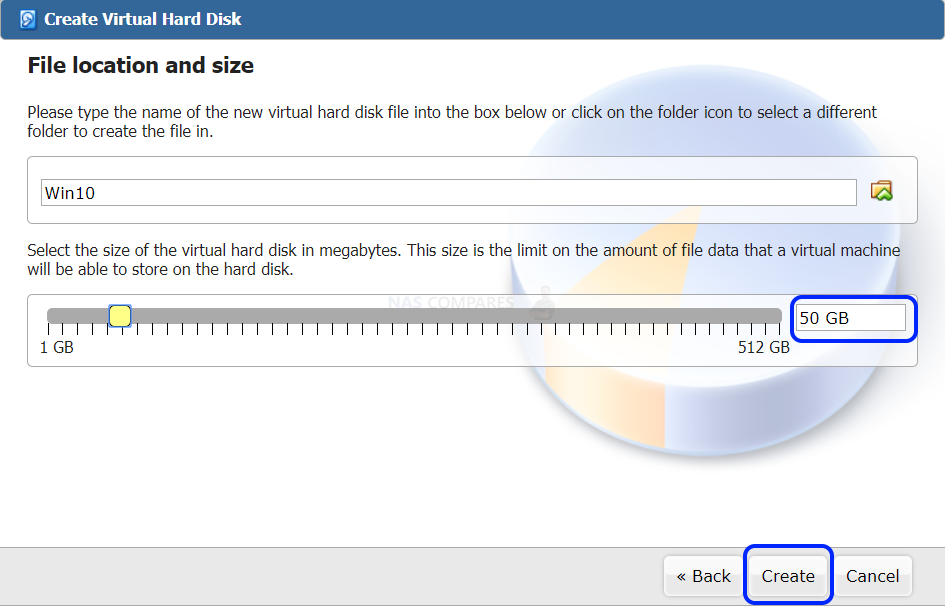
STEP 8
After creating the virtual machine, you should be able to see its name in the VirtualBox management interface. We will now proceed to configure the following settings for the virtual machine:
- CPU settings
- Video memory settings
- Operating system CD/DVD image file that you wish to install
First, we will configure the CPU settings. Click on [Settings], select [System] and then select the [Processor] tab to access the CPU settings. (When configuring CPU allocation, please take into account your NAS’s hardware performance.)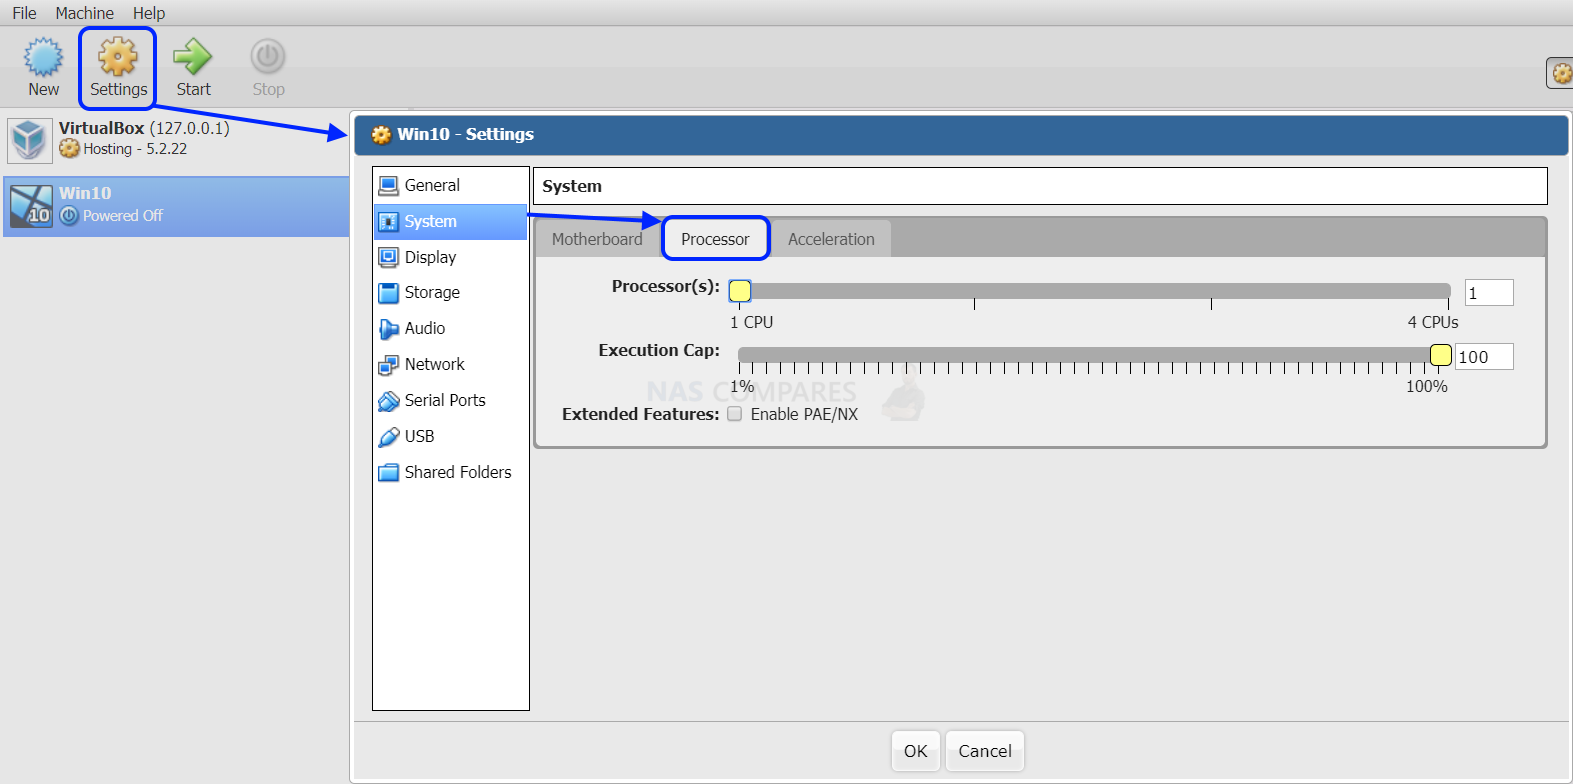
Next, select [Display] in order to configure the video memory. Please first select the [Enable 3D Acceleration] and [Enable 2D Video Acceleration] options and then set the Video Memory to [128 MB].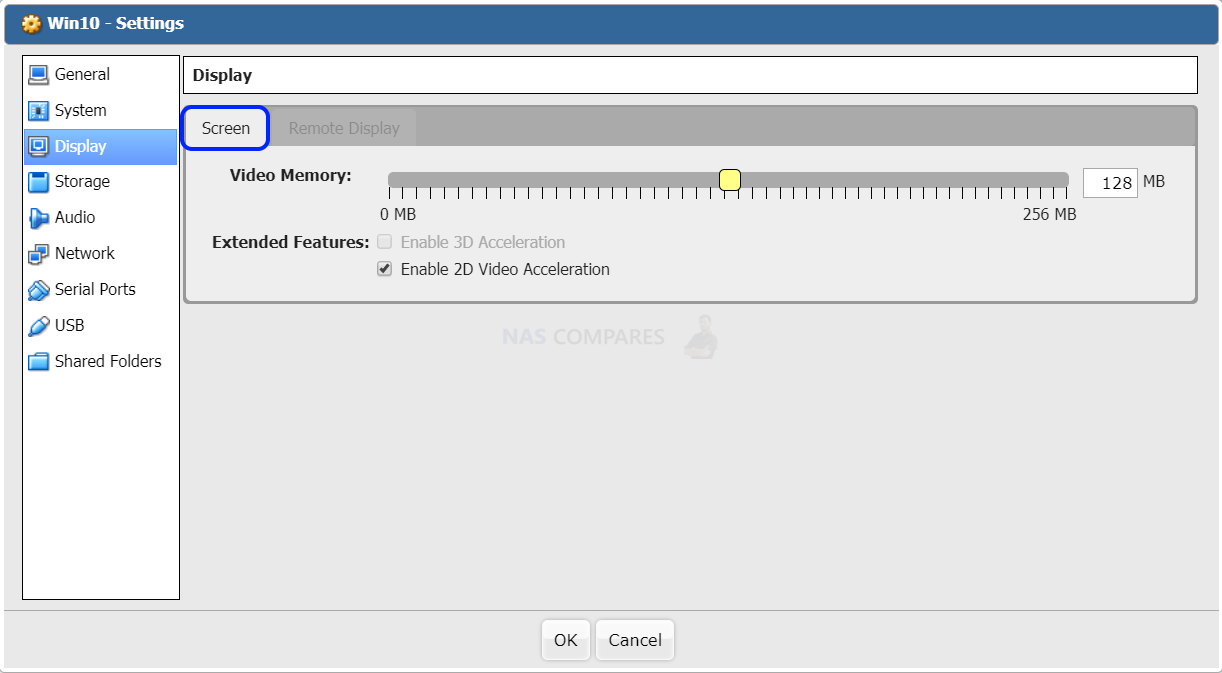
Now, select [Storage], select [Empty] and then click on the “Optical Drive” icon. Select [Choose a virtual CD/DVD disk file…]. At this time you can browse through your NAS and select the virtual CD/DVD disk file for the operating system that you wish to install. After selecting the file, click on [OK].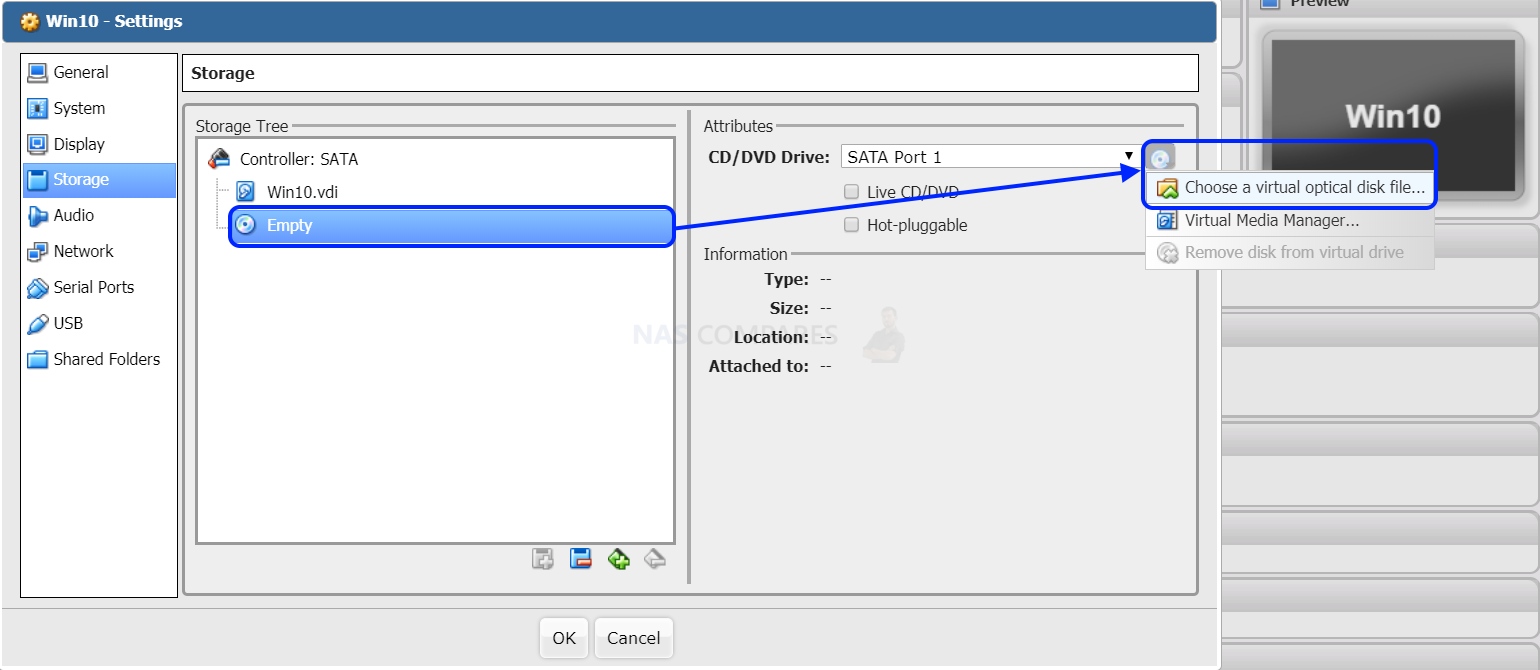
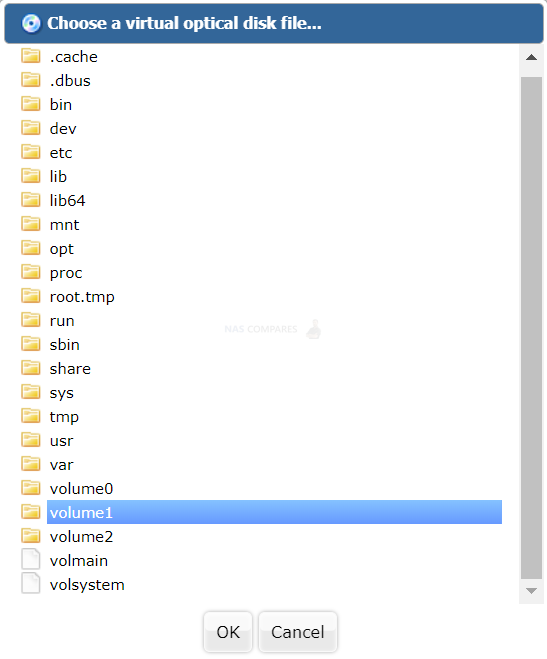
Note: When selecting the CD/DVD image file from ASUSTOR Portal, you can double click on [/] and then select [Volume 1] to browse through the data on your NAS.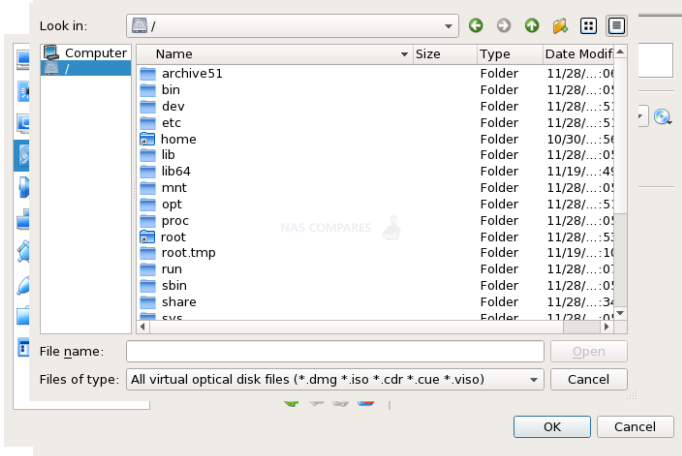
STEP 9
Verify that the virtual CD/DVD image file has been mounted and then click on [Start] to begin installing the operating system.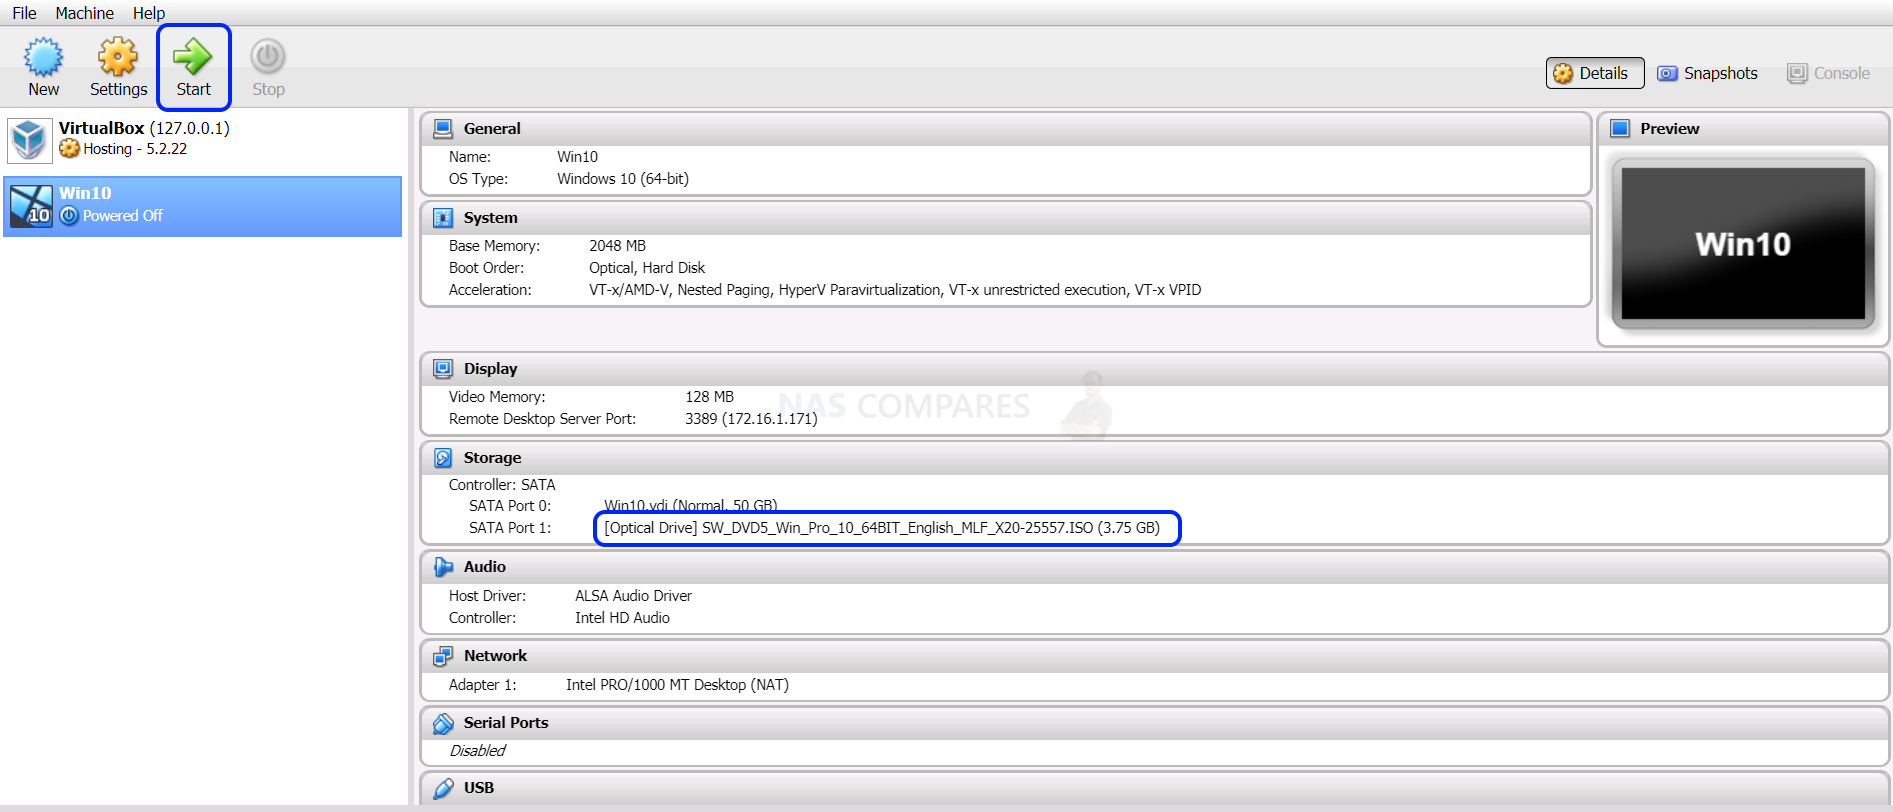
Once the installation screen has opened on Portal, click on [View] at the top of the window and then select [Full-screen Mode]. You will now be ready to begin the installation of the operating system.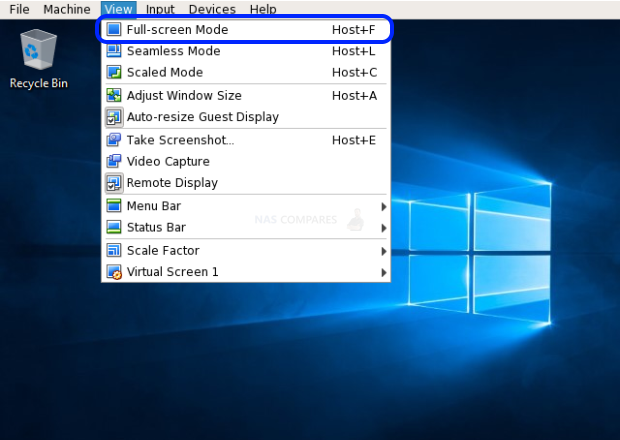
If the message below appears, select [Do not show this message again] and then click on [Switch].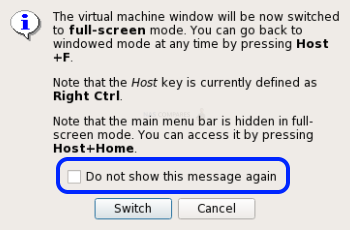
Note: The Host key is defined as the Right Ctrl key by default.
3. Configuring Remote Desktop Connection
The VirtualBox Extension Pack is needed to enable remote desktop connection on VirtualBox. This is necessary for models without HDMI support. Installing an operating system onto a VM and operating in a VM all need to be done in a Remote Desktop Connection since there are no HDMI ports. Be sure to enable Web Server in Services.
This setting can be set in phpVirtualbox in ADM.
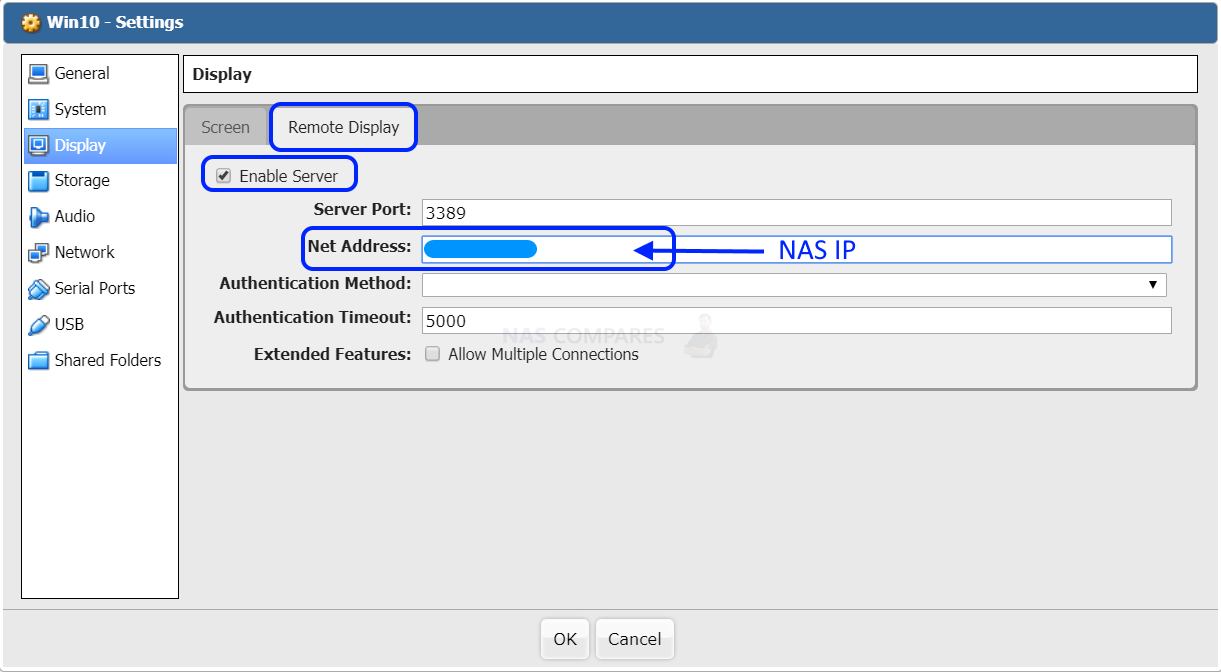
- Select Remote Display under Display in Settings.
- Enable server and input the IP address of the NAS under Net Address. Click OK to save.
After settings have been adjusted, use Remote Desktop Connection for Windows. Input the NAS IP address followed by a Colon and the port number. Example: 192.168.1.100:3389. Afterwards, you would be able to connect to the virtual machine for installing an operating system and running the virtual machine.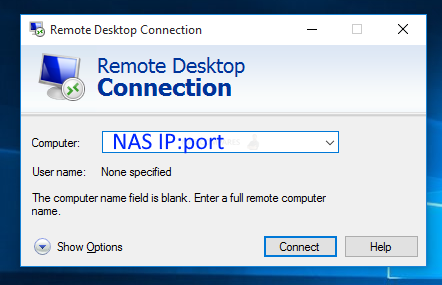
Use a web browser to open VirtualBox in ADM and click on Console to connect a remote display if no suitable remote desktop connection software available. Adobe Flash support must be enabled to support remote display connections in a web browser in phpVirtualBox.
Enabling Flash on Chrome: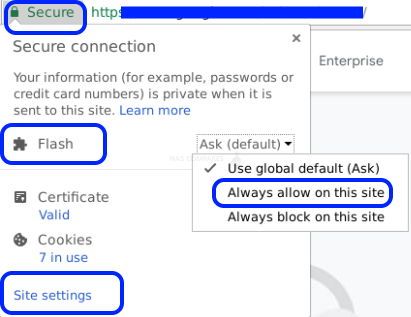
Click on Site Settings to also enable Flash.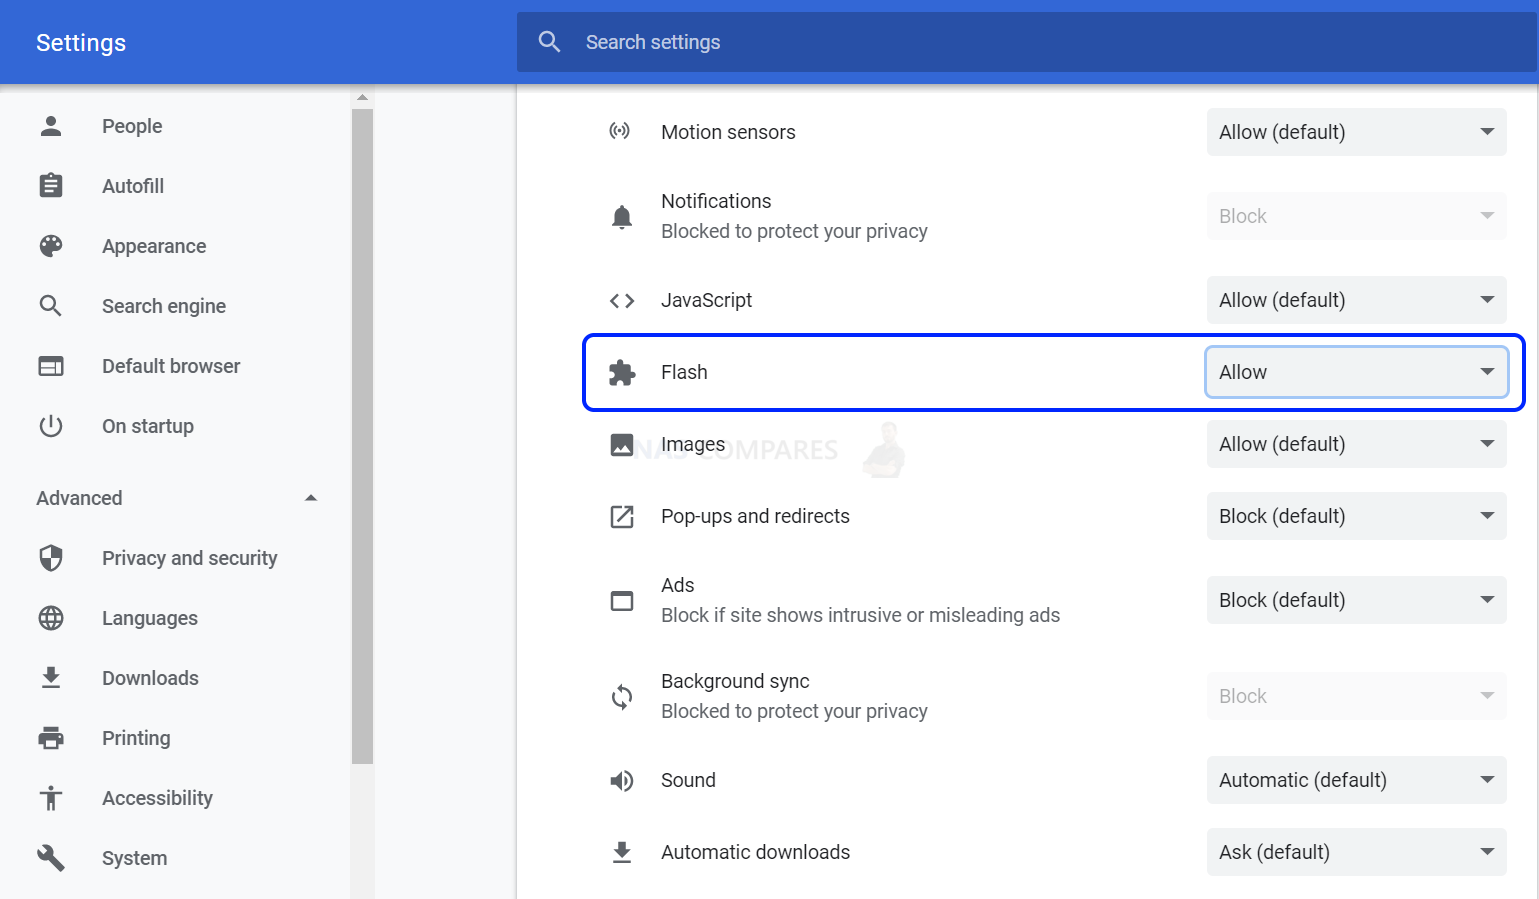
Enabling Flash on Firefox.
Click on flash applet.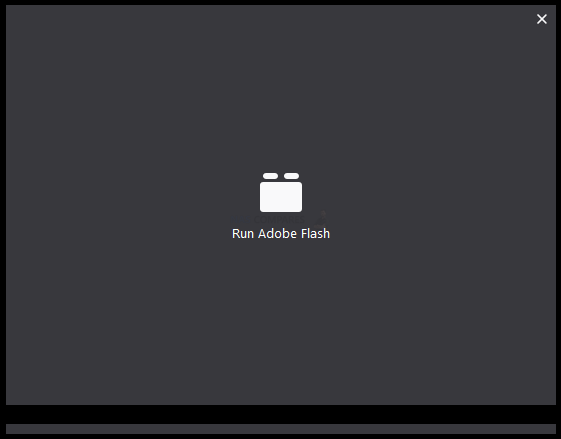
Press Allow to enable.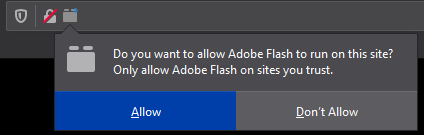
And then it should work as intended.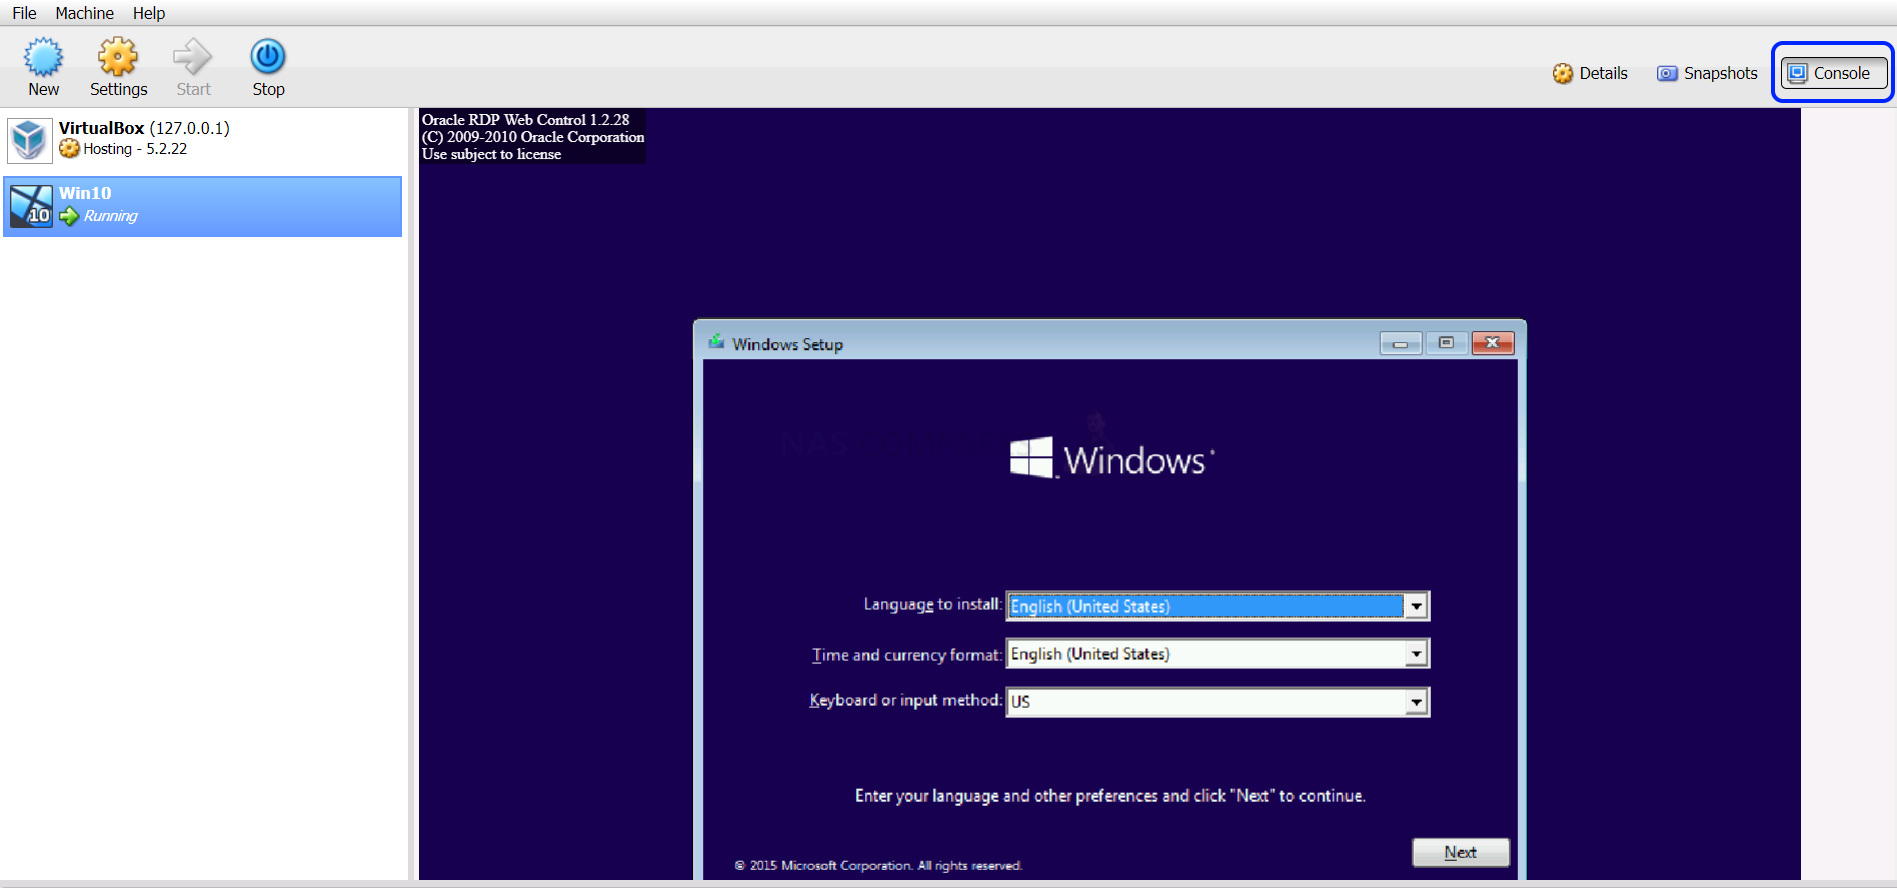
4. Installing VirtualBox Guest Additions
After completing installation of the operating system, we will install VirtualBox Guest Additions for better usage experience. The two examples in this section will demonstrate installation via HDMI (ASUSTOR Portal) and phpVirtualBox (ADM Web browser interface).
4.1 Installing via HDMI
STEP 1
Click on [Device] and then select [Insert Guest Additions CD image…].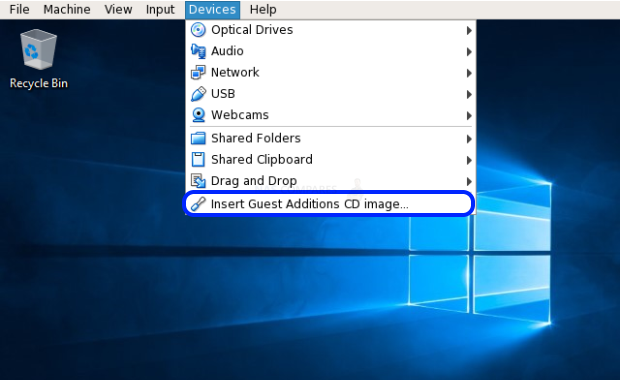
After downloading and installation is complete, access the CD drive device from your operating system. You should be able to see a screen similar to the one shown in the graphic below.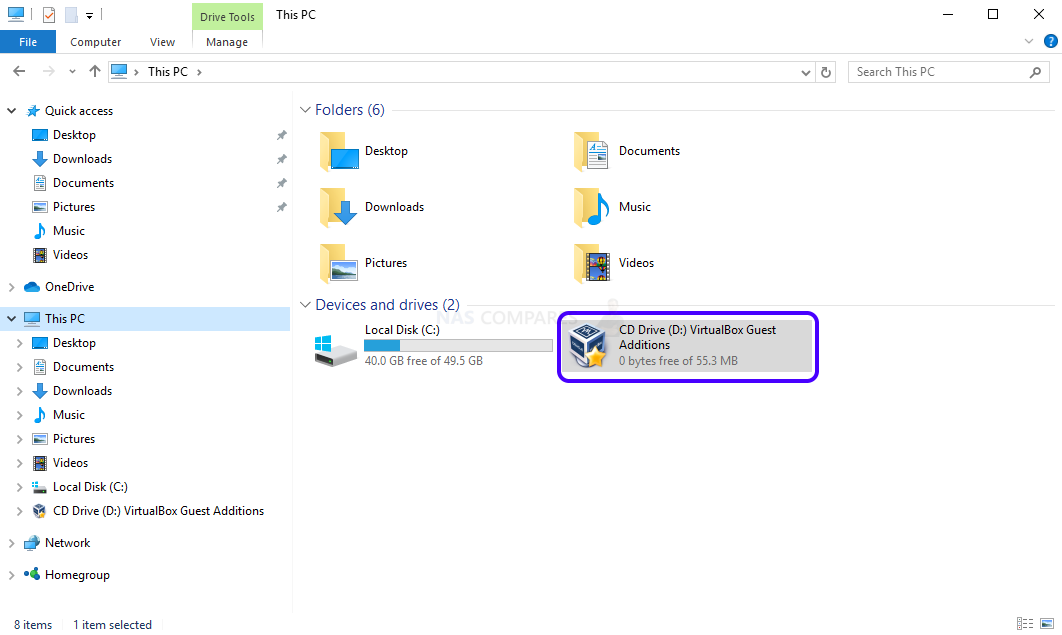
STEP 2
Browse through the content on the CD drive and double-click on [VBoxWindowsAdditions] in order to begin the installation.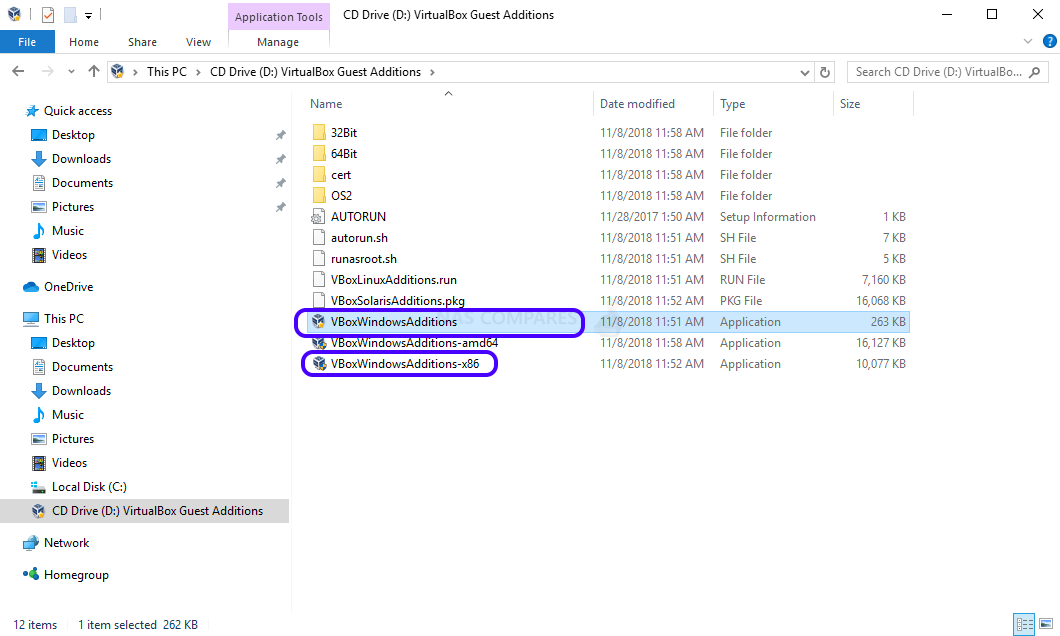
Note: If you have installed a 32-bit operating system, please select [VBoxWindowsAdditions-x86].
STEP 3
The setup wizard should now appear. Select [Next] for all the setup steps. After installation completes, the system will request to reboot the virtual machine. In the last step of the setup wizard, select the [Reboot now] radio button and then click on [Finish].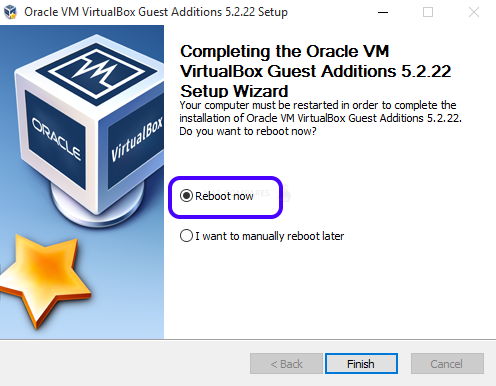
Congratulations! You have completed basic configuration of a virtual machine. You can now begin to enjoy the convenience of a combined NAS and PC experience.
4.2 Installing via phpVirtualBox
STEP 1
Open Chrome and then log into ADM. Open VirtualBox from the ADM desktop.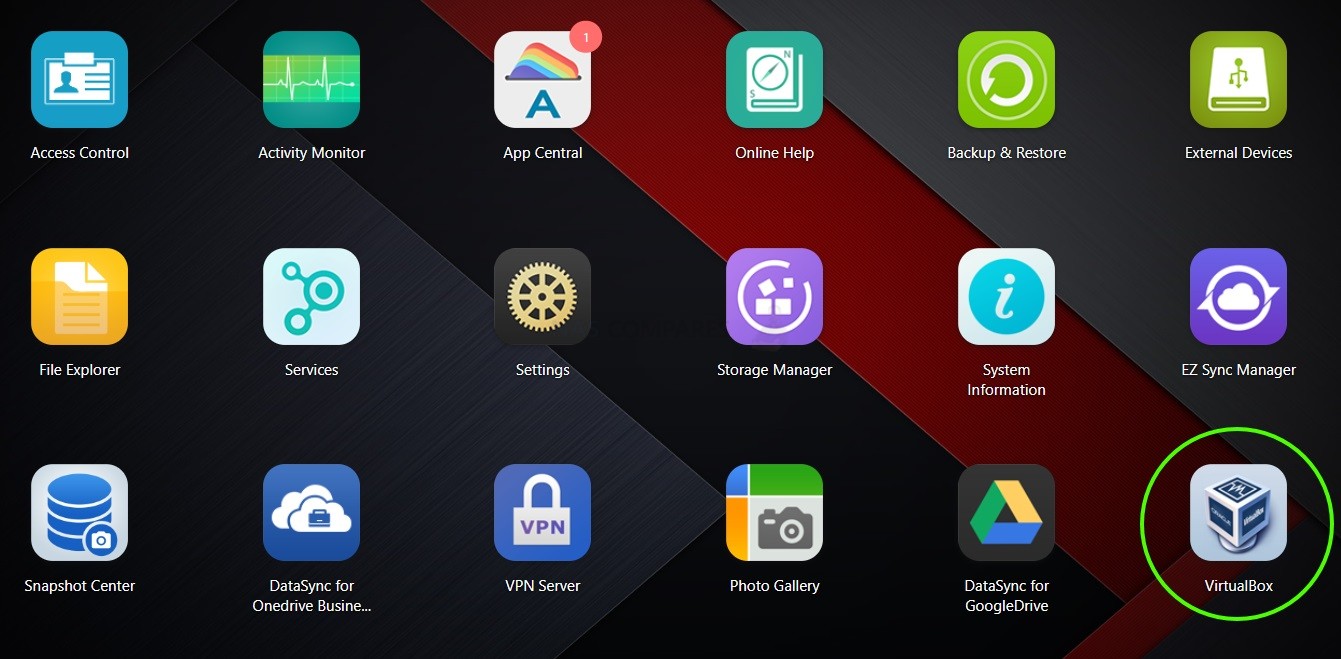
STEP 2
After opening VirtualBox, click on the virtual machine that is running. Next, click on the [Settings] icon from the toolbar and then select [Install Guest Additions…].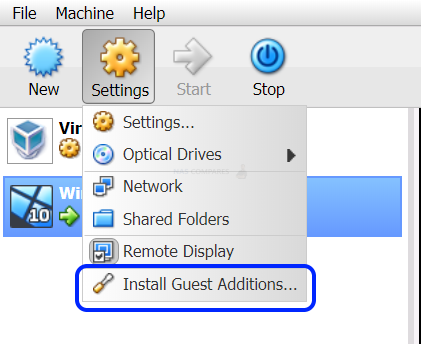
STEP 3
Click [OK] on the message box that pops out.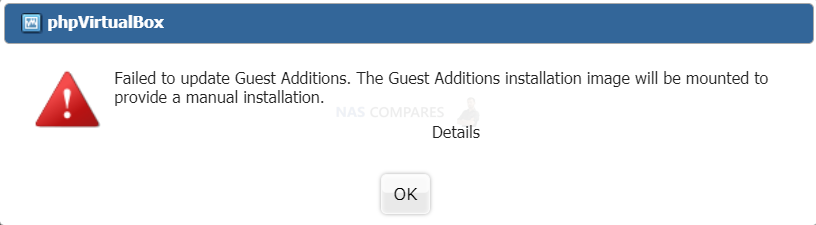
STEP 4
Click on [Console] in the upper-right hand corner of the interface and then click on [Run VBoxWindowAddition.exe]. Follow the steps provided for installation.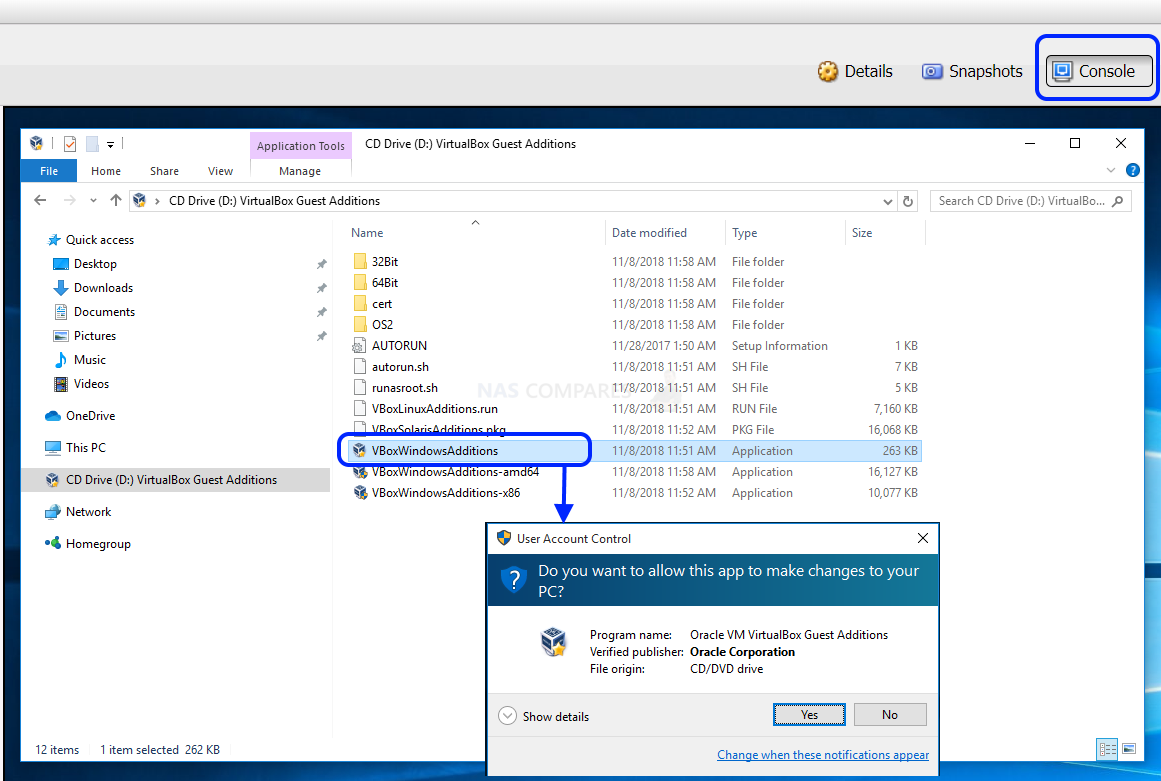
5. Running Virtual Machines From Mobile Devices
After configuring virtual machines and installing VirtualBox guest additions, you can use any mobile device (notebook, smartphone, tablet) to run virtual machines on your NAS.
5.1 Notebook
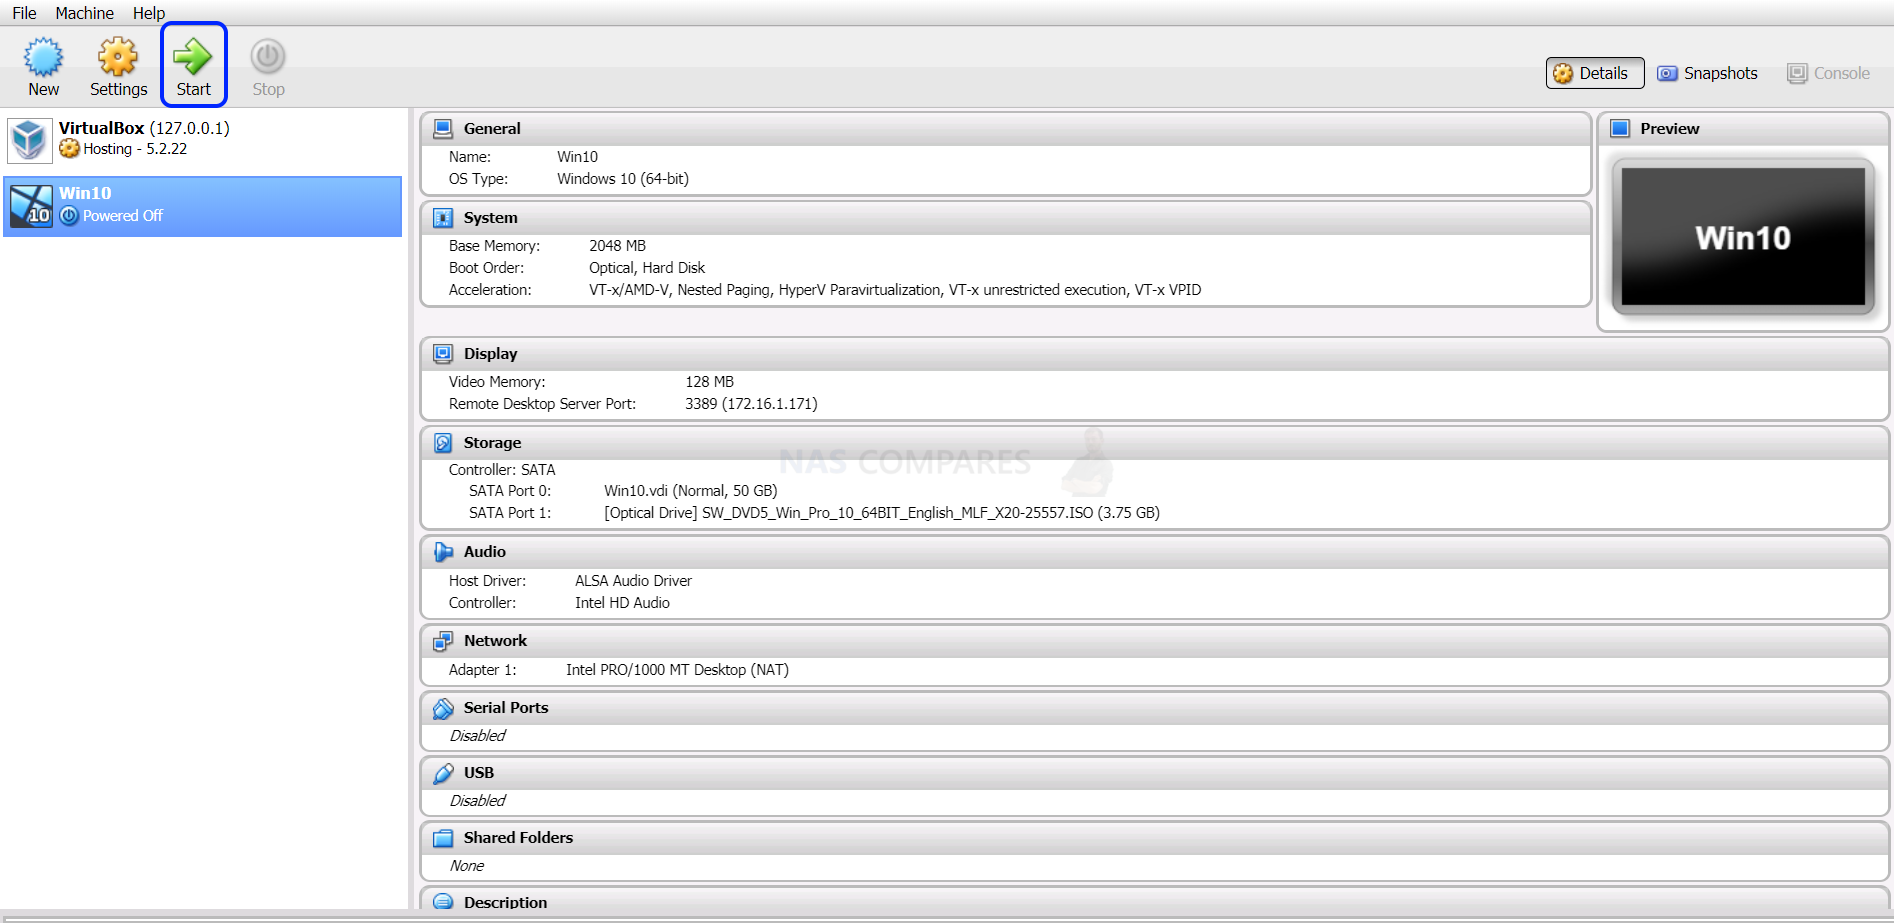
- Enter your NAS IP into a Web browser and then log into ADM. Open VirtualBox from the ADM desktop.

- After opening VirtualBox, select an operating system and click on the [Start] button.
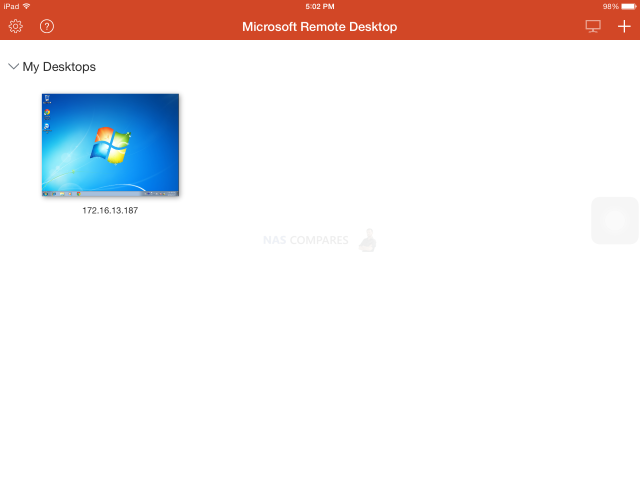
5.2 Smartphone / Tablet
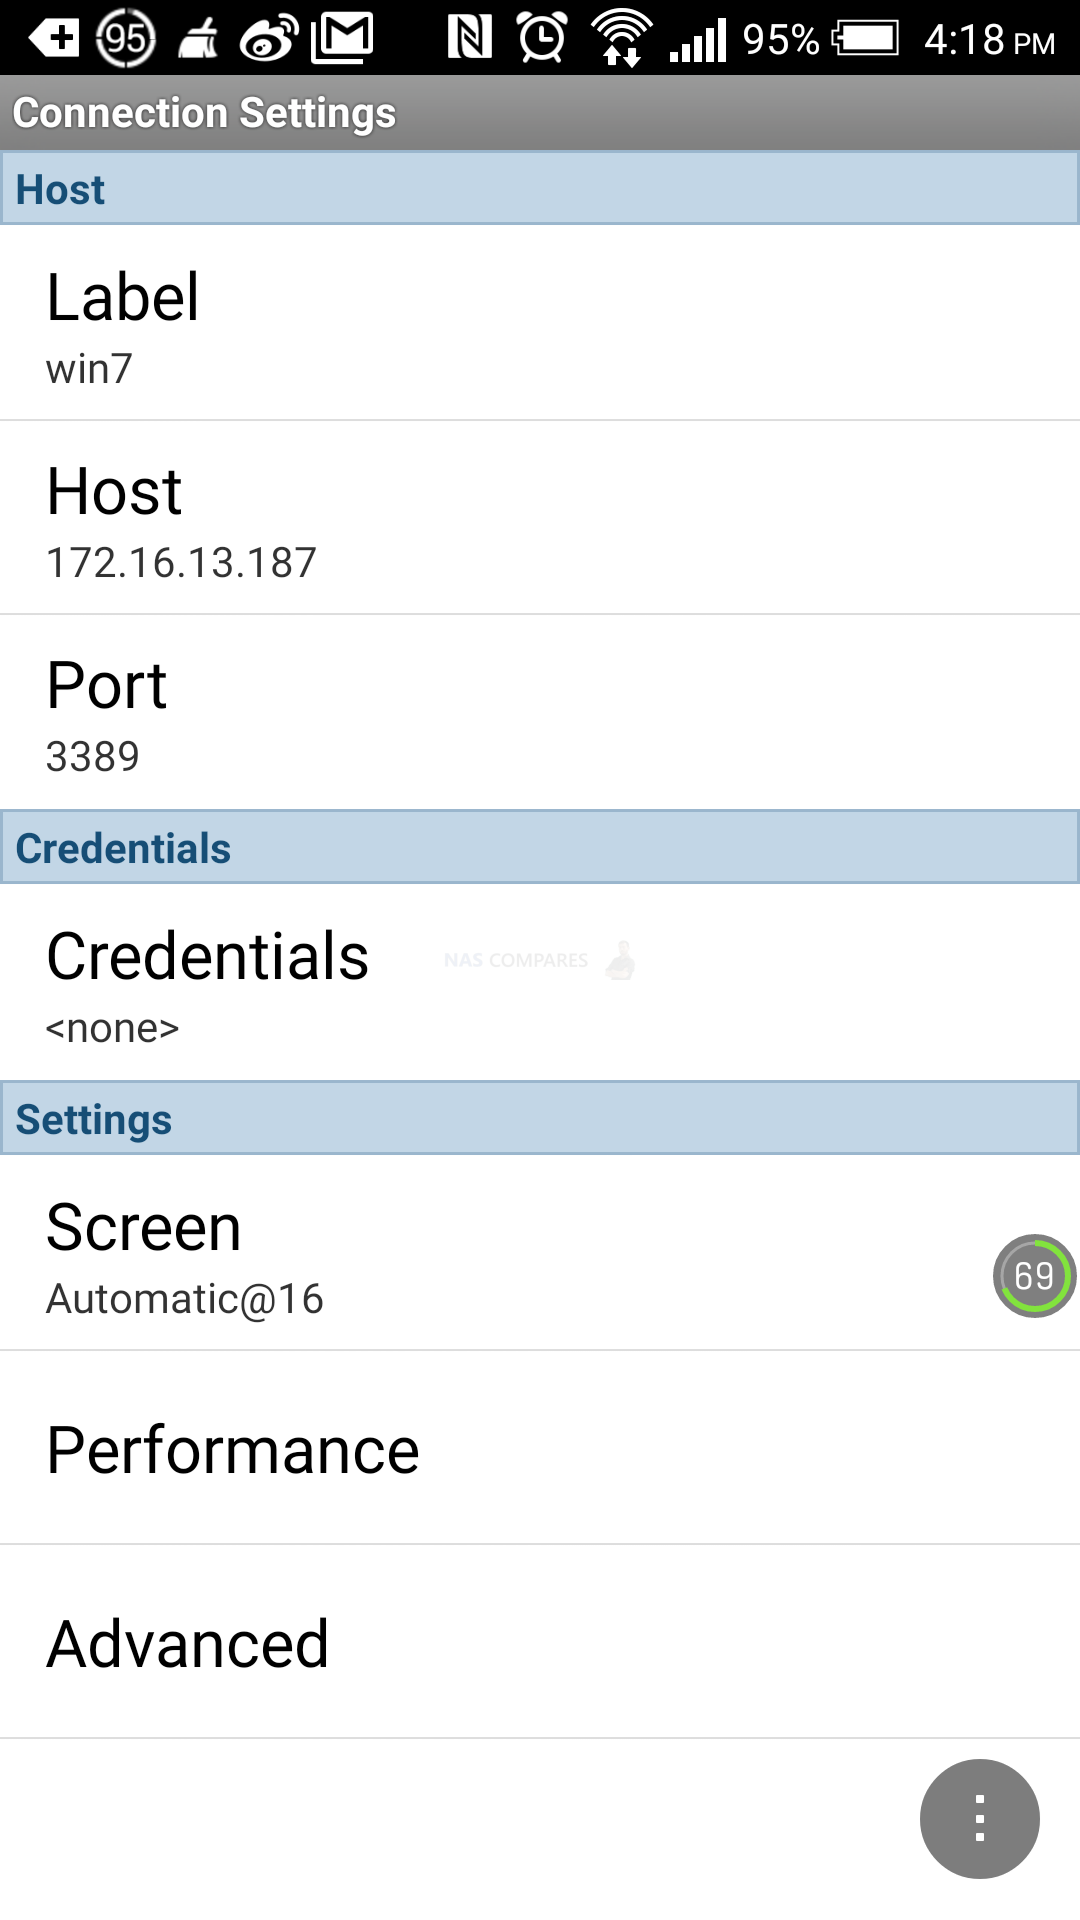
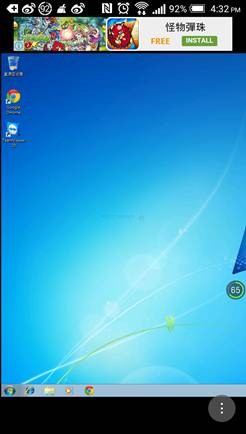
Please download the recommended app to run virtual machines from your smartphone or tablet. After entering the appropriate IP address, account name and password and you will be able to run the virtual machine using the app.
- Android devices: Please download Remote Desktop Client from Google Play.
 |
 |
- iOS devices: Please download Microsoft Remote Desktop from the Apple App Store.
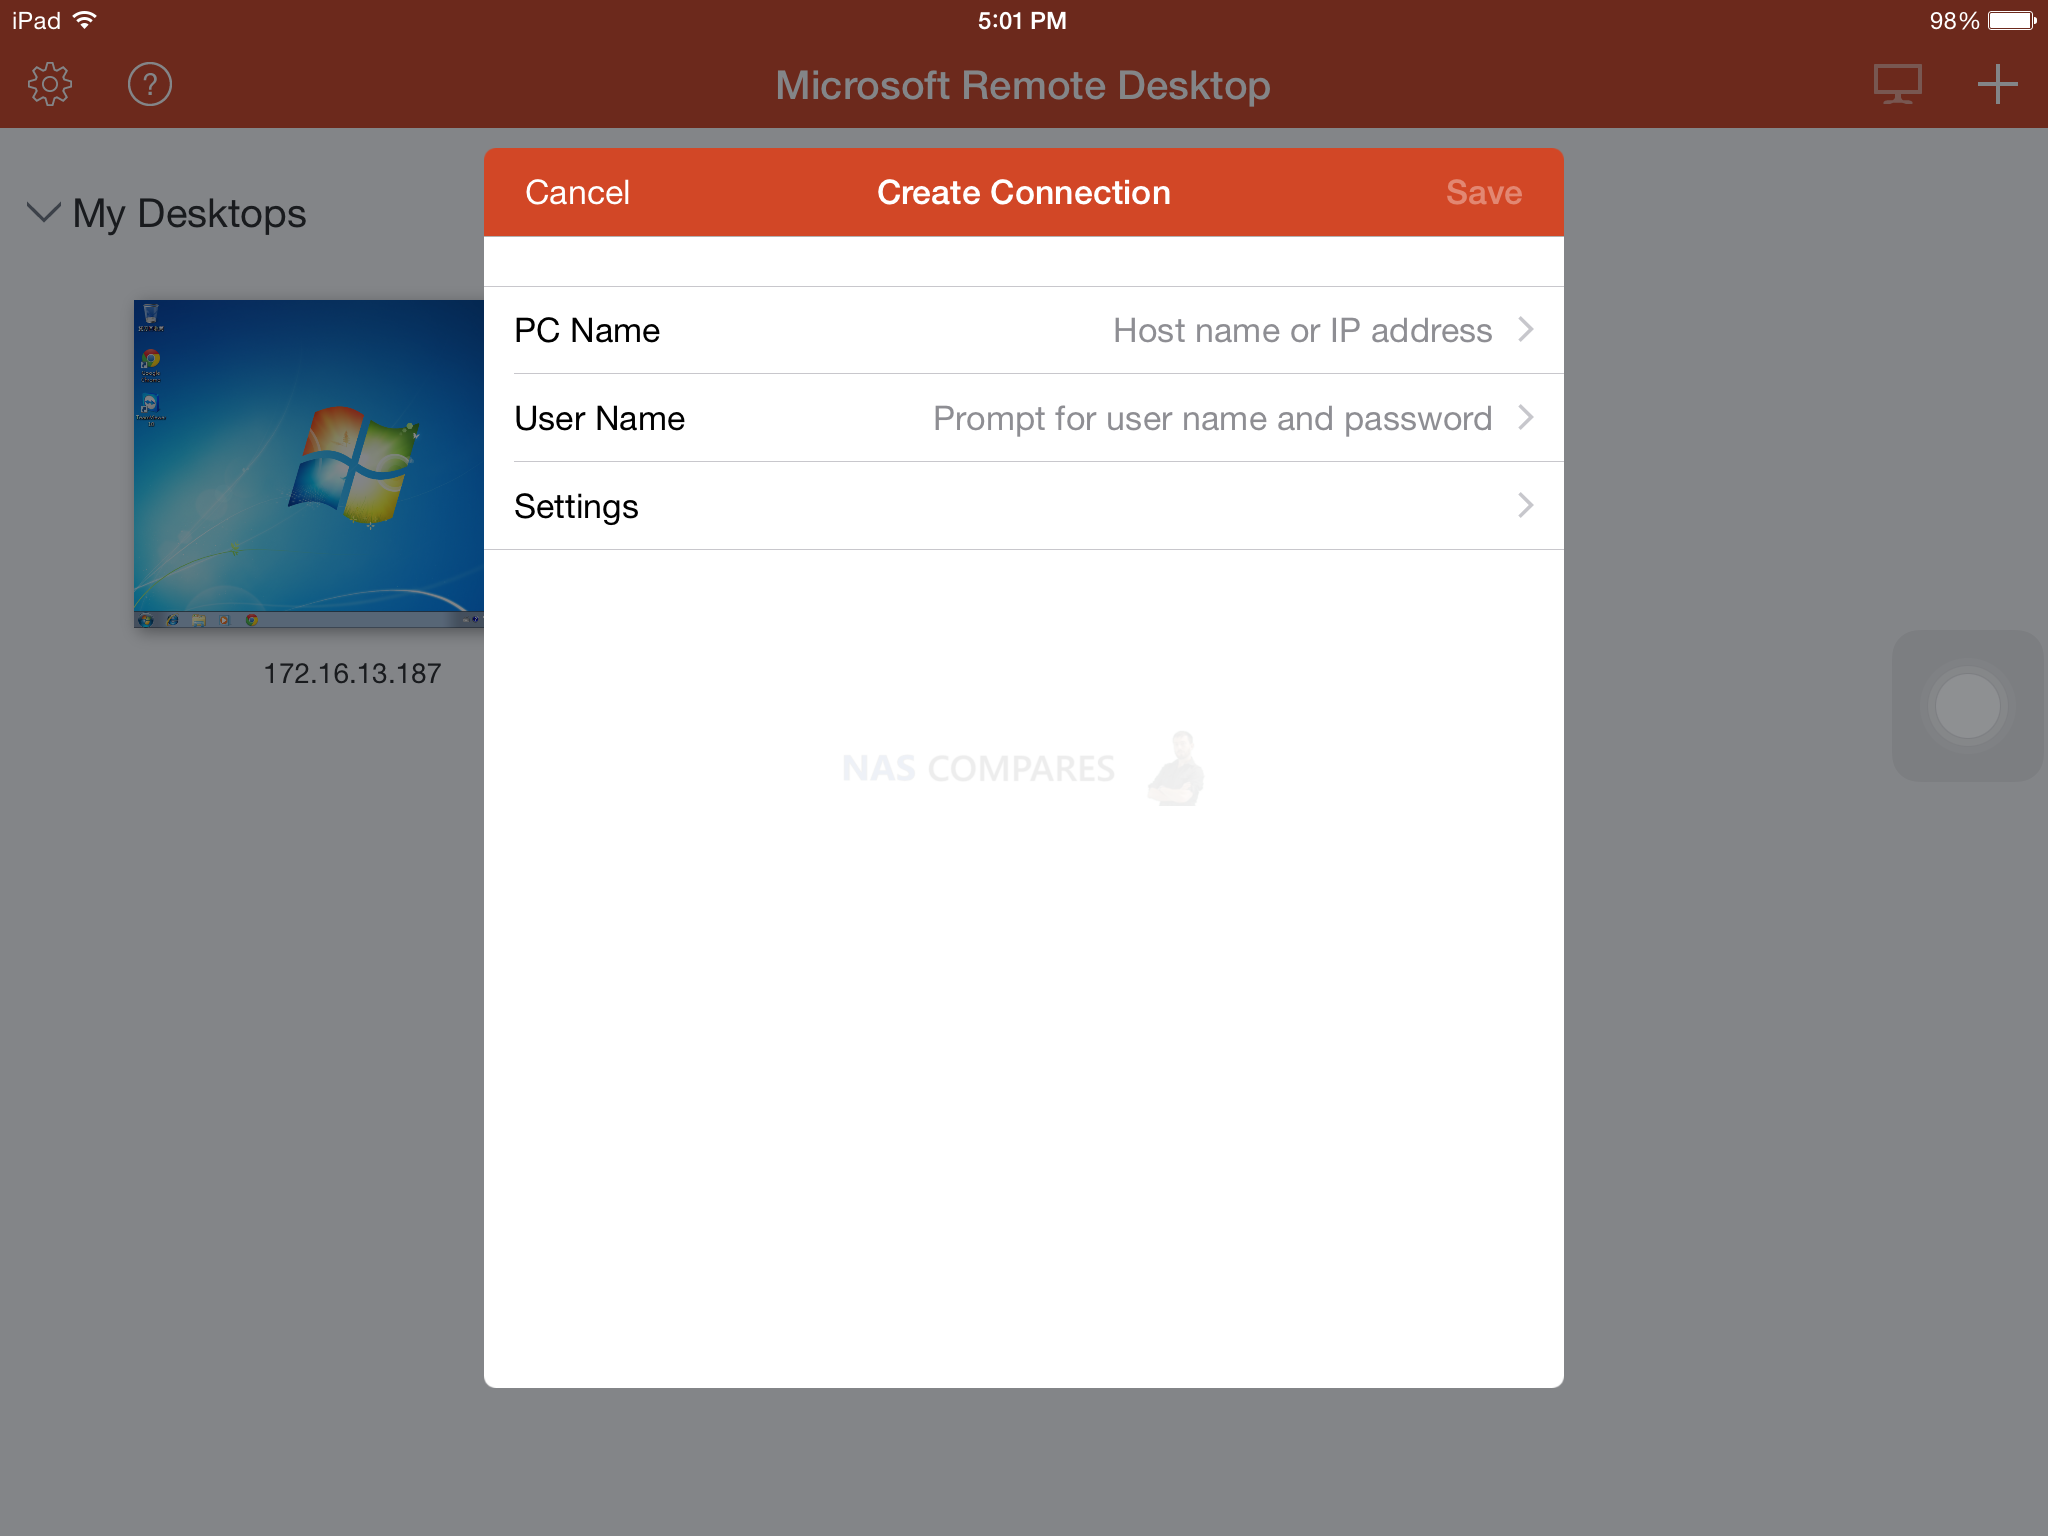
6. NAS File Access
So how do you access the files stored on the virtual machine?
In the graphic below, “VM 1” represents the virtual machine that you have created. “File” represents the files stored on VM1. From a NAS storage perspective, the NAS views VM1 as a single file. Therefore, when accessing VM1 using common file access methods, you will only be able to see a single file and will be unable to open it and view additional content or files.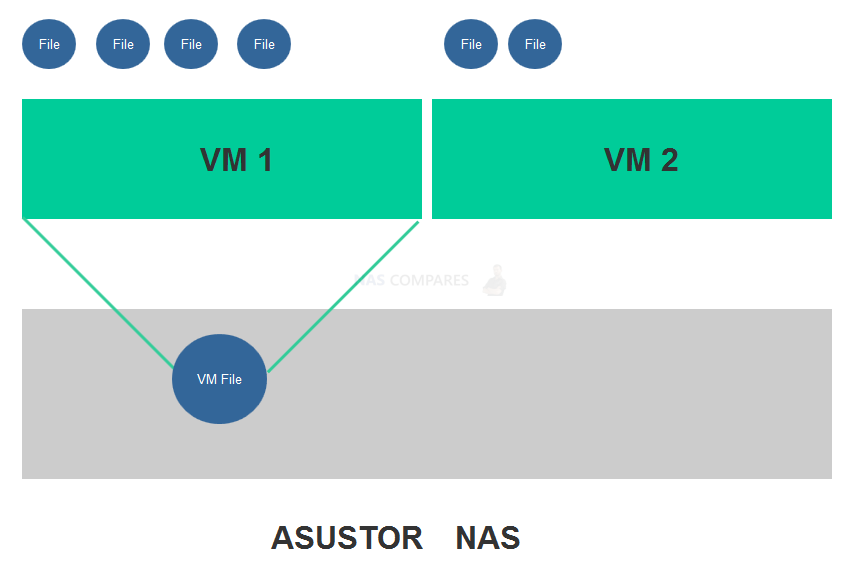
So how do you access the files on your NAS from within the virtual machine? Based on convenience for file sharing and operation, we recommend using Samba/CIFS as the fastest way to access files on your NAS from a virtual machine. This file access method is exactly the same as the one you would use on a regular computer. No matter if its accessing shared folders on the NAS or external hard drives connected to the NAS, you won’t need to learn new!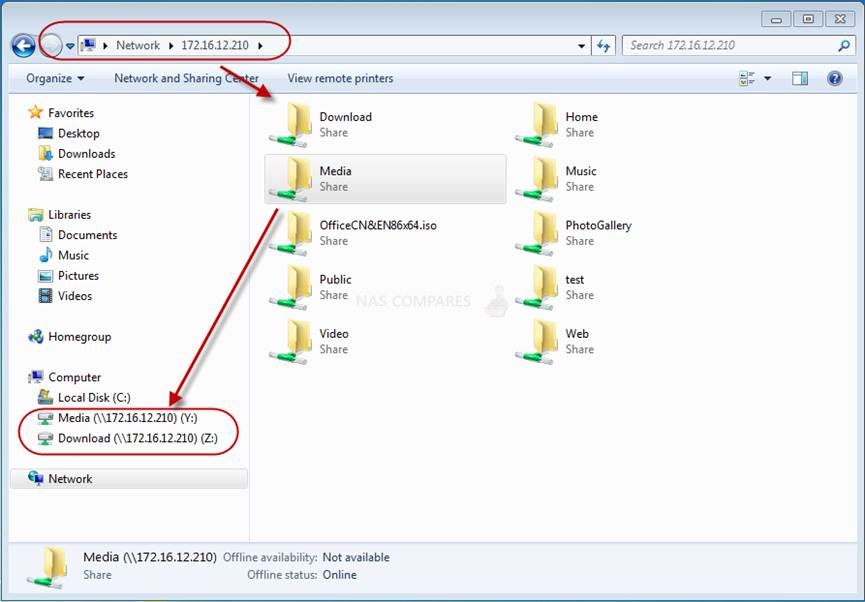
7. Notes
ASUSTOR Portal will detect new virtual machines and add them to the Portal interface as shortcut icons. If you wish to disable this function, please access [Settings] [VirtualBox] from within ASUSTOR Portal.
That’s it, now you can access the virtual machine using Windows Remote Desktop Tool, Installing Teamviewer or any other remote access tool you’d like to try (or have pre-installed on your system). Or you can simply use the VM through the browser tab if you’d like instead, but the refresh rate and response time will not be as fast, due to the fractionally higher latency.
A Quick Question to You – Yes, you reading this!
If you plan on buying your NAS Drive the links below will take you to some Synology NAS Options

🔒 Join Inner Circle
Get an alert every time something gets added to this specific article!
This description contains links to Amazon. These links will take you to some of the products mentioned in today's content. As an Amazon Associate, I earn from qualifying purchases. Visit the NASCompares Deal Finder to find the best place to buy this device in your region, based on Service, Support and Reputation - Just Search for your NAS Drive in the Box Below
Need Advice on Data Storage from an Expert?
Finally, for free advice about your setup, just leave a message in the comments below here at NASCompares.com and we will get back to you. Need Help?
Where possible (and where appropriate) please provide as much information about your requirements, as then I can arrange the best answer and solution to your needs. Do not worry about your e-mail address being required, it will NOT be used in a mailing list and will NOT be used in any way other than to respond to your enquiry.
Need Help?
Where possible (and where appropriate) please provide as much information about your requirements, as then I can arrange the best answer and solution to your needs. Do not worry about your e-mail address being required, it will NOT be used in a mailing list and will NOT be used in any way other than to respond to your enquiry.


|
 |


Minisforum N5 Pro NAS - Should You Buy?
UGREEN DH4300 & DH2300 NAS Revealed - Good Value?
Aoostar WTR Max NAS - Should You Buy?
Xyber Hydra N150 NAS Review - Is This COOL?
Minisforum N5 Pro vs Aoostar WTR Max - The BIG Showdown
Do MORE with Your M.2 Slots - GREAT M.2 Adapters!
Access content via Patreon or KO-FI
Hi there, I have installed a Windows 10 Pro VM on my NAS using this tutorial. I am experiencing extremely slow VM speed response, to the point it’s not usuable. It takes forever to do anything. It was even very very slow at installing. Any Ideas as to why this may be happening? My Ausutor Lockerstor 4 has the Max amount of RAM installed Plus 2 1GB NVME drives as well. The Speed issue is specifically on the VM, the rest of the NAS seems to operate fine. I have Guest Additions installed.
You may need to check the hardware requirements for that particular Windows installation. CPU might be too weak.