

Taking the Synology Beestation Apart to See What is Inside…
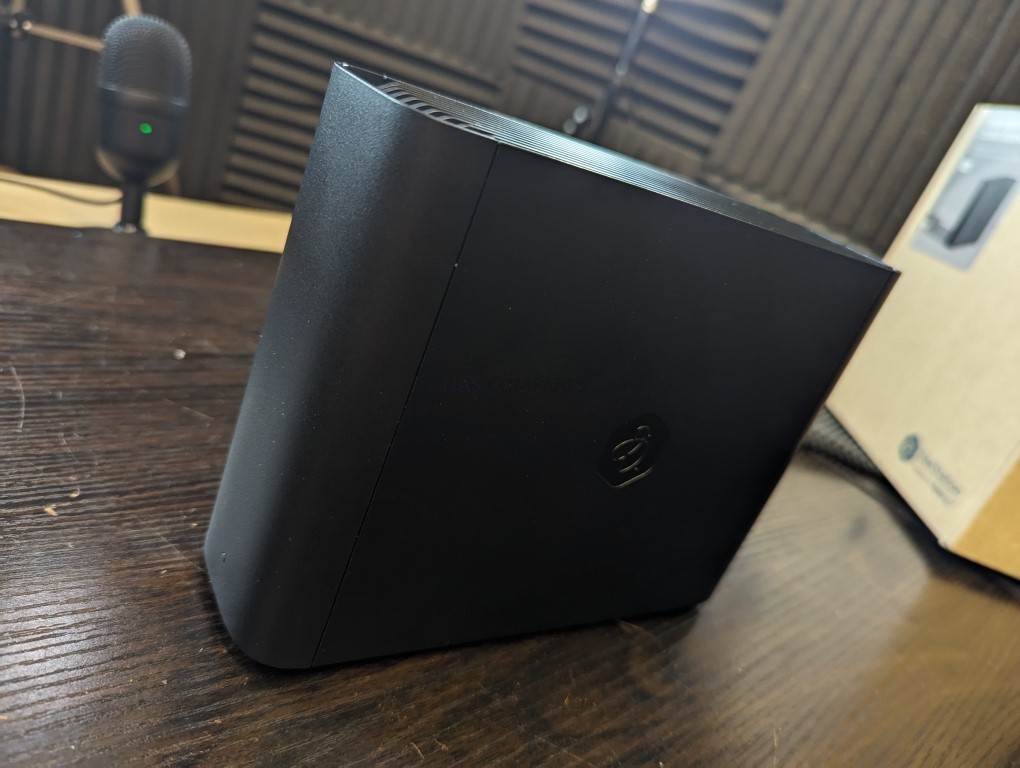
Synology is approaching a whole new kind of user with the release of the new BeeStation personal cloud simplified NAS system. For all of the years that we have discussed the Synology NAS platform, very few solutions from the brand have been this hassle-free and easy to use. A lot of this simplification by Synology in BeeStation, DSM, and the system’s approach to storage stems from the system being a far more closed platform than previous DiskStation and rackmount solutions that have come before it. Many more experienced storage veterans and IT specialists wonder about how the Synology BeeStation is put together, how its internal hardware and components differ from traditional DiskStation alternatives, and how exactly the system is managing that inclusive 4TB of storage. So in today’s video, I got my screwdriver out and decided to take apart and completely disassemble the Synology BeeStation 4TB model. If you are reading this article, that is likely because you are either a user on the fence who is considering buying this system and wants to know about how to take it apart in the event of maintenance, or you are a fellow reviewer or tech specialist who wants to use this guide as the means to understand how to take the BeeStation apart. Regardless of who you are, I hope you enjoy this guide and attribute and share it if you find it helpful. Before we delve further, we need to discuss a few disclaimers.
Synology Beestation Disasembly – IMPORTANT WARNING!
![]()
This is a really, really important point. Taking apart the Synology BeeStation runs a significant risk of not only damaging your data but also completely nullifying any hardware or software support that Synology will provide you. The BeeStation was designed to be a closed system and not targeted towards higher-end tech enthusiasts, and therefore does not allow the same easy dismantle procedure that you find in the DiskStation range. This Synology BeeStation was provided to me by Synology UK, and I am dismantling the system without their assurance or without their authorization to do so; the same needs to be applied to your own BeeStation system if you intend to follow the steps in this guide to tear down and dismantle it. This system was not designed to be taken apart, and taking it apart may result in the following:
- You might cause damage to the hard drive inside via static electricity, motion, or physical pressure.
- The BeeStation casing is an exceptionally tight-fitting enclosure, and dismantling it will almost certainly leave marks and clear indications that you have done so, which will invalidate any hardware support available to you as you have tampered with the system and performed actions that are not covered by the hardware warranty.
- You run the risk of scratching the internal motherboard, PCB, or delicate components during the dismantling of the BeeStation, which will result in complete system failure at worst and detrimental performance drops at best if this occurs.
Do not proceed with dismantling your Synology BeeStation unless you are happy to run the risk that it may be deemed inoperable or that your support by Synology may cease as a result.
Additionally, the Synology BeeStation includes numerous measures to back up the content of the system’s data and set up to the Synology C2 cloud, a connected USB drive, or at an object file/folder level to third-party cloud services. It is extremely recommended that you have an up-to-the-second backup in place before you attempt any of the steps in this guide. Any data loss resulting from following the steps in this guide is purely at your own discretion, and myself and NAS Compares cannot be held accountable. Bottom line, be aware that what you are doing right now is outside of what this system was supposed to do, and that you are doing so at your own risk. Understand? Good. Let’s get on with dismantling the BeeStation and tear down this cost-effective NAS.
Also, it is HIGHLY RECOMMENDED that you read through the steps completely first, before you begin dismantling your BeeStation NAS, as it’s decent bits more layered in the access compared with a normal Diskstation NAS system.
Dismantling the Synology BeeStation Persona Cloud – A Step By Step Guide
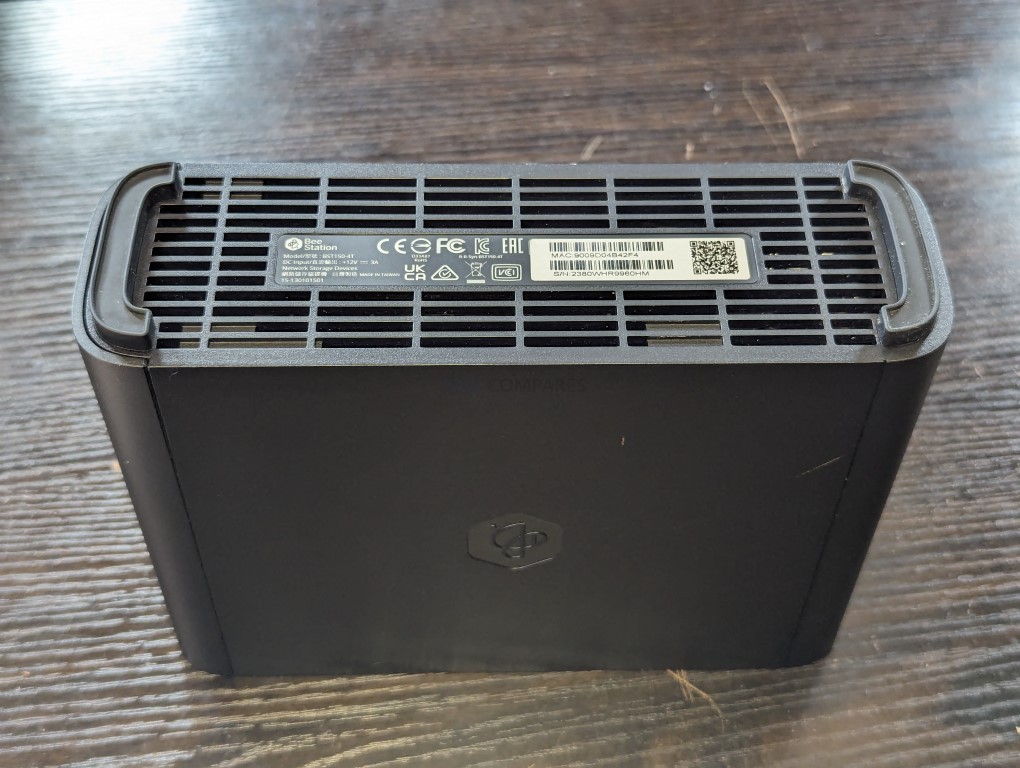
First thing you need to do is disconnect all ethernet (LAN), power cables and USB devices and give the system sufficient time to allow the HDD inside to spin down. Then carefully turn the device up and have the base vent panel face up. Again, be CAREFUL as this system features a mechanical HDD inside and that can be susceptible to shock/motion damage.
Next you need to slowly and carefully peel back the rubber foot panel located at the base, at the front of the Beestation (i.e the single LED light side). It is held in place with strong adhesive, but you can replace it back after opening the case up later, as the rubber foot sits in a grooved panel and the adhesive has plenty of reuse!
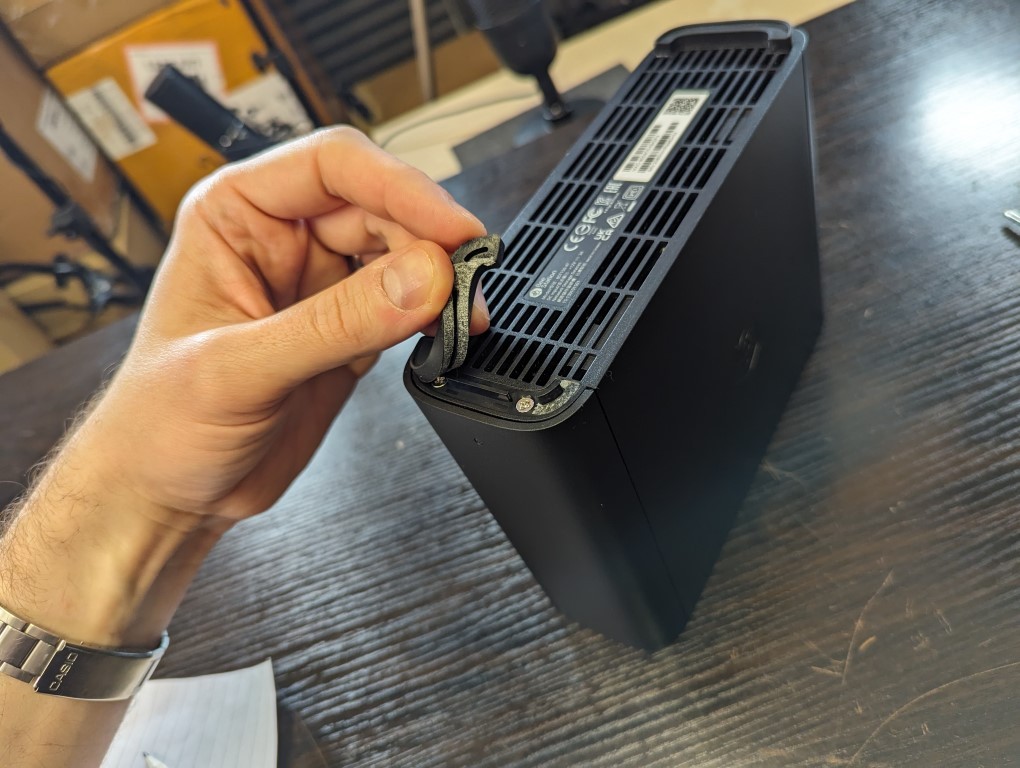
Under the rubber panel are two Phillips/cross-head screws. There are the ONLY external means to open up the enclosure/casing of the BeeStation.
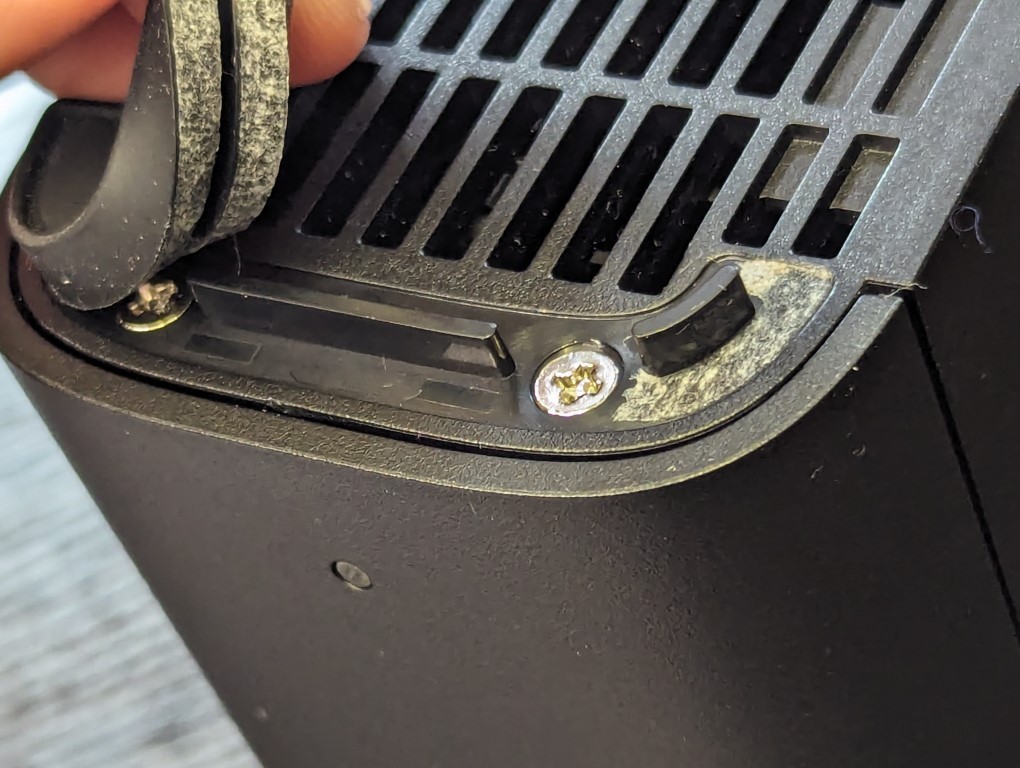
Remove each of these screws (keep them to one side and make sure to remember they are the base screws, as the system has 2 kinds of screws in it’s construction and mixing them up with rip the screw holes to pieces!
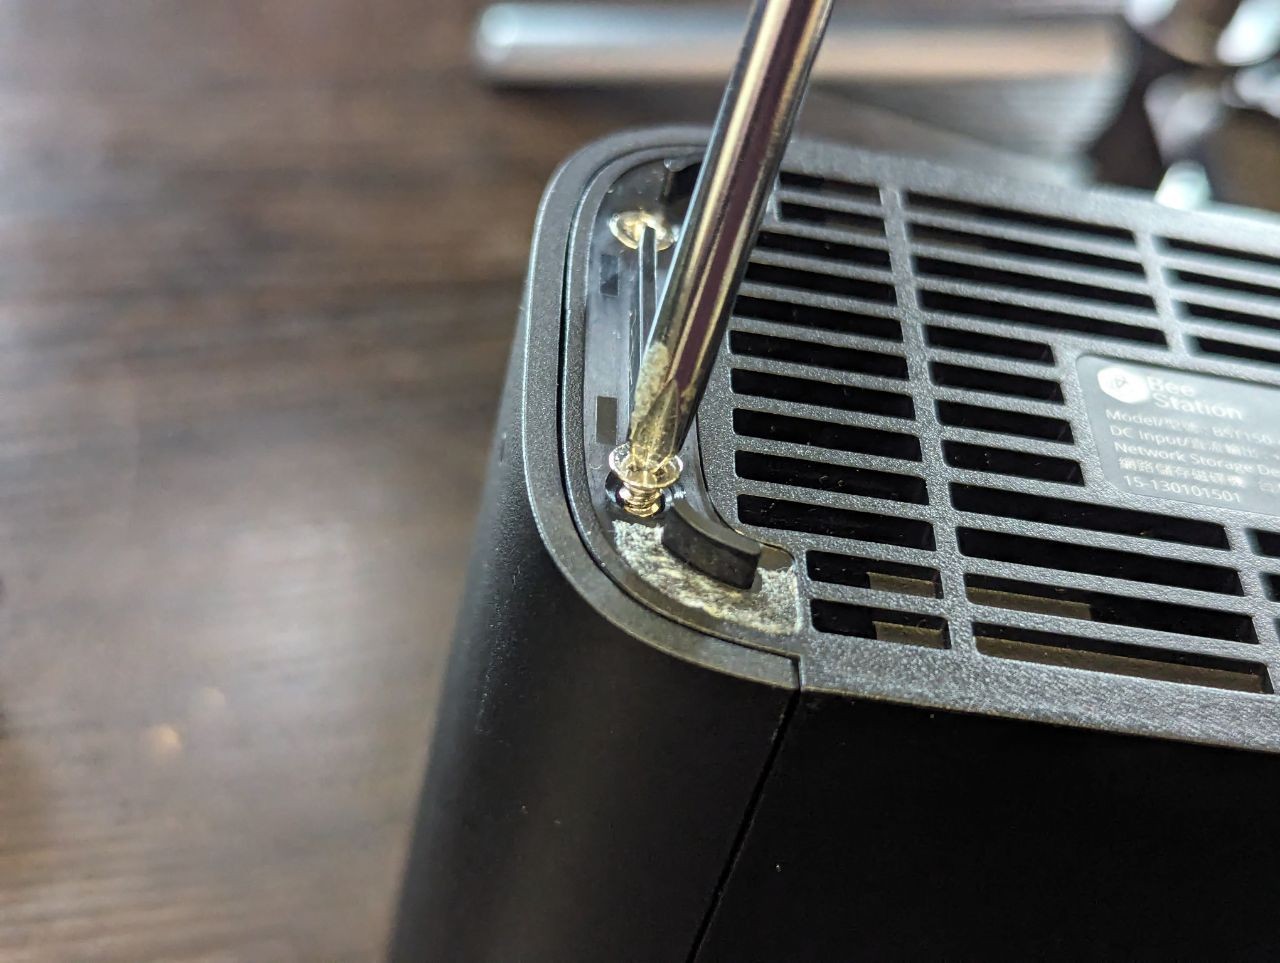
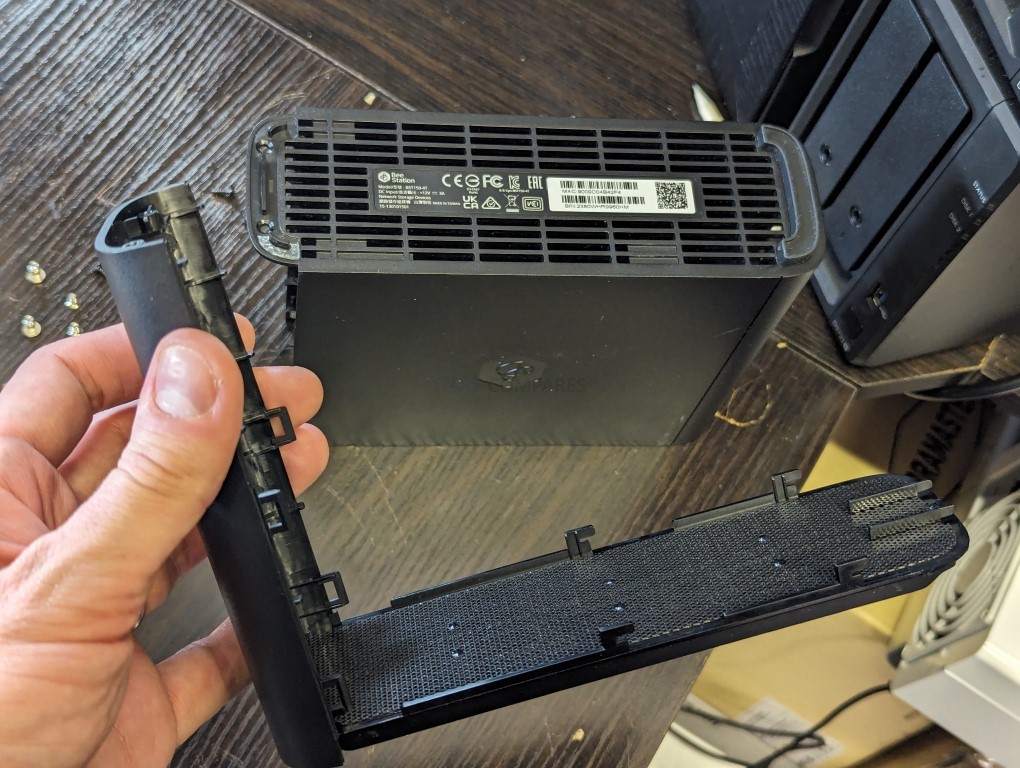
Removing these two scews will allow you to apply a small above of pressure to leverage the front panel of the BeeStation NAS to be removed. Important – do this carefully (that word again!) as the entire casing is made up of 2 pieces and its super easy to crack it in two!
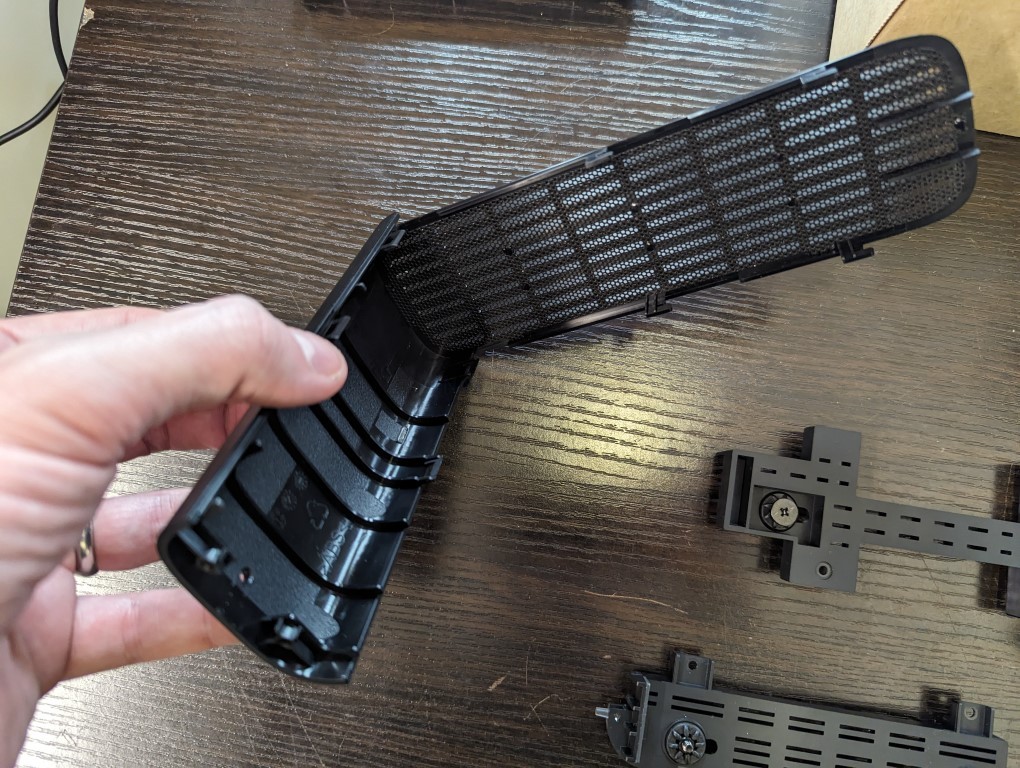
The top part of the front panel is actually an L-shaped panel that has the fully ventilated dust panel attached. Mkae sure that your ease the panel off carefully enough not to break those 4 hooks at the top, as these are what align the top panel with the rest of the casing.
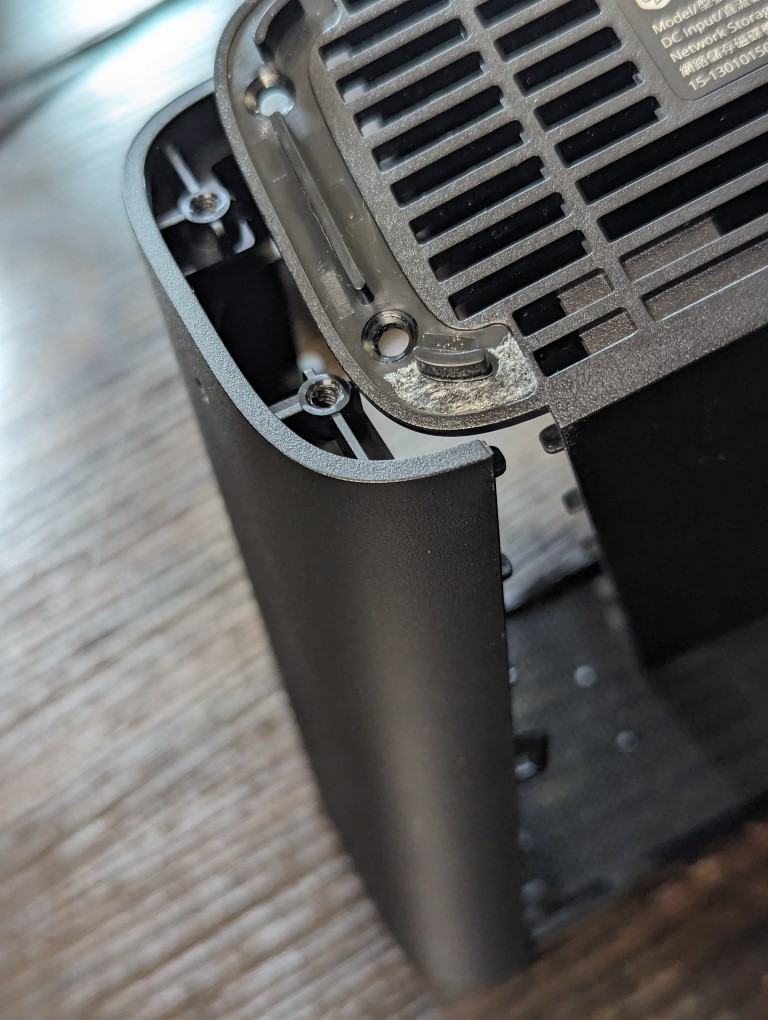
Slight side note, but for those that care about dust build up on 24×7 systems like the BeeStation, this can be quite useful to perform cleaning. Anyway, carrying on!
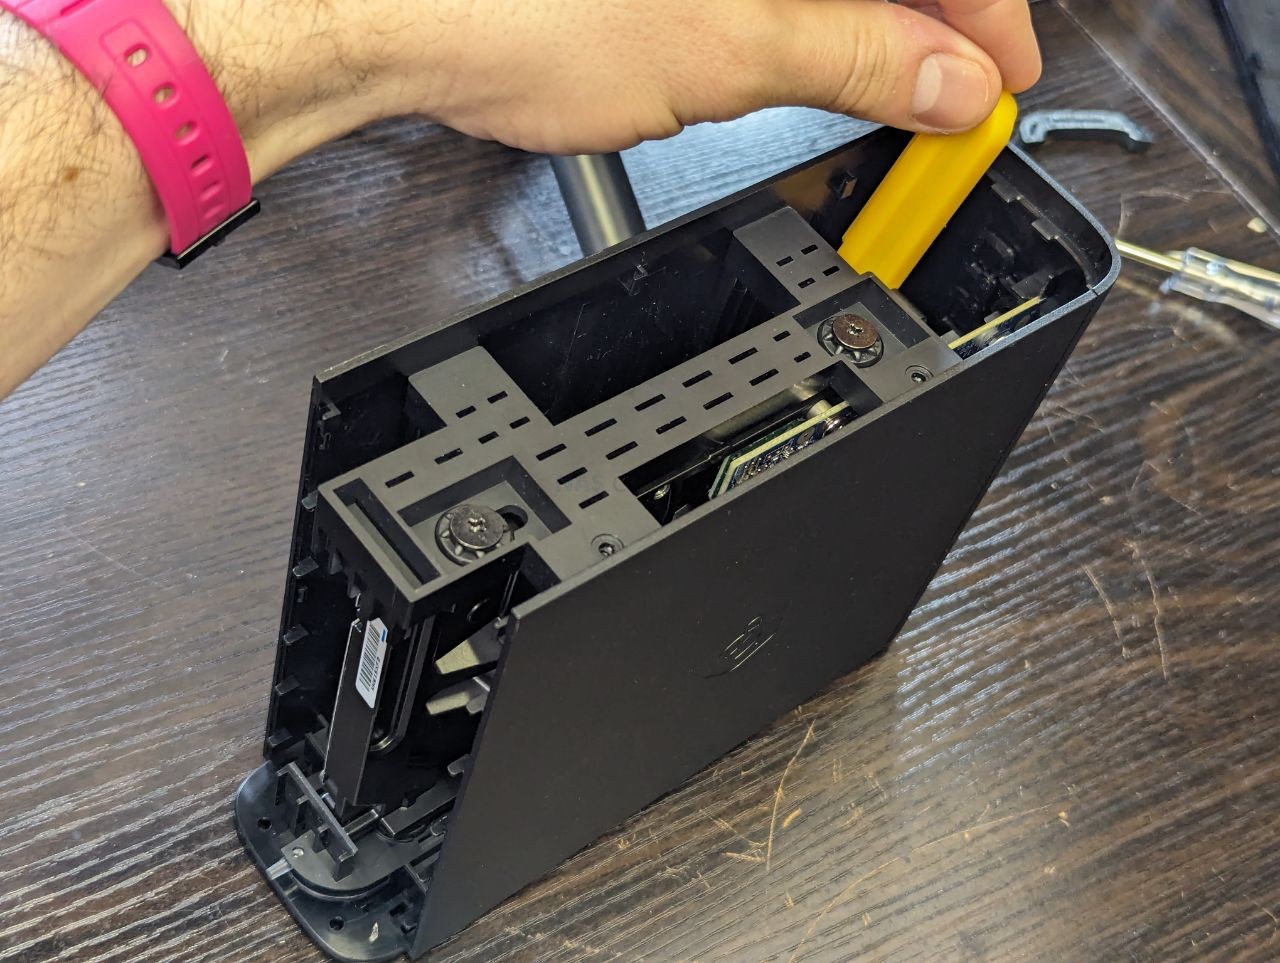
Next up os removing the Hard Drive that the Beestation Personal Cloud arrives with. The first thing you need to remove is the 2 smaller screws located around the edge of the casing. DO NOT REMOVE THE 2 LARGER SCREWS IN THE MIDDLE!!! These larger screws hold the HDD in place and you need to do this much later, or else risk the drive moving around during the dismantling.
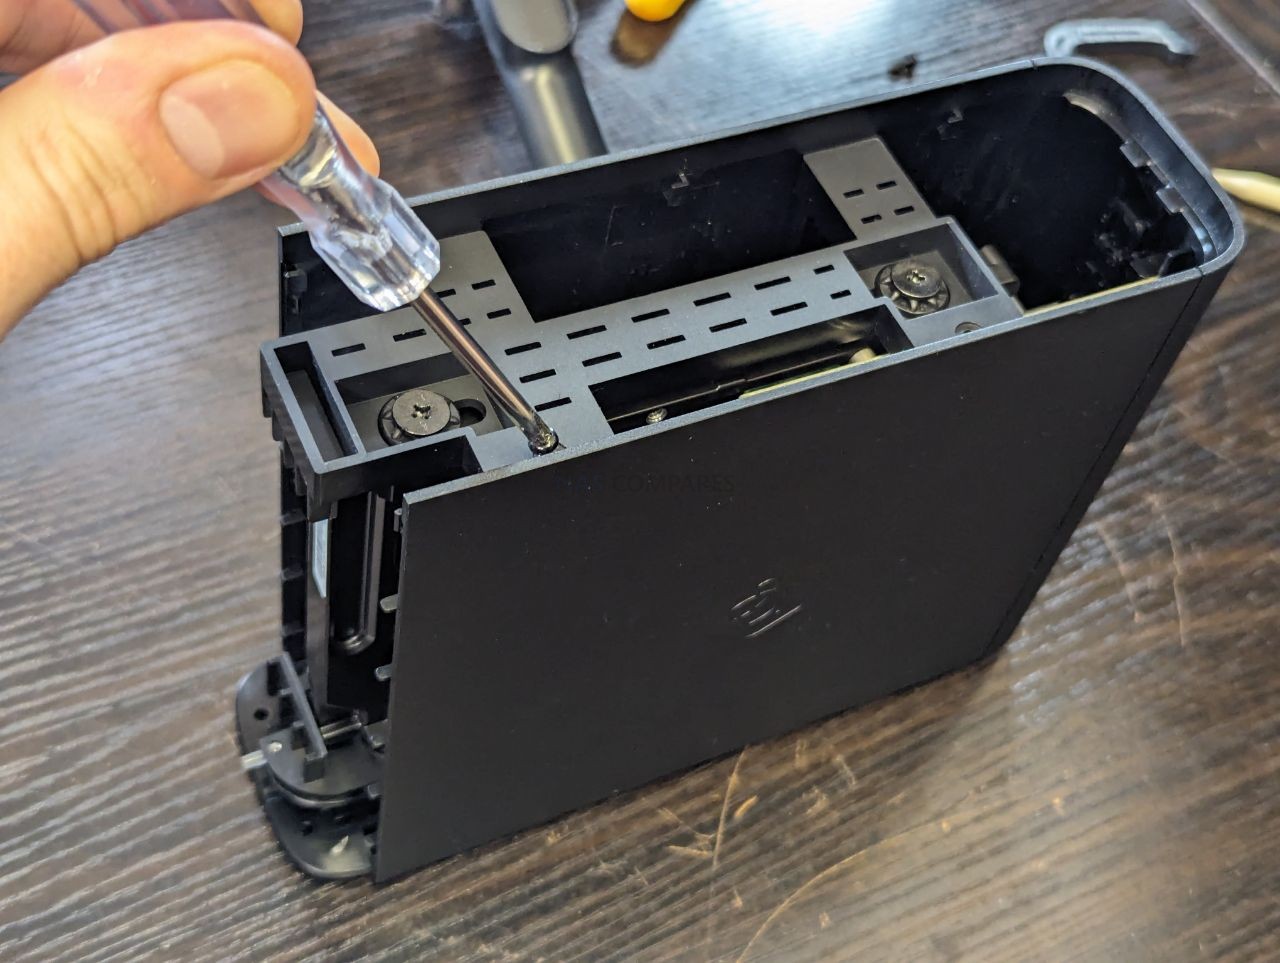
Each screw will be easy to remove, however there are actually 3 more screw located around the base of the framework. They are tricky to reach, and a longer screwdriver would be recommended, but it can be done with an ordinary 15cm + screwdriver will get the job done.
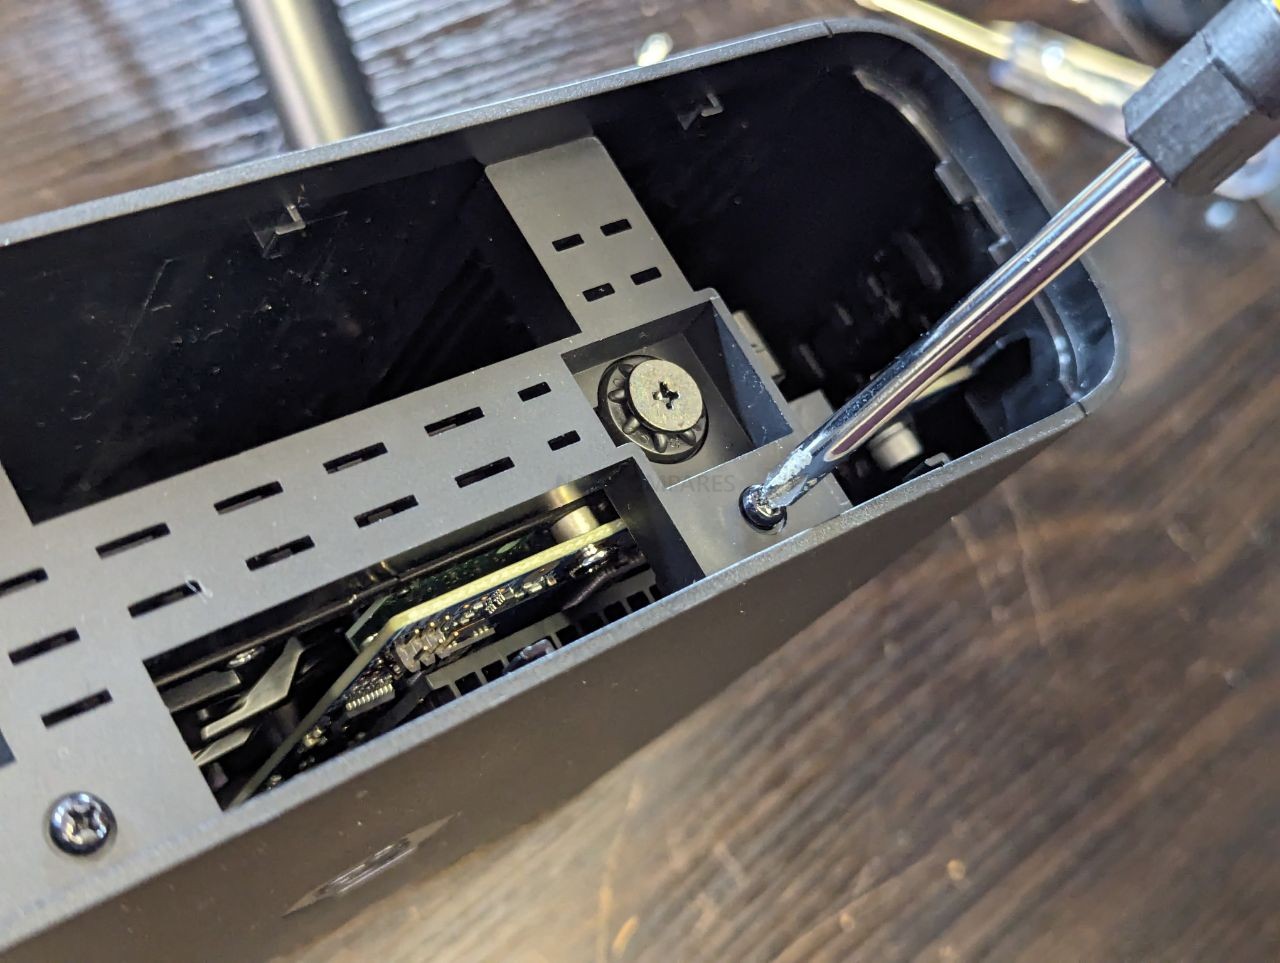
At the front base area, you can find two black Phillips/cross-head screws that you need to remove. You will need to come at there from a slight angle if you only have a short screwdriver. Important – DO NOT USE AN ELECTRIC/AUTOMATIC SCREWDRIVER!!! Notwithstanding that you will tear the soft screw to pieces, you might cause vibration that will be damaging to the HDD next to the screw! Do it the OLD SKOOL way!
The last screw is much harder to spot and reach, it is located at the bottom-back of the enclosure, on the NON-Motherboard side. You will need to come at it from a slight angle, even with a longer screwdriver. Note, you COULD have removed the top panel attached to the HDD in order to get to the screw a little easier, but I personally would rather the HDD remains in an immobile cage throughout this part of the Beestaion teardown. It’s your call!
That is the last screw that you need to remove and , once it is done, you can begin the removal of the HDD clip/cage.
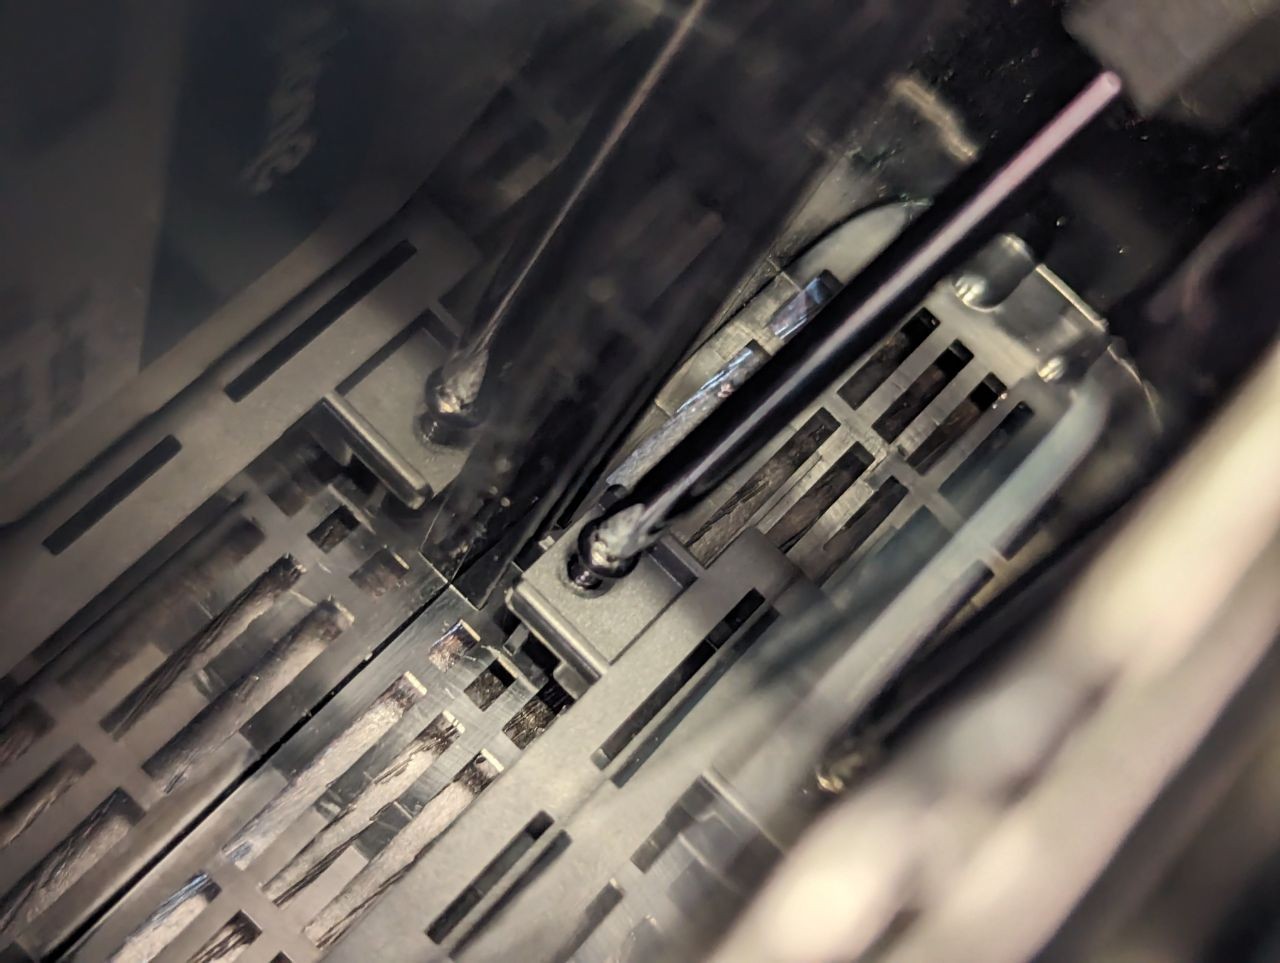
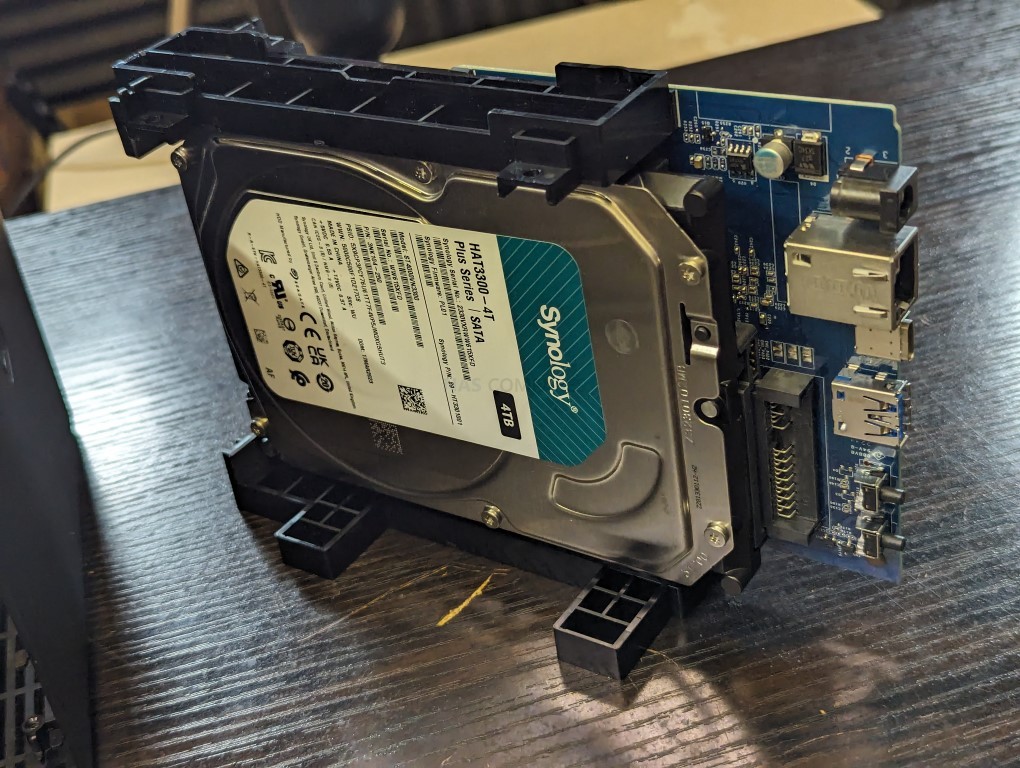
The HDD Clip/cage will slide out sideways (with a little resistance). BE CAREFUL with the removal of the HDD cage/clips, as the right-hand side will have the controller board (which has the heatsink on top of the CPU, and a bare PCB – which can be super susceptible to static and moisture!
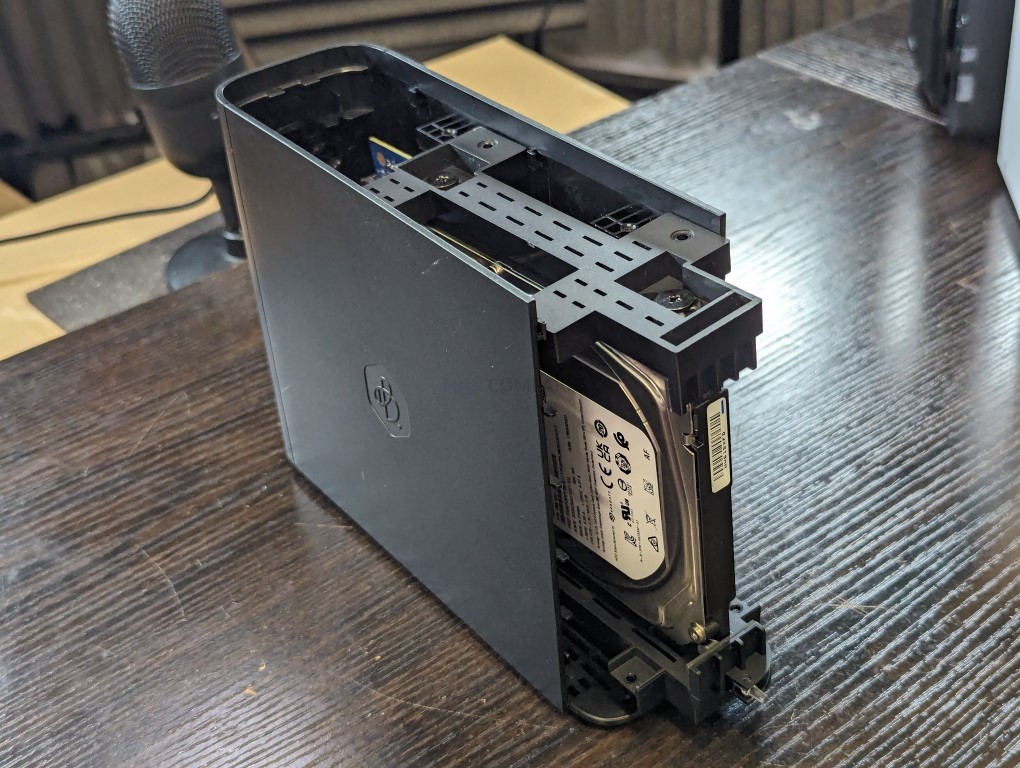
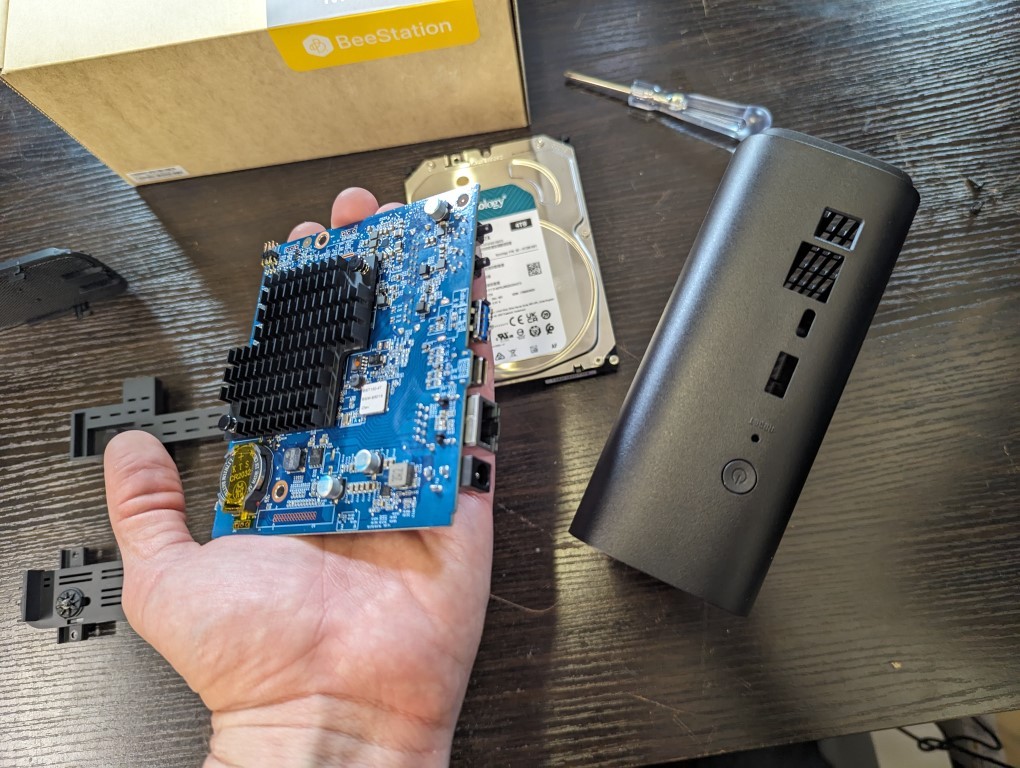
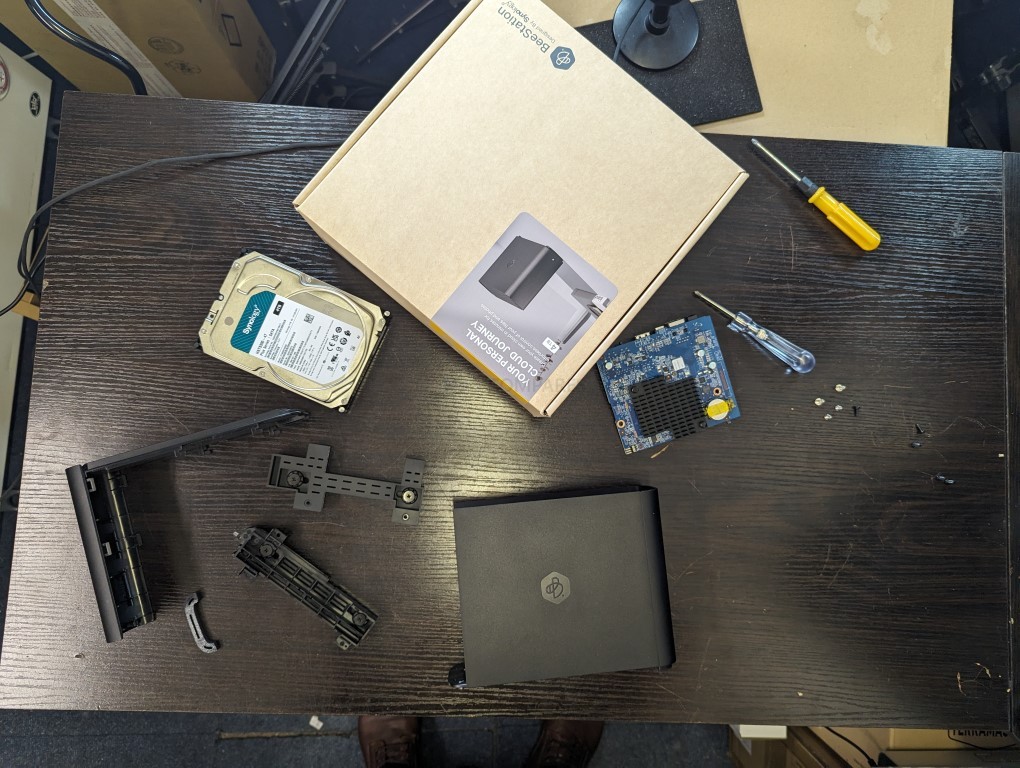
One you have removed the HDD Cage tray, you will now have three components on the table:
The one we want to focus on is the HDD tray/cage. Carefully turn it around and lay the drive facedown on the table.
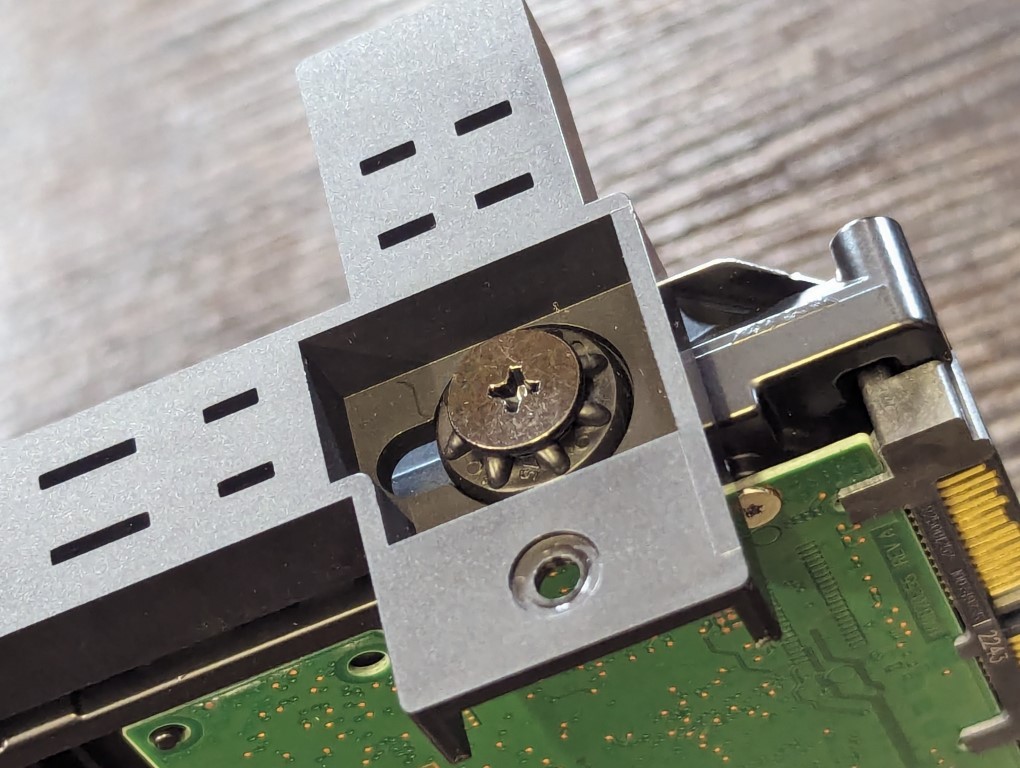
Once the drive is ‘face down’, you need to carefully (yes, THAT word again! Take a drink) remove the two silver screws, Try to touch the blue PCB controller board as little as possible.
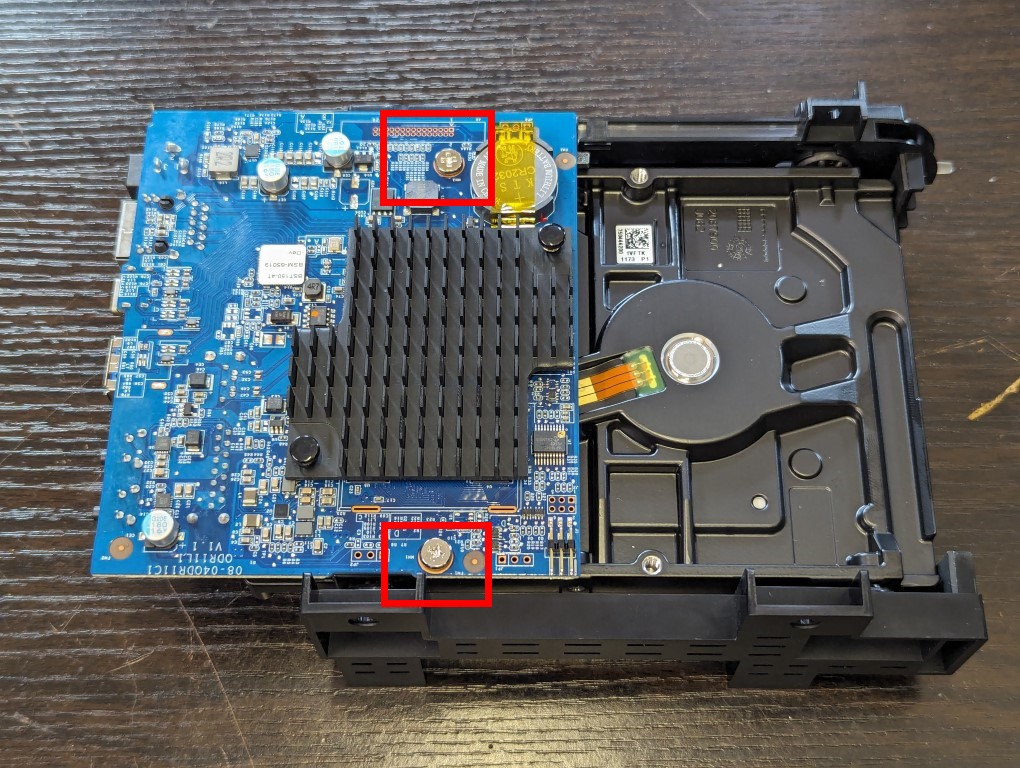
Once you have removed those two screws, you need to either slide the controller board away from the Hard drive, or slide the hard drive away. You are doing this to disconnect the SATA connector that is soldered to the controller board. Do NOT leverage the hard drive upwards/downwards, as you run the risk of breaking the connector.
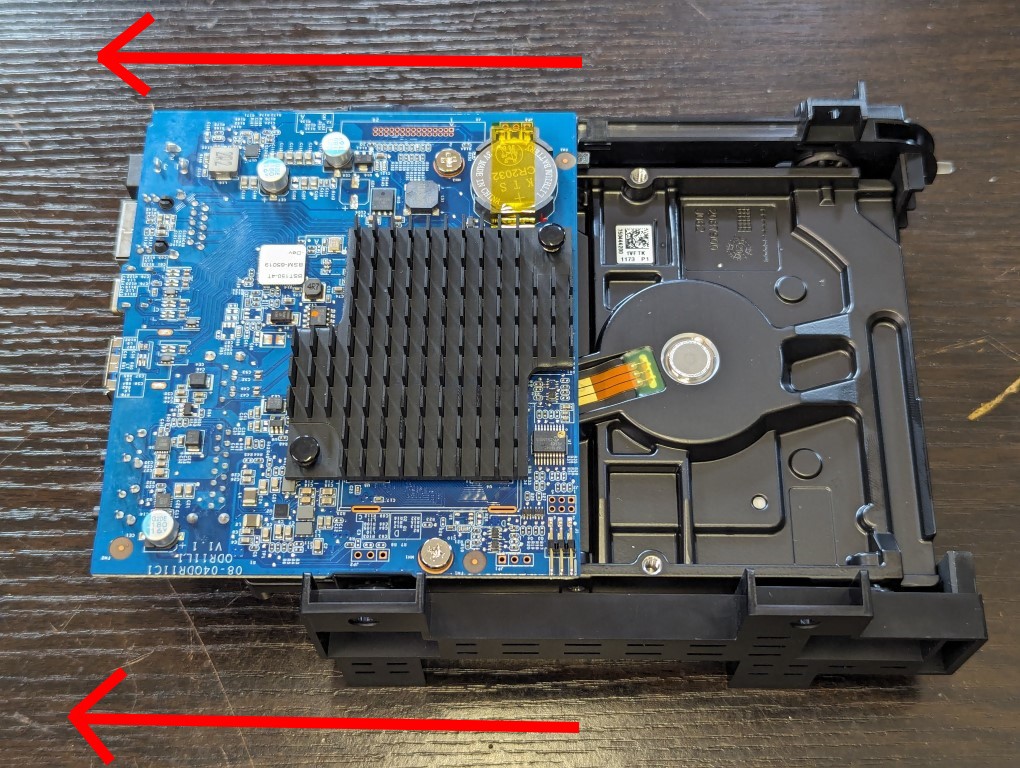
The controller PCB should come away very easily and with little resistance. But before we move forward, it’s worth checking the SATA connector is unharmed.
Take a closer look at the SATA connector. It should look like this:
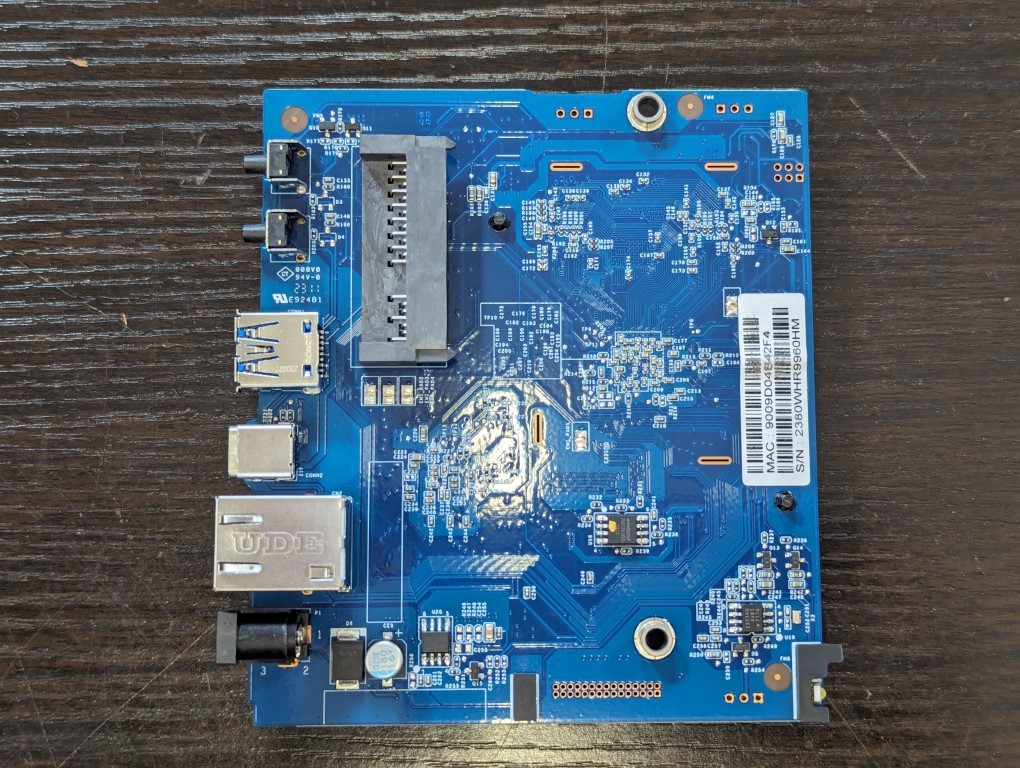
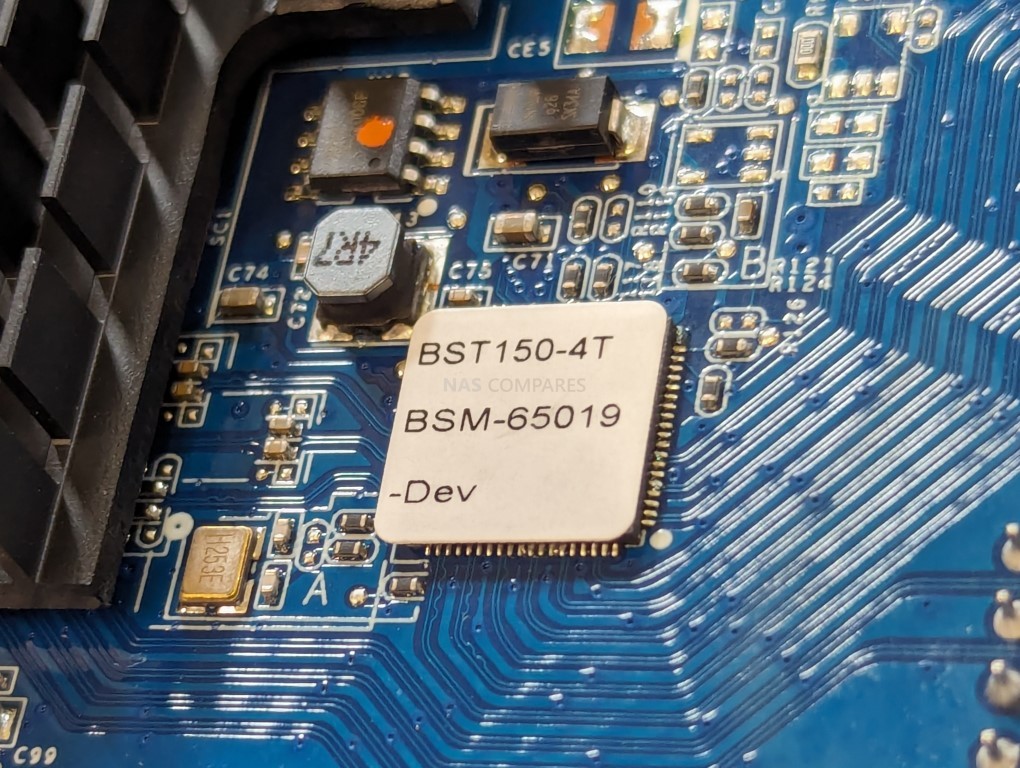
This is what the storage side of the Synology Beestation BST150 looks like:
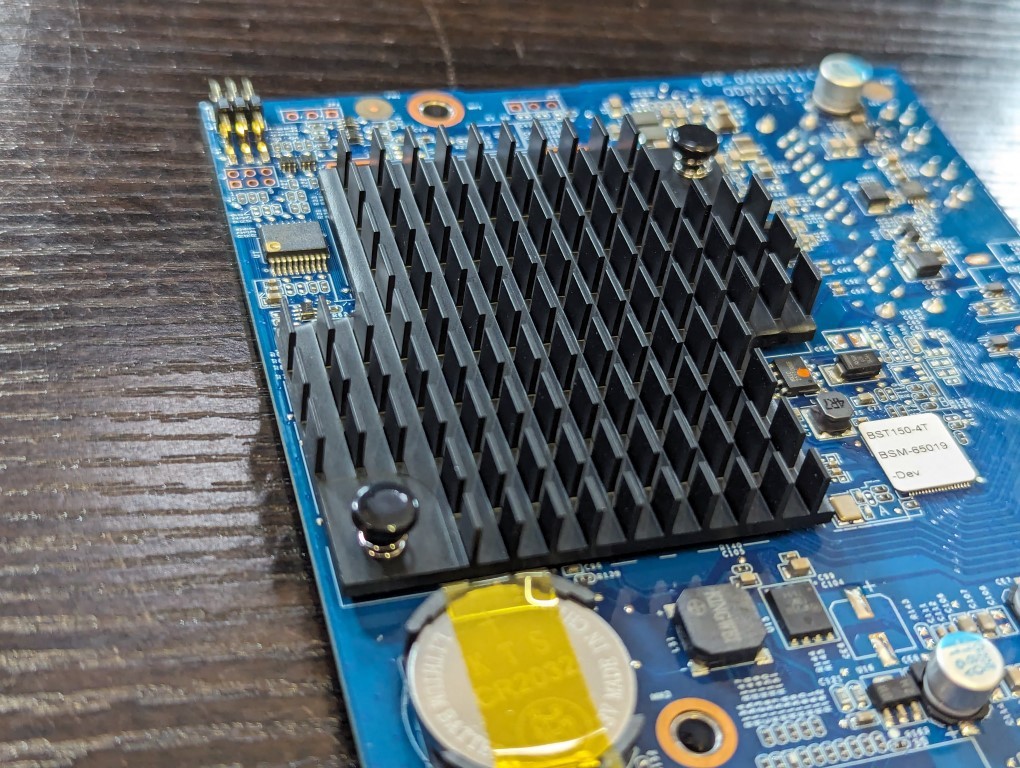
The underside of the controller board is where we find a large black heatsink panel that covers the HDD and 1GB DDR4 memory. IMPORTANT – I still have numerous tests to perform on this device for the review, comparison videos and guides for this device. Therefore I am not going to remove this heatsink, as it might result in detrimental performance that will undermine future content.
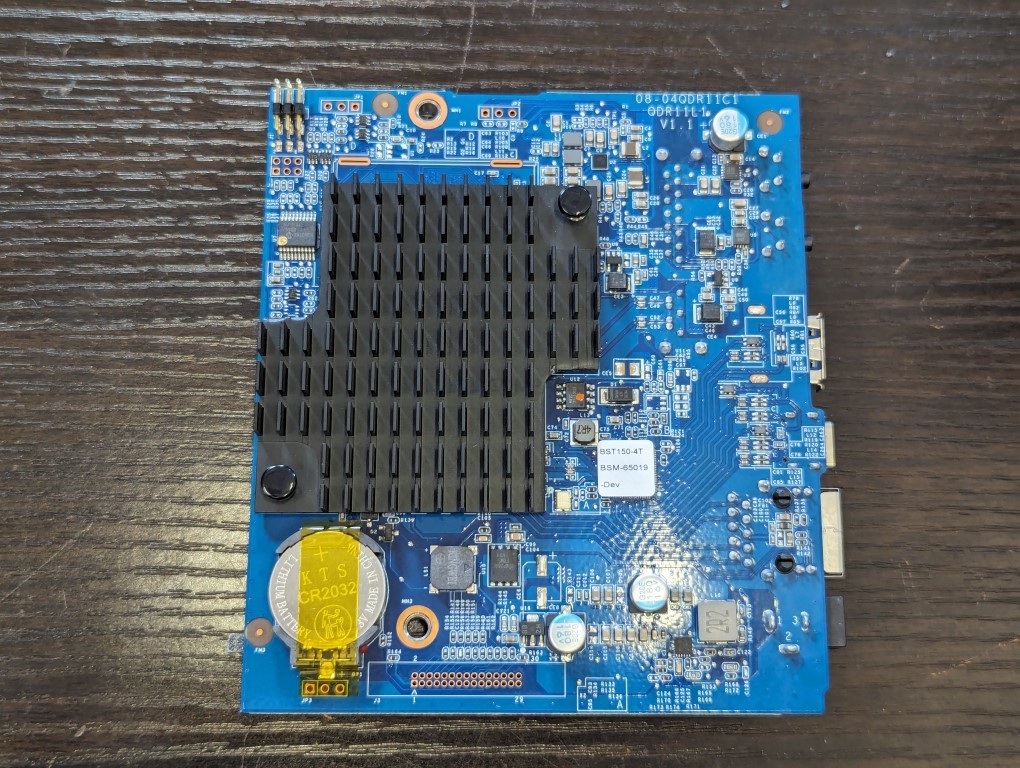
However, for those that want to know, underneath this heating panel is the Realtek RTD1619b quad core 64bit ARM processor that runs the Synology Beetstation and BSM services, as well as 1GB of DDR4 memory that arrives in presoldered modules on the main PCB. Ther is NOT an kind of SODIMM slot and, given the price and CPU choice in terms of efficiency, this is not a huge surprise.Therefore, memory upgrades on the Synology BeeStation are not possible.
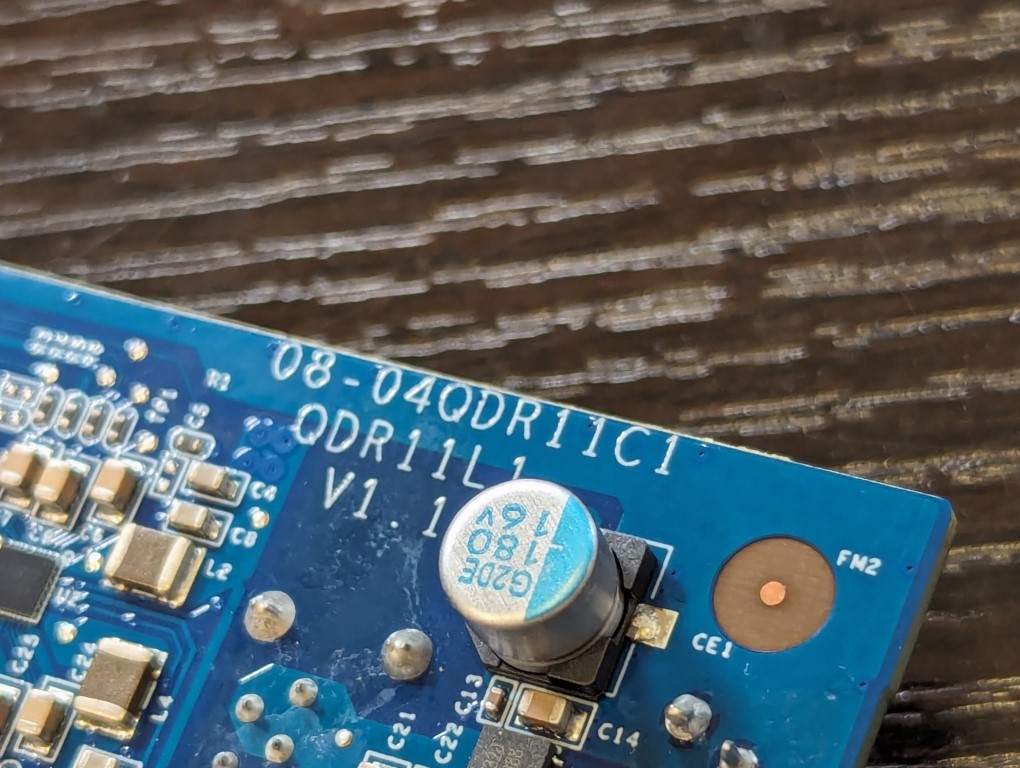
The system software package is delivered via a smaller component that arrives pre-labeled at the factory with the software revision that the BeeStation arrives with. It is worth noting that, as time rolls on, Synology are going to be rolling out numerous firmware updates and (as is the case with the Synology Diskstation/DSM systems) it will update the installer and bootloader package on this chip no doubt.
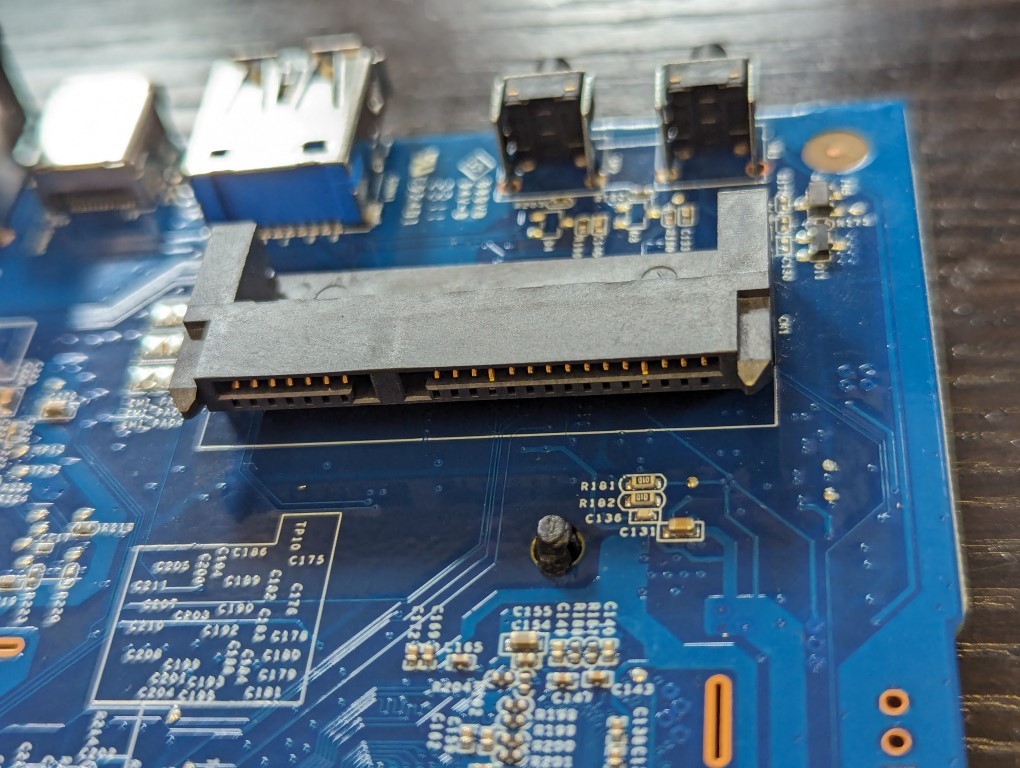
Each of the physical connections (1GbE RJ45, Power delivery, USB Type A+C and physical buttons) are soldered to the PCB and are not provided on any kid of sister board.
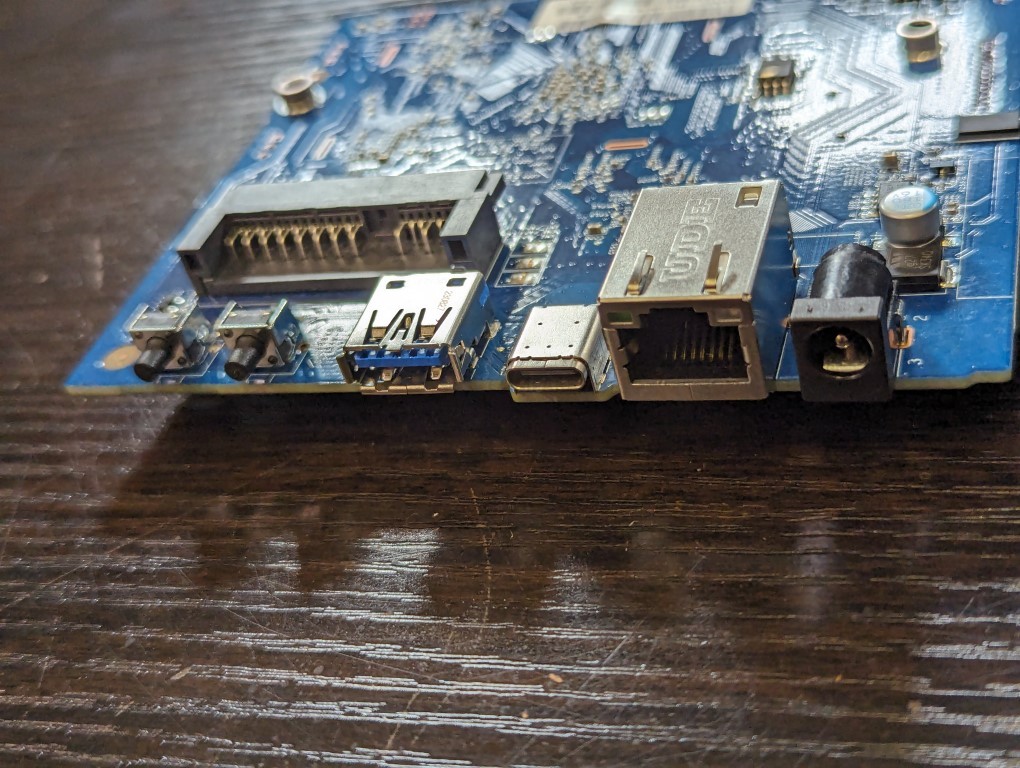
Interesting, Synology have not just cloned and reused the DS124 hardware configuration here (though there are certainly areas of cross over) and instead have designed a whole new PCB layout and scale. The board (model ID and serial identification below) need to factor in the absence of any active cooling system (i.e a fan) on the Beestation, that was present on Diskstation systems like the DS124 and DS223j that arrive with a similar hardware configuration. Equally, this system changes one of the USB ports to Type C and has a very different back port arrangement to spread out.
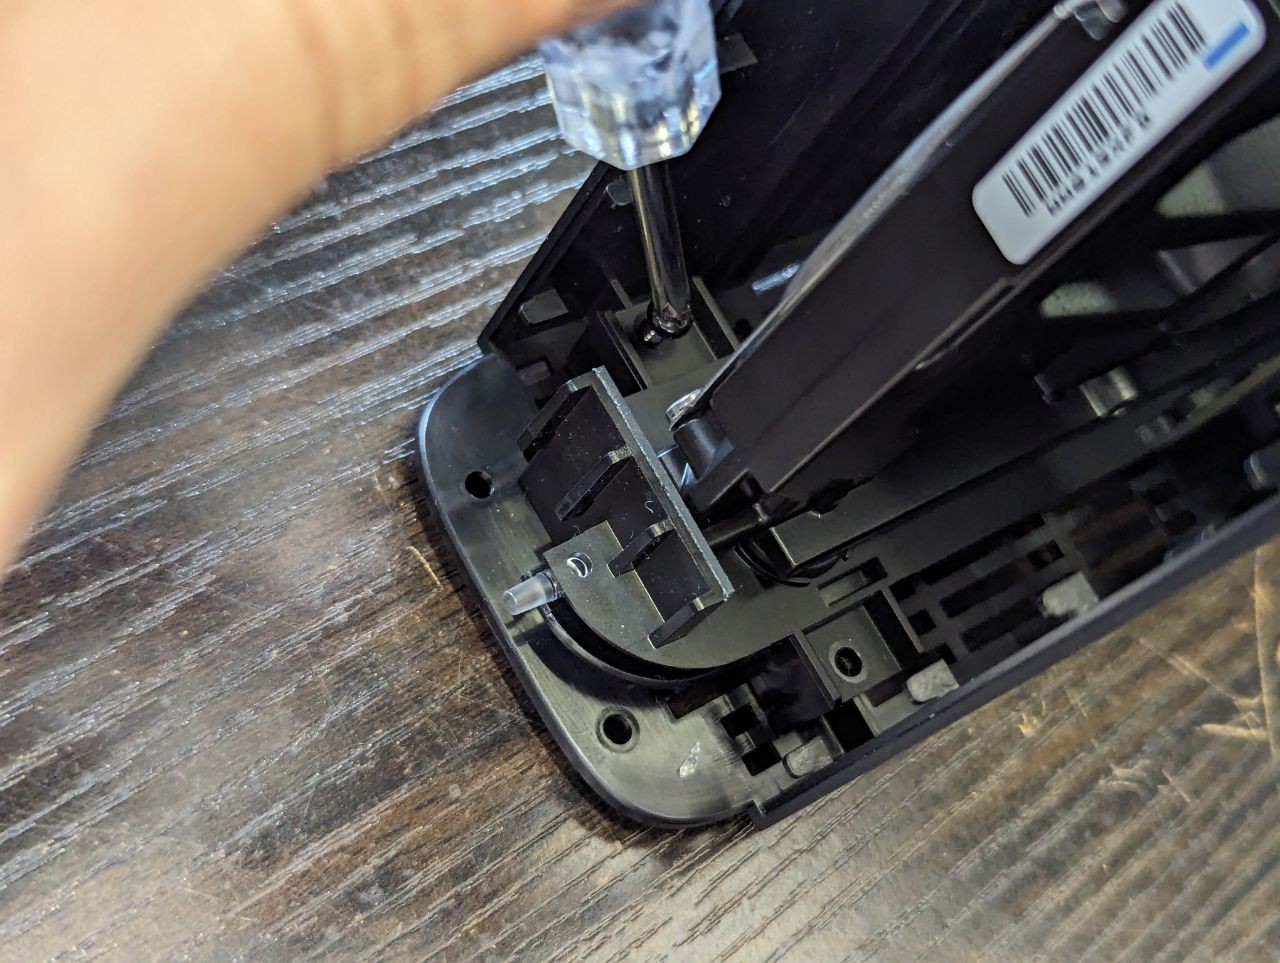
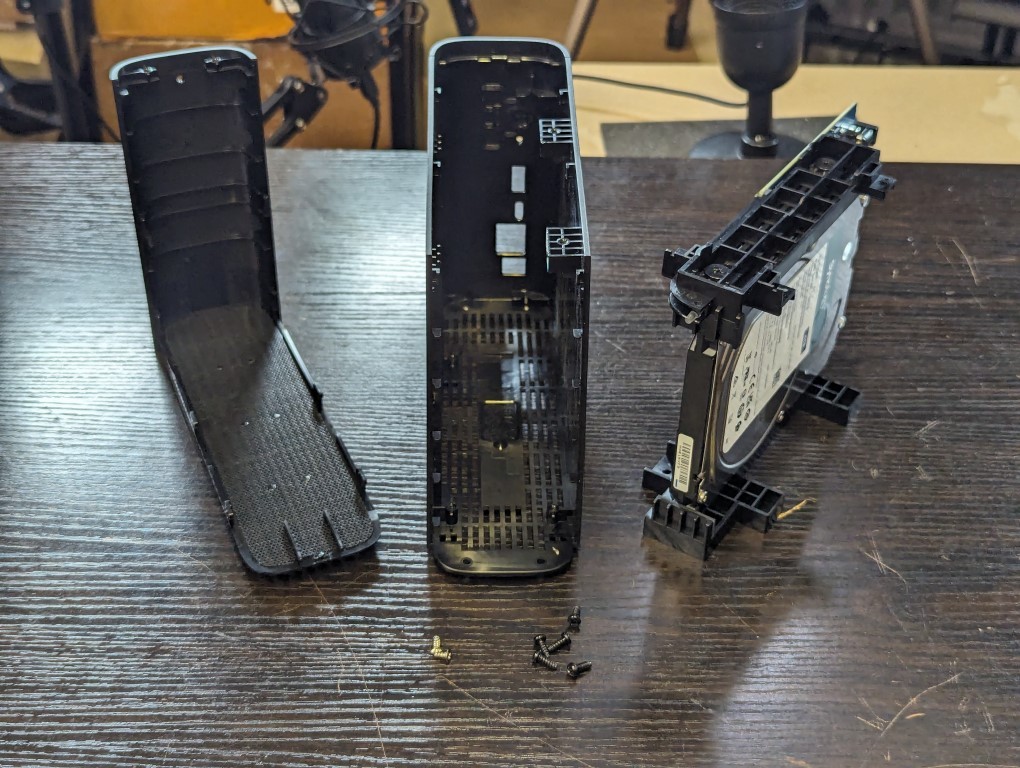
Next, removing the Hard Drive from itsplastic handles. The HDD is held in place by 4 screws that go directly into the same four screw holes that are usually used by HDD bays on Diskstastion NAS that utilize trays. Ther are four screw in each corner. Important note for later – Make a note of the clips and direction that are on either side of the HDD – whether you want to reassemble this Beestation to the factory build OR you are considering exploring larger HDDs, getting these clips the wrong way around or in the wrong direction will, at best, mean it won’t for back together and you need to redo them, or at WORST, you end up damaging the controller board and casing as you attempt to re-insert the drive.
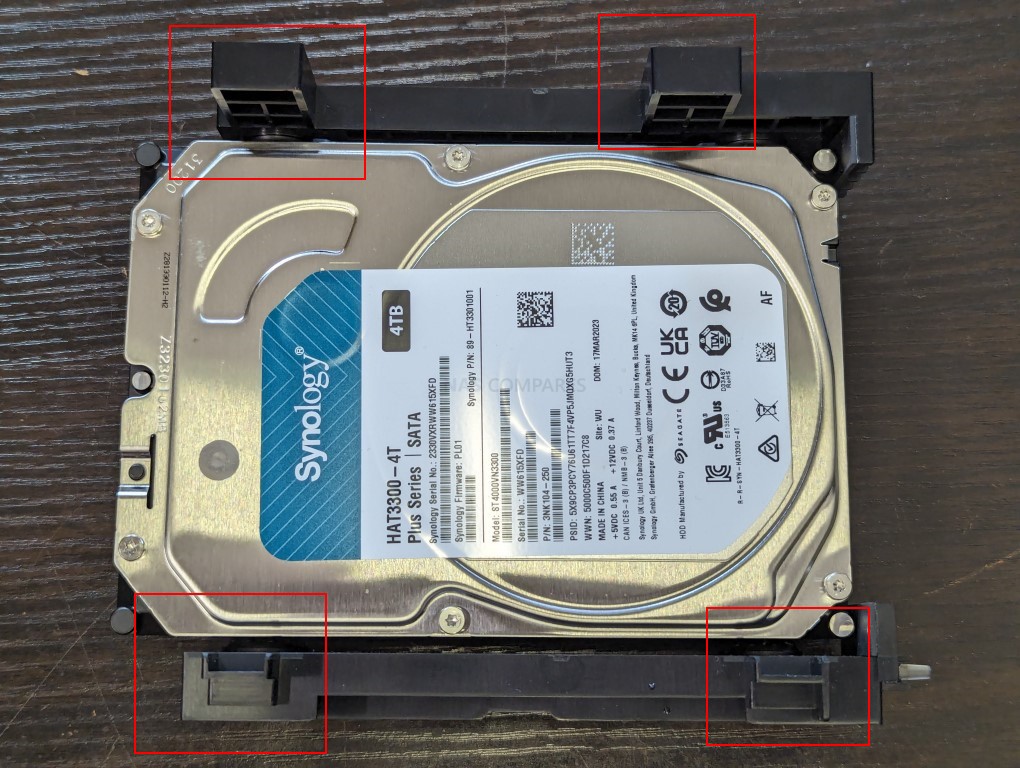
Each screw uses a counter-sunk system and also arrives with a rubber washer between the screw head and the plastic. This means that you do not need to fully remove the screw, as there is a small % of space left. Regardless, just remove the four screws and each of the side panels should come off very easily.
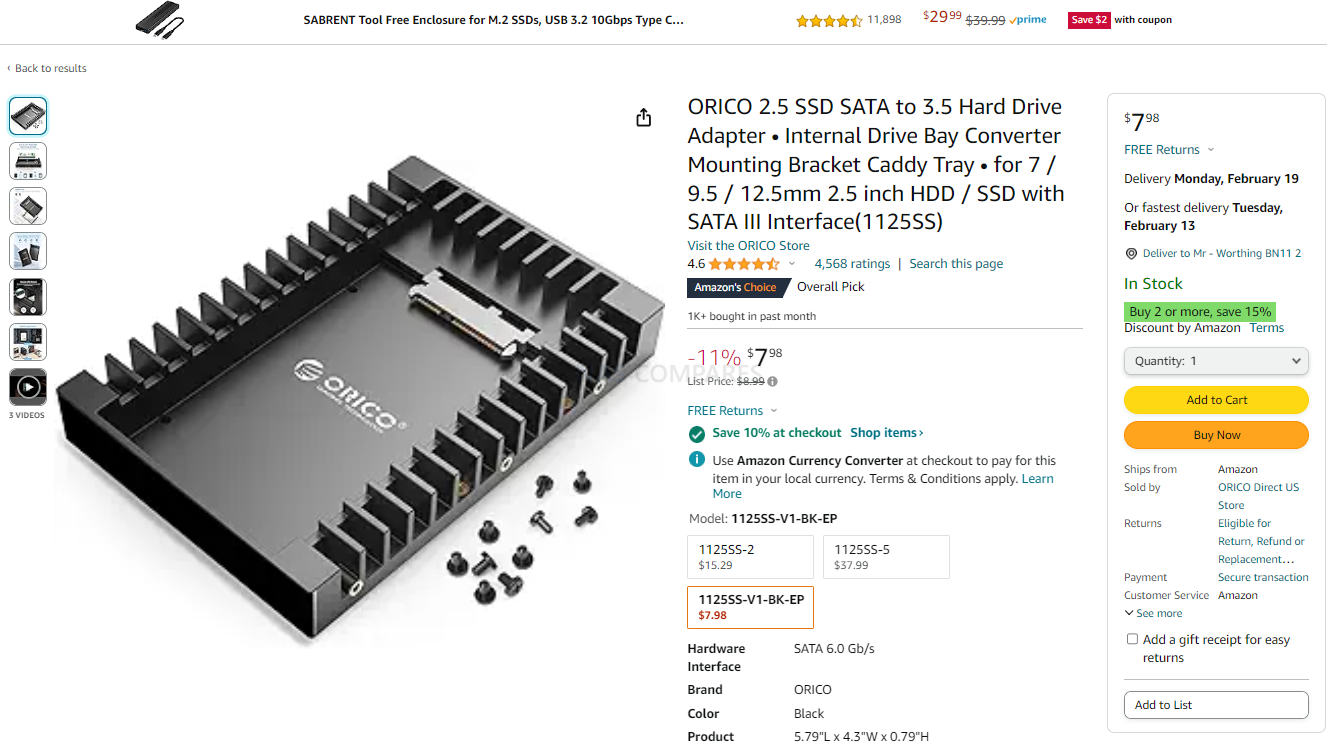
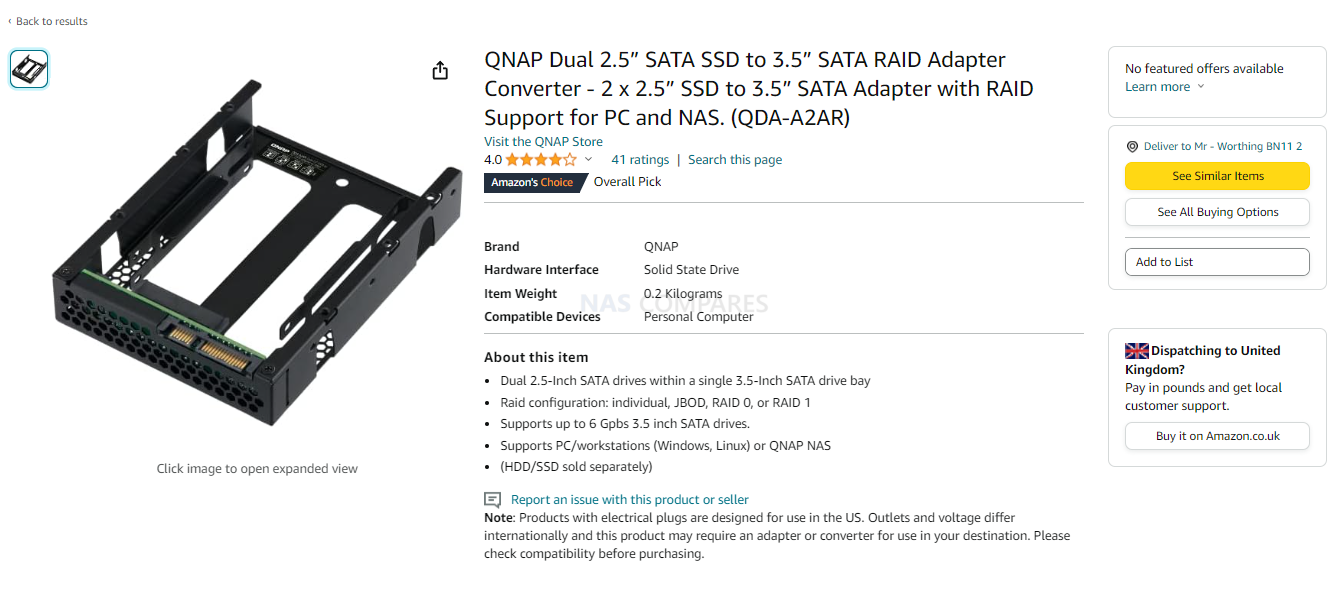
Once again, make sure you keep track of which panel goes with each side of the HDD – As this will be a right pain during reassembly. An important area of note here is that IF you are considering adding larger/alternative drives to the Beestation and you have your heart set on an SSD, you are going to need a 2.5″ to 3.5″ HDD adapter, as the screw holes that the tray clips AND the PCB Backboard are not available on a 2.5″ SSD. This does also open the door to the potential for a Dual 2.5″ SATA SSD to 3.5″ SATA Adapter case, which would provide the performance benefits of 2x SATA SSD in a RAID 0, or the redundancy benefits of 2x SATA SSDs in a RAID 1, if the case supports internal RAID 0/1). Here are two options:
| 2.5″ to 3.5″ SATA Adapter ($7.99+)
Find on Amazon HERE |
2x SATA 2.5″ SATA to 1x 3.5″ SATA Adapter RAID Caddy (19.99+)
Find on Amazon HERE |
However, there is considerably more to adding a new hard drive to the BeeStation than just the physical injection!
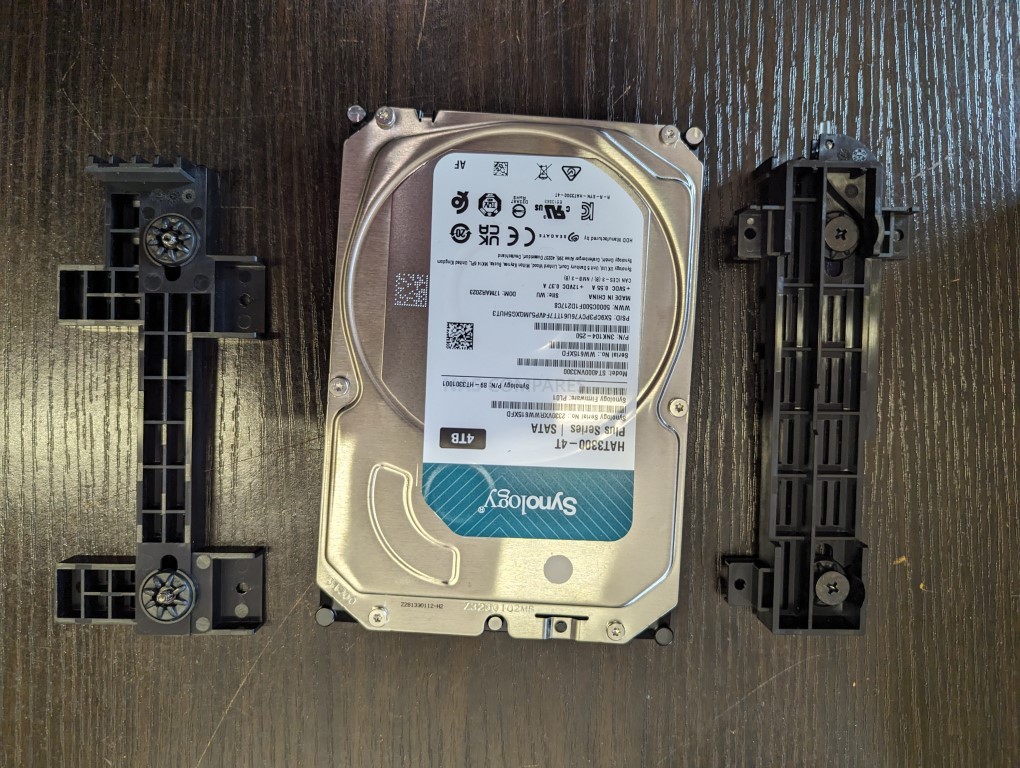
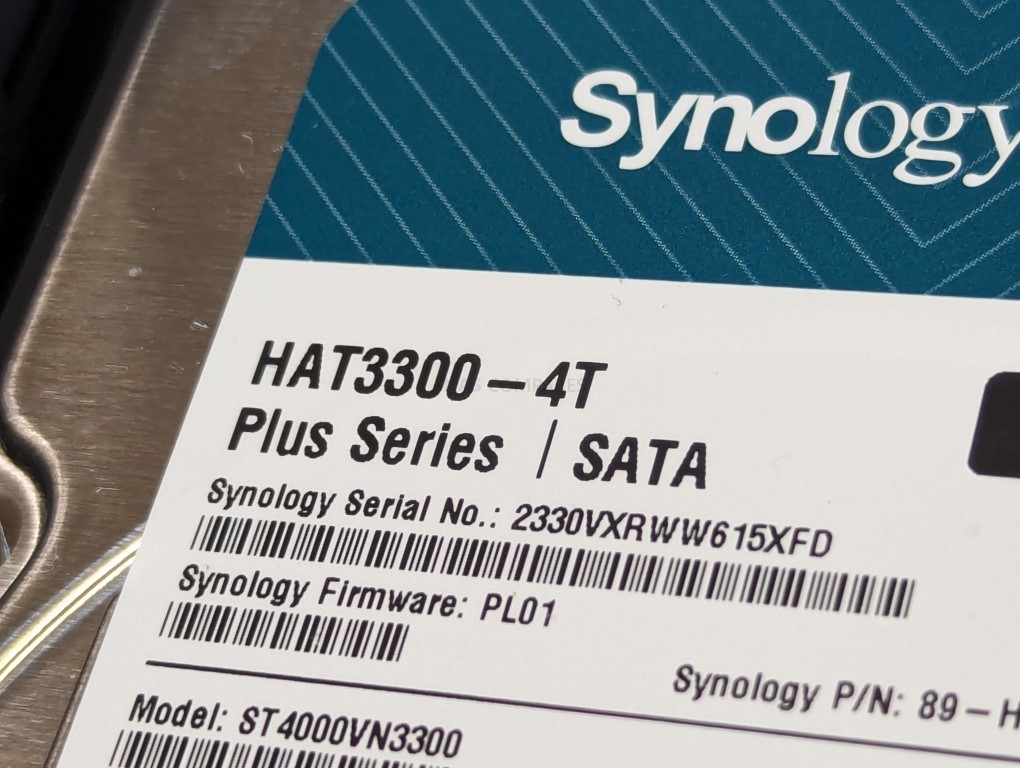
This reveals the drive in all it’s glory (in this case, a Synology HAT3300 which is a Seagate Ironwolf NAS HDD with Synology Firmware, but yours might well be the HAT3310, which is a Toshiba N300 drive with Synology FW). At launch, the Synology BeeStation arrived with just a single 4TB option, but no doubt in the further (perhaps when you are reading this) Synology have rolled out bigger HDD options or RAID equipped multi-bay versions.
But, there you go! That is the disassembly of the Synology BeeStation. I hope you enjoyed this guide and found in useful/informative! REMEMBER, I did this to show you what the inside of your BeeStation Personal Cloud looks like, so YOU DON’T HAVE TO! If you have any further questions, you can reach out to me on robbie ( at ) nascompares.com, or use our free advice section located on the right hand side of the page. Alternatively, you can reach us on our Discord HERE, our community forum HERE, or for faster and more personal support over on KoFi Commissions HERE. If you use and/or share the content of this guide online, please help us spread awareness of our platform and the work we do by backlinking us appropriately! Thanks for reading!
Synology BeeStation Personal Cloud Review – Quick Conclusion
READ THE FULL BeeStation Review HERE
Synology has clearly done their homework on the development and presentation of the BeeStation private cloud. They are targeting a whole new audience with this system, and therefore, criticisms based on experiences with their other hardware are likely to fall on deaf ears. The BeeStation is probably one of the best middle grounds I have ever seen between an easy-to-use and exceptionally easy-to-set-up private cloud system, while still managing to provide smooth and seamless features for accessing and sharing your private cloud’s storage securely. Looking at this system with a more network-savvy microscope kind of defeats the point, and I’ve tried to be fair in my assessment. The lack of LAN access by default seems a little odd, and launching the BeeStation series in this single-bay, 4TB-only fashion may be a bit of a marketing misstep, but overall, what you’re seeing here is an effectively priced and scaled private cloud system. It’s a fantastic alternative to third-party clouds and existing simplified NAS systems. With many users keeping an eye on their budgets and tightening costs, Synology, known for its premium position in the market, had a challenge scaling down to this kind of user. However, I have to applaud Synology’s R&D for creating a simple and easy-to-use personal cloud solution that still carries a lot of their charm and great software reputation. It may not be as feature-rich as DSM, but BSM does exactly what it says it will do, and I think the target audience it’s designed for will enjoy the BeeStation a great deal!
| Where to Buy a Product | |||
 |
    
|

|
VISIT RETAILER ➤ |
 |
|
|
VISIT RETAILER ➤ |
 |
|
|
VISIT RETAILER ➤ |
|
|
|
|
VISIT RETAILER ➤ |
 DEAL WATCH – Is It On Offer Right Now? DEAL WATCH – Is It On Offer Right Now?These Offers are Checked Daily
|
📧 SUBSCRIBE TO OUR NEWSLETTER 🔔
🔒 Join Inner Circle
Get an alert every time something gets added to this specific article!
This description contains links to Amazon. These links will take you to some of the products mentioned in today's content. As an Amazon Associate, I earn from qualifying purchases. Visit the NASCompares Deal Finder to find the best place to buy this device in your region, based on Service, Support and Reputation - Just Search for your NAS Drive in the Box Below
Need Advice on Data Storage from an Expert?
Finally, for free advice about your setup, just leave a message in the comments below here at NASCompares.com and we will get back to you. Need Help?
Where possible (and where appropriate) please provide as much information about your requirements, as then I can arrange the best answer and solution to your needs. Do not worry about your e-mail address being required, it will NOT be used in a mailing list and will NOT be used in any way other than to respond to your enquiry.
Need Help?
Where possible (and where appropriate) please provide as much information about your requirements, as then I can arrange the best answer and solution to your needs. Do not worry about your e-mail address being required, it will NOT be used in a mailing list and will NOT be used in any way other than to respond to your enquiry.


|
 |


Minisforum N5 Pro NAS - Should You Buy?
UGREEN DH4300 & DH2300 NAS Revealed - Good Value?
Aoostar WTR Max NAS - Should You Buy?
Xyber Hydra N150 NAS Review - Is This COOL?
Minisforum N5 Pro vs Aoostar WTR Max - The BIG Showdown
Do MORE with Your M.2 Slots - GREAT M.2 Adapters!
Access content via Patreon or KO-FI
so, if the hdd failed and I have a backup of it, I have to throw away the bee station and buy another one and reset it from my backup drive?????????????
REPLY ON YOUTUBE
Why are NAS cases designed to be extremely tedious to take apart? A small formfactor computer case is easier to manage for a fraction of the price. SMH.
REPLY ON YOUTUBE
€280 device = €100 HDD + €180 worth of enclosure and software
REPLY ON YOUTUBE
So far I like the beestation. Tried to do this with a Seagate 20Tb NAS hhd, it worked till the settings for the beestation would say that it was not able to create a storage space, it would come up and show 0 bytes. So in the end, put the original hard drive back in. I was wondering what the max size can be installed and working. A side note when I went to the website for the BSM OS file on 10-14-2024, I had seen that they had two options BSM_BST150-4T_65373.pat and also BSM_BST170-8T_65373. But going back today to check the file again, was not there. I also seen a post on reddit for the new firmware file.
REPLY ON YOUTUBE
Great video , mine failed after 5 months of light use
REPLY ON YOUTUBE
Is this hard drive encrypted in case someone disassembles BeeStation and just plug the drive via SATA to read it?
REPLY ON YOUTUBE
This could have easily been made hot-swappable with an opening slide-in tray and door. Synology were obviously determined not to allow that.
REPLY ON YOUTUBE
There is a third kind of viewer. One who is just curious but doesn’t know a thing about tecs and already had a DS1522+ thanks to you (and is happy) so has no use for this device, but just is curious what it inside.
REPLY ON YOUTUBE
You say this is $199. But on Synology website. It’s $299.
REPLY ON YOUTUBE
I look forward to any drive swap videos that might be forthcoming. It would be pretty ridiculous if they actually did put in the effort of firmware locking it to just certain drives.
I’ve done drive swaps in the 1st gen WD MyCloud enclosures and those will work just fine if you clone the old drive onto the new drive (and then use a utility like Linux’s gparted to resize the largest partition, the data partition, if the new drive is larger).
REPLY ON YOUTUBE
It’s a good job this isn’t a high end wristwatch channel. I enjoy the content, thank you.
REPLY ON YOUTUBE
I’m watching the video because I watch all of your videos 🙂
REPLY ON YOUTUBE
Plastic junk
REPLY ON YOUTUBE
What if the drive fails?
REPLY ON YOUTUBE
Waste of time and money.
REPLY ON YOUTUBE
I’ll be shocked if this BeeStation stuff exists in 5+ years time. I just can’t see any scenarios where this product is the perfect fit.
REPLY ON YOUTUBE
Is that coin cell a standard 2032 or a rechargeable? I hope the latter …
REPLY ON YOUTUBE
Can’t shake the feeling that it’s a gimmick money-grab product at best. Imagine the sh*tstorm of not tech savvy customers booing when their cheap personal cloud bites the dust.
2x 4Tb SSDs in SHR1 at least or something would have been a solid offering, but obviously not in the same price range. I don’t think this product would bring anything positive for the company.
REPLY ON YOUTUBE
So, repairability is virtually zero when you are not able to replace the HD.
This kind of DRM is despicable, creating more e-waste at the end-of-life in my opinion.
But then Synology is bound to lock-down their users as they usually attempt to, so no big surprises to me.
I indeed wonder what happens when you shuck the drive with another model to find out if indeed replacing the HD is possible or not and what happens afterwards, if the unit locks-up permanently etc.
If indeed not possible I would not consider purchasing such a product.
REPLY ON YOUTUBE
Thoughts on using this as a routine backup of a ds220+, to plug in too network and then store off site routinely? Does synology DSM -> bsm support this workflow?
REPLY ON YOUTUBE
You got a spelling error in the thumbnail brother
REPLY ON YOUTUBE
But but the led.
How did they power the led?
The drive brackets have the led or is it on the board?
REPLY ON YOUTUBE