How to Setup a Virtual Machine on your QNAP NAS Drive
Regardless of wherever you are in the world right now, the virtues of conducting your business operations remotely, as well as ensuring the security and dependency of your assets (physical or digital) have never been more relevant. Perhaps you are considering shifting a % of your workforce into remote access roles so they can do their jobs from home, or you are an employee or self-employed individual that is weighing up their options need a robust virtual machine solution? Into this arena, we have QNAP NAS and their QNAP Virtual Machine software, Virtualization Station 3 that has developed over the last 5 years into quite an impressively featured, yet user-friendly VM platform. Supporting numerous VM image types (ranging from Windows to Linux Ubuntu, Android and even virtual QNAP QTS – vQTS) it is quite a powerful tool that allows you to create a virtual desktop computer experience that will reside on your NAS drive for access over the network or internet. Despite the technical nature of virtual machines, it is actually surprisingly simple to set up a Windows 10 virtual machine on a QNAP NAS, with free tools online to convert your physical Windows PC into a virtual image (with VMware- VMware VCenter Converter and Hyper-V/Microsoft Disk2vhd), as well as the option to download a free trial copy of Windows 10 from the Windows store (if you click that link with a Windows PC, it won’t show the ISO file, so visit it with an Android/iOS/OSX based device to see the link properly), which you can then validate with your own product key, or start with a new one, there are lots of options to set up your QNAP NAS based Windows 10 virtual machine. So, let’s go through how to do it.
What you need to Setup a Windows Virtual Machine on your QNAP NAS Drive
Setting up a virtual machine is easy, but does require some specific hardware and software available from the beginning. So, go through this checklist to ensure you have the following to hand/ready:
- A virtual image (ISO, VHD, OVA, etc) of Windows that is downloaded from the Windows Image Store, or a virtual image of your own PC that you created with VMware VCenter Converter and Hyper-V/Microsoft Disk2vhd tools as discussed. Be sure to be using a 64bit version of the VM guest
- Sufficient storage space on the Volume you are storing this VM onto within the NAS to save the VM
- An internet connection – not strictly necessary, but you may well need updates to the tools that are used in this QNAP VM installation guide, as well as use the Virtualization Station 3 VM Converter tool – so if your VM image is not showing when looking in the folder it is located in, it might be an incompatible version and you should be cable to convert it using the tools included.
- A laptop or tablet that is on the same network as your QNAP NAS that can be used to input/setup the NAS for the first time. After this, you can arrange for the VM to be internet accessible, but the first time should ideally be conducted locally (not strictly necessary, but really, REALLY makes it easier)
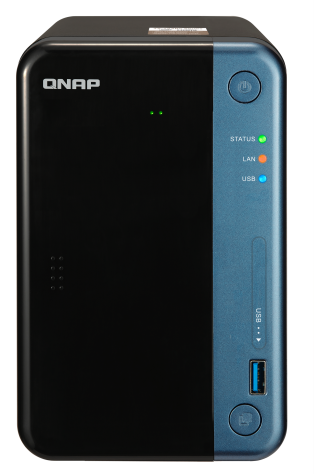
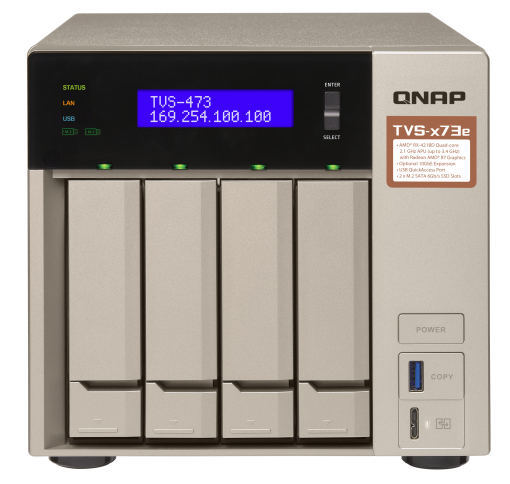
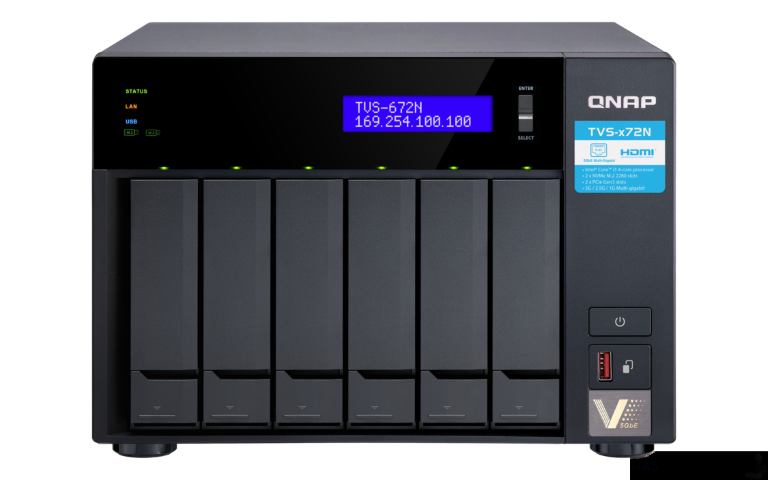
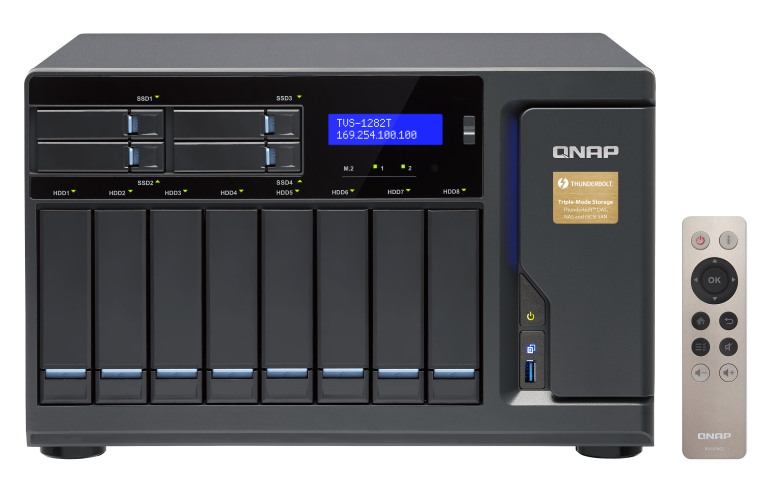
- A QNAP NAS that has at least a 4-Core Intel x86 64bit Processor (Intel Celeron, Pentium, Core, Xeon, etc) and 4GB of Memory (ideally 8GB, as you need spare memory to run the QNAP in the background). Below are the best options ranging from between £500-2000+.
A virtual machine (VM) is much like a regular physical PC, however, it is a virtual equivalent that, in the case of NAS, lives on your network storage device and can be accessed by one or more users over the local network or via the internet. A virtual machine allows you to create a duplicate of (or replacement for) your physical PC and converts it into a digital format. This version can then be used for software testing, duplication for multiple staff users or as a virtual copy of your existing setup for use when working from home, in coffee shops, the commute or more. Below are three solutions that scale depending on budget and power.
 |
 |
 |
 |
| QNAP TS-253Be
££££ |
QNAP TVS-473e
££££
|
QNAP TVS-672N
££££
|
QNAP TVS-1282
££££
|
Install and configure the Virtual Machine Manager package
This guide to install a Windows 10 VM on your QNAP NAS is based on the idea that you have your QNAP NAS already setup, updated to the latest QTS firmware, have your storage pool and volume arranged and have access to the internet or the QNAP Virtualization Station app already installed, in the latest version (to ensure that the virtual environment dropdown list has every option). Additionally, the Windows 10 Virtual Machine image you are going to use is already stored on the NAS storage or is on a USB drive connected to the NAS device.
Installing Virtualization Station
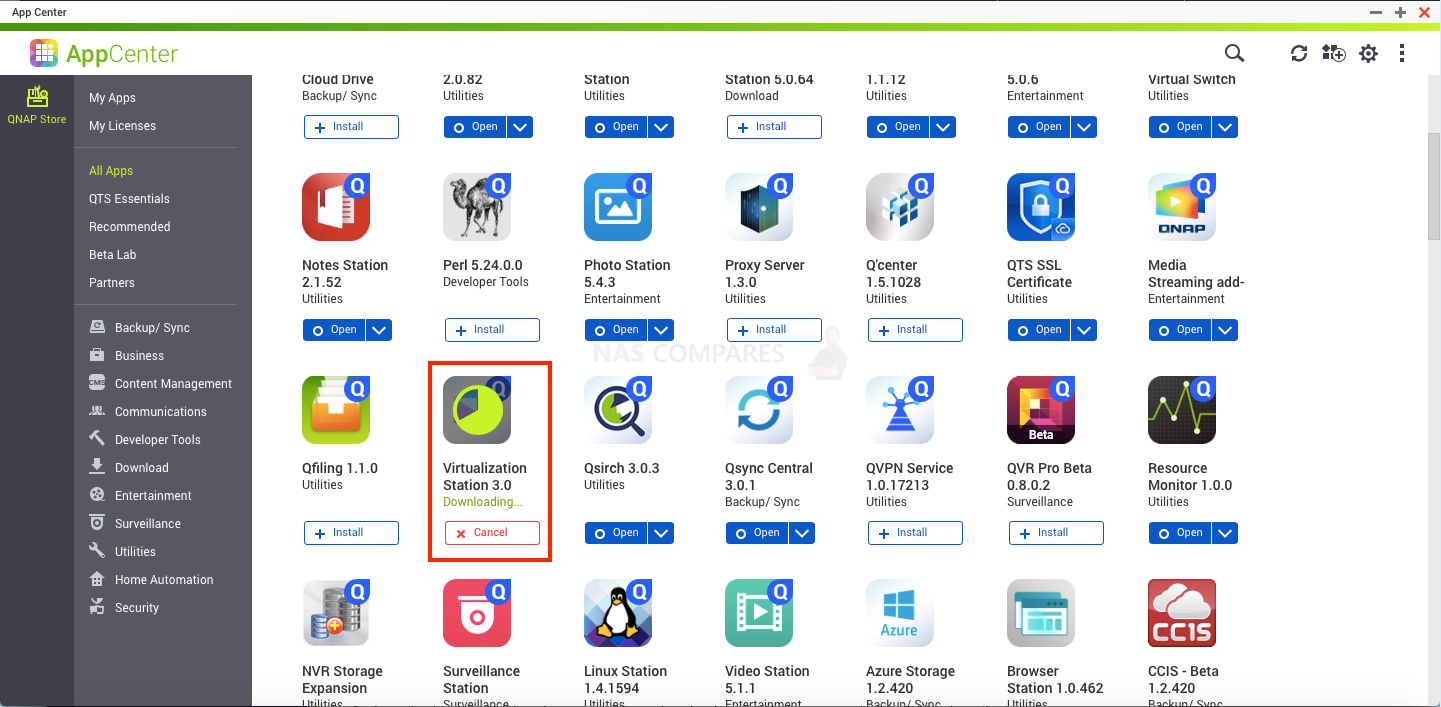
Virtualization Station can be installed from the QTS App Center. Search for “Virtualization Station” and click “+ Install”. After the installation is complete, you can launch Virtualization Station.
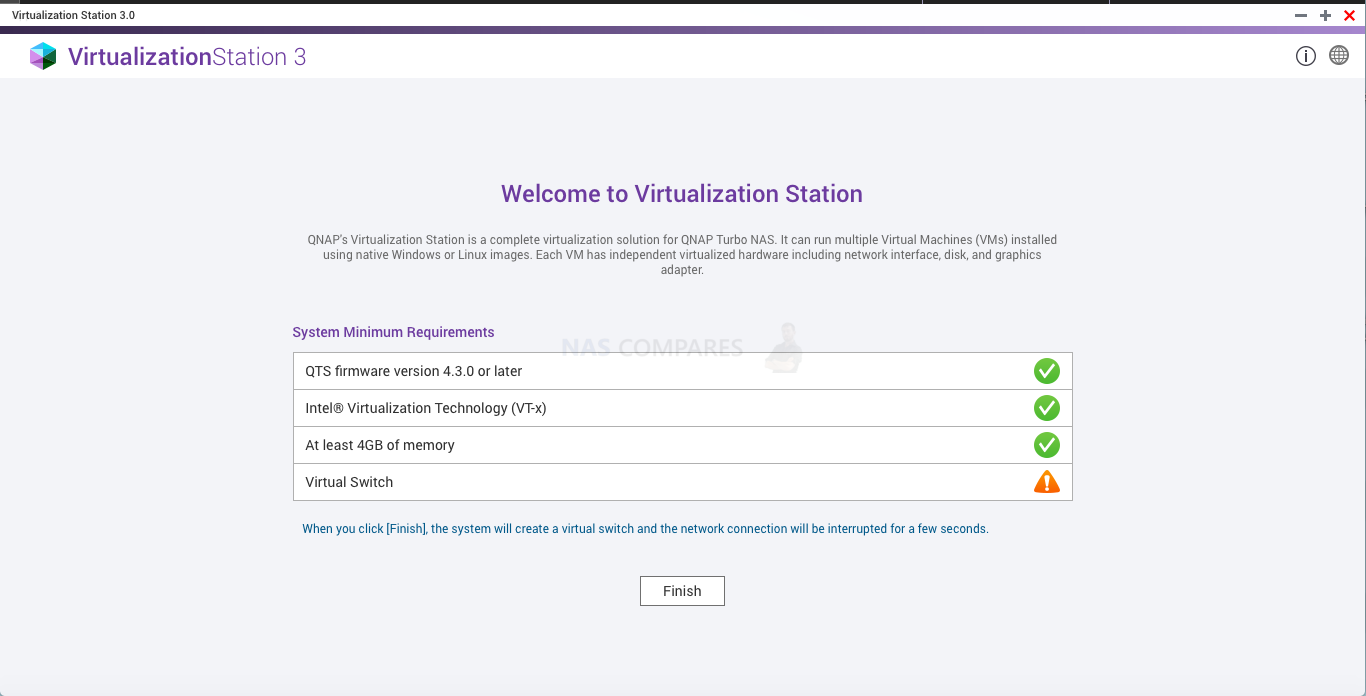
Virtualization Station will check your NAS system resources to ensure it can run Virtualization Station.
Setting up a VM
Creating a VM from an ISO image
The ISO image must be stored in your QNAP NAS before using it to create a VM, or transferred over from a USB drive from your local machine
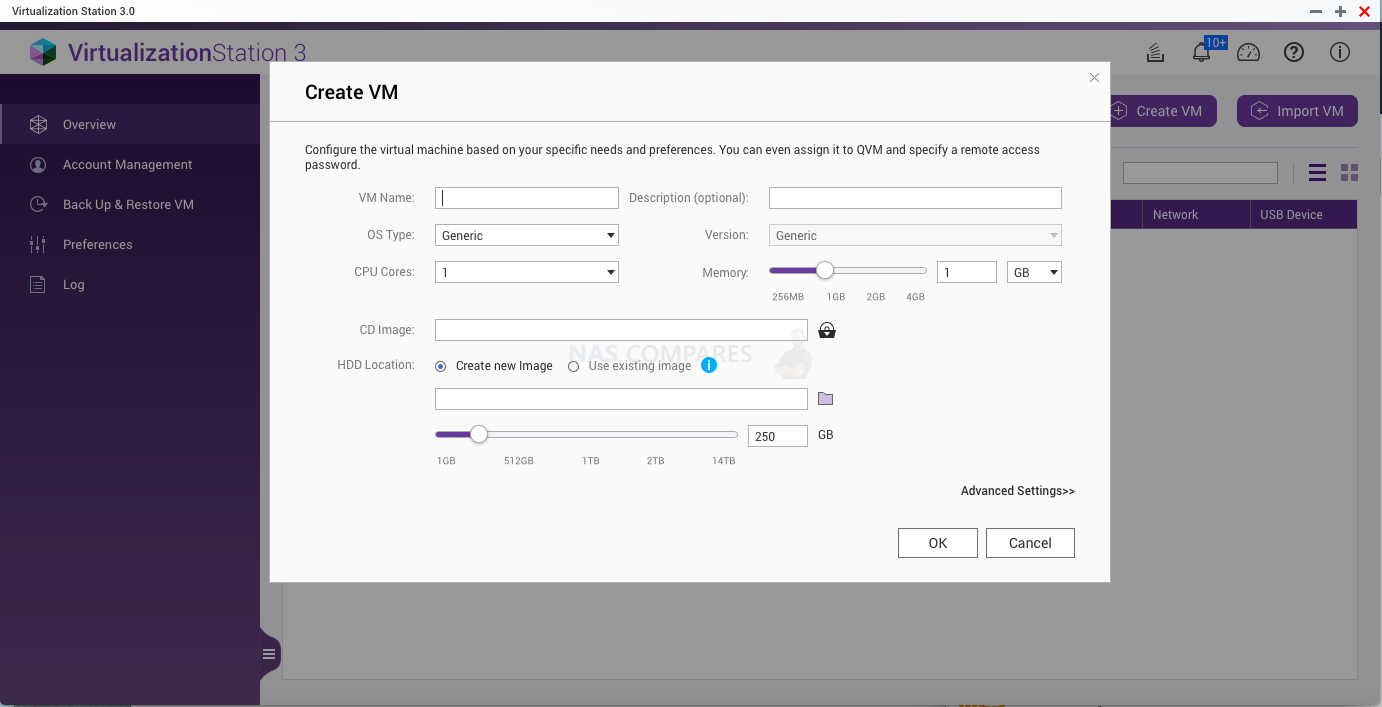
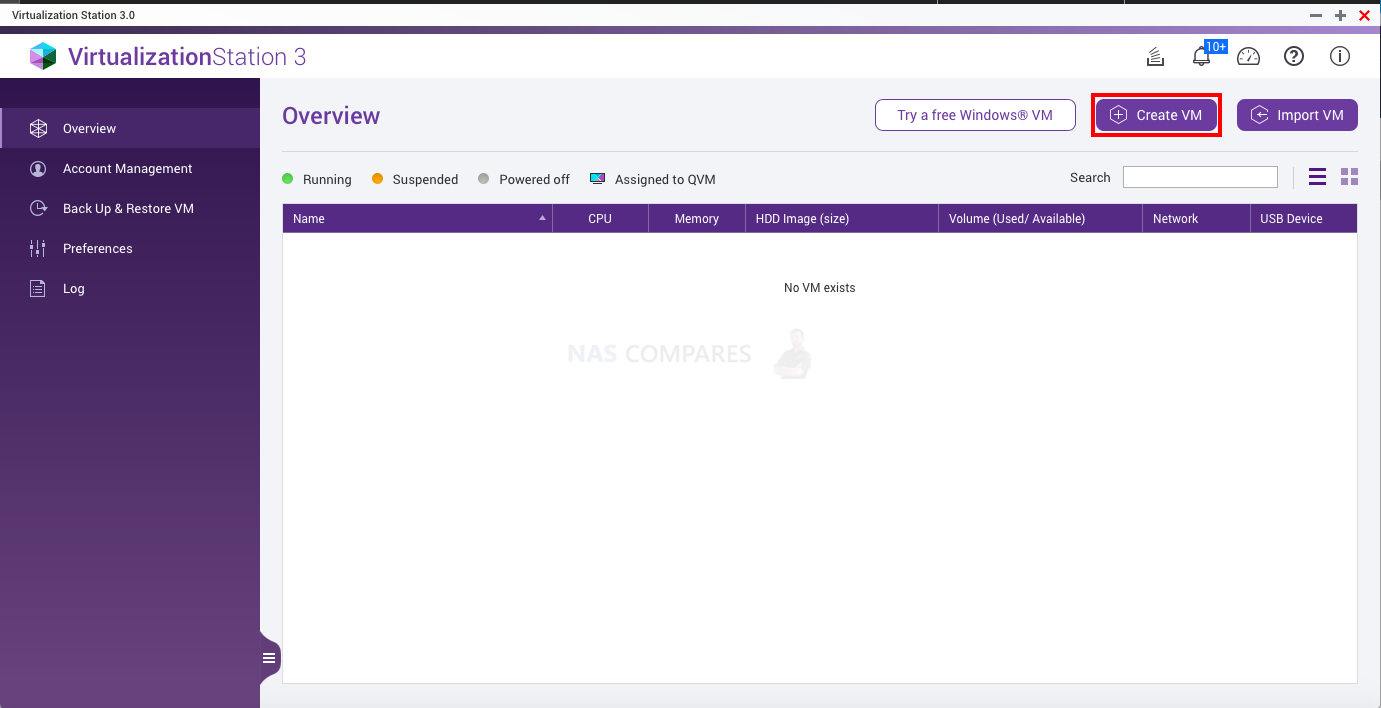
Open Virtualization Station, go to the “Overview”, and click “Create VM”.
In the “Create VM” menu, you will be asked to specify the details of the VM.
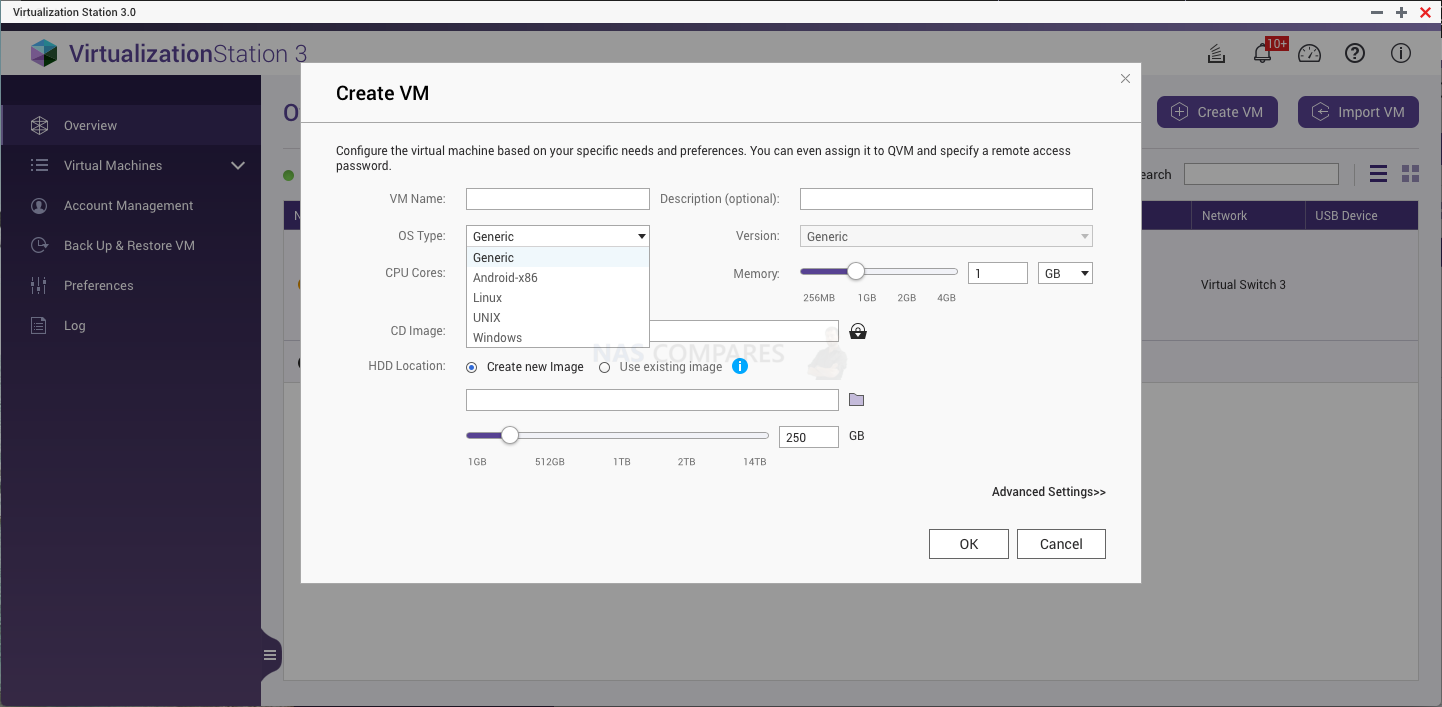
Select an OS type for your VM.
Select the ISO image of the operating system to use.
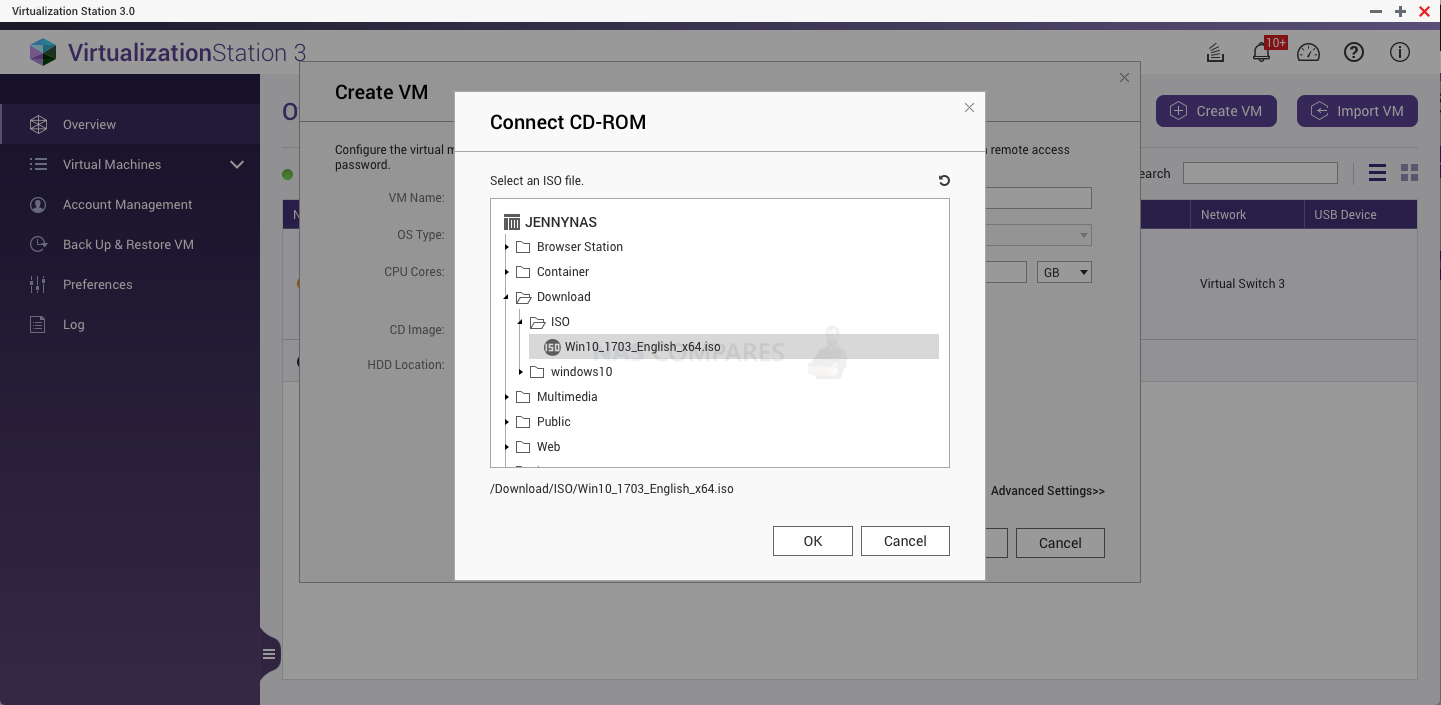
Click “Start” to power on the VM.
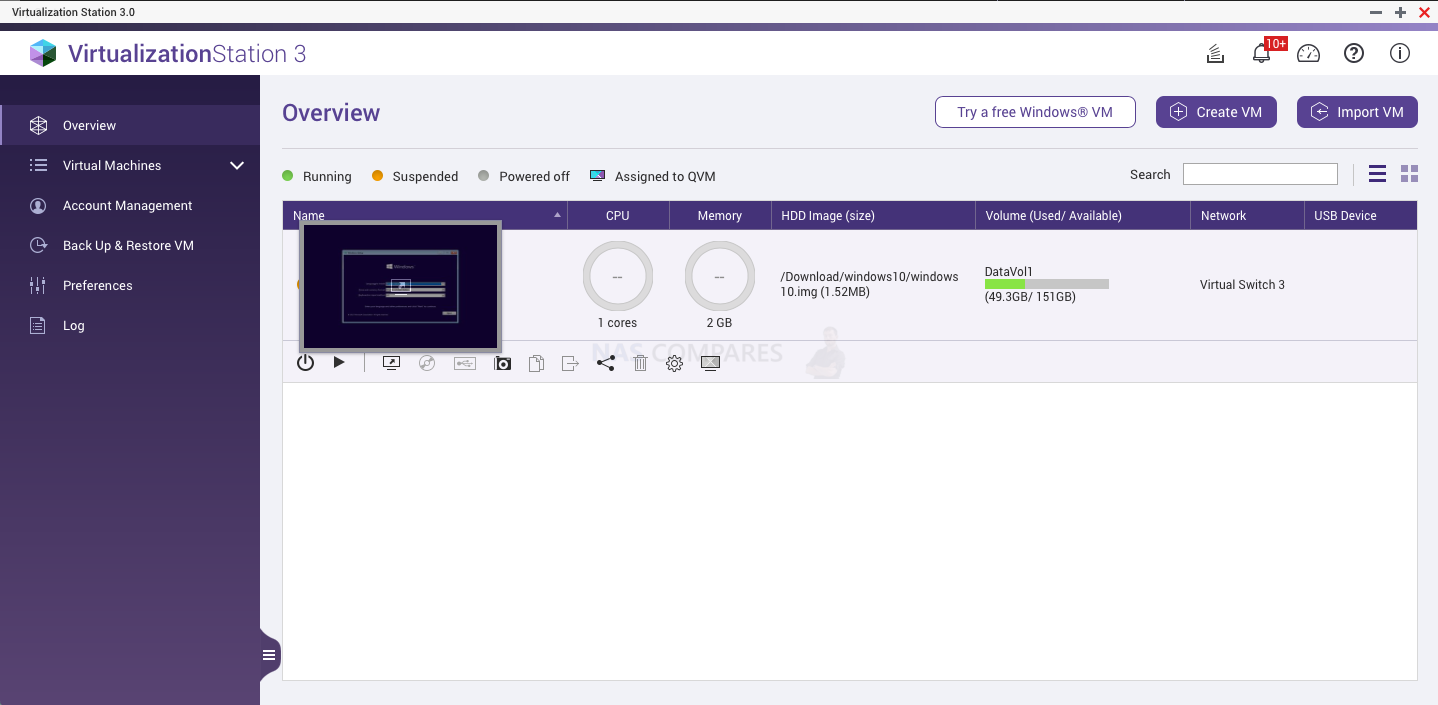
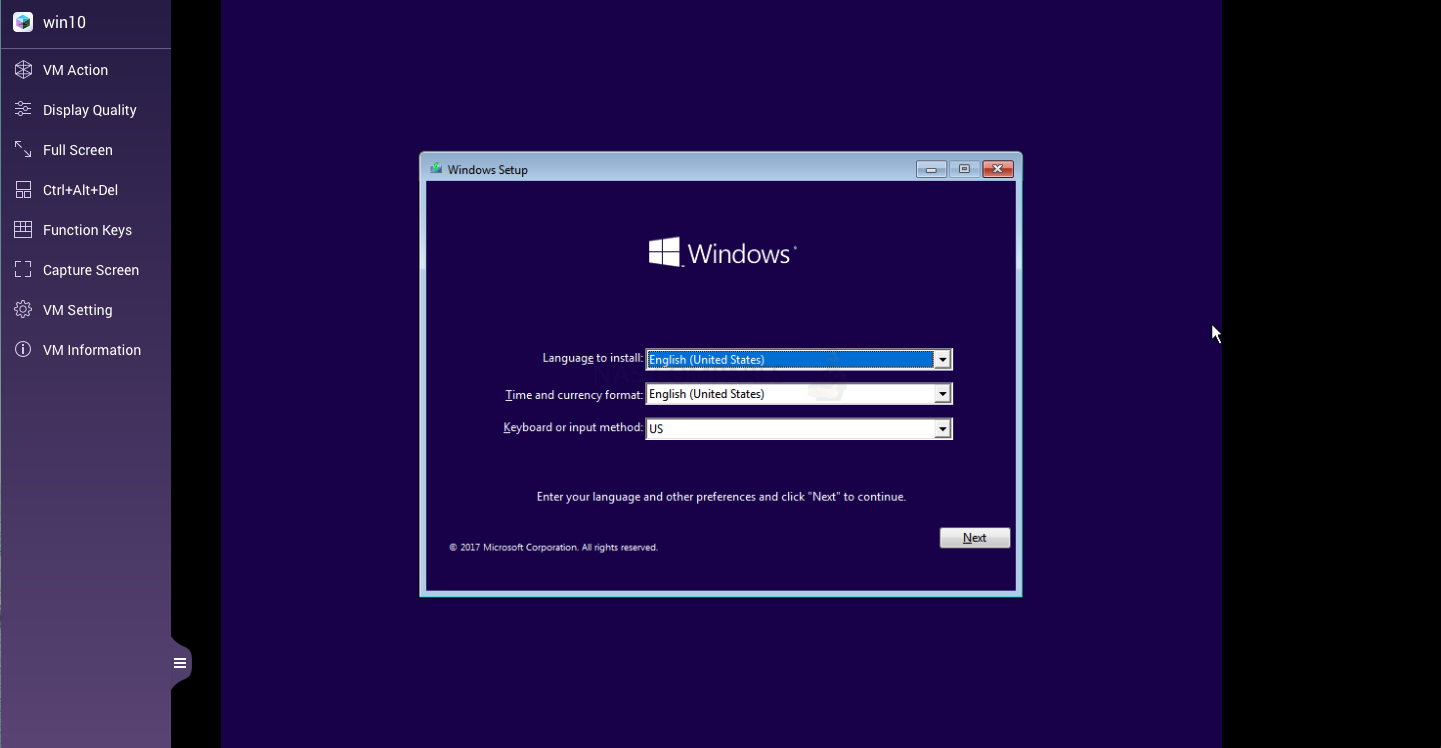
Clicking the VM thumbnail will open a new tab for you to operate the VM.
Setting up a free Windows VM
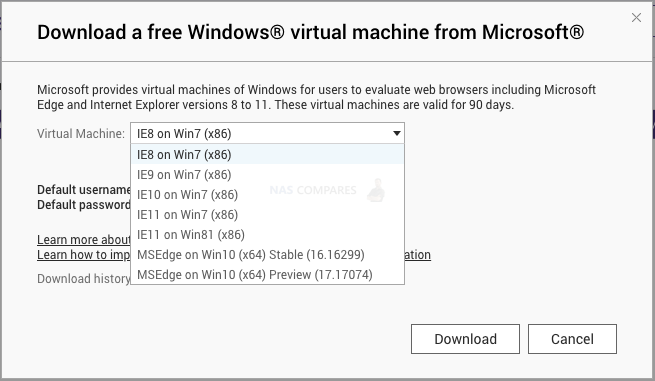
In “Overview”, click “Try a free Windows VM”.
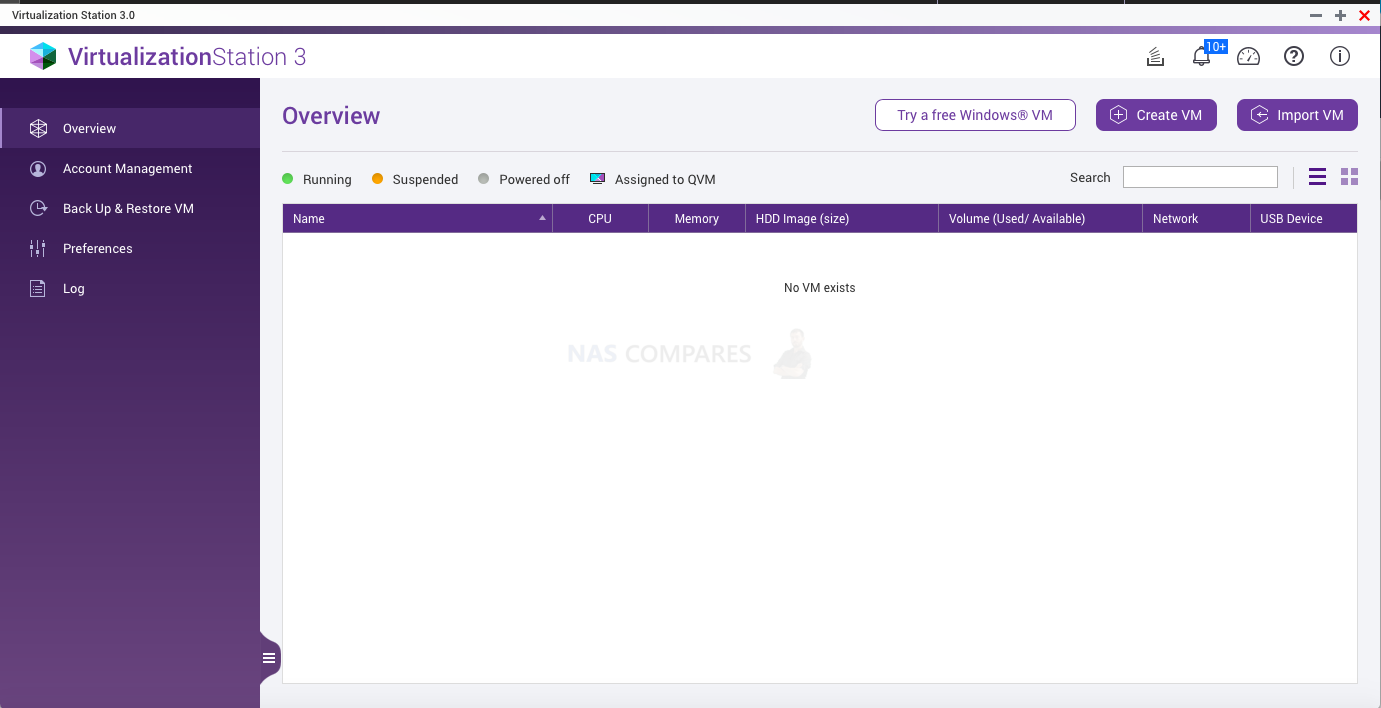
There are VM for Windows 7, Windows 8.1 and Windows 10. After selecting a VM, click “Download”. This VM is currently provided free by Microsoft® for evaluating web browsers such as Internet Explorer. The VM is valid for 90 days and you have to log in the VM with below default username and password:
Default username: IEUser
Default password: Passw0rd!
Operating Virtualization Station
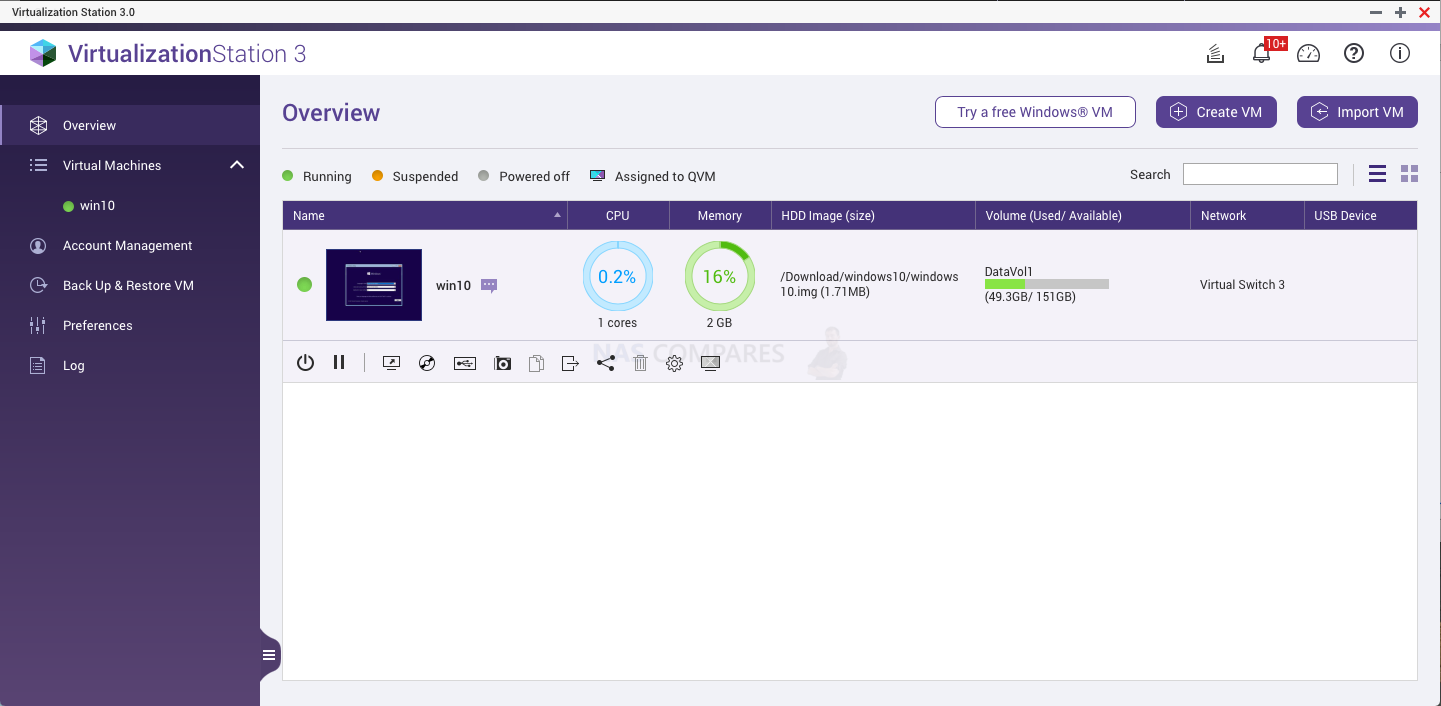
1. Overview
All of the VM that have been created are listed on the Overview page.
Import VM
To import a VM, click “Import VM” and then you can import the VM file from the QNAP NAS or your host PC.
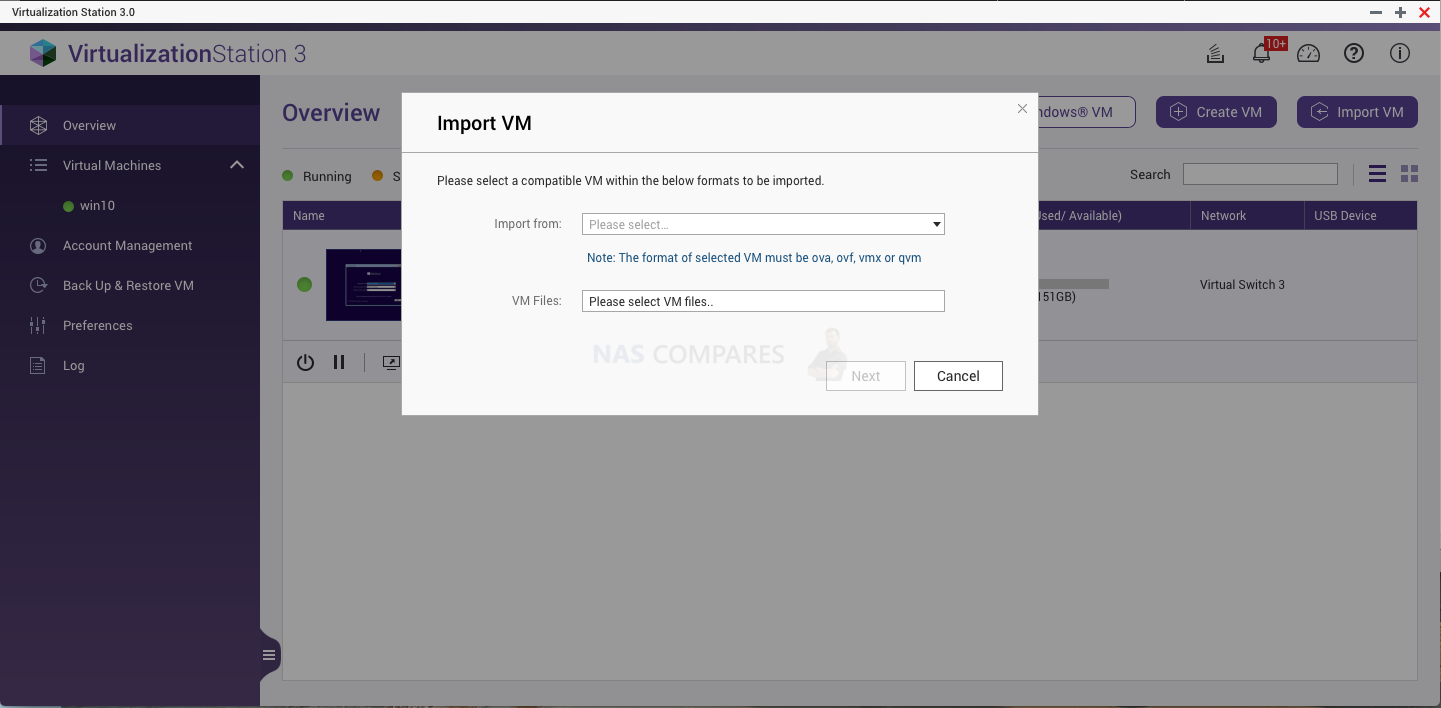
Note: *.ova, *.ovf files are only compatible with VM exported by VirtualBox v4 and VMWare 5.0 only. *.vmx files are only compatible with VM created by VMware Workstation 8/9/10. *.qvm is for VM created by Virtualization Station.
Export VM
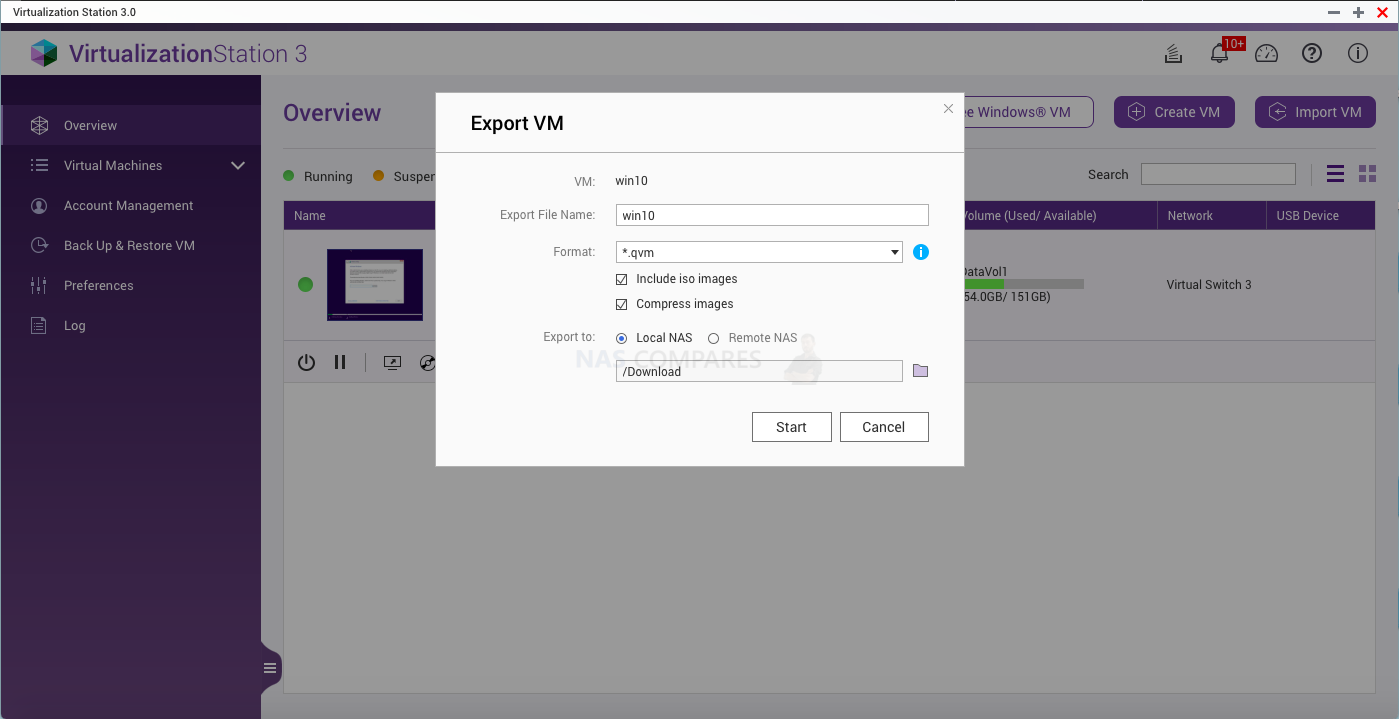
Click  on the VM toolbar. Select an export format, choose “Include iso images” or “Compress images” if needed and specify a location for the exported VM. Click “Start” to export the VM.
2. Virtual Machines
Information
You can view all of your VM on the left side menu. Clicking the VM name on the list or clicking  on the VM toolbar will show the VM information page including the status and configuration of the VM.
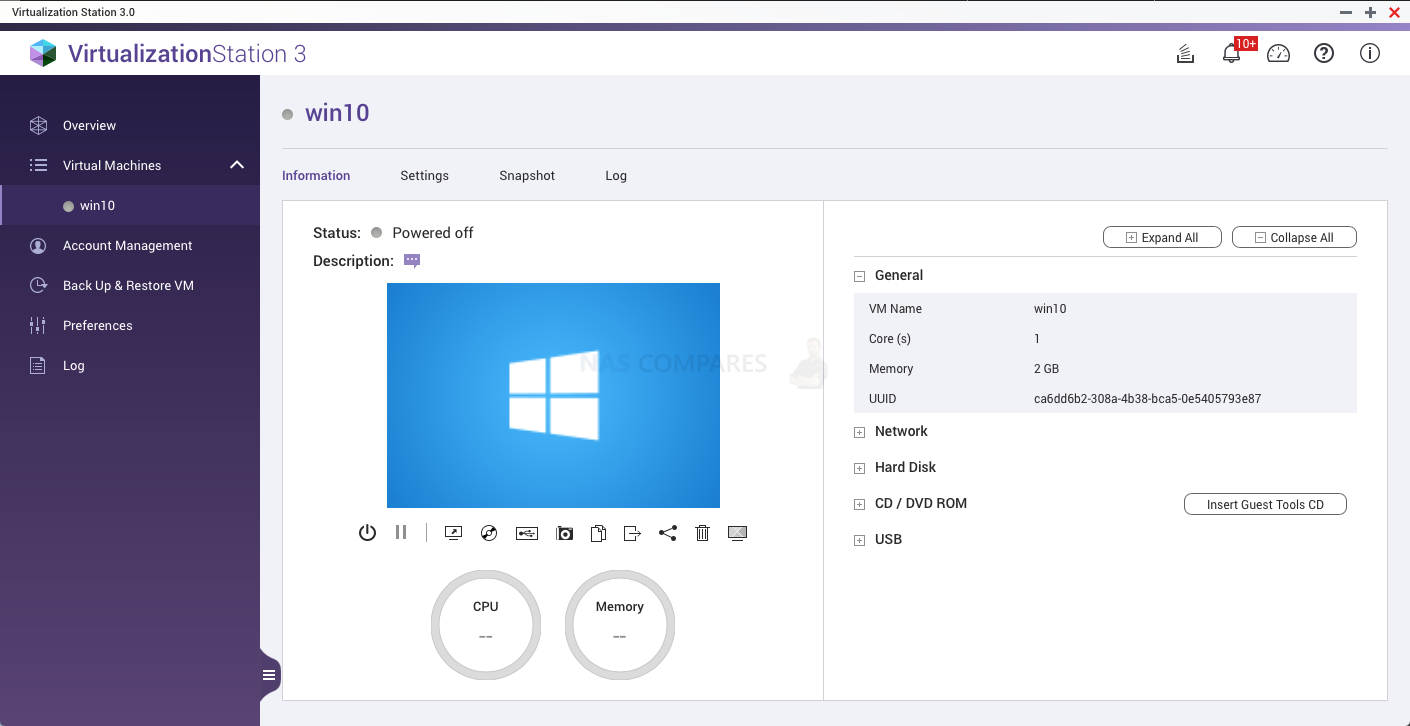
- Click
 to power, shutdown or force shutdown the VM.
 - Click
 to pause the VM. Once VM is suspended, you can click
  to resume it.
 - Click
 to open a new web tab for VM operation.
 - Click
 to insert/eject CD/DVD image files. Also, you can click “Insert Guest Tools CD” to install the Guest Tool (Virtio drivers for Windows operating systems included).
 - Click
 to configure USB device connections.
 - Click
 to take a snapshot of the VM status.
 - Click
 to duplicate the VM.
 - Click
 to export the VM.
 - Click
 to share the VM using a share link. You can specify an expiration date for the share link.
 - Click
 to delete the VM.
 - Click
 to assign to QVM. After assigning the QVM, there will be a shortcut of VM console in HD Station.There is no CD/DVD, USB, Snapshot, Clone, Export and Share function in vQTS.
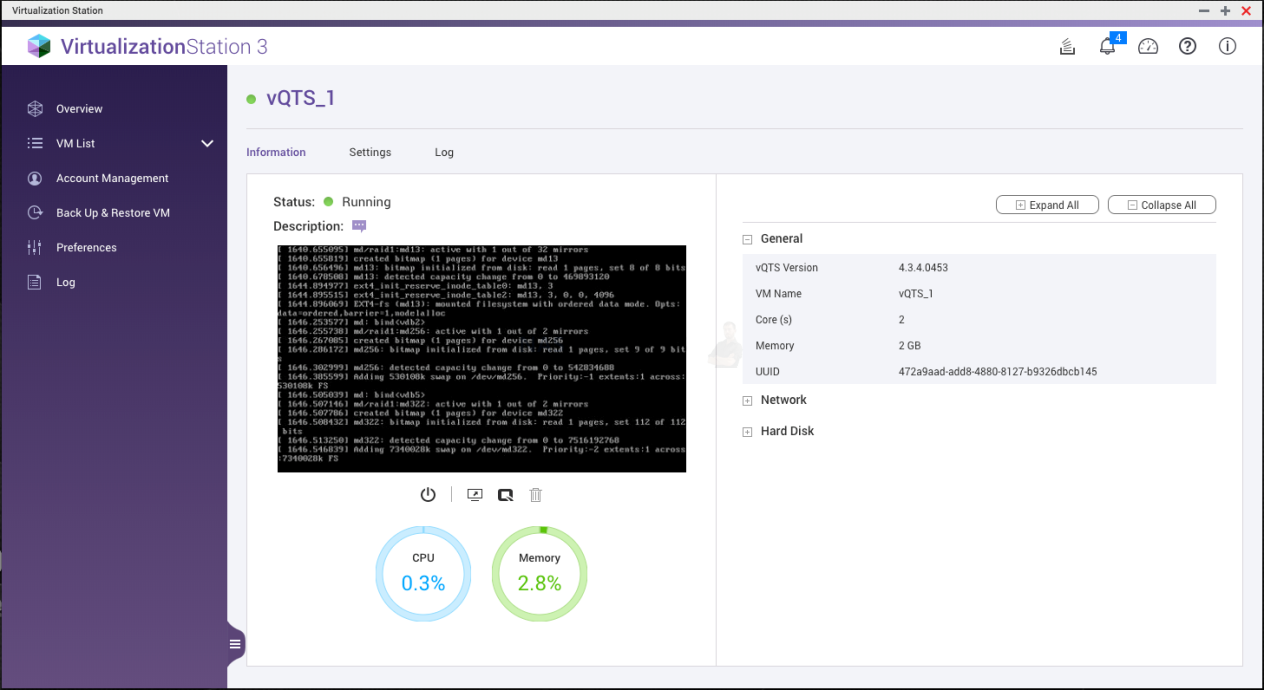
- Click
 to retrieve the IP addresses of vQTS. You can use the IP address to connect vQTS Portal
To use Virtio interface for Windows VM, you must install the Virtio drivers in the VM. The drivers are available in the Guest Tools CD. Click “Insert Guest Tools CD” in the CD/DVD ROM column to use it in your VM.
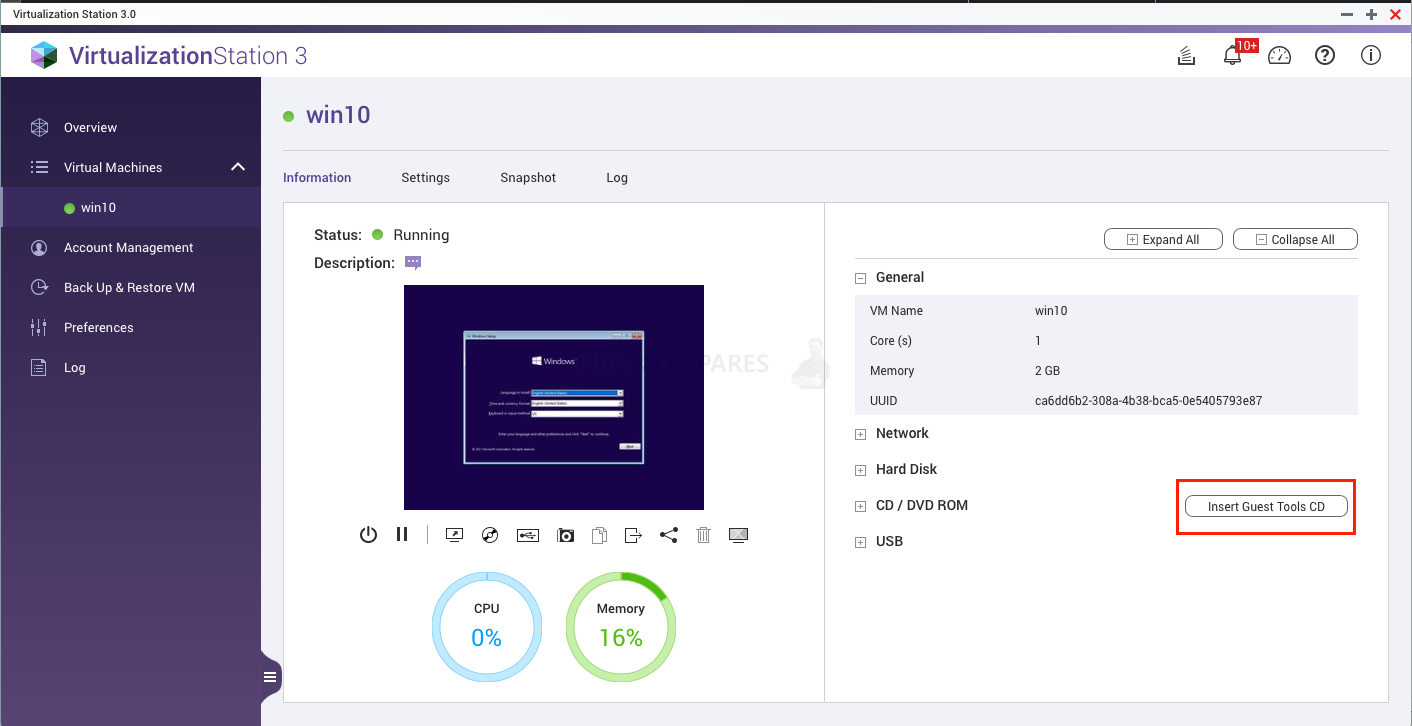
Tip: In Kernel-based Virtual Machine (KVM) infrastructure, “Virtio” is the primary platform for I/O virtualization and seen as an abstraction driver. It provides a higher I/O performance for virtual hard drives and network adaptors.
Settings
VM settings include “General”, “Boot Options”, “Network”, “Storage”, “CD /DVD”, “Video”, “Audio”, “Keyboard Layout”, “Remote Console”, “USB”, “Auto Start” and “Virtio-serial”. Some settings cannot be modified when the VM is online.
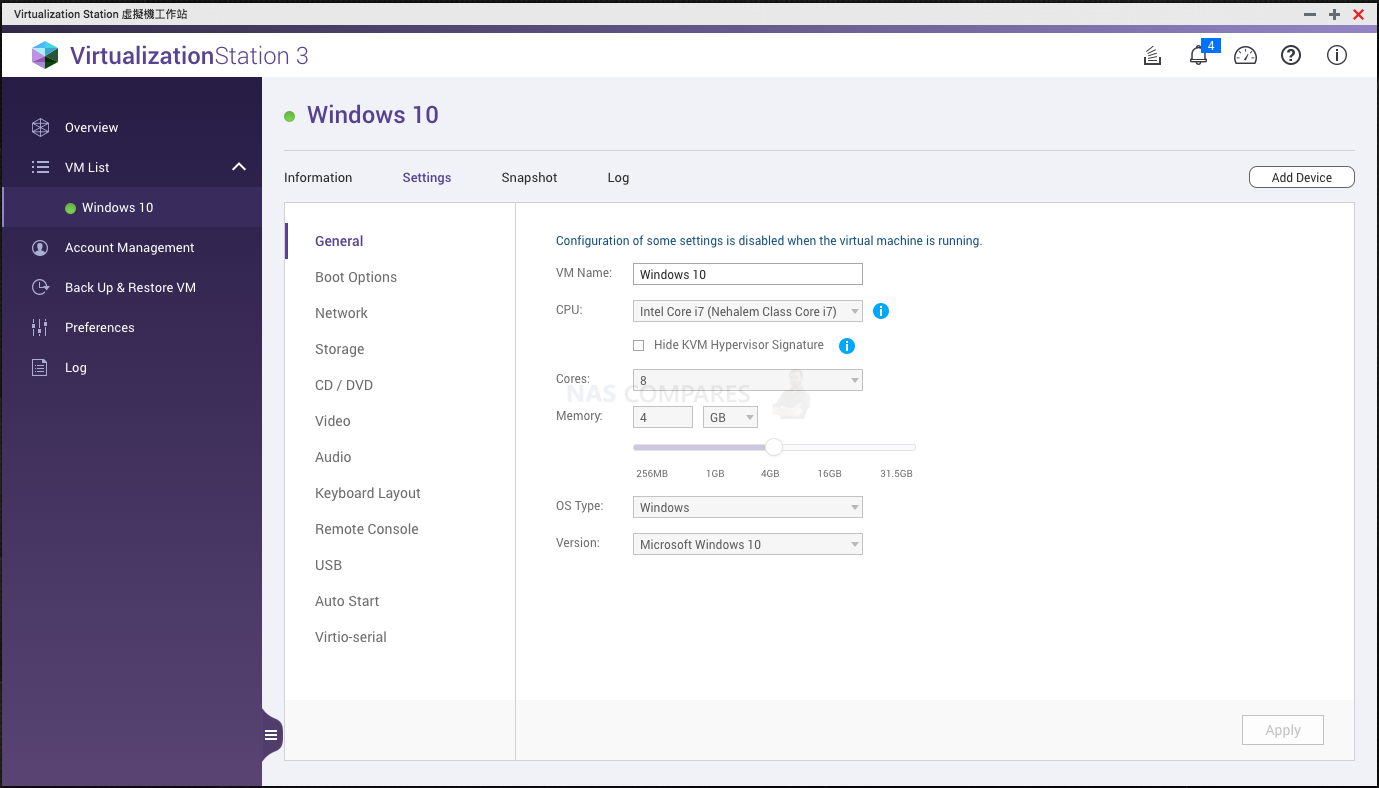
- General
Basic VM configuration such as the VM name, CPU cores, memory and OS type. You can specify different CPU commands set to run the VM. To ensure compatibility when importing/exporting VM, ensure the VM has the same CPU command set. - Boot Options
Specify the boot order of devices including HDD and CD/DVD drives. - Network
Specify virtual adapters to connect to Virtual Switches. - Storage
Each HDD has a correspondent image file stored in the specified location. There are three cache modes: “Writeback”, “Writethrough” and “None”.”Writeback” is using the NAS page cache. When the capacity of NAS cache is full, it will write back all the cache data on the disk. Compared with “Writethrough”, “Writeback” has a better transfer rate. However, “Writethrough” is more secure as it directly writes data to the disks by using write cache and avoids data loss if unexpected events occur. “None” will bypass the NAS cache so that the transfer rate performance will be between “Writeback” and “Writethrough”. - CD / DVD
Specify an “Image Path” to locate a ISO image - Video
Specify a video type. “VGA” can be used in most legacy OS, while “Cirrus” has a higher compatibility with legacy OS. For “VMVGA”, if the VM has the related driver installed, this type can provide more resolution options. - Audio
Specify an audio type for the VM. The related drivers installed - Keyboard Layout
The default setting is “English (US)”. For the keyboard mapping, you can select different keyboards to insert key signals. - Remote Console
The default port range for “Auto Port” is 5900-5930. This can be manually set if required. - USB
To connect USB devices, check either “Enable USB 2.0” or “Enable USB 3.2 Gen 1” to see the USB Connection panel on the VM information page. A USB device can only be assigned to one VM at a time, and other NAS apps will be unable to see this device when it is assigned to a VM
A VM can be set to automatically start within 0-600 seconds of the NAS starting up. - Virtio-serial
Enable Virtio-serial to communicate with the VM in which the guest tool is installed so that you can retrieve the IP address of VM and synchronize the NAS time after the VM resumes or has reverted to a snapshot’s content.
Snapshots of VMs
Virtualization Station provides a snapshot feature to record the VM system status at a point of time. In the event of a VM failure, users can quickly roll back to the snapshot to ensure continual system operation. Click  on the VM page.
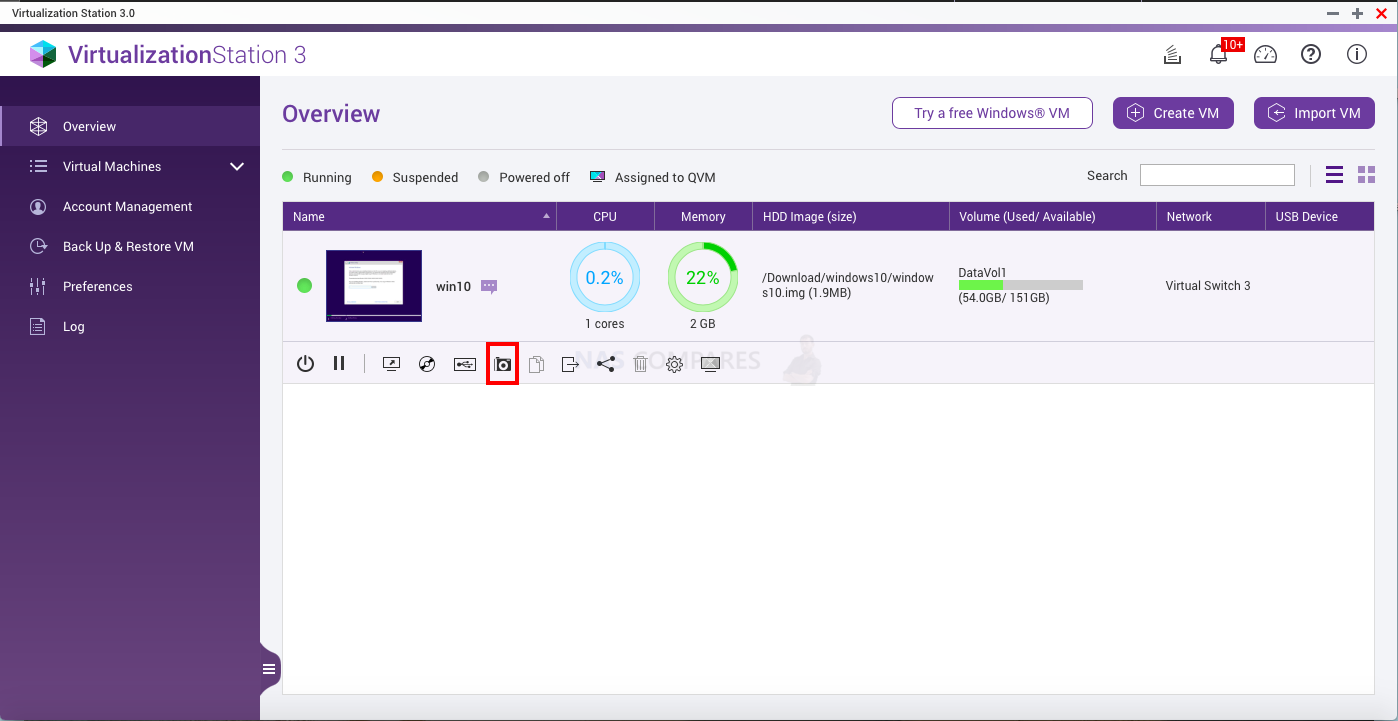
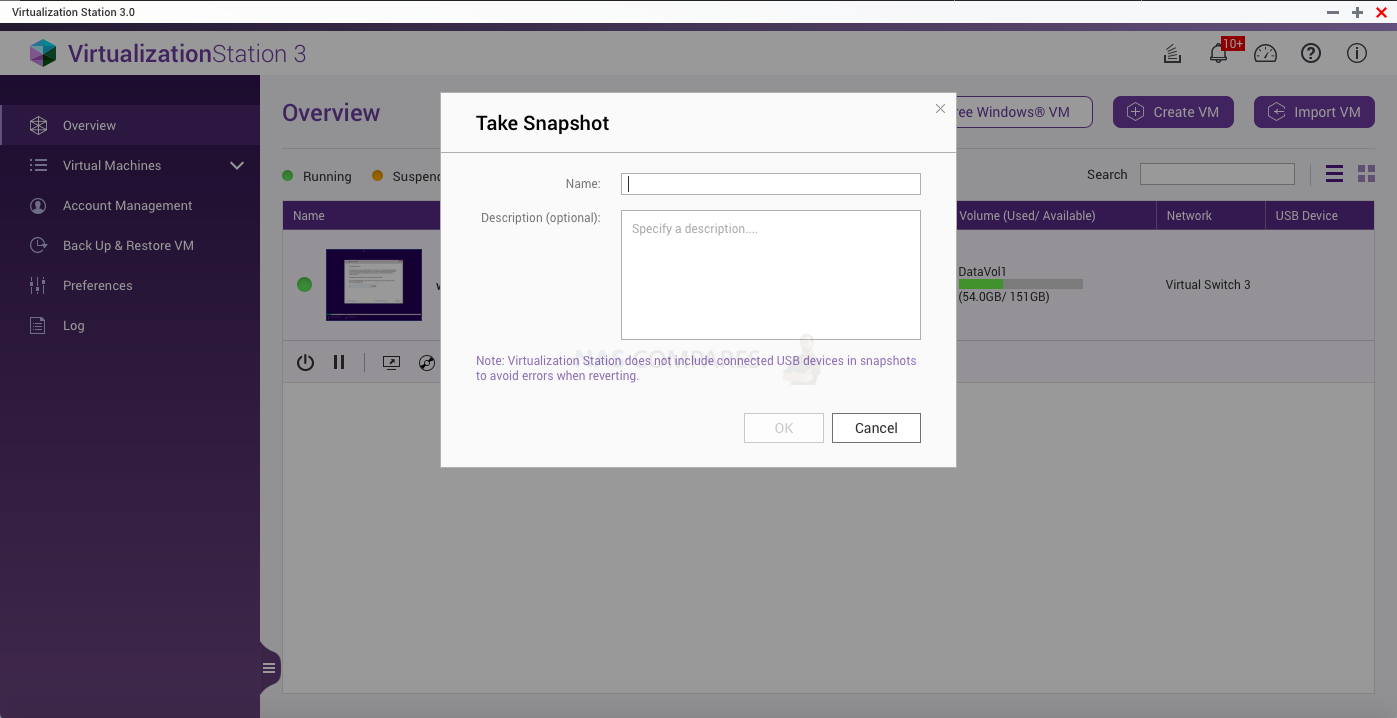
Click “Take snapshot” to start the process of taking a snapshot. Name the snapshot and click “OK” to create the snapshot.
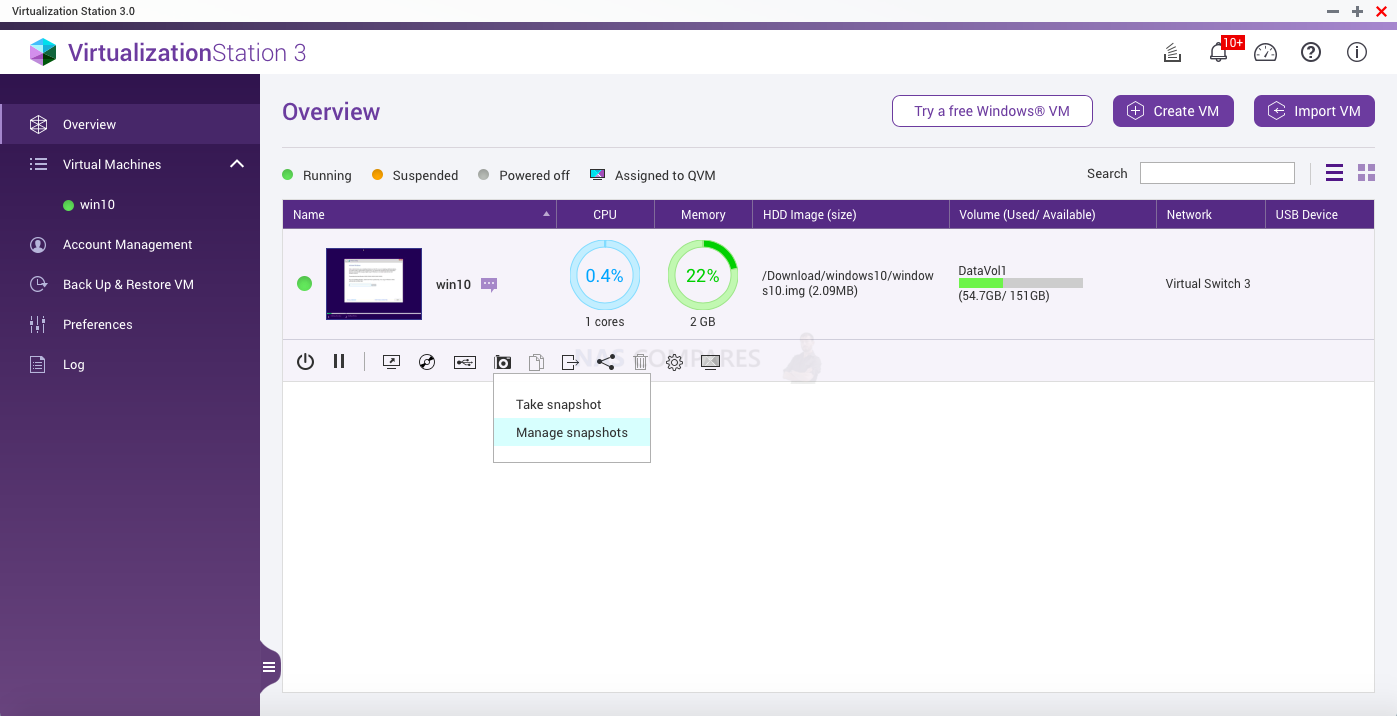
Click “Manage snapshots” to check all the snapshot tasks.
After a snapshot is taken, click  and choose “Manage snapshots” to view the snapshots.
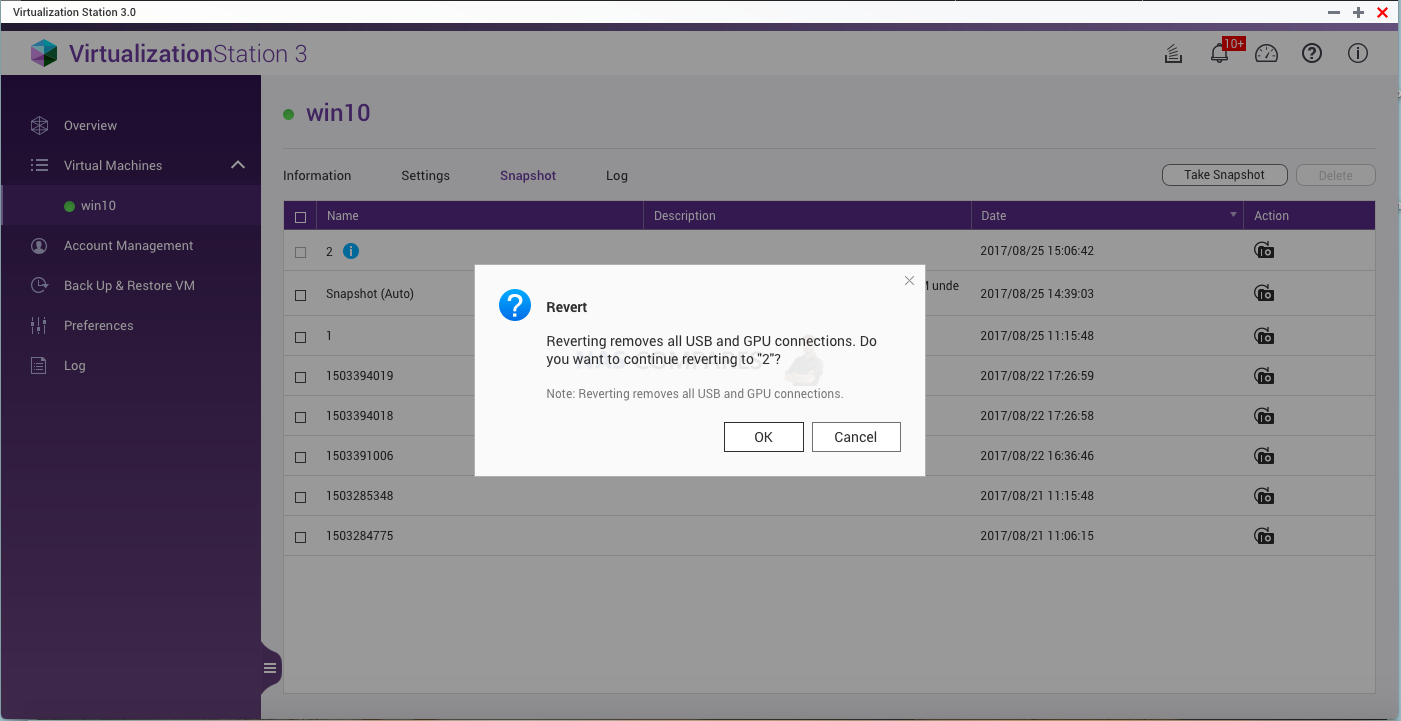
Click  and “OK” to revert the VM to the status recorded by the snapshot.
Log
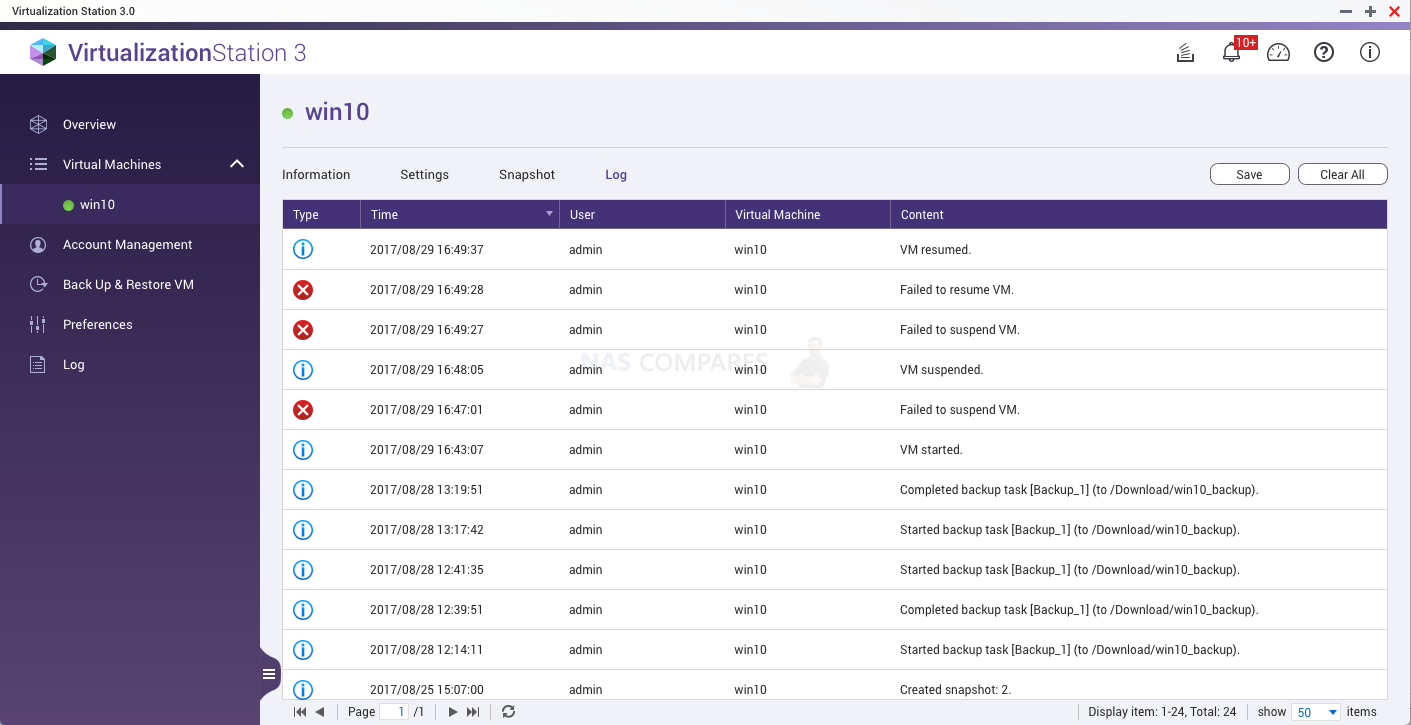
Click “Log” to check VM information, warnings or errors.
3. Account Management
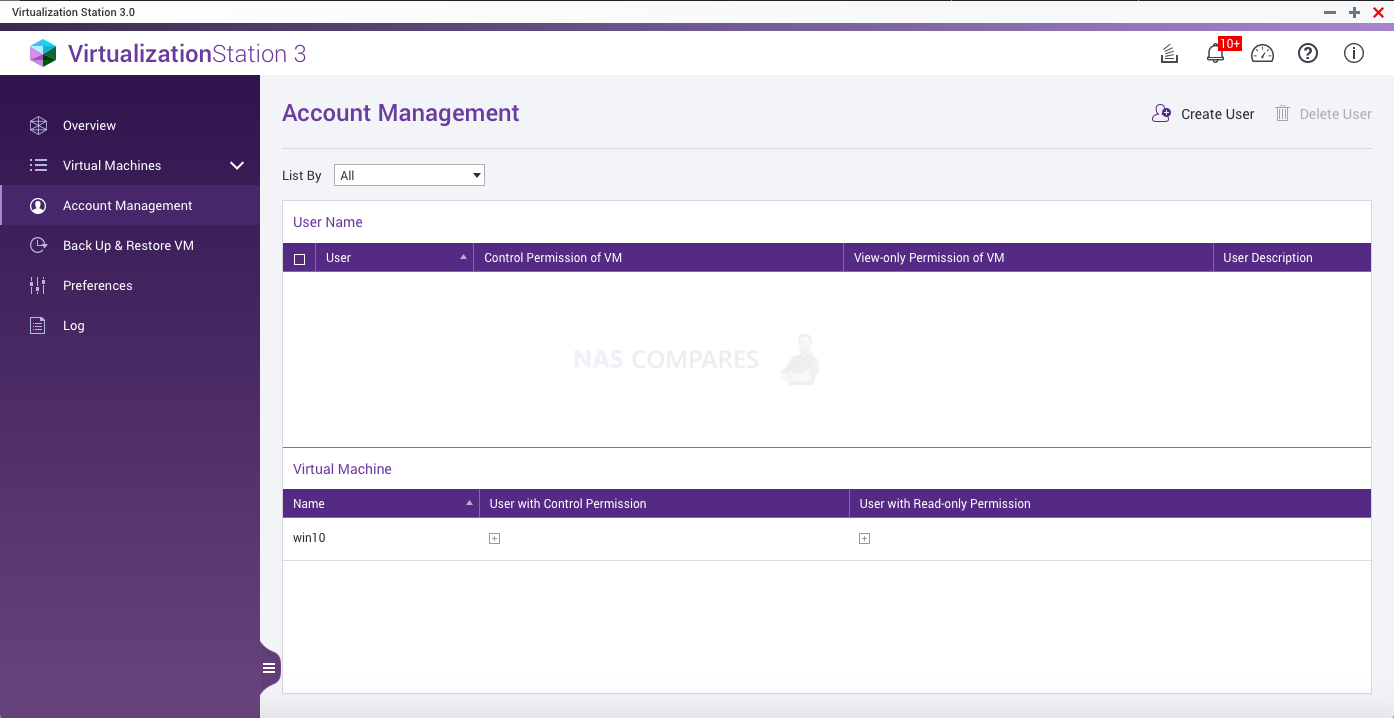
Click  , you will see a table listing each user’s permissions. This table will either show an overview of users’ permissions for each VM including Control Permission and View-only Permission or show an overview of VMs for each user. You can also select “All” to display both as well.
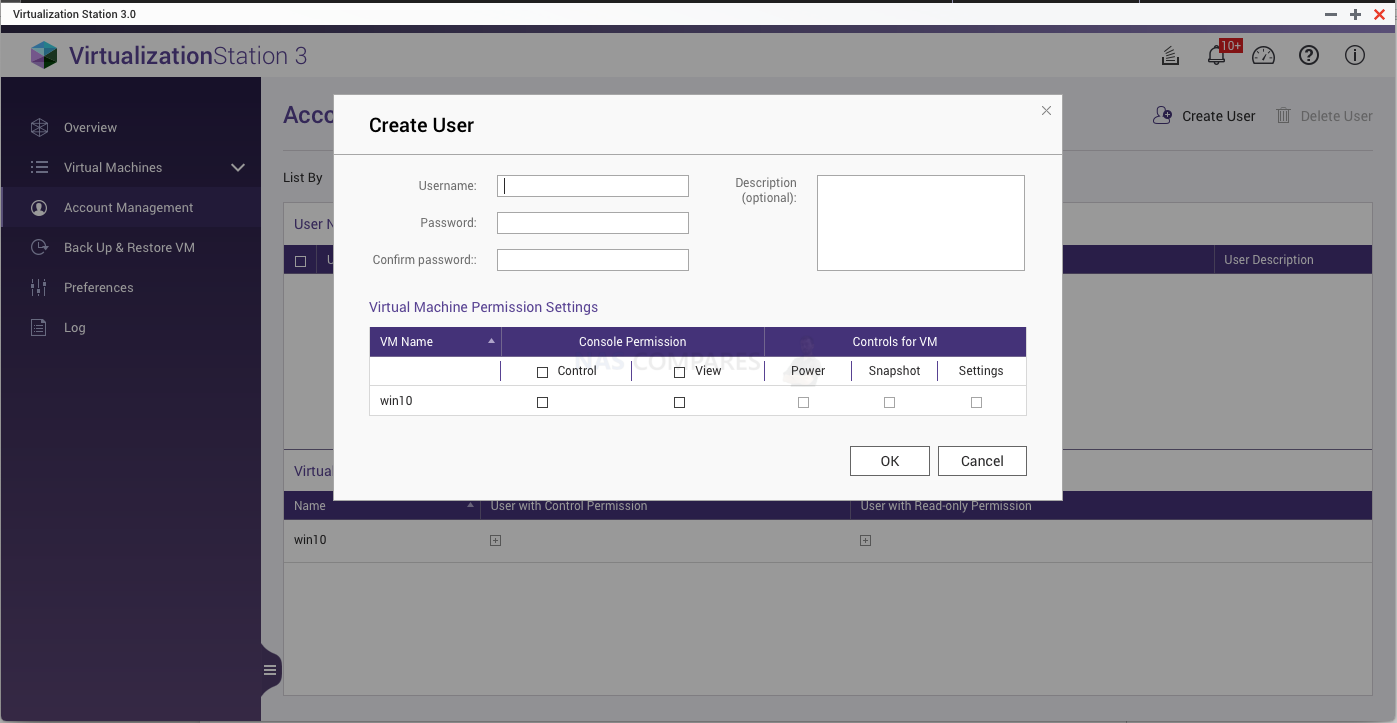
Click  to create a new user. You can allocate a VM to the user and set the permissions (including Console and Actions). You can also view and modify the permissions of existing users by clicking their username.
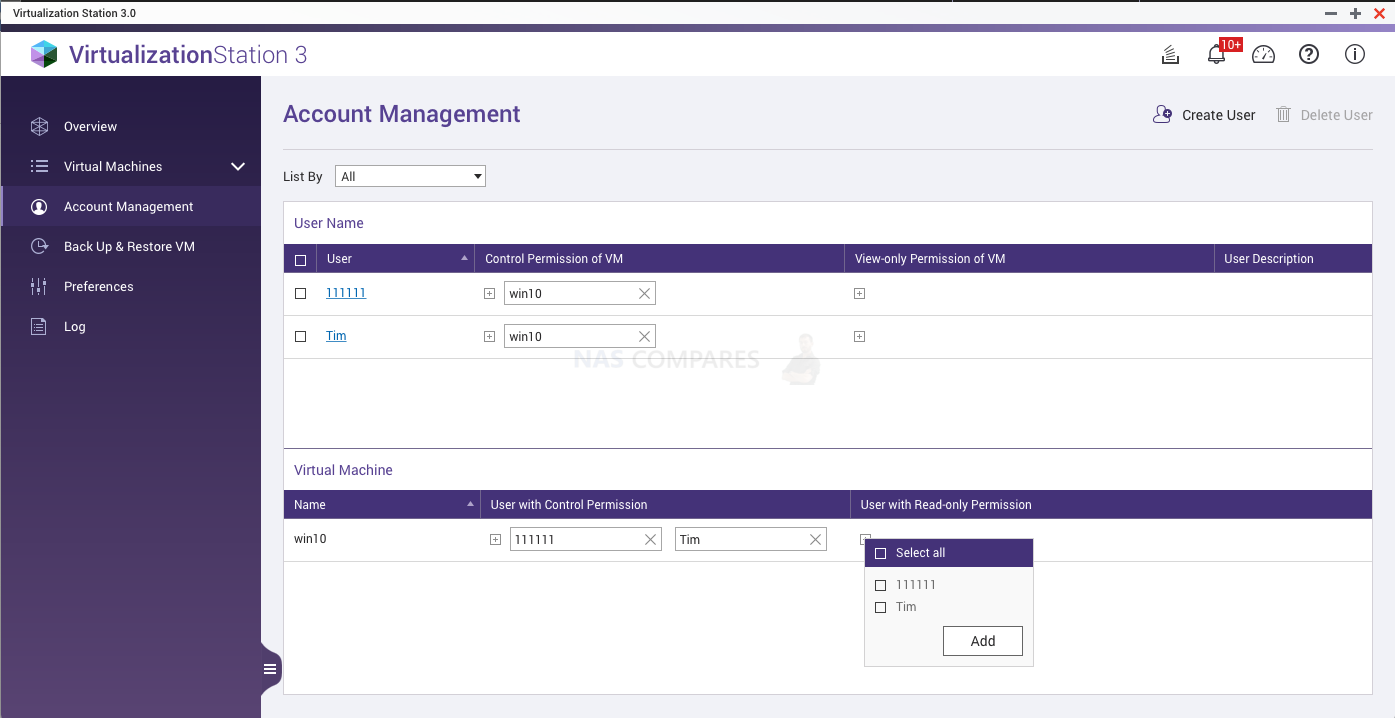
Click  on the table to add a VM to the current user with either Control Permission or View-only permission. If you click
  on the table, you will remove the VM from the table.
To delete users, check the users to delete and click  .
.
4. Back Up & Restore VM
VM can be backed-up/restored to/from remote or local NAS. Every task can be manually activated, restore, edited and deleted.
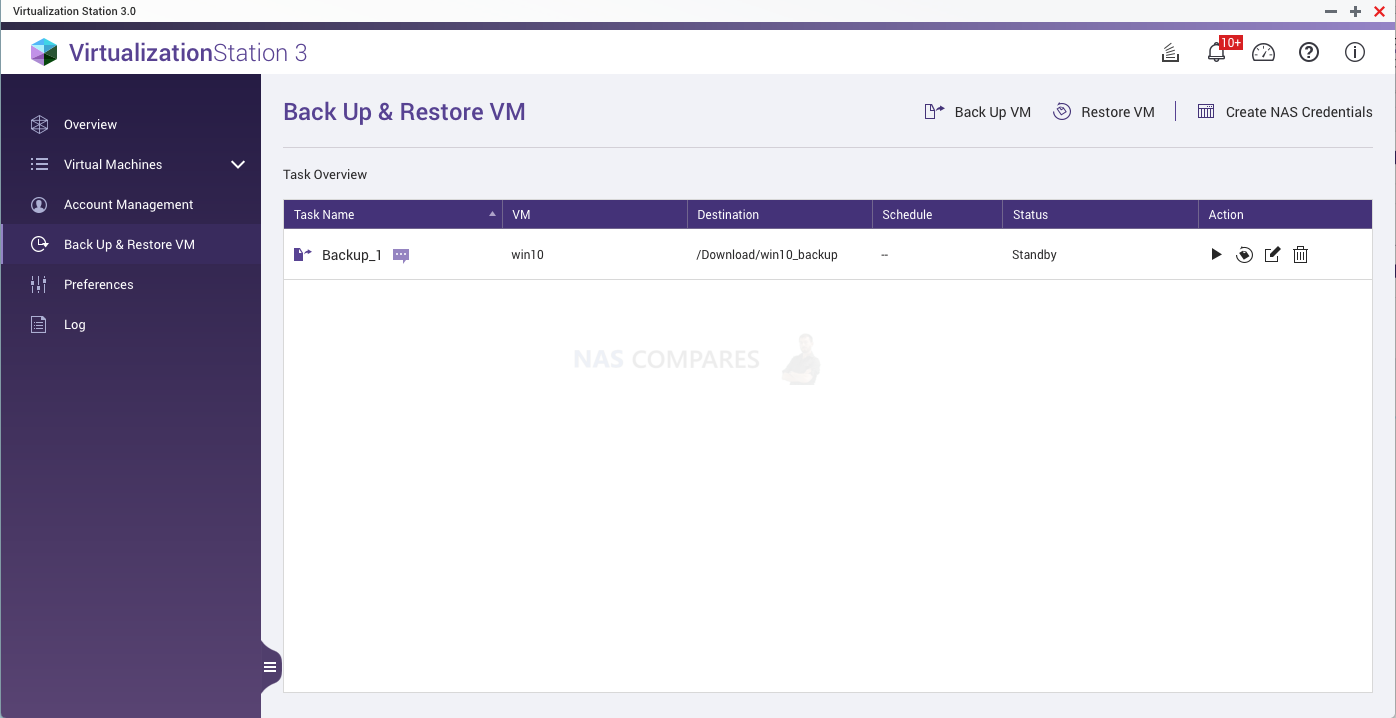
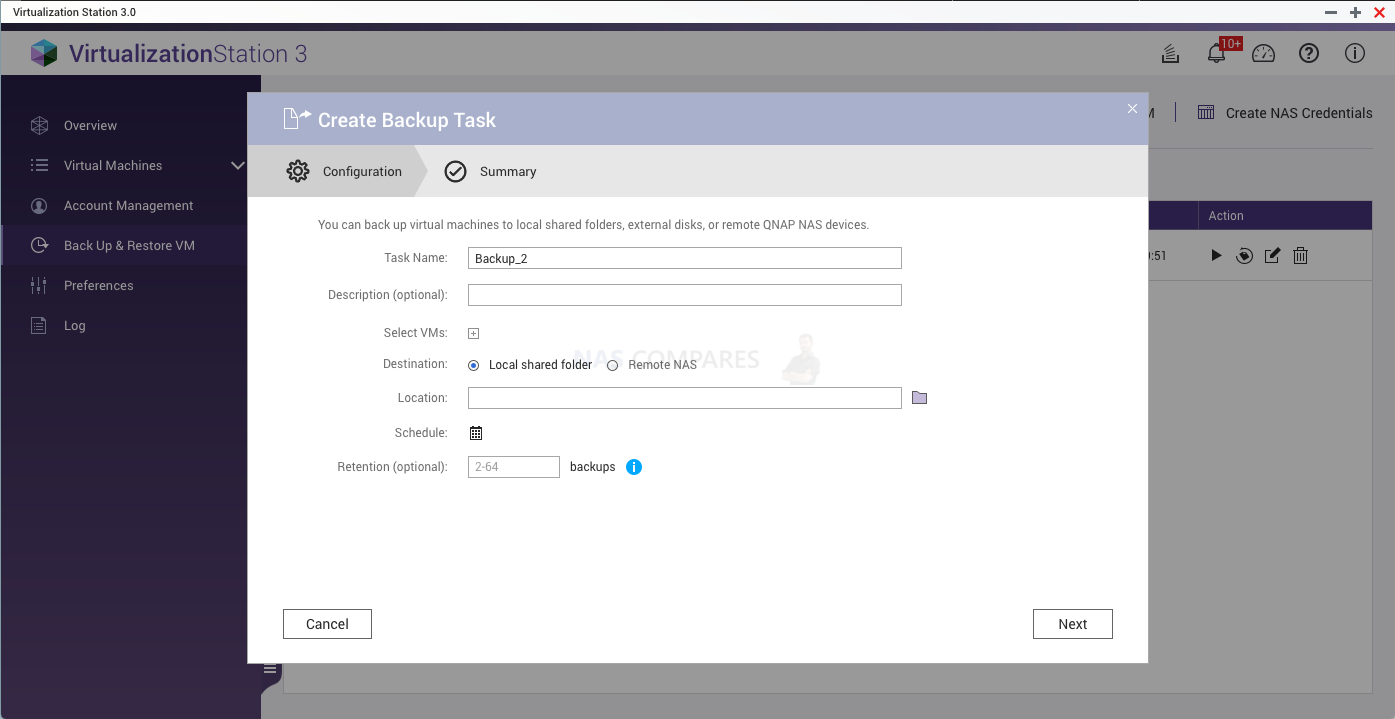
- Click “Back Up VM” to back up a VM. The VMs can be backed up at remote or local NAS. You can select the maximum number of backup versions.
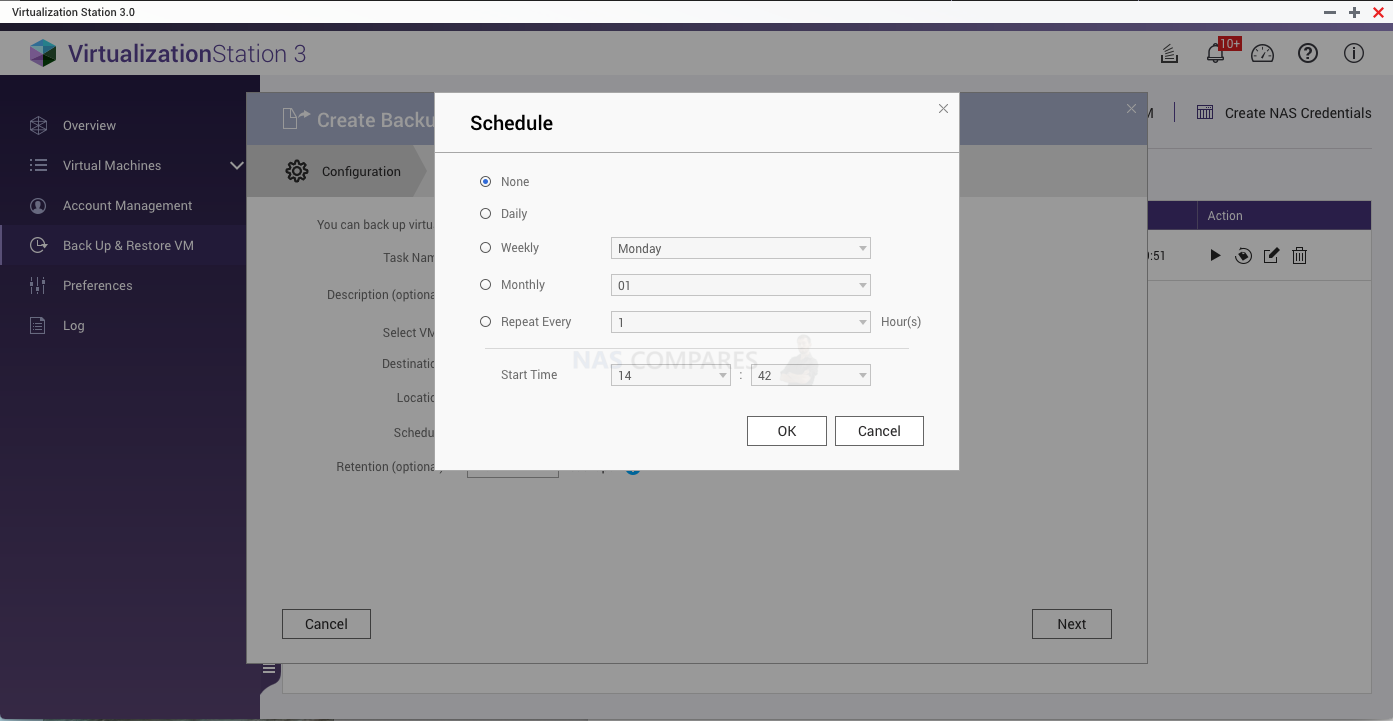
Select the schedule to arrange automatic backup times.
- If the VM cannot be started or it disappears, click “Restore VM” to restore a backed-up VM.
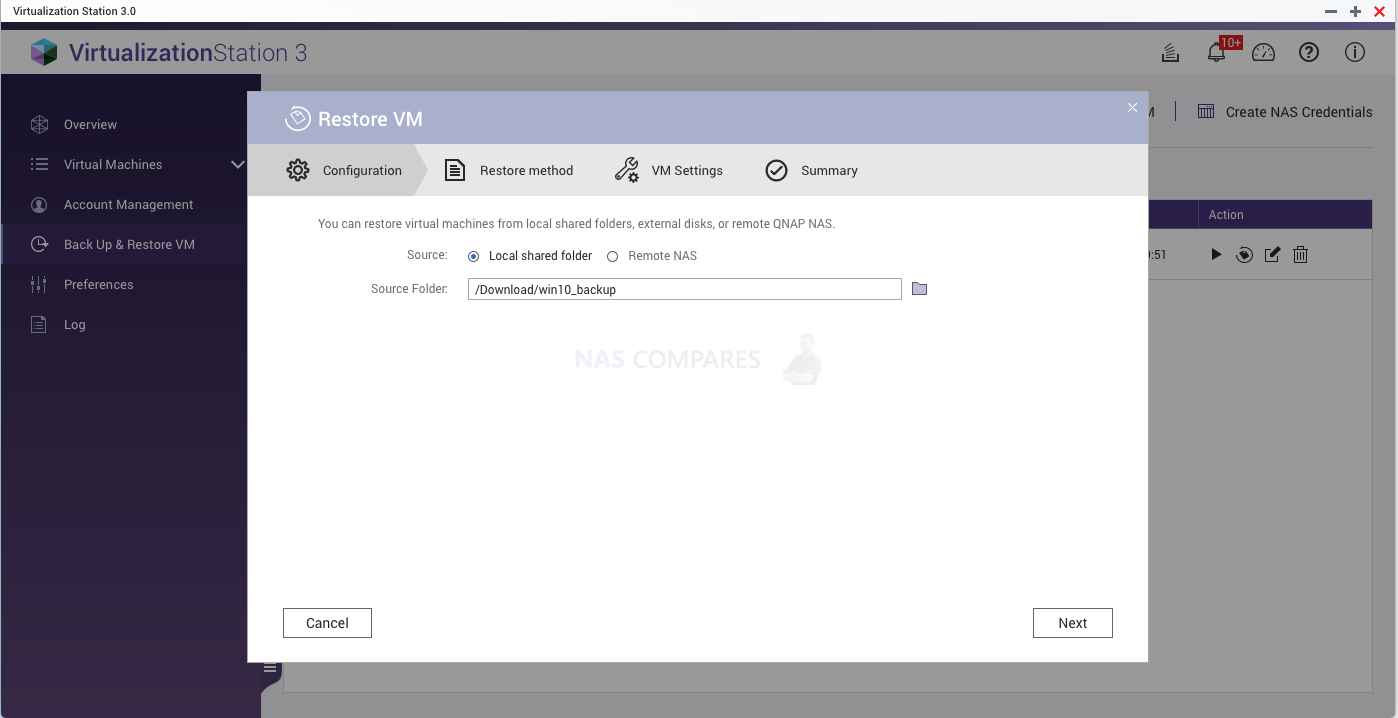
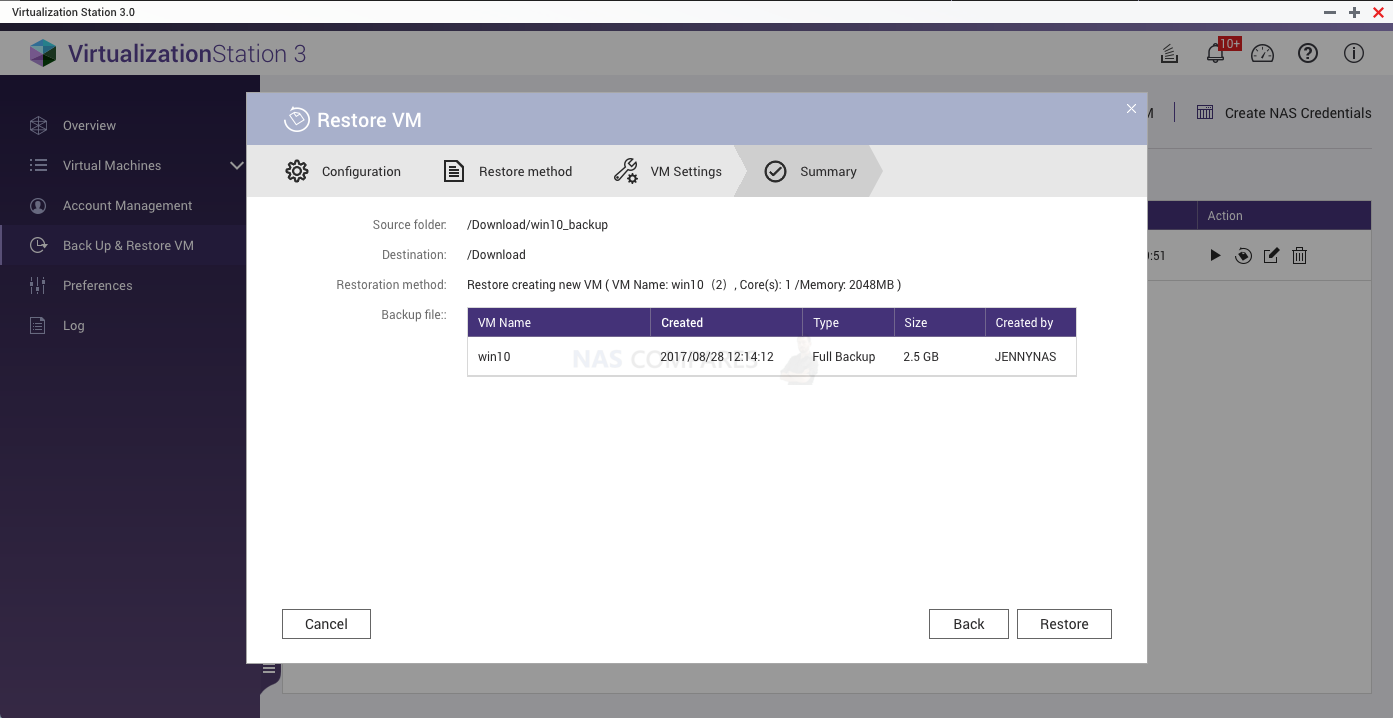
You can overwrite the existing VM or create a new VM.
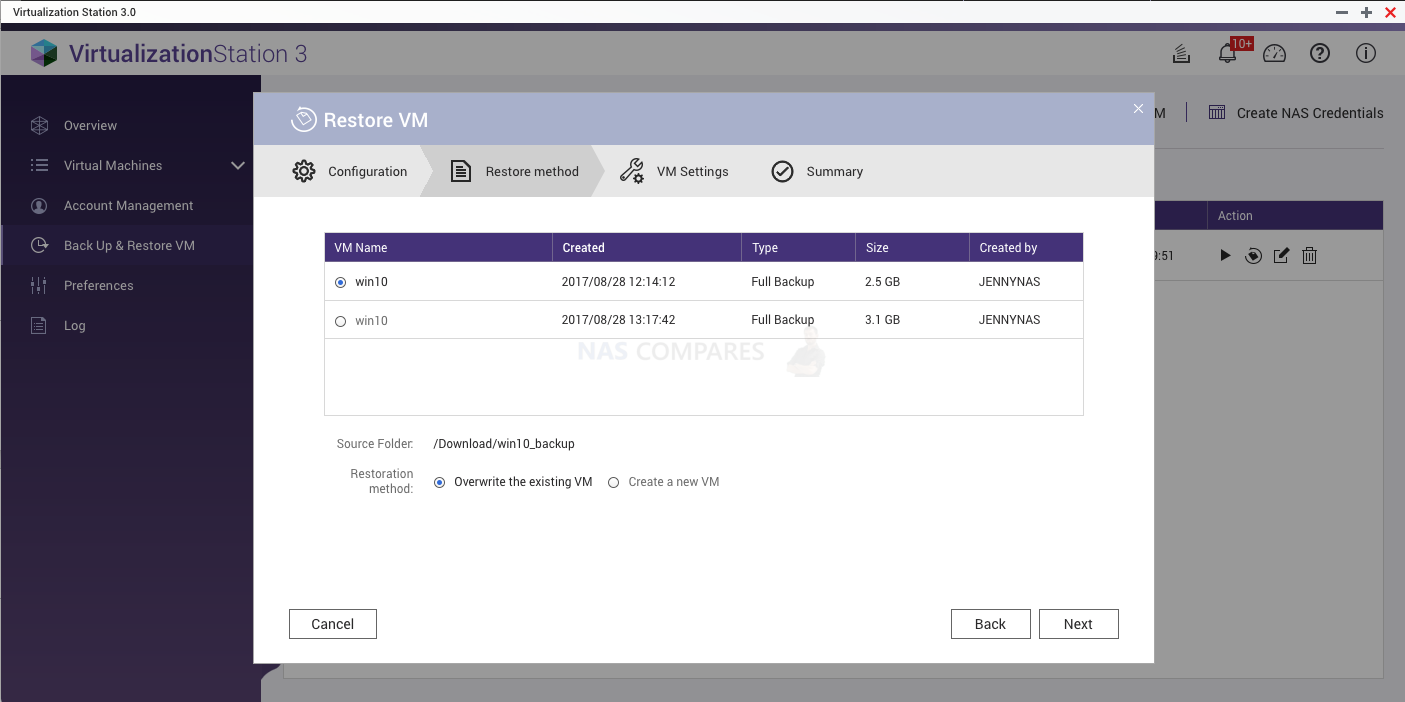
The VM will be restored to the state recorded by the backup file. Users can also create a VM from a backup file directly. This method shortens the VM creation process but deletes the backup after completion.
5. Preferences
There are four tabs in “Preferences”:
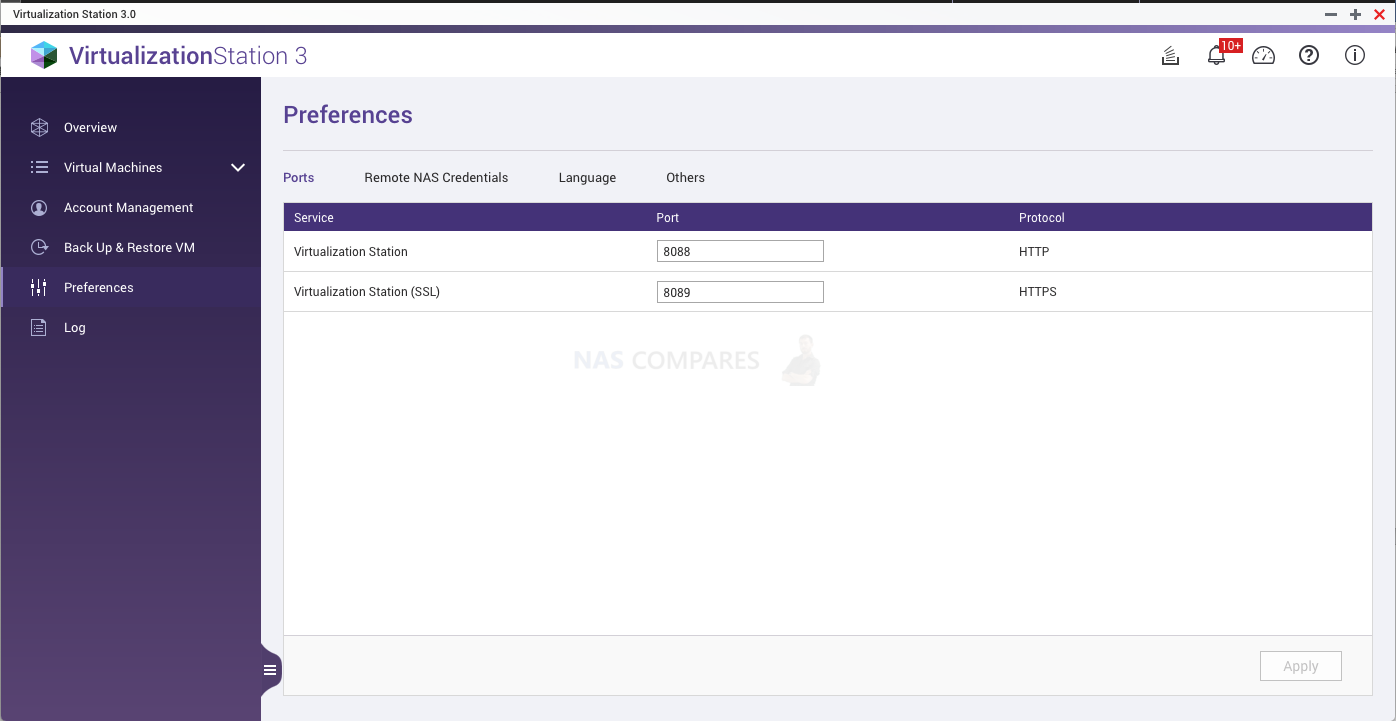
- Ports Settings
The default ports of “Web Server” and “Web Server (SSL)” are 8088, 8089 respectively. You can specify the ports used by Virtualization Station.
- Remote NAS Credentials
You can view or add NAS network information including the display name, IP address, and more.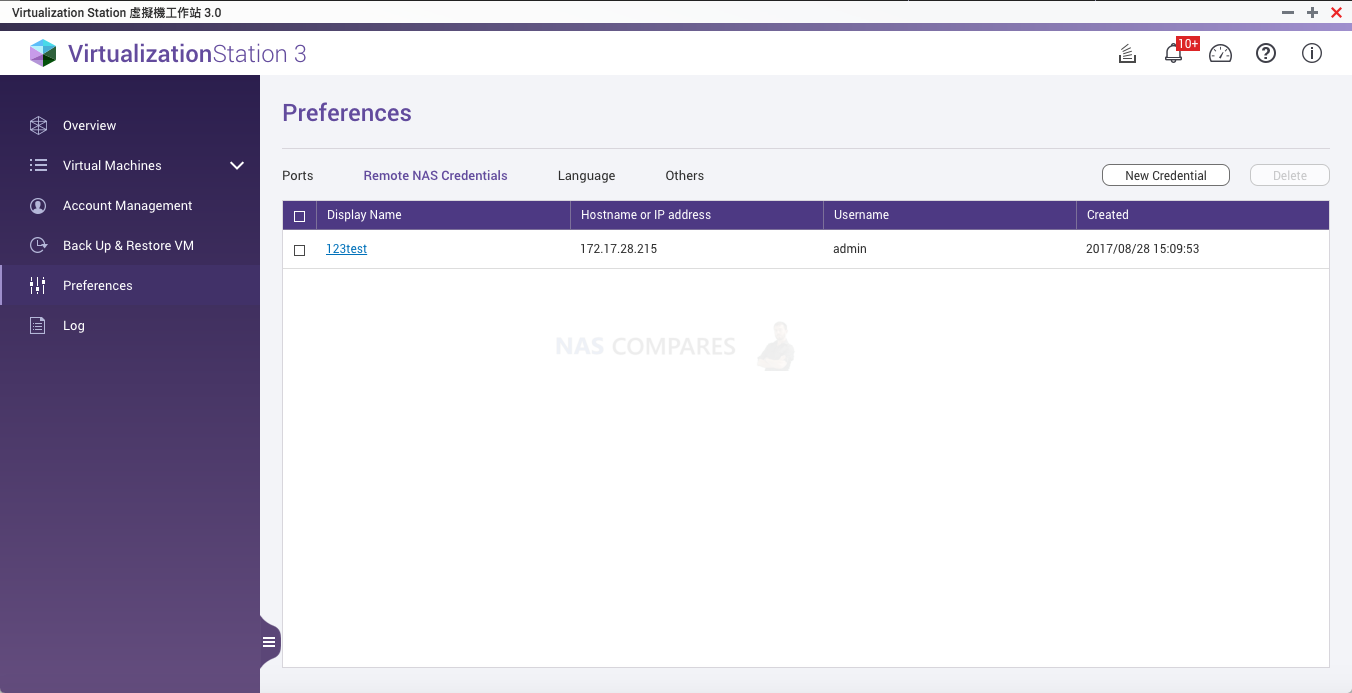
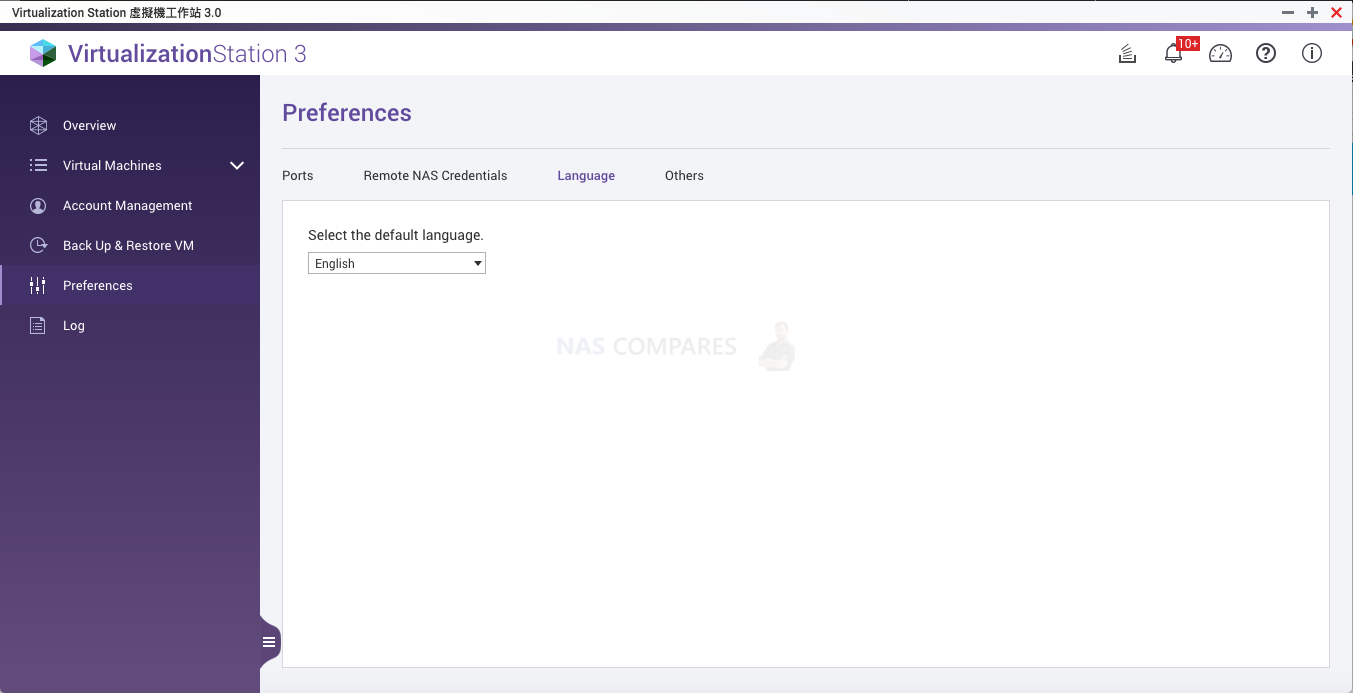
- Language
You can change the displayed language.
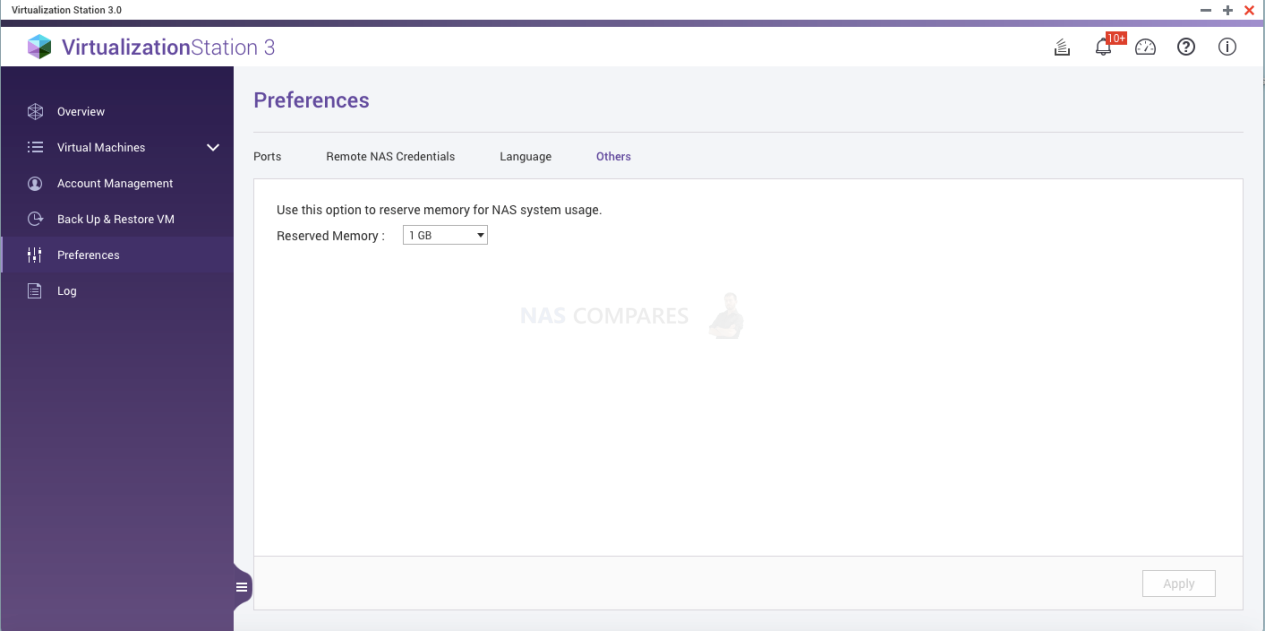
- Others
Users can set the reserved memory. This ensures that the NAS will have sufficient resources for system services.
6. Log
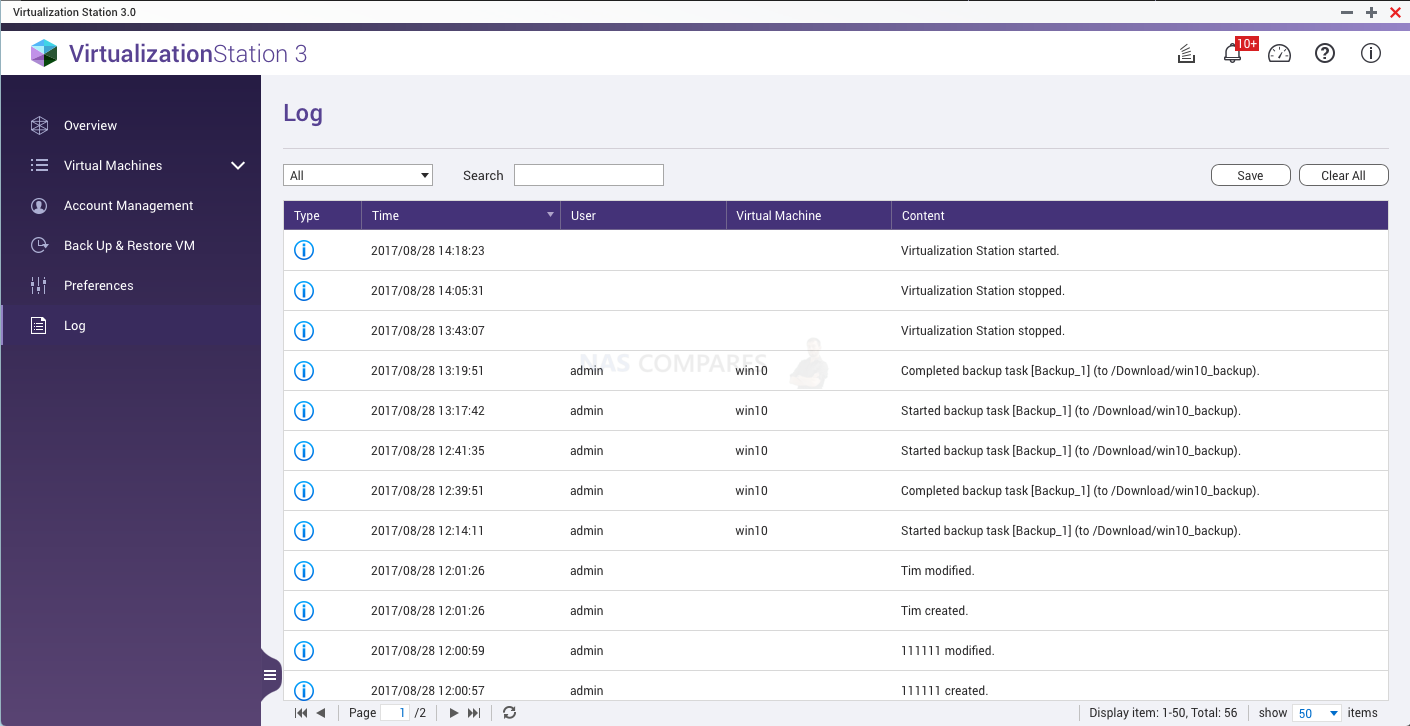
To check the system logs of the Virtualization Station, click  . You can download a list of system logs by clicking “Save”. This will download a CSV file of the Virtualization Station system logs to your current device.
7. Console (HTML5)
The console is viewed after opening the VM.
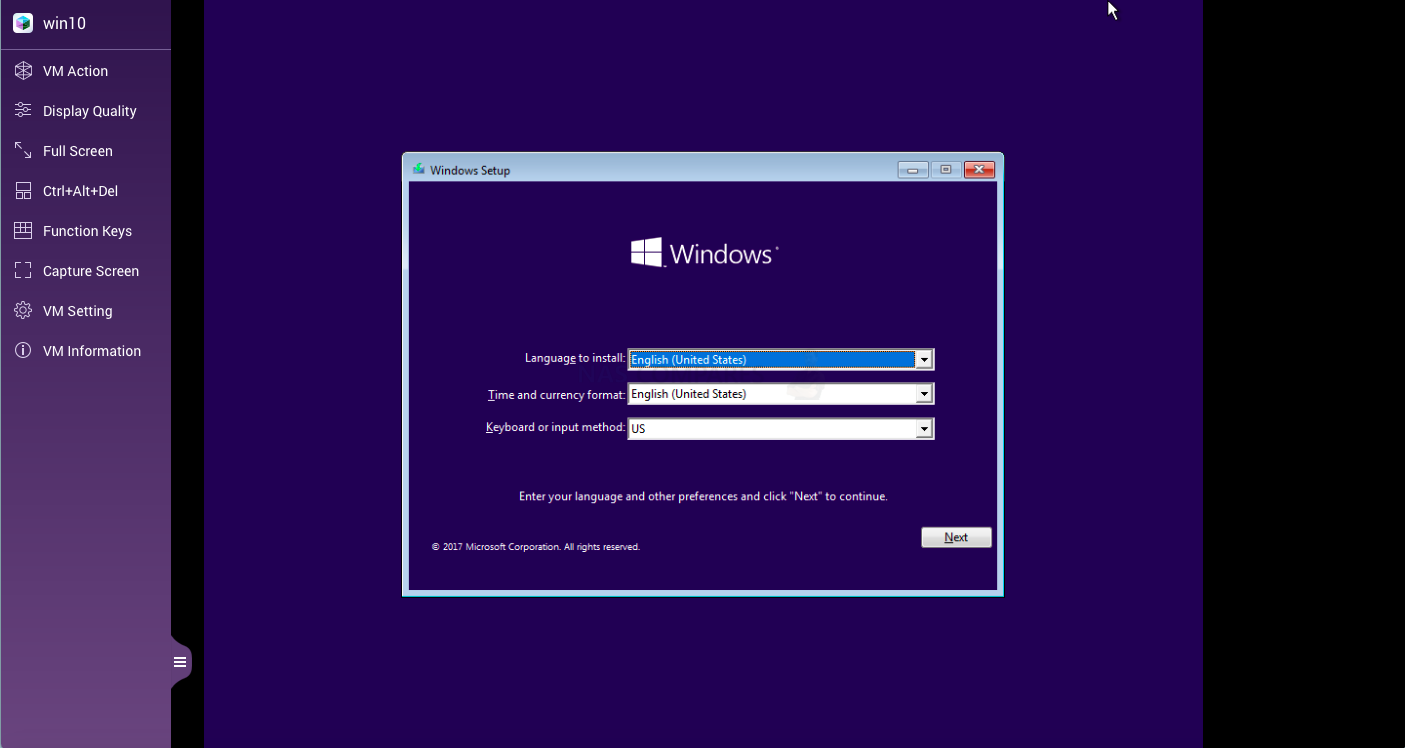
- VM action: Suspend, reset, shutdown, force shutdown or take a snapshot.
- Display quality: Select the connection quality – High, Medium, Low and Very Low.
- Full screen: View the VM in full screen.
- Ctrl + Alt + Del
- Function keys: Users can open the keyboard here.
- Capture screen: Click and it will open the screenshot in the new browser.
- VM setting: Change VM settings.
- VM information: View the VM information.
That’s it, now you can access the virtual machine using Windows Remote Desktop Tool, Installing Teamviewer or any other remote access tool you’d like to try (or have pre-installed on your system). Or you can simply use the VM through the browser tab if you’d like instead, but the refresh rate and response time will not be as fast, due to the fractionally higher latency.
A Quick Question to You – Yes, you reading this!
If you plan on buying your NAS Drive the links below will take you to some Synology NAS Options

🔒 Join Inner Circle
Get an alert every time something gets added to this specific article!
This description contains links to Amazon. These links will take you to some of the products mentioned in today's content. As an Amazon Associate, I earn from qualifying purchases. Visit the NASCompares Deal Finder to find the best place to buy this device in your region, based on Service, Support and Reputation - Just Search for your NAS Drive in the Box Below
Need Advice on Data Storage from an Expert?
Finally, for free advice about your setup, just leave a message in the comments below here at NASCompares.com and we will get back to you. Need Help?
Where possible (and where appropriate) please provide as much information about your requirements, as then I can arrange the best answer and solution to your needs. Do not worry about your e-mail address being required, it will NOT be used in a mailing list and will NOT be used in any way other than to respond to your enquiry.

|
 |
Synology FS200T NAS is STILL COMING... But... WHY?
Gl.iNet vs UniFi Travel Routers - Which Should You Buy?
UnifyDrive UP6 Mobile NAS Review
UniFi Travel Router Tests - Aeroplane Sharing, WiFi Portals, Power Draw, Heat and More
UGREEN iDX6011 Pro NAS Review
Beelink ME PRO NAS Review
Access content via Patreon or KO-FI
Discover more from NAS Compares
Subscribe to get the latest posts sent to your email.






Hello thanks for this video great work. I am not sure if you can help. I installed a VM and everything is working using VIRTIO drivers. I have a TS-h973-AX and I am using the 10Gbe port. My virtual switch it also using that adapter but the VM network performance is limited to only 1Gbps for some reason. I can get proper speed when directly connecting to the NAS but when I go through a virtual machine is it only 1Gbps. Inside the VM it actually says my link is 100Gbps but it is really limited to 1Gbps. Thank you for any insight on this.
REPLY ON YOUTUBE
Hi,
really grateful for the Youtube channel you have as well as this companion website- i pretty much bought and did initial set up of my NAS TS-453D (first time user) based on your advice.
I am having an alarming issue with setting up the virtualization station from the get go. Right where it says it is going to create a Virtual Switch once you click Finish and the network connection will be interrupted- i lose connection to that pop up window and then to the NAS itself but it doesn’t come back and it has been this way for the last few hours with the LAN light in amber and i cannot even ping the IP address of the NAS now.
Any help would be greatly appreciated.
Thanks for this great video. I was racking my brain trying for find easy to follow instructions like yours is. Thanks for sharing!!!
REPLY ON YOUTUBE
Thanks for this. I’ve been watching your channel on/off for the past few years. I have a TS-412 & more recently the TS453-BT3 with a TR-004 RAID array.
Your videos area always SO clear & honest. I’ve only watched the QNAP ones, but they always seem very unbiased (IMO) in your review style…
I need a Virtual Windows machine to install software for the Lotharek HxC floppy emulator hardware, for some vintage music equipment – and I run OSX at my place.
I figure using the Windows Virtual Machine on my NAS should be good enough to run the software, to create the configuration files and/or disc images for the HxC emulator!
REPLY ON YOUTUBE
Thank you
REPLY ON YOUTUBE
Just to save other people, who read through this instructions, some time: the following topics are simply not correctly explained in the text and video above:
1. You can not download the tool VMware VCenter Converter without registering as a user anymore (date: 12-09-2020)
2. The alternative tool disk2vhd did not take 14 hours on my Windows 10 desktop, but only 20 minutes. To create a VHD-image from the current (running) Windows 10 partition, which is about 400 GB large and resulted in a 67 GB large VHD-File. So in case you want to turn your system partition into a VHD image, I’d recommend taking disk2vhd from Microsoft.
3. But whatever you want to do with the system image in the VHD-format, forget the idea to use it in the virtualization station on your QNAP. Virtualization station DOES NOT(!) support images in the VHD format!!! I don’t know what happened here at NASCompares (maybe a mixup with Synology, which offers a converter for VHD based images), but there is a reason why the video continues with download a fresh ISO image from the Microsoft Servers. Because continuing the story with an VHD image would simply not have worked.
There are instructions for how to convert a VHD image into an ISO based image, but those didn’t sound like something that is done in a few minutes.
So my advice: head directly to the part where you download a fresh ISO image for Windows 10 and install that from scratch. Another important point: if performance is an issue, do google “VirtIO” drivers. Because with the original drivers, the performance loss for disk and network IO is huge.