

Best cloud backup provider for Qnap/Synology NAS
We bought a NAS and your website helped us a lot in making all the decisions, for which we are grateful!
We bought a QNAP TVS-1282T and have around 28TB netto. Currently only 4TB in use.
We want to back this up to a cloud service, but we have no idea which services work great on a qnap, and are also affordable. (Dropbox costs us €54 monthly). We had dropbox but the business solution has limited API calls and is because of this useless.
28TB
For backing up your NAS do consider BlackBlaze. You can try it for 15 days free if you don’t believe its good. But the main reason is unlimited backup size. Everyone else like Dropbox, Amazon, and others will charge more per gigabyte. Blackblaze will keep the costs down, saving you half or more of your money. The other great feature is version control. So even if you get hit by ransomware type of virus or simply deleted or mistakenly changed few files. You can restore your data from historical backup versions and get all data back.
You can get it for free here and try:
Home: https://www.backblaze.com/cloud-backup.html#af9rgr
Business: https://www.backblaze.com/business-backup.html#af9rgr
Comparison with other service providers: https://www.backblaze.com/best-online-backup-service.html#af9rgr
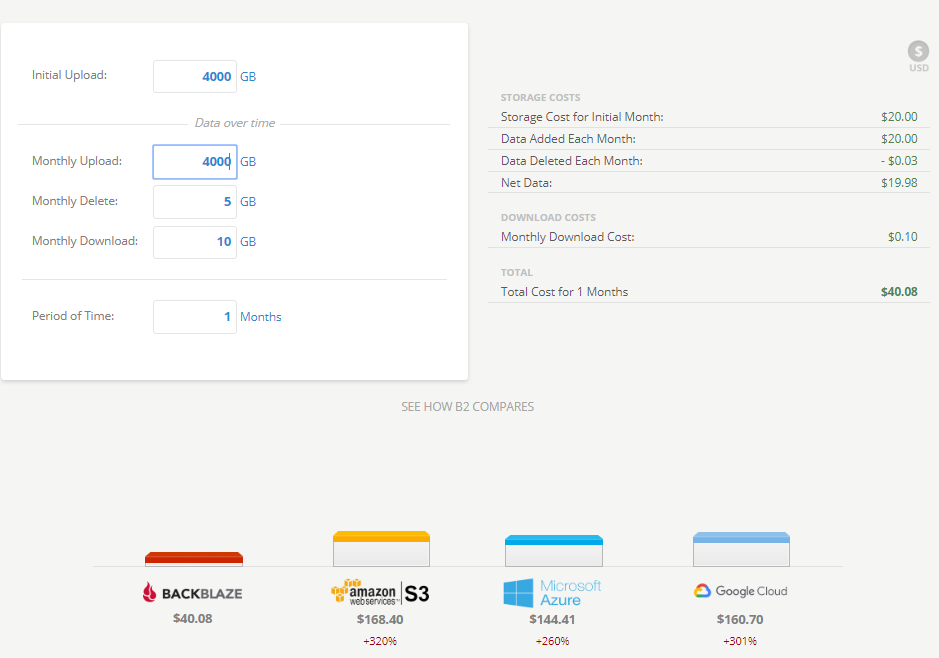
Their price calculator shows that it will cost you 40$ to put your existing data in the cloud. After that, it will cost 20$/month to do incremental cloud backup if you add another 2TB every day. But most likely you will have generated less than a TB a month.
The alternative always is another NAS in a remote location. This will be just a one-off cost for a cheap backup NAS to synchronize all data every minute. That would be an easy and cost-effective solution.
Qnap Supported Cloud Services


How to Set up QNAP’s Hybrid Backup Sync to Work With B2 Cloud Storage
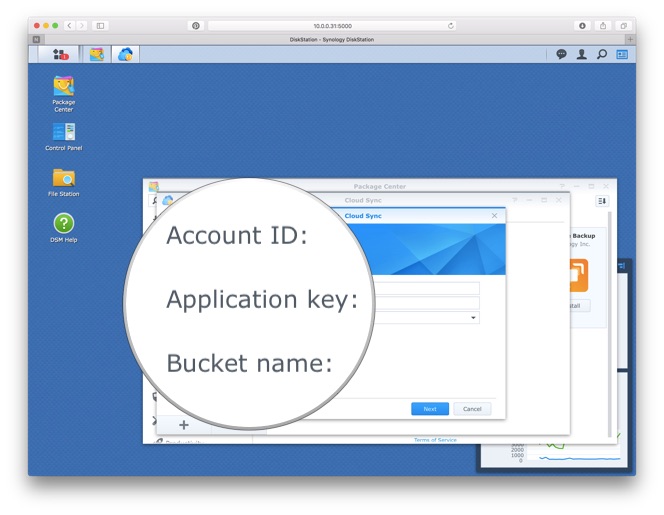
To set up your QNAP with B2 sync support, you’ll need access to your B2 account. You’ll also need your B2 Account ID, application key and bucket name — all of which are available after you log into your Backblaze account. Finally, you’ll need the Hybrid Backup Sync application installed in QTS on your QNAP NAS. You’ll need QTS 4.3.3 or later and Hybrid Backup Sync v2.1.170615 or later.
- Open the QTS desktop in your web browser.

- If it’s not already installed, install the latest Hybrid Backup Sync from the App Center.

- Click on Hybrid Backup Sync from the desktop.
- Click the Sync button to create a new connection to B2.

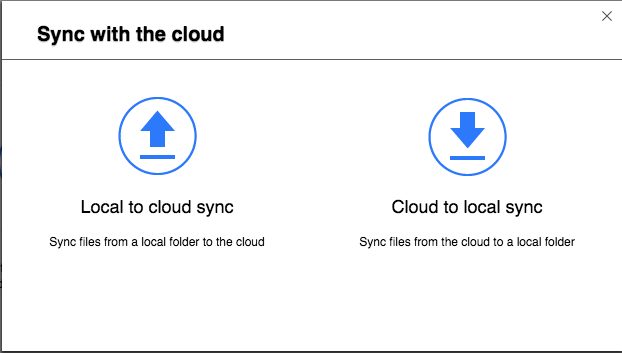
- Select “One-way Sync” and “Sync with the cloud.” Other options are also available.
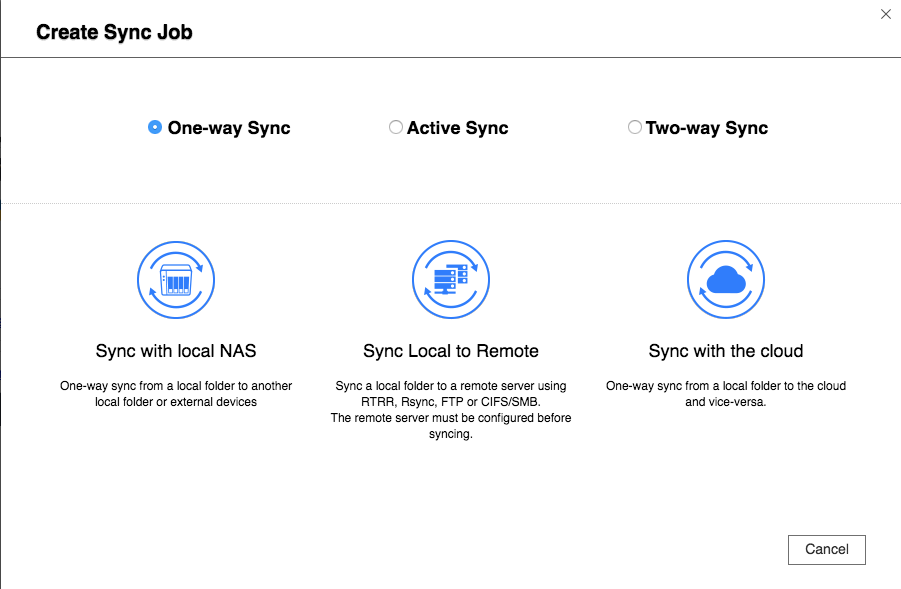
- Select “Local to cloud sync.”
- Select an existing Account (job), or just select “Backblaze B2” to create a new one.
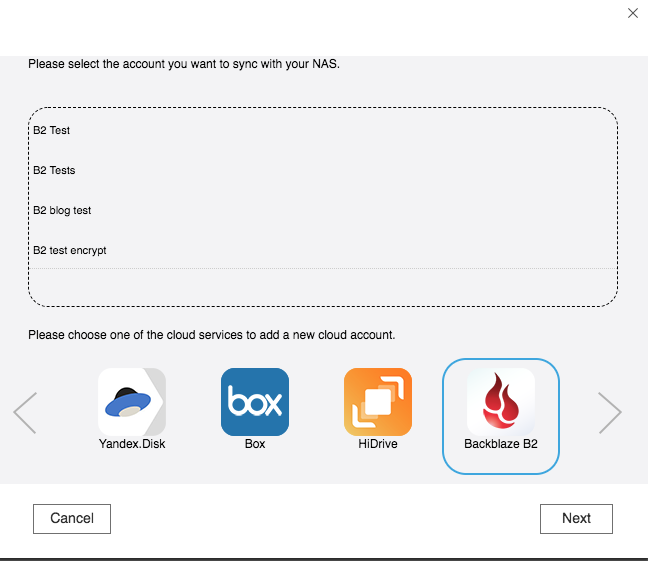
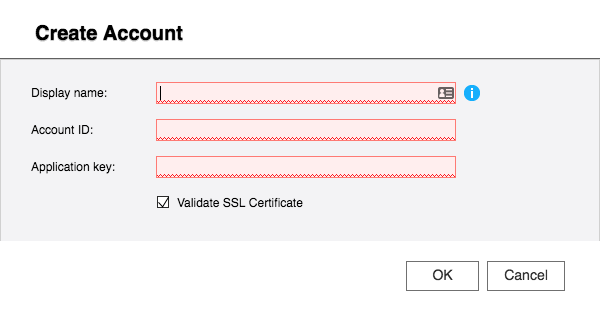
- Enter a display name for this job, and your Account ID and Application key for your Backblaze B2 account.
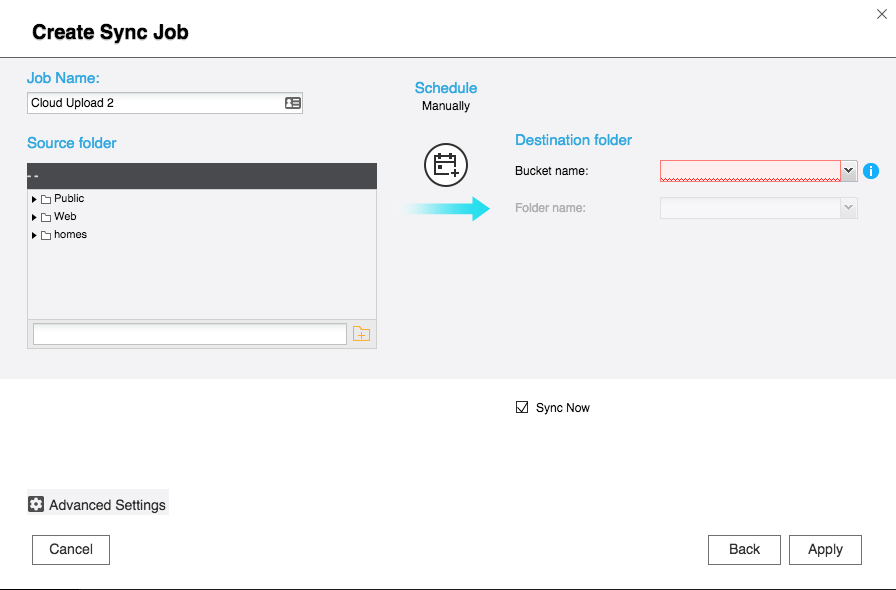
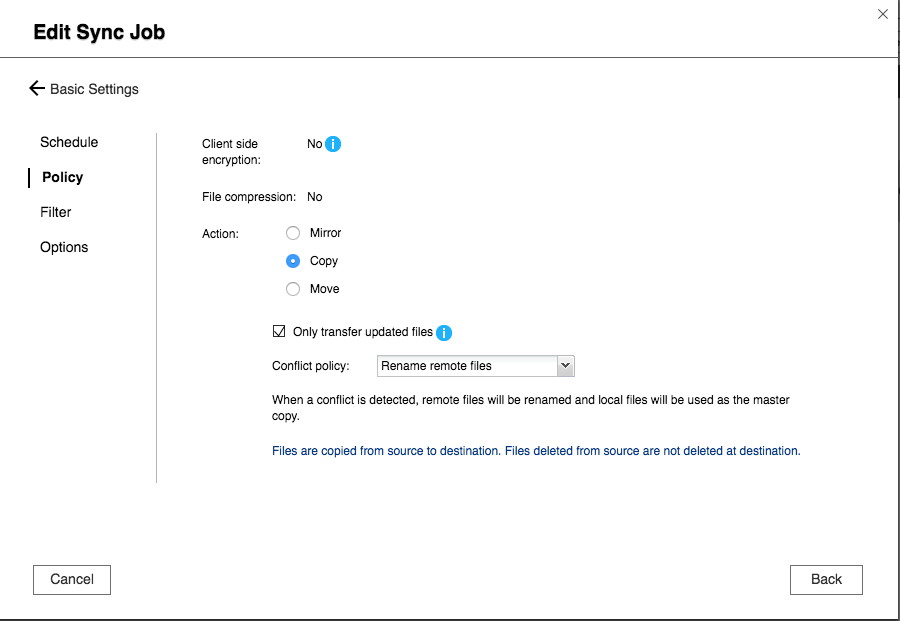
- Select the source folder on the NAS you’d like to sync, and the bucket name and folder name on B2 for the destination. If you’d like to sync immediately, select the “Sync Now” checkbox. Click “Advanced Settings” if you’d like to configure a backup schedule, select client-side encryption, compression, filters, file replacement policies, and other options. Click “Apply.” If you selected “Sync Now,” your job will start.
- After you’ve finished configuring your job, you will see the “All Jobs” dialog with the status of all your jobs.


How to set up your DiskStation with B2 cloud sync support
To set up your DiskStation with B2 sync support, you’ll need access to your B2 account. You’ll also need your B2 Account ID, application key and bucket name — all of which are available when you log into Backblaze. Finally, you’ll need the Cloud Sync application installed on your DiskStation.
- Open the DiskStation Management interface in your web browser.
- Install Cloud Sync v2.1.0 or later from the Package Center, if it’s not already installed.
- Click on the Main Menu.
- Click on Cloud Sync.
- Click the + button to create a new connection to B2.
- Select “Backblaze B2 Beta” from the list of cloud providers.

- Enter the account ID, application key, and bucket name you’ll be using for the sync. The bucket is the container that holds the DiskStation files you’d like to sync.
- Select the folder on the DiskStation you’d like to sync.
- Click Next. Confirm the task settings and the DiskStation will begin to sync to B2.
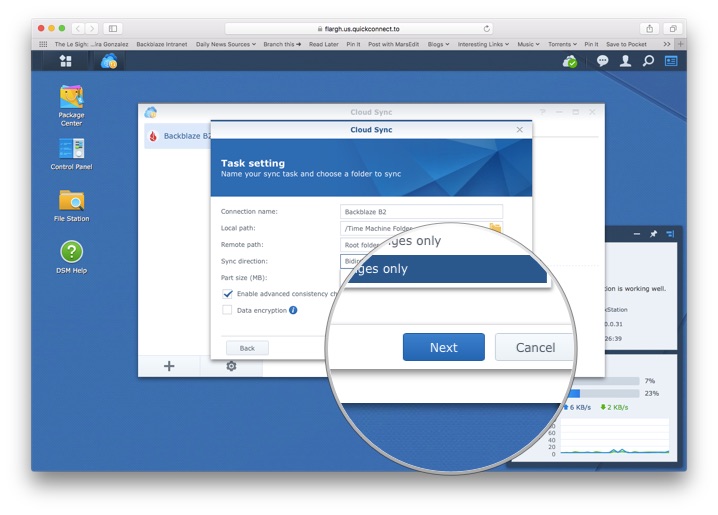
- Task settings lets you specify the folder you’re uploading, and lets you prevent the DiskStation and B2 from syncing specific files or subdirectories. You can create exclusions for specific file types, too, as well as file names.
| Where to Buy a Product | |||
 |
    
|

|
VISIT RETAILER ➤ |
 |
|
|
VISIT RETAILER ➤ |
 |
|
|
VISIT RETAILER ➤ |
|
|
|
|
VISIT RETAILER ➤ |
We use affiliate links on the blog allowing NAScompares information and advice service to be free of charge to you. Anything you purchase on the day you click on our links will generate a small commission which is used to run the website. Here is a link for Amazon and B&H. You can also get me a ☕ Ko-fi or old school Paypal. Thanks! To find out more about how to support this advice service check HERE If you need to fix or configure a NAS, check Fiver Have you thought about helping others with your knowledge? Find Instructions Here


ZimaOS is the BEST Beginner NAS OS - Watch Your Back UnRAID and TrueNAS !!!
30TB Hard Drives are TOO BIG ! (and here is why)
COMPLETE UGREEN NAS Setup Guide - 2025 EVERYTHING VERSION
$110 USB4 to 2x10Gb Adapter Review - What the WHAT?
UGREEN NAS Now has iSCSI, 2FA and Jellyfin (and more) - FINALLY!
Seagate 30TB Ironwolf and EXOS Hard Drive Review
Access content via Patreon or KO-FI
DISCUSS with others your opinion about this subject.
ASK questions to NAS community
SHARE more details what you have found on this subject
CONTRIBUTE with your own article or review. Click HERE
IMPROVE this niche ecosystem, let us know what to change/fix on this site
EARN KO-FI Share your knowledge with others and get paid for it! Click HERE