

My current thoughts and questions are currently:
- Purchase the Synology DS1821+
- Purchase 2/4 x HAT5300 Series 3.5” SATA HDD and get more when needed
- How do exactly do I upgrade it to 10GbE support?
- How do SNV3400/3500 Series M.2 NVMe SSD work? How do I install them?
- And how do SAT5200 Series 2.5” SATA SSD work? How do I install them?
Excuse the basic questions, but I dip into NAS territory every 5 years or so when there’s an issue.I just want a FAST and extendable system.
Adding 10GbE card on your NAS (guide added at the bottom of this post) will improve data transfer speeds. Just make sure your computer has 10GbE port too. Here are a few switches listed to simplify the process https://nascompares.com/answer/cheapest-10gbe-switches-updated/
But, sometimes people will use them for caching. It is not as fast as NVMe SSD, but in business environments where NVMe is too expensive or not available in bigger capacities, this is a good compromise to boost HDD RAID performance with some caching.
-
Is it advisable to use a mixture of HDD and SSD drives?
-
Do I need any special screwdrivers or tools to do the upgrades?
Synology and Qnap both allow multiple RAIDs. This allows you to create two RAIDs/Volumes. One with SSD and another with HDDs. You can not mix SSD and HDD within the same RAID though.
Regarding tools, you will need Philips Screwdriver. https://amzn.to/3WaPNkY
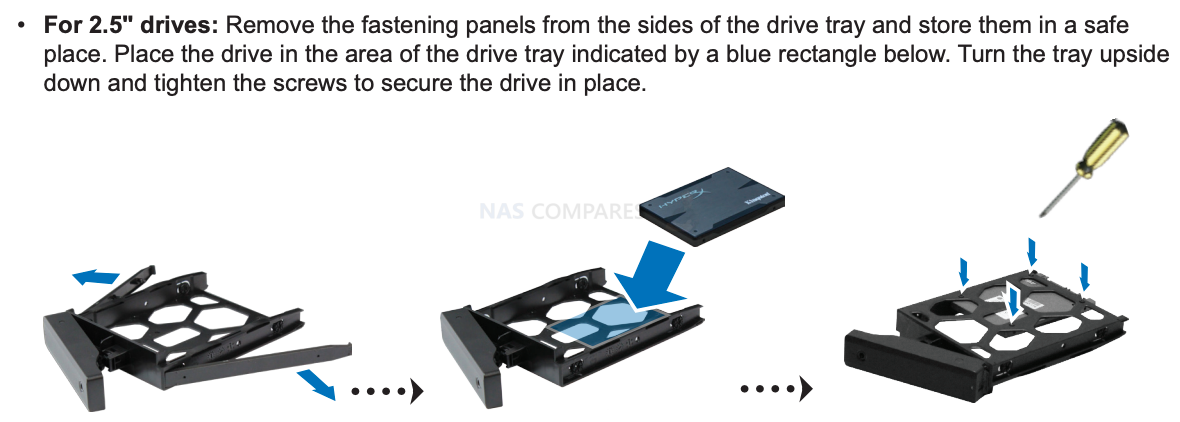
Install 2.5 inch SSD for caching
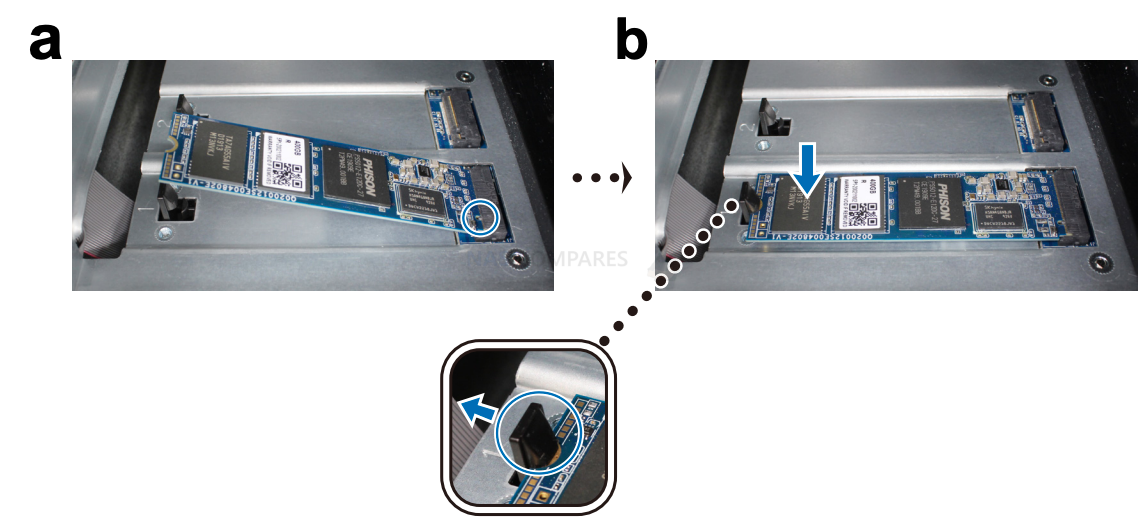
Add an M.2 NVMe SSD caching to Synology NAS
6 Insert the drive trays back into the drive bays.
7 Reconnect the cables removed in step 1, then press the power button to turn on your Synology NAS.
1 Shut down your Synology NAS. Disconnect all cables from your Synology NAS to prevent possible damage.
2 Remove the hard drive trays from the drive bays.
3 Push the lever outward. The module will pop up and be released from the slot.
4 Hold the SSD module and remove it from the slot. Insert the drive trays back into the drive bays.
5 Reconnect the cables removed in step 1, then press the power button to turn on your Synology NAS.
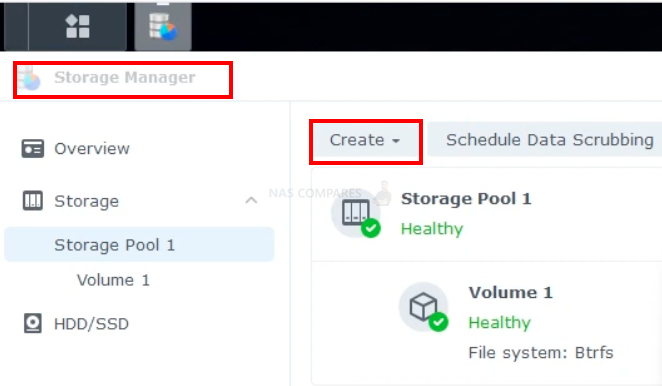
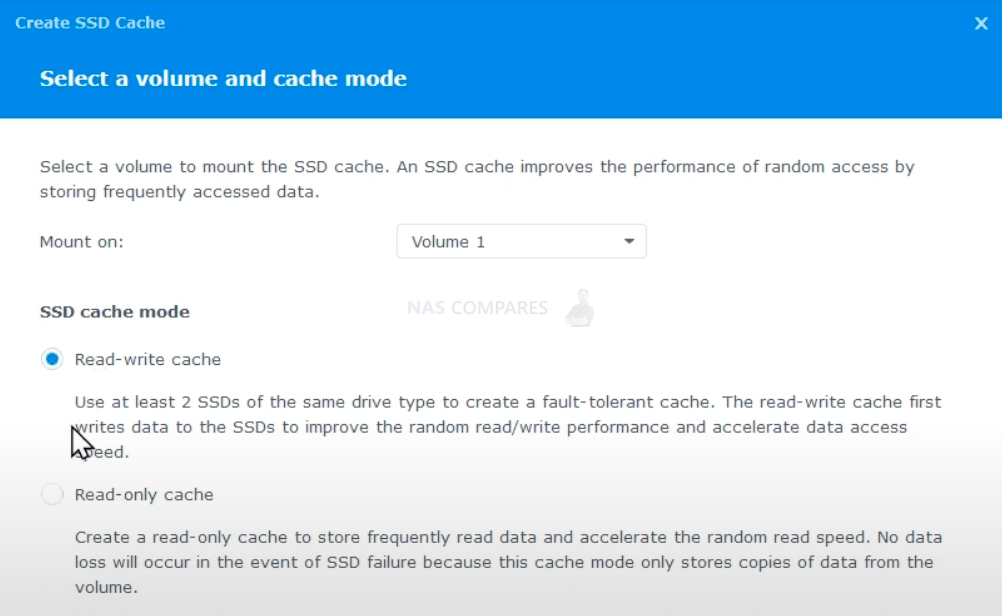
Enable cache
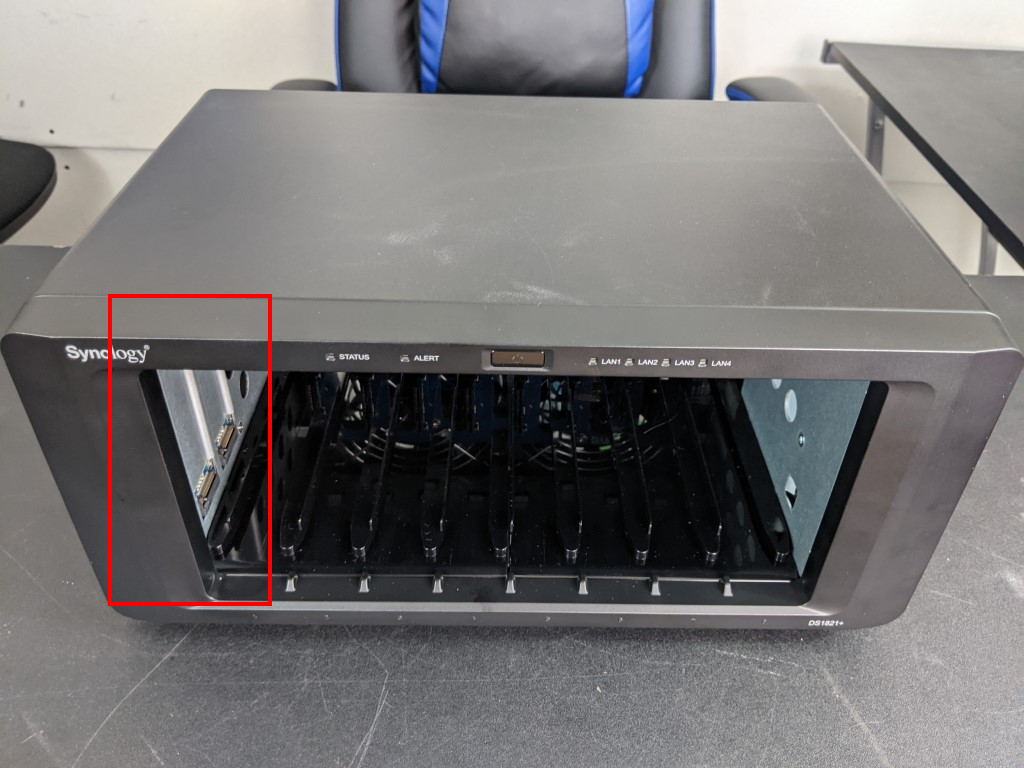
Add a 10GbE Network Interface Card
Your Synology NAS has a PCI Express expansion slot which allows you to install 10GbE or Gigabit network
interface card for LAN port expansion.
To install a network interface card:
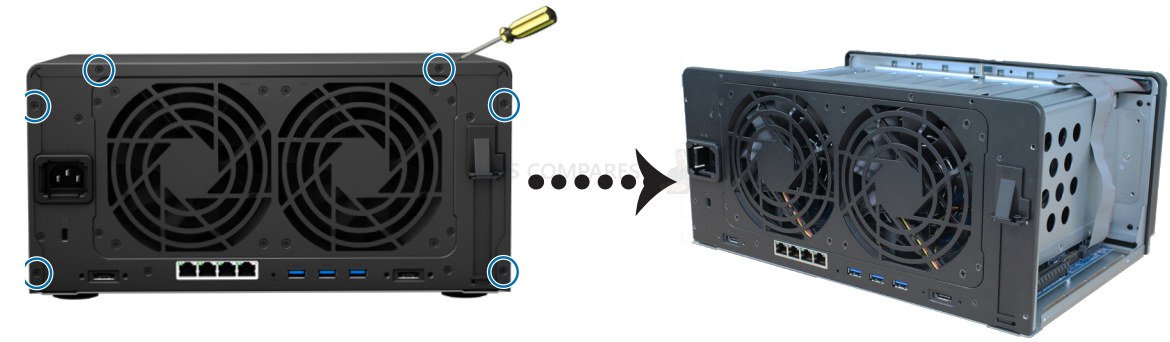
1 Shut down your Synology NAS. Disconnect all cables from your Synology NAS to prevent possible damage.
2 Remove the six screws that secure the top cover.
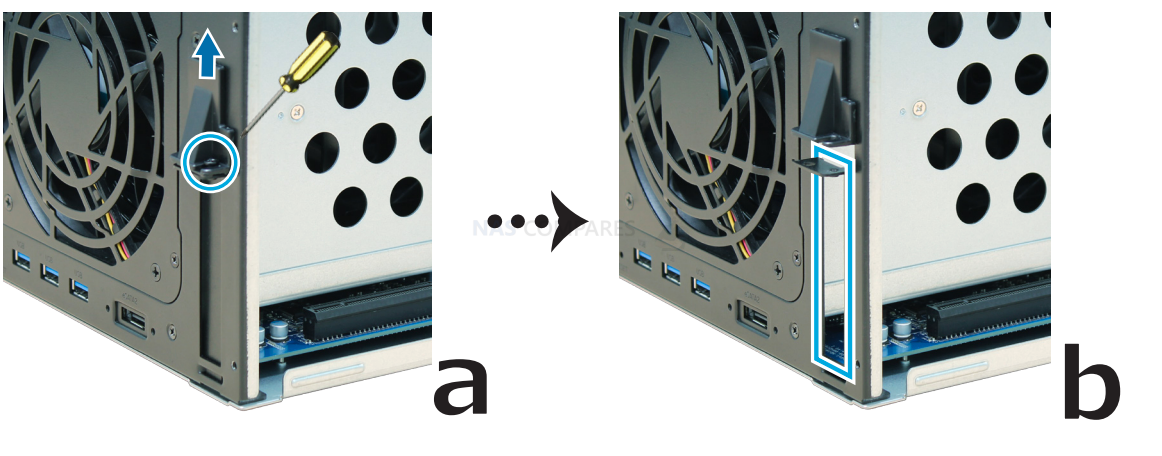
a Remove the screw that secures the adapter slot’s cover.
b Remove the adapter slot’s cover.
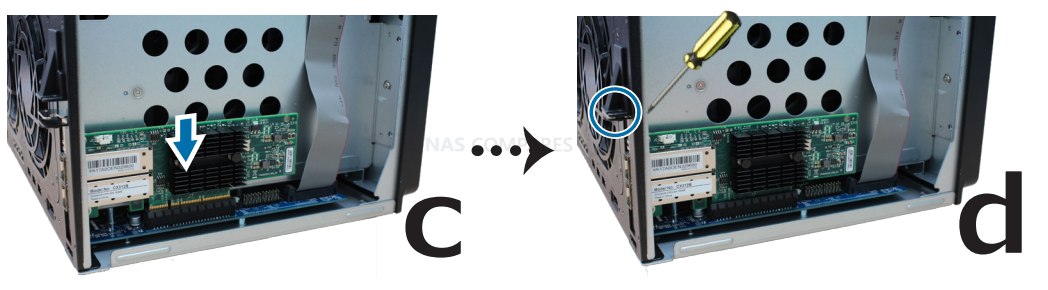
d Put back and fasten the screw that you removed in step 3-a so as to secure the newly inserted card.
| Where to Buy a Product | |||
 |
    
|

|
VISIT RETAILER ➤ |
 |
|
|
VISIT RETAILER ➤ |
 |
|
|
VISIT RETAILER ➤ |
|
|
|
|
VISIT RETAILER ➤ |
We use affiliate links on the blog allowing NAScompares information and advice service to be free of charge to you. Anything you purchase on the day you click on our links will generate a small commission which is used to run the website. Here is a link for Amazon and B&H. You can also get me a ☕ Ko-fi or old school Paypal. Thanks! To find out more about how to support this advice service check HERE If you need to fix or configure a NAS, check Fiver Have you thought about helping others with your knowledge? Find Instructions Here


UGREEN DH4300 & DH2300 NAS Revealed - Good Value?
Aoostar WTR Max NAS - Should You Buy?
Xyber Hydra N150 NAS Review - Is This COOL?
Minisforum N5 Pro vs Aoostar WTR Max - The BIG Showdown
Do MORE with Your M.2 Slots - GREAT M.2 Adapters!
5 Top Tips for Content Creators Buying a NAS
Access content via Patreon or KO-FI
DISCUSS with others your opinion about this subject.
ASK questions to NAS community
SHARE more details what you have found on this subject
CONTRIBUTE with your own article or review. Click HERE
IMPROVE this niche ecosystem, let us know what to change/fix on this site
EARN KO-FI Share your knowledge with others and get paid for it! Click HERE