How to Upgrade the Hard Drive in Your BeeStation
Why Would You want to change the hard drive in the Synology Beestation? Whether you are an existing owner of the Synology Beestation or a potential NAS buyer who is considering moving away from public cloud services onto your own personal cloud, the Beestastion and BSM provide a fantastically user-friendly alternative to the Synology Diskstation and DSM solutions that the brand has been releasing for almost 25 years. The Beestation can be set up in minutes, sets up all the apps, storage and services in 3 clicks and is BY FAR the most user-friendly NAS system I have ever used! However, it DOES have 1 weakness… one rather sizable Achilles heel… THAT 4TB hard drive inside! The Synology Beestation (At launch – so that might change as time goes on) arrives with a single 4TB Synology HAT3300/3310 5400RPM Hard Drive for storing all your data. This can lead to a lower glass ceiling when it comes to your long-term storage – fun fact, The latest iPhone Pro models supports upto 48MP Apple ProRAW images, which captures more dynamic range at the cost of much larger files, around 75MB for each image. That would still allow just under 60,000 images on a 4TB drives – but once you factor in video backups, PC backups and more, 4TB of capacity is actually going to run out quicker than you think, especially if you connect the maximum 8 supported users. Then there is the performance barrier of a single 5400RPM HDD. Hardware are not great for larger simultaneous input/outputs (e.g lots of individual write operation tasks happening at the same time) and the response times and smoothness of the BSM/BeeStation experience will be diminished. You are also losing out on RAID failover, something that is largely unavailable in a 1 bay, but short of using a dual drive cage adapter (more on that later on) this is unavoidable.
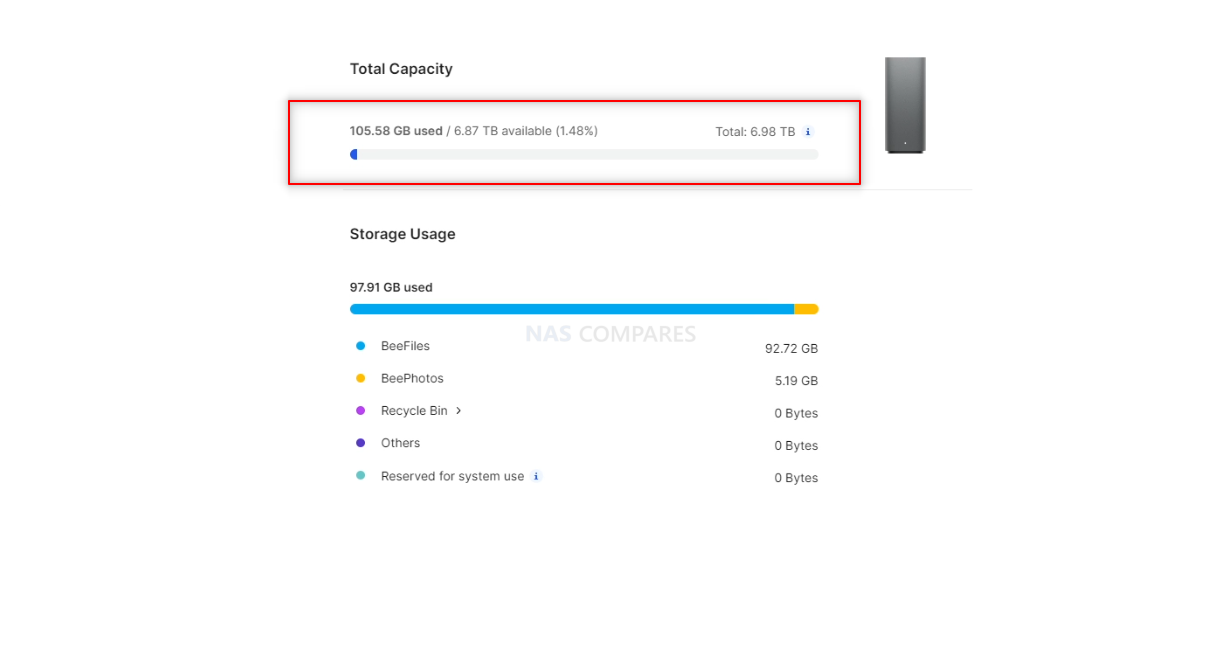
This brings us neatly back around to the subject of changing the HDD inside the Synology Beestation to something with a higher capacity, maybe a Pro series drive with 7200RPM and more cache. or perhaps even a faster SSD instead of an HDD? Synology has not allowed this system to support hot swapping or easy accessibility to the drive media (understandable, as a 1 Bay system). Synology have released this device as an entry-level product that is not designed for more specialized use, so providing the means to upgrade the media and migrate system processes over to a new drive is NOT a straightforward process. Additionally, we should also take some time to discuss the risks and Synology’s position on this.
IMPORTANT WARNING!
![]()
This is a really, really important point. Taking apart the Synology BeeStation runs a significant risk of not only damaging your data but also completely nullifying any hardware or software support that Synology will provide you. The BeeStation was designed to be a closed system and not targeted towards higher-end tech enthusiasts, and therefore does not allow the same easy dismantle procedure that you find in the DiskStation range. This Synology BeeStation was provided to me by Synology UK, and I am dismantling the system without their assurance or without their authorization to do so; the same needs to be applied to your own BeeStation system if you intend to follow the steps in this guide to tear down and dismantle it. This system was not designed to be taken apart, and taking it apart may result in the following:
- You might cause damage to the hard drive inside via static electricity, motion, or physical pressure
- The Beestation uses a passive cooling system and strategic heatsinks around the internal components, allowing the system to be low noise thanks to a lack of active cooling fan. But changing the storage media inside might compromise this passive cooling system and therefore lead to unpredictable internal system temps or a detrimental effect of the system as a whole.
- The BeeStation casing is an exceptionally tight-fitting enclosure, and dismantling it will almost certainly leave marks and clear indications that you have done so, which will invalidate any hardware support available to you as you have tampered with the system and performed actions that are not covered by the hardware warranty.
- You run the risk of scratching the internal motherboard, PCB, or delicate components during the dismantling of the BeeStation, which will result in complete system failure at worst and detrimental performance drops at best if this occurs.
Do not proceed with dismantling your Synology BeeStation unless you are happy to run the risk that it may be deemed inoperable or that your support by Synology may cease as a result.
Additionally, the Synology BeeStation includes numerous measures to back up the content of the system’s data and set up to the Synology C2 cloud, a connected USB drive, or at an object file/folder level to third-party cloud services. It is extremely recommended that you have an up-to-the-second backup in place before you attempt any of the steps in this guide. Any data loss resulting from following the steps in this guide is purely at your own discretion, and myself and NAS Compares cannot be held accountable. Bottom line, be aware that what you are doing right now is outside of what this system was supposed to do, and that you are doing so at your own risk. Understand? Good. Let’s get on with dismantling the BeeStation and tear down this cost-effective NAS.
Also, it is HIGHLY RECOMMENDED that you read through the steps completely first, before you begin dismantling your BeeStation NAS, as it’s decent bits more layered in the access compared with a normal Diskstation NAS system.
What Do You Need for this Guide
There are actually not too many things needed for upgrading your Synology BeeStation Drive. I recommend the following:
- A Synology BeeStation (duh?)
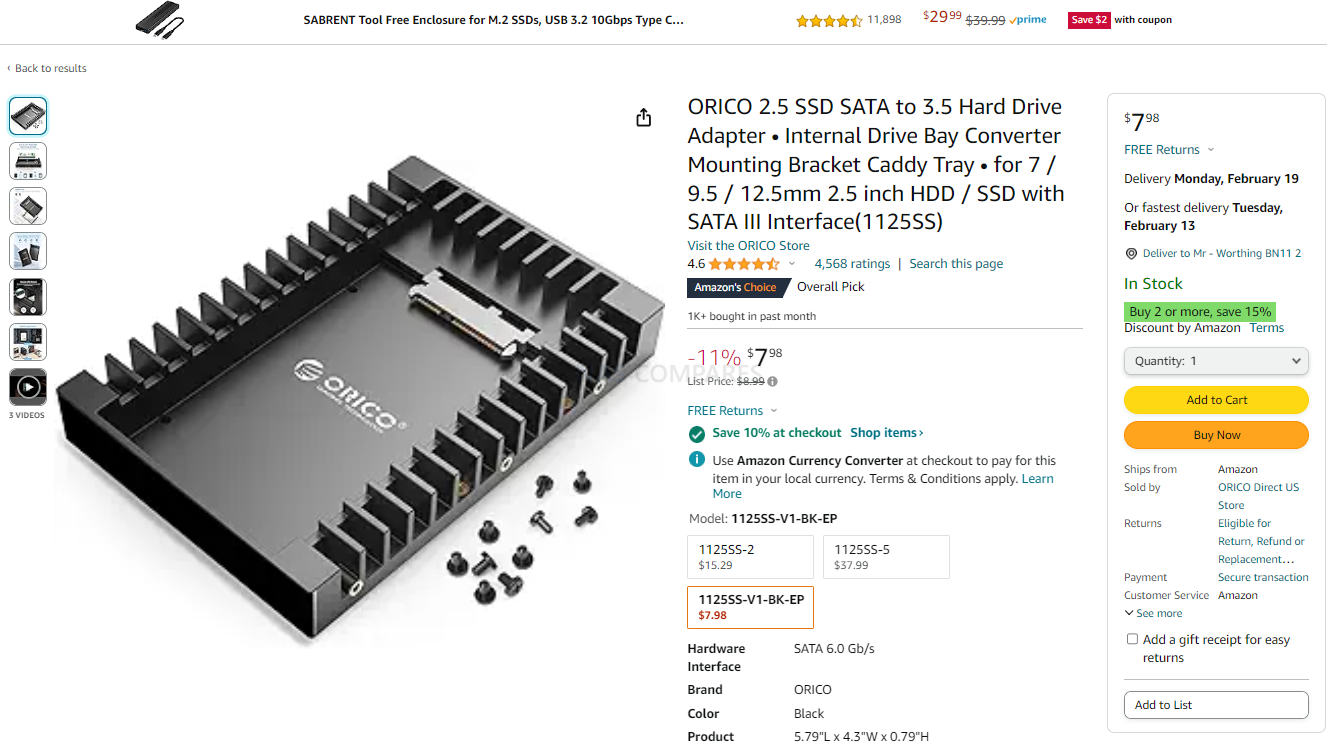
- A SATA HDD (or SATA 2.5″ SSD with 3.5″ physical Adapter – EXAMPLE)
- A crosshead Phillip screw driver – the longer the better!
- The Synology Assistant Client Tool for Windows, Mac or Linux (installed on a system that is on the same local area network as the Beestation) – HERE
- A downloaded copy of the latest Synology BSM Software .pat file – Download it HERE
The Firmware is optional, as it depends on the upgrade path you choose, but it doesn’t hurt to have it downloaded and ready.
BACKUP YOUR DATA FIRST – How To Backup Your Beestation Personal Cloud NAS
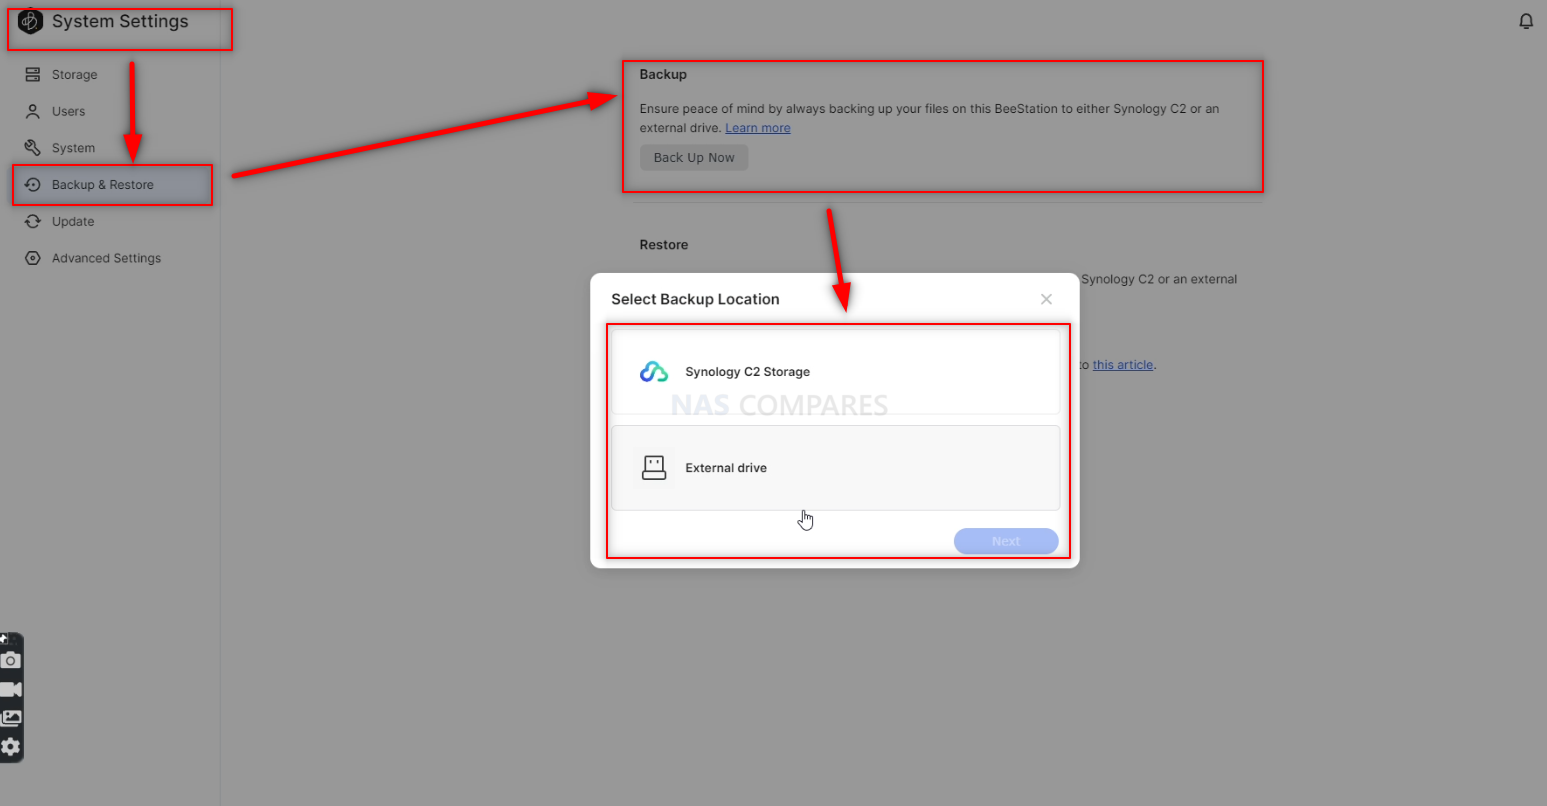
It is INCREDIBLY important that you backup any important data that is already on your Synology Beestation, as the process of installing a new HDD or SSD into the system will result in it replacing the original 4TB HDD. Luckily, there are a couple of great options for backing up your data for restoration when your new HDD/SSD is up and running. The most extensive (and large) one that will ultimately save you time later re-creating shares and folder structure is using the system backup in the System Configuration menu. This allows you to create a full system backup to either the Synology C2 Cloud (subscription cloud service, but does include a trial period) or to a connected USB drive. Later in the guide, I will explain how to restore a full USB backup.
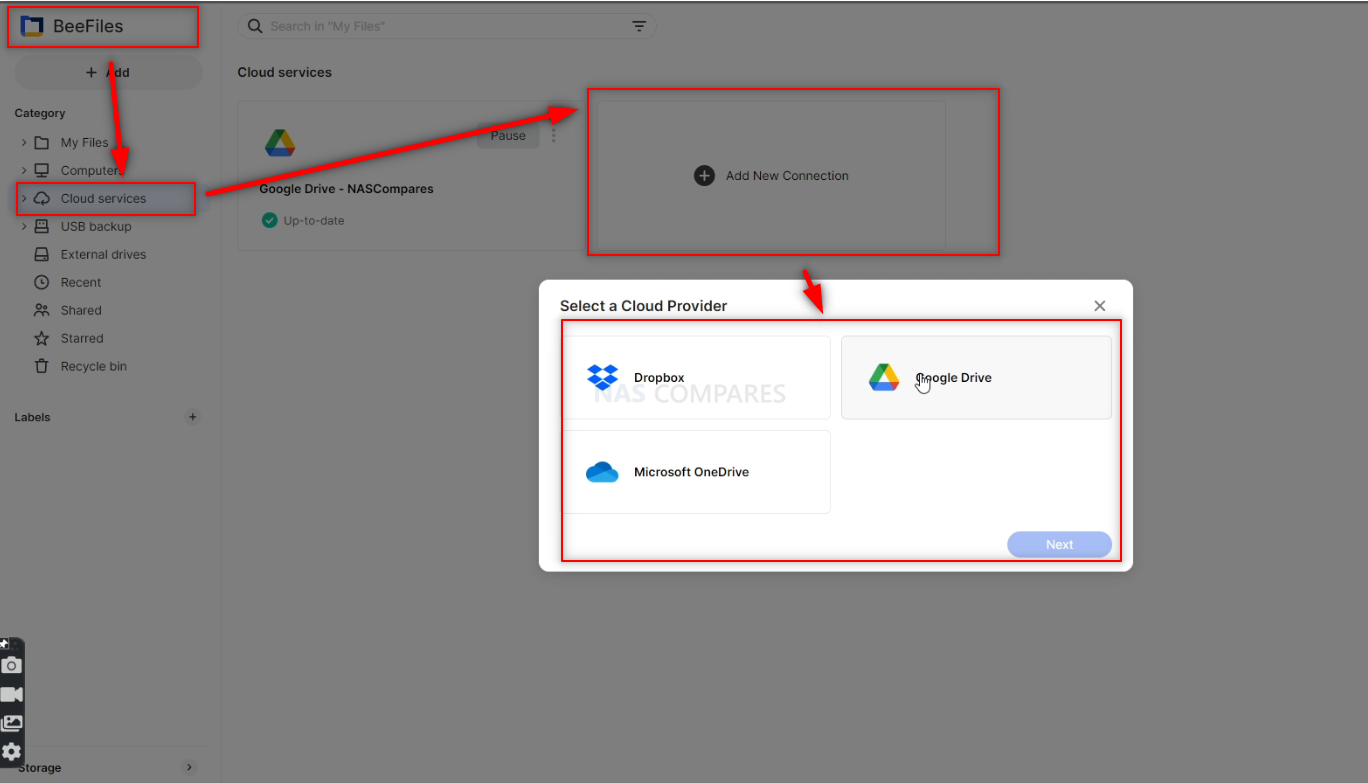
Alternatively, if you are not especially fussed about the system configuration and want a more file/folder-specific backup that only backs up the core/important data (ie you don’t have/want a 4TB backup, but just want some select files/folders), you can use the USB Backup or Cloud Backup options in Beefiles. These are chiefly designed to backup an area of storage from a 3rd Party Cloud (Google Drive, Dropbox or OneDrive) or USB with a specific BeeFiles Folder (you can create multiple). This also has the feature of ensuring the data is 2 way synchronized, which means you CAN use this to copy data form the NAS to the Cloud/USB automatically.
Personally, I would recommend using the System level backup if you can ensure you have a large enough C2 Storage/USB. But also, you should have at least TWO copies of your data, as the system level backup will be in a Synology BSM/Beestation format and will only work in another Beestation system – it won’t be visible via a traditional DAS/Direct connect method.
The last thing to discuss before we begin the Hardware portion of this guide is how you wish to disconnect from the BeeStation system. Installing a new HDD/SSD will also require the system to be formatted. This will happen during the re-initialization when you install a new drive, so you have two options before this. The first is to unlink the Beestation from your Synology Account (as the system is connected via a serial number to your synology account). You will then reconnect with it later on during re-initialization. The main benefit of this method is that Unlinking with the system will KEEP your data on the 4TB hard drive inside – which means if you need to reverse all this (or even just want the old data as a OS-level backup of sorts), this process will be easier and ensure your data is still in place.
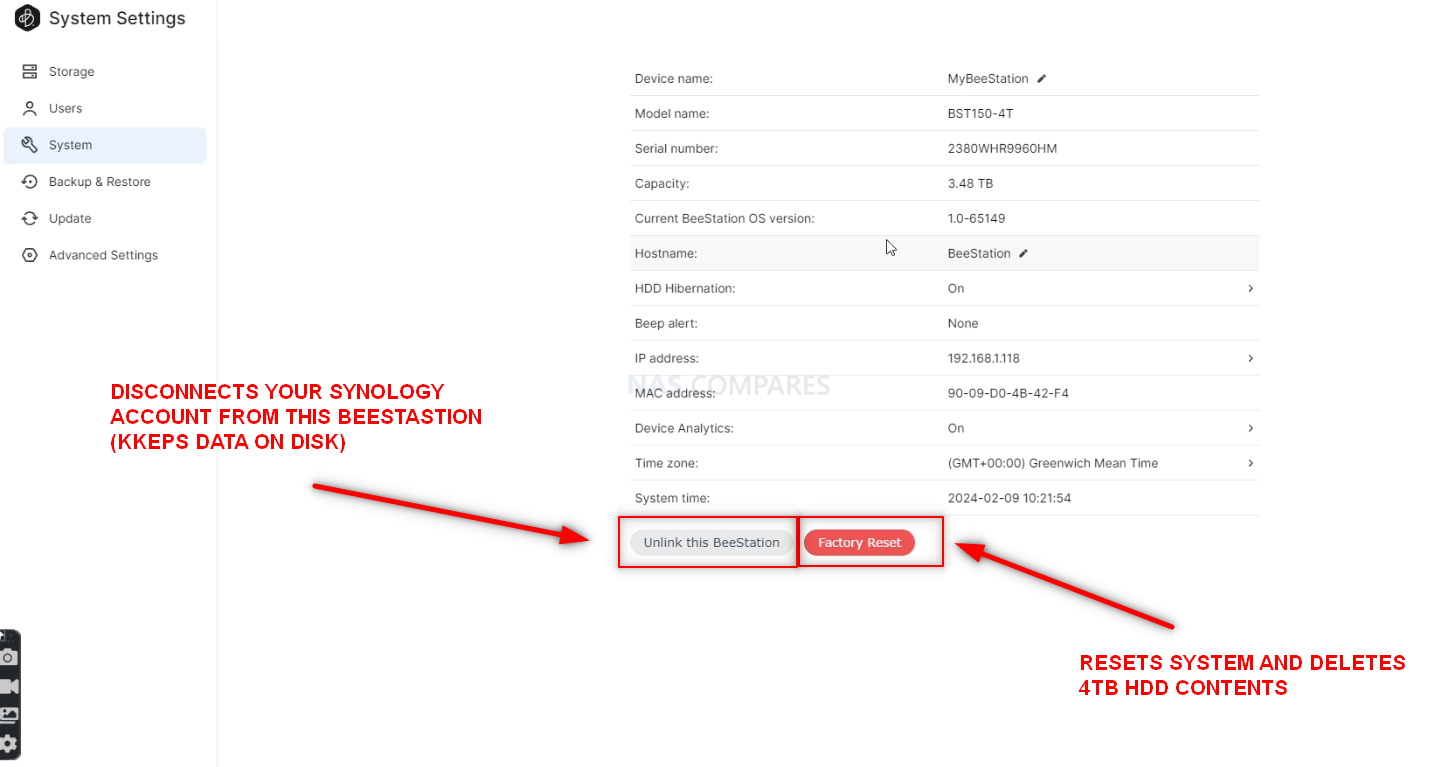
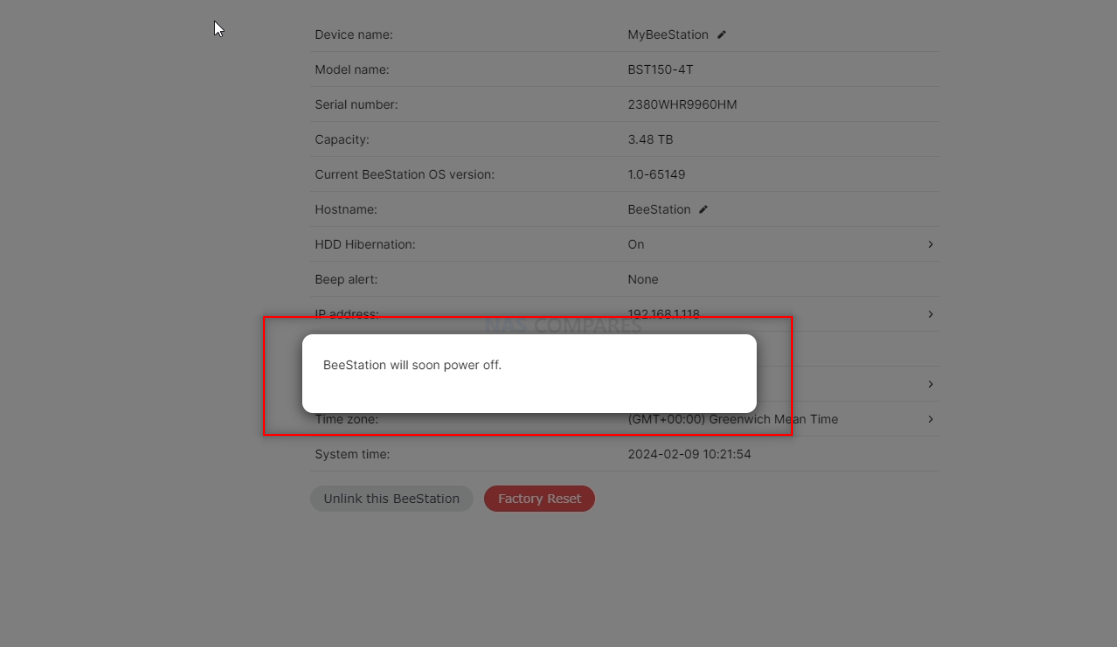
Alternatively, you can opt to just fully factory reset the whole device, which will not only disconnect your Synology Account but also delete all the data from the 4TB Hard Drive. After you have chosen the option that suits your needs. Safely power down the device via the GUI or after the system restore. Then you need to leave the system alone for a few minutes (to allow the 4TB HDD to spin down) and then disconnect all USB, Ethernet and power cables.
How To Upgrade Your Beestation HDD – The Start
First thing you need to do is disconnect all ethernet (LAN), power cables and USB devices and give the system sufficient time to allow the HDD inside to spin down. Then carefully turn the device up and have the base vent panel face up. Again, be CAREFUL as this system features a mechanical HDD inside and that can be susceptible to shock/motion damage.
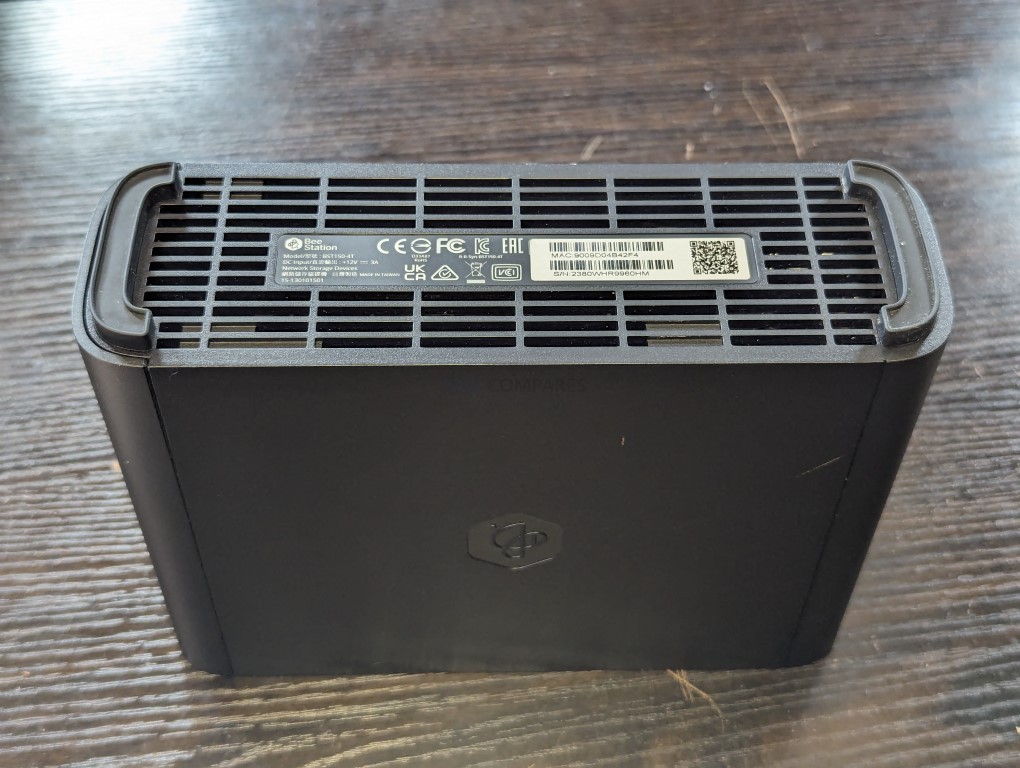
Next you need to slowly and carefully peel back the rubber foot panel located at the base, at the front of the Beestation (i.e the single LED light side). It is held in place with strong adhesive, but you can replace it back after opening the case up later, as the rubber foot sits in a grooved panel and the adhesive has plenty of reuse!
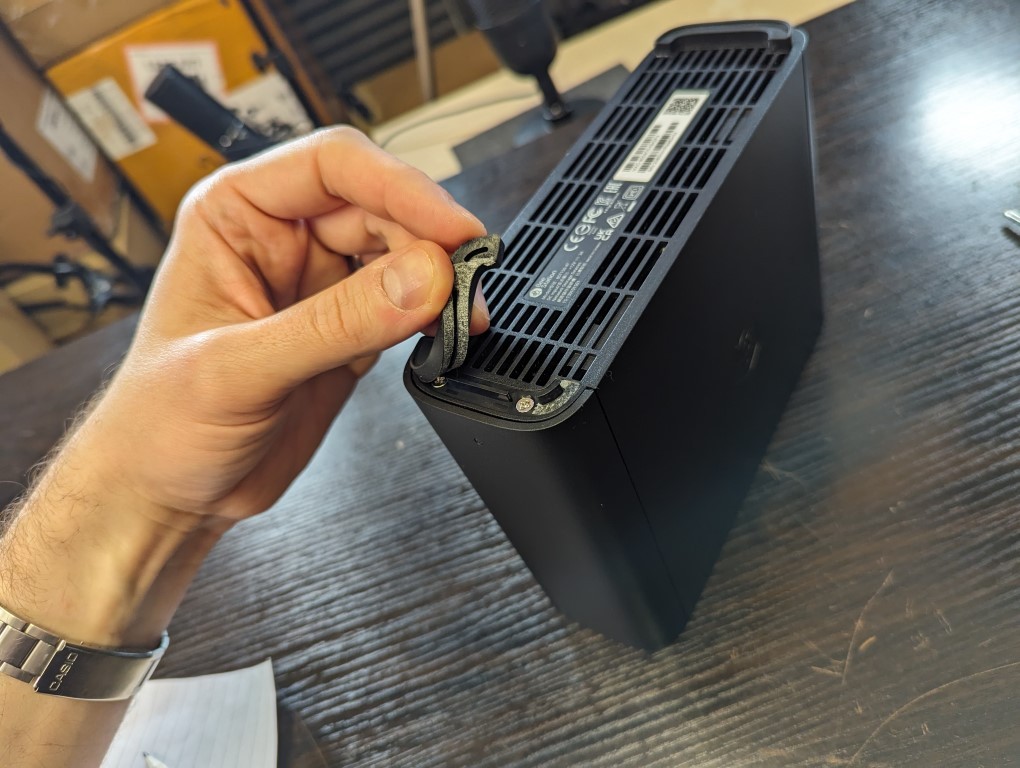
Under the rubber panel are two Phillips/cross-head screws. There are the ONLY external means to open up the enclosure/casing of the BeeStation.
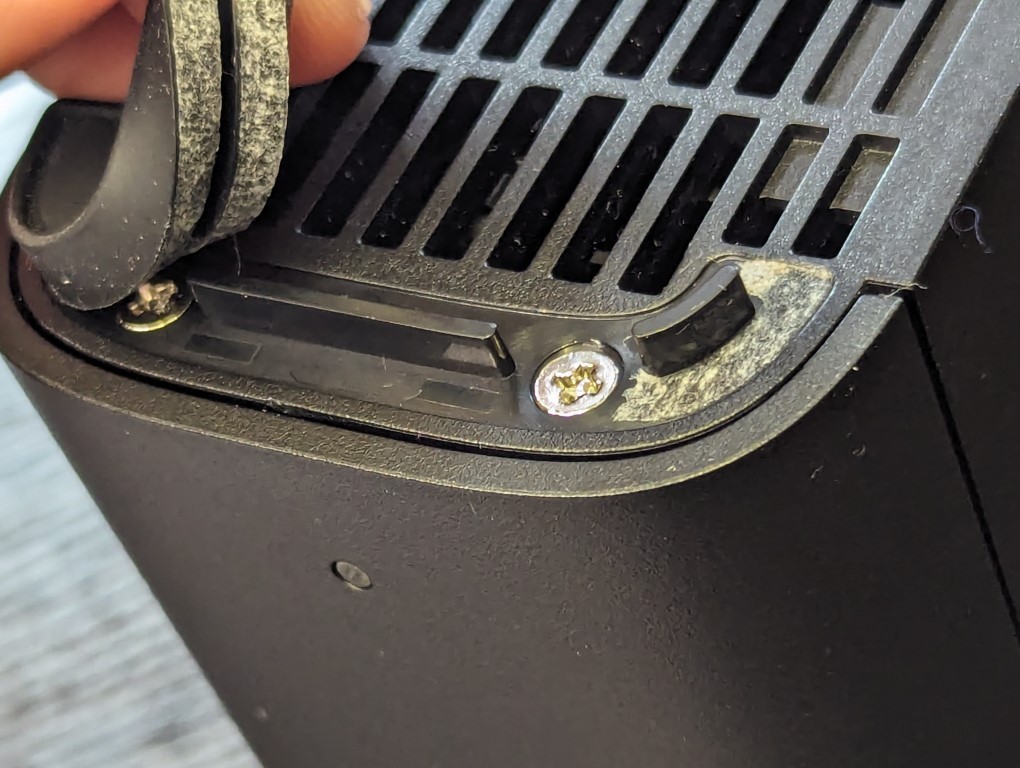
Remove each of these screws (keep them to one side and make sure to remember they are the base screws, as the system has 2 kinds of screws in it’s construction and mixing them up with rip the screw holes to pieces!
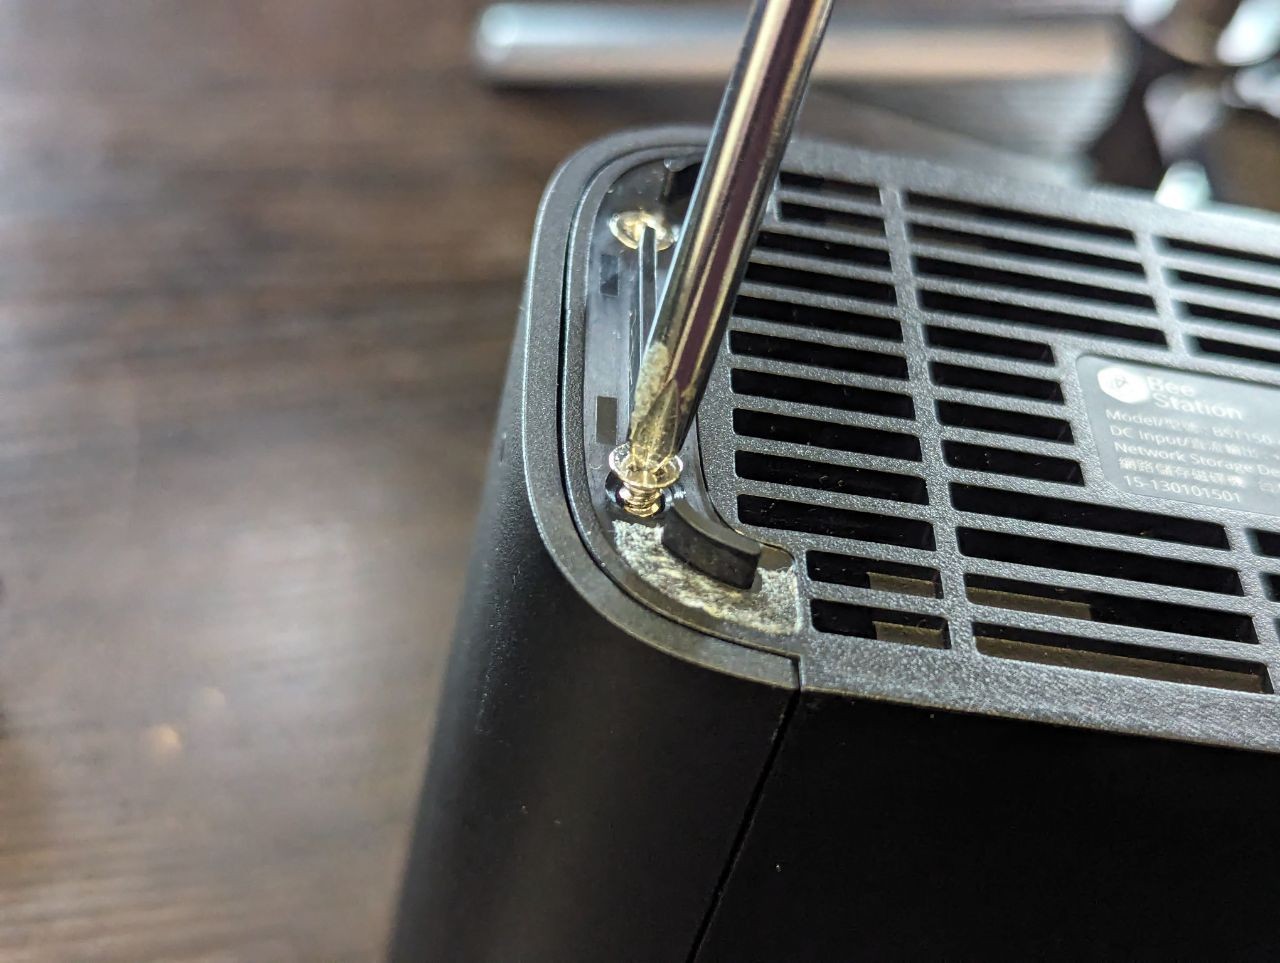
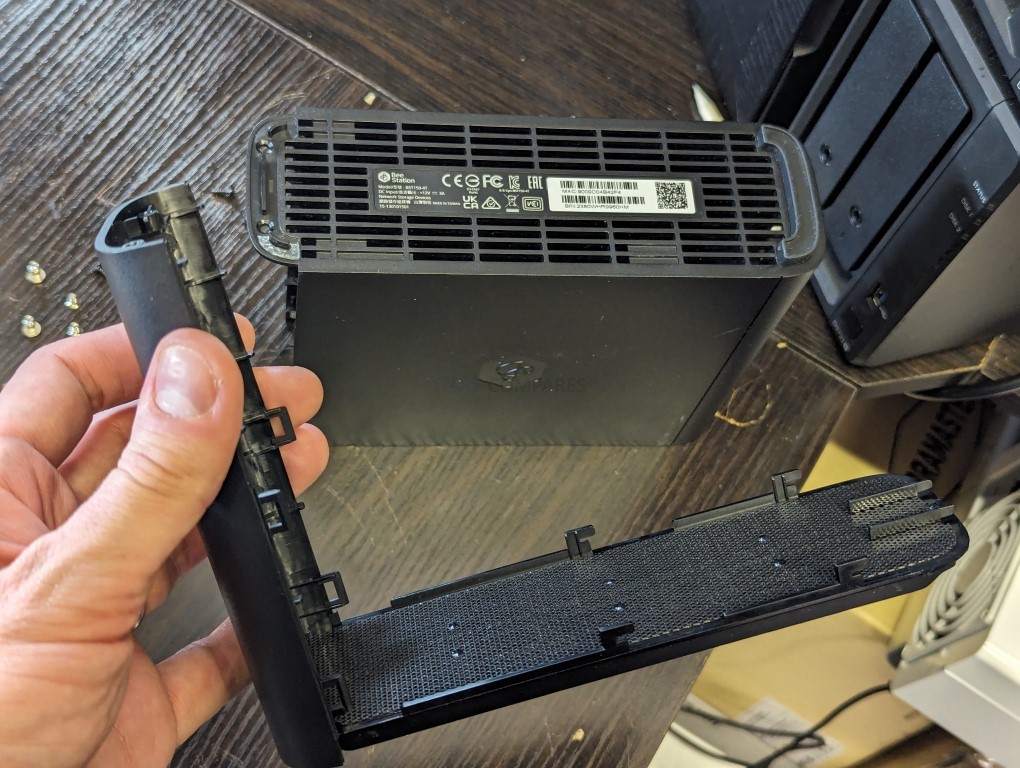
Removing these two screws will allow you to apply a small above of pressure to leverage the front panel of the BeeStation NAS to be removed. Important – do this carefully (that word again!) as the entire casing is made up of 2 pieces and it’s super easy to crack it in two!
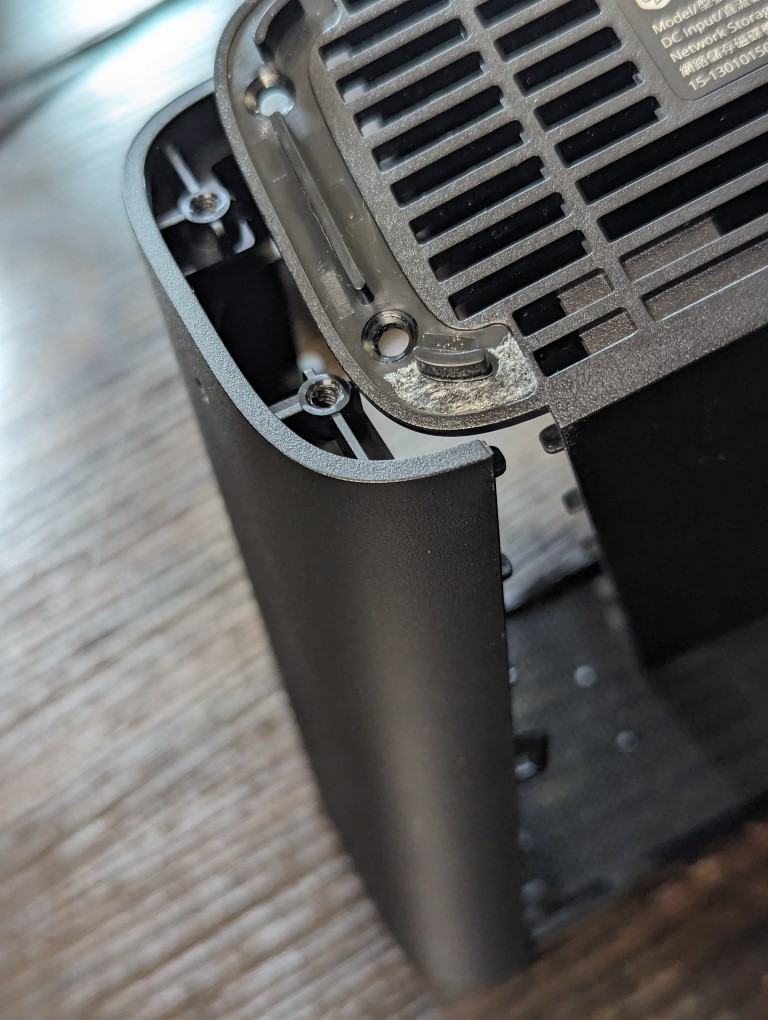
The top part of the front panel is actually an L-shaped panel that has the fully ventilated dust panel attached. Mkae sure that your ease the panel off carefully enough not to break those 4 hooks at the top, as these are what align the top panel with the rest of the casing.
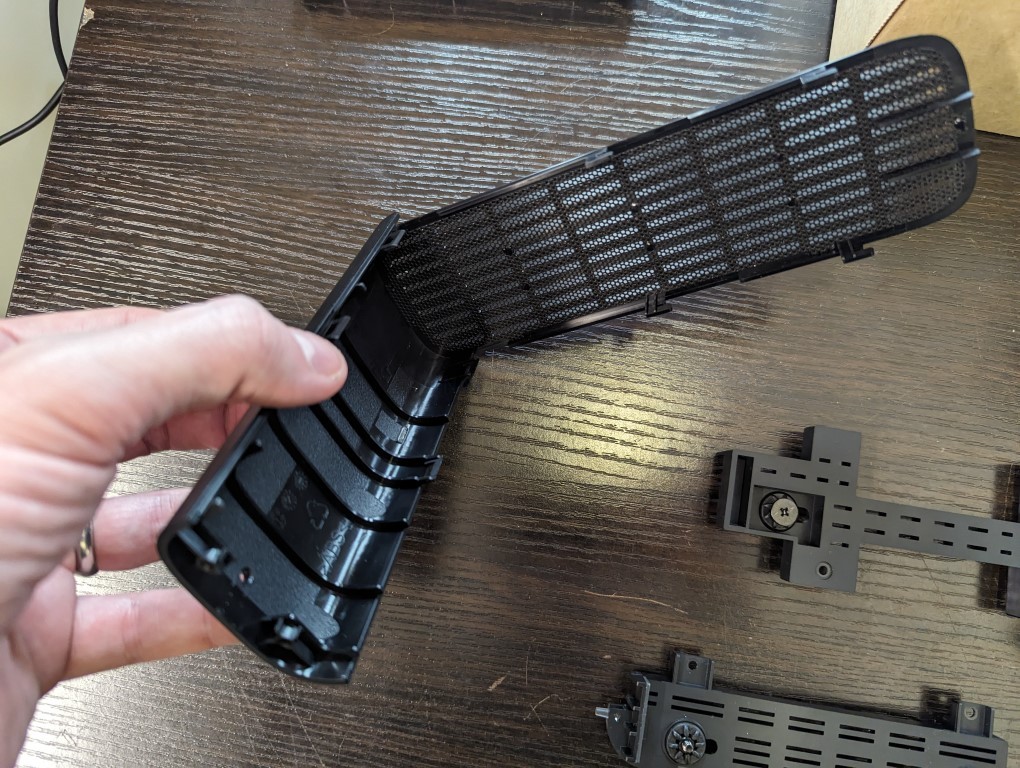
Slight side note, but for those that care about dust build up on 24×7 systems like the BeeStation, this can be quite useful to perform cleaning. Anyway, carrying on!
Next up os removing the Hard Drive that the Beestation Personal Cloud arrives with. The first thing you need to remove is the 2 smaller screws located around the edge of the casing. DO NOT REMOVE THE 2 LARGER SCREWS IN THE MIDDLE!!! These larger screws hold the HDD in place and you need to do this much later, or else risk the drive moving around during the dismantling.
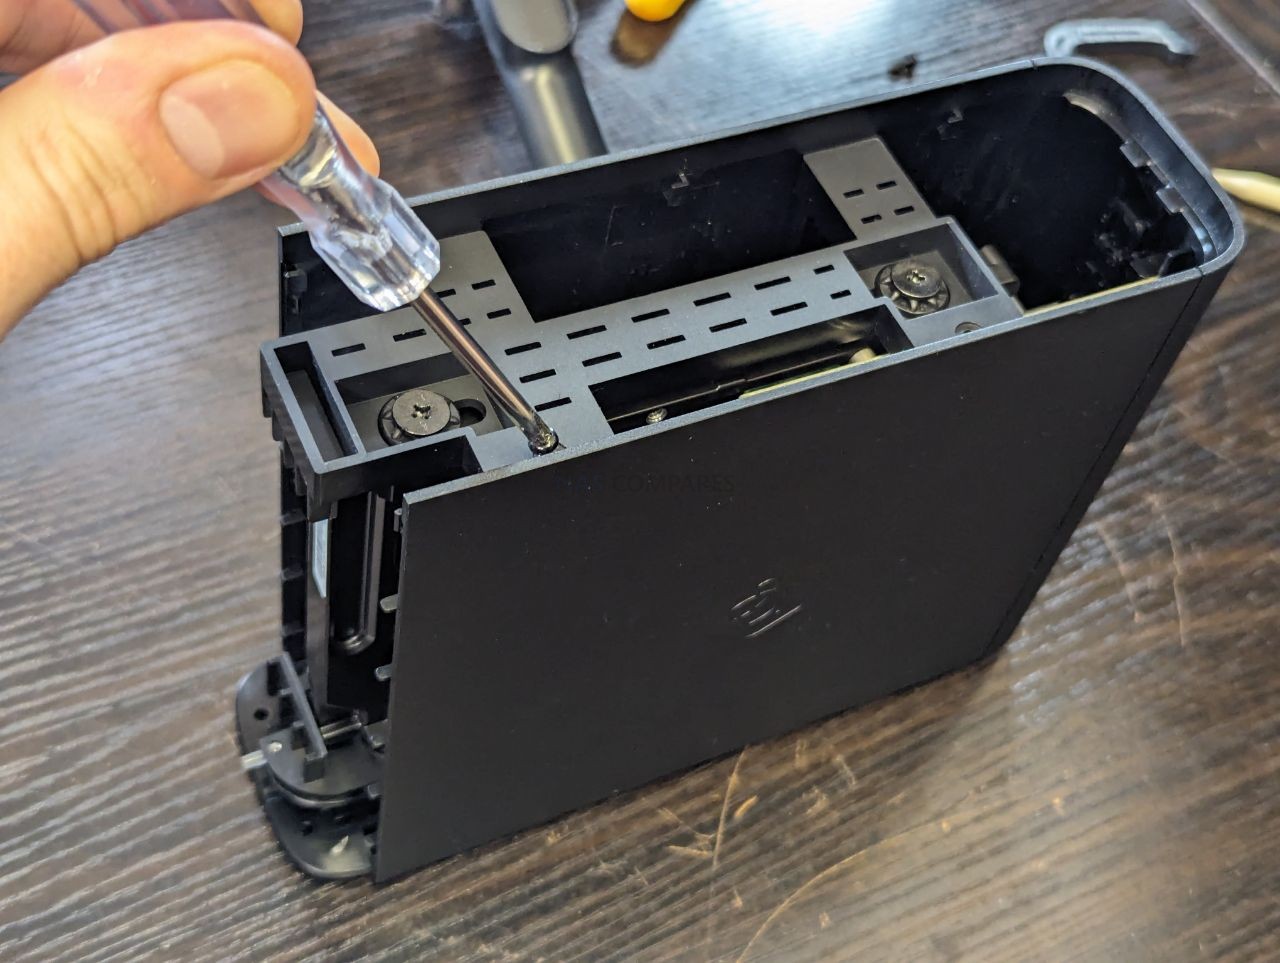
Each screw will be easy to remove, however there are actually 3 more screw located around the base of the framework. They are tricky to reach, and a longer screwdriver would be recommended, but it can be done with an ordinary 15cm + screwdriver will get the job done.
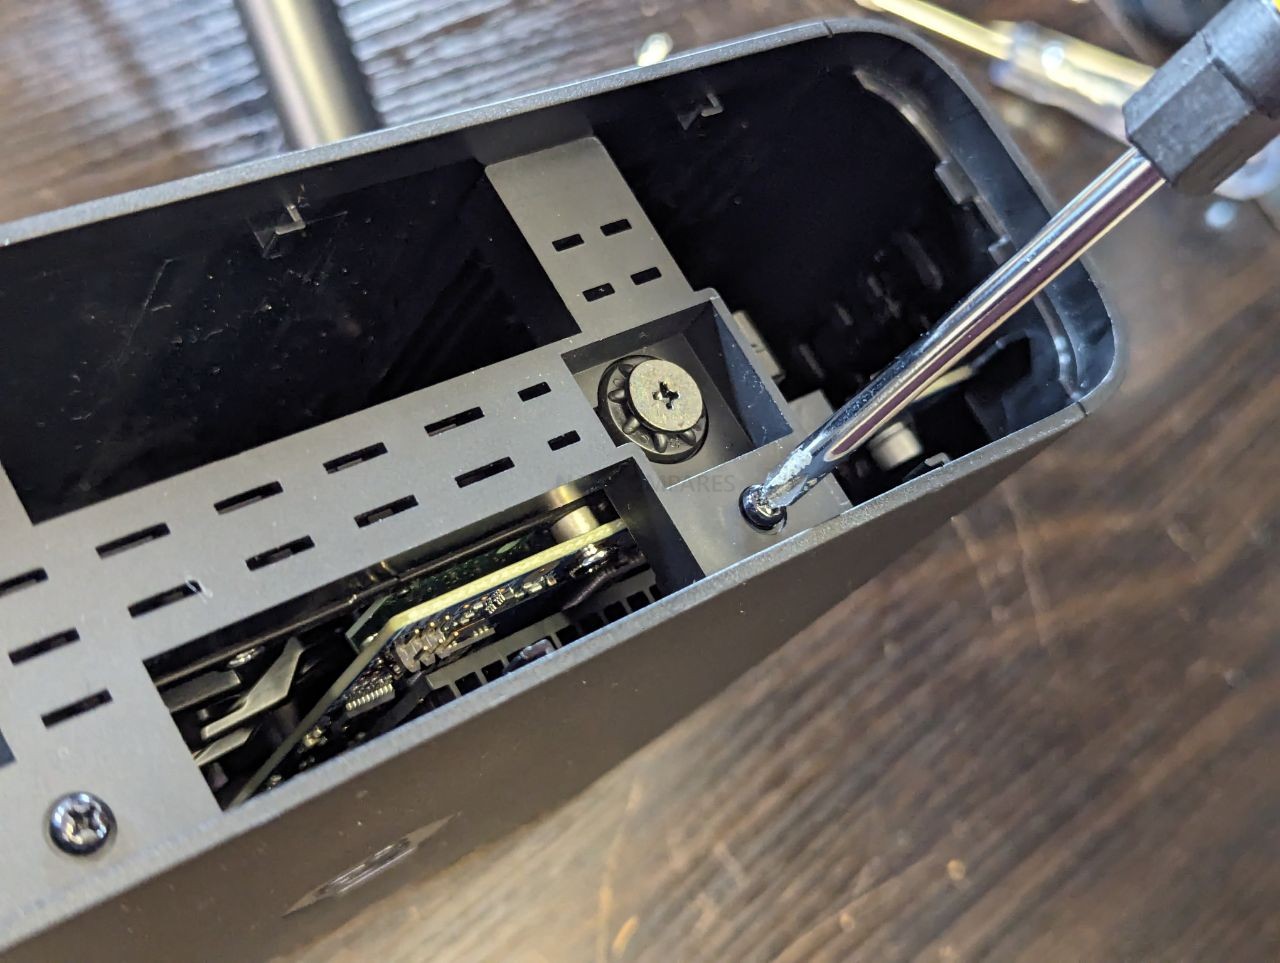
At the front base area, you can find two black Phillips/cross-head screws that you need to remove. You will need to come at there from a slight angle if you only have a short screwdriver. Important – DO NOT USE AN ELECTRIC/AUTOMATIC SCREWDRIVER!!! Notwithstanding that you will tear the soft screw to pieces, you might cause vibration that will be damaging to the HDD next to the screw! Do it the OLD SKOOL way!
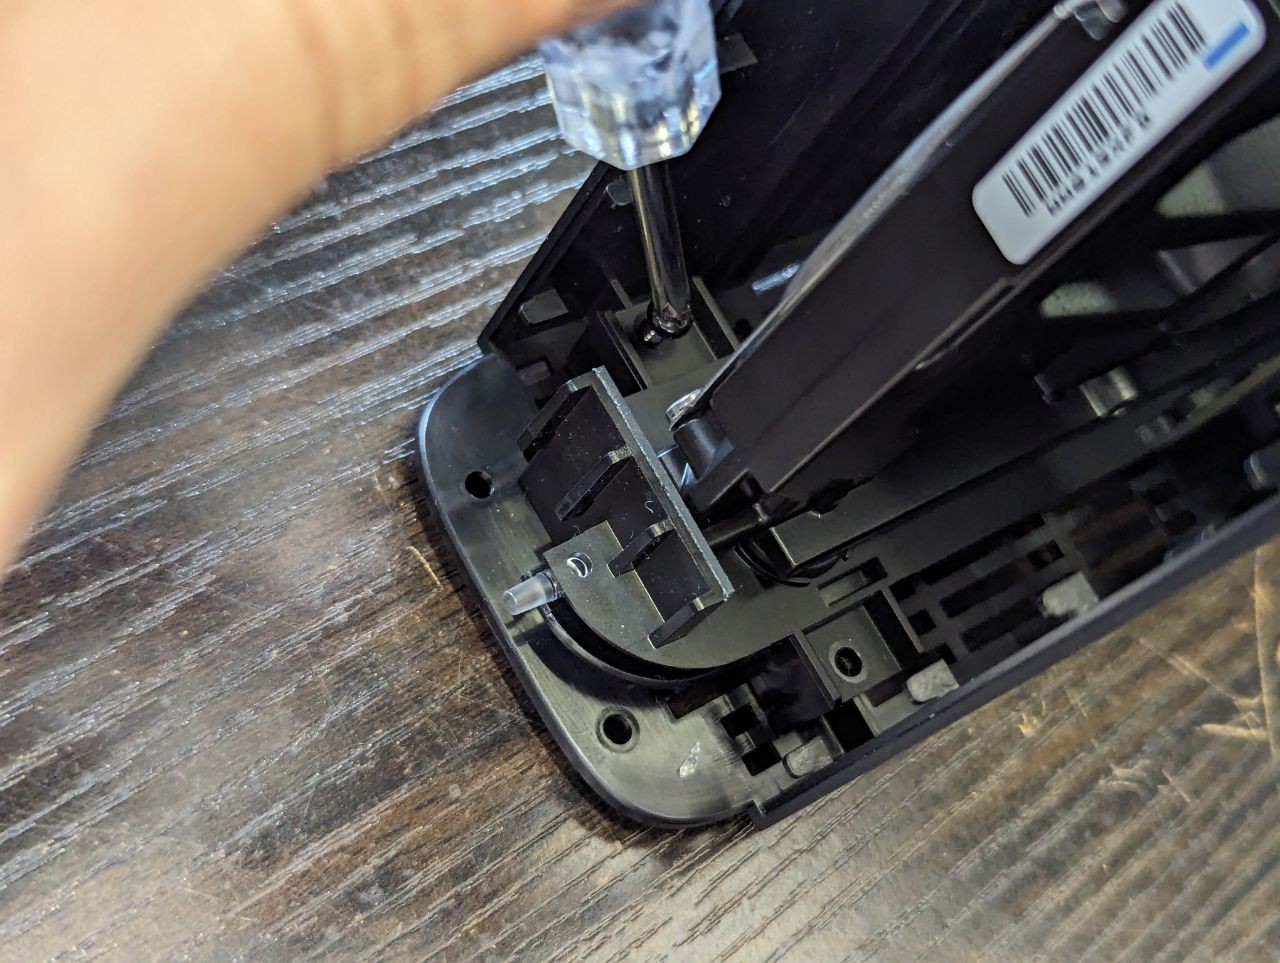
The last screw is much harder to spot and reach, it is located at the bottom-back of the enclosure, on the NON-Motherboard side. You will need to come at it from a slight angle, even with a longer screwdriver. Note, you COULD have removed the top panel attached to the HDD in order to get to the screw a little easier, but I personally would rather the HDD remains in an immobile cage throughout this part of the Beestaion teardown. It’s your call!
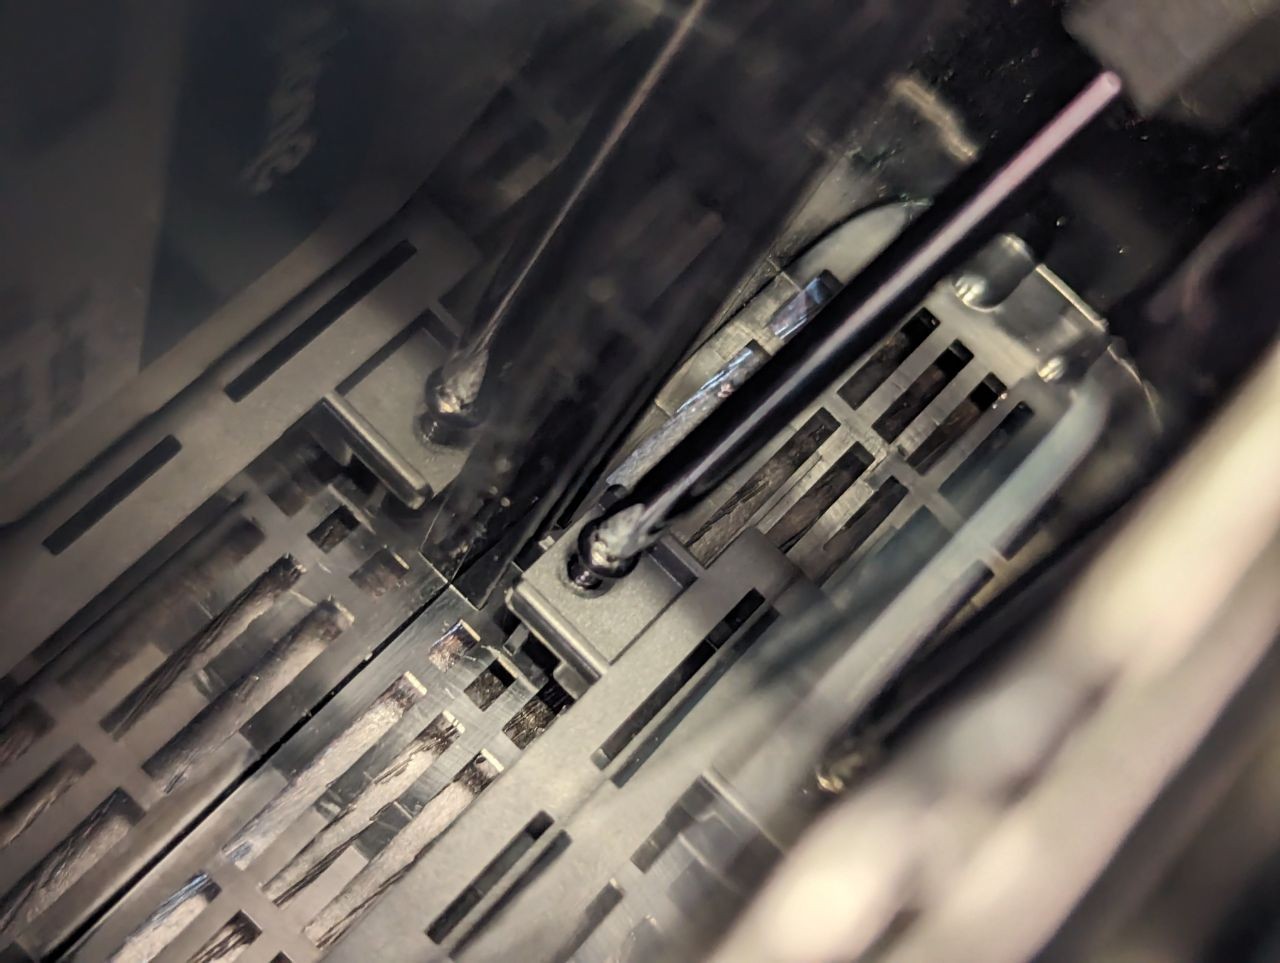
That is the last screw that you need to remove and , once it is done, you can begin the removal of the HDD clip/cage.
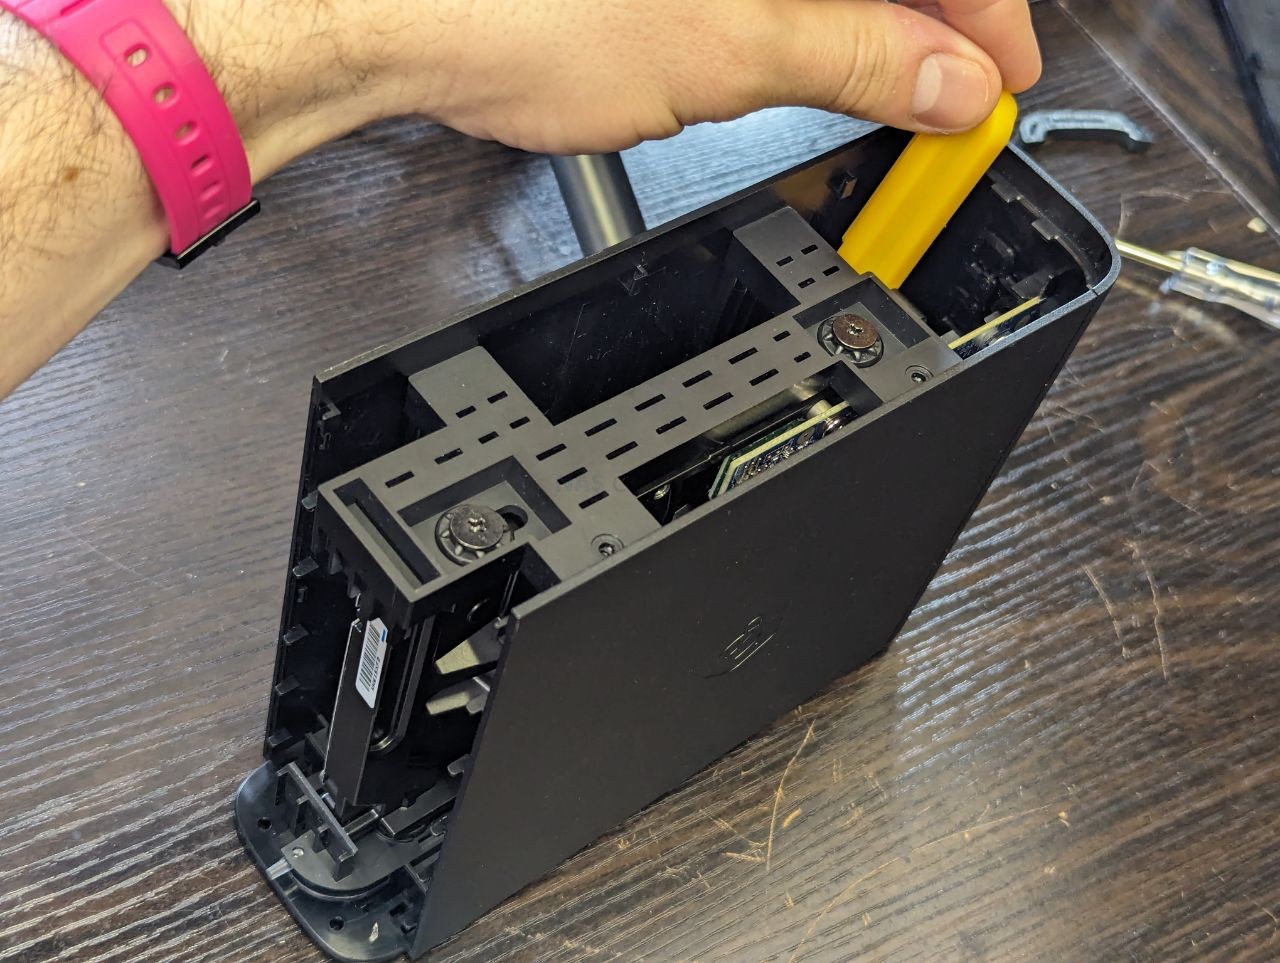
The HDD Clip/cage will slide out sideways (with a little resistance). BE CAREFUL with the removal of the HDD cage/clips, as the right-hand side will have the controller board (which has the heatsink on top of the CPU, and a bare PCB – which can be super susceptible to static and moisture!
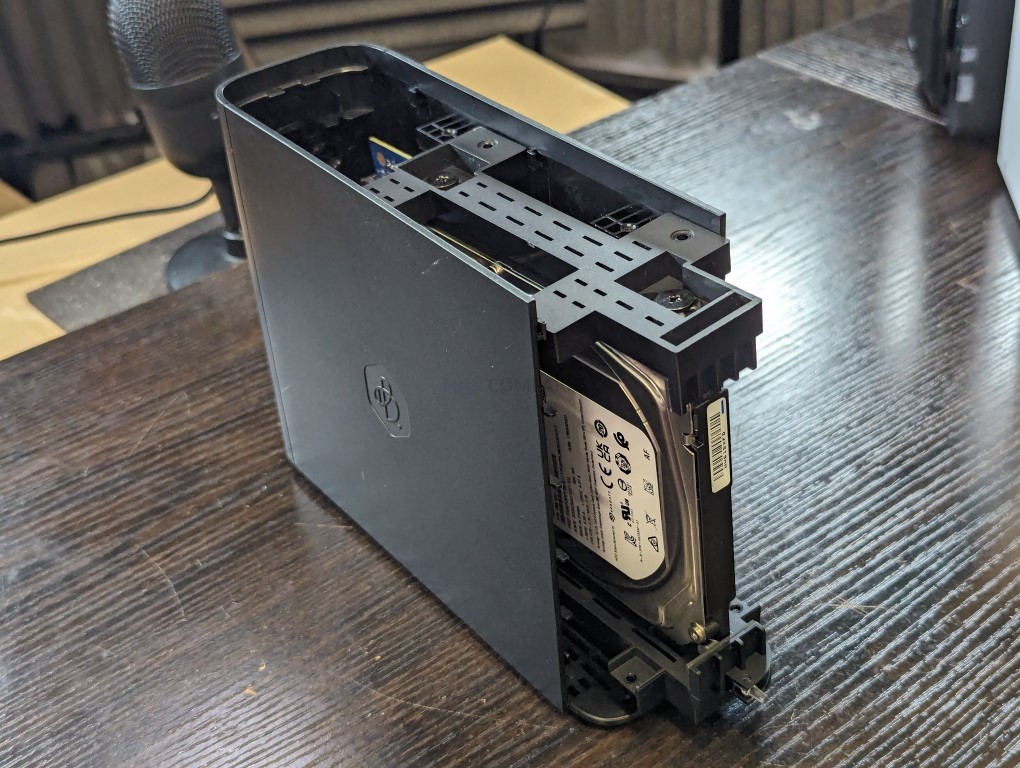
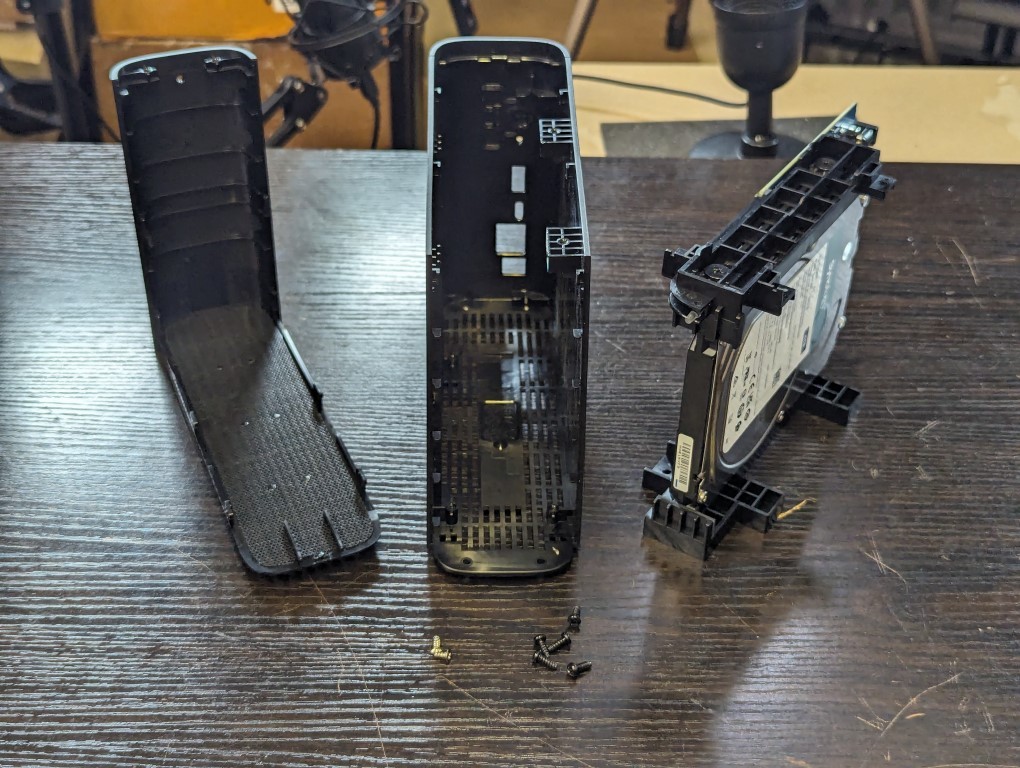
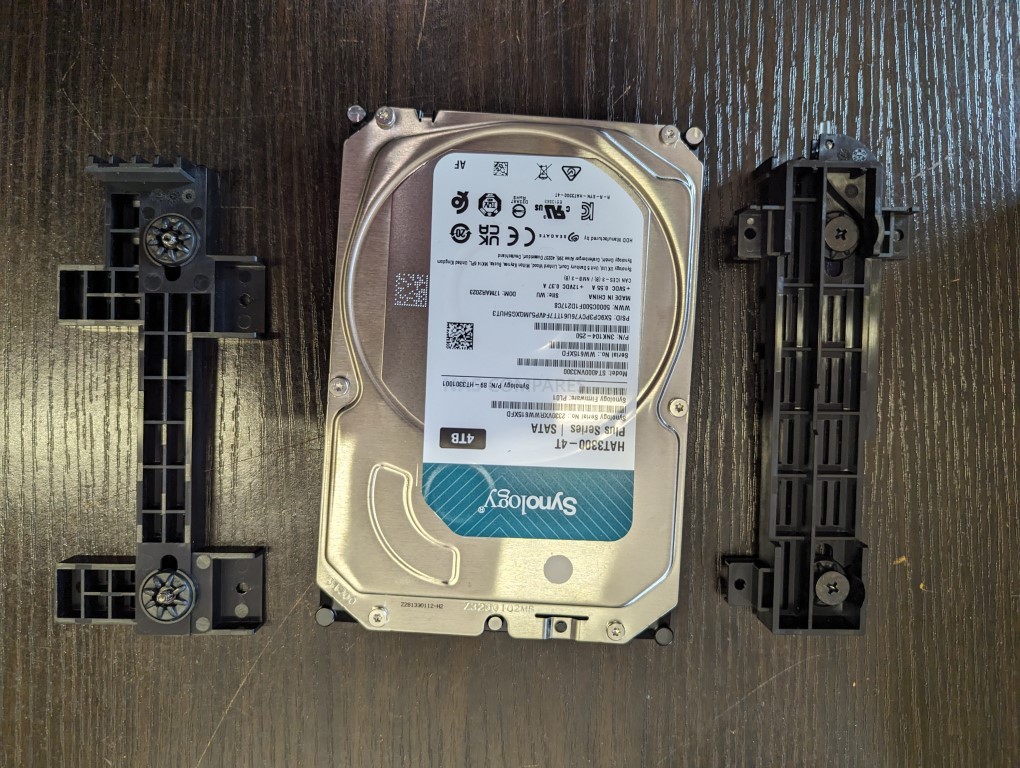
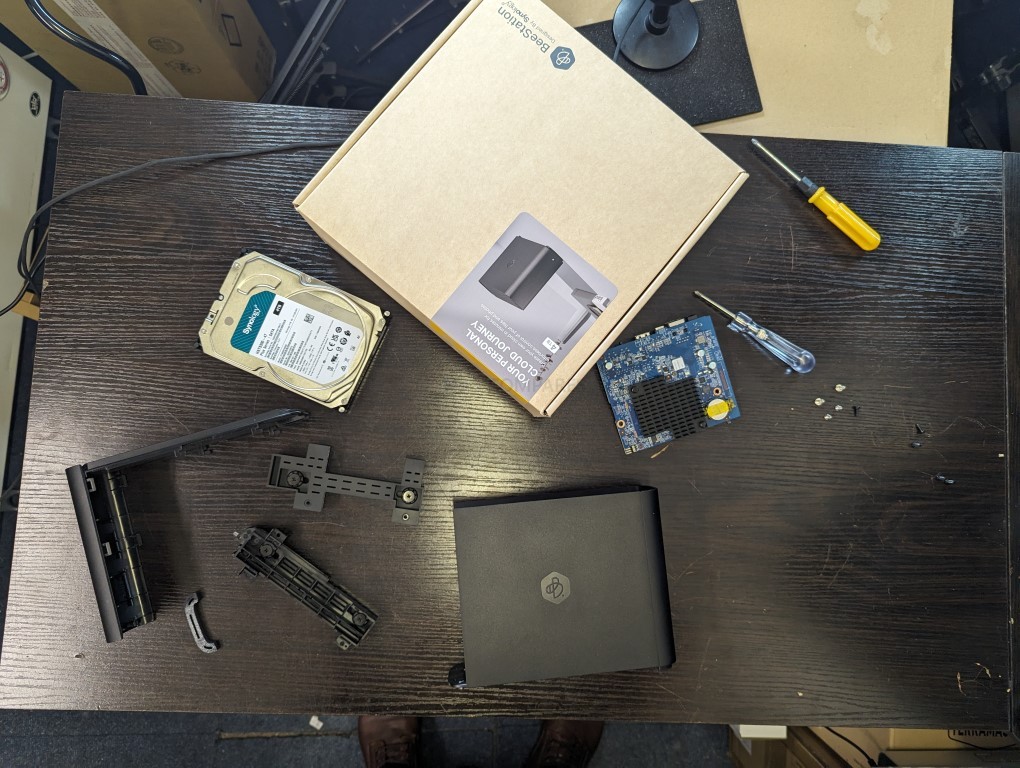
One you have removed the HDD Cage tray, you will now have three components on the table:
Next, removing the Hard Drive from its plastic handles. The HDD is held in place by 4 screws that go directly into the same four screw holes that are usually used by HDD bays on Diskstastion NAS that utilize trays. Ther are four screw in each corner. Important note for later – Make a note of the clips and direction that are on either side of the HDD – whether you want to reassemble this Beestation to the factory build OR you are considering exploring larger HDDs, getting these clips the wrong way around or in the wrong direction will, at best, mean it won’t for back together and you need to redo them, or at WORST, you end up damaging the controller board and casing as you attempt to re-insert the drive.
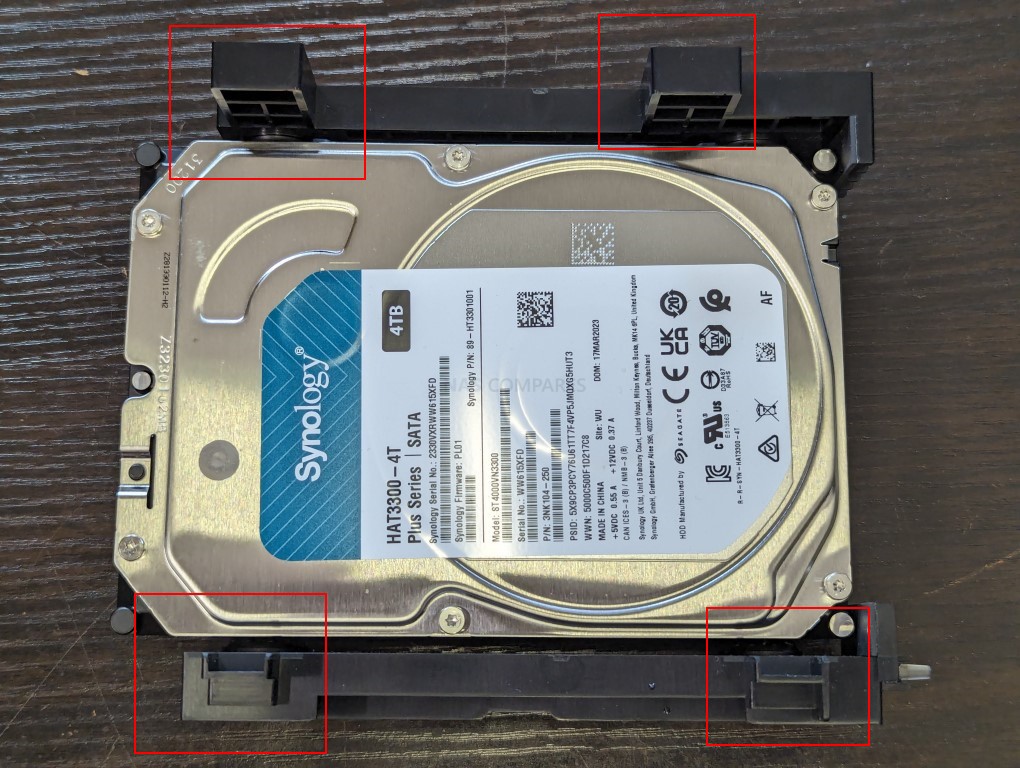
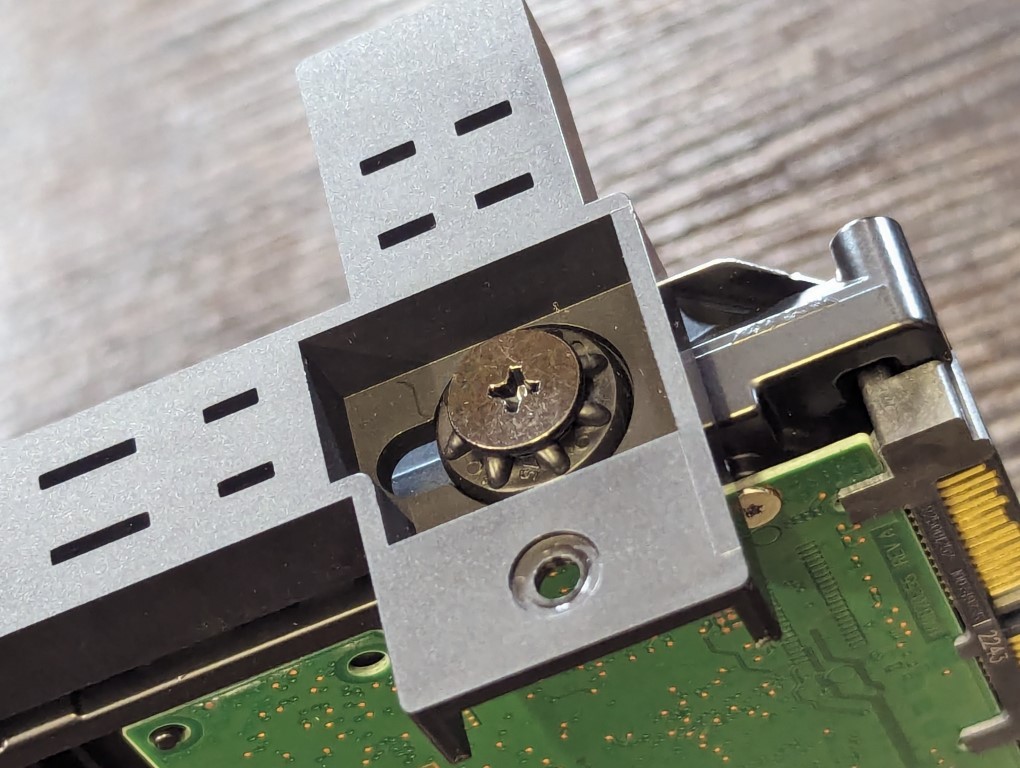
Each screw uses a counter-sunk system and also arrives with a rubber washer between the screw head and the plastic. This means that you do not need to fully remove the screw, as there is a small % of space left. Regardless, just remove the four screws and each of the side panels should come off very easily.
Once again, make sure you keep track of which panel goes with each side of the HDD – As this will be a right pain during reassembly. An important area of note here is that IF you are considering adding larger/alternative drives to the Beestation and you have your heart set on an SSD, you are going to need a 2.5″ to 3.5″ HDD adapter, as the screw holes that the tray clips AND the PCB Backboard are not available on a 2.5″ SSD. This does also open the door to the potential for a Dual 2.5″ SATA SSD to 3.5″ SATA Adapter case, which would provide the performance benefits of 2x SATA SSD in a RAID 0, or the redundancy benefits of 2x SATA SSDs in a RAID 1, if the case supports internal RAID 0/1). Here are two options:
| 2.5″ to 3.5″ SATA Adapter ($7.99+)
Find on Amazon HERE |
SYNOLOGY ASSISTANT NOT CONFIGURED PICTURE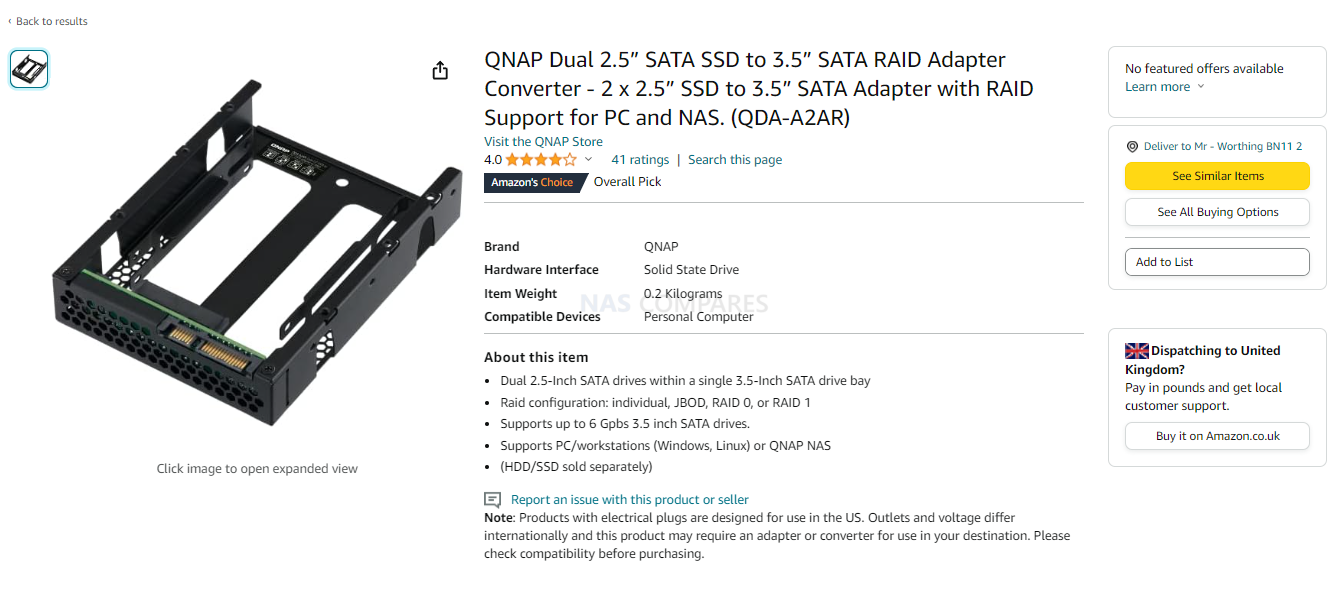
Find on Amazon HERE |
However, there is considerably more to adding a new hard drive to the BeeStation than just the physical injection!
The one we want to focus on is the HDD tray/cage. Carefully turn it around and lay the drive facedown on the table.
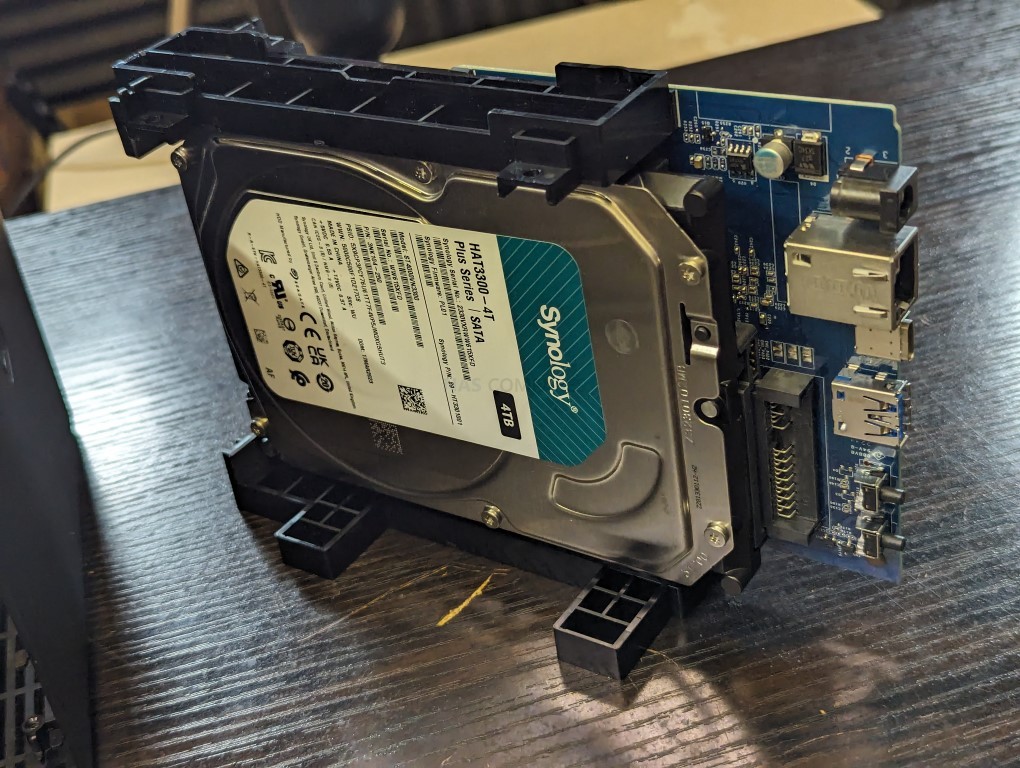
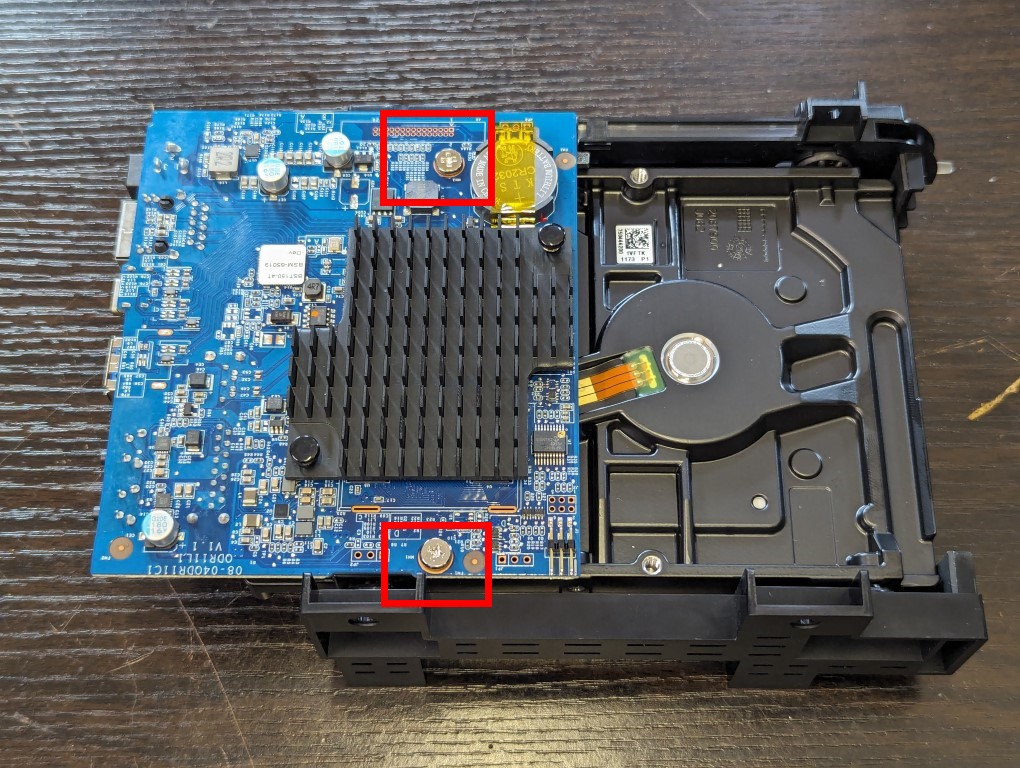
Once the drive is ‘face down’, you need to carefully (yes, THAT word again! Take a drink) remove the two silver screws, Try to touch the blue PCB controller board as little as possible.
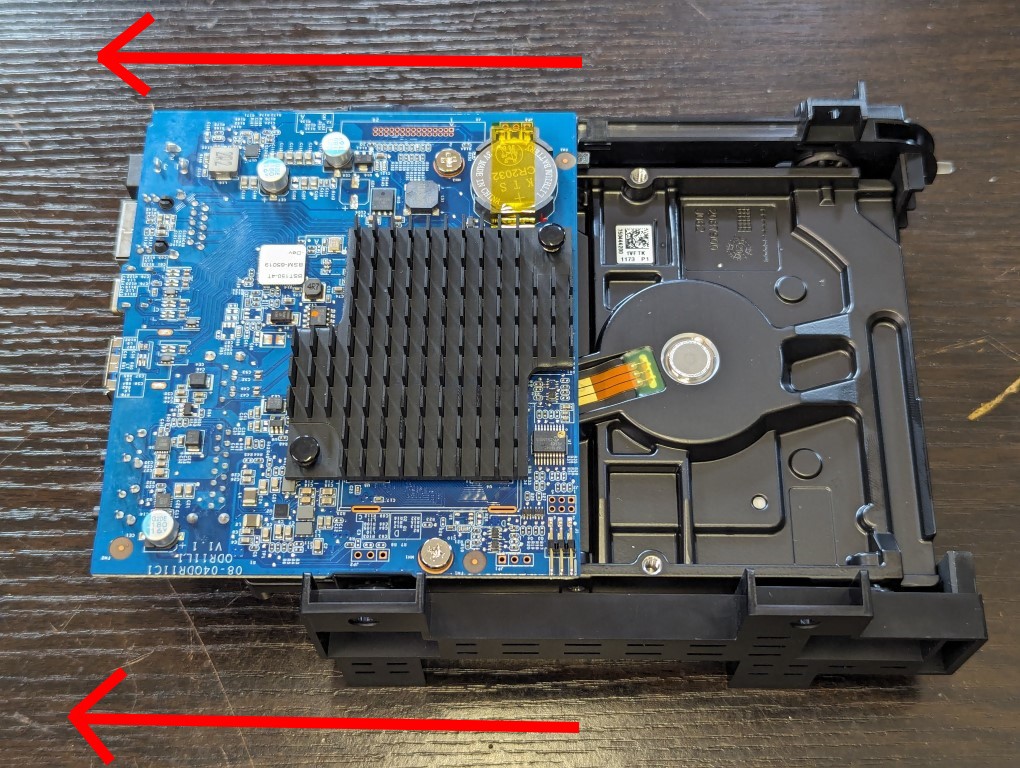
Once you have removed those two screws, you need to either slide the controller board away from the Hard drive, or slide the hard drive away. You are doing this to disconnect the SATA connector that is soldered to the controller board. Do NOT leverage the hard drive upwards/downwards, as you run the risk of breaking the connector.
The controller PCB should come away very easily and with little resistance. But before we move forward, it’s worth checking the SATA connector is unharmed.
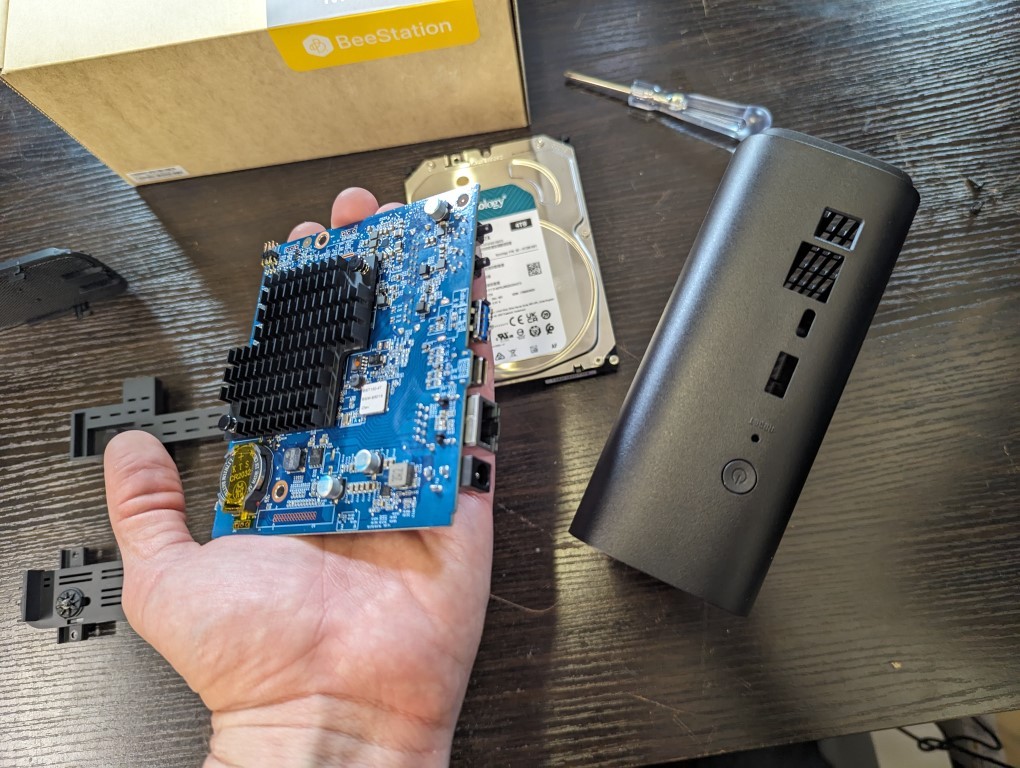
Place the controller PCB delicately to one side and then get your new storage media drive (your new HDD or SSD) unpacked and ready
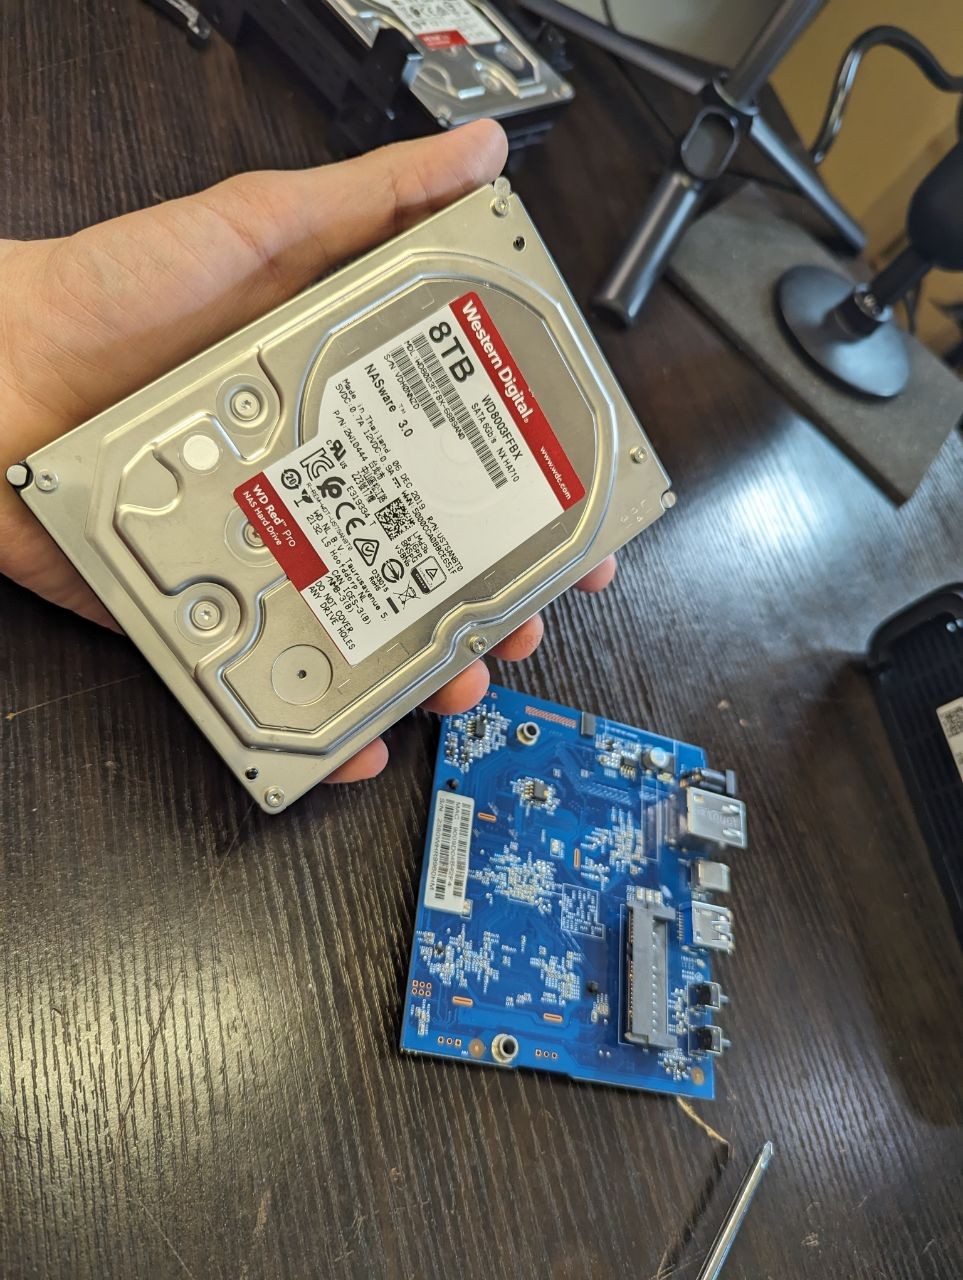
Slot the new SATA drive into the PCB via the SATA slot.
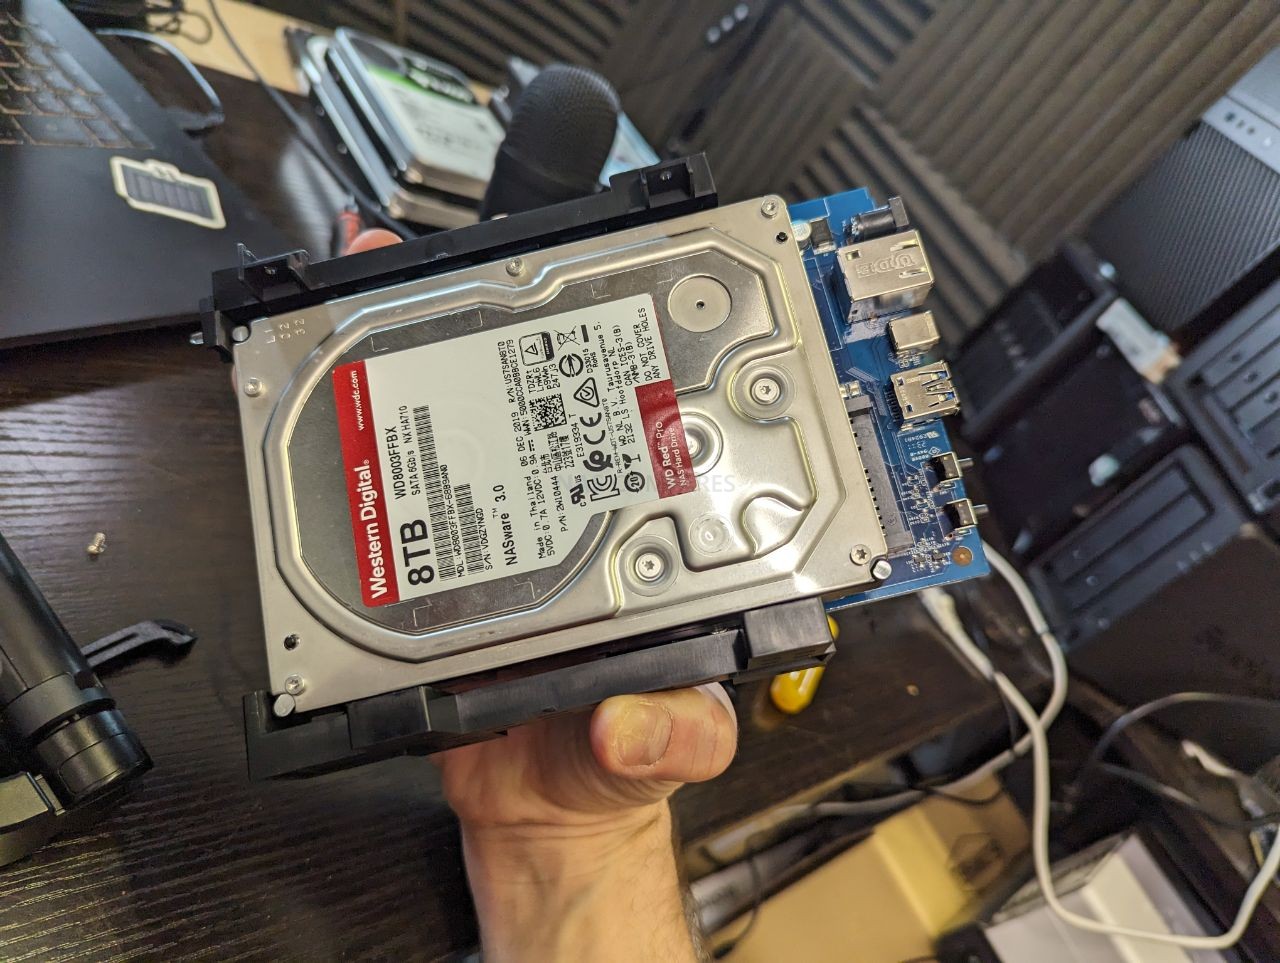
Then flip the drive and board over, then screw in the two silver screws to attached the PCB to the HDD. Next, reattached the two tray clips to either side of the new HDD – gain, make sure you select the correct clips for either side and in the correct direction.
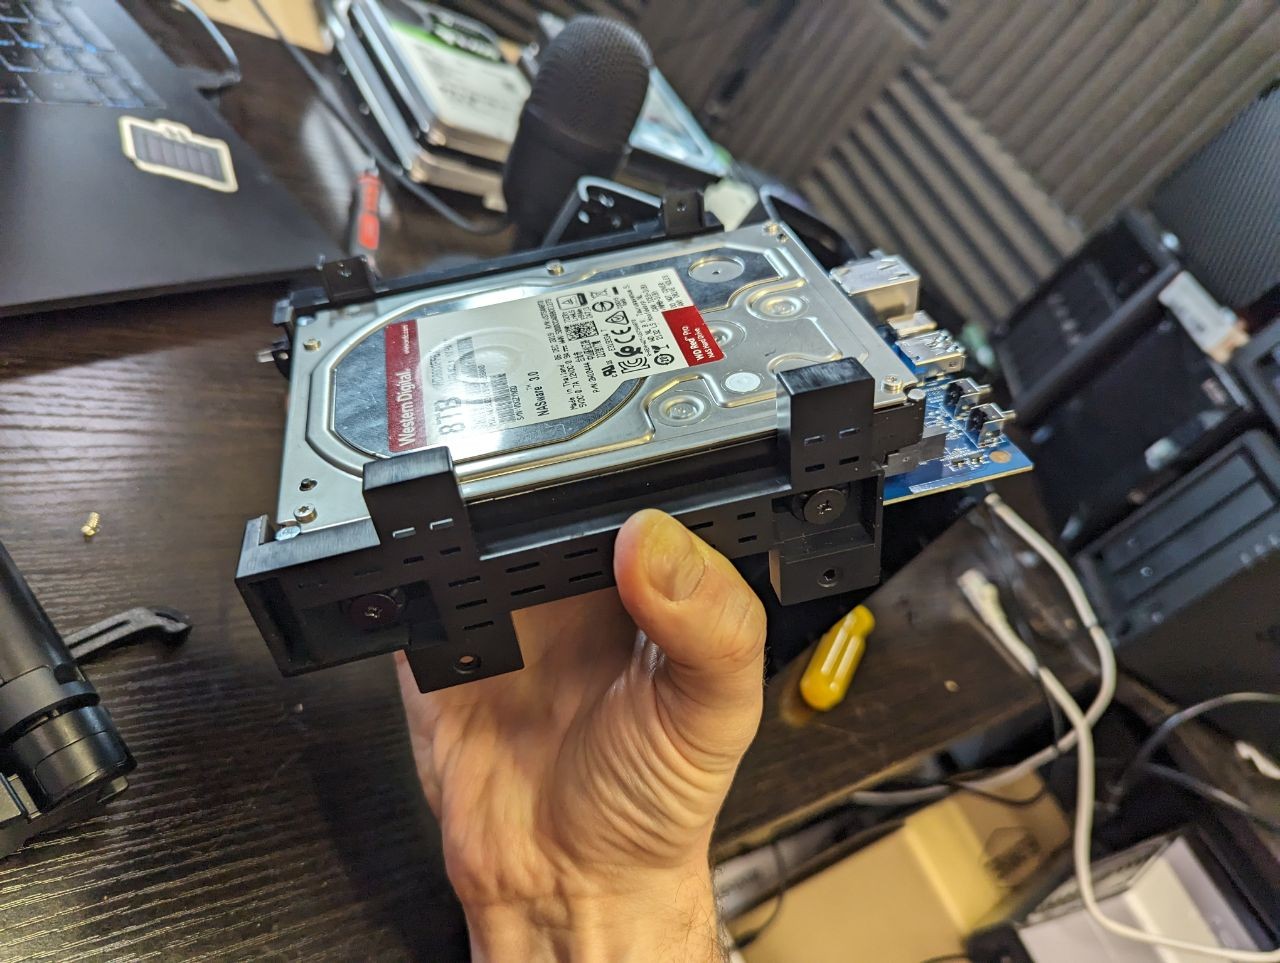
Then slot the drive cage back into the base Beestastion black plastic casing. It will be a very specific alignment and you will know it is correct, as the back ports will be completely flush with the rear port cavities on the casing
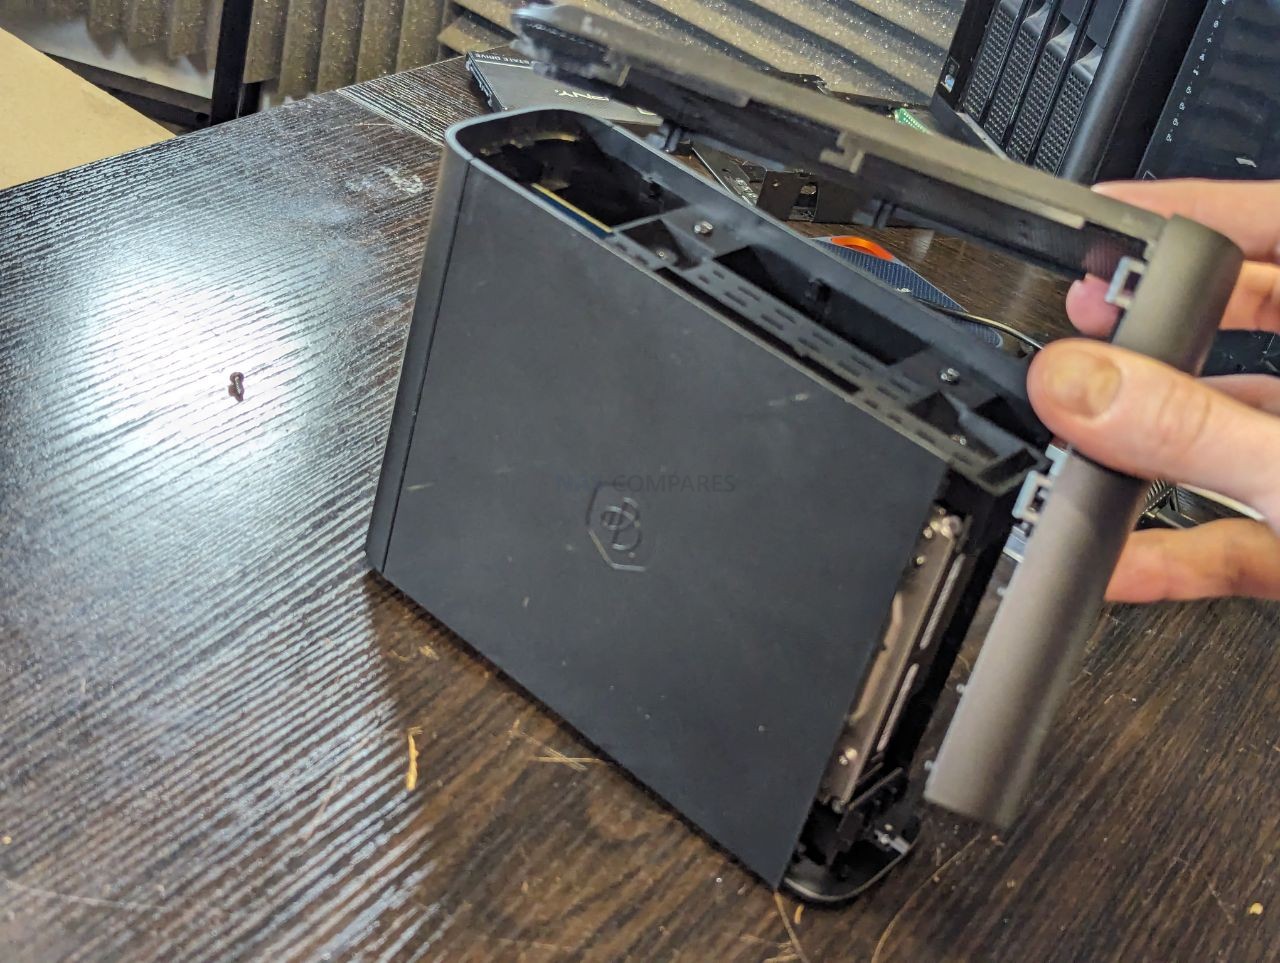
Screw the 3 base screws in place once again. plus then re-screw the two top placement screws

Then slide back into place the L-shaped top panel. Ensure the 4 hooks at the top slide in neatly and the LED cover at the front/base will meet flush with the other plastic panel.
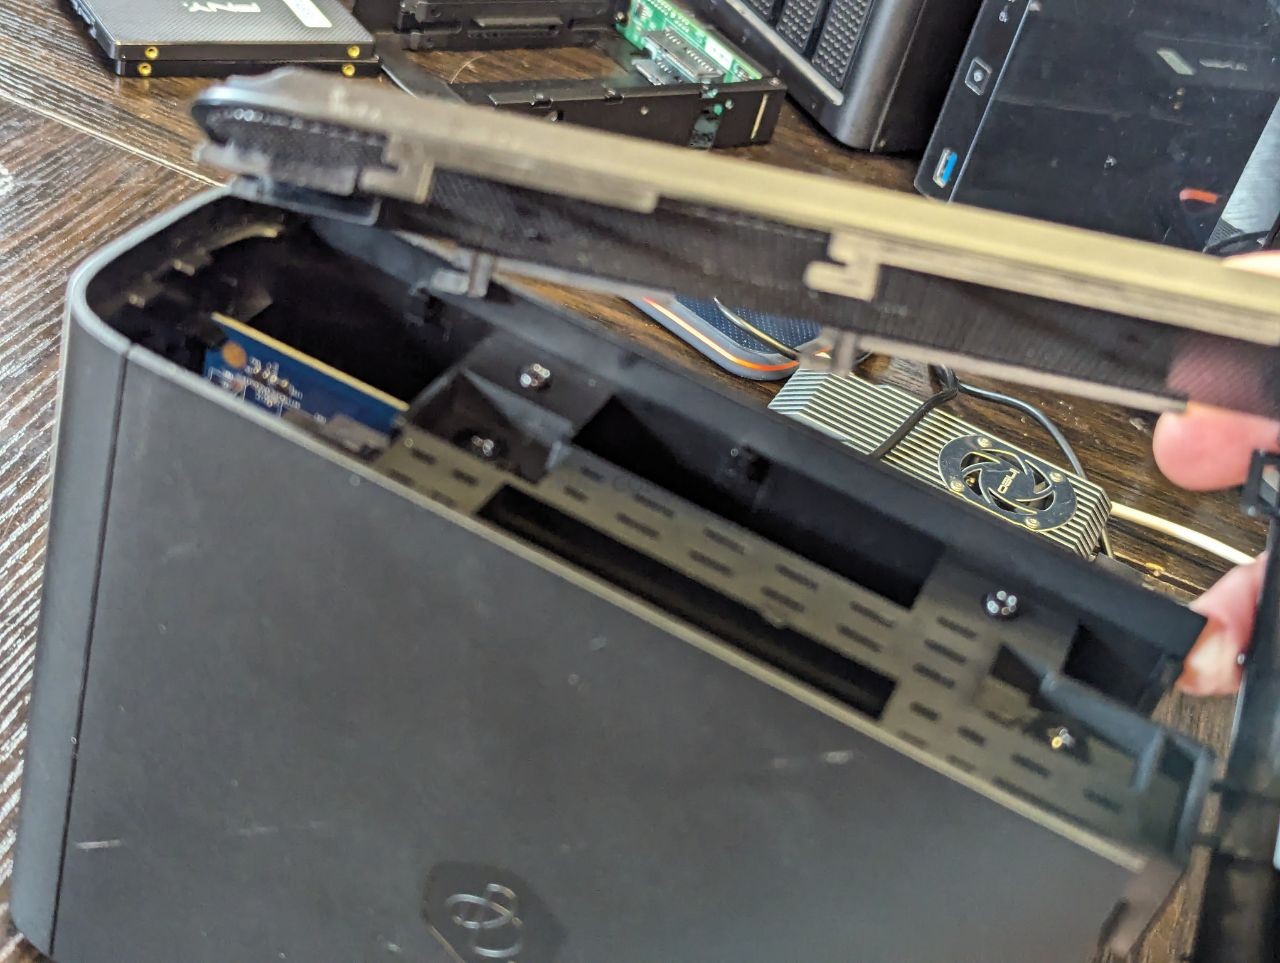
Re-screw the two silver screws that hold the L-shaped panel in place and then re-attached the rubber foot panel.
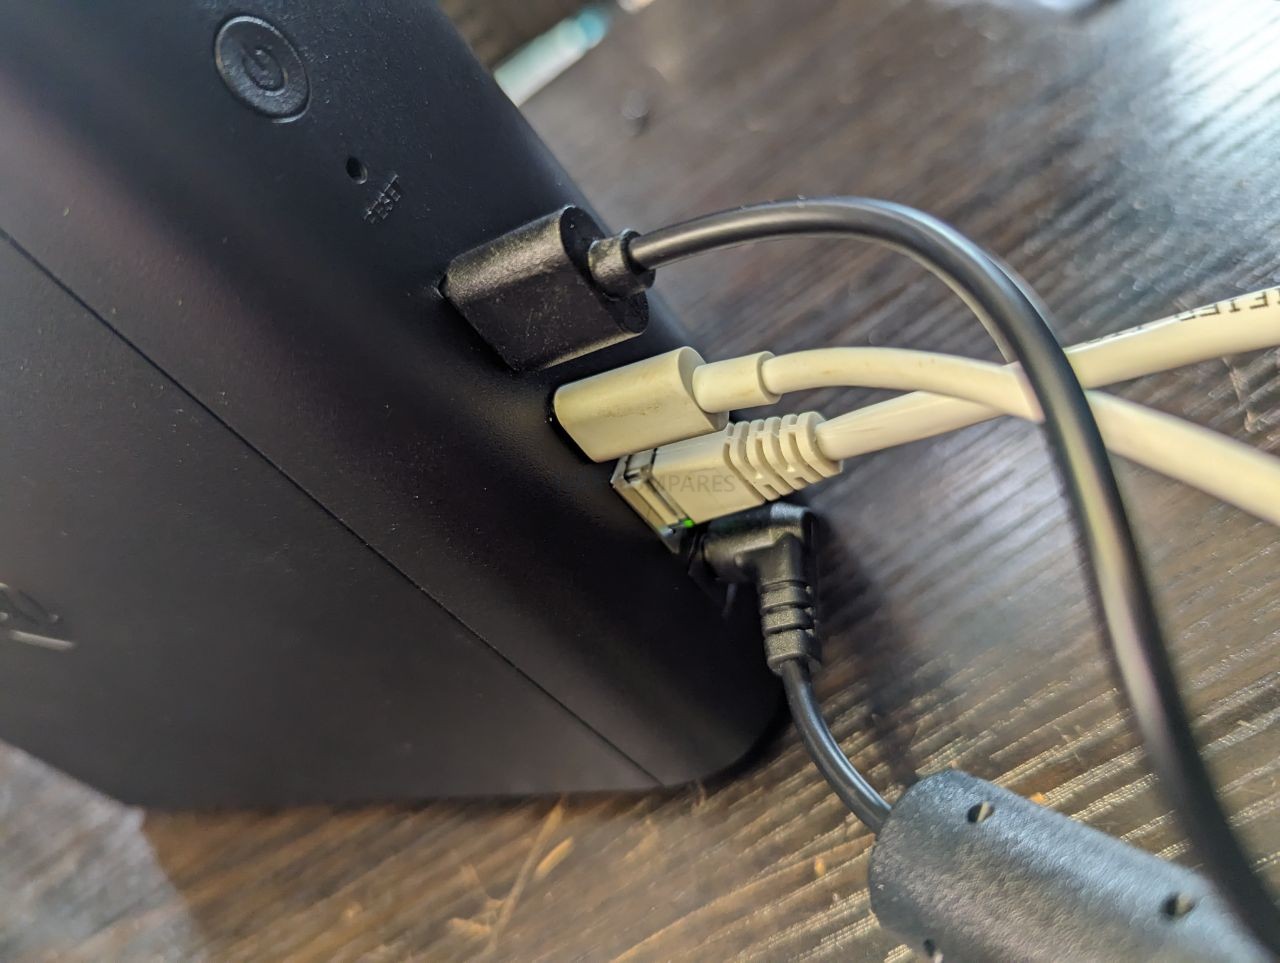
Reconnect the local area network/internet connection, as well as the USB drive (if you have a USB backup) and finally the power cable. Then press the power button and now move over to your network connection PC/Mac/Linux desktop and we can start the reinitialization.
Re-Installing BSM on your BeeStation
When the device begins booting, after a few minutes you will hear the system beep. However, instead of heading to the usual Synology Bee Portal site page, you need to open up the Synology Assistant tool. It will scan the local area network and it will find the Synology BeeStation, but it will say that it is in the process of ‘Upgrading’
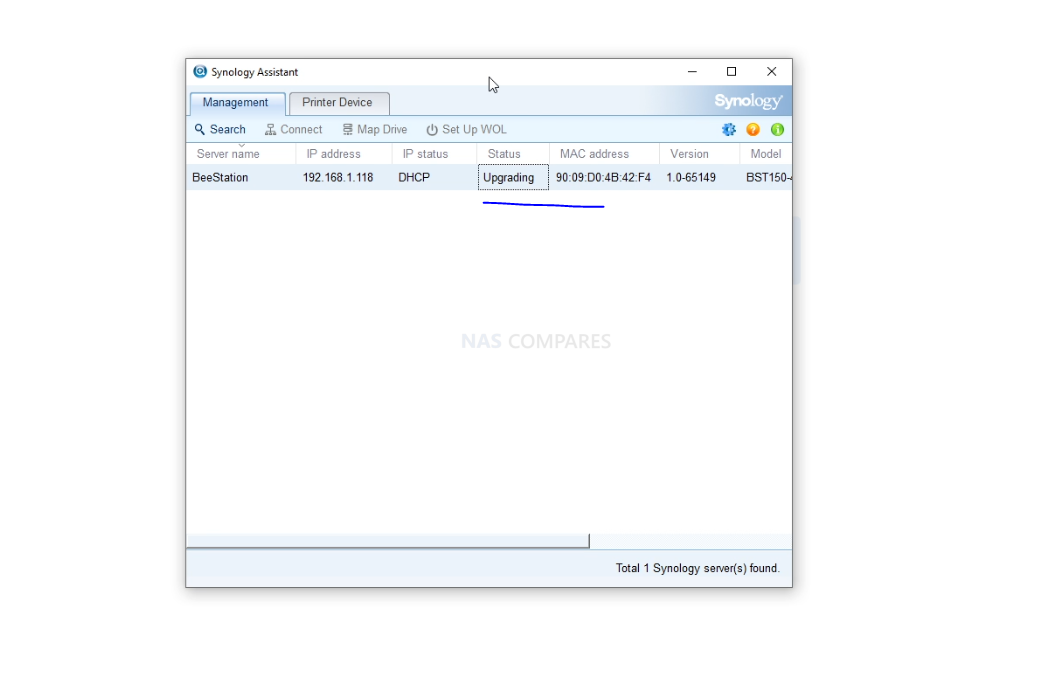
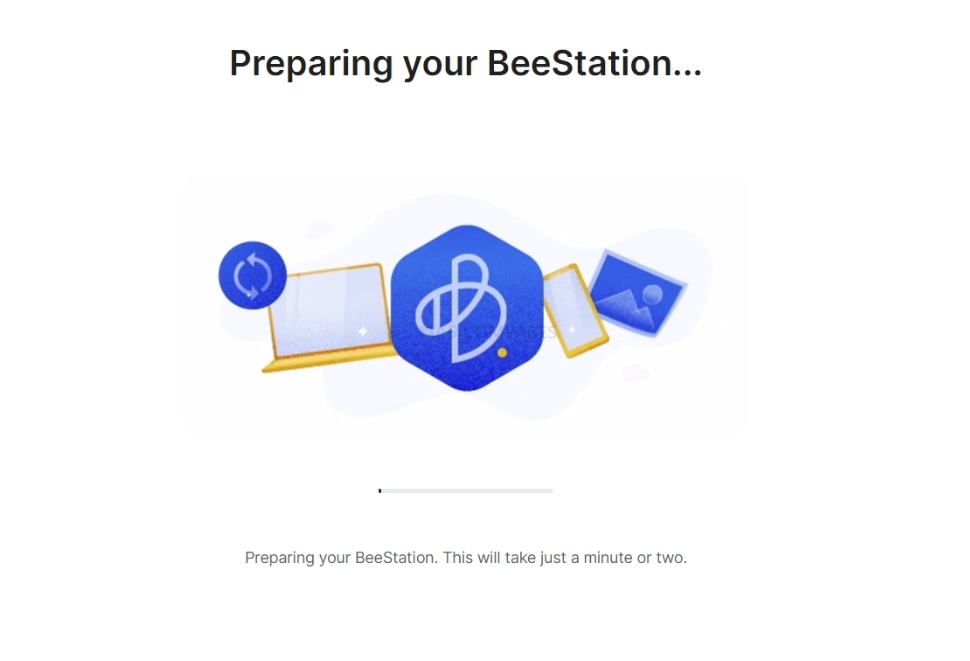
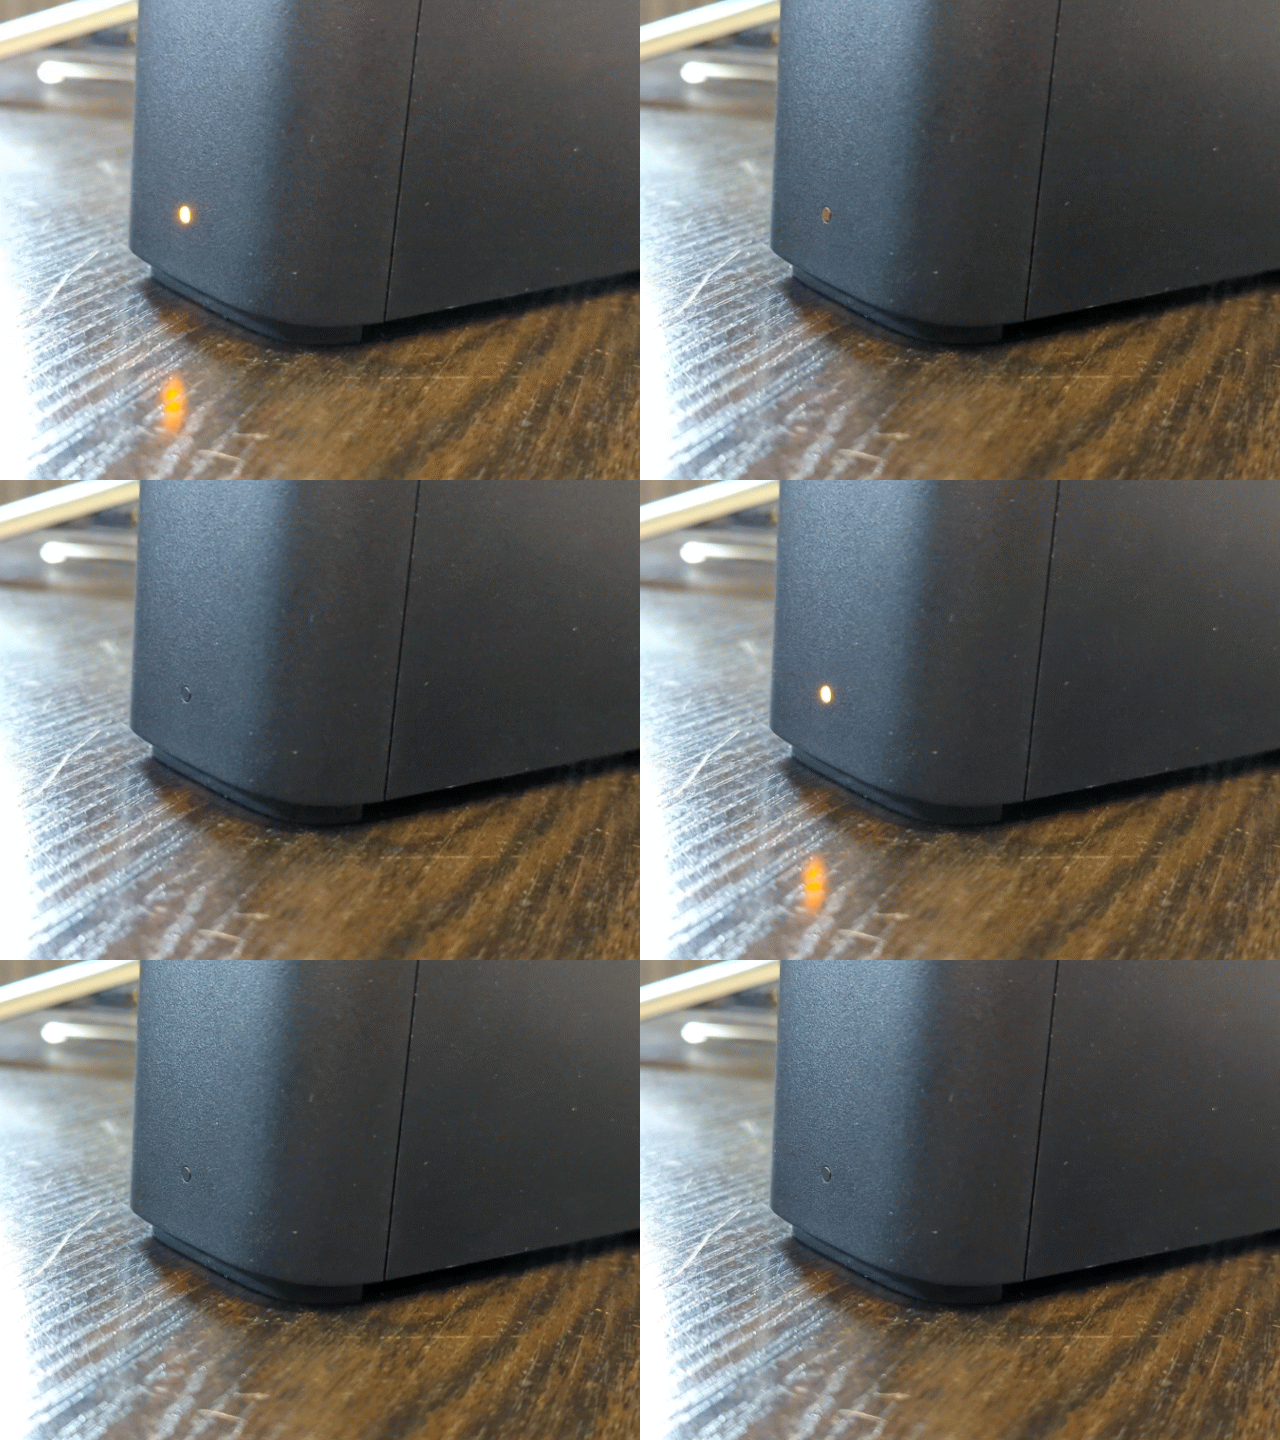
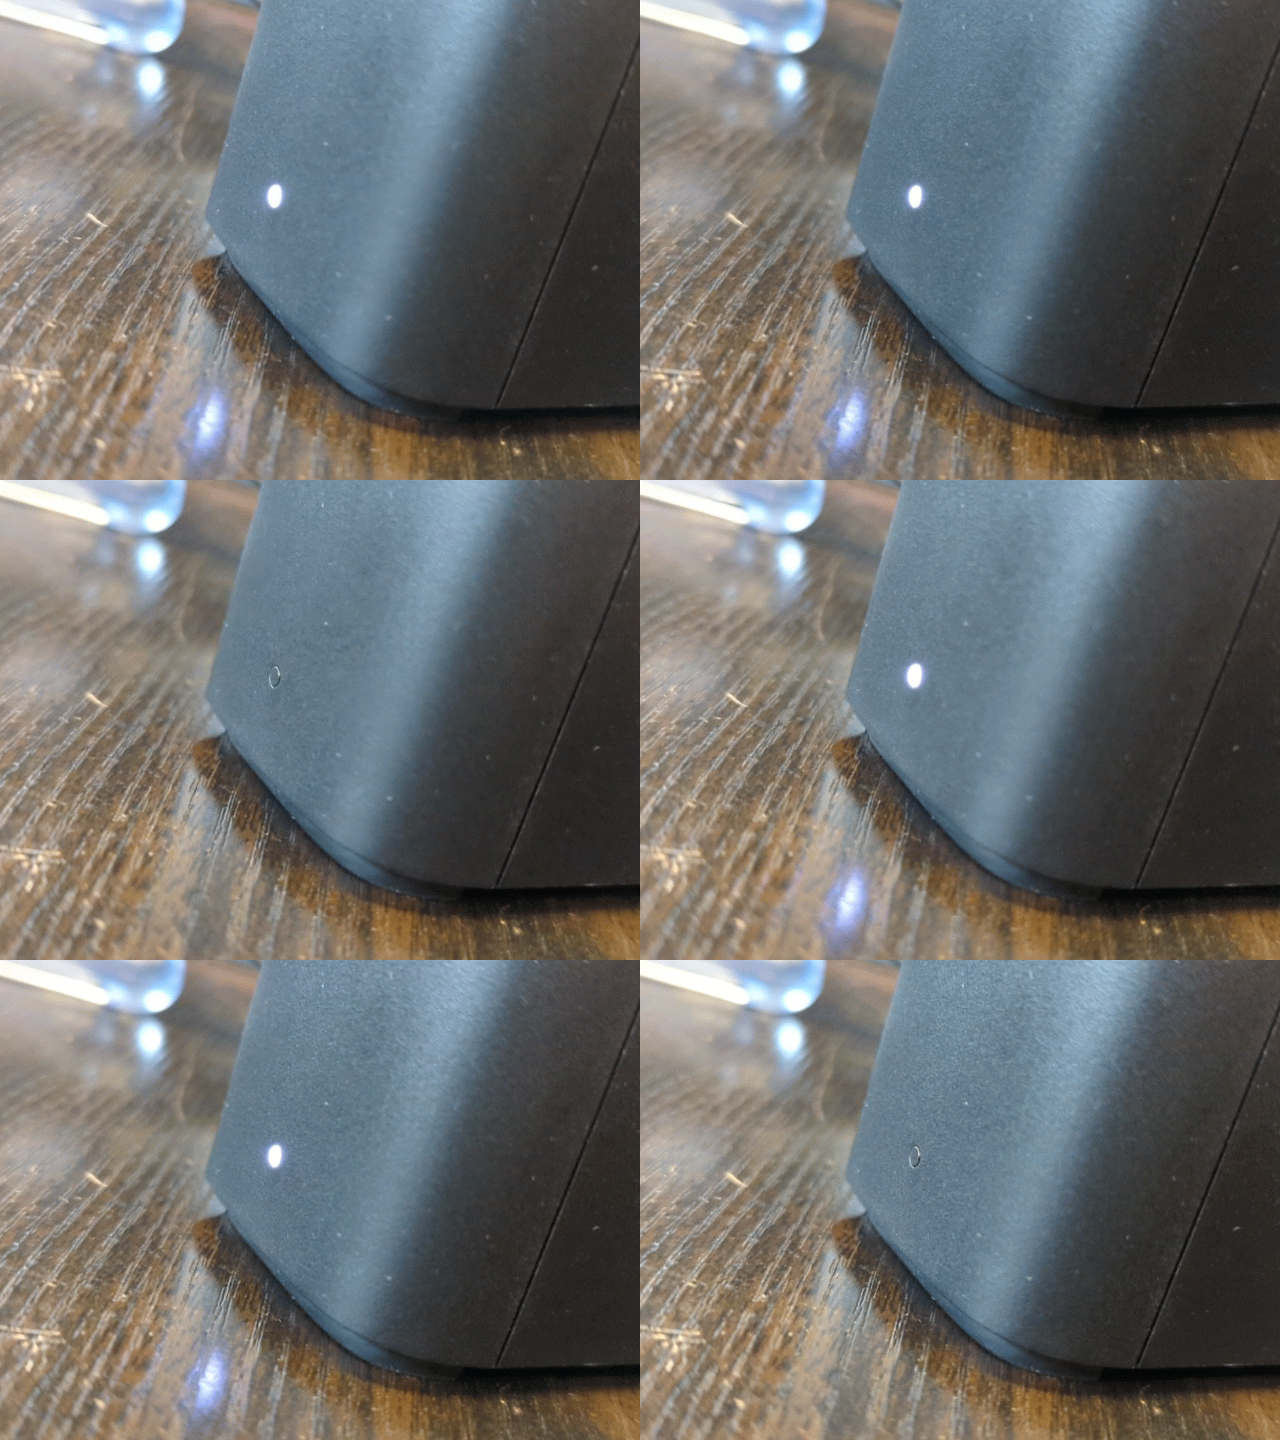
Now the amount of time this takes will depend on a lot of factors (drive size, download speed if the system is collecting the BSM software online. After some time has passed (10-20 mins tops), the system will reboot ( you will hear the drive spin down and the light on the system will change from a flashing orange light to a slow white light.
| 1 – UPGRADING
|
2 – REINITIALIZING
|
After a few minutes, the synology assistant should now show the message ‘Starting Services’. Don’t forget to click the ‘search’ button at the top left to rescan to see any new changes to the system status.
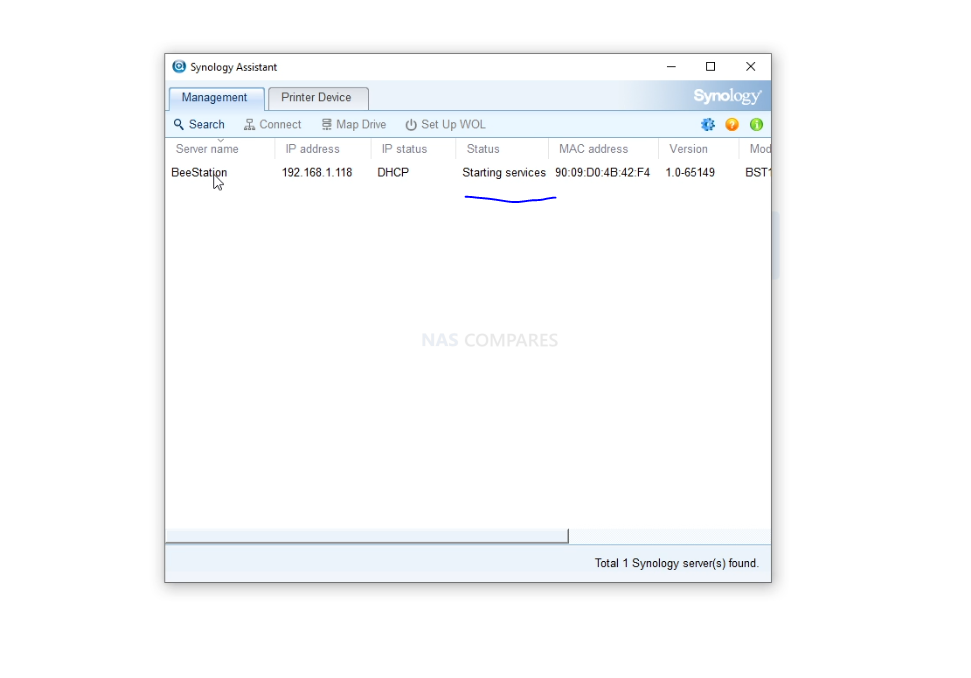
After a period of time, the system will now show a new message that indicates that the system needs configuration in the synology assistant:
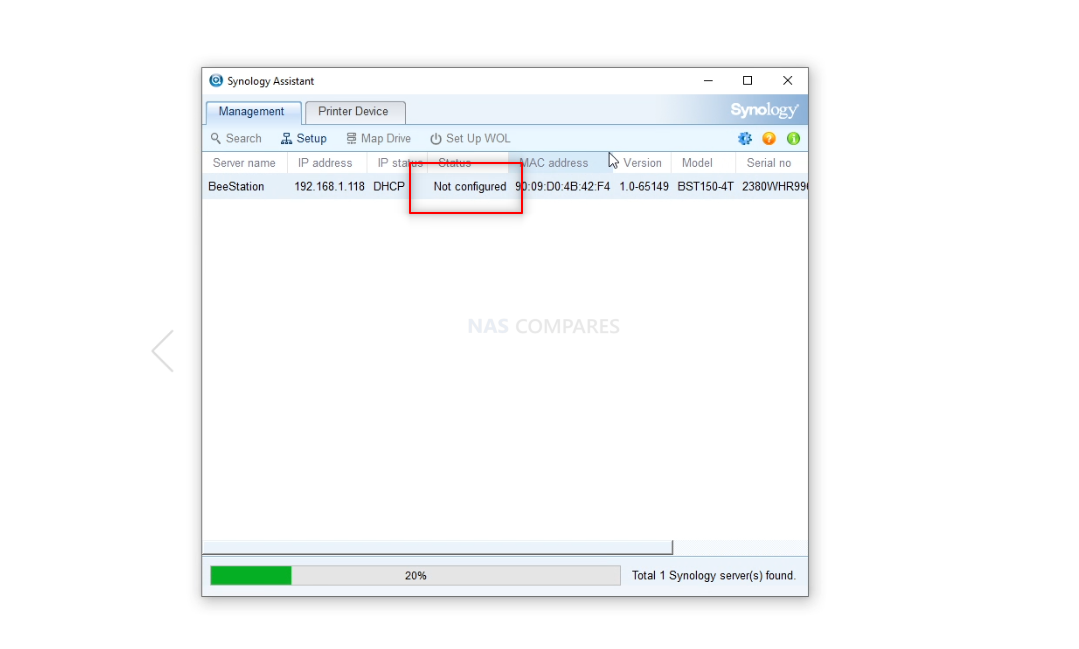
Now you just need to double-click the Beestation listing on the Synology Assistant tool, and it will open up a new tab on your web browser that will guide you through the original BSM installation process, via the Synology Beestation Portal web site:
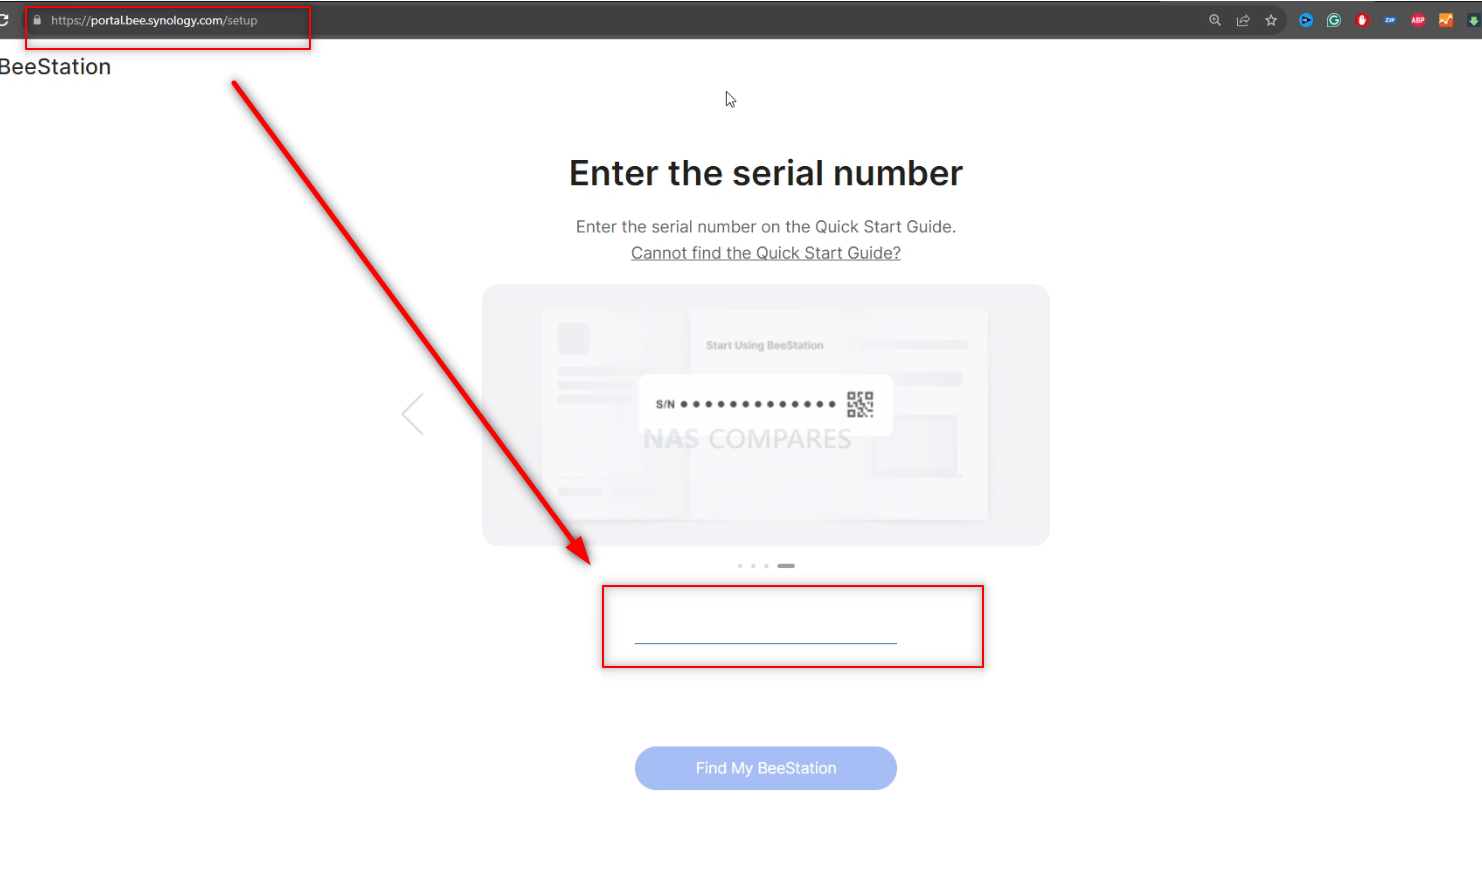
When you have logged into your Synology Account and have gone through the first 4 steps of the installation, you will be asked if the system is showing an orange light. If it does not, you will need to follow to on-screen restart prompts using the reset button, which will all the system to reboot into ‘find’ mode. Once you have the On-screen serial number prompt and the light on the BeeStation is Solid orange (not flashing) you can go through the usual system setup prompts and connect the BeeStation with your Synology account as normal and log in as you would have before.
What if my Synology BeeStation does not boot into the usual installer?
There IS a chance that your BeeStation will instead display a message saying ‘Not Configured’ upon the first power on after installing your new drive, typically caused by a lack of facility to download the latest firmware (i.e the network connection is not present or restricted on your network). This will result in the system booting into a similar system setup window as found on the Synology Diskstation/DSM devices.
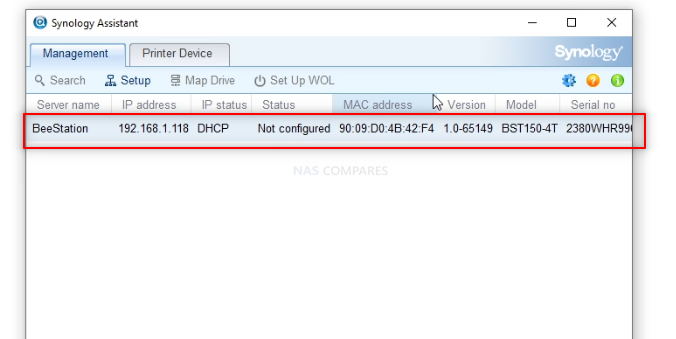
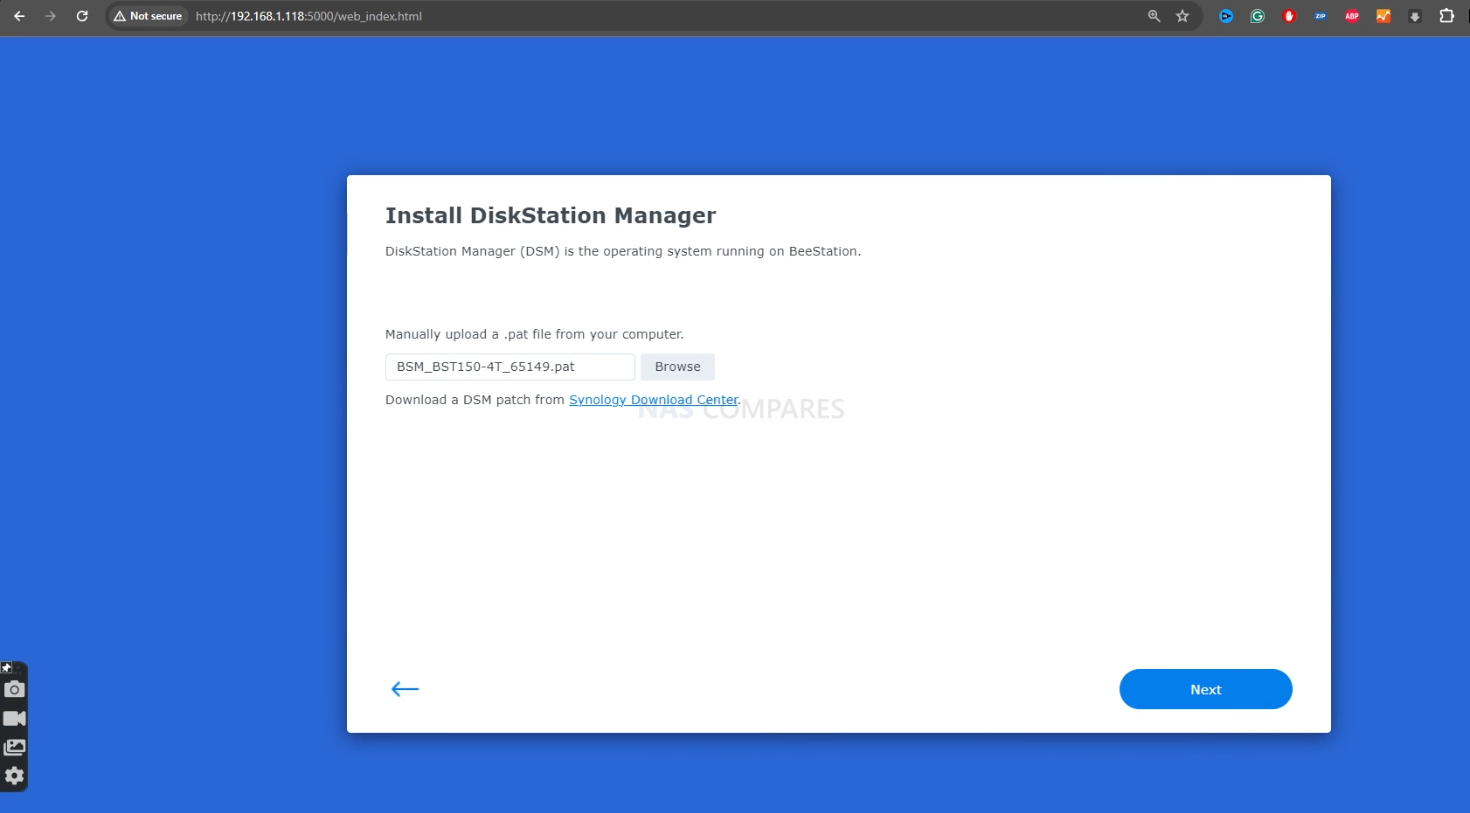
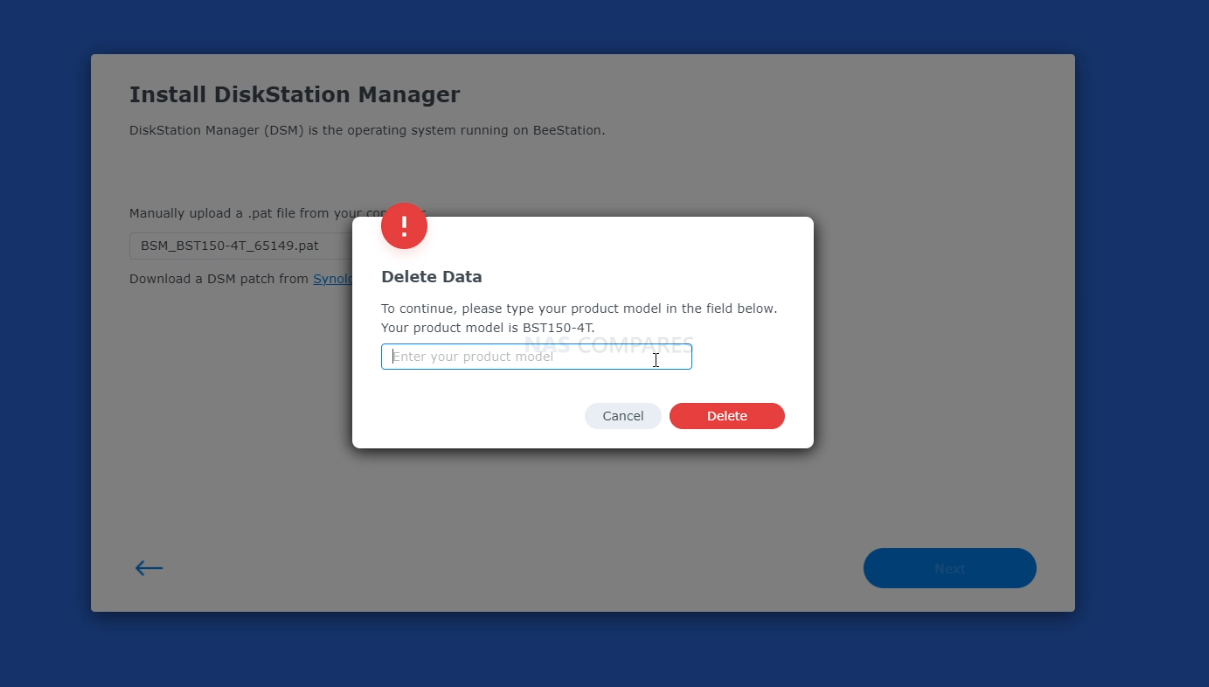
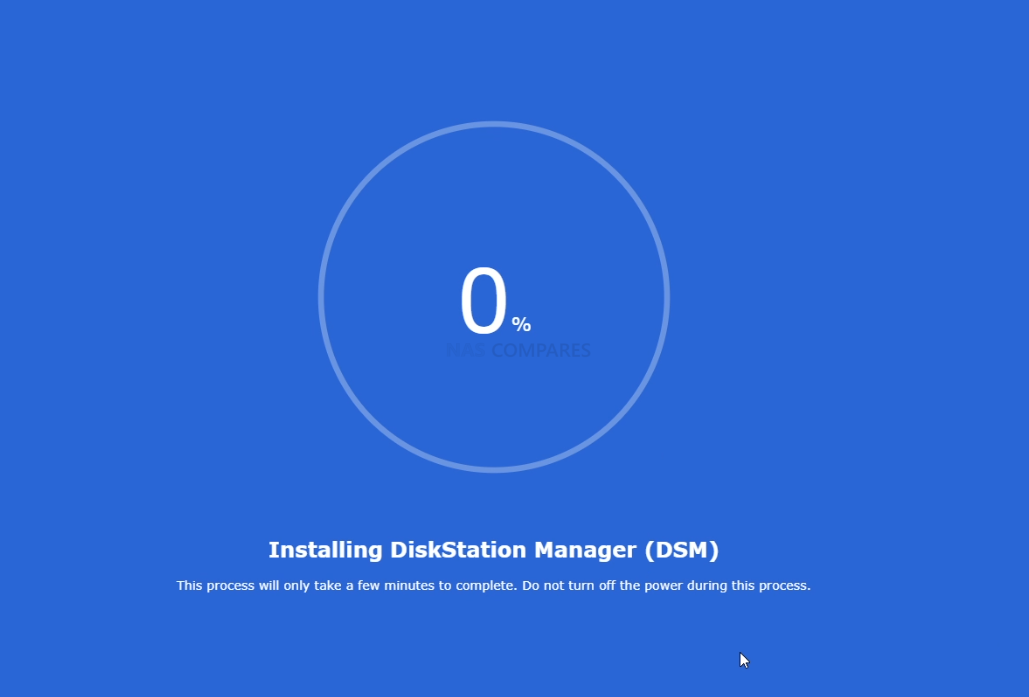
If this occurs, double-click the BeeStation listing on the Synology Assistant tool, and it will open a new tab on your web browser that shows the manual installation steps for BSM on your BeeStation system via the LAN. Just follow the steps on the screen to select the downloaded BSM image you have on your PC/Mac machine, as well as begin the installation to the new HDD/SSD – This will wipe the contents of the drive, but that is normal and you should be using a new/blank drive anyway.
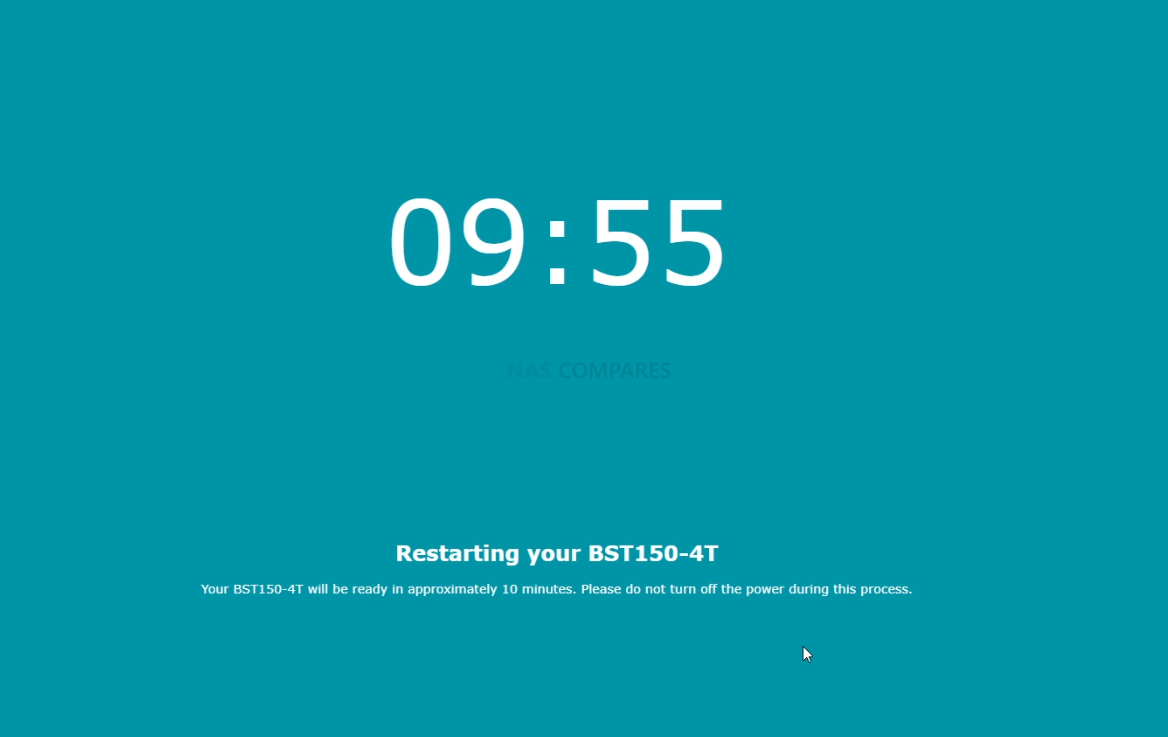
This will install the latest BSM software and the system will restart after 10 mins and you can follow the steps outlined in the previous section to setup the Beestation with your new HDD/SSD for the first time.
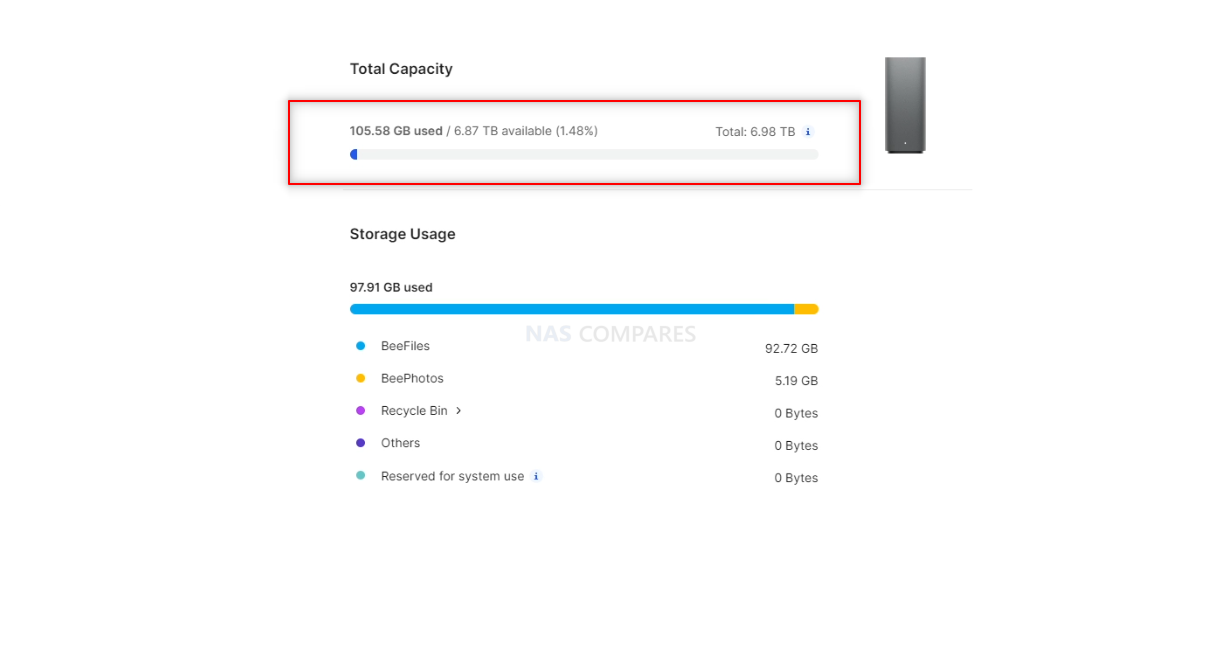
How to Restore Your Data to the Upgraded Drive BeeStation?
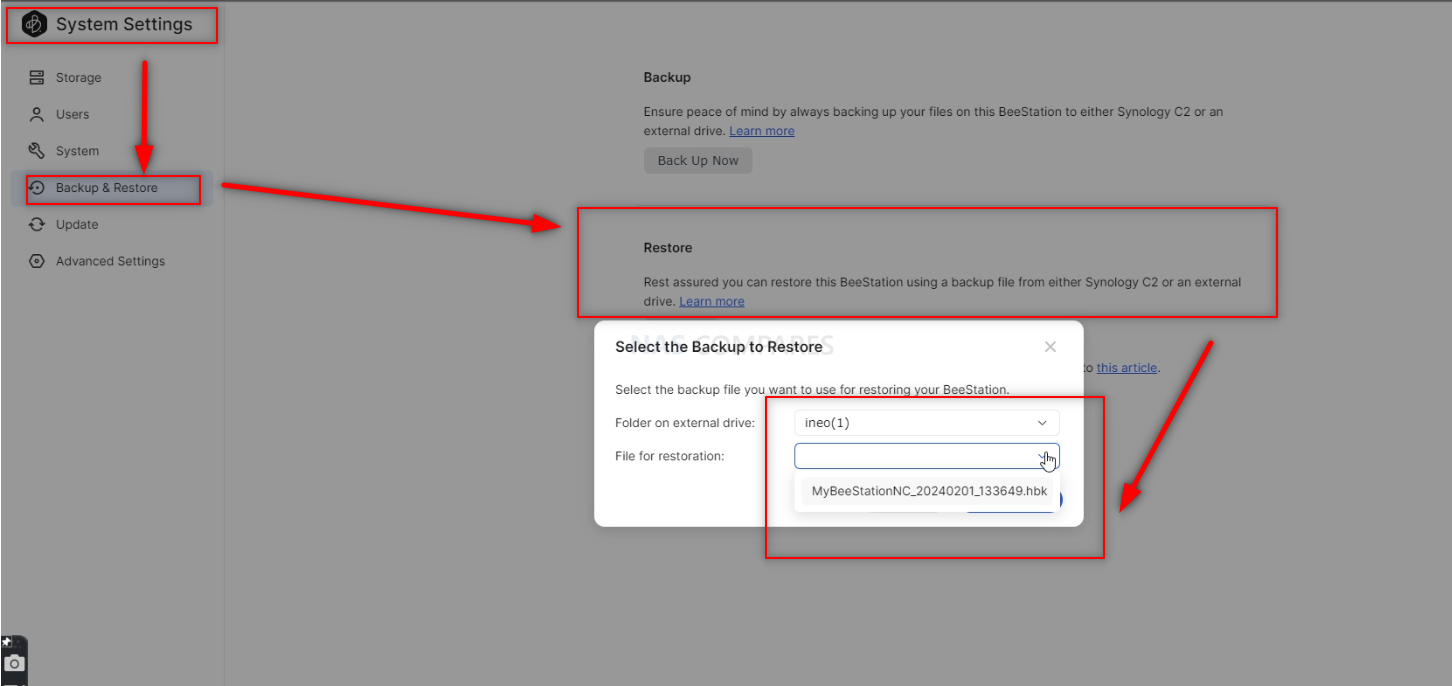
Now that your BeeStation is up and running, with your new HDD/SSD, you might have a backup of your data on USB or on the Cloud that you want to restore. If you want to use the BeeFiles Backup services for USB/Cloud, you can do this easily with the options in the BeeFiles tool and your cloud sync or USB that you created earlier can be re-connected and the data will be sent back to the Beestation. However, if you have opted to do the system-wide backup in the System settings menu, you will need to head in the system config page and select the Restore Tab on the left hand side of the page:
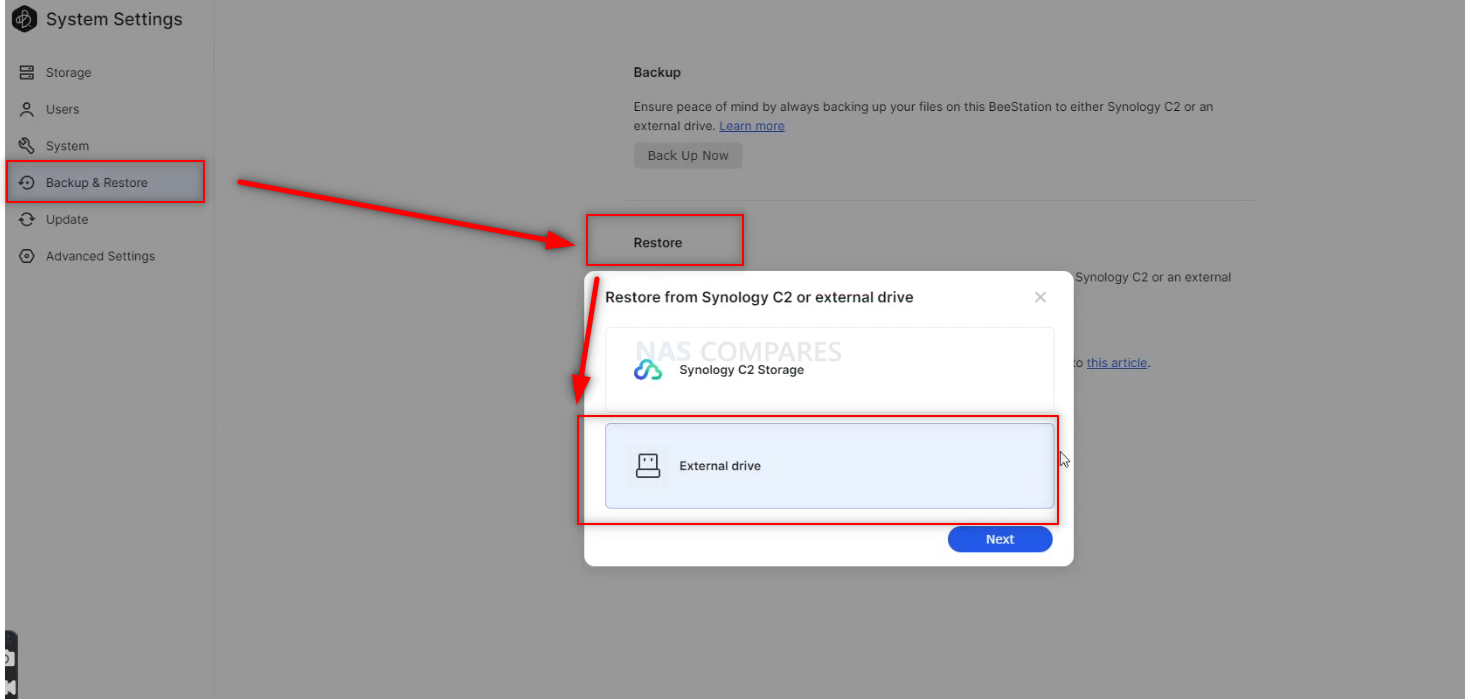
Next, select the Restore option, ensuring that you either have the USB Backup drive you used connected to the BeeStation system, or you have established a connection with your appropriate Synology C2 account.
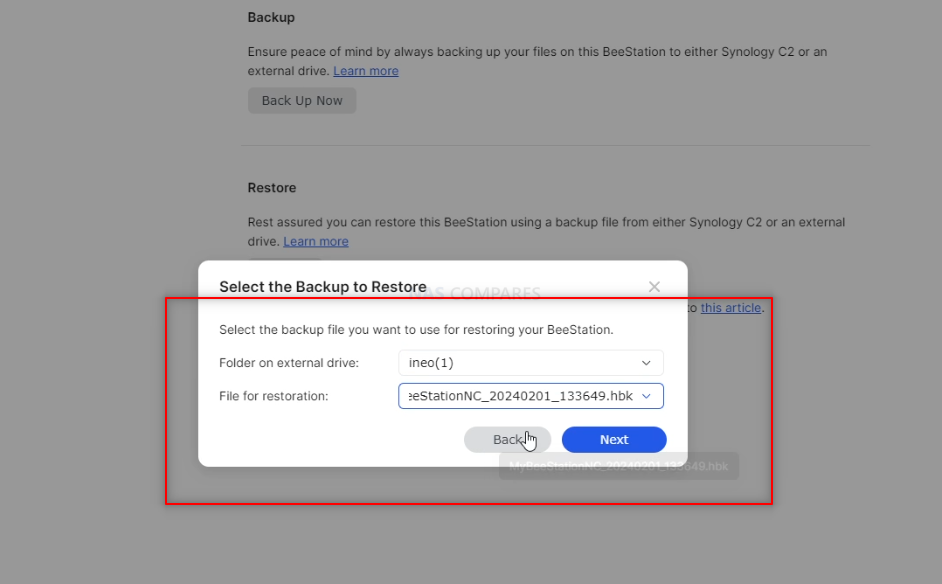
Next, you need to go through the list of Backup Images (if you have multiple) and select the appropriate system backup image you want Then you need to select the backup and proceed with restoring this system image
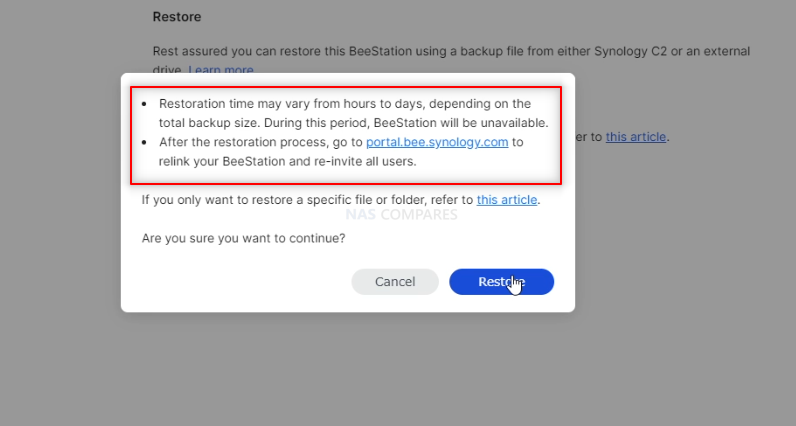
It is worth noting that this process can take a great deal of time (depending on the size of the backup, whether it is cloud/local based and the filled % of the capacity that back was of the original 4TB drive. In my tests, it took 35 mins to restore the system that had 300-400GB of data – it is a slow by methodical process.
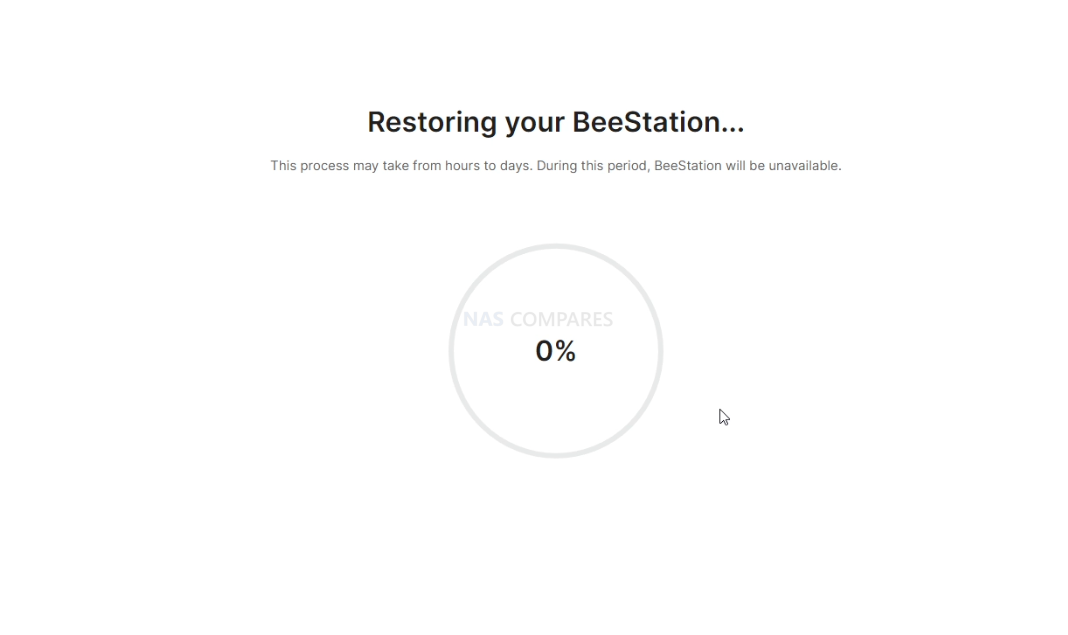
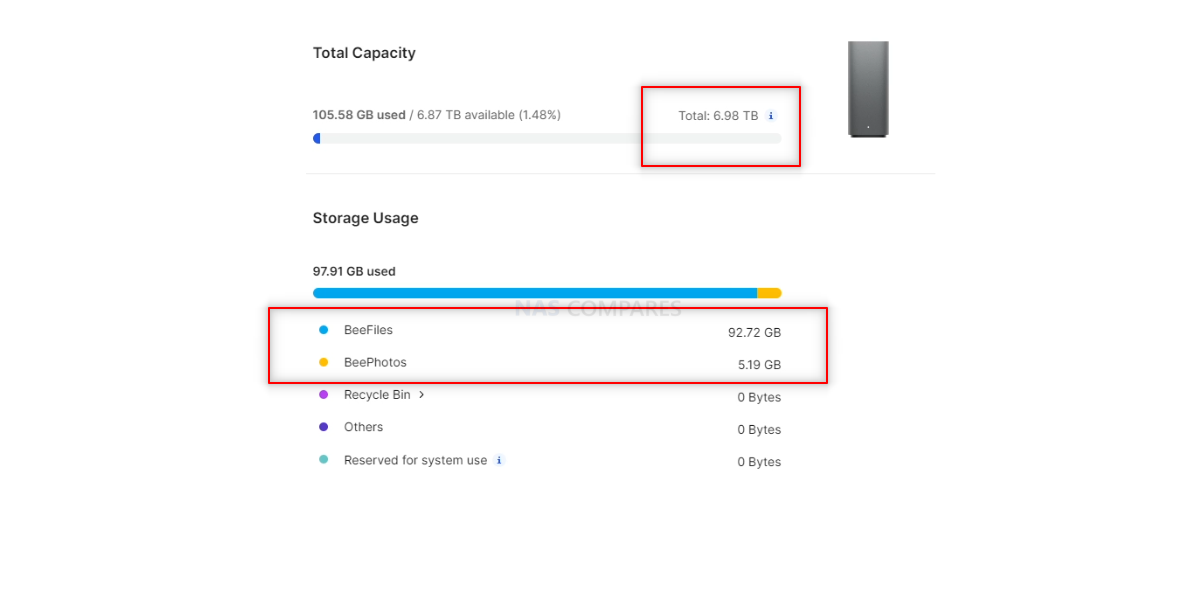
Once that is done, the system will reboot and when it has finished, you will need to re-enter and connect your Synology Account. After you log back into the system, you can go into the system setting and BeeFiles again, and you will see that not only is all the data restored, but also that the Synology BSM software has resized the partition to ensure that you are not losing any of the extra space that is available on your new possibly larger HDD (i.e it does not reinstall the 4TB system image, then ignore the extra HDD space – it expands the volume to the full available space of the drive)
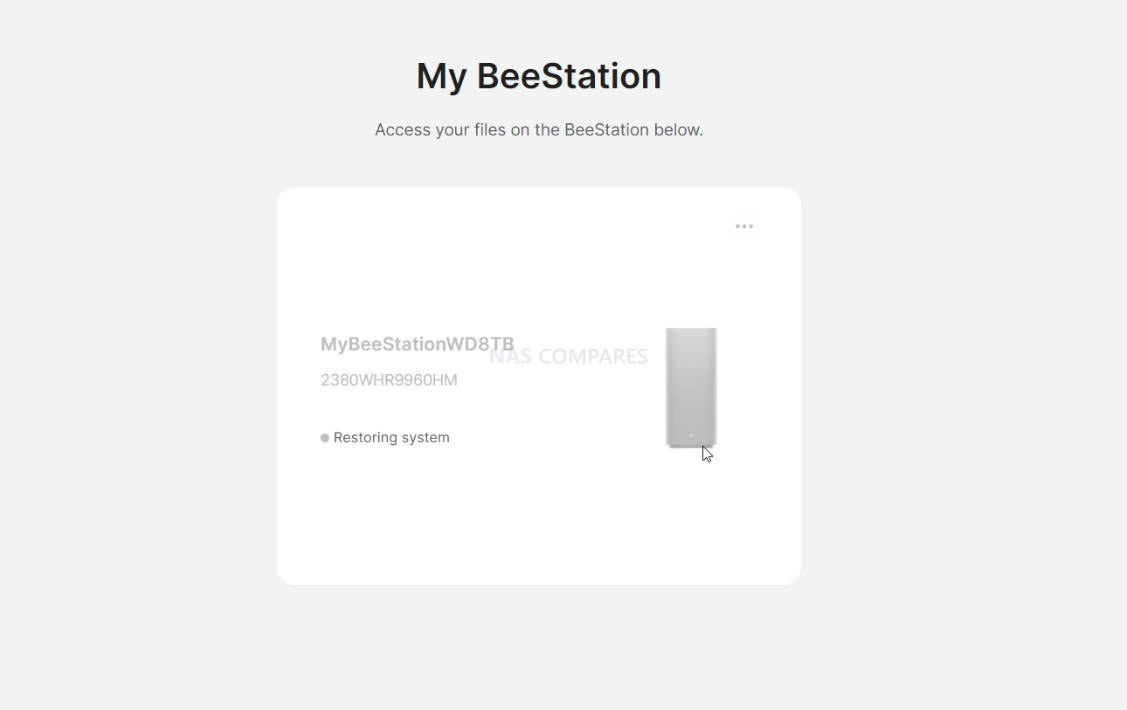
And there you go! You have now installed a new HDD or SSD in your Synology BeeStation. REMEMBER, this is NOT authorized by Synology as use for the BeeStation system and will result in the brand not supporting you in the event of issues encountered as a result of installing non-recommended configurations such as this. The Beestation is a simplified cloud alternative to Synology DSM systems. If you want to experiment with more complex configurations, larger storage and faster systems, you should look at the Synology Rackstation and Diskstation systems.
I hope you enjoyed this guide and found in useful/informative! REMEMBER, I did this to show you what the inside of your BeeStation Personal Cloud looks like, so YOU DON’T HAVE TO! If you have any further questions, you can reach out to me on robbie ( at ) nascompares.com, or use our free advice section located on the right hand side of the page. Alternatively, you can reach us on our Discord HERE, our community forum HERE, or for faster and more personal support over on KoFi Commissions HERE. If you use and/or share the content of this guide online, please help us spread awareness of our platform and the work we do by backlinking us appropriately! Thanks for reading!
Synology BeeStation Personal Cloud Review – Quick Conclusion
READ THE FULL BeeStation Review HERE
Synology has clearly done their homework on the development and presentation of the BeeStation private cloud. They are targeting a whole new audience with this system, and therefore, criticisms based on experiences with their other hardware are likely to fall on deaf ears. The BeeStation is probably one of the best middle grounds I have ever seen between an easy-to-use and exceptionally easy-to-set-up private cloud system, while still managing to provide smooth and seamless features for accessing and sharing your private cloud’s storage securely. Looking at this system with a more network-savvy microscope kind of defeats the point, and I’ve tried to be fair in my assessment. The lack of LAN access by default seems a little odd, and launching the BeeStation series in this single-bay, 4TB-only fashion may be a bit of a marketing misstep, but overall, what you’re seeing here is an effectively priced and scaled private cloud system. It’s a fantastic alternative to third-party clouds and existing simplified NAS systems. With many users keeping an eye on their budgets and tightening costs, Synology, known for its premium position in the market, had a challenge scaling down to this kind of user. However, I have to applaud Synology’s R&D for creating a simple and easy-to-use personal cloud solution that still carries a lot of their charm and great software reputation. It may not be as feature-rich as DSM, but BSM does exactly what it says it will do, and I think the target audience it’s designed for will enjoy the BeeStation a great deal!
UPDATE – You can watch the FULL YouTube Review of the Synology BeeStation HERE
Or Read the FULL Massive Beestation Review HERE
| Where to Buy a Product | |||
|
|
    
|

|
VISIT RETAILER ➤ |
 |
    
|

|
VISIT RETAILER ➤ |
 DEAL WATCH – Is It On Offer Right Now? DEAL WATCH – Is It On Offer Right Now?These Offers are Checked Daily
|
📧 SUBSCRIBE TO OUR NEWSLETTER 🔔
🔒 Join Inner Circle
Get an alert every time something gets added to this specific article!
This description contains links to Amazon. These links will take you to some of the products mentioned in today's content. As an Amazon Associate, I earn from qualifying purchases. Visit the NASCompares Deal Finder to find the best place to buy this device in your region, based on Service, Support and Reputation - Just Search for your NAS Drive in the Box Below
Need Advice on Data Storage from an Expert?
Finally, for free advice about your setup, just leave a message in the comments below here at NASCompares.com and we will get back to you. Need Help?
Where possible (and where appropriate) please provide as much information about your requirements, as then I can arrange the best answer and solution to your needs. Do not worry about your e-mail address being required, it will NOT be used in a mailing list and will NOT be used in any way other than to respond to your enquiry.

|
 |
WHERE IS SYNOLOGY DSM 8? and DO YOU CARE? (RAID Room)
UniFi Routers vs OpenWRT DIY Routers - Which Should You Choose?
WHY IS PLEX A BIT S#!t NOW? IS 2026 JELLYFIN TIME? (RAID Room)
Synology FS200T NAS is STILL COMING... But... WHY?
Gl.iNet vs UniFi Travel Routers - Which Should You Buy?
UnifyDrive UP6 Mobile NAS Review
Access content via Patreon or KO-FI
Discover more from NAS Compares
Subscribe to get the latest posts sent to your email.




so, if the hdd failed and I have a backup of it, I have to throw away the bee station and buy another one and reset it from my backup drive?????????????
REPLY ON YOUTUBE
Why are NAS cases designed to be extremely tedious to take apart? A small formfactor computer case is easier to manage for a fraction of the price. SMH.
REPLY ON YOUTUBE
€280 device = €100 HDD + €180 worth of enclosure and software
REPLY ON YOUTUBE
Why does the software look identical to Google Drive?
REPLY ON YOUTUBE
So far I like the beestation. Tried to do this with a Seagate 20Tb NAS hhd, it worked till the settings for the beestation would say that it was not able to create a storage space, it would come up and show 0 bytes. So in the end, put the original hard drive back in. I was wondering what the max size can be installed and working. A side note when I went to the website for the BSM OS file on 10-14-2024, I had seen that they had two options BSM_BST150-4T_65373.pat and also BSM_BST170-8T_65373. But going back today to check the file again, was not there. I also seen a post on reddit for the new firmware file.
REPLY ON YOUTUBE
Great video , mine failed after 5 months of light use
REPLY ON YOUTUBE
Is this hard drive encrypted in case someone disassembles BeeStation and just plug the drive via SATA to read it?
REPLY ON YOUTUBE
After syncing with Dropbox can you disconnect DropBox and keep the local files on the drive?
REPLY ON YOUTUBE
If this was 8tb I would have bought it and happily not had the hassle of spending so much time learning how to use a NAS
REPLY ON YOUTUBE
Can you swap out the spinning drive for an SSD?
REPLY ON YOUTUBE
This could have easily been made hot-swappable with an opening slide-in tray and door. Synology were obviously determined not to allow that.
REPLY ON YOUTUBE
This could have easily been made hot-swappable with an opening slide-in tray and door. Synology were obviously determined not to allow that.
REPLY ON YOUTUBE
I bought a beestation last week and let me tell you its simple and easy to use! No fuss no muss and i was up and backing up all my desktops in the house within minutes!
REPLY ON YOUTUBE
Love your reviews guys! What happens when it comes time to expand? 4Tb might not be enough
REPLY ON YOUTUBE
if i put video and audio files on this unit can i access them with an nvidia shield pro
REPLY ON YOUTUBE
Synology has finally started to design a more advanced UI for users… This is the biggest improvement I’ve seen.
REPLY ON YOUTUBE
The lack o a SSD in the NAS isn’t the real reason that the system slows down when too many people are trying to access it. NAS machines have existed for decades prior to the invention of Solid State Drives. The real issue is the speed of the hard drive itself. Probably also the computer hardware inside.
REPLY ON YOUTUBE
Cant seem to find them for sale in my area uk
REPLY ON YOUTUBE
no dsm must have account lan not on by default i will pass
REPLY ON YOUTUBE
Hello, Thank you for the review, but i was curious about can it split to 4 1TB for 4 users to access? or is there other way to invite user then limit the stroage space
REPLY ON YOUTUBE
YouTube hasn’t been updating me of your new videos. I had to search you out to make sure you still existed! Not sure what’s going on with Google doing that to you.
REPLY ON YOUTUBE
When is this coming to the US? Would definitely buy this for Mother’s Day if it’s available. Lot of old photos I could load here for my parents
REPLY ON YOUTUBE
Should have had 2.5gbe
REPLY ON YOUTUBE
If one has any interest in a NAS I would highly recommend getting a NAS with removable storage. When this fails and it will fail and have no understanding about how to get it working again which is not easy. It’s a waste of money you could have put money into a two bay. Under constant power it will fail in 3 to 5 years so never use it as a backup for important files. It’s best use case is to swap files between computers or for short term storage of unimportant files.
REPLY ON YOUTUBE
It would be really useful if there was an accounting app/ software company that could develop the cloud access features so that you could host your own remote access accounting system and avoid the costs imposed by the likes of QuickBooks, Xero and others who are bound to raise their prices once MTD for Income Tax/Corporation Tax is required in the UK
REPLY ON YOUTUBE
Man, how you re able to produce so much content? I really like your reviews.
REPLY ON YOUTUBE
cool
REPLY ON YOUTUBE
There is a third kind of viewer. One who is just curious but doesn’t know a thing about tecs and already had a DS1522+ thanks to you (and is happy) so has no use for this device, but just is curious what it inside.
REPLY ON YOUTUBE
That LAN switch definitely needs to be on by default. I like the UI design, I hope Synology take some of the ideas for DSM 8 from BSM
REPLY ON YOUTUBE
They could have put in a couple of 4tb ssd drives and a 2.5tb. LAN and local file share on by default. The cost might go up. But better for a beginner
REPLY ON YOUTUBE
any mention of a UK release date? Or just wait for it to appear on Amazon?
REPLY ON YOUTUBE
I’ve watched your other videos on this product. What I’m still wondering (before I finish this video) is what happens if this unit is destroyed or stolen, is there another backup option, or is this beestation the only place that all your data lives?
REPLY ON YOUTUBE
Hate seagulls..they’re in the cloud therefore hate cloud….
REPLY ON YOUTUBE
I f I buy this and use it for a while, how hard/easy is it to transfer data when I later decide to upgrade to a multi-bay Synology NASA?
REPLY ON YOUTUBE
You are a legend mate. Thank you
REPLY ON YOUTUBE
You say this is $199. But on Synology website. It’s $299.
REPLY ON YOUTUBE
I look forward to any drive swap videos that might be forthcoming. It would be pretty ridiculous if they actually did put in the effort of firmware locking it to just certain drives.
I’ve done drive swaps in the 1st gen WD MyCloud enclosures and those will work just fine if you clone the old drive onto the new drive (and then use a utility like Linux’s gparted to resize the largest partition, the data partition, if the new drive is larger).
REPLY ON YOUTUBE
It’s a good job this isn’t a high end wristwatch channel. I enjoy the content, thank you.
REPLY ON YOUTUBE
I’m watching the video because I watch all of your videos 🙂
REPLY ON YOUTUBE
Plastic junk
REPLY ON YOUTUBE
What if the drive fails?
REPLY ON YOUTUBE
Waste of time and money.
REPLY ON YOUTUBE
I’ll be shocked if this BeeStation stuff exists in 5+ years time. I just can’t see any scenarios where this product is the perfect fit.
REPLY ON YOUTUBE
Is that coin cell a standard 2032 or a rechargeable? I hope the latter …
REPLY ON YOUTUBE
Can’t shake the feeling that it’s a gimmick money-grab product at best. Imagine the sh*tstorm of not tech savvy customers booing when their cheap personal cloud bites the dust.
2x 4Tb SSDs in SHR1 at least or something would have been a solid offering, but obviously not in the same price range. I don’t think this product would bring anything positive for the company.
REPLY ON YOUTUBE
So, repairability is virtually zero when you are not able to replace the HD.
This kind of DRM is despicable, creating more e-waste at the end-of-life in my opinion.
But then Synology is bound to lock-down their users as they usually attempt to, so no big surprises to me.
I indeed wonder what happens when you shuck the drive with another model to find out if indeed replacing the HD is possible or not and what happens afterwards, if the unit locks-up permanently etc.
If indeed not possible I would not consider purchasing such a product.
REPLY ON YOUTUBE
Thoughts on using this as a routine backup of a ds220+, to plug in too network and then store off site routinely? Does synology DSM -> bsm support this workflow?
REPLY ON YOUTUBE
You got a spelling error in the thumbnail brother
REPLY ON YOUTUBE
But but the led.
How did they power the led?
The drive brackets have the led or is it on the board?
REPLY ON YOUTUBE