

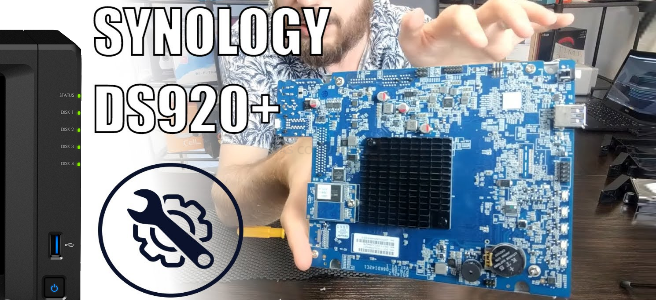
Synology DS920+ NAS Hardware Tear Down
For those of you that are interested in the newest generation of Synology NAS, you are probably wondering about what exactly goes on under the bonnet. We talk about the CPU and Memory plenty, but what about on the inside? Where does the Synology DSM software get extracted from? Where is the other memory bay? How is the CPU kept cool? There are interesting (if slightly nerdy) questions. Luckily I have a space DS920+ NAS here and I am an interesting (if slightly nerdy) guy who wants to find out. So, let’s take the Synology DS920+ NAS apart and find out what is inside that small black chassis. Alternatively, if you are looking for the DS920+ NAS Review, please find my DS920+ Hardware Review HERE. Now, I’ll go get my screwdriver.
Disclaimer – Please, Please, PLEASE do not try this yourself. I am doing this so you do not have to! I mainly started this to find out how Synology had locked the device to 6GB maximum memory. Do not do this unless you have the technical knowledge to know what you are doing OR are ok with invalidating your warranty. Also, BACKUP YOUR DATA!
Taking the Synology DS920+ NAS a part
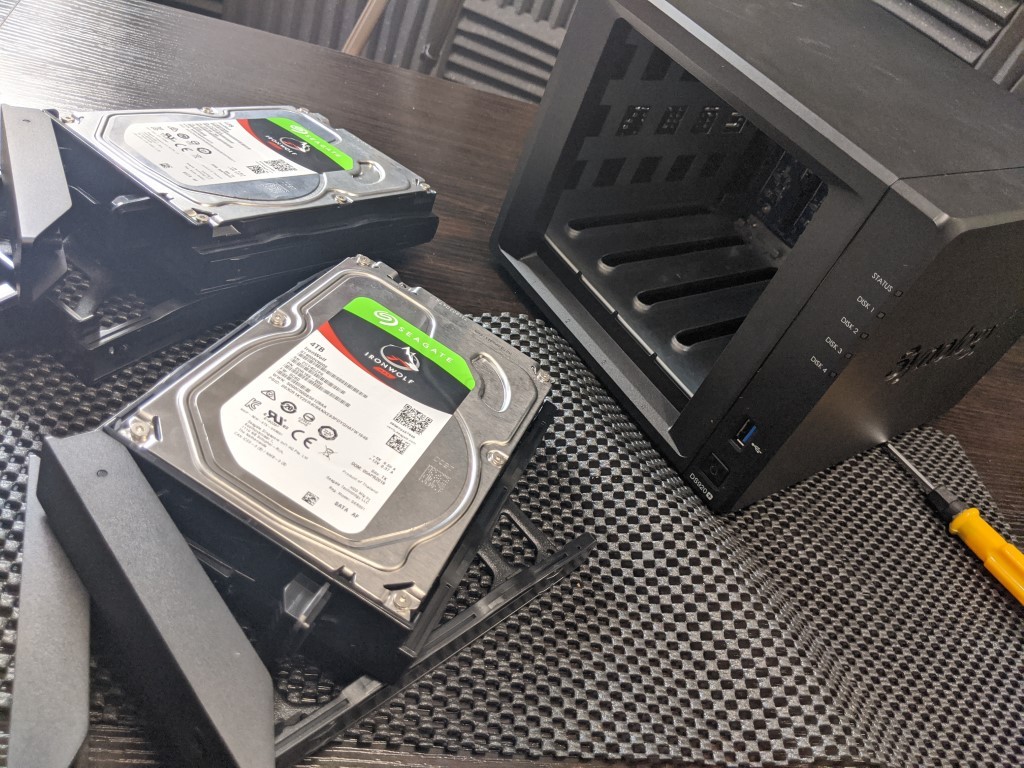
First things first, I made sure to safely power down the DS920+ NAS, then remove the PSU and LAN connection. Then I removed the HDD media from inside.
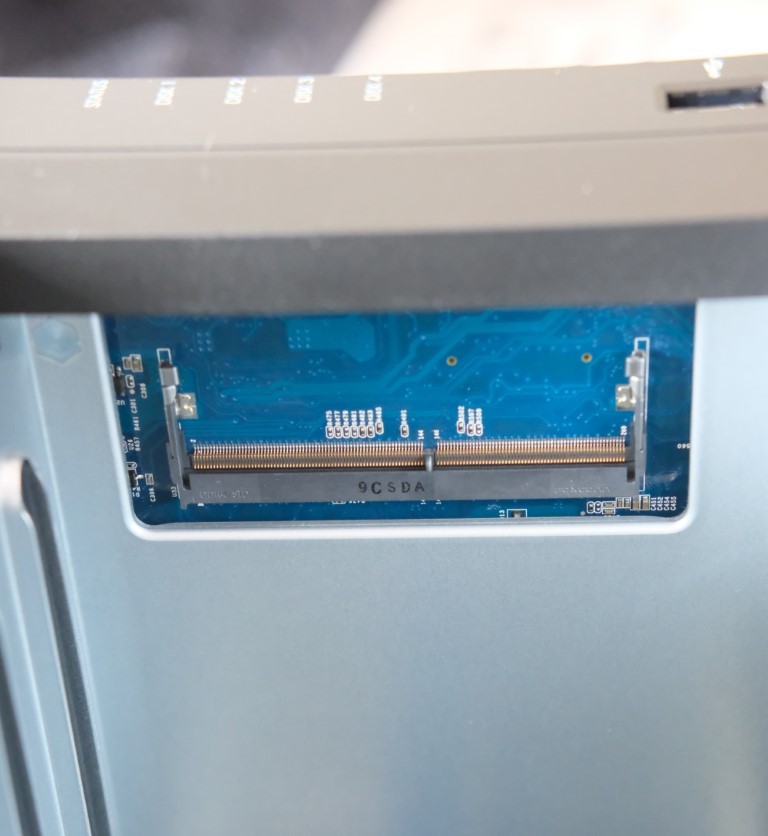
Once I removed the HDD media and trays I made sure that the SODIMM memory module was empty.
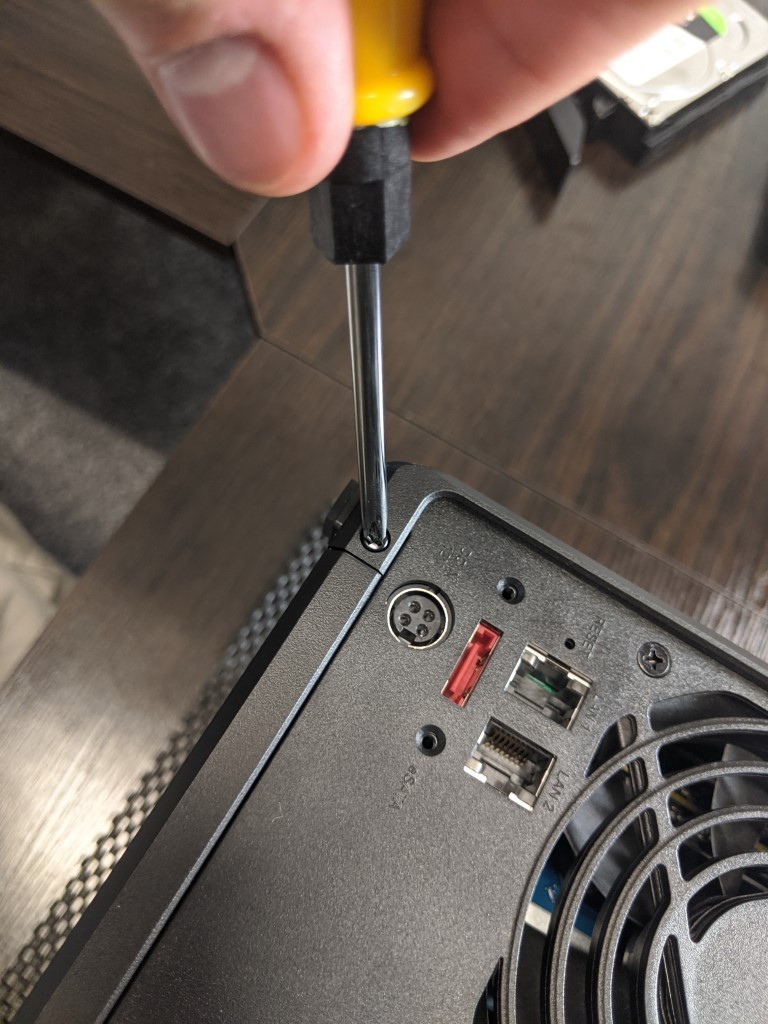
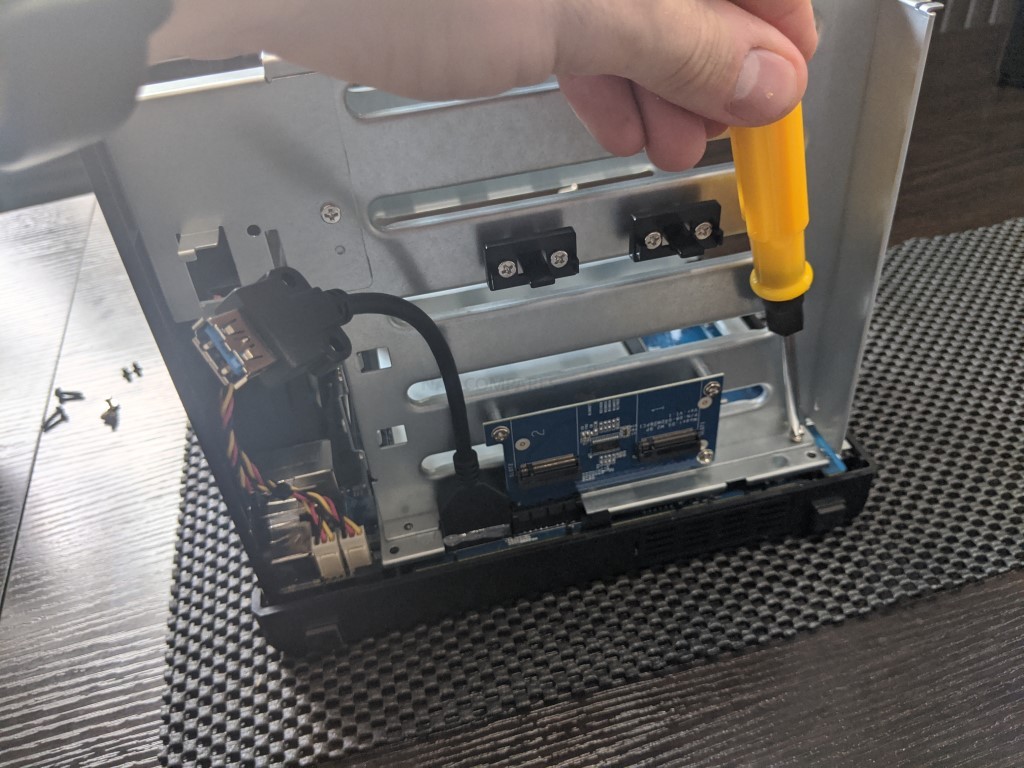
Then I rotated the device in order to gain access to the rear 3x screw that hold the device casing together. First is the top left corner.
Then remove the lower screw on the same side.
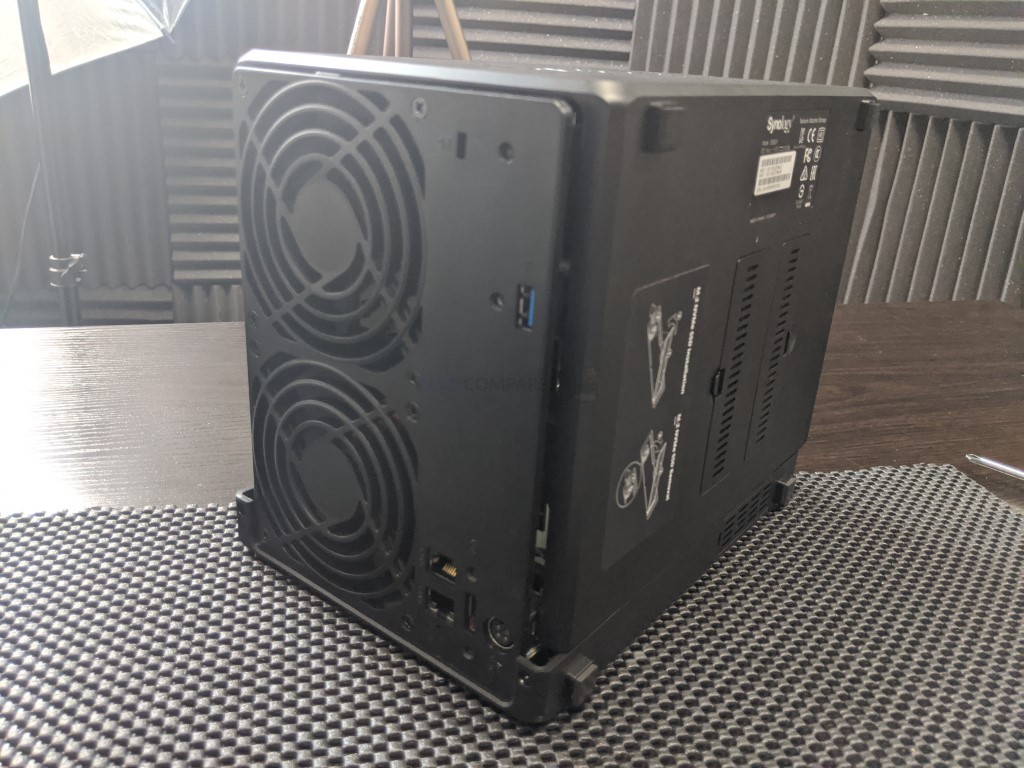
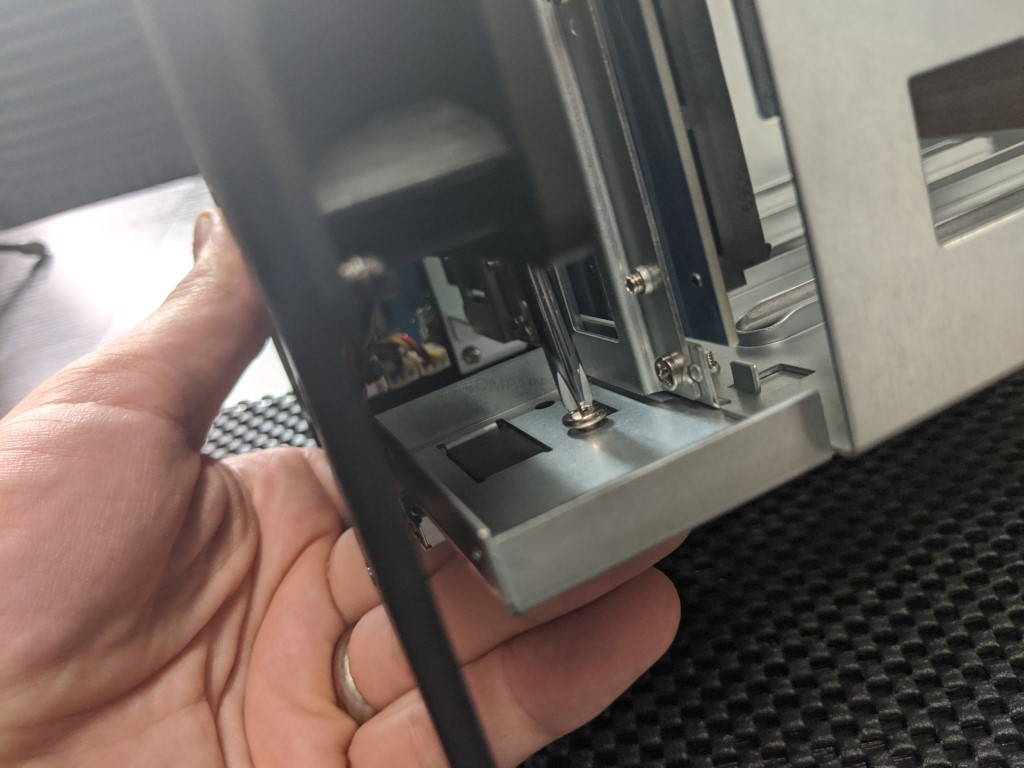
Then I removed the screw located next to the USB 3.0 Port, as this secures the connector internally to the chassis

After removing these screws, the larger half of the external chassis will slide away.
Once the larger part of the framework is gone, you will see the main SATA HDD frame.
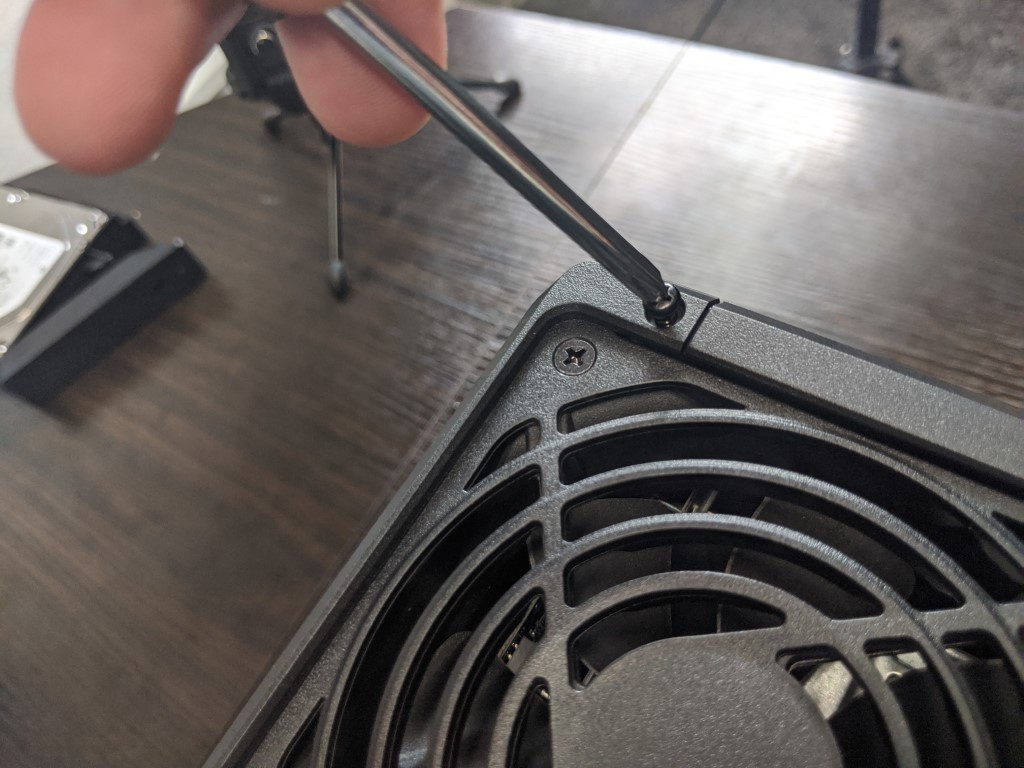
Next you need to unscrew each of the fans from the internal framework. Each is secured with a single screw.
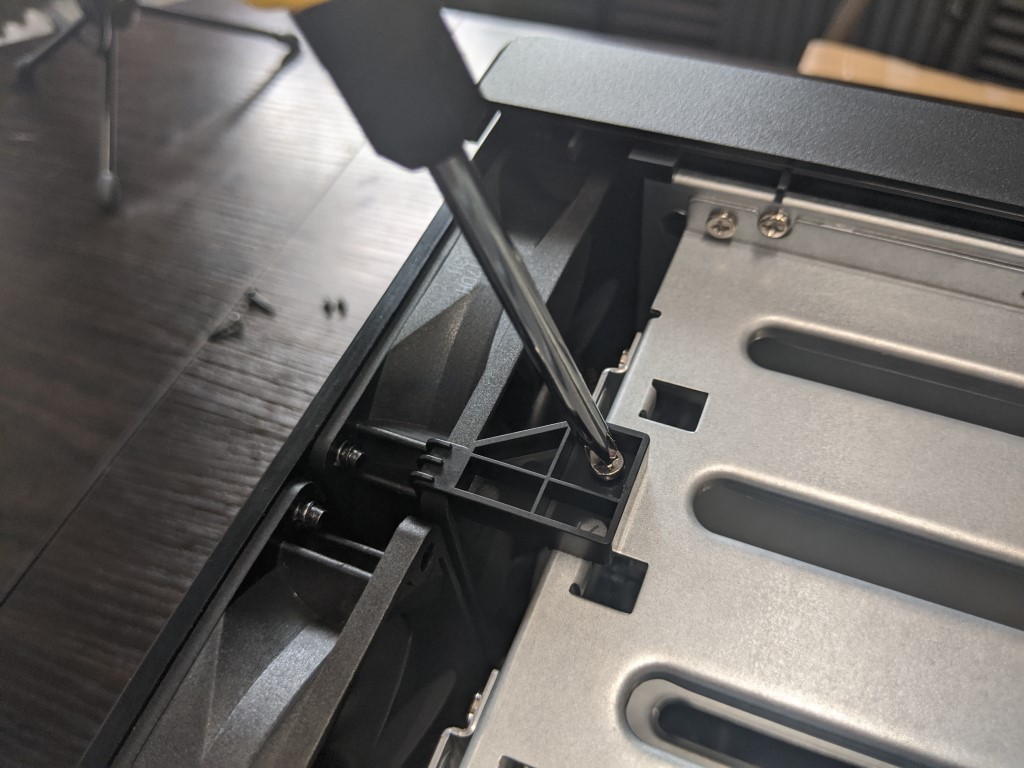
You will need to remove each to make sure the fans are not damaged in the movement of the internal framework.

Next, you will need to insecure the main internal framework that holds the SATA media cage and its connection to the main base metal panel. These is formed for 8 screws (4 on each side)
There are two groups of different screw types on each side

Removing these 8 screws will loosen the physical connection with the rear of the chassis and allow you to access the two screws that are just behind the fan modules, that keep the USB internal connector attached.
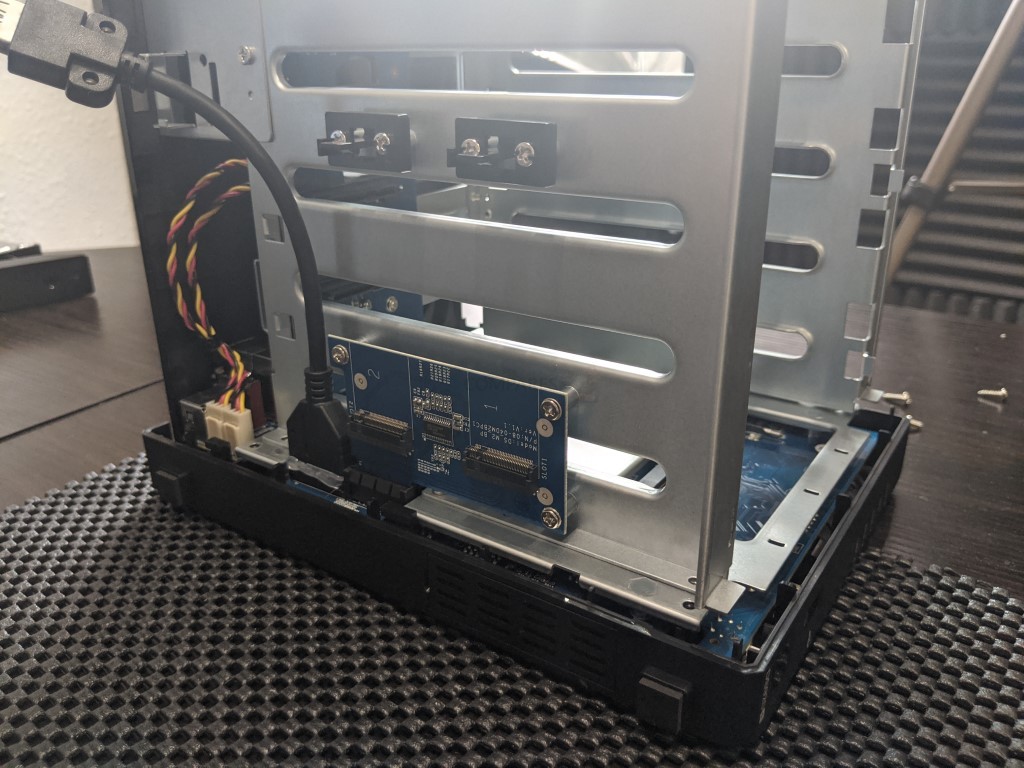
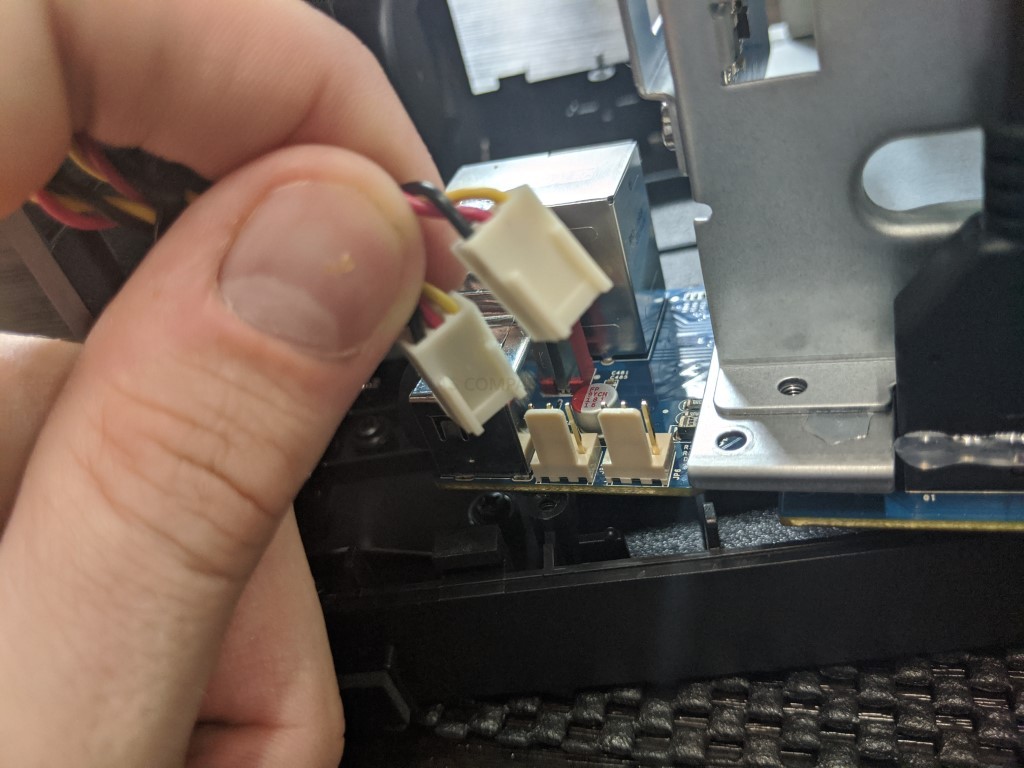
From there you can remove the two white power connectors for each fan, which should allow you to remove the internal frame cage and main PCBs from the 2nd half of the DS920+ chassis.
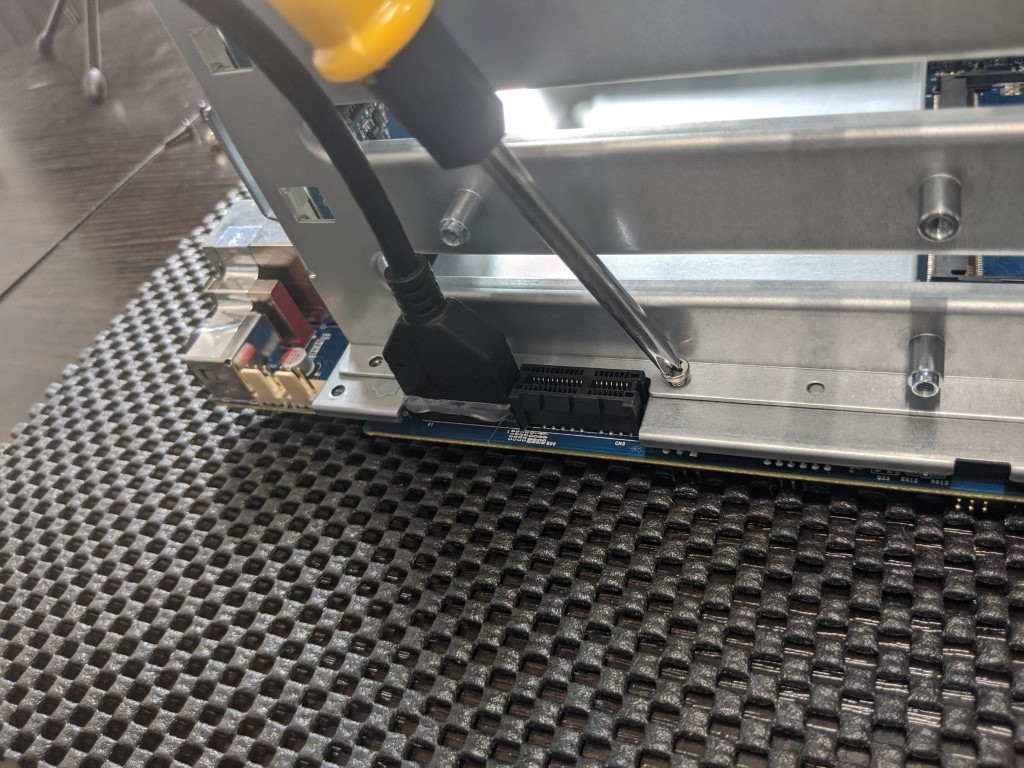
Next, we need to remove the NVMe SSD board that is attached by 3 screws to the SATA frame cage. Removing these screws will allow you to lift out the NVMe PCB. Be fore to be careful whilst doing this!

Once you remove these screws, it will reveal a single extra screw located under the NVMe SSD PCB. Remove this screw, and then the whole SATA cage should lift from the main board.
This will allow you to remove the main cage and you are left with the main controller board with its metal panel on the top.
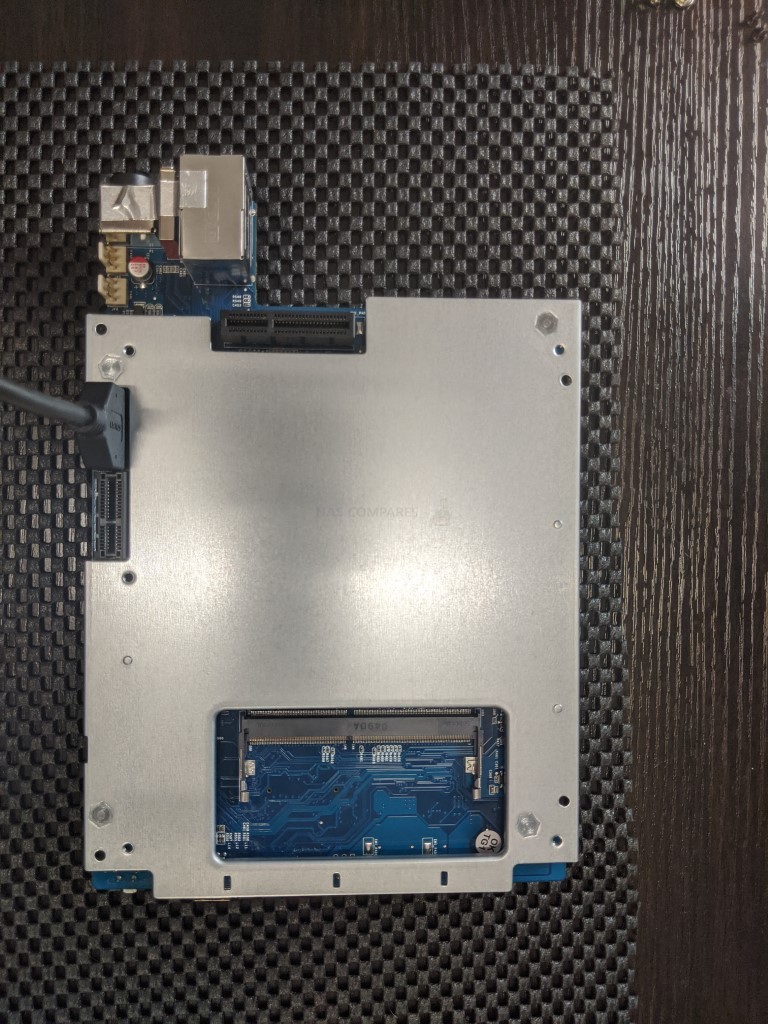
The metal panel is held against the internal controller board by 4 screws at each corner and is easily removed, exposing the mainboard.

Once you remove these four screws, you have the main controller board exposed, along with all its key components. Again, BE CAREFUL!
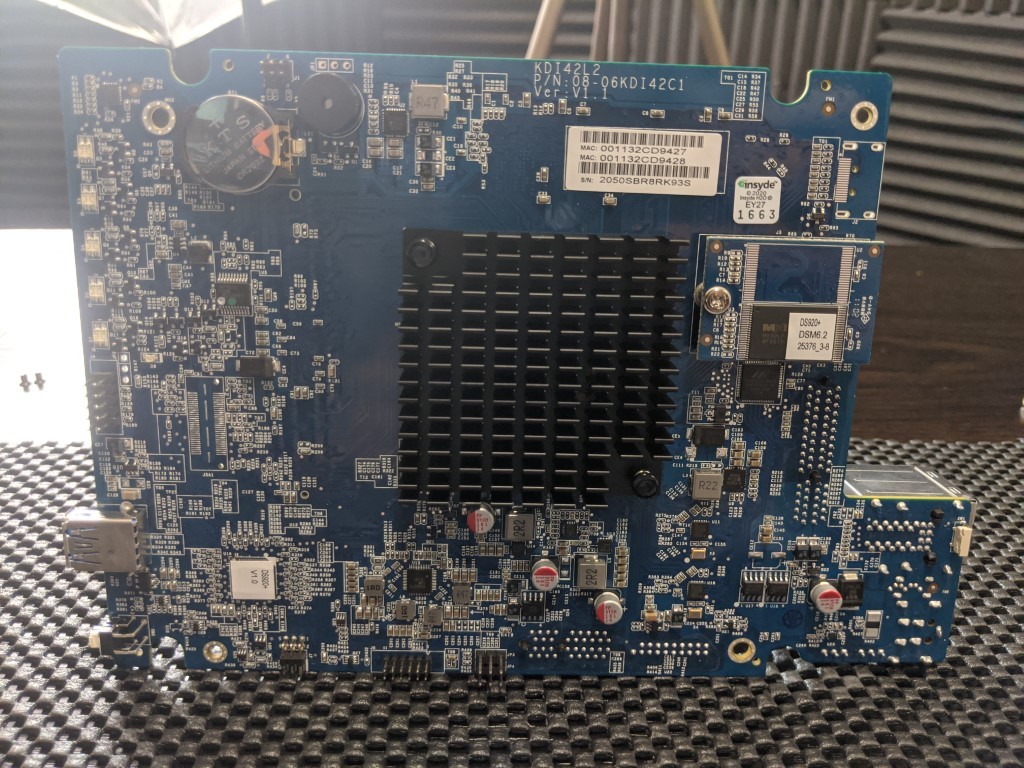
The large black heatsink in the centre is where the Intel J4125 CPU is kept, and this heatsink is several times its size.

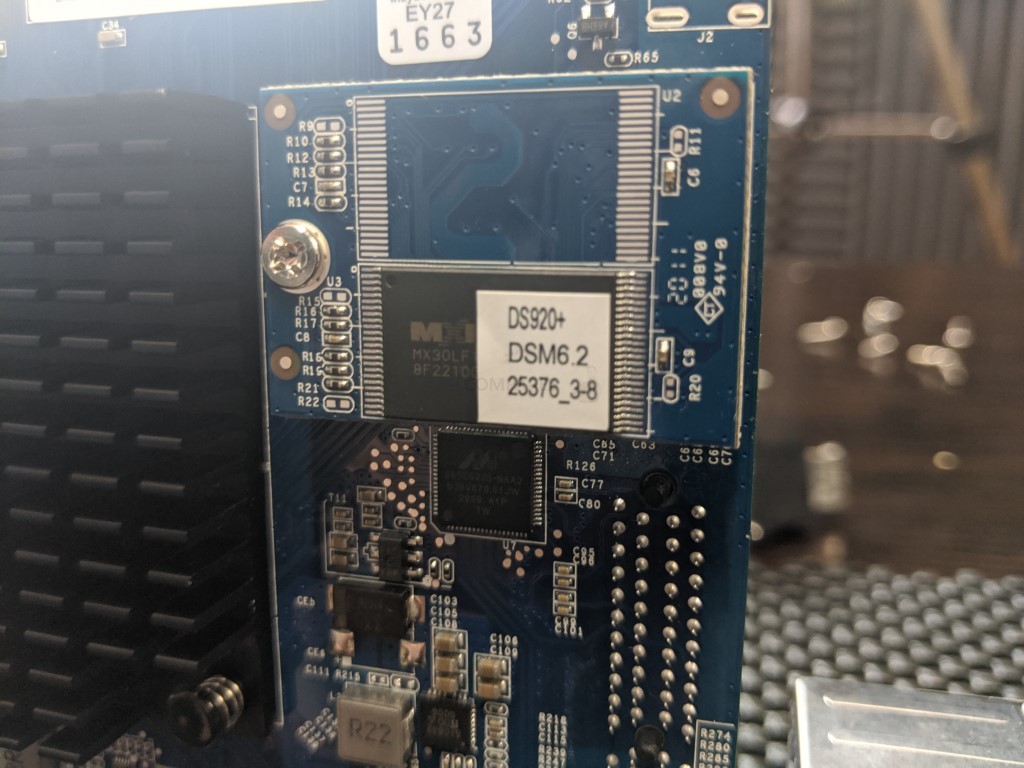
To the right of the CPU is the small piece of flash ROM memory that keeps the DSM software that is shipped with the device at launch.
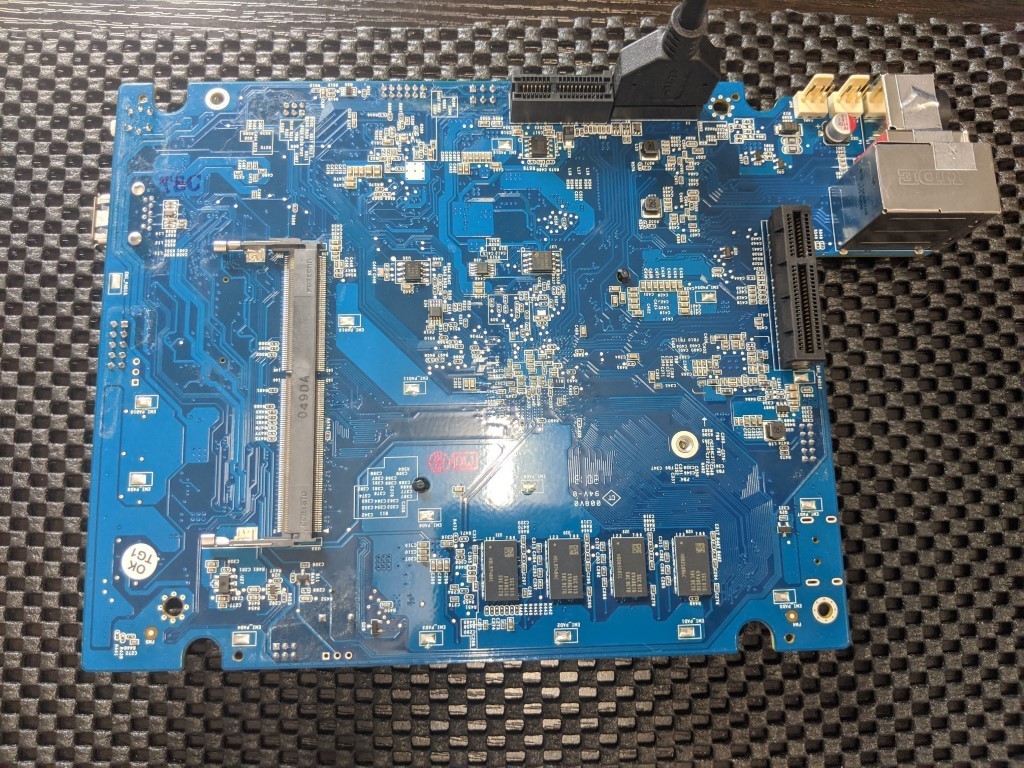
Flipping the board over (carefully) shows us the side that many users are the most interested in. The board has the SODIMM DDR4 Memory slow for adding a 4GB Synology DDR4 2666MHz RAM module.
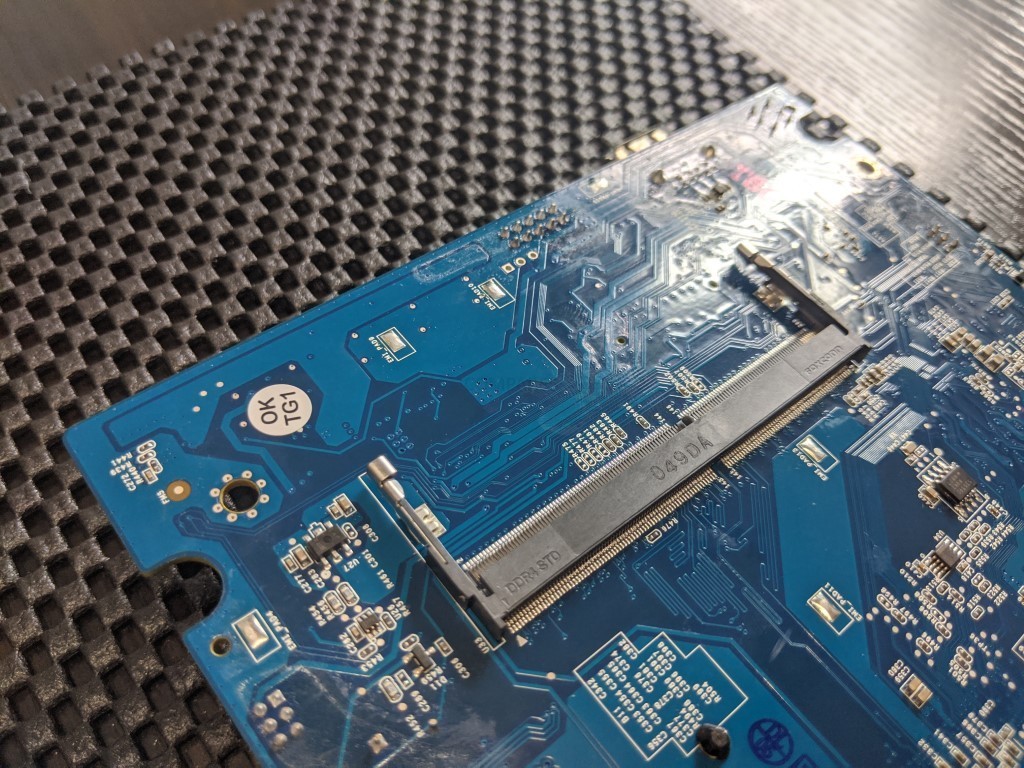
However the memory module is indeed the ONLY available upgrade slot inside and those that hoped to find a 2nd slot inside (which included me too, will recently) are met with a collection of soldered memory chips in the main board inside. These make up the 4GB of DDR4 memory that the device ships with.
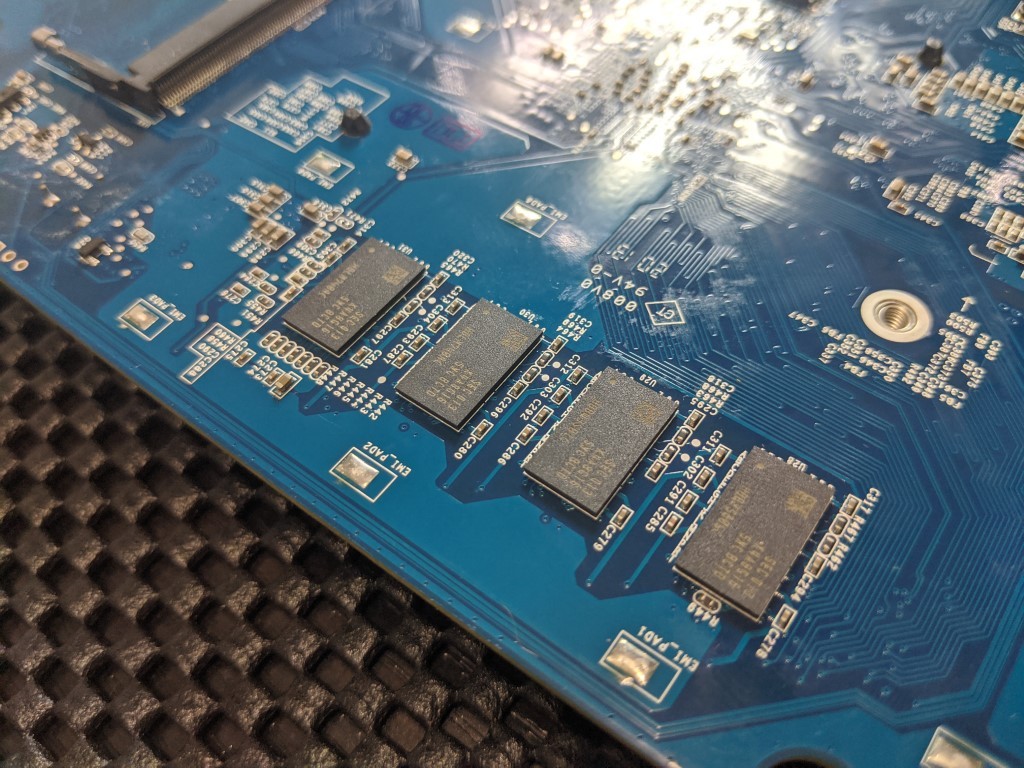
These 4 cells are memory models and K4A4G165WE-BCTD in model ID. That is Samsung memory, more information here – https://www.samsung.com/semiconductor/dram/ddr4/K4A4G165WE-BCTD. As well as a bank of information on the Samsung datasheets HERE.
And there you have it. That is the inside of the Synology DS920+ NAS Drive. Once again, I do not recommend you do this yourself, but I do hope that you found it useful. If so, why not let me know in the comments. Otherwise, thank you for reading.
Visit the NASCompares Deal Finder to find the best place to buy this device in your region, based on Service, Support and Reputation


📧 SUBSCRIBE TO OUR NEWSLETTER 🔔
🔒 Join Inner Circle
Get an alert every time something gets added to this specific article!
This description contains links to Amazon. These links will take you to some of the products mentioned in today's content. As an Amazon Associate, I earn from qualifying purchases. Visit the NASCompares Deal Finder to find the best place to buy this device in your region, based on Service, Support and Reputation - Just Search for your NAS Drive in the Box Below
Need Advice on Data Storage from an Expert?
Finally, for free advice about your setup, just leave a message in the comments below here at NASCompares.com and we will get back to you. Need Help?
Where possible (and where appropriate) please provide as much information about your requirements, as then I can arrange the best answer and solution to your needs. Do not worry about your e-mail address being required, it will NOT be used in a mailing list and will NOT be used in any way other than to respond to your enquiry.
Need Help?
Where possible (and where appropriate) please provide as much information about your requirements, as then I can arrange the best answer and solution to your needs. Do not worry about your e-mail address being required, it will NOT be used in a mailing list and will NOT be used in any way other than to respond to your enquiry.


|
 |


UGREEN NAS Now has iSCSI, 2FA and Jellyfin (and more) - FINALLY!
Seagate 30TB Ironwolf and EXOS Hard Drive Review
Why Do Cheap NAS Boxes EXIST????
Minisforum N5 Pro NAS - Should You Buy?
UGREEN DH4300 & DH2300 NAS Revealed - Good Value?
Aoostar WTR Max NAS - Should You Buy?
Access content via Patreon or KO-FI
This is the sort of content i love. I have an issue and find someone who posted an exact and detailed way that allows me to fix it. Thank you!
REPLY ON YOUTUBE
That is so much unscrewing, definitely making me think twice about upgrading for the moment.
REPLY ON YOUTUBE
Yup. Just what I needed to understand disassembly. Thank you mate!
REPLY ON YOUTUBE
HI
how many space there are from dissipator and cover? if possible add a low profile small fan? or if possible replace dissipator with another?
thanks
REPLY ON YOUTUBE
Very helpful, thank you!
REPLY ON YOUTUBE
This video could have been 3 minutes long.
REPLY ON YOUTUBE
Been using this NAS for over 3 years now, bought it after watching this very review. Still runs like a dream, and I couldn’t be happier with what it does for my family.
REPLY ON YOUTUBE
I can say that the soldered memory chips are NOT an advantage. After a little over 2 years of usage (and conveniently for Synology, out or warranty) my Synology 920+ has a memory failure and the RMA cost is $549 US. Seriously, Synology?? A brand new 923+ is $600. After having 2 Synology NAS devices fail in 6 years I have lost any and all confidence in the brand.
REPLY ON YOUTUBE
hello did you succed to upgrade usb port ? i would like to try the 10gbe qnap adaptater to my DS920+ , do you think there is a way to work ? thank you for your answer
REPLY ON YOUTUBE
Helpful, thank you! I decided not to break it down all the way after watching this. All I’m doing is removing dust. I wanted to see the board.
REPLY ON YOUTUBE
I added 16 GB Kingston ram into my Synology DS920+ with 4 GB already in it, and it doesn’t boot up. All I see is just constant blinking blue light
REPLY ON YOUTUBE
“easy to access cmos” :/
REPLY ON YOUTUBE
good job! ty!
REPLY ON YOUTUBE
Thank you so very much. Appreciate your efforts.
REPLY ON YOUTUBE
What are the pins for underneath it case? It’s the other tab that opens aside from the NVMe
REPLY ON YOUTUBE
What are the pins for underneath it case? It’s the other tab that opens aside from the NVMe
REPLY ON YOUTUBE
what size SSD would you use .. 1 tb would be a waste would it
REPLY ON YOUTUBE
I do appreciate what you have done to the NAS community. Excellent work!
REPLY ON YOUTUBE
Excellent Video. I upgraded from a DS220J based on your reviews of the DS920+ … I LOVE this 920. the 220j just fell on it’s face when asked to do anything beyond the basics.
REPLY ON YOUTUBE
Чел, всё хорошо, но эти отвёртки из фикспрайса…
REPLY ON YOUTUBE
how could i replace the 2x 1gbe they`re not working anymore i nee help with that or if theres an option for that
REPLY ON YOUTUBE
Excellent video
REPLY ON YOUTUBE
I comment you on using a camera with a static focus point in your setting. Although, you ignored this pro setup when you tried to show the PCB closely at 15:41
In general, I saw what you wanted to see me, it was just blurry.
REPLY ON YOUTUBE
Upgrading to this model from DS412+. Watching this video while waiting for the delivery!
REPLY ON YOUTUBE
thumbs up for the info and the two watches on the same wrist.
REPLY ON YOUTUBE
you cant make linkaggregation on the 1Gbe ports?
REPLY ON YOUTUBE
any reports of this model being affected from previous LPC issues
REPLY ON YOUTUBE
I wonder, could you connect a GPU to it?
REPLY ON YOUTUBE
Hello everyone, I’m trying to connect NO contact (controlled by eWeLink app) to the power button of my DS918+ … has anybody tried it already? Or I need to solder some pins on the motherboard?
REPLY ON YOUTUBE
does this nas support 2.5″ hard drives?
REPLY ON YOUTUBE
Can you plug the NAS into a PC through USB? and use the whole drive speed? What is a CPU that can handle Plex fine?
REPLY ON YOUTUBE
Thanks for this informative video, all your videos are awesome. I’m thinking to get this one.
REPLY ON YOUTUBE
“Xpenologists” breaking eyes to see serial number on the case))
REPLY ON YOUTUBE
I am going through all the videos learning about NAS, particularly from Synology before I dip my toes to get one (preferably the DS920+) to replace an ageing Drobo 4 bay. I am getting more confident by the day and by the videos. watched. Thank you for the great videos.
REPLY ON YOUTUBE
There no warranty void sticker and its not legal to void warranty for opening up devices in some parts in the world just saying.
REPLY ON YOUTUBE
What an amazing video, thank you sir.
REPLY ON YOUTUBE
Man it sounds like poo – sorry the QNap rules in the way of memory. I don’t find plastic as cool. I do love your reviews though.
REPLY ON YOUTUBE
Thanks for sharing this tear down.
REPLY ON YOUTUBE
Recently bought this as my first NAS.. Attached a Seagate Exos 16TB, configured as SHR.. Later will expand with other bays. The only negative I can call out is that it came with a 16 amp plug which is very difficult to attach to a socket used for low power devices.. only refrigerators, water heaters etc need that. So I replaced the cable with a 10 amp one and its working fine
REPLY ON YOUTUBE
look like it design for dual boot flash but implement only one. of fully implement maybe it more reliable because if you have only one and it failed that box will be a brick.
REPLY ON YOUTUBE
Thanks for this video. Looking to get my first NAS and I think this is the one. Which drives would you recommend to go in this? Looking around the 6TB mark. Thanks
REPLY ON YOUTUBE
Just bought this NAS while watching the video. Thanks for the comprehensive review.
REPLY ON YOUTUBE
HI, I just bought DS920+ learning from your channel. Thankyou very much for Providing Inside out understanding. I just have one question can i setup my NAS with one Drive and then Later i can populate other slots.
REPLY ON YOUTUBE
hello one questions if synology Nas destroyer all data lost?
REPLY ON YOUTUBE
Fantastic reviewTY
REPLY ON YOUTUBE
Am i right in thinking that the DS920 does _NOT_ have a fan over the CPU at all? just a heat sink?
REPLY ON YOUTUBE
Thanks for a comprehensive overview.
REPLY ON YOUTUBE
I can’t believe I watched 50 minutes of this. Very very informative. I’m a new nas user and this 920+ is my first nas so thank you for the overview!! I didn’t know it could do much more than I already thought it could!
REPLY ON YOUTUBE
bought this exact NAS on prime day sale today. $473 USD, 16GB crucial 2666 memory upgrade $82 (20GB ram total), 2x noctua nf-a9 fans to get rid of the stock synology loud fans $34, 2x250GB western digital blue nvme for caching. Reusing 4x8TB ironwolf drives. it’s main purpose for me is going to be 4k uncompressed plex server
REPLY ON YOUTUBE
I know it’s an old post, but all that pretty packaging you’re so impressed by you’re paying for. Protective packaging is a must, but why does is have to be so impressive? A measly dollar/quid increases drastically by the time it gets to the consumer. Simply put, in business, if you spend money you have to make money .
Other than that a fair video.
REPLY ON YOUTUBE
Can you please check the memory chips soldered to the DS920+? It should be different from the ones you showed in the tear down of DS220+, because both boards have 4 memory chips, the DS220+ has 2GB, and DS920+ should have 4GB. The Samsung K4A4G165WE-BCTD is 4Gb density, so 4 of those should be 16Gb = 2GB. The DS920+ should have 8Gb density memory chips.
I have yet to make sense of the RAM situation of the DS220+/720+/920+ series. The datasheet of the Intel Celeron J4105/4005 shows that the two memory channels can independently have either single or dual rank configurations, and supports 4, 8, and 16Gb densities. It does state that maximum total system capacity is 8GB, but the memory controller supports dual rank (1Gbx8)x(8×2) such as the Samsung M471A2K43CB1-CPB 16GB SO-DIMM. The Crucial 32GB SO-DIMM CT32G4SFD8266 doesn’t have detailed datasheet, but if it is single rank, then I think the configuration is (4Gbx8)x(8) but each chip’s 32Gb density is too high and not supported. In any case, my understanding is that the CPU can only map and utilize 8GB of memory, and the portion beyond that may never be accessed. I hope to see more definitive evidence that there is performance gains between having 8GB and more than 8GB.
side note: the J4125/4025 are probably the same SoC as the J4105/4005 but “refreshed” to optimize clock frequencies. The previous generation J3355/3455 SoC has a different memory controller that supported DDR3 and DDR4.