

Best Synology NAS for the Docker Application
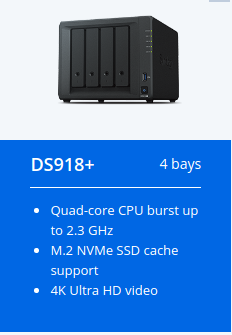
I was wondering if you know if the DS918+ will be good enough to run docker-containers and running plex. I want to buy a NAS since I will start filming a lot and need to save a the files somewhere, and read that Synology can run docker as well.
I like to code and thought this might be a good option to run some simple homepage in docker on the NAS as well. And maybe I can have it as a Plex-server for my LG 4K smart tv.
Docker, the Synology DS918+ and Plex
Thank you for your message, I hope I can help (spot of British modesty there). I apologise for any typos in my reply, this is being composed whilst on the move. Additionally, forgive the slight delaying my reply, this is a one-man show and as I am sure you can appreciate, everyone loves a bit of free support. Anyway, moving this rather stereotypical English apologetic introduction aside, on to your question.
I have not spent a great deal of time experimenting with docker in all honesty. I used it on this NAS and a QNAP TS-453B much earlier this year and wanted to do a 3 part feature, but other projects got in the way. I can certainly confirm that the docker application is supported on the DS918+. Click on applied models on the top right of this page to confirm the devices from Synology that support this application
https://www.synology.com/en-uk/dsm/feature/docker
I would also add that although the docker application is a relatively lightweight application when compared with the Synology Virtual Machine manager and other container apps, you may still want to consider additional memory to keep the device performing tip top. Checkout my guide to increasing the memory on the DS918+ all the way up to 16GB here
Finally, I can confirm that the DS918+ is a good Plex NAS. Here are the performance and transcoding tests for this device:
Of course I would prefer you choose nascompares.com to buy your perfect solution, however, if you would rather buy locally, please use the page below to take you to your local Amazon store, click any Amazon advert to take you to your local store and help support this free advice service with Advert Revenue. Thanks again and have an awesome 2018 – http://nascompares.com/choosing-between-synology-qnap-drobo-thecus-netgear-and-asustor/
P.s. If you wanted to experiment with the Plex Docker install:
Official Docker container for Plex Media Server
plexinc/pms-docker
With our easy-to-install Plex Media Server software and your Plex apps, available on all your favorite phones, tablets, streaming devices, gaming consoles, and smart TVs, you can stream your video, music, and photo collections any time, anywhere, to any device.
Usage
Before you create your container, you must decide on the type of networking you wish to use. There are essentially three types of networking available:
bridge(default)hostmacvlan
The bridge networking creates an entirely new network within the host and runs containers within there. This network is connected to the physical network via an internal router and docker configures this router to forward certain ports through to the containers within. The host networking uses the IP address of the host running docker such that a container’s networking appears to be the host rather than separate. The macvlannetworking creates a new virtual computer on the network which is the container. For purposes of setting up a plex container, the host and macvlan are very similar in configuration.
Using host or macvlan is the easier of the three setups and has the fewest issues that need to be worked around. However, some setups may be restricted to only running in the bridge mode. Plex can be made to work in this mode, but it is more complicated.
For those who use docker-compose, this repository provides the necessary YML template files to be modified for your own use.
Host Networking
docker run \
-d \
--name plex \
--network=host \
-e TZ="<timezone>" \
-e PLEX_CLAIM="<claimToken>" \
-v <path/to/plex/database>:/config \
-v <path/to/transcode/temp>:/transcode \
-v <path/to/media>:/data \
plexinc/pms-docker
Macvlan Networking
docker run \
-d \
--name plex \
--network=physical \
--ip=<IPAddress> \
-e TZ="<timezone>" \
-e PLEX_CLAIM="<claimToken>" \
-h <HOSTNAME> \
-v <path/to/plex/database>:/config \
-v <path/to/transcode/temp>:/transcode \
-v <path/to/media>:/data \
plexinc/pms-docker
Similar to Host Networking above with these changes:
- The network has been changed to
physicalwhich is the name of themacvlannetwork (yours is likely to be different). - The
--ipparameter has been added to specify the IP address of the container. This parameter is optional since the network may specify IPs to use but this paramater overrides those settings. - The
-h <HOSTNAME>has been added since this networking type doesn’t use the hostname of the host.
Bridge Networking
docker run \
-d \
--name plex \
-p 32400:32400/tcp \
-p 3005:3005/tcp \
-p 8324:8324/tcp \
-p 32469:32469/tcp \
-p 1900:1900/udp \
-p 32410:32410/udp \
-p 32412:32412/udp \
-p 32413:32413/udp \
-p 32414:32414/udp \
-e TZ="<timezone>" \
-e PLEX_CLAIM="<claimToken>" \
-e ADVERTISE_IP="http://<hostIPAddress>:32400/" \
-h <HOSTNAME> \
-v <path/to/plex/database>:/config \
-v <path/to/transcode/temp>:/transcode \
-v <path/to/media>:/data \
plexinc/pms-docker
Note: In this configuration, you must do some additional configuration:
- If you wish your Plex Media Server to be accessible outside of your home network, you must manually setup port forwarding on your router to forward to the
ADVERTISE_IPspecified above. By default you can forward port 32400, but if you choose to use a different external port, be sure you configure this in Plex Media Server’sRemote Accesssettings. With this type of docker networking, the Plex Media Server is essentially behind two routers and it cannot automatically setup port forwarding on its own. - (Plex Pass only) After the server has been set up, you should configure the
LAN Networkspreference to contain the network of your LAN. This instructs the Plex Media Server to treat these IP addresses as part of your LAN when applying bandwidth controls. The syntax is the same as theALLOWED_NETWORKSbelow. For example192.168.1.0/24,172.16.0.0/16will allow access to the entire192.168.1.xrange and the172.16.x.xrange.
Parameters
-p 32400:32400/tcpForwards port 32400 from the host to the container. This is the primary port that Plex uses for communication and is required for Plex Media Server to operate.-p …Forwards complete set of other ports used by Plex to the container. For a full explanation of which you may need, please see the help article: https://support.plex.tv/hc/en-us/articles/201543147-What-network-ports-do-I-need-to-allow-through-my-firewall-v <path/to/plex/database>:/configThe path where you wish Plex Media Server to store its configuration data. This database can grow to be quite large depending on the size of your media collection. This is usually a few GB but for large libraries or libraries where index files are generated, this can easily hit the 100s of GBs. If you have an existing database directory see the section below on the directory setup. Note: the underlying filesystem needs to support file locking. This is known to not be default enabled on remote filesystems like NFS, SMB, and many many others. The 9PFS filesystem used by FreeNAS Corral is known to work but the vast majority will result in database corruption. Use a network share at your own risk.-v <path/to/transcode/temp>:/transcodeThe path where you would like Plex Media Server to store its transcoder temp files. If not provided, the storage space within the container will be used. Expect sizes in the 10s of GB.-v <path/to/media>:/dataThis is provided as examples for providing media into the container. The exact structure of how the media is organized and presented inside the container is a matter of user preference. You can use as many or as few of these parameters as required to provide your media to the container.-e KEY="value"These are environment variables which configure the container. See below for a description of their meanings.
The following are the recommended parameters. Each of the following parameters to the container are treated as first-run parameters only. That is, all other paraters are ignored on subsequent runs of the server. We recommend that you set the following parameters:
- HOSTNAME Sets the hostname inside the docker container. For example
-h PlexServerwill set the servername toPlexServer. Not needed in Host Networking. - TZ Set the timezone inside the container. For example:
Europe/London. The complete list can be found here: https://en.wikipedia.org/wiki/List_of_tz_database_time_zones - PLEX_CLAIM The claim token for the server to obtain a real server token. If not provided, server is will not be automatically logged in. If server is already logged in, this parameter is ignored. You can obtain a claim token to login your server to your plex account by visiting https://www.plex.tv/claim
- ADVERTISE_IP This variable defines the additional IPs on which the server may be be found. For example:
http://10.1.1.23:32400. This adds to the list where the server advertises that it can be found. This is only needed in Bridge Networking.
These parameters are usually not required but some special setups may benefit from their use. As in the previous section, each is treated as first-run parameters only:
- PLEX_UID The user id of the
plexuser created inside the container. - PLEX_GID The group id of the
plexgroup created inside the container - CHANGE_CONFIG_DIR_OWNERSHIP Change ownership of config directory to the plex user. Defaults to
true. If you are certain permissions are already set such that theplexuser within the container can read/write data in it’s config directory, you can set this tofalseto speed up the first run of the container. - ALLOWED_NETWORKS IP/netmask entries which allow access to the server without requiring authorization. We recommend you set this only if you do not sign in your server. For example
192.168.1.0/24,172.16.0.0/16will allow access to the entire192.168.1.xrange and the172.16.x.xrange. Note: If you are using Bridge networking, then localhost will appear to plex as coming from the docker networking gateway which is often172.16.0.1.
Users/Groups
Permissions of mounted media outside the container do apply to the Plex Media Server running within the container. As stated above, the Plex Media Server runs as a specially created plex user within the container. This user may not exist outside the container and so the PLEX_UID and PLEX_GID parameters are used to set the user id and group id of this user within the container. If you wish for the Plex Media Server to run under the same permissions as your own user, execute the following to find out these ids:
$ id `whoami`
You’ll see a line like the following:
uid=1001(myuser) gid=1001(myuser) groups=1001(myuser)
In the above case, if you set the PLEX_UID and PLEX_GID to 1001, then the permissions will match that of your own user.
Tags
In addition to the standard version and latest tags, two other tags exist: plexpass and public. These two images behave differently than your typical containers. These two images do not have any Plex Media Server binary installed. Instead, when these containers are run, they will perform an update check and fetch the latest version, install it, and then continue execution. They also run the update check whenever the container is restarted. To update the version in the container, simply stop the container and start container again when you have a network connection. The startup script will automatically fetch the appropriate version and install it before starting the Plex Media Server.
The public restricts this check to public versions only where as plexpass will fetch Plex Pass versions. If the server is not logged in or you do not have Plex Pass on your account, the plexpass tagged images will be restricted to publicly available versions only.
To view the Docker images head over to https://hub.docker.com/r/plexinc/pms-docker/tags/
Config Directory
Inside the docker container, the database is stored with a Library/Application Support/Plex Media Server in the config directory.
If you wish to migrate an existing directory to the docker config directory:
- Locate the current config directory as directed here: https://support.plex.tv/hc/en-us/articles/202915258-Where-is-the-Plex-Media-Server-data-directory-located-
- If the config dir is stored in a location such as
/var/lib/plexmediaserver/Library/Application Support/Plex Media Server/, the config dir will be/var/lib/plexmediaserver. - If the config dir does not contain
Library/Application Support/Plex Media Server/or the directory containingLibraryhas data unrelated to Plex, such as OS X, then you should:- Create a new directory which will be your new config dir.
- Within that config dir, create the directories
Library/Application Support - Copy
Plex Media Serverinto thatLibrary/Application Support
- Note: by default Plex will claim ownership of the entire contents of the
configdir (see CHANGE_CONFIG_DIR_OWNERSHIP for more information). As such, there should be nothing in that dir that you do not wish for Plex to own.
Useful information
- Start the container:
docker start plex - Stop the conrainer:
docker stop plex - Shell access to the container while it is running:
docker exec -it plex /bin/bash - See the logs given by the startup script in real time:
docker logs -f plex - Restart the application and upgrade to the latest version:
docker restart plex
Fedora, CentOS, Red Hat
If you get the following output after you have started the container, then this is due to a patched version of Docker (#158)
plex    | s6-supervise (child): fatal: unable to exec run: Permission denied
plex    | s6-supervise avahi: warning: unable to spawn ./run - waiting 10 seconds
As a workaround you can add - /run to volumes in your docker-compose.yml or -v /run to the docker create command.
Running on a headless server with container using host networking
If the claim token is not added during initial configuration you will need to use ssh tunneling to gain access and setup the server for first run. During first run you setup the server to make it available and configurable. However, this setup option will only be triggered if you access it over http://localhost:32400/web, it will not be triggered if you access it over http://ip_of_server:32400/web. If you are setting up PMS on a headless server, you can use a SSH tunnel to link http://localhost:32400/web (on your current computer) to http://localhost:32400/web (on the headless server running PMS):
ssh username@ip_of_server -L 32400:ip_of_server:32400 -N
| Where to Buy a Product | |||
 |
    
|

|
VISIT RETAILER ➤ |
 |
|
|
VISIT RETAILER ➤ |
 |
|
|
VISIT RETAILER ➤ |
|
|
|
|
VISIT RETAILER ➤ |
We use affiliate links on the blog allowing NAScompares information and advice service to be free of charge to you. Anything you purchase on the day you click on our links will generate a small commission which is used to run the website. Here is a link for Amazon and B&H. You can also get me a ☕ Ko-fi or old school Paypal. Thanks! To find out more about how to support this advice service check HERE If you need to fix or configure a NAS, check Fiver Have you thought about helping others with your knowledge? Find Instructions Here


Best NAS for under $499
Best NAS for Under $250 (2025)
Minisforum N5 Pro NAS - FIRST IMPRESSIONS
HexOS Q2 Update - What's Changed?
5 Exciting NAS Coming Later in 2025
Beelink ME Mini vs GMKtec G9 vs CWWK P6 NAS Comparison
Access content via Patreon or KO-FI
DISCUSS with others your opinion about this subject.
ASK questions to NAS community
SHARE more details what you have found on this subject
CONTRIBUTE with your own article or review. Click HERE
IMPROVE this niche ecosystem, let us know what to change/fix on this site
EARN KO-FI Share your knowledge with others and get paid for it! Click HERE