Synology DSM 6.2 on QNAP NAS – How to do it and Should You Bother?
It has long been established that, in terms of home and business NAS in 2019, Synology and QNAP NAS have been the top two brands you need to buy. However, although both are stable, flexible, well developed and user-friendly brands for those new and old to NAS, they have a number of key differences that will often make one brand chose over another. Typically:
| QNAP NAS Advantages | Synology NAS Advantages |
| Better Internal Hardware
Better External Connections More Configurable Better Support of 3rd Party Apps GUI that is appealing to Windows and Android Users |
More User-Friendly GUI
Better 1st Party Apps Easier to Setup and Forget Great 1st Party Alternative Apps to Popular 3rd Party Apps GUI that is appealing to Mac Users |
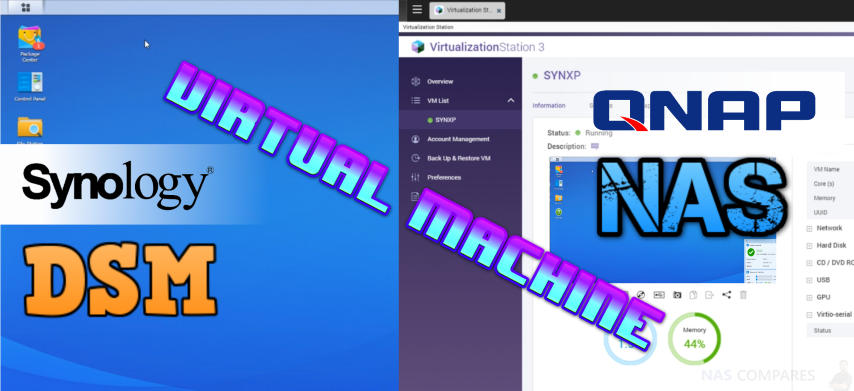
These are often the key deciding factors for people when choosing a NAS Drive between QNAP and Synology. However things are rarely that cut and dry and alot of users will want 2-3 features of Synology and 2-3 features of QNAP, but cannot choose between them. What if there was a way to try out both? Good News, thanks to the popular FREE Virtualization Station software from QNAP, as well as some clever chap at Xpenology and the QNAP forum, (a HUGE thank you to you guys on this one!) you can now set up a virtual Synology DSM on your QNAP NAS. It will only take around 15-20 minutes and will let you try out a few of the award-winning Synology software to help you decide if you want to switch to Synology NAS, or if you are better off with your QNAP NAS. This can save you time, money and disappointment thinking ‘is the grass greener on the other side?’. Below is a detailed guide on how to do this along with stern warnings and important considerations you need to factor in. Take a look.
Important Things to Remember If you use this NAS Guide
I cannot stress this enough – THIS IS NOT A VIABLE, LONG-TERM ALTERNATIVE TO A GENUINE SYNOLOGY NAS!!! Use this as a means to see if Synology DSM is right for you, or as a simple experiment. Do not think this is going to let you have the best of both brands – it will almost certainly be a poor representation of the Synology DSM user experience and also not a fair comparison from QNAP NAS either. Use this as your own risk and DEFINITELY do not use this as a stable platform for your data.
Another Warning! This is NOT stable and Should not be used as an alternative to a Synology NAS
Again, just in case you just scrolled past the first warning, I cannot stress this enough, if you are reading this because you are trying to install the Synology DSM software on your QNAP NAS, to replace QTS, or because you think using Synology DSM on the comparatively more powerful QNAP hardware, then stop right there! This is by no means perfect and even during the making of this tutorial, I encountered many bugs. Some very small, but others would be severely detrimental to the stability of your long term storage. This is NOTHING to do with QNAP or Synology software, but because of the inherent instability of the host and client software. I am producing this guide because so, SO many of you ask about the viability of this as a platform and although it works, it is by no means a replacement for QNAP QTS or retail bought Synology NAS Drive. So, in the interests of clarity, I have included a few of the errors and issues I encountered, so you can be fully aware of what this is. Sorry to be so negative, this is an interesting experiment and if you are a QNAP user, considering moving over to the Synology platform, this can serve as a great way to find out about the software before you take the plunge. Alternatively, you would be better off visiting the official Synology DSM demo found HERE.
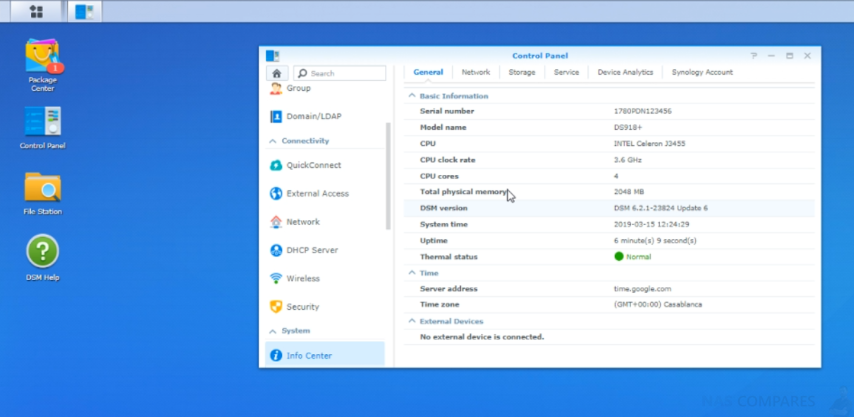
ISSUE 1 – In the hardware settings, a number of the specifications were either wrong (such as the clock speed of the CPU) or blank. This could cause issues along the line in a number of ways.
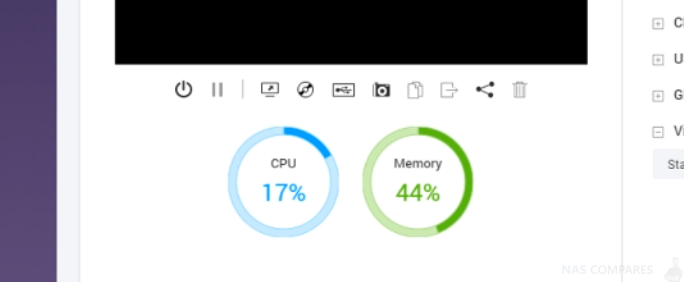
ISSUE 2 – The CPU and Memory utilization was all over the place! Even when DSM 6.2 on the QNAP Virtual Machine was in idle, it would spike to 20-30% for no reason.
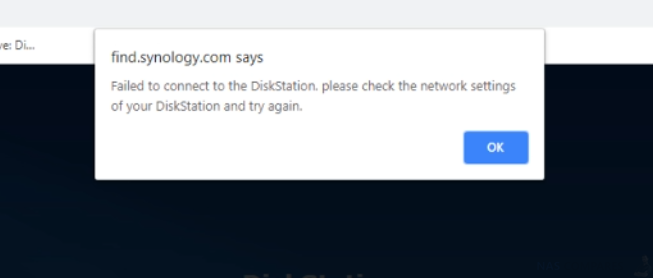
ISSUE 3 – The virtual Synology DSM NAS would disappear from the network if/when it was lagging (during the previously mentioned CPU spikes)
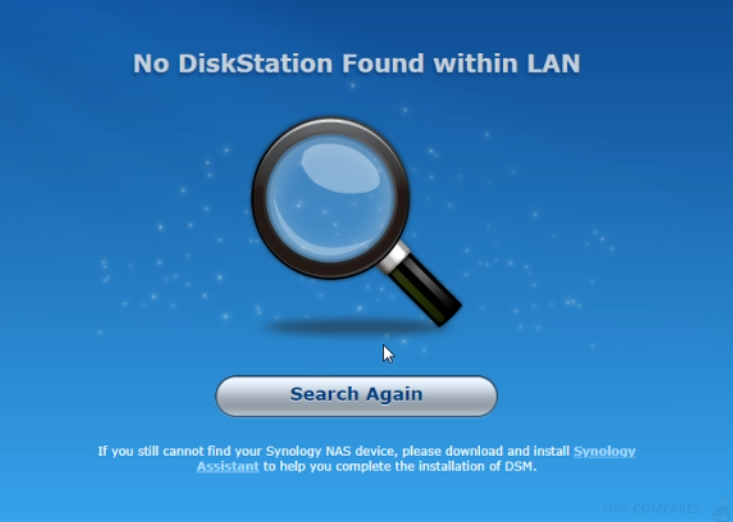
ISSUE 4 – Same lack of access, but this was when I was trying to set up a static IP and remote access. I could access the virtualization software remotely, but accessing the virtual DSM via Synology QuickConnect was never as smooth as the real thing!

Issue 5 – Even when the NAS was found, it would occasionally be lost midway through the access process. Whether this was down to me not providing strong enough hardware to support the virtual Synology DSM, or an authentication issue, I am unsure. But it was at this point that I started swearing. Ultimately these are just a few examples of preliminary issues I encountered (there were several more) and only went on to strengthen my opinion that installing Synology DSM on a QNAP NAS is nowhere near as good as the real thing on a genuine DS918+ and is not representative of the NAS platform in actual use.
What You Will Need to Install Synology DSM on a QNAP NAS
You’ve made it this far? Ok, let’s do this. In order to proceed with the installation of Synology DSM 6.2 on your QNAP NAS, you will need the following:
- A QNAP NAS with at least a 4 Core Intel 64bit CPU. I recommend much higher, but this si the bare minimum.
- A QNAP NAS with 4GB of Memory, though I only used 2GB for this test, you will need at least another 2GB for the QNAP System. I would recommend 4GB to the DSM virtual machine
- These Installation files – https://drive.google.com/drive/folders/1bKQkIOHxcOaXowpOrBfxXv5S8gHkPpxP?usp=sharing
- Around 100GB of spare storage, jsut so you can fully test everything in this demonstration
- QNAP Virtualization Station Downloaded and installed
You will also need a PC/Mac/Web Browser enabled system, to access the user interface of the QNAP NAS and Virtual Synology DSM.
Synology DSM on a QNAP NAS Step Guide
Here are ALL the steps you will need to follow to install Synology DSM on your QNAP NAS. Don’t be intimidated by the number of steps, I just wanted to make sure that even the tiniest detail is covered in the installation.
Synology DSM on a QNAP NAS Step 1
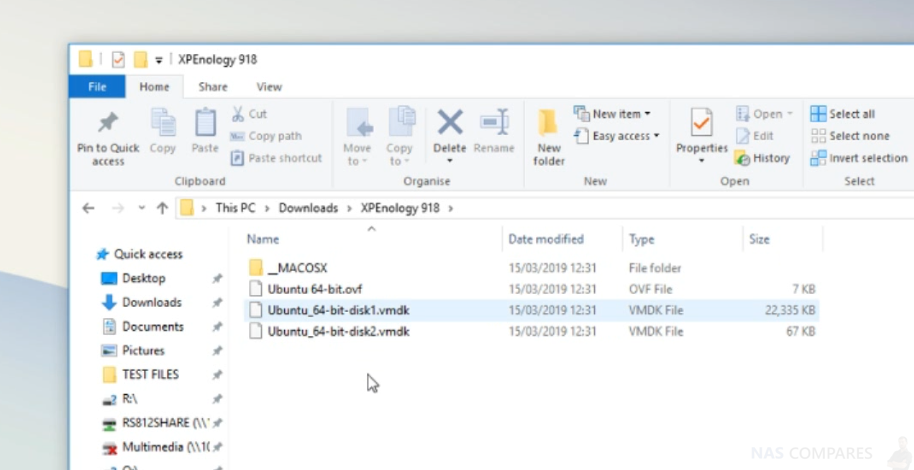
Download the DS918+ Xpenology Package to your PC/Mac and then unzip the package – https://drive.google.com/drive/folders/1bKQkIOHxcOaXowpOrBfxXv5S8gHkPpxP?usp=sharing
Synology DSM on a QNAP NAS Step 2
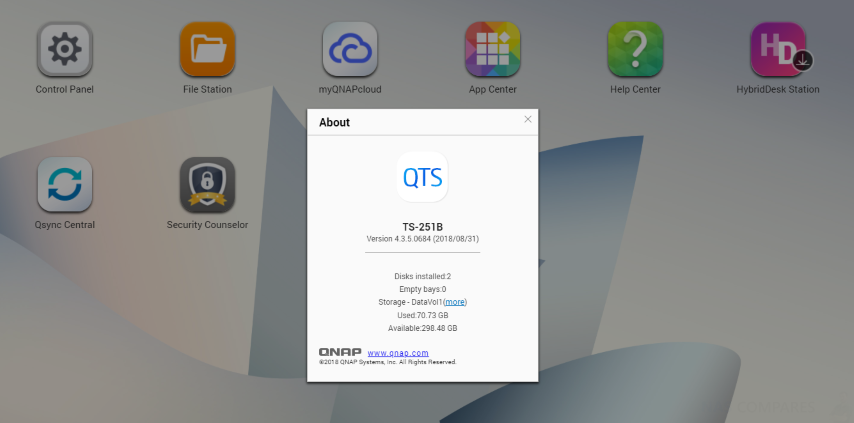
Log Into QTS on your QNAP NAS
Synology DSM on a QNAP NAS Step 3
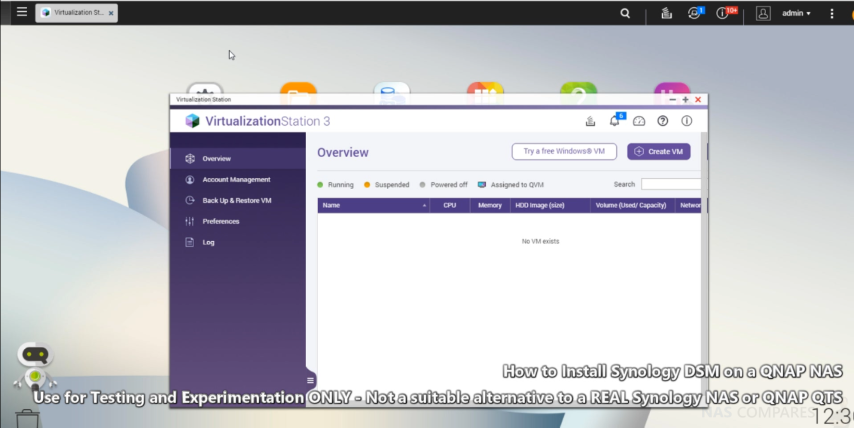
Install and Open Virtualization Station from the App Center
Synology DSM on a QNAP NAS Step 4
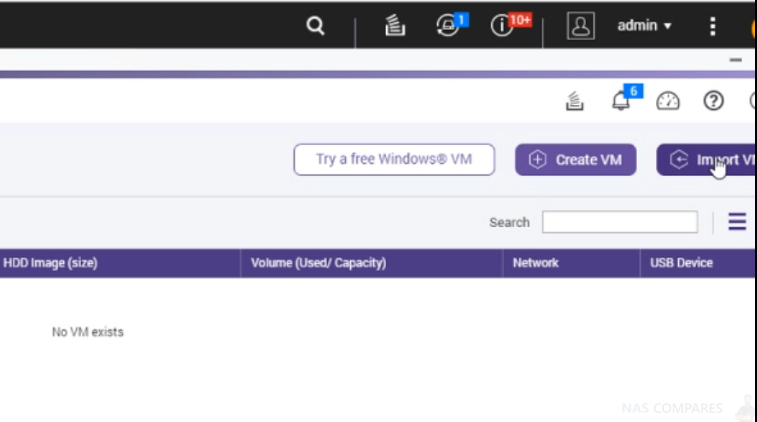
Head to the Top Right and Click ‘Import VM’
Synology DSM on a QNAP NAS Step 5
Select ‘Import from PC’ and then click ‘please select VM files’ to access your local download folder
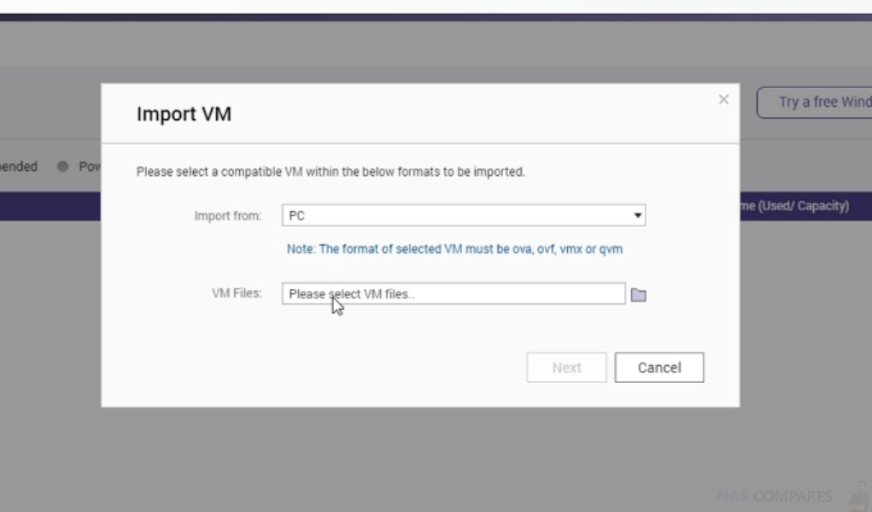
Synology DSM on a QNAP NAS Step 6
Find the Xpenology Files you downloaded earlier and select the .OVF file and click Open
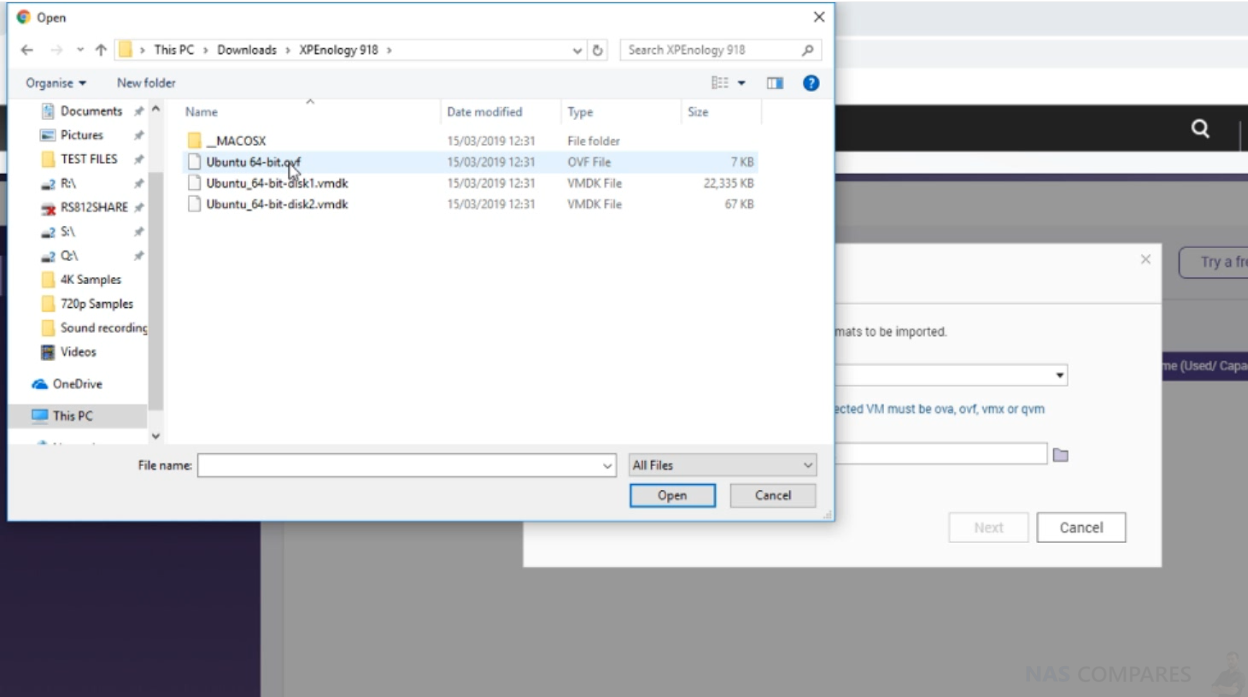
Synology DSM on a QNAP NAS Step 7
The Virtualization Station VM software will then acknowledge that the further image files are required (in red). Now just click the folder icon to find those files.
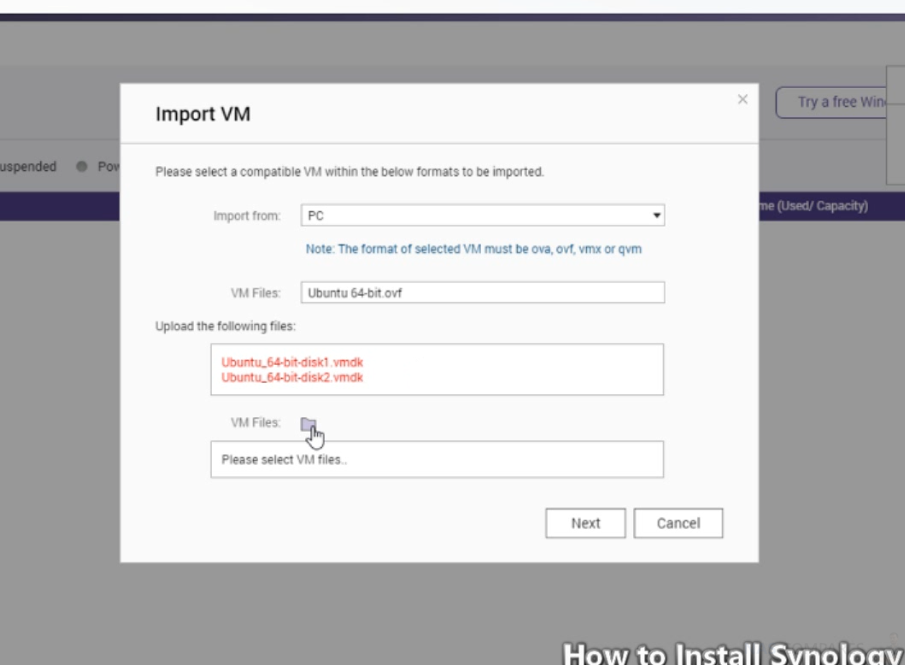
Synology DSM on a QNAP NAS Step 8
Once again, find the folder you downloaded earlier and now select both of the VMDK files and click Open
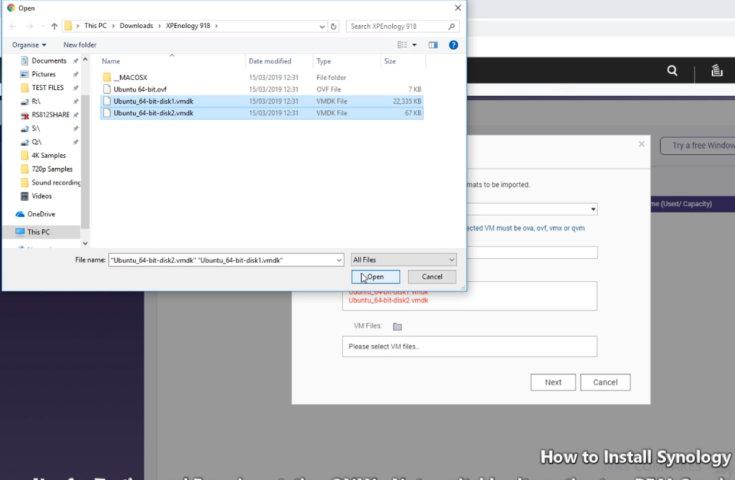
Synology DSM on a QNAP NAS Step 9
Next, you will be presented with a screen detailing the backend of your Virtual DSM software. From here you can dedicate the number of cores, memory (2GB at least, more recommended). Also, make sure you select CPU PASS THRU in the Model choice.
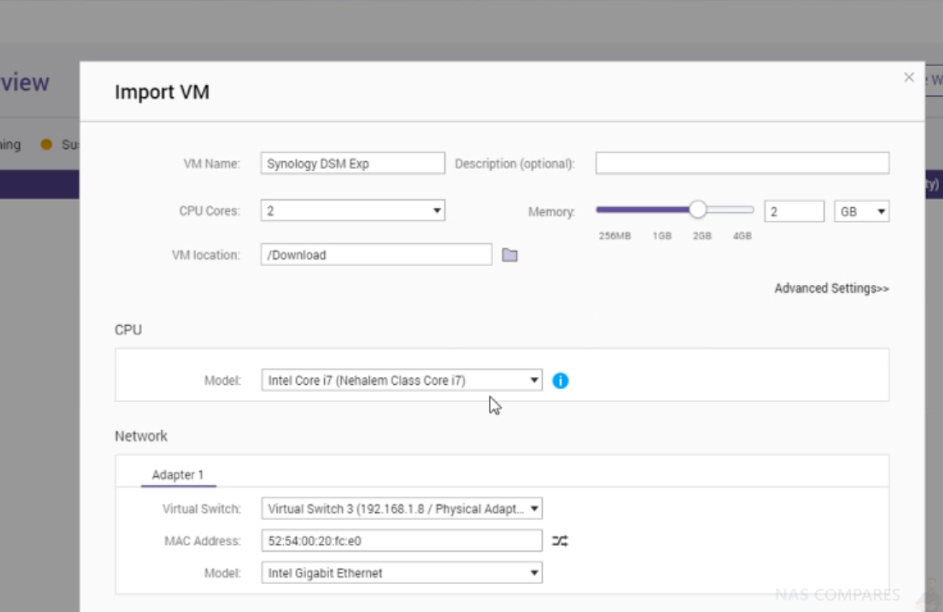
Synology DSM on a QNAP NAS Step 10
At the Hard Disk option, you will see that two HDD are listed. One will act as the flash module that is generally found in all NAS devices where the Operating system is kept. Be sure to change the controller to SATA, not IDE.
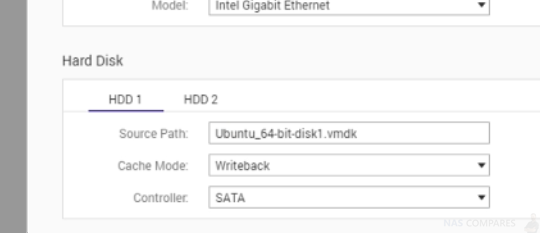
Synology DSM on a QNAP NAS Step 11
Double Check that HDD 2 is also listed as a SATA controller
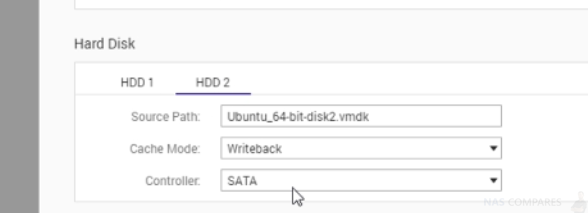
Synology DSM on a QNAP NAS Step 12
Once you click create, at the top right of Virtualization Station, you will see the Virtual NAS machine being created in the background
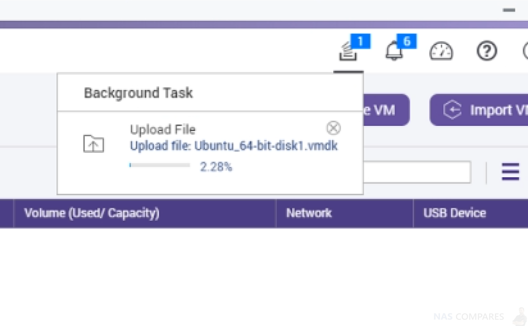
Synology DSM on a QNAP NAS Step 13
Once it is completed, the Virtual Machine for the DSM installation will appear in your VM overview list
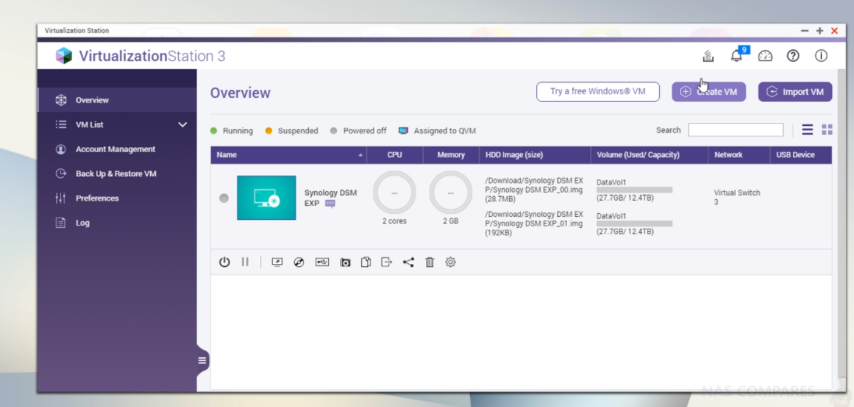
Synology DSM on a QNAP NAS Step 14
Before you boot/start up the VM, you will need to go into the settings menu to change a few options. DSM on a QNAP NAS is not 100% stable and these changes will help, but not avoid the main instabilities
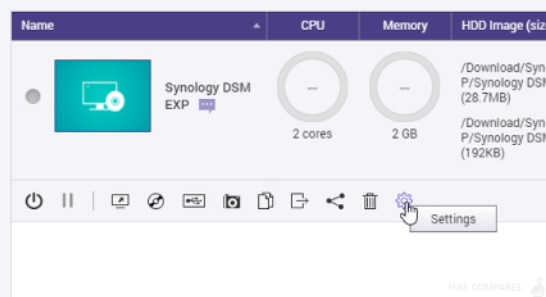
Synology DSM on a QNAP NAS Step 15
First head to the HDD 2 option (NOT HDD 1) and give it some GB of storage space. This is the drive the Synology Software will live on, so although I DO NOT recommend using this guide as anything more than experimentation and to see if DSM on a Synology NAS is right for you, you should give it sufficient space to use it (200GB minimum)
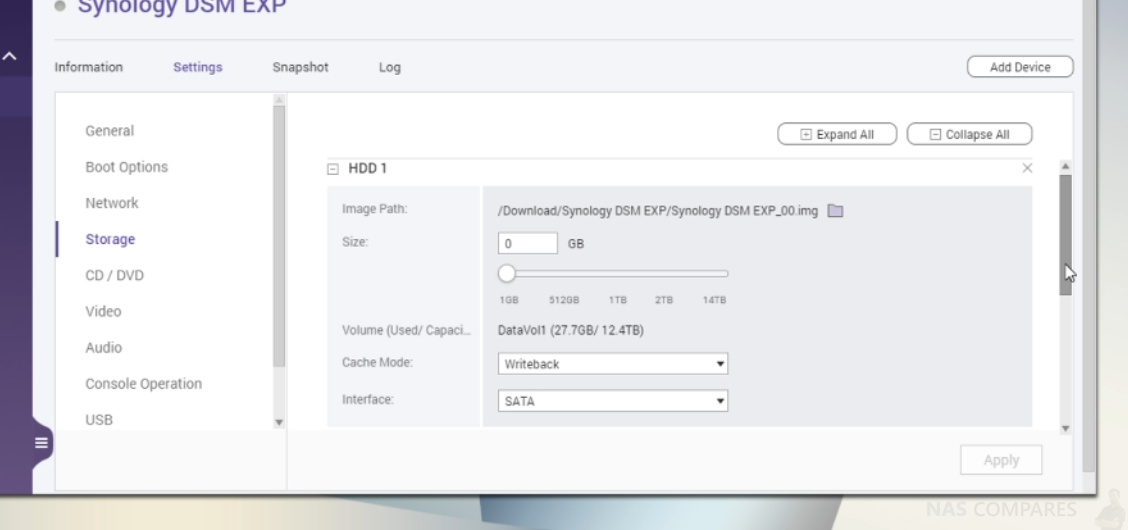
Synology DSM on a QNAP NAS Step 16
Disable the audio, as this will not function at all well in the VM DSM on QNAP NAS
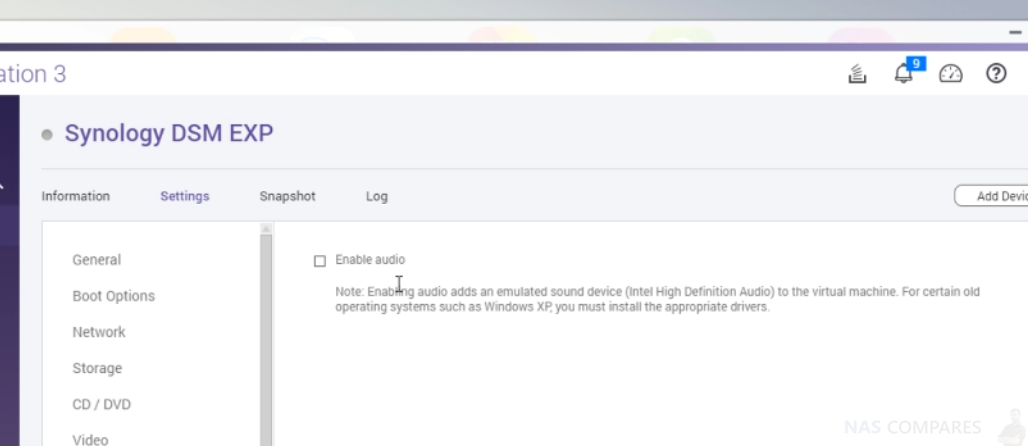
Synology DSM on a QNAP NAS Step 17
Now save the changes and then you can make your way back to the overview and start the VM you have created.
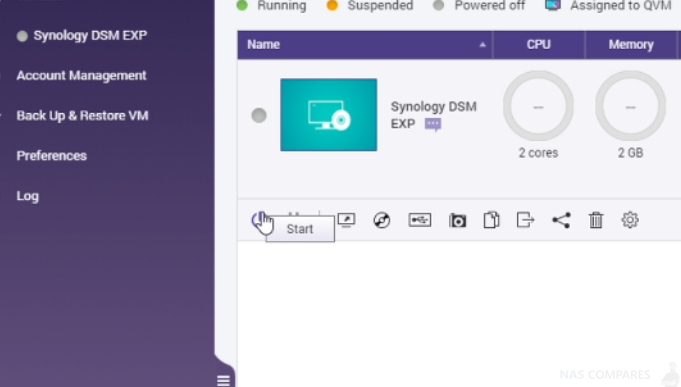
Synology DSM on a QNAP NAS Step 18
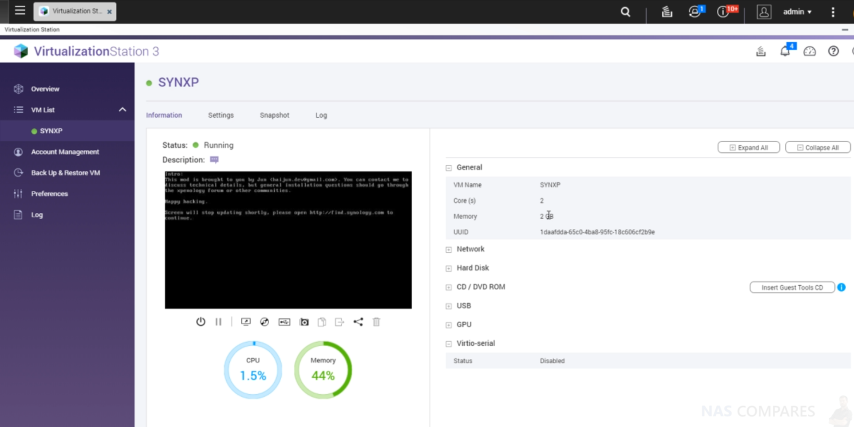
The VM can be opened in a new tab and when you do so, this message will be displayed

Give it a minute or two, then open up the following link in your browser:
http://find.synology.com
From here we can begin the installation of DSM on the Virtual Machine, using HDD 1 as the installer and HDD 2 as the target.

Synology DSM on a QNAP NAS Step 19
You will begin to search the local area network (LAN) for your NAS VM
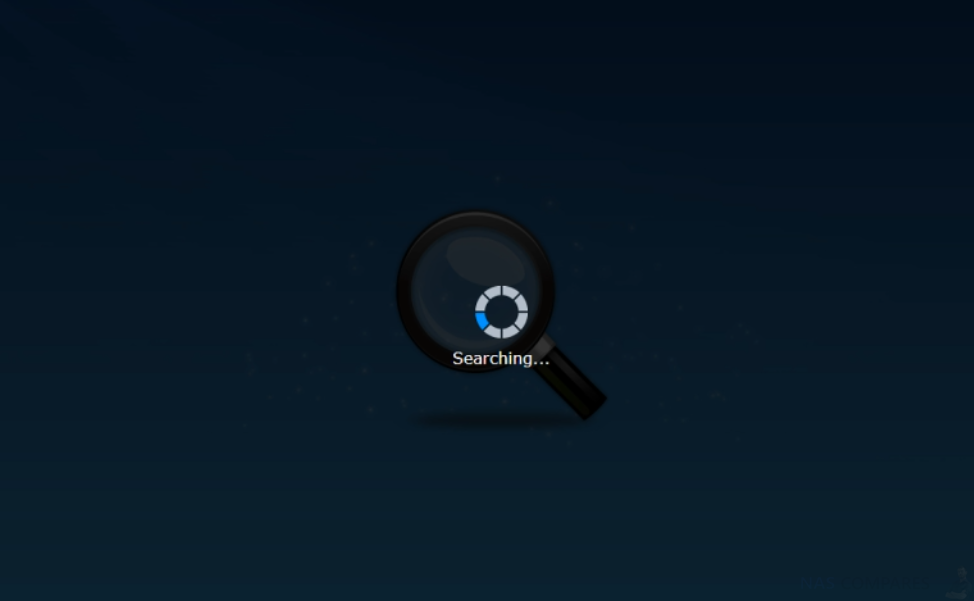
Synology DSM on a QNAP NAS Step 20
The VM should be found and it will look the same as if you were looking for an official Synology NAS.
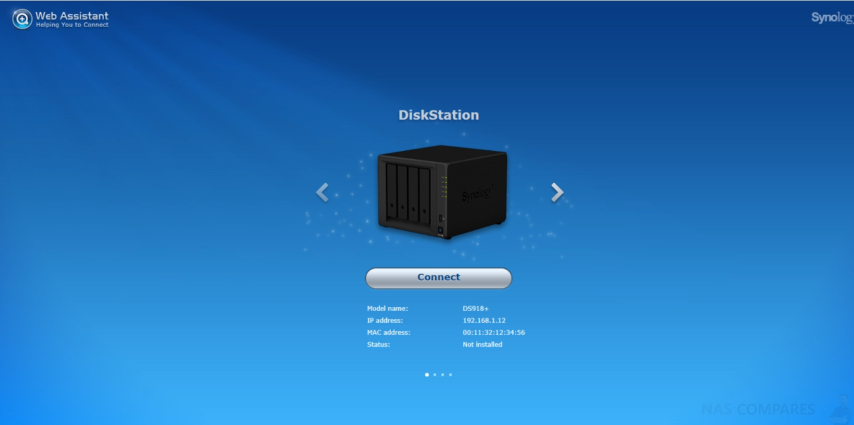
Synology DSM on a QNAP NAS Step 21
A closer look at the Status will show that the virtual Synology NAS does not have DSM installed. So, now you need to click ‘Connect’
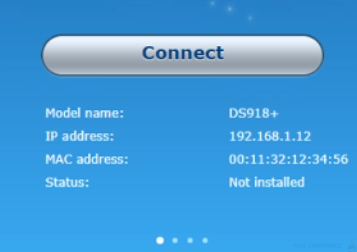
Synology DSM on a QNAP NAS Step 22
The DS918+ image will be shown and you need to click the ‘Set up’ button
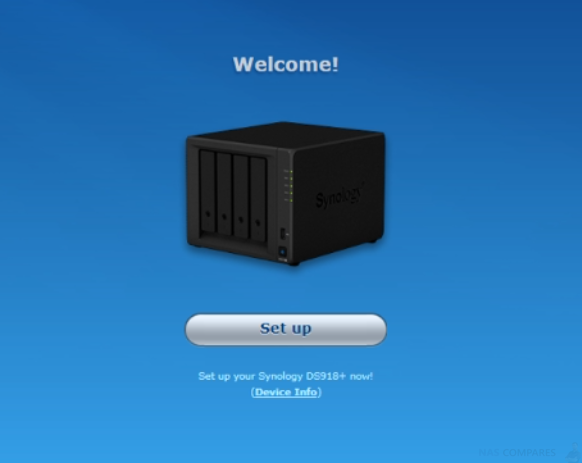
Synology DSM on a QNAP NAS Step 23
Installation of the DSM will be the same as if you were using a regular Synology NAS, however, the DSM it will use is the bootloader we have on HDD 1 from earlier. Click Install Now.
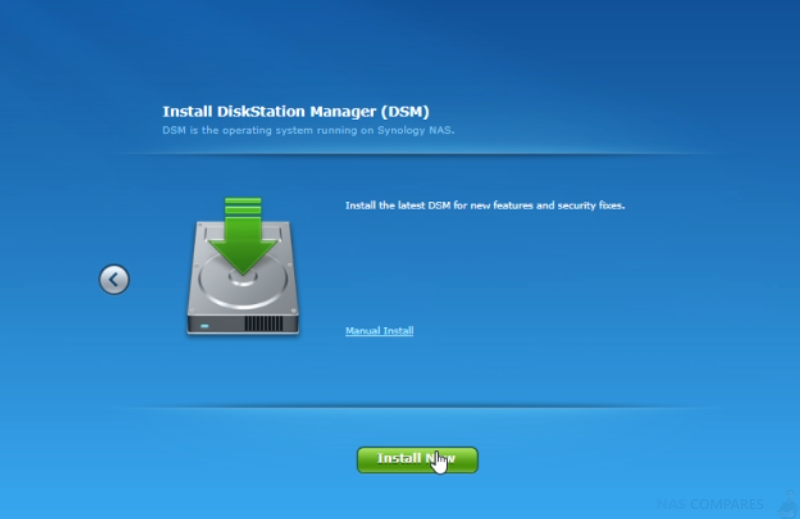
Synology DSM on a QNAP NAS Step 24
The installation will take around 115 minutes in this virtual environment
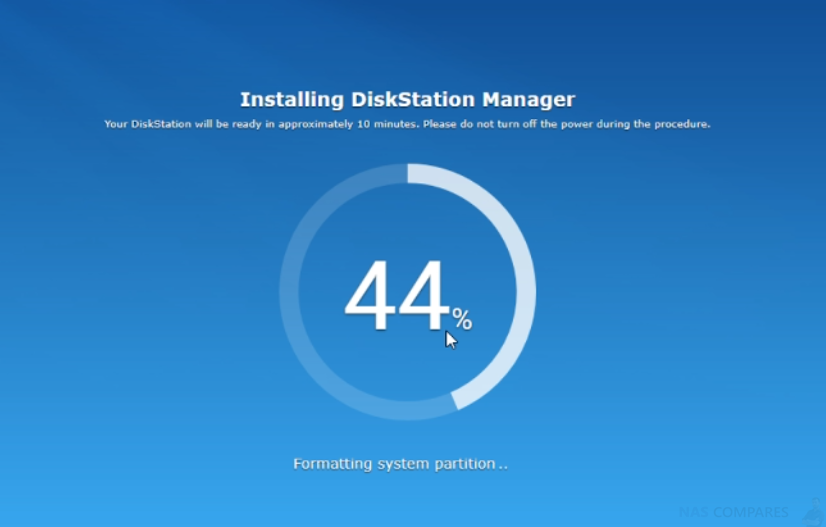
Synology DSM on a QNAP NAS Step 25
Let the virtual diskstation NAS restart
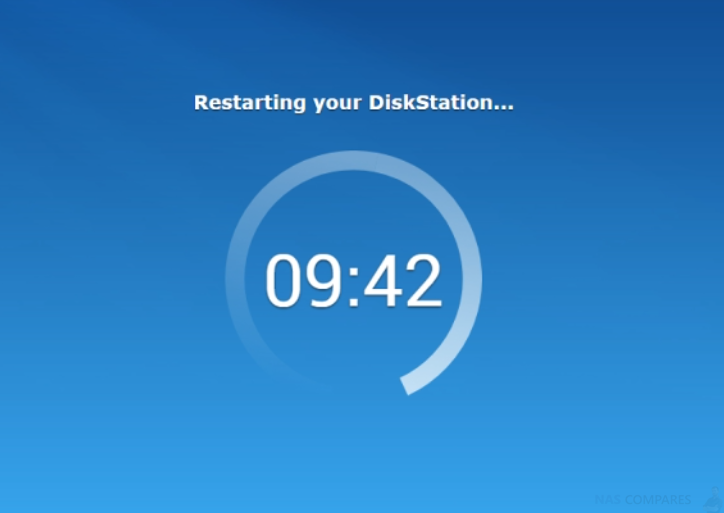
Synology DSM on a QNAP NAS Step 26
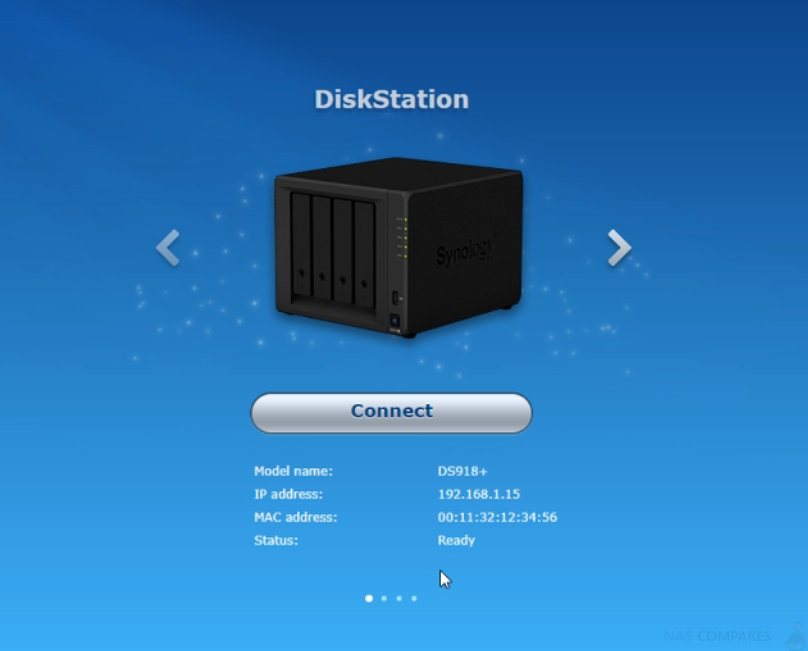
Heading back to the find. synology link again will find your virtual DS918+, but this time it will show that the device is installed and ready. Click Connect
Synology DSM on a QNAP NAS Step 27
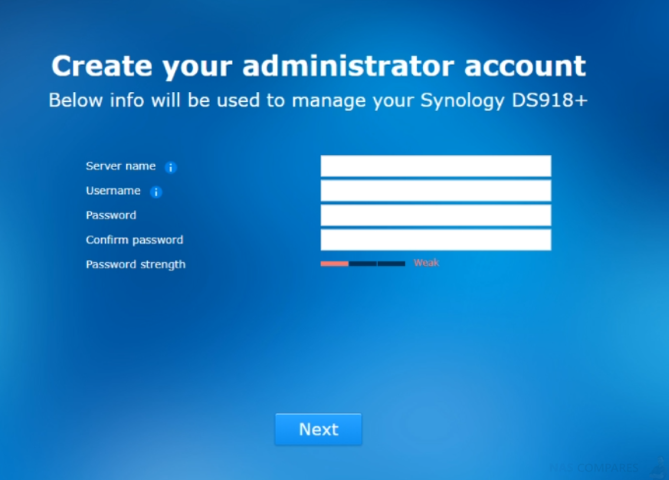
Once you log into the virtual Synology NAS, you will need to give it the server name and admin credentials
Synology DSM on a QNAP NAS Step 28
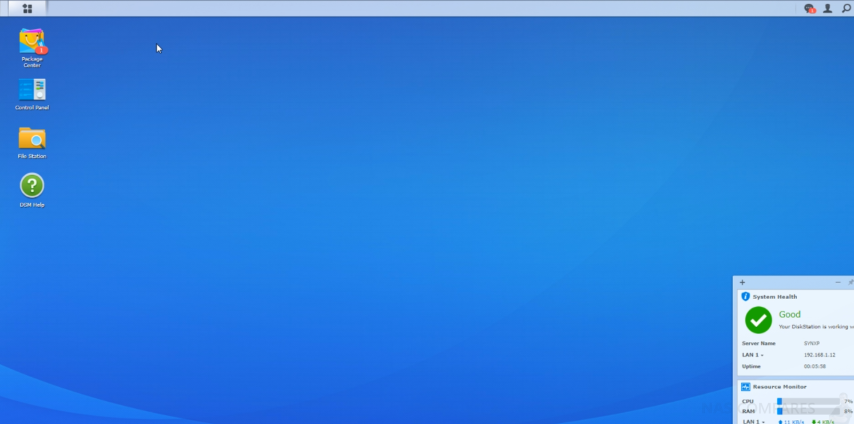
Congratulations, you have created your virtual Synology DS918+ with DSM on your QNAP NAS drive.
Synology DSM on a QNAP NAS – Your Last Warning!
It is also worth noting that you will need to have the QNAP and Virtualization Station running at ALL times to use this Synology DSM virtual environment. This will, of course, affect performance for both the DSM and QTS and among many reasons is why I do not recommend this as more than as an experiment. Additionally, do not use this as a RAID environment, as not only are you in no way covered by either Synology or QNAP in the even of it collapsing but also that it is unstable in a number of ways and these unpredictable factors make it unsuitable for backups and long term storage.
Using Xpenology – Warning!
Right, let’s discuss the elephant in the room! NASCompares are not responsible for the legal consequences of using Xpenology. It should always be noted that this is not endorsed by Synology and should be used purely as a form of reference and not as an alternative to purchasing a Synology NAS with included DSM software.
This article is not intended for consumers. This article is intended for app development and research and contains information and links only for trained professionals on study opportunities on DSM. We do not recommend routine use of XPEnology! For reliable operation of the DSM, you should buy the original product from the manufacturer! You should NOTuse this as an alternative to a Synology NAS and for those that want to test the DSM software, we recommend visiting the live demo here.
Xpenology – How to Install Synology DSM on your Custom Built NAS
🔒 Join Inner Circle
Get an alert every time something gets added to this specific article!
This description contains links to Amazon. These links will take you to some of the products mentioned in today's content. As an Amazon Associate, I earn from qualifying purchases. Visit the NASCompares Deal Finder to find the best place to buy this device in your region, based on Service, Support and Reputation - Just Search for your NAS Drive in the Box Below
Need Advice on Data Storage from an Expert?
Finally, for free advice about your setup, just leave a message in the comments below here at NASCompares.com and we will get back to you. Need Help?
Where possible (and where appropriate) please provide as much information about your requirements, as then I can arrange the best answer and solution to your needs. Do not worry about your e-mail address being required, it will NOT be used in a mailing list and will NOT be used in any way other than to respond to your enquiry.

|
 |
Do You NEED 5GbE NAS? (Or Should You Skip Ahead to 10GbE)
UGREEN DXP4800 PRO NAS Review
Minisforum G7 Pro Review
CAN YOU TRUST UNIFI REVIEWS? Let's Discuss Reviewing UniFi...
WHERE IS SYNOLOGY DSM 8? and DO YOU CARE? (RAID Room)
UniFi Routers vs OpenWRT DIY Routers - Which Should You Choose?
Access content via Patreon or KO-FI


Discover more from NAS Compares
Subscribe to get the latest posts sent to your email.




Why not install xpenology native on a qnap
REPLY ON YOUTUBE