

How to Install Tailscale on a QNAP NAS
![]()
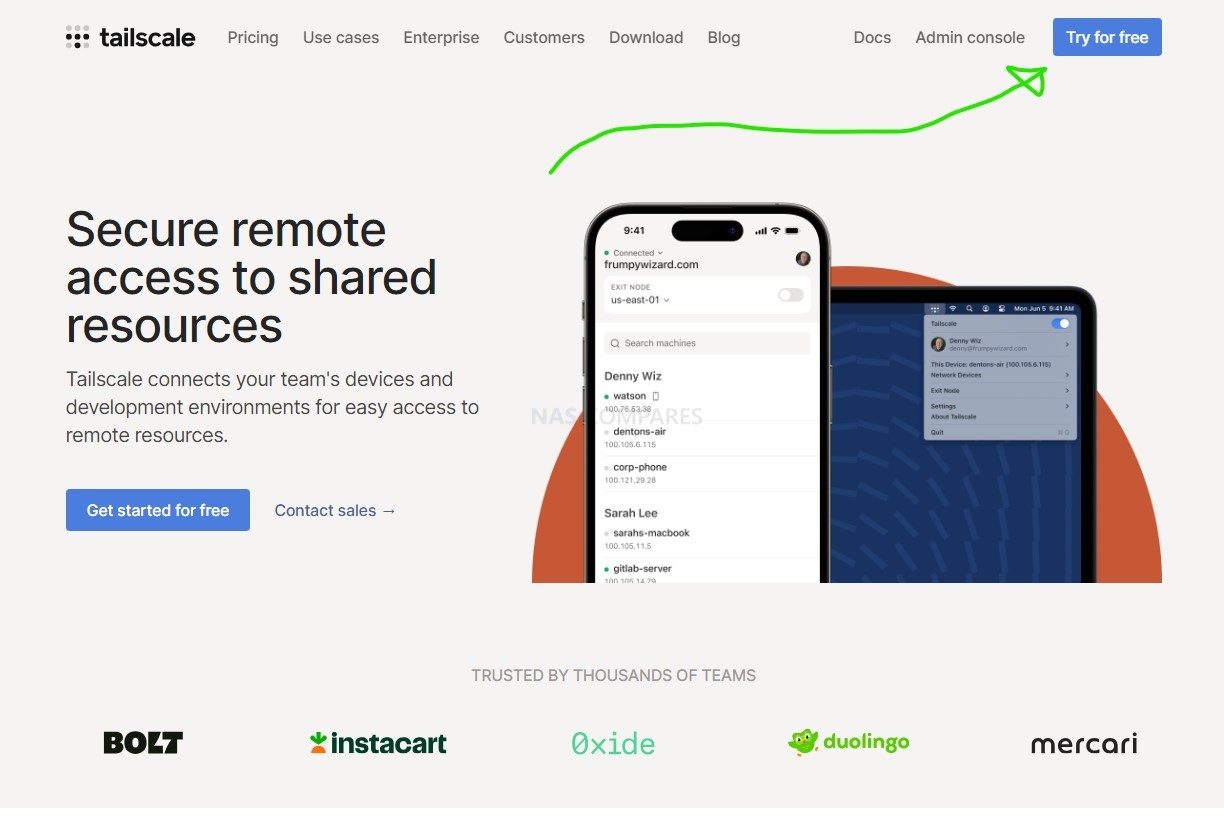
Keeping the data as secure as possible is probably one of the most paramount concerns of any NAS owner. Everyone wants to make sure that their data cannot be accessed by unauthorized individuals, but at the same time want to make sure that their hardware can communicate with their NAS for backups and general access as conveniently as possible. This is a balancing act that has always been difficult for NAS brands and owners to facilitate. Ensuring that access is as tight and secure as possible, whilst at the same time, giving users the flexibility in control to allow the most remote access they might need. Although most NAS brands, including QNAP, provide the means to set up remote access via the brand’s own service, a lot of users prefer to use their own established remote access tools they already use alongside sophisticated VPN services. This is where Tailscale and its recent official support on QNAP NAS is such a big deal. Widely regarded as one of the best remote access VPN tunnel services out there, as well as being remarkably user-friendly, Tailscale has grown in popularity quickly. This combined with growing security concerns around ransomware attacking your NAT system, means that setup for Tailscale on your QNAP NAS is both well-timed and extraordinarily desirable. In today’s article, I’m going to talk you through how to set up Tailscale with your QNAP NAS, as well as a few extra hints and tips on setting the device up perfectly for remote access across all of your client devices.
(Optional) – Create a Tailscale account and install the apps on your hardware
Before you go ahead and set up Tailscale on your QNAP NAS, you are going to need to create a Tailscale account and set up at least one client: PC/tablet/phone with Tailscale. You could do this later, but it will make things a little bit more complicated. Additionally, if you already have a Tailscale setup on your devices and already have an account, you can skip this step.
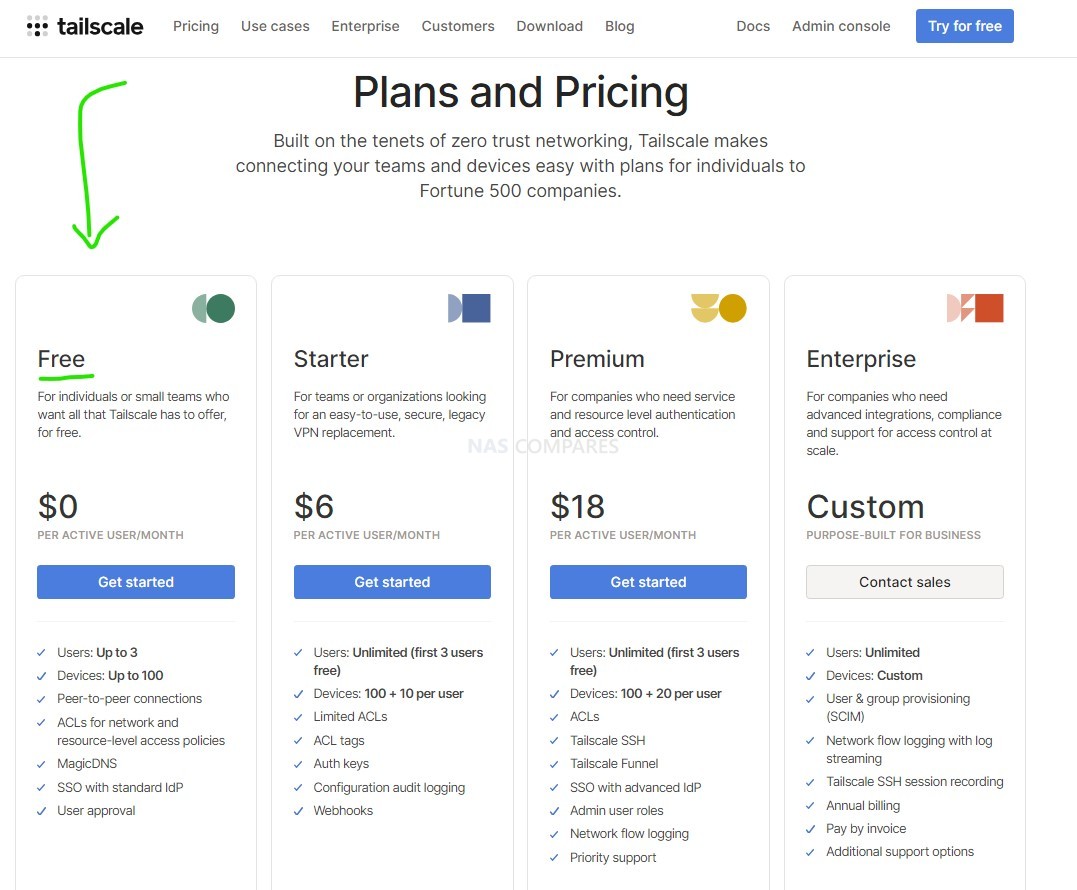
- Head over to tailscale.com and create a new user account. Tailscale is free for small-scale use and for low numbers of clients and volume use, though if you are going to utilize it in a much larger capacity of users, clients, and services, it is recommended to go for one of the paid subscription tiers.
- After you have created your Tailscale account, it is recommended that you have Tailscale installed on one of your home local client devices. In short, this needs to be a device that you are intending to communicate with the QNAP with via the encrypted tunnel of Tailscale. You can head over to the Tailscale download section and select the relevant client installer for your OS or platform.
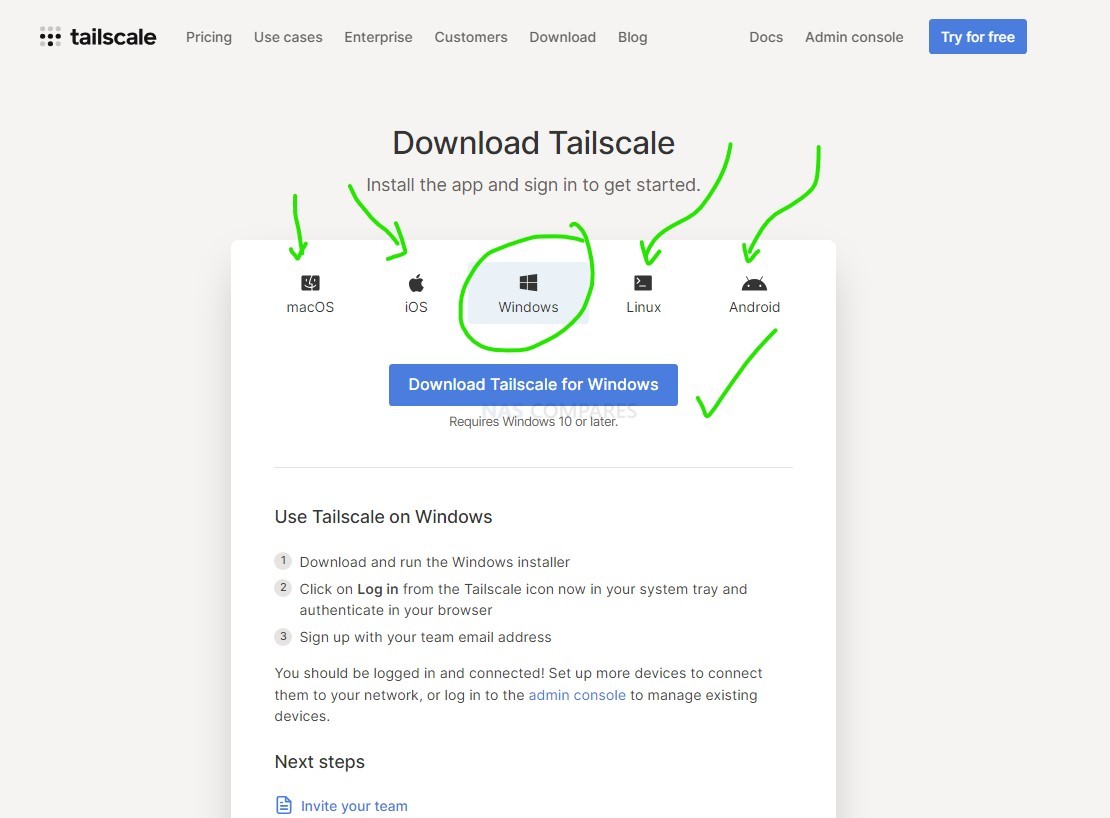
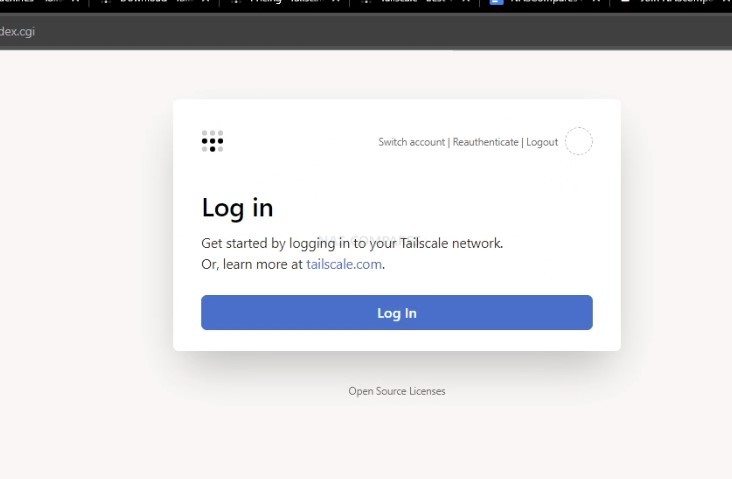
- From here, you simply need to go ahead and install the downloaded installer to run the Tailscale client on your local hardware client. Then just log in with the credentials you created earlier. It is also recommended that you head over to tailscale.com via your web browser and approve this device to be added to your list of available machines.
- You are now ready to start using Tailscale, the encrypted tunnel between all of your devices in a singular directed encrypted network remotely. Next, we need to go ahead and install Tailscale on your QNAP NAS.
Setting up Tailscale with QNAP NAS
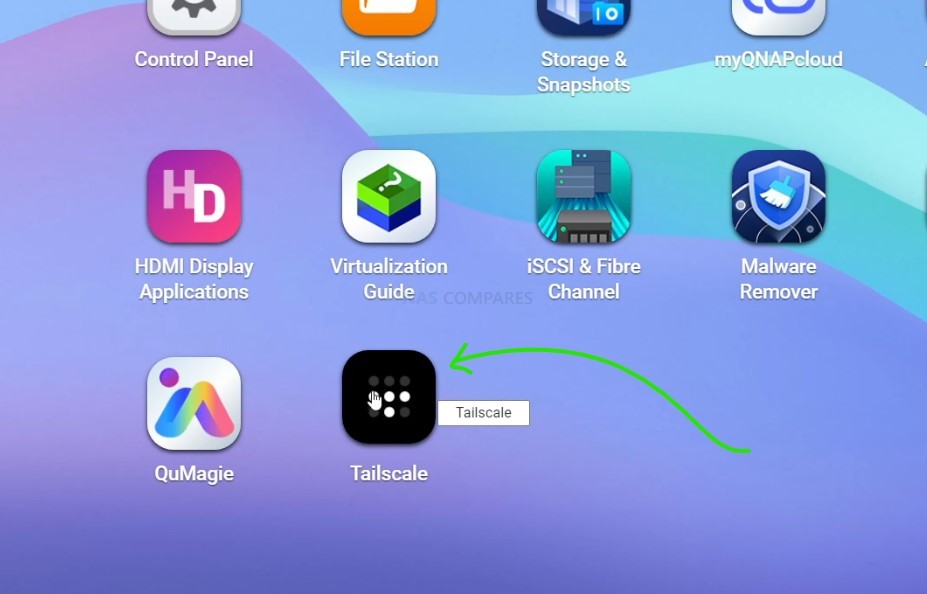
The first thing you’re going to need to do is head over to the QNAP app center and find the Tailscale application. Until recently, if you wanted to install Tailscale, you needed to use the unofficial app center QNAP club, or utilize container-based installation. However, now in the latest software and app center updates, you can find Tailscale easily and ready to install as a one-click installer.
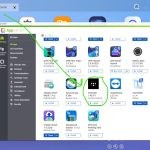
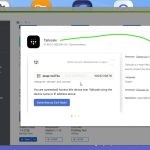
- With the software fully installed, you can go ahead and open the application from the app center itself or from your normal range of listed applications on the QNAP NAS. Unlike a lot of other applications for NAS, when you run this application, it will open into a new window and simply have a single option to add this device to your list of Tailscale approved devices. If you went ahead and created your Tailscale login earlier, or already have one in place that is logged in by this web browser, clicking this button will immediately add the QNAP NAS to your Tailscale device network.
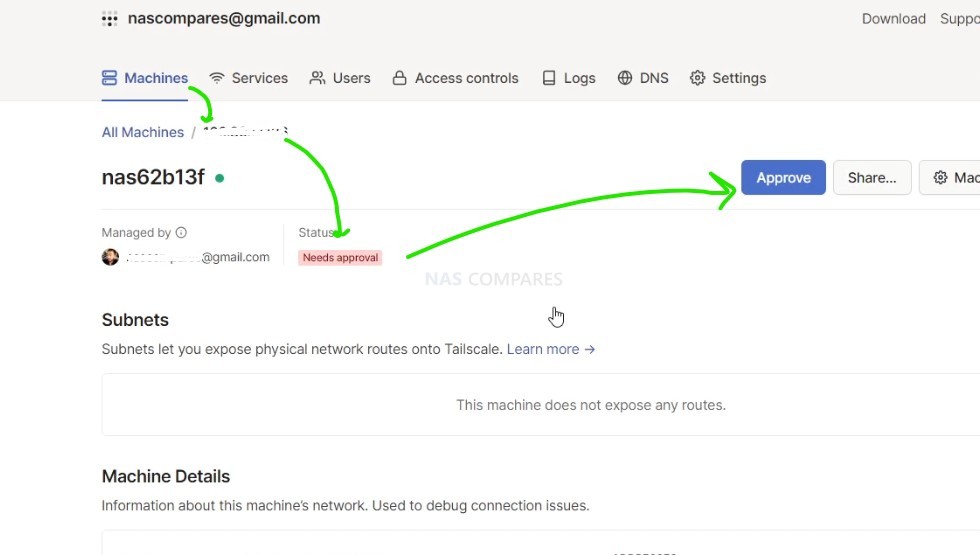
- Once you have added this device to your list of Tailscale approved devices, you are still going to need to verify and approve this device from the Tailscale side. In order to do this, you need to log back into Tailscale, select my devices, and then approve this device via the clear approval button.
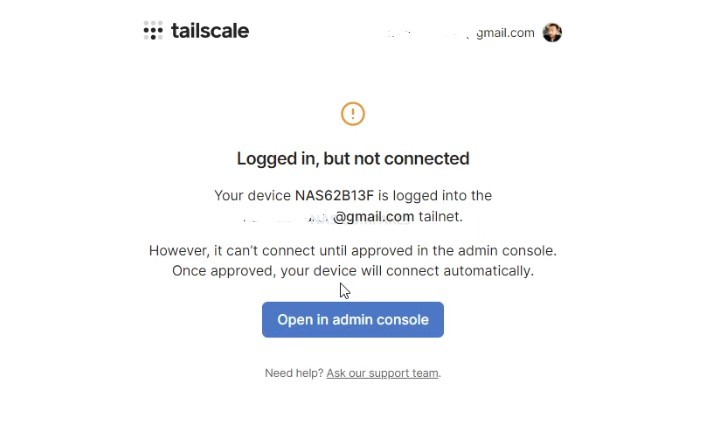
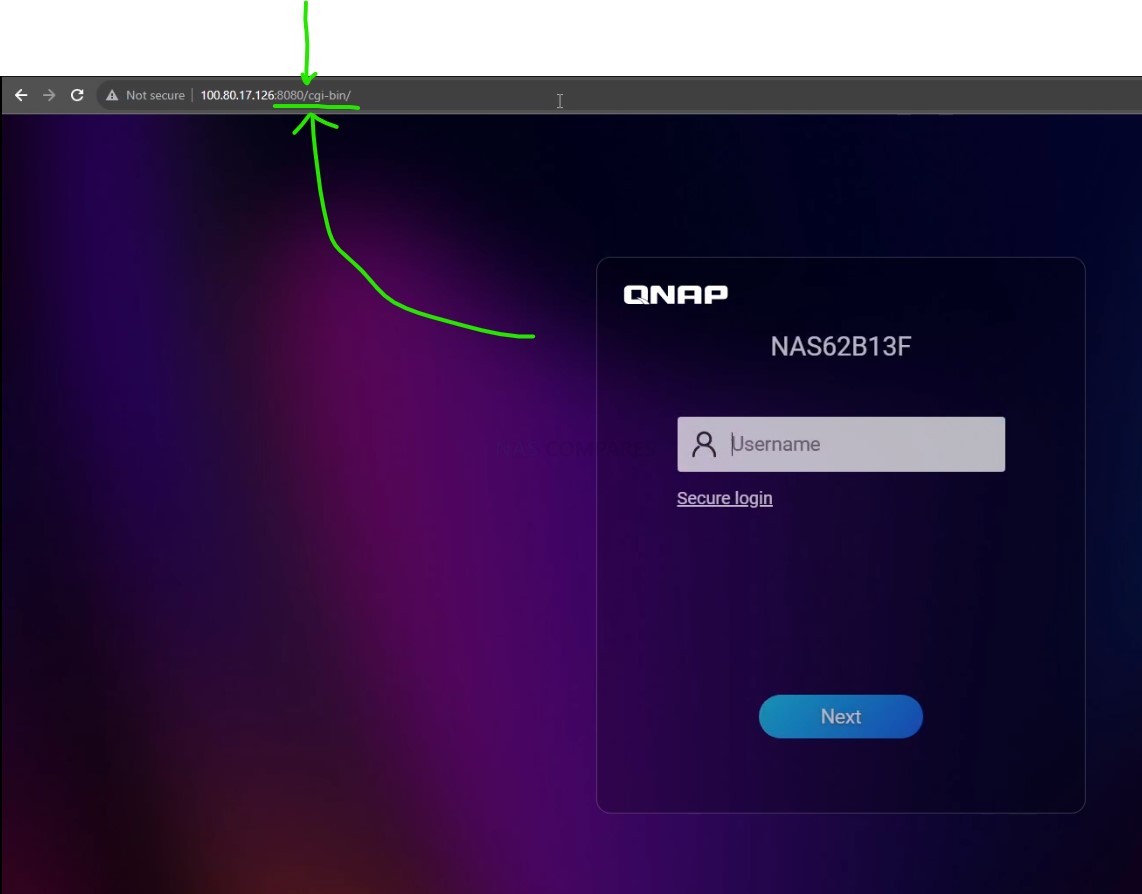
- That’s it, you can now begin creating the network of devices, each with Tailscale, to have access to this NAS. It’s also worth remembering that depending on the setup and configuration of your QNAP NAS, you may need to add an extra bit of information to the login URL to precisely access the GUI by the web browser on your QNAP NAS. So, if this is the case for your setup, don’t forget to add the port. And do you include the slug to the end of the login details, like so:
How to use your QNAP NAS as the VPN gateway for all of your devices.
Much like most other VPN services that run on NAS platforms, there is also the option to use the NAS as a VPN server gateway for all of your devices to pass through. In brief, this means that all of the Tailscale devices in your network, rather than directly accessing the internet as normal, will access the internet via the QNAP NAS remotely and use the QNAP NAS as the main doorway. This is done by heading back into your Tailscale-installed QNAP NAS, and clicking the Tailscale application icon once again:
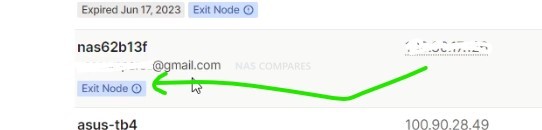
- Doing so will open a new tab and unlike before when you were invited during the installation to set up the tuner for the first time, this time you will be invited to set up the QNAP NAS as an exit node. This means that it can service as the gateway for your VPN traffic connected via Tailscale and through the QNAP NAS.
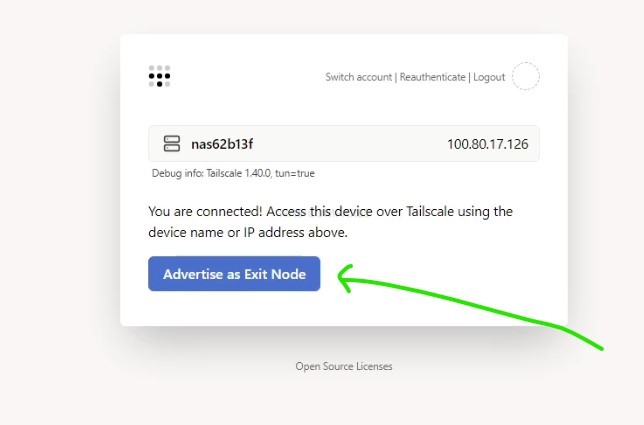
- You will know that it has worked, as your QNAP NAS will appear as an ‘exit node’ on the list of devices on your Tailscale account.
What to do if Tailscale disappears from your network adapters?
Once you have installed Tailscale on your local computer for accessing the QNAP NAS remotely via this secure VPN tunnel, a new network adapter choice will appear alongside your usual network connections in Windows or MacOS. Traditionally, that means that you’re going to see a wired network adapter, a wireless network adapter, and now a Tailscale adapter. This is what easily allows you to enable and disable Tailscale encryption on your transmission as and when you want it between your devices. However, some users have reported that when disabling the Tailscale network adapter, it can disappear from the list of available network adapters and prevent access to some Tailscale devices remotely.
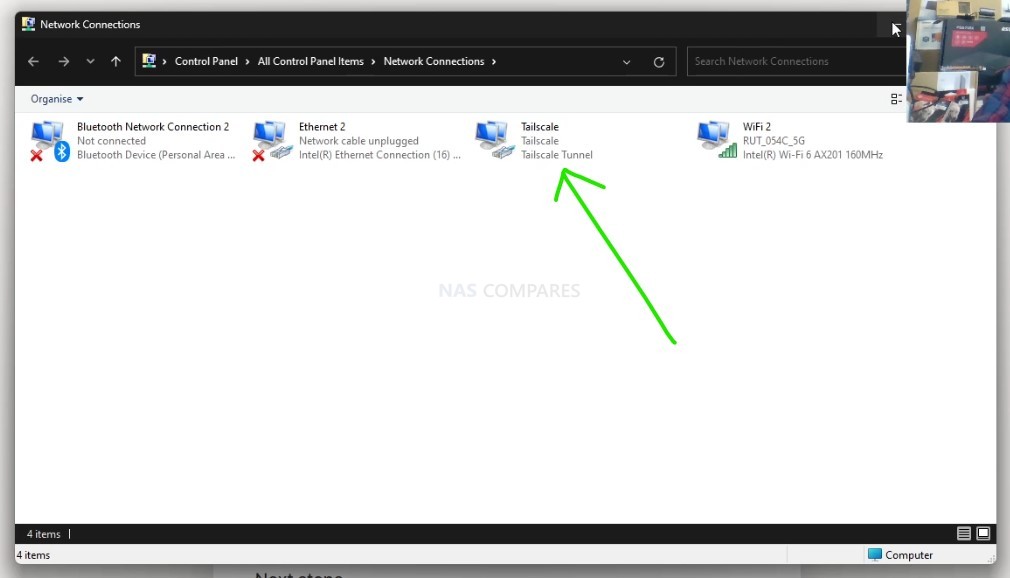
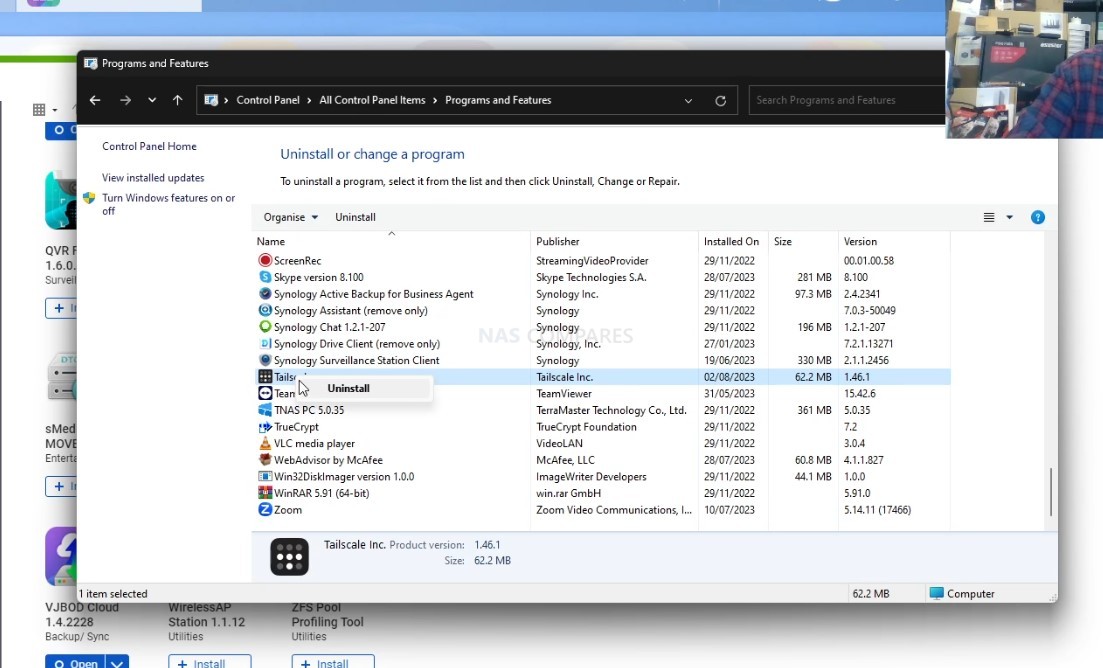
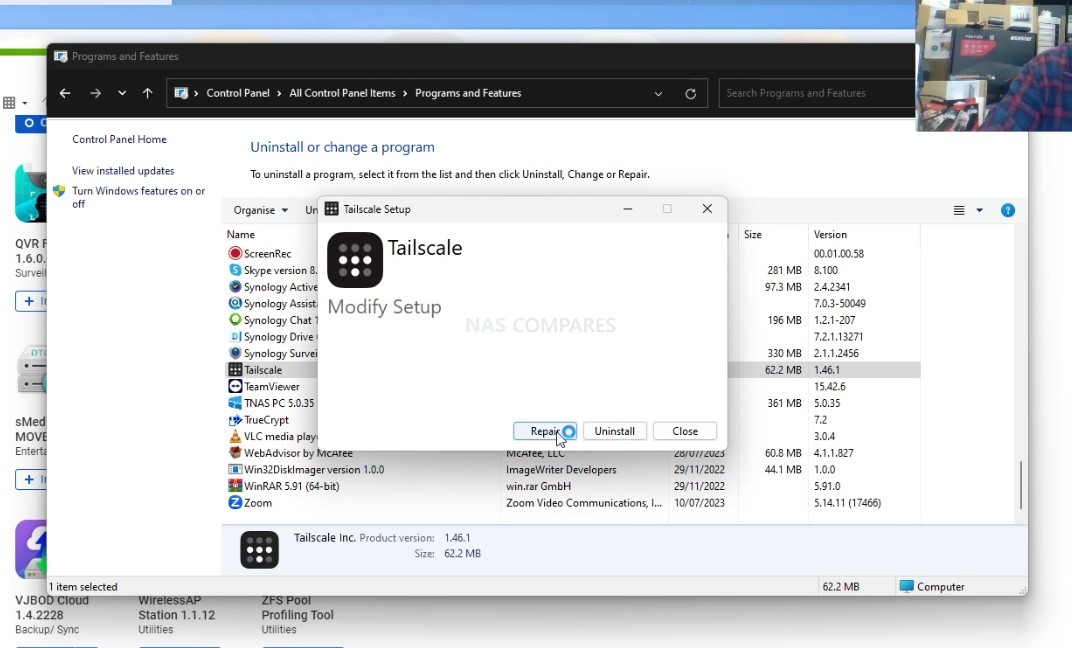
In order to resolve this, it is recommended to head into the program manager of Windows (and equivalent in MacOS) and click on the Tailscale application. Doing so will open up a new window that offers you the option to uninstall the app or repair the application. Select repair and, after a few minutes and a slow-moving green bar, Tailscale should reappear on your list of network adapters. This resolves the issue, allowing you to continue using Tailscale to communicate between all of your encrypted tunnel devices.
I hope you found this guide useful, and if you still need further assistance and guidance on this, please use the video below where we’ve walked through how to install and set up Tailscale for the first time on a QNAP NAS:
📧 SUBSCRIBE TO OUR NEWSLETTER 🔔🔒 Join Inner Circle
Get an alert every time something gets added to this specific article!
This description contains links to Amazon. These links will take you to some of the products mentioned in today's content. As an Amazon Associate, I earn from qualifying purchases. Visit the NASCompares Deal Finder to find the best place to buy this device in your region, based on Service, Support and Reputation - Just Search for your NAS Drive in the Box Below
Need Advice on Data Storage from an Expert?
Finally, for free advice about your setup, just leave a message in the comments below here at NASCompares.com and we will get back to you. Need Help?
Where possible (and where appropriate) please provide as much information about your requirements, as then I can arrange the best answer and solution to your needs. Do not worry about your e-mail address being required, it will NOT be used in a mailing list and will NOT be used in any way other than to respond to your enquiry.
Need Help?
Where possible (and where appropriate) please provide as much information about your requirements, as then I can arrange the best answer and solution to your needs. Do not worry about your e-mail address being required, it will NOT be used in a mailing list and will NOT be used in any way other than to respond to your enquiry.


|
 |


UGREEN DH4300 & DH2300 NAS Revealed - Good Value?
Aoostar WTR Max NAS - Should You Buy?
Xyber Hydra N150 NAS Review - Is This COOL?
Minisforum N5 Pro vs Aoostar WTR Max - The BIG Showdown
Do MORE with Your M.2 Slots - GREAT M.2 Adapters!
5 Top Tips for Content Creators Buying a NAS
Access content via Patreon or KO-FI
Would appreciate guide on how to setup PLEX server and clients for Tailscale-based remote access ????
REPLY ON YOUTUBE
Thanks for the guide.
I see however that the listed version of Tailscale in QNAP’s app store is still v1.40, which is now over 2 years old. The current version is 1.84.3.
This somewhat concerns me, as potentiality this is a security risk. If QNAP isn’t updating quickly enough, a tool like this is a potential attack vector to compromise my NAS.
I did review the Tailscale changelog, and the last mention of a CVE was in version 1.38.4. So I’m assuming 1.40 has no known vulnerabilities, and all updates since where for functional bugfixes / new features.
REPLY ON YOUTUBE
I was having the same issue with connection as some. I verified that turning off the QuFirewall worked and was able to access NAS through Tailscale IP. I narrowed the issue down to the last final Deny All IPv4 rule in the profile used after turning it off. I have added 2 additional Allow rules above the Deny All IPv4 rule. The first is a Tailscale VPN Rule (Permission Allow, Interface All, IP Subnet, IP Address 100.64.0.0, Subnet Mask 255.192.0.0/10, Protocol UDP, Port 41641). The 2nd rule is a NAS Web UI Rule (same as first rule except, TCP and whatever port you are using). I think you can use your specific Tailscale IP Address instead of what I’ve listed but I think using above allows for maximum scalability and convenience as it covers all IP’s in your private Tailscale network. You shouldn’t have to update firewall rules if your Tailscale IP changes later on.
REPLY ON YOUTUBE
Excuse my ignorance but would you use this on your NAS on your home network, then install it on another device outside of your network to connect to Plex so you can stream your content?
REPLY ON YOUTUBE
Thanks NC. I have a Qnap TS-231K, but I can’t find Tailscale for it.
REPLY ON YOUTUBE
will be great if can make a video on how to setup a Tailscale Subnet Router For Qnap NAS.
REPLY ON YOUTUBE
@NASCompares: I followed all the steps but it’s impossible to get Tailscale work unless i disable the QuFirewall. What to do?
REPLY ON YOUTUBE
the app is only available for QNAP running 64bit CPU.
REPLY ON YOUTUBE
I am trying to use SMB from a Mac outside of my network and I can’t seem to connect. Is there something more I need to do?
REPLY ON YOUTUBE
Did the setup, couldn’t connect. Turned off the QNAP firewall and connected ok. Which is more secure using Tailscale or using the firwewall?
REPLY ON YOUTUBE
And as always the app from qnap store is an old version, so we depend on their goodwill to have an up-to-date application, while we could use the real version, maintained by the developers using container station. But to do that there is way more configurations i think?
REPLY ON YOUTUBE
Thanks for the shout out Robbie and thanks for the video ????
REPLY ON YOUTUBE
Thanks mate! I was looking into giving my mom access to my photos thru something else rather than fb. This might be the solution for our not so techie minds. Maybe one day it can help with an offsite backup. Cheers.
REPLY ON YOUTUBE
great video….! ? couldn’t get it to work, port forwarded 8080 on routers and turned off qnap firewall copied ip address of nas from tailscale network devices, pasted in incognito browser with PIA vpn on and off and added :8080/cgi-bin/at the end it did not connect. and could not see QTS UI. if you could help me and my friend out and possible tell me what we are doing wrong or what we have missed?
REPLY ON YOUTUBE
Great video. For the life of me though I can’t get to my NAS UI (Even adding the :8080/cgi-bin on the end). I can get to all the containers and other services hosted on it, just not the QTS desktop UI. Anyone got any ideas? I am using the official app (which is 1.40.0)
REPLY ON YOUTUBE
Tailscale appears in the system tray (control centre) in Mac OS like windows. Installing Tailscale on macOS is even easier since there is an offical Tailscale app on the Mac OS store.
REPLY ON YOUTUBE
Been using it for my jellyfin sever on qnap. Took 5 minutes to set up 8 devices. On phone pick connection, get ip and add port to either browser or jellyfin app and just works
REPLY ON YOUTUBE
Great video, people over at r/qnap ask about this a lot with the ransomware scare going on.
REPLY ON YOUTUBE